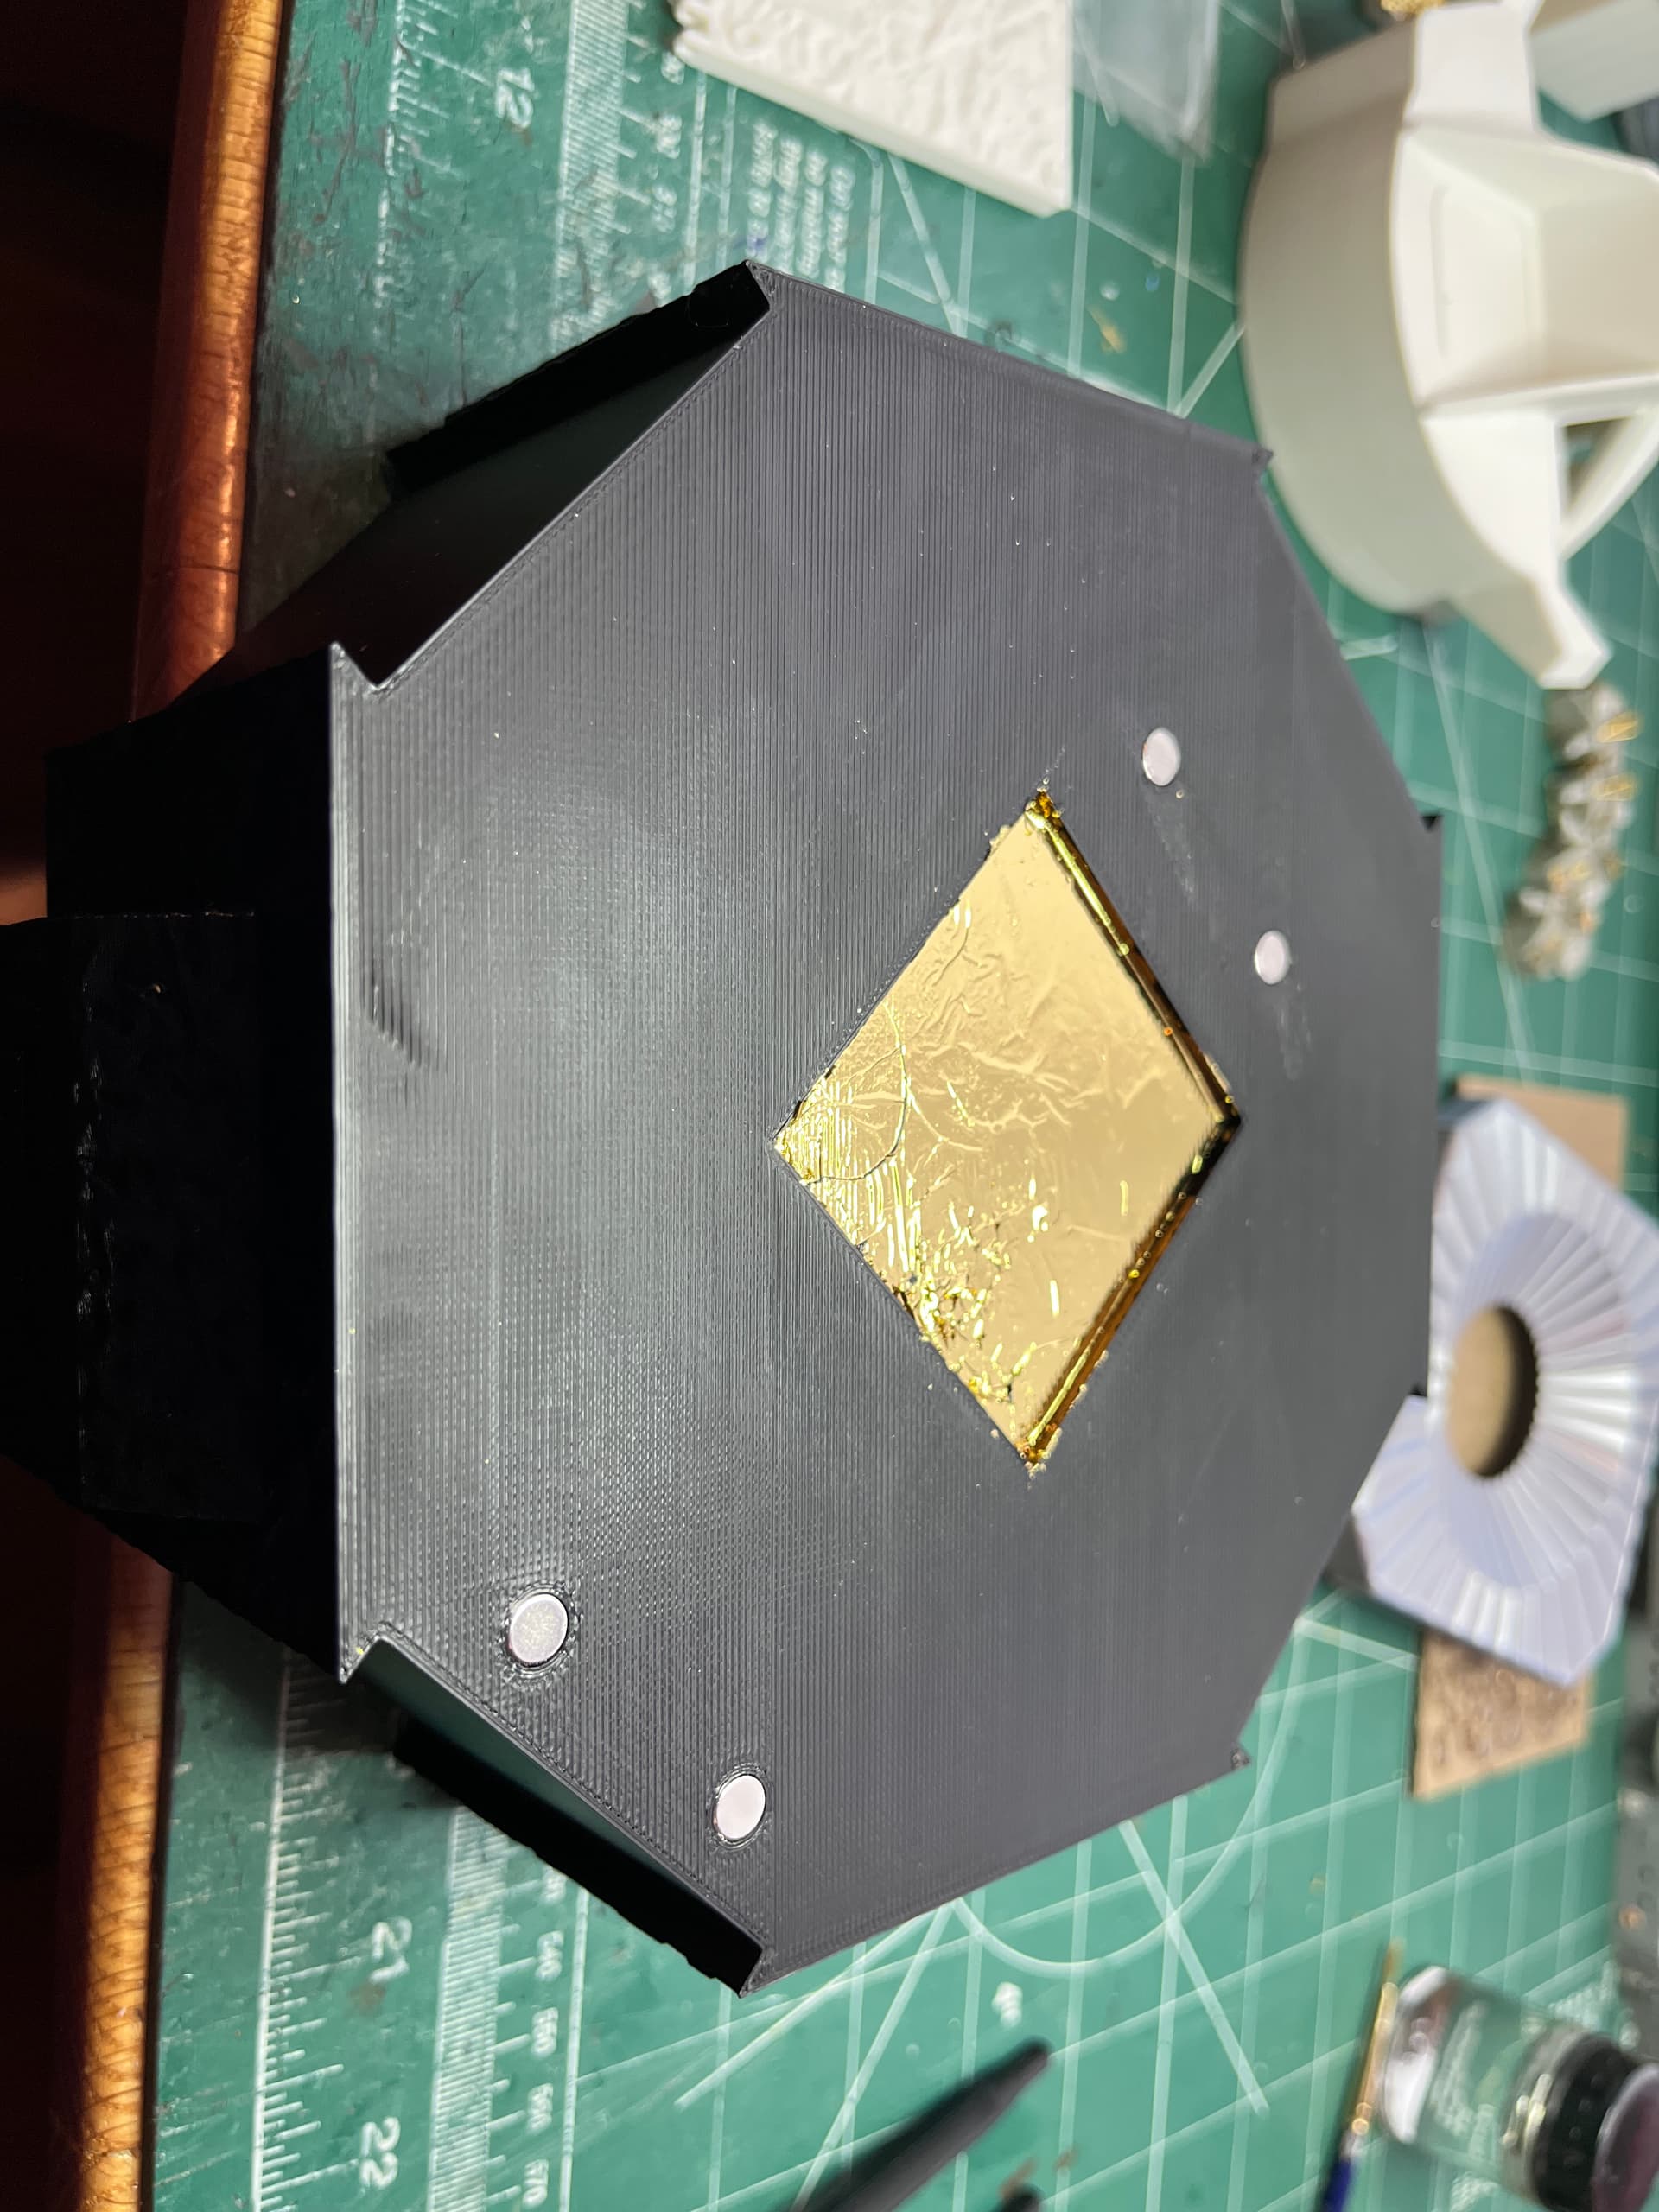
Most of the descent parts are printed in black. That way the three foil colors; gold, rose gold and silver can be applied and no painting is required. For the main body there are four 6x3mm magnets that are glued in. These will hold the ascent stage in place. I am adding them now so I can foil over them and they will disappear. You can also see that I have started the tedious foiling process.
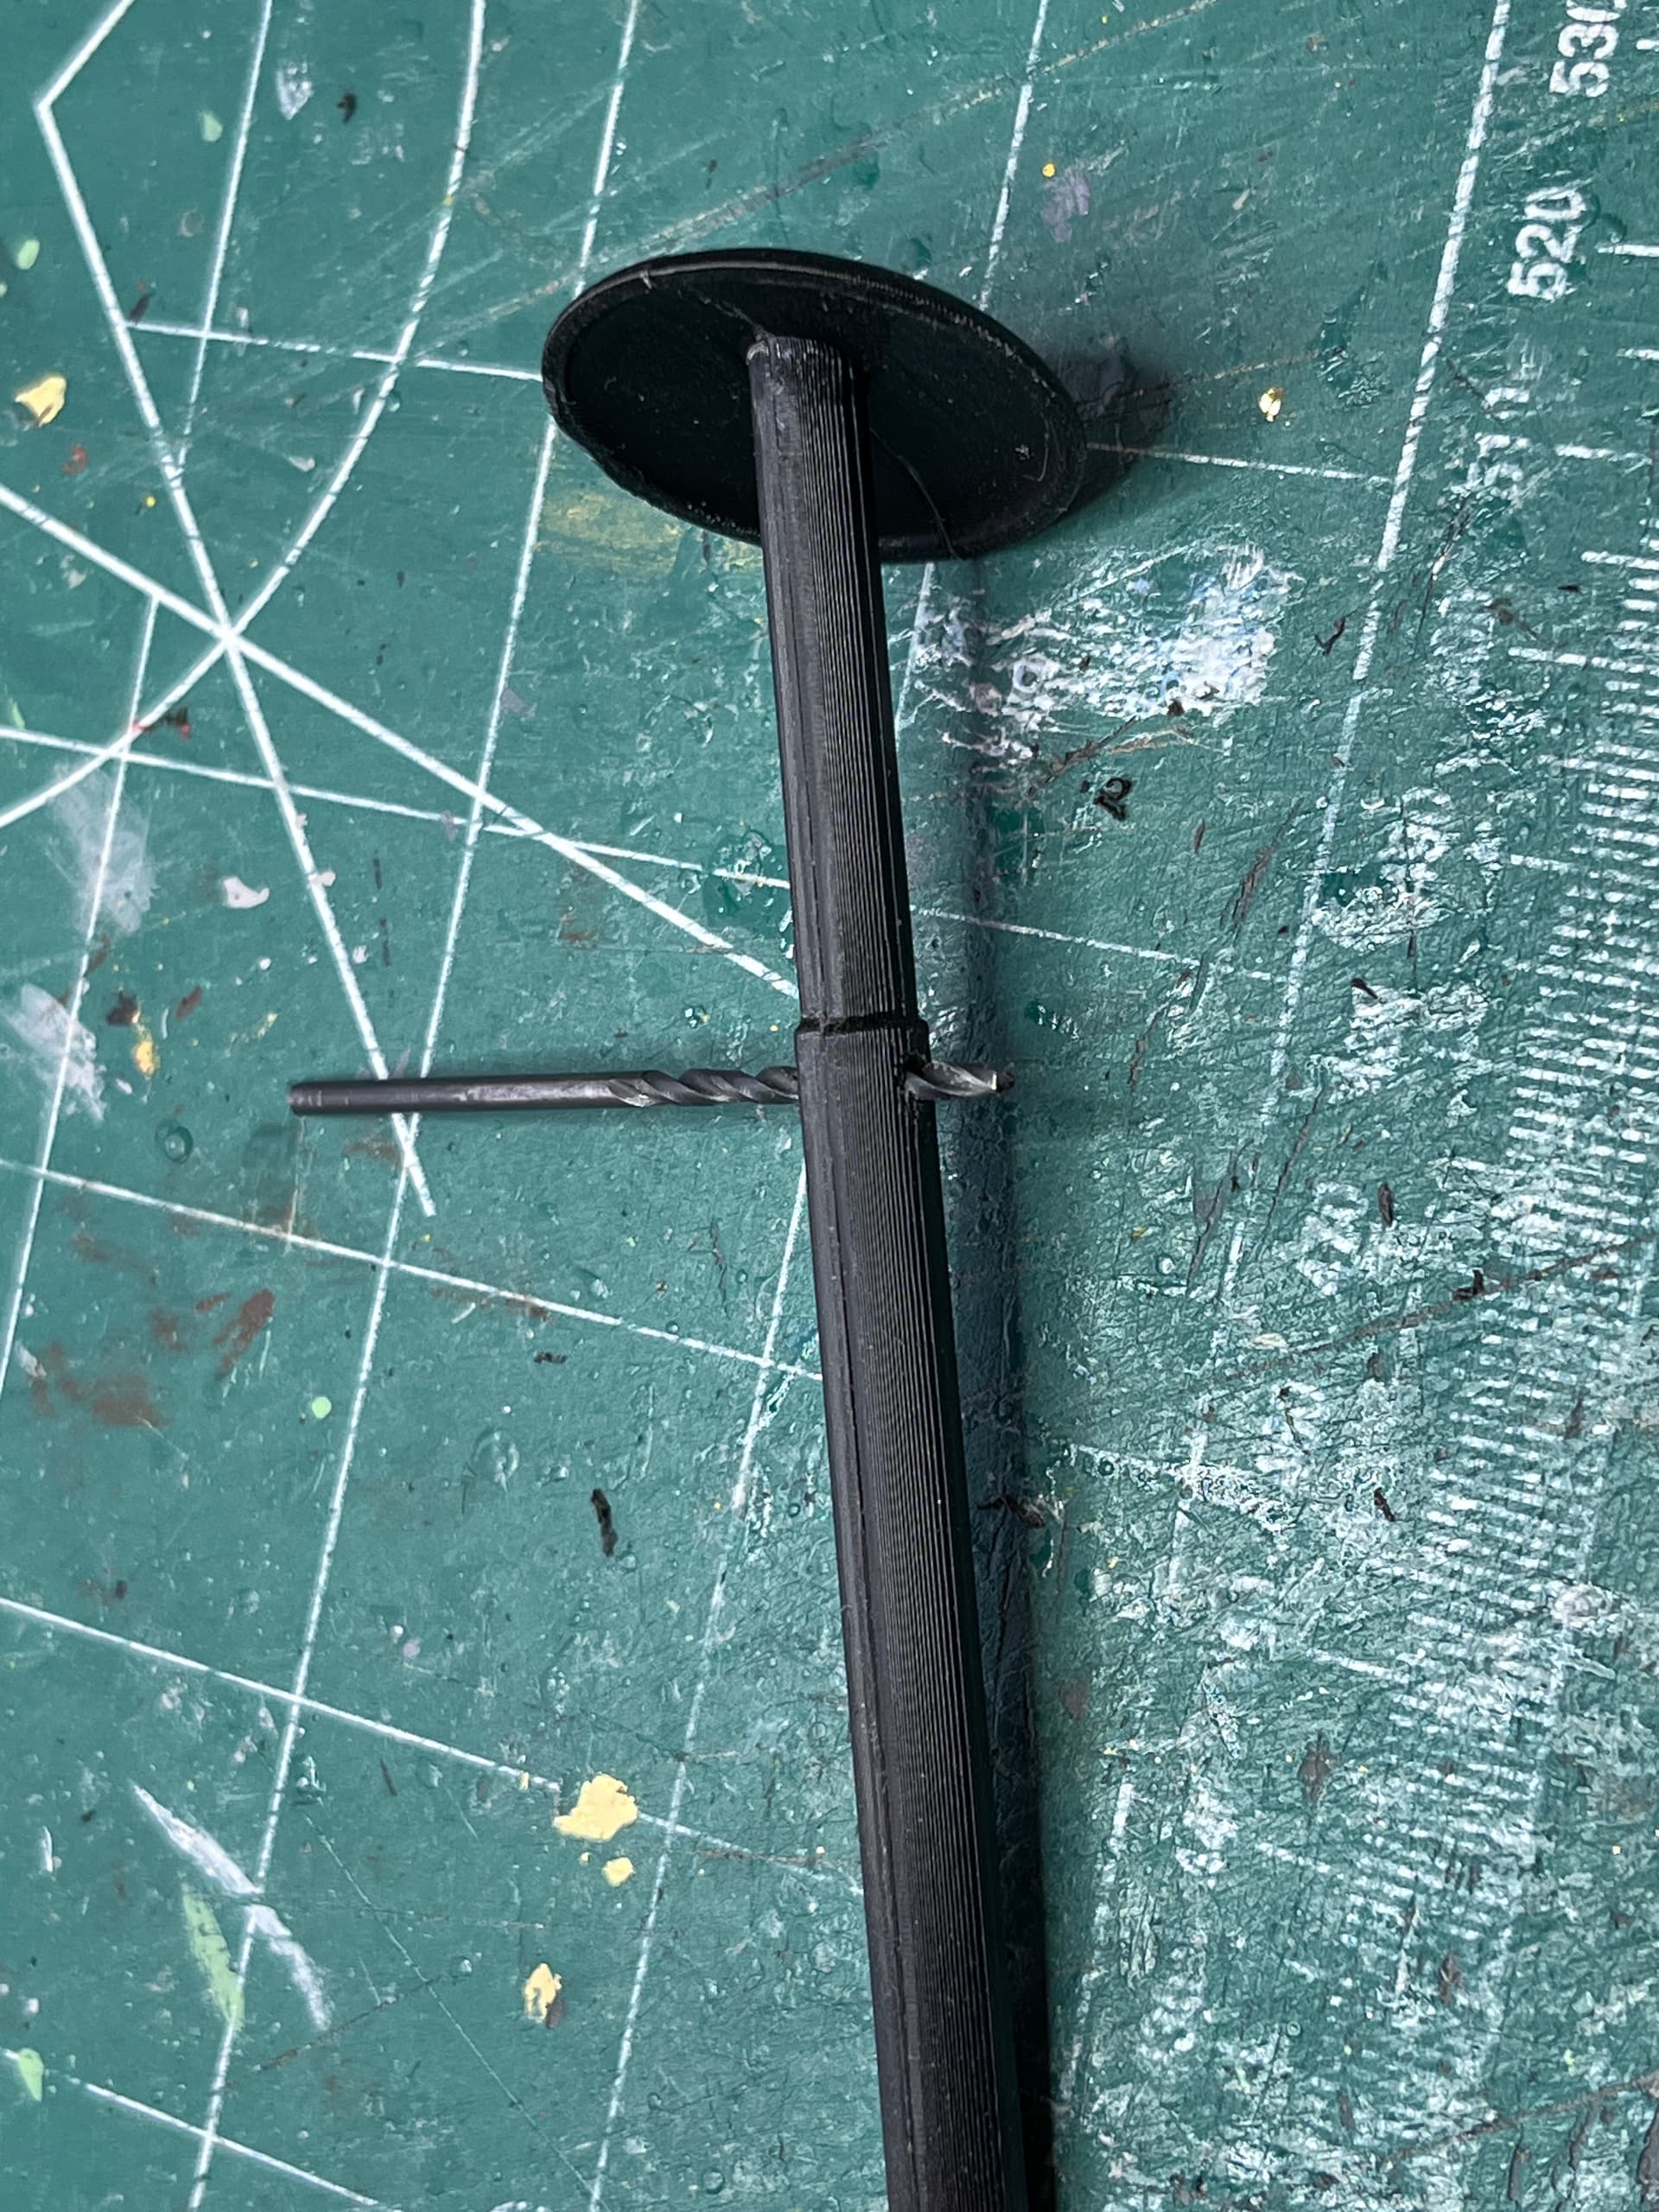
For the main leg struts I ran a 5/64" drill through the holes and ran an exacto knife over all of it like a cabinet scrapper to make sure the joints are smooth and there is nothing to snag the foil.
3 Likes
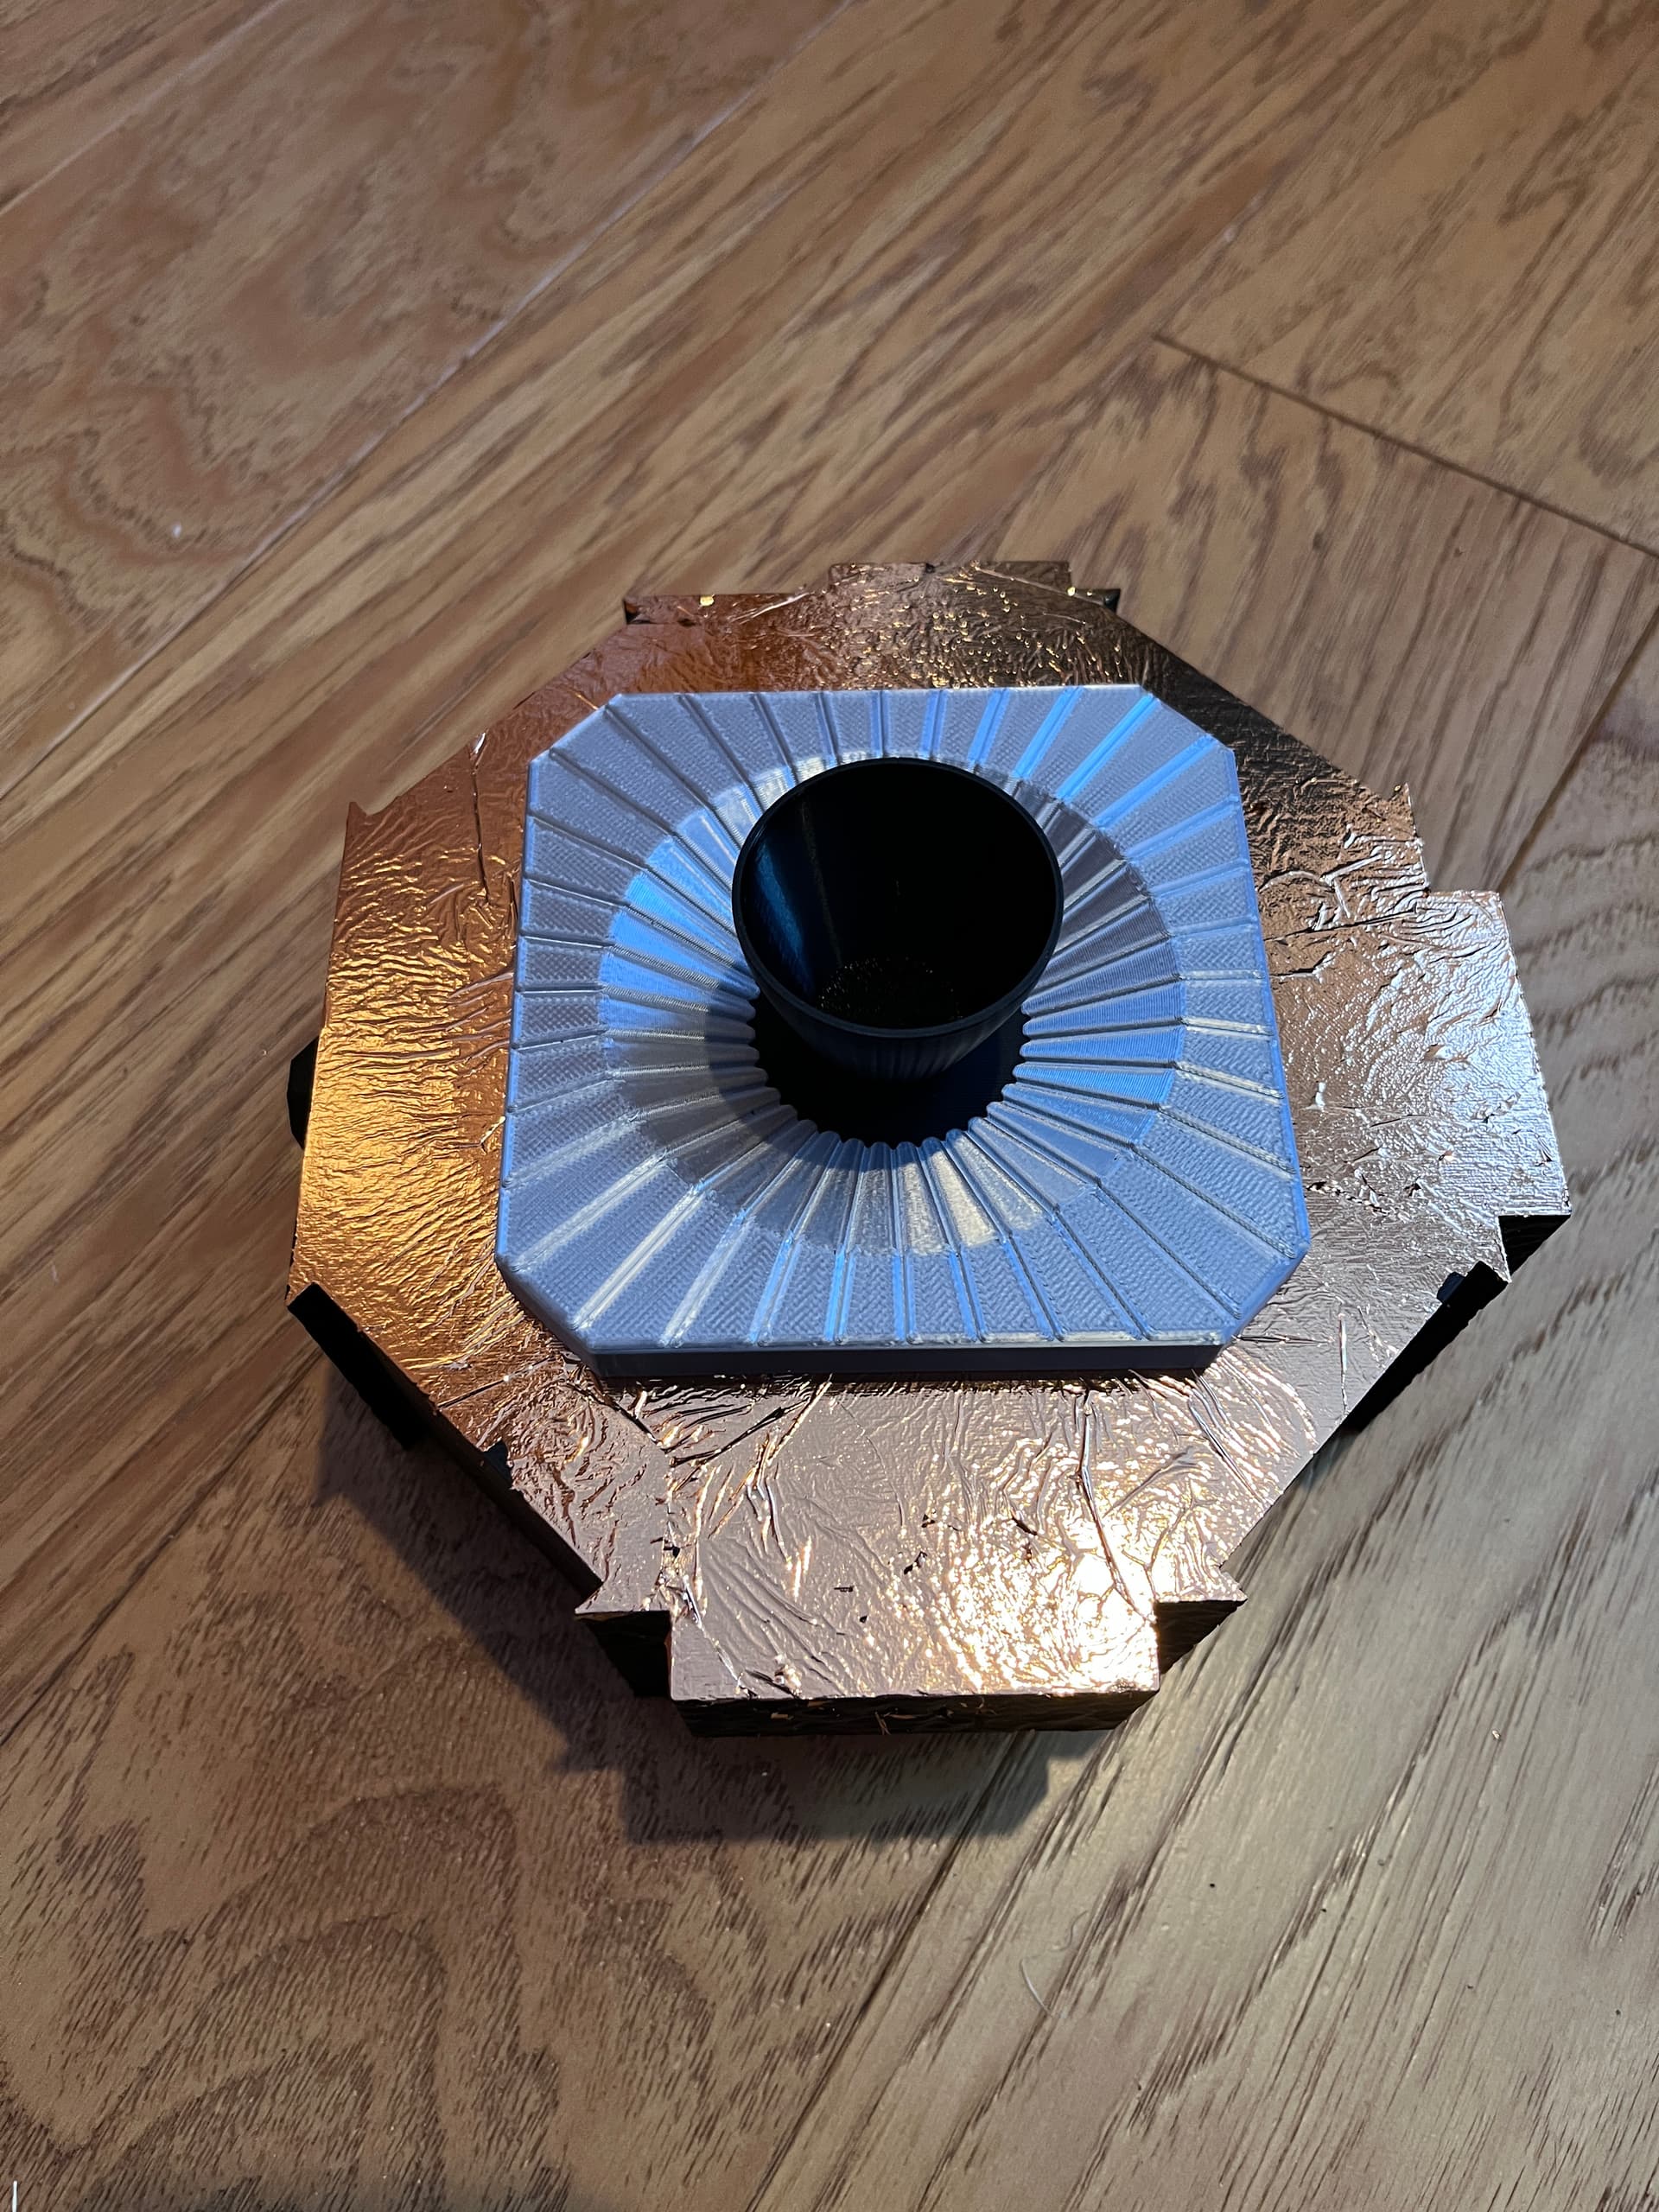
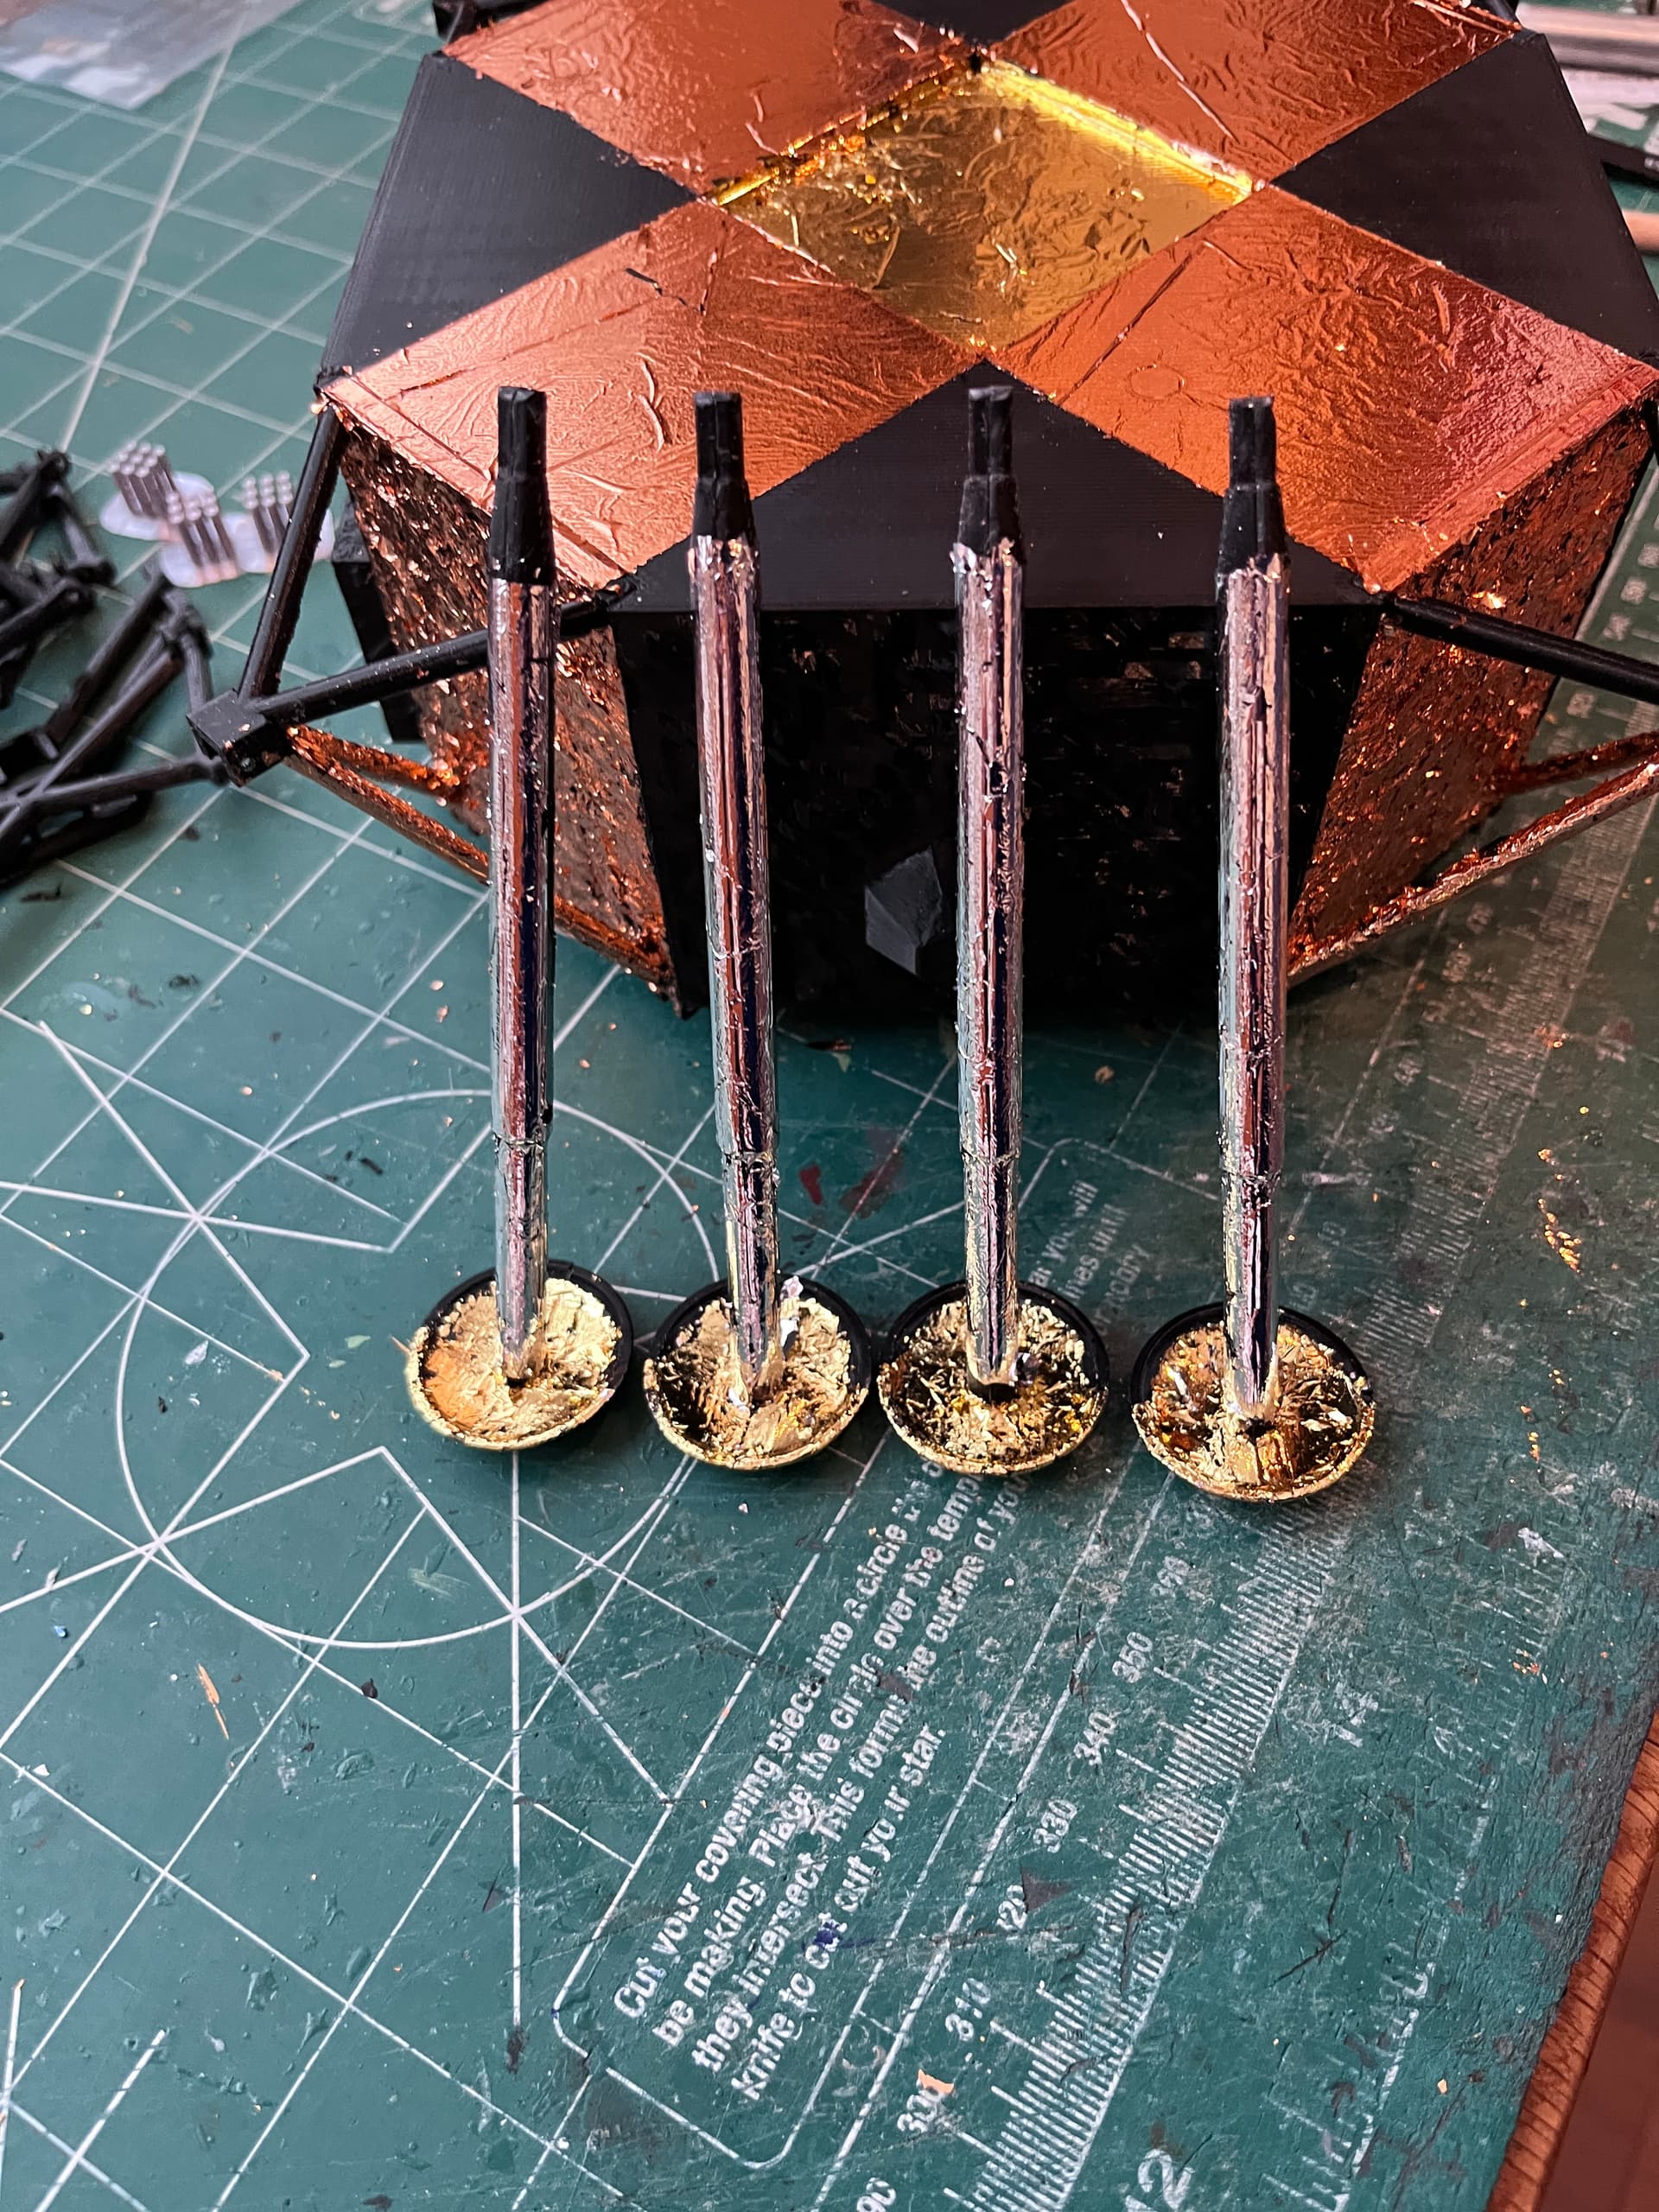
Continuing to foil. It is going to take weeks. The bottom was foiled yesterday with a rose gold. The glue is still not dry. Ask me how I know… Fortunately when foil is accidentally smudged off it is a simple matter of adding more foil. Drying will take about 4 or 5 days. Today I removed the tape and glued on the engine bottom plate. The bottom plate would be more accurate to foil with a silver foil but I chose to simply print it in silver. The engine nozzle is temporarily set in place for the picture.
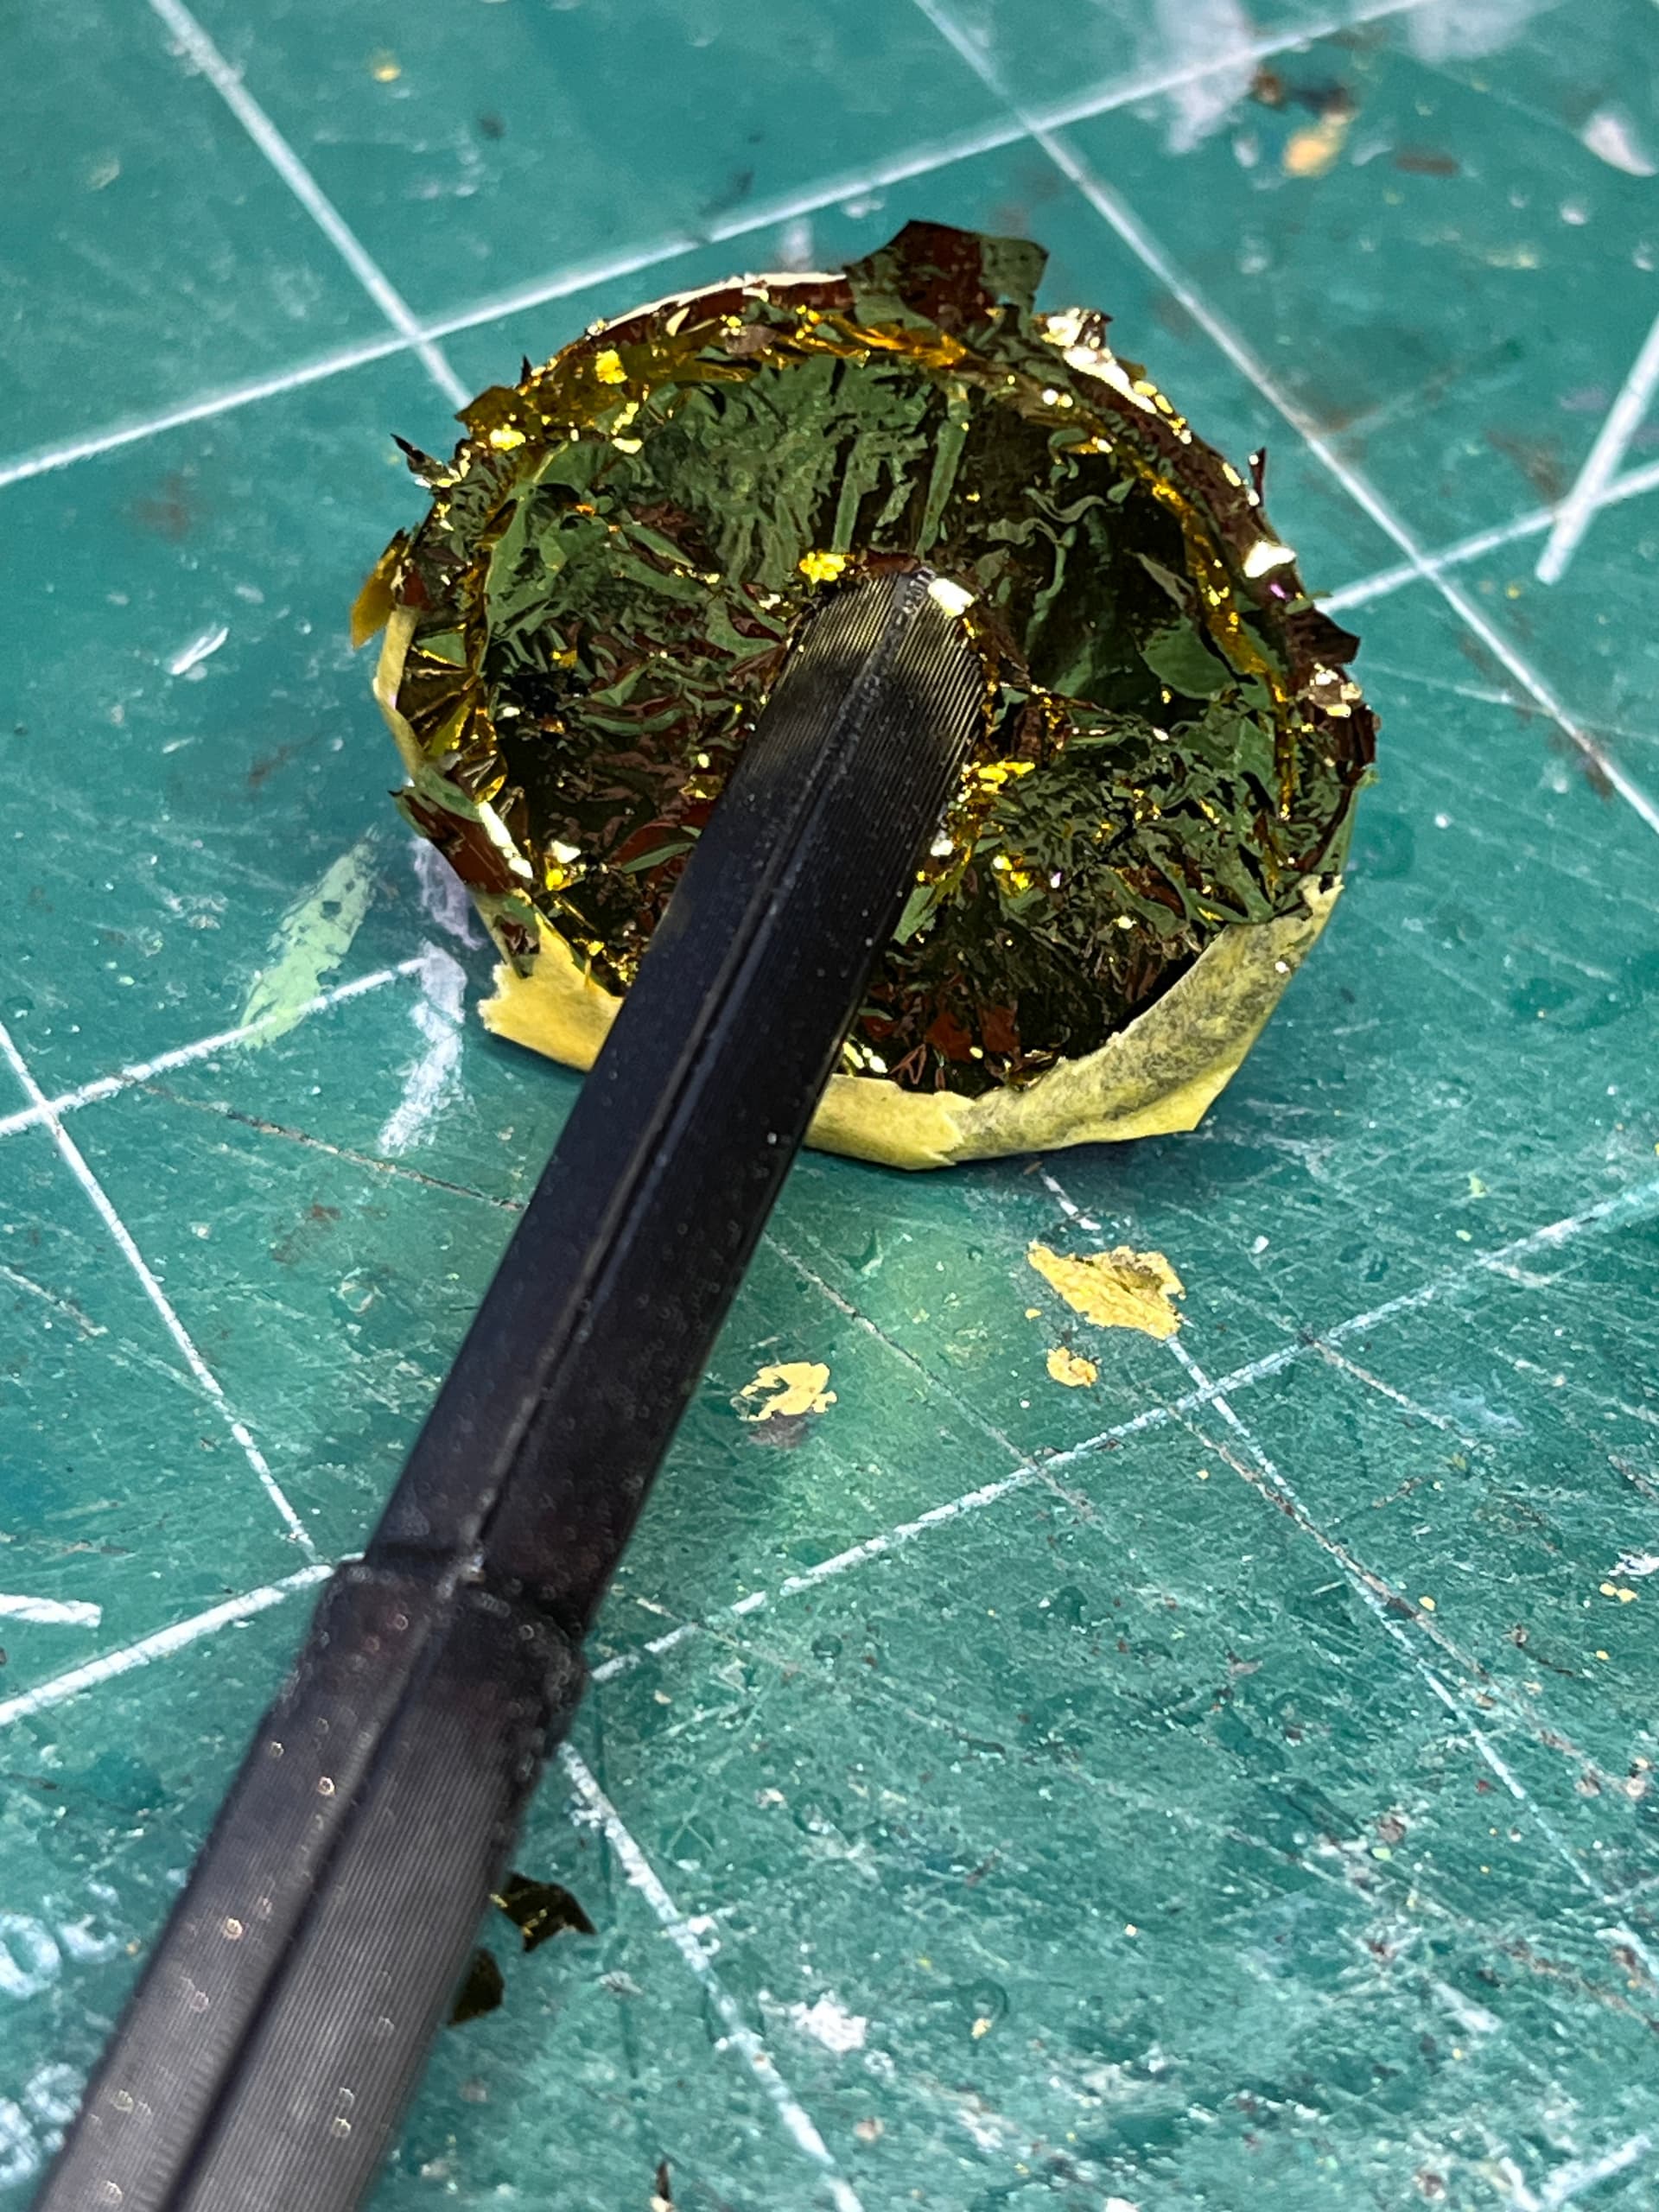
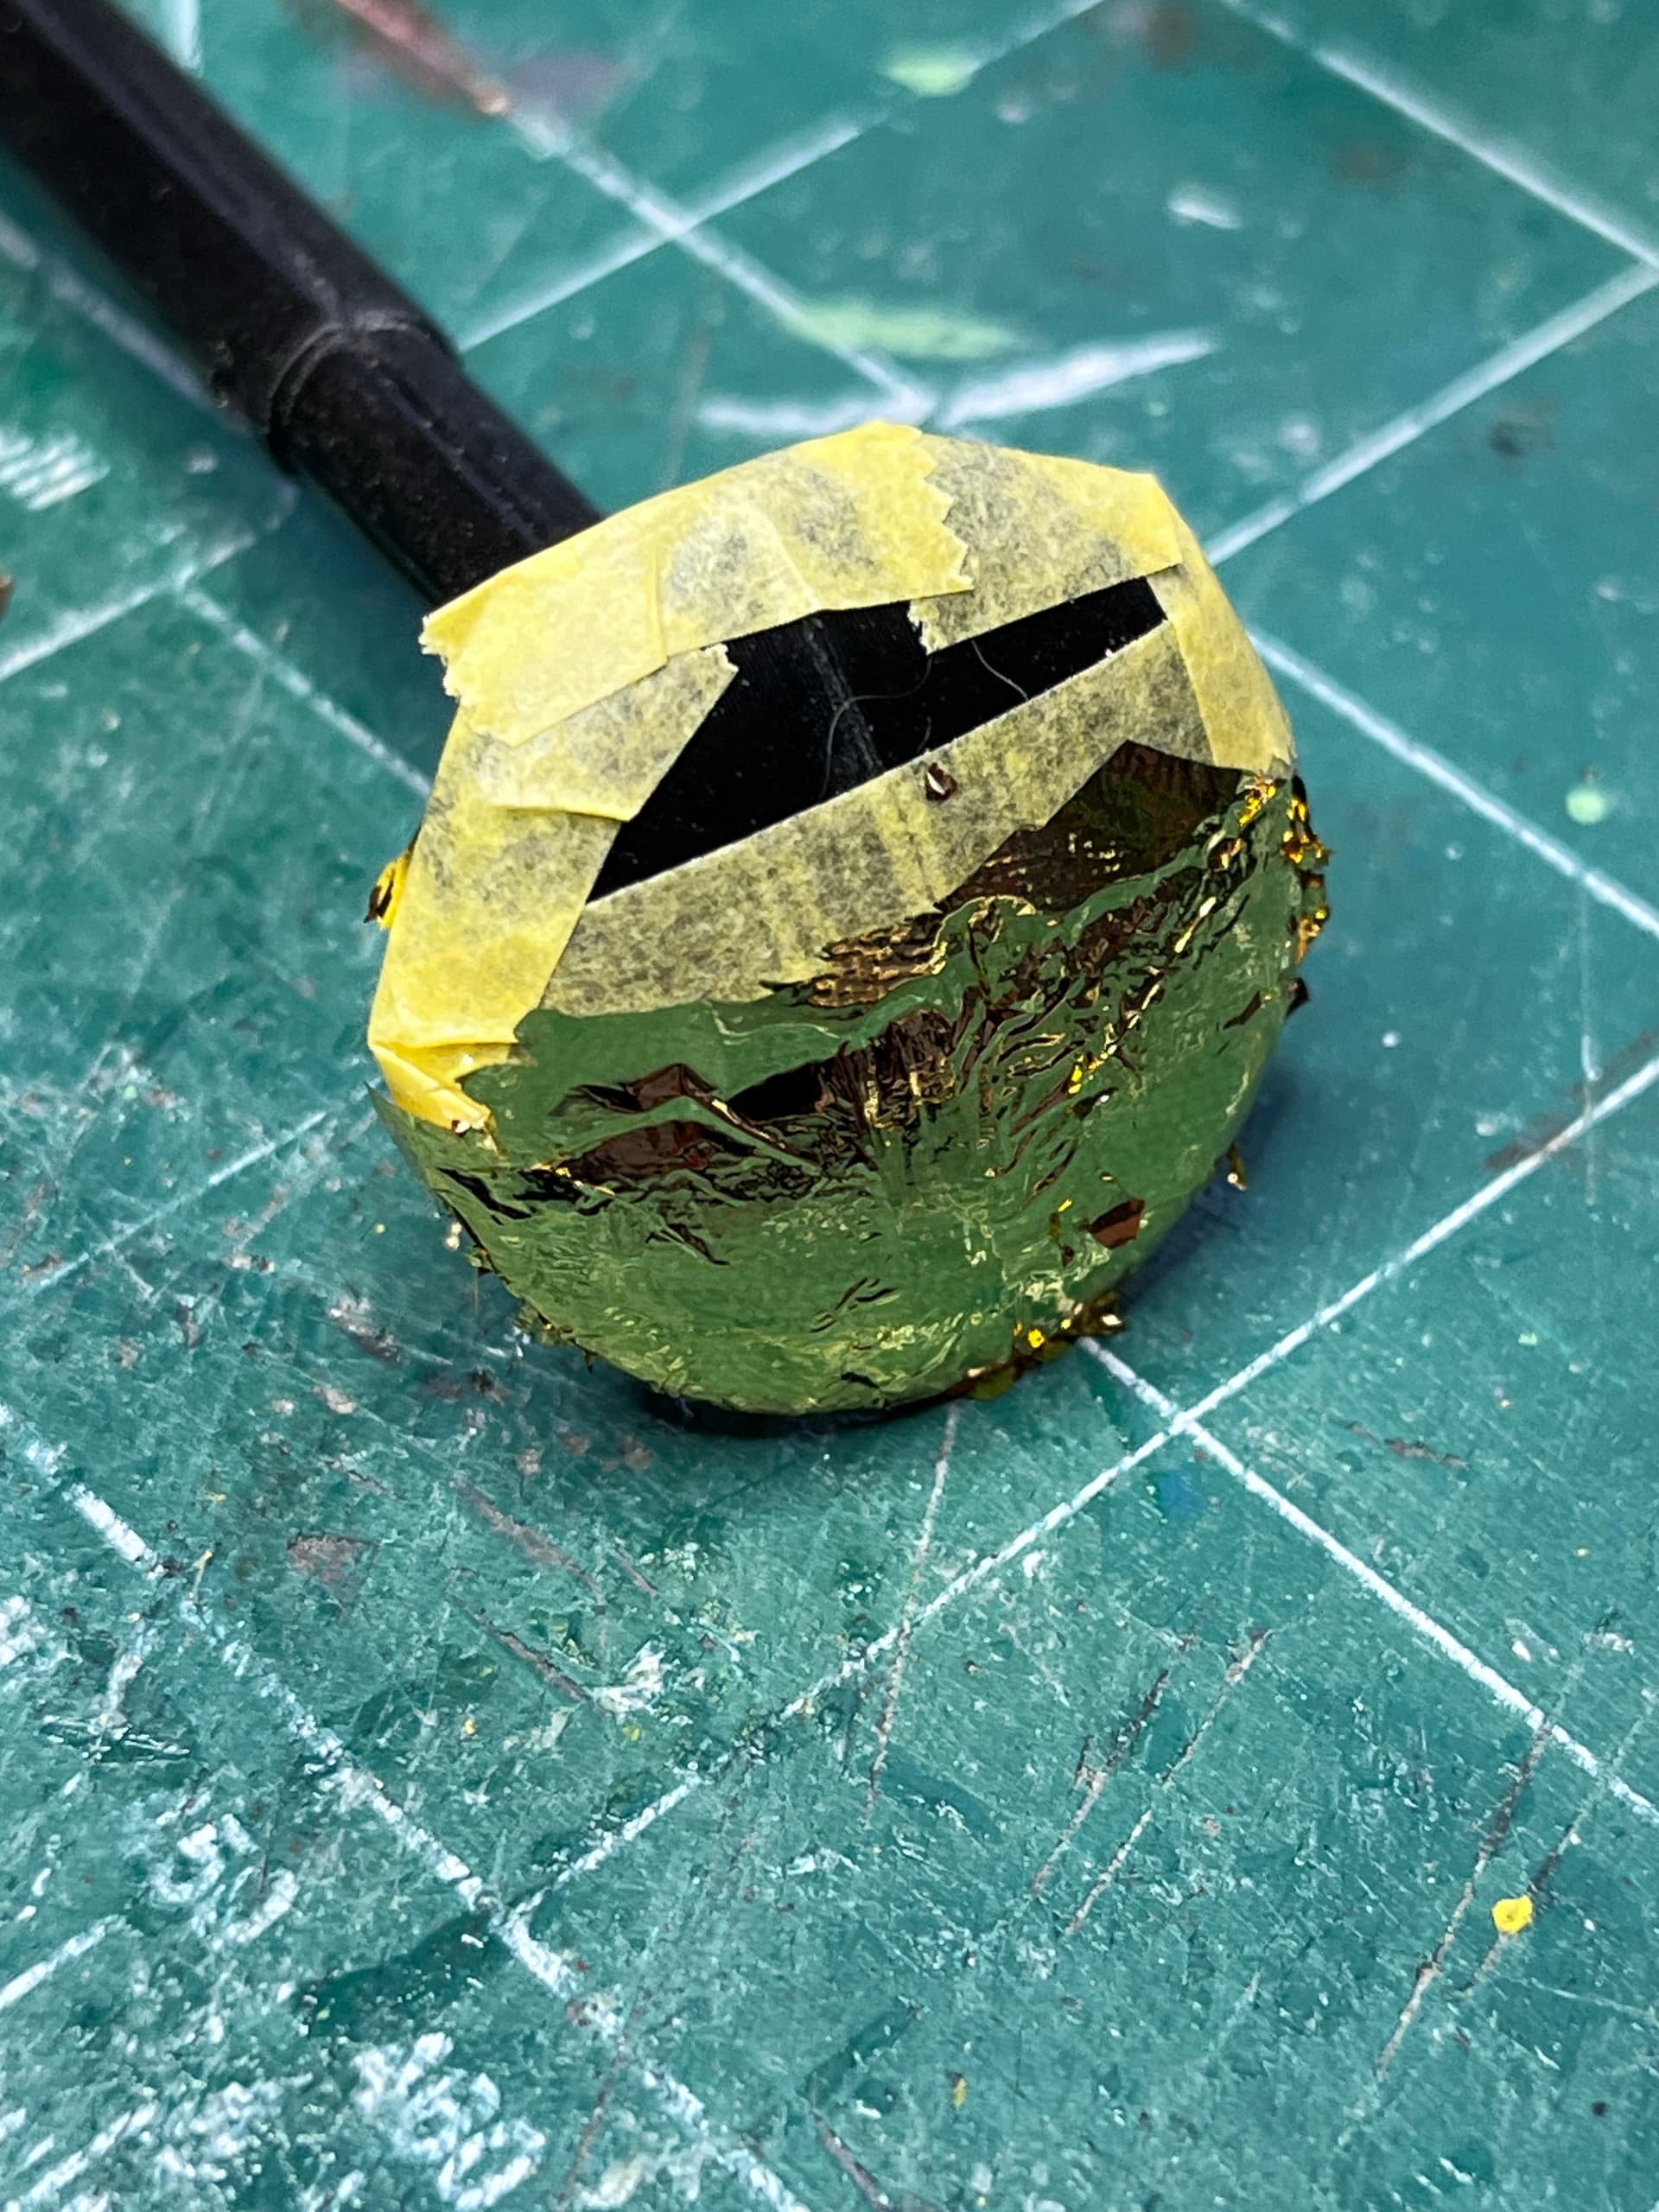
The foiling process will be 1) tape off area, 2) brush on light layer of glue, 3) apply foil and tamp down with brush, 4) after a day or two remove tape and check if more foil needs to be added, 5) wait another 2 or 3 days before continuing. Here is the top and bottom of one of the legs. Half the bottom and the corresponding lip is black so after adding tape, the exposed portion was glued and foiled. There is still excess overlapping foil that will be lightly brushed off tomorrow before removing the tape.
5 Likes
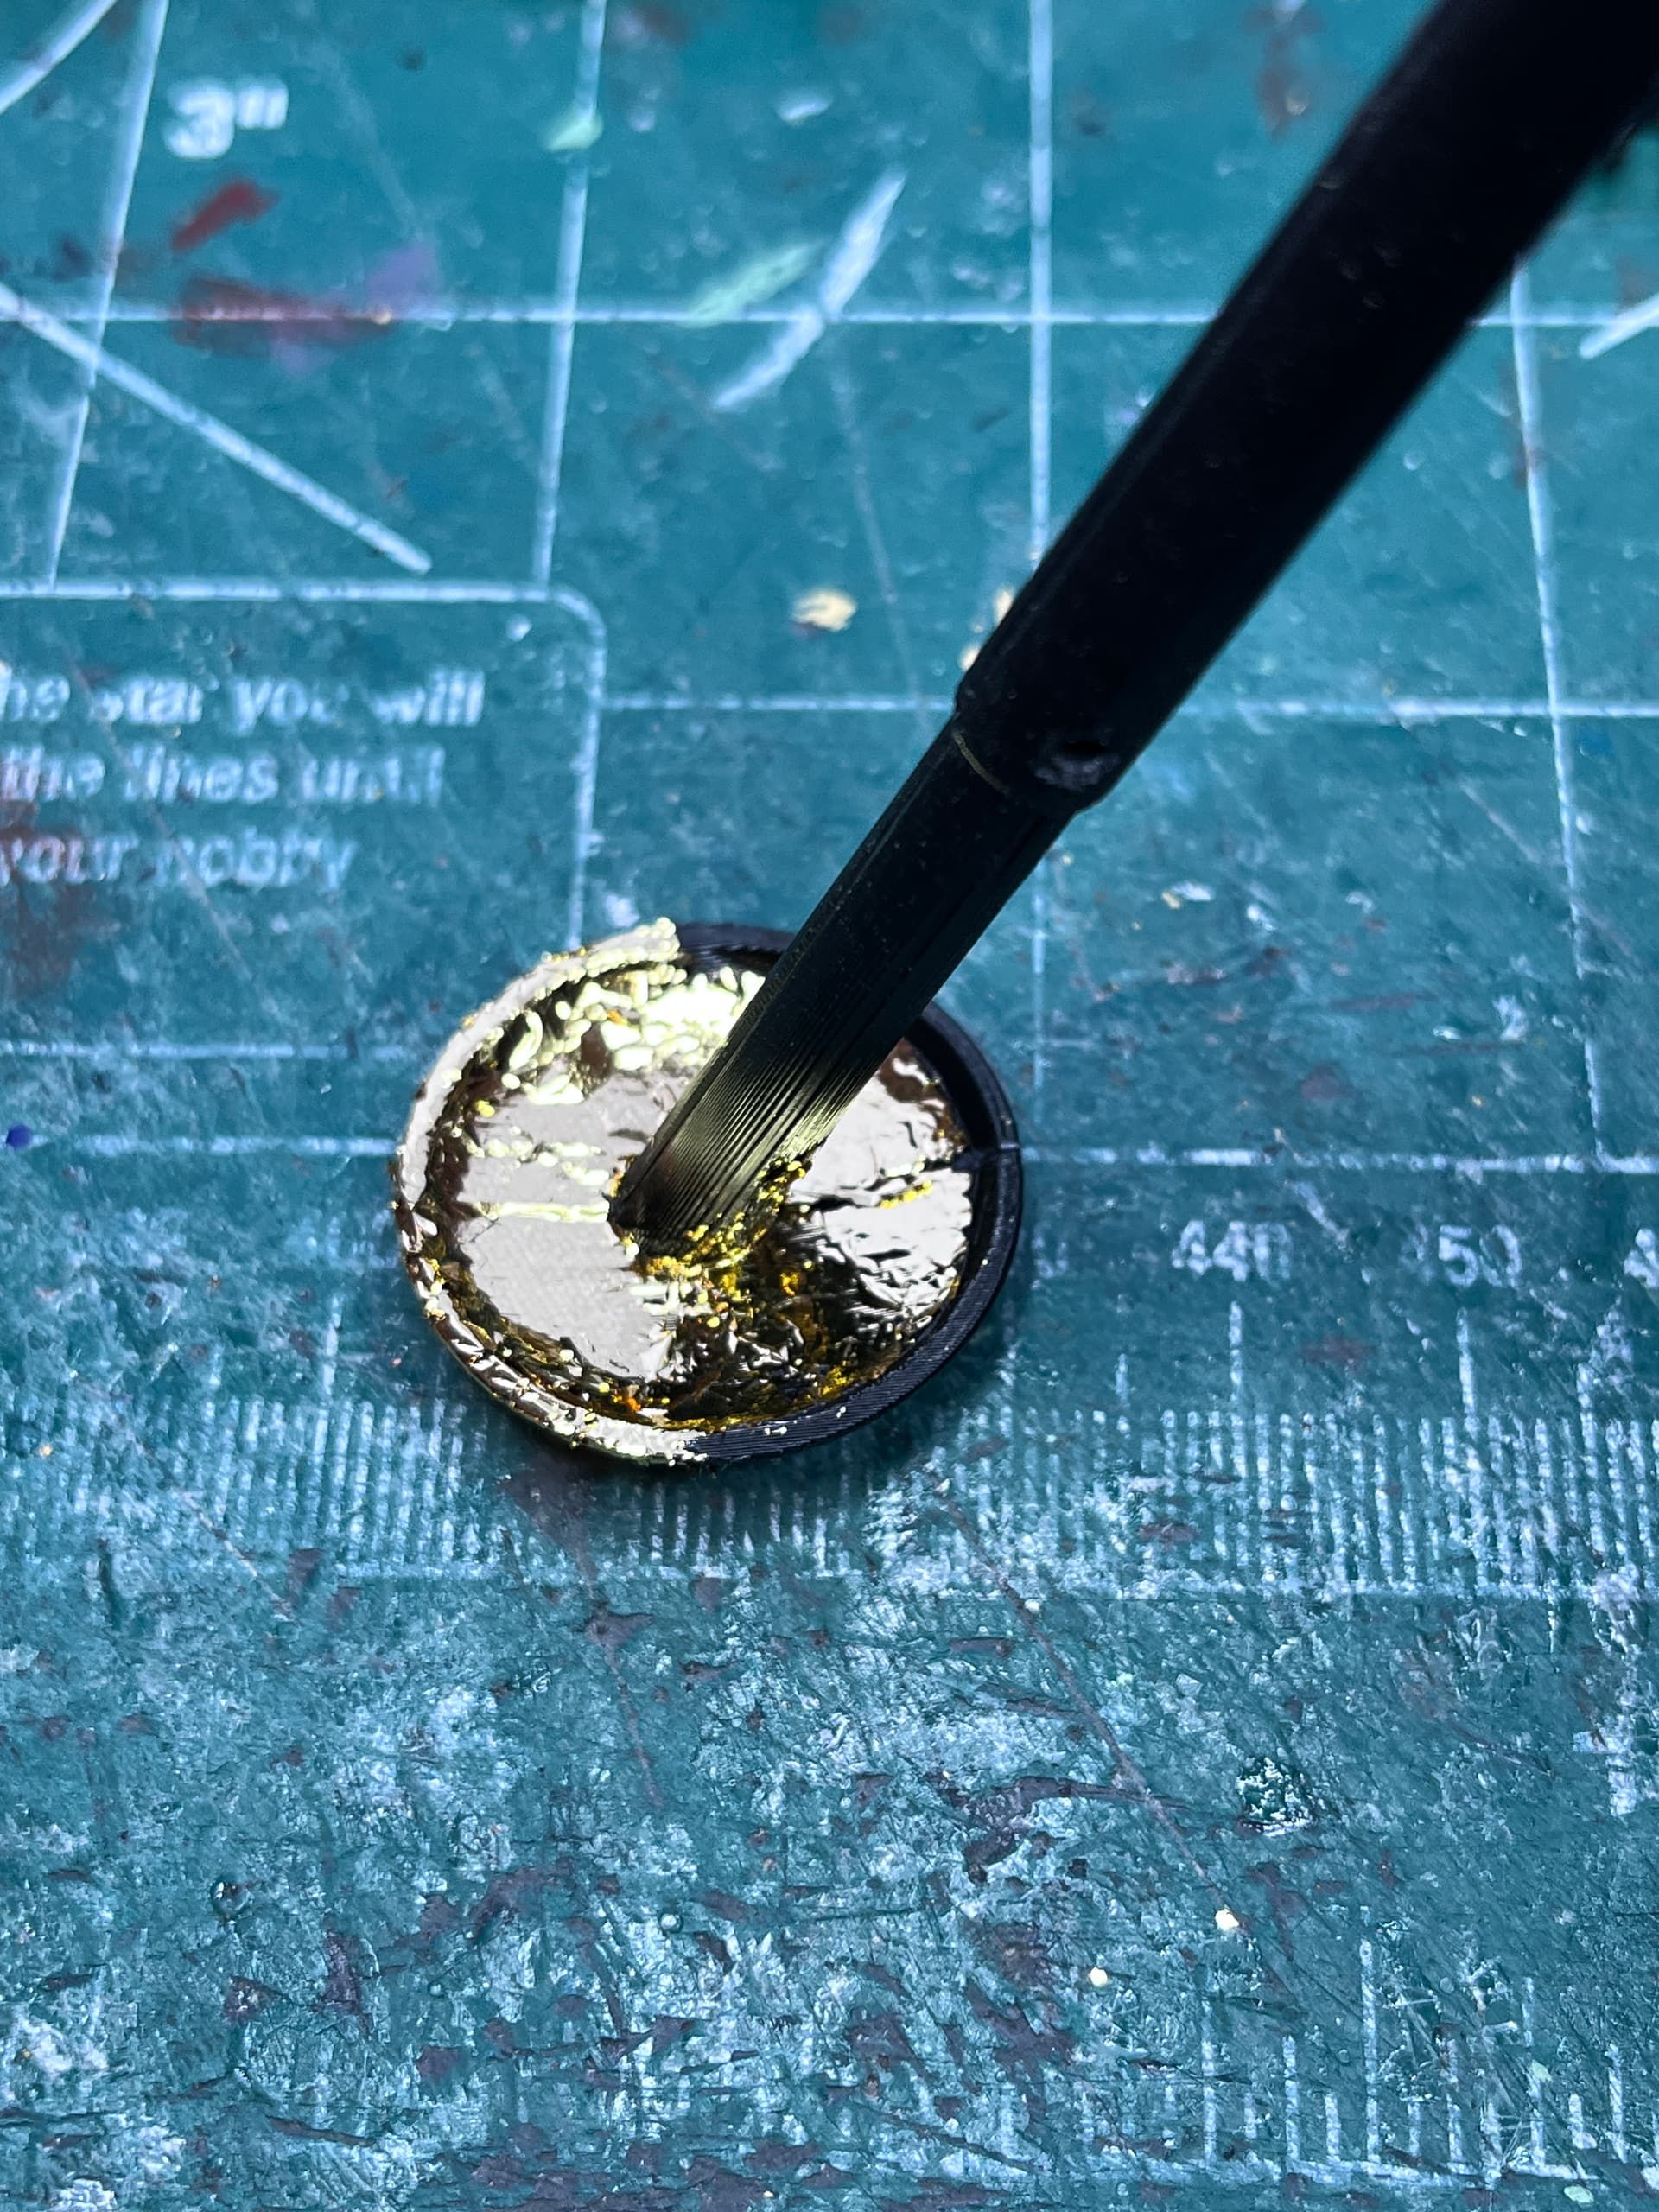
The tape has been removed and the foil “brushed” to remove the excess. The main strut still needs to be foiled in a silver foil.
4 Likes
Continuing to foil.
And as I descend into foiling madness… flakes of foil get everywhere. Two of the big sections of the ascent stage have been printed. I chose to print them in silver and paint the black panels a flat black.
4 Likes
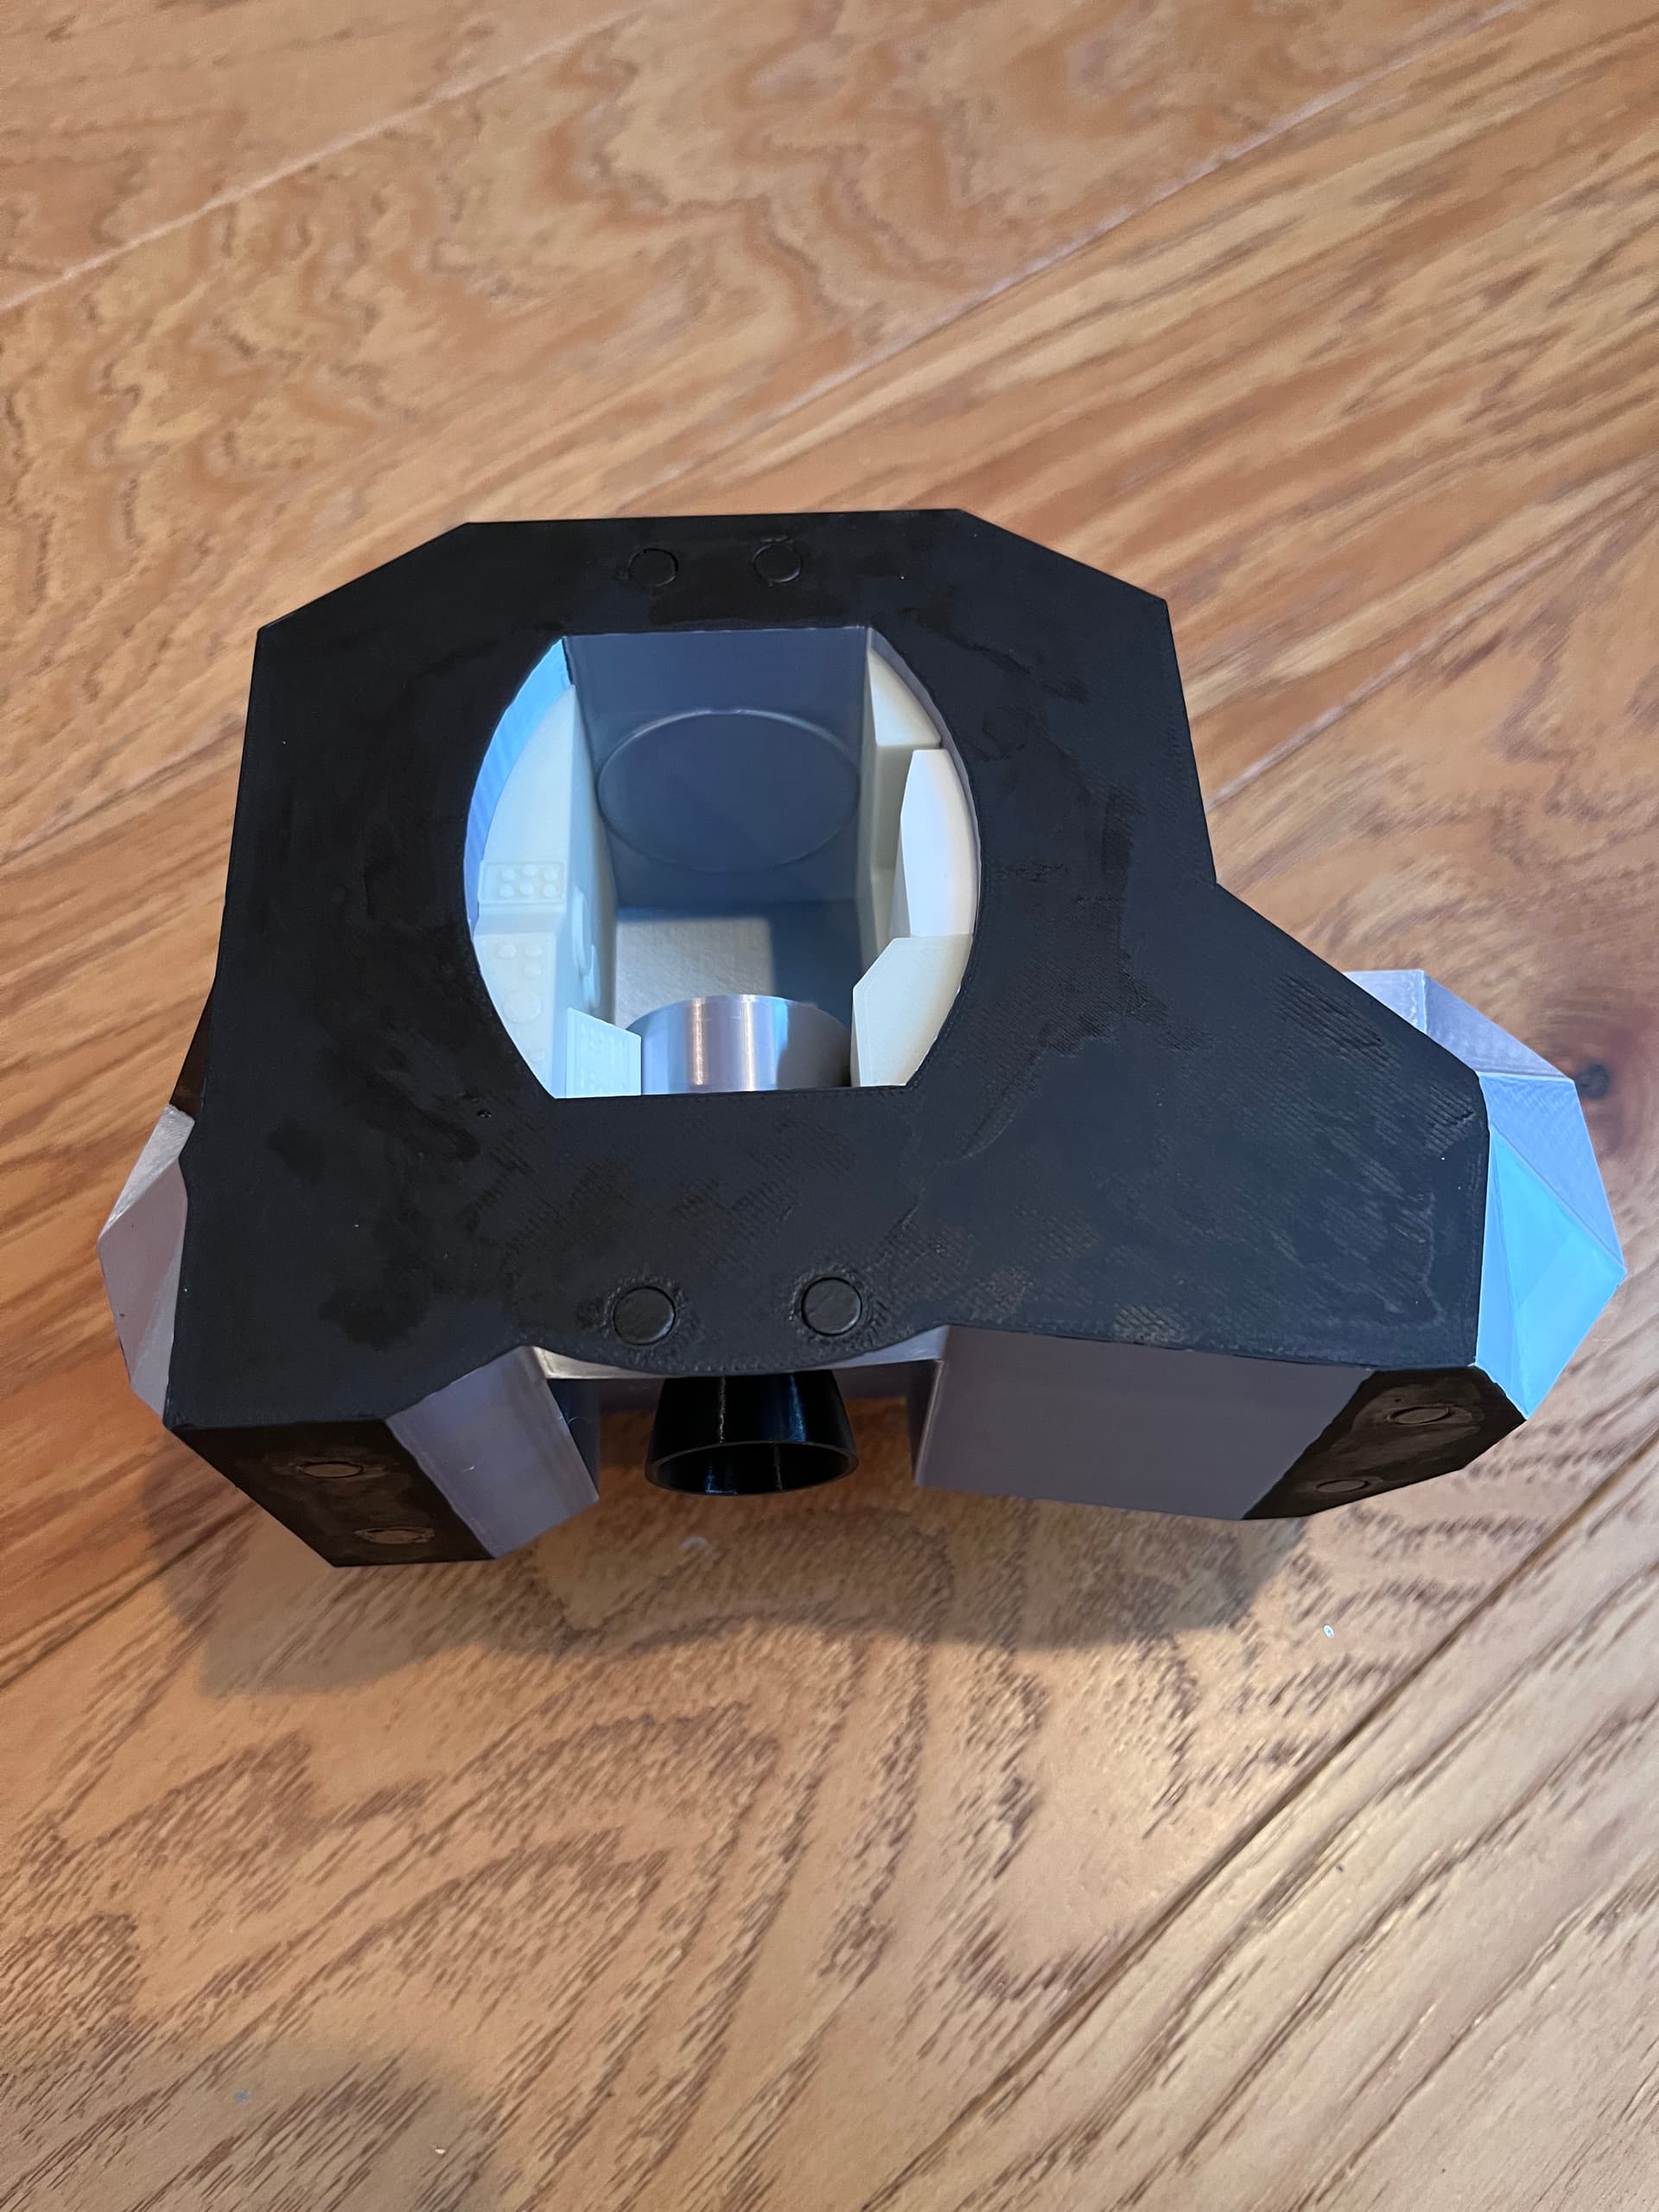
The interior of the center section, ascent stage is complete. I used a bone white for the side panels and a white for the other two pieces plus the silver round cover for the ascent engine.
Here you can see the engine nozzle and more of the painting. The magnets are in place.
1 Like
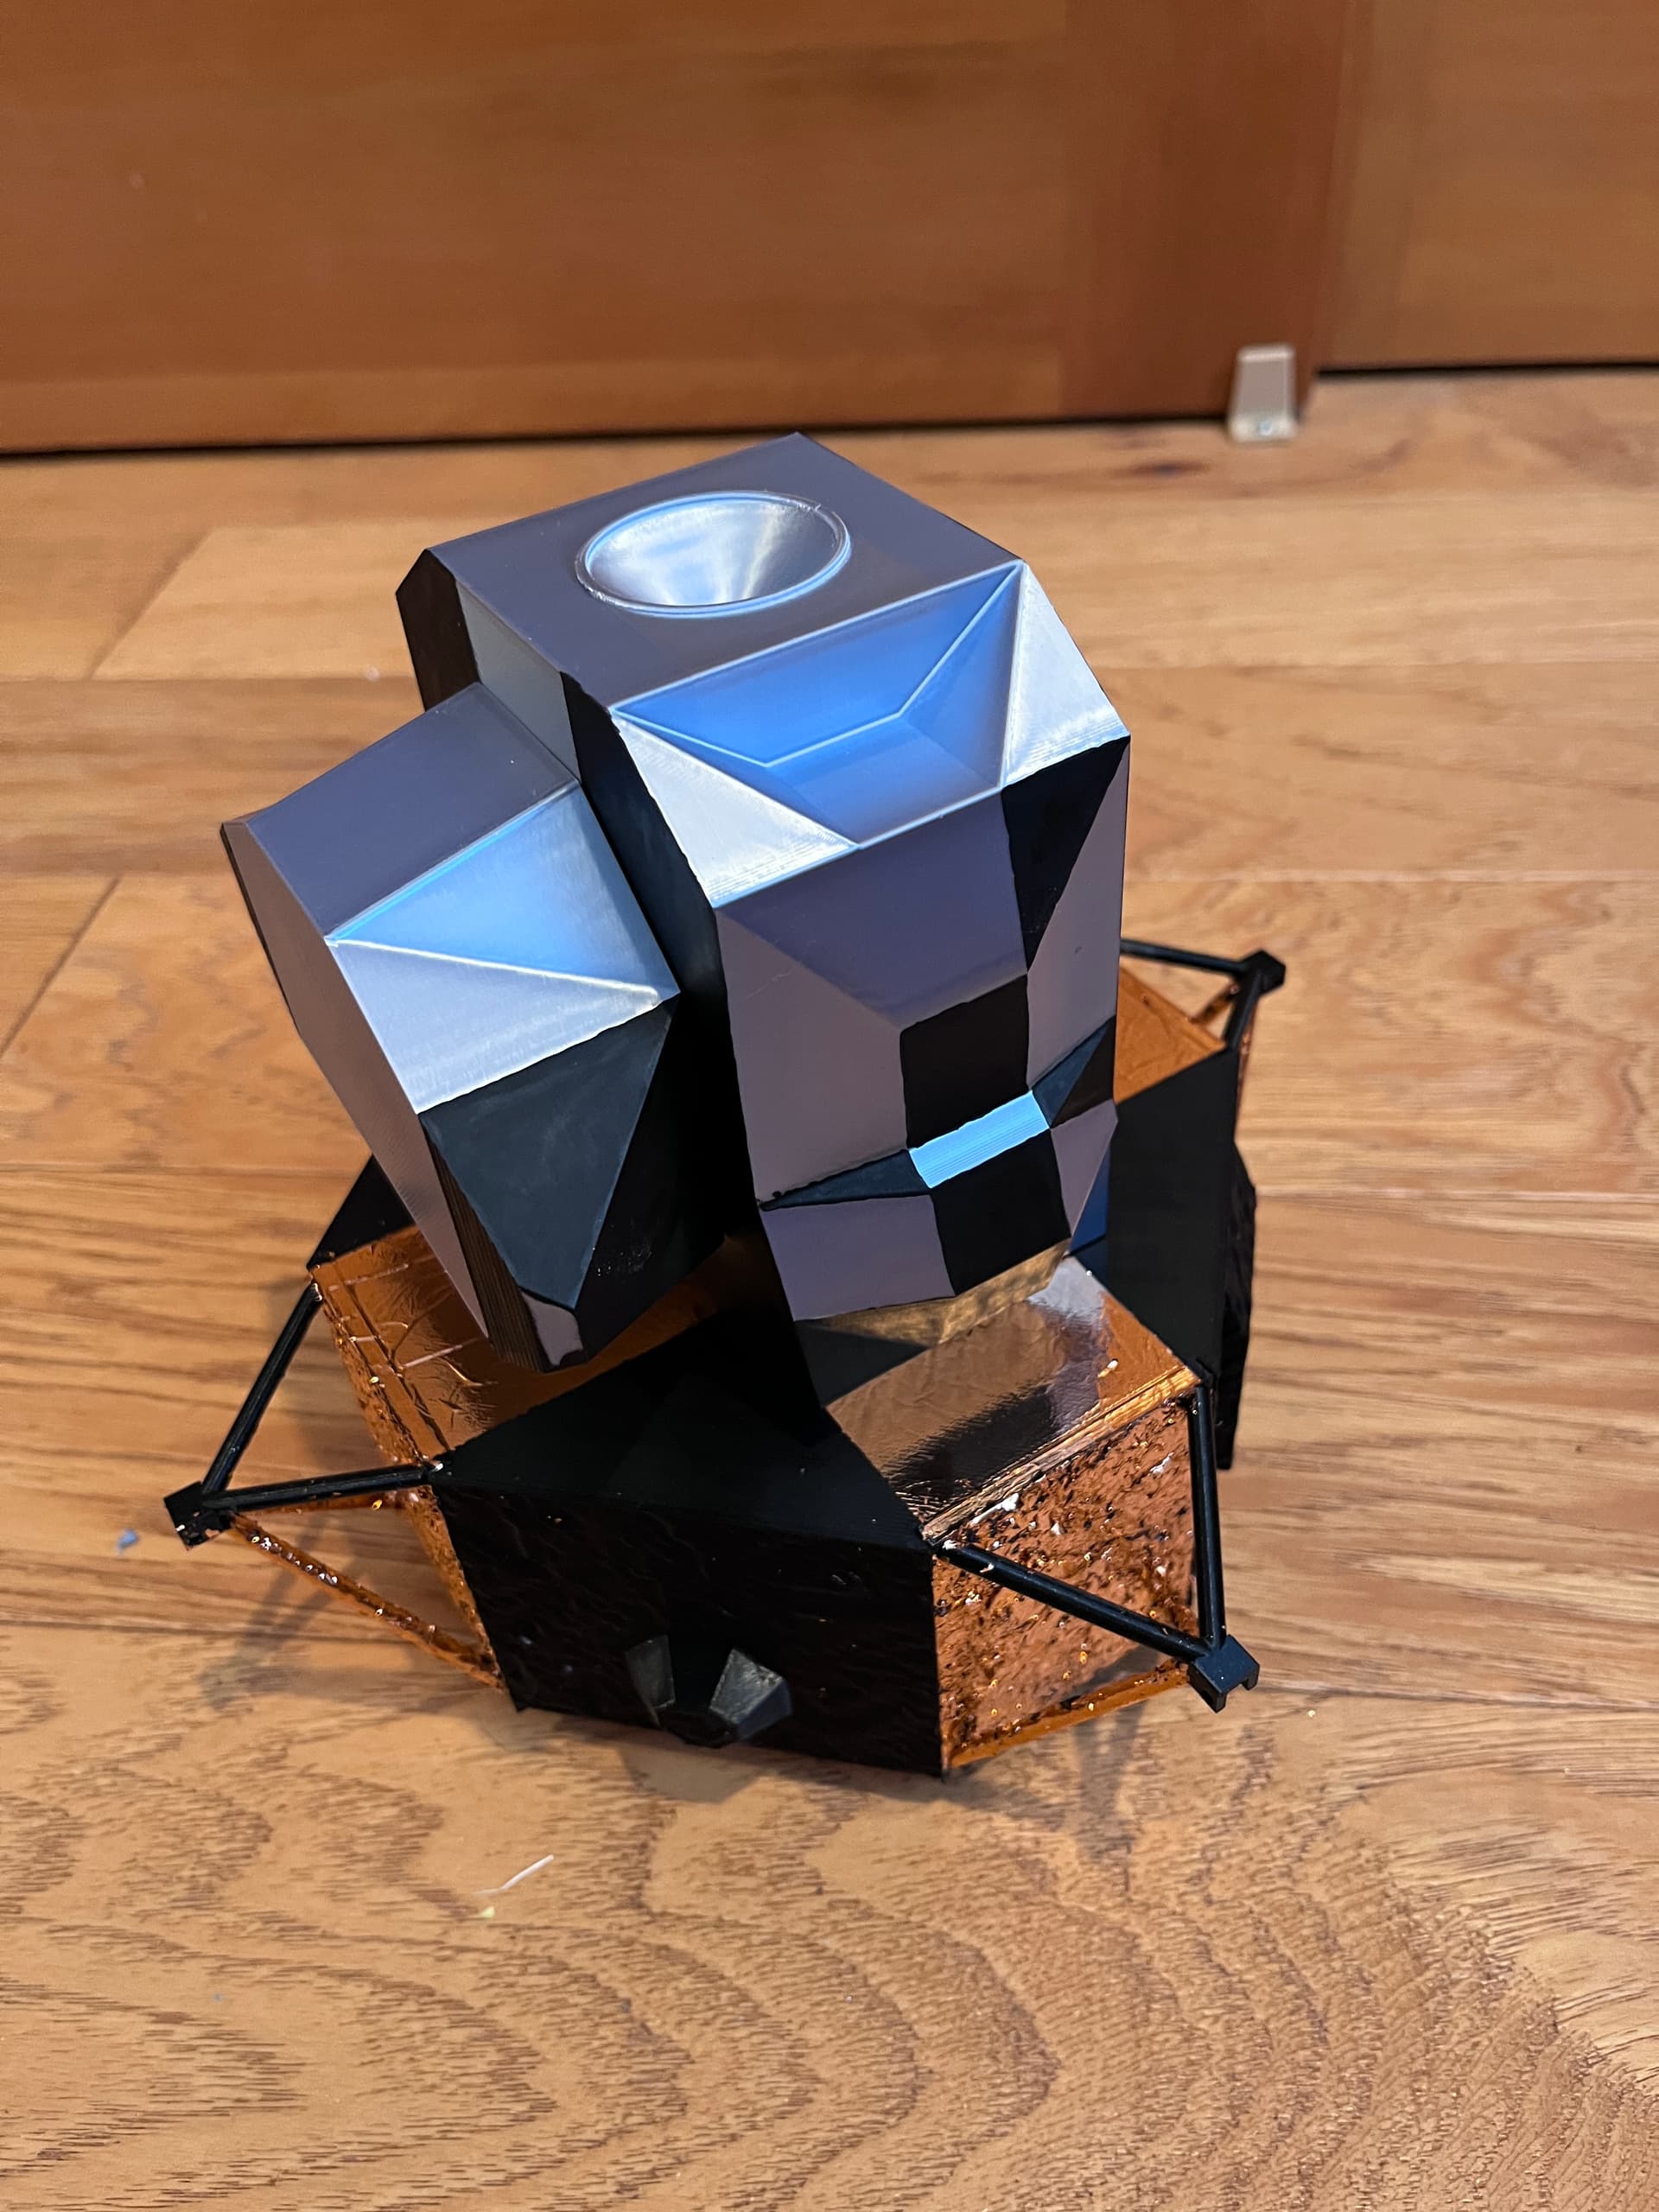
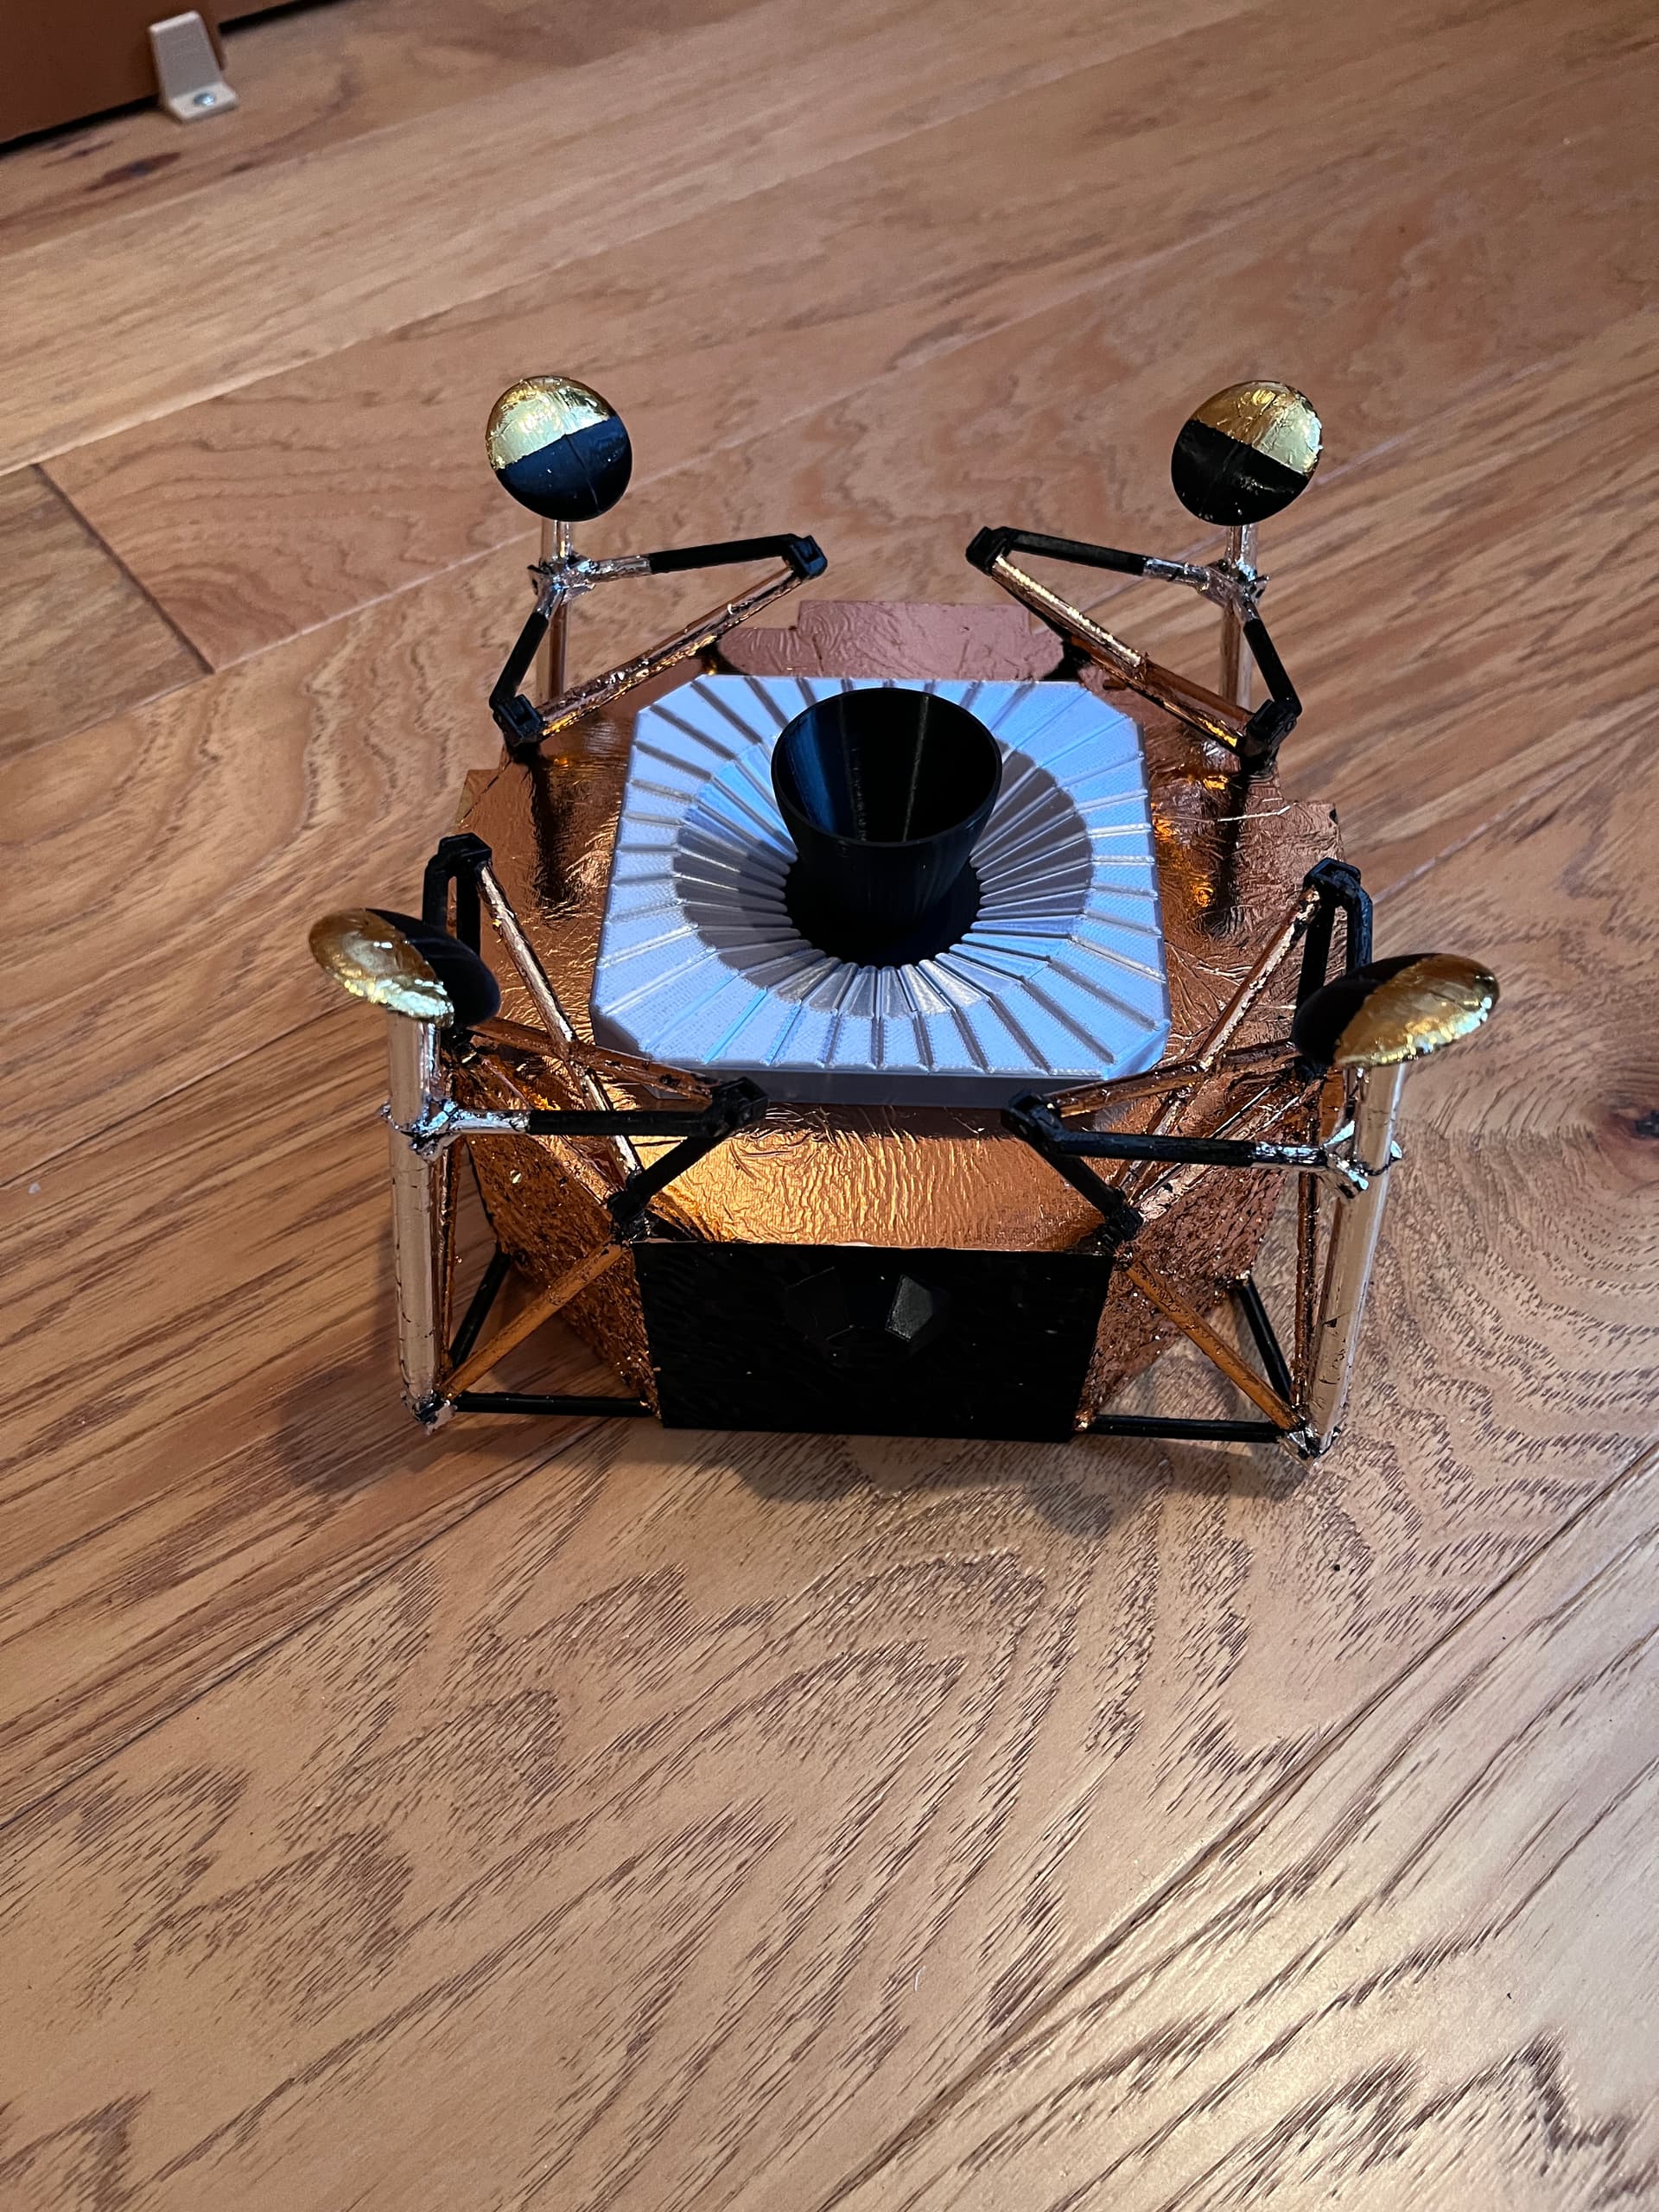
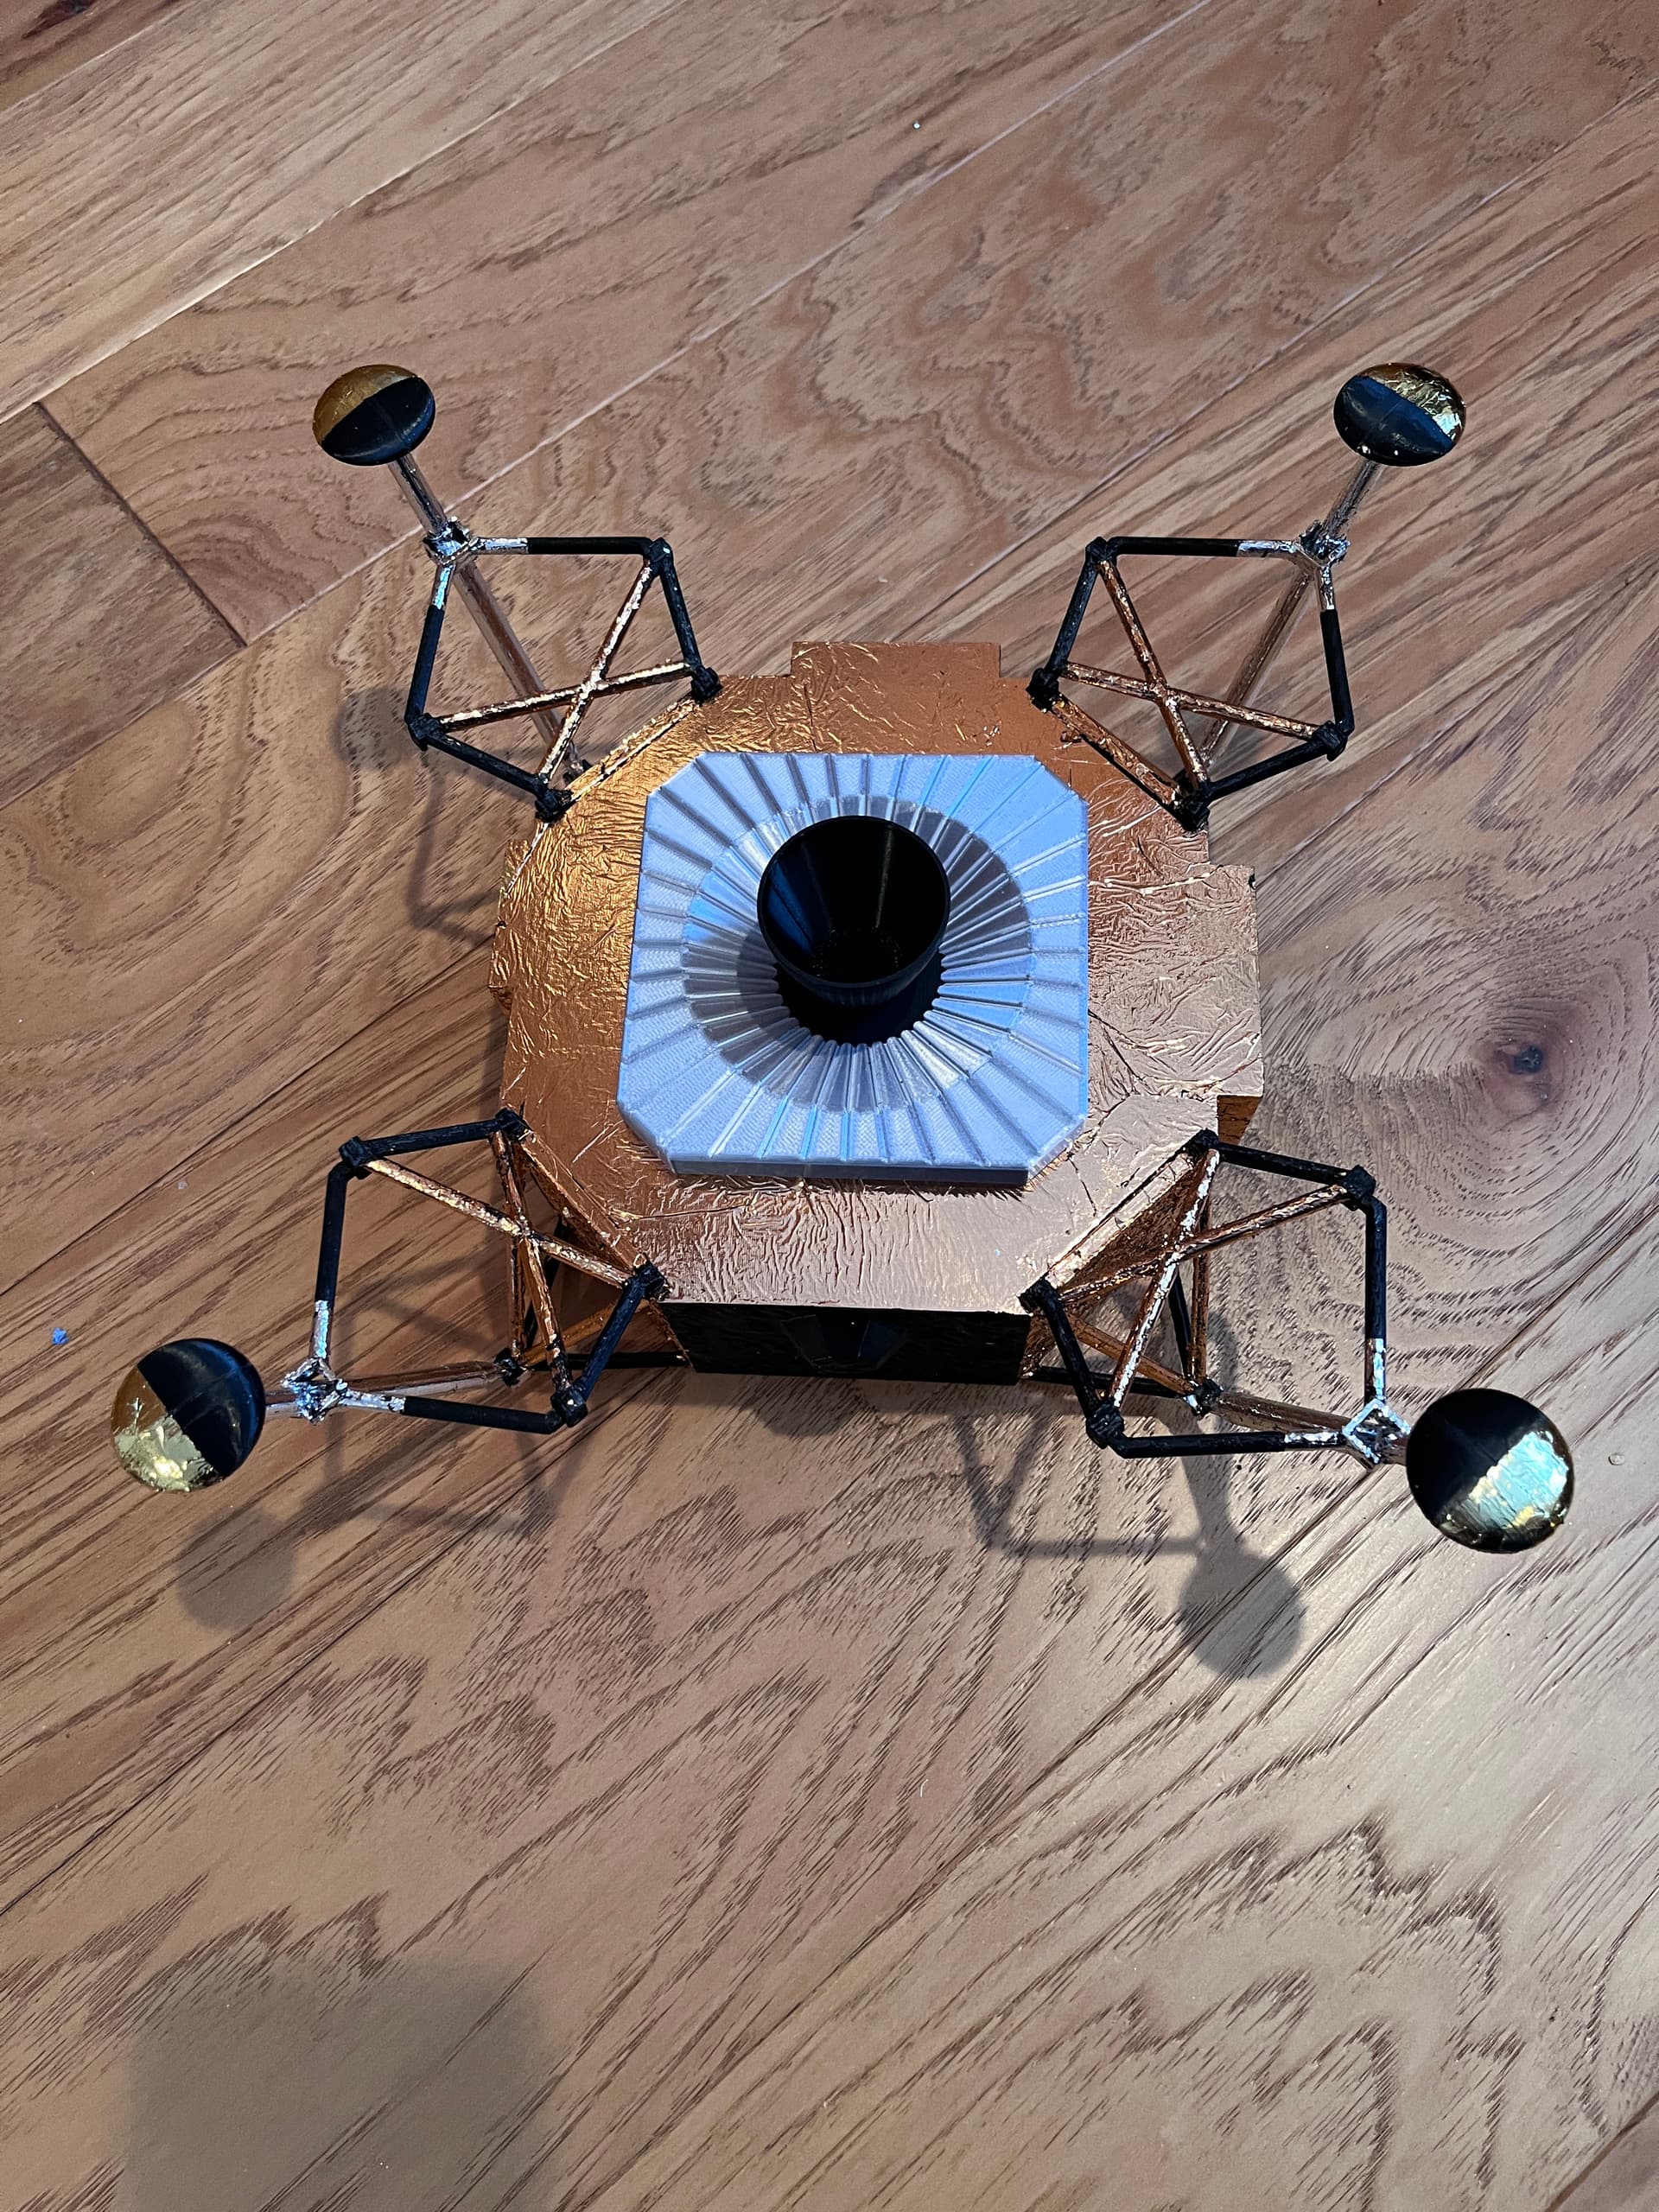
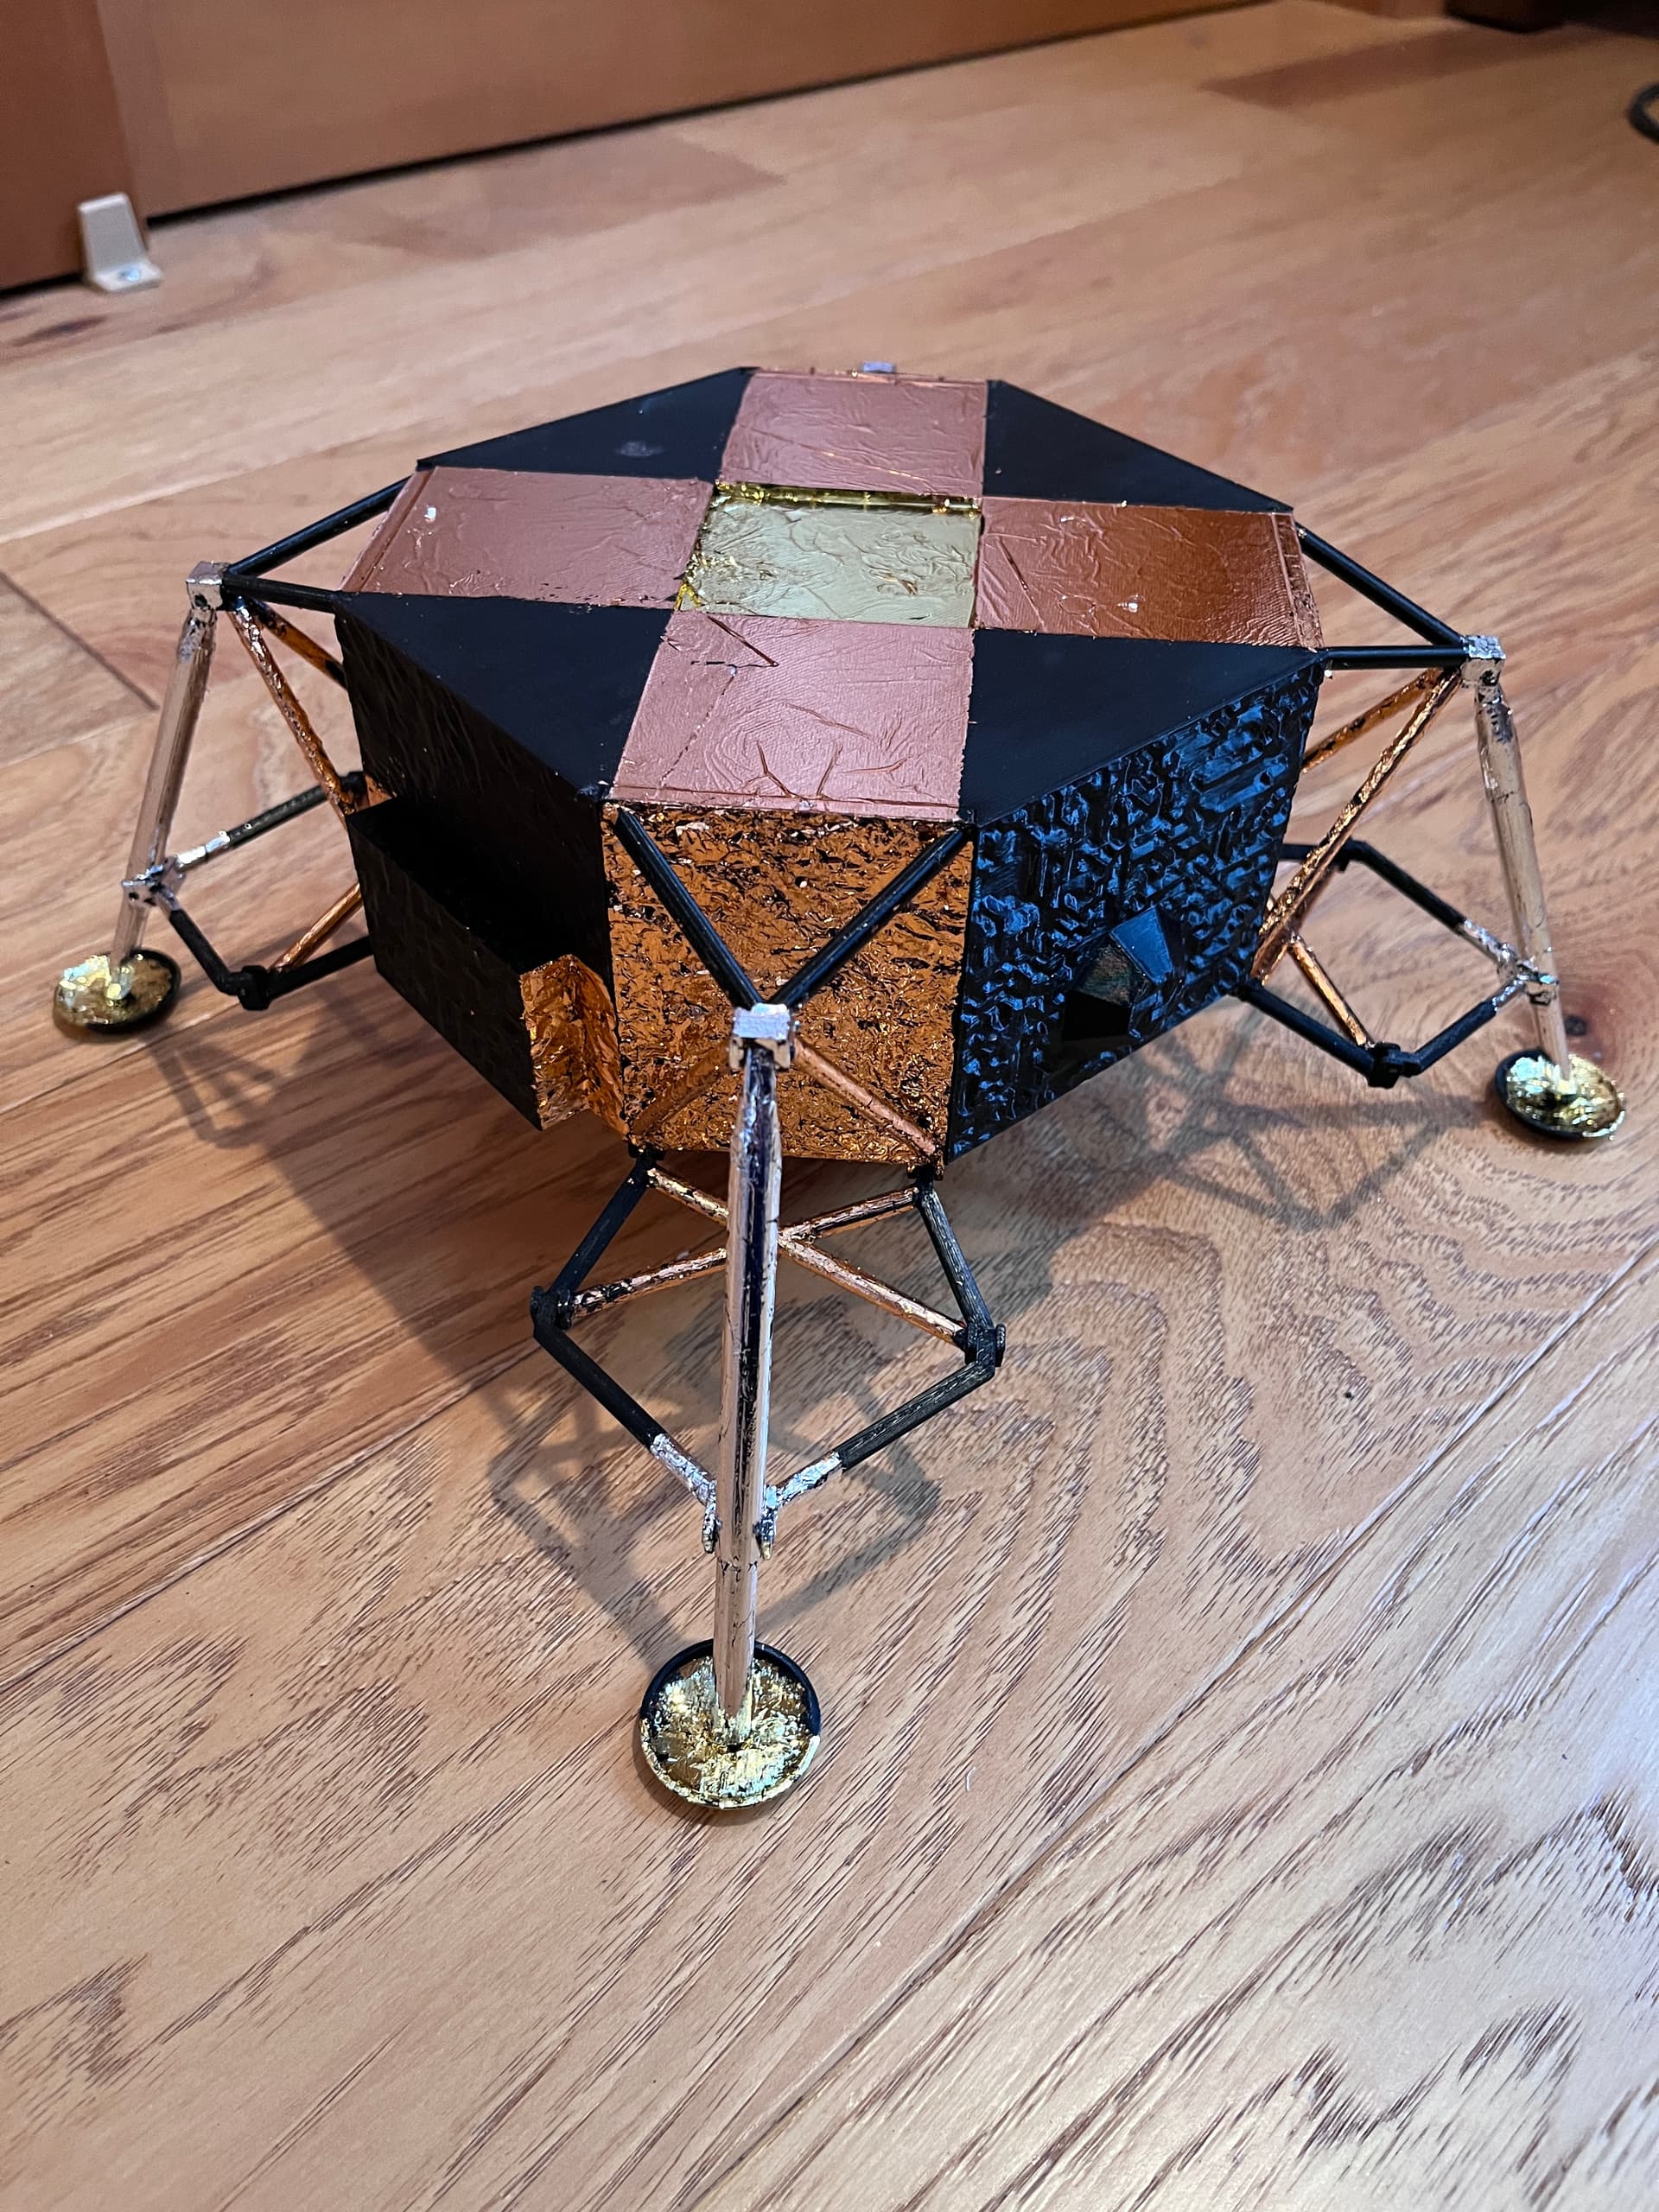
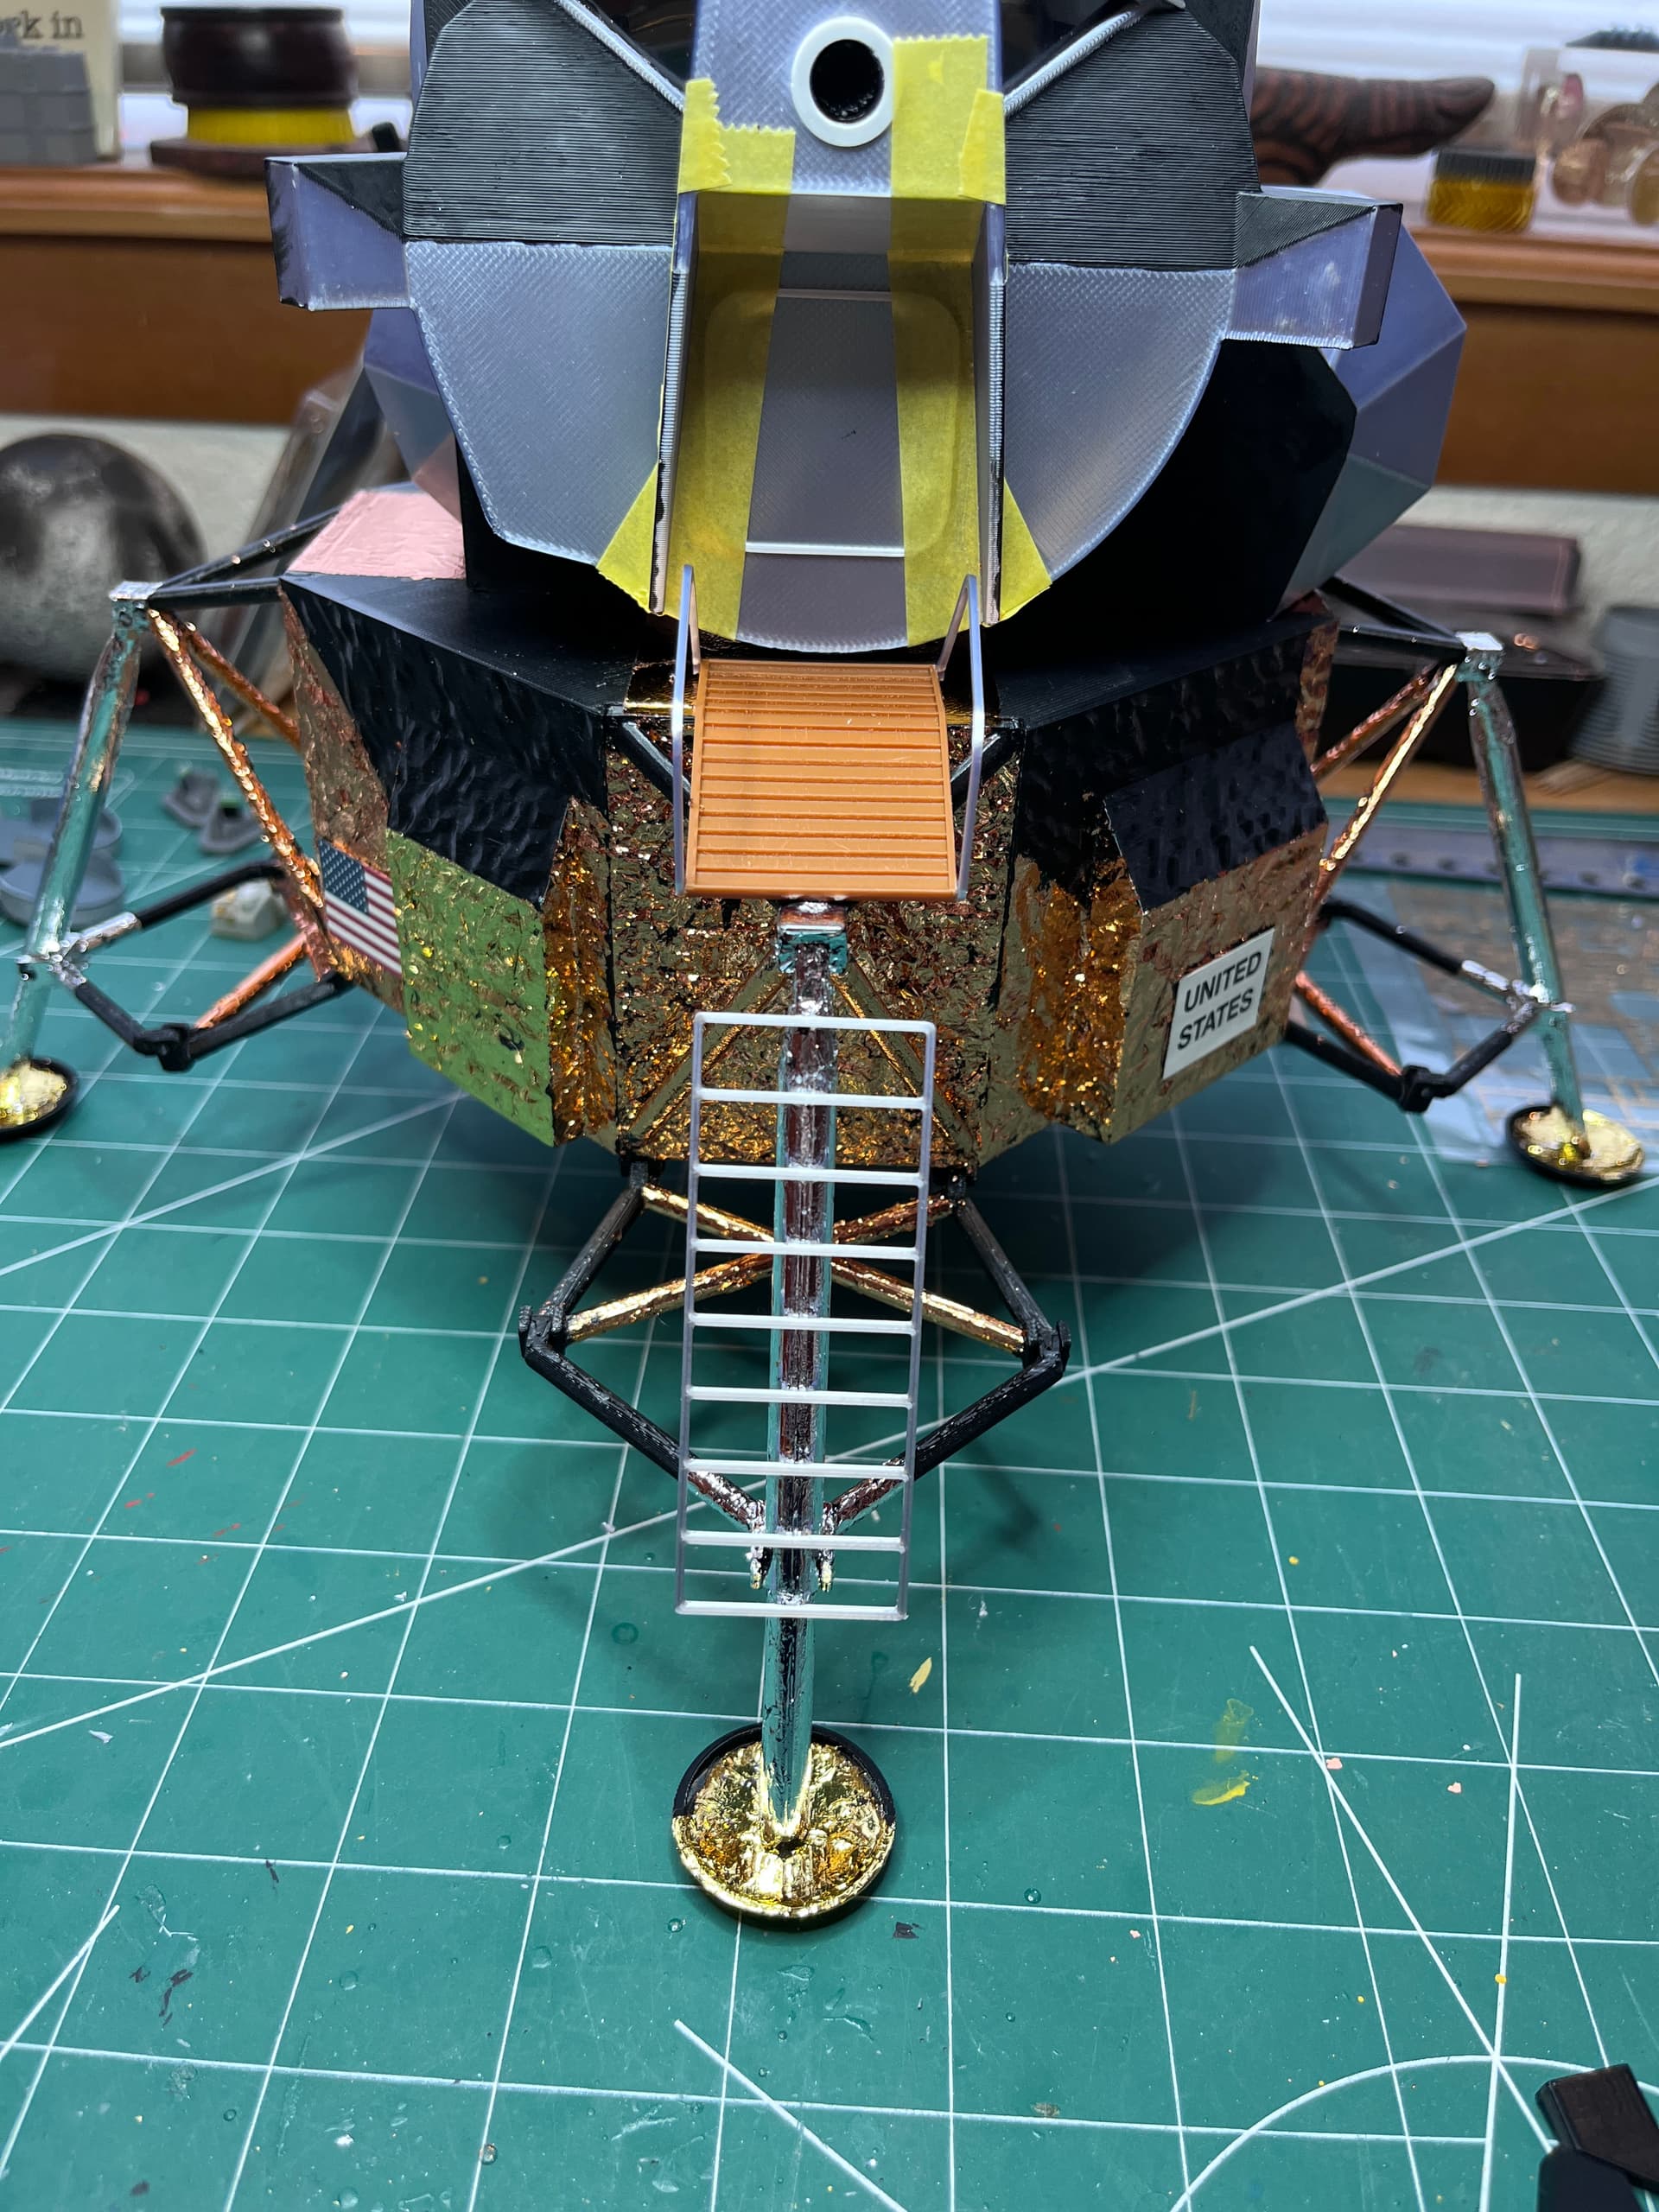
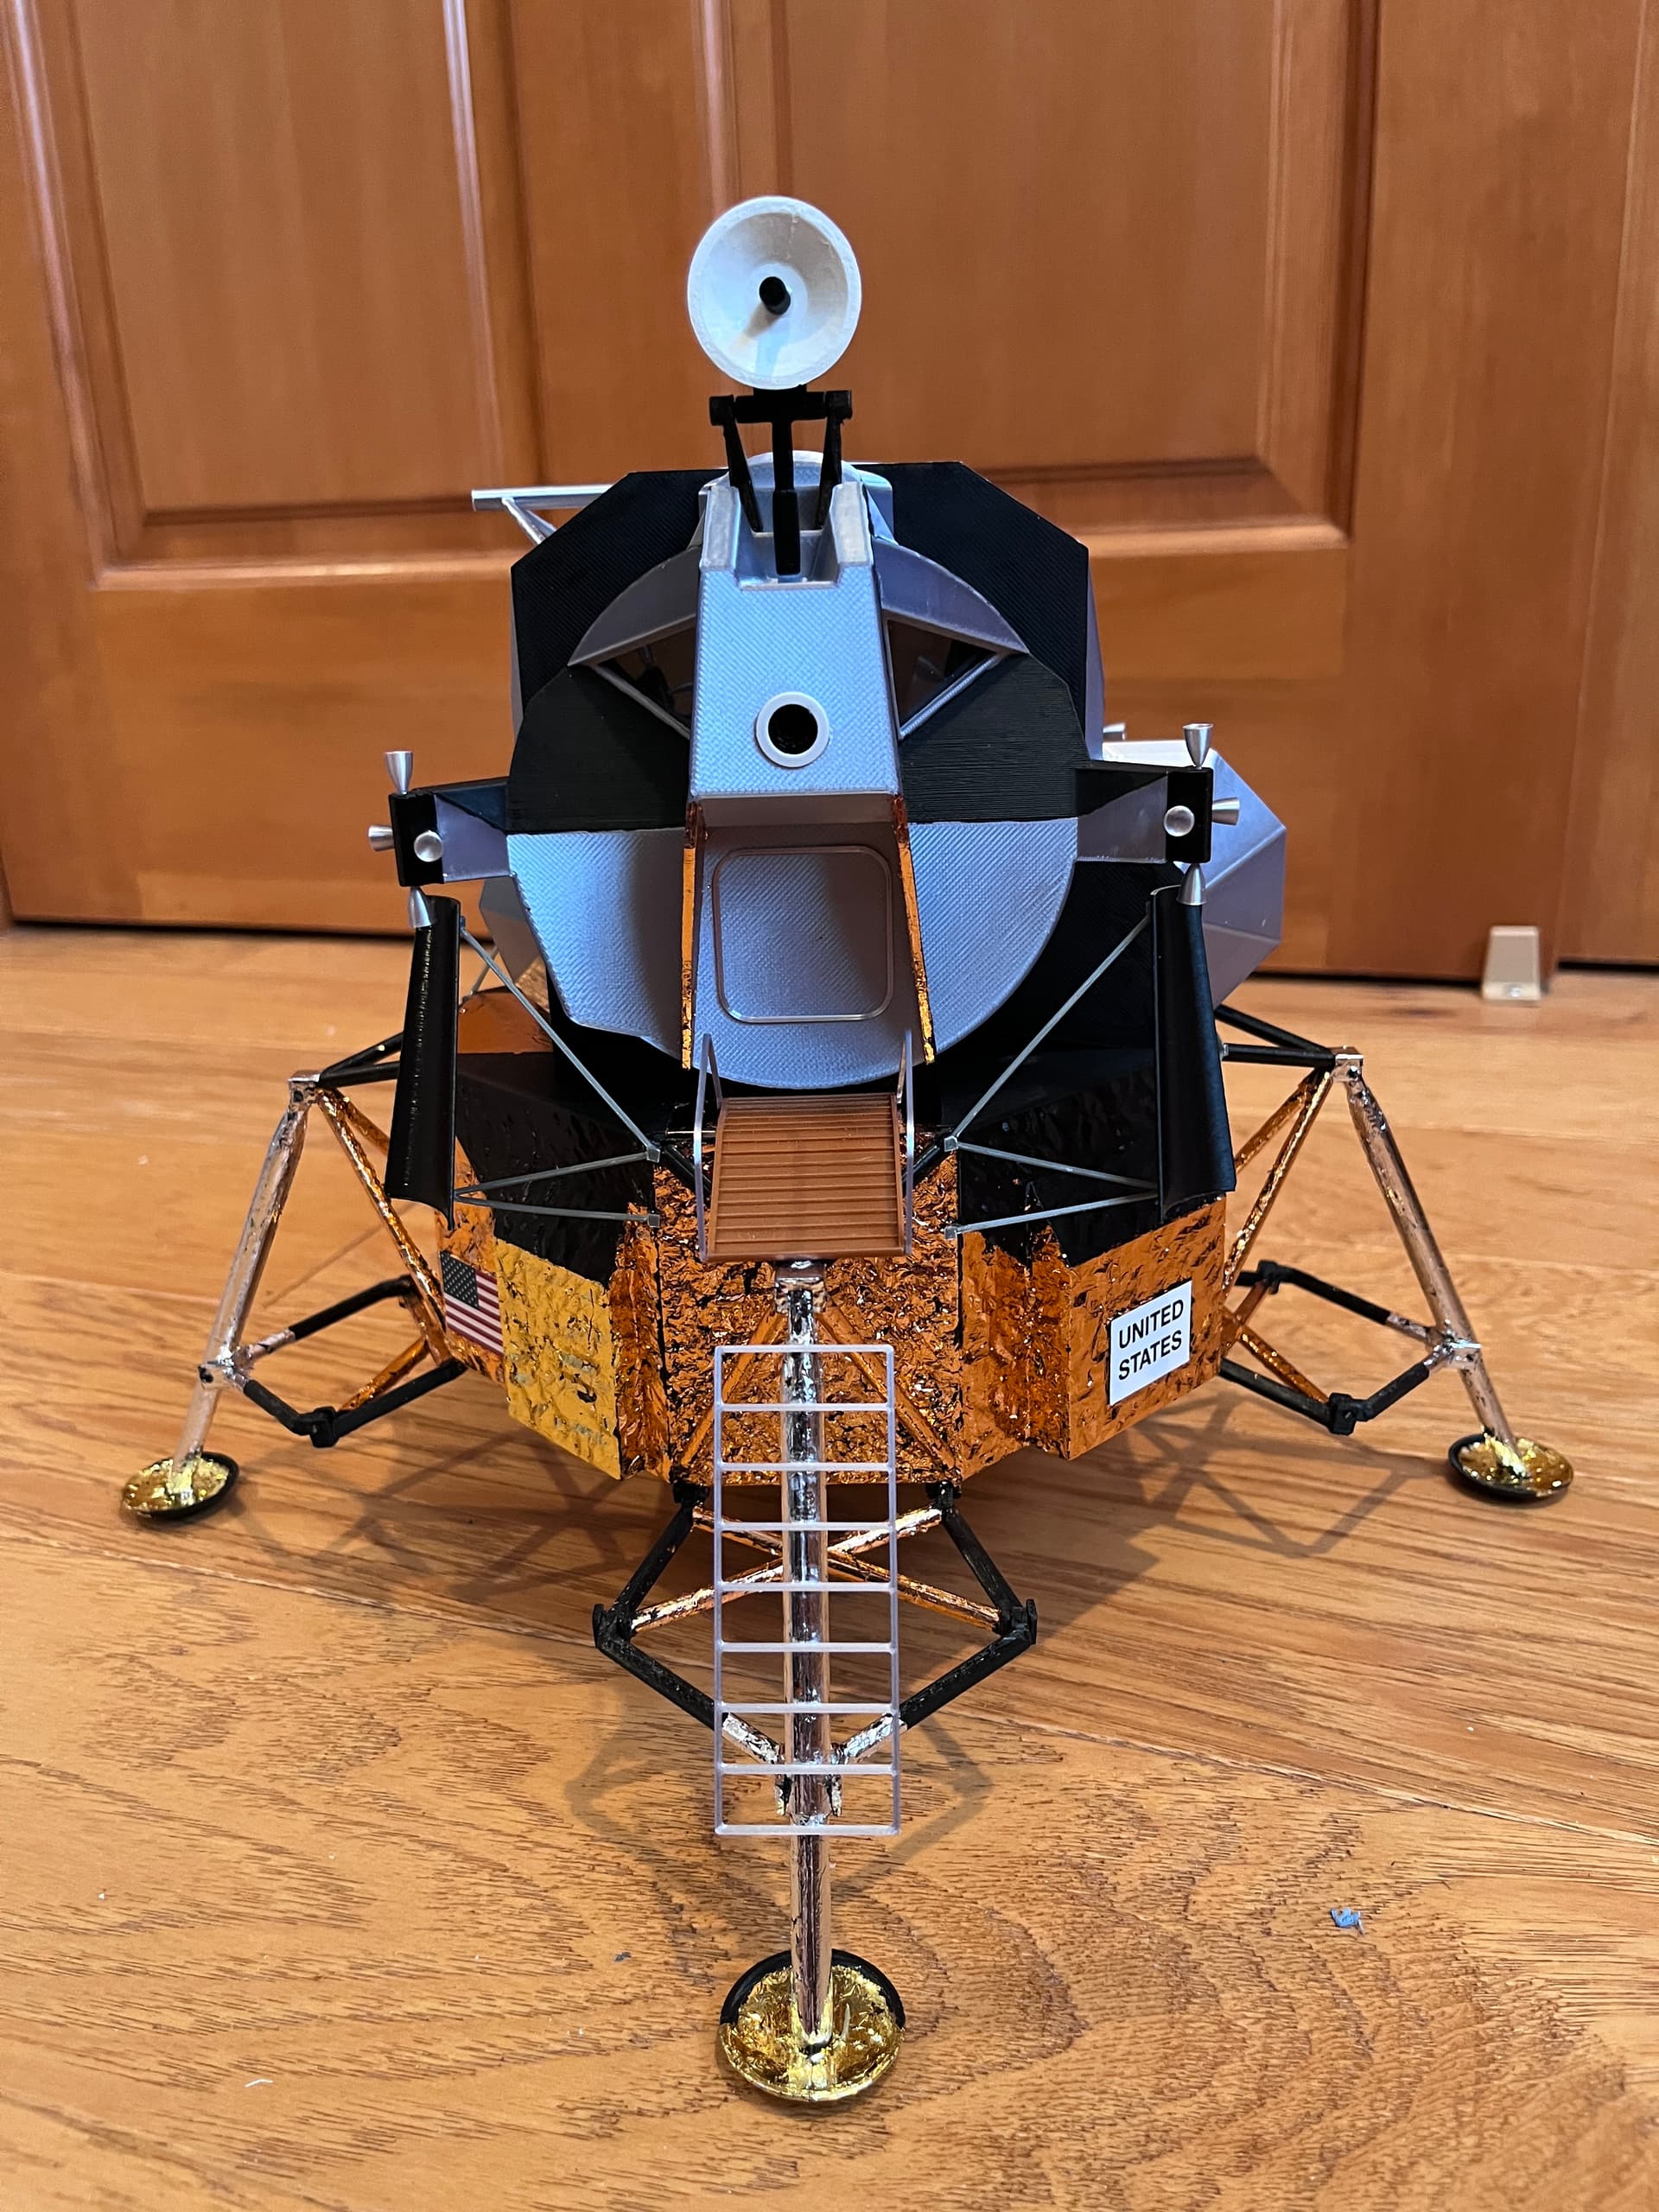
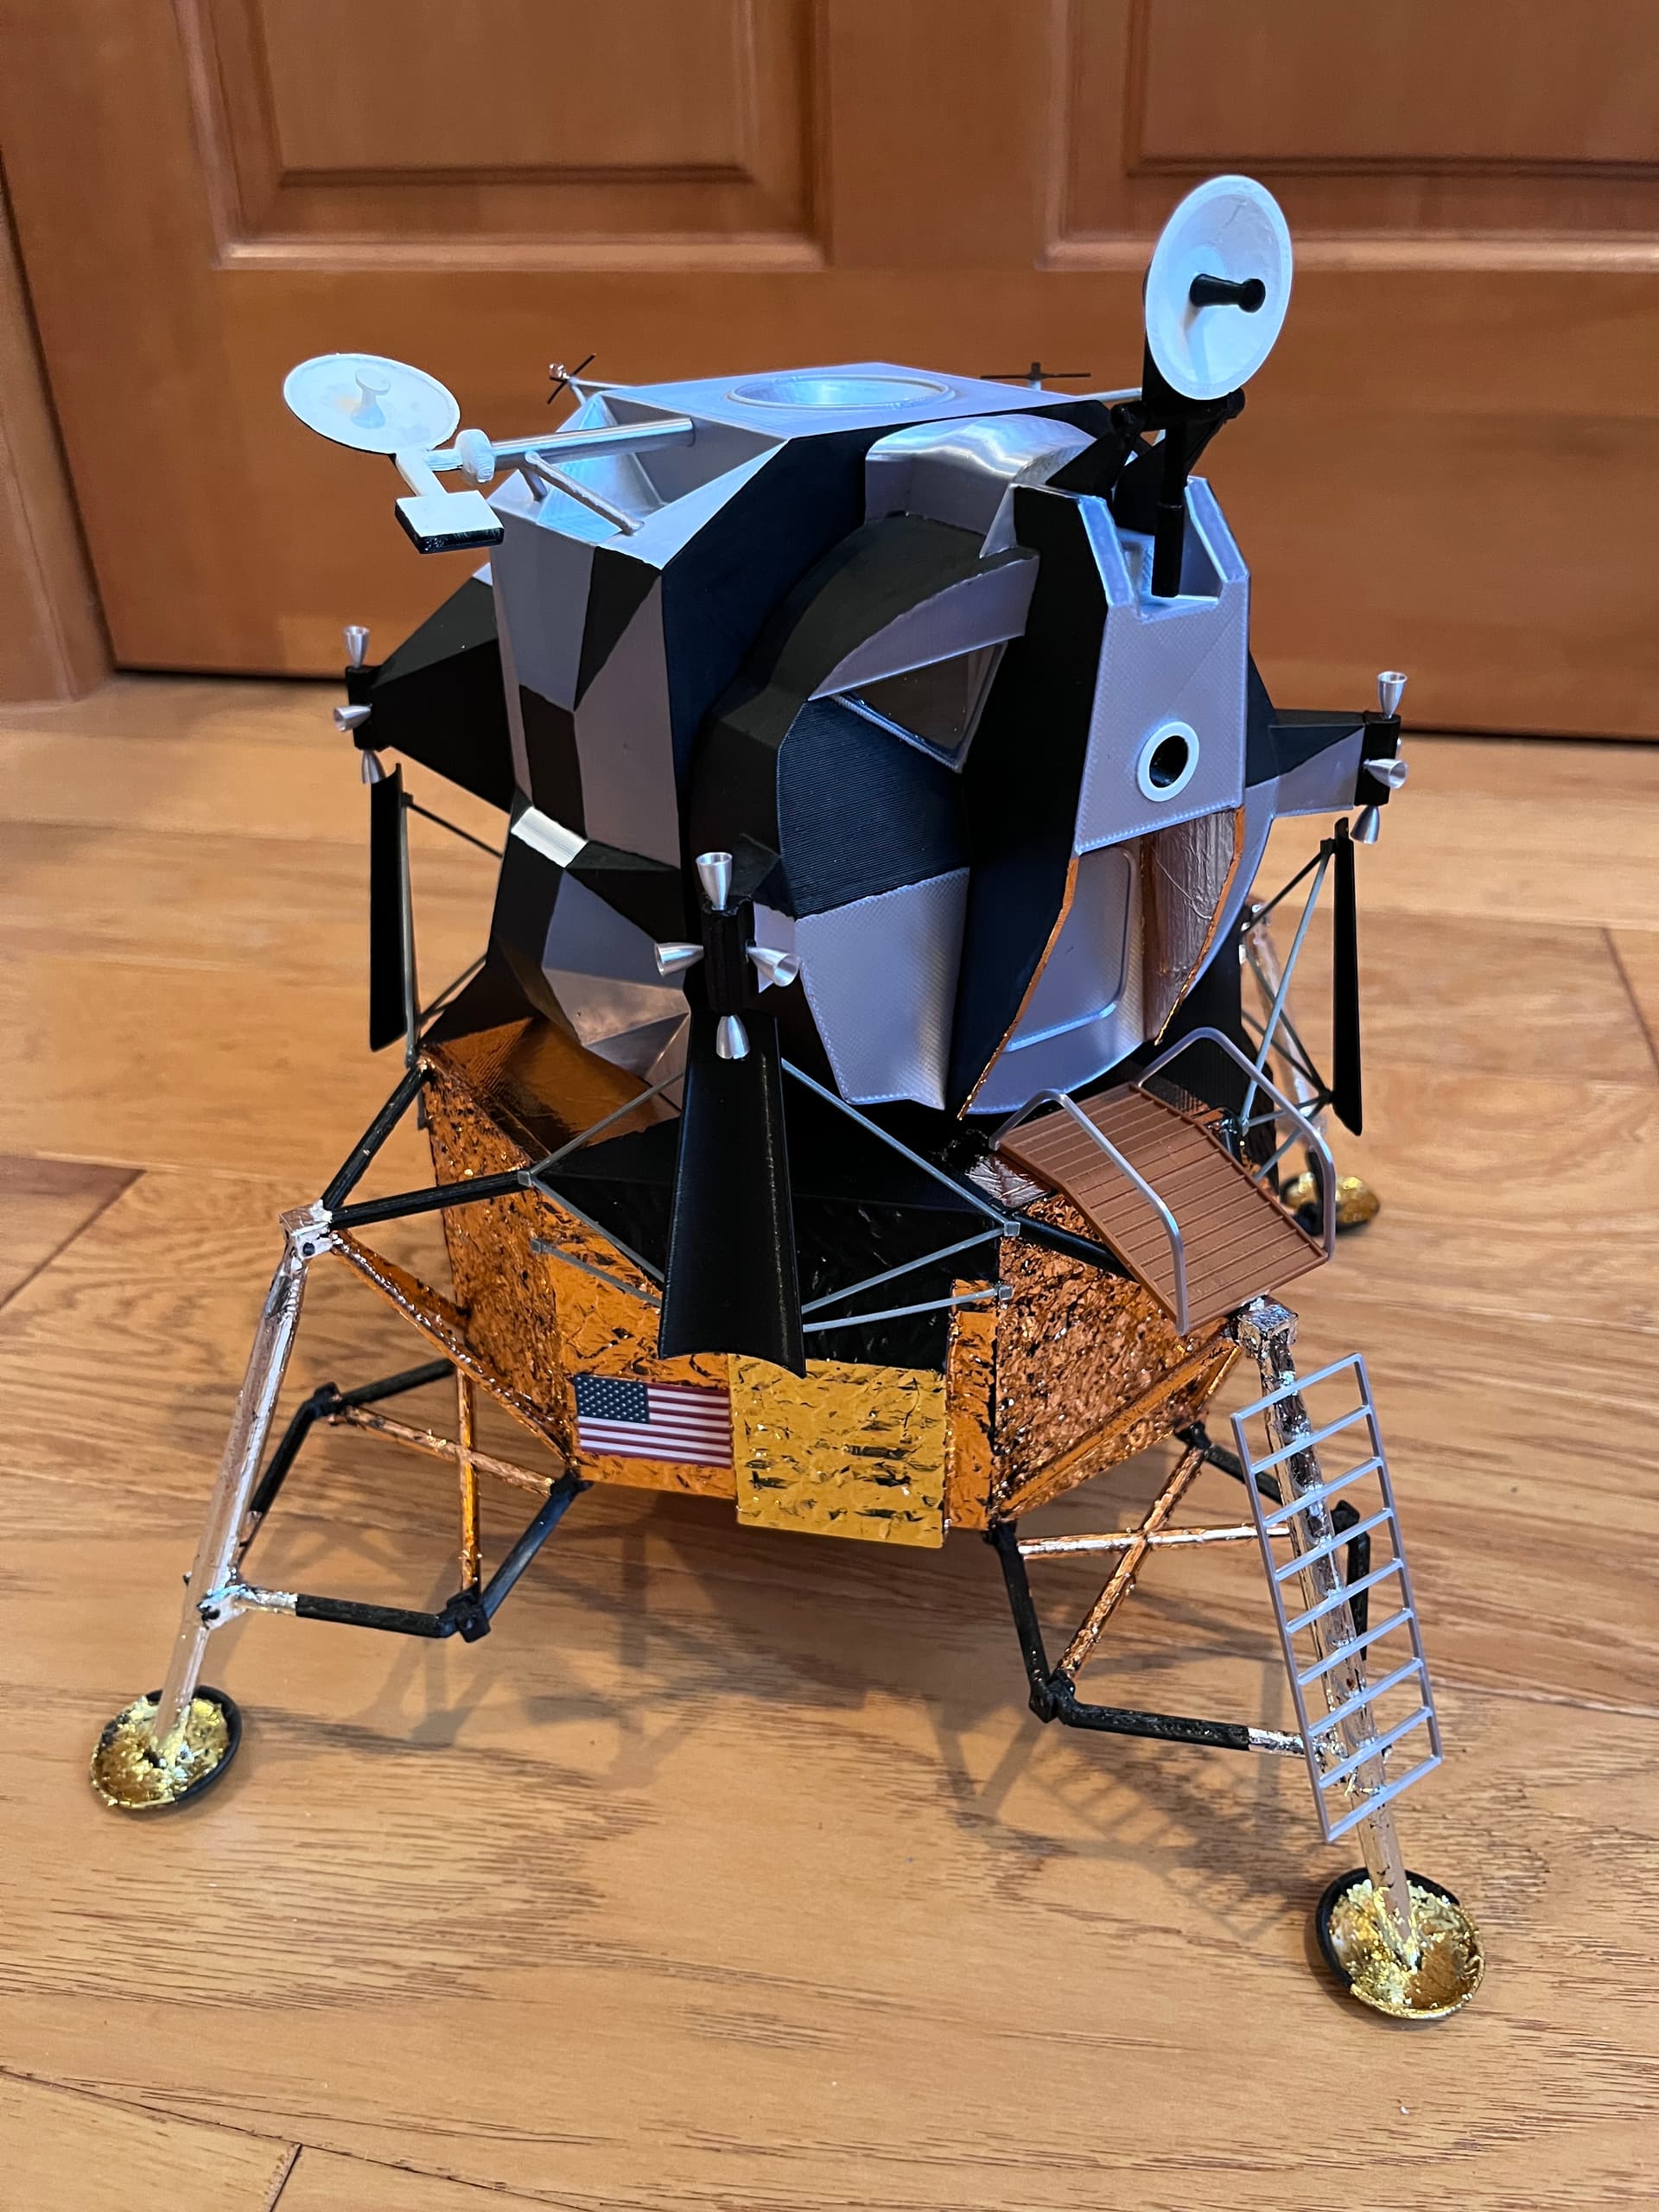
The descent stage is foiled and the legs are on! There is glittery foil all over the room but it was worth it. Still need to add the decals, the ladder/landing plus the deflectors which will wait until the ascent stage is complete so they can be lined up.
1 Like
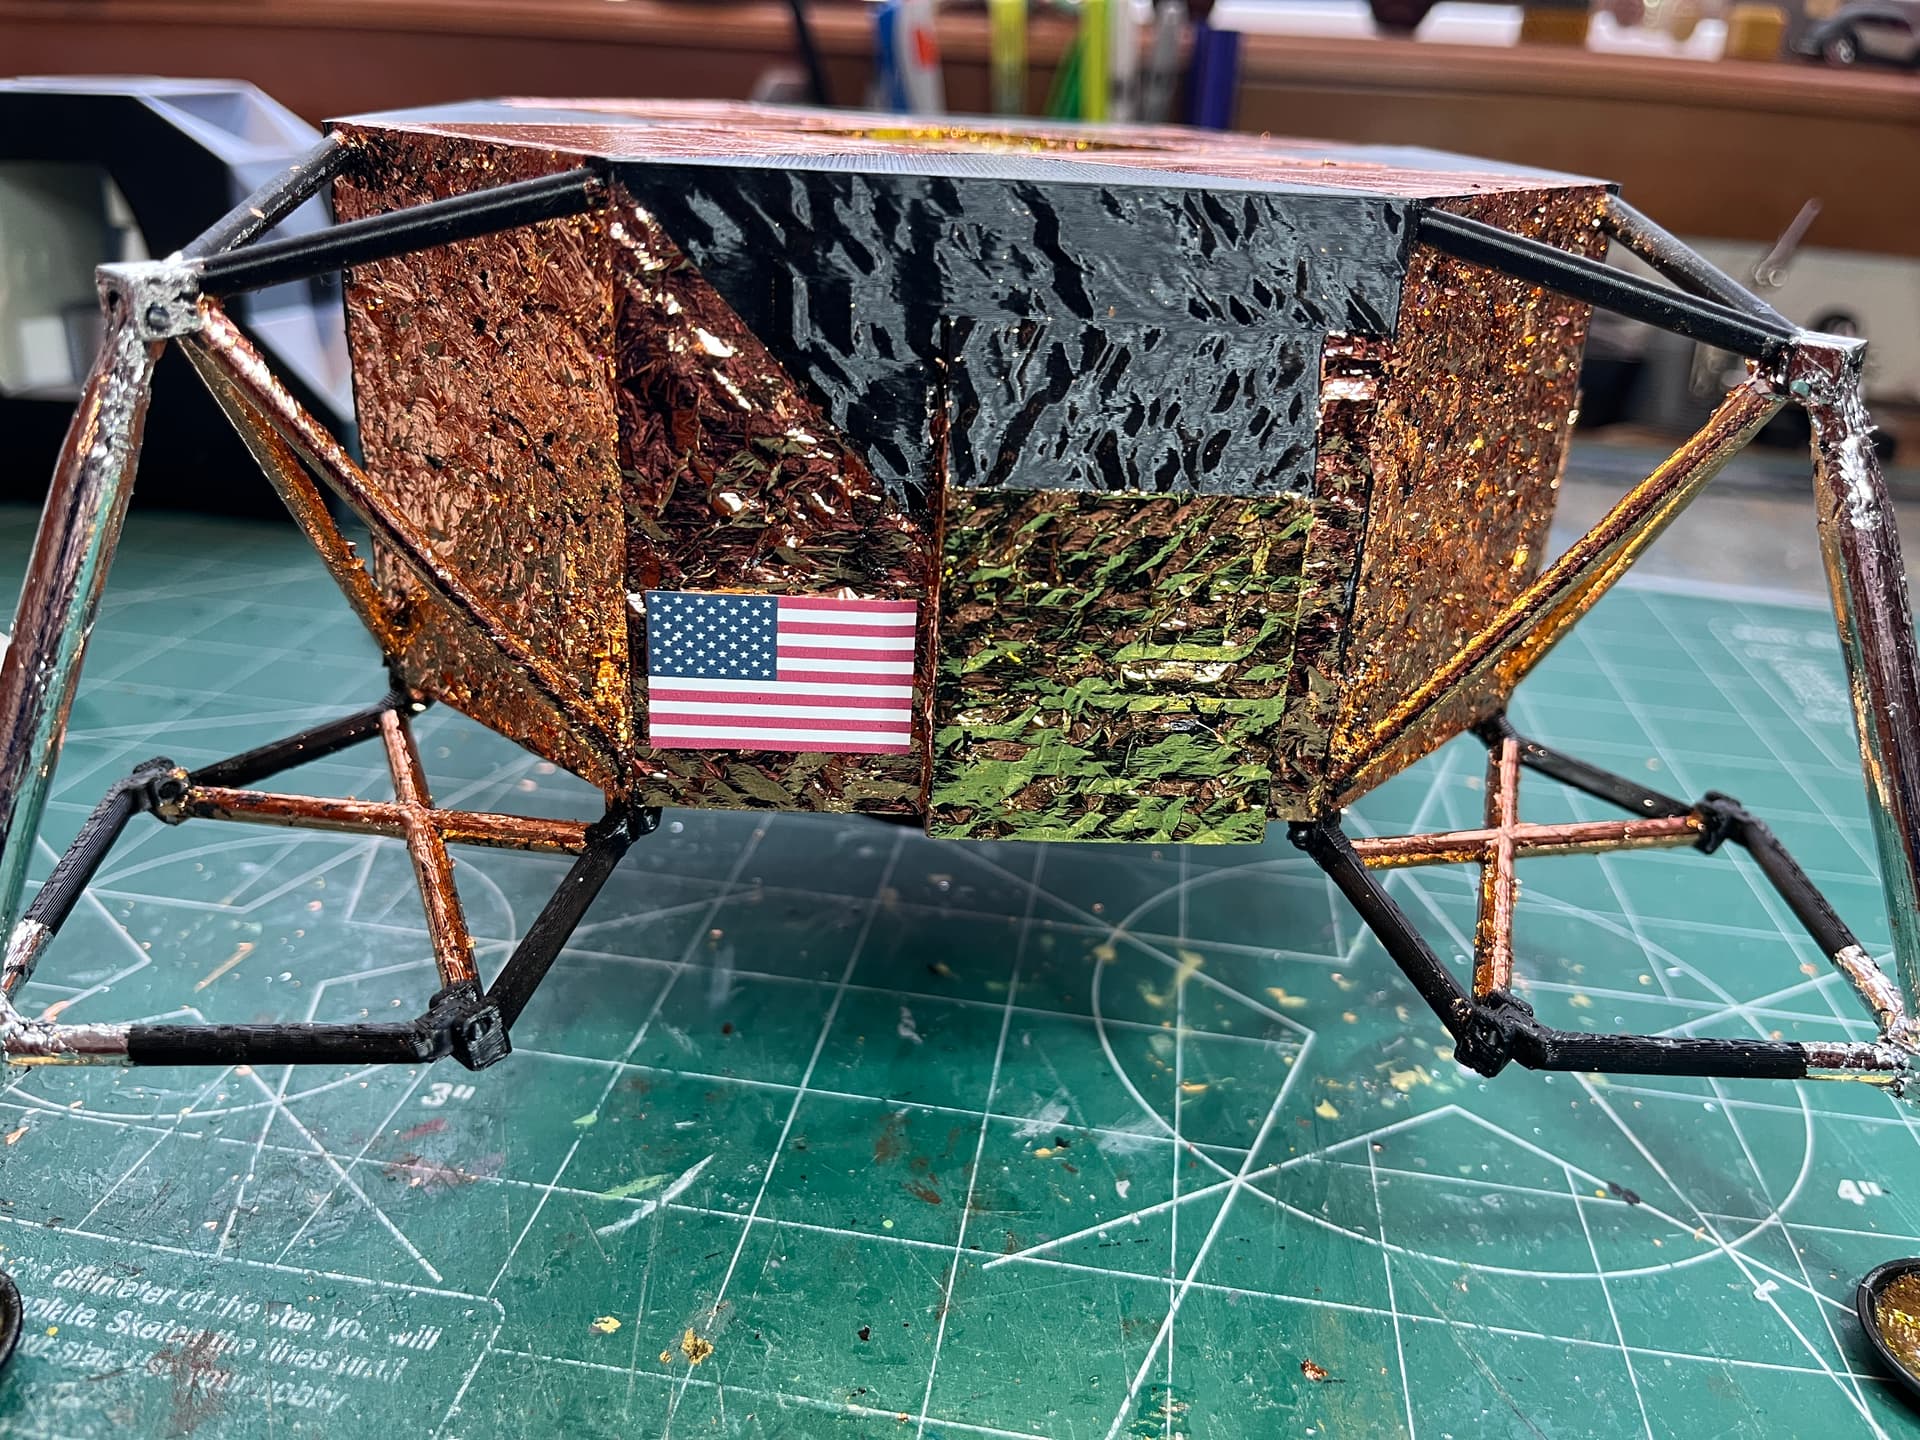
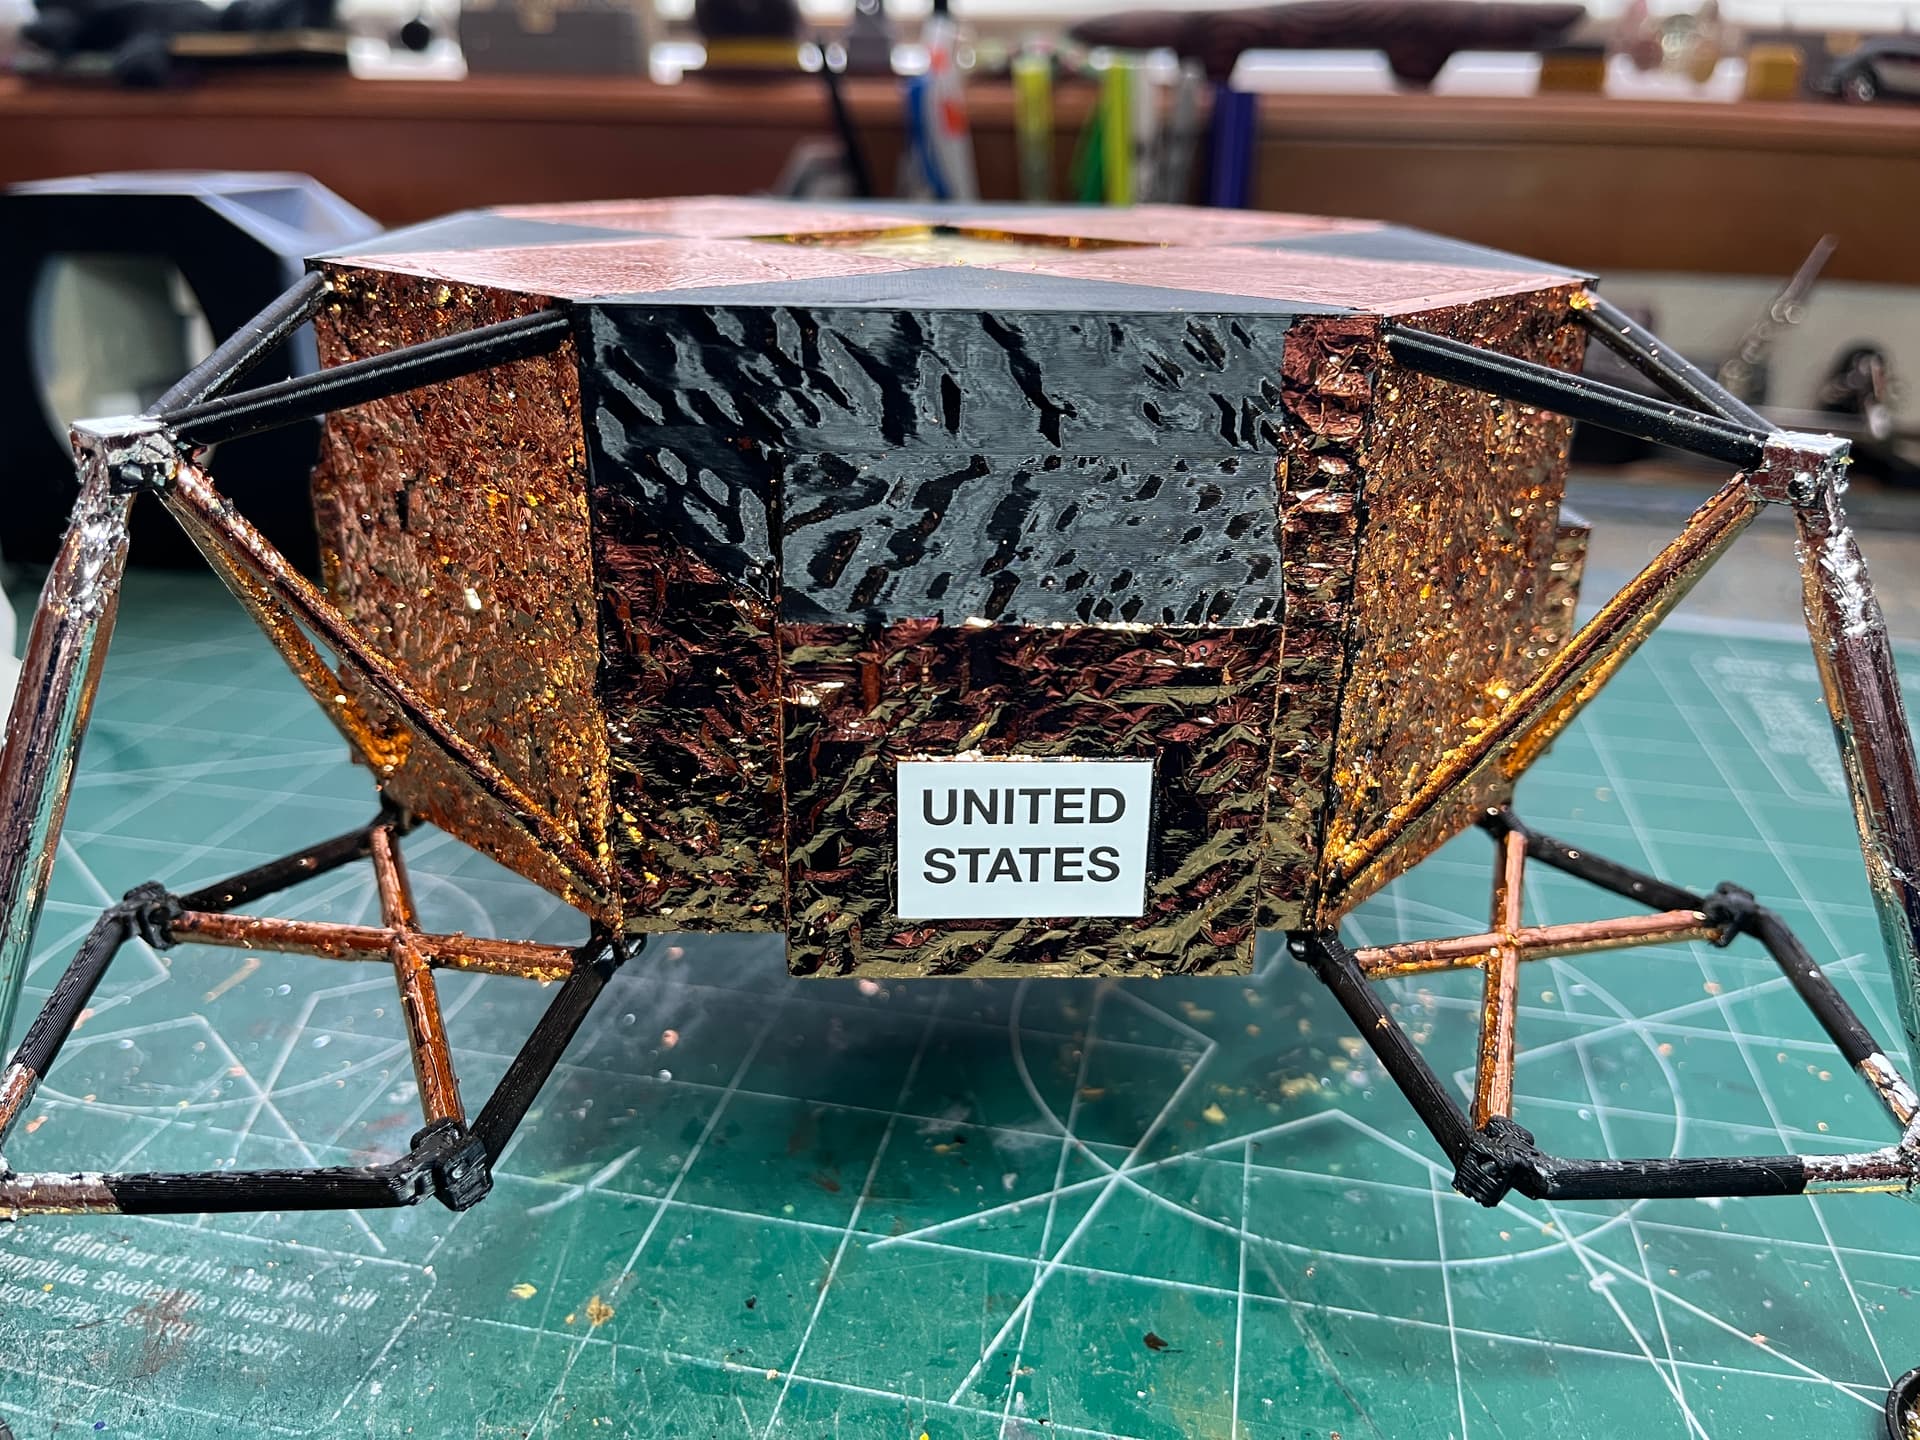
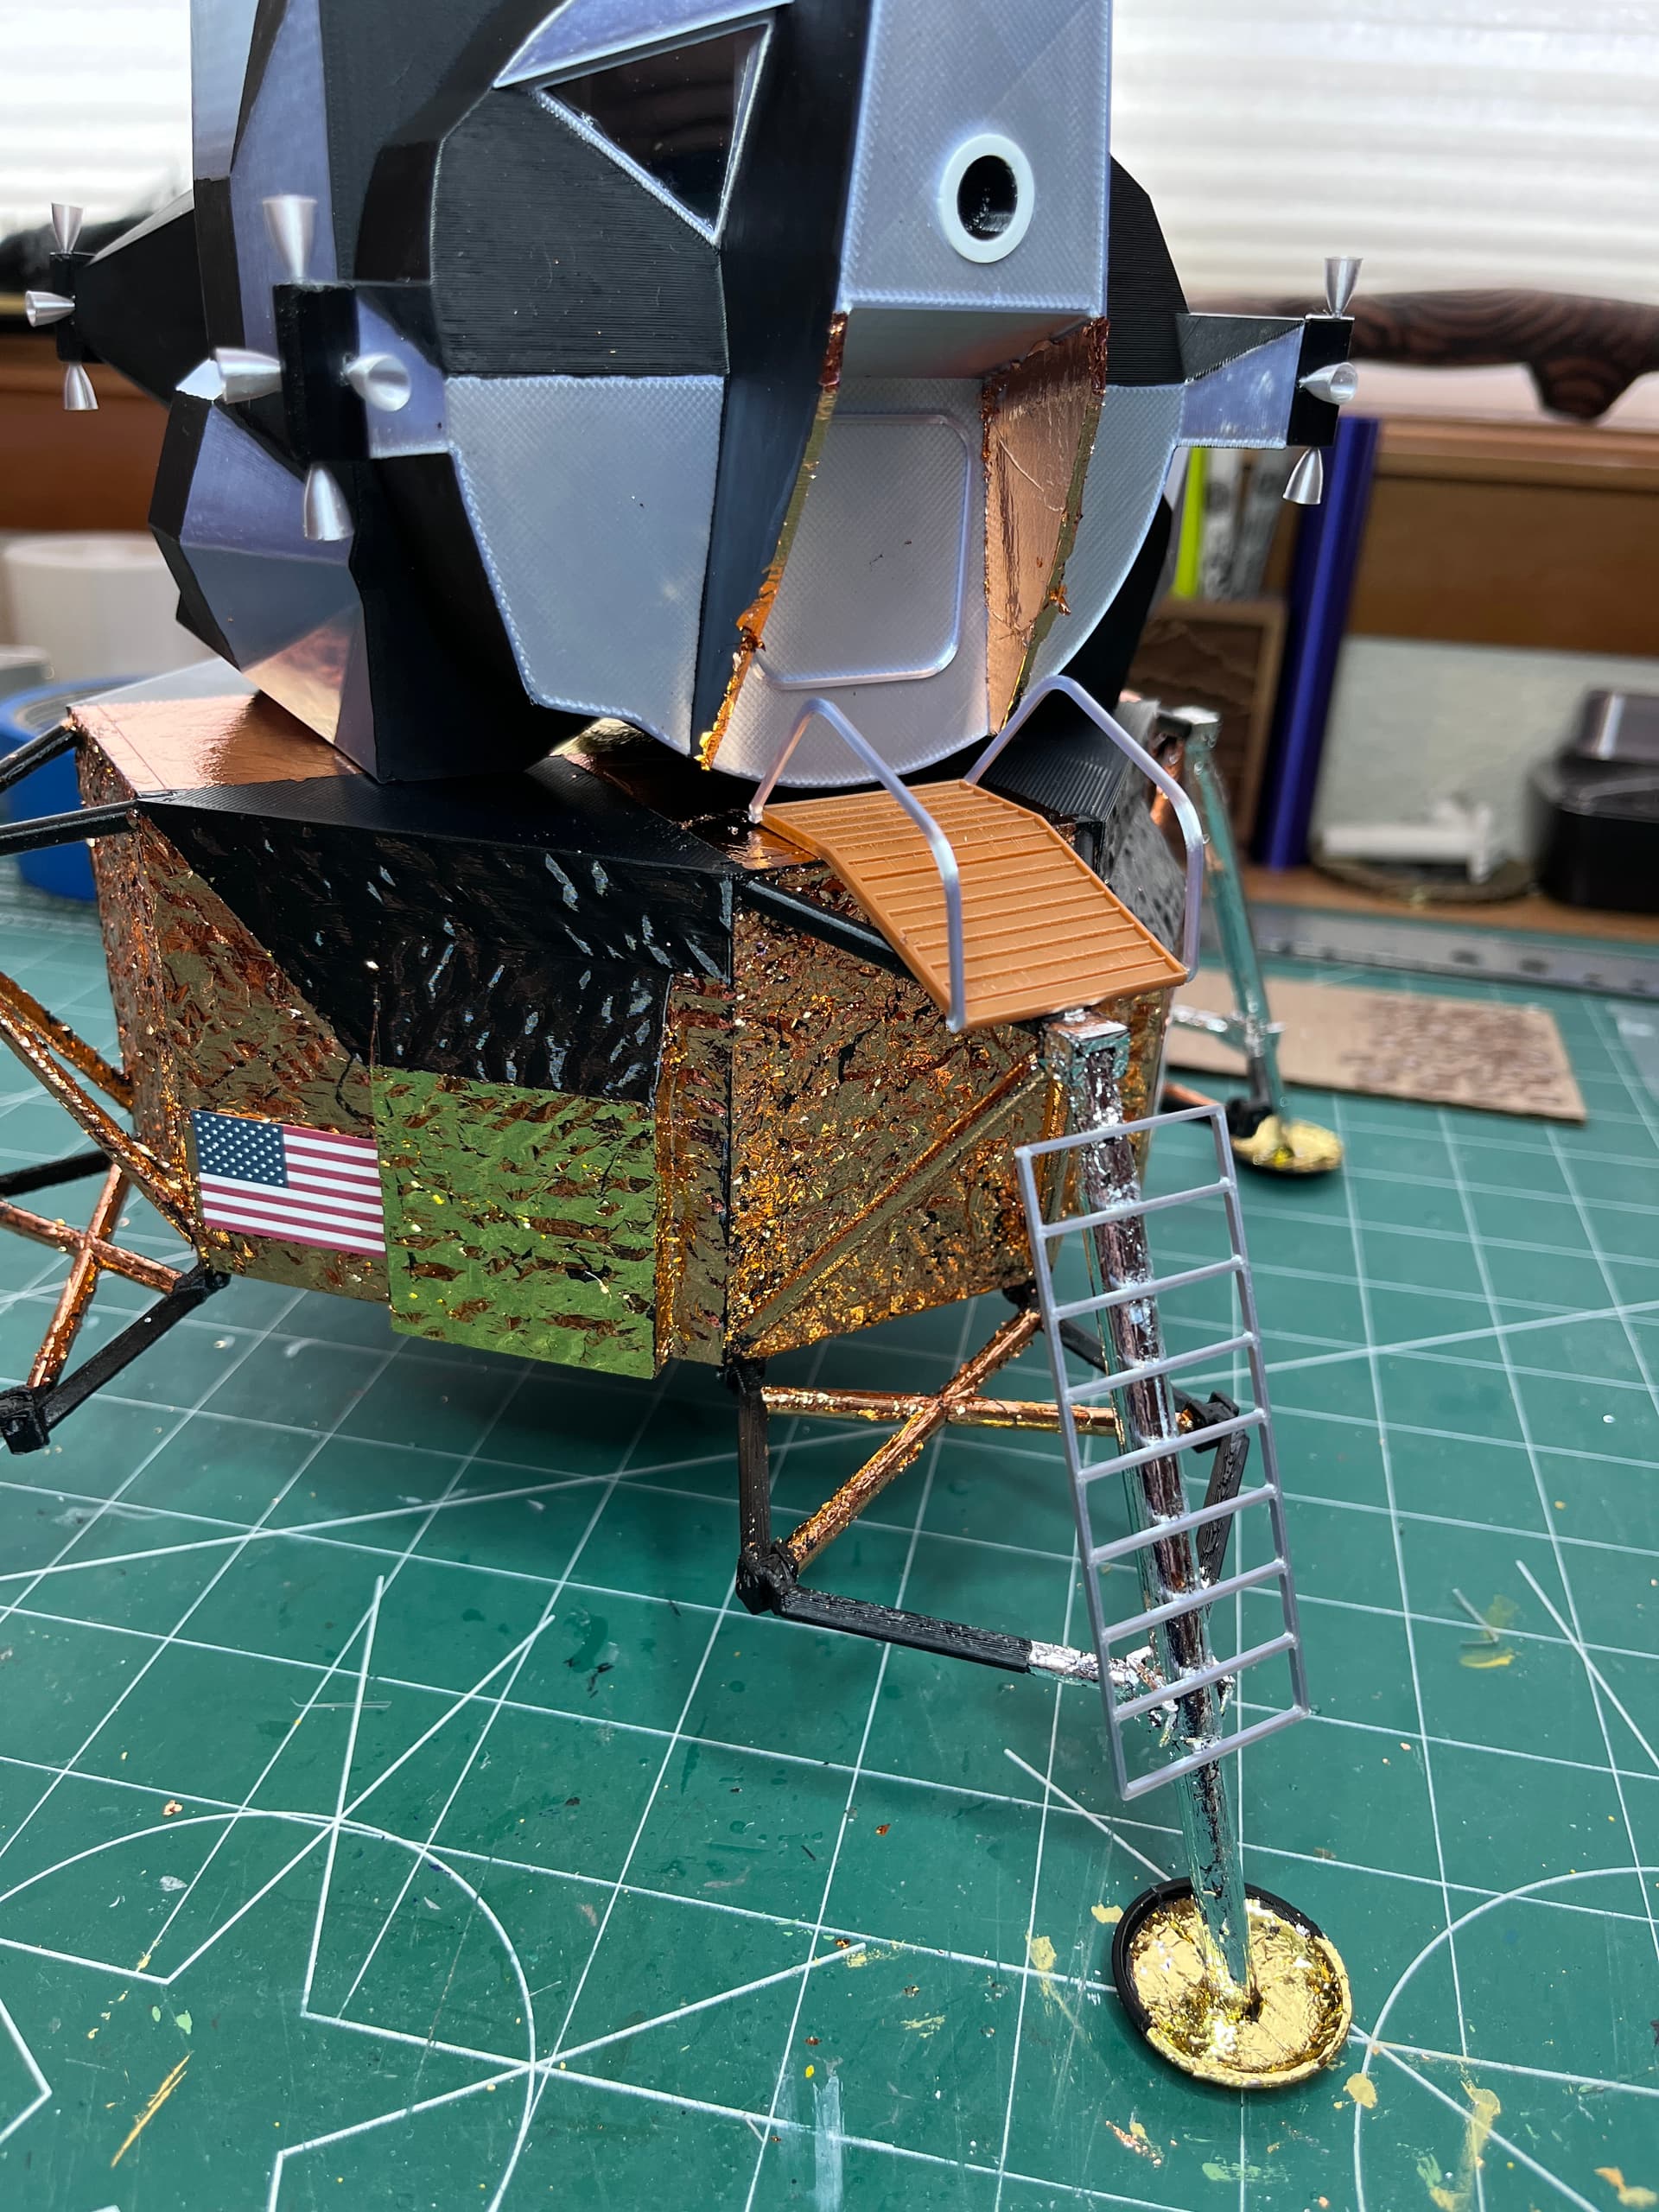
And here is the flag and the United States decal in place.
3 Likes
Wow! What glue are you using that takes a week to dry?
Quite the impressive and ambitious project!
The glue looks to be a thin white glue, it came with the foil pack along with a brush to pick up and dab the foil onto the glued surface. My guess is the metal foil is not breathable so drying time is ridiculous. I was really surprised the next day to find the foil smudged off and the glue was still tacky. I added more foil and waited, and waited. The foiling is worth it. The model would not be the same without the foil.
1 Like
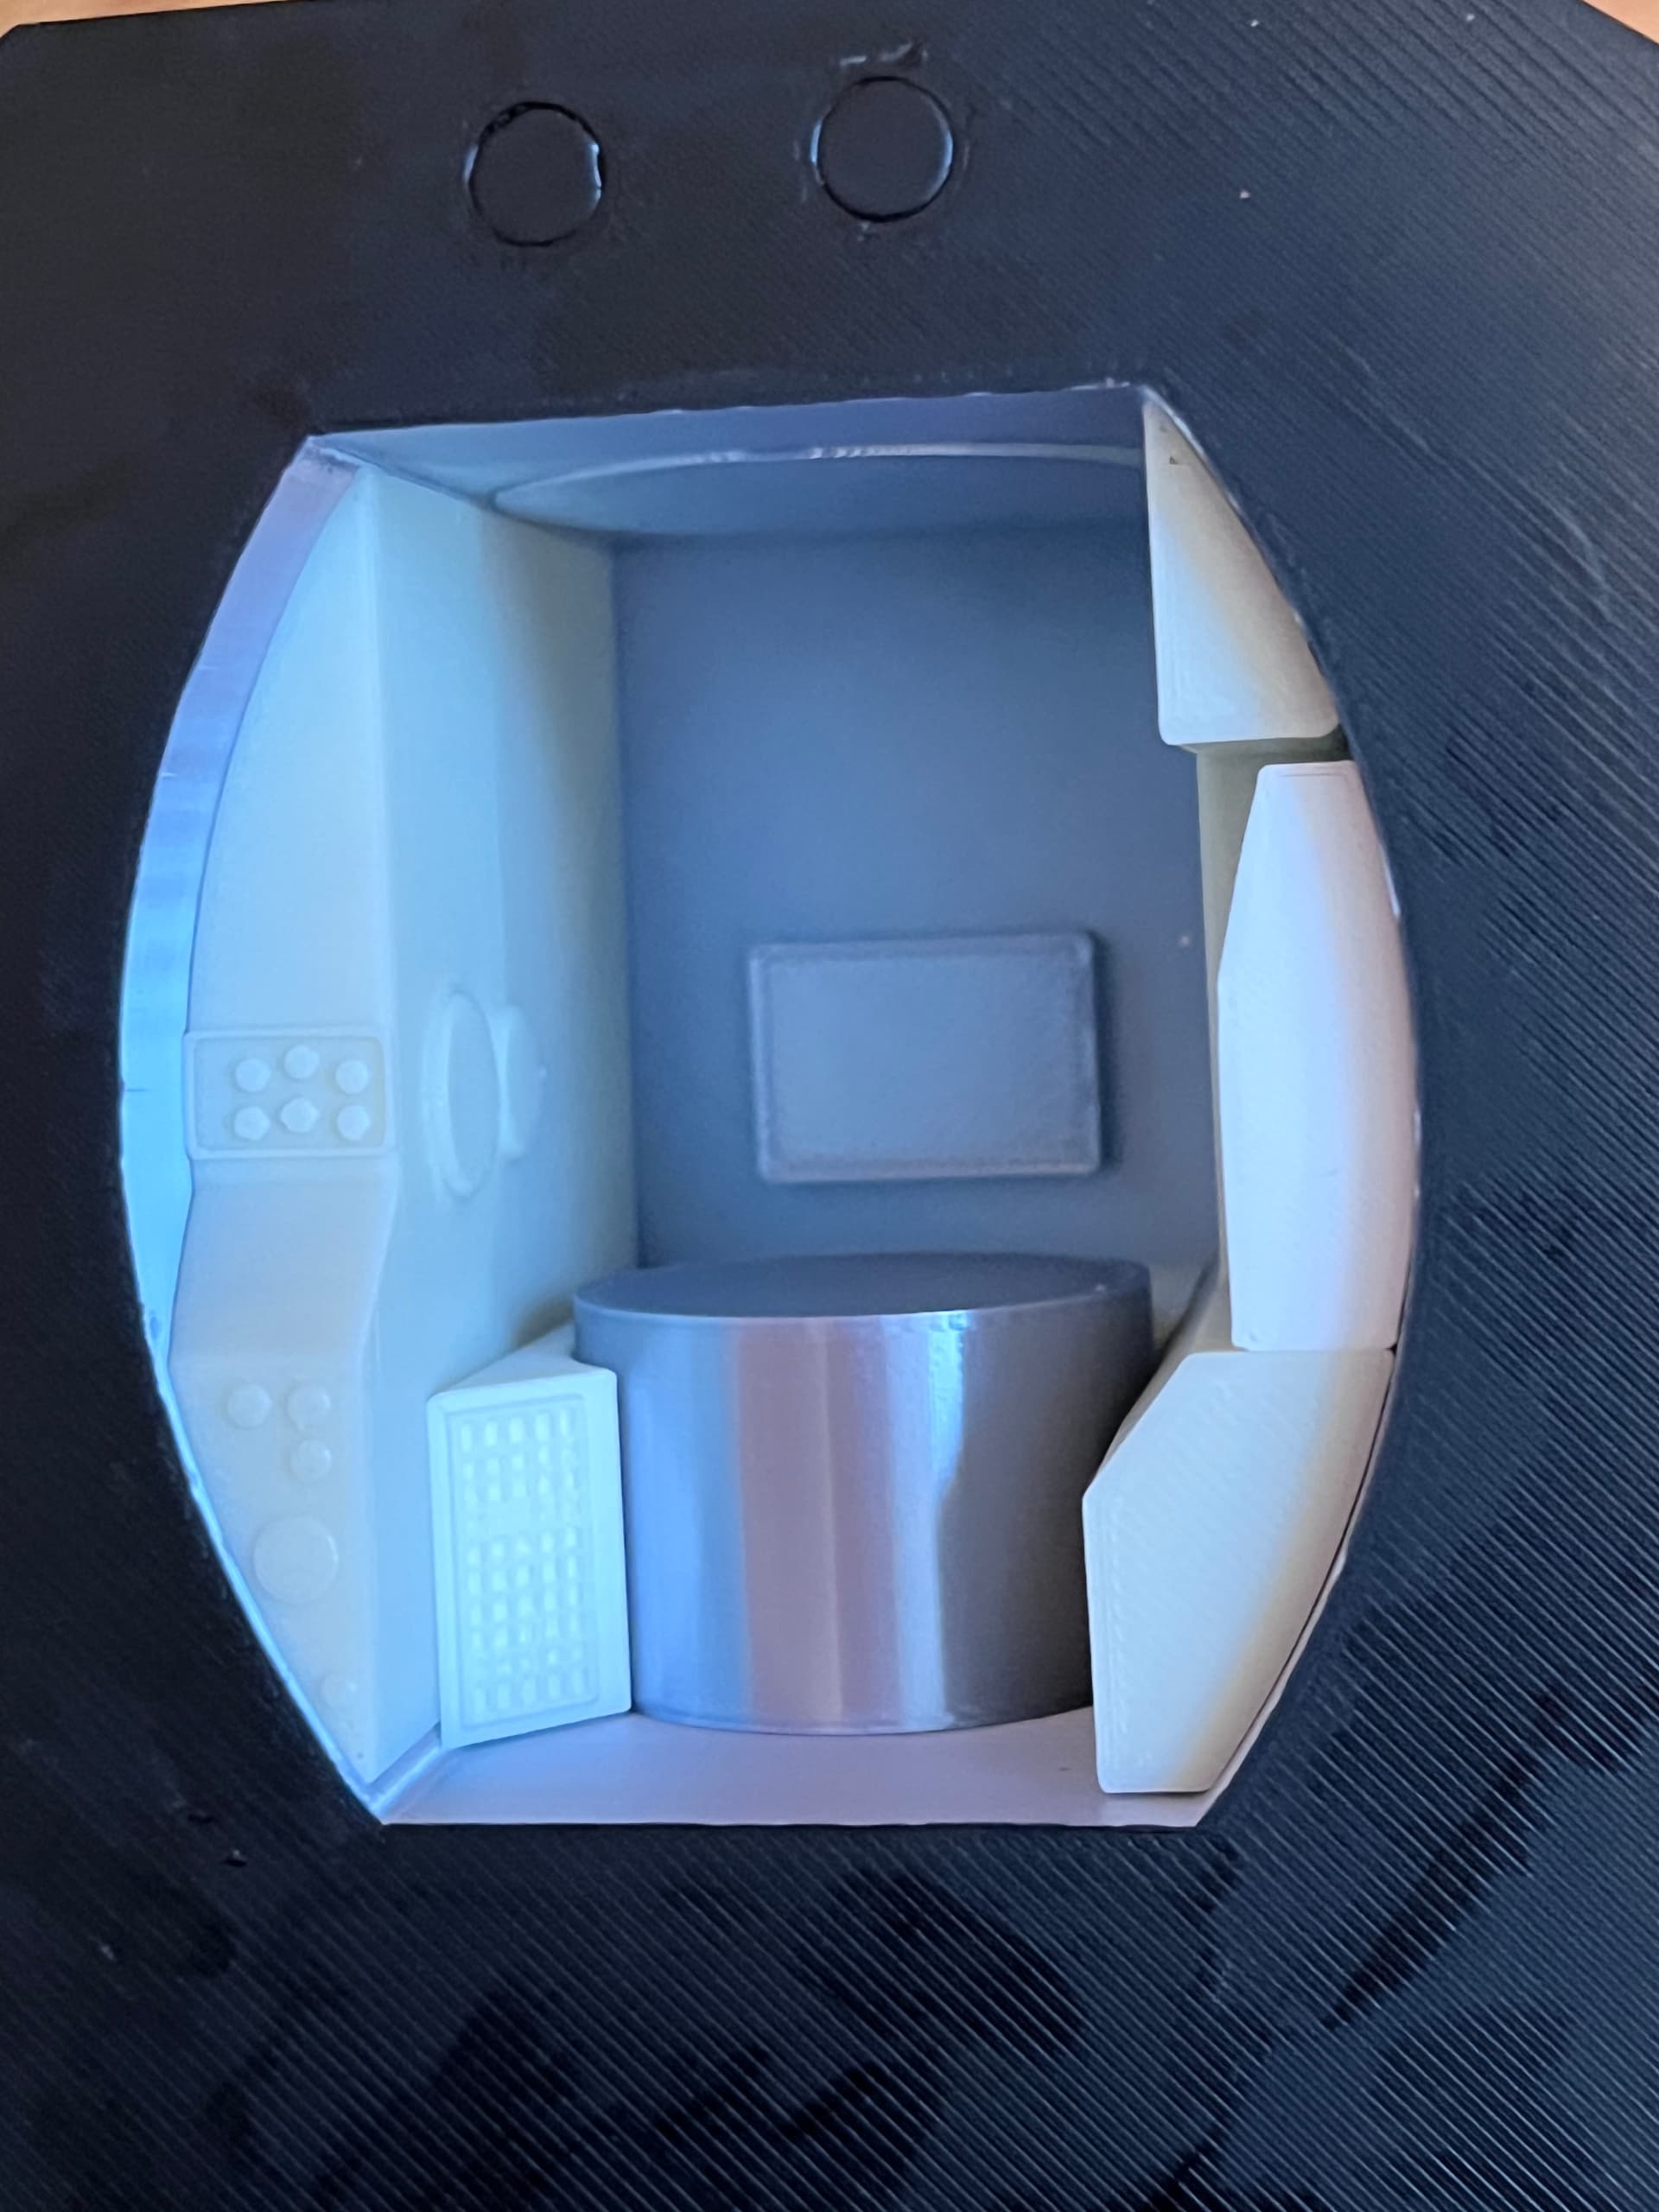
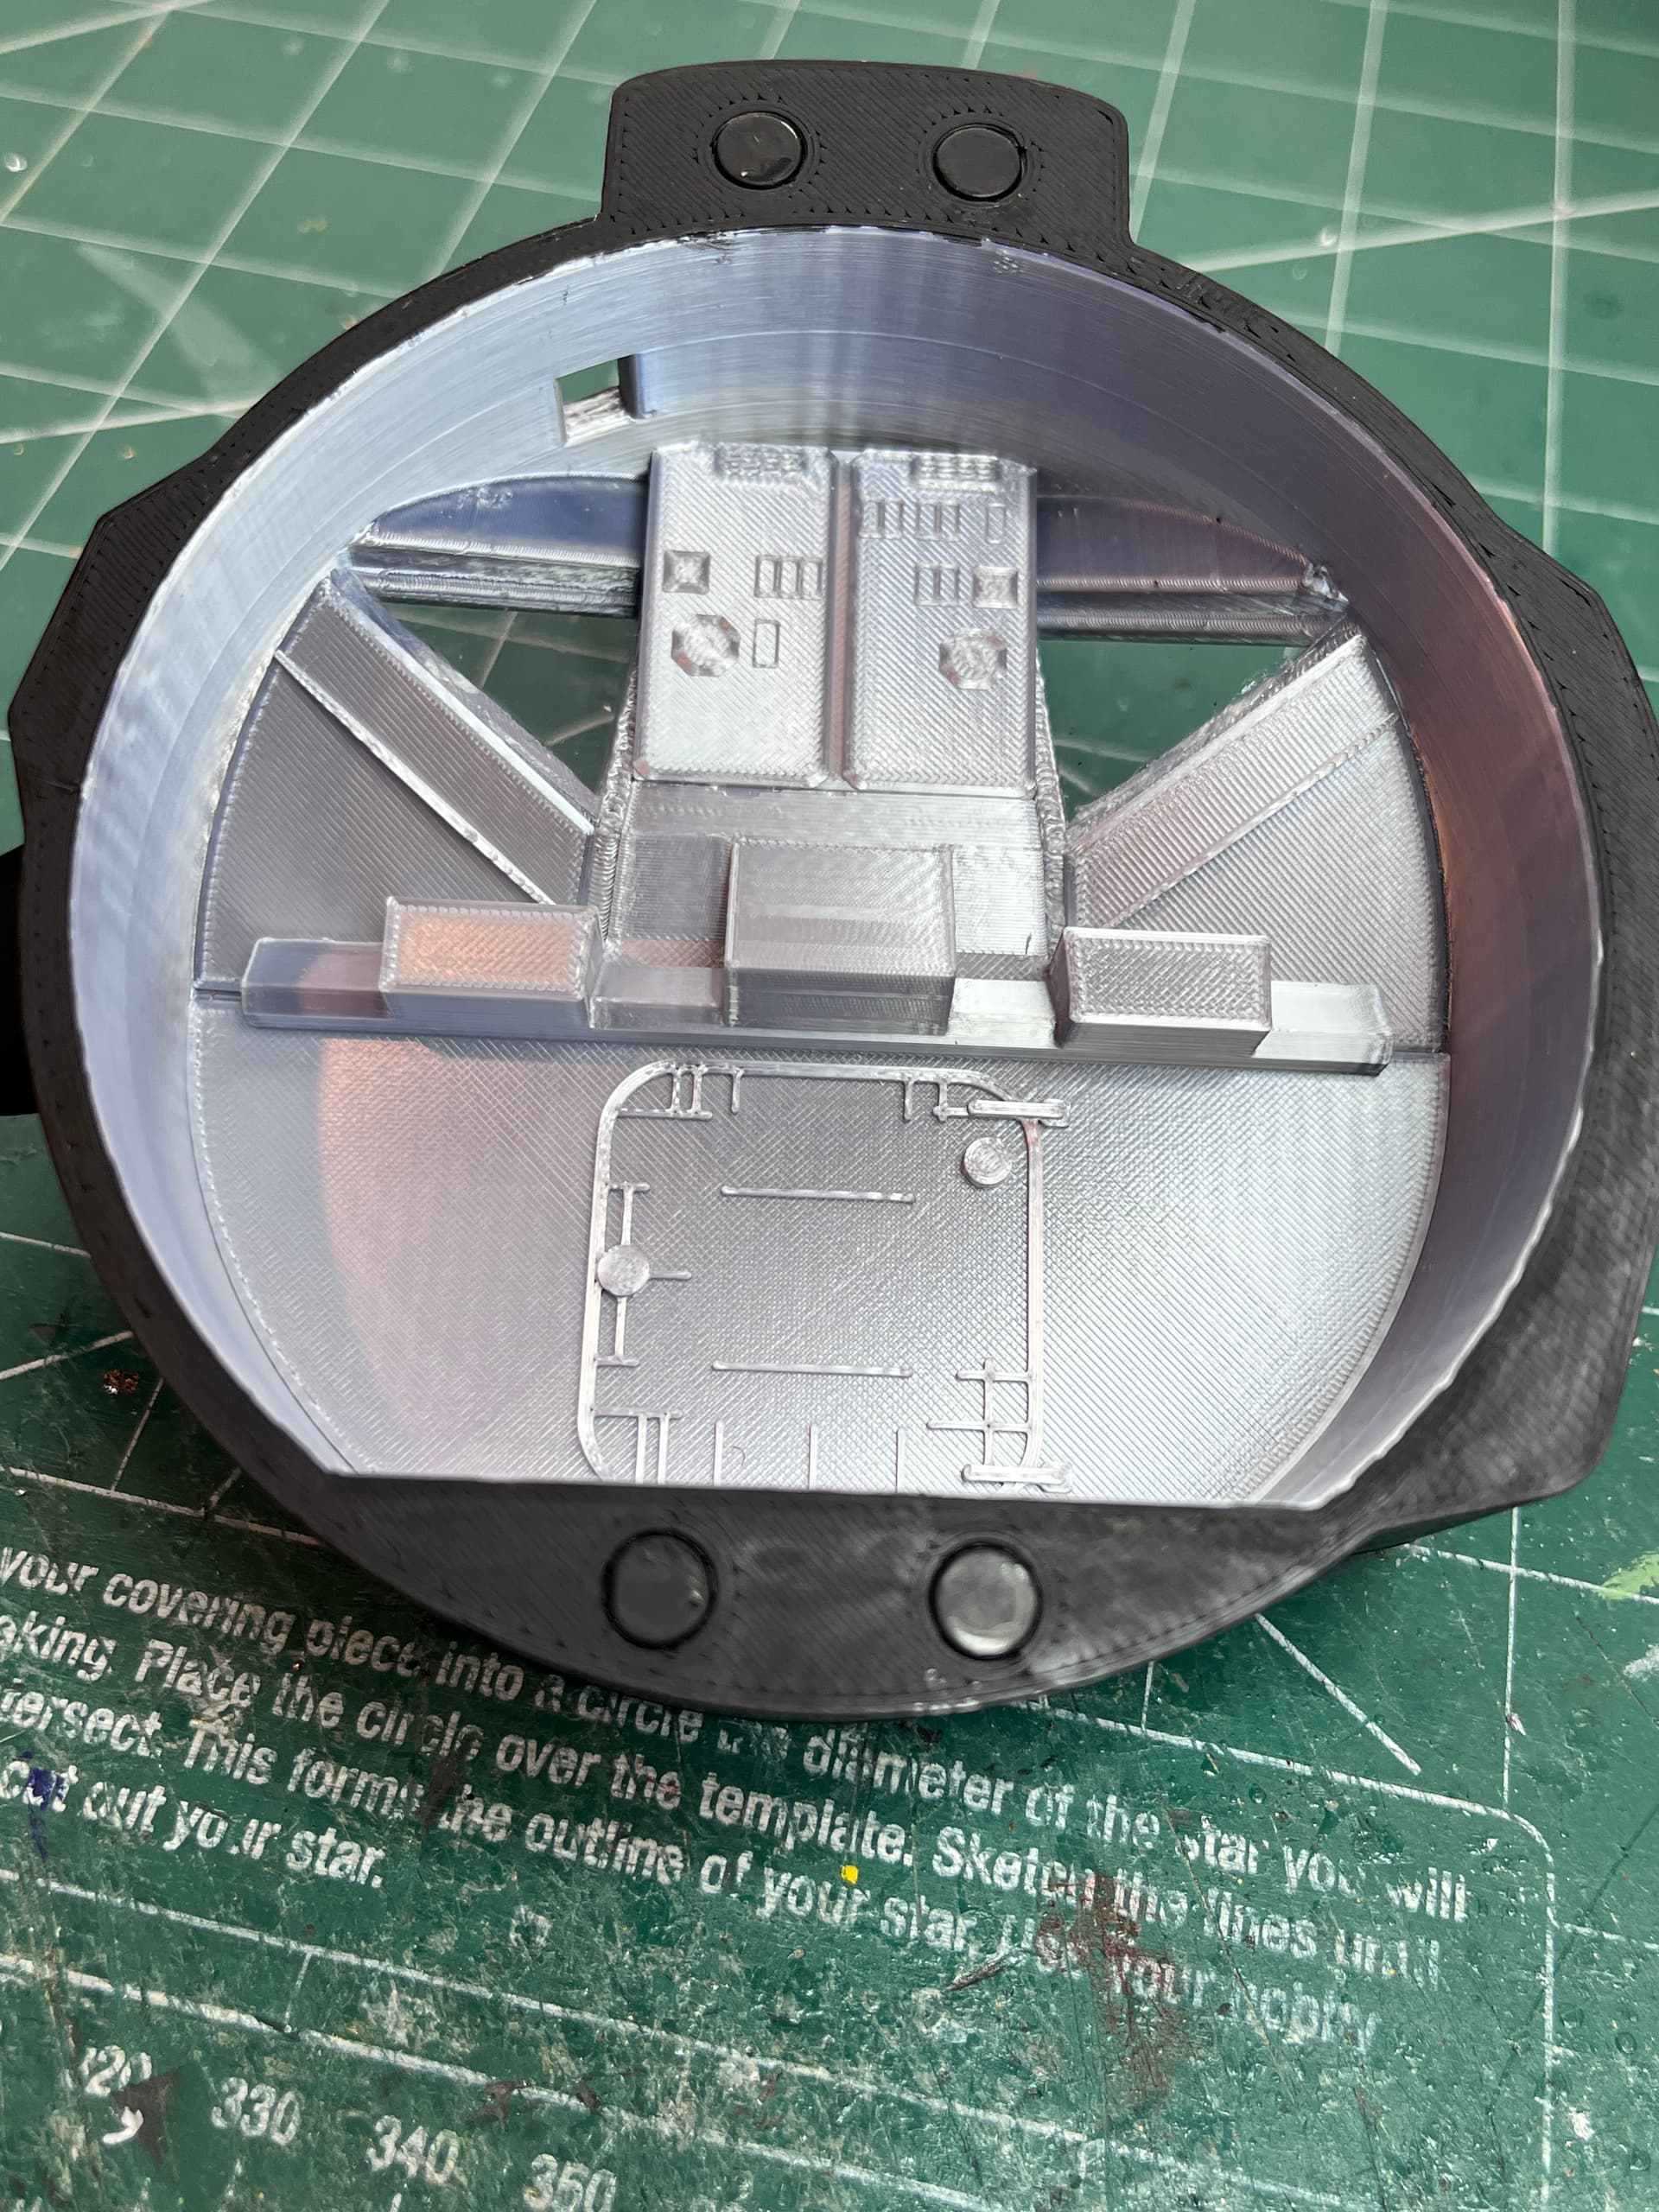
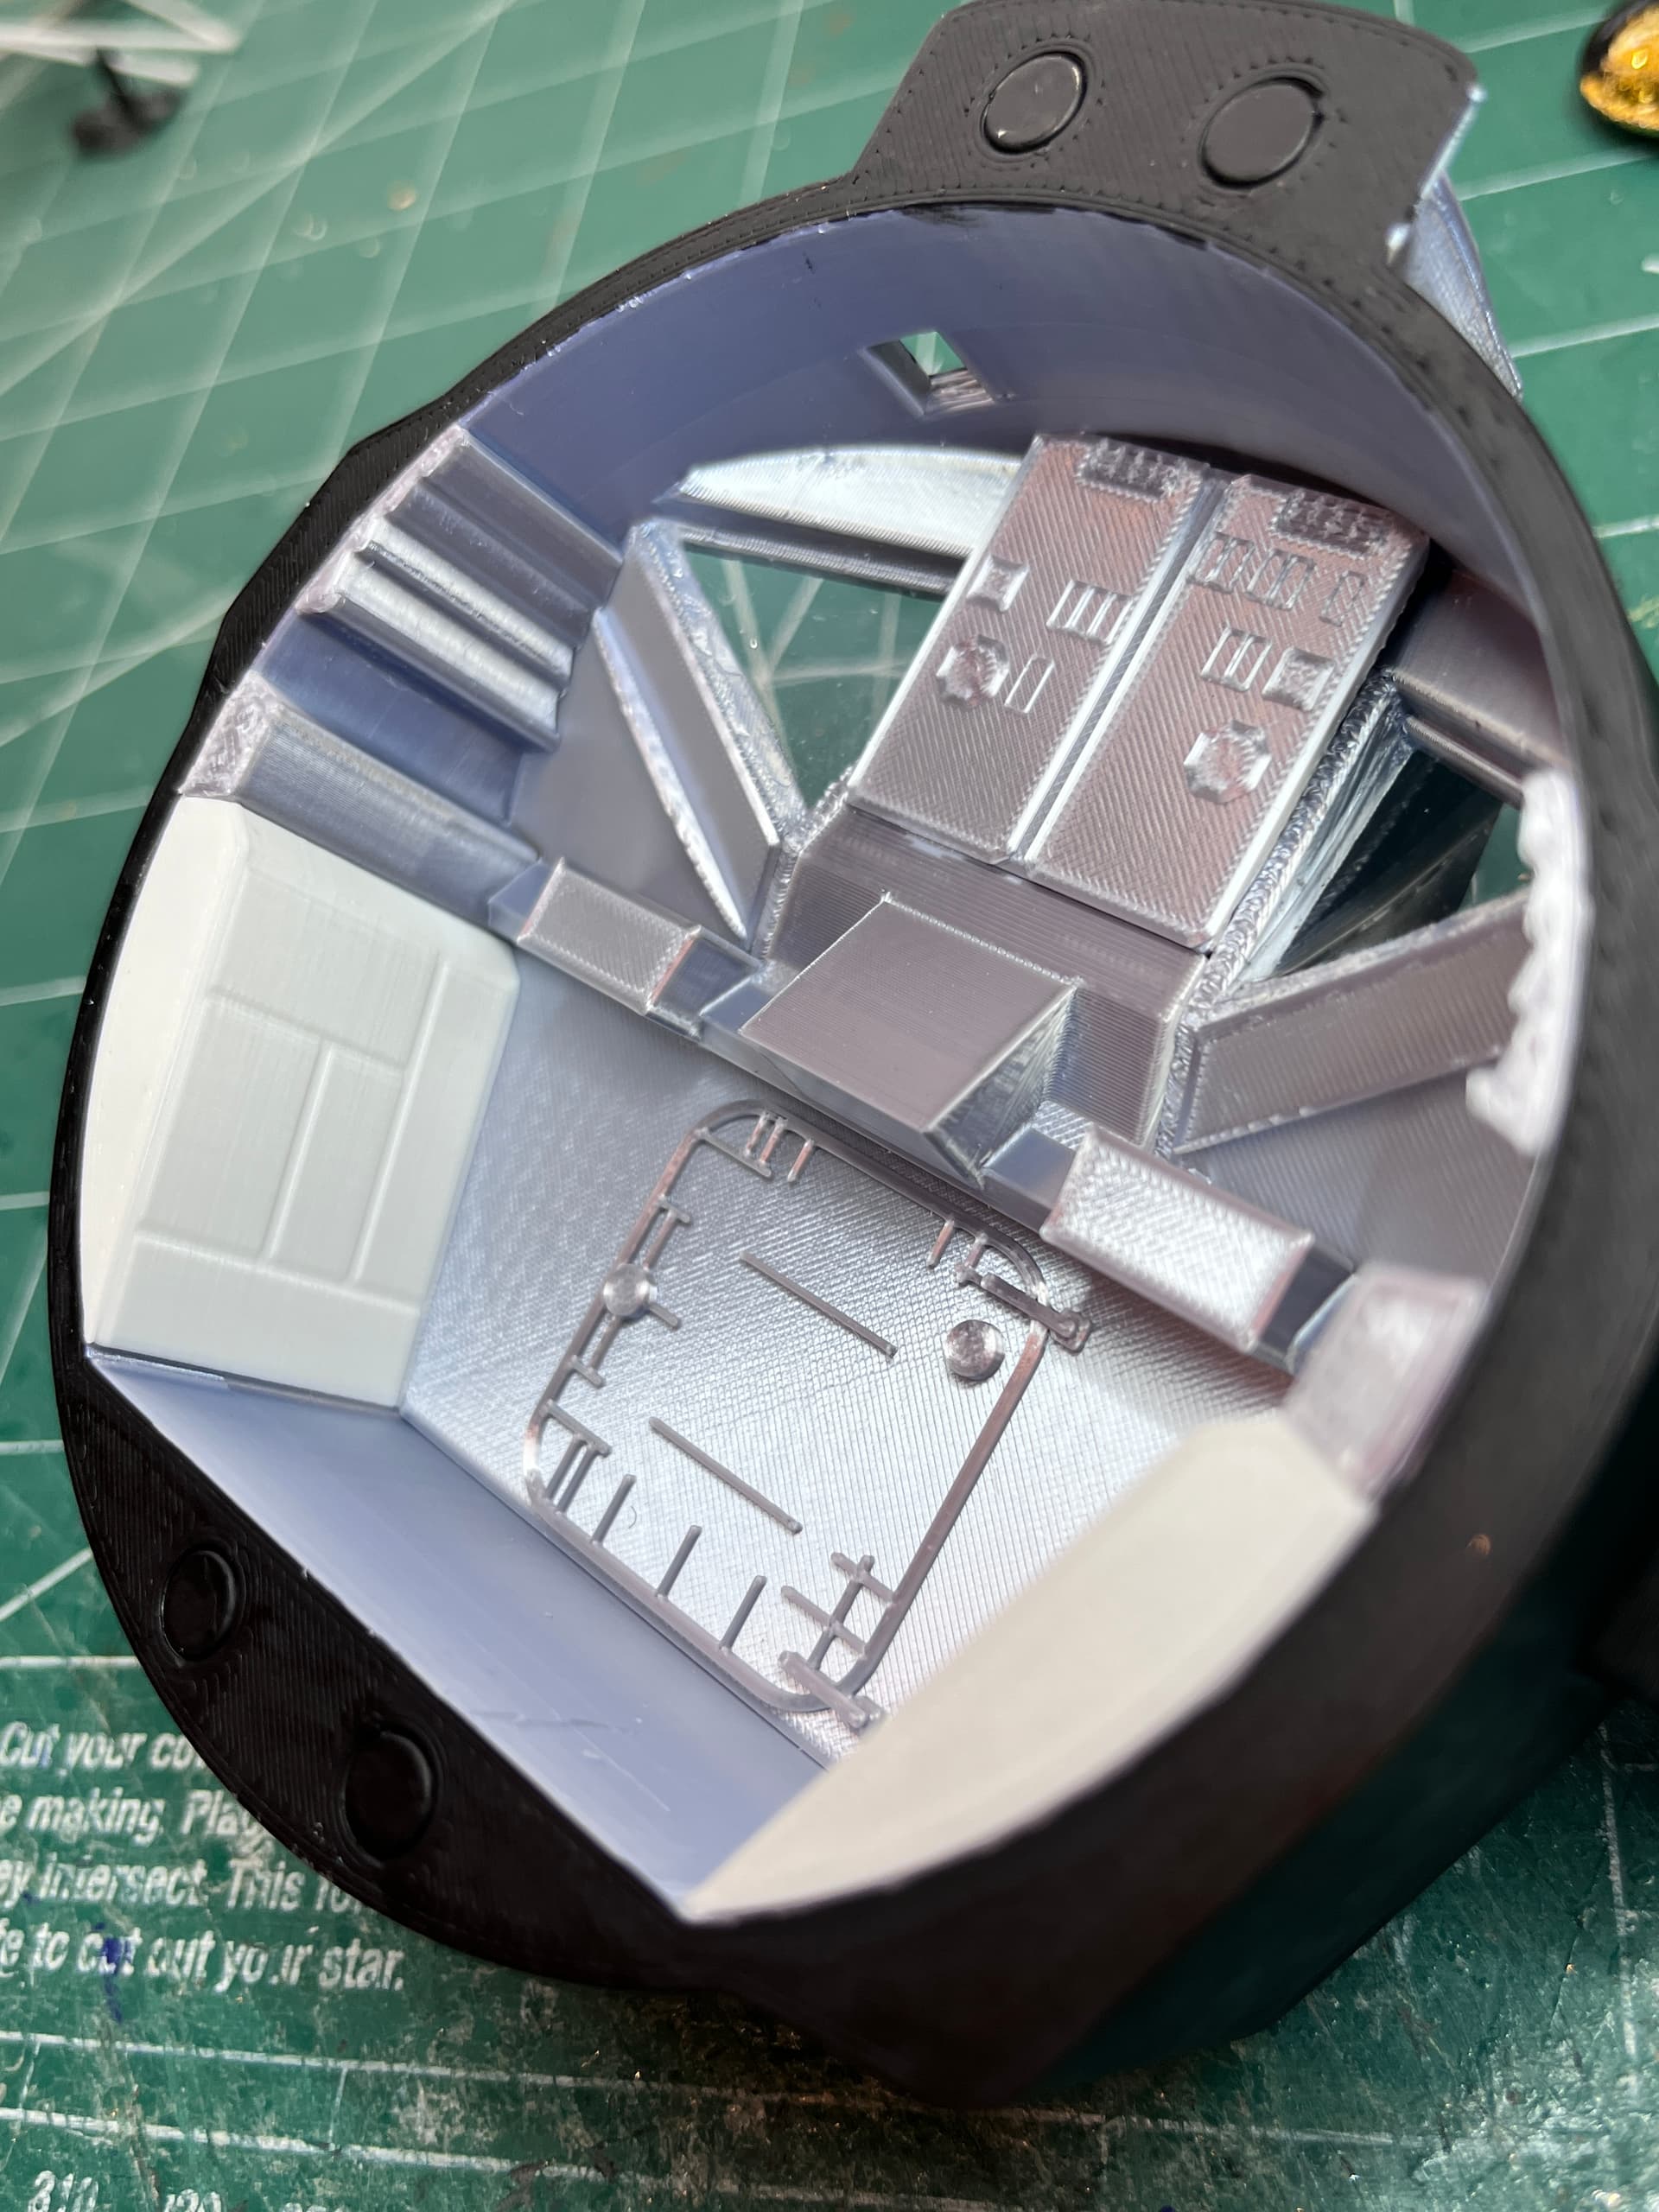
The tricky part of 3D printing is how to get the best looking parts which sometimes involves slicing and gluing. The sides that do not print well are the sides that are supported by supports. For the ascent front end I chose to print it as a complete part with supports holding up the inside. Here is the inside, not very smooth.
To make this look good I decided to print thin plates that contain details. Here are some of the inside plates having been printed.
And here are those plates plus the upper center console glued in place. Before gluing the plates I cut out some acetate windows and glued those in place. Now for the side parts…
2 Likes
And here is the inside with side parts.
3 Likes
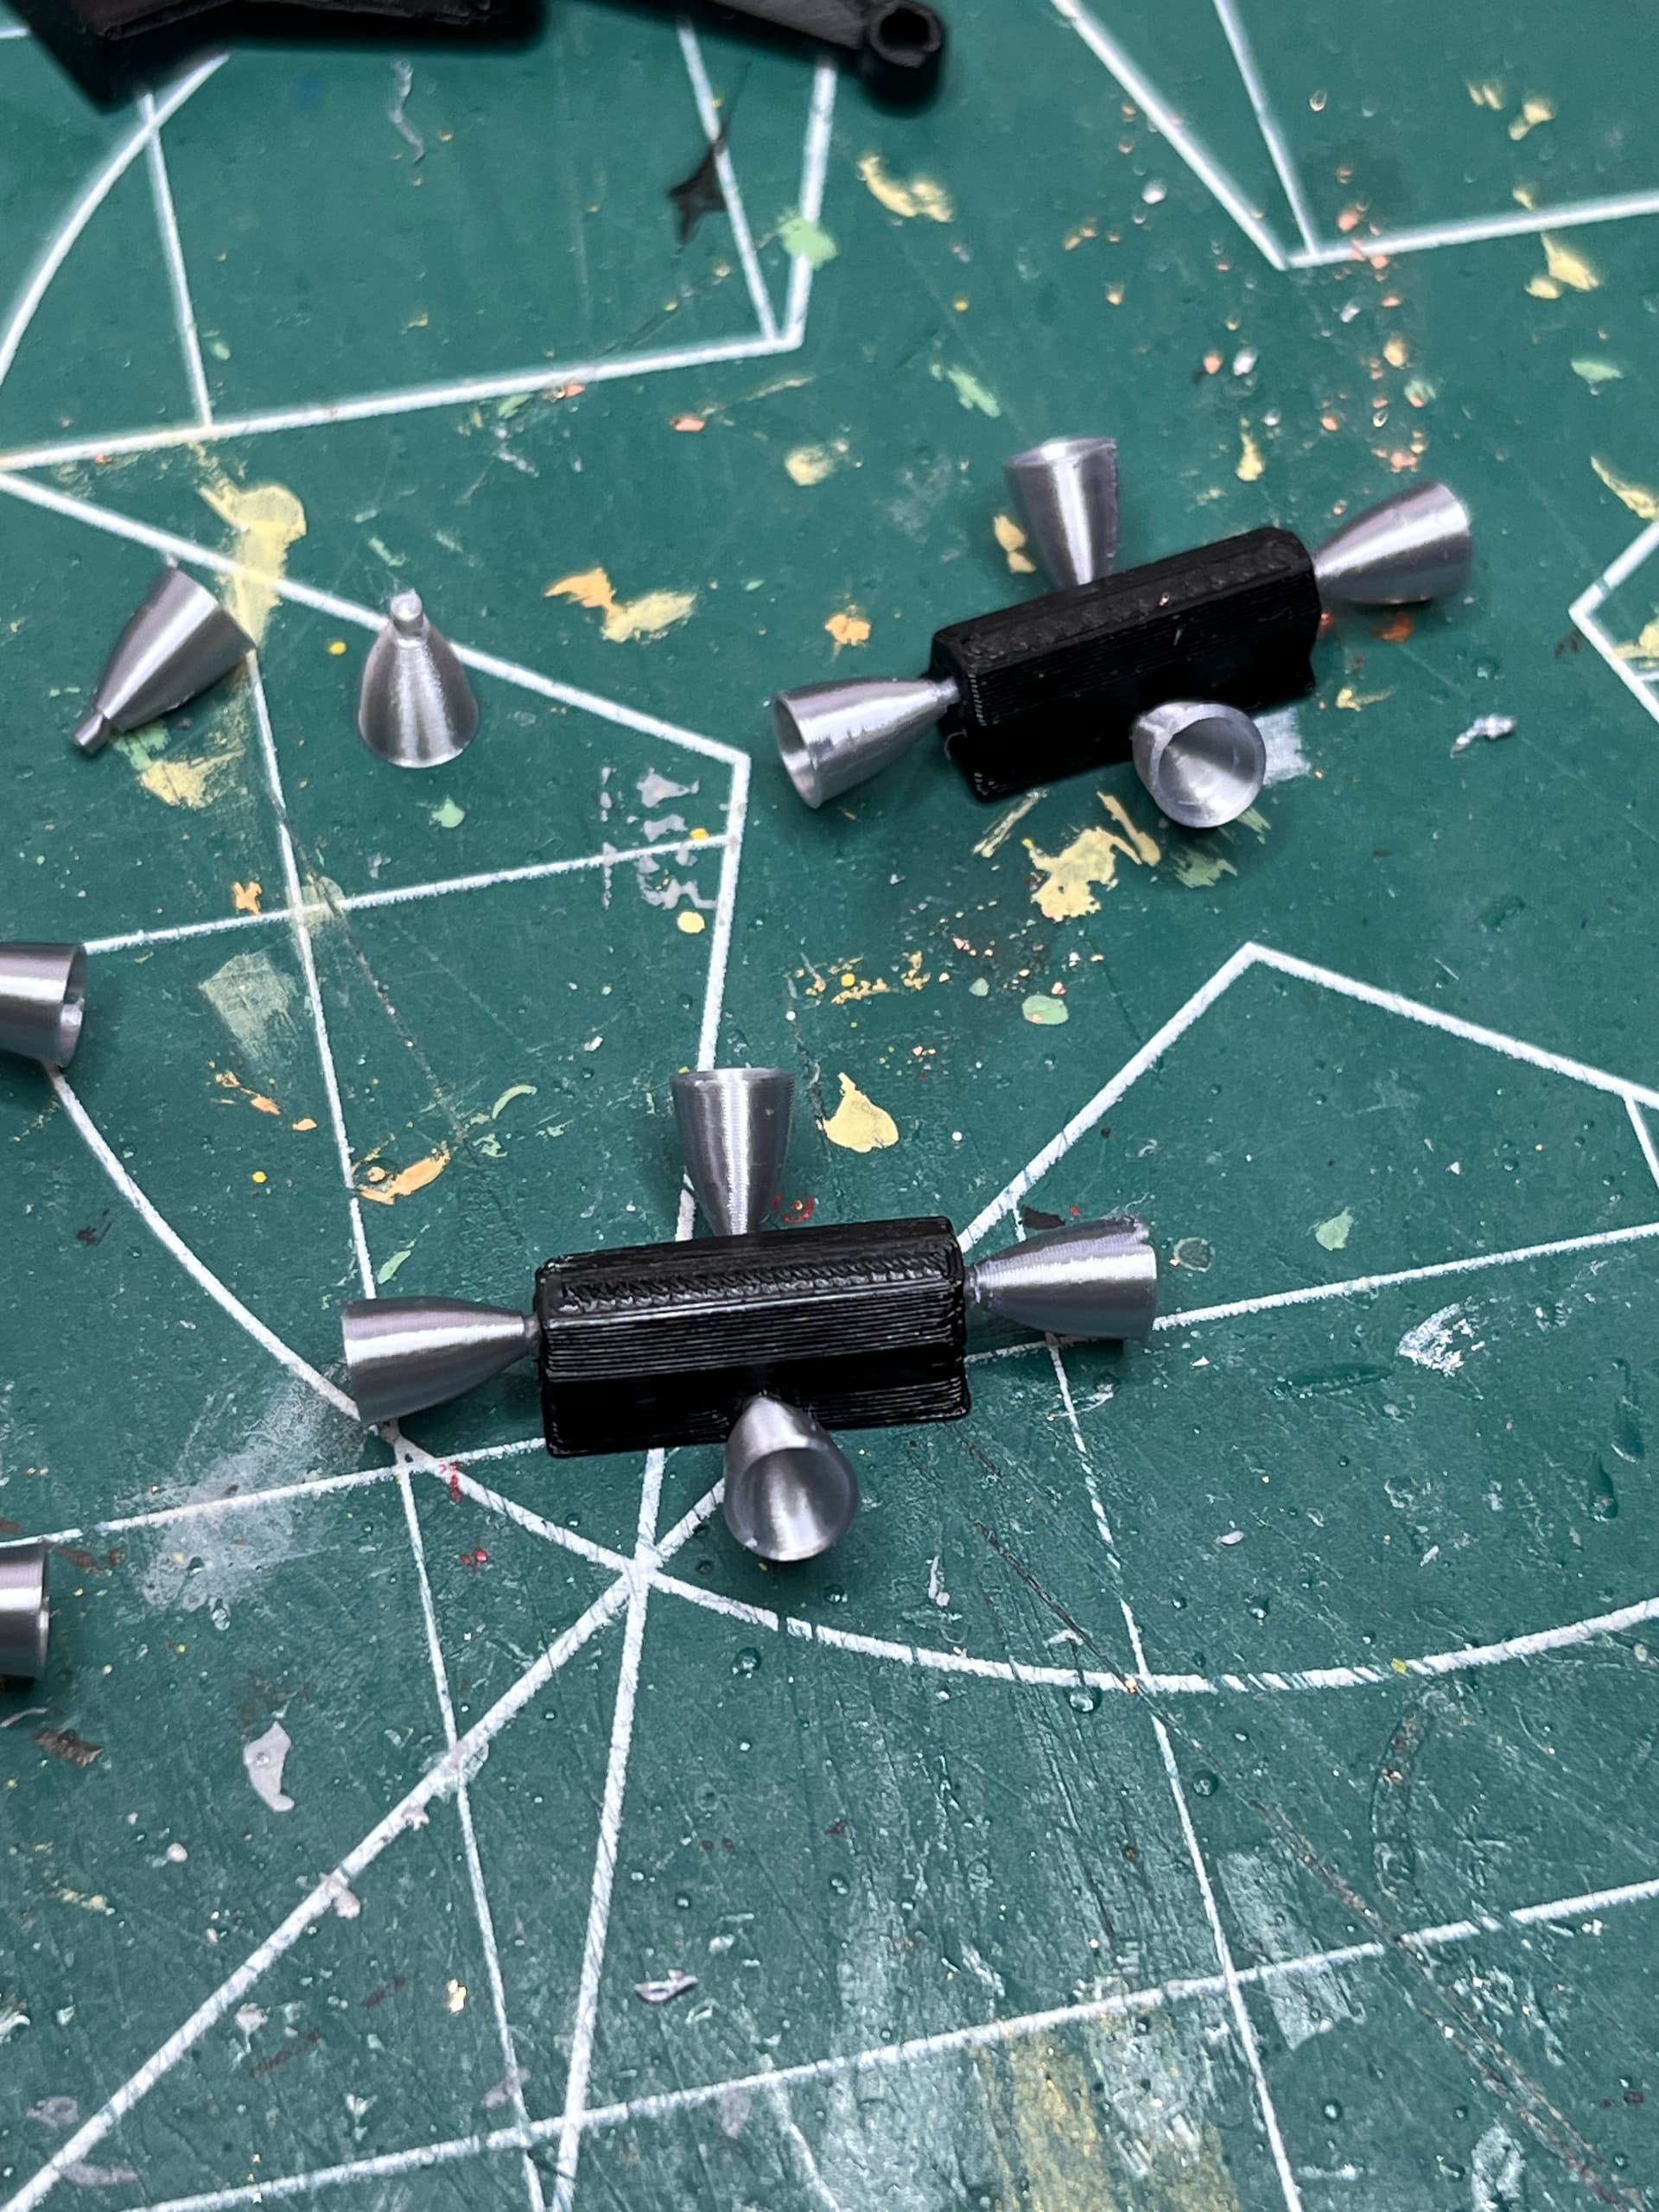
The thrusters printed up will with the small nozzle. Those and the egress platform and ladder are on.
1 Like
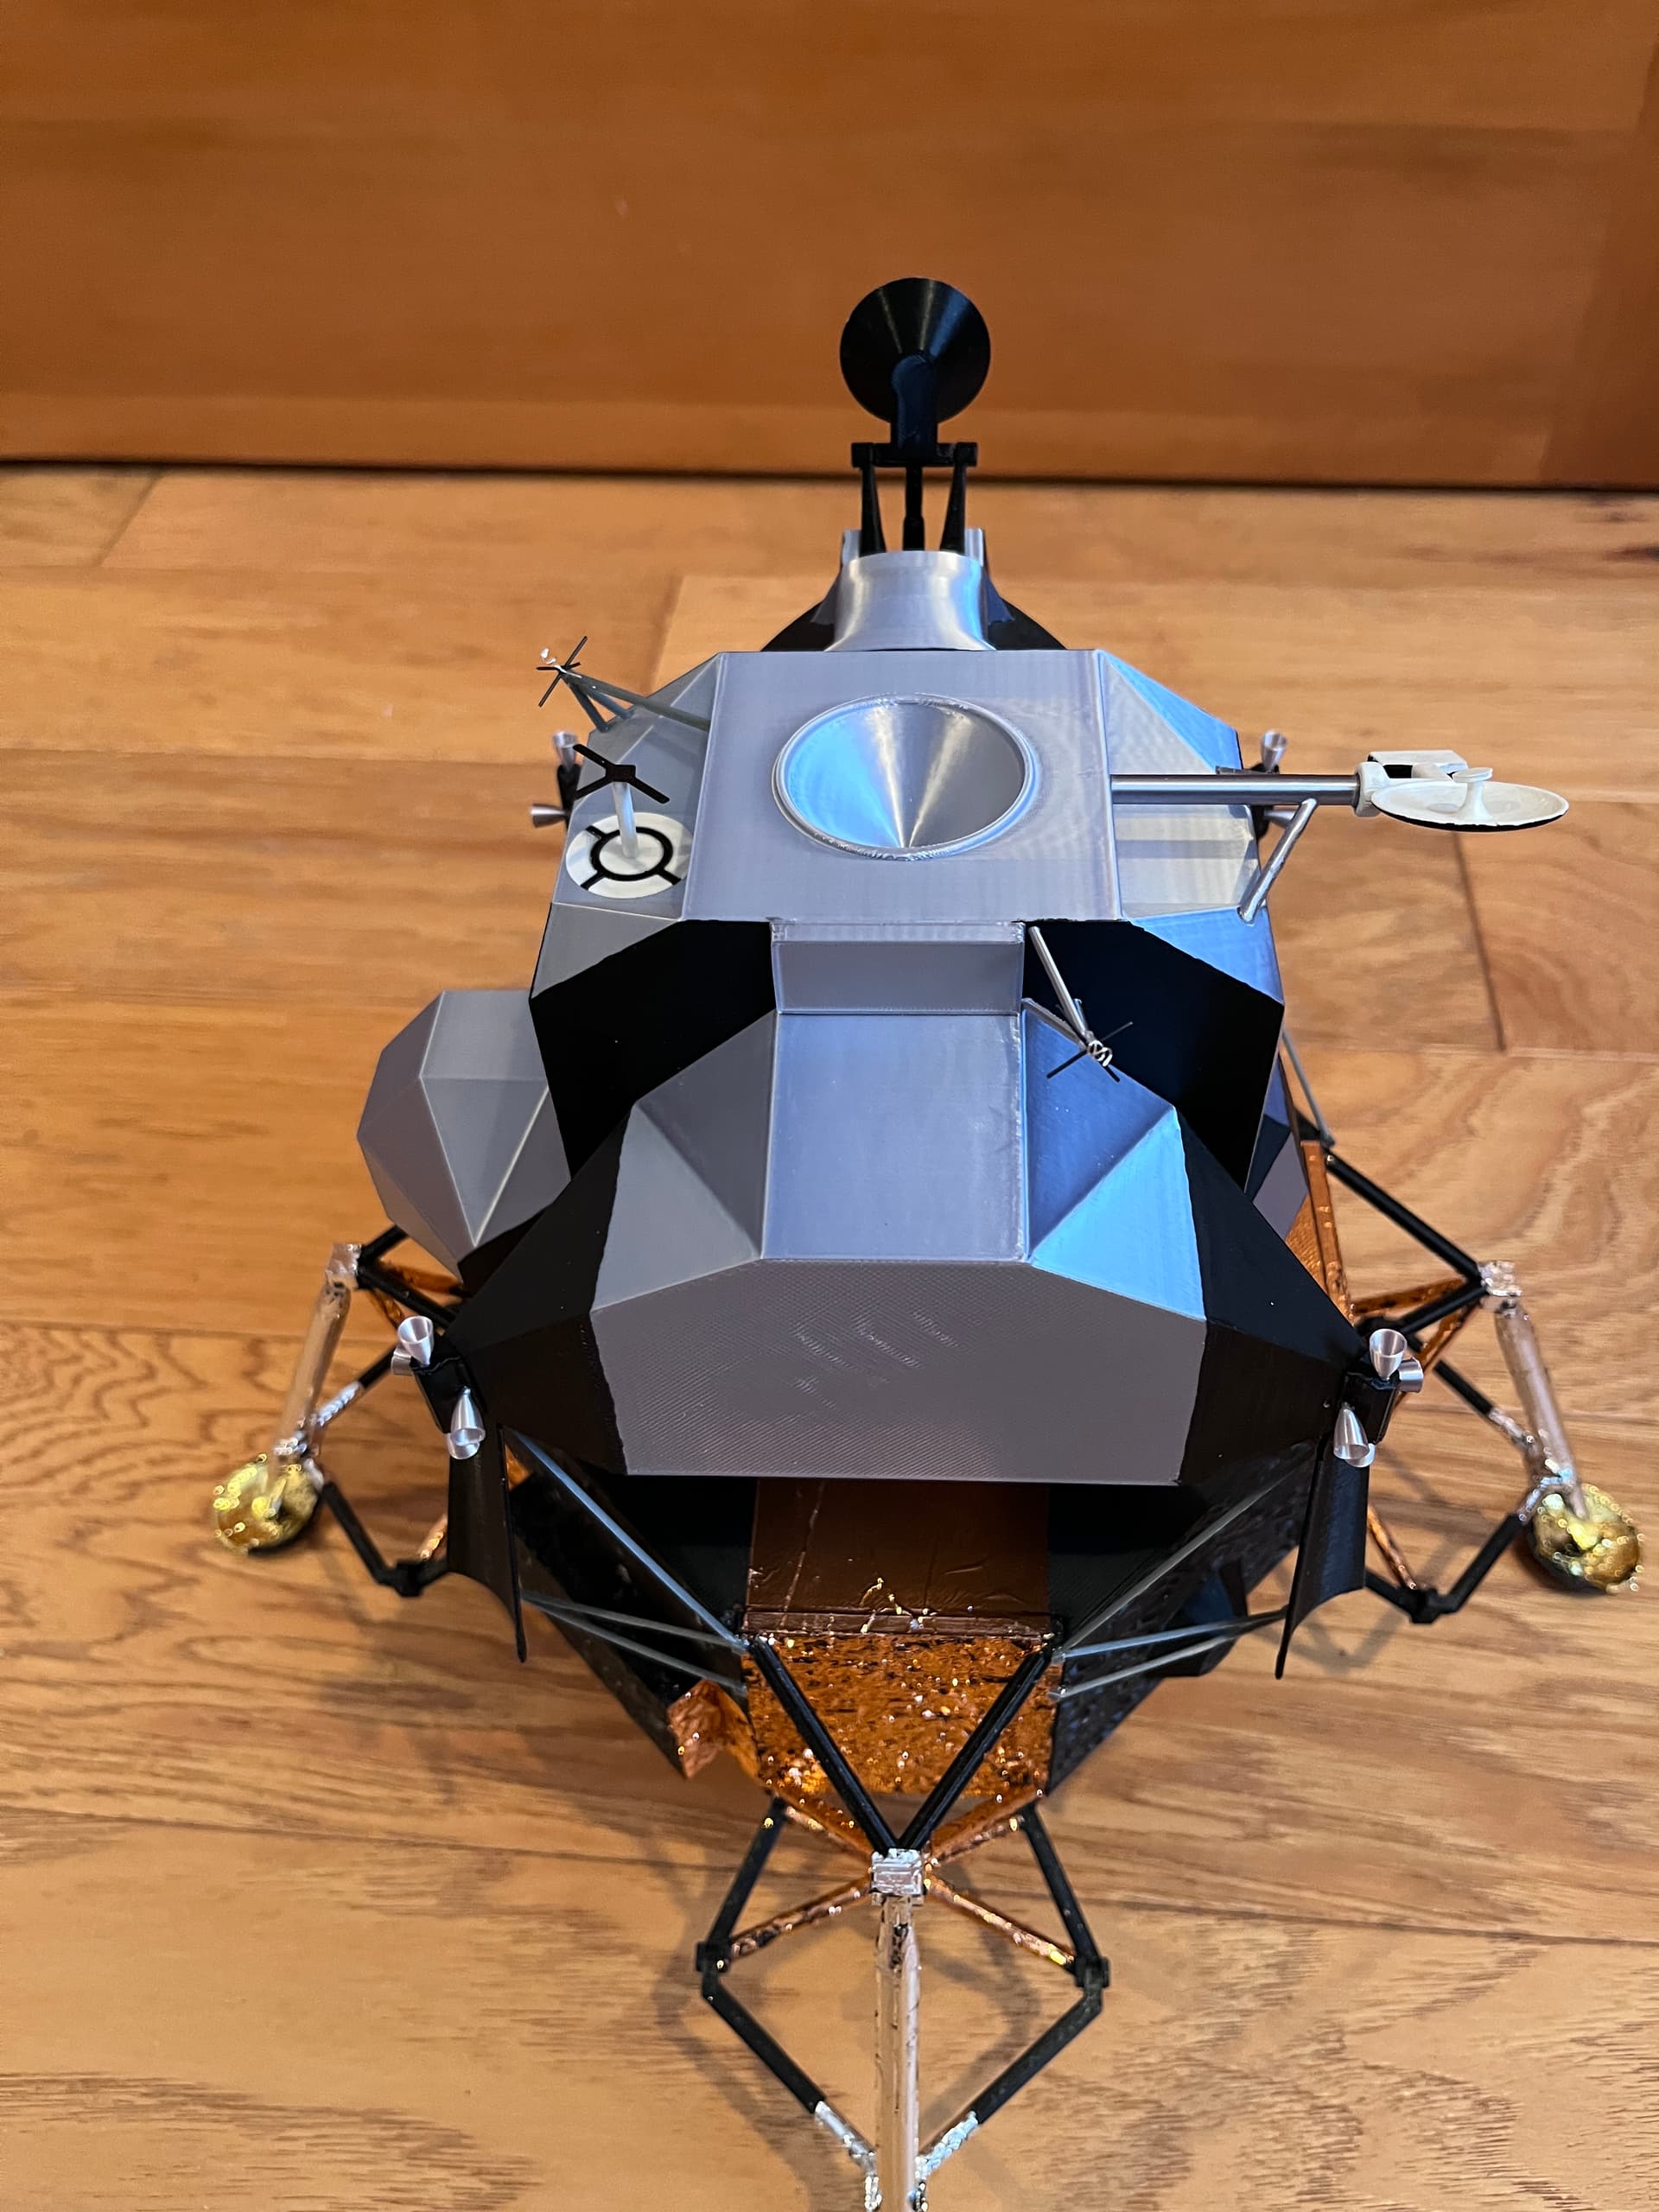
The deflectors are on. That completes the descent stage. The rendezvous radar is on. Only three more antennas to go…
3 Likes
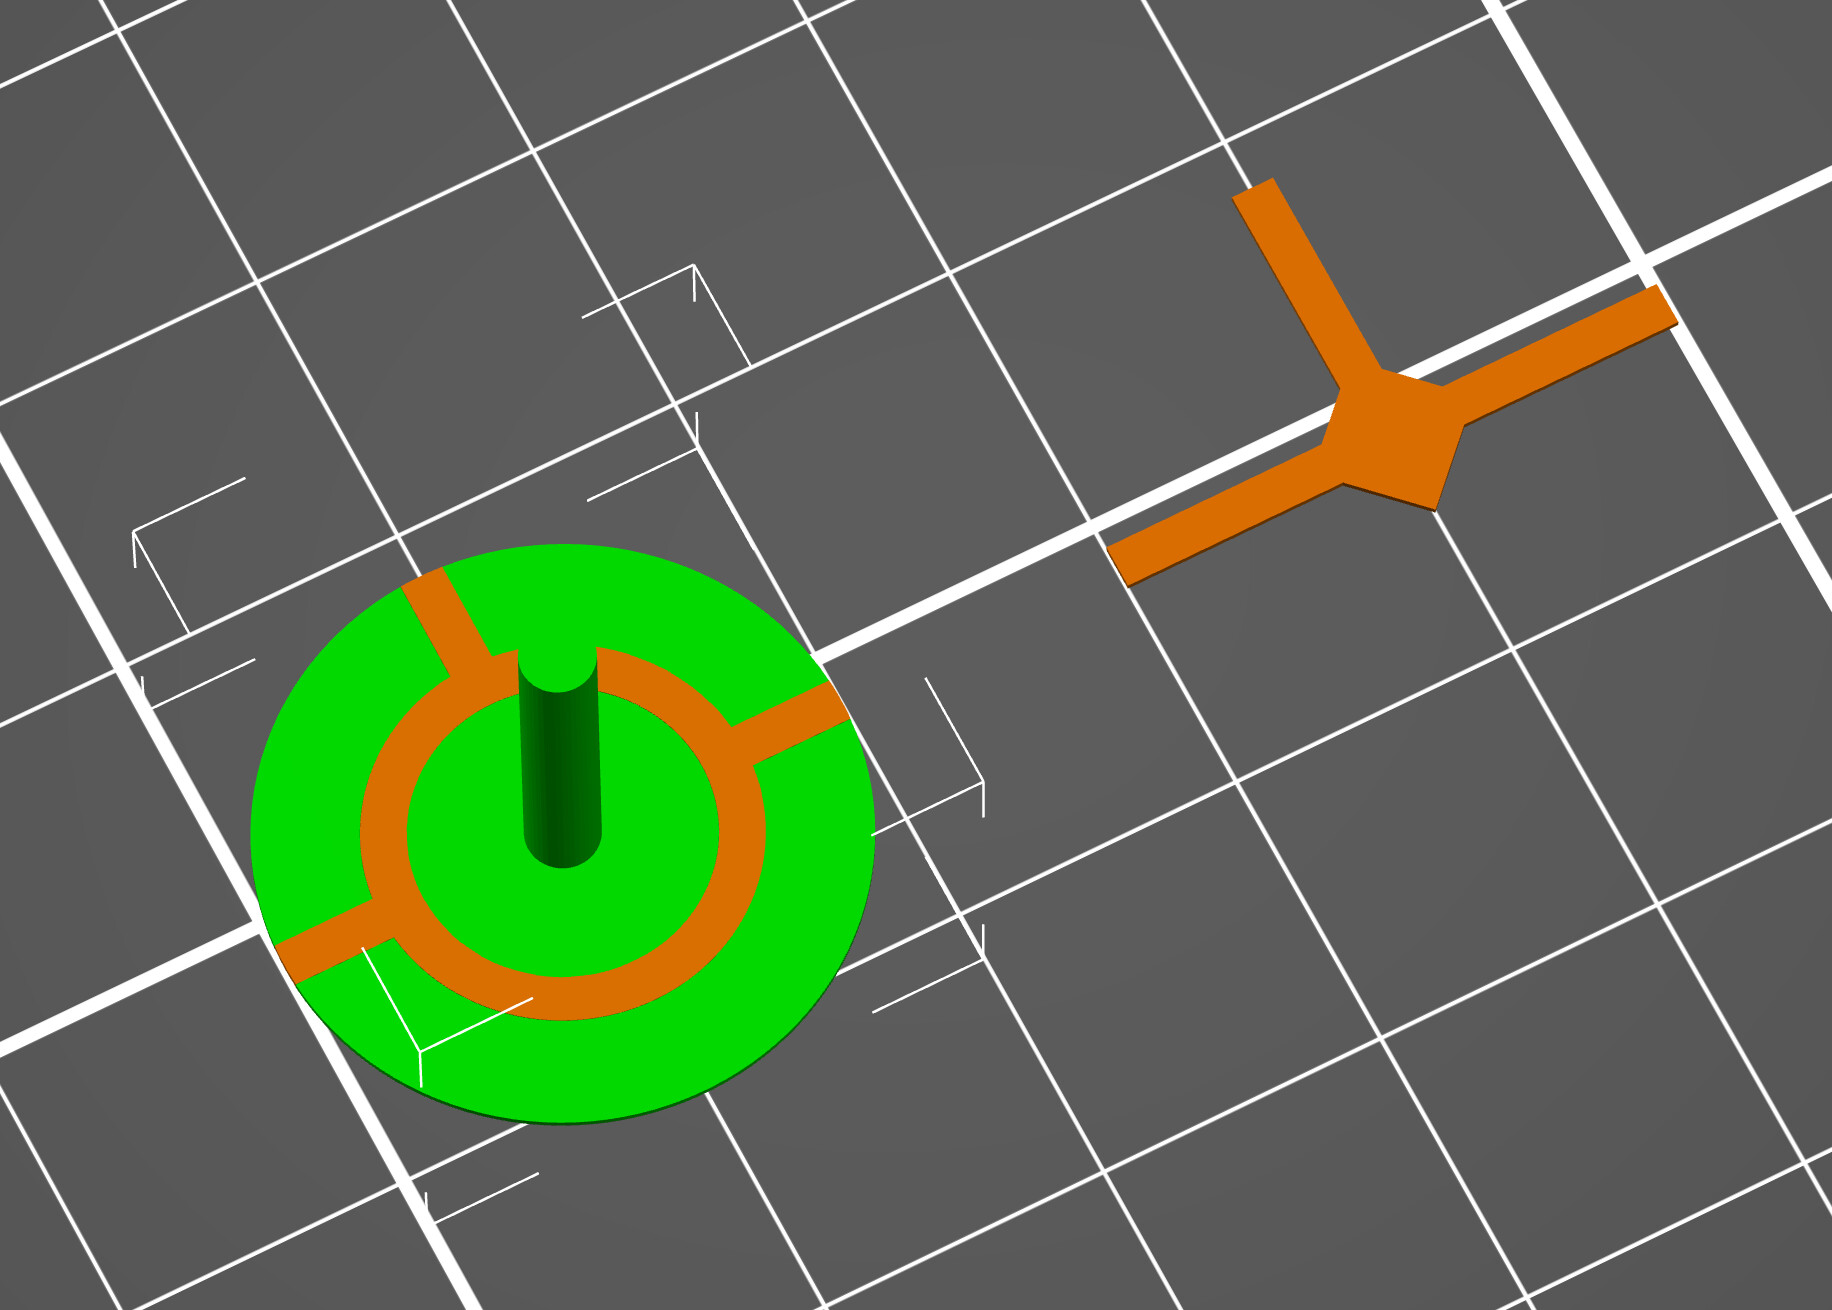
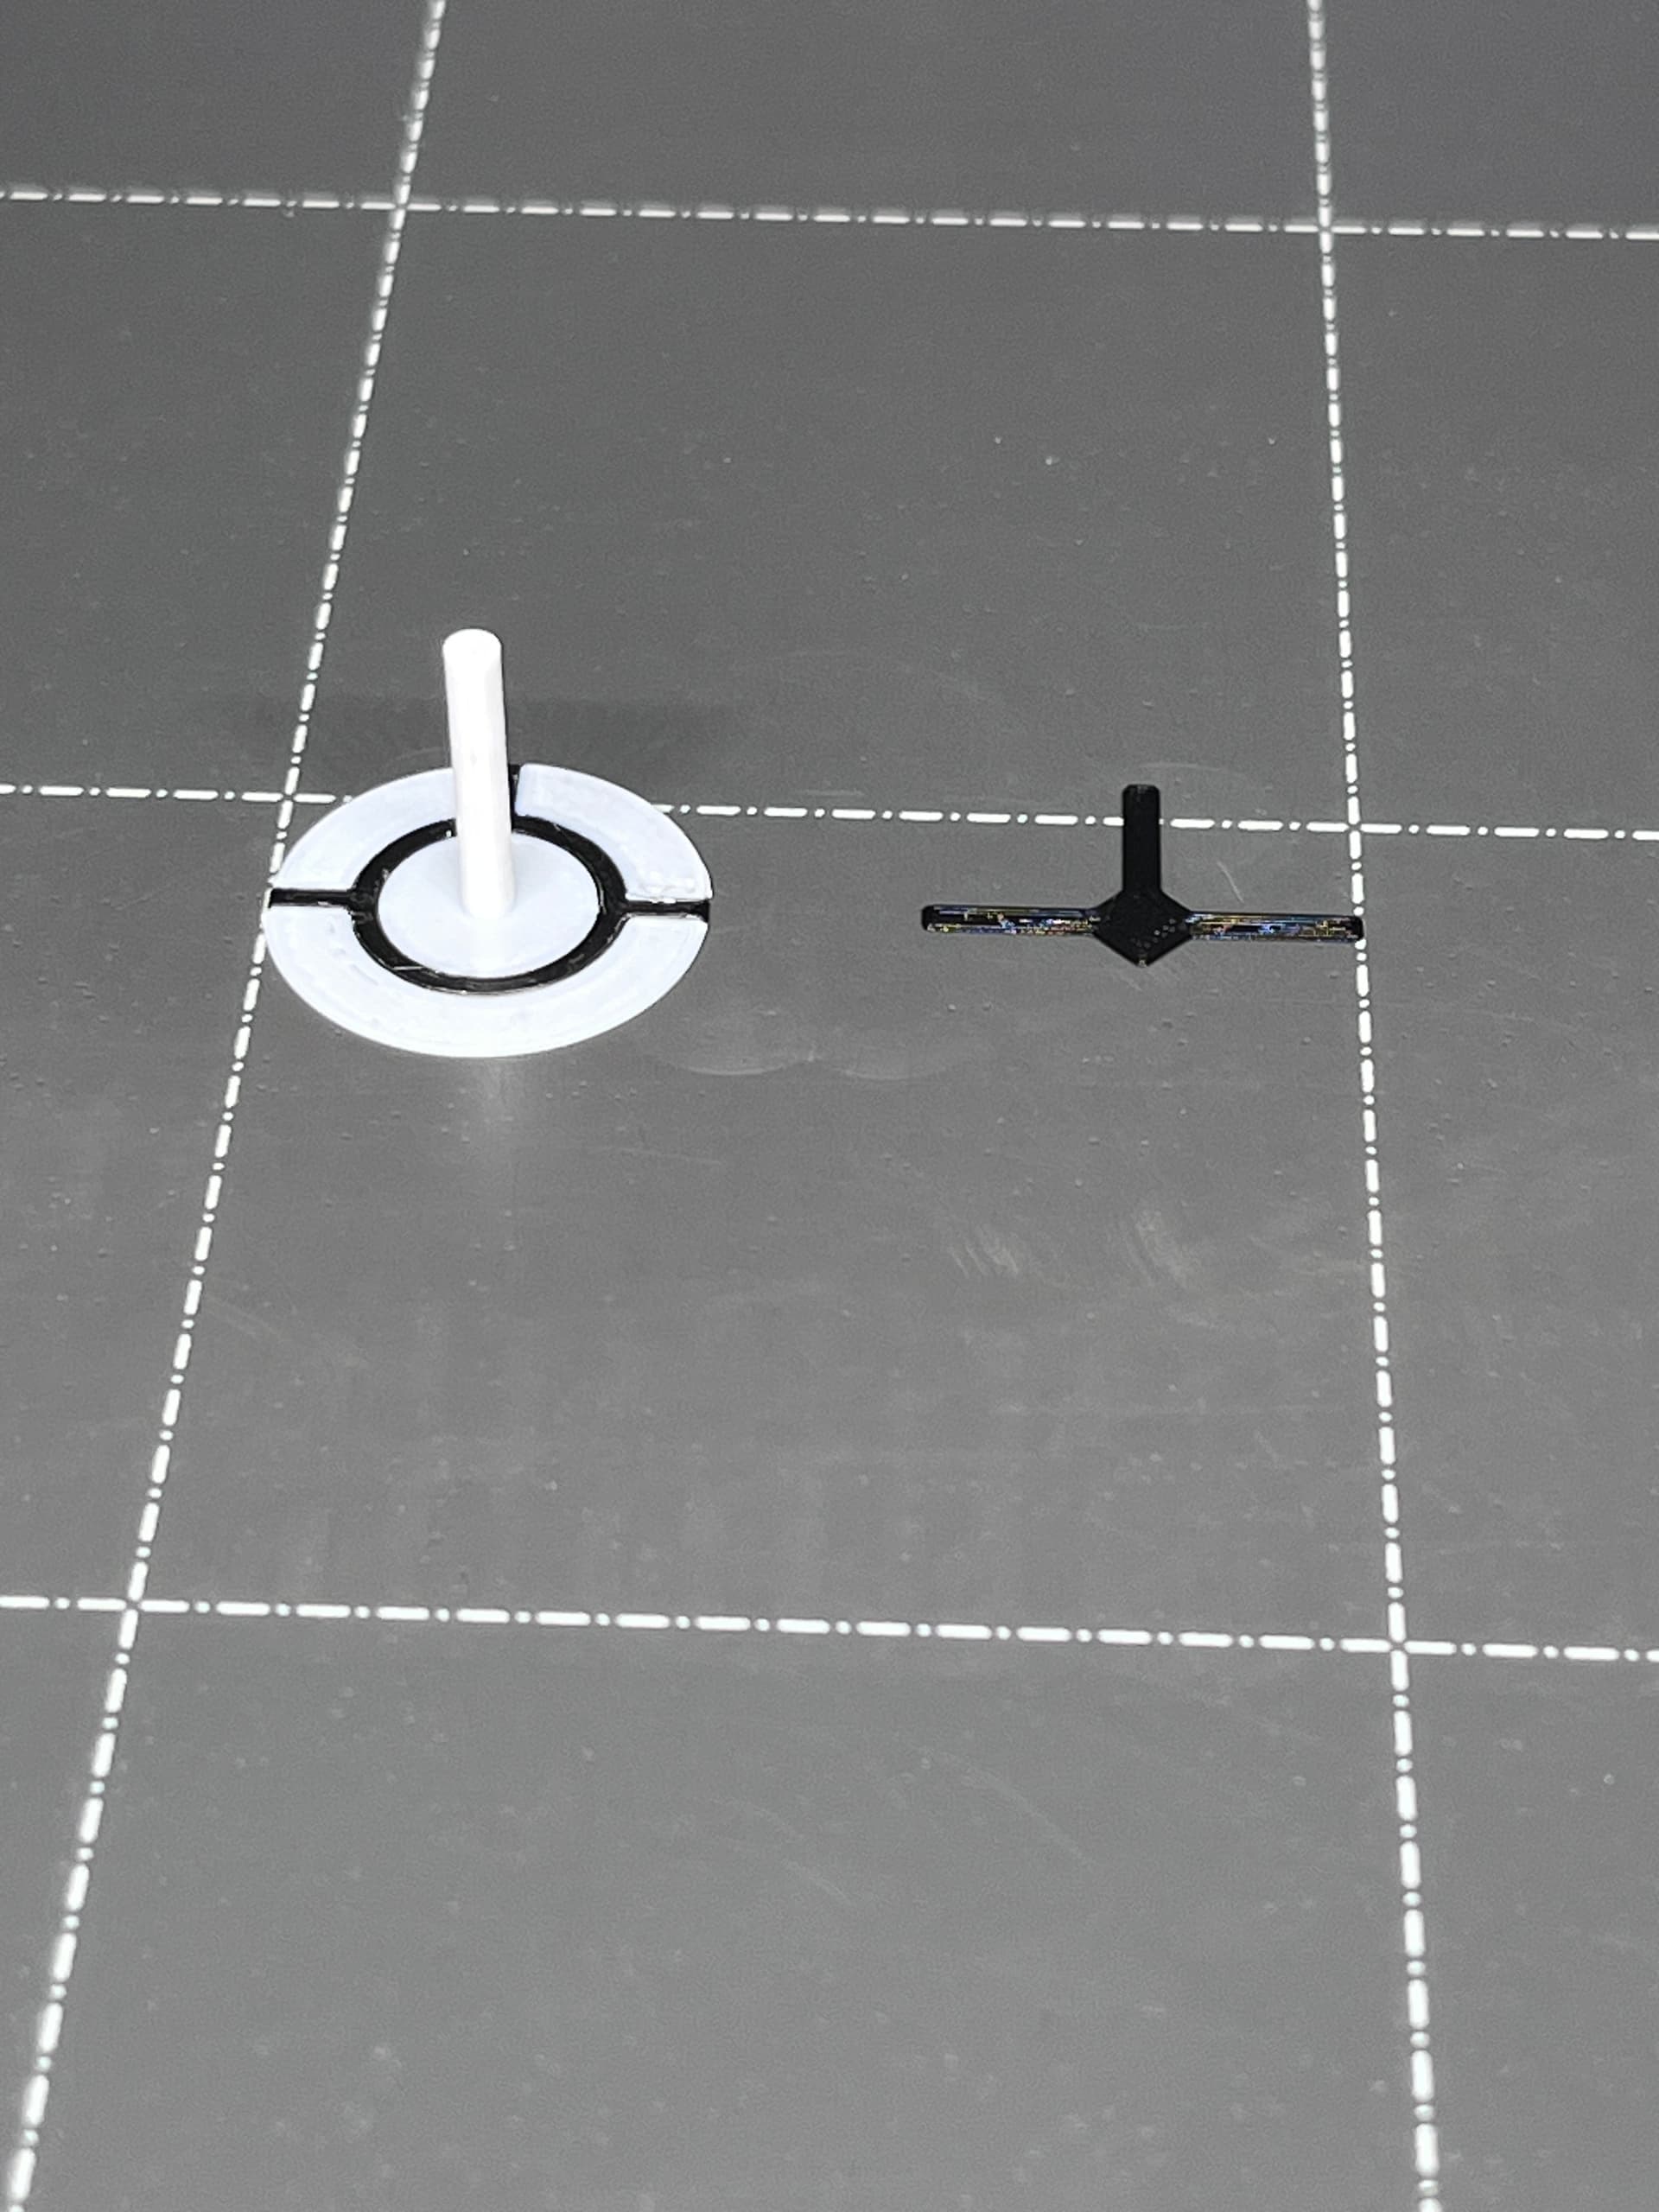
The last part is the docking target. Since it has a thin plate with black and white I chose to print this and not attempt painting it. There are two multi-color print techniques I use with a single print head printer. The horizontal color change is the easiest. This one required printing two parts, one next to the other. In the slicer I sliced the black parts and saved those for printing. Using the small 0.25mm nozzle I set the first layer height to 0.15 and the remaining layers to 0.10mm. The black parts are 0.25mm thick. With the black parts still in the slicer I then brought in the white part and set that in place directly over the black parts. When you are sure the white parts are positioned exactly (no daylight between the parts), highlight and remove the black parts. Now you can slice and save the white parts. If your slicer has elephant foot compensation, you should turn that off so the parts melt together. Here is an image in the slicer with both black (orange) and white (green).
On the printer start by printing the black parts.
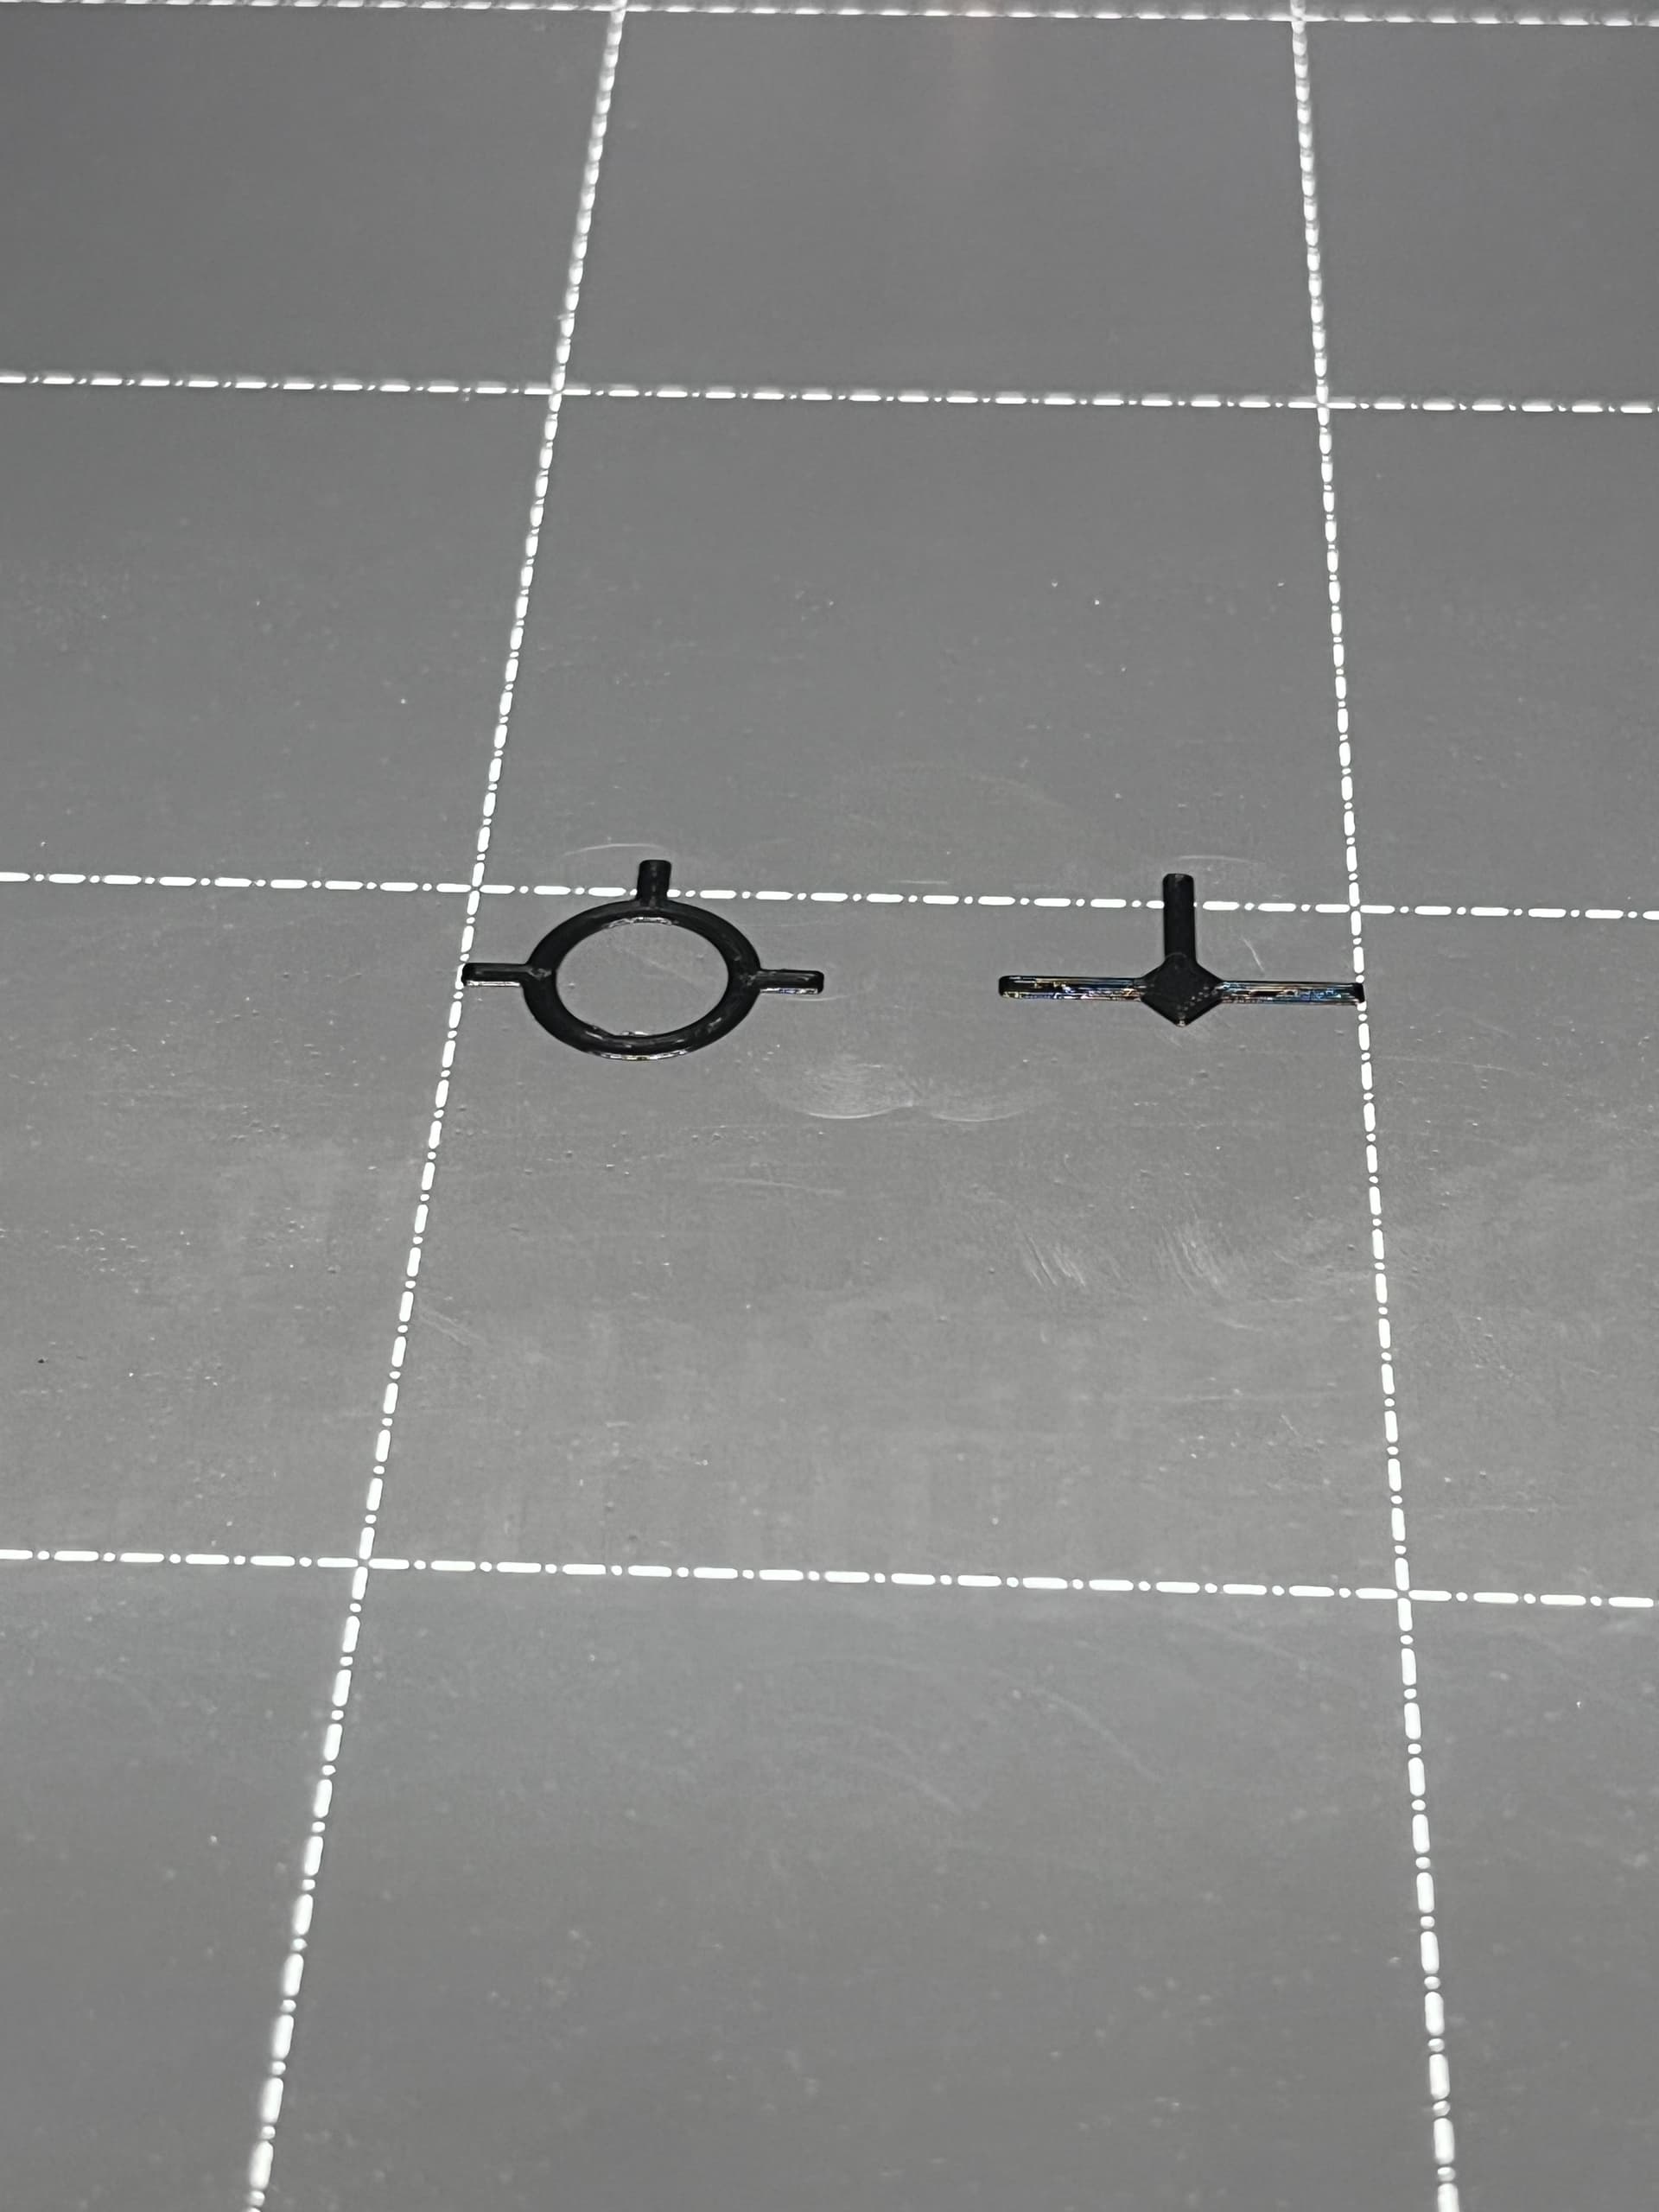
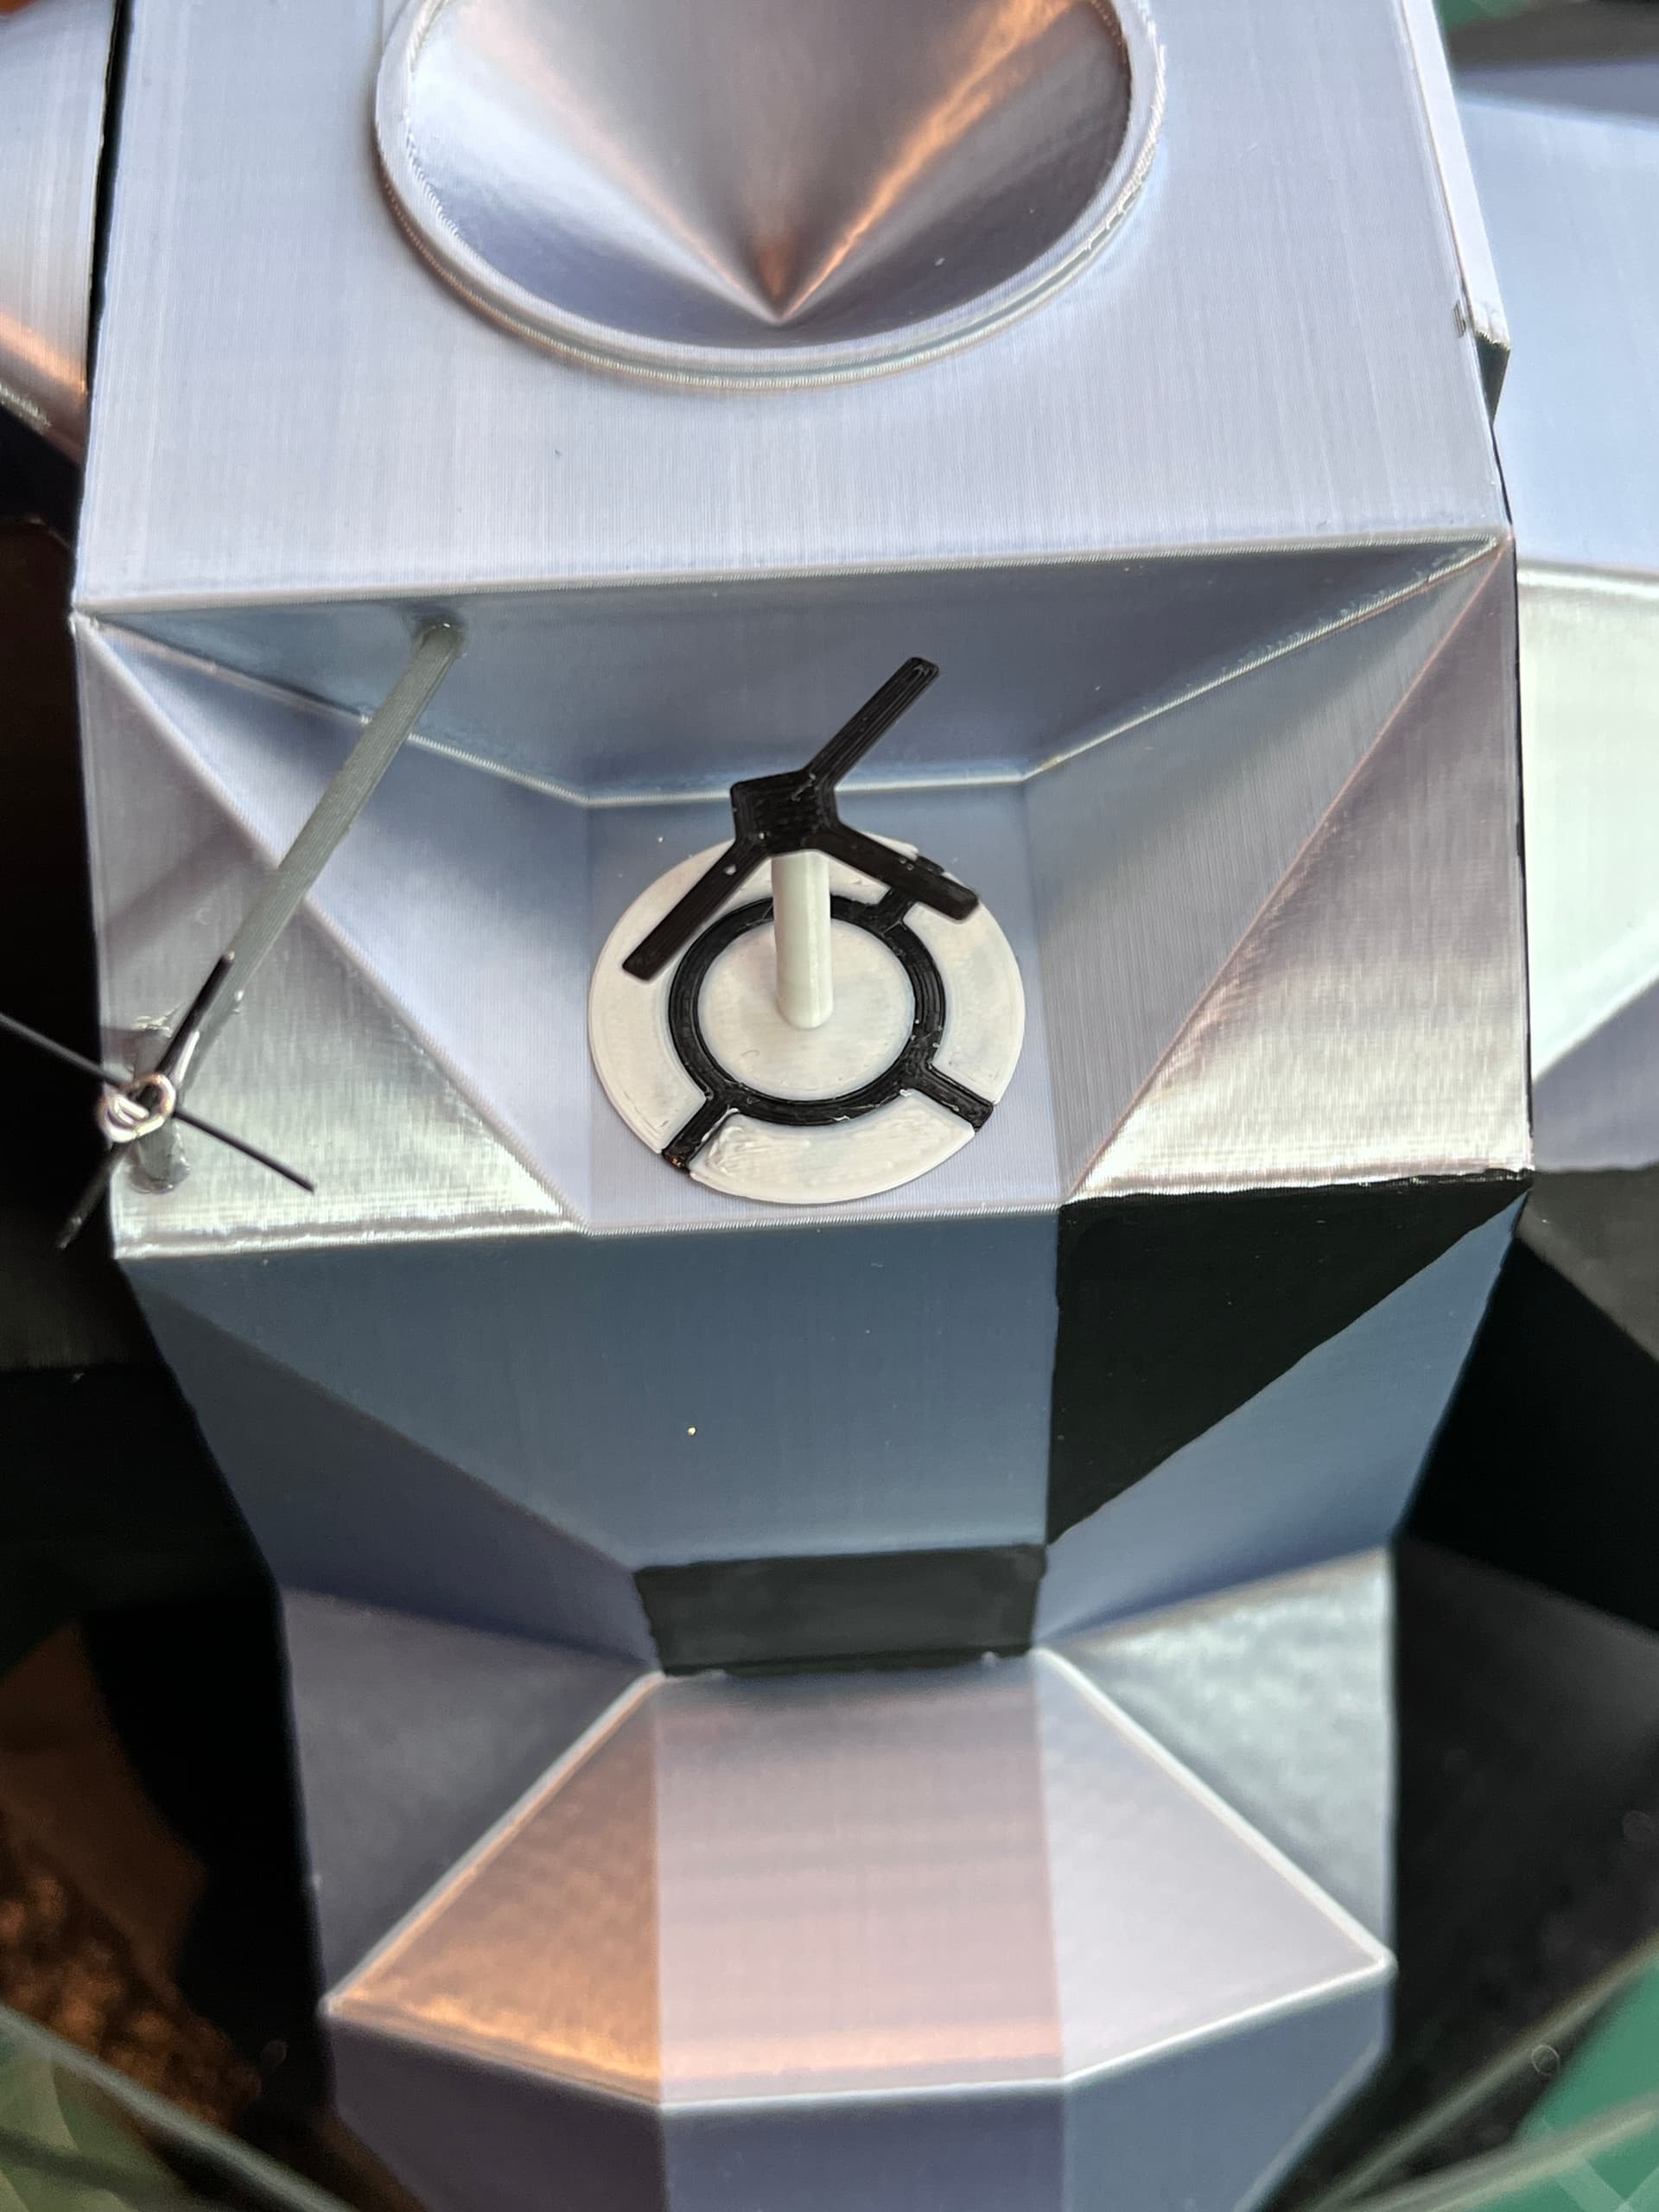
Remove any nozzle cleaning artifacts, change to a white filament, but DO NOT remove the black parts. Leave those in place. Now print the white parts over the black parts. You should end up with something like this.
Now the parts can be removed and glued to the model. You should end up with something like this.
1 Like
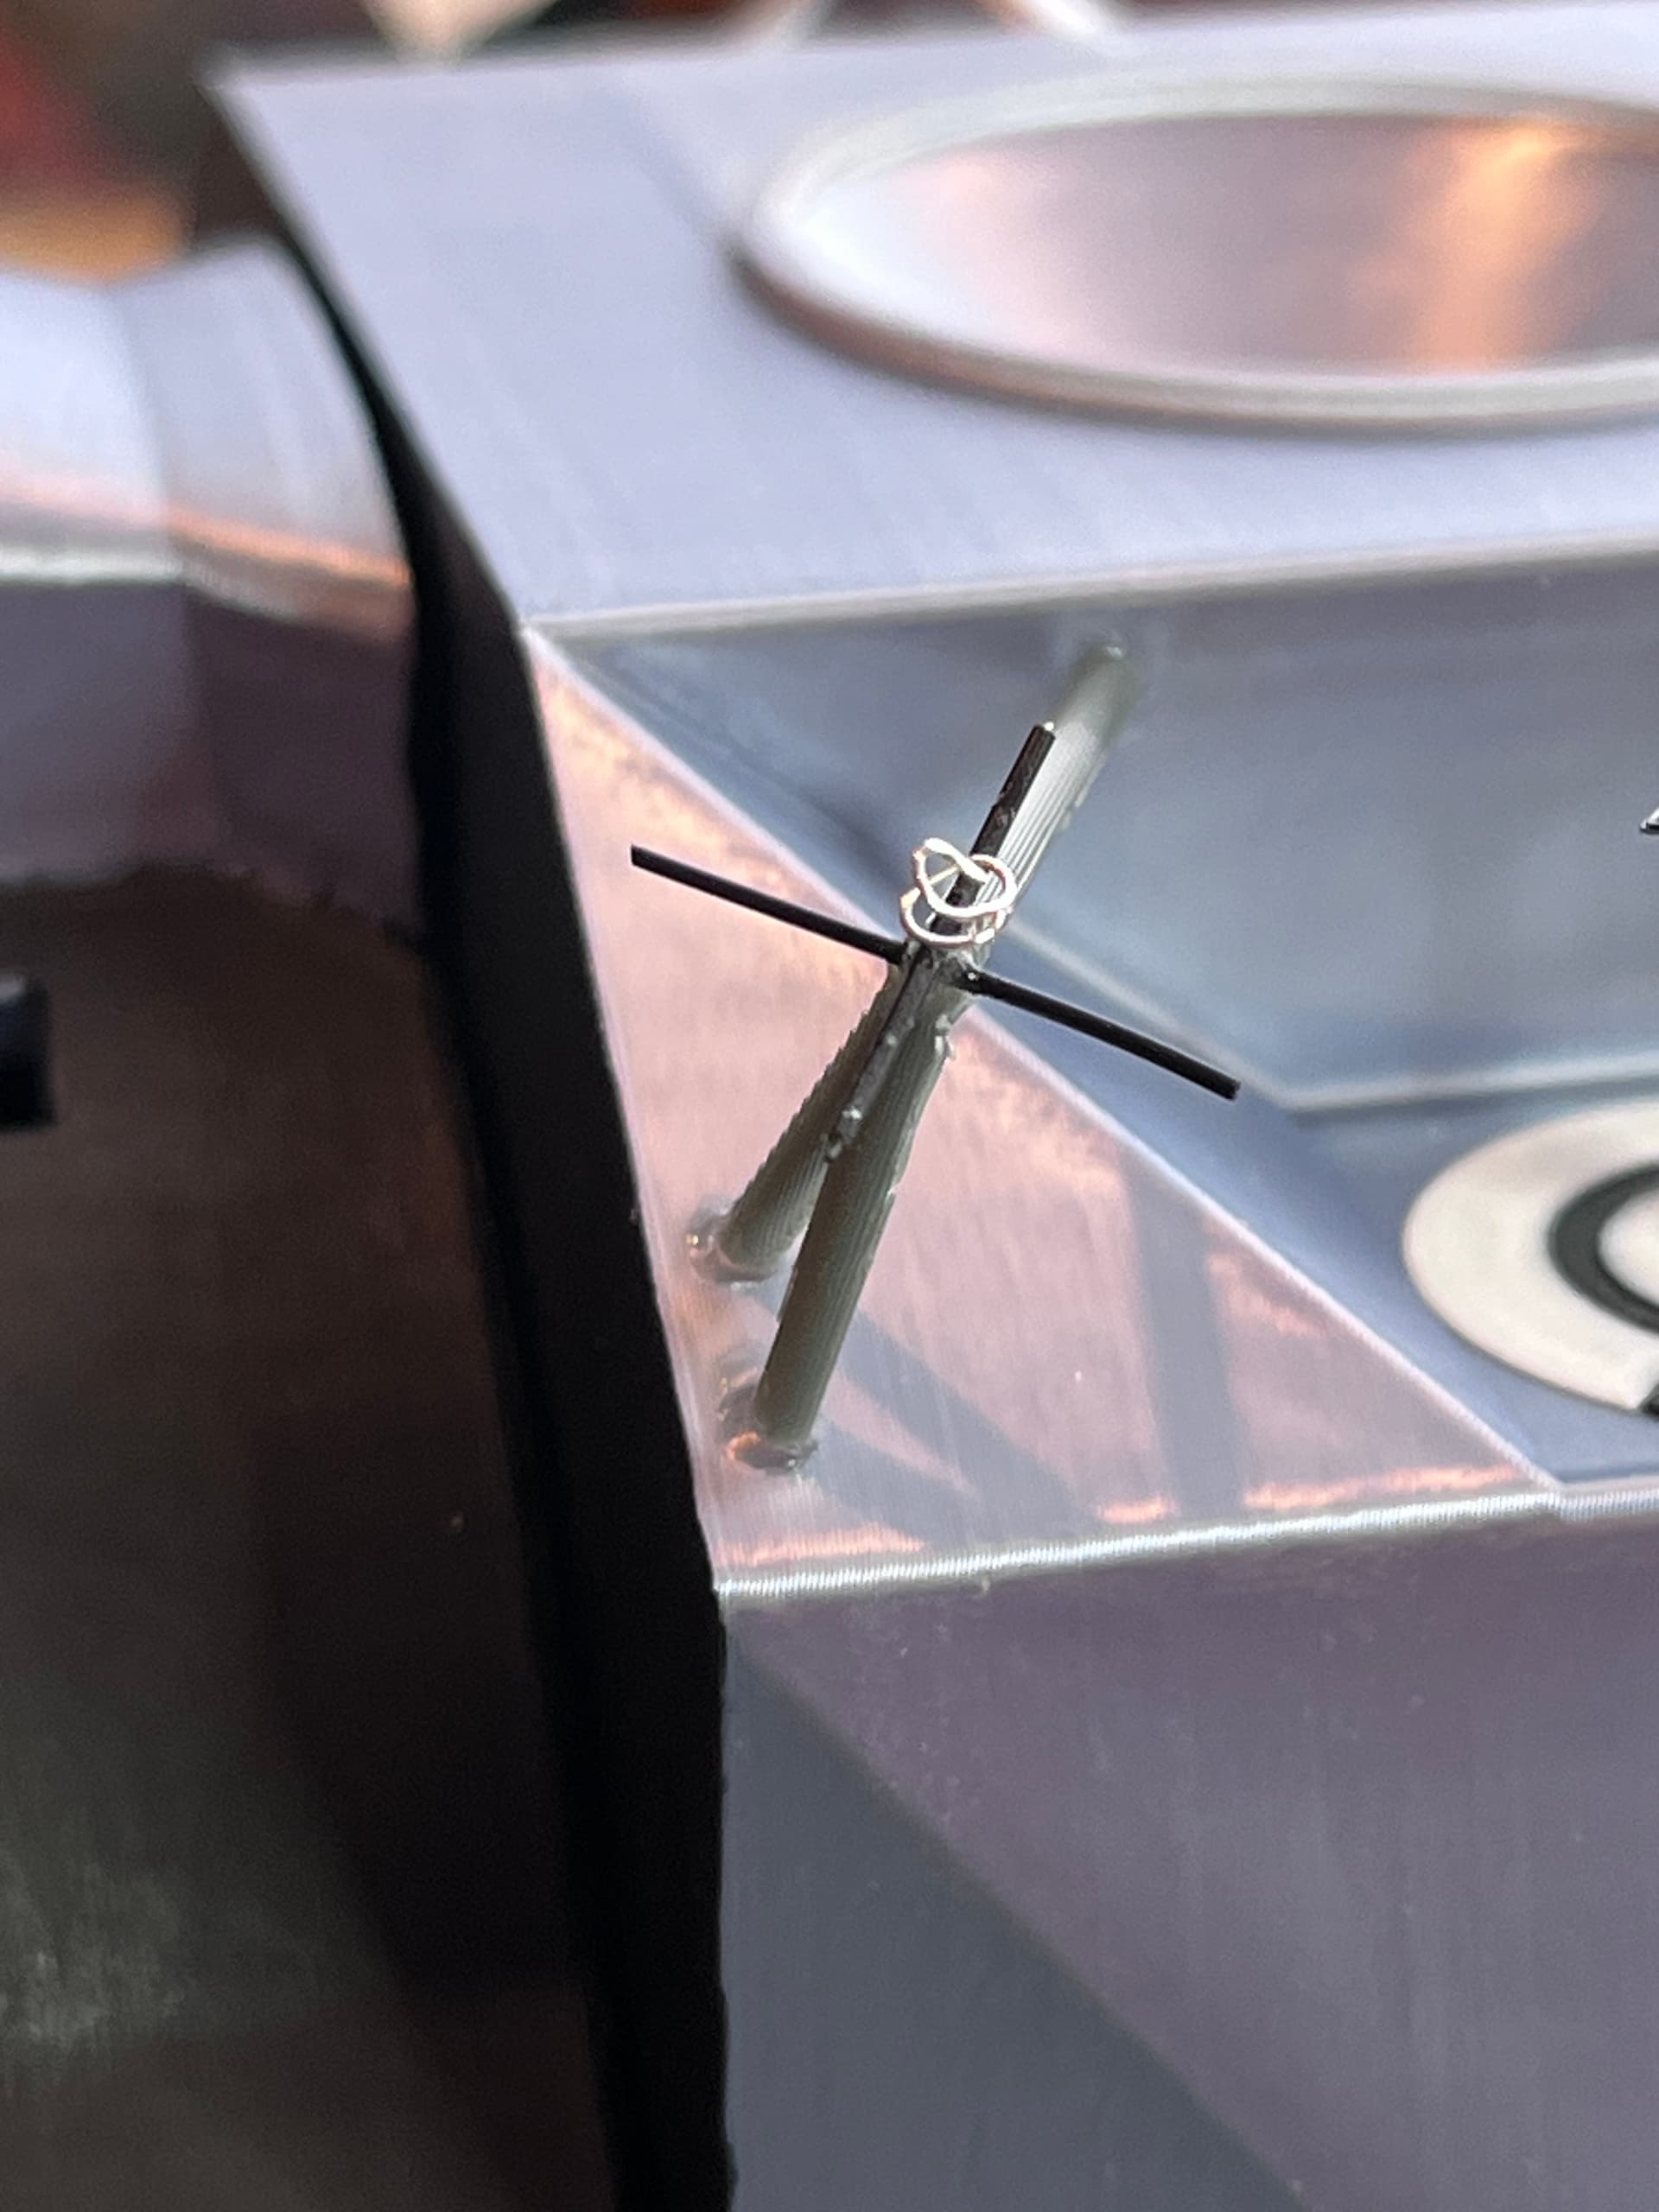
The other final detail was the ends of the VHF antennas (2). I used a really small black wire that I use for wire wrapping chips.
2 Likes
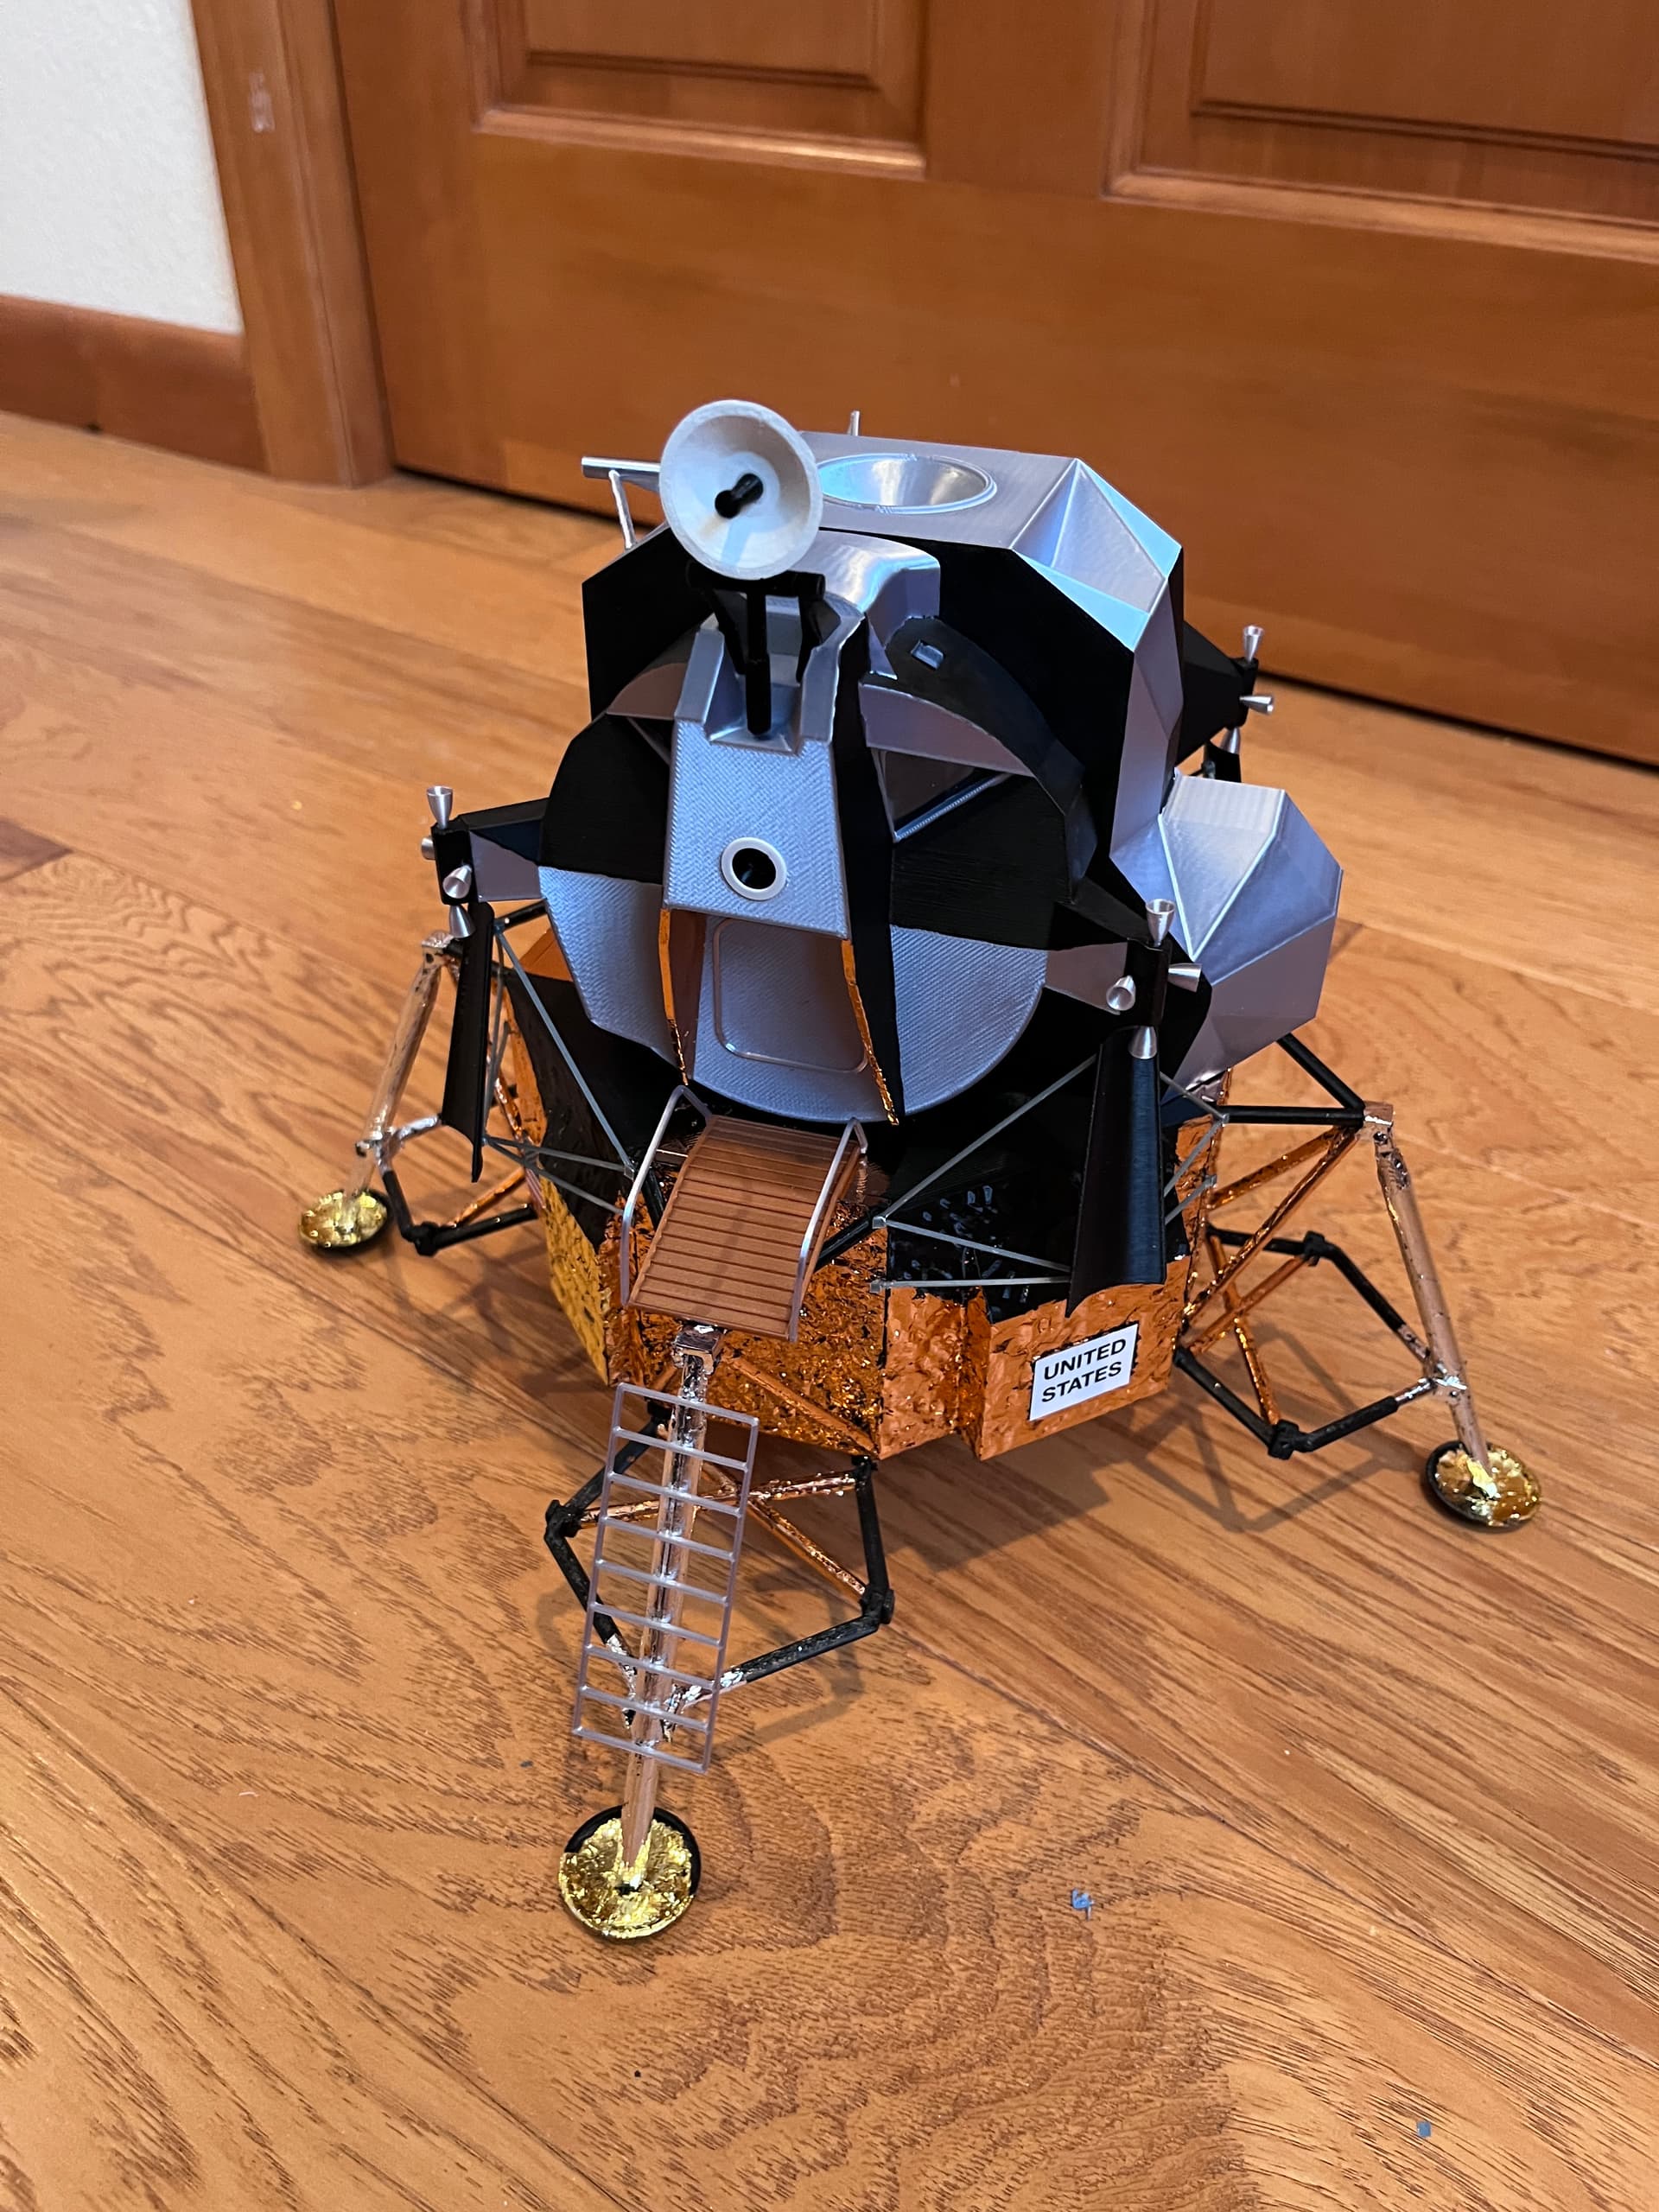
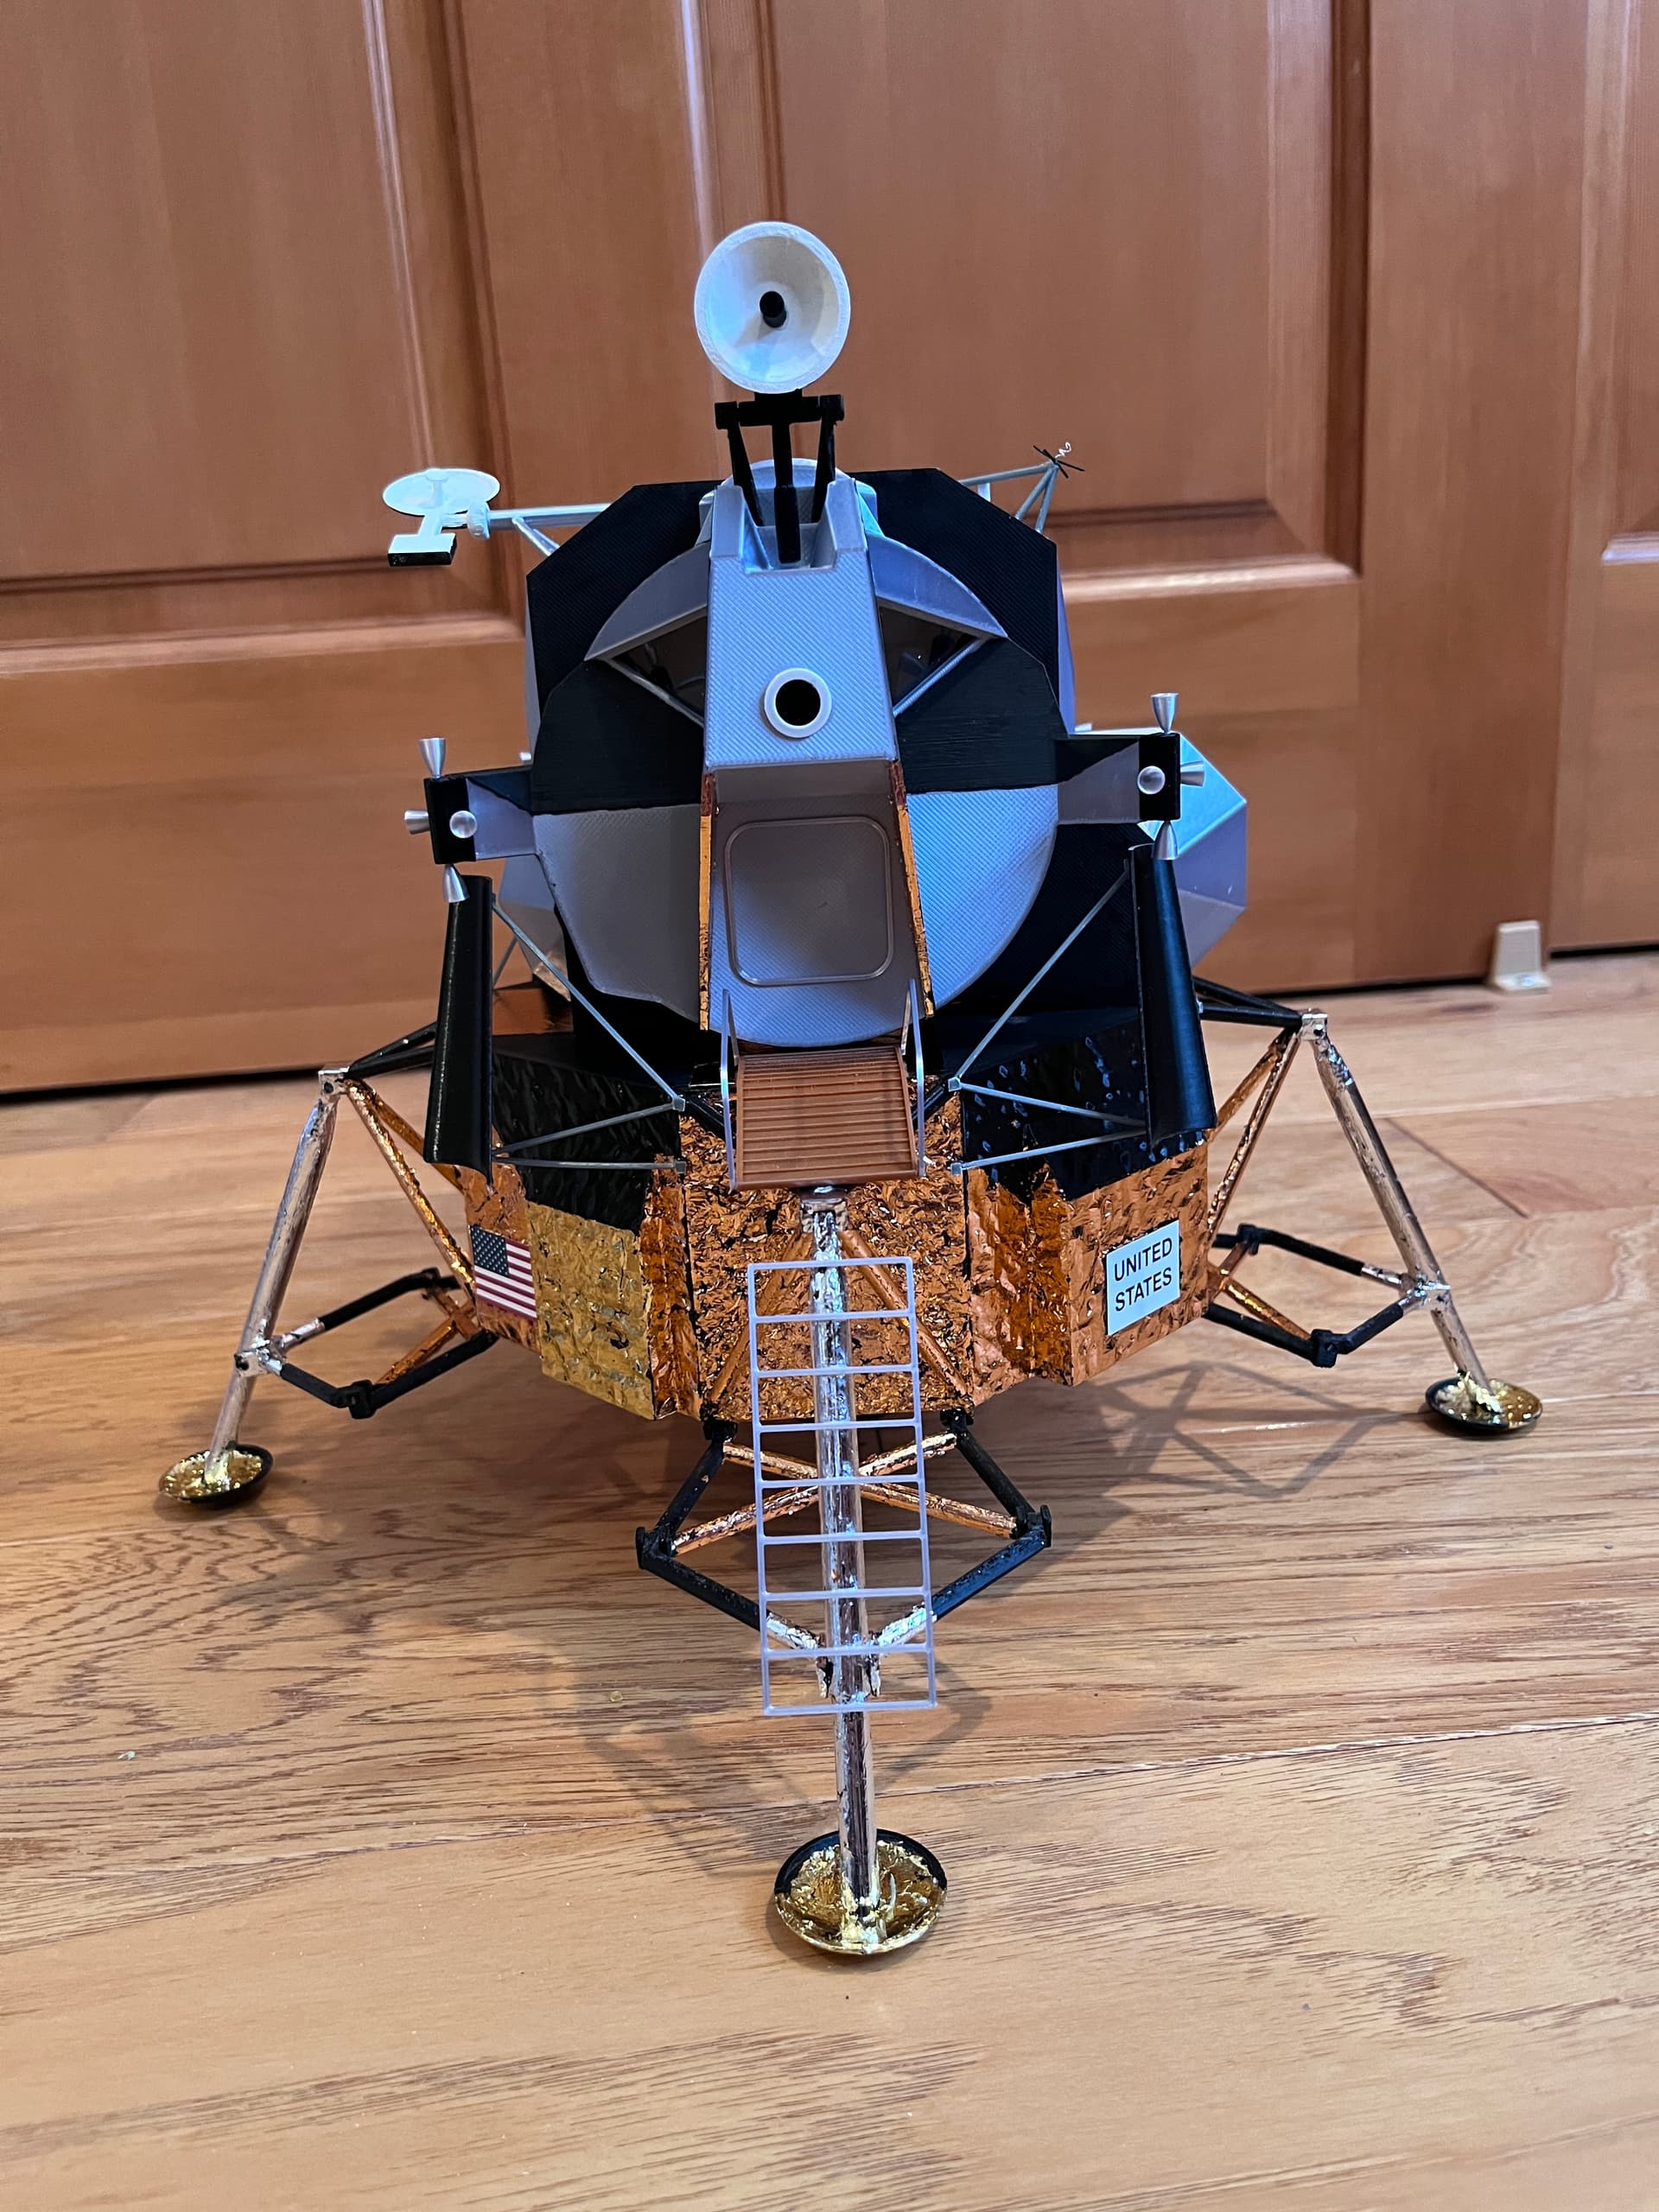
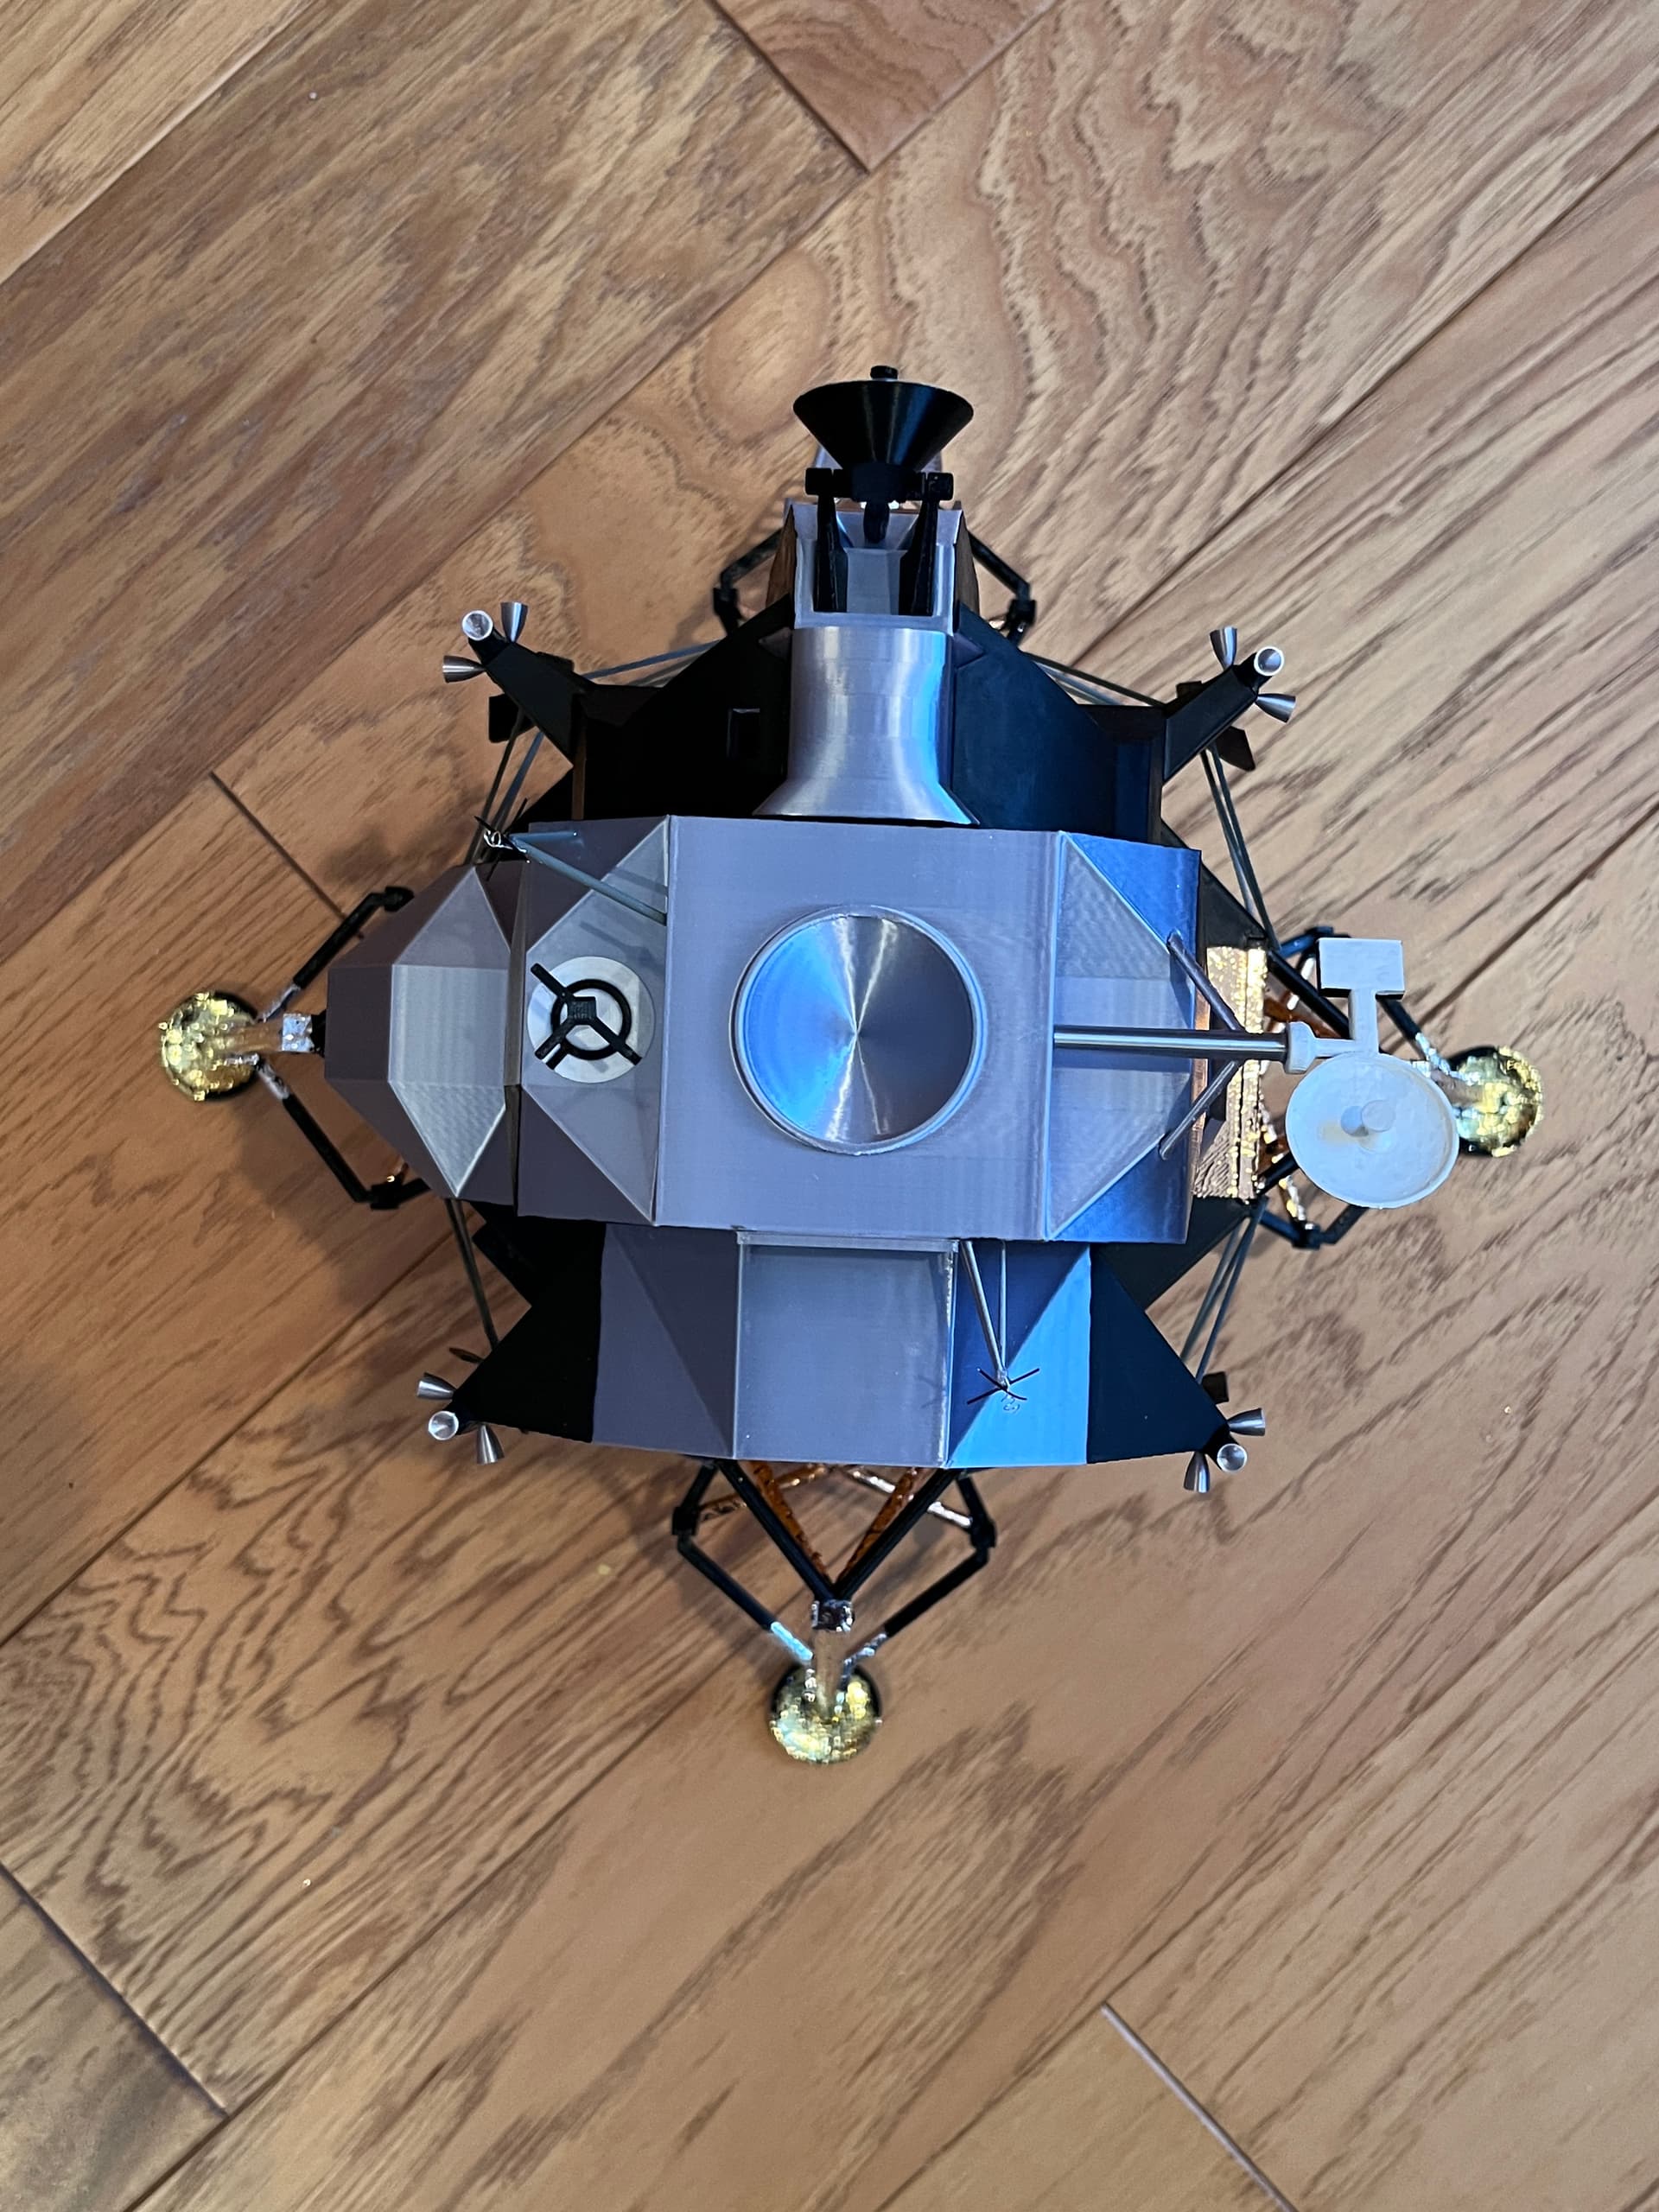
And here is the completed model. I will post when the parts are available. Need to create an assembly document first.
3 Likes
If you would like to build one of these, I have published the parts for free at Apollo Lunar Module by bglasford1 | Download free STL model | Printables.com along with all the other 3D models I have created.
1 Like
This looks amazing and if I had a printer, I would be all over it. You nailed it!
Scott, Thanks for the praise. You should seriously consider getting a 3D printer. I have built models using everything from paper to plastic to wood. I have almost completed a 1:200 USS Missouri with all the photo etch. It may be my last plastic kit model. Once I discovered 3D printing I realized you are only limited by your imagination. 3D printing is revolutionizing the modeling hobby. I did have to learn a CAD system, Fusion 360. A year ago I got a resin printer which can print some insanely accurate parts, with 35 micron accuracy. I even use the resin printer to make parts missing on the Missouri model such as the rack of hoses used to refuel other ships and the spare float plane float.
What amazes me is that SpaceX 3D prints their engines and Relativity Space 3D 100% printed a rocket they launched into space. They are now scaling up to a larger rocket that will compete with the SpaceX Falcon 9. Companies have been test printing parts in space at the ISS. If you are going to Mars it would be difficult to haul all the spare parts you might need. All you really need is a 3D printer and spools of metal, make whatever parts you need. And they plan to 3D print what is needed on the surface of Mars. The future is exciting.
1 Like
Oh it’s on the list for sure! I started the research a few months ago and frankly, the options were a but overwhelming so I paused. I have to really understand what all the difference materials are, so I can at minimum get something that works for me.
I had no idea they were printing rockets!
I just got a cricut vinyl cutter and have to learn that this week so I can make masks for my F-86 where the decals sucked. After I master that, I will restart my 3D printer quest.