A well done A-10, Armor_Aficionado, especially since it’s an A-10 based at Moody AFB, where I was assigned over 50 years ago. Thanks for sharing.
Castelnuovo, nice start on the SBD ‘pit
JB Raider, the razorback looks super. Great finish and great checkerboard – I have not had the courage to try that yet.
Eaglecash867, super detail work on the Frogfoot there. Following with great interest.
Armor_Aficionado, love the Warthog, and the massive ordanance load hanging off it.
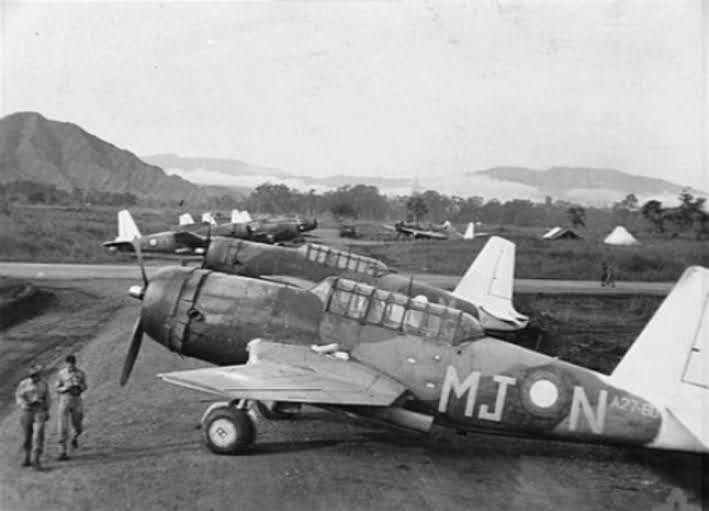
The Vengeance has the base colours on and the white tail done. Next will be the clear coat for decals before heavy weathering.

Got the Stuka done a couple of weeks ago but just got round to getting the final pics today. Got it weathered with Flory washes and some staining and after that it was just a case of adding the final parts. So here she is ready to go on the base.
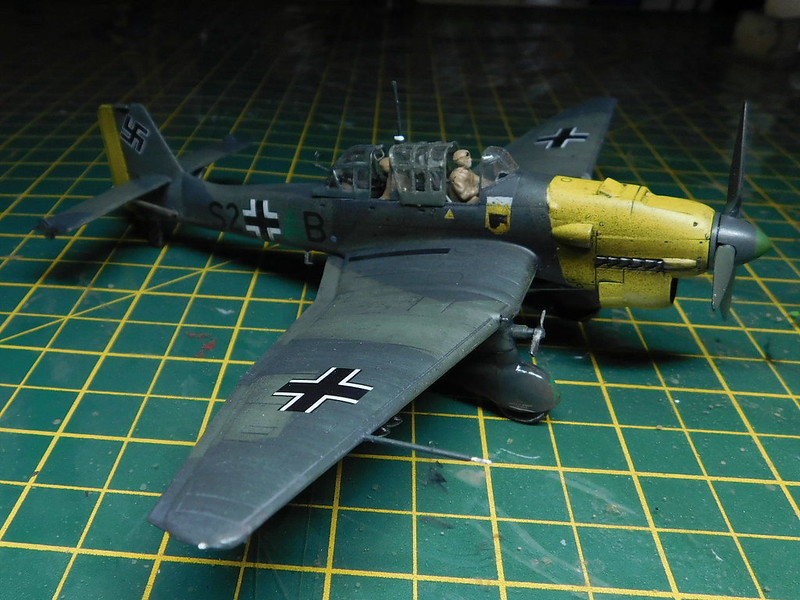
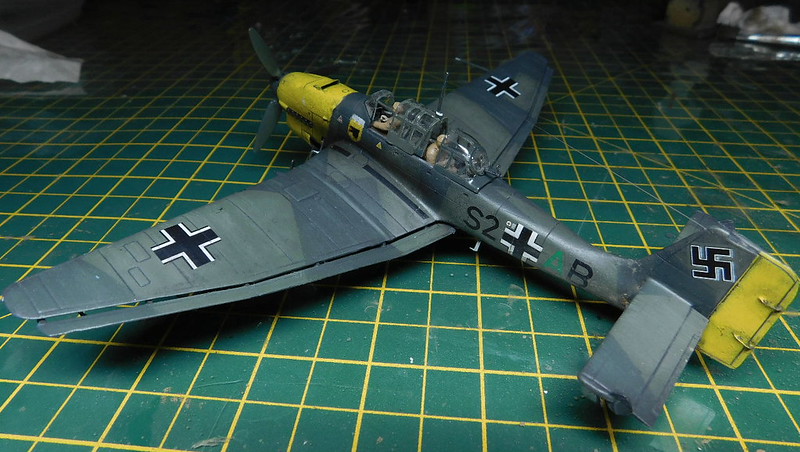

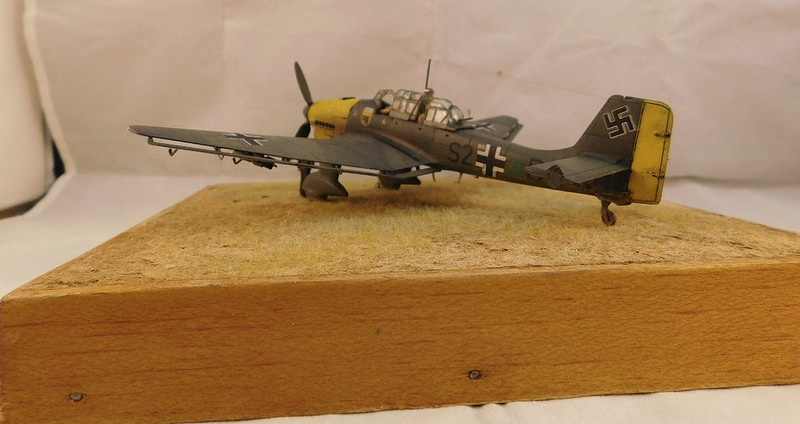
And then here is the end result. Simple dio with a couple of altered figures from Airfix. Also made a starting handle.
This aircraft was based in Greece in May 41 and i believe took part in Operation Mercury, the assault on Crete.


Overall, a nice kit. Detail kis deffinetly far better than the Fujimi kit and the fit is nice. A few let downs, a couple of which are minor and easy to fix, open area around the centre bomb crale and lack of cover for the pilts target viewing window. But the one piece open canopy just does work on this. It was fine for the Gladiator but not on a Stuka. And a Stuka canopy is not easy to cut open if the sliding pilots section is molded with the fixed centre section. And the lack of a Trop filter was a big let down.
But its a Stuka so i love it.
I joined in about the time Lewbud had passed away so the roster was never updated.
Good job on the A-10 Armor_Aficianado.
Lostagain, the Vengence is coming along nicely, cool looking paint scheme.
Another nice one Bish! Love those Stukas! How does it compare to the Academy kit?

John, could you add this to the completed paige when you do your next update?
The P-47 and the Stuka look great, congrats!
And a big thank you to Elizabeth Nash for renaming the GB in Larry’s memory!
Thanks JB. I would say they are pretty close in detail and fit. But if this was an 87D, i would put the Academy kit on top as the Airfix issues are not on the Academy kit. I was only really thinking of comparisons with the Fujimi kit as they are both B models, but would be interesting if Airfix did a SD or Academy a B.
Great finish on the Stuka Bish. Interesting to hear that a new Airfix kit still has a few issues. Good weathering with the flory washes
I have the decals on the Vengeance. They are Aussie Decals, and are a bit thick, but they conform well with decal solvent.
I reckon the letters are too big though and they don’t fit in like the instructions or the photos of the actual plane.
Hard to tell in the photo, the codes are in Sky Blue.

Thanks LA. I think its just Airfix trying to be clever and coming up with somthing different when they should just be keeping it simple.
Thats looking really nice, i see what you mean about the codes though, to me it looks as if the letter J is the problem. Its to wide and pushes everything else to the rear.
Thank you to the powers that be for the thread name change! [:)]
I’m calling this one finished. AMT F7F-3P Tigercat. So far the largest kit I’ve built since getting back into the hobby and I’m now pretty much out of shelf space.
The kit is built mostly OOB. I did get resin wheels to replace the kit wheels. The pilot figure is scrounged from some other kit. I like to have a pilot in the cockpit to give the build scale. There’s no weight in the nose to keep the plane from being a tail-sitter. If/when I put it on a base, I’ll fix that. The paint is Mr. Hobby/Color Navy Blue. I used Montex stencils for the first time and they worked out well. The mask fit the canopy and windscreen exactly. All the markings were painted using the Montex stencils and some homemade stencils from a friend who has a Cricut machine. The 20mm cannon barrels are aluminum tubing. The few decals are scrounged from my pile of old decal sheets. As always, comments and critique are welcome. BTW: I picked up the AMT F7F-3N at a swap meet recently for $10. The kit has been started. It has resin wheels and white metal landing gear was included.


If permitted, this is my next build for Close Air Support, a “what-if” F4U-1A Corsair with a 1000 lb bomb slung under the fuselage. I picked up this Tamiya kit at Jaxcon for $10. It’s kinda like an Eduard Overtrees kit. There were no instructions, no decals and a few parts missing. Still, it’s building up into a nice model. Right now the airplane is primed with Stynyl Rez black primer. Tomorrow I’ll wet sand the primer to get it ready for an NMF finish.


Tigercat turned out great Frank!
Thanks, keavdog.
It is starting to look like an airplane

Well, it took a bit longer than I’d thought, but I have now cleared my bench sufficiently to start on my entry - Airfix’s 1/72 Bristol Beaufighter TF X. There’s not much progress to report yet, just that I’ve made a start -
Obligatory sprue shot

This is a nicely-moulded kit, the detail on the cockpit side consoles is pretty decent and should paint up OK, the wheel wells are a bit basic but what’s there looks good (I might add a bit of plumbing to make these look a bit busier), and the panel lines are OK, although still a little overdone compared to, say, an Eduard kit. There are some mould seams, especially on the smaller parts, but nothing horrendous. I haven’t spotted any sink marks yet and, of the few ejector pin marks that there are, none will be visible when built. The heater pipe in the cockpit & WOP/AG position is missing, but that’s easily remedied, the undercarriage looks good, and so do the engines, for 1/72 scale. The IP is provided in decal form, which may be OK when the view into the cockpit is limited, but the Beau has a lot of glass, so I’ve got the Yahu IP, and a set of Pmask canopy masks (which also provide for the rear bubble/gunner’s position and wheel hubs).
Modest progress so far -

I’ve cleaned up the cockpit parts & started assembly, and airbrushed Tamiya cockpit green on the interior of the fuselage, wheel wells & U/C doors, as well as inside the engine cowling parts - which are actually going to be very oily & dirty, and basically black. Dunno why the instructions even suggest cockpit green, really. And I’ve painted the more obviously black bits black - tyres, props, engine parts etc.
So, as I said, not much to report yet, but I’m in. More to follow.
Stay safe,
Hutch.
A bit more progress to report on the Airfix Beaufighter - interior completed, dark brown oil wash, Tamiya tape harnesses - references indicate only lap straps for the Observer’s seat (not a WOP/AG as I had thought, although he basically did the same job).

The side consoles did paint up quite nicely, with a few spots of colour here & there, including some from gel pens, and the Yahu IP fits in nicely, too - miles better than any decal[:)]

The heater pipe was added to the starboard side, the red one above it is (I believe) an emergency hydraulic feed, from a reservoir tank in the fuselage (which I didn’t add, since it wouldn’t be seen). Both pipes came from a paper-clip, straightened out.

Joining the fuselage halves, I took it slowly, starting from the tail end & working forward. This worked well, but the nose end did need to be held together while the glue set, and there is a slight step, which will be easy to deal with. Incidentally, I’d read of how hard the cockpit section was to fit when the fuselage was glued, so I fitted it after fixing the rear of the fuselage, and the rest of the fuselage closed around it


During this process I was transported back to being about 10 & building the old Airfix Beau, in the back garden one summer’s day. Unfortunately, it seems the 10-year old me came to the present day & left a gluey fingerprint on the fuselage! Still, it’s away from anywhere tricky & should be a simple clean-up.
Then, with the fuselage joined up, I couldn’t resist dry-fitting the wings. I might need a tiny amount of filler on the port wing, but I may be able to avoid that with a bit of cleaning up - I haven’t looked closely yet. The other wing fits just fine.

Next steps are ailerons, tail, and undercarriage, probably not until the weekend, but you never know.
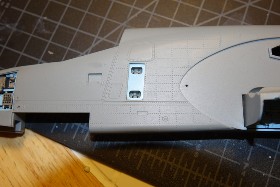
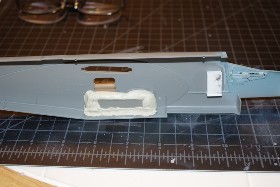
Some more work done. Wheels, dive brake holders installed and few more odds and ends

Finally got my photo-etch parts from Belgium to finish the foot steps with the metal reinforcement straps that the real deal has inside. I ended up cutting up a couple of the pieces in a 1:48 scale Su-2 photo-etch kit to make them. Glued them in and then applied Mr. Metal Primer, followed by painting with Tamiya Metallic Grey.
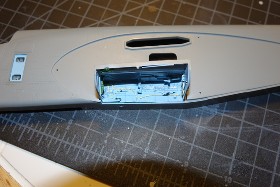
Also attached the Aires main gear wells to the fuselage halves. Had to do a quick, complete mockup of both engine nacelles to see what sequence things had to go together when the Aires wells were permanently attached. Once I was sure of assembly sequence, alignment, and fit, I used Apoxie Clay to permanently attach the gear wells and then took the engine nacelles back apart after everything cured. Now I’m working on all of the details inside the gear wells.
Castel Nuovo, the paintwork’s looking good on that SBD.
Like the detail going into the Frogfoot, Eaglecash. I do like that plane, it looks like what it is - a modern-day Stormovik.
I got some more done on the Beau -
Wings, nose, & tail fitted, seams cleaned up (and gluey fingerprint removed![:)]) -

The gap in the port wing joint was filled, as was a much smaller gap on the starboard side, and both needed treatment at the very front. Given the (so far) excellent fit of parts, and the fact I haven’t heard of anyone else finding this, I presume it’s down to me.
The transparent parts are very thin, and beautifully clear -

These are now masked up ready for paint, but I haven’t attached the rear bubble/gun position yet, since it would cover up a small part of the fuselage. The front cockpit glass is, however, now fixed with tiny drops of Tamiya Extra Thin. The fit of the part was perfect, so capillary action spread the glue along the joint. The whole landing light panel is moulded as a transparency, the Pmask set provides a mask for the lens, so this was applied & the part fitted.

The engine cylinders were assembled, and I’d read that the well-known problem with the fit of the cowlings could be helped by filing down the ends of the cylinders. This must apply only to the front circle of cylinders, since the others are moulded with their attachment ring around them, we’ll see how it works! The engines were painted black, then airbrushed with aluminium so as to leave dark shadows. When this dried, a black oil wash was applied fairly heavily, then partly removed with a paper towel, and I like the colour & texture this produced.

Maybe a thin brown wash will go on over it, but I haven’t made up my mind yet. I’ll try a dry fit in the cowlings & see how they look.
So, I think we’re just about ready for a coat of primer, probably next weekend, so more to come, same bat-time, same bat-channel!
Stay safe,
Hutch.
This entry is a “what-if” fictional “P-74” Corsair fighter-bomber. The kit is Tamiya’s F4U-1A. The build depicts a Corsair assigned to the 527th FS, 86th FG, Pisa, Italy, 1944. The primary mission of the 86th FG was close air support. The reason for this build is I just wanted to see how an NMF Corsair would look wearing USAAC livery. Kinda flashy, I think. The 86th Fighter Group website: http://www.86fighterbombergroup.com/

 .
.
Coming up next? Not sure yet.