68, nice to see this together, looking nice.
Shooter, wow, that was close. Was there any other damage in the area.
68, nice to see this together, looking nice.
Shooter, wow, that was close. Was there any other damage in the area.
Scott…Whew! Dodged the bullet for sure! Say, that’s a nice pad for a rent house!
68- Nice progress on the Stuka. Keep bringin’ pics.
WOW Three of them and I got my hands full with just one. Are those the Hasegawa birds?
I walked around the neighborhood this morning and I’m the only one that had a fallen tree. Typical luck, but the crew did get out here this afternoon and got it all cleared away under 2 hours and the yard looks better without the tree.
Got the straps on the gun mags done but not much else due to other commitments. A test fit of putting the fuselage halves together shows I’m not going to have any issues there. I found that I can spread the engine mounts apart to add the motor at a later date so I could close her up now, something I might do over the weekend.
I knew it. I just knew it. Clemens’ madness is contagious. [;)]
Looking good, 68!
68, yikes…that’s too close. Glad there was no damage to anything of yours. Must have been your lucky day.
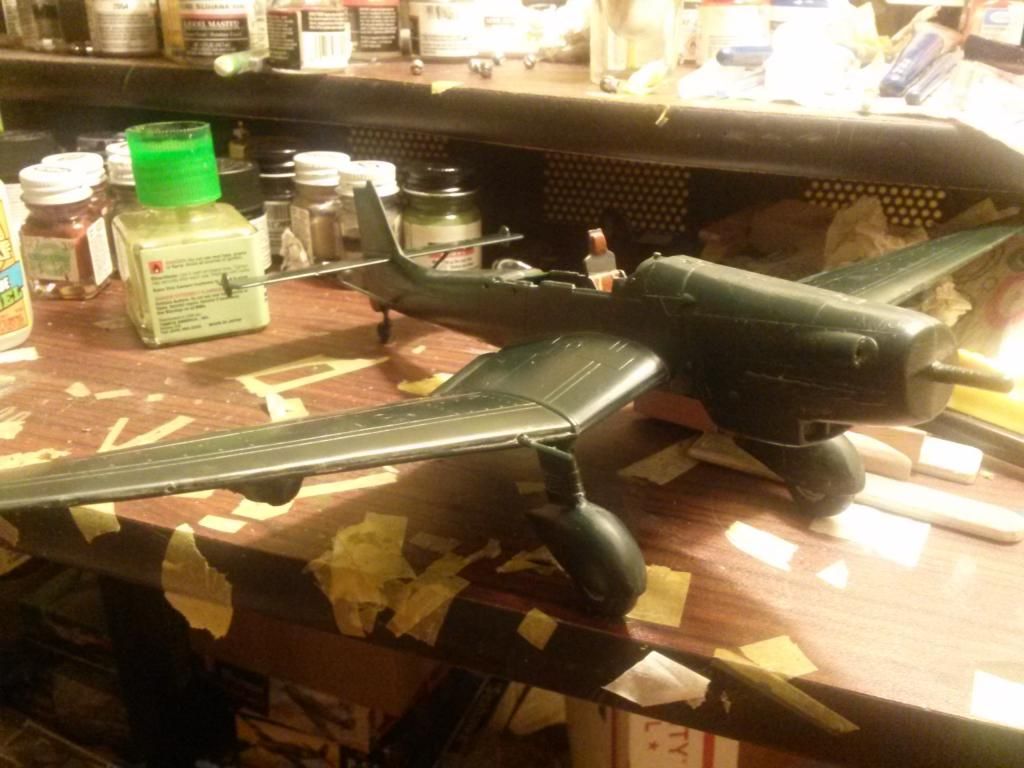
Here is how she sits now.  Now the clear parts are horrible. I’m not sure if it was this way with all the '83 Monogram Stukas, or just mine. Having the canopy closed as I originally planned is out of the question. I may be able to have the front canopy open, and have that cover up the other ones. We shall see though.
68, you have some production line going there.
Shooter, well, at least there was no damage. Look forward to seeing more pics.
Nice progress ajd. have you considered a vacform canopy.
There aint no way I’d tackle a project like that! You are the man is all’s I’ve gotta say. Wow. I believe those to be Revellograms right?
Fujimi’s
Wow! I was waaaaaaaaaaaaay off on that one!!! lol
Ed: Those 4 Stukas are looking good!
Scott: That really was close. Good to know the tree didn’t cause any damage to anything but itself.
ajd: Nice progress on your side as well!
Greg: Yeah, damn right it is! If you only knew the power of the Dark Side…
A technical question for the Stuka Expertens…In the gunner area, wouldn’t the leather restraining strap which runs across the fuselage wall, hang down disconnected on one side until the gunner is seated?
I test fitted the strap and looking at it, it would seem to be an hindrance in climbing in and out of the cockpit. So I figure it must be detached on side or the other.
I got the fuselage glued together and installed the inboard angled wing spars, have some seam filling to do on the bottom of both but the top looks almost seamless. Might have some seam issues with the wings when I get to that. I been putting off on finishing the pilot seat but it can wait, still have that engine to paint and install. All in all it is going together smoother than the 190 did. This girl is BIG! I can only imagine what the Airfix Mosquito must be like.
I suppose it’s time for another update on my Hobby-Gram Stuka. I admit that I haven’t worked on this model very much recently, as I was laid off from work last month and that has put a damper on my enthusiasm for much of anything. Everyone in this thread has been doing some really nice work, and it helps encourage me a bit to get back to finishing, so I am grateful to all of you for that.
First, here something that I decided was a failure, and removed after completion. The wing walkways on the Stuka G2 were 3 strips instead of a single wide one, and I tried to replicate these with some sticky label paper. But I put the strips on too far apart and they just appeared too thick, so I removed them. Sometimes you just have to try something to find out it doesn’t work.
You might be able to tell that I cut a small piece of plastic and glued a punched out piece of foil for the landing light in the wing. That I kept.
Then it was gluing pieces together and filling and puttying. Nothing spectacular or interesting there. I then put the canopy pieces together, masked it with tape and glued it in place with tacky glue. Openings to the radiators were stuffed with wet tissue and she was ready to be primed.
I used Tamiya Fine Surface Primer for the first time on this model. It went down smoothly and dryed quickly. I was pleased with the result, tho it does require quite a bit of spraying to cover as it really is “fine”.
That’s where she stands right now, tho I may try to get the bottom color of Tamiya AS-5, Light Blue Luftwaffe on later. Depends on the humidity.
Till next time, and thanks for looking.
Gary
Sorry to hear about the lay-off news Gary; I know that story all too well. Kind of takes the wind out of your sails to say the least.
The model looks superb. I’ve tried bare metal foil for the wing walk area you’re talking about on a 1/48 Stuka I did a while back. It worked out pretty well but was tedious with no margin for error in the cuts. Perhaps you could use something like Humbrol metal cote and just tape it off.
As for mine, I’m done and have pics just need to post. I’m in the process of moving so they’ve been sitting in photo bucket. I’m a little intimidated by all the great work here but will hold my breath and post them this week end.
Looks like you made some good progress, Gary! I can’t wait to see her painted!
Sorry for my absence guys. Been away for a few days and thought I would be able to get online, but unfortunately I wasn’t.
Shooter, on my previous two builds, I had attached the strap on both sides. But what you say makes perfect sense, I had just not considered it.I imagine it would have been easy enough for the gunner to clip and unclip the strap.
Gary, I have not had much work since March. Luckily I have had some saving’s to fall back on. I actually don’t mind not working, unfortunately I am now at the point where I have to pull my finger out. The past few months have given me loads of modelling time which has been a real bonus. The Stuka is looking good, be nice to see some colour on it.
Mikey, look forward to seeing those final pics.
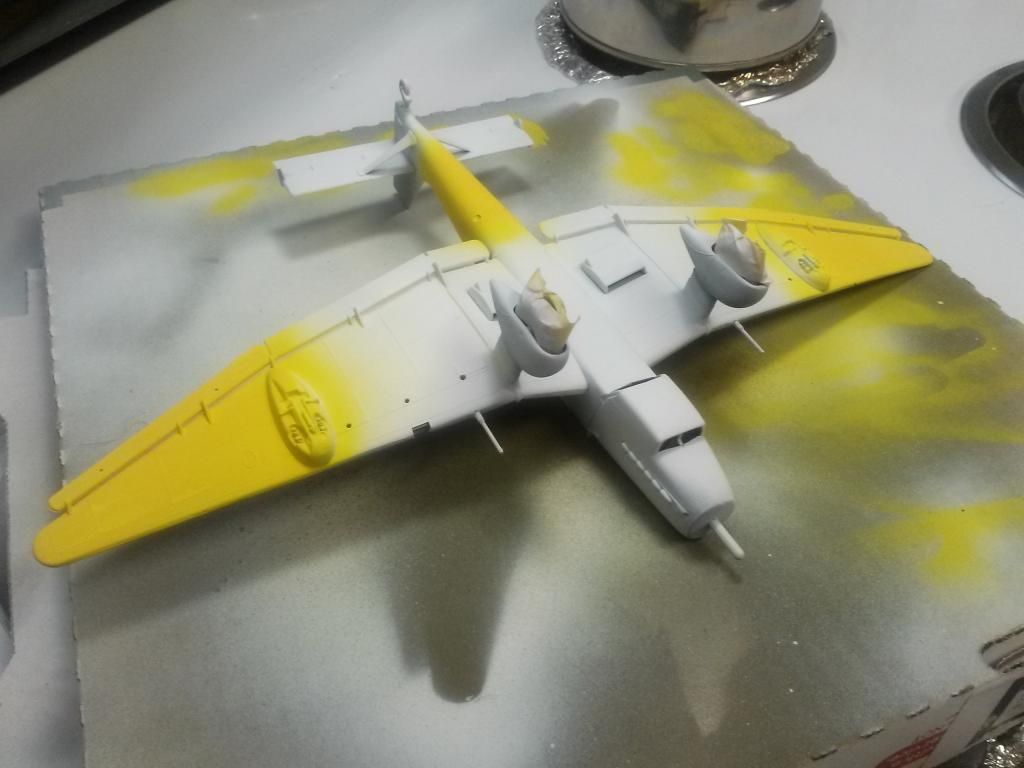
Well not much progress, but figured I would bump this back up.  Got a nice smooth base of flat white on the under surfaces, and then airbrushed some XF-3 flat yellow for theater markings. I’ll get some rlm 65 on tomorrow, and maybe even the rlm 71 on top if I’m lucky.
Looking nice aj, be even better with the rest of the paint on.
Looks like your nailin’ her down there with the paint there adj! Looking forward to seeing the outcome on the bottom side here.