Well it’s not much but I got the gun glued to the turret. Next up is the tedious process of painting rubber road wheels.
6 Likes
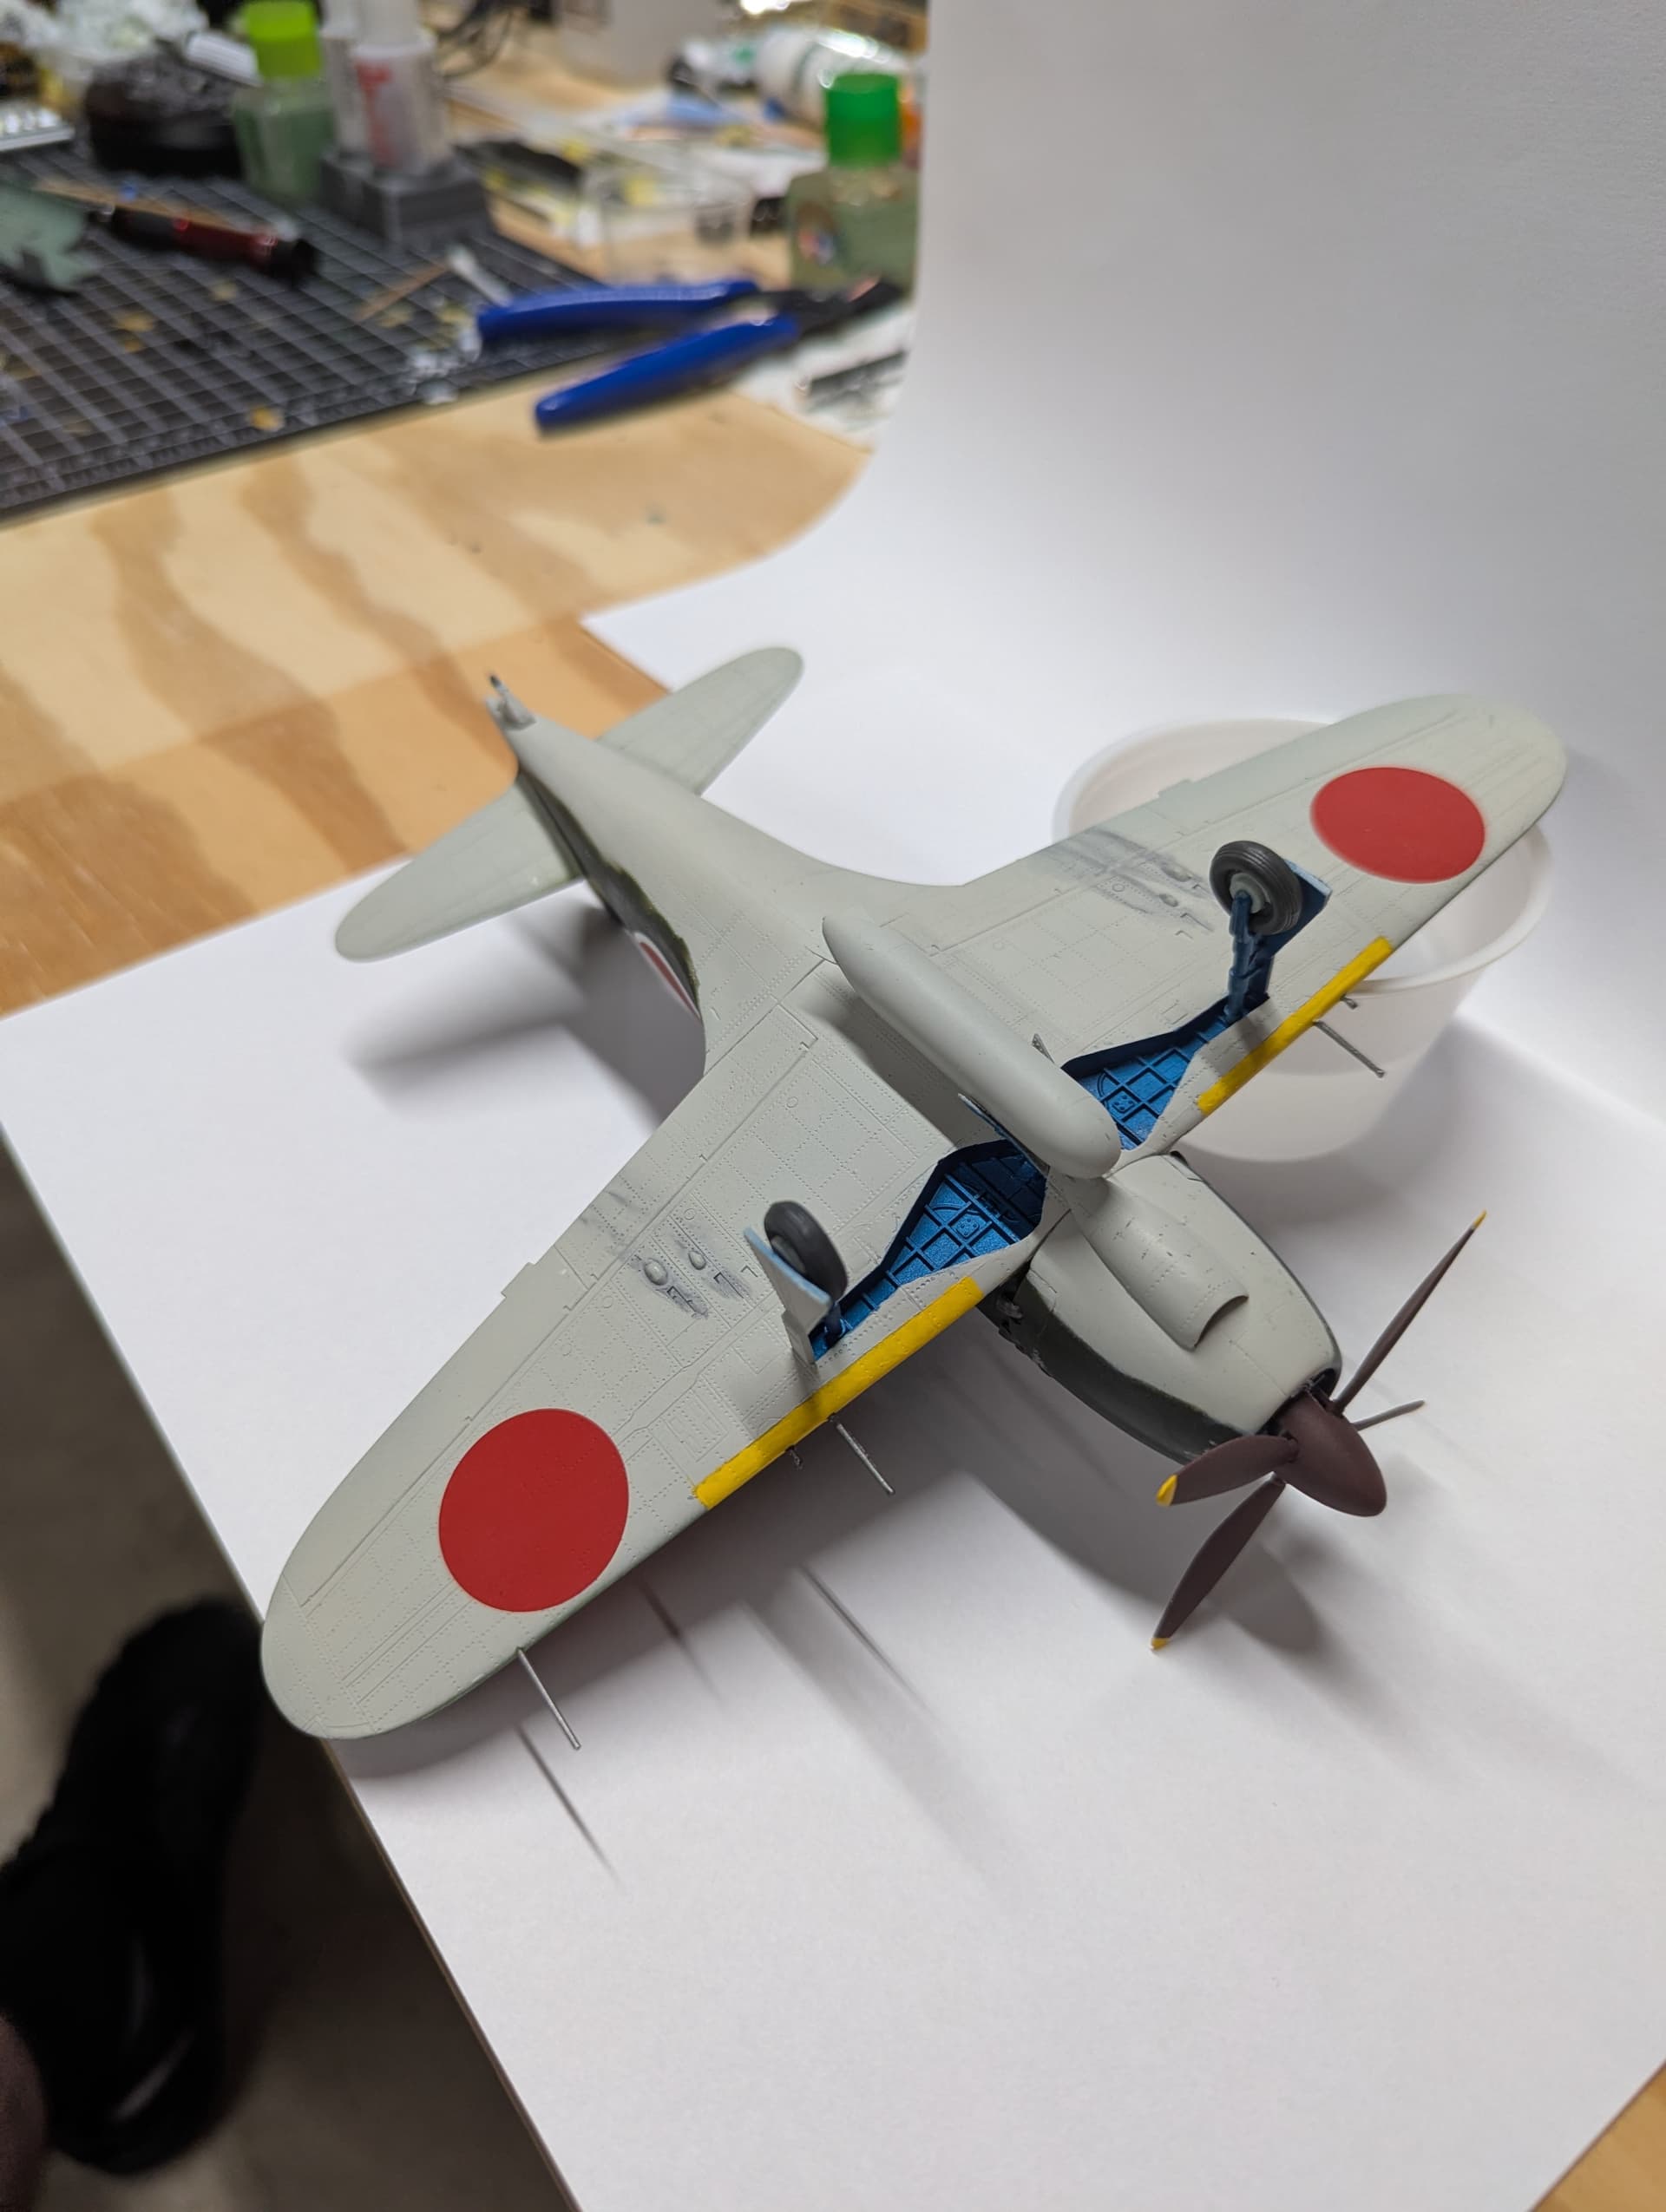
It’s not perfect but I’m going to call the Raiden done, mainly because I don’t want to try to pry the canopy off to try to touch up the interior paint. The antenna also kept giving me grief and I had to go to extreme measures to hold it in place.


Thanks for letting me participate! I really enjoy these group builds. Now I can go work on my Beaufort in the Battle of Britain group build.
6 Likes
Nice job on the Raiden. One of my favorite Japanese aircraft - real hotrod.
1 Like
Nice job on the Raiden. And just like you, now I am doing my hurricane for the bob group build.
2 Likes
Been a while since I updated, but work is close to done.
1 Like
I love the way this is coming together. A very cool looking tank that I was not aware existed prior to this GB ![]()
1 Like
Thanks for participating in our little GB @dadoffour.
Your Raiden looks great. I will show it to my two boys who for some reason found out about the J2M via a WW2 video game and always ask me when I am going to build the one in my stash.
Remember, No kit or build is perfect. Here is my checklist for a successful group build experience:
- Had Fun
- Learned Something
- Made Friends (Virtual or otherwise)
- Shared The Hobby with Others
- Earned Points… Oh, no! No, no, no!.. I did not mean that last one. Why isn’t my delete key working??? here we go again! Grrrrr!
Happy Modeling
2 Likes
- Check
- Check
- Check
- Check
- Points??? Cha ching!
2 Likes
I am very happy seeing such fine modelling and reading so interesting topics from all you folks in this GB.
While finishing assembly and painting, I somehow messed up the cowling fit. This was purely my fault, not TAMIYA, since when I had dry fitted earlier, this fit was Lego-type impeccable (I - wrongly - applied a heavy coat of CA glue to secure the exhausts, then this created an offset that I had to grind down and something was lost on the way). Had to fix it with some plastic sheet.
Anyhow, below some progress pics. Movable canopy section and antenna mast remain to be fitted.


5 Likes
Way to recover from your self-induced fit problem @Zvezda1980. Failure is always the best teacher! And it’s always nice when our failure is fixable. Your Zeke is looking very nice. I look forward to adding it to the wall soon!
1 Like
Very nicely done @Zvezda1980 . Great recovery. Your zero looks great.
1 Like
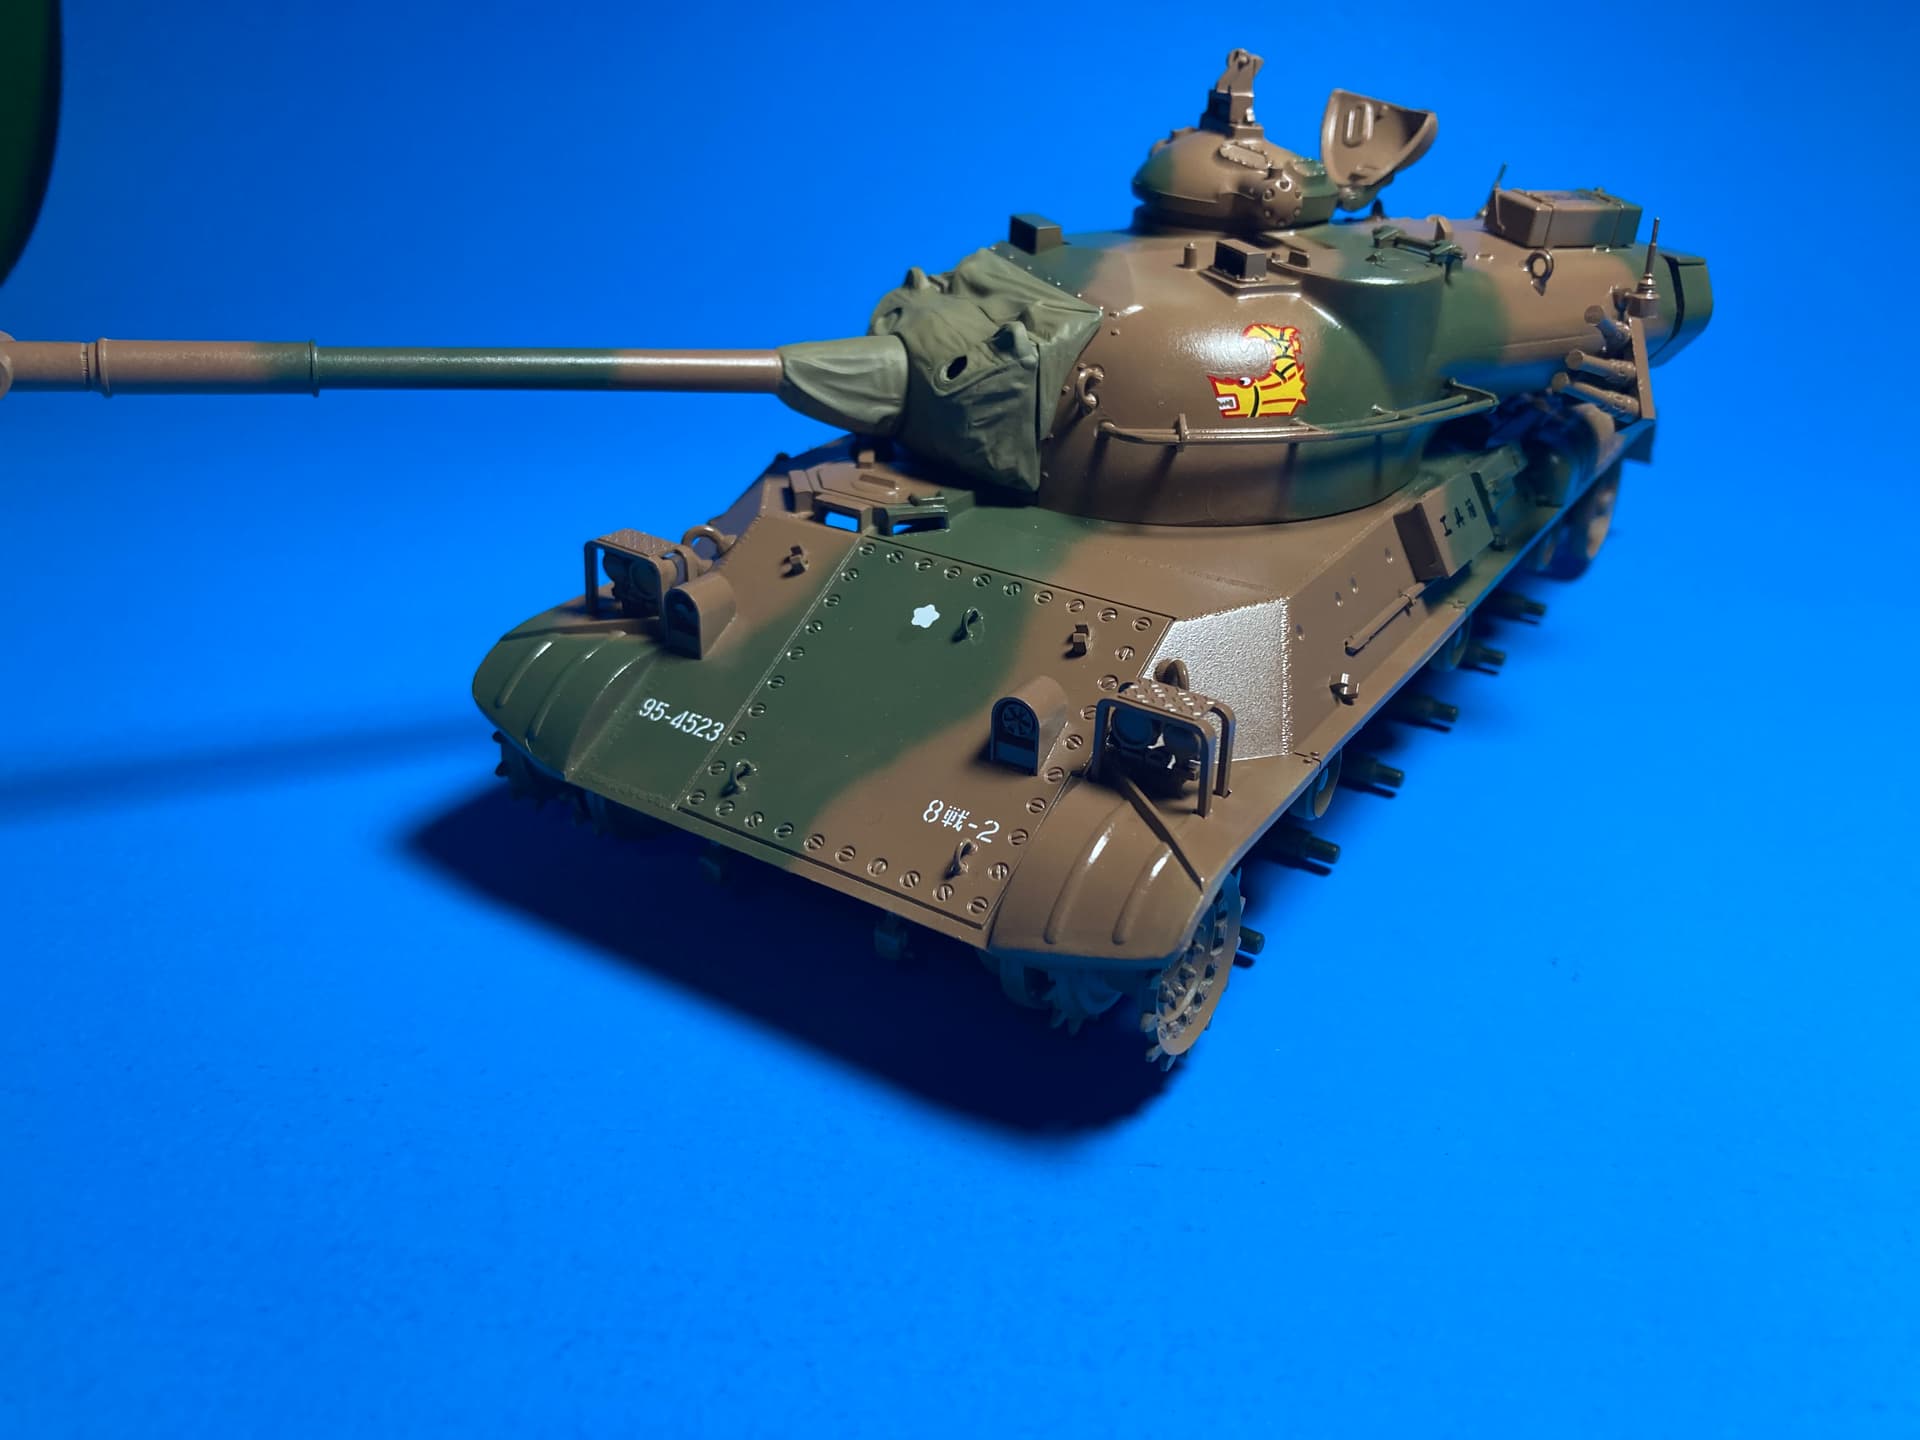
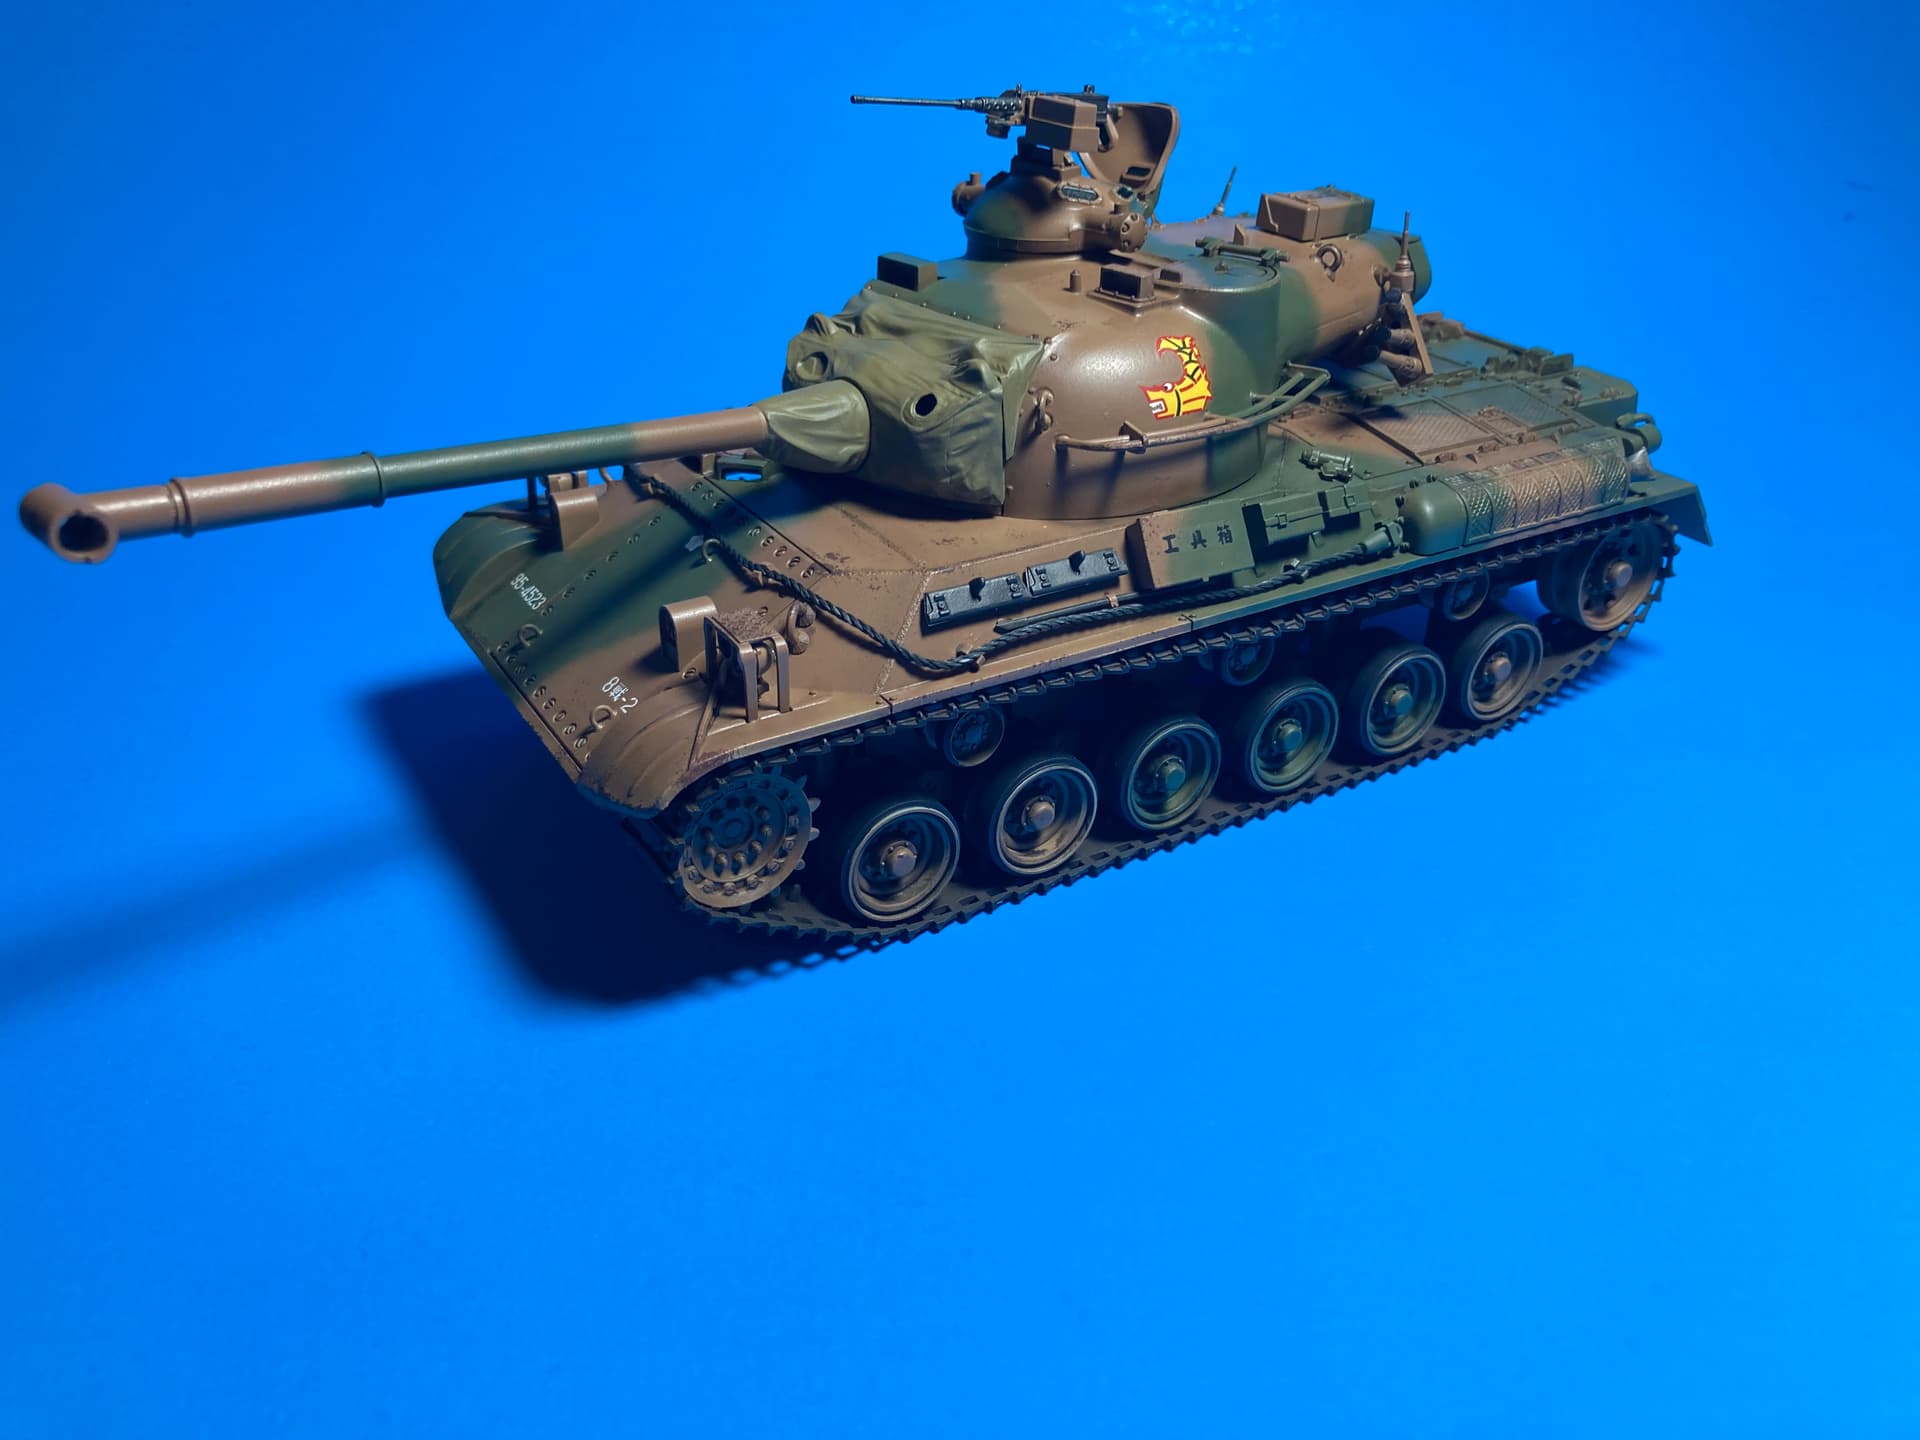
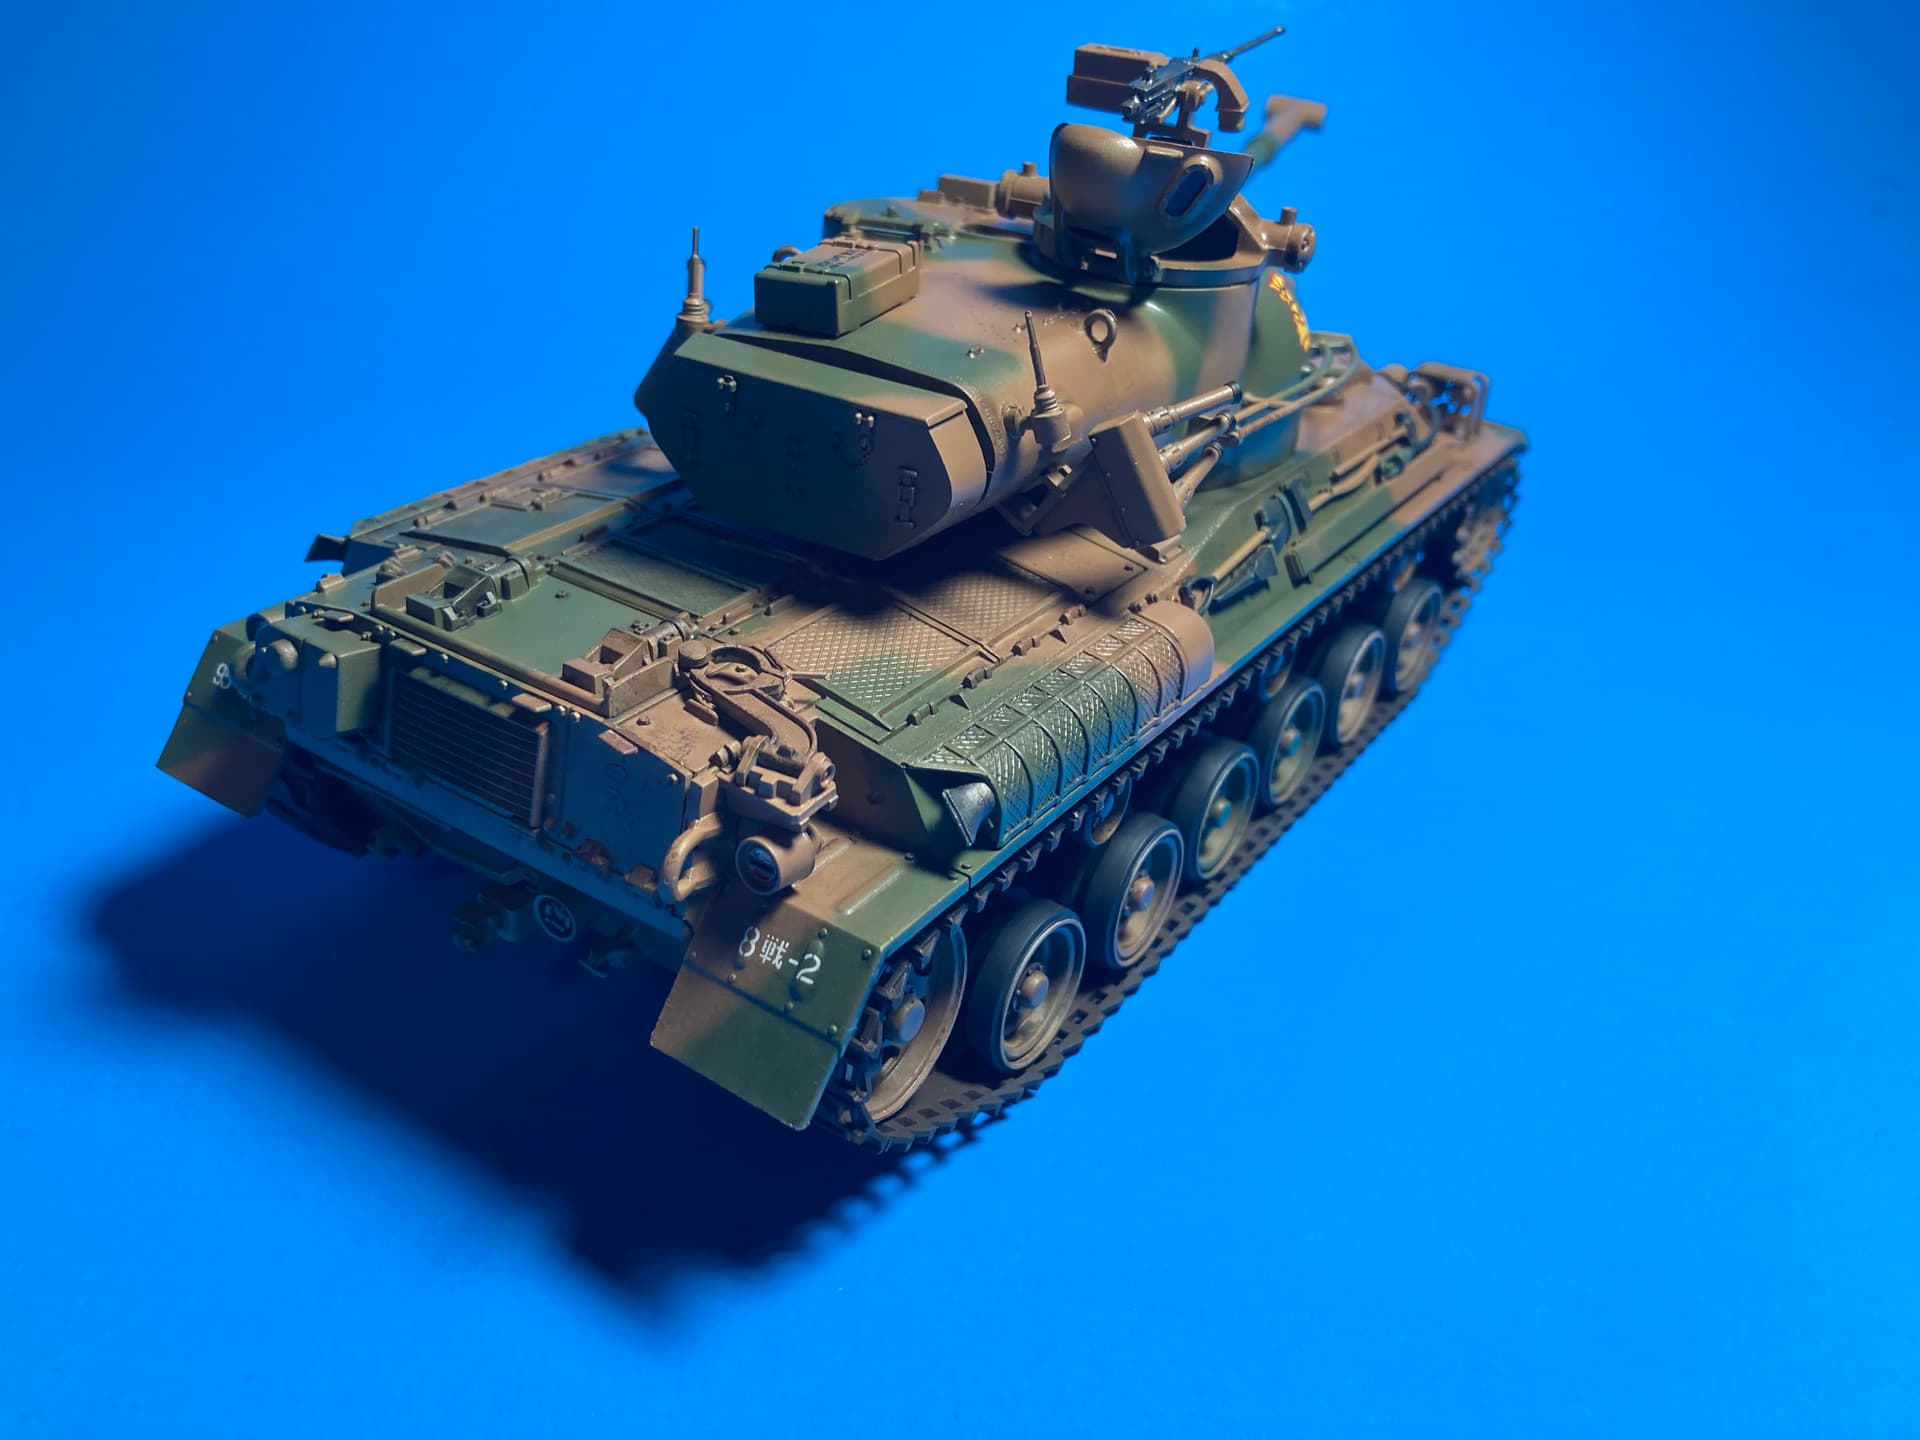
Type 61 is almost done think I just have the commander left. Decided to only do some chipping and a dark green wash on the model.

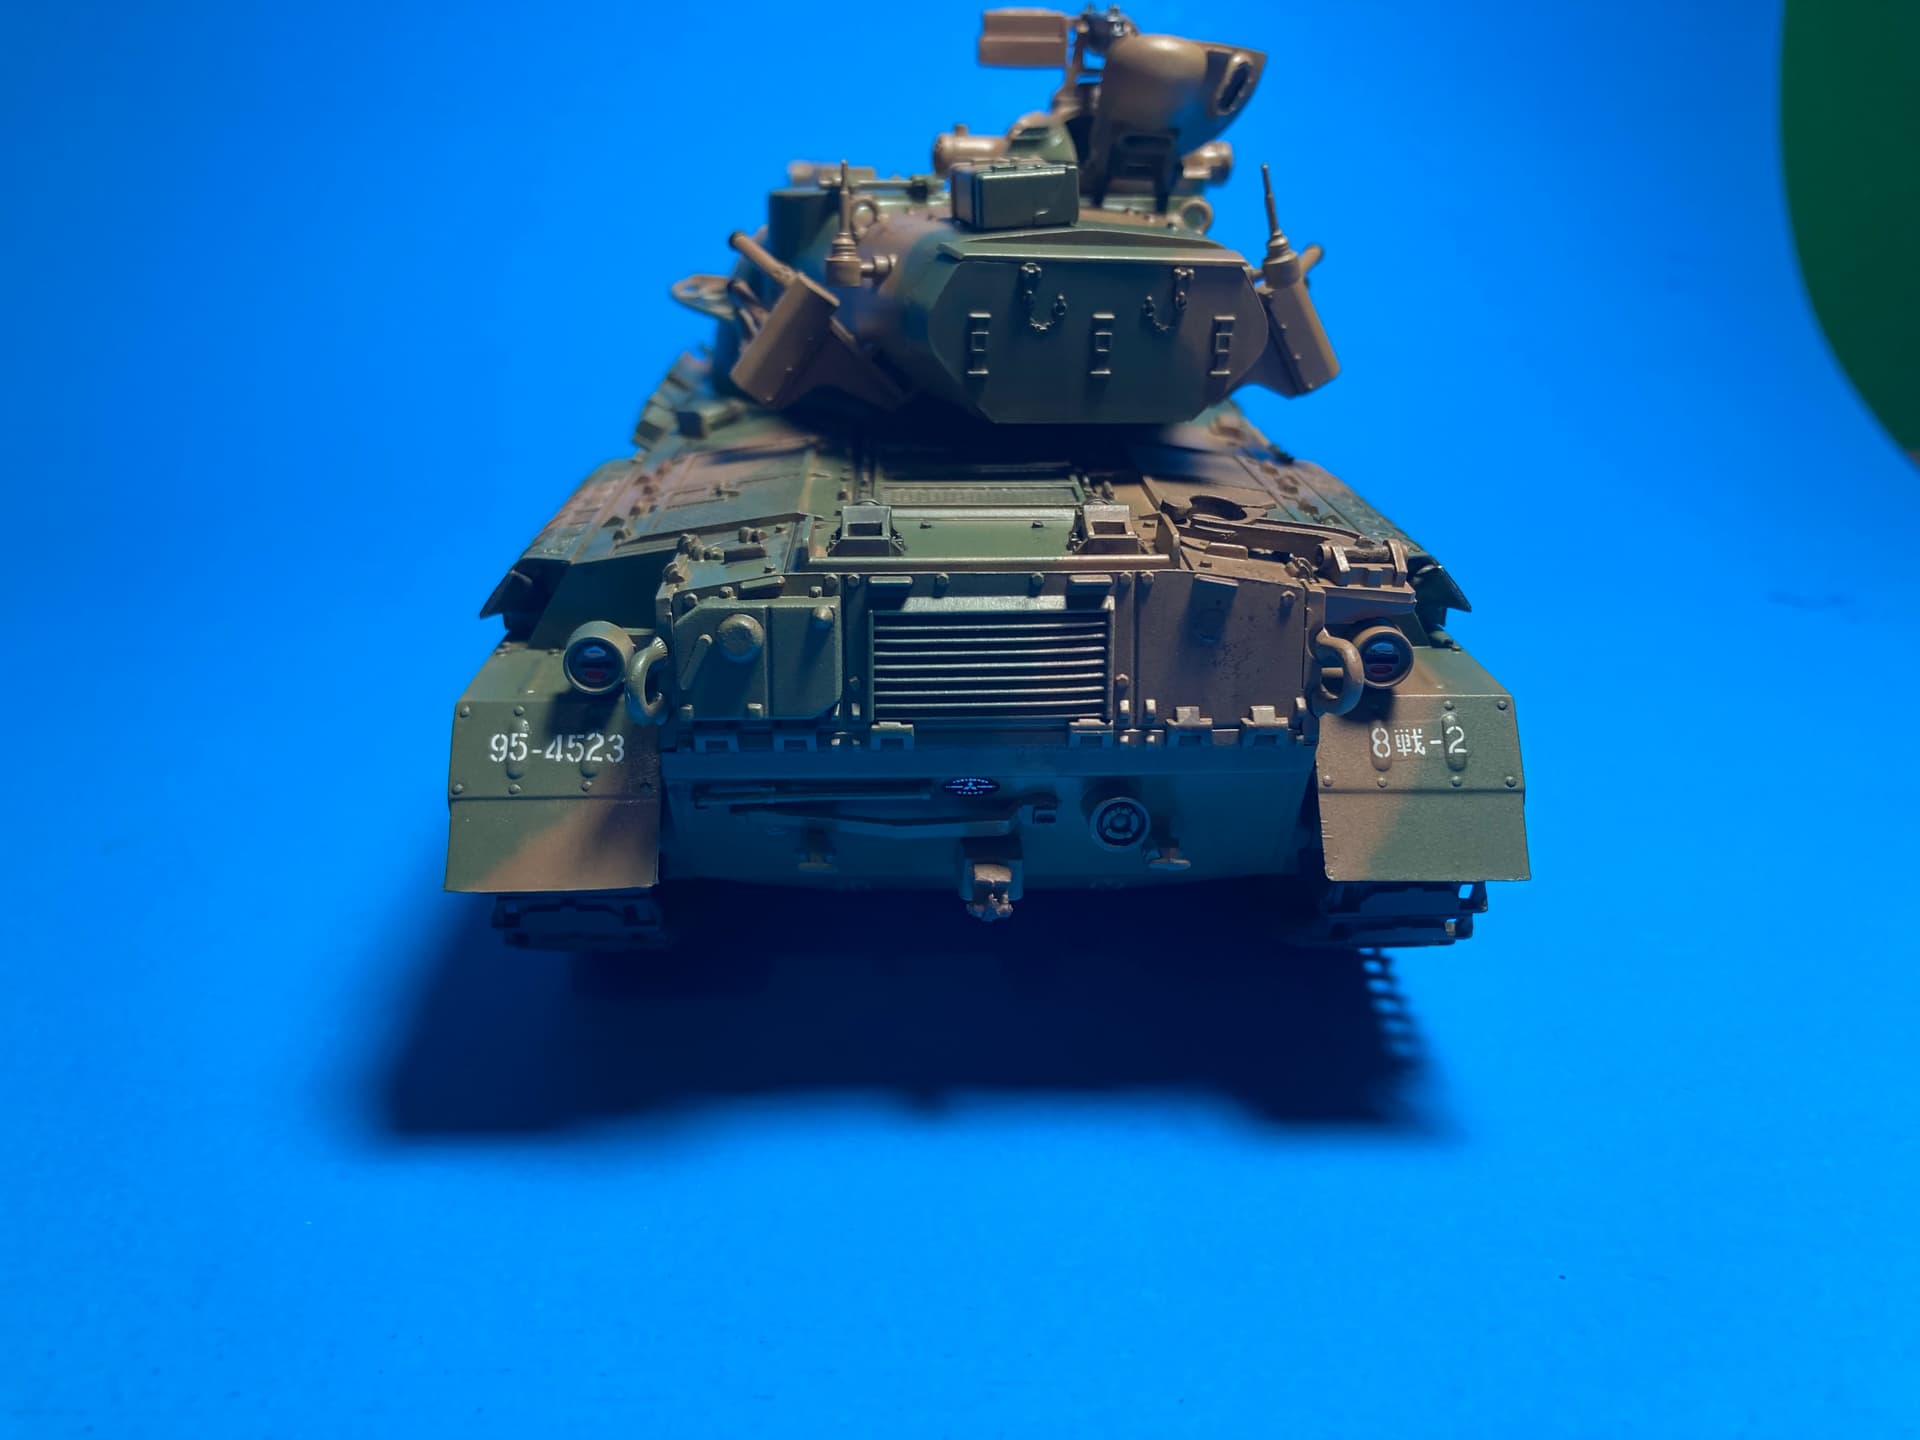
10 Likes
That looks great! Yep! The commander needs to be there pointing or something “commander-like”.
3 Likes
Beautiful colors and the gun mantlet cover is outstanding.
1 Like
I finally managed to complete this little kit. A sludge oil wash was applied, as well as some dark grey pastels for the exhaust stains & heat discoloration. Chipping was kept to a minimum, mostly where people would step on to enter the cockpit.
This build was inspired after reading (last summer) the fantastic book of Thomas McKelvey Cleaver “Under the Southern Cross: The South Pacific Air Campaign Against Rabaul” . This Zeke has just arrived up from Truk, with landing hook still in place and due to participate in the dramatic fights over Rabaul and Bougainville .
The kit is a perfect specimen of outstanding TAMIYA engineering and I will certainly build more of them (Zeke’s, Zero’s & Humps) in the near future.
I wish to warmly thank our host and all participants of this GB.
Some selected photos below


3 Likes
@Zvezda1980 Nice work on the A6M5. Tamiya does make some of the best models ever. I’ve never done a 72nd scale Tamiya kit, and tend to shy away from them (single engine fighters) since the panel lines always seem to be more akin to Grand Canyons and small parts always look out of scale (to my eyes, anyway). But I see no evidence of that in your Zero. I actually thought it was their 48th scale kit until I saw the 72nd designation on the box.
1 Like
Your A6M5 came out wonderful Zvezda. Now you will need to build Boyington’s F4U to keep it company. Now which of these photos do you want me to use on the wall? I am thinking photo #6 ?
1 Like
Thanks for the kind words, could be better, some mistakes were made, but I enjoyed it.
Photo-6 is fine. And indeed, Pappy’s Corsair is in the imminent To-Do list ![]()
1 Like
Thank you. Indeed, their specific A6M kits stand out from the average 1/72 offerings.
1 Like
The "Pete"is looking great! Your weathering and panel lines work really “POP!” You’re doing a fantastic job on this kit.
1 Like