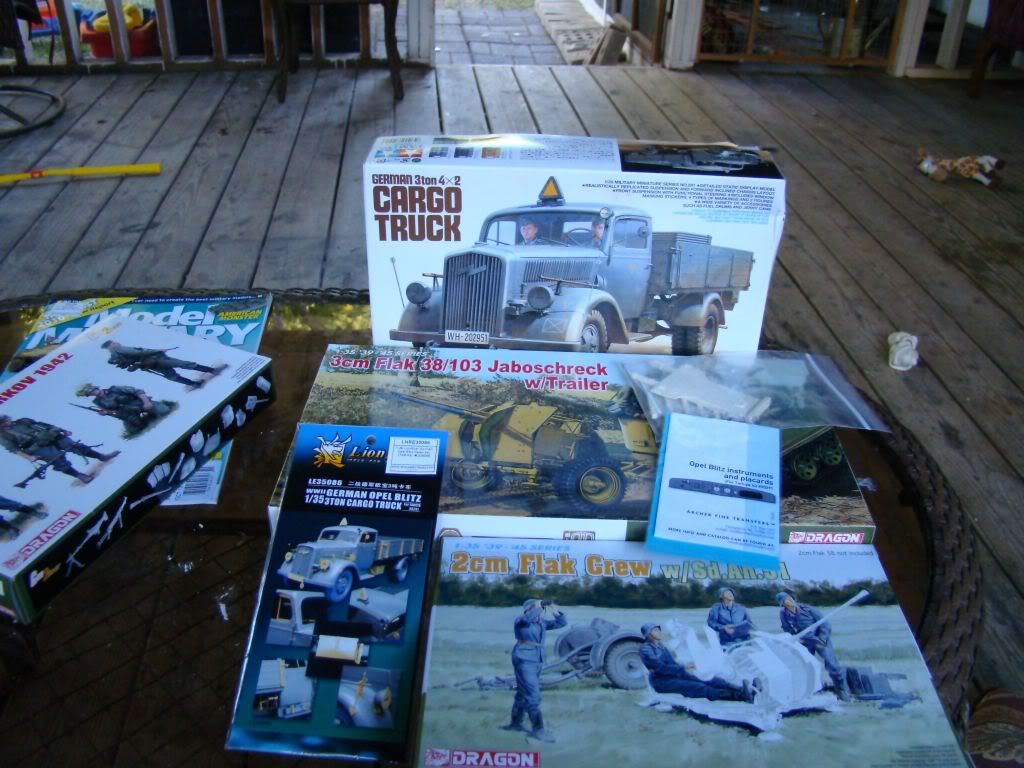
Here is my latest project I will be working on. I wanted to do an Opel Blitz that has been converted over into a mobile flak gun mounting a 3cm flak 38/103. This will be somewhere in Germany in 45 with the truck being crewed by Luftwaffe gunners trying desperately to shoot down an allied fighter. For this build I will be using
Tamiya Opel Blitz
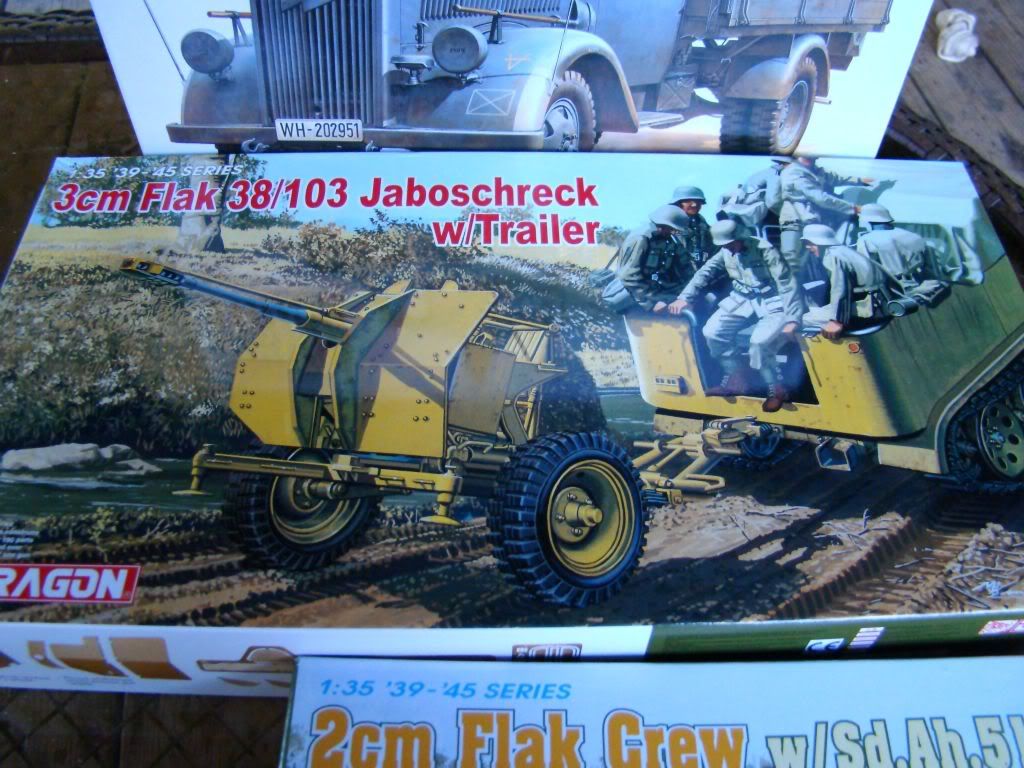
Dragon 3cm Flak 38/103 Jaboschreck
Dragon 2cm Flak Crew
Hussar Opel Blitz Late Wheels (still to arrive)
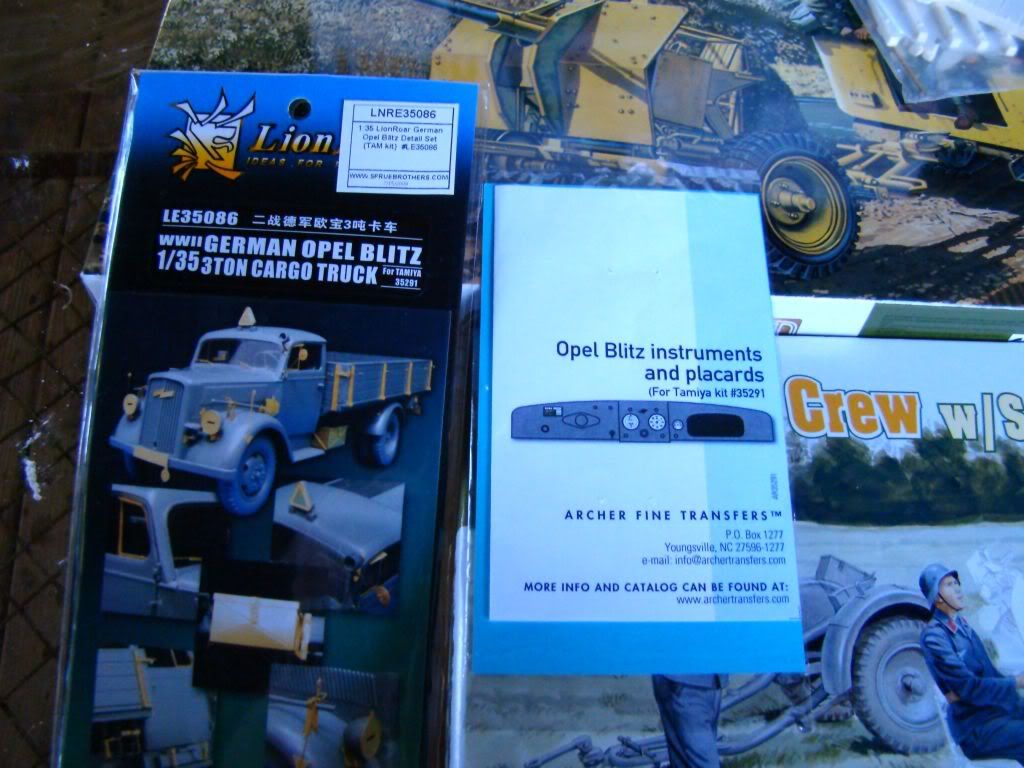
Lion Roar Opel Blitz Detail Set
Archer Opel Blitz Instruments and Placards
Masterpiece Flak Sled
Bronco Sd.Ah.52 Ammunition Carriage Trailer (possible?)
I am not too sure if I want to use the trailer or not or even if the truck was capable of towing it after the gun was mounted to the bed. I do not know much about the gun it’s self since info on it is hard to find, but seeing how desperate the Germans were during the final months of the war, I can see this thing being mounted to a truck for extra mobility and ease of operation.
Chris
Sounds like an interesting project… However, there is no known instance of this weapon being mounted on the Opel truck. They were delivered in early 1945 mounted on Steyr 2000A trucks though.
(I’m sure the usual it is your model, do what you like, have fun, its only a hobby blah blah blah will follow…)
Granit, the only real info I could find on this weapon were mounted on styer trucks. I did however come across a field improvised gun mount made out of scrap wood and metal to make some sort of tripod. But then again in the final days of the war, anything could have been possible crews slapping guns onto anything that moved and worked or not work.
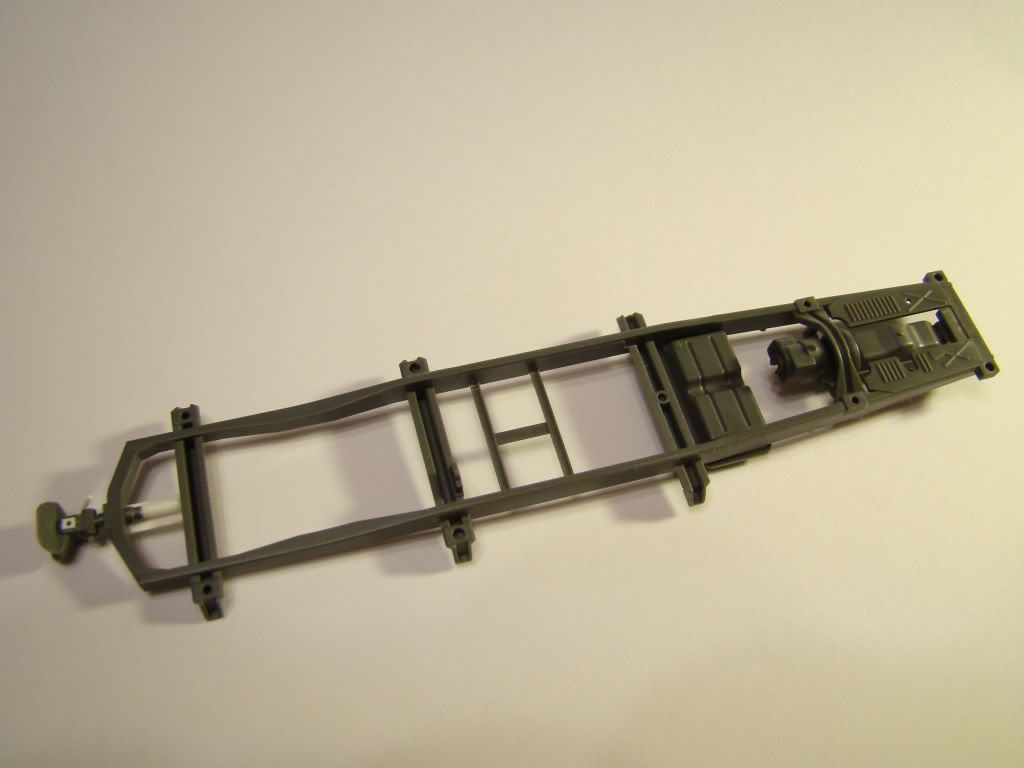
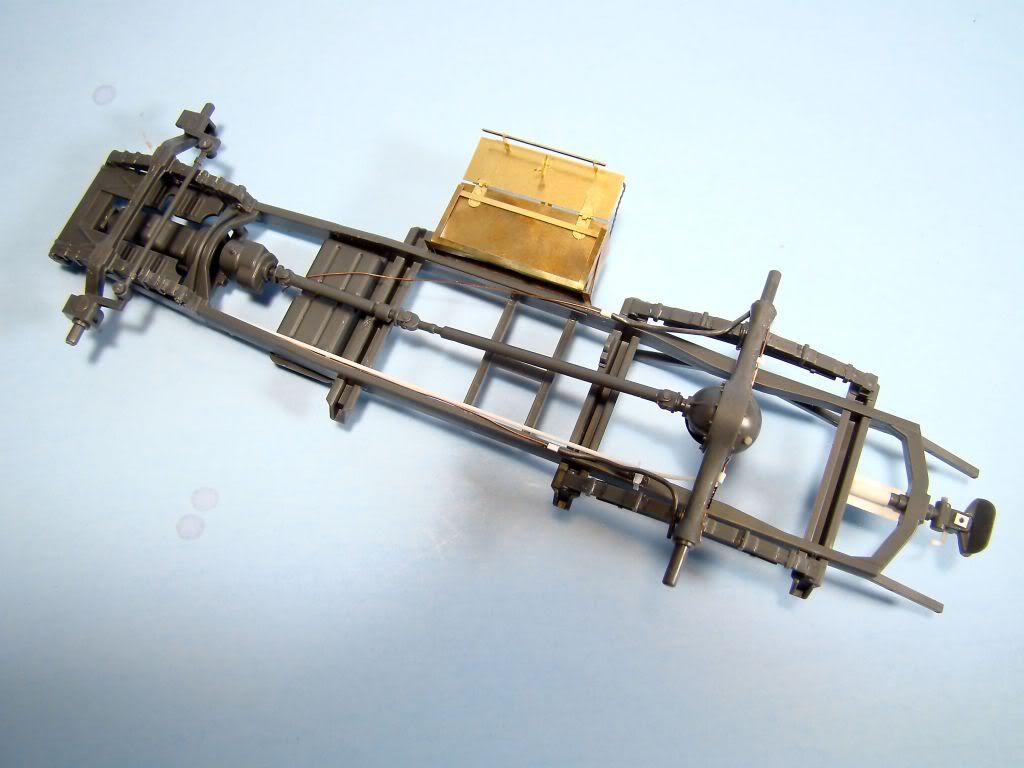
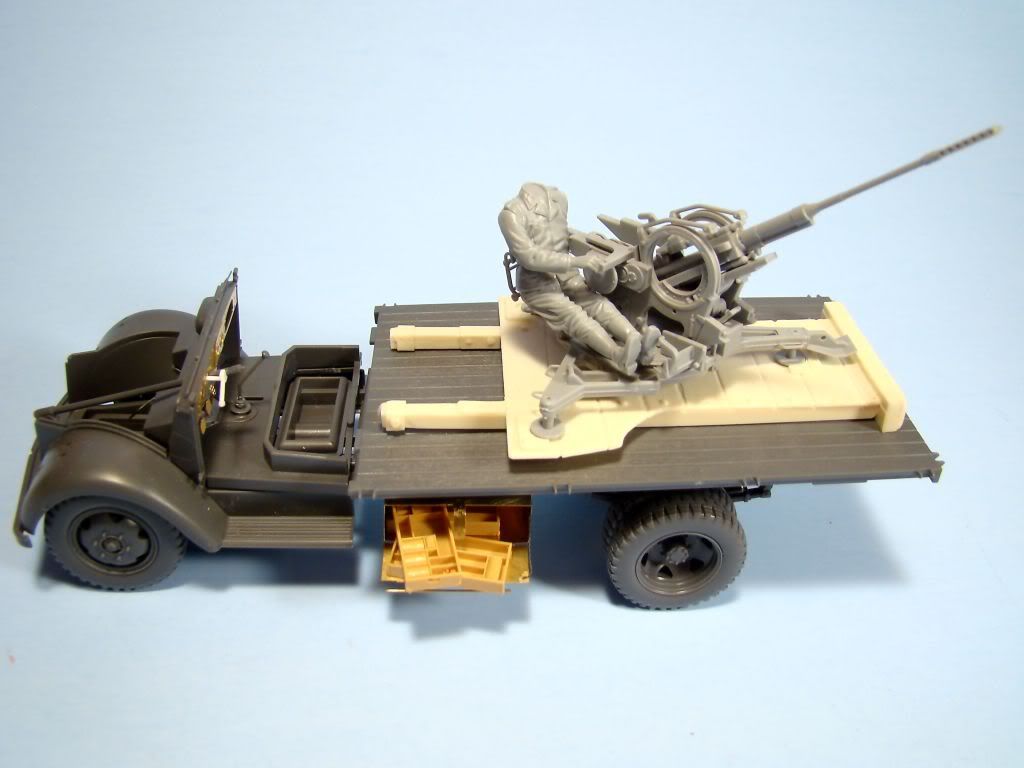
Just begun assembling the chassis frame for the truck today. I sanded down all the mold lines on the frame prepping for some basic details to follow later. I did some simple work to enhance the towing pintle as this could use some extra detail. I added some plastic rod, sheet, and resin blots to the hitch area to mimic the details seen in the Kagero book. I also plan to add some simple wire and plumbing to the frame.
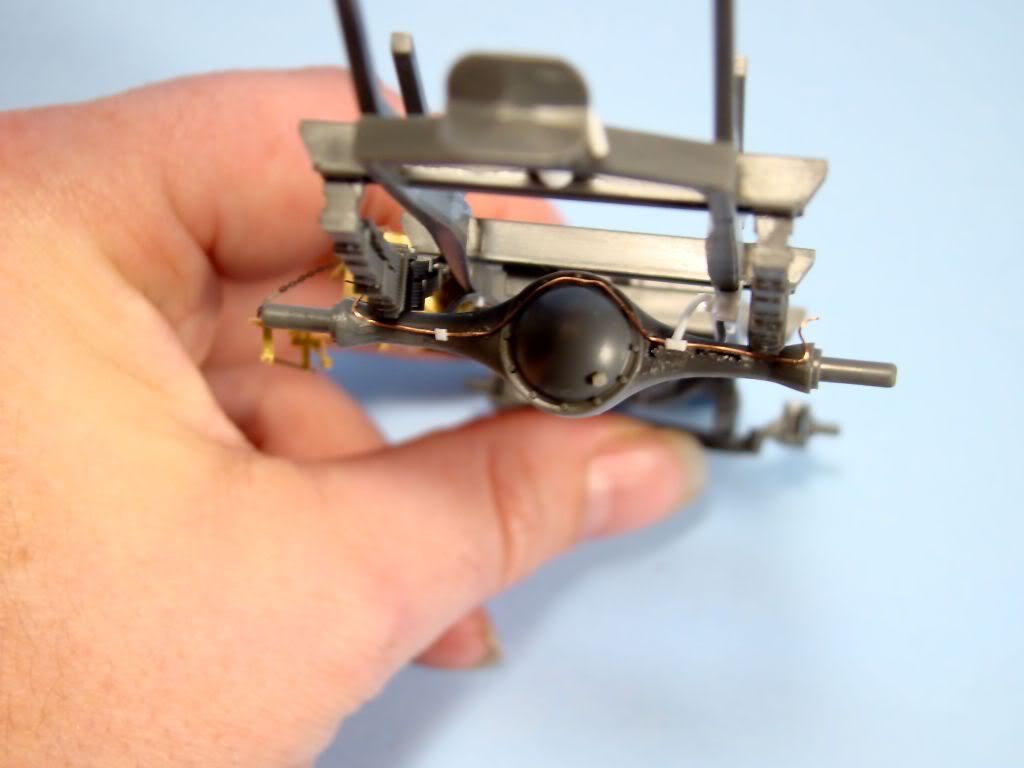
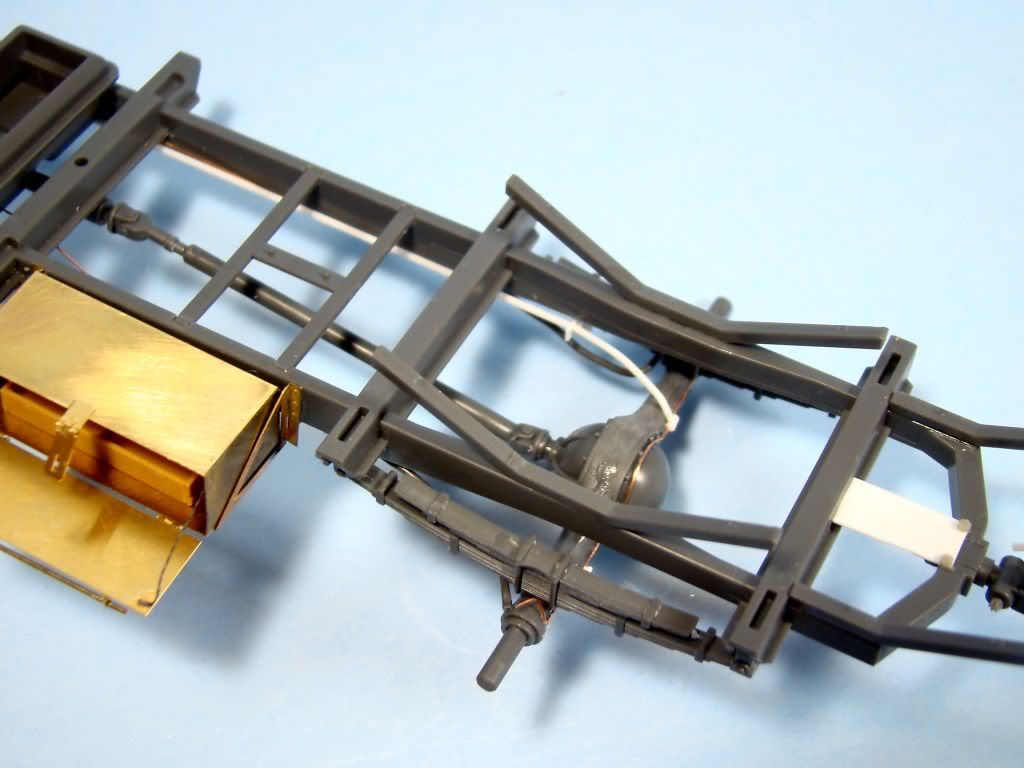
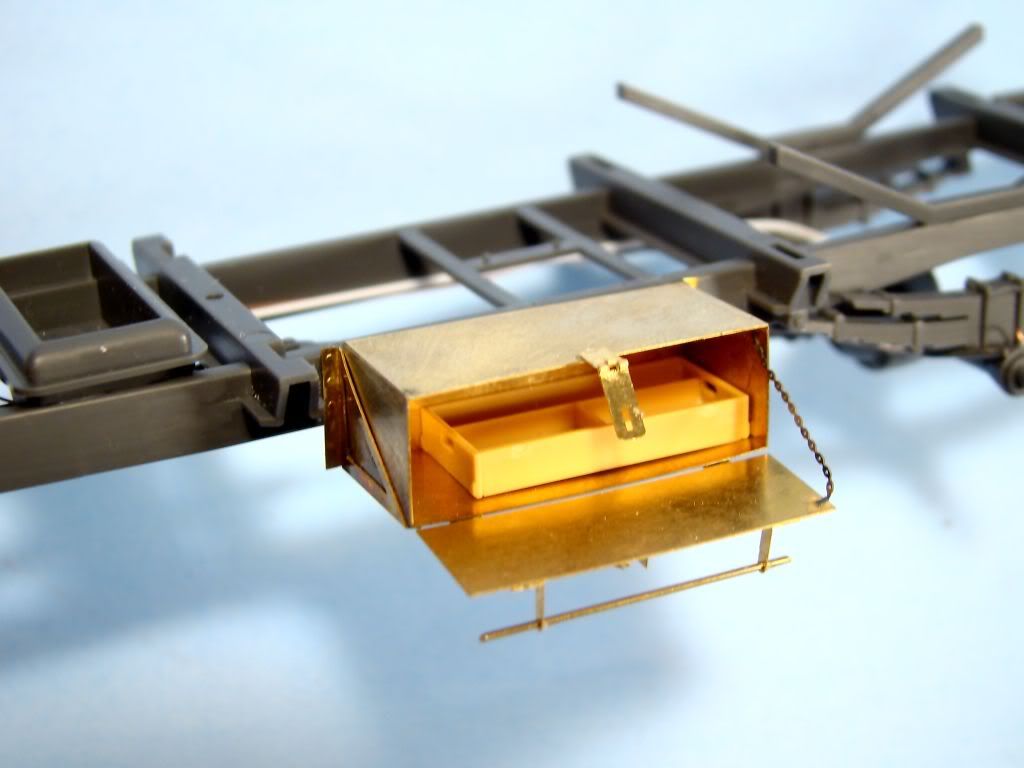
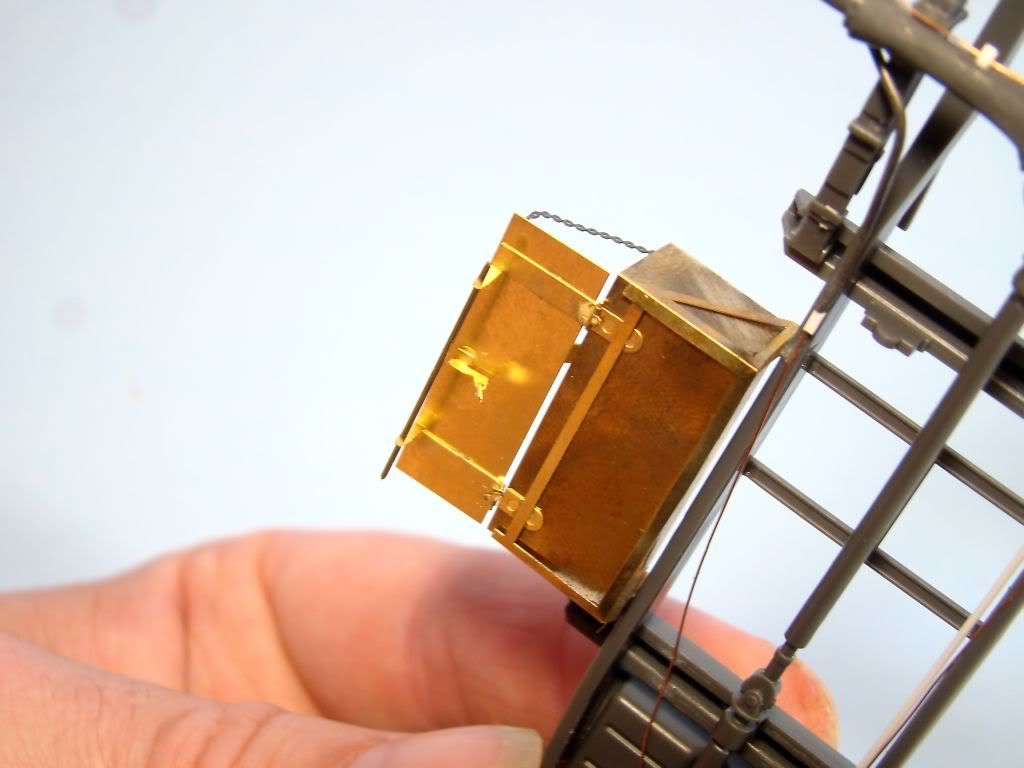
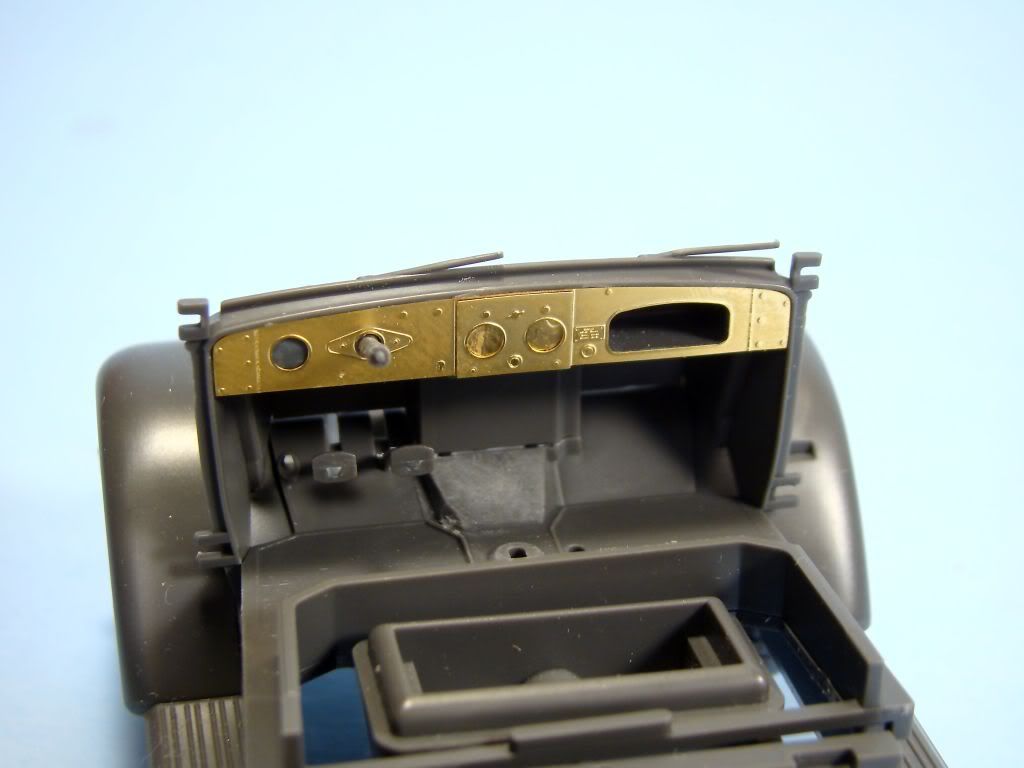
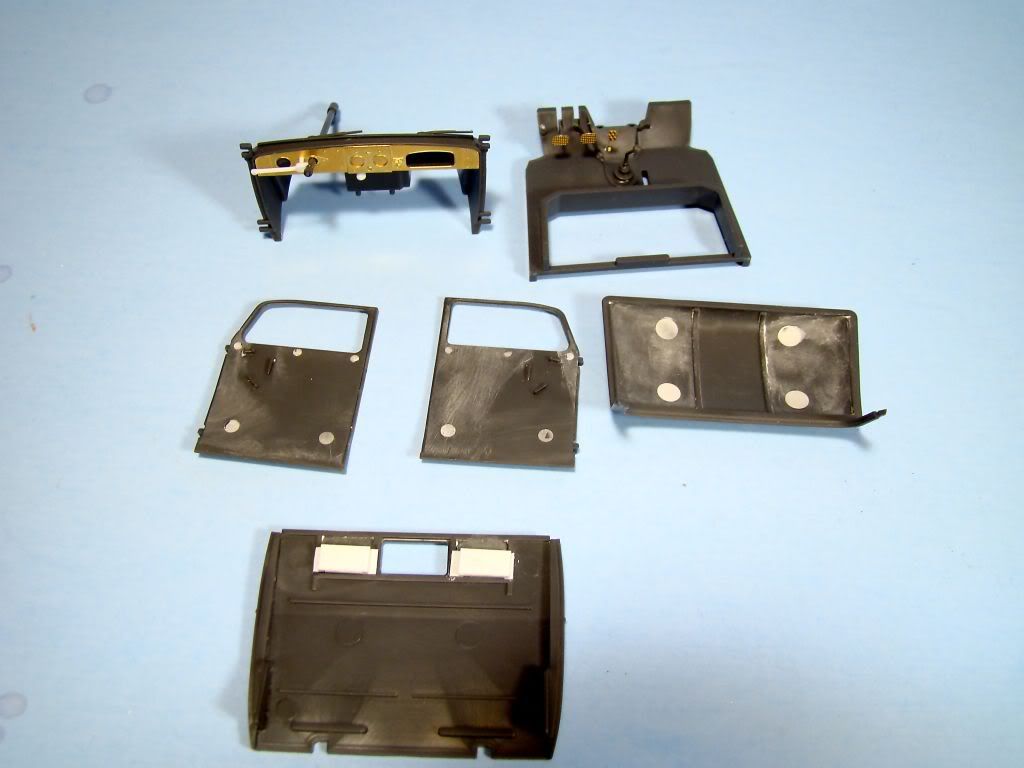
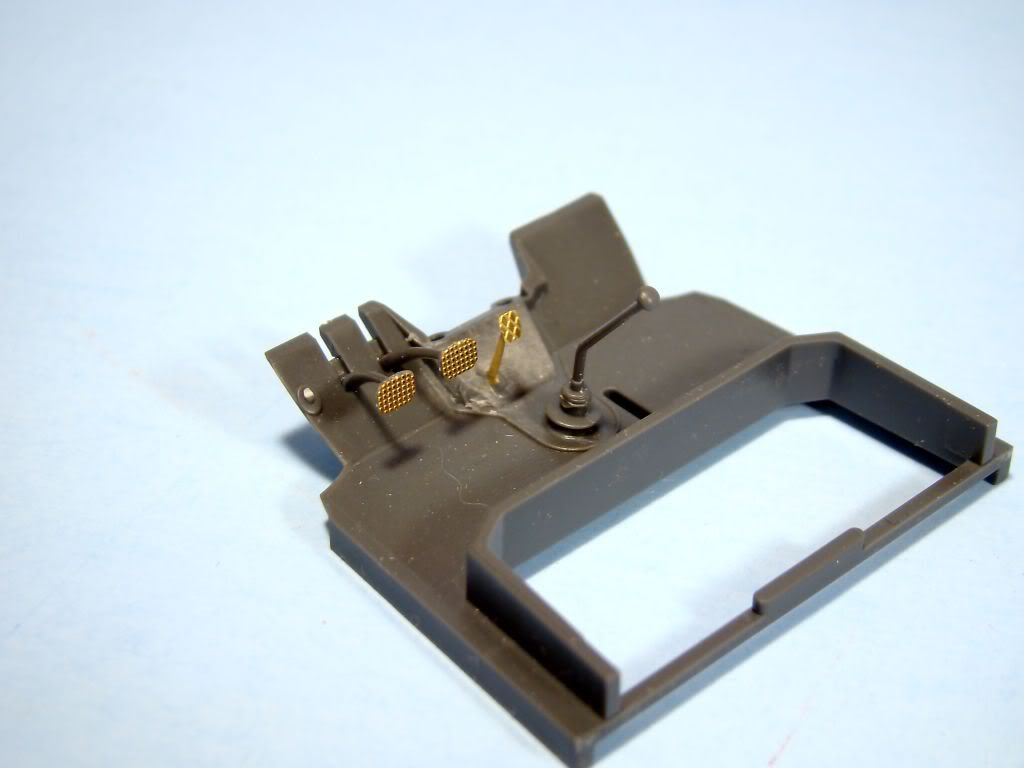
Here is a progress update on the build so far. I have completed the chassis frame which was a simple affair with no trouble at all. I have added the hydraulic lines and e-break cables for the rear brake drums along with a brain plug for the dif cover. The large style tool box was mounted onto the frame from the lion roar set which has some outstanding detail as assembles very easily. My only complaint about lion roar’s set is the working hinges; these are quit fiddly to work with and require a steady hand to work with them. I instead took a short cut and glued the hinges in the position I wanted and bent the hinges to shapes. I moved onto the cab and replace the dash with the new photo etch part which has better detail on it. All the injector pin marks in the cab have been filled in and waiting to sand smooth in prepping for paint which should come in the next few days.
I’m guess the box is used for tool since I don’t see anywhere else on the truck that tools need to change tires and what no would be stored. The boxes are just left over tool bins from a famo I did years ago.
Cool, just what I’m looking at doing. Still debating wether or not to use the sides for the bed As do at least have the camo idea in my head and can’t wait to start painting.
I opted “no” on mine and just have large “timbers” bolted down on the bed to keep the flak-sled in place…all of my ref pics show this to be the most common mod…more pics:
I’ve moved the WIP to a larger base since these pics and have done more work—hope to post some more WIP soon…
Wow this is gonna be super cool when done. I love the details like the brake pipes and stuff, really does take it to another level. I will definately be following this. [:P]
Thanks everyone for following and the great comments. This is turning out to be a fun build so far with no headache yet.[;)] I don’t want to go too over broad with extra details, but just add the right bit to make this stand out more and look more like a real truck. Tamiya took some short cuts on the model, but overall I’m please with how things are turning out. More to follow very soon.
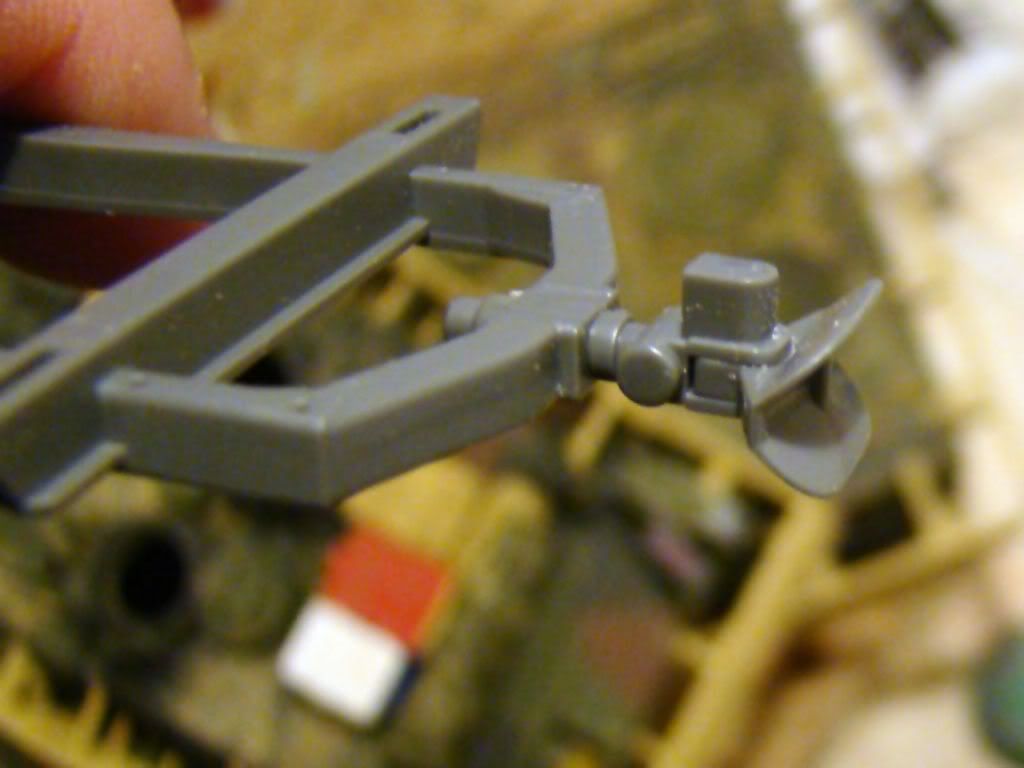
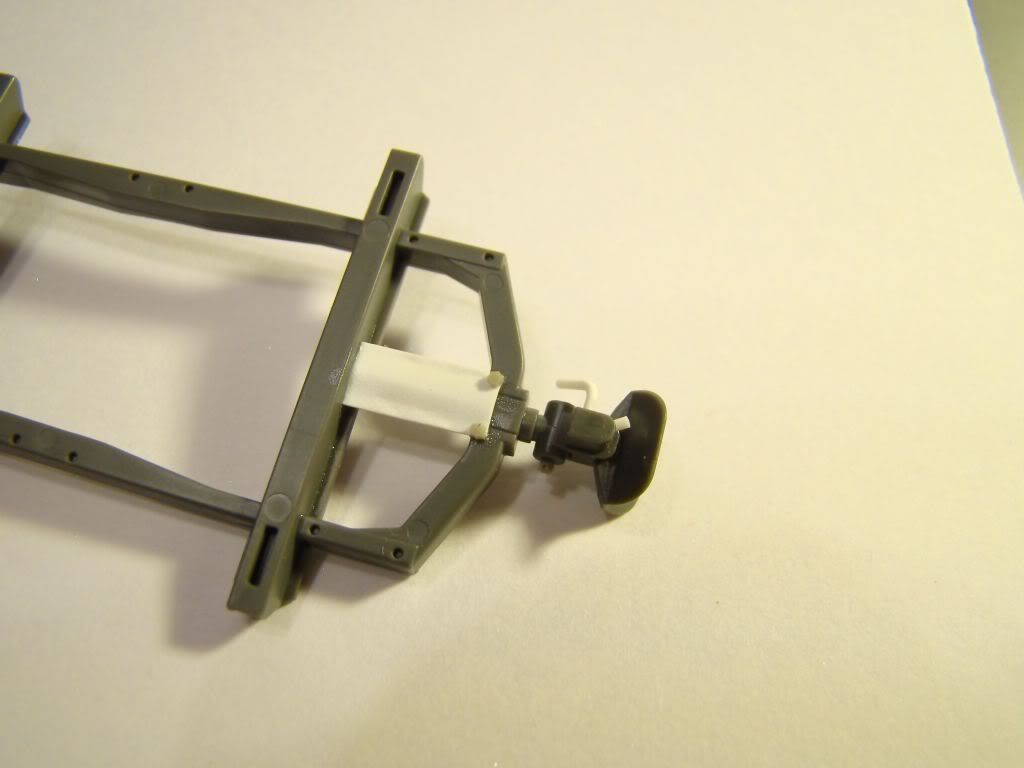
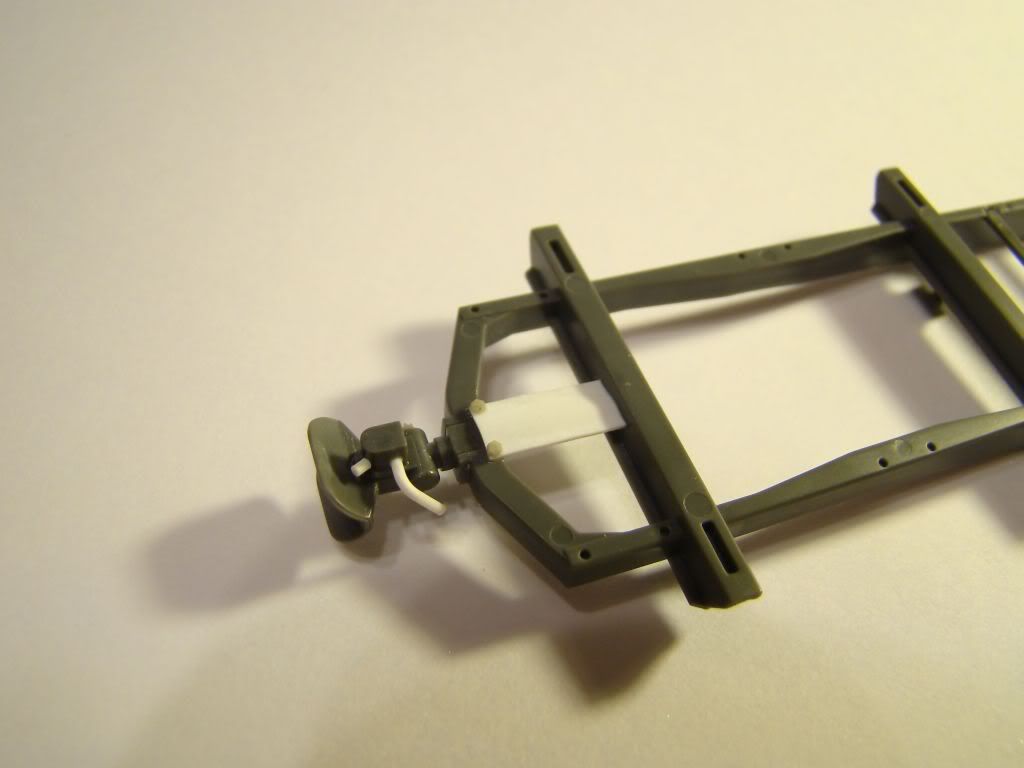
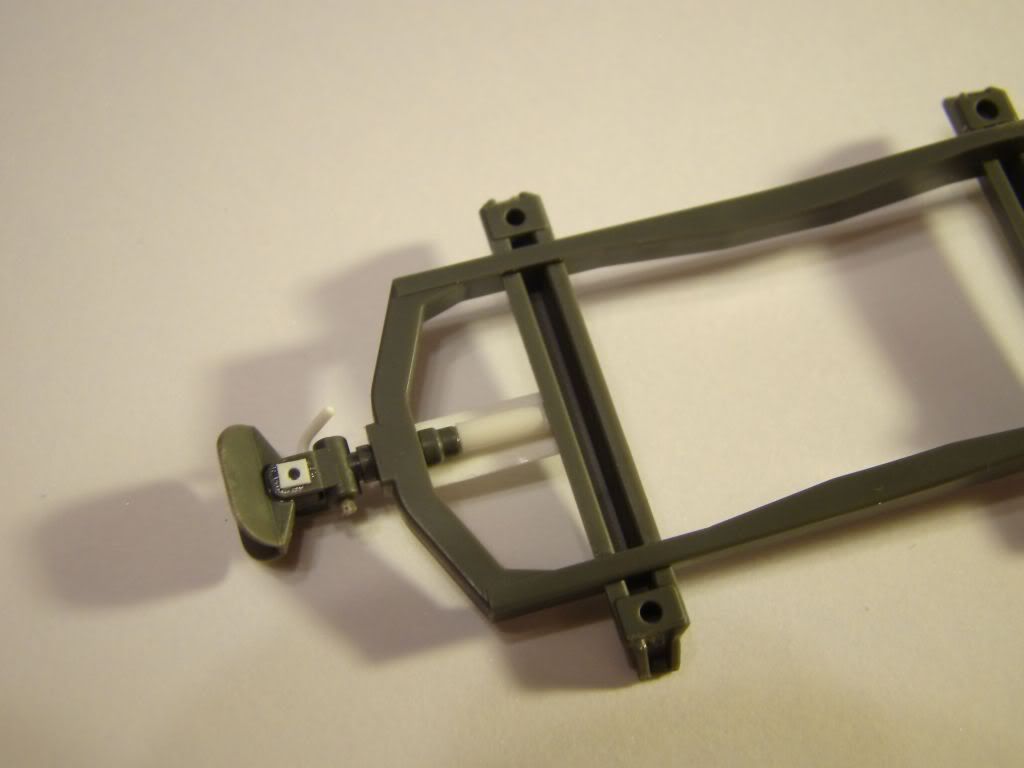
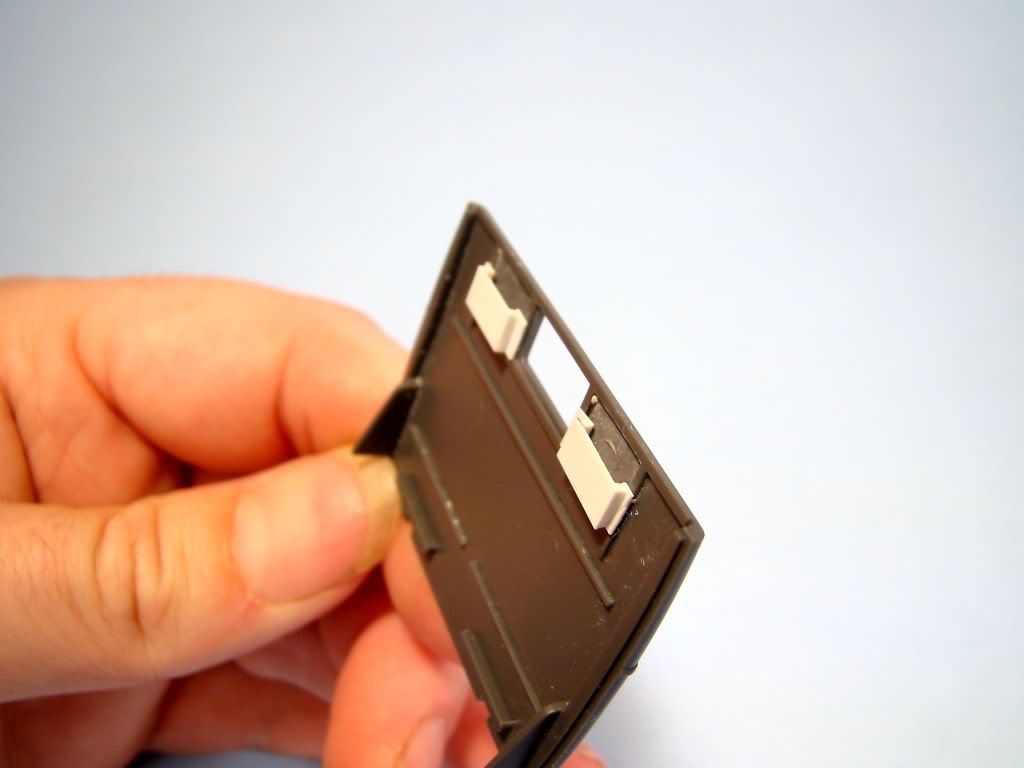
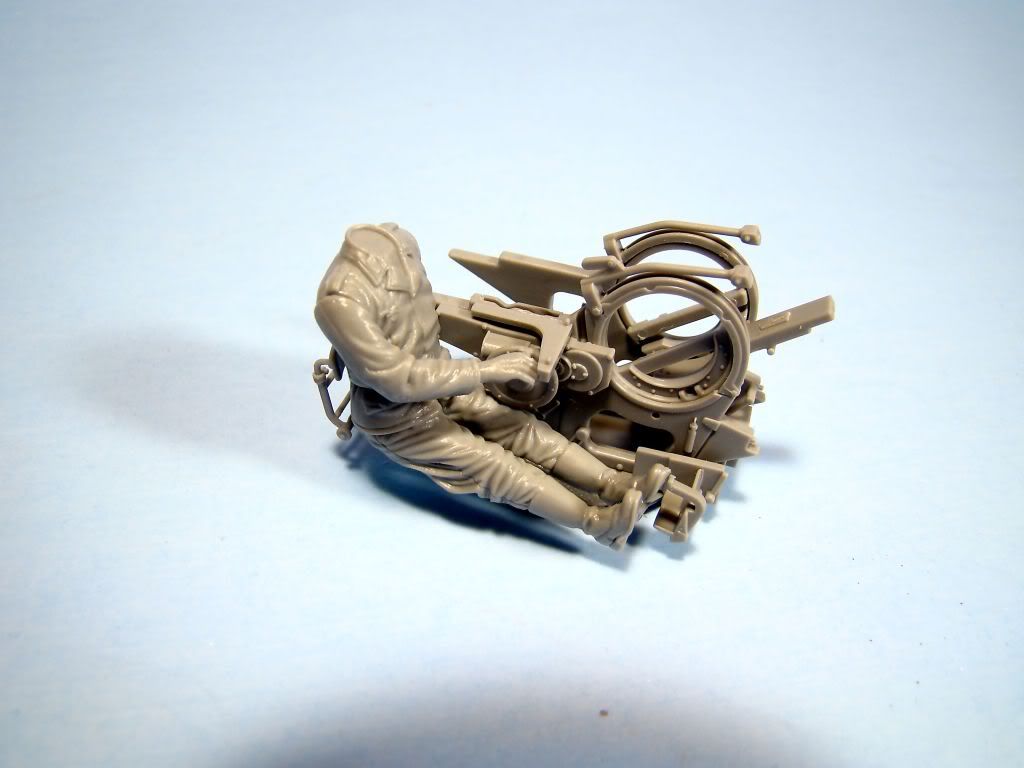
Here is an update just prior to painting beginning tomorrow. I just finished up detailing the rest of the cab and adding the last bit of parts needed. On the rear of the cab I added to small storage bins to the top of the wall used for maps and papers. This was made from plastic strips cut to size. I went ahead and added the clutch pedal to the floor board and hoping this part will not break off during painting. The dash was finished out with an electrical button just below the dash at the center. Another thing I added was the turn signal switch on the stirring column; this was made from plastic strip and rod. One thing I have notice is some of the trucks have the switch and some do not. Another weird thing is I have also seen Mercedes parts used on the blitz, I am guess some of the parts were interchangeable between them. Work also started on the flak gun and had to modify it just a bit so that the gun receiver could fit into the cradle just right. Here you can see that I assembled one of the crew figures for the gun which needs some slight surgery on the legs to make them seem more natural and fit better. Other than that I will be starting to paint the cab so I can move onto the rest of the truck.