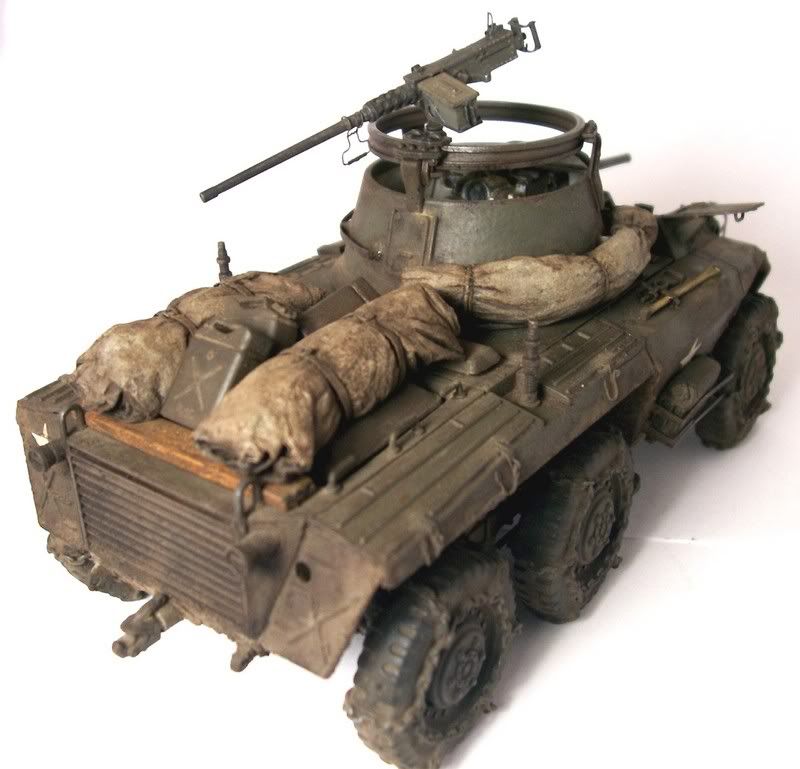
well here,s the final build update i finally got that part over with and the painting has begun more on that shortly for now the finished deal.
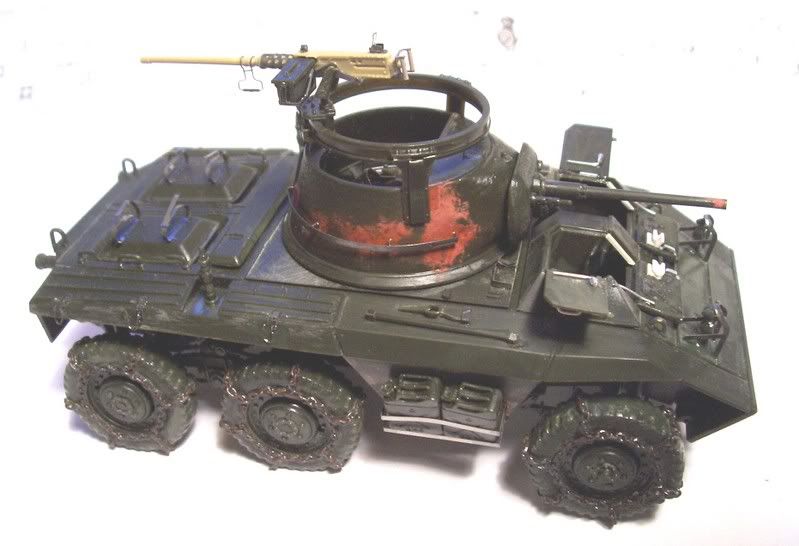
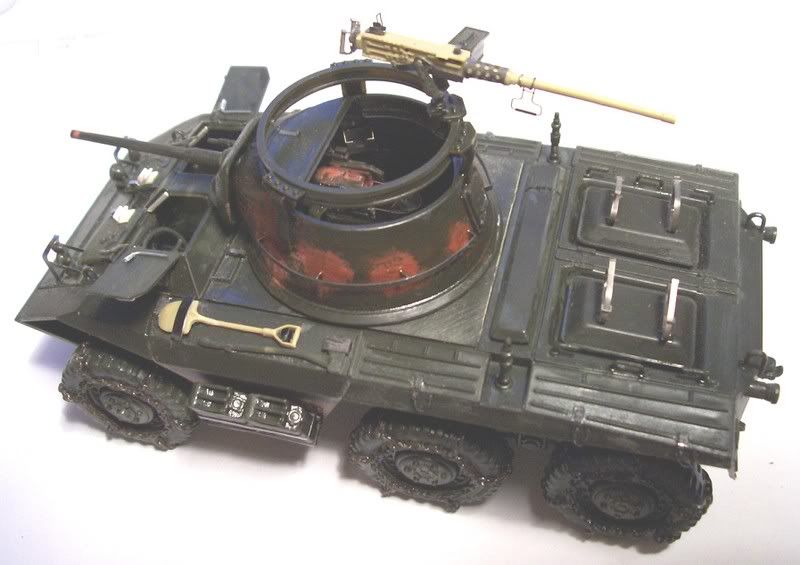
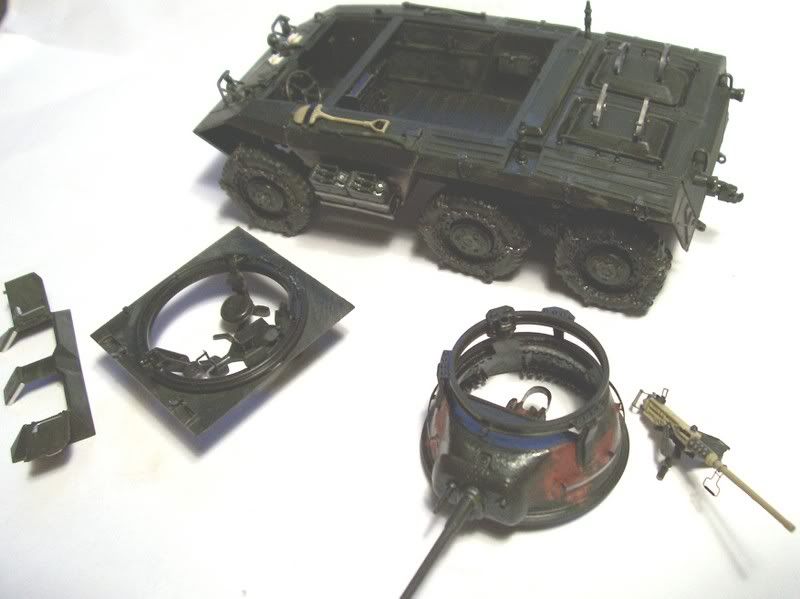
and broke down for the paintshop
some paint progress to follow shortly.
well here,s the final build update i finally got that part over with and the painting has begun more on that shortly for now the finished deal.
and broke down for the paintshop
some paint progress to follow shortly.
…looking good…you gonna leave off the side skirts on this one? Since you have snowchains, gonna do a winter scheme?
Hi Manny, yes definatly leaving the fenders off and seriously concidering the winter scheme but not 100% sure yet things have a way of changing at the last minute lol
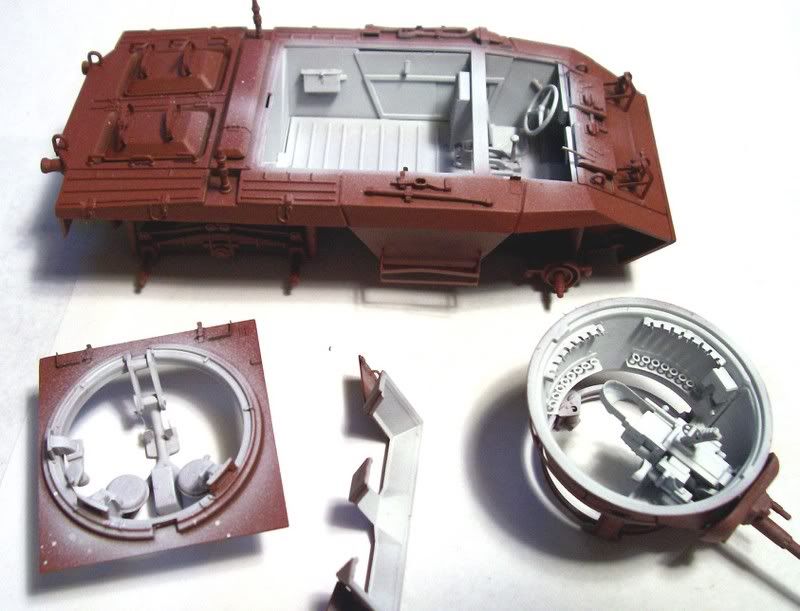
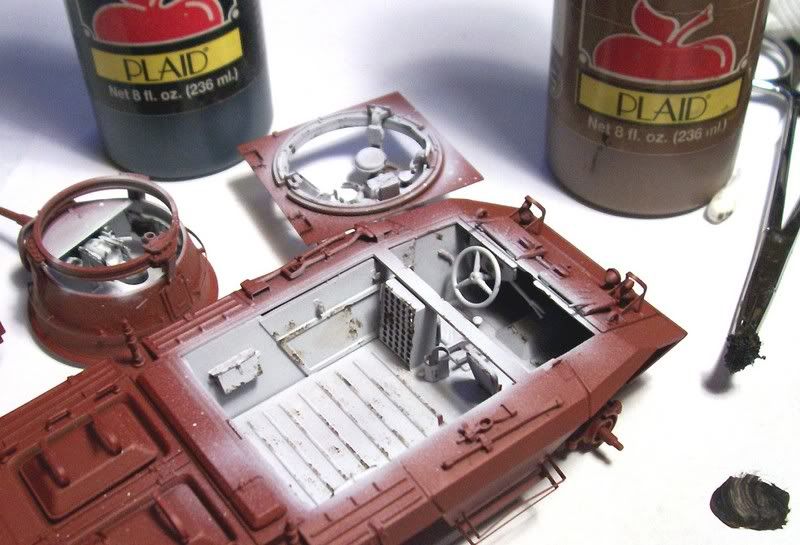
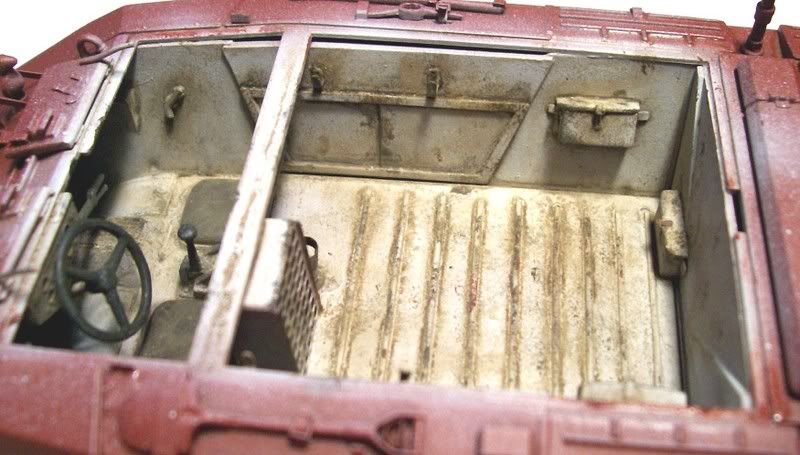
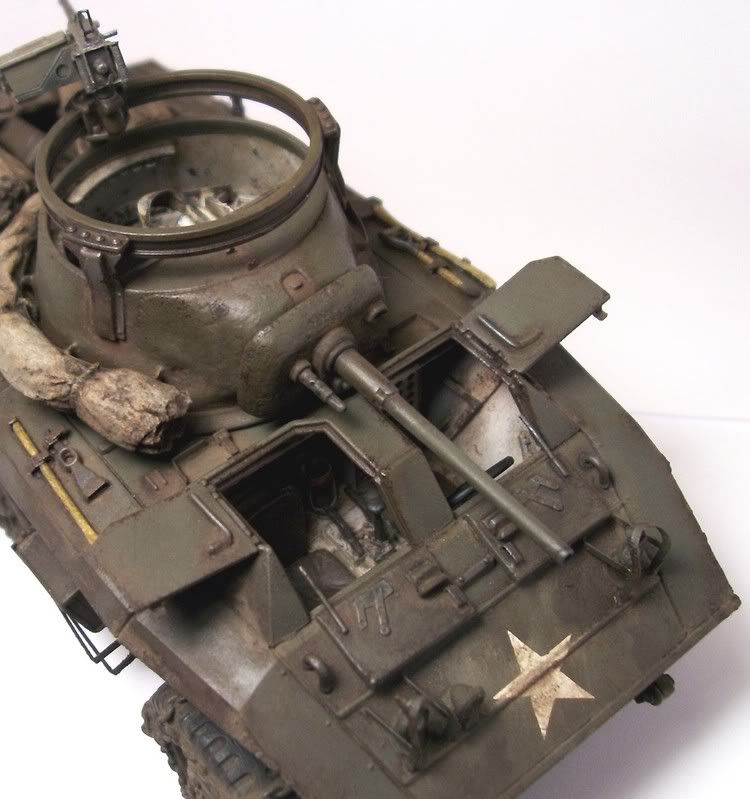
I have began the painting with the interior and have done a simple step by step using pictures once more like the bronco nothing fancy just the impression something is in there it still lacks some stowage and extra’s but for now,
Step 1 the model recieved a primer coat of red oxide then the interior got a basecoat of white.
step 2 using craft paints brown and black and a piece of sponge i applied some wear and tear
step 3 i applied several all over sloppy washes until i was happy with the look using burnt umber oil paints
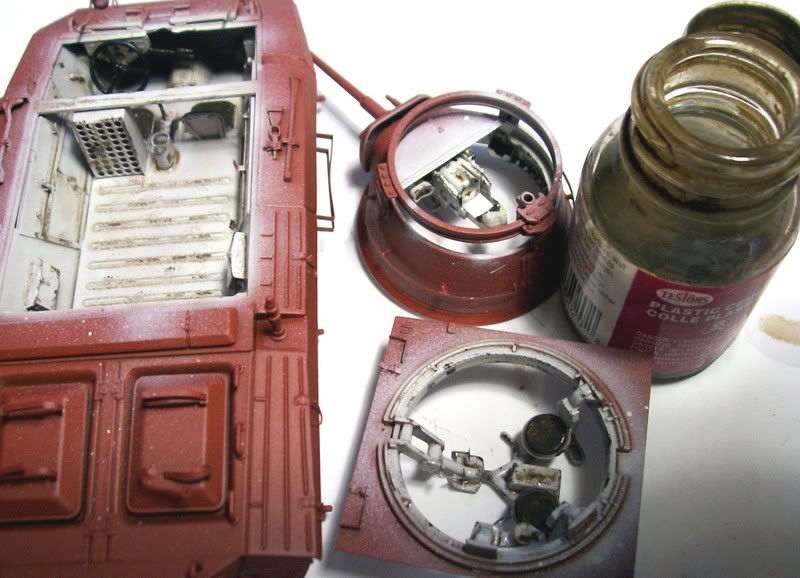
step 4 a dry brushing of shadowed steel was applied
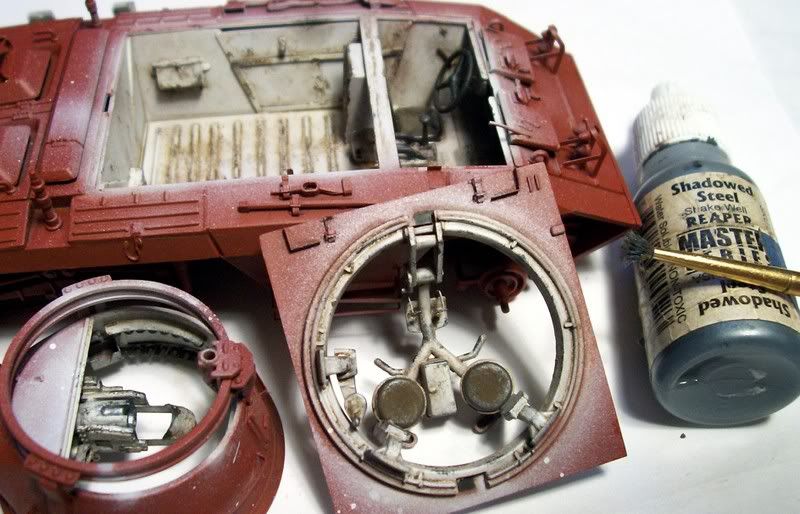
step 5 i applied a select pin wash using ivory black oil paint
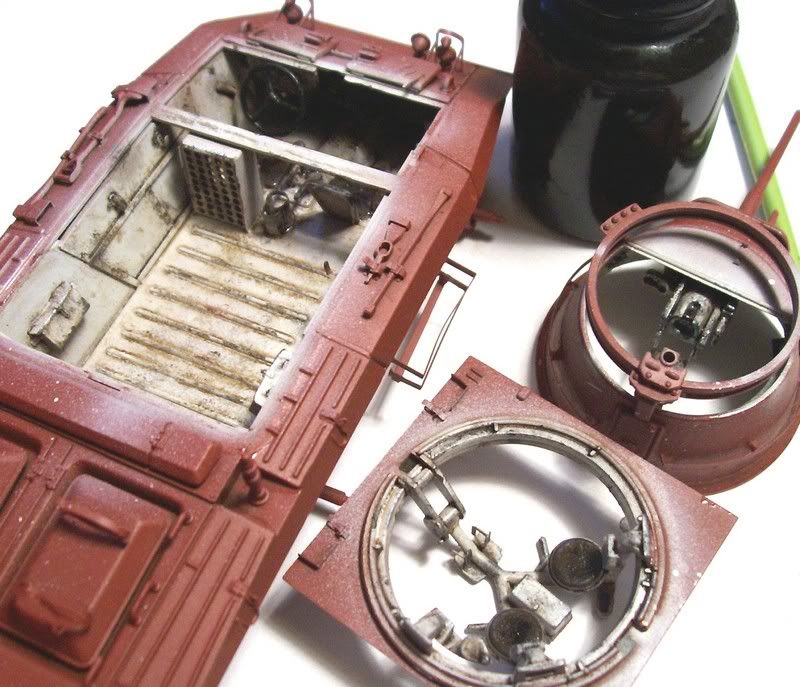
step 6 i added bragdon’s dustbowl brown pigments to complete the look
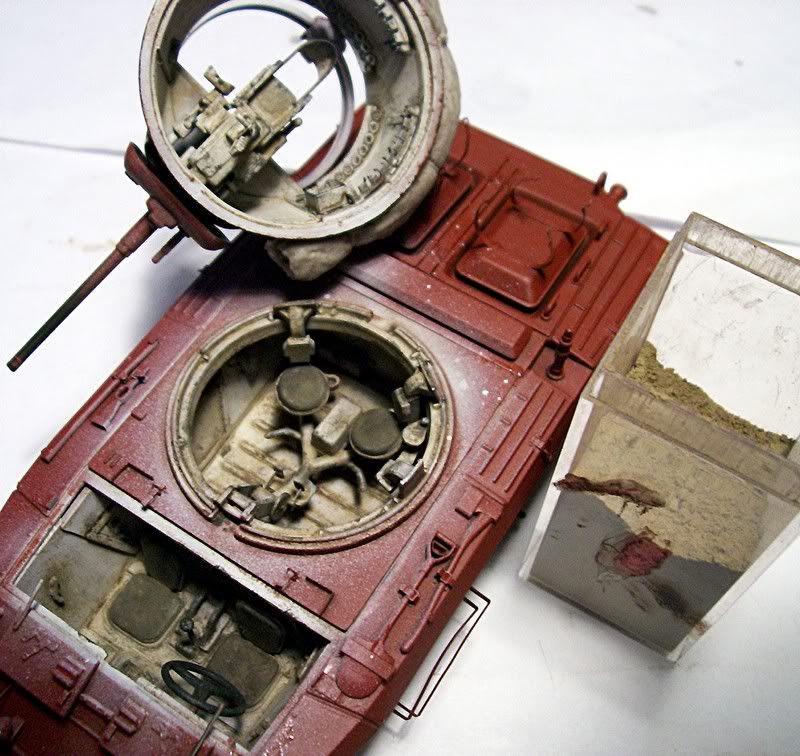
and the finished item

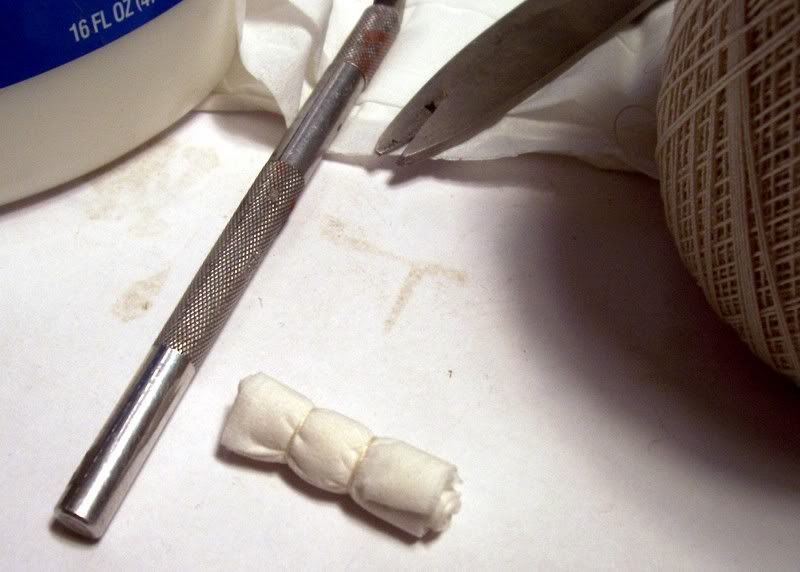
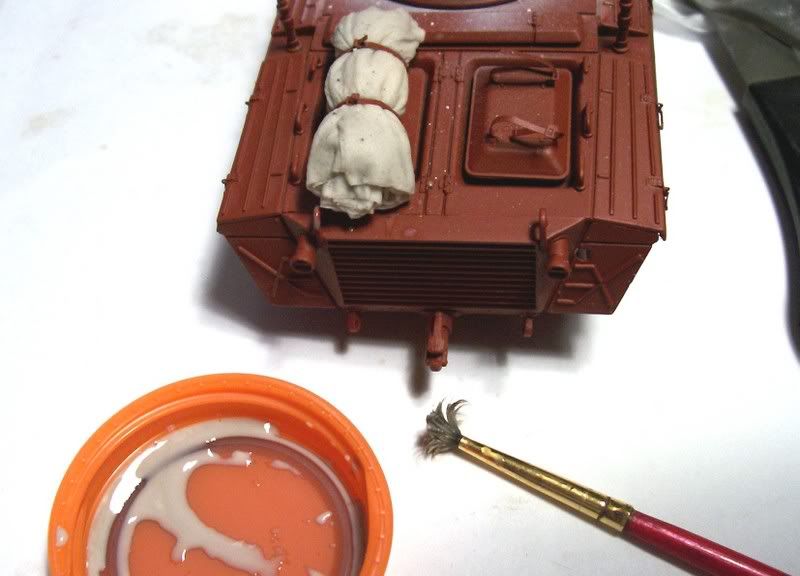
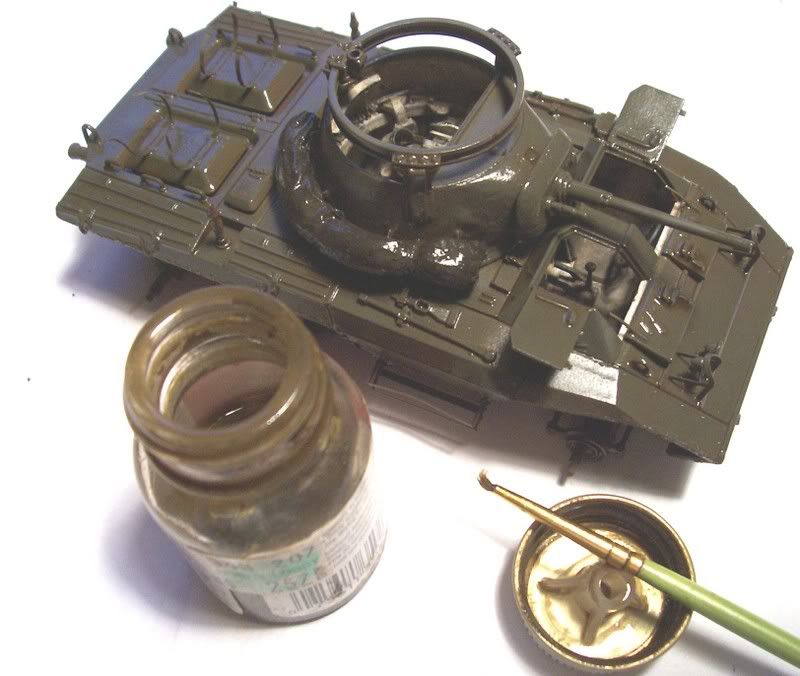
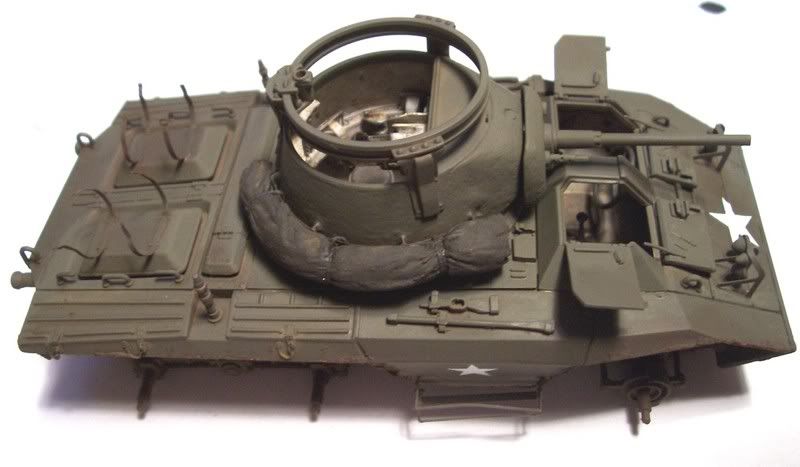
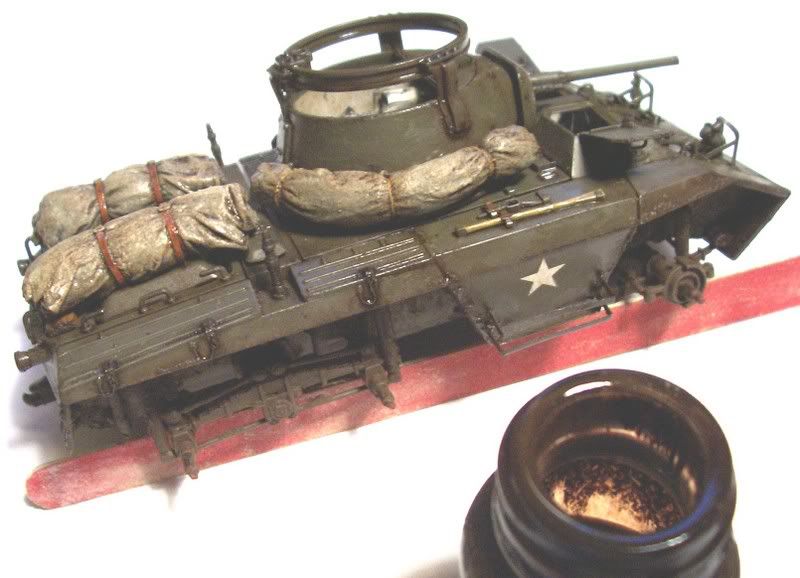
With the interior done i began to prepare the exterior for painting the kit stowage didnt do much for me so i decided to make some new tarps this is the process i used
using tissue paper and fine string i folded the paper and rolled it up and tie it off with the string tightly
next i placed it on the vehicle in its intended position

then using a mix of white glue and water i dabbed it on until it was soaked, now the tissue expanded leaving some nice folds and wrinkles
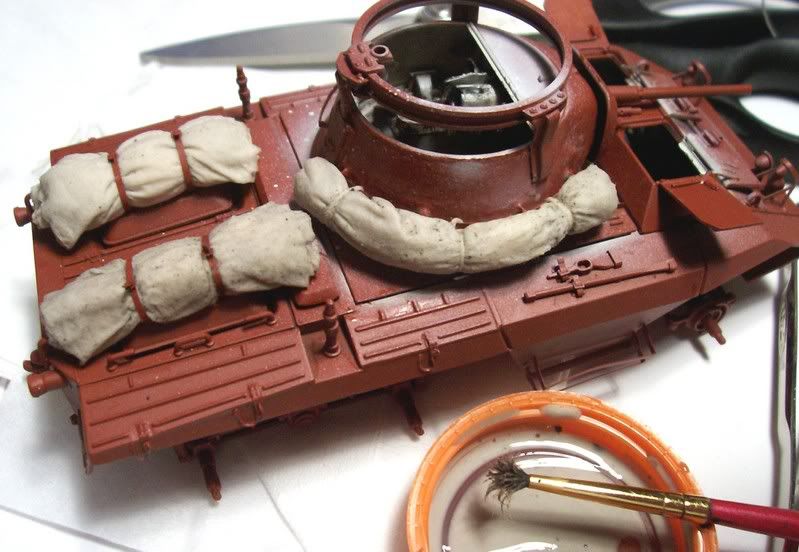
then i did another the same way

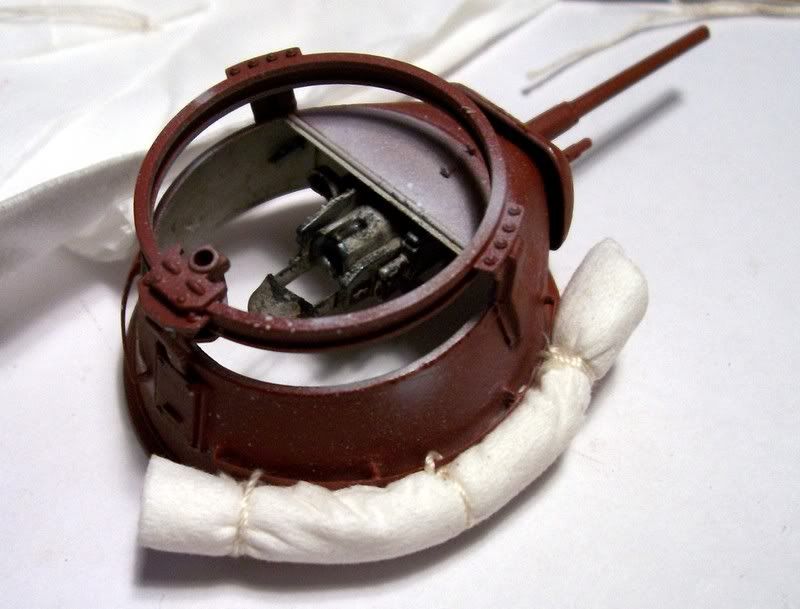
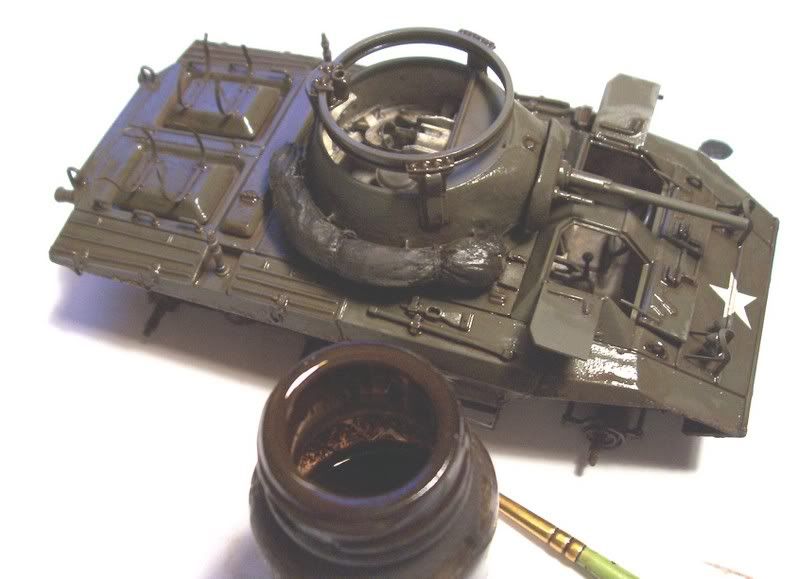
and a third one on the turret this one i had to be careful with and will remain on the vehicle for painting the others were removed after they had dried.
and how they look together, hopefully these should paint up nicely
I hope I’m not too late here, but the turret interior should be OD not white.
if anyone needs me i’ll be back at the drawing board! [:O]
Well Manny has that Ukrainian sheila you can use as a start [:)]
Excellent work so far. I have the Italeri 1:72 M8 and M20’s in my stash and seeing your progress pics, makes me want to build the pair of them!
cheers
Mike
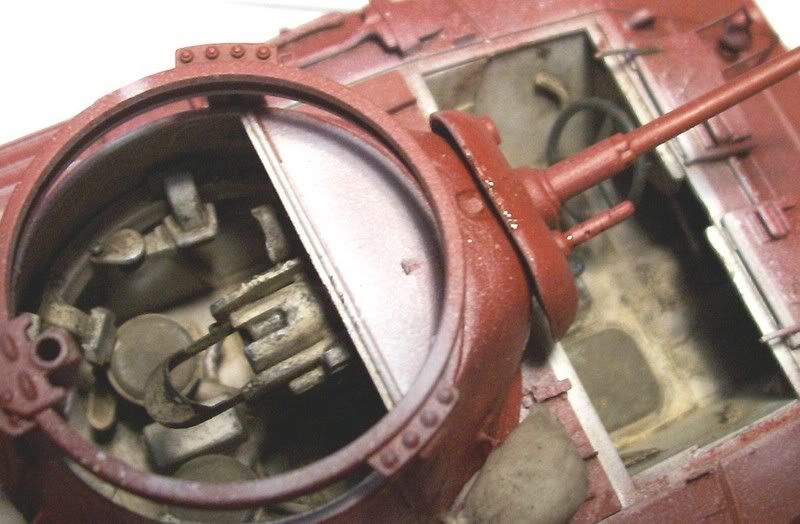
Wow, those PE ammo racks look awesome…I believe this is the best step-by-step you have posted yet…for anyone out there (including me) who wonders how you get the results you do, this tutorial has it all…looking great…
Well I never thought of doing tissue paper tarps in situ like that. What a great idea!
thank you chaps, now for the final installment, the painting and weathering.
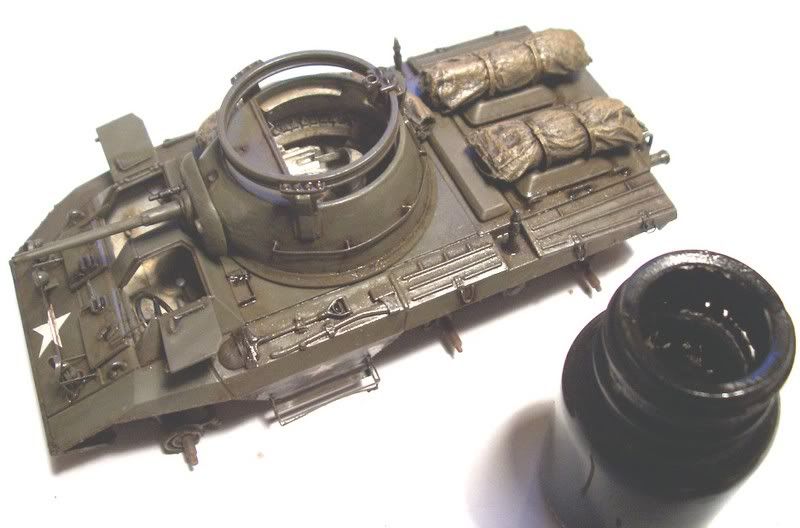
before i painted it i first added some texture using my trusty bondo and and old brush and just stippled it on quickly because it keeps setting up on the brush heh.
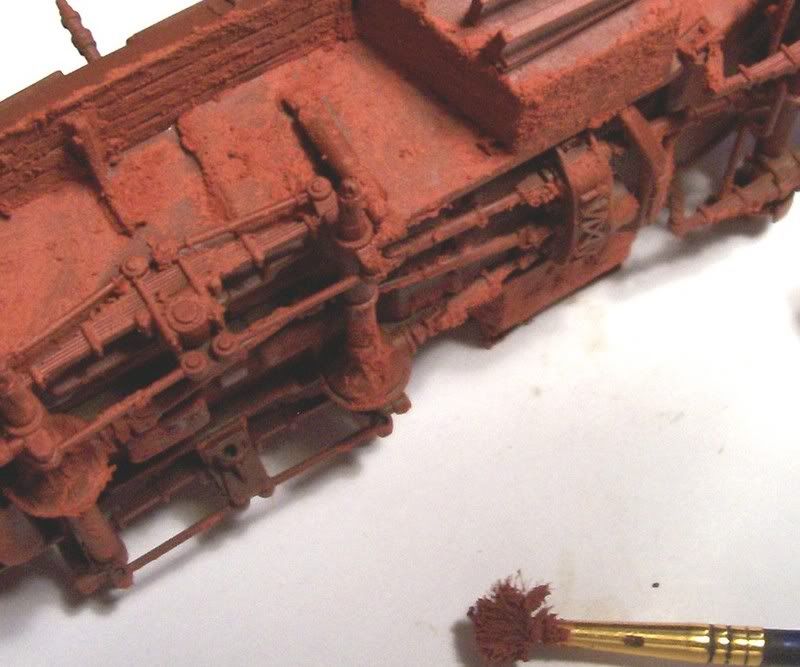
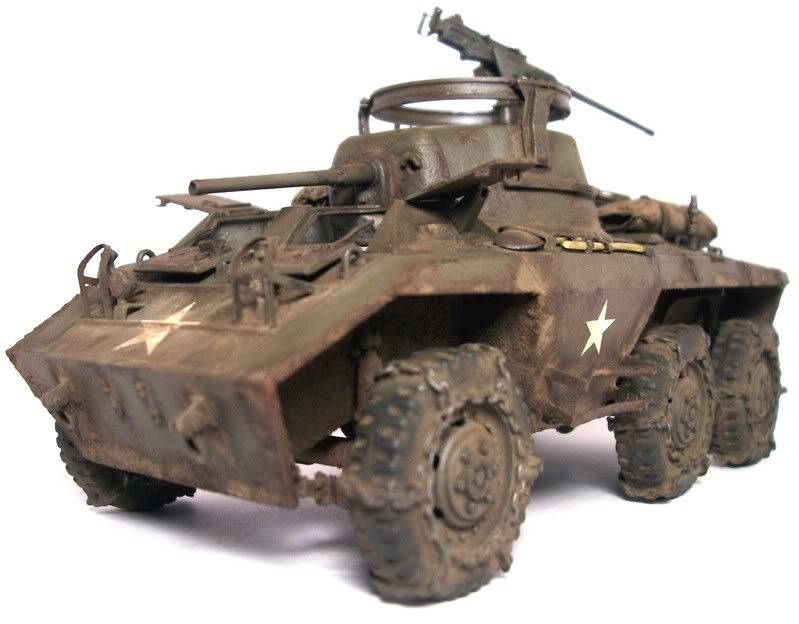
Next was the basecoat of Tamiya Khaki green the tarp was hand painted in dark brown then the model recieved its first all over wash of burnt umber oil paint.
Once dry i applied the decals there was no need for a gloss coat because i trimmed the carrier film to the end of the decal so there was nothing to silver
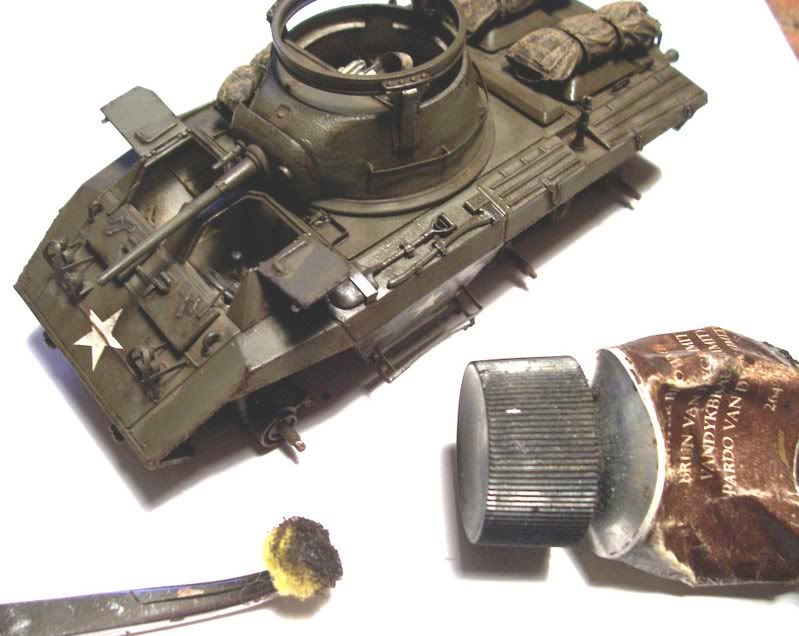
next up another all over wash of van dyke brown oil paint
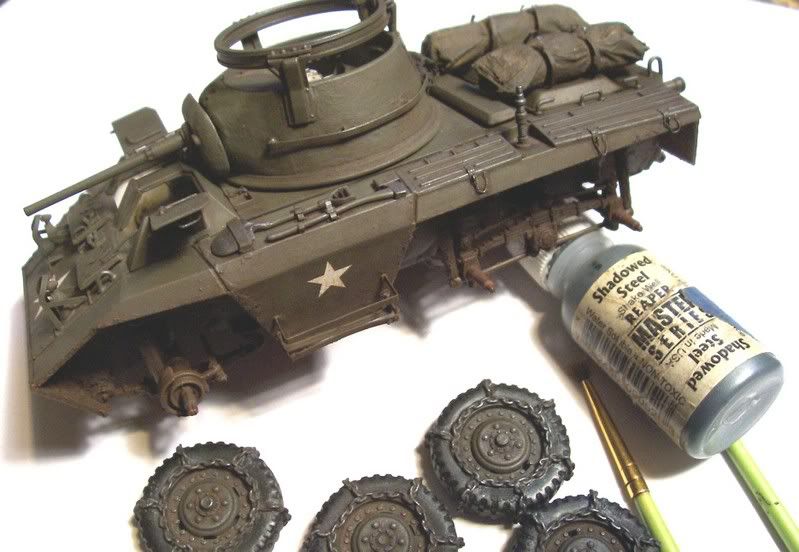
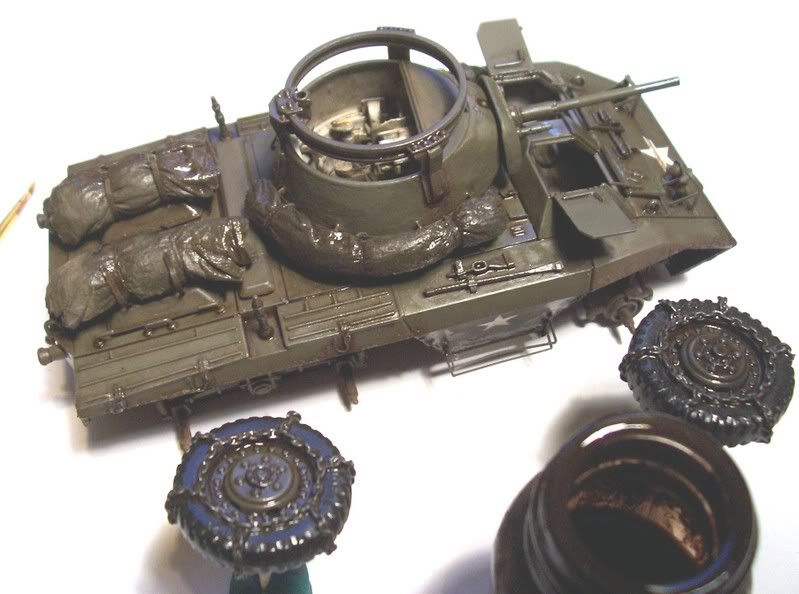
The wheels had already been primered black then the centers airbrushed green after which i painted the chains, the metal parts of the hand tools and the under carriage and wheel wells of the vehicle in dark brown craft paint

After which the everything received a drybrushing of shadowed steel
Another all over wash of van dyke brown
Next a pin wash of ivory black
Some Wear and tear was added using van dyke brown applied with a sponge
next the wooded handles and details were painted, for the wood i paint it first in acrylic stone then using burnt umber and yellow ochre mixed to the right colour i streak the wood grain longways.
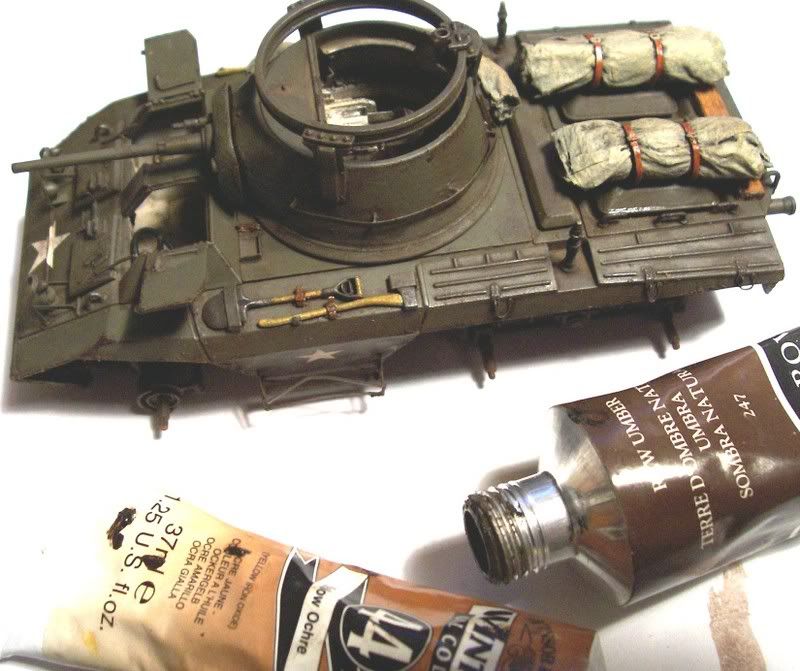
yet another wash of van dyke brown
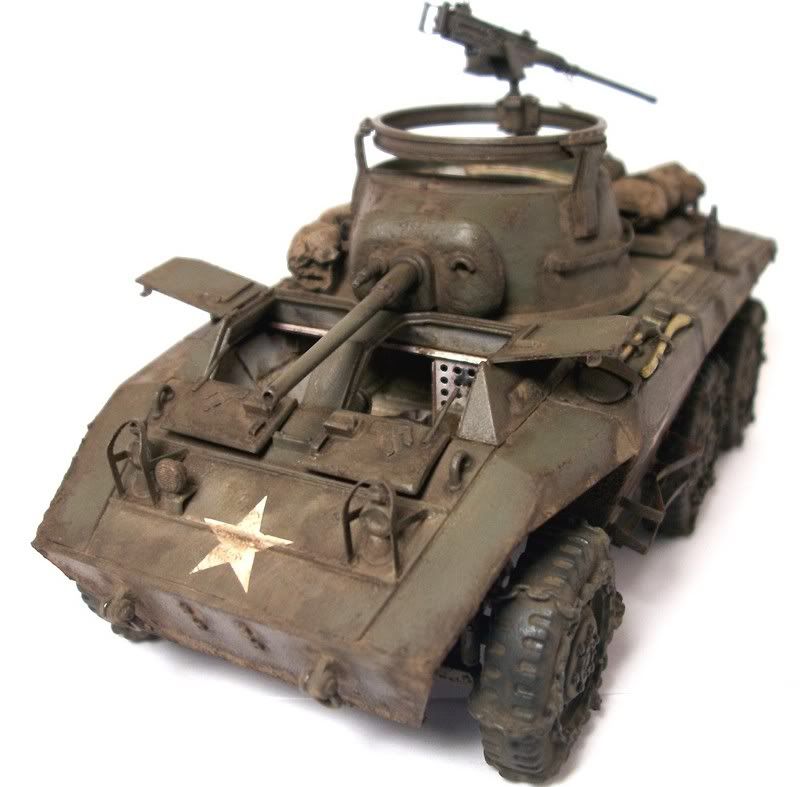
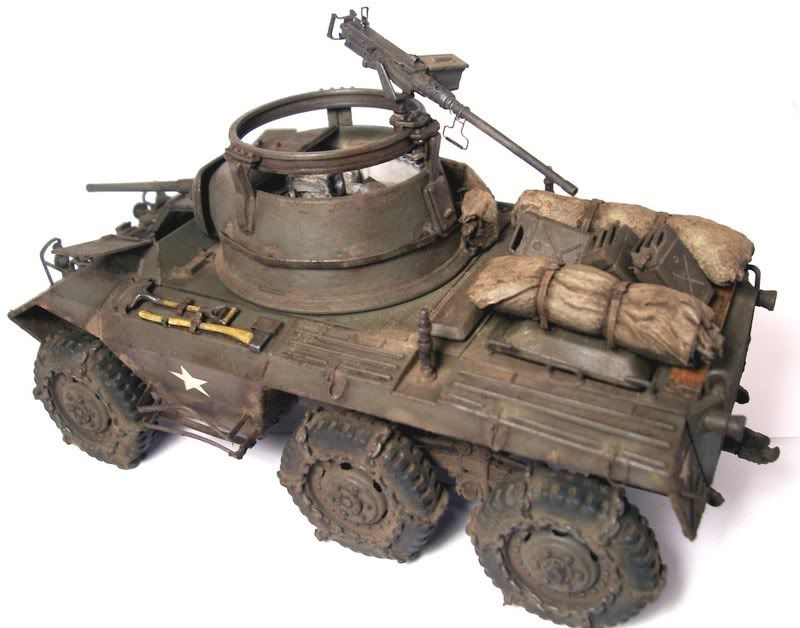
finally everything was attached to the vehicle for the last stage of blending it all together
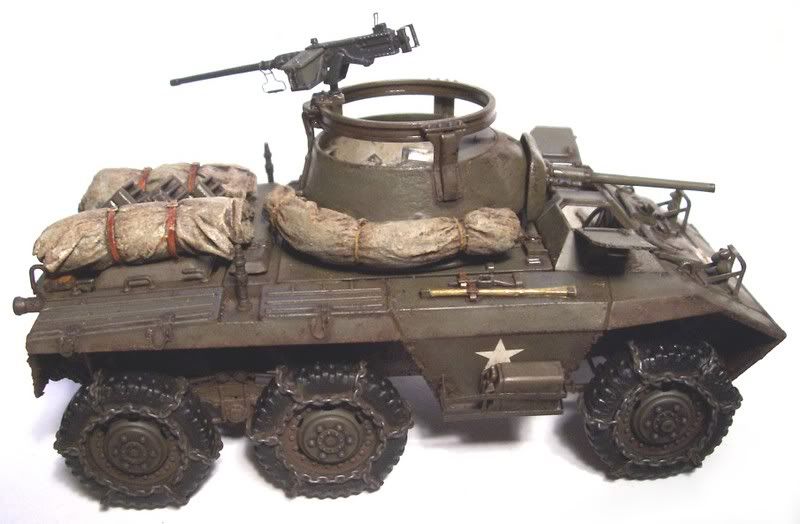
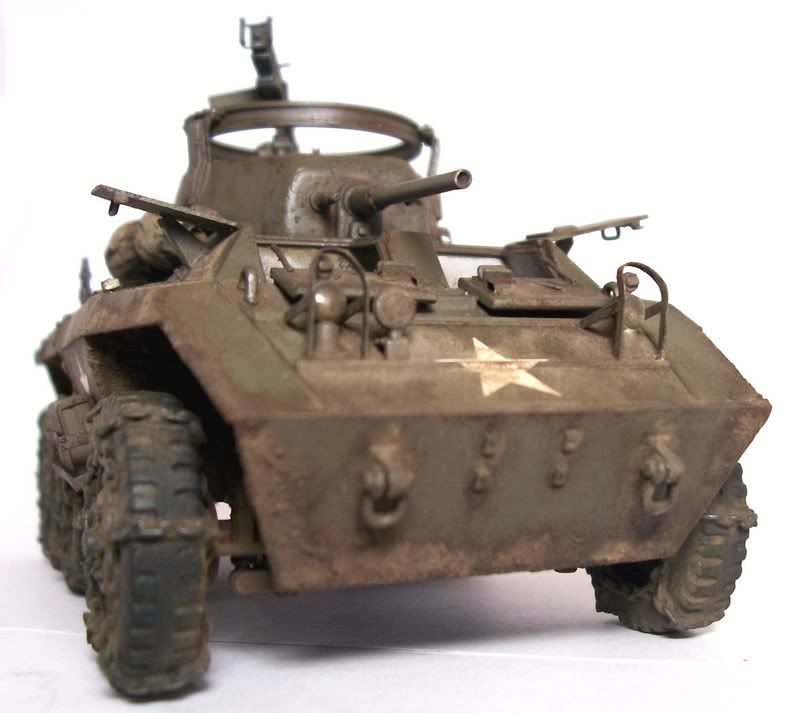
Once it was all together using my favourite pigments which i applied dry and scrubbed them into the textured areas and anywhere else i thought dust and dirt may gather then stiffly brushed the loose away, i added 2 part epoxy to the headlights which i drilled out earlier for lenses and that just about wraps it up except for the finished pics, this may not be the best available kit of this vehicle but im sure happy with the way it turned out and i had a lot of fun doing it, thanks for watching.
Stunning…absolutly stunning[tup][8D]
I’m speechless.
Rounds Complete!!
Hey Ron, sorry for not replying to this thread earlier; I’ve been busy apologizing to your fellow “LEMurs”, (to you, as well…[:-^])…I’m sure you’ve heard…
…anyway, now that my feet are back in my boots, I’m was never really the biggest fan of this vehicle–never did much for me on the “modelling radar”–but you’ve once again taken a subject that I thought would be “blah” and, through your consistent and amazing weathering techniques, have turned it into something that has really caught my eye and piqued my interest! This really looks outstanding!
NIce to see you here posting another tutorial; Armorama’s got quite a few of your’s over there, and this one here’s superb–I always had problems doing that “tissue paper bedroll” thing; now I see that you tie them up dry (lightbulb![:O]!) and wet 'em down in situ! Cool! Learned something AGAIN here! [:D]
The job ya did on the tires with the chains is award-winning, man! Truly “PRO” stuf! You continue to be an inspiration to all of us here! Thanks for the great tutorial and congratulations on this superb build! [swg]
Okay, some cool things you did to this model that I really liked were:
The PE ammo racks and detail to the .50…
The tissue bedroll method…really taken an old concept and added a new twist by wetting them AFTER tying them down and painting them on the model, which, IMO, is the way to go these days: build EVERYTHING and then paint in place…
the textured mud on the underside…your final weathering suggests mud/dirt in different stages of drying (some looks crusty, some looks damp)…cool…
Improvised snow chains…
Top Notch work, as usual…
PS: really like the color of the wood on your pioneer tools!
OMG, Ron! [bow]
7 letters describe this, AWESOME!
Can you teach me?!?! LOL [;)]
[tup] Just gorgeous Biffa! Another example of it being not the kit, but the builder that makes the masterpiece.[bow]
man, what a beauty biffa, you kill with all the work you do
Just love the mud and dirt on this guy. Tarps are a nice touch. Just curious if the fenders came with this kit? Just my preference, but I like the vehicle with them.
2) The tissue bedroll method…really taken an old concept and added a new twist by wetting them AFTER tying them down and painting them on the model, which, IMO, is the way to go these days: build EVERYTHING and then paint in place…
This method is a winner for braille scale builders and I am certainly looking froward to trying it out, perhaps even on Italeri’s M8 or M20.
Lovely work, I do like the mud you placed underneath, looks excellent.
cheers
Mike
[#toast] Actually, [XX][tup] there are “NO” words to describe this.
As always guys i thank you for the great comments its always nice when one turns out good especialy one of the older less popular kits [:)]
Hey Doog nice to see you back in the forums its been kinda quiet around here without you [:D] i wouldnt worry too much about what you said, in truth i agree with you about that sort of thing i was never one for being part of the incrowd or special clubs hell i couldnt even get in the boy scouts because i came from the wrong part of town so i know how that is but the lem is just another forum with a bunch of nice guys building models for fun much like anywhere else really, no secret hand shakes or nuthing [:)] anyway once again nice job on the article and i guess i will have to buy this edition of the mag when it hits the shelf just so i can “i know that dood”
Thanks again to everyone for checking this out and for commenting.
Hey
Haven’t had time for a few days to check the forum, but I’m glad I didn’t miss this. Fantastic finish on this build.