Let’s build a model airplane, shall we? ![]() Here are some in-progress shots of my AmTech Ta-183 in glorious 1/48 scale.
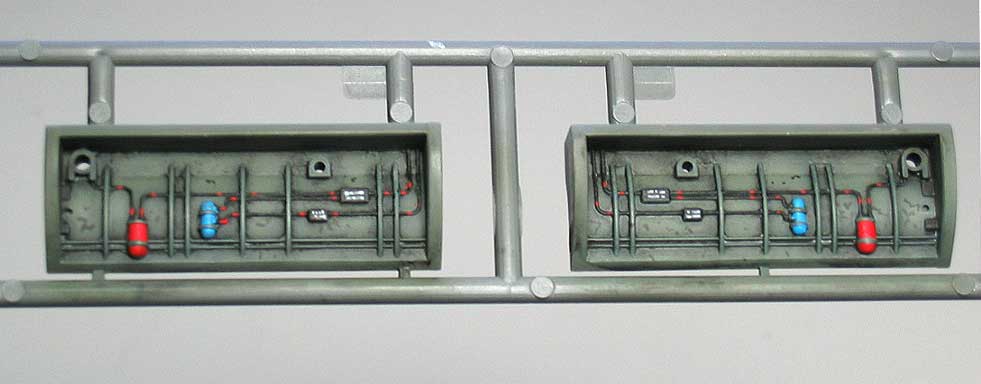
Here are some in-progress shots of my AmTech Ta-183 in glorious 1/48 scale. 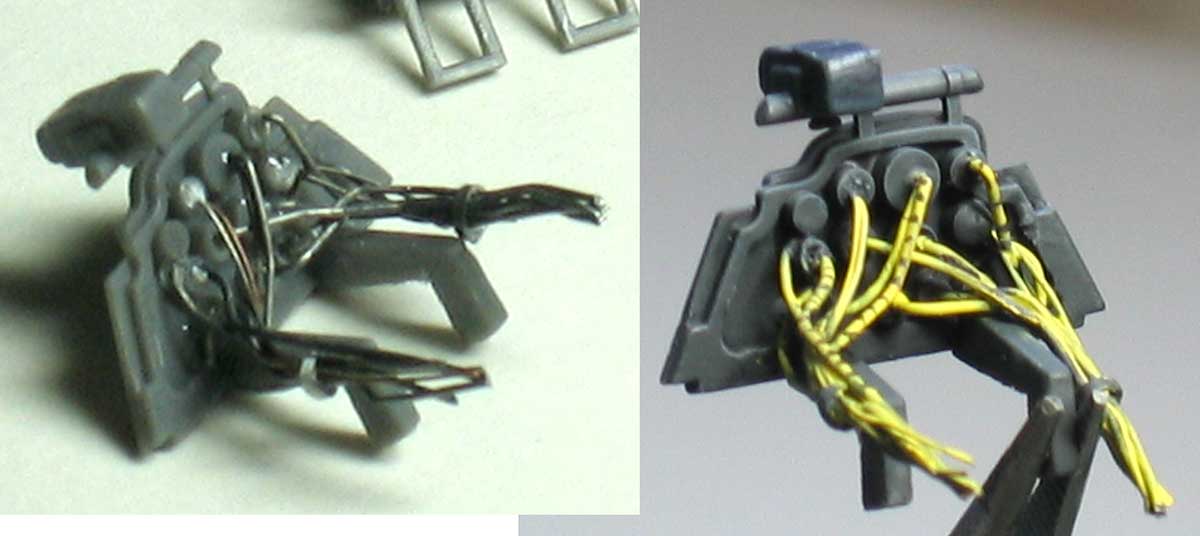 Here’s the back of the IP, plumbed with various bits of wire and solder. Out-of-the-Bx? What’s all that about?
 ![]()
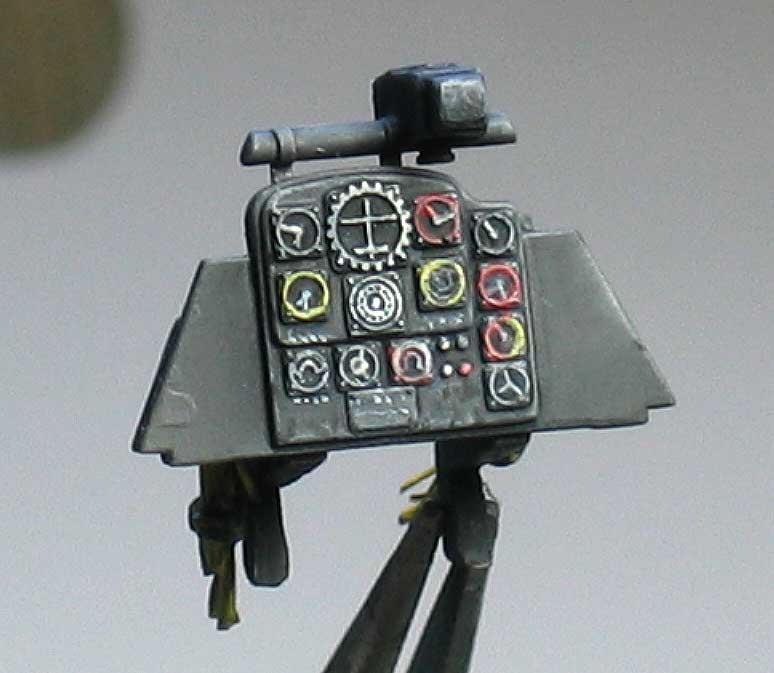 Man, this seemed a lot easier when I was 15! Danged reading glasses combined with a magnifying glass nowadays… :8 Can any late-war enthusiasts tell me what kind of glass goes on this gunsight? Thanks!
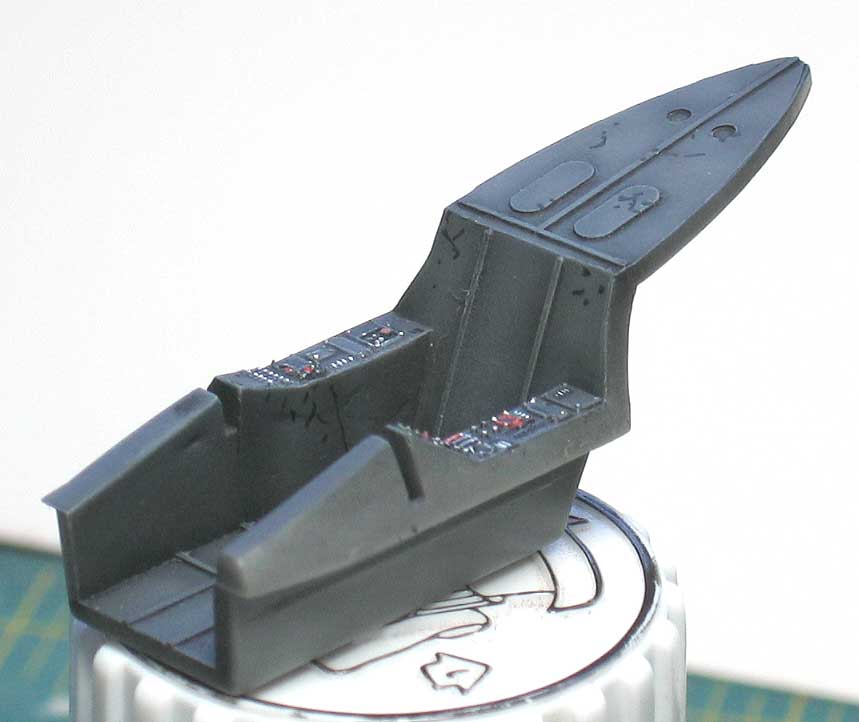
 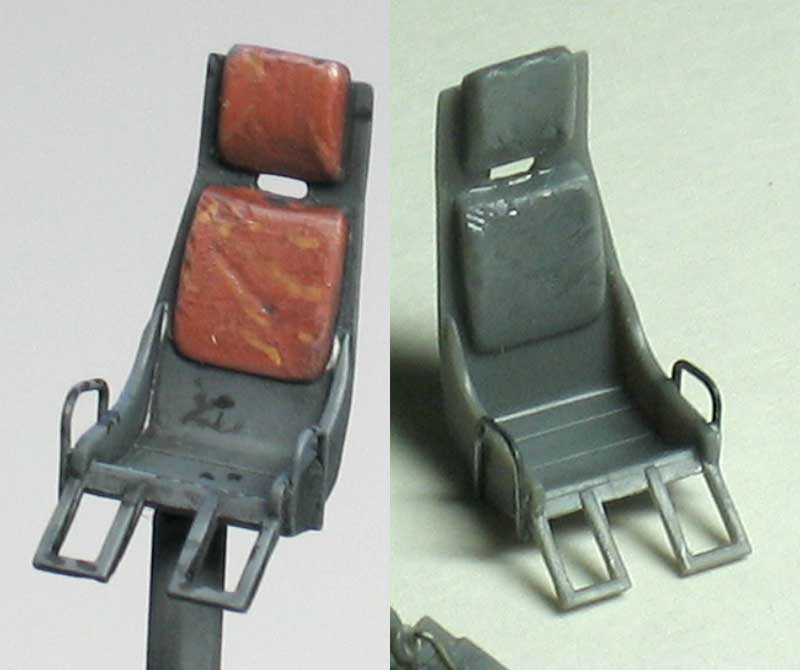 I drilled out an opening for the belts, dinged up and creased the cushions and added the grab handles on the seat. Here it is after and before.
 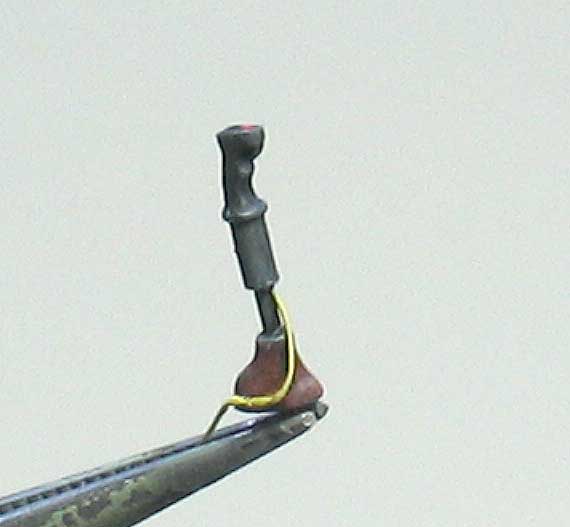 Ach, der shtick! Mit der Wire beadden-onnen…
 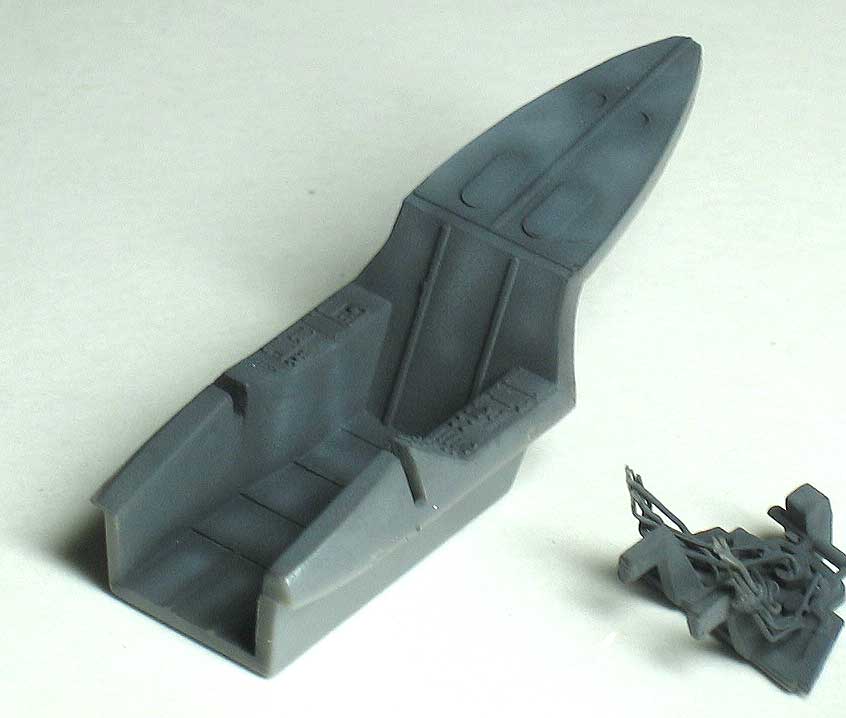 Here’s the tub with base color enhanced by dark and light shading.
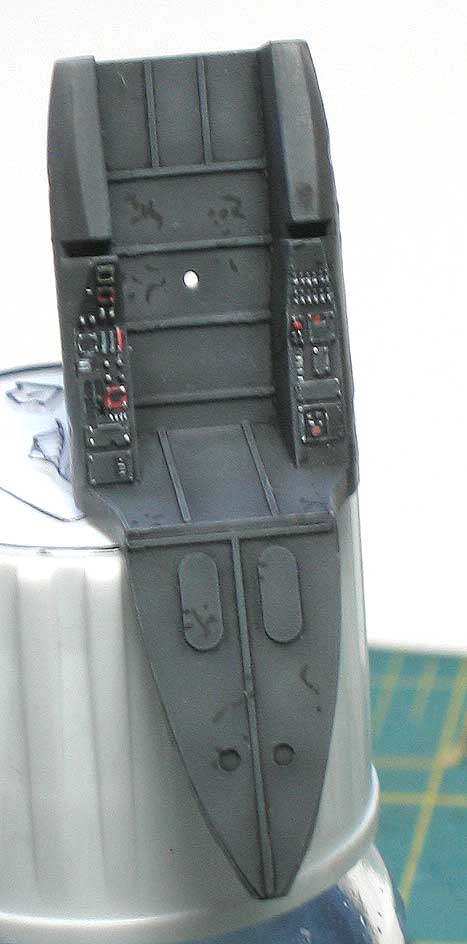
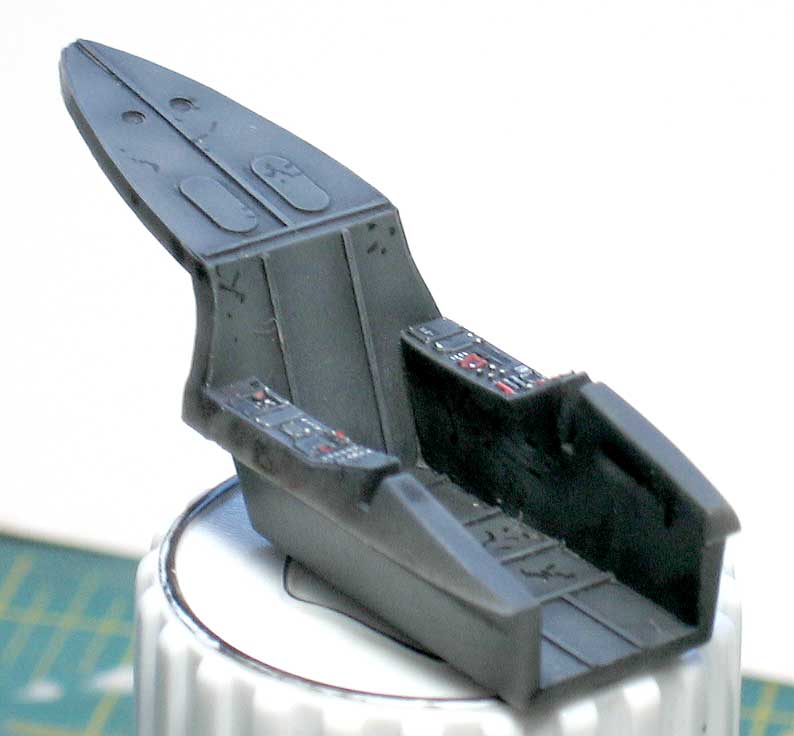 Here it is after Future, a dark oil wash, flat coat, drybrushing with pale tan and details barbarically hacked in with a housepainting brush.
 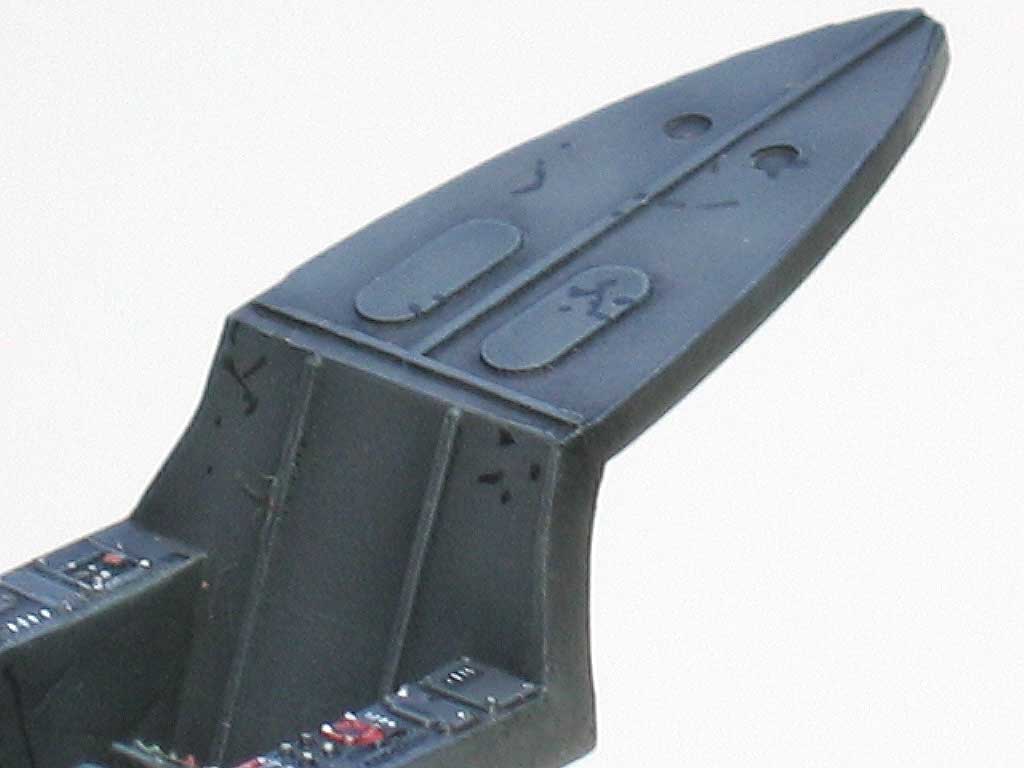 Black makes nice paint chips, dontcha think? Silver is too harsh, and unpainted metal oxidizes and darkens quickly. I’ll hit it with some pencil graphite later, tho…
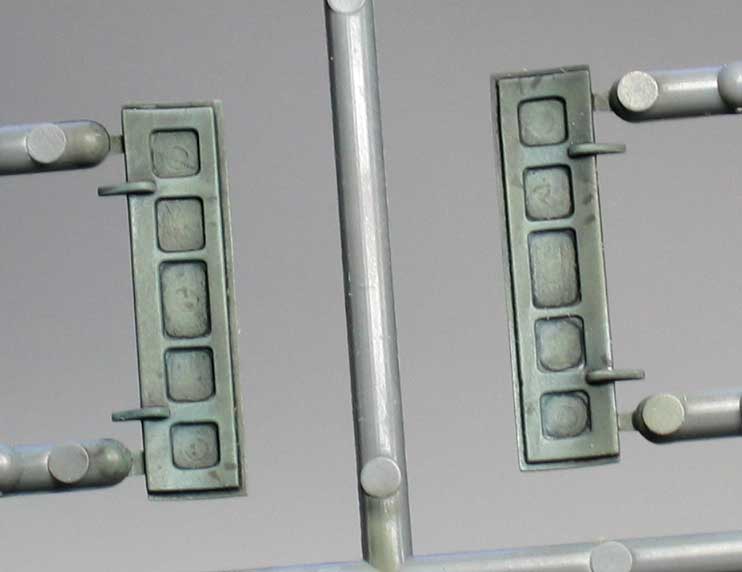
 I’ve got the RLM 02 parts mostly ready to go as well. Those colorful bottles in the gear bays need some love, and here and there colors and various touches need to be worked in. I’ll keep you posted.
That’s gonna be an awesome looking office. Looks great! Interesting subject too.
Wow you’re off to a fantastic start!! Please keep us posted with how this goes… The huckbein is a VERY interesting aircraft.
Great work!
That is going to be a stunning pit by the time you’ve finished.
Karl
It is looking nice & am looking forward to seeing more on the build progress.
After picking up the Huma Triebflugel, this kit tops the wanted list for my Luftwaffe 46 stash.
WOW Great work so for. The DB and Weathering look GREAT !
More More More I want more pics…
Bud
Excellent work so far. Looking forward to the final product.
The photo junkies are here[;)]… we should be hearing form Ed any ol’ time now[:D]
Great looking pit. Very nice detail work.
Regards, Rick
Obviously well on your way to an outstanding build. Hopefully all that beautiful work will be visible when you’re done. Looking forward to the completed project!
Too bad AMtech appears to have gone the way of the Dodo bird, though.
Mark
Awesome job so far, chuk. I can’t wait to see more of your progress
Thanks, guys- your encouragement means a lot. I’ll post more when I’ve got 'em!
I gotta say that is beautiful, im working on my first model that I have ever tried to get a good amount of detail onto and its stuff like this that gives me something to strive for
Its looking real nice. That kit was one of the top kits I’ve built, while it doesn’t have too many parts, the fit is just great and lots of room to detail.
Life and work have been keeping me pretty busy as of late, but I’ve been able to sneak in some modeling here and there. It feels like it’s been forever since I’ve glued two pieces together! 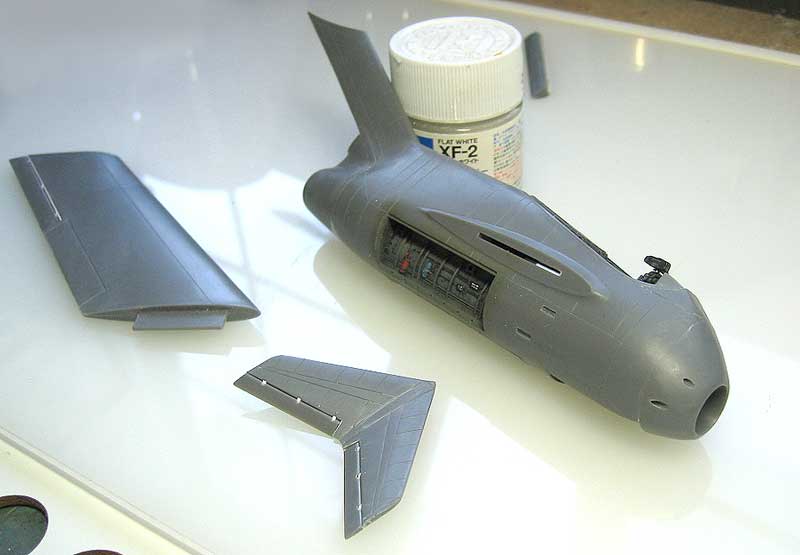 I was kind of surprised at the niumber of subtle sink marks on this particular pressing of the kit- guess I’m just lucky. I don’t mind, though- there’s something theraputic about filling, sanding and enjoying the satisfaction of a nice, smooth fuselage.
 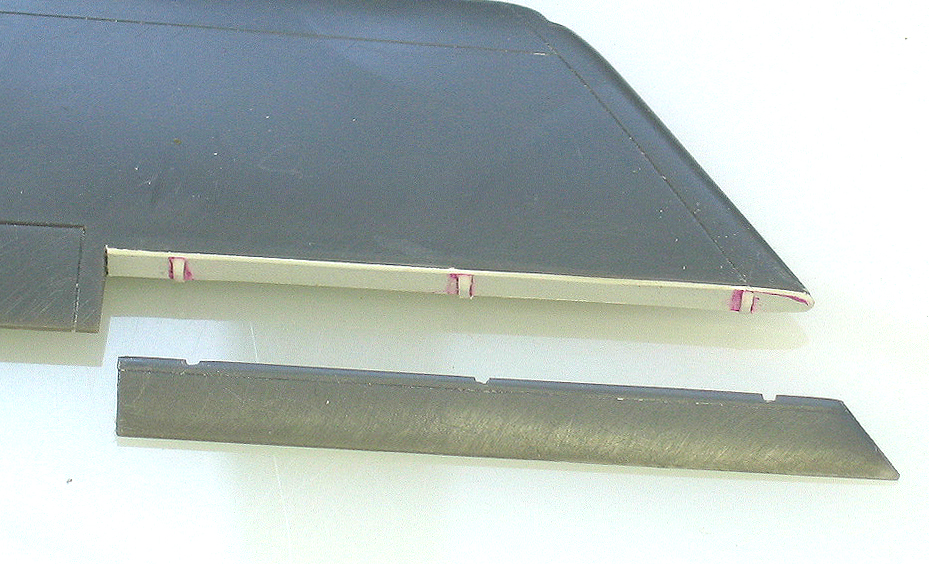 It was an easy job to separtate the ailerons and such- cover the gaps, some bits of styrene for hinges…
 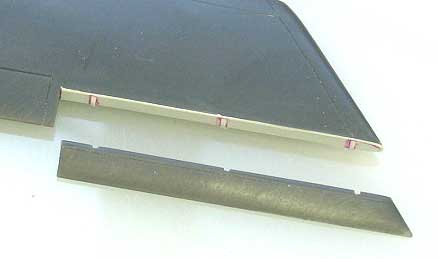 … and voila! Nicely animated flying surfaces. The Ta-183 was intended to be flown by the rudder and ailerons, with the elevators being used mostly as trim surfaces- fascinating! That said…
 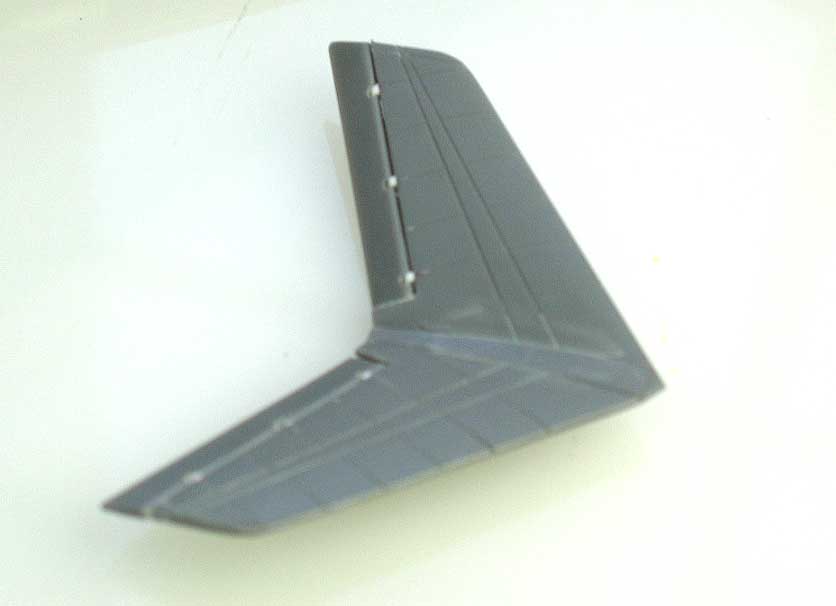 …I dropped the elevators a bit as well. I sanded the elevators and wings to have sharper trailing edges.
 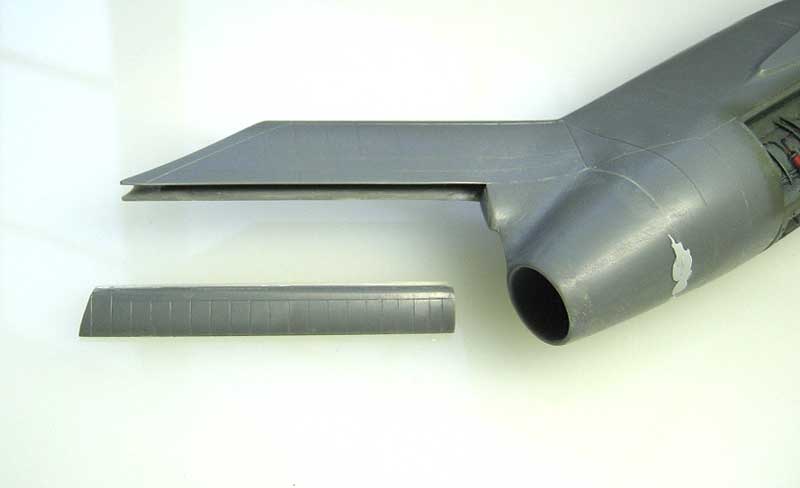 That big, fat rudder got the treatment as well. I glued a length of styrene rod to it’s leading edge and faired it in with putty, and thinned the vertical fin inners to fit. On a side note, I’ve been using Tamiya Light-Curing Putty- it works pretty well. Apply putty (quickly, mind you) and put it in direct sunight or right up close to a good fluorescent tube. Hardens up in two minutes max, just a swipe of laquer thinner and you’re good to sand.
 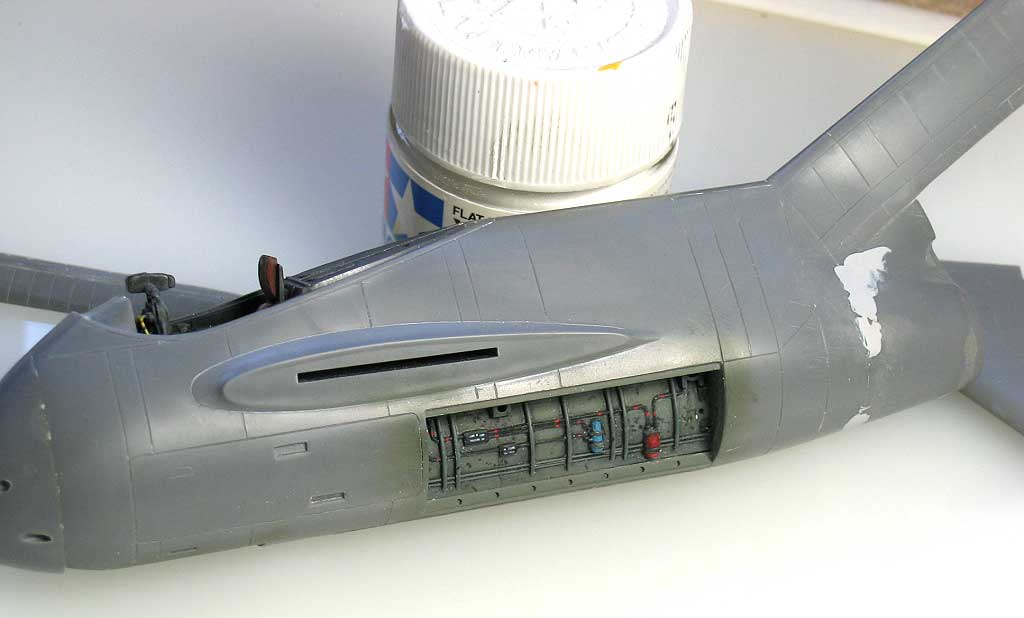 Here’s the port gear bay in place, with some Mr. Surfacer 500 yet to be smoothed in back on the butt end of things.
 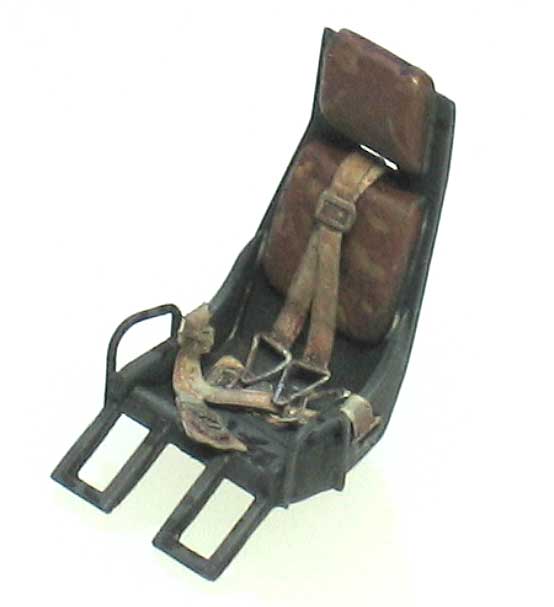 I had some old fashioned, unpainted Eduard seat belts left over so I screwed up my nerve and painted them myself. :whistle:
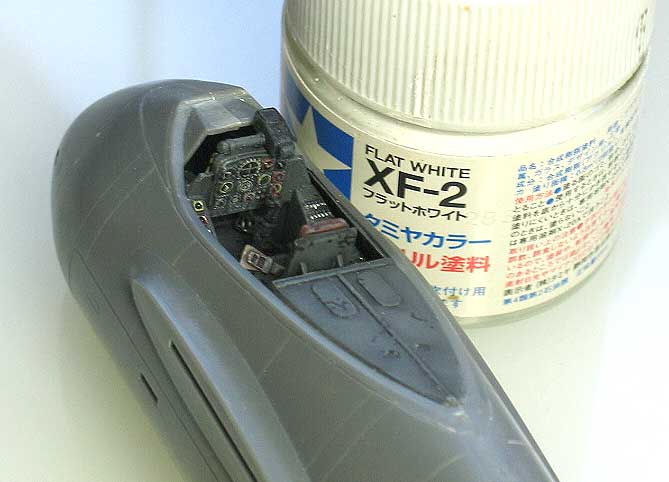 Here’s how it looks in place.
 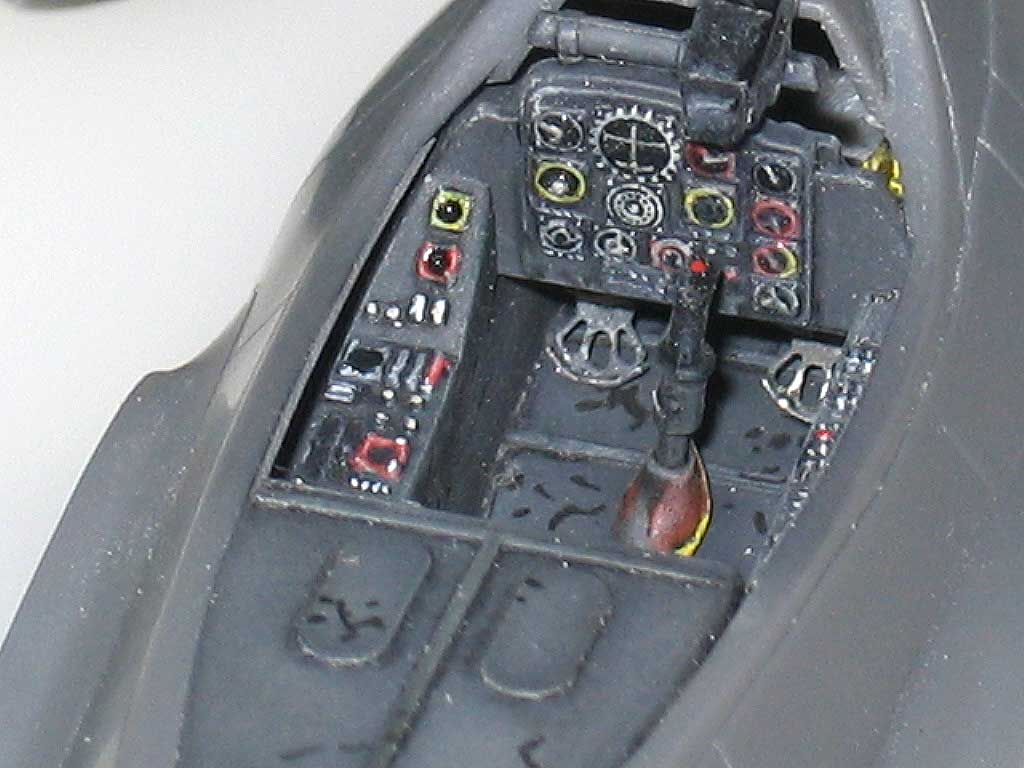 I had some rudder pedals left over as well- you can just see 'em in in finished 'pit.
 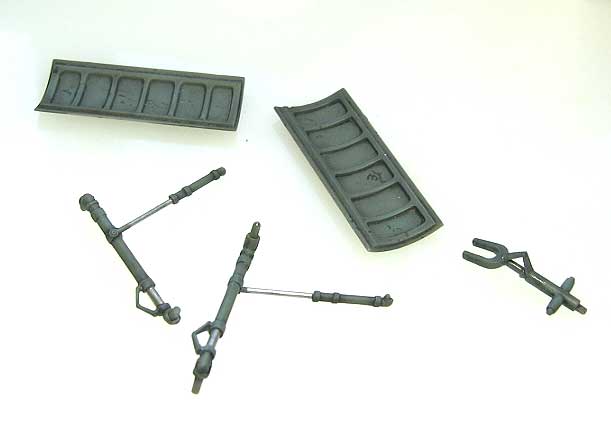 The landing gear are coming along- I added a torque link to the front strut, and may add a sway brace as well. The main gear still need brake lines, but they’ll get 'em. Tomorrow’s Christmas Eve- if I get my wish I’ll have some more modeling time. I hope you all enjoy peaceful and joyous holidays, wherever you be!
Wow. Looks really really god from where I’m sitting. You’re doing a great job on that chubby little bird. I especially like your easy method of “animating” the control surfaces!
Your doing a SWEET Job on that. WOW !
Bud
Progress! Assembly went well, and I got the basic camo laid down in an afternoon. The camo colors are the old PollyS range with the eagle on the bottle. New PollyS airbrush thinner caused an amusing chemical reaction with the paint, resulting in an expanded. clotty mass gunking up the airbrush. [yuck] Tamiya thinner worked perfectly, allowing for a nice, smooth application.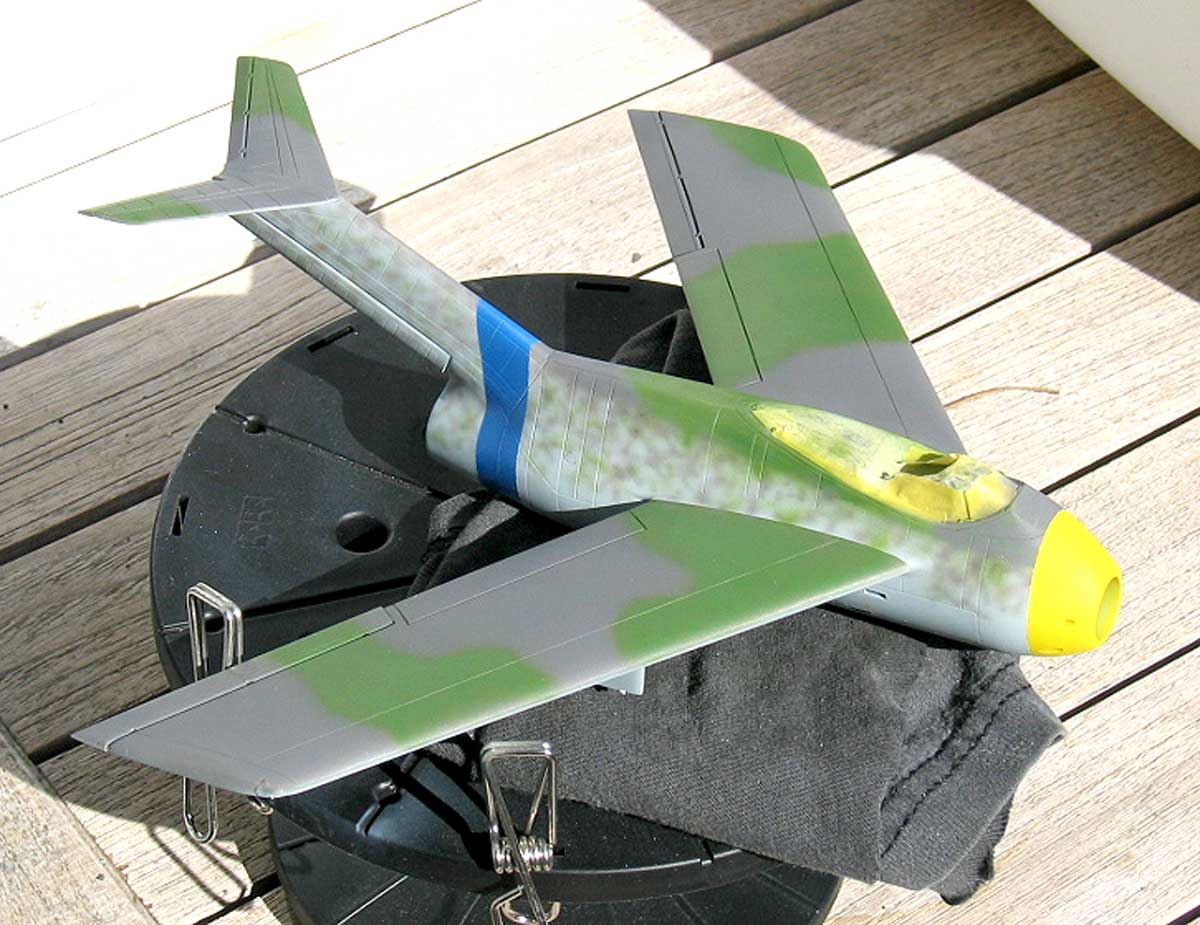 Since it’s a Focke Wulf, I’m painting it much like an FW 190 with a late war 76/75/83 scheme. I haven’t done mottling in twenty years! I’ve got a tip for my fellow airbrushers who are sick of paint building up on the needle: apply a little Rain-X. Rain-X id the US brand name for a silicone windshield treatment that makes rain roll right off the glass, and darned if it doesn’t make paint roll right off the needle! I applied the grauviolet mottle with an untreated needle and had to constantly unscrew the tip and clean it with a damp cotton swab. I pulled the needle and added a tiny bit of Rain-X, wiped it dry and reassembled to apply the 83 lichtgrun. There was a marked improvement, and no ill effects with the paint. You’ll want to try this one- trust me!
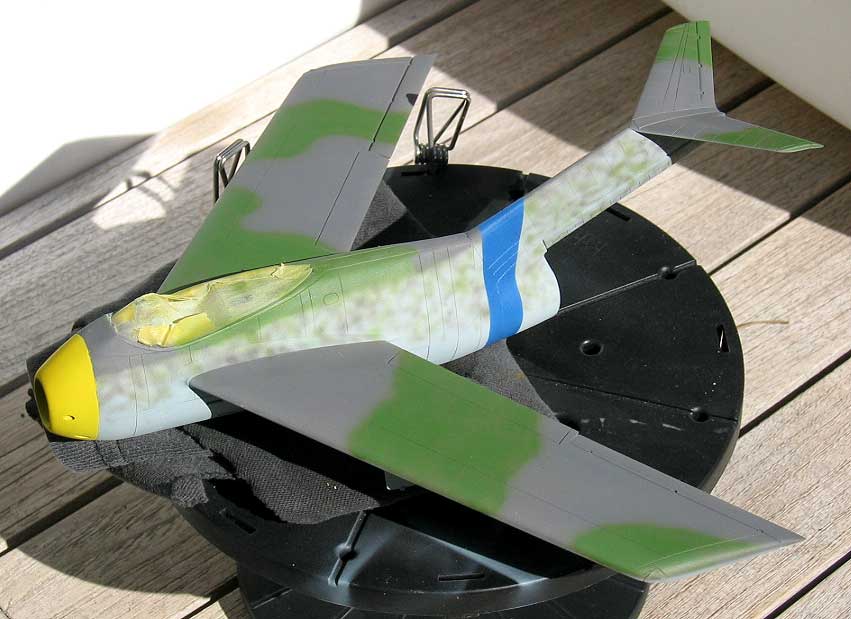
Here’s a shot of the rudder- I scribed some new inspection panels here and there to try out my new Mission Models scribers. I can report that they worked beautifully. Another tip- I shaved off the raised ridges around newly-scribed lines with an old-fashioned double-edged razor- the blue-steel kind- snapped in two down the middle. This allowed for a lot less sanding and rescribing. The flexibity of the blade allows it to conform to curved surfaces without digging into the model. 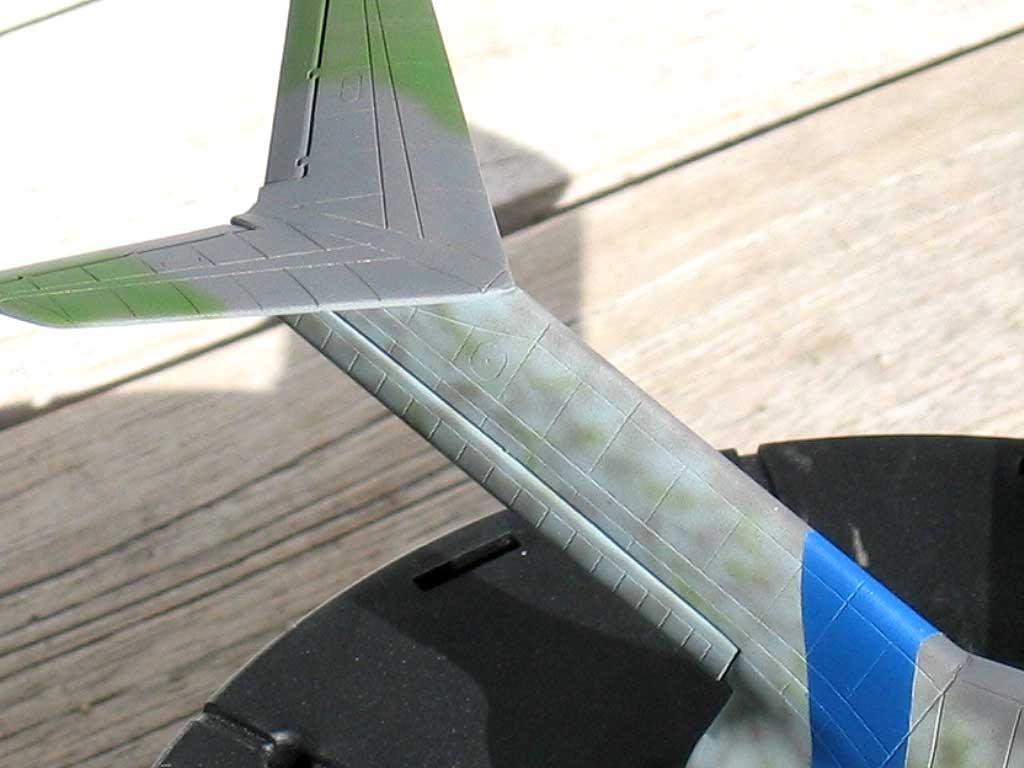
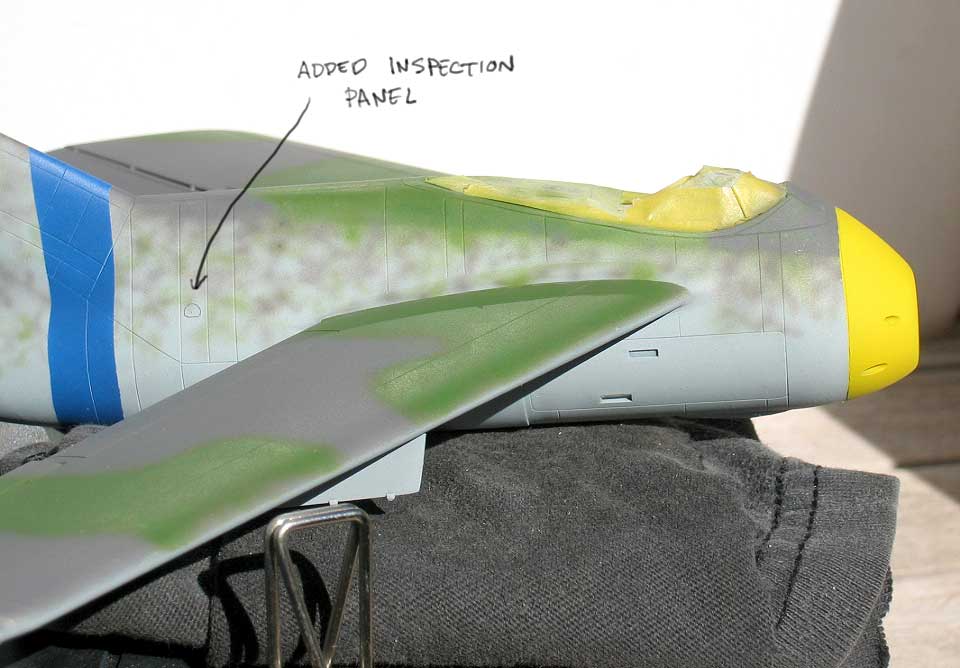 A yellow beak (Tamiya Flat Yellow)seemed appropriate, although black might be better for a raven…
 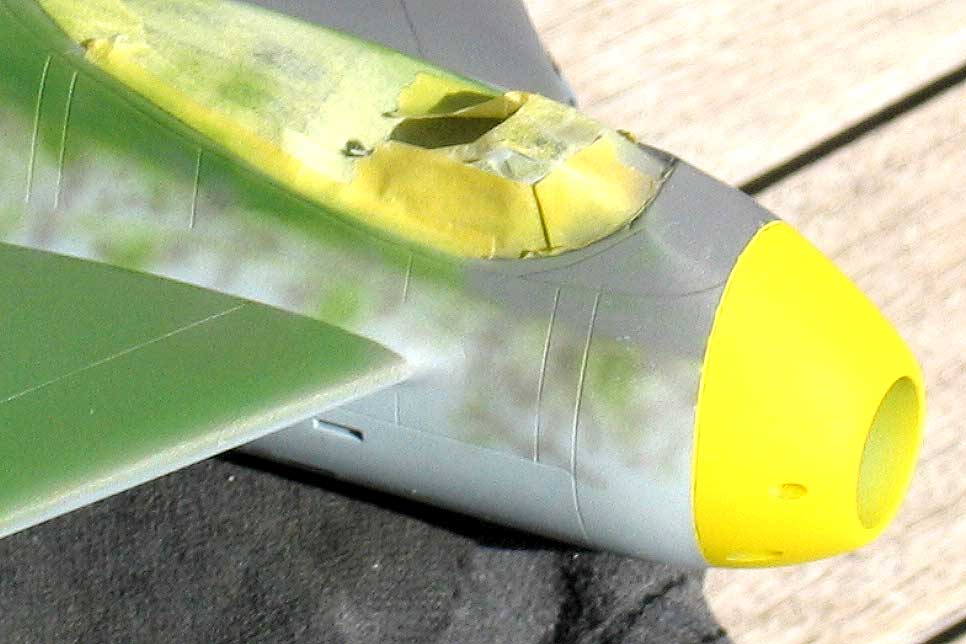 I opted for only two external stores racks.
  The mottling was applied with very thin paint sprayed at low pressure with an Iwata Custom Micron B.
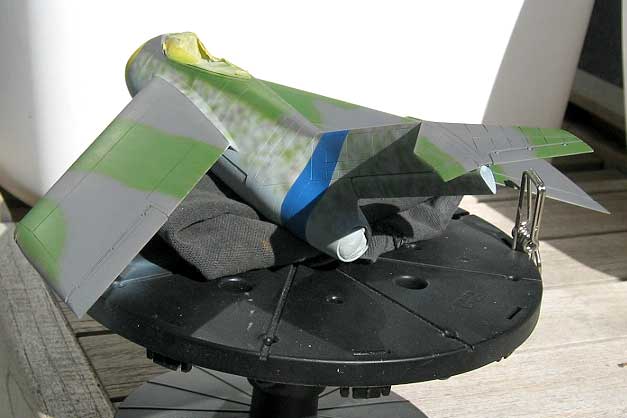
  The Defence of the Reich ID bad was masked off and sprayed with Tamiya Flat Blue, lightened a bit with white. Next comes weathering- this bird will have seen some action by the time I’m through it! I’ll probably give it a coat of Future later this afternoon to protect the finish so far. Stay tuned!
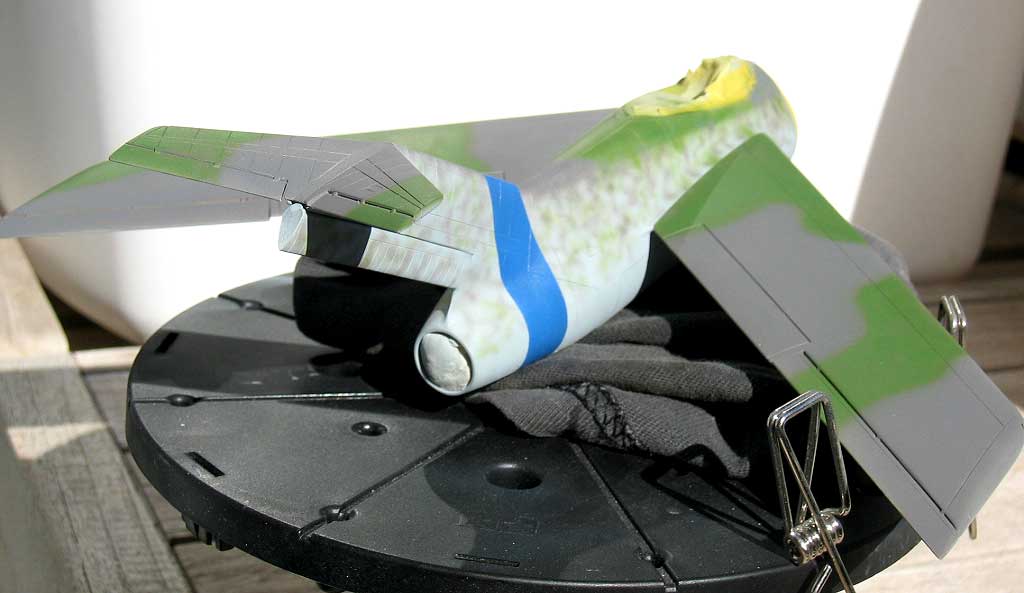


That’s looking nice!
Very impressive! Thats just superb work you have done on the ''pit. This is looking like a winner to me. Thanks for sharing this one with us.
Thanks, guys- I’ll keep you posted on the build. She’s got her coat of Future and will cure for the week. I had a small area of alligatoring in the RLM 76 on the bottom of the stabilizer- I’ll have to patch that over, cure, Future, cure… patience- the modeler’s virtue! I’ll work up the landing gear and wheels as all that’s going on-paint the missiles as well!