That’s some awesome work there, please post some more pics when you have them.
Also, when I built this kit a couple of years ago the one thing that disappointed me was the air intake (or lack thereof) in the nose. Sorry if I missed this in your post but how are you going to deal with it?
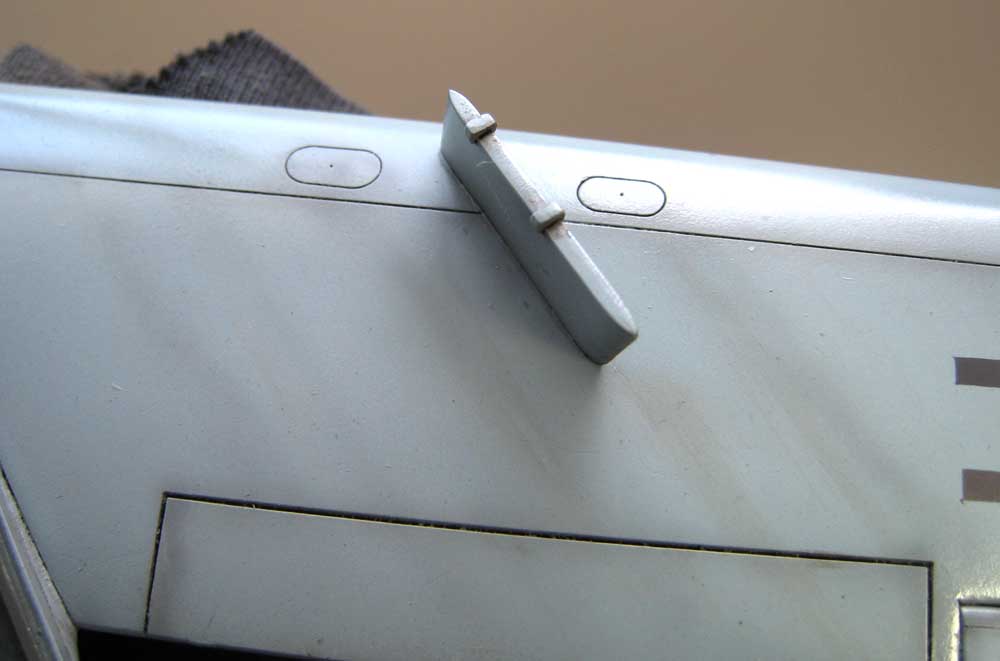
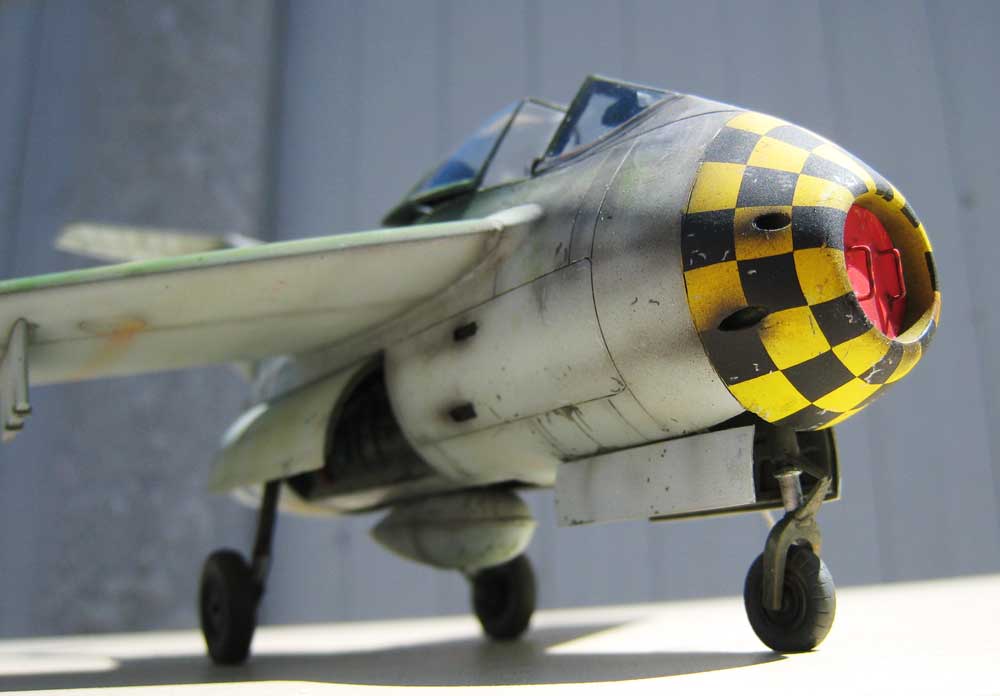
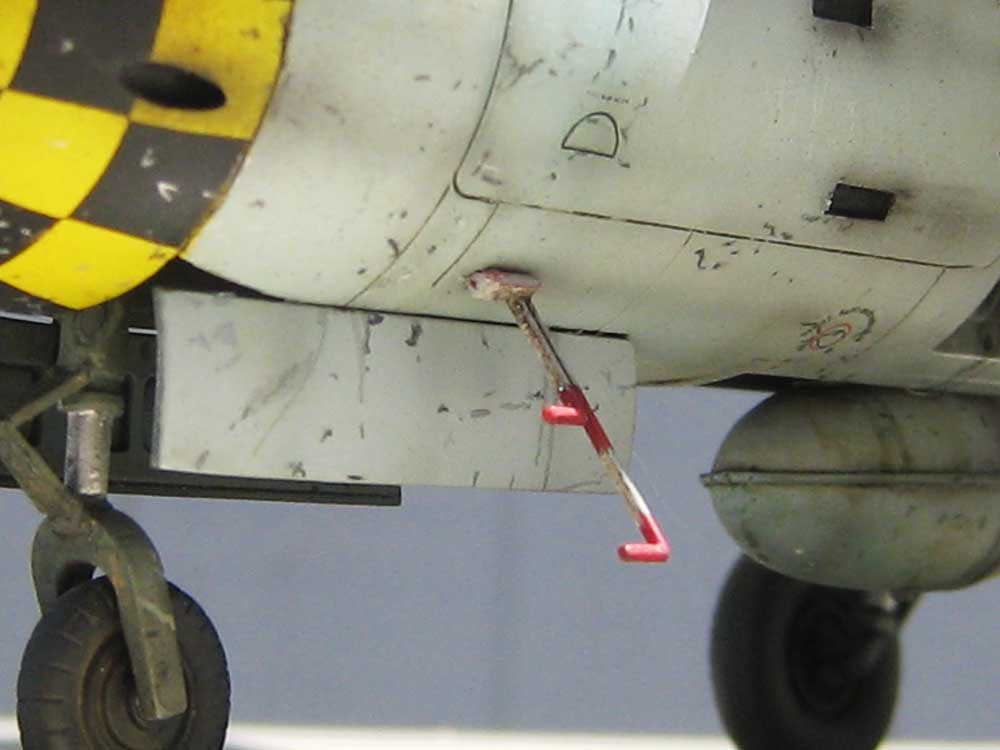
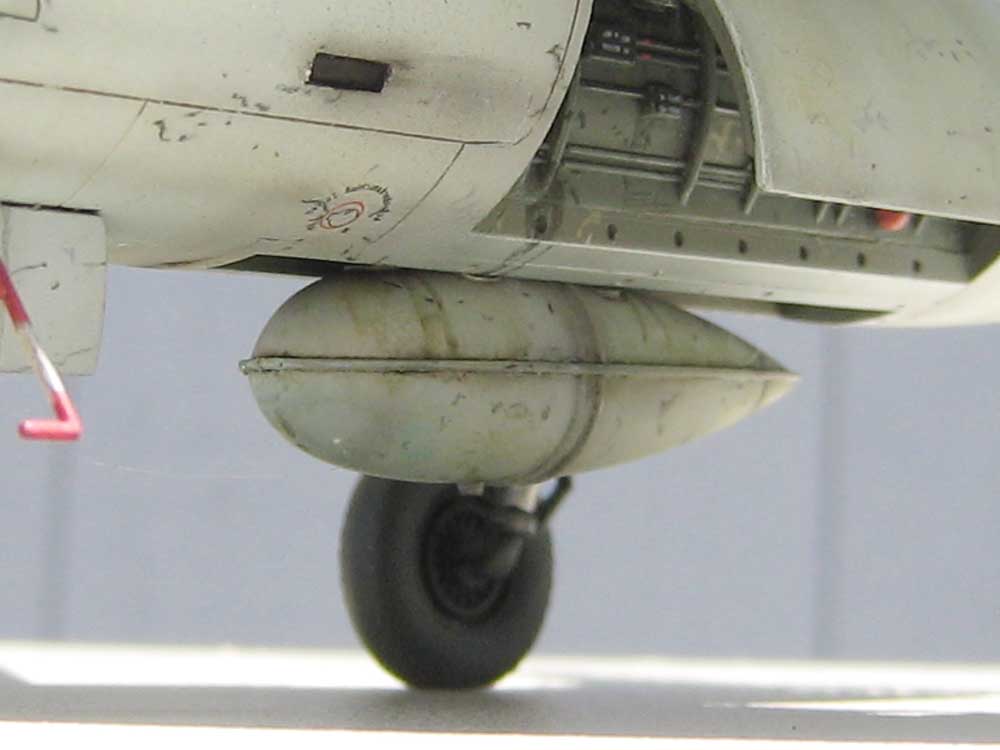
Hey, darson- what are FOD covers for, anyway? I’ll make a nice little styrene cover with a grab handle, paint it red and hopefully find an appropriate stencil for it. Problem solved!
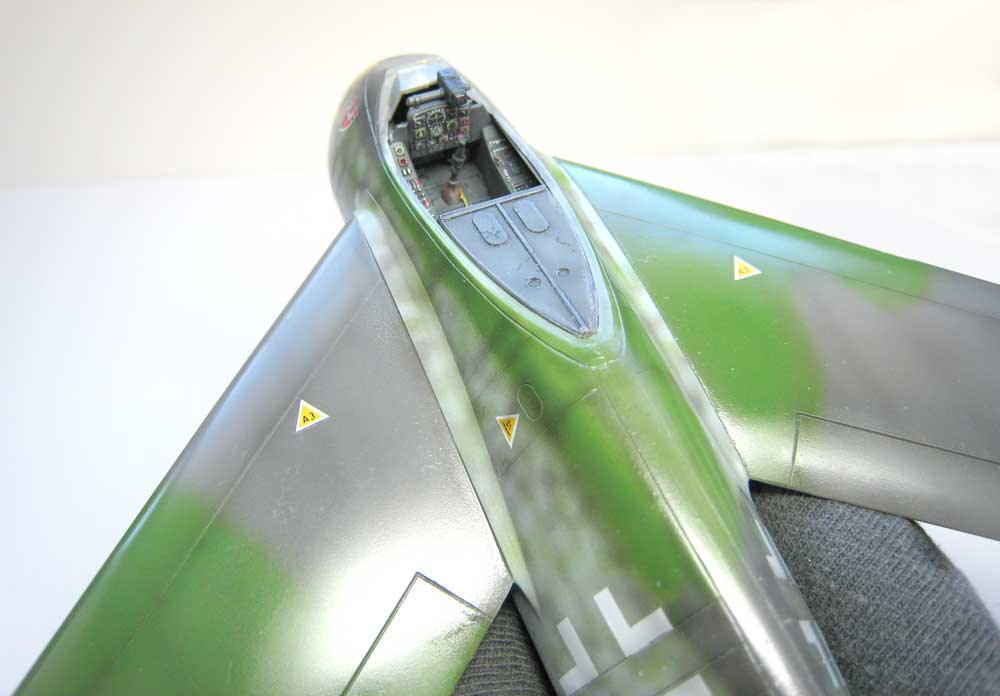
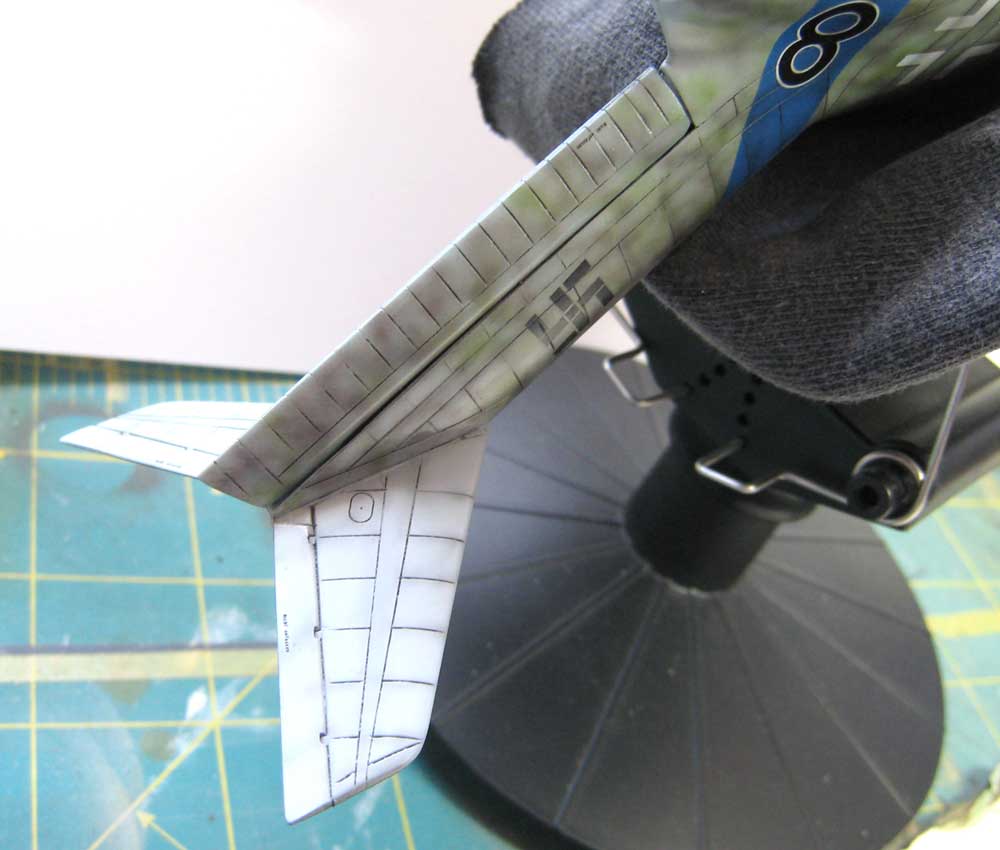
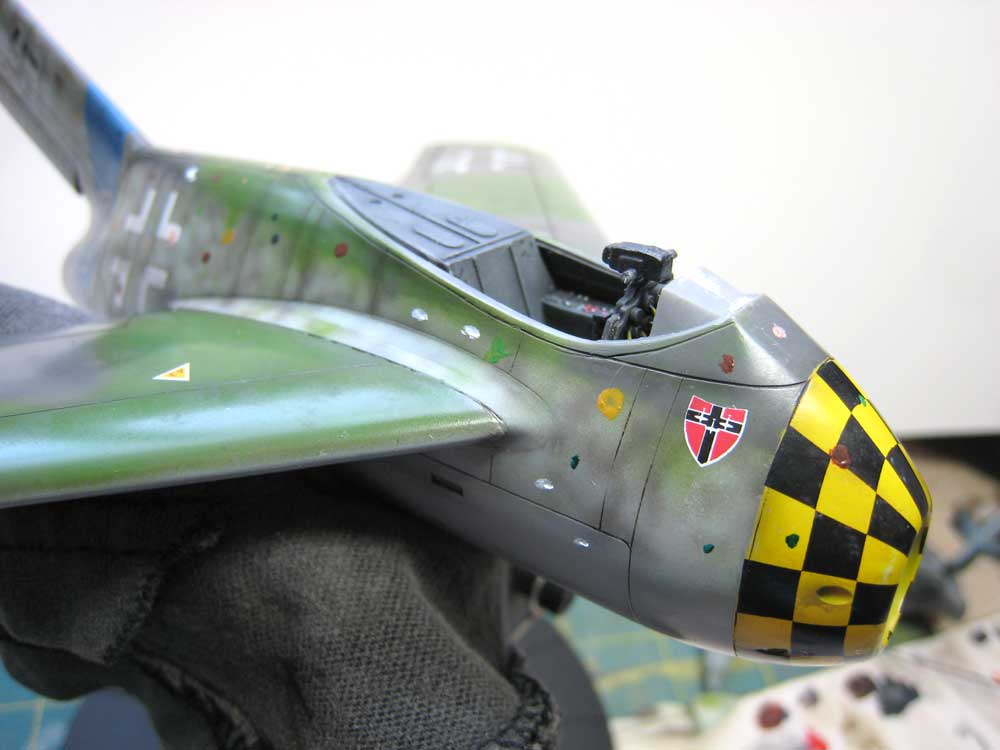
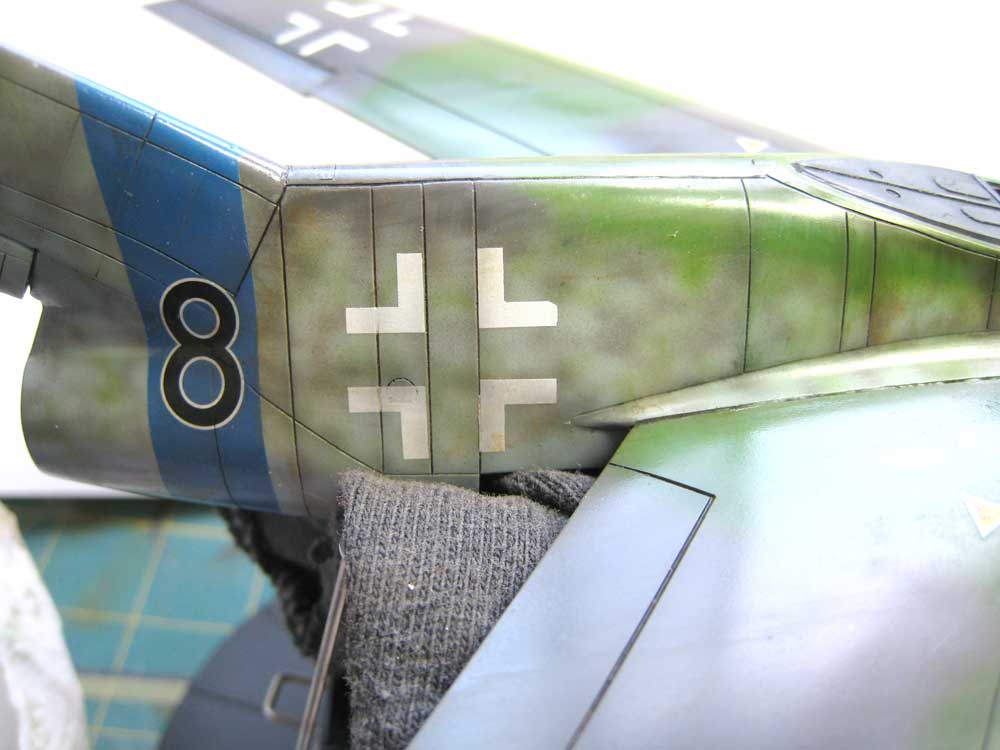
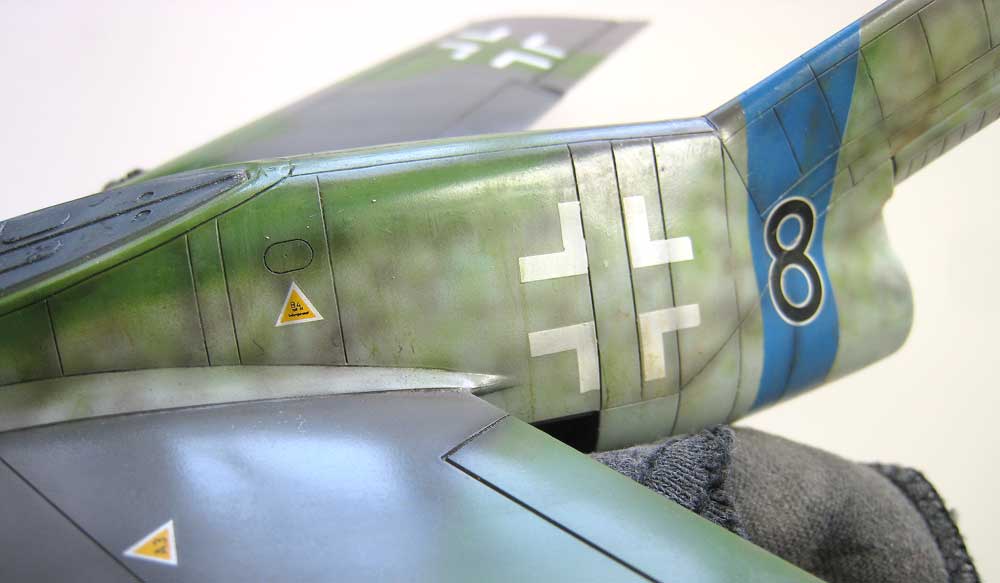
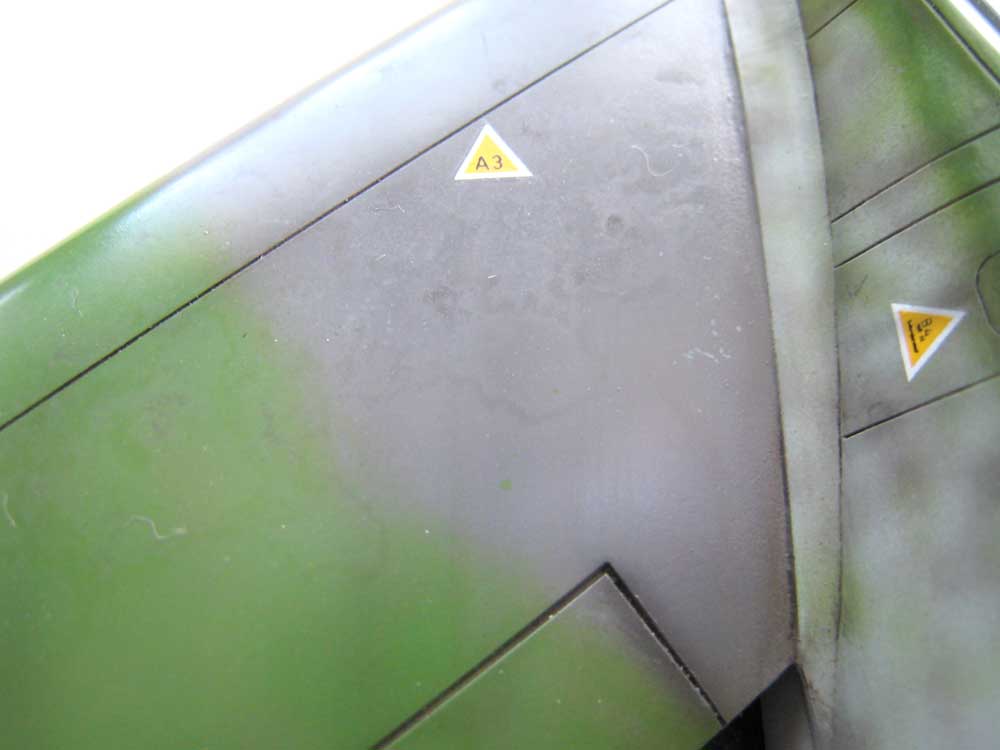
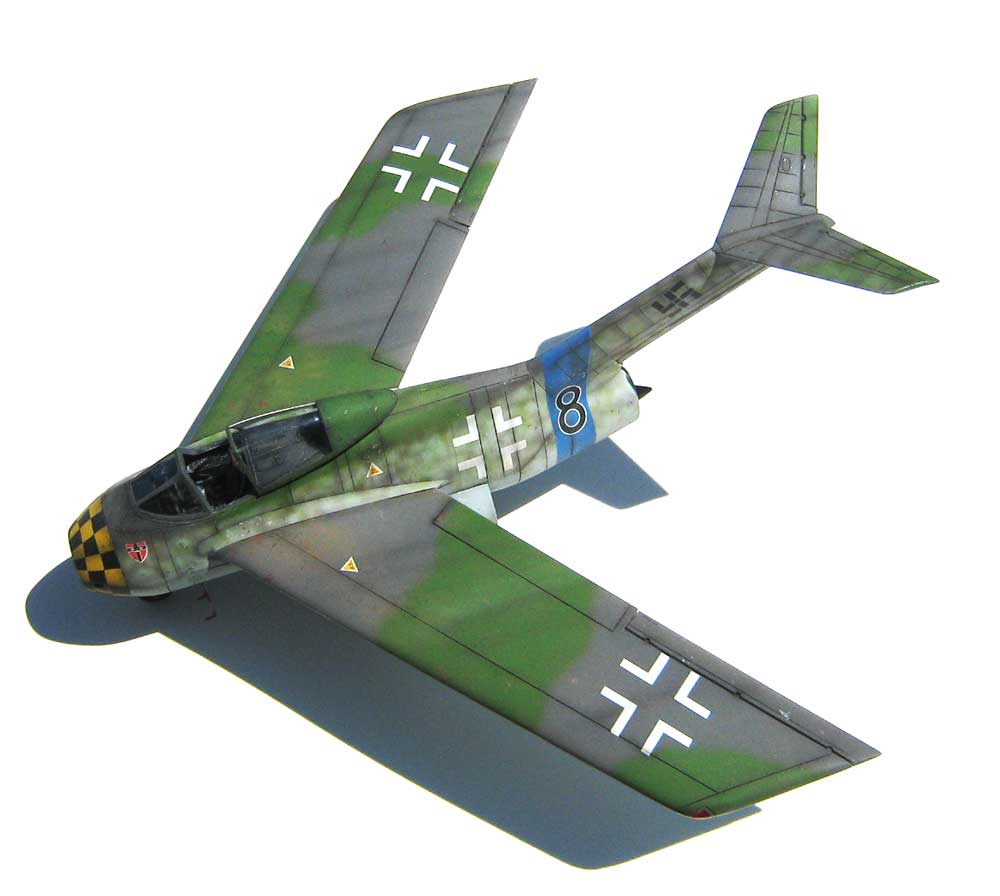
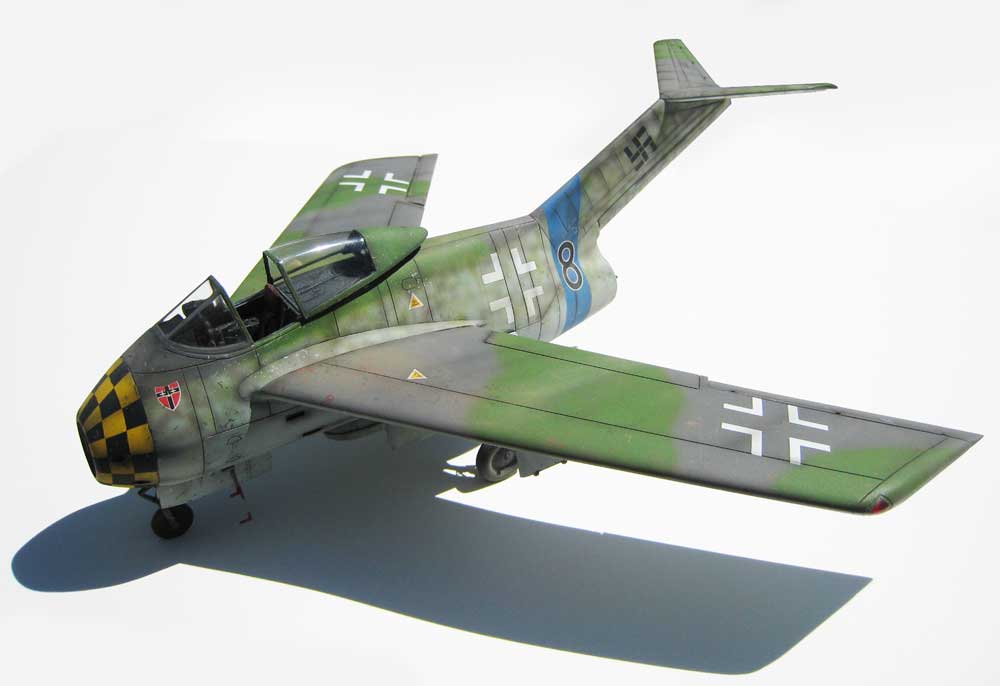
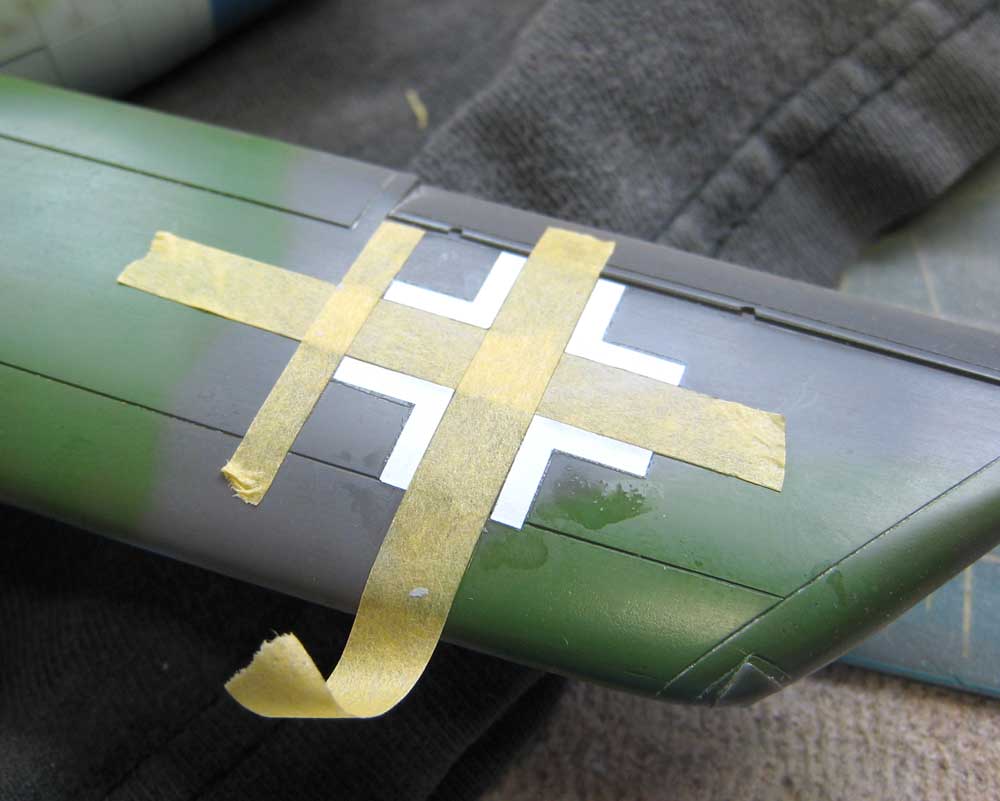
Back in gear! I put her aside while I built my B-25H for review on Modeling Madness. I decided to go all-out with the decals- this is just for fun, right? I also decided to try a bunch of new things- like really cutting away all the clear film on a decal. Here’s how crazy people do it: I used Microset and Microsol, followed by a hit of Solvaset to get the decal down into the panel lines. That gooey look is just a little damage to the Future coat and will disappear after another coat. For the lower wing crosses I thought I’d try cutting my own masks. A quick spray… …and viola! Air Superiority Grey, 1946 style! Here’s an overall shot- all are kit decals (very nice) except for the 8’s. These were from the Tamiya FW190 A-8/R2 kit. I was worried thate checkers would be difficult, but when on quite easily. They really “snuggled down” under the Solvaset- but shrunk a bit in the process. nothing I can’t touch up easily… Next: weathering begins! Stay tuned…
I did some subtle post-shading and took off the masking.
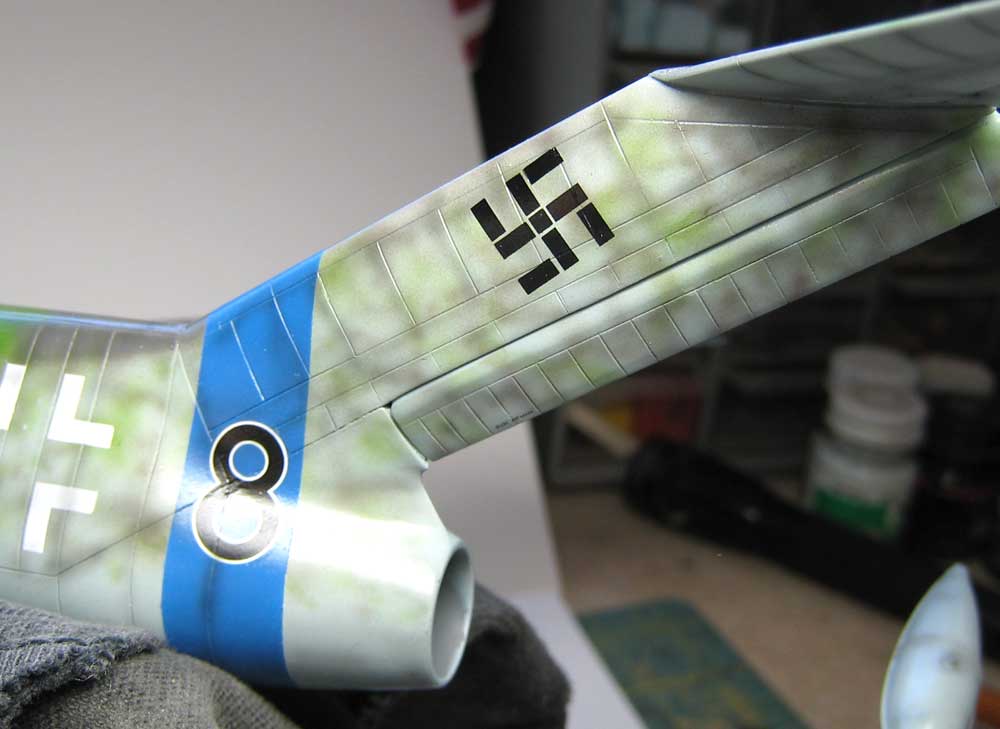
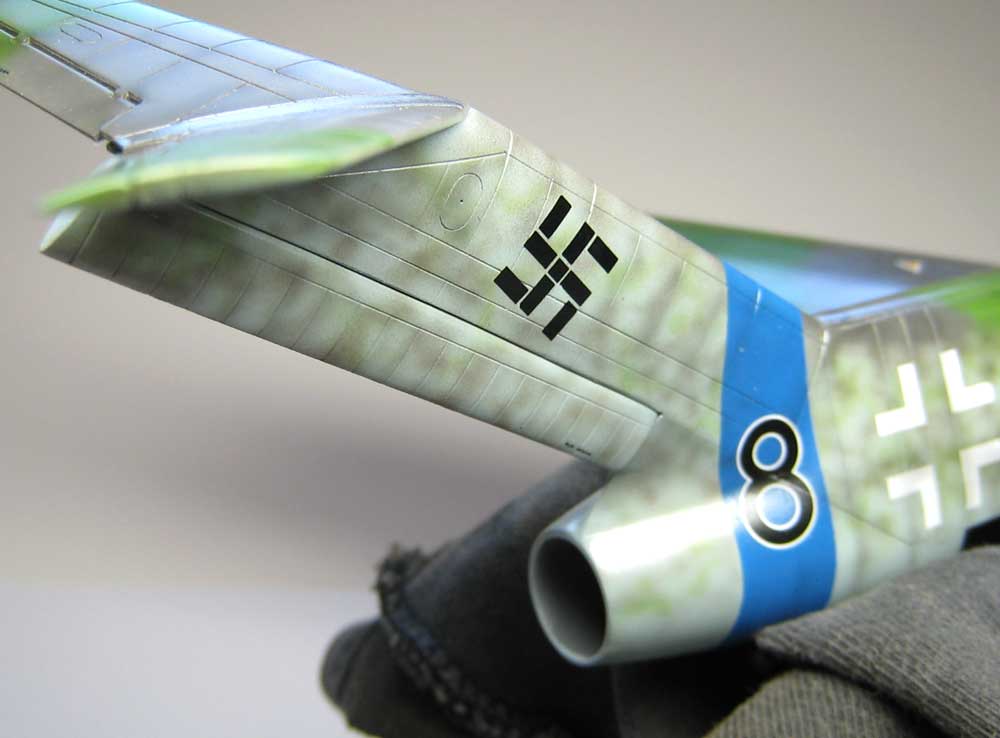
The two-part swastika decals were a bear to fit after I’d trimmed away most of the clear film.
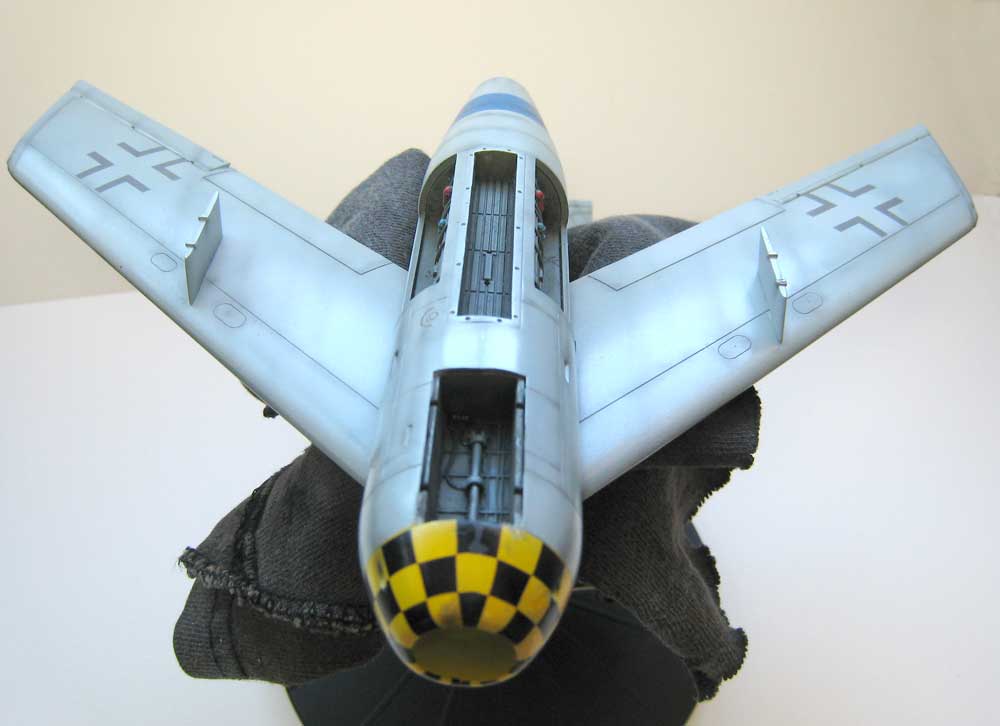
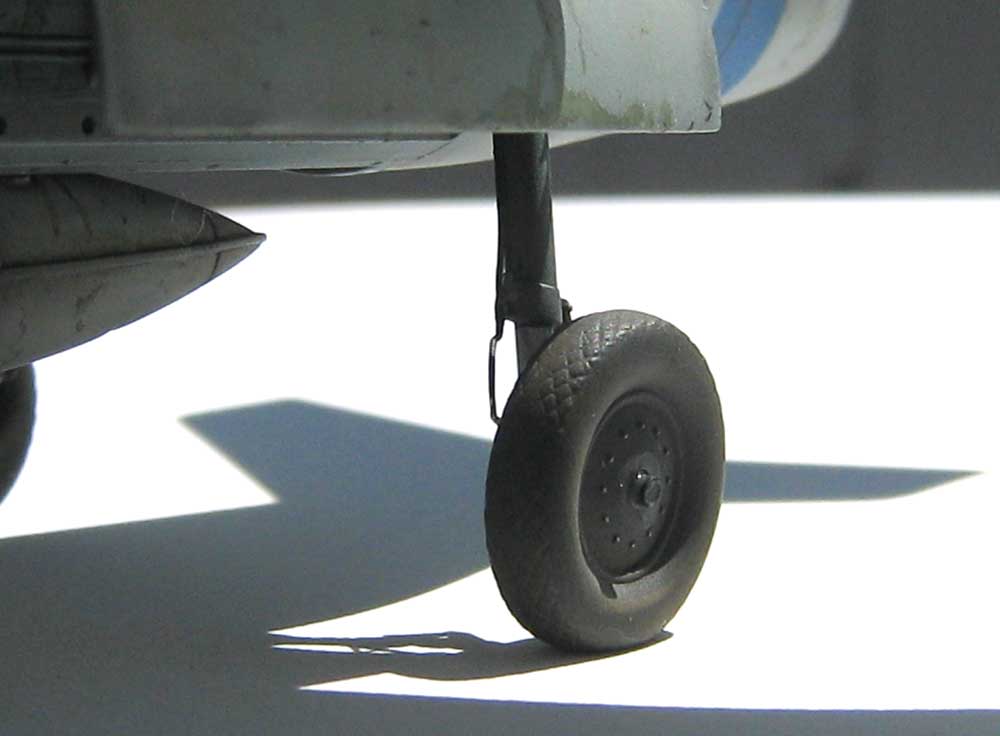
The kit main gear doors fit so well they acted as perfect masks- held on a blob of blue-tack each.
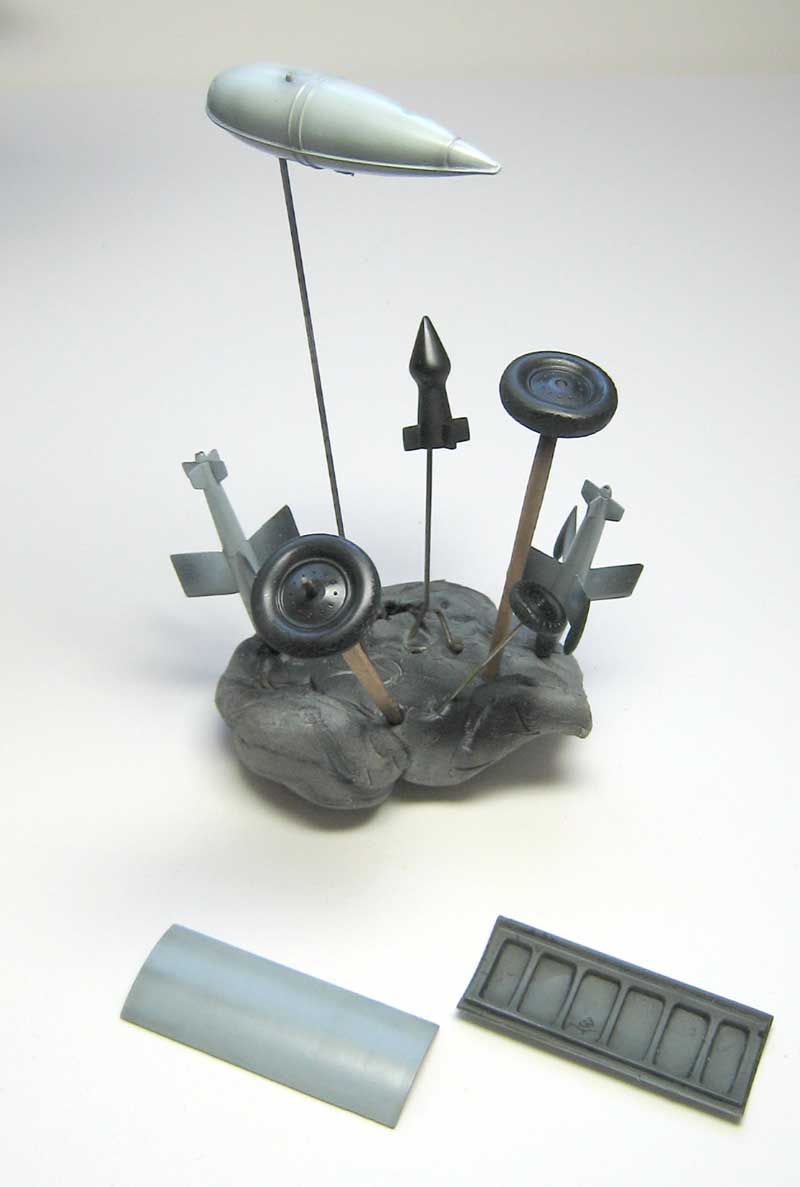
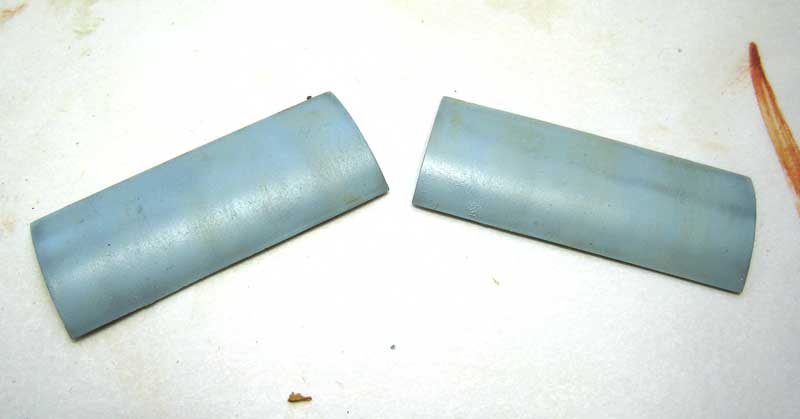
Here’s a captivating bit of modern sculpture… Bits and pieces!
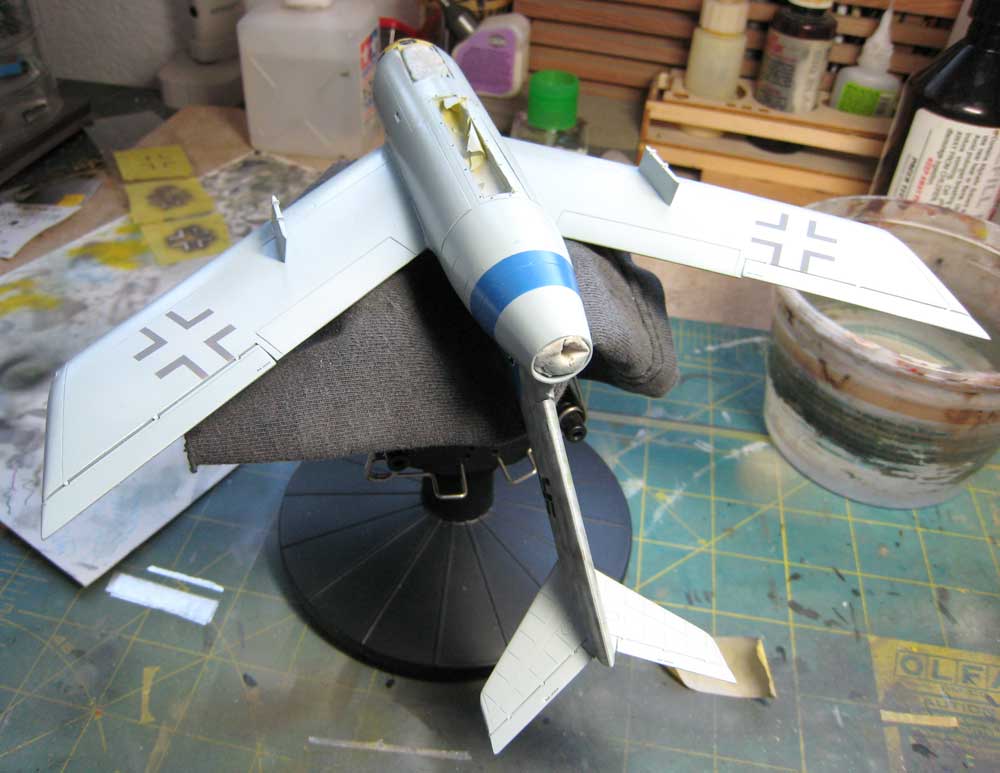
I’ve had a chance to do a bit more work on this sweet little jet: I applied a quick oil wash of black burnt sienna to all of the panel lines.
I wipe the excess wash away with a q-tip dampened with Humbrol thinners, drawing the color along the slipstream.
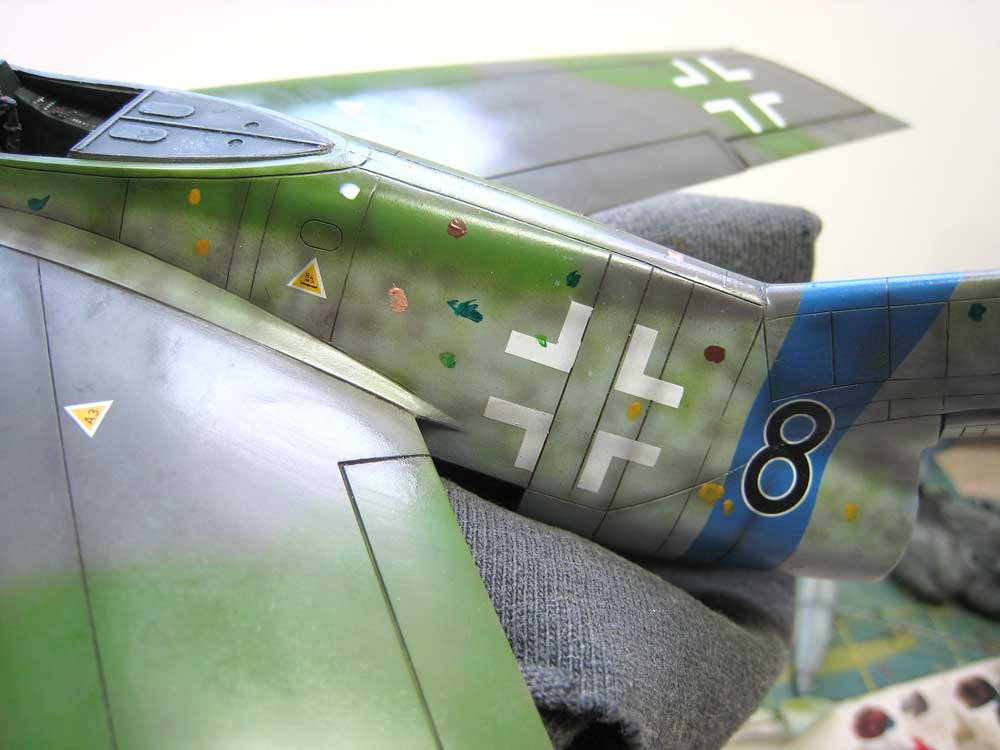
Now on to the filters. There’s no better way to break up the uniform nature of the model’s colors, imparting a greater sense of scale and dirtyness. Dabs of oil piant, straight from the tube, are spotted here and ther long the fuse and rudder- don’t forget the gear doors!
Take wide brush, again merely moistened with thinner and work the dabs of paint out over the surface of the model. The ideea is not to make a wash, but a thin film of paint to modify the base coat. Clena your brush often, so as to keep the effect from becoming a monochrome.
On the fuselage and its components, draw the film of paint down in vertical strokes.
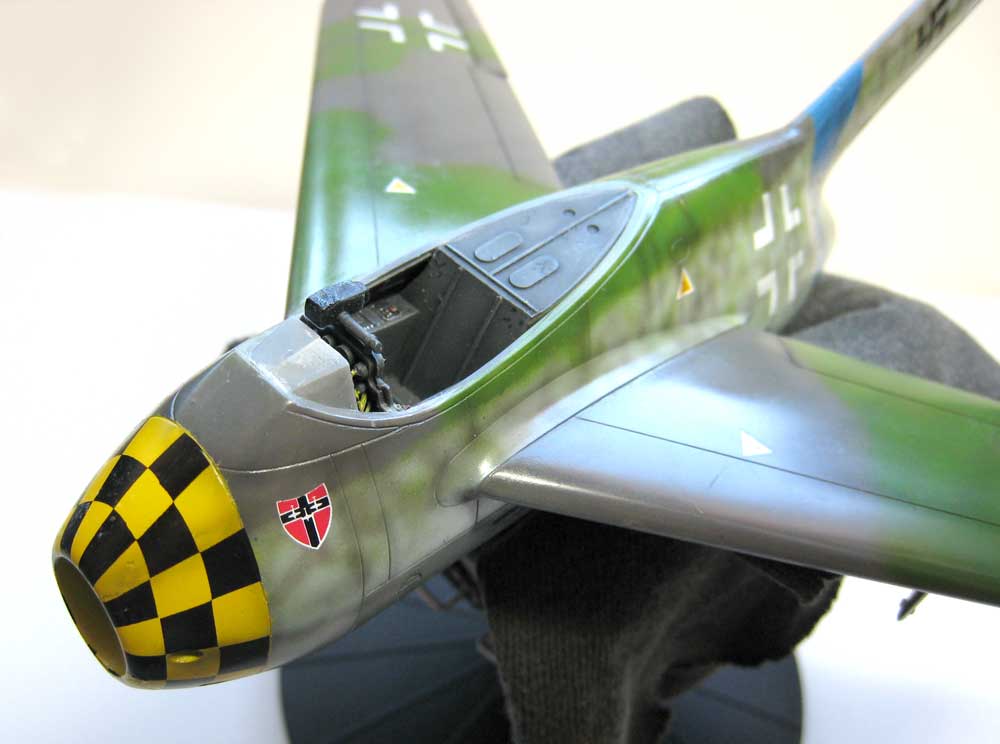
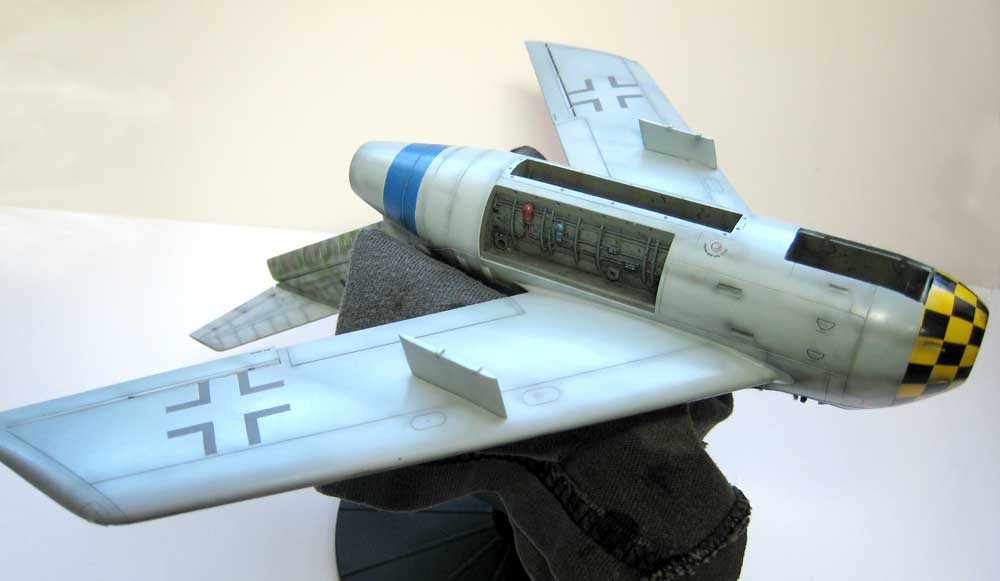
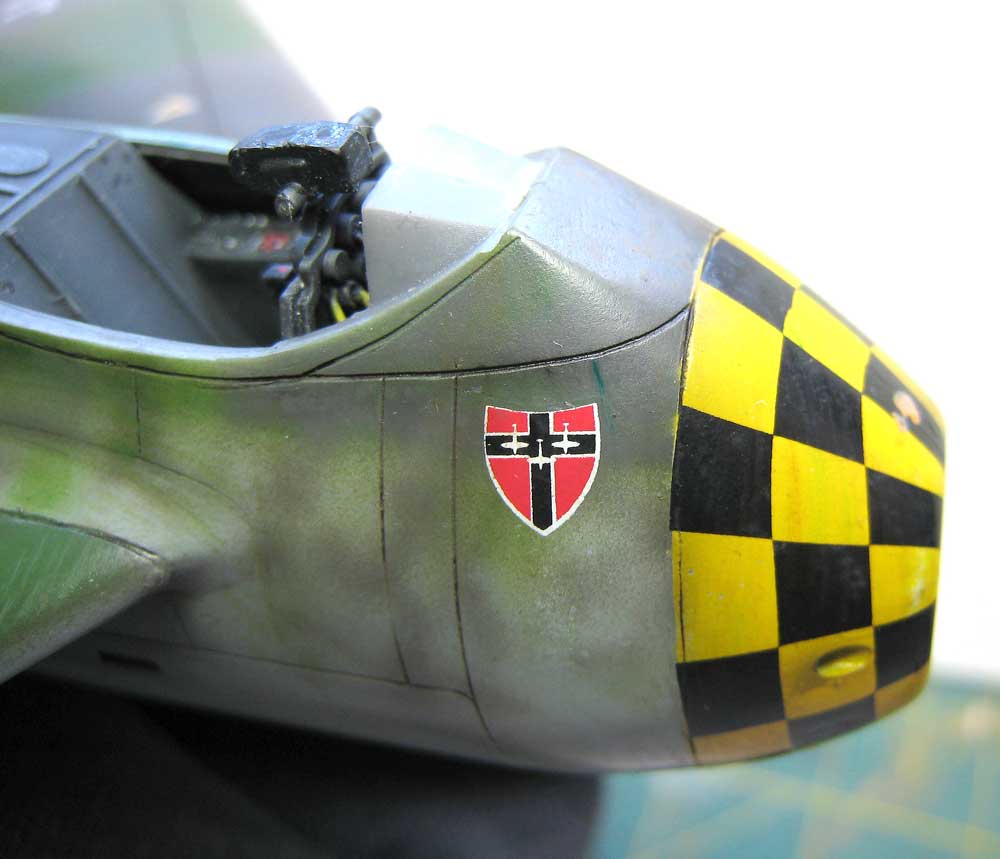
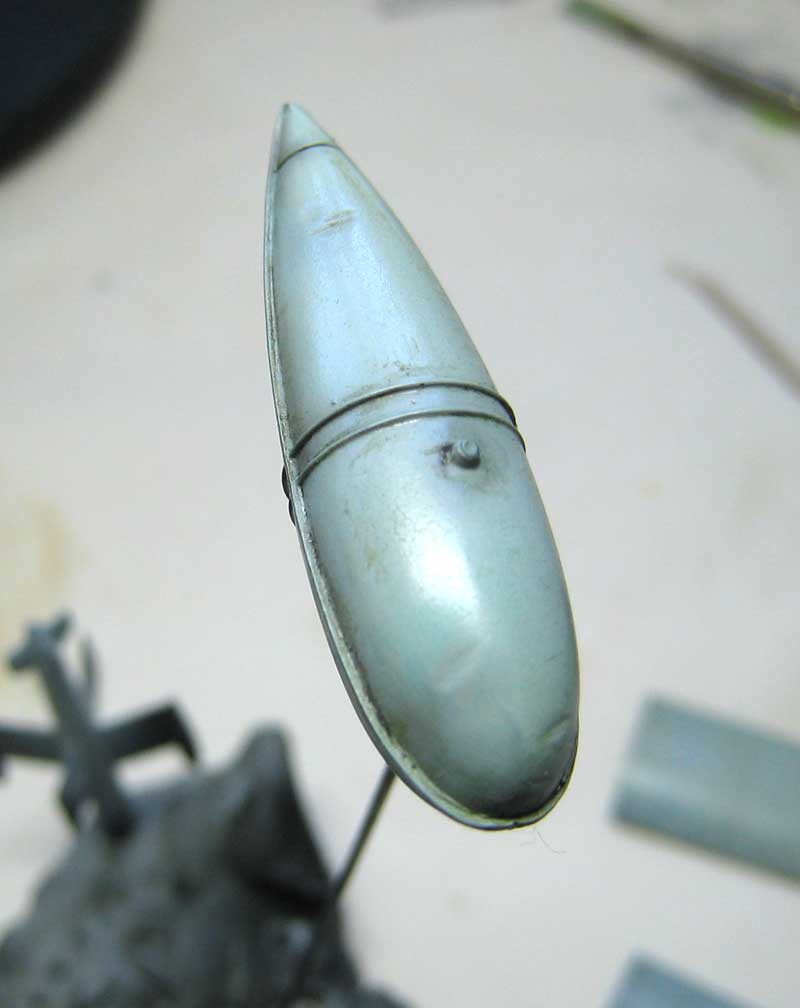
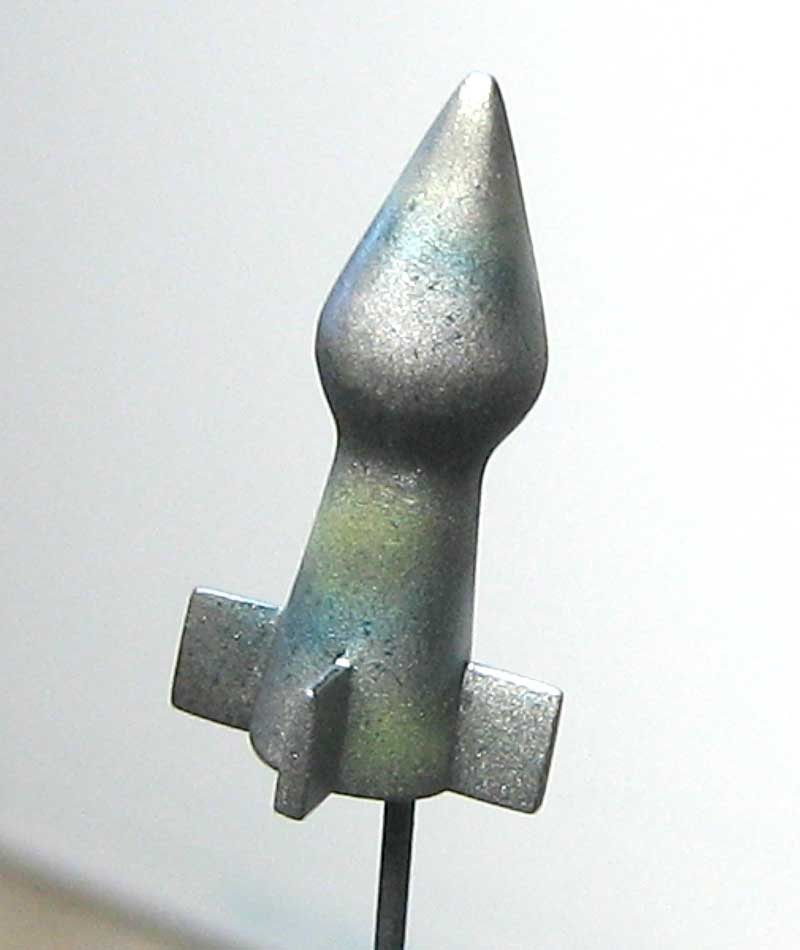
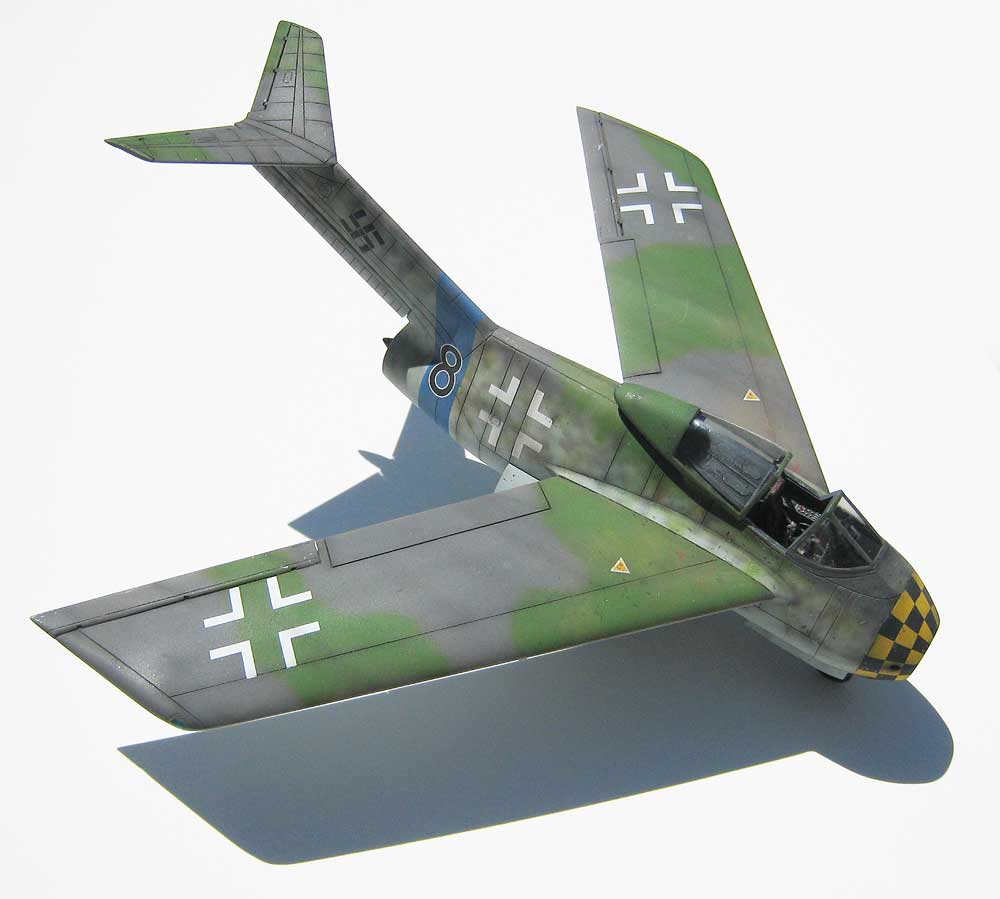
The tailcone was painted black, the given a thinned coat of bright silver. Bands of transparent brown, blue and yellow were sprayed in rings to simulate the effects of jet blast.
Thanks, guys! The technique is easy, fun and fast. Here’s a fringe benefit from having a q-tip loaded with “dirty thinner” from wiping off the panel wash excess- using a tapping motion, add some dirt to the traffic areas of the wing. You can build this up with a couple of consecutive applications. More variety on you base coat.
She’ll be getting a flat coat today- on the paintchipping!
I’ve been following your progress and since I build 1/72nd I have started the inferior PM models kit. It lacks detail BUT looks good in outline. After doing some research I have noticed that the main gear doors on the Amtech kit are rectanular while the PM kit has them with an angle which bears true from all the research SO… whats up and which is right? Anyone with an answer(No guesses please!). Thanks for any answers and…Good Hunting, G.W.
Great paint job, the blending of the camo is really well done. The dented fuel tank is a real nice touch. The only thing that I didn’t like about this kit was that I wished they made the air intake deeper so that it can be at least given the impression of going into an engine. You are really taking it to the next level by painting those german crosses, creat pictures to show how you’ve done it too.
RDXpress- Thanks! Ihope you’re enjoying your build. I have no idea which gear doors are more in keeping with the historical facts as they stand- sorry!
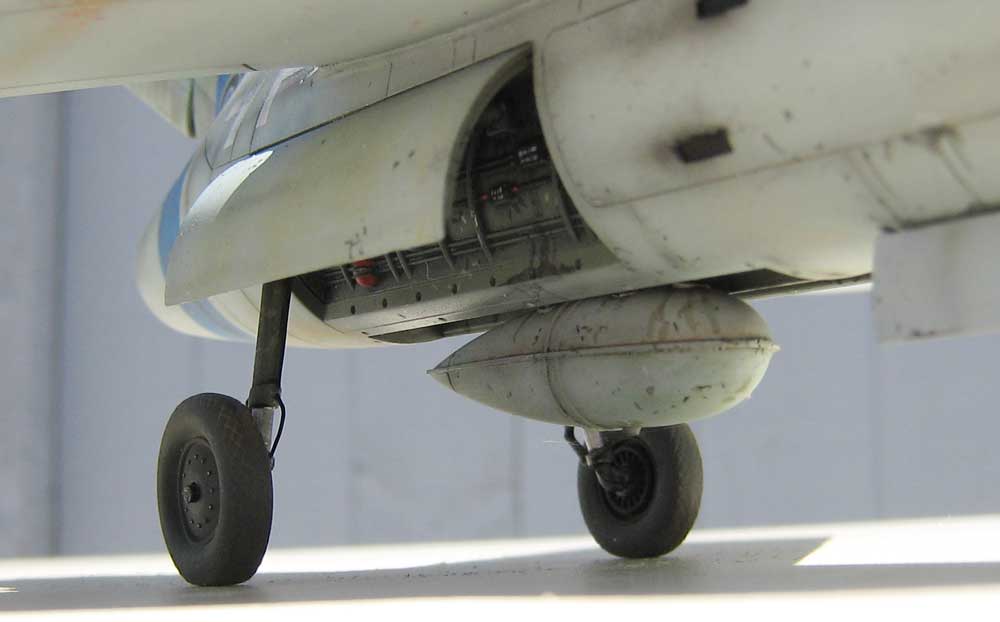
waikong: I cheated past the shallow opening with a quick FODcover- cheers! [:P]
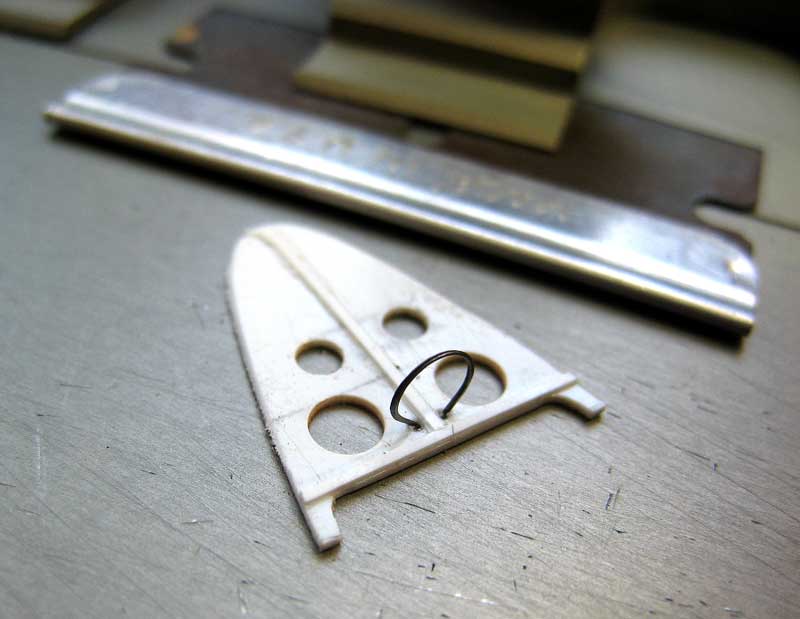
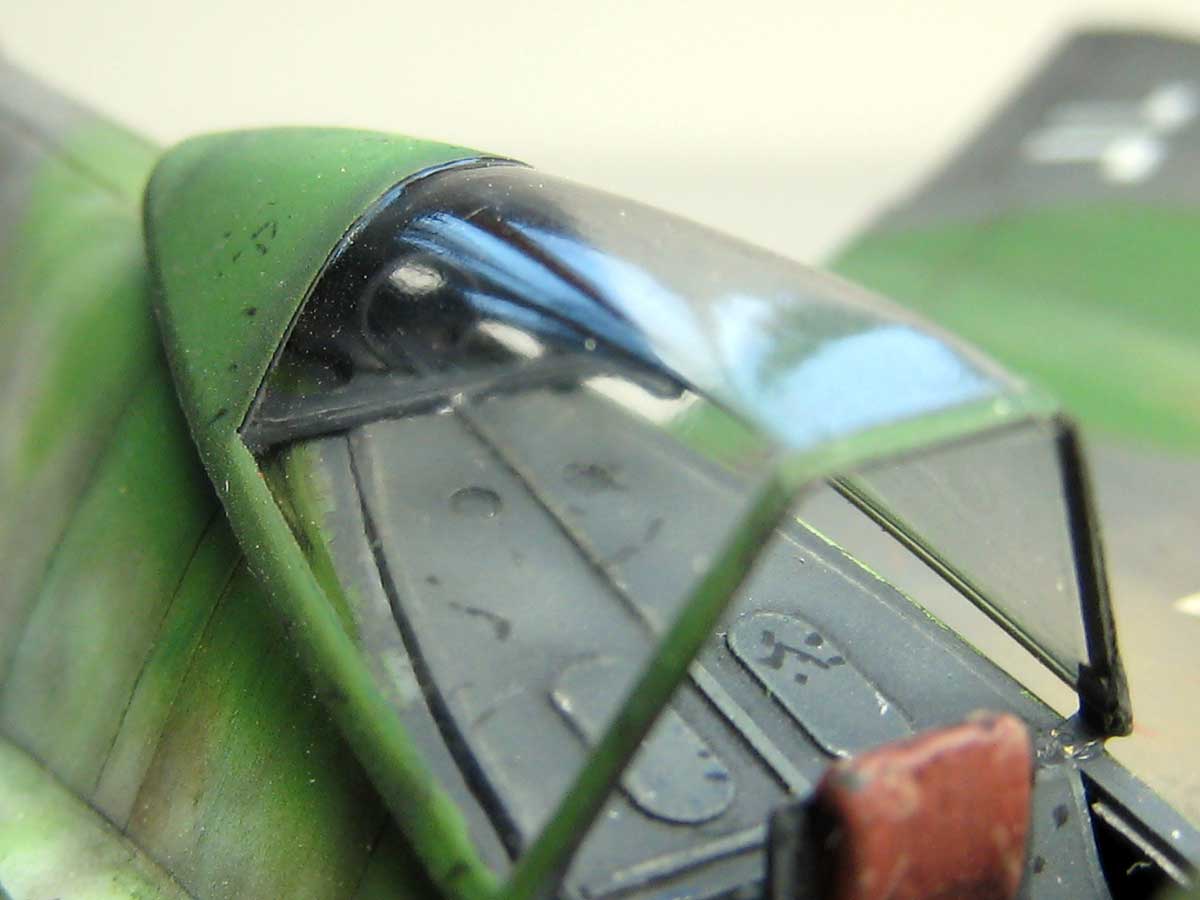
Okay, she’s just about done. It was one of those “D’oh!” moments when I realized I had been totally ignoring the canopy up until now! I got down to it- cut out and separated the Squadron/Falcon vacuform. No worries there, but when I placed the rear dome on the model there was no where to rest it! It basically fell down on the fuselage spine, so I knew some structure needed to be cooked up. Out came some vintage 1970’s squadron styrene, some recently-purchased Evergreen strips and a spare DF loop from an Eduard Me109 set- viola!
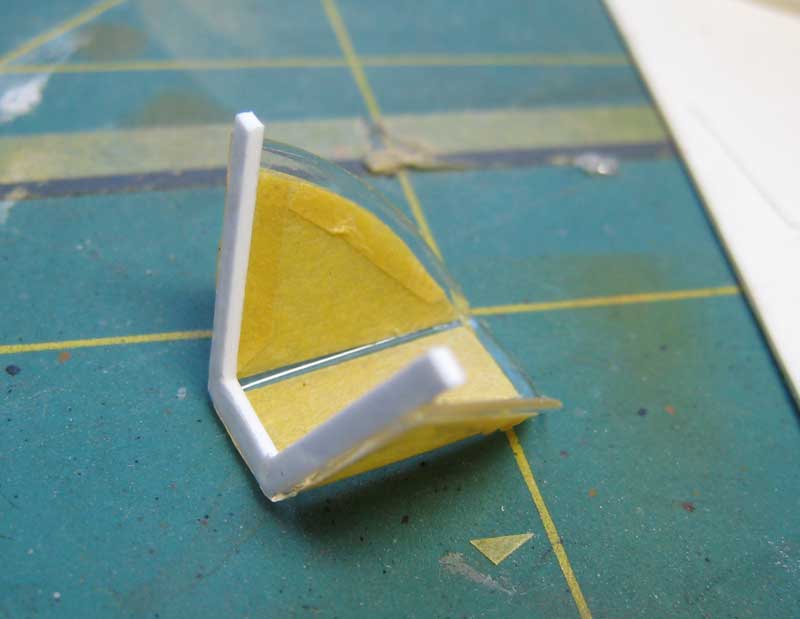
I glued it to the Future-dipped canopy with a few spots of CYA, followed by a bead of Testors Canopy Cement.
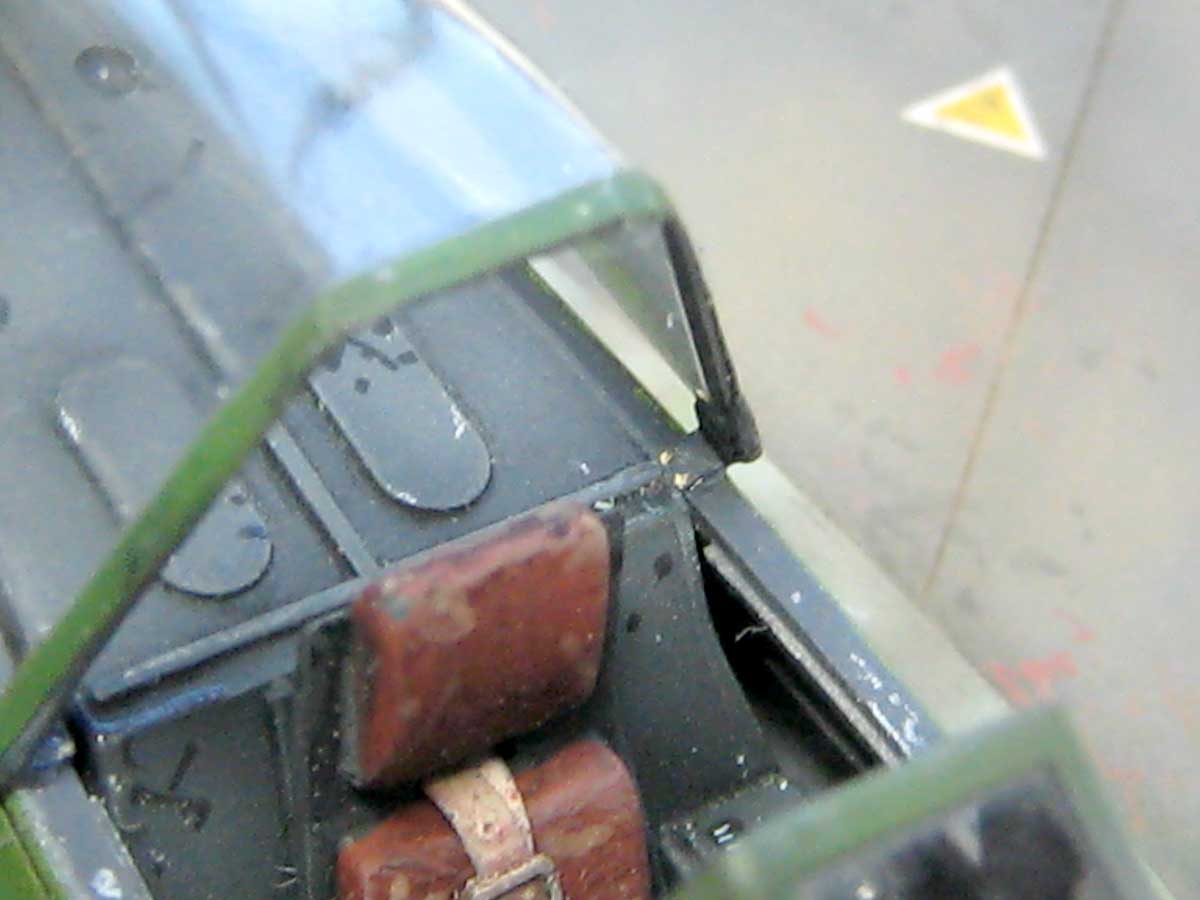
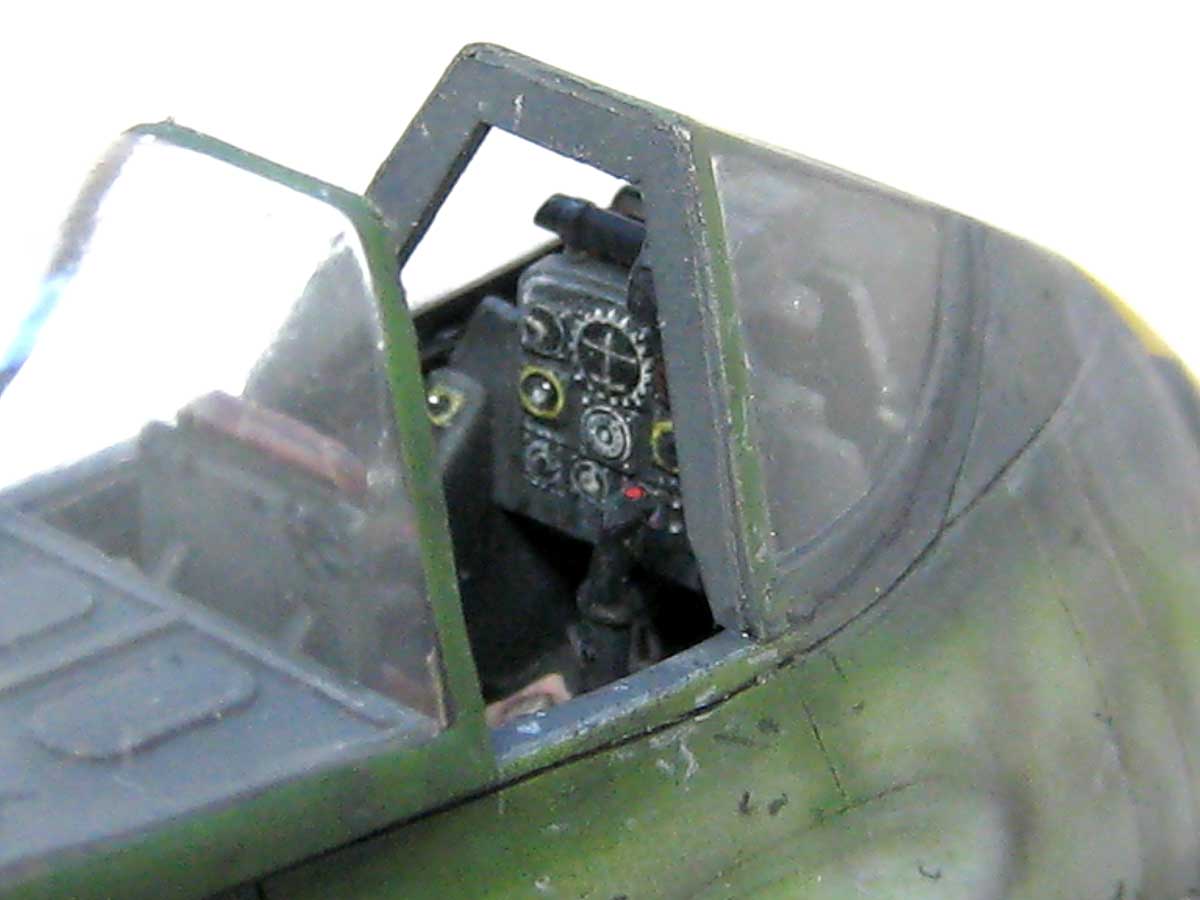
FW 190’s had a rather robust rollover bar built into the windscreen framing, so I thought that might look cool here as well.
To hold the front of the sliding portion to the frame I used a couple of PE sway braces from the True Details generic set- perfect!
I repeated the painting and weathering process for the assembly. I masked the frames inside and out- easy and effective on such a simple example.
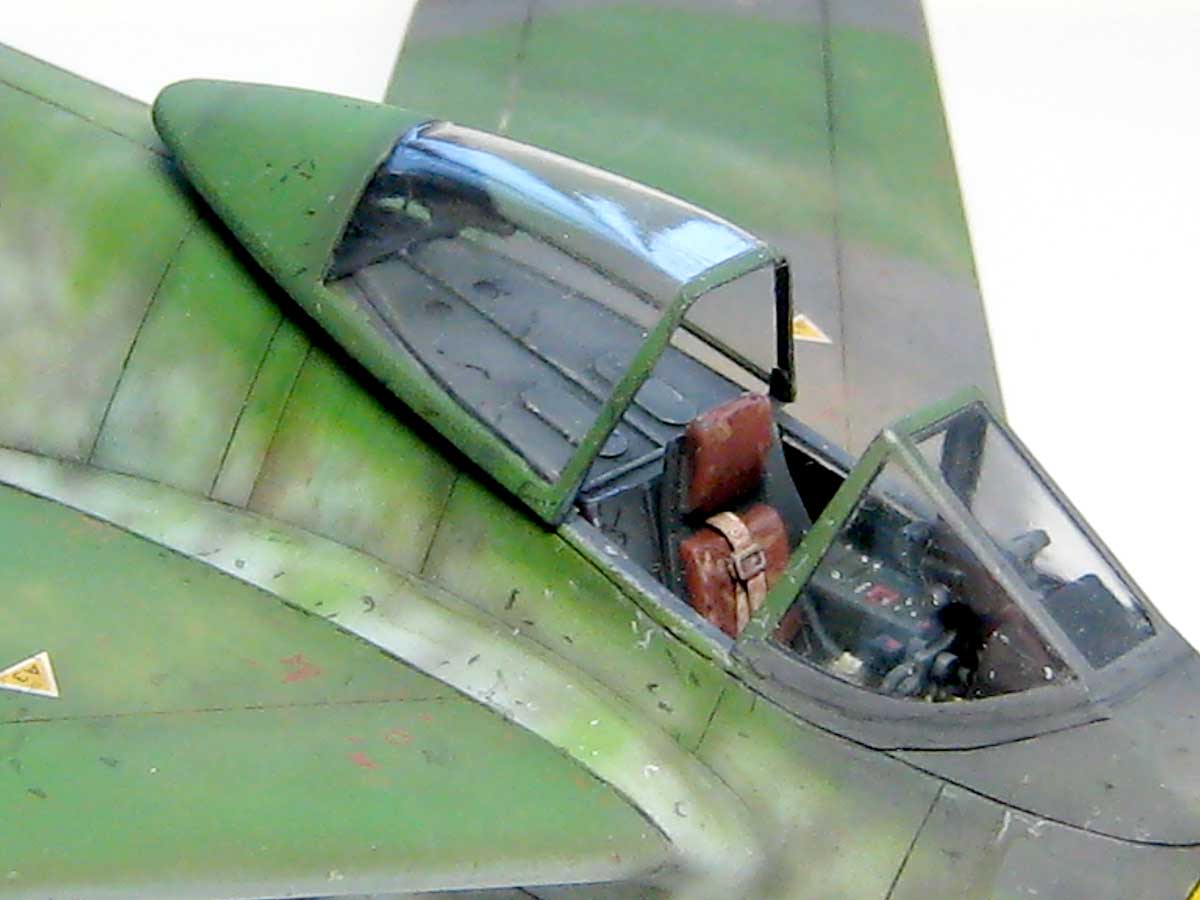
A few dabs of touch-up paint and she’s done- stay tuned, and cheers!
Wow. Posts like this dont come up very often. Your photos and attention to detail are sublime. Your use of filters on an aircraft have spoken for themselves with an excellently weathered craft. You have gone above and beyond, to give a quality Step by step, which many modellers, myself included find priceless.
You really should submit this post to FSM to post in their features slot.
I know the term ‘Excellent’ gets bandied about a fair bit in this forum but this model deserves it.
I’ve been waiting for you finish this for over a year! Every post I learn something. That canopy detailing came out really nice - makes me what to buy another one just to add some of details you put in!
You guys are the best! I’m blushin’ from all this kindness. Thanks a million!
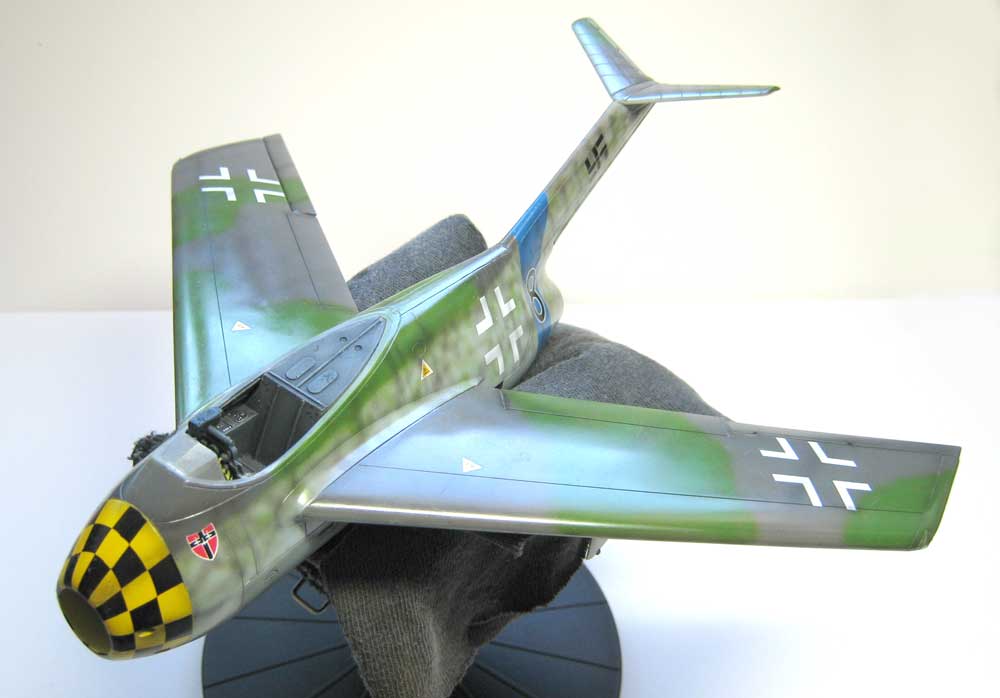
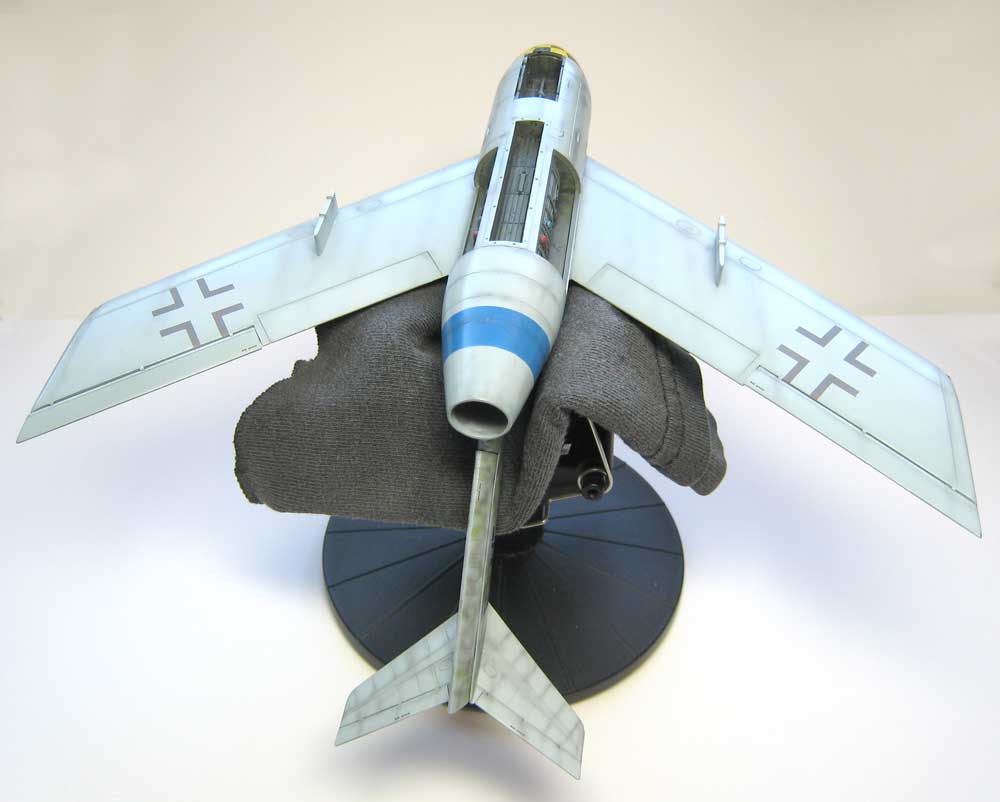
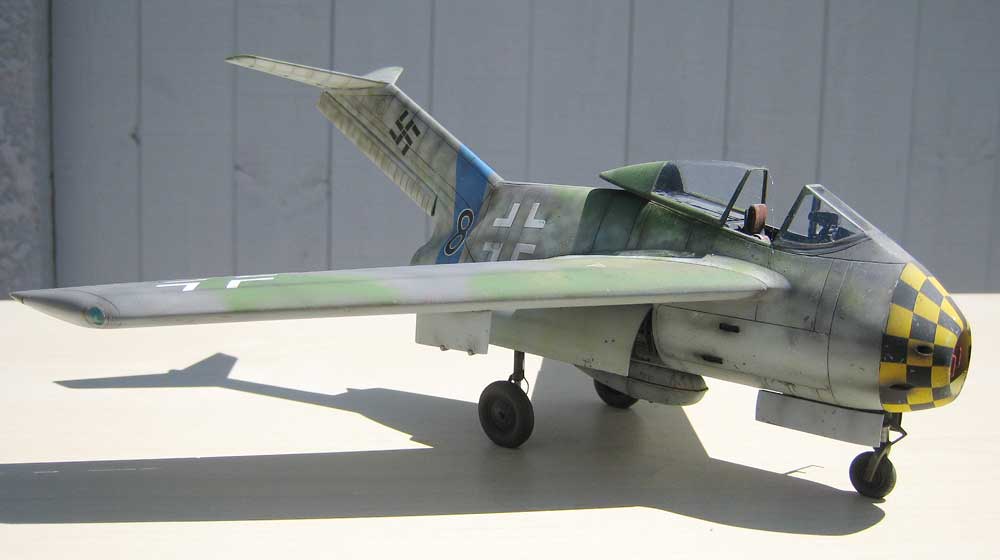
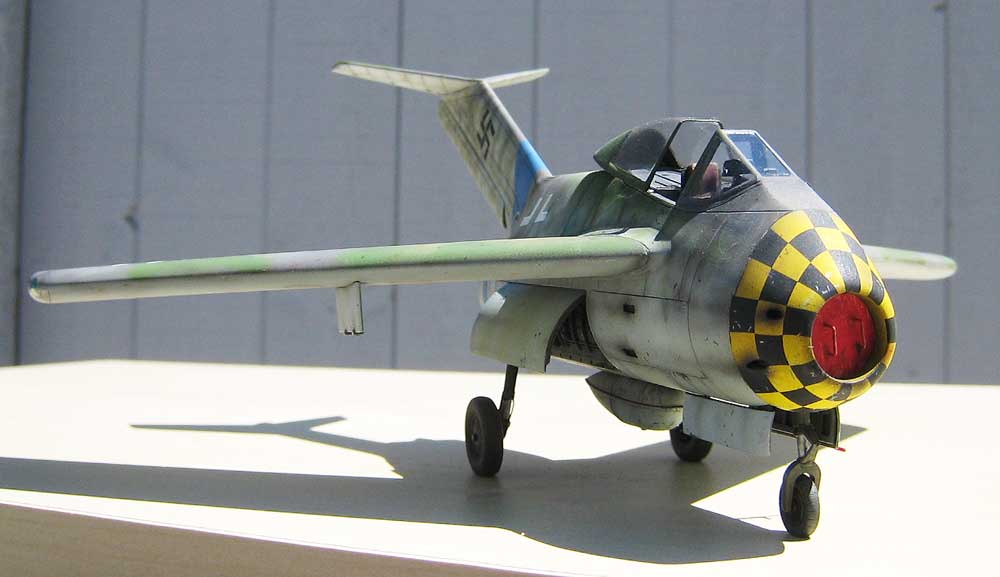
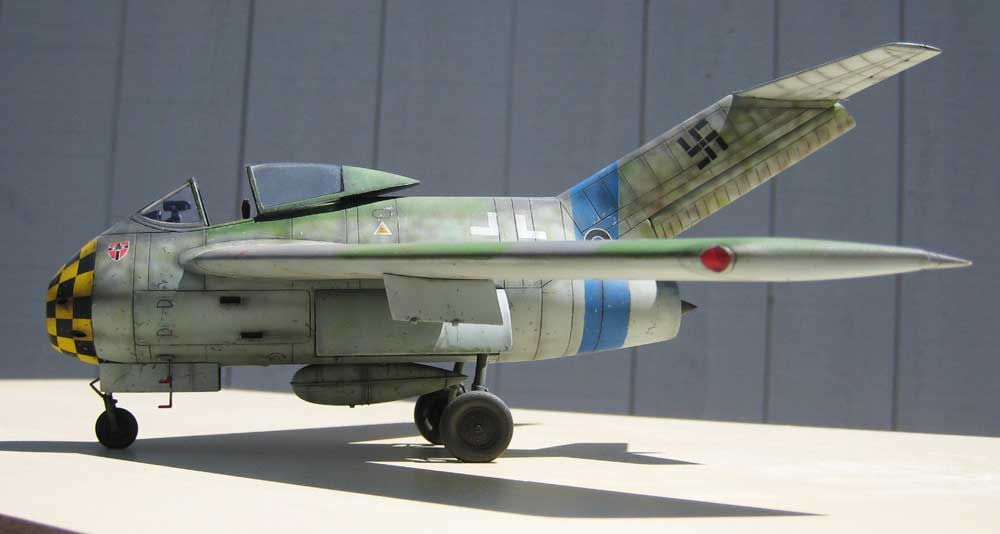
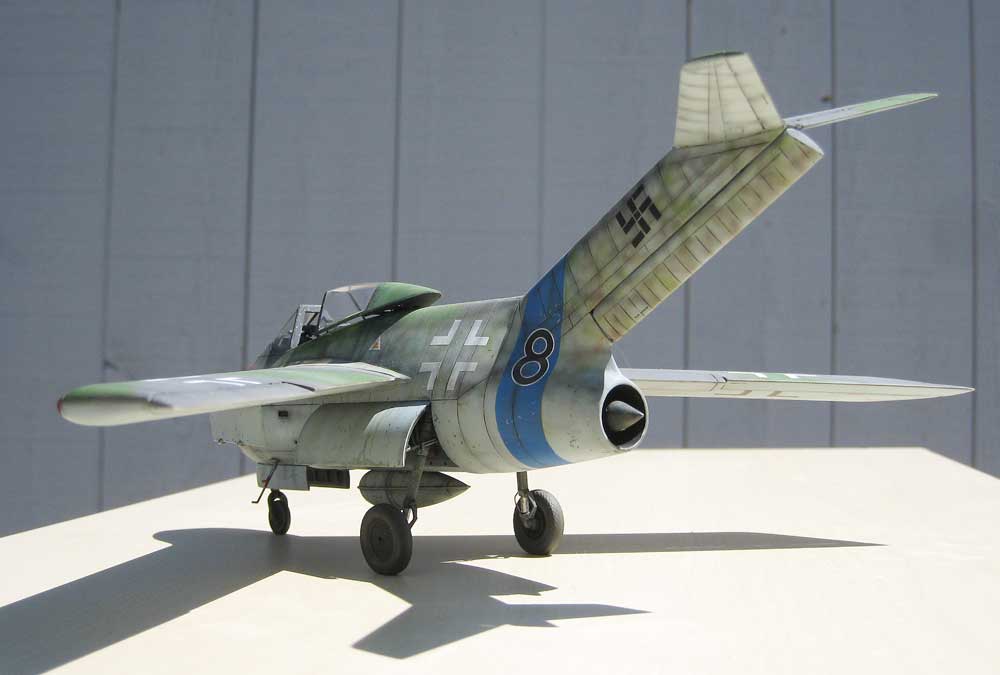
Well, she’s done. I took her out to the driveway to snap some pics. Sat her on a a blank comics page- 4-ply bristol board on top of a rotating stool, and went to it. I sensed impending disaster- a puff of wind blew up the board- the model flew back- and I managed to catch it! :o Only the rudder was dislodged, so after a quick repair I resumed shutterbugging- this time with the plane on a wooden shelf board. Guess you could call it a plank stand!
I added a torque link to the nose gear from styrene- and there’s the simple FOD cover- styrene as well with bent wire handles.
 I used Microset and Microsol, followed by a hit of Solvaset to get the decal down into the panel lines. That gooey look is just a little damage to the Future coat and will disappear after another coat.
 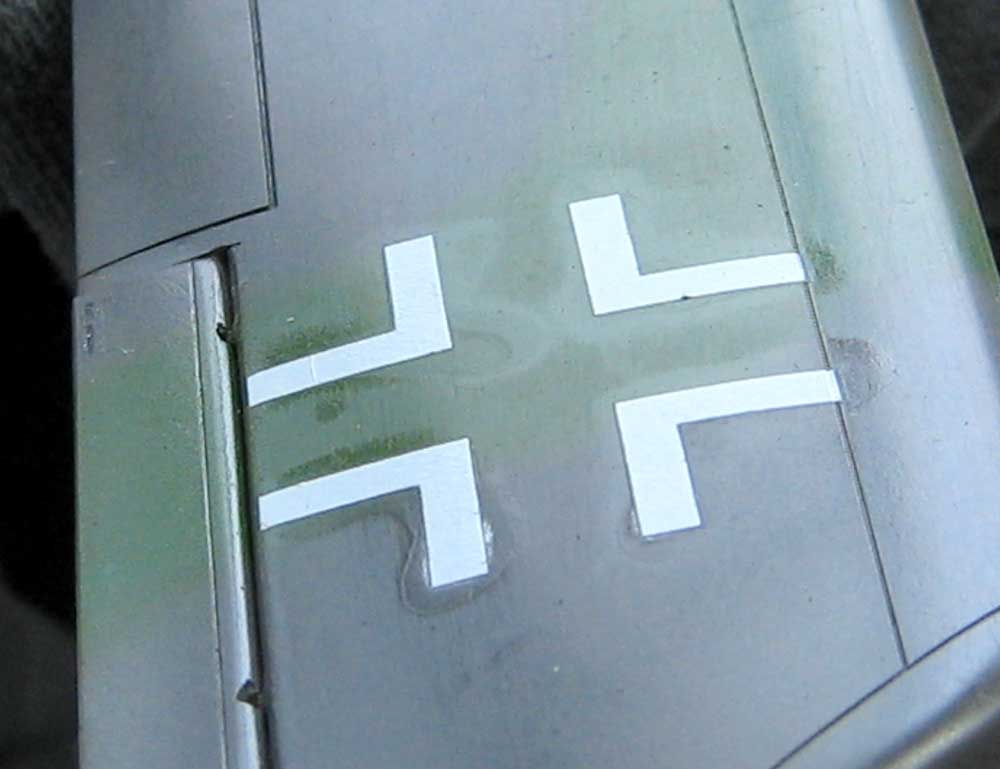 For the lower wing crosses I thought I’d try cutting my own masks.
 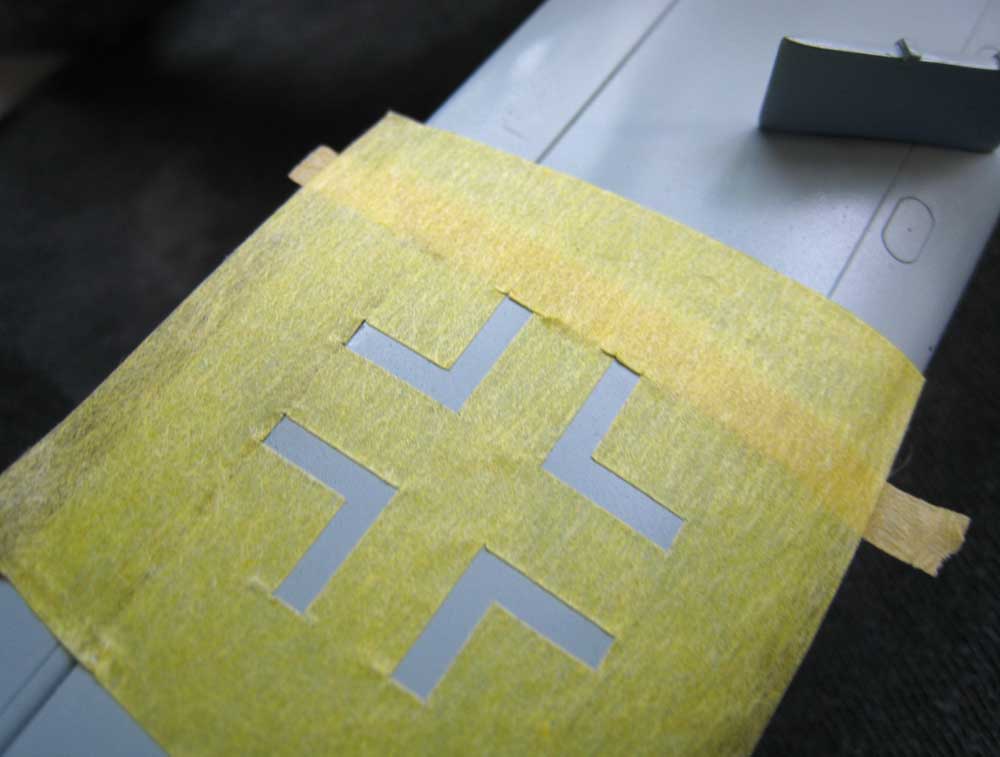 A quick spray…
 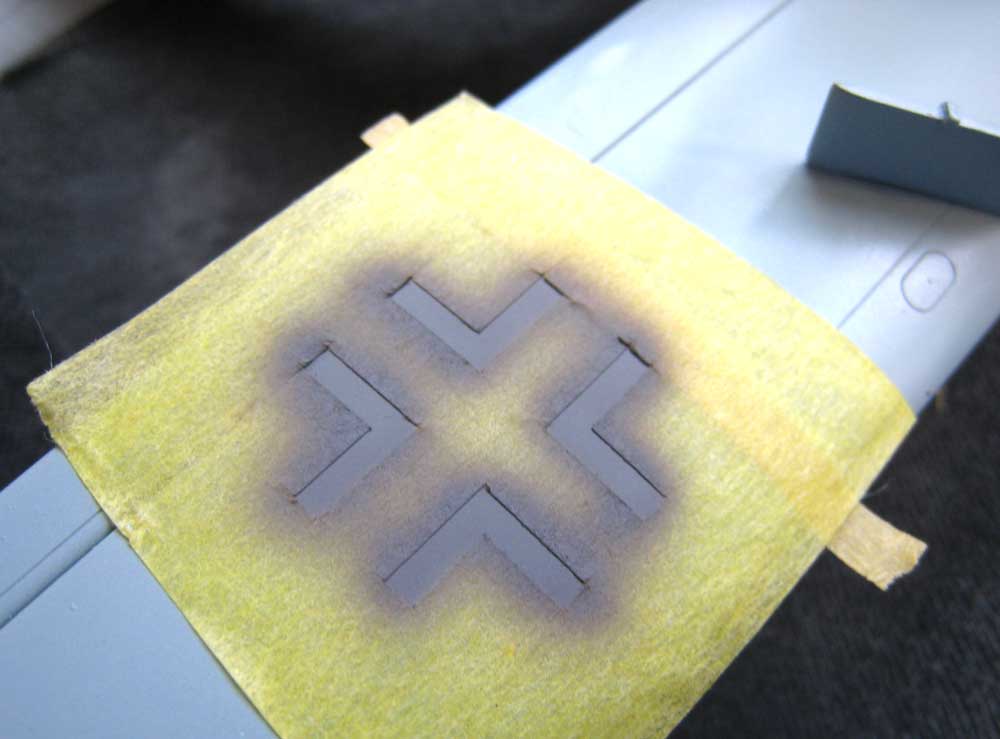 …and viola! Air Superiority Grey, 1946 style!
 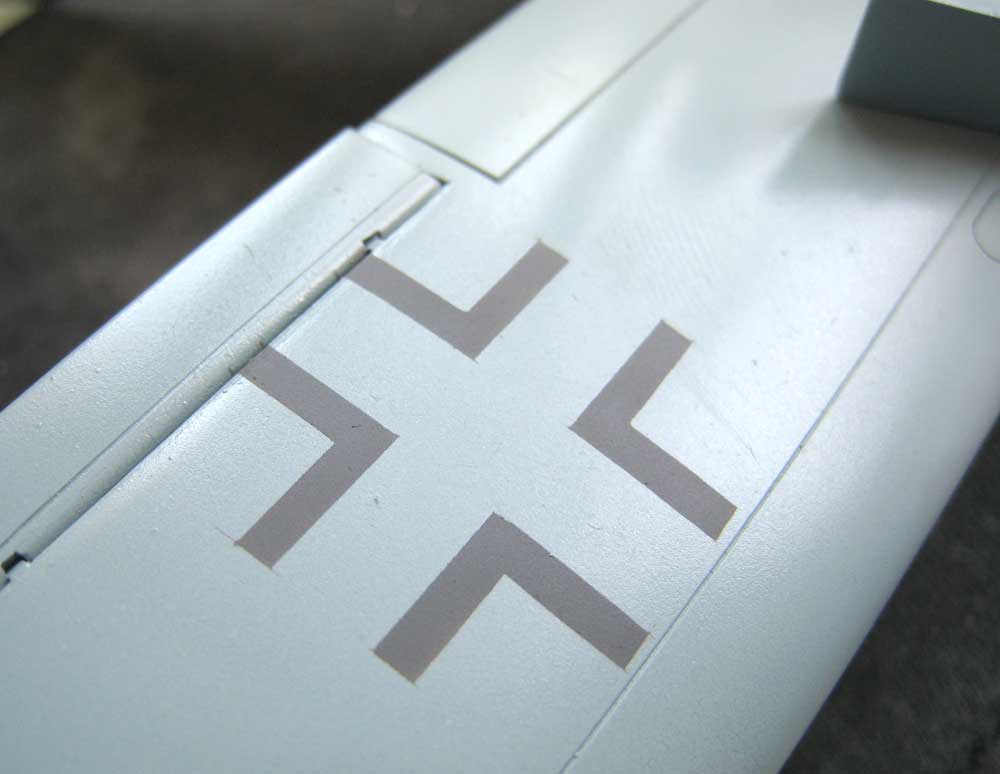 Here’s an overall shot- all are kit decals (very nice) except for the 8’s. These were from the Tamiya FW190 A-8/R2 kit.
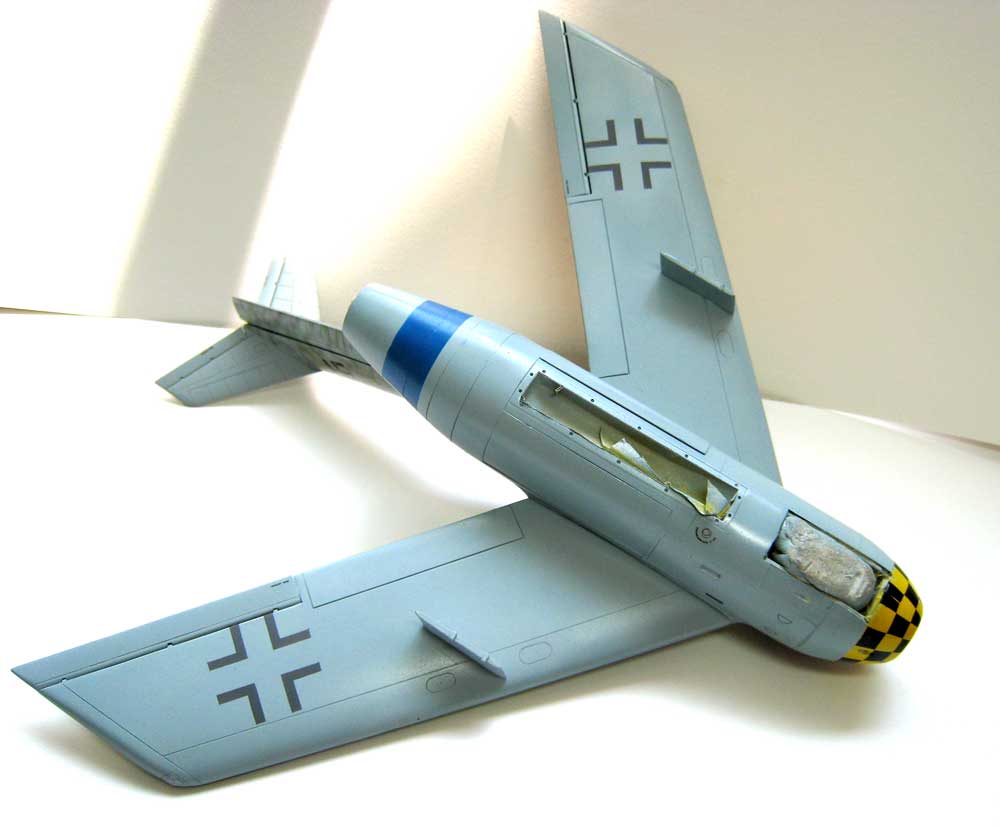
 I was worried thate checkers would be difficult, but when on quite easily. They really “snuggled down” under the Solvaset- but shrunk a bit in the process. nothing I can’t touch up easily…
  Next: weathering begins! Stay tuned…