Hola @chucho_quiroz, gracias!
I used two PE sets for this – both are Eduard. The seat belts (Sutton harness) was included in the kit and is just fine!
Hola @chucho_quiroz, gracias!
I used two PE sets for this – both are Eduard. The seat belts (Sutton harness) was included in the kit and is just fine!
Beautiful cockpit! I would go nuts trying to fit all that pe.
The cockpit alone, is a masterpiece!!! That’s crazy
Small update today – been distracted by nice weather, and some other projects.
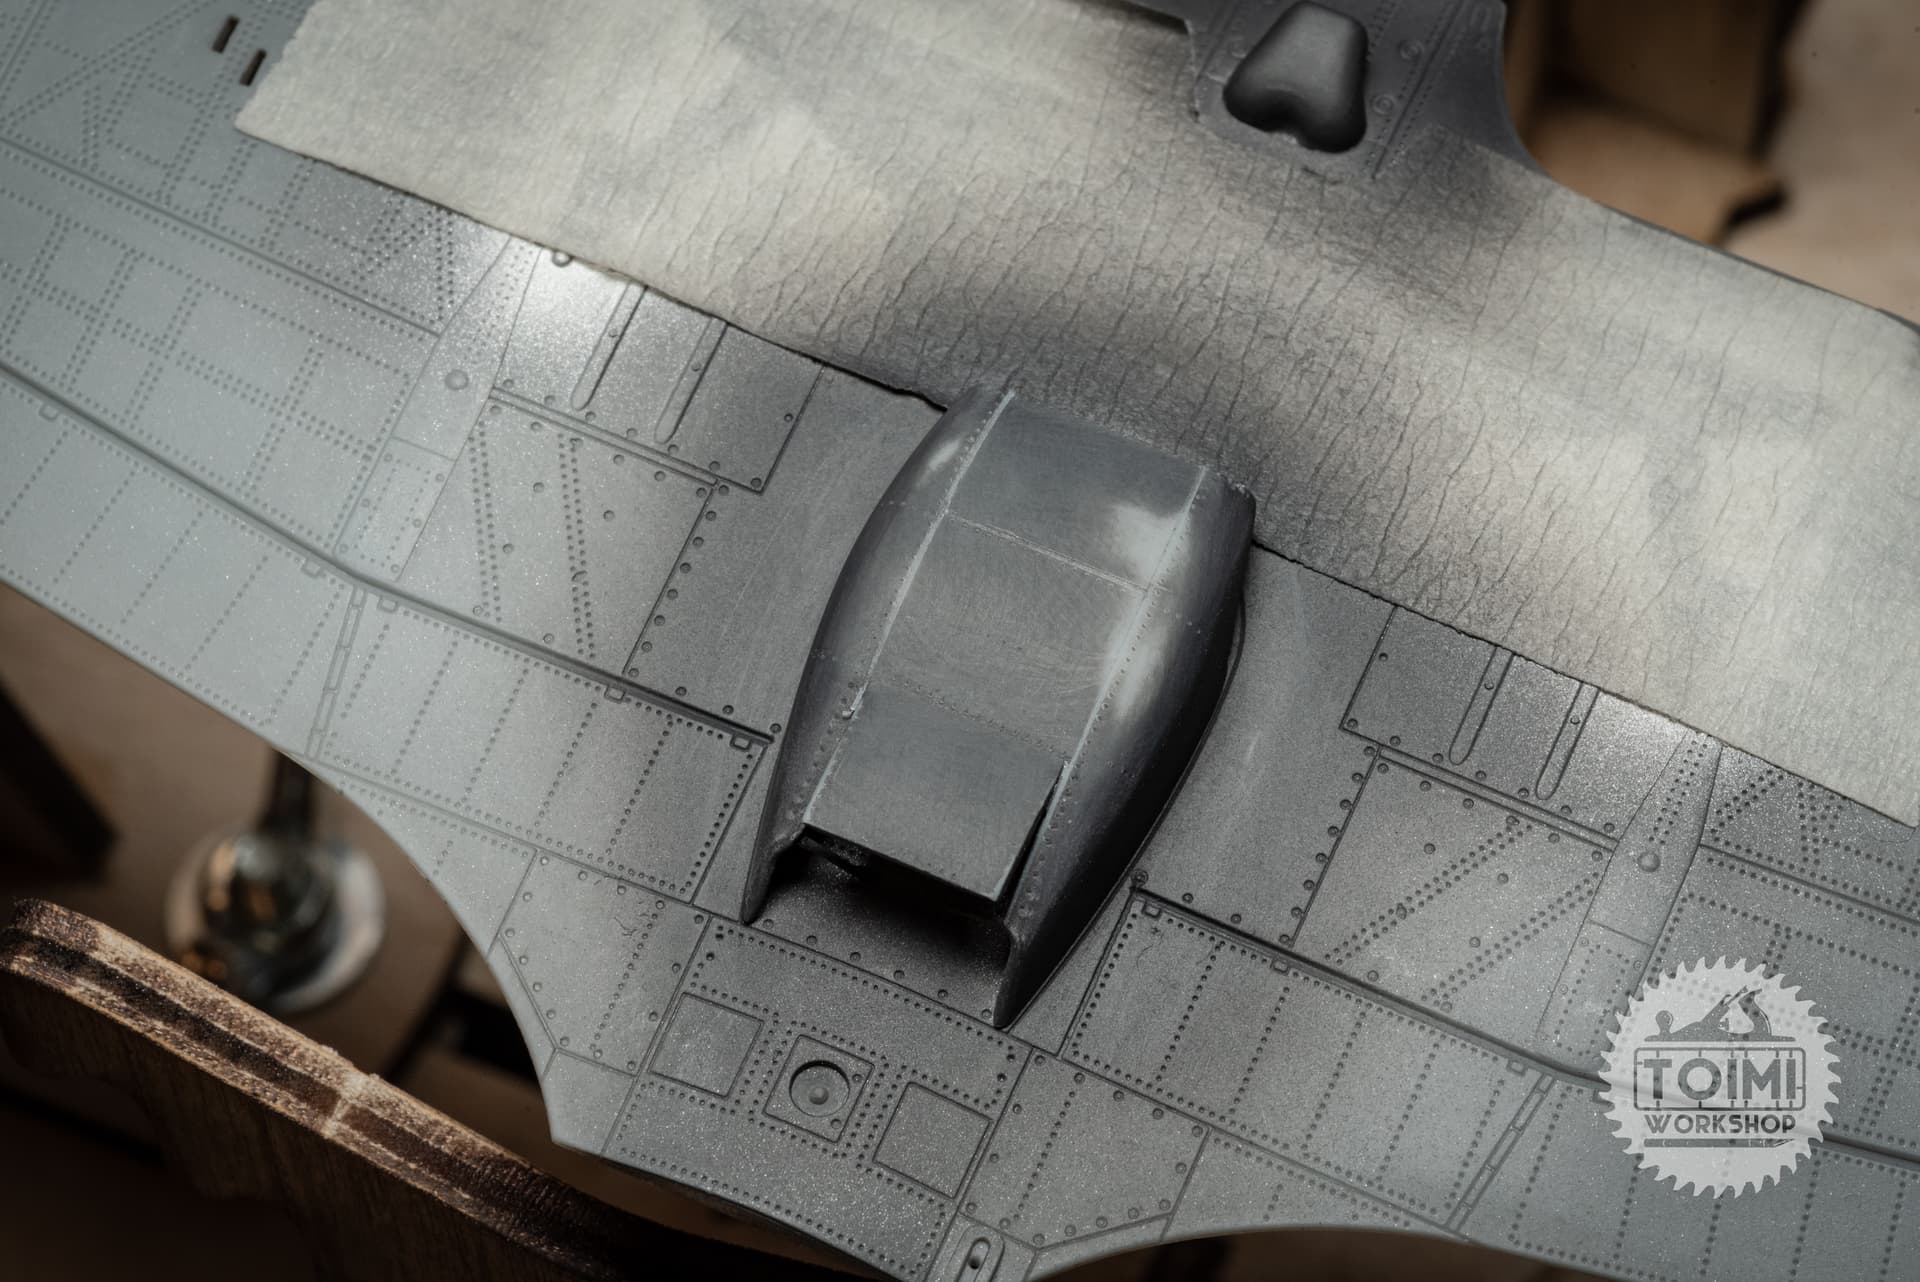
The radiator scoop has been re-scribed and re-riveted. Not perfect, but better than smooth! There are evidently several different radiator panel/rivet layouts for these early Hurricanes, and none matched the kit’s pattern. Seemed like the best option was to rely on images of Gloster-made early Mk I radiators. ![]()
First time using a riveter tool. Pretty hair-raising – you get one shot! I did practice before I tried the tool on the actual kit, but now my Revellogram 1/48 P-40B Tigershark has thousands of extra rivets, and is officially a paint/test mule. ![]()
The fuselage halves went together fairly well, with no gaps, but with some slight misalignment (hence the primer guide-coats). Some sanding, minor filling, and re-scribing will be needed, but nothing terrible. Lower wing fit was excellent.
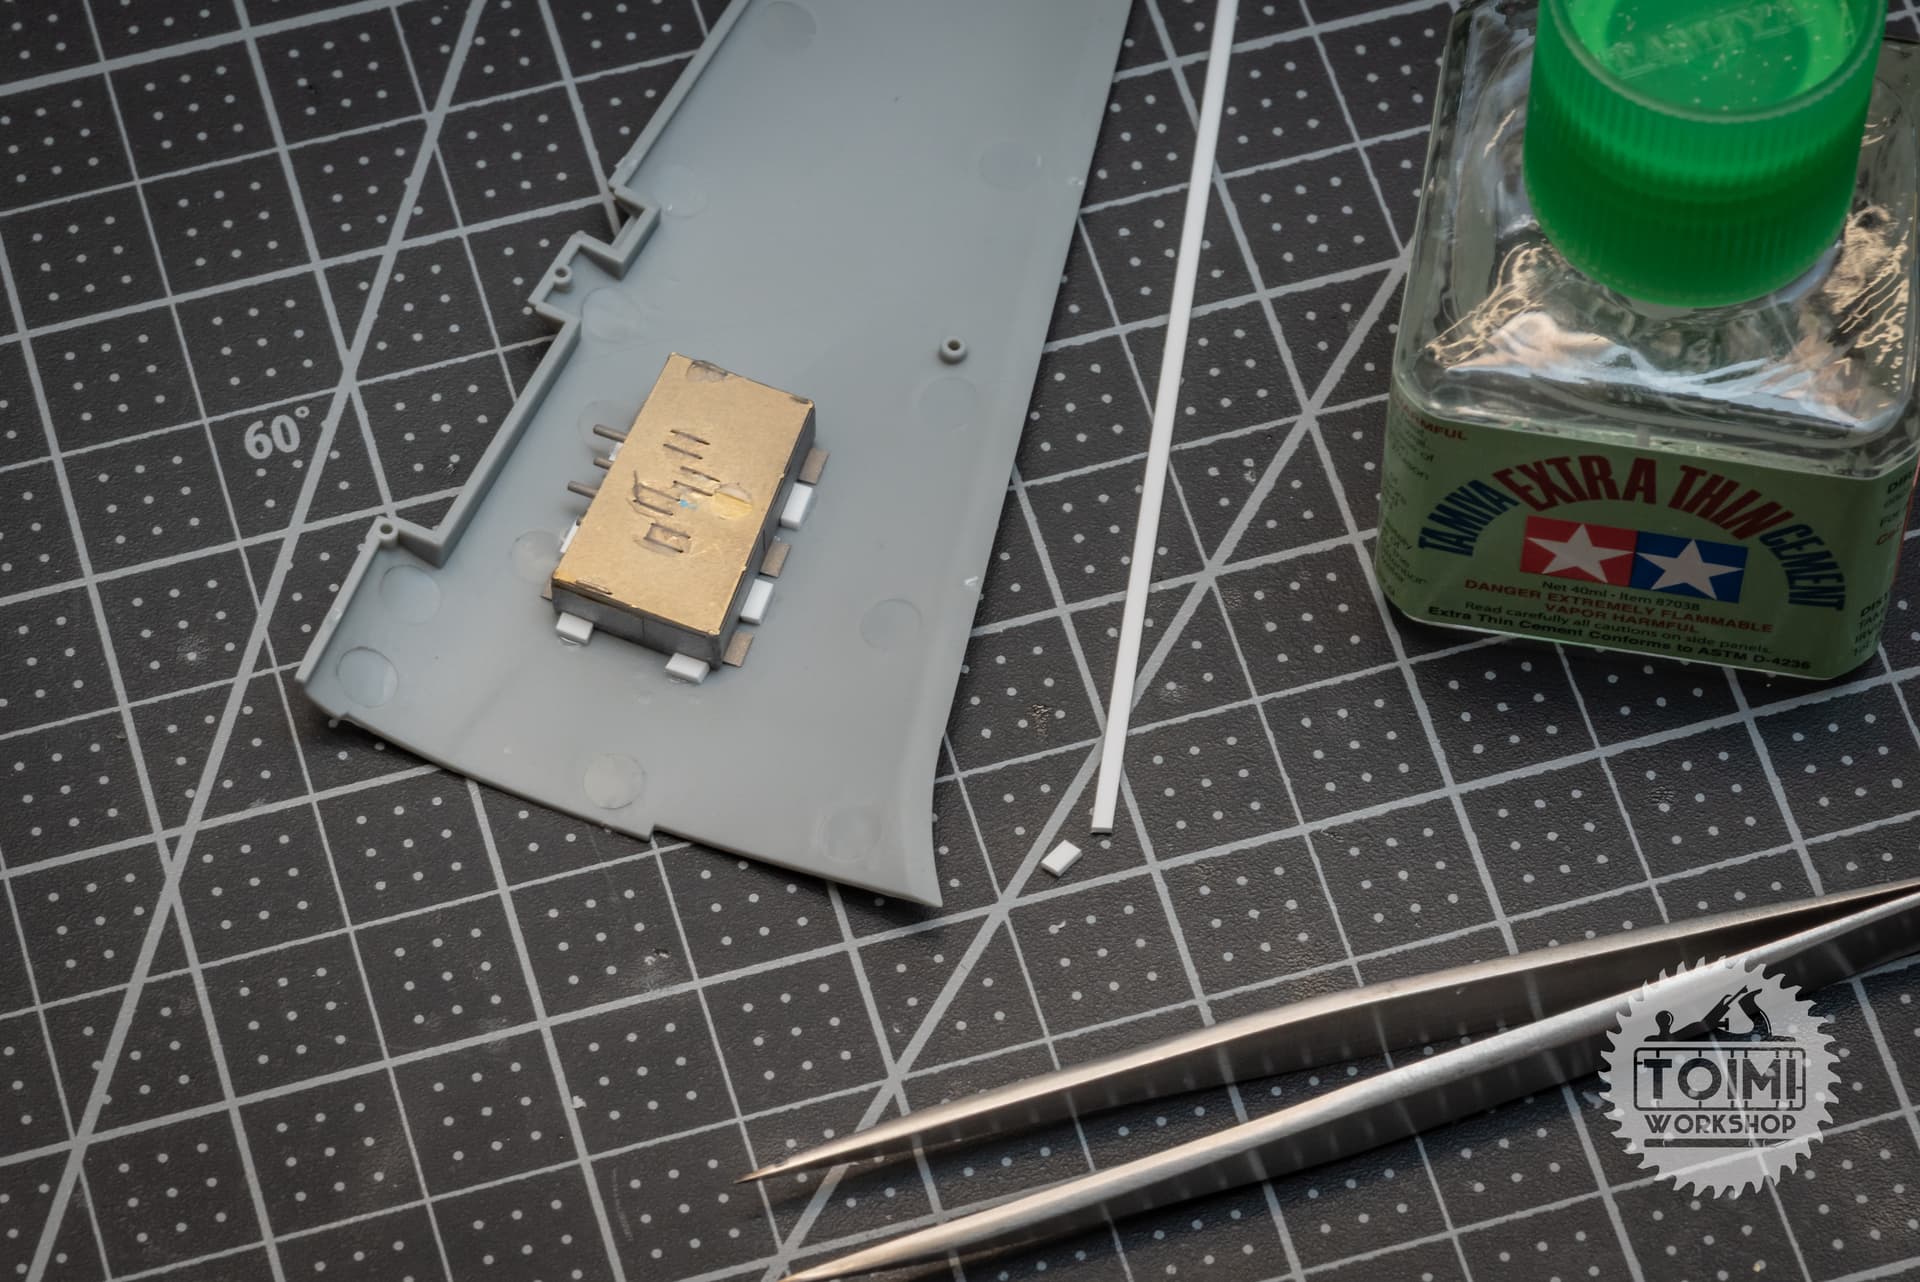
And finally got the guns ready to be installed. I added some pneumatic lines and actuators for the triggers, but they are pretty much invisible; also, I have a few too many coats of paint and varnish on the guns, and they’ve got a little melty-looking. But I keep reminding myself that at less than 1" wide, it looks fine to the Mk.I eyeball – and I’m more than ready to be done with this little “kit within a kit.”.
The next tricky part will be gluing the guns assembly to the underside of the top wing half. Once the top wing is cemented to the bottom, there’ll be no way to fix it if the gun bay pops loose inside there.
You may want to add some styrene support to each side of the box inside the wing to give added surface for attaching the P/E. It looks so good that it would be a travesty if it came loose later.
Yeah, that sounds like a good plan. Thanks! I also grabbed some epoxy at the LHS today – might use some of that, plus styrene strucure, to build some fillets to hold it in place.
The solution I came up with was to sandwich the gun bay within the wing. There really isn’t much room in there to begin with – one corner of the gun bay actually contacts the bottom wing, and required some careful filing.
To make sure it’ll be 100% secure in place, I used some styrene blocks to hold it in the correct position while test-fitting, and then superglued it in place. Then I covered the shell ejection ports with some styrene to prevent any squeeze-out, laid a thin pillow of soft Apoxie Sculpt on the lower wing for the gun bay to nestle into.
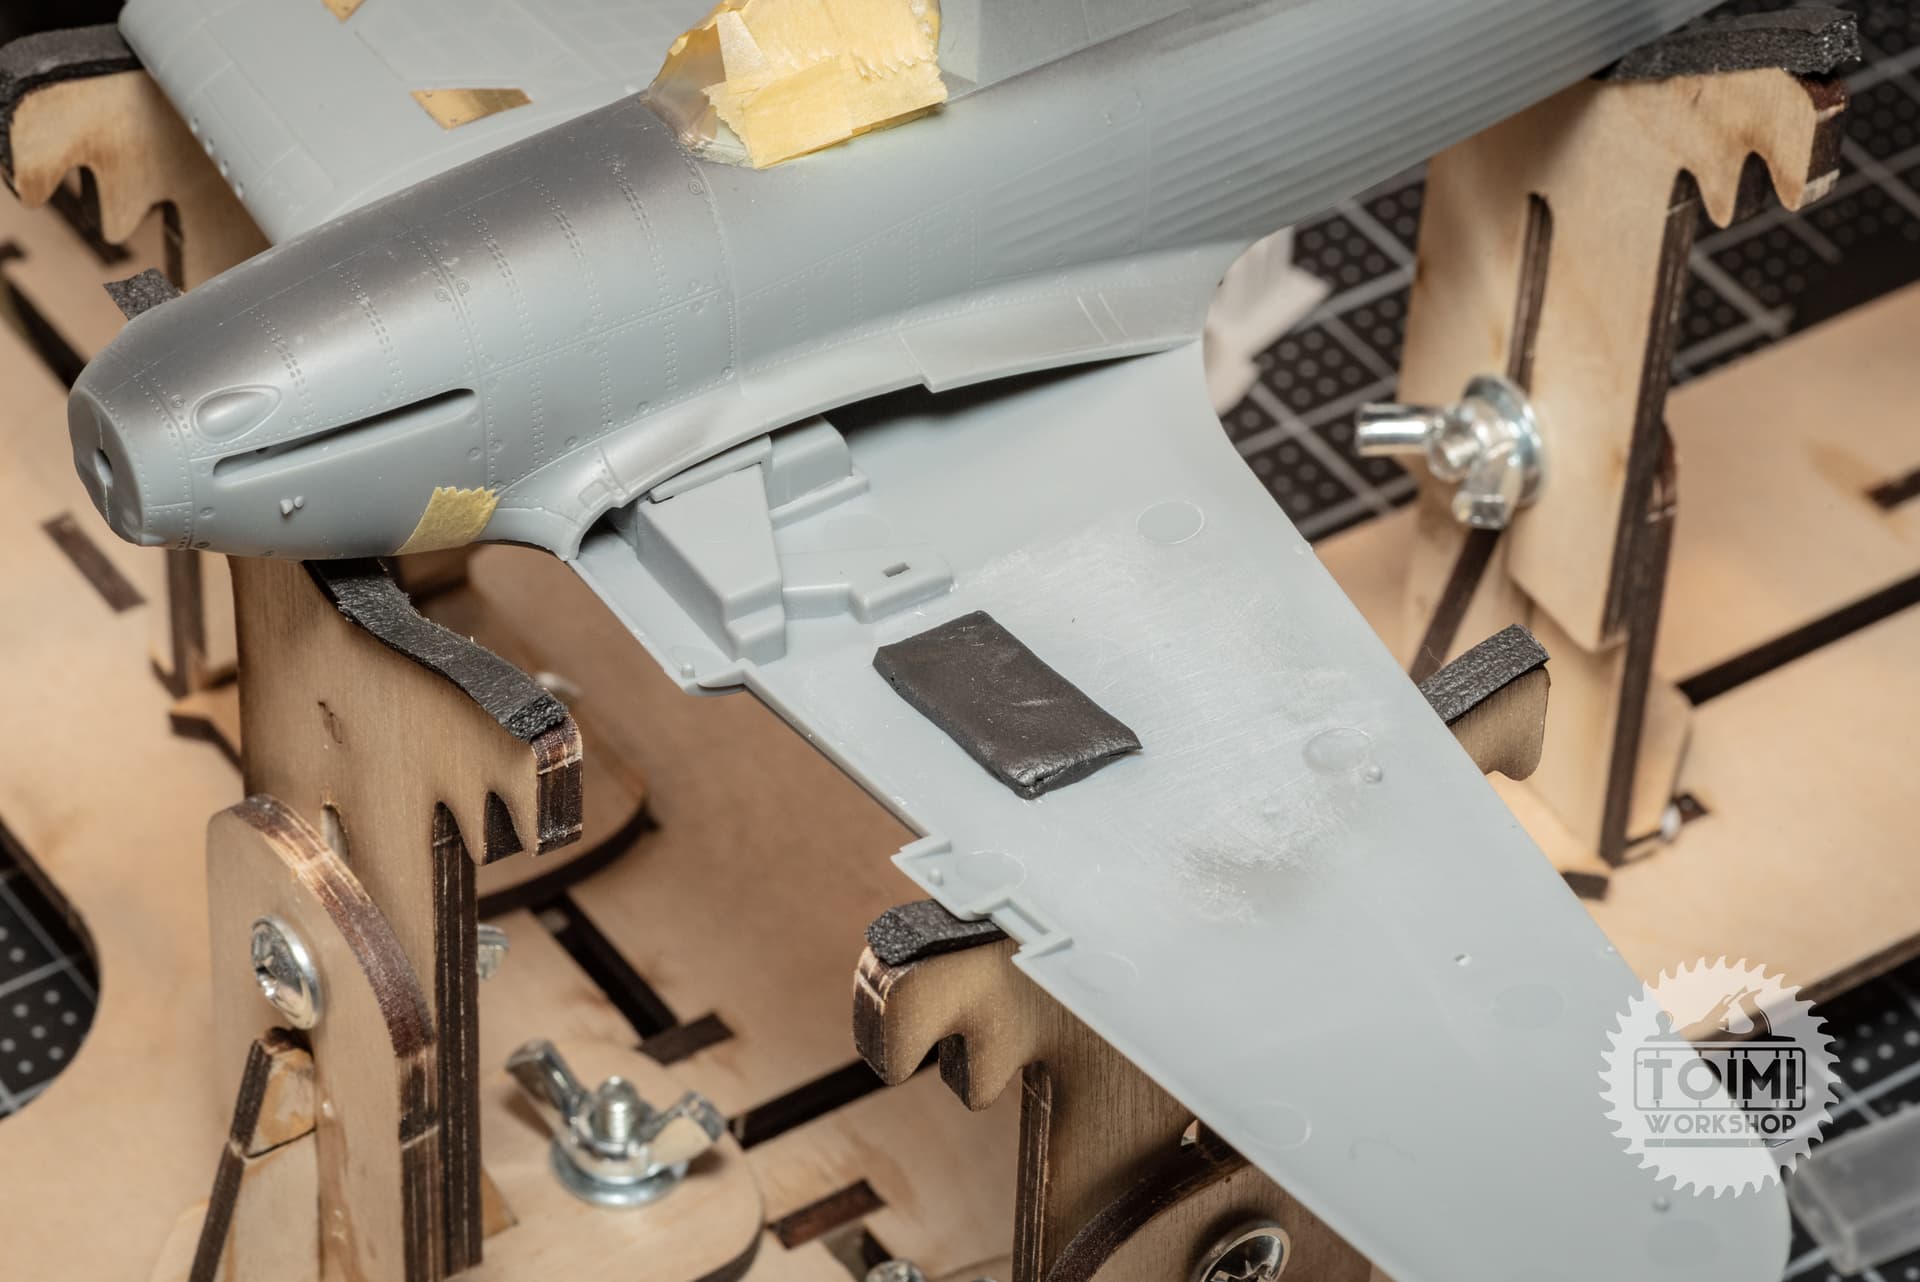
I pressed it into place without needing too much force, but it quickly became obvious that I would not be pulling it back apart again. ![]() So I just started wicking cement into the wing join and used tape to “clamp” things. To close the top fuselage seam, it needed a tiny amount of up-pressure on the wingtip – not enough to perceptibly change the dihedral.
So I just started wicking cement into the wing join and used tape to “clamp” things. To close the top fuselage seam, it needed a tiny amount of up-pressure on the wingtip – not enough to perceptibly change the dihedral.
That extra bit of styrene inside the gun area (where the barrels would protrude) is just to add strength – I wasn’t able to put cement on any of the internal locator pins or contact points, so a little extra strength will make me feel better.
Good day, i like your work on the Hurricane…¡ It’s amazing to my eyes, i have the Hasewaga kit, could you tell me what photetch set did you use for the wheeel bays? Apreciated your answer Saludos desde Yucatán México
Hola @chucho_quiroz, muchas gracias ![]()
This Edward detail set includes the wheel bay details:
But I don’t know if this set will fit the Hasegwa kit. If you look on Scalemates you may find an option just for your kit:
https://www.scalemates.com/kits/hasegawa-09065-hurricane-mki--197451
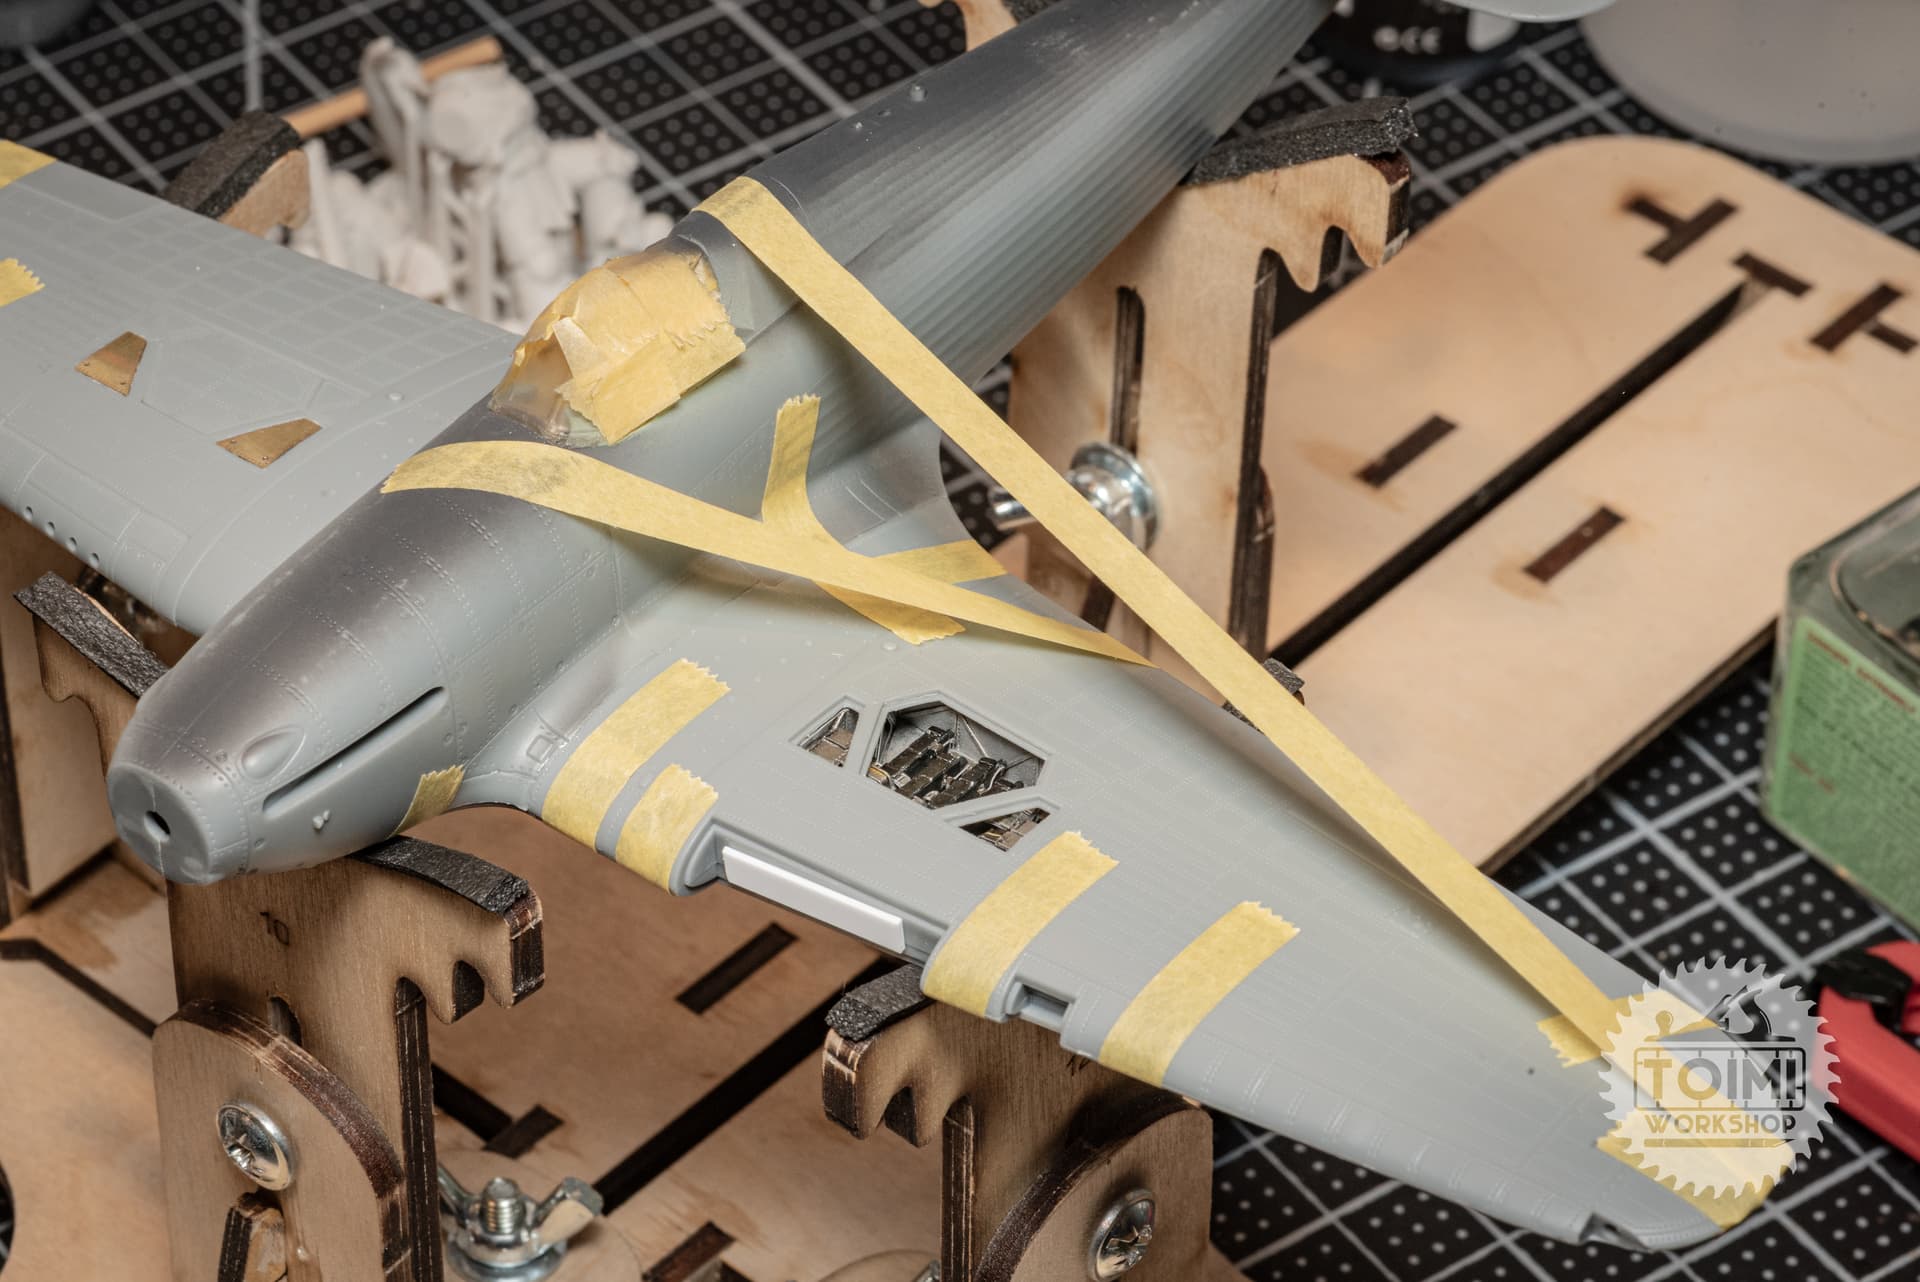
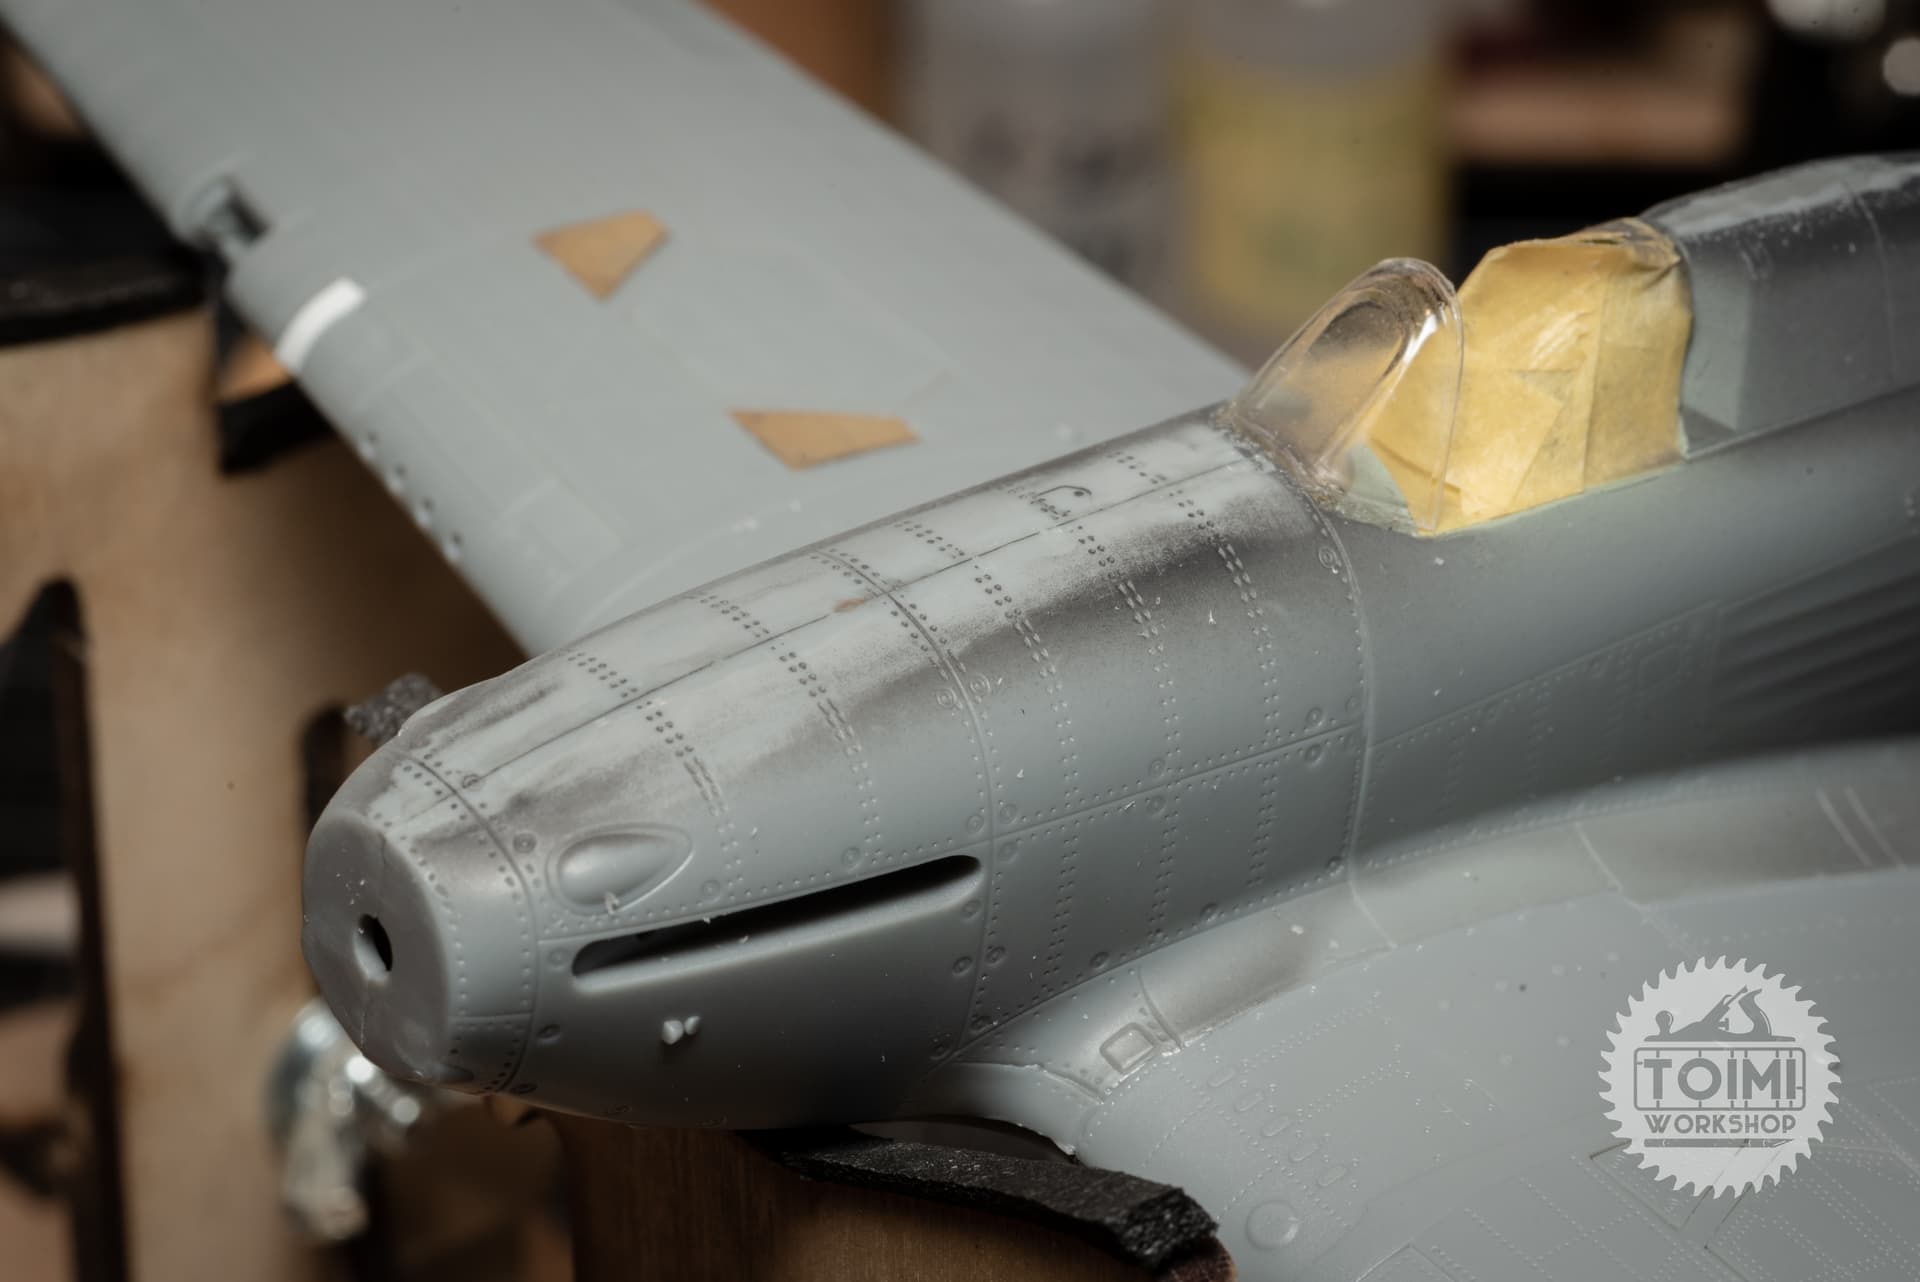
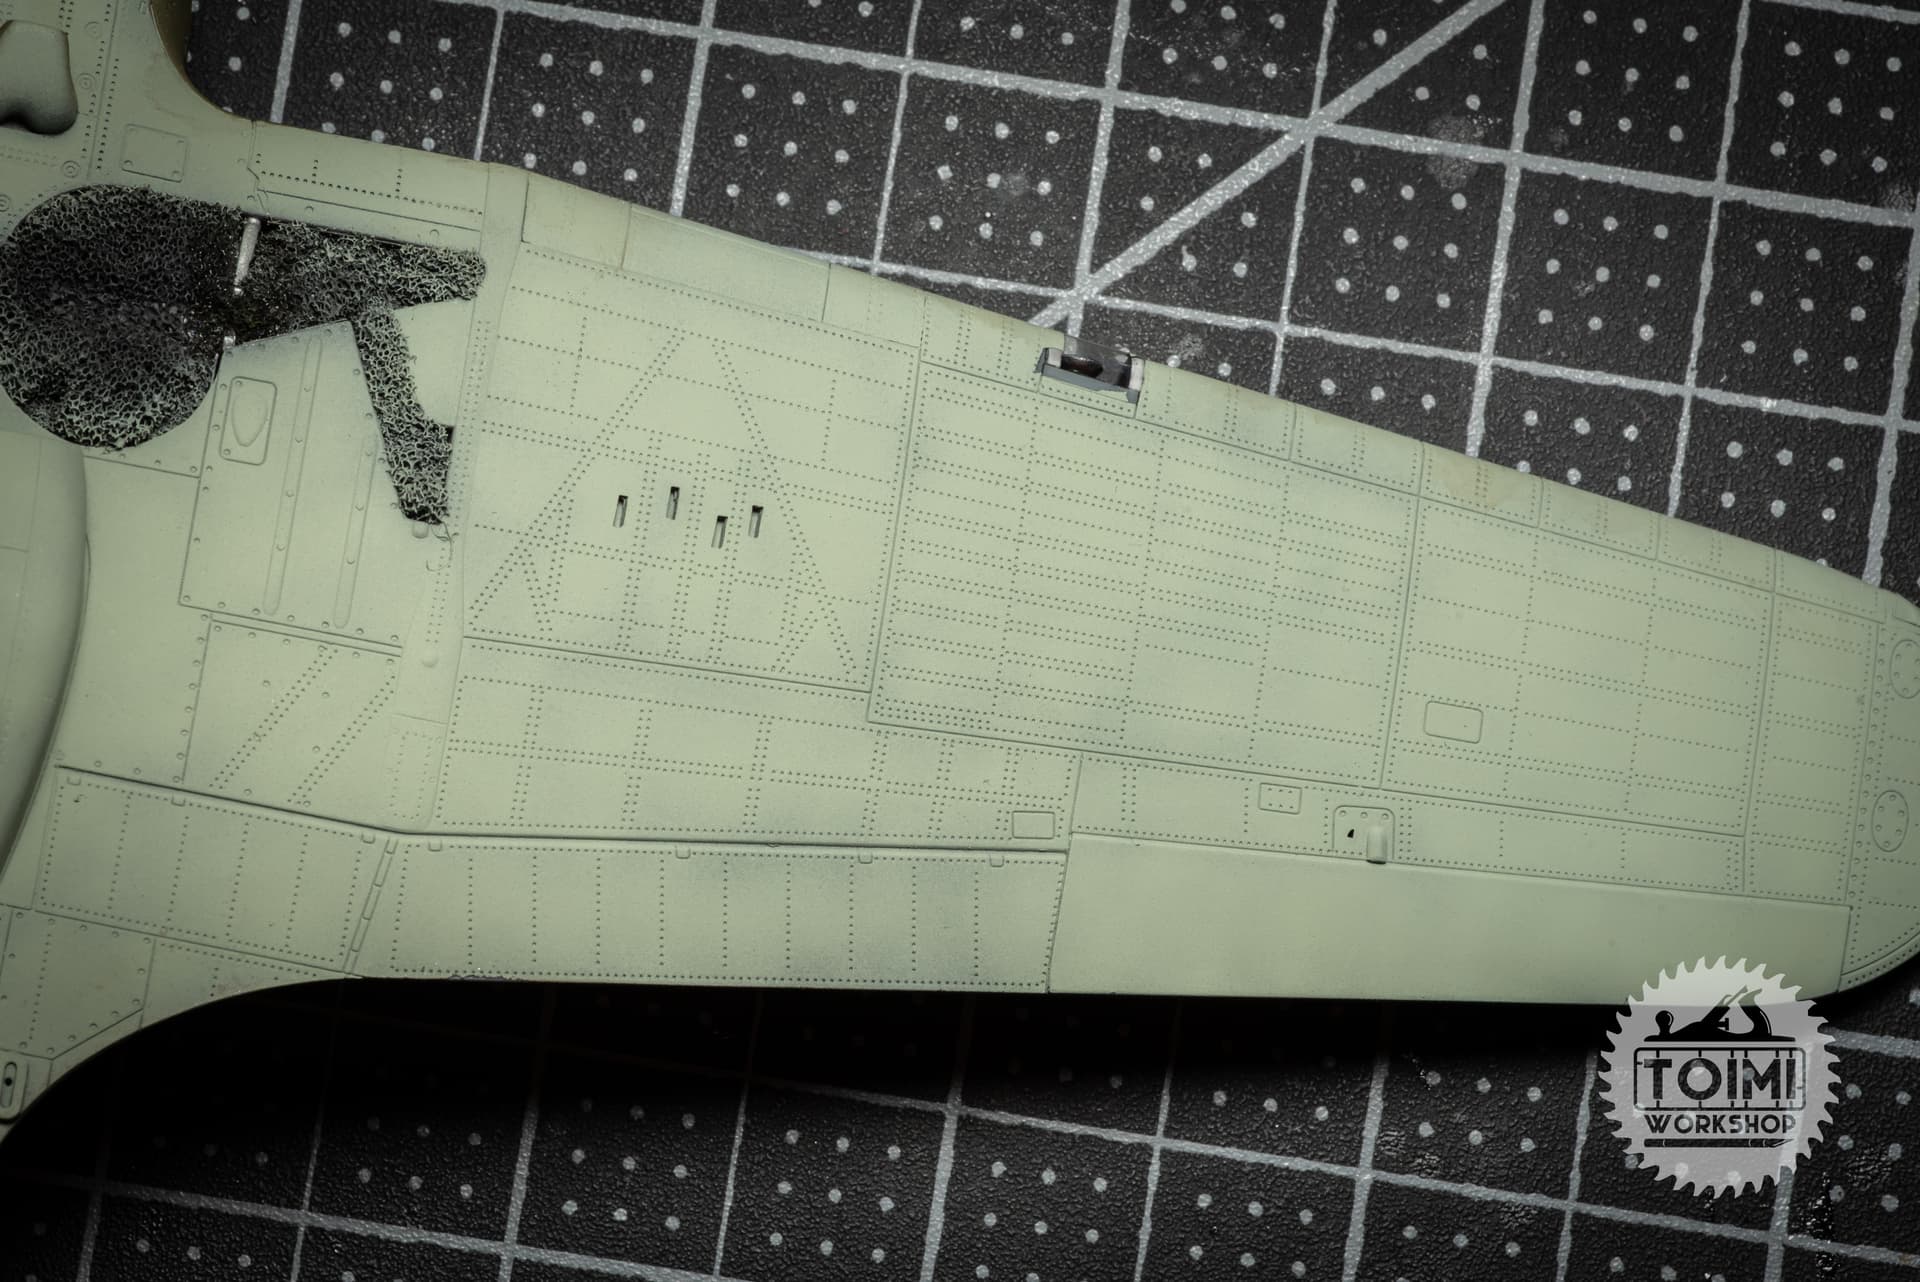
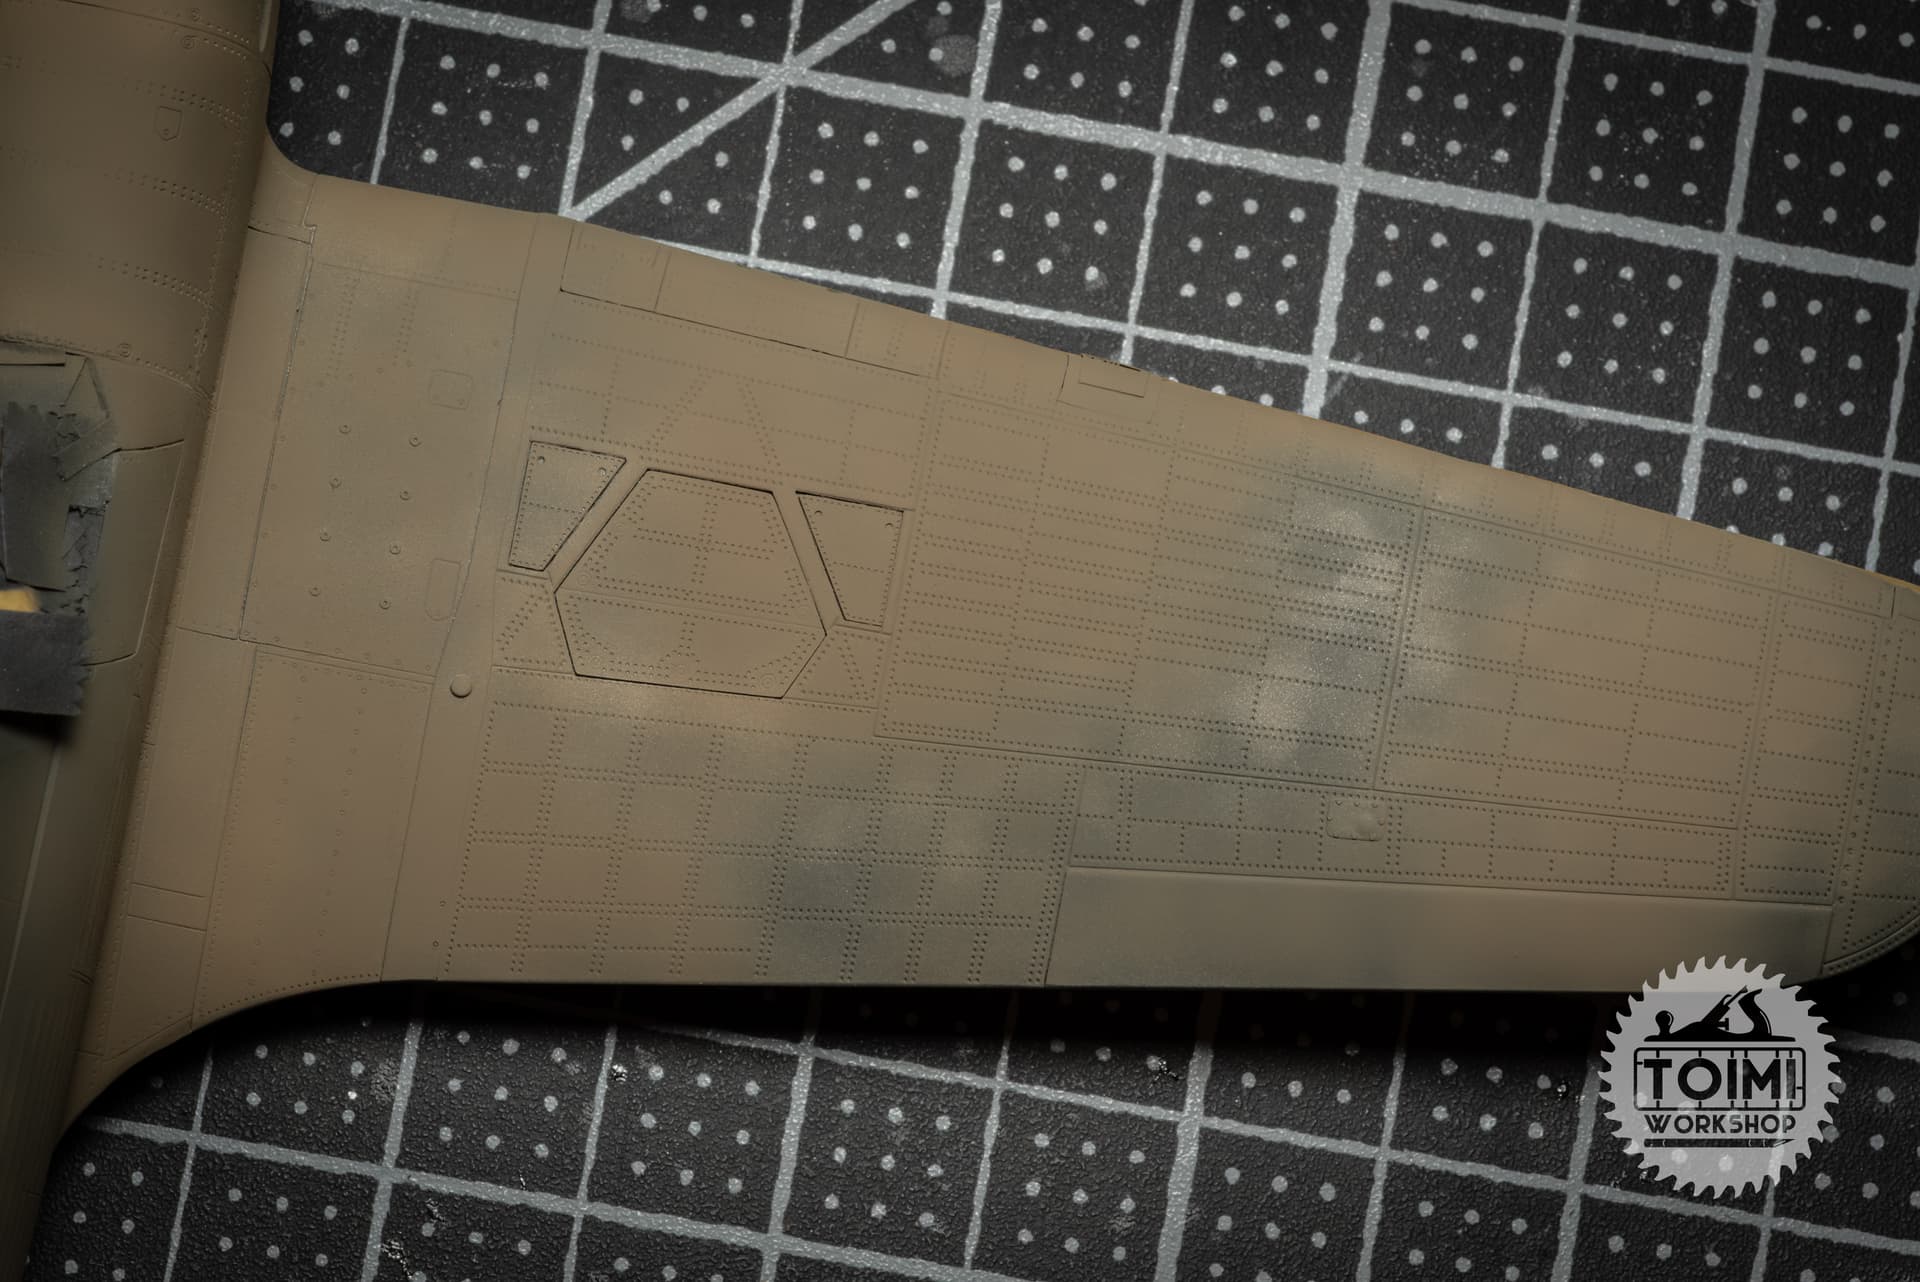
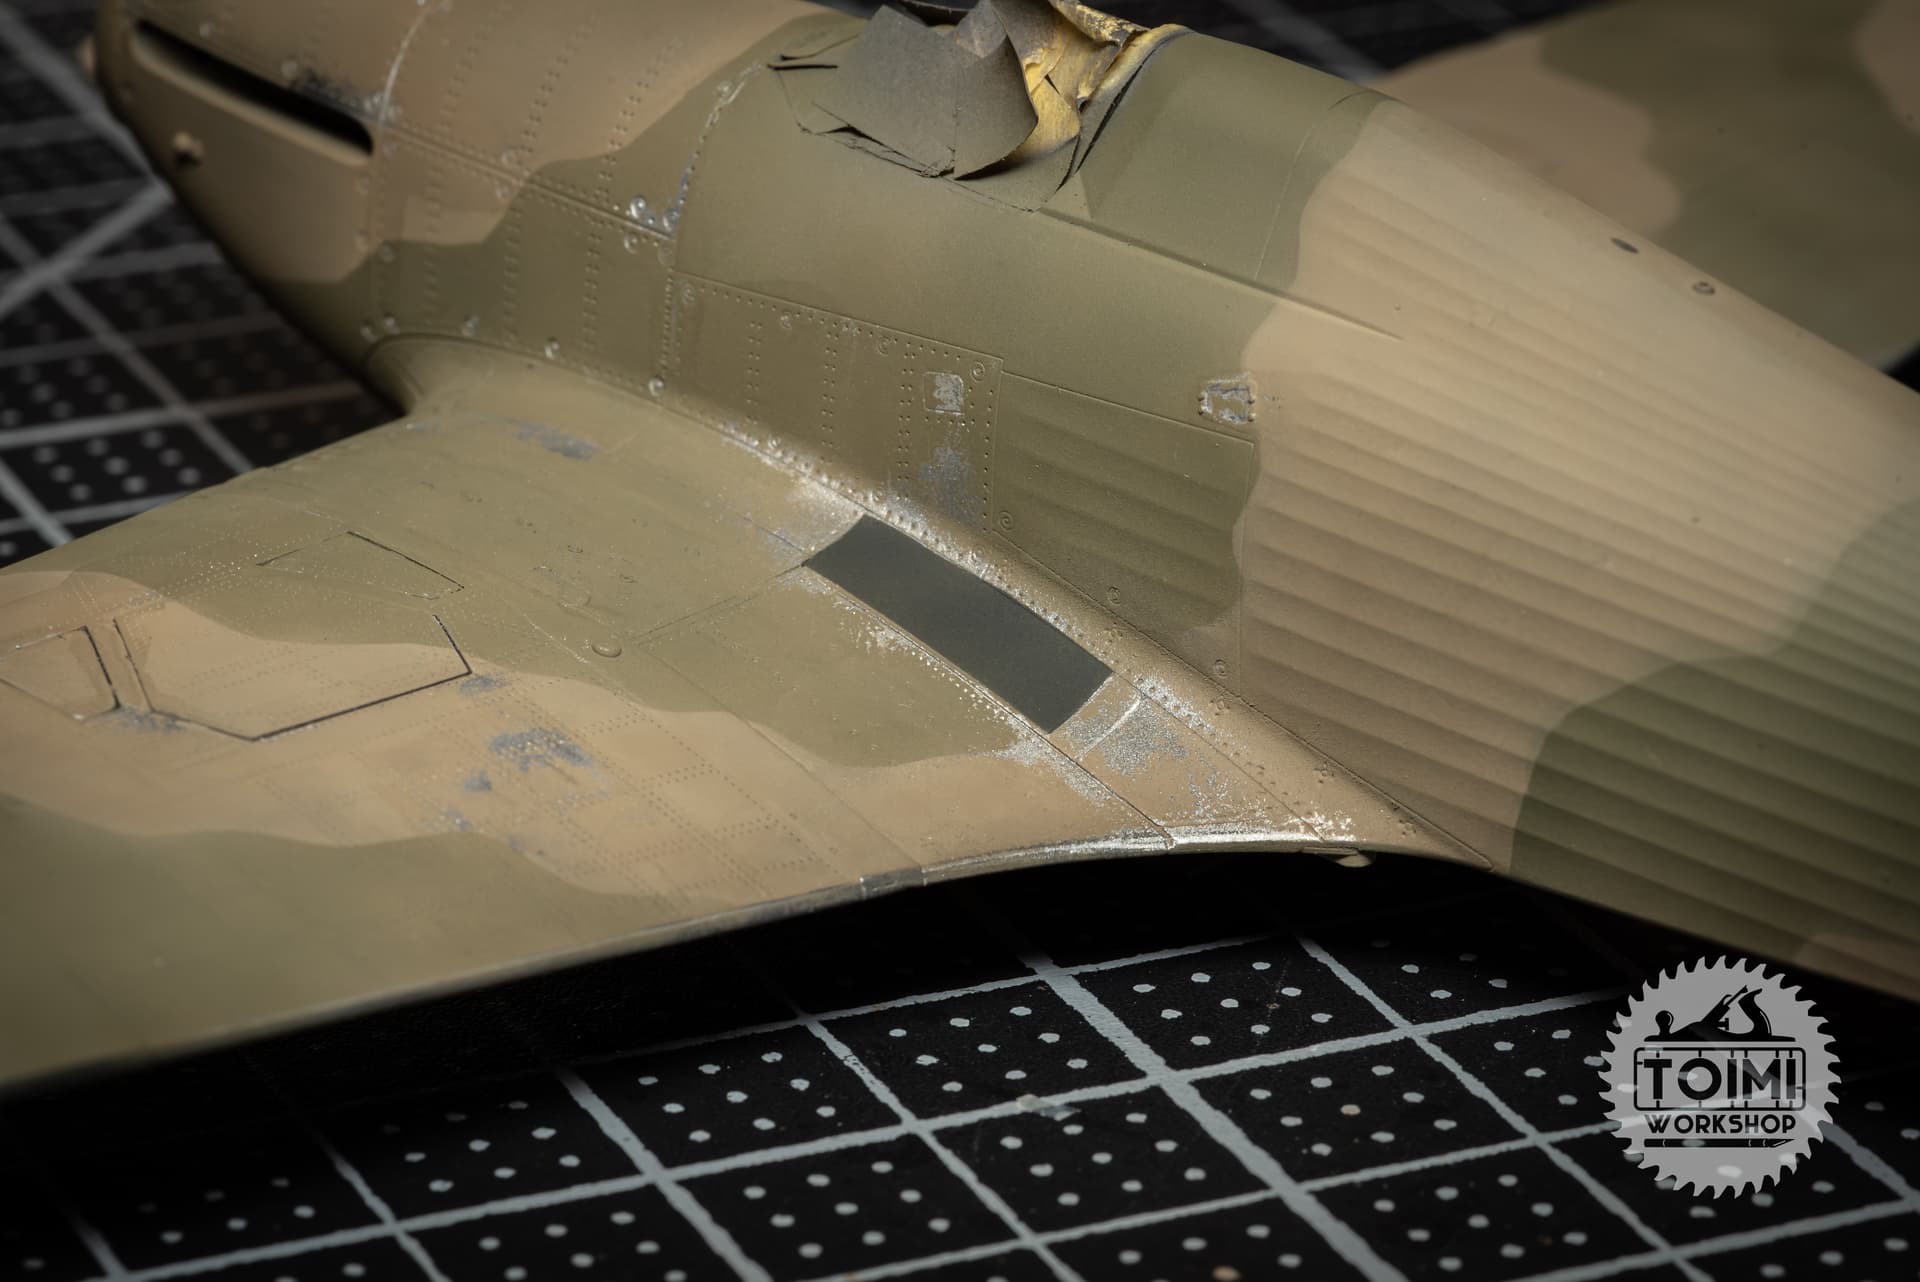
Been some slow tedious work on the Hurricane this week – filling and smoothing seams, scribing and riveting, and a small amount of detail correction.
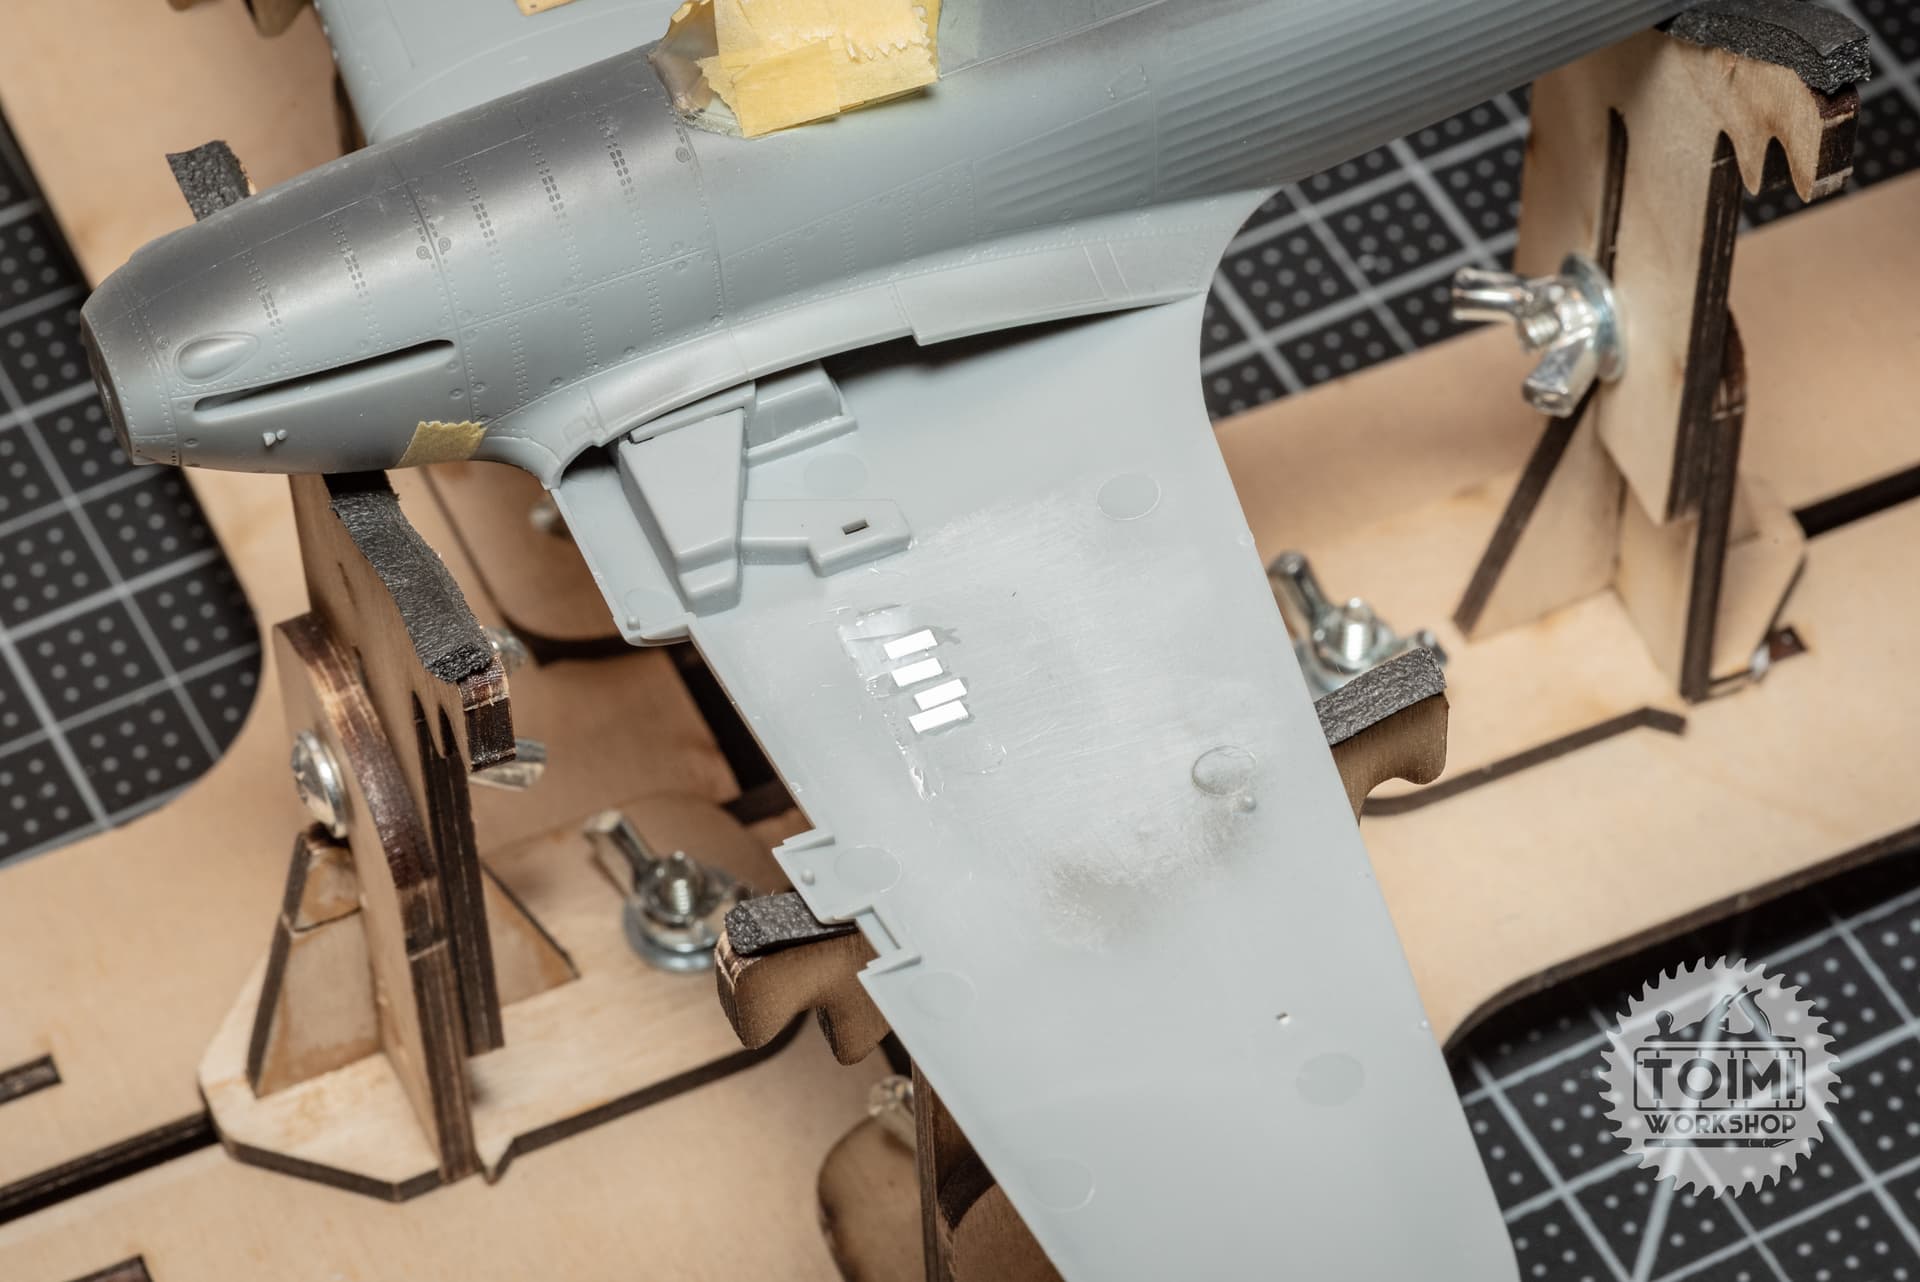
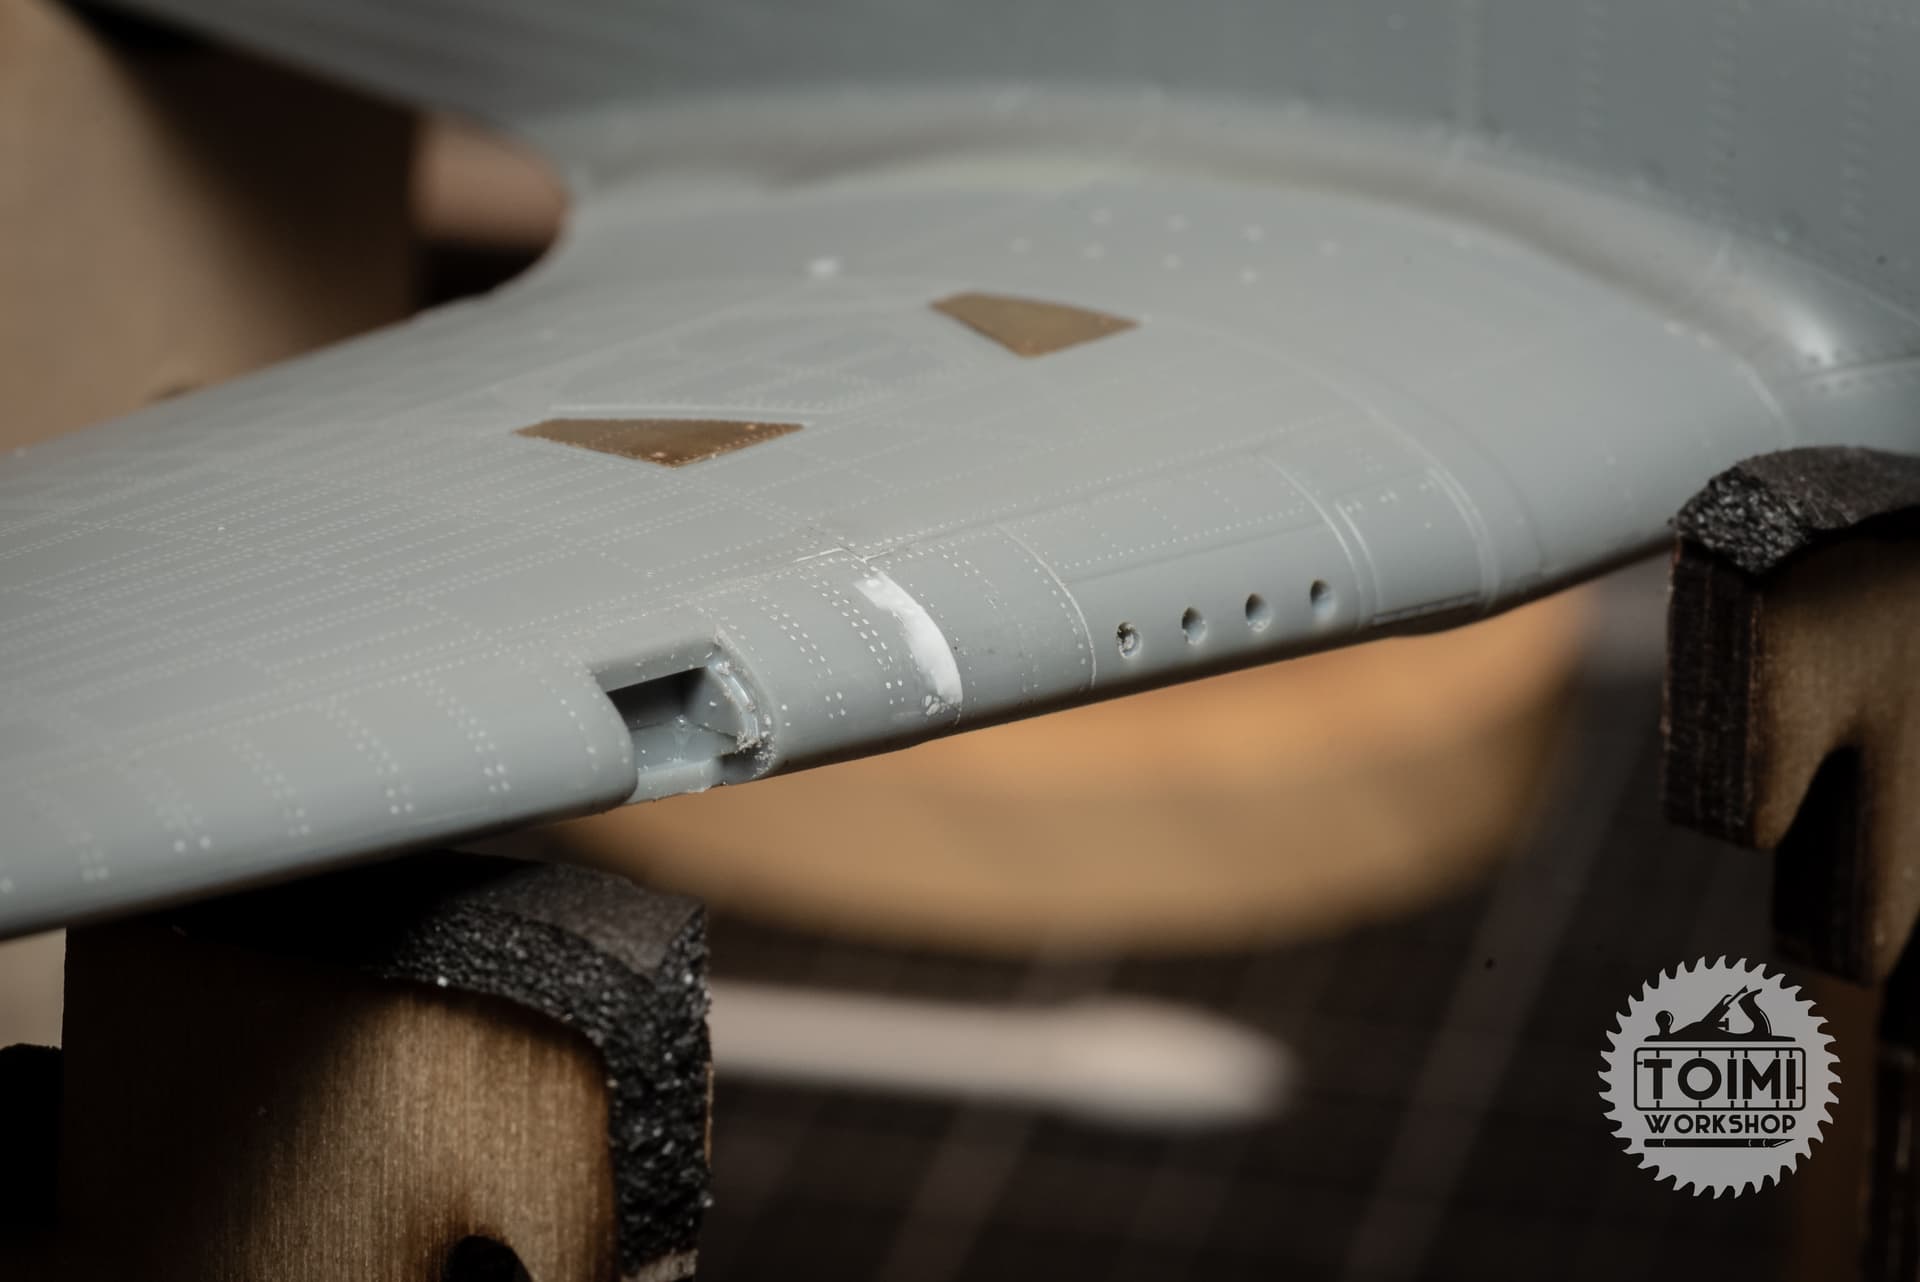
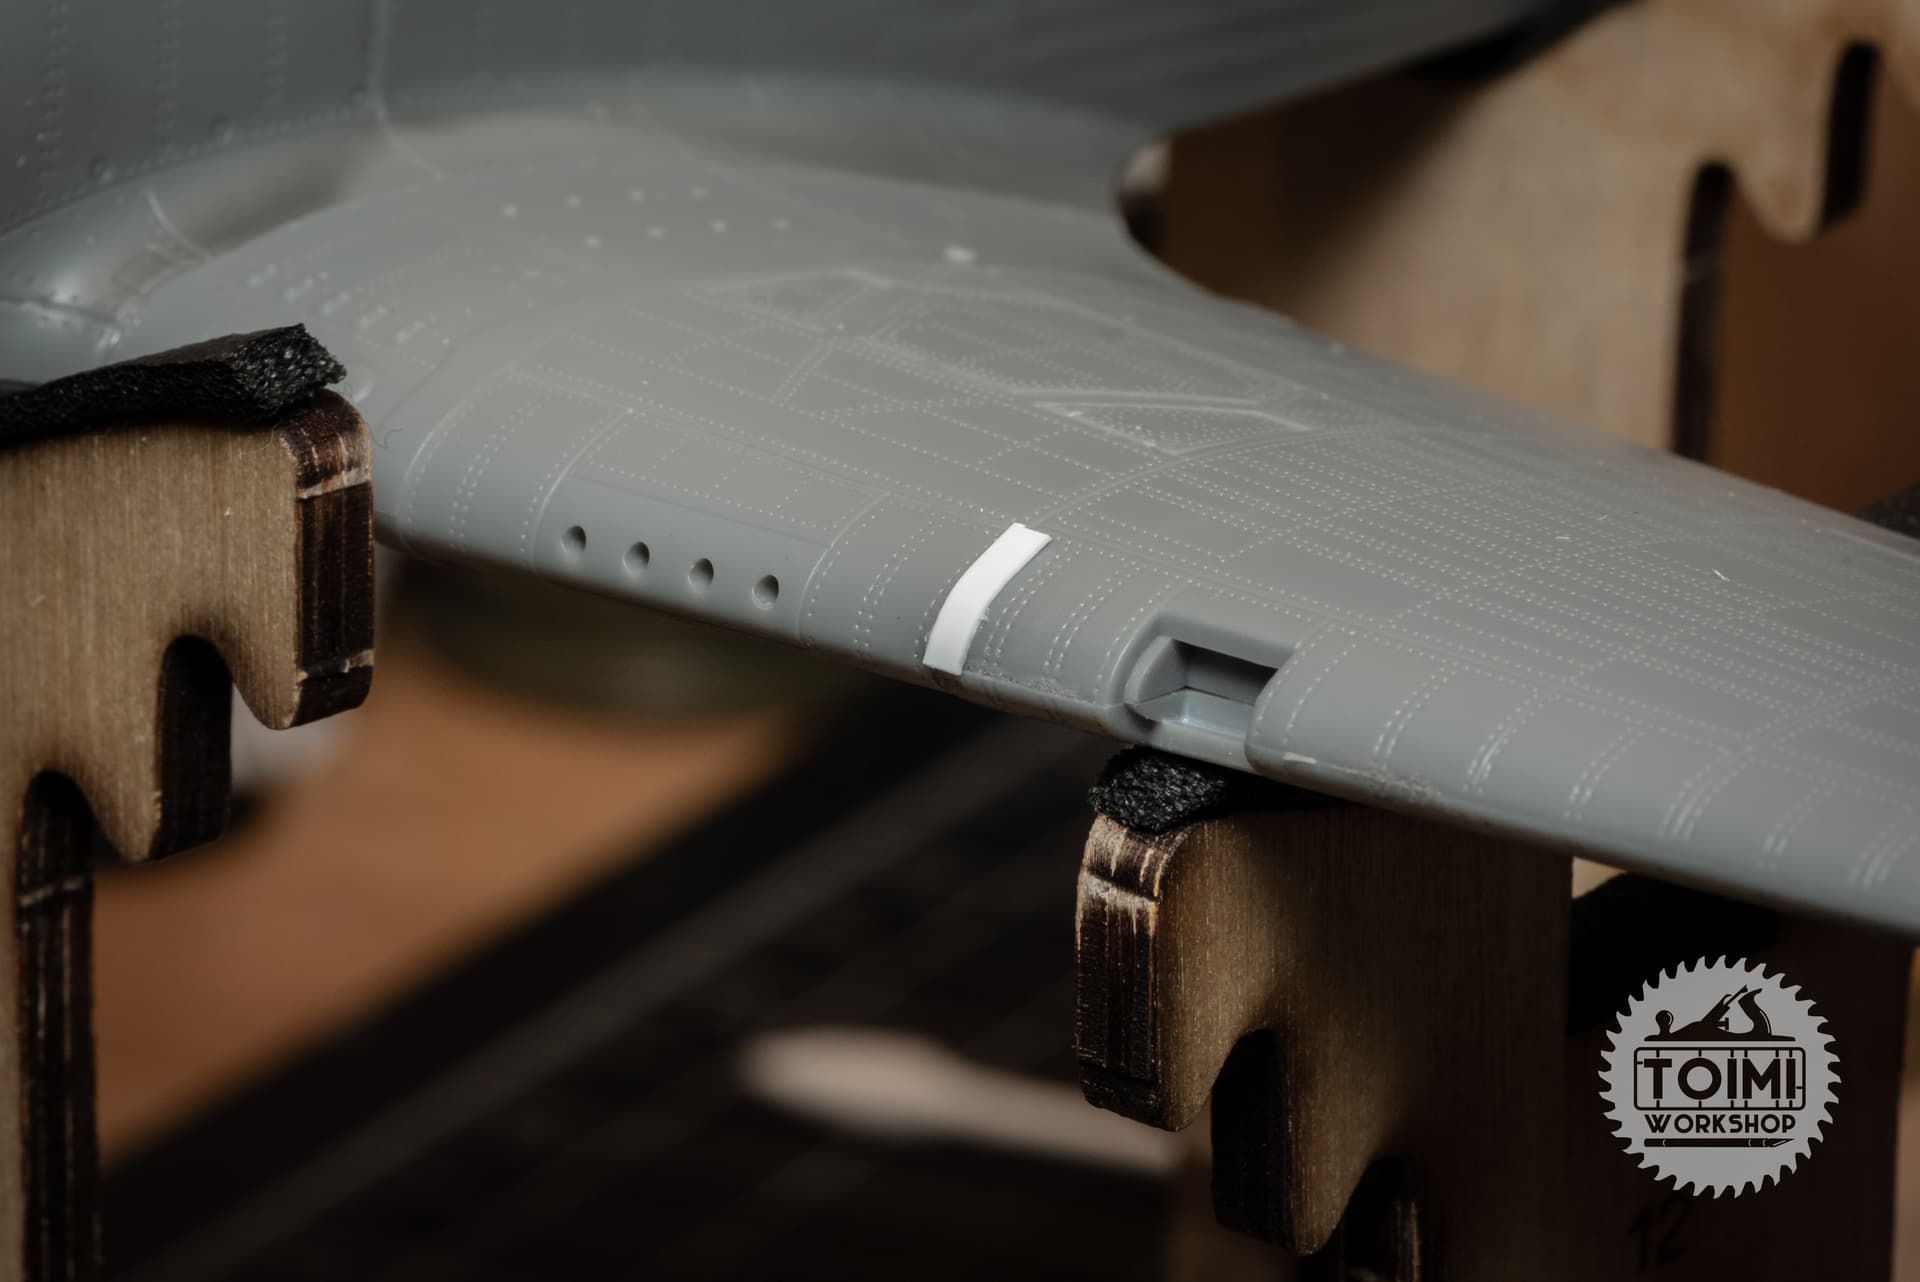
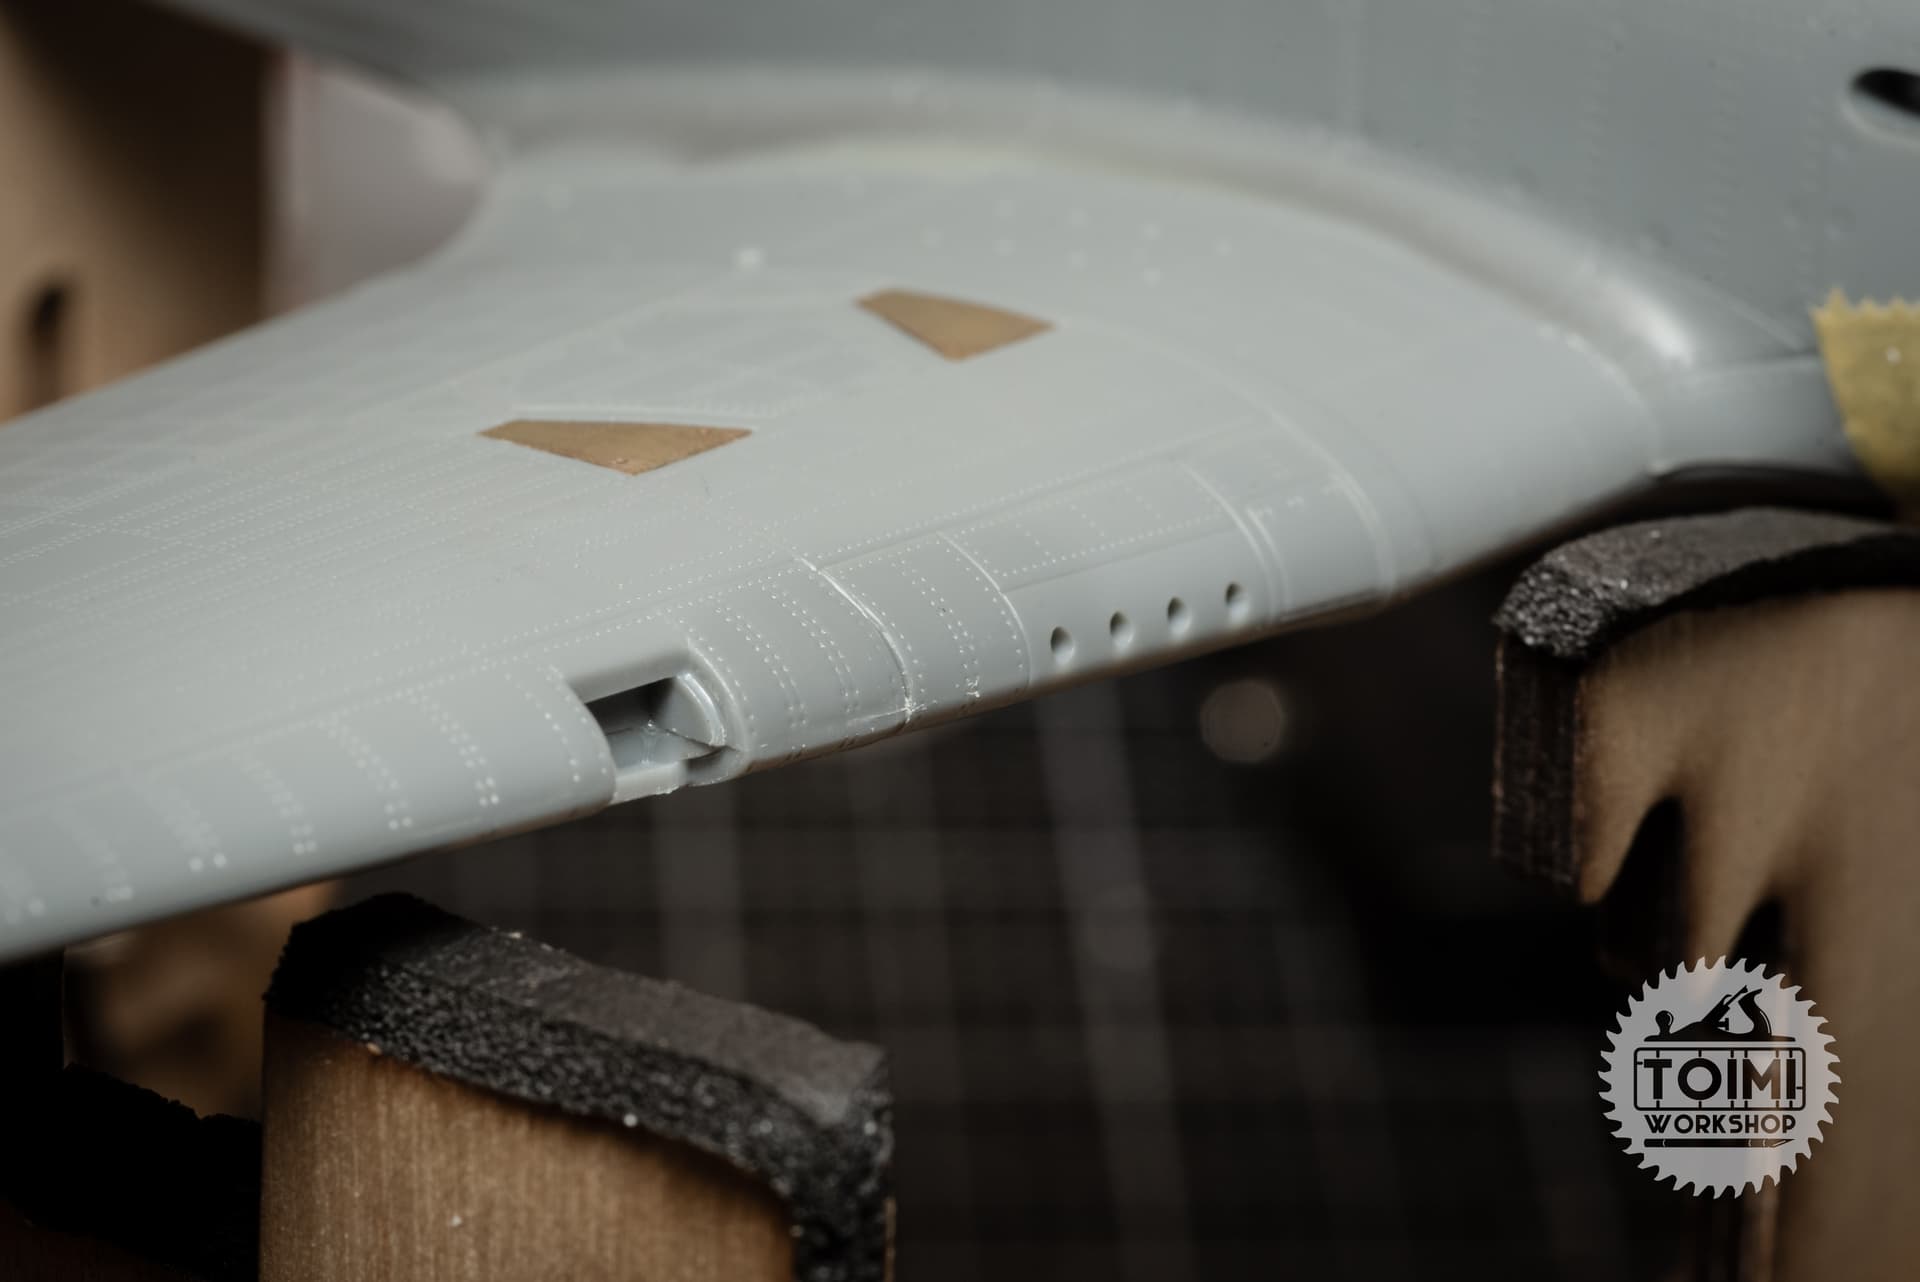
This whole kit has been a strange mix of nearly perfect fit, and then some really bad fit. The gun-port parts, molded separately surely to avoid a seam across the muzzle openings, are a good example of a tricky spot. They fit so snugly into their spots on the wing leading edge that the seams totally disappear – you can barely wick cement into the join. Unfortunately I was too impressed by this fit to notice that they were both proud of the wing leading edge on the outboard side by about 0.5mm. Some white styrene card cut to fit and then blended in solved the issue.
The cowling seam wasn’t too bad – a nice uniform gap which was easy to fill with sprue goo (a slightly darker grey plastic than the kit, hence the line).
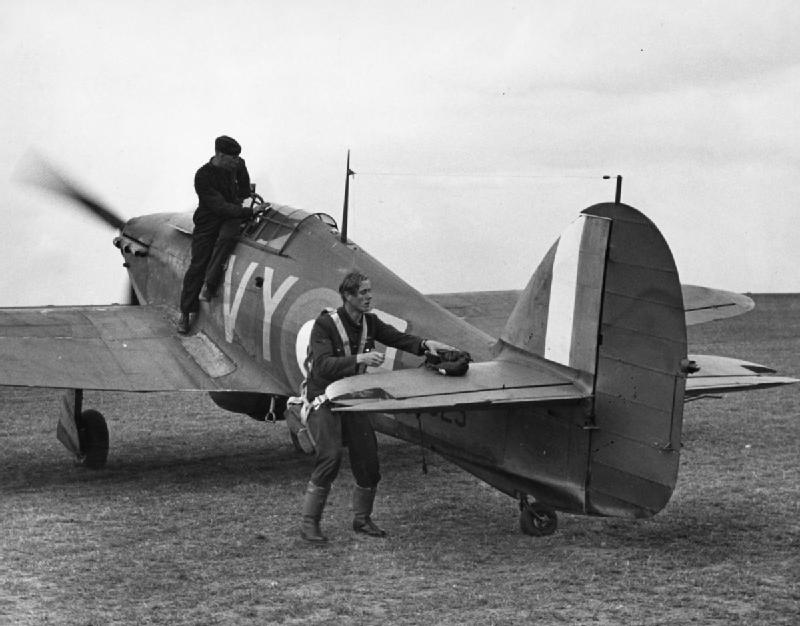
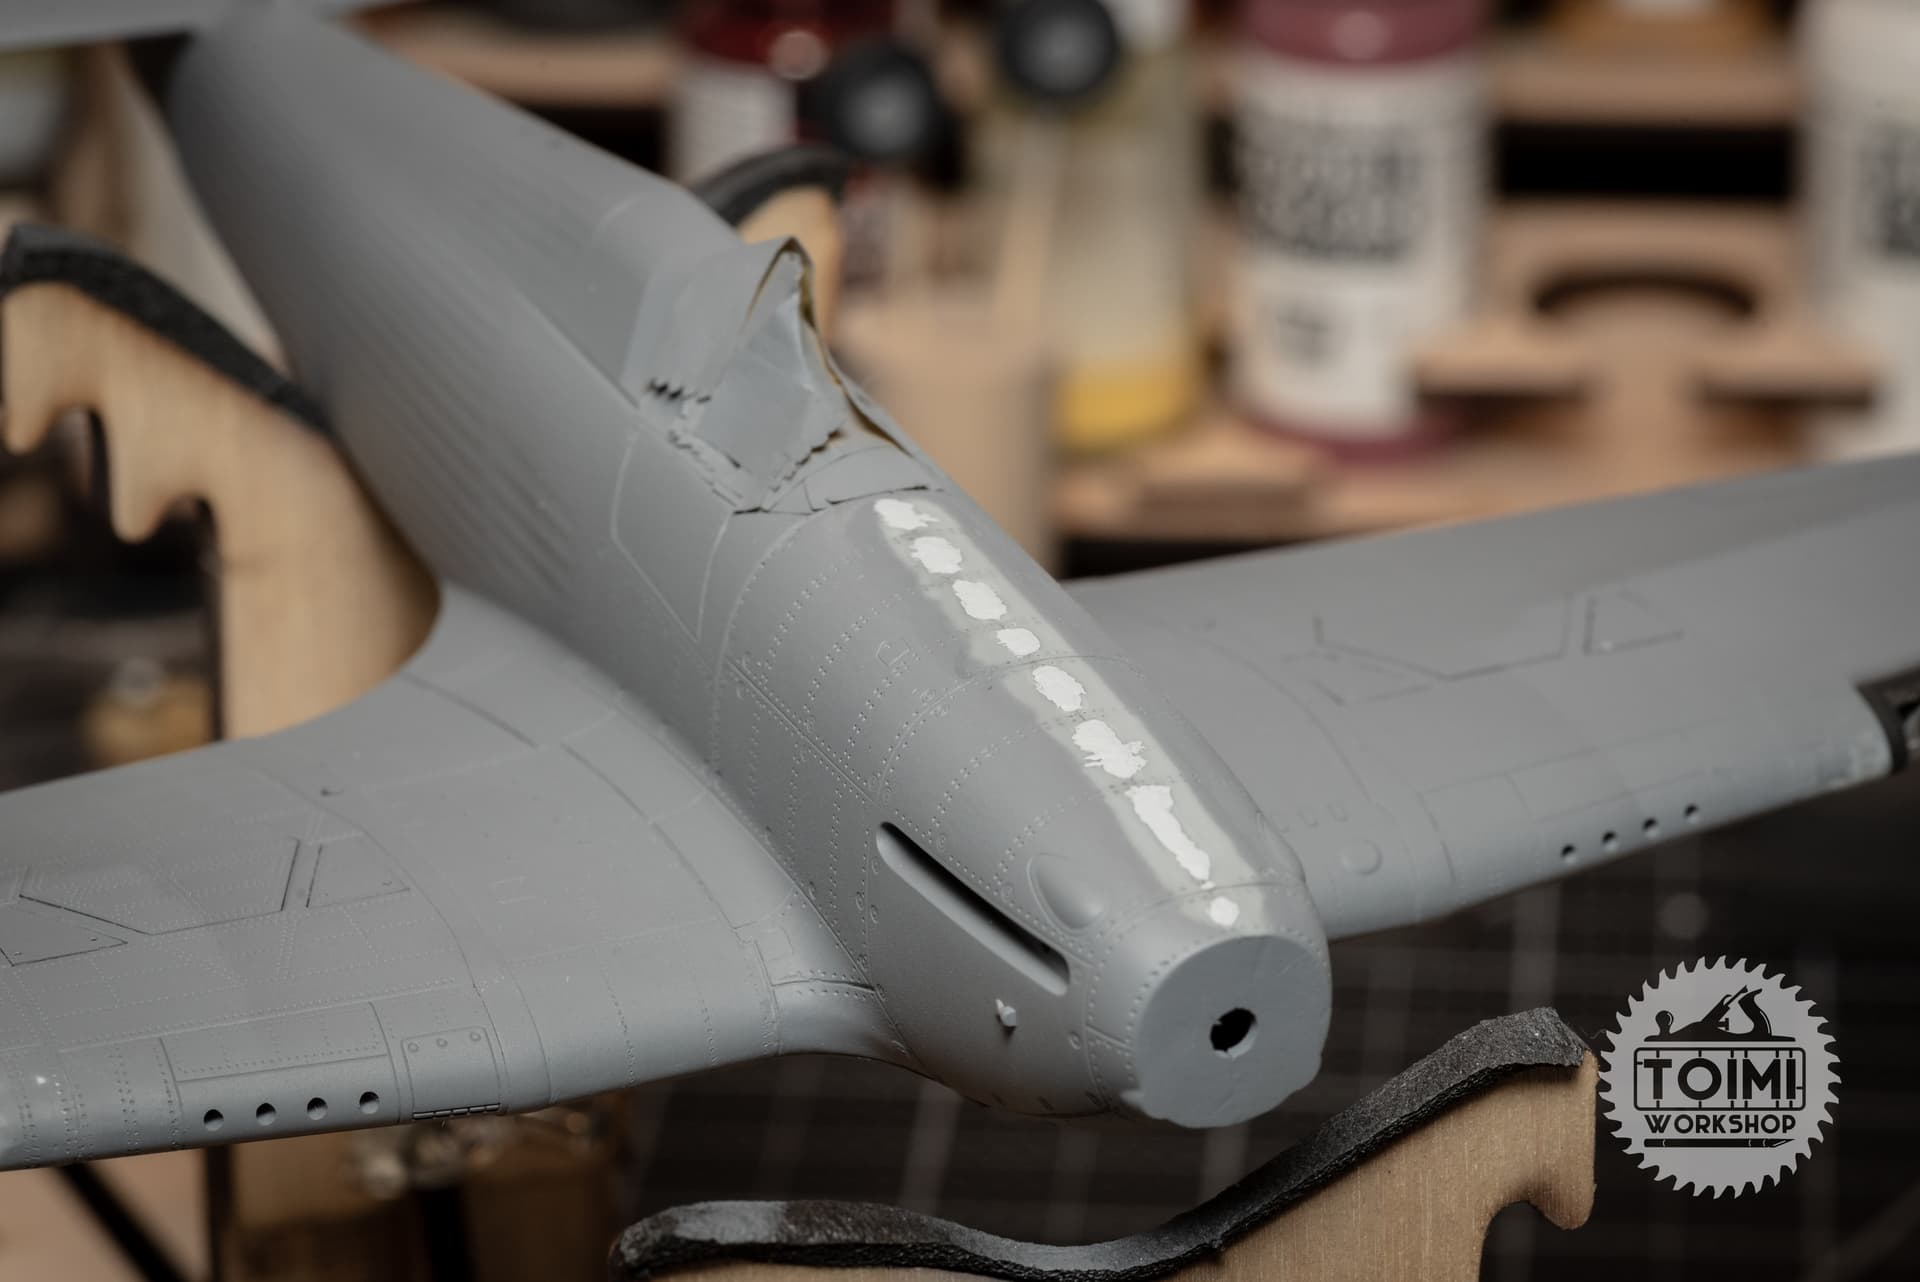
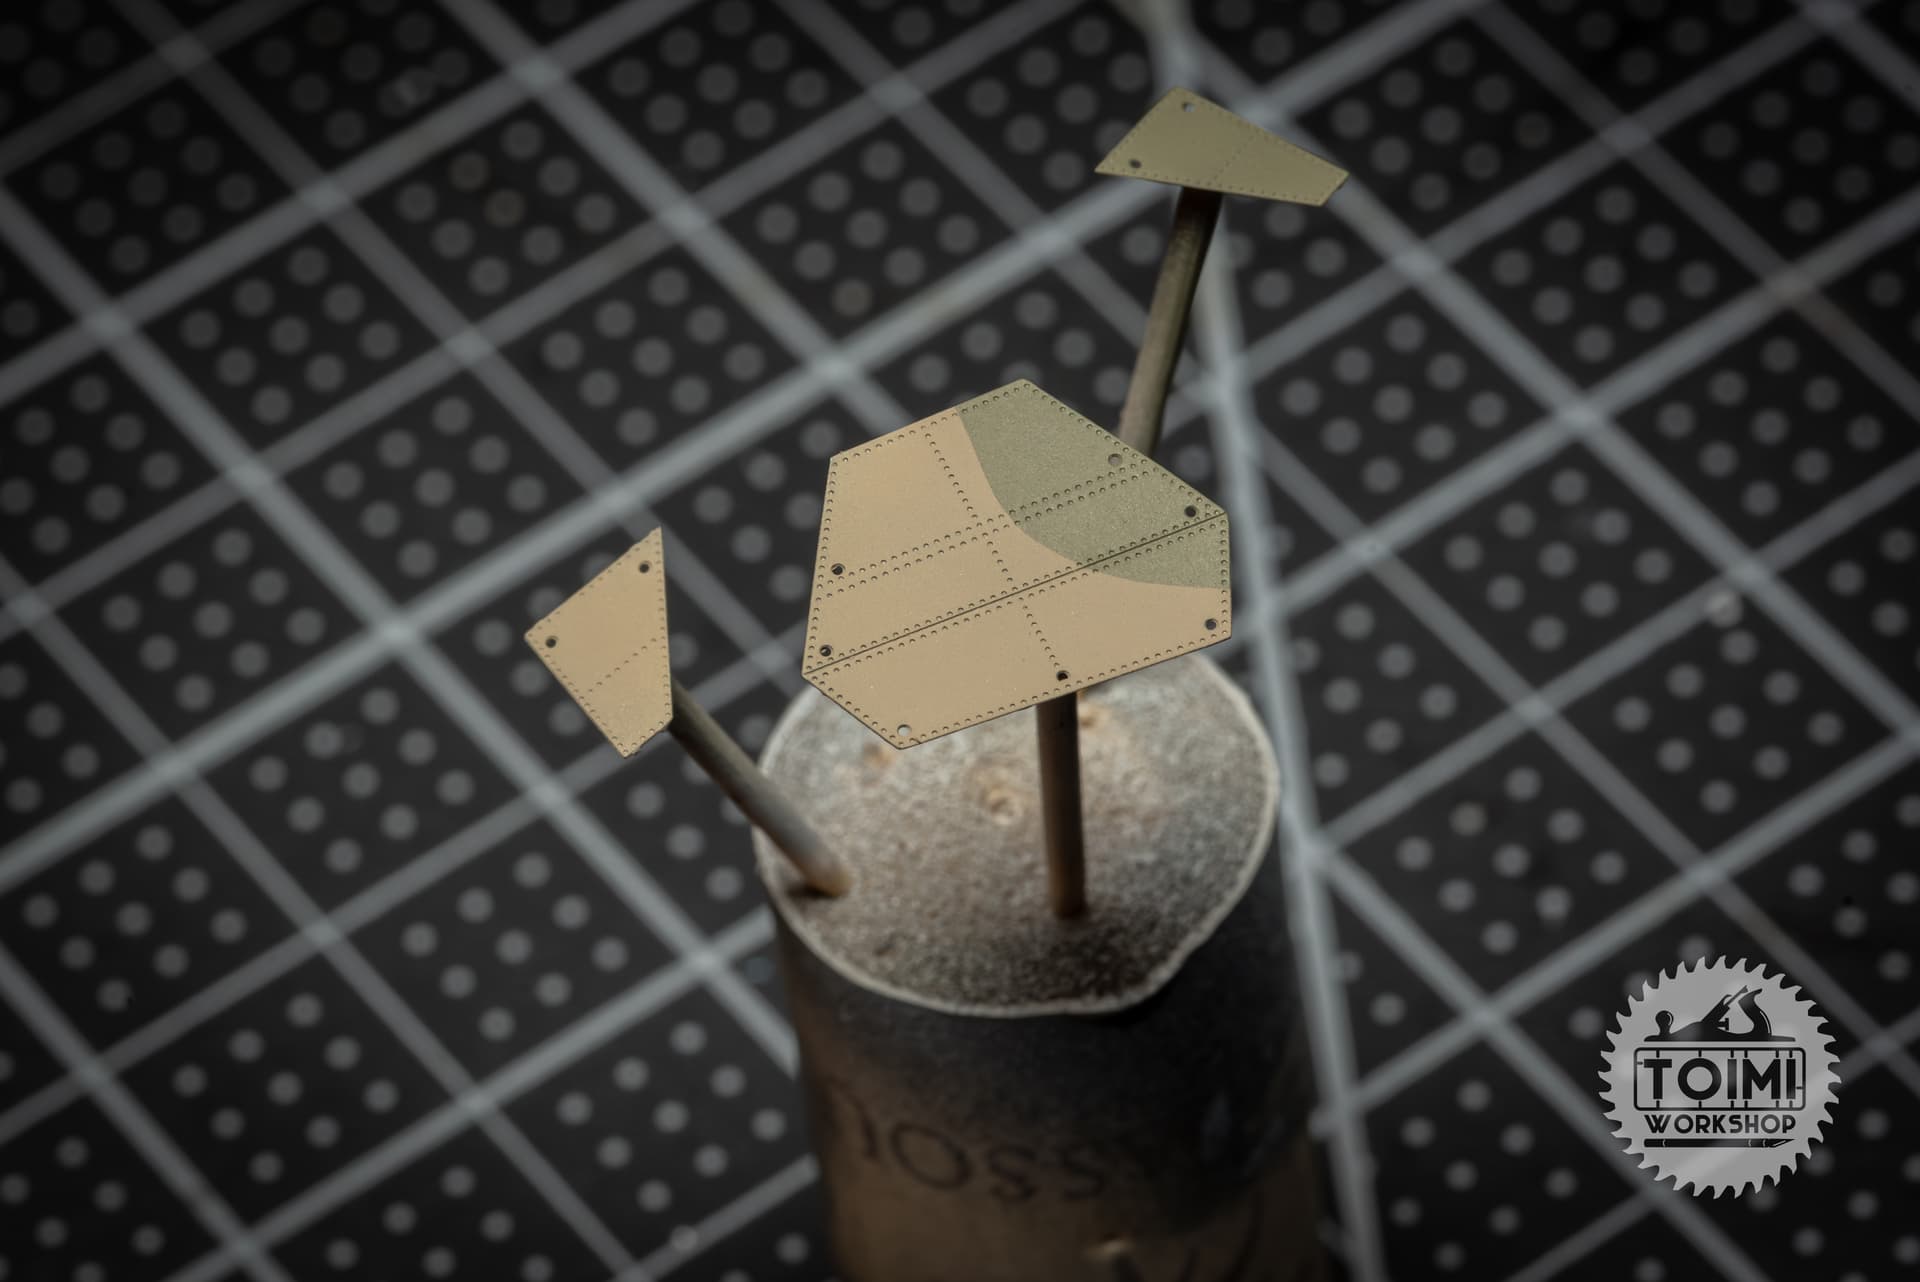
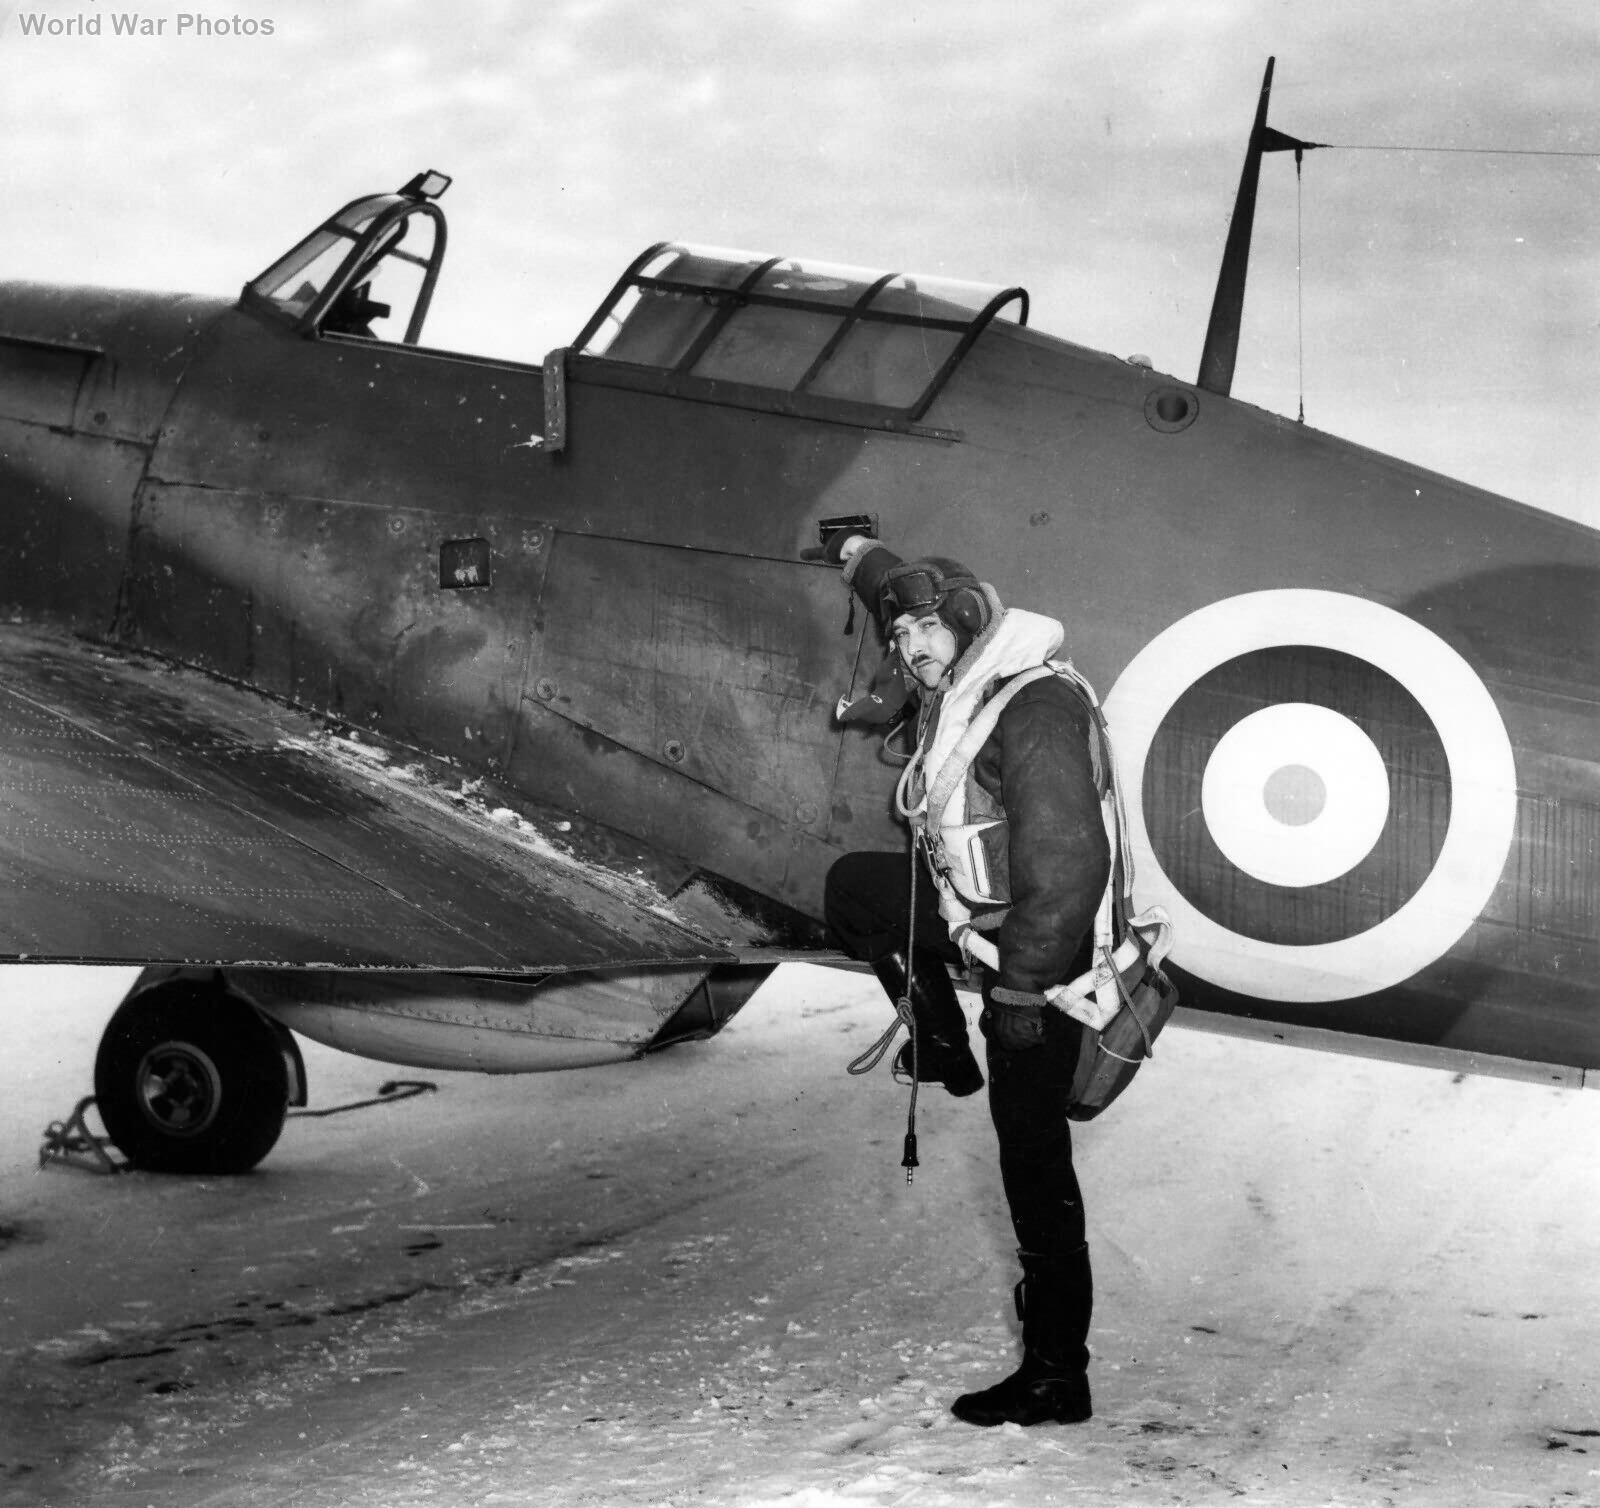
Then there were some very odd detail choices to correct. This dramatic image served as the inspiration for the next couple evenings’ work.
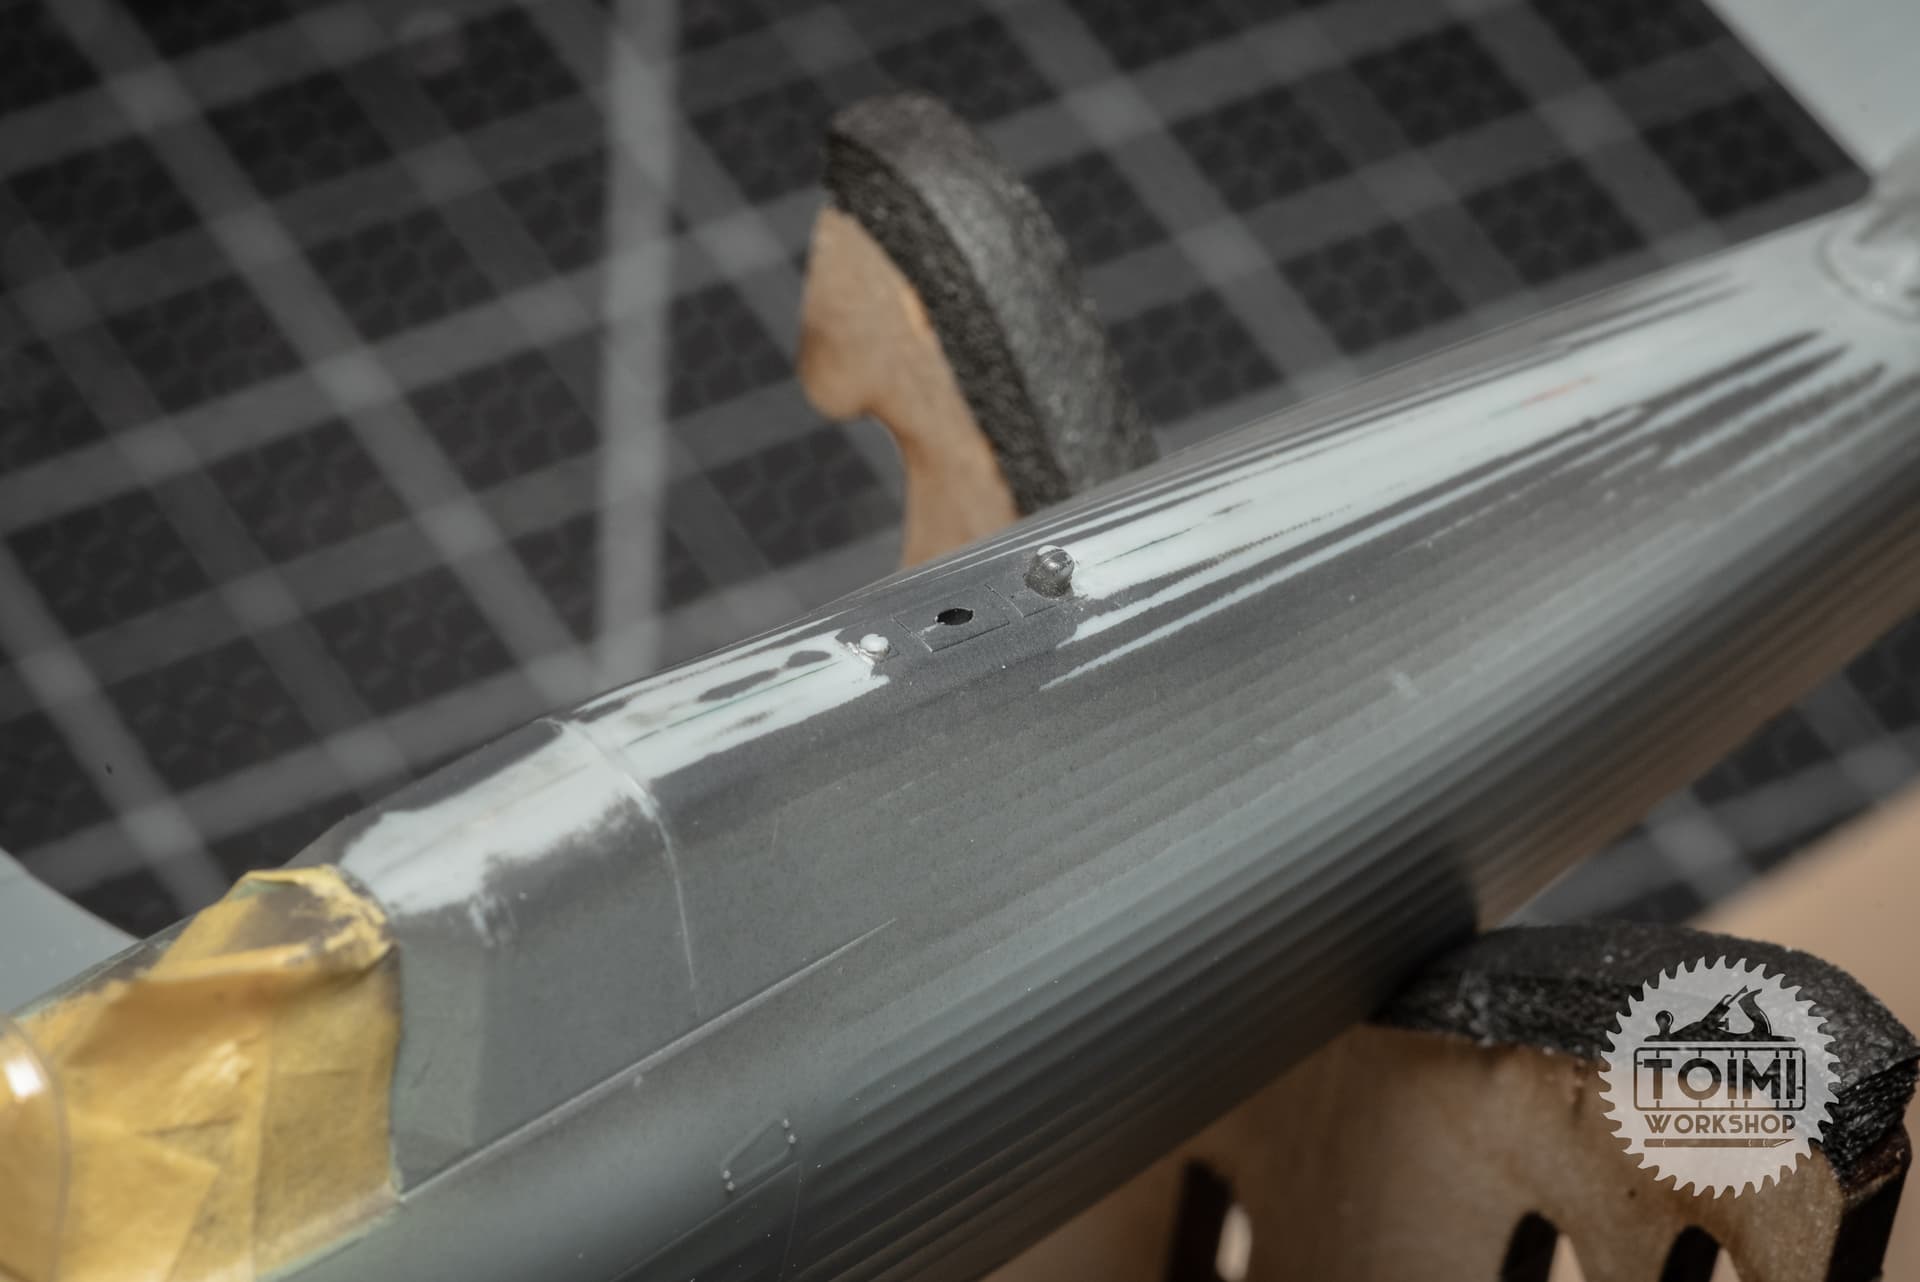
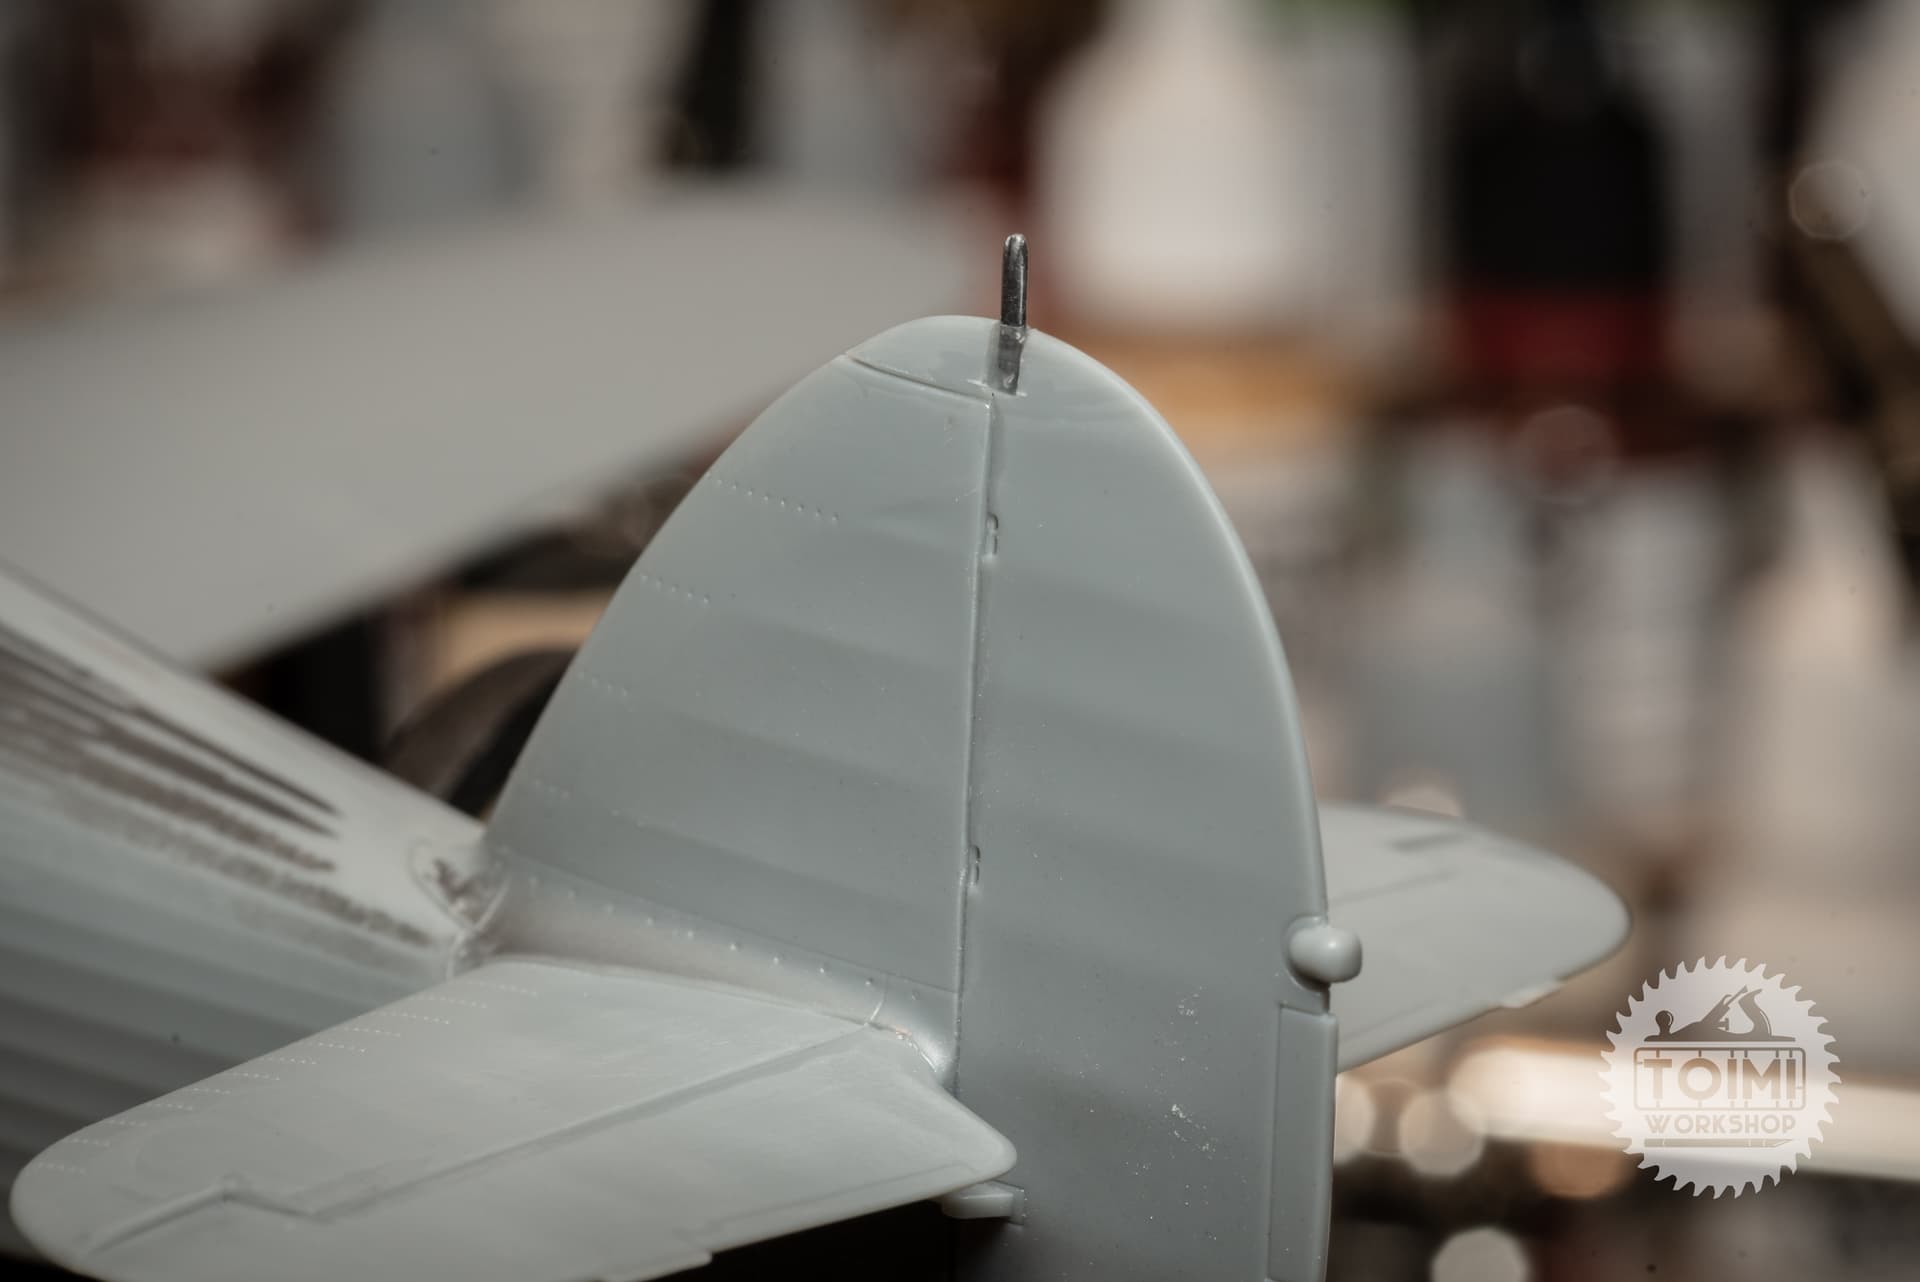
There should be three elements in the dorsal area behind the cockpit: the navigation light, the aerial wire mast, and the insulated pass-through for the aerial wire. Research indicates that the mast on the 242 sqd Hurricanes by summer 1940 was the later tapered style, with the triangular insulation fitting.
The kit comes with an acceptable mast, but the nav light and through-fuselage fitting are… way off.
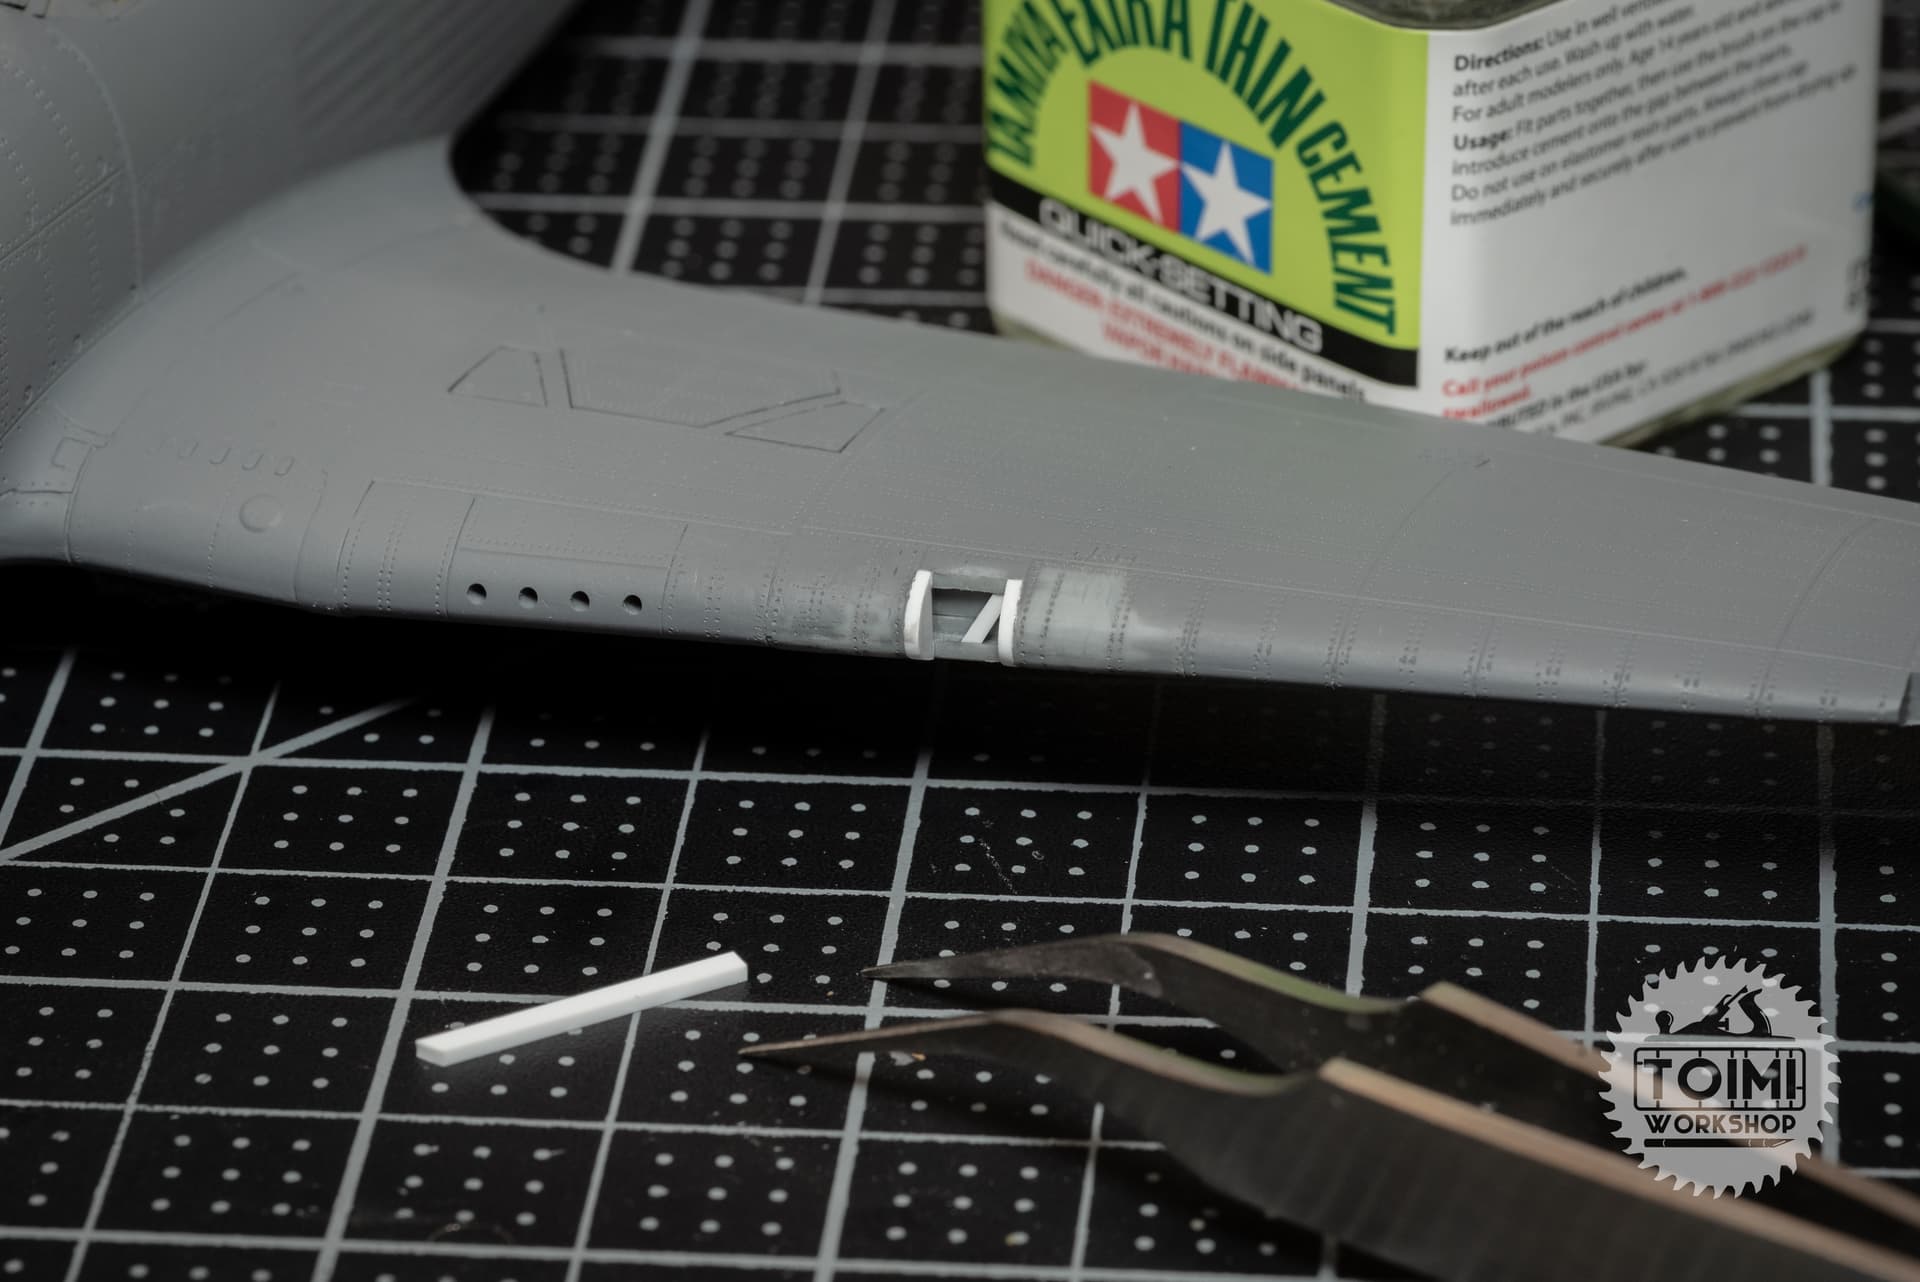
So I just filed all that stuff off. I’ll use a paint mask to represent the panels for both elements, and add a clear light at the end of the build. For the wire pass-through, I fit a bit of brass rod. Still not 100% accurate but much better, and should be easy to glue a “wire” into later.
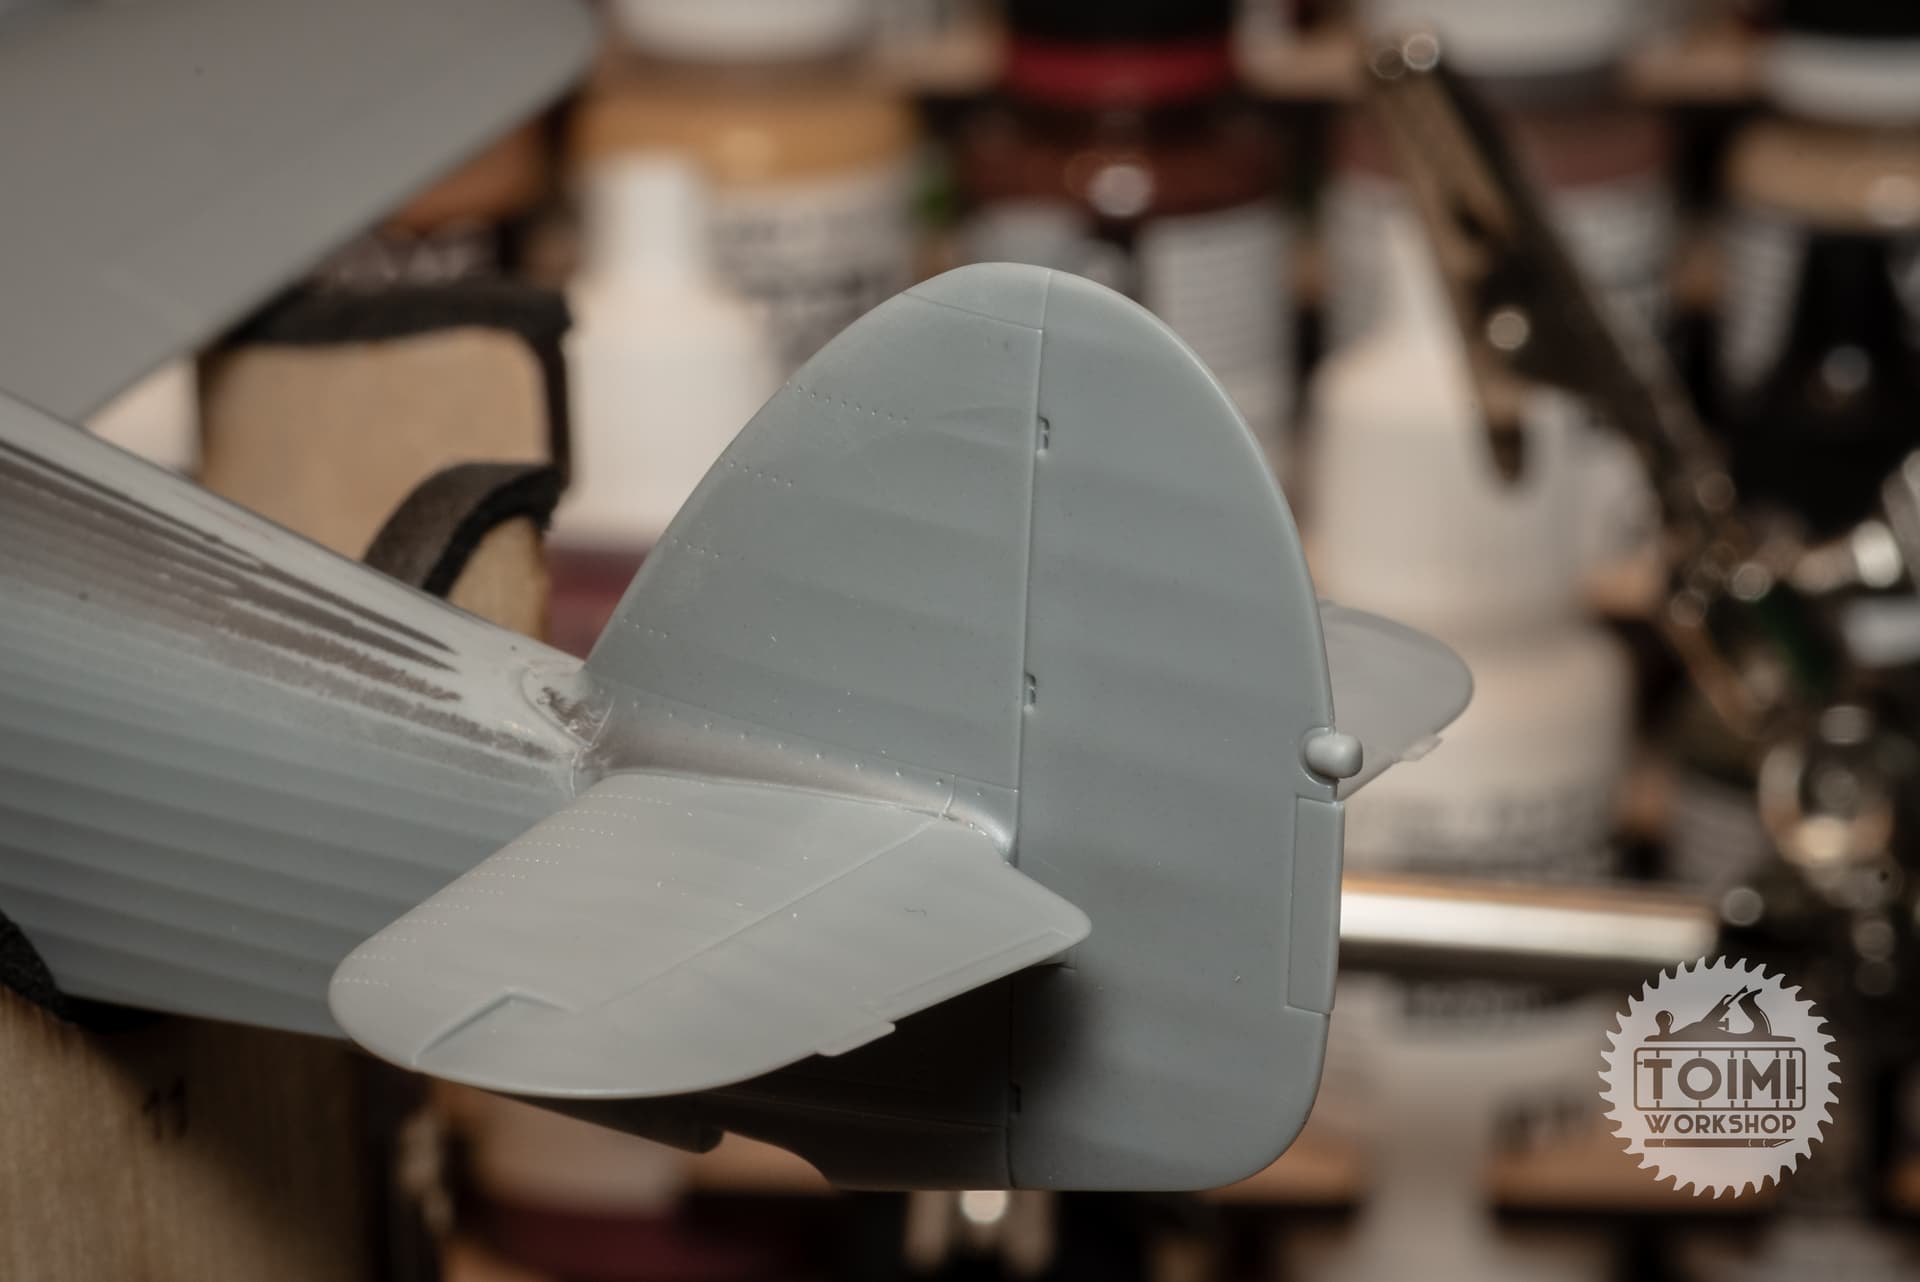
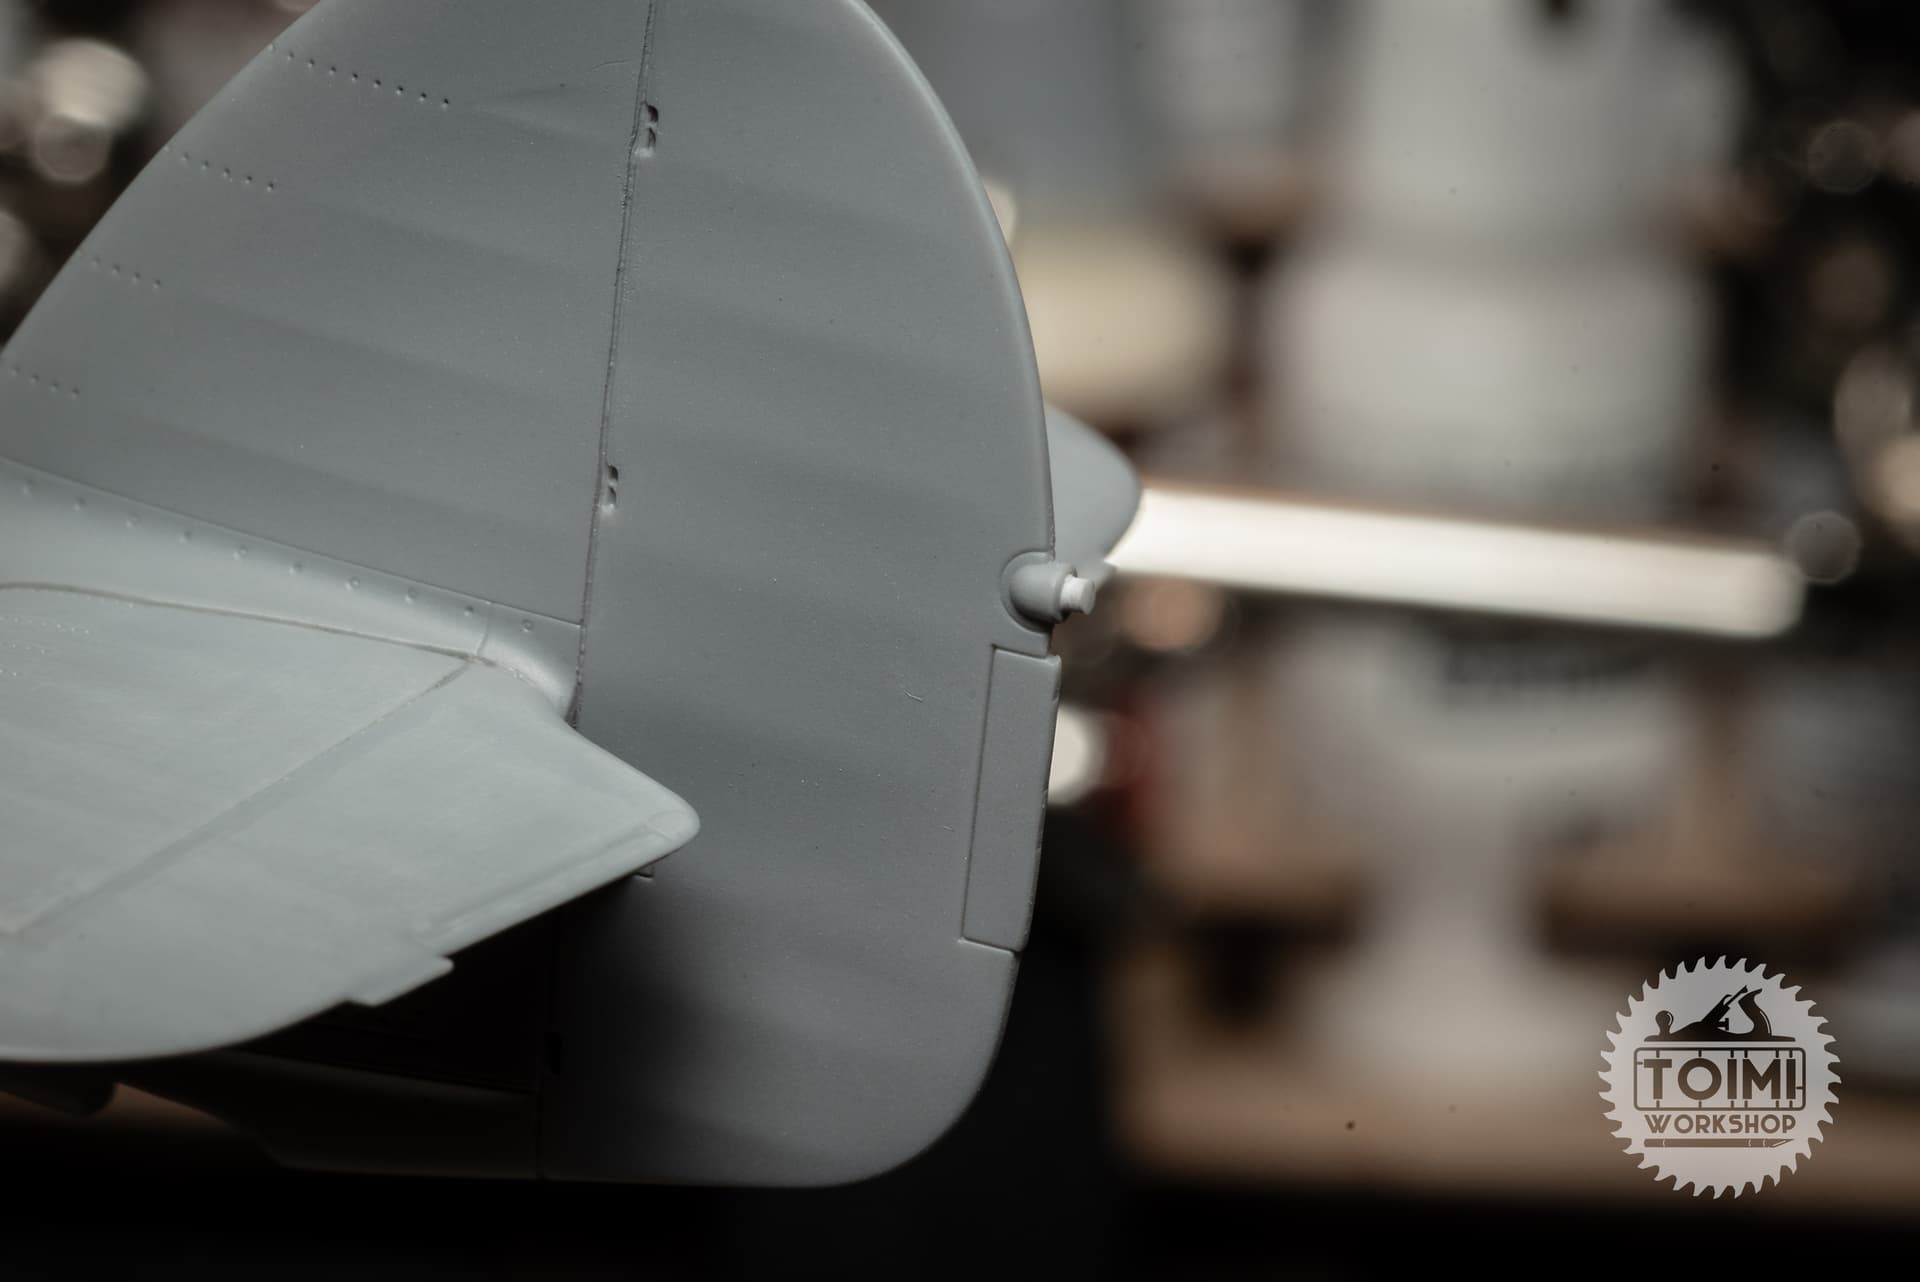
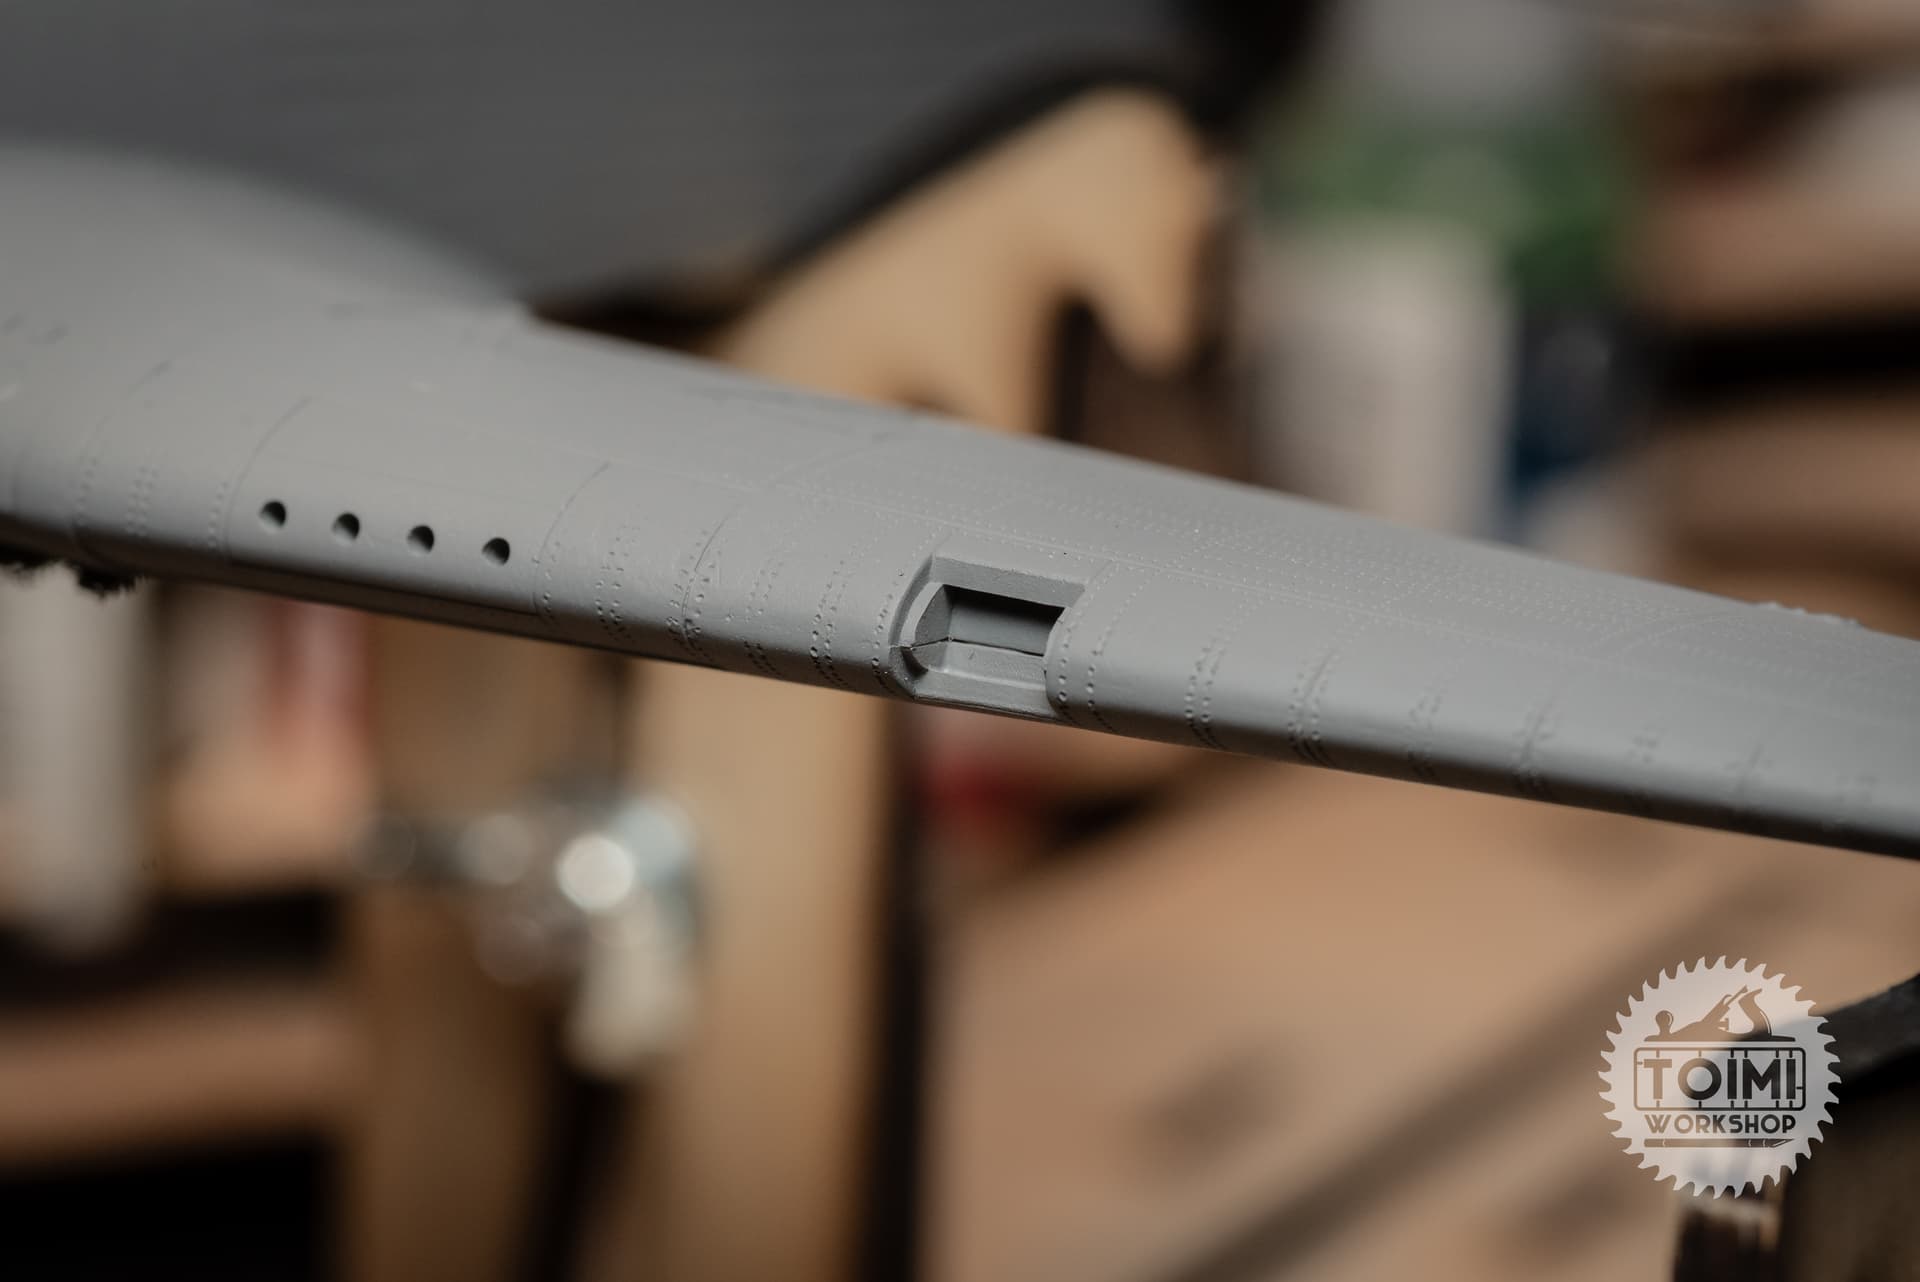
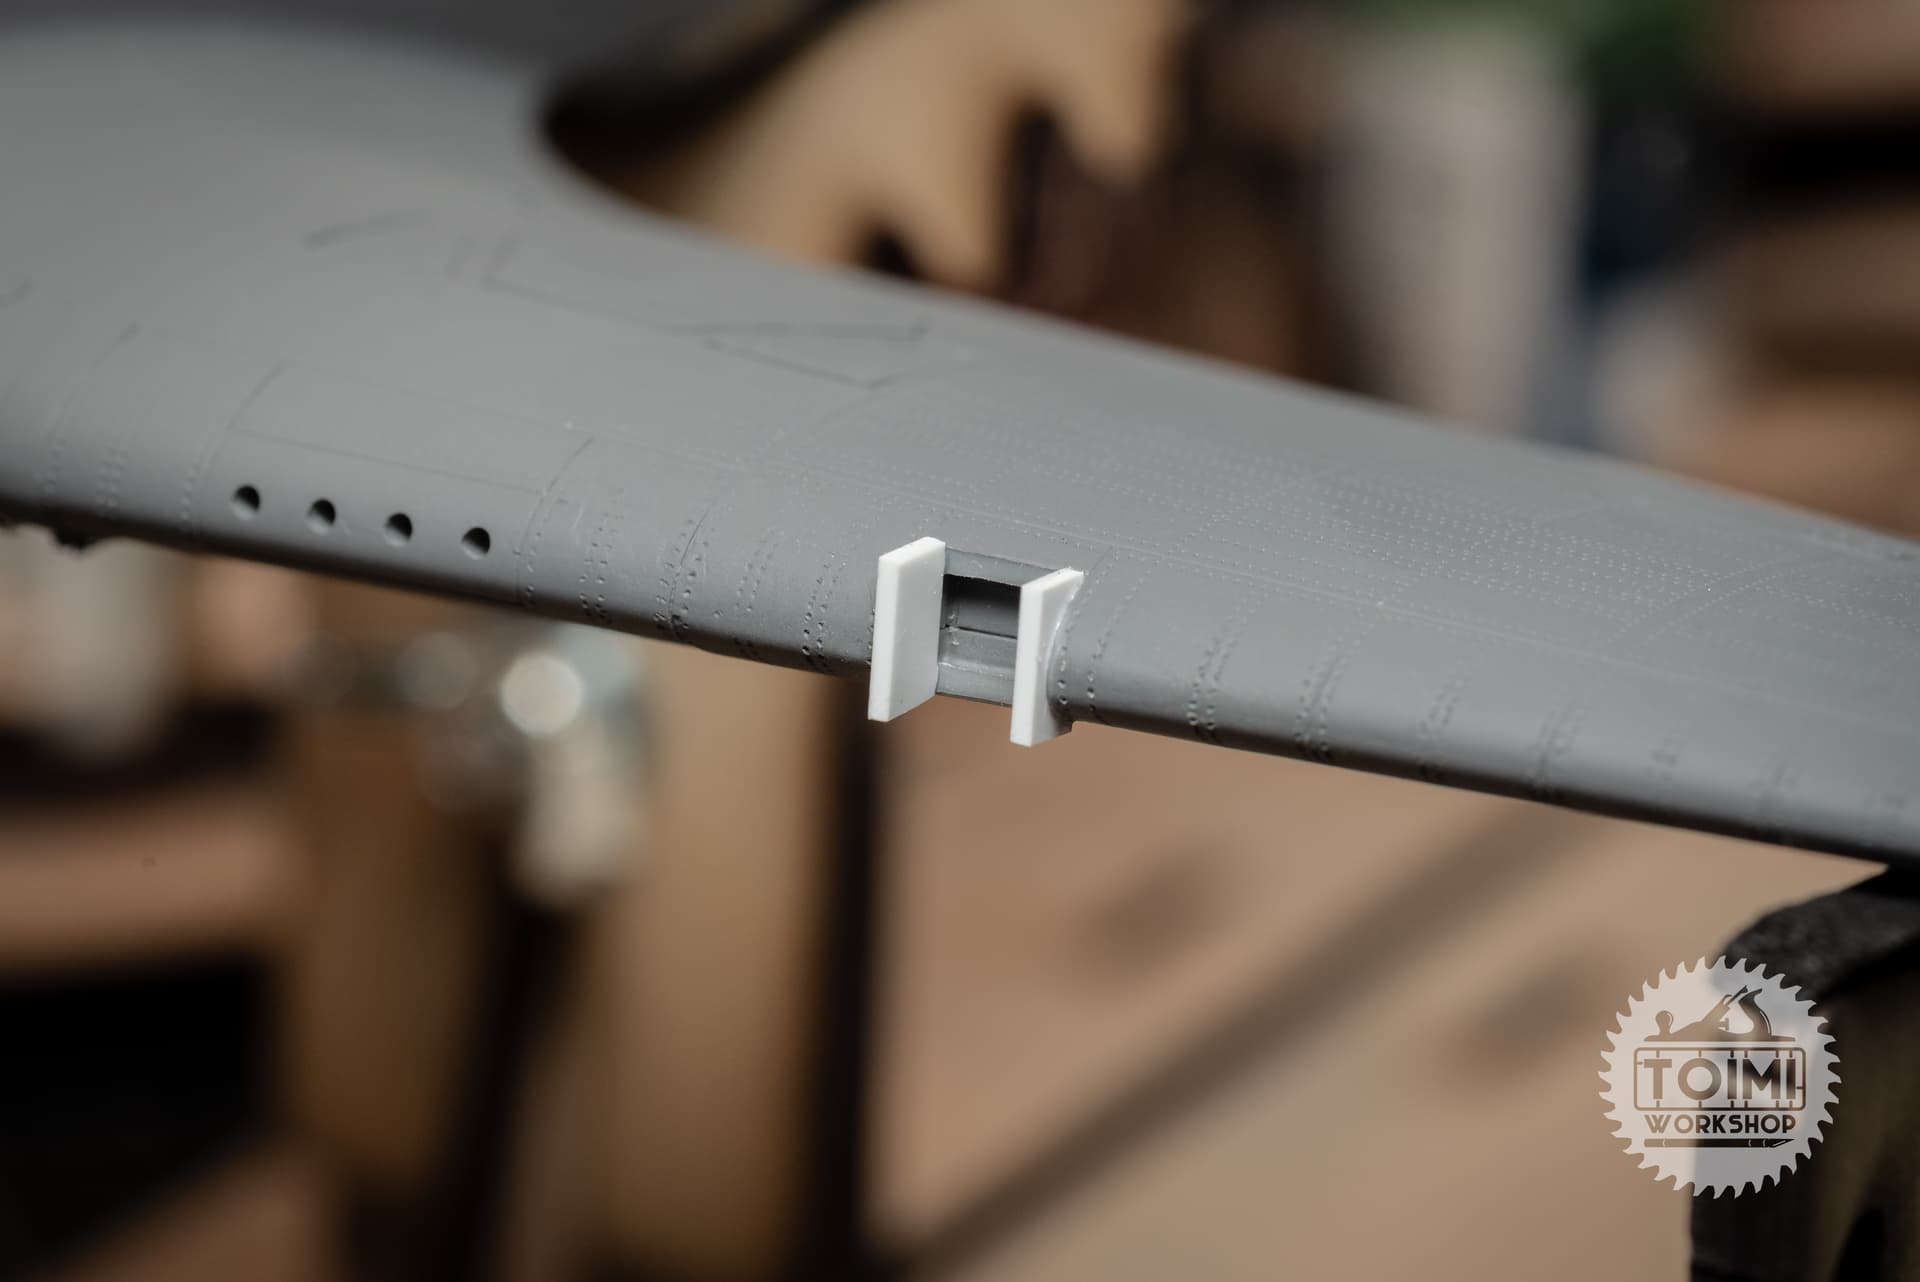
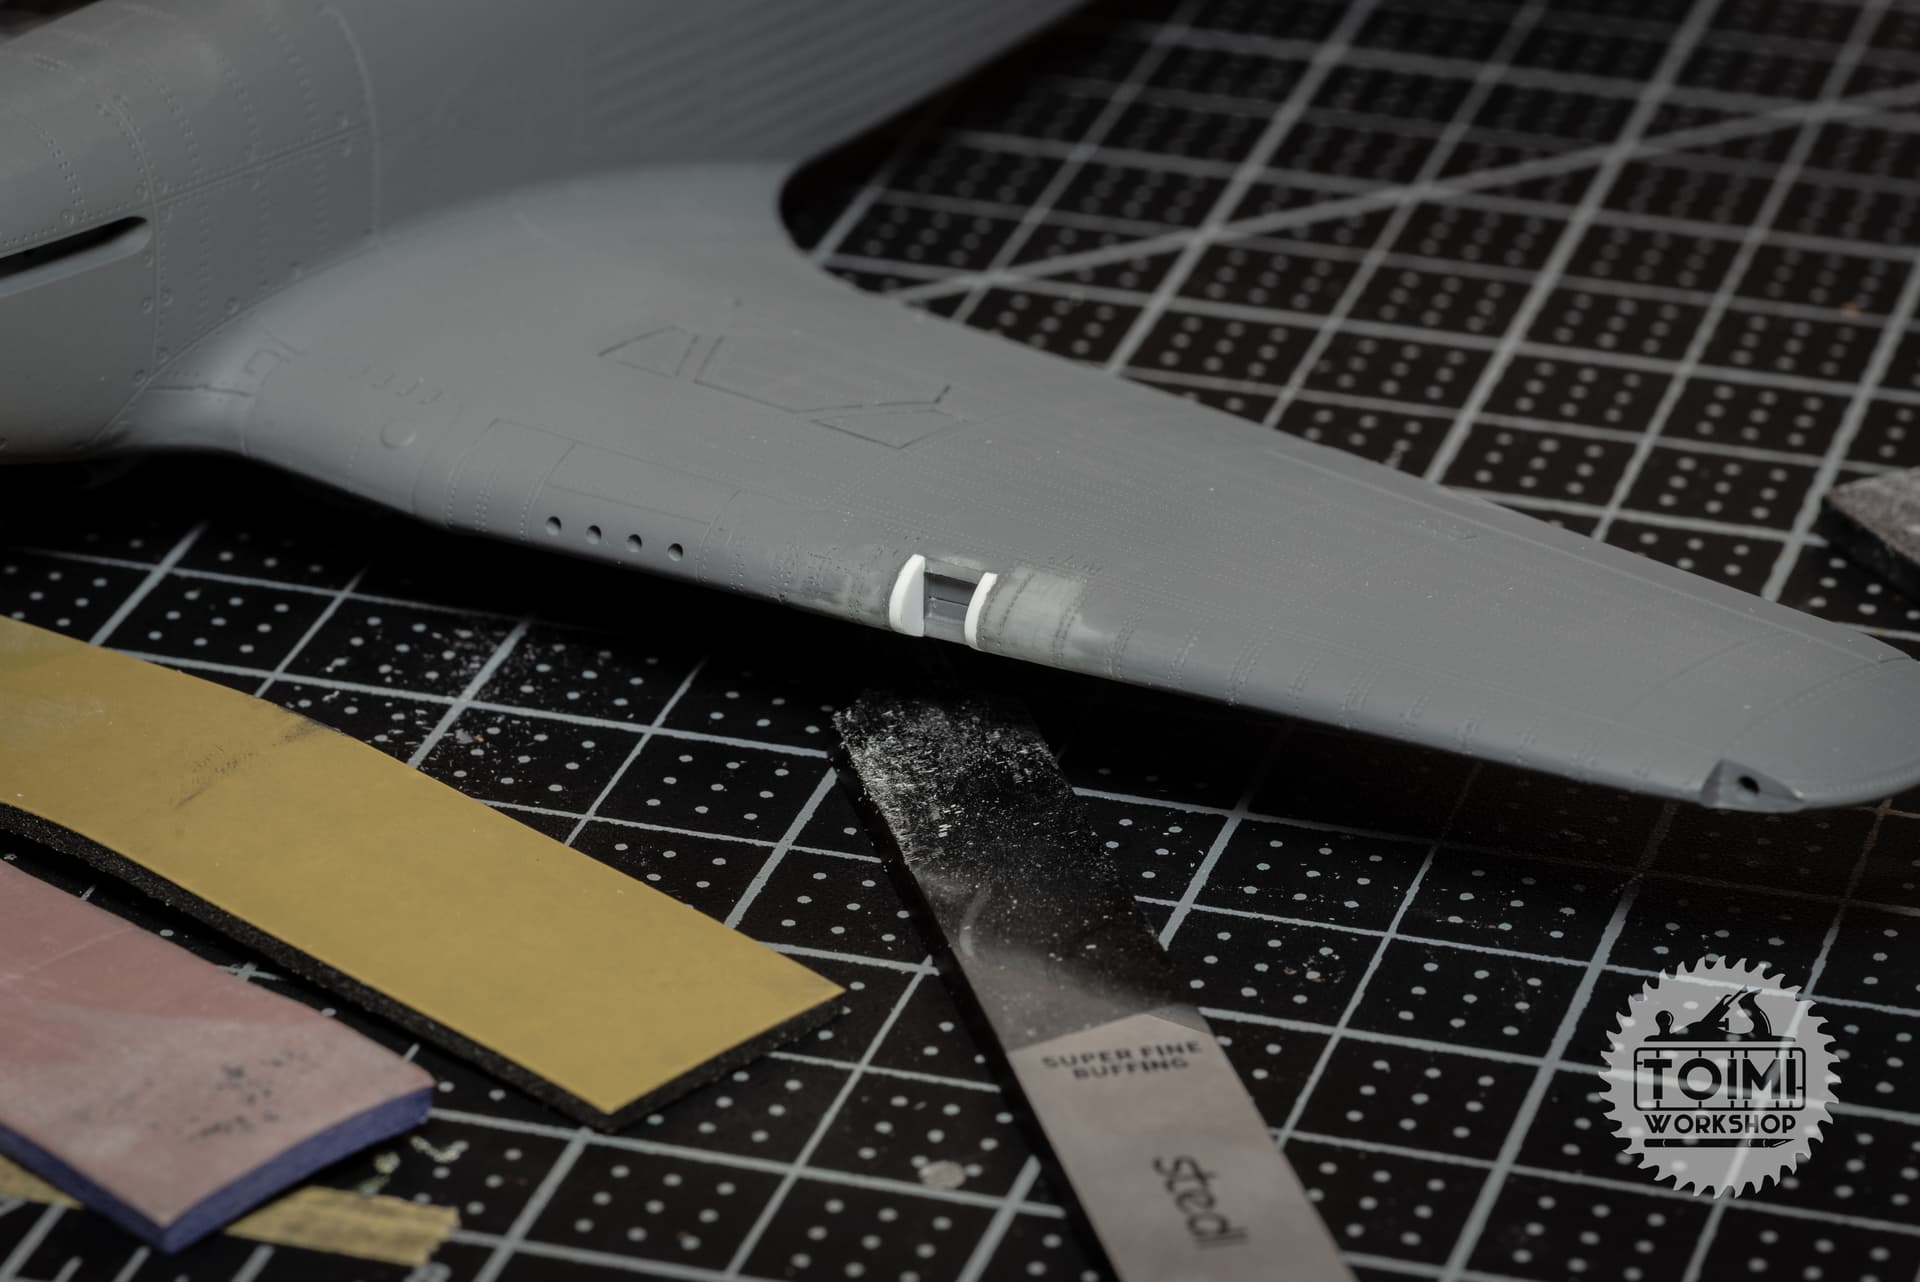
Then there’s the tail, which is missing the aerial wire mast altogether, and has a silly “panel” line running vertically across the rudder top. And then that tail nav light “blob.”
Knowing how much more handling was still to come for this kit, and also knowing that I wouldn’t be able to glue on a suitable mast after painting, I decided go all-in and carved a channel into the rudder top and installed a bit of filed-flat paperclip as the mast, then faired it with CA glue. I also sharpened up the seams between the rudder and elevators and the airframe. Lastly I (slightly) improved the nav light housing, and again, a clear lens will be added after finishing.
It’s at this point, after staring at reference images too long, that it started to bother me that the rudder and elevators are all molded together, perfectly straight and flat, in a rather unnatural way; I briefly considered busting out the razor saw.
But enough is enough – I’d be adding days to the build at best. Surely there’s a Hurricane kit that has these details correct from the get-go. Next time…
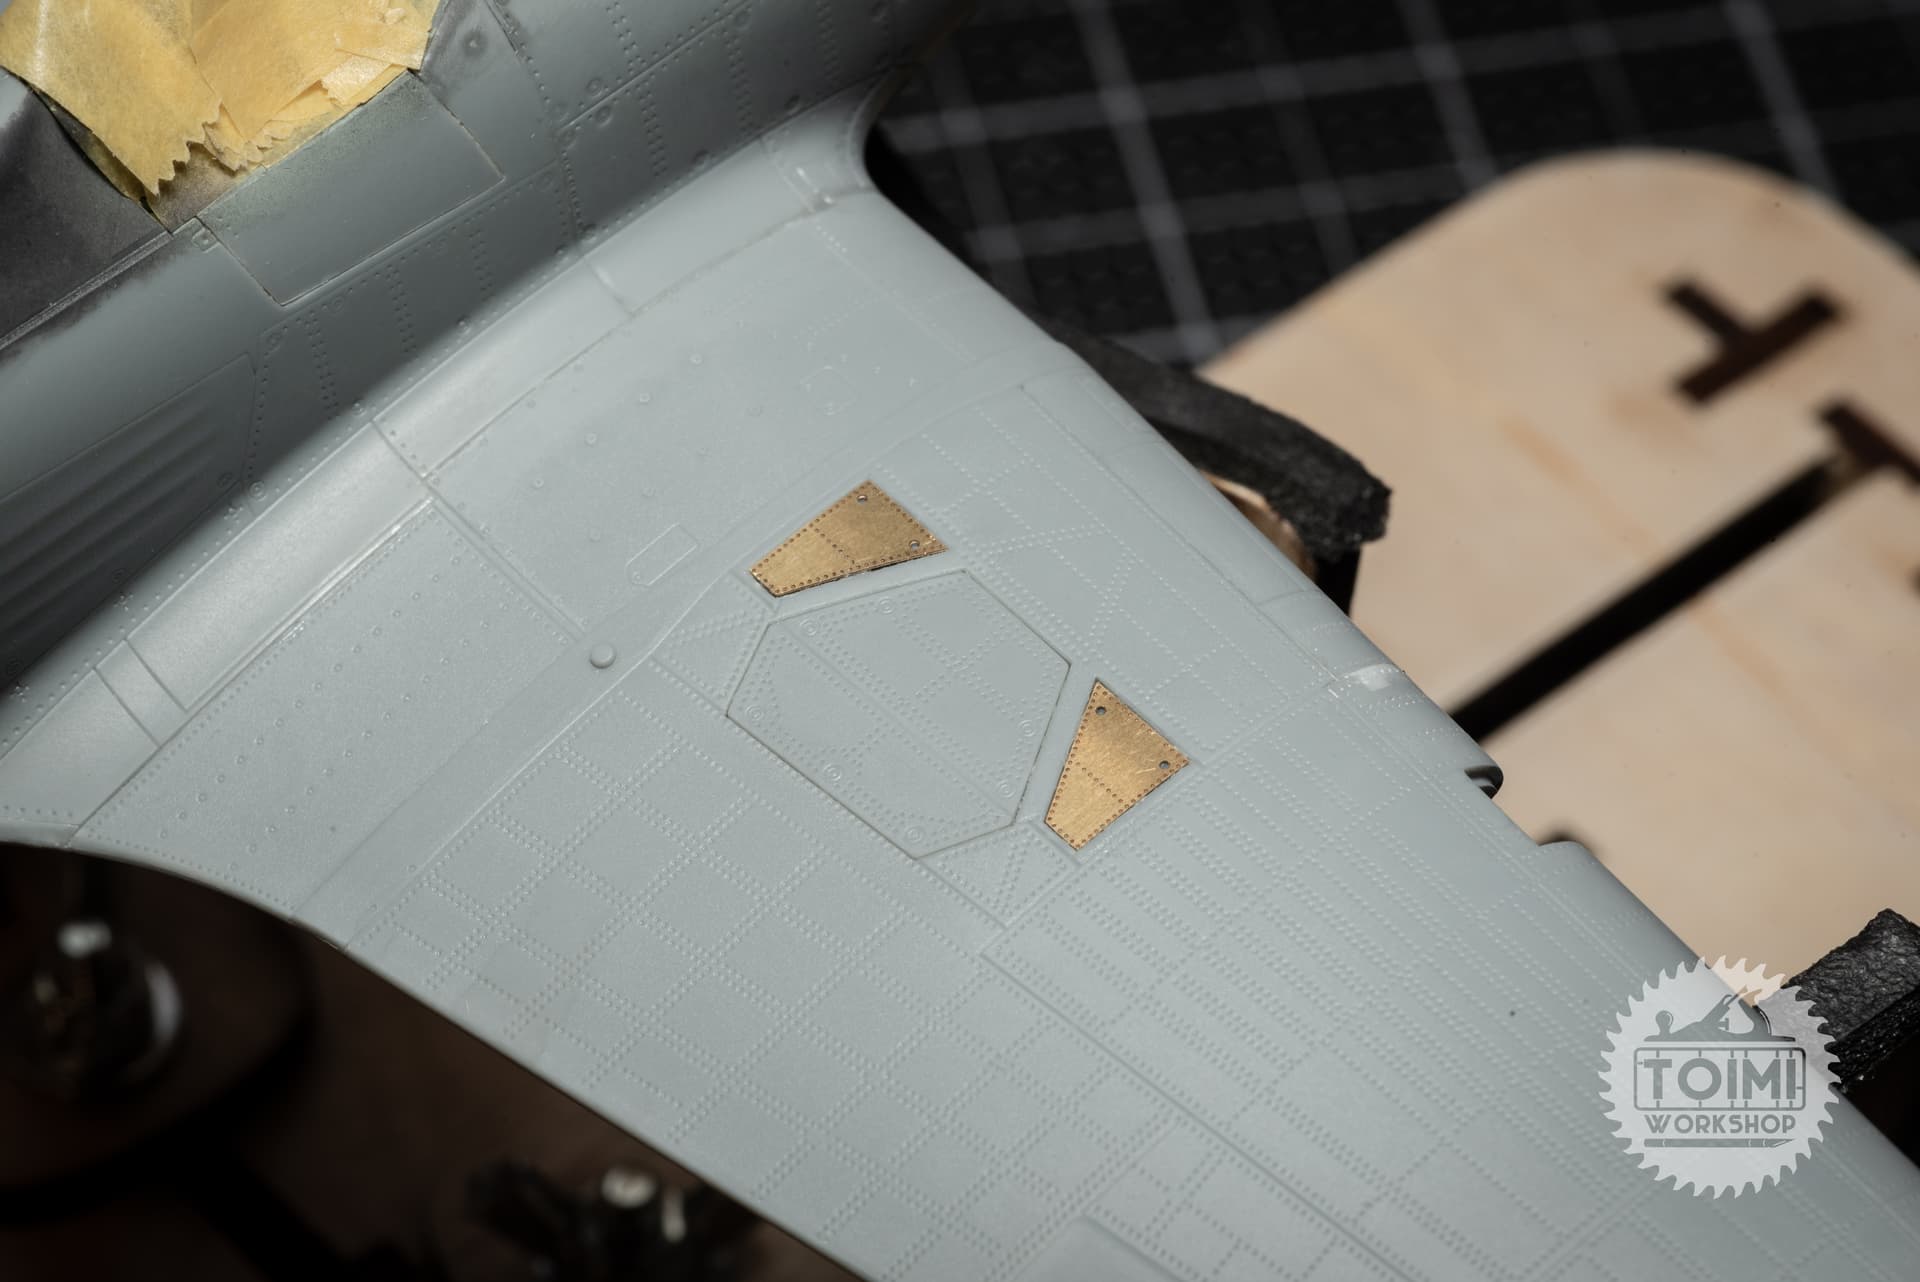
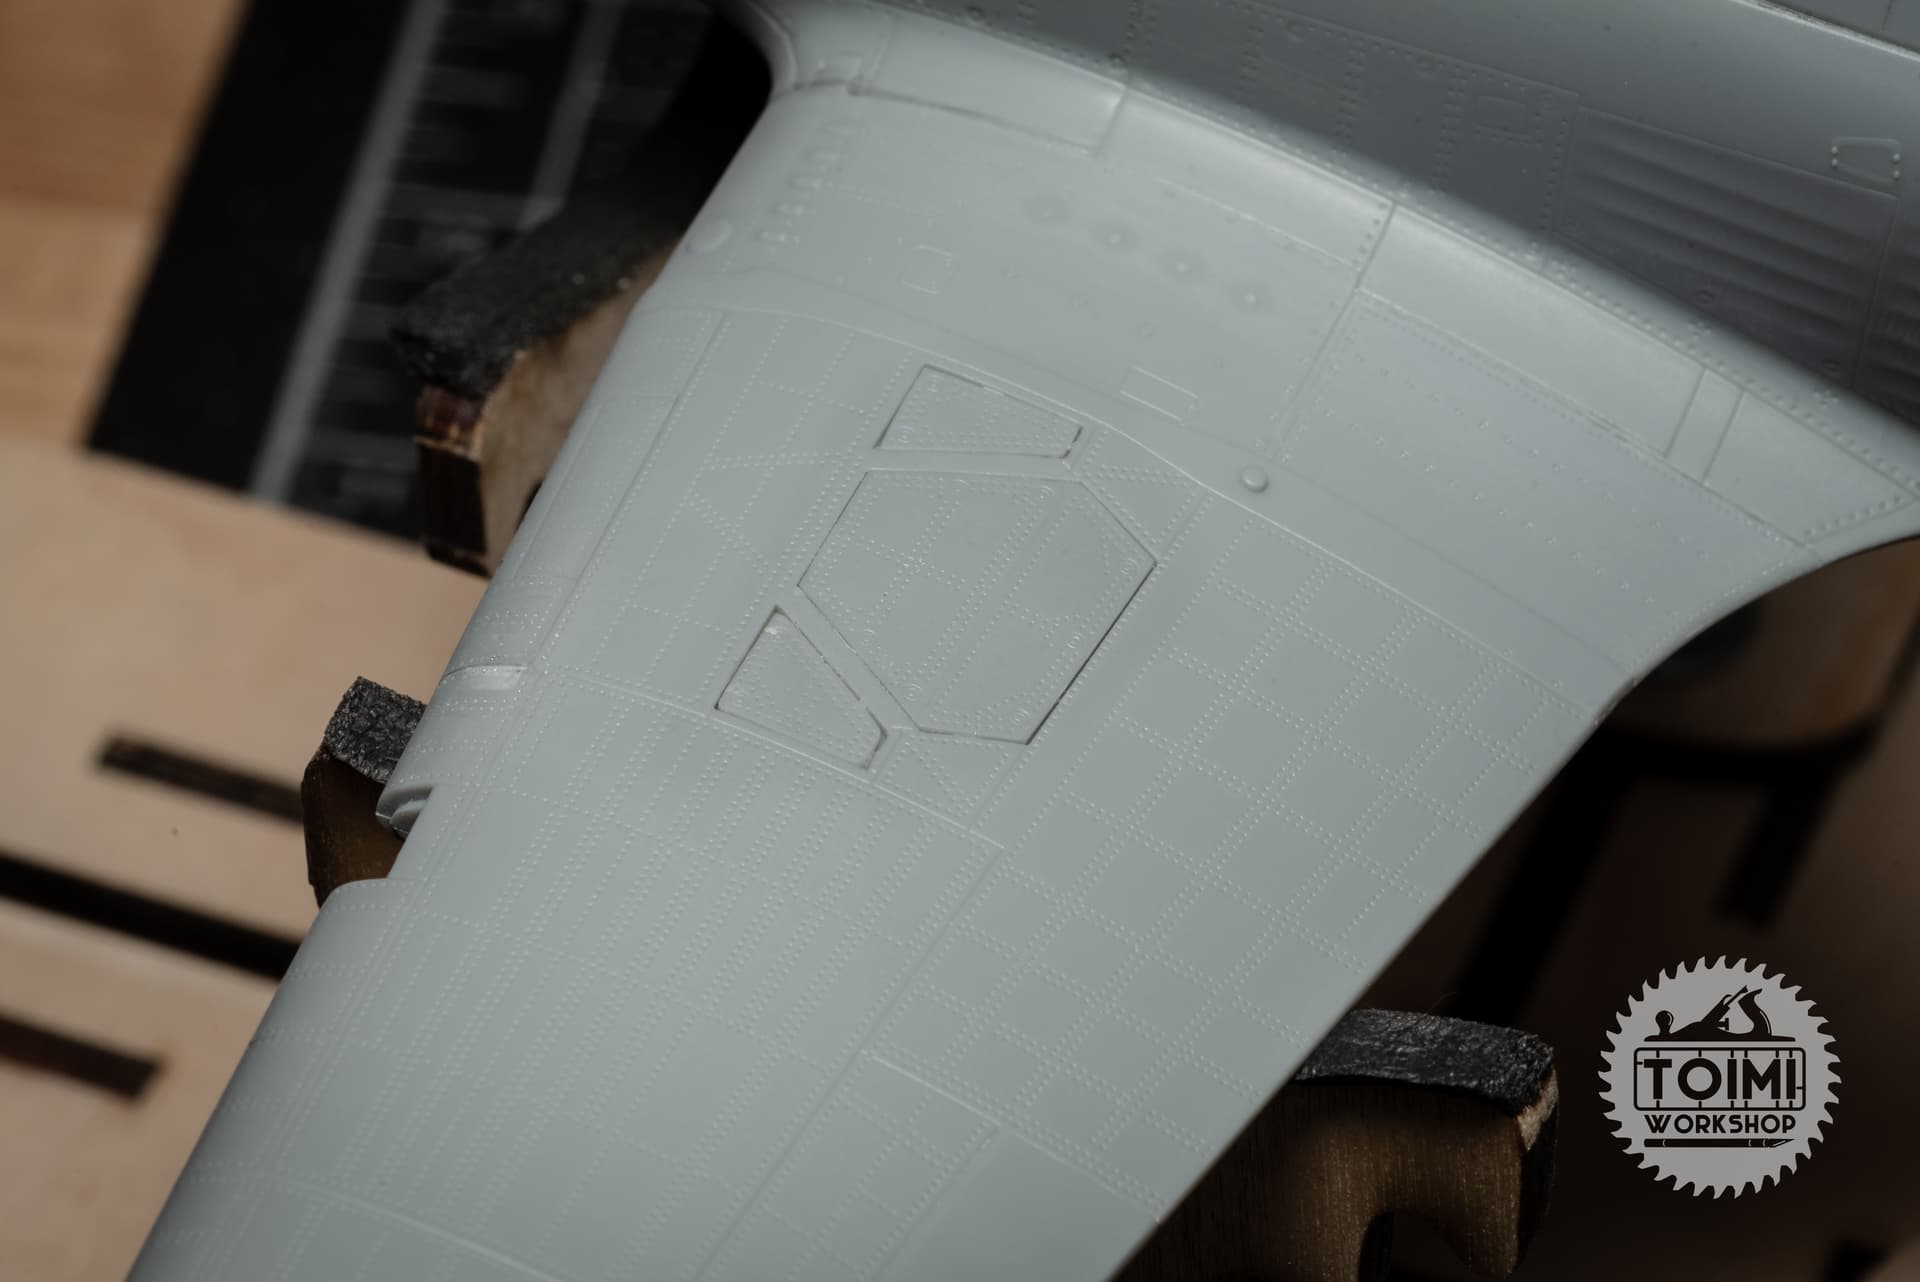
For the gun bays, I didn’t care for the final fit of the covers on the starboard wing, so I chiseled them out a bit and used the PE parts to flush things up. On the port side, which will be modeled open, after struggling with sponge bits and masking tape for almost an hour, I had a forehead-smack moment, and just glued the kit parts in with a few tiny specs of white canopy glue so they can be popped off after painting.
Next up is a primer coat, which surely will reveal a few areas for touch-up.
NIce work! As the saying goes, “Perfection is the enemy of the good”. No one will notice the imperfections pertaining to the rudder.
Garu
Primer looks pretty good – a few minor touch ups is all. A pesky ghost of the nose cowling seam is intermittently visible, so I’ve attacked that with some thin filler.
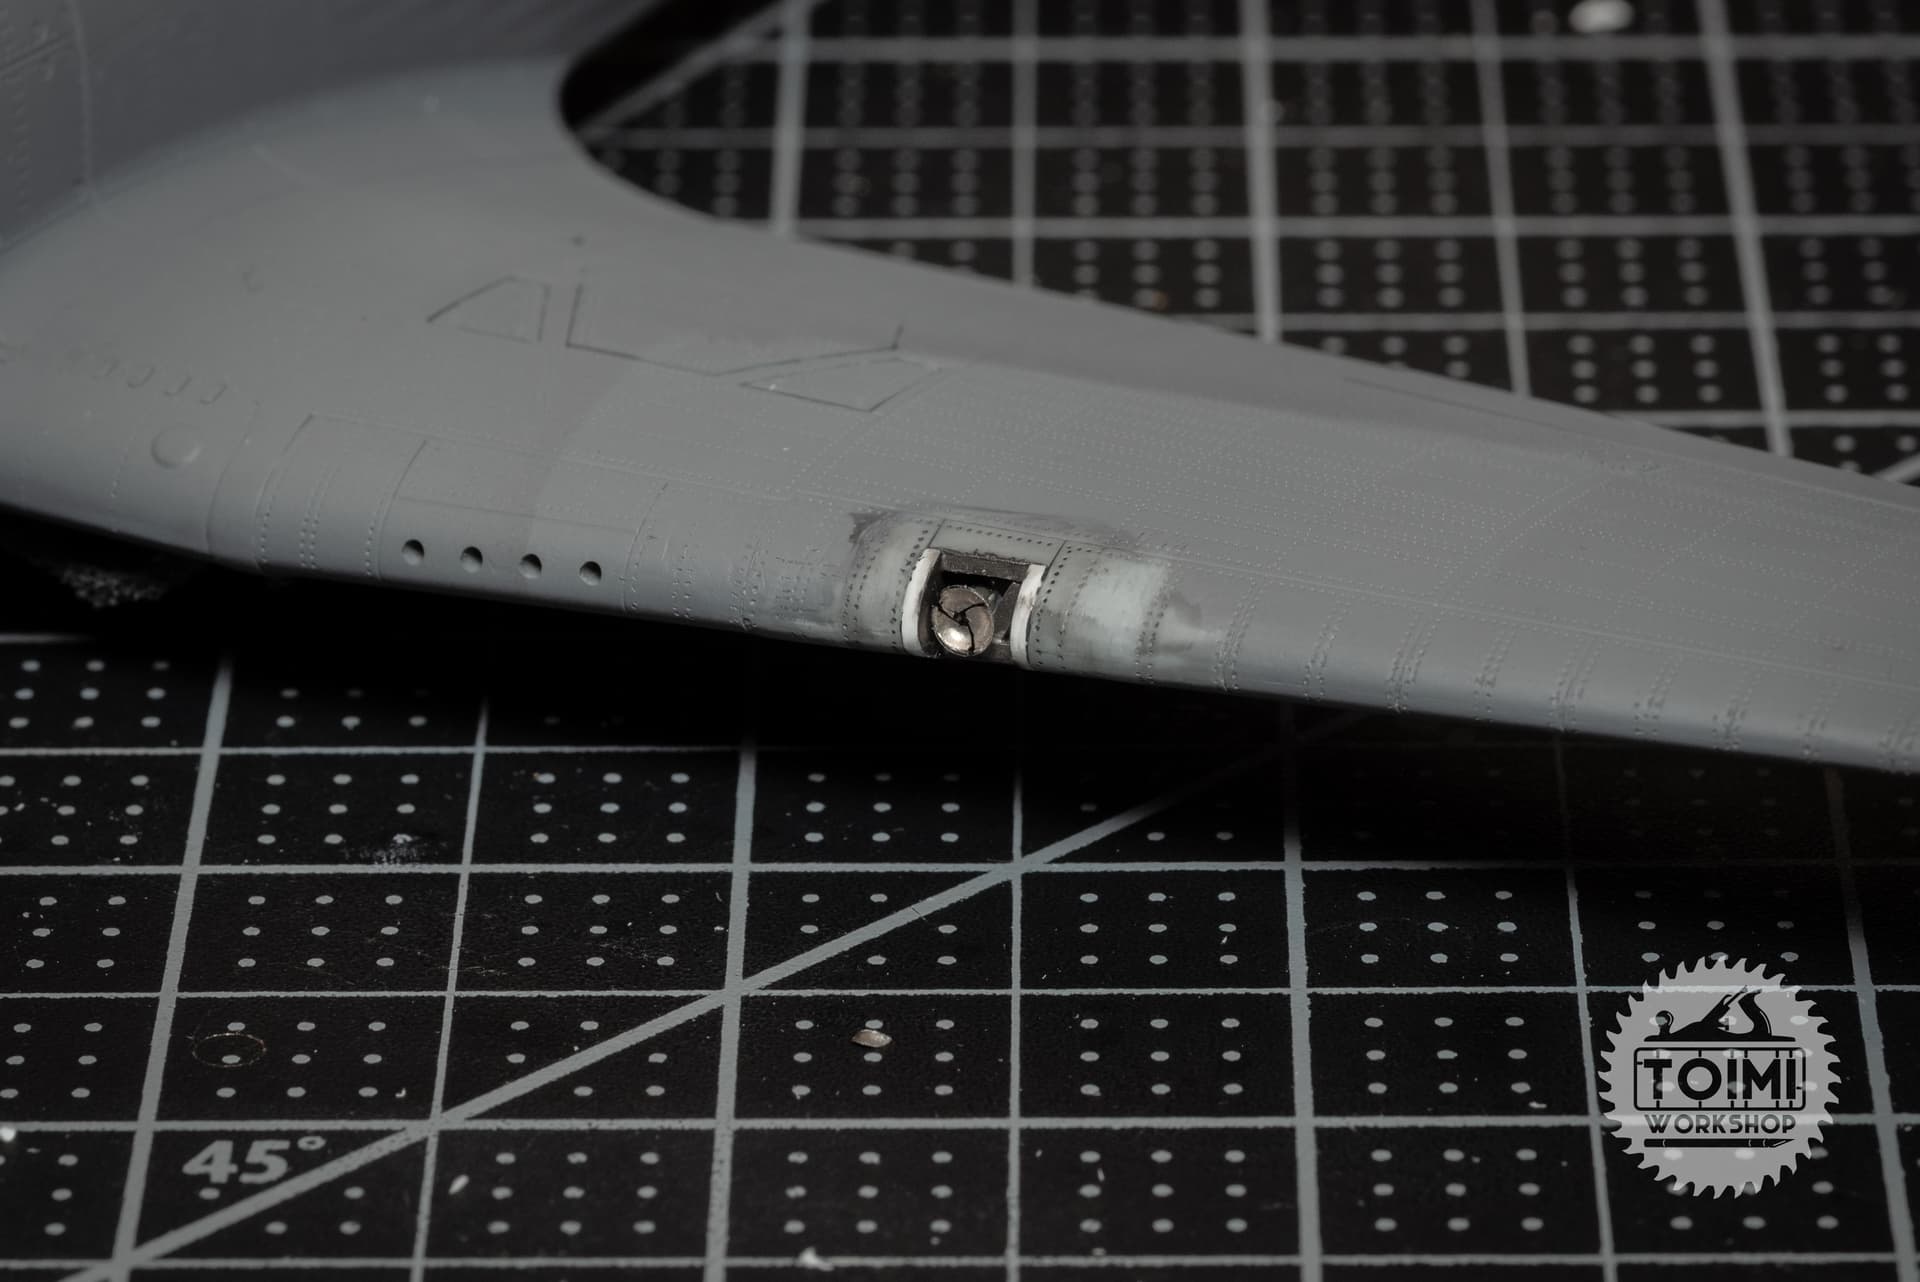
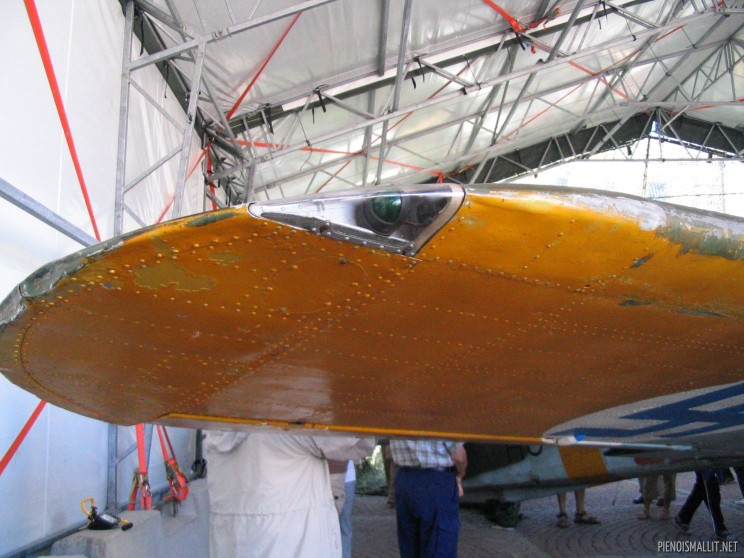
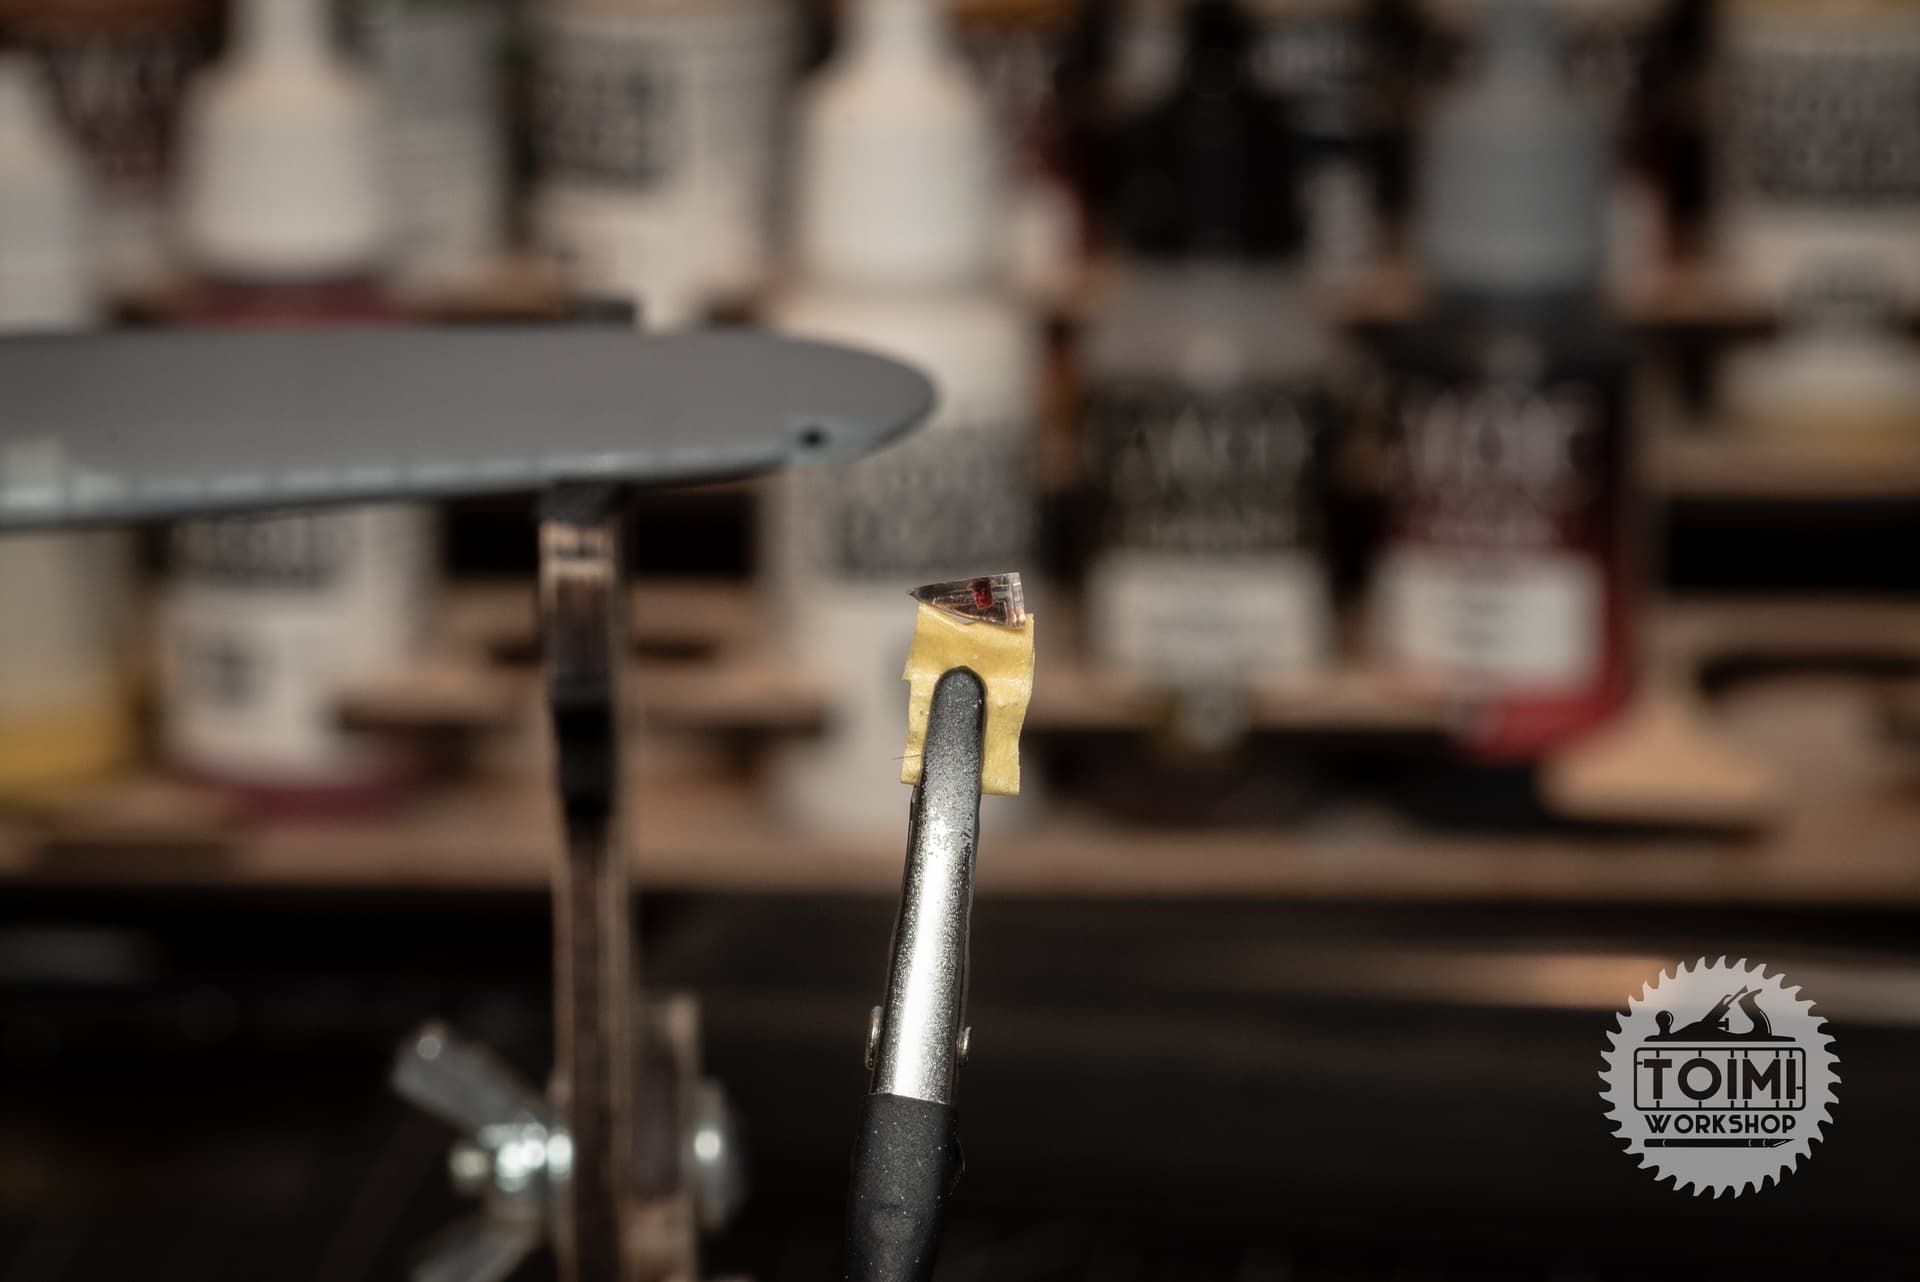
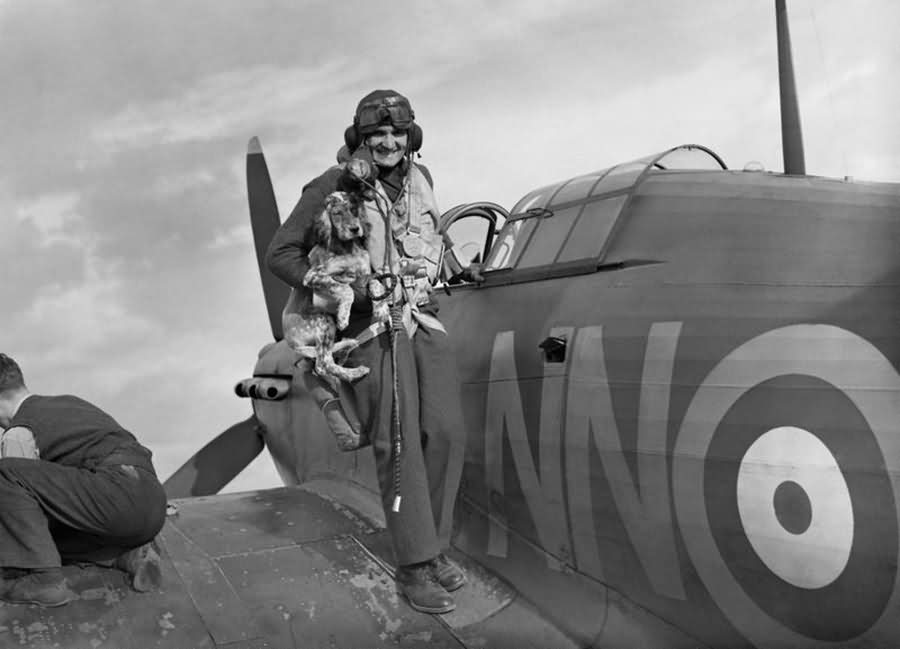
An issue I’d overlooked until now (though it’s called out in the FSM review of this kit) is the landing lights. They’re big and distinctive on a Hurricane – this example is from the Mk. I preserved in original condition in Finland:
The lights on this HobbyBoss kit are just thick clear parts which cover a large empty hole. I did some surgery to make it look a bit more like the real thing, then I primed and detail painted it with dark aluminum, hoping to suggest the hollow wing structure.
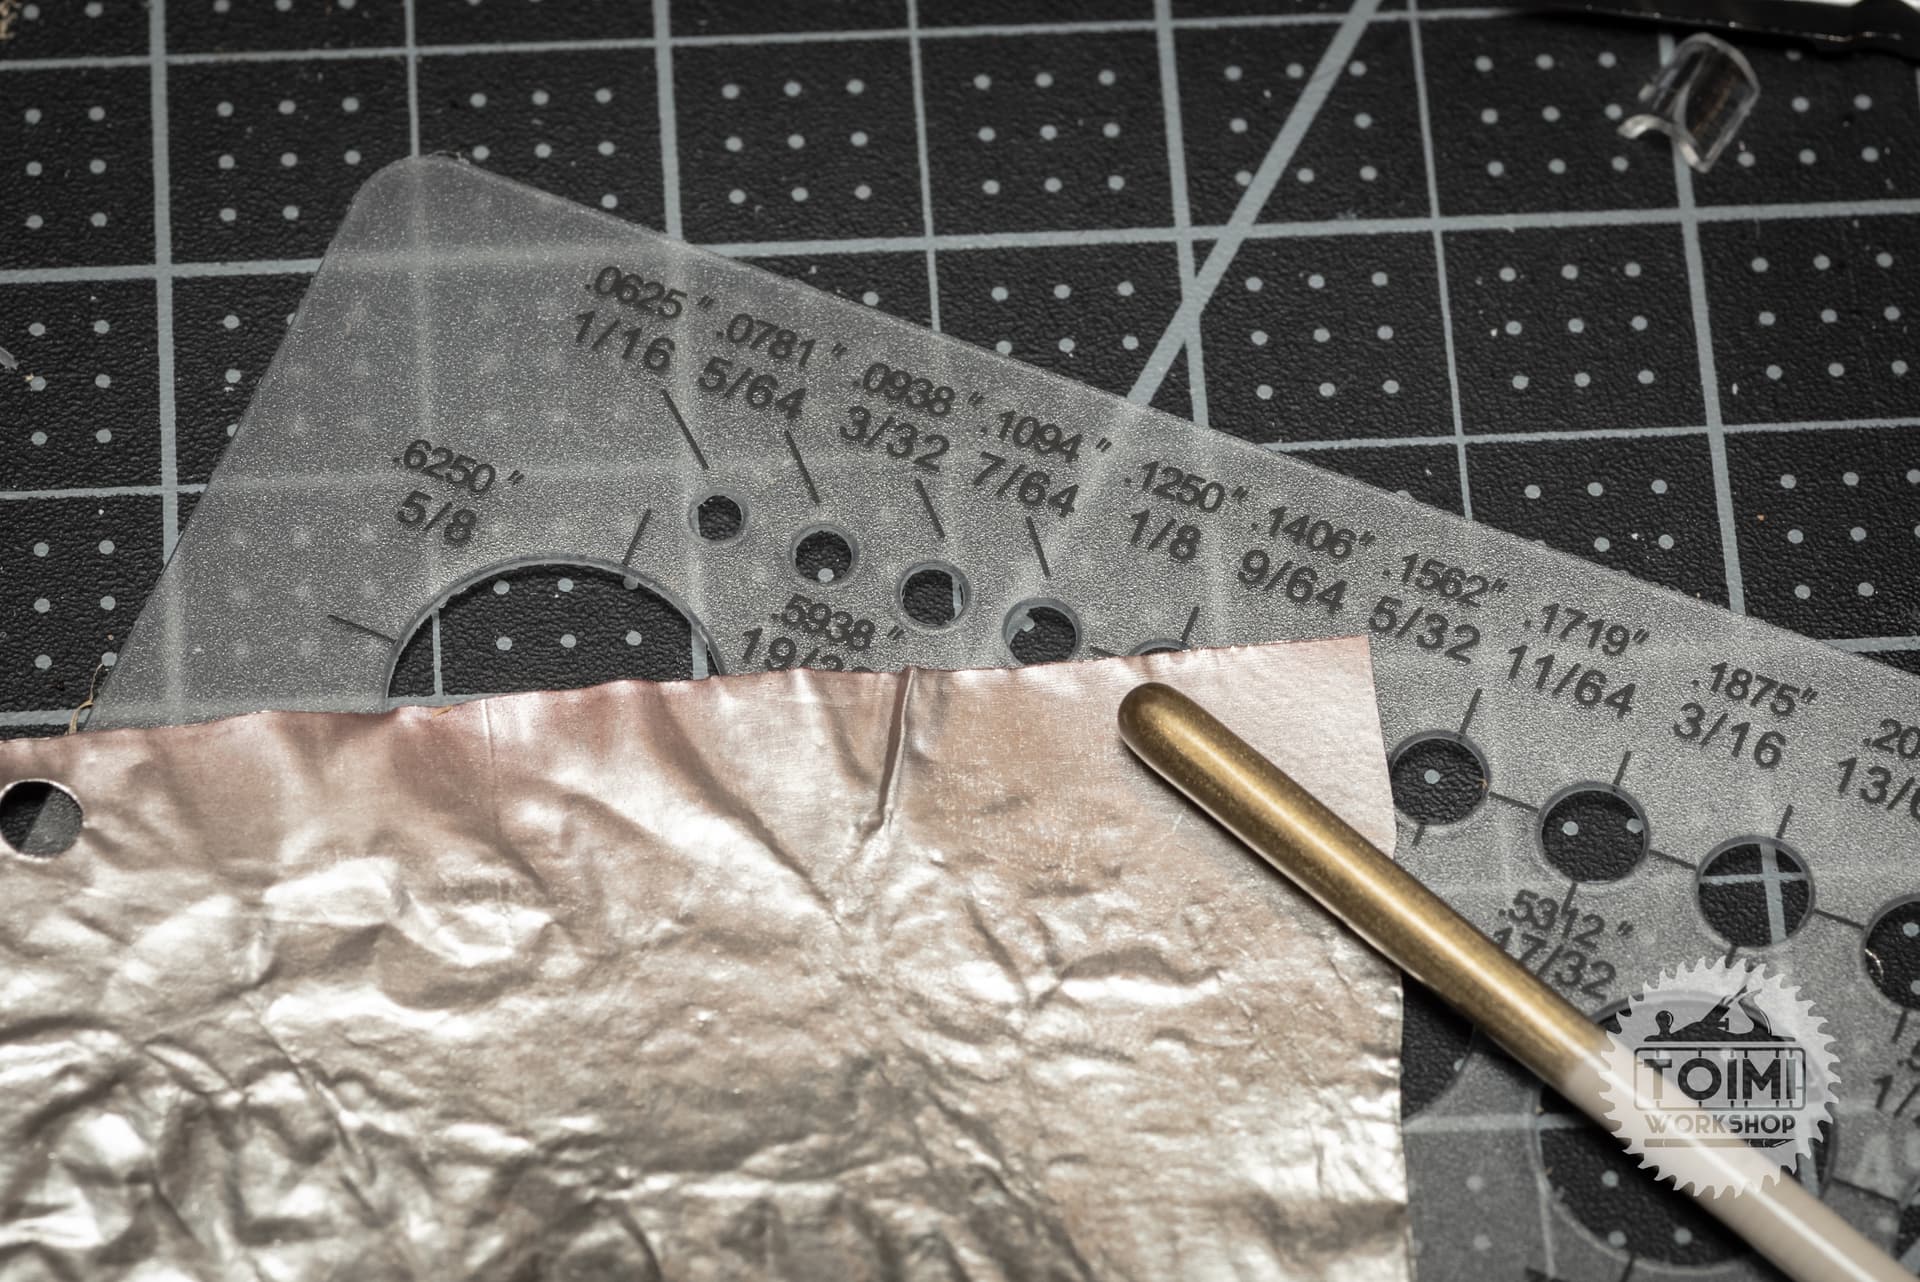
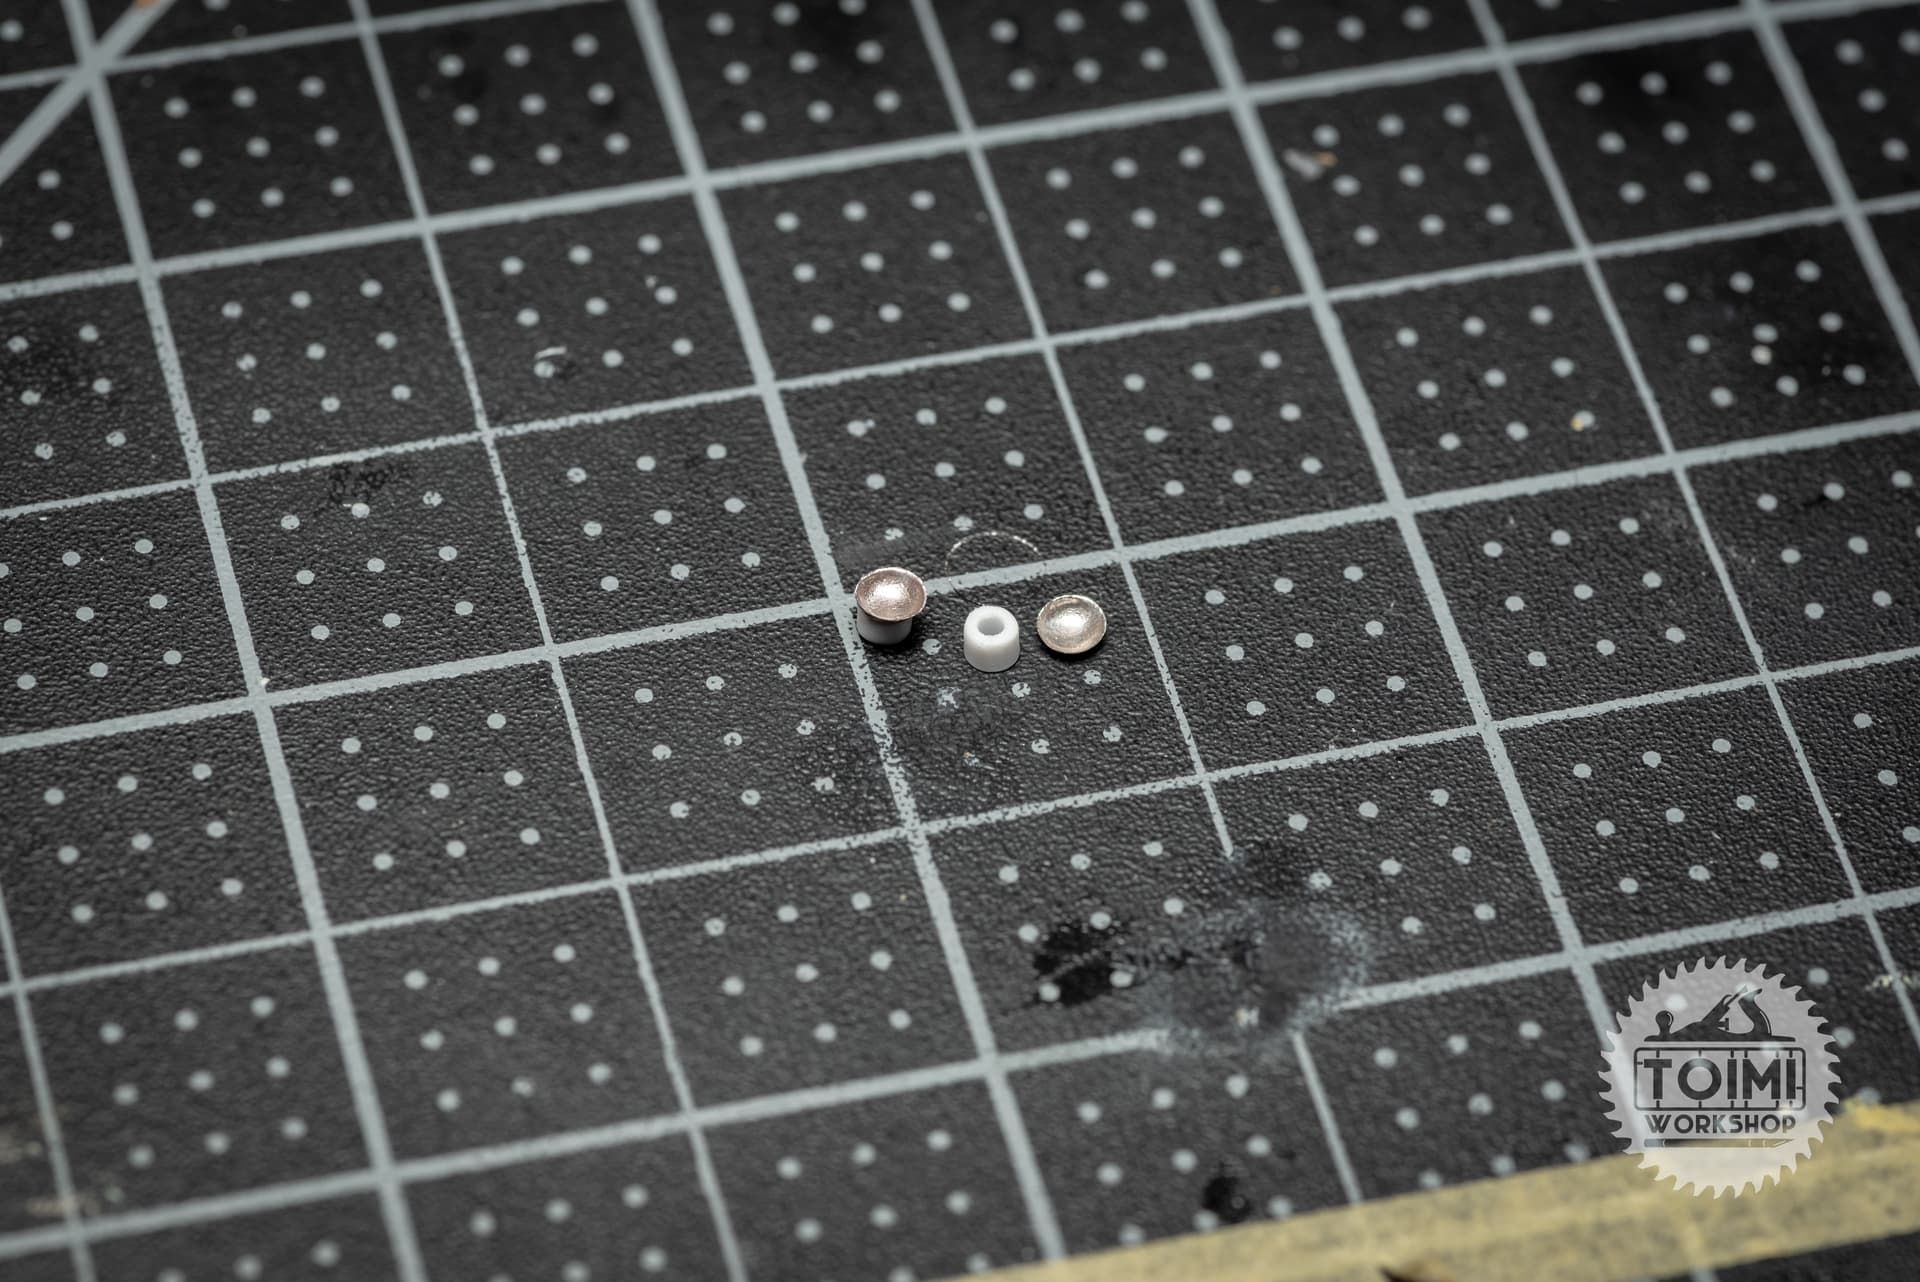
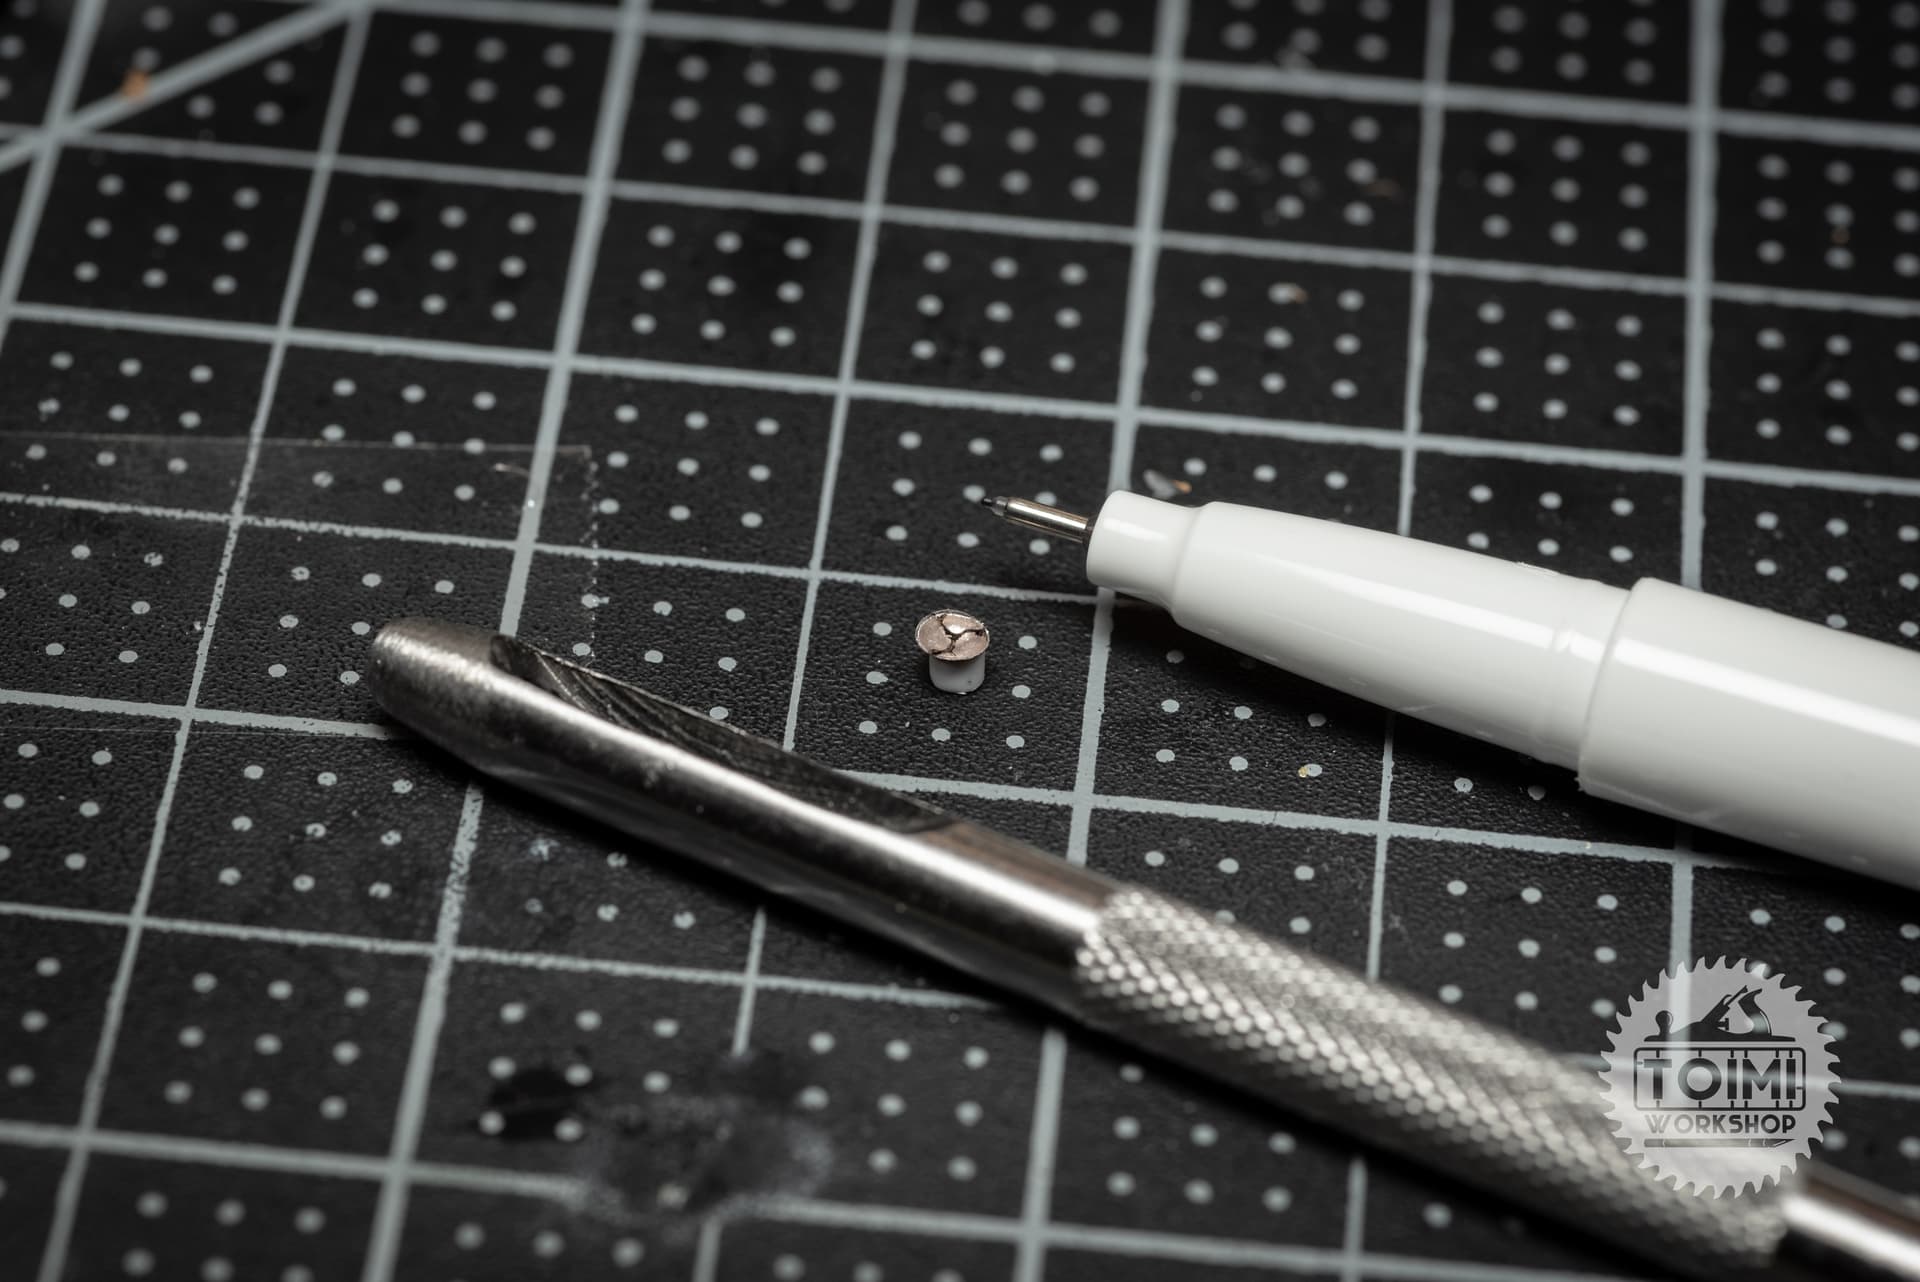
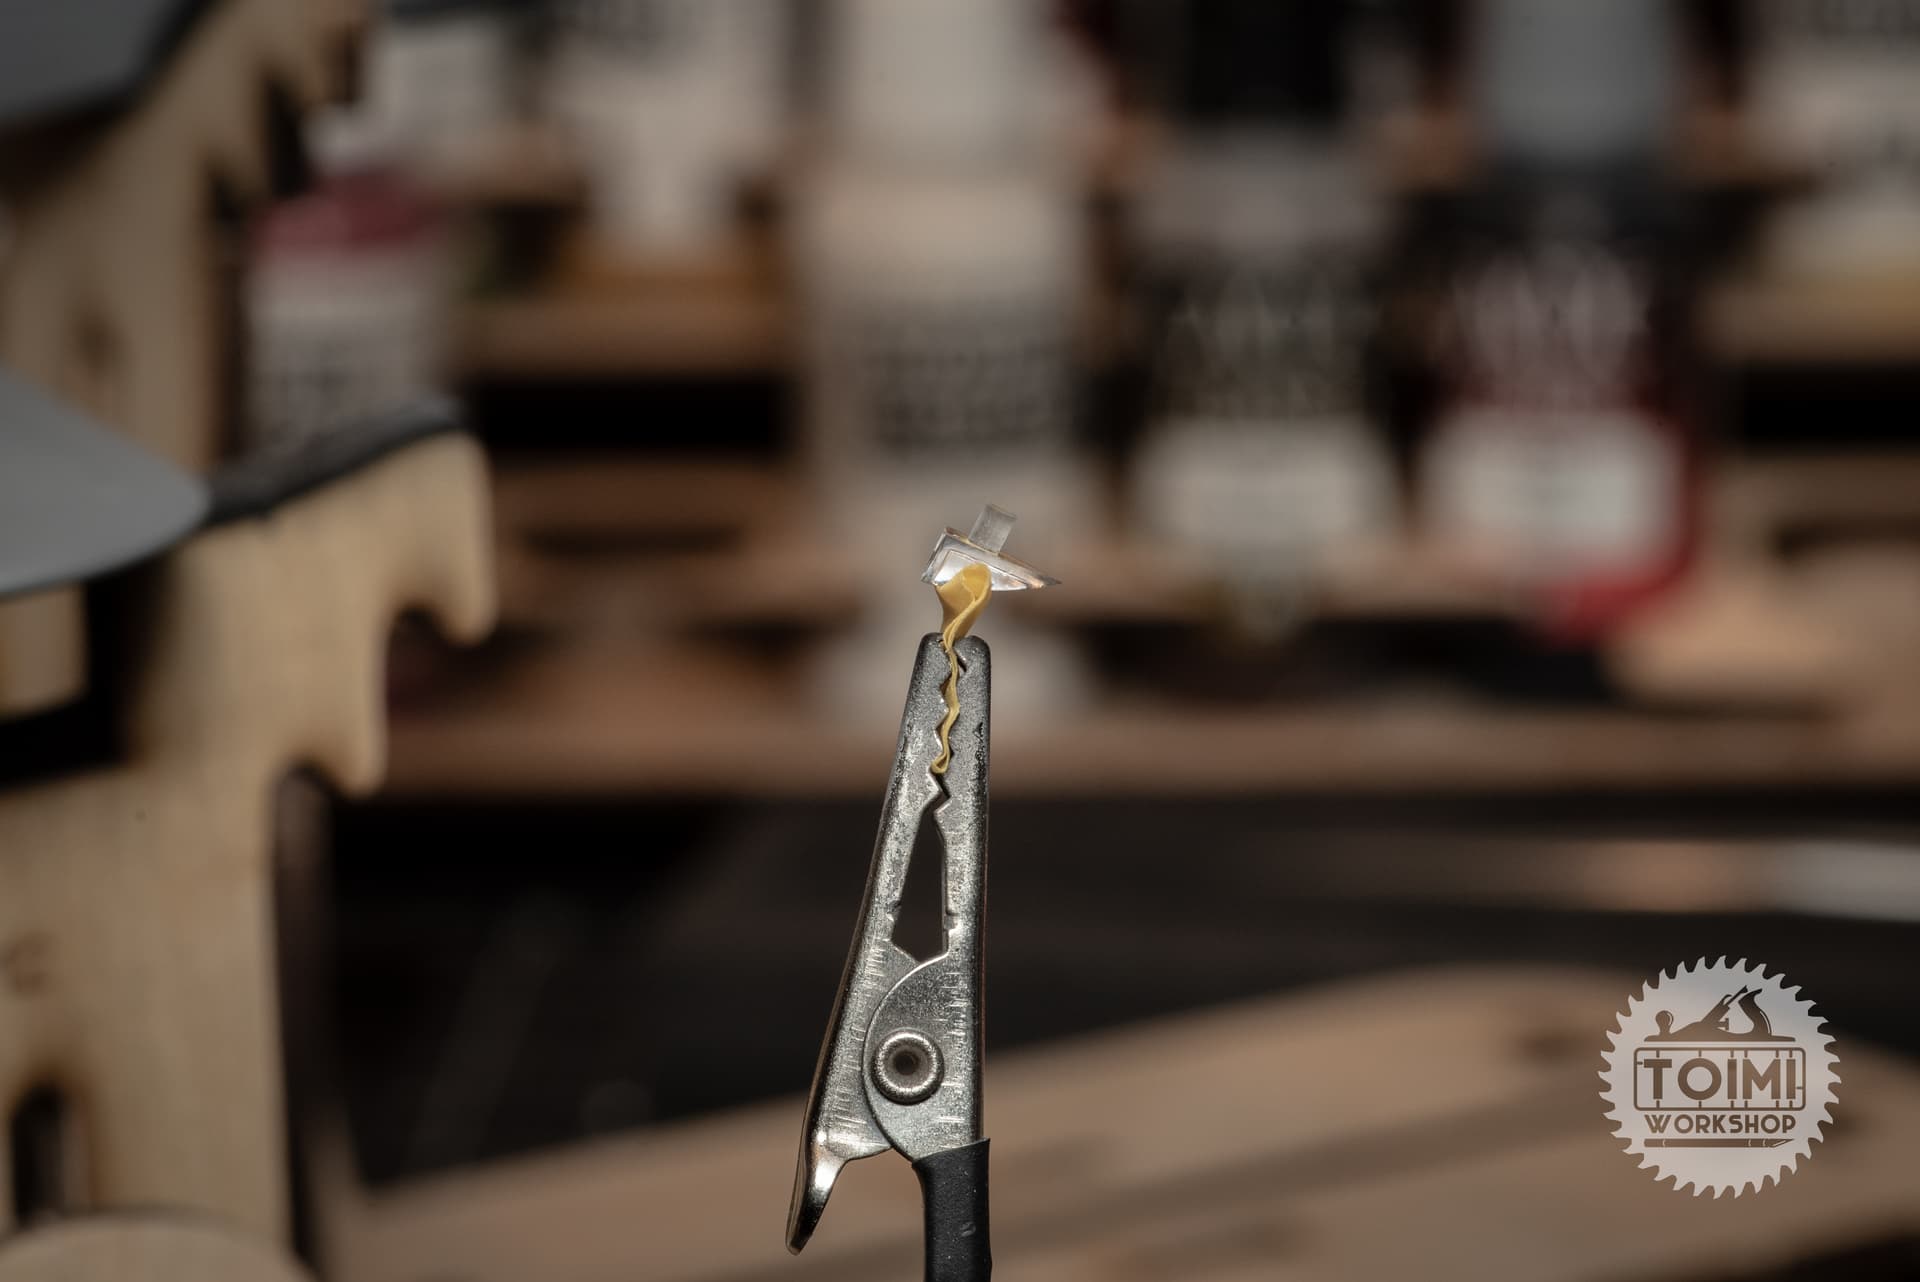
For the light itself, I followed this tutorial from IPMS Stockholm, which worked awesome! The foil from the cork of a wine bottle was just the right thickness and silvery-ness. Using the butt end of a small paintbrush, I burnished the foil into a 3/32" circle template.
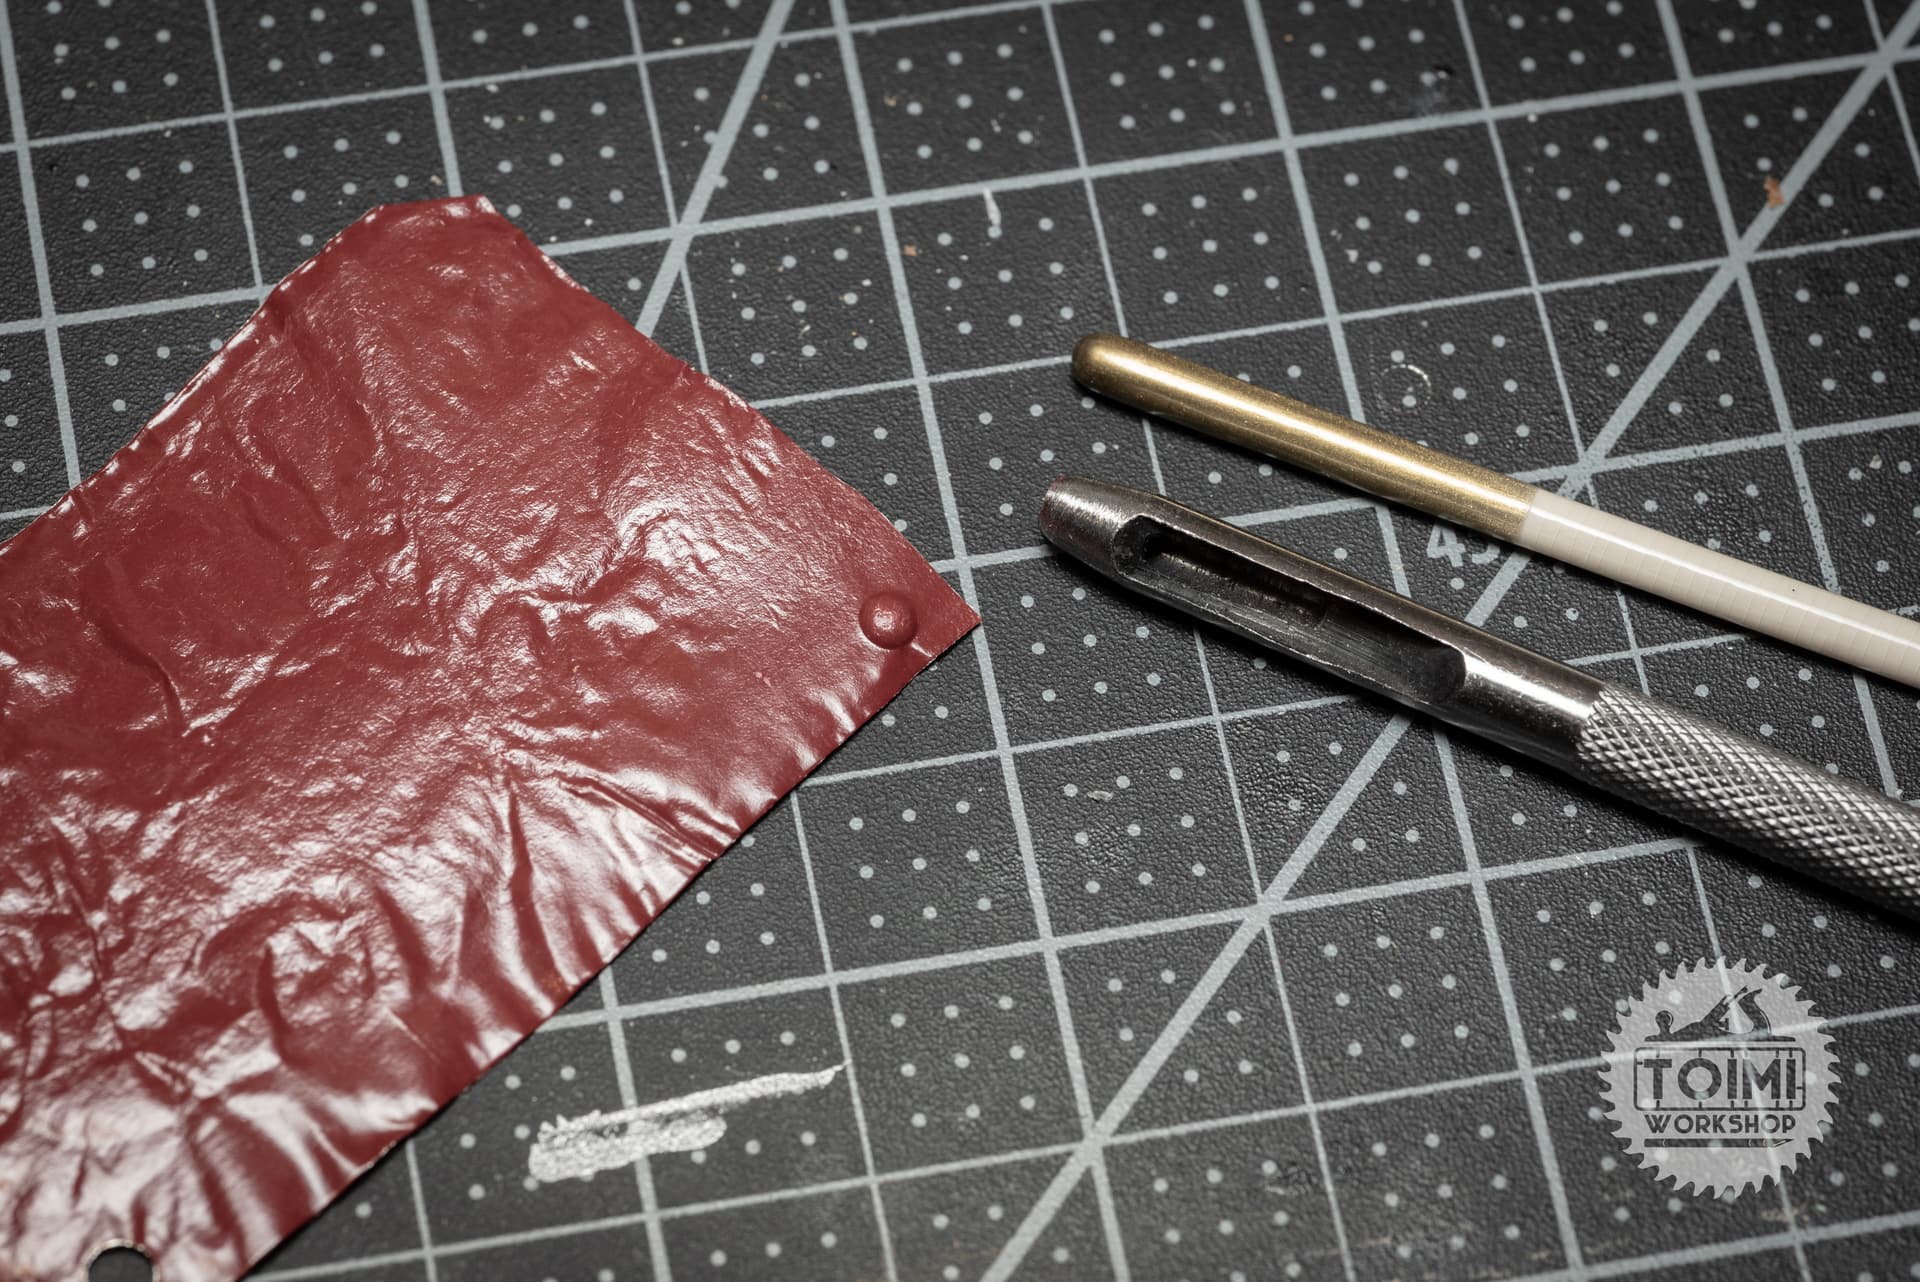
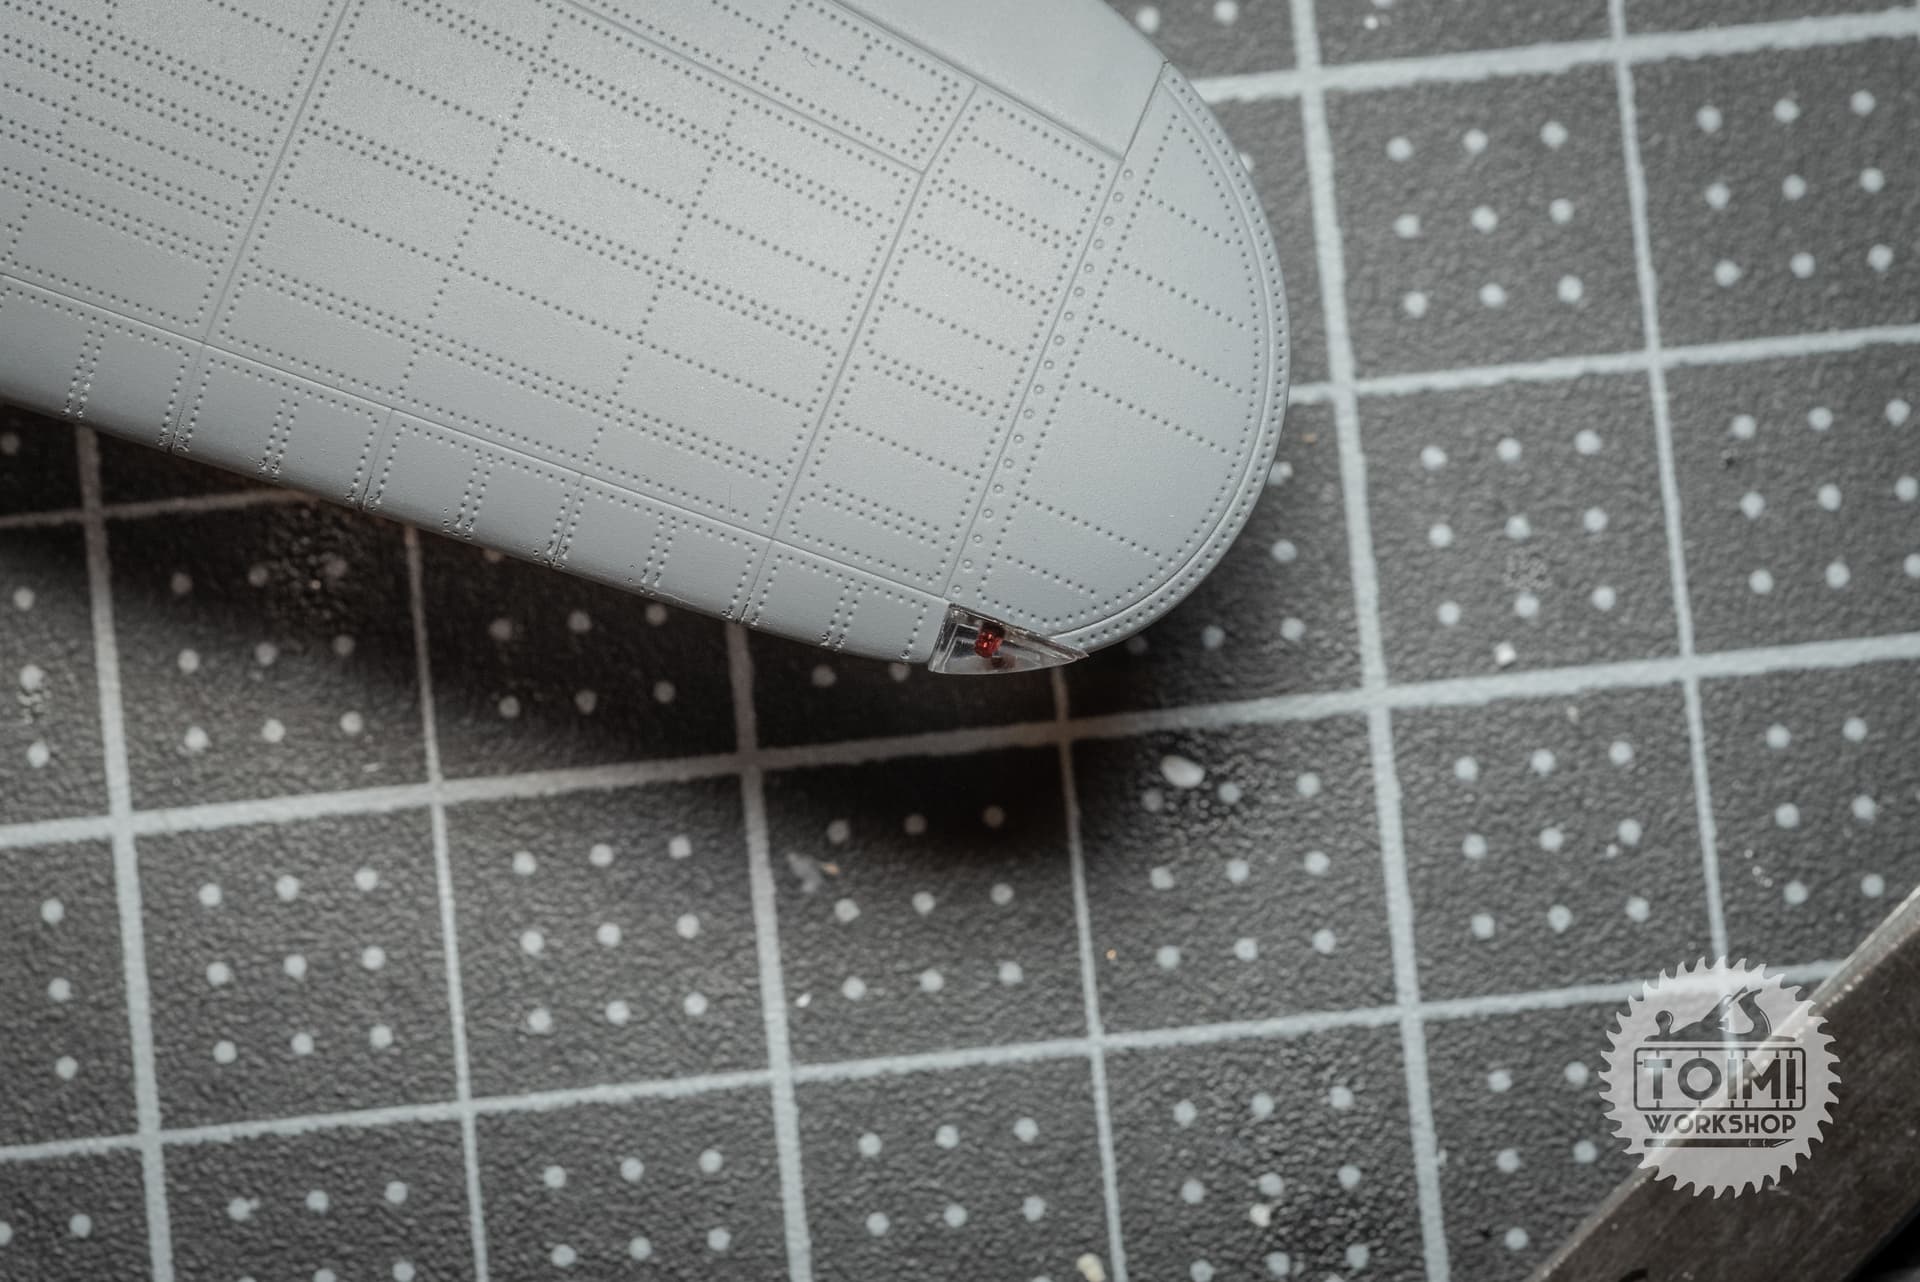
Then, a 1/8" punch cutter cut the tiny “dome” out. Superglue fixed it to a small styrene stub. A bit of clear Scotch tape cut out with the same punch for a lens, and I drew the cool spiral wiring/bulb housing on with a 0.05mm Fineliner pen.
After a few iterations, I got two I was happy with, and installed them into the wing bays, covered the area with some clear Scotch tape, trimmed it to fit, and then masked the perspex cover shape with Tamiya tape.
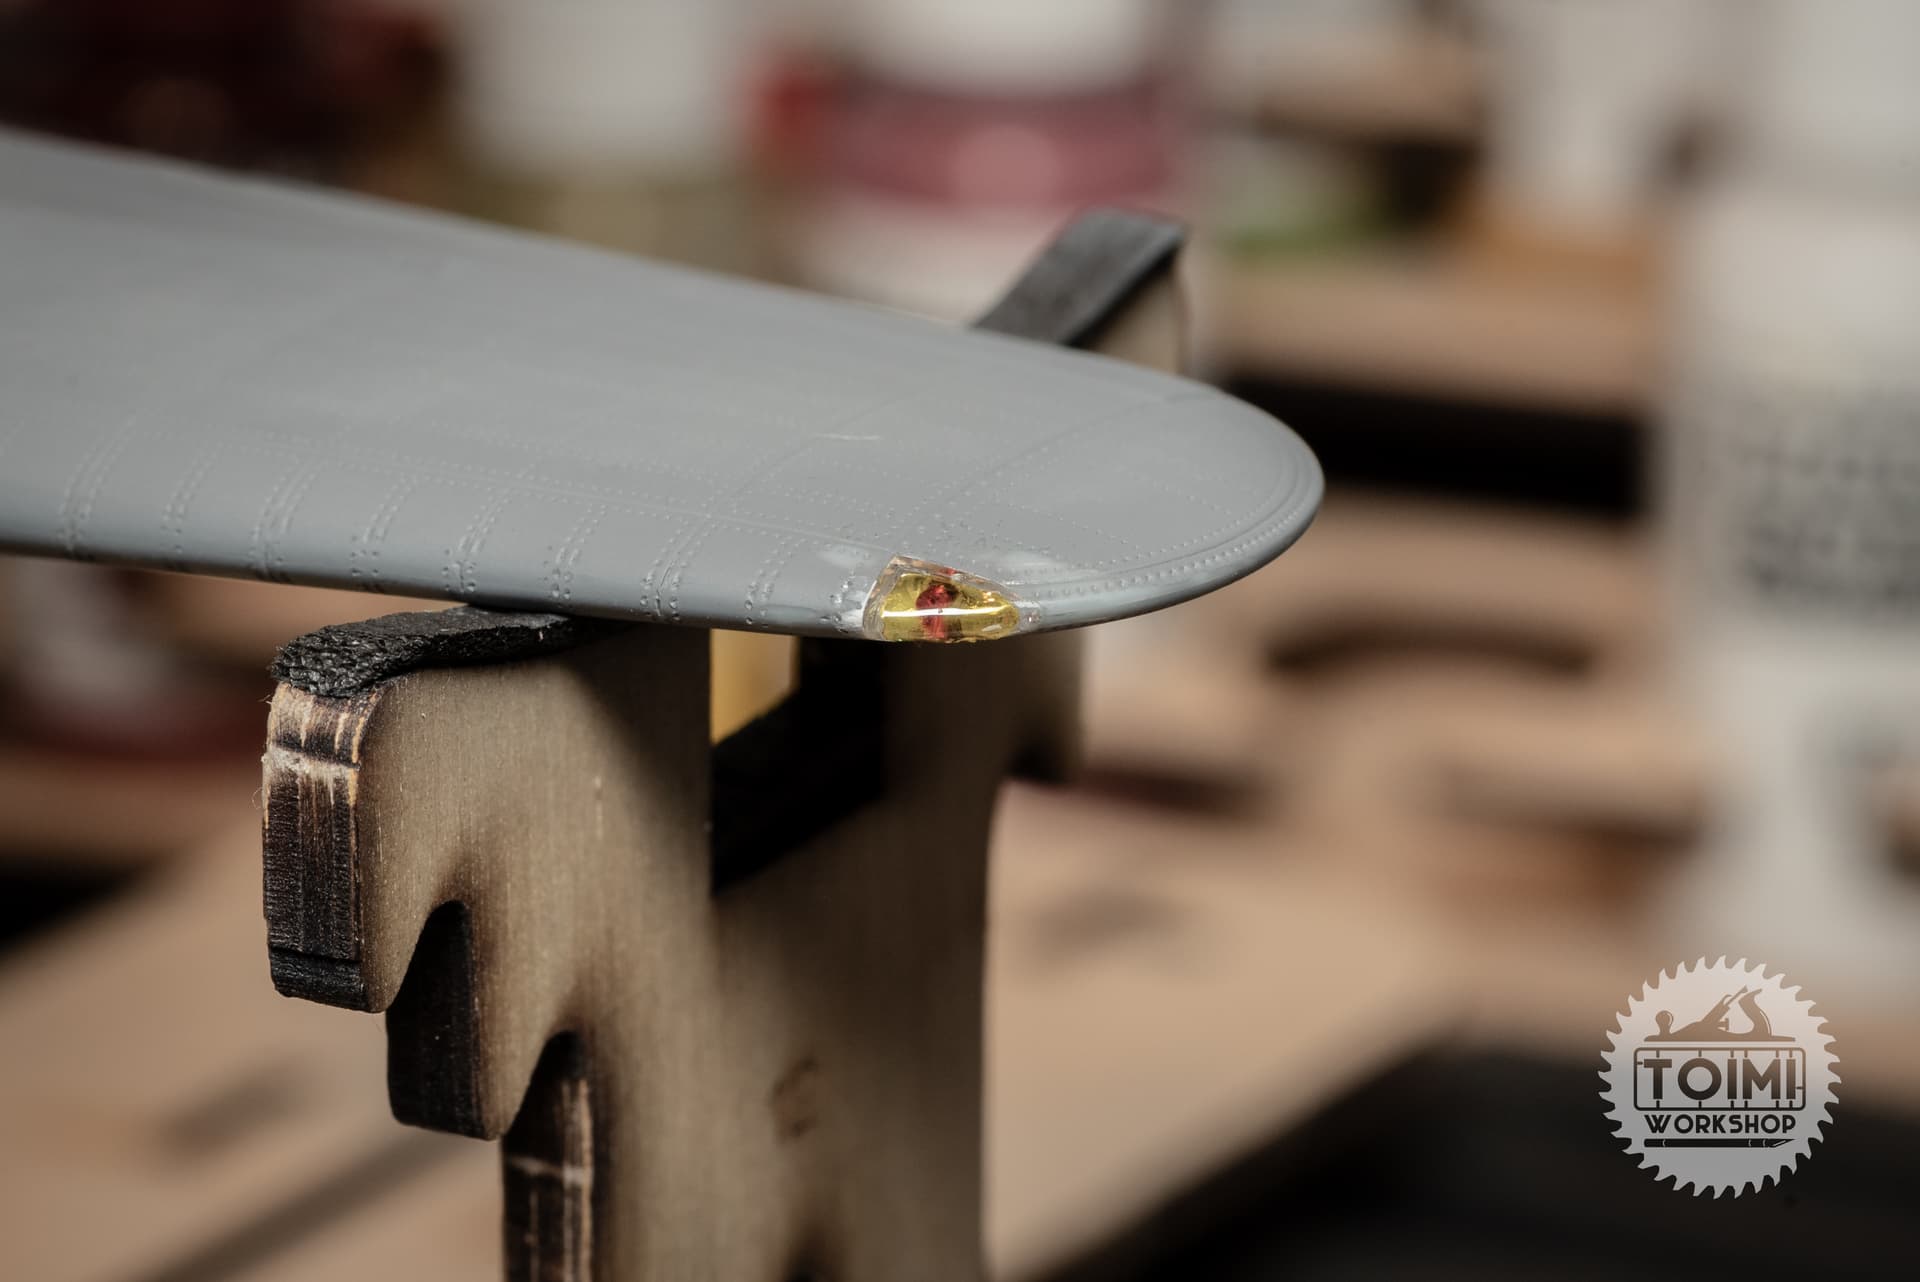
Next up: the wingtip lights. Again, a great photo of the Finnish Hurricane!
Did the standard job on these. Nipped off the little locating nub on the back, and drilled a hole for the bulb. Touched in some transparent Tamiya red and green (for port and stbd, respectively), and a little black for the socket, and cemented them in place. Had to do a little fairing, and then masked, using that yellow high-temp tape that @Linebacker recently recommended.
Now, ready for a second shot of primer and if all looks good, paint!
Nicely done! Love the tip on the foil.
Those turned out great!
I have been saving different kinds of foil from the kitchen for a while now. Yogurt lids, wine bottles, even my guilty pleasure take-out burritos – they have interesting textures, patterns, thicknesses, etc. But I can’t take credit, I’m sure I read that tip here at some point.
Small update tonight. Got the final primer coat of dark grey in place, and then sprayed a dark aluminum/grey mix on areas that I plan to chip the main colors from.
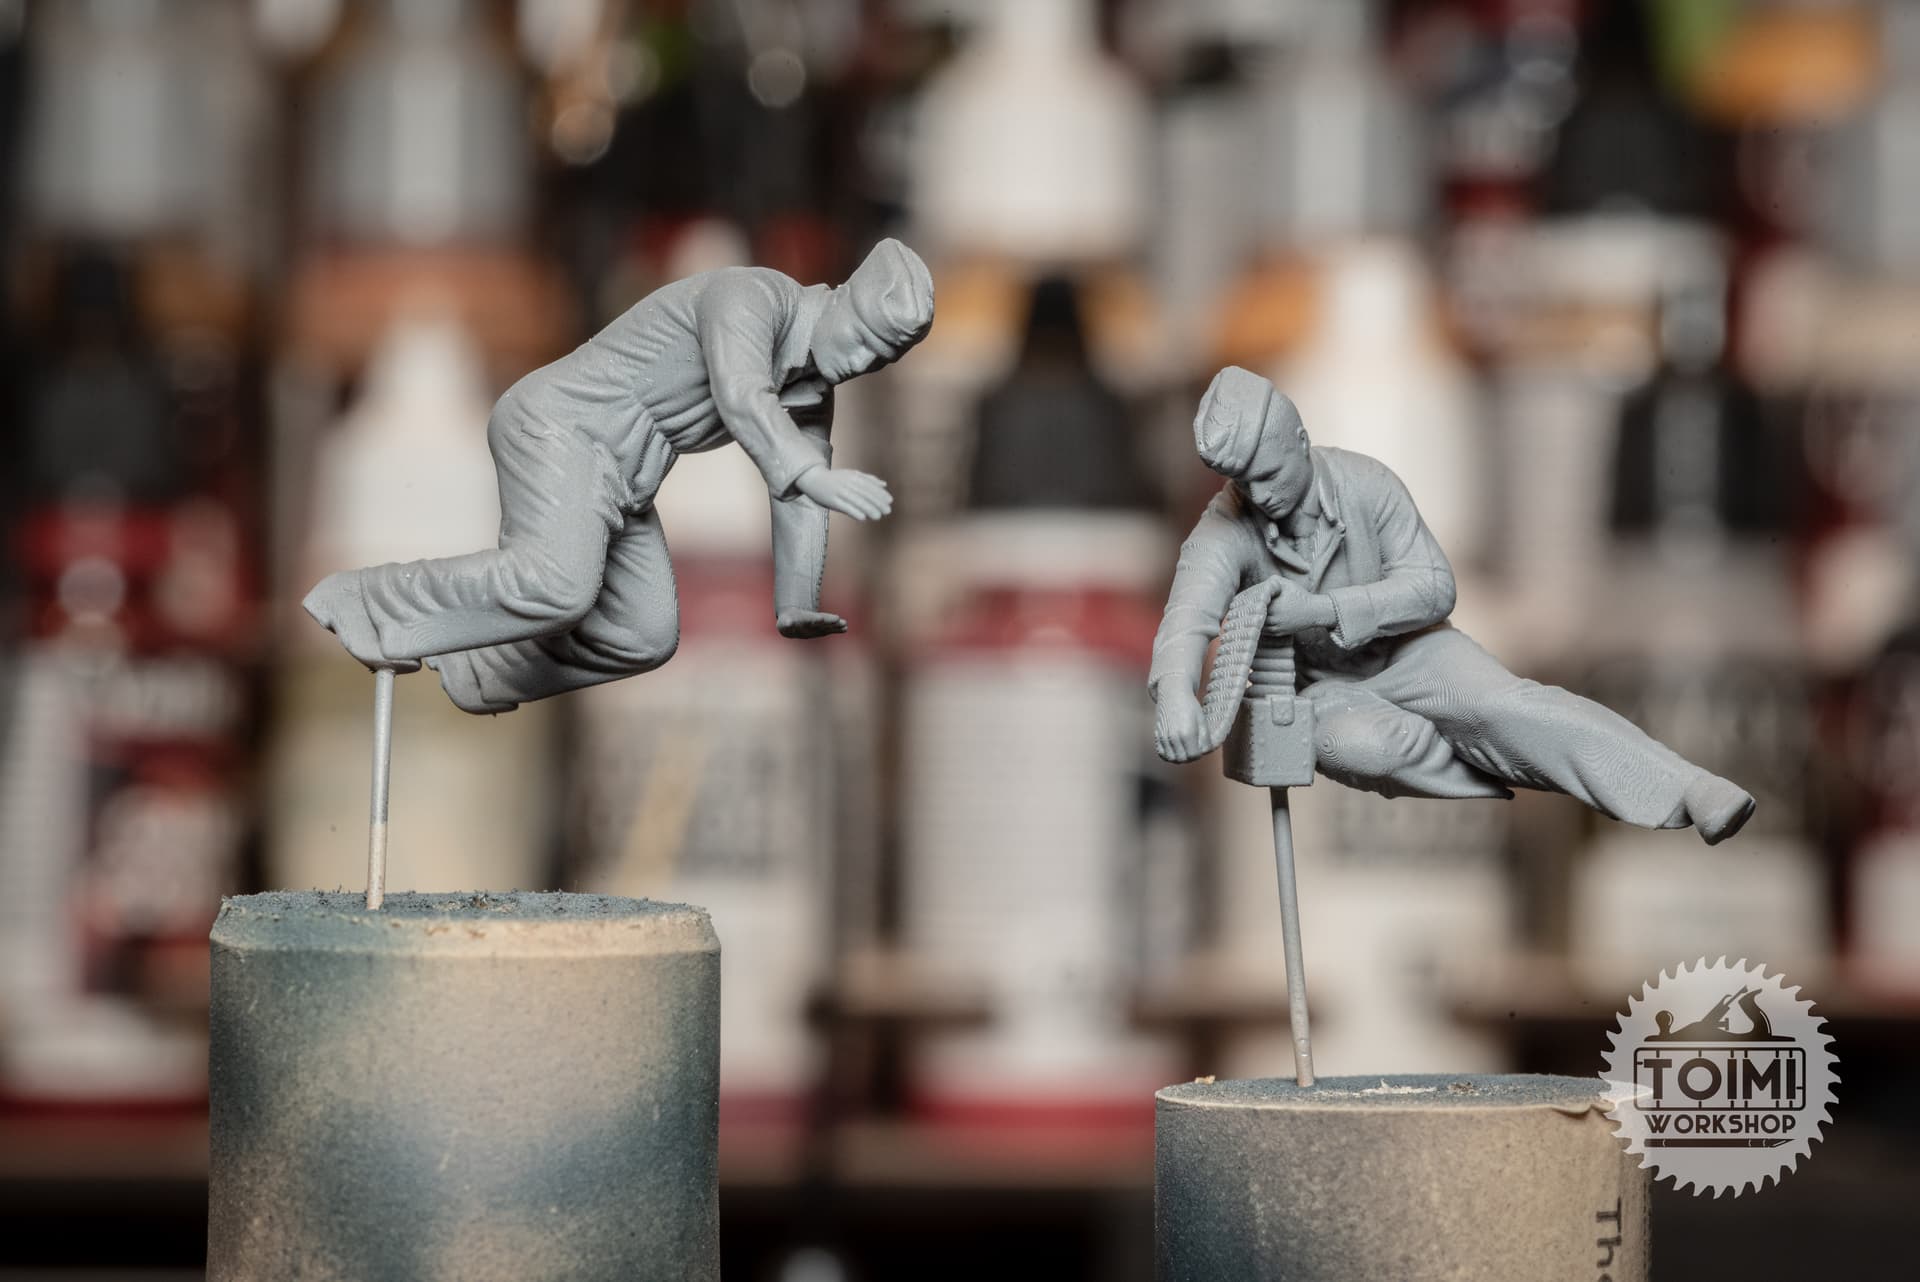
Also got the gun bay covers bent, scuffed, and ready to prime so I can paint them along with the wing; lastly, got shot of primer on a couple of the RAF ground crew.
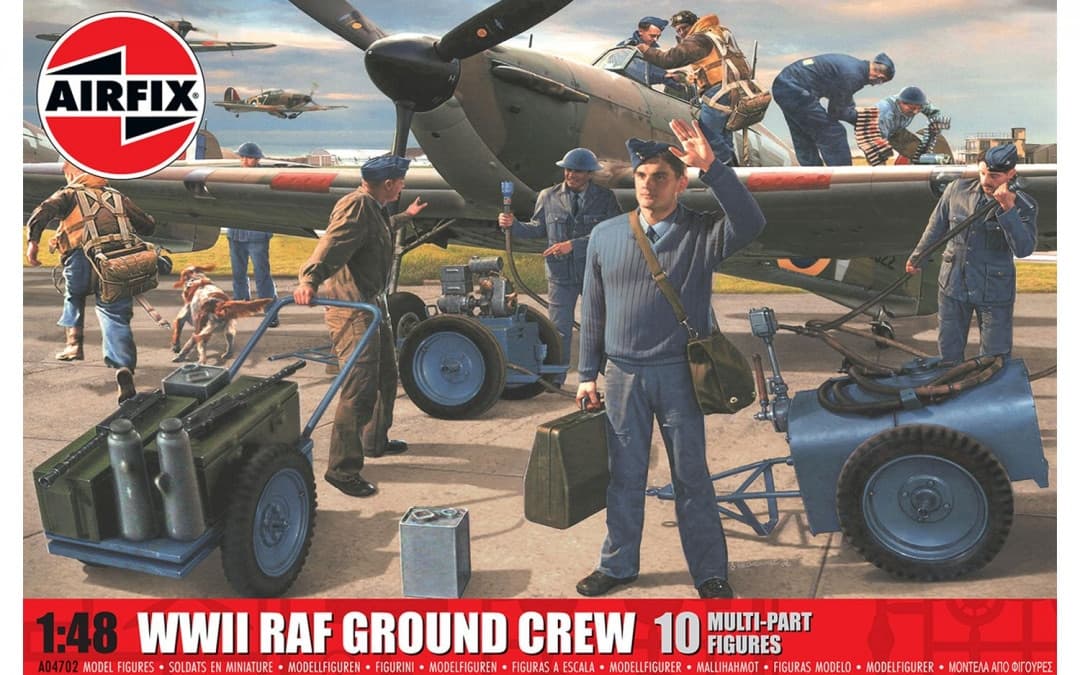
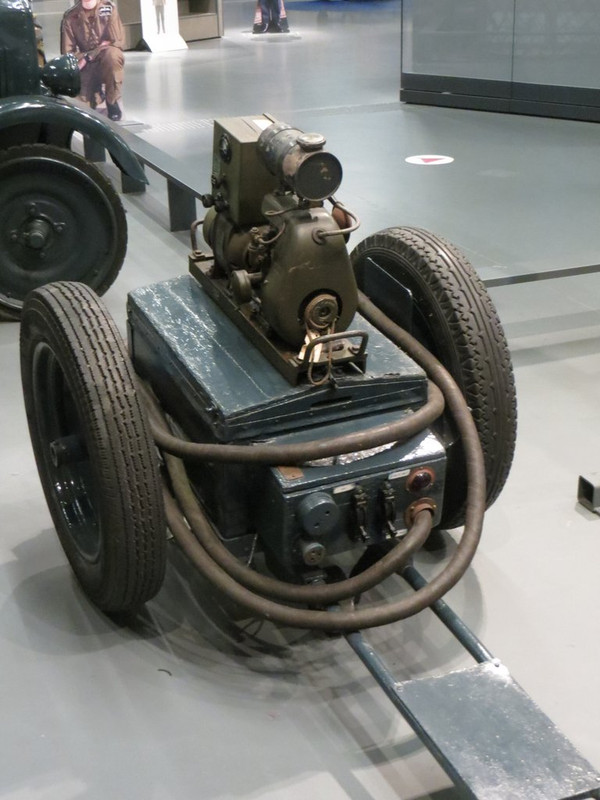
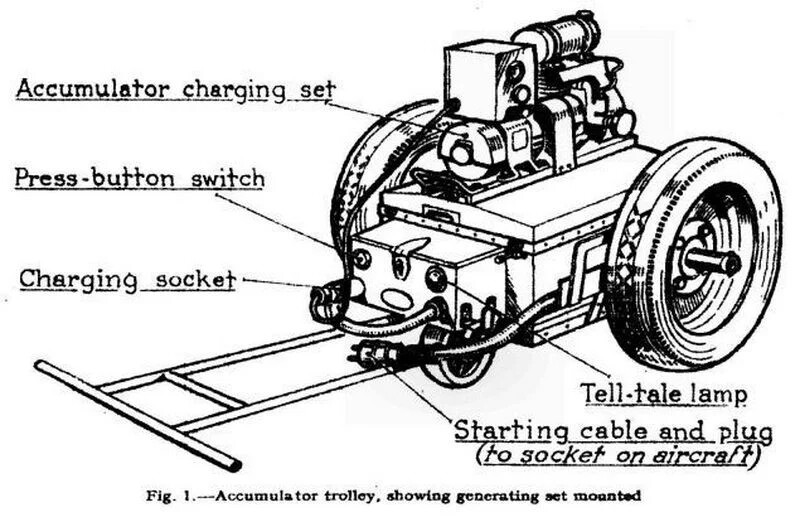
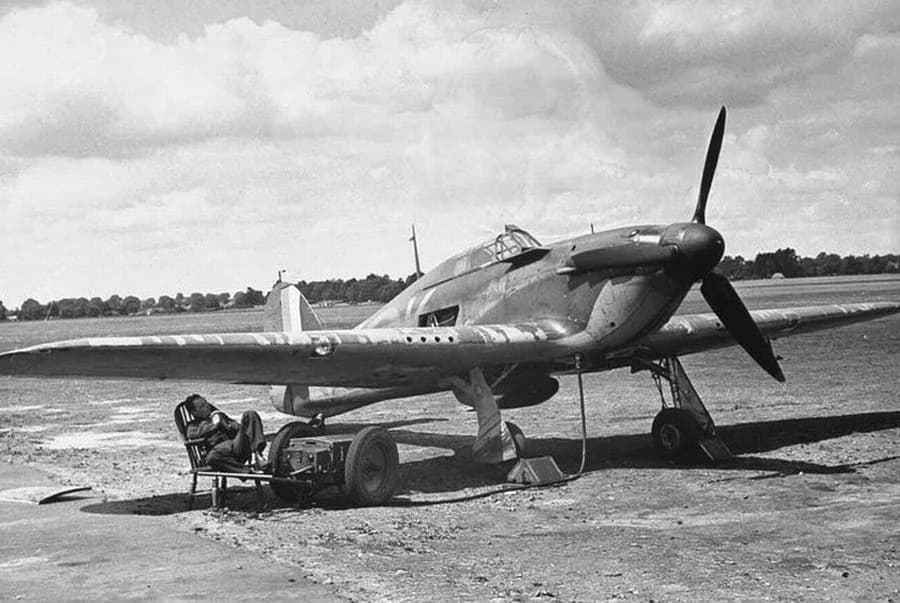
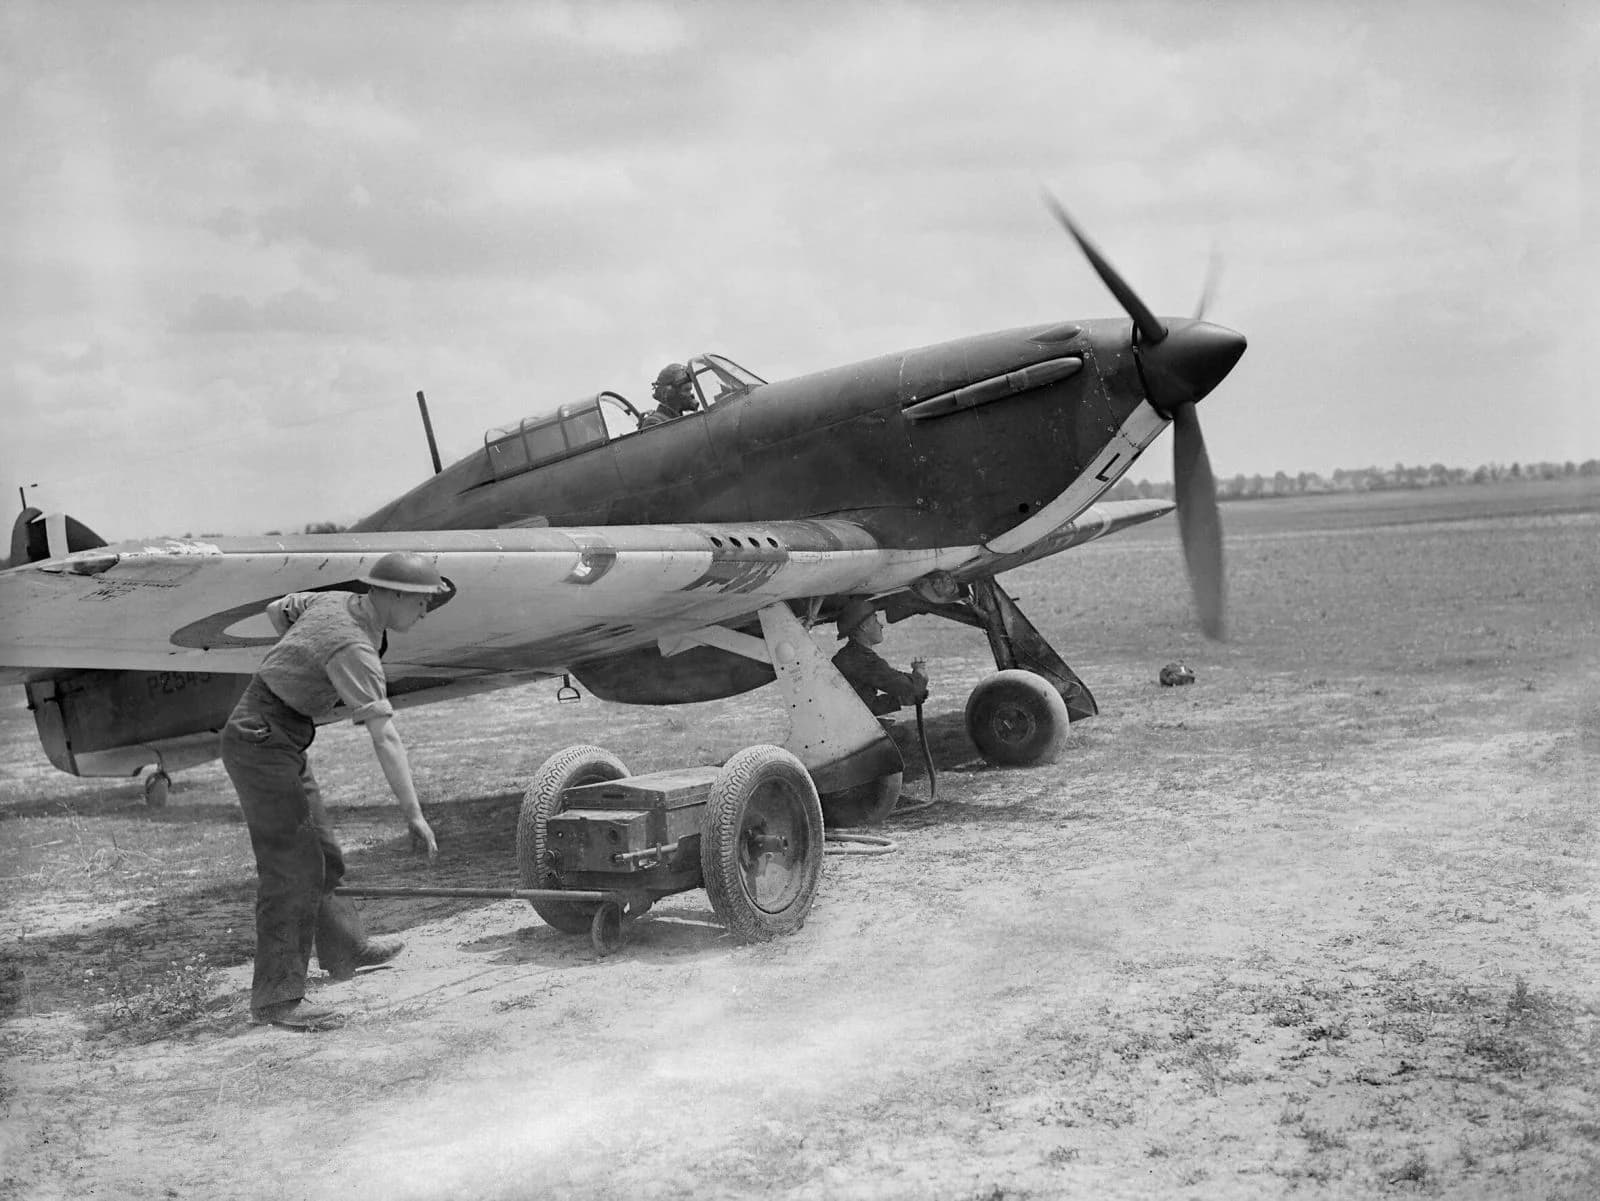
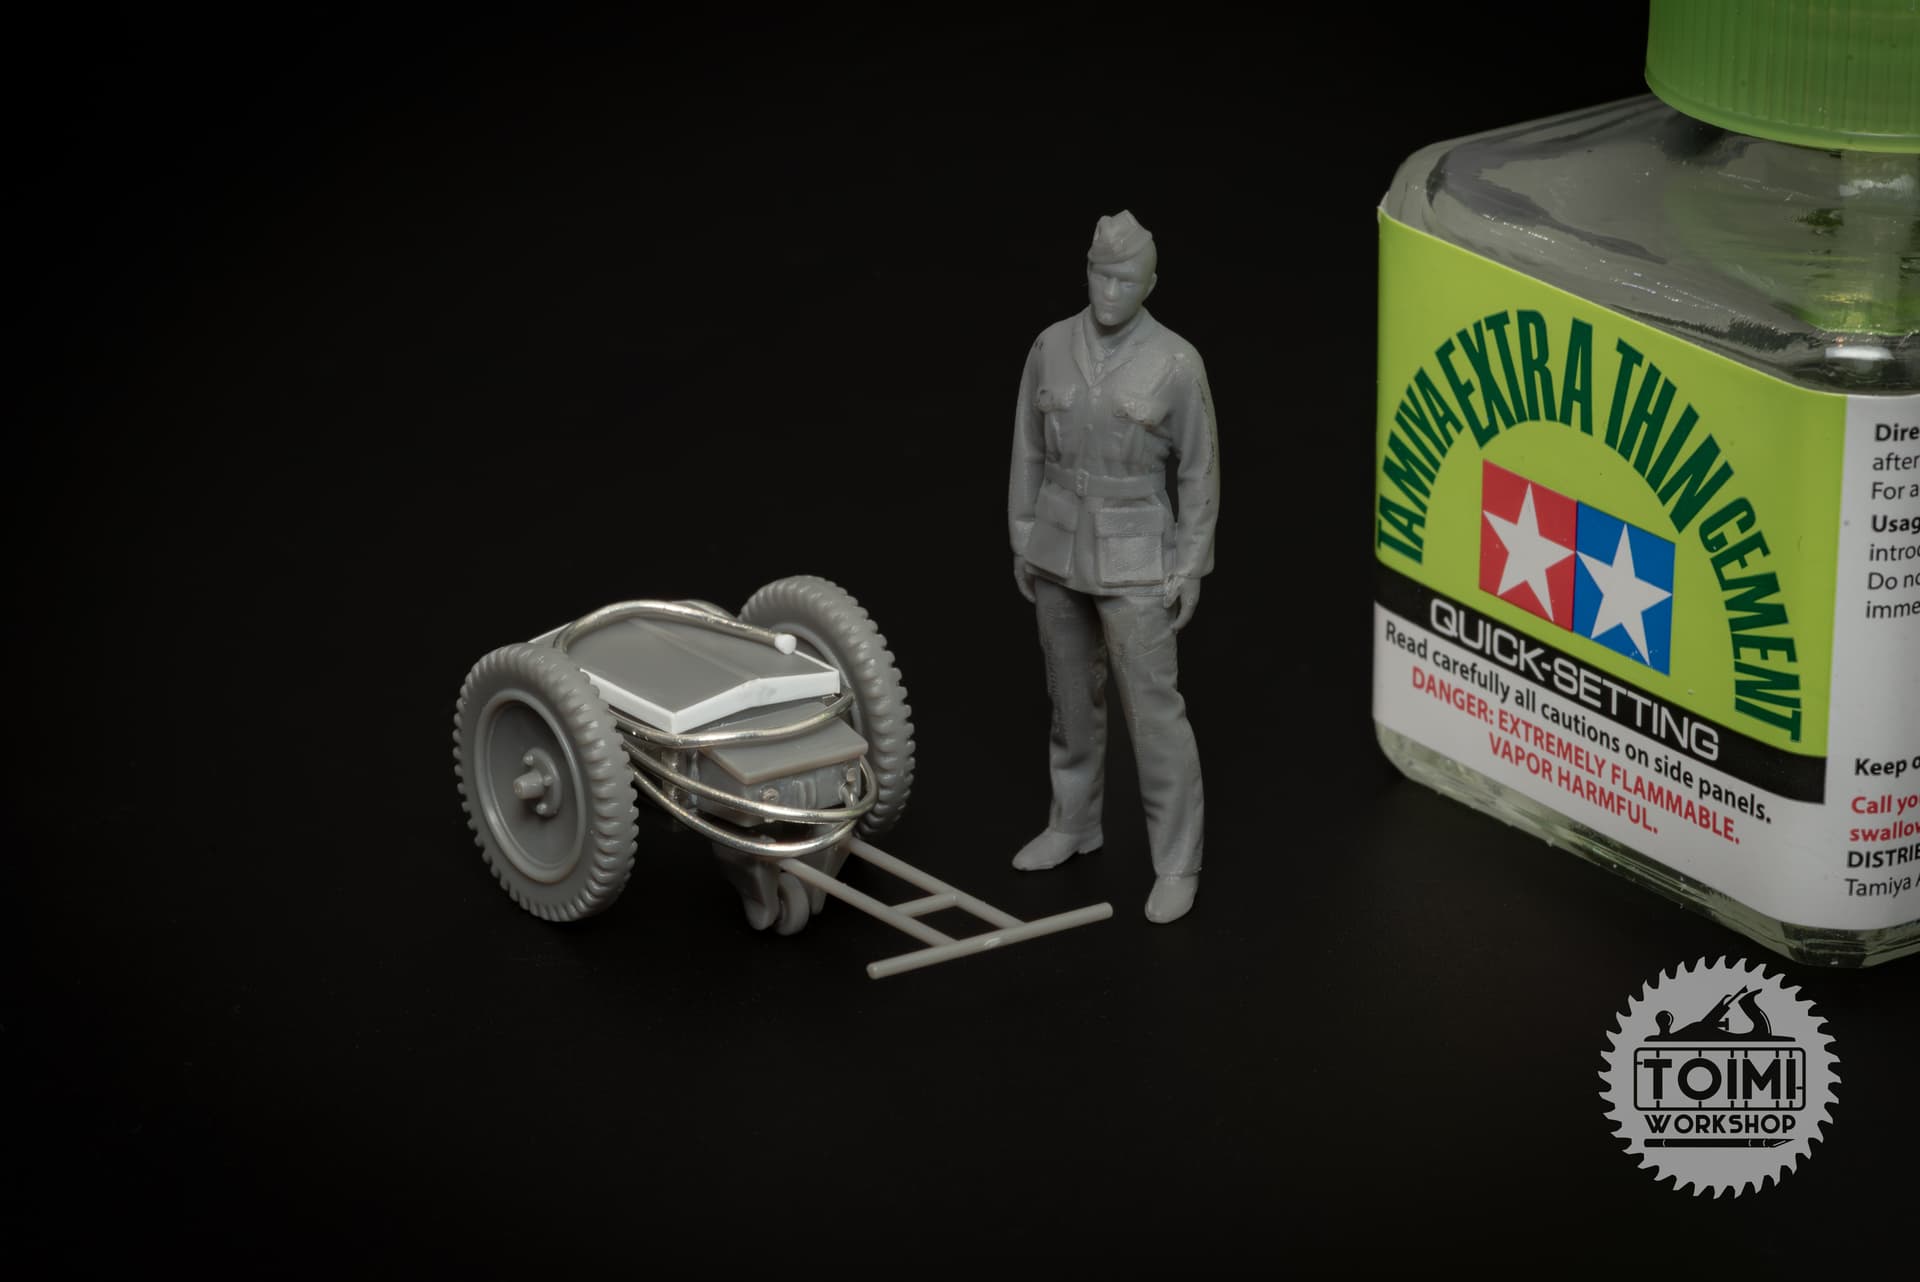
I’m going to need few uninterrupted hours to do the main colors on the Hurricane, so on a holiday weekend with just snippets of time, I worked on this trolley accumulator from the 2015 Airfix WWII RAF Ground Crew set.
The “trolley-acc” was essentially a wheeled set of large batteries that could be used to start aircraft and run their electrical systems without draining the smaller on-board batteries. When fighters were in dispersal during the Battle of Britain, waiting for the scramble order, trolley-accs and similar tools were kept them ready to fight.
Period and museum photos show a wide variety of these machines, many of which were certainly modified during and after the war. That makes 100% historical accuracy difficult. Seems like most had a wooden box structure, with angled steel corners, and a bent sheetmetal-reinforced lid. Found a pretty good discussion here: https://ww2aircraft.net/forum/threads/trolley-accumulators.59181/
I opted to build this trolley-acc without the gas generator set on top, which was useful at ad-hoc airfields without electrical or other amenities. 242 Squadron was based at RAF Coltishall in August 1940, which was an established airfield, so they could plausibly charge the trolley-acc with local power.
Not 242 Squadron, but the same idea, same period:
It’s hard to say for sure about the accuracy of the trolley-acc in this kit, given all the variations – but it was a fun little upgrade build. I used foil for the angle-iron, plasticard for the lid rim, and some non-lead wire for the rubberized cable (the rubber hose included in the kit is badly overscale).
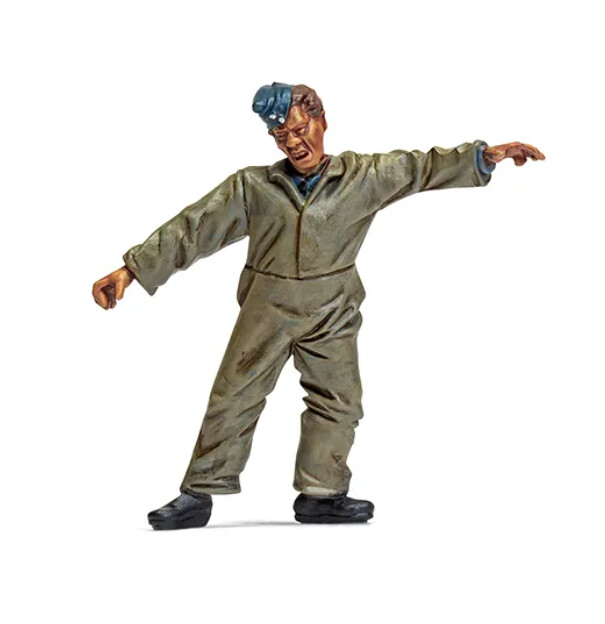
P.S. The above figure NOT one of the melty dudes from the kit. They have not aged well. ![]()

Finally, it was time for some actual paint. I had to wait until I could dedicate a few solid hours, since the chipping fluid would only be usable for a few hours after application. For the same reason, there aren’t a lot of “process” photos.
I coated all the silver areas with AK’s Worn Effects fluid, let that dry for about 20 minutes, and then started with the Sky underside. I used a ~3:1 mix of Tamiya XF21 Sky and XF2 White, thinned with Tamiya’s lacquer thinner. I think it came out a really pleasing “RAF” color.
Then gave the upper surface a light coat of the “RAF Dark Earth,” using ~4:1 ratio of Tamiya XF49 Khaki and XF52 Flat Earth.
For masks, I purchased a digital Hurricane mask set from Hawaiian Air Depot printed it on regular printer paper, not (yet) owning a cutter tool. I applied some clear packing tape and then Tamiya masking tape over the masks and cut the shapes out with a hobby knife – it worked pretty well, though it was a bit tedious, and smooth curves are tough.
But the results are good enough, I think. I sprayed the next coat of RAF Dark Green using a ratio of 3:1 Tamiya XF81 Dark Green 2 (RAF) and XF49 Khaki. I think using the Khaki in both camo colors really unifies the scheme.
With the speed of this painting process, allowing only 20-30 minutes of dry time before masking each step, I was concerned about paint lift, but it was not an issue.
Well, except on the Scotch tape lens covers for the landing lights. Not surprisingly, the paint barely sticks to that stuff. Should be okay to touch up, but I’ll wait until late in the finishing process.
Then I used some distilled water and brushes of varying stiffnesses to “chip” the paint in high-wear areas, relying heavily on Battle of Britain Hurricane photos for reference.
After the chipping I used Tamiya XF69 NATO Black for the nonskid panels (which are rarely chipped to bare metal, at least as far as I can tell in the photos I have).
The chipping is pretty stark, and some of it got away from me a little – but I think it’ll tone down significantly during the oil paint weathering process. One thing that’s really bugging me is that the sunken “rivet” detail on the kit holds the paint, while it wears off the surrounding area. Naturally this is the opposite of the real deal, at least on the wing panels, where the rivets are proud of the surface – and lose their paint first. Gonna have to ponder this issue.
A few decals are the next step – just the nose art – maybe today. Then it’ll be time for my first attempt at masking and painting markings. I have a 1ManArmy set on hand, but it is a liiiitle intimidating!
Loose sleeves around spinning mechanical parts in #37? I can’t see what could possibly go wrong…
Those masks and the chipping in Post #38 came out beautifully! I can definitely see an exchange of my brother-in-law’s cricut (and associated operating skills) for beer. Chipping via fluid is something I’d love to get my head around - It’s kindof bugged me that there’s an agent under the model that will cause the paint to release if disturbed by water, but you’re saying that it’s only effective in that capacity for a few hours?
I feel like I’m going to be coming back to this topic when I take on some in-stash aviation builds. Even though mine are only 1:72 scale, I feel like larger-scale examples provide a certain fidelity that’s easier to follow
A combat-ready airfield is a dangerous place even without jerry dropping bombs on you. In fact, F.O. McKnight’s first experience with death was at RAF Station Church Fenton, Tadcaster, Yorkshire, when a fellow Canadian corporal was standing in front of the wing when an armorer accidentally fired the guns from inside the cockpit. (the Calgary Mosquito Society)
Like they say, safety regulations are written in blood! The gun-button safety-catch was there for a good reason. So were the yellow propellor tips.
I had the same concern, so I did some testing on my paint mule, using the exact primer/paint/varnish combo I planned to use on the build. I found that the chipping was TOO easy at 30 minutes, about perfect for 2-3 hours, and got harder and harder beyond that. After 24 hours it was pretty much impossible to chip. (Weirdly, the flat earth color chipped much easier than the dark green, which required care around the color boundaries.)
This is my first 48th scale kit, after a half-dozen 72nd. I don’t think I’ll be going back … except maybe for larger subjects where space is an issue.