Major Glenn Eagleston flew the P-51 for 354th FS and the P-47D for 353rd FS in France 1944-45. He was credited with 18-1/2 victories. In Korea, he flew the F-86 and was credited with two Mig-15’s. A couple weeks ago I ordered the Hobby Boss 1/48 P-47D from Ali Express. The package arrived today. The kit looks very simple with fewer parts than other brands. Online reviews seemed to agree it’s OK considering the low price point. As luck would have it, today I also had my first free day in weeks and I was able to process the images for the skull and eagle markings. I had some good jpgs, I had to make the backgrounds transparent and then export them to png format. Tomorrow I will print them on my Koala laser decal paper and try them on flat styrene sheet.

Cutting Edge made a decal set for his bird. I want to do this plane as well.
https://www.aircraftresourcecenter.com/Rev1/301-400/Rev343-Cutting-Edge-CED48231/00.shtm
Superscale made a decal sheet with his P-47 markings on them. Also, one of the Testors boxings of the old Hawk P-47, one of the metal plated IIRC, kit came with Eagelston’s markings as an option.
Hi keavdog, stikpusher, thanks for the info. I tried to get to links where I can buy the Cutting Edge or Superscale decals, but I was unable to find the correct websites. I know Furball has a set of decals but it’s $23.99 + shipping for a whole set of maybe 10 different planes including Eagleston’s.
I printed the images on the Koala laser decal paper and tried them on an old 1/72 A-10 I have laying around. This came out much better than my earlier experiments. I let the decals soak for about a minute, with absolutely zero bleeding or fading. The decals went on fairly well, but there is a lot of silvering. I think I will need to trim them almost to the edges, work on my application technique, and I also have some color correcting to do on the eagle. But the initial results are encouraging.

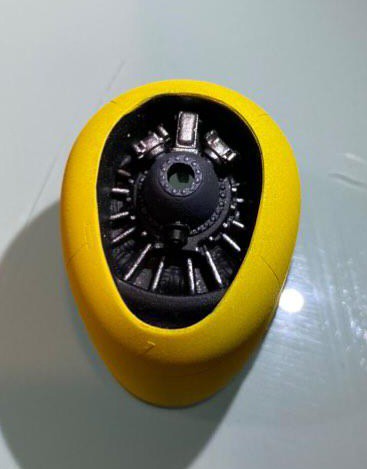
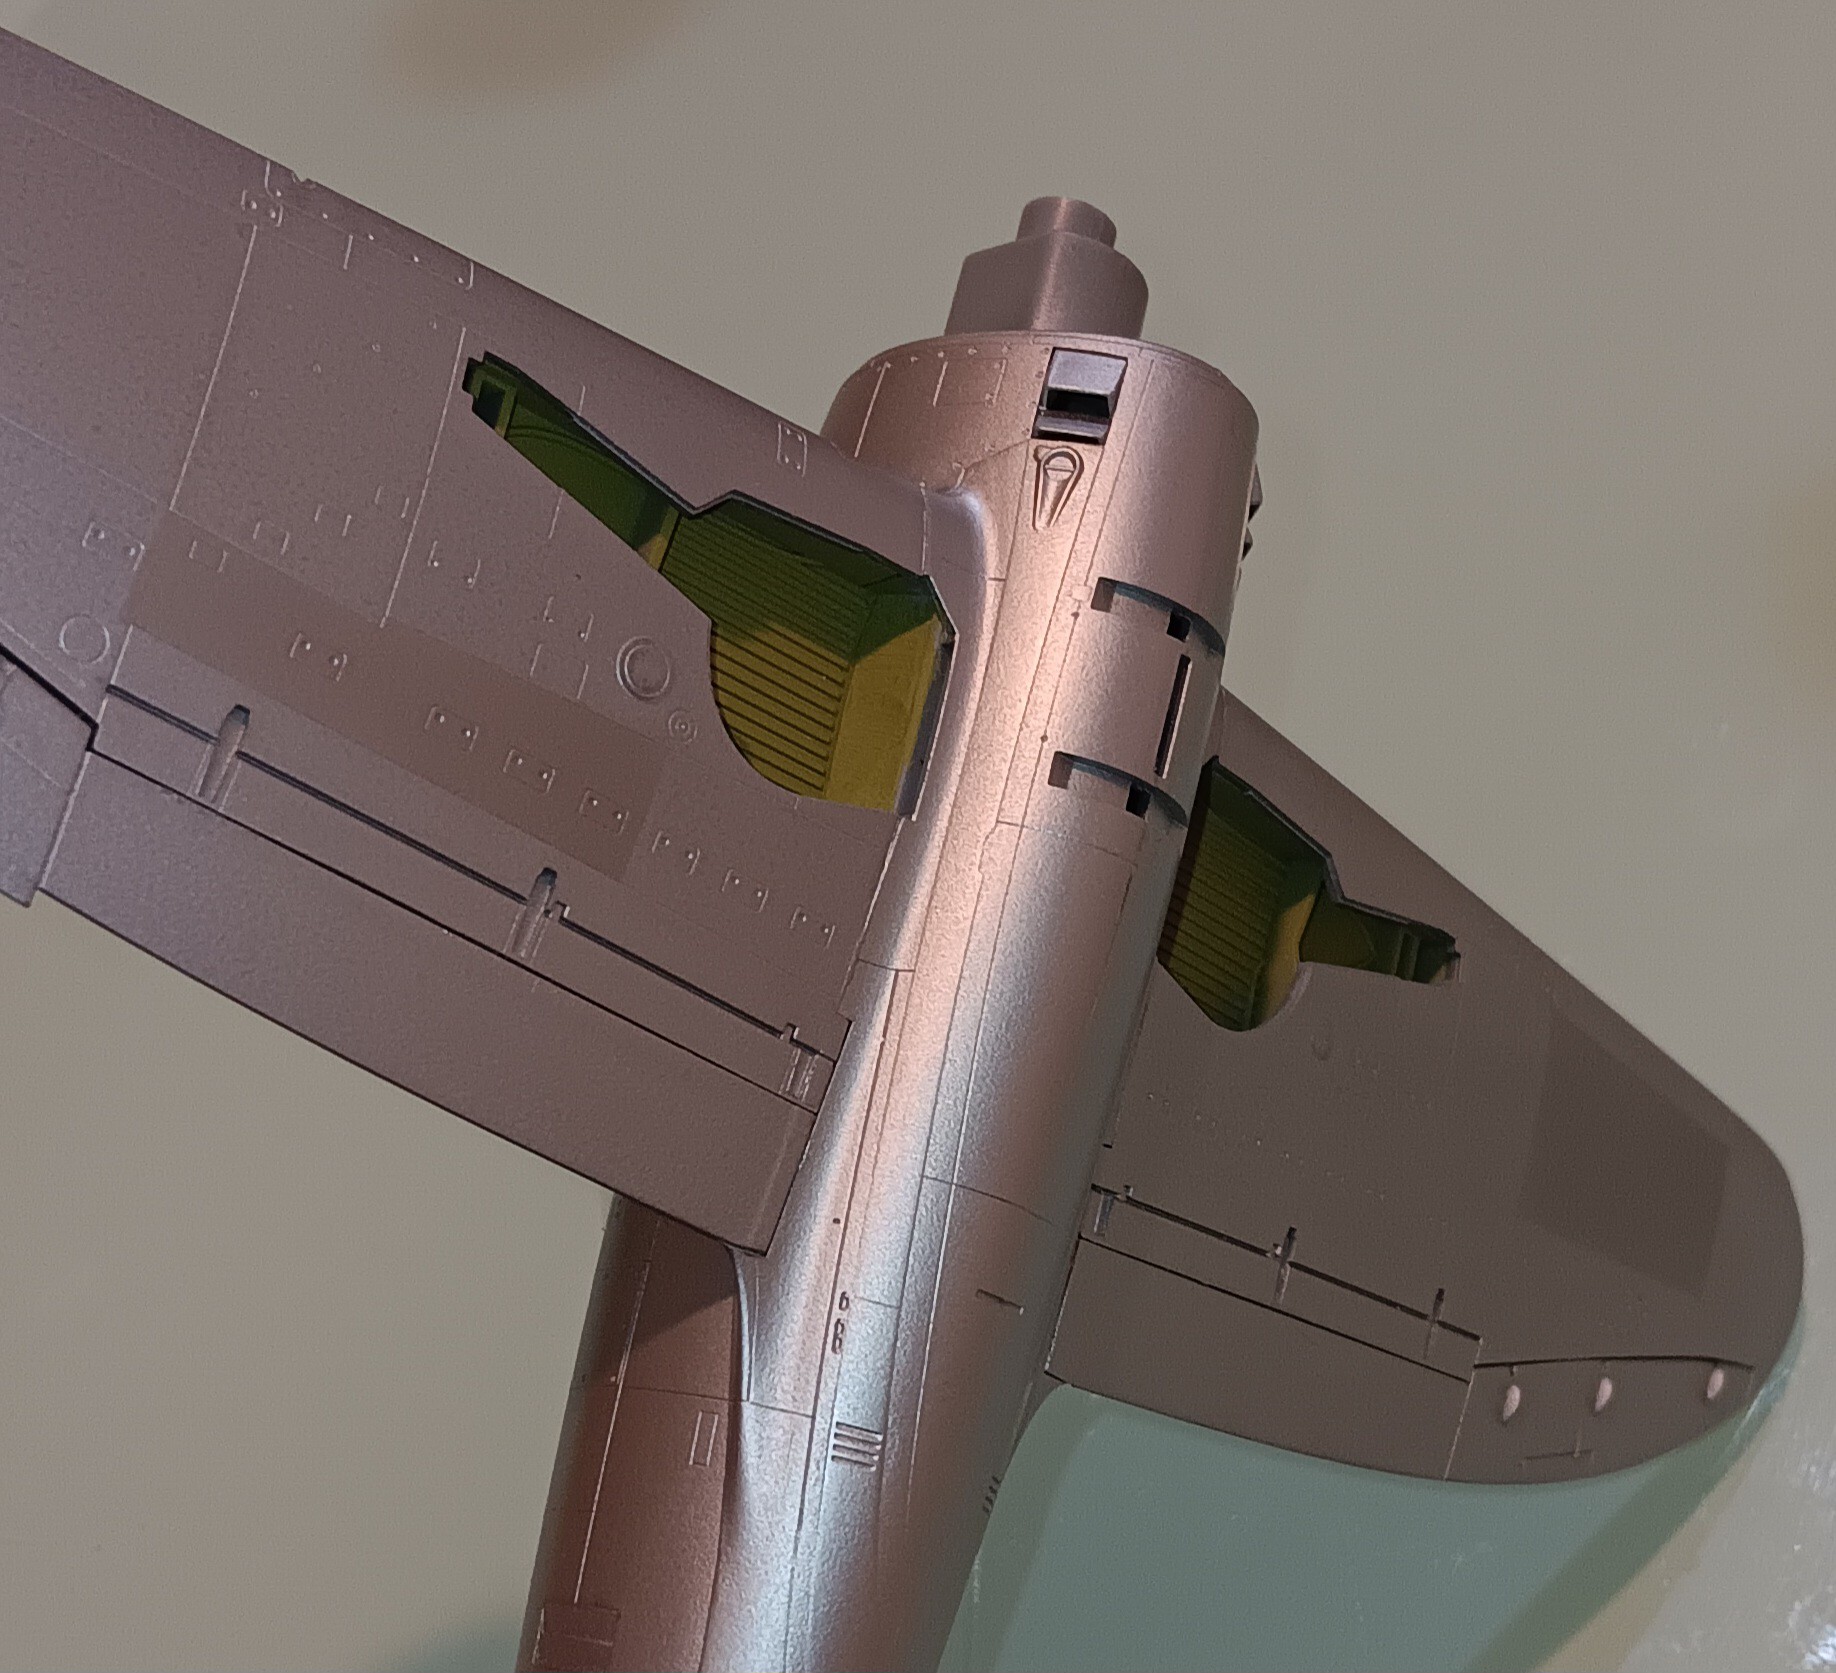
Painted the engine cowling a couple days ago. It is all one piece, the front half of the engine is molded directly in the cowling. I just did some masking and used my trusty Krylon rattle can flat black primer to paint the engine, then used craft acrylics applied with a brush to get some of the engine details. It was kinda hard to get the brush in there, so I just did the best I could. Far from a masterpiece, but I got it done in 30 minutes.
Then I tried to paint the cowling with yellow Folk Art craft acrylic. It didn’t go well. I got what seemed to be a good thinned mixture, and applied many light coats with my airbrush. I wasn’t completely happy with the finish, but I decided it was barely good enough. But when I applied some masking tape to do some panel line scribing, the tape lifted the acrylic right off. So I had to remove it all and redo it with Testors yellow enamel. That came out much bettter, so in the long run it was probably a good thing the tape messed up the acrylic. The craft acrylic has its uses, but I am also learning its limitations the hard way.
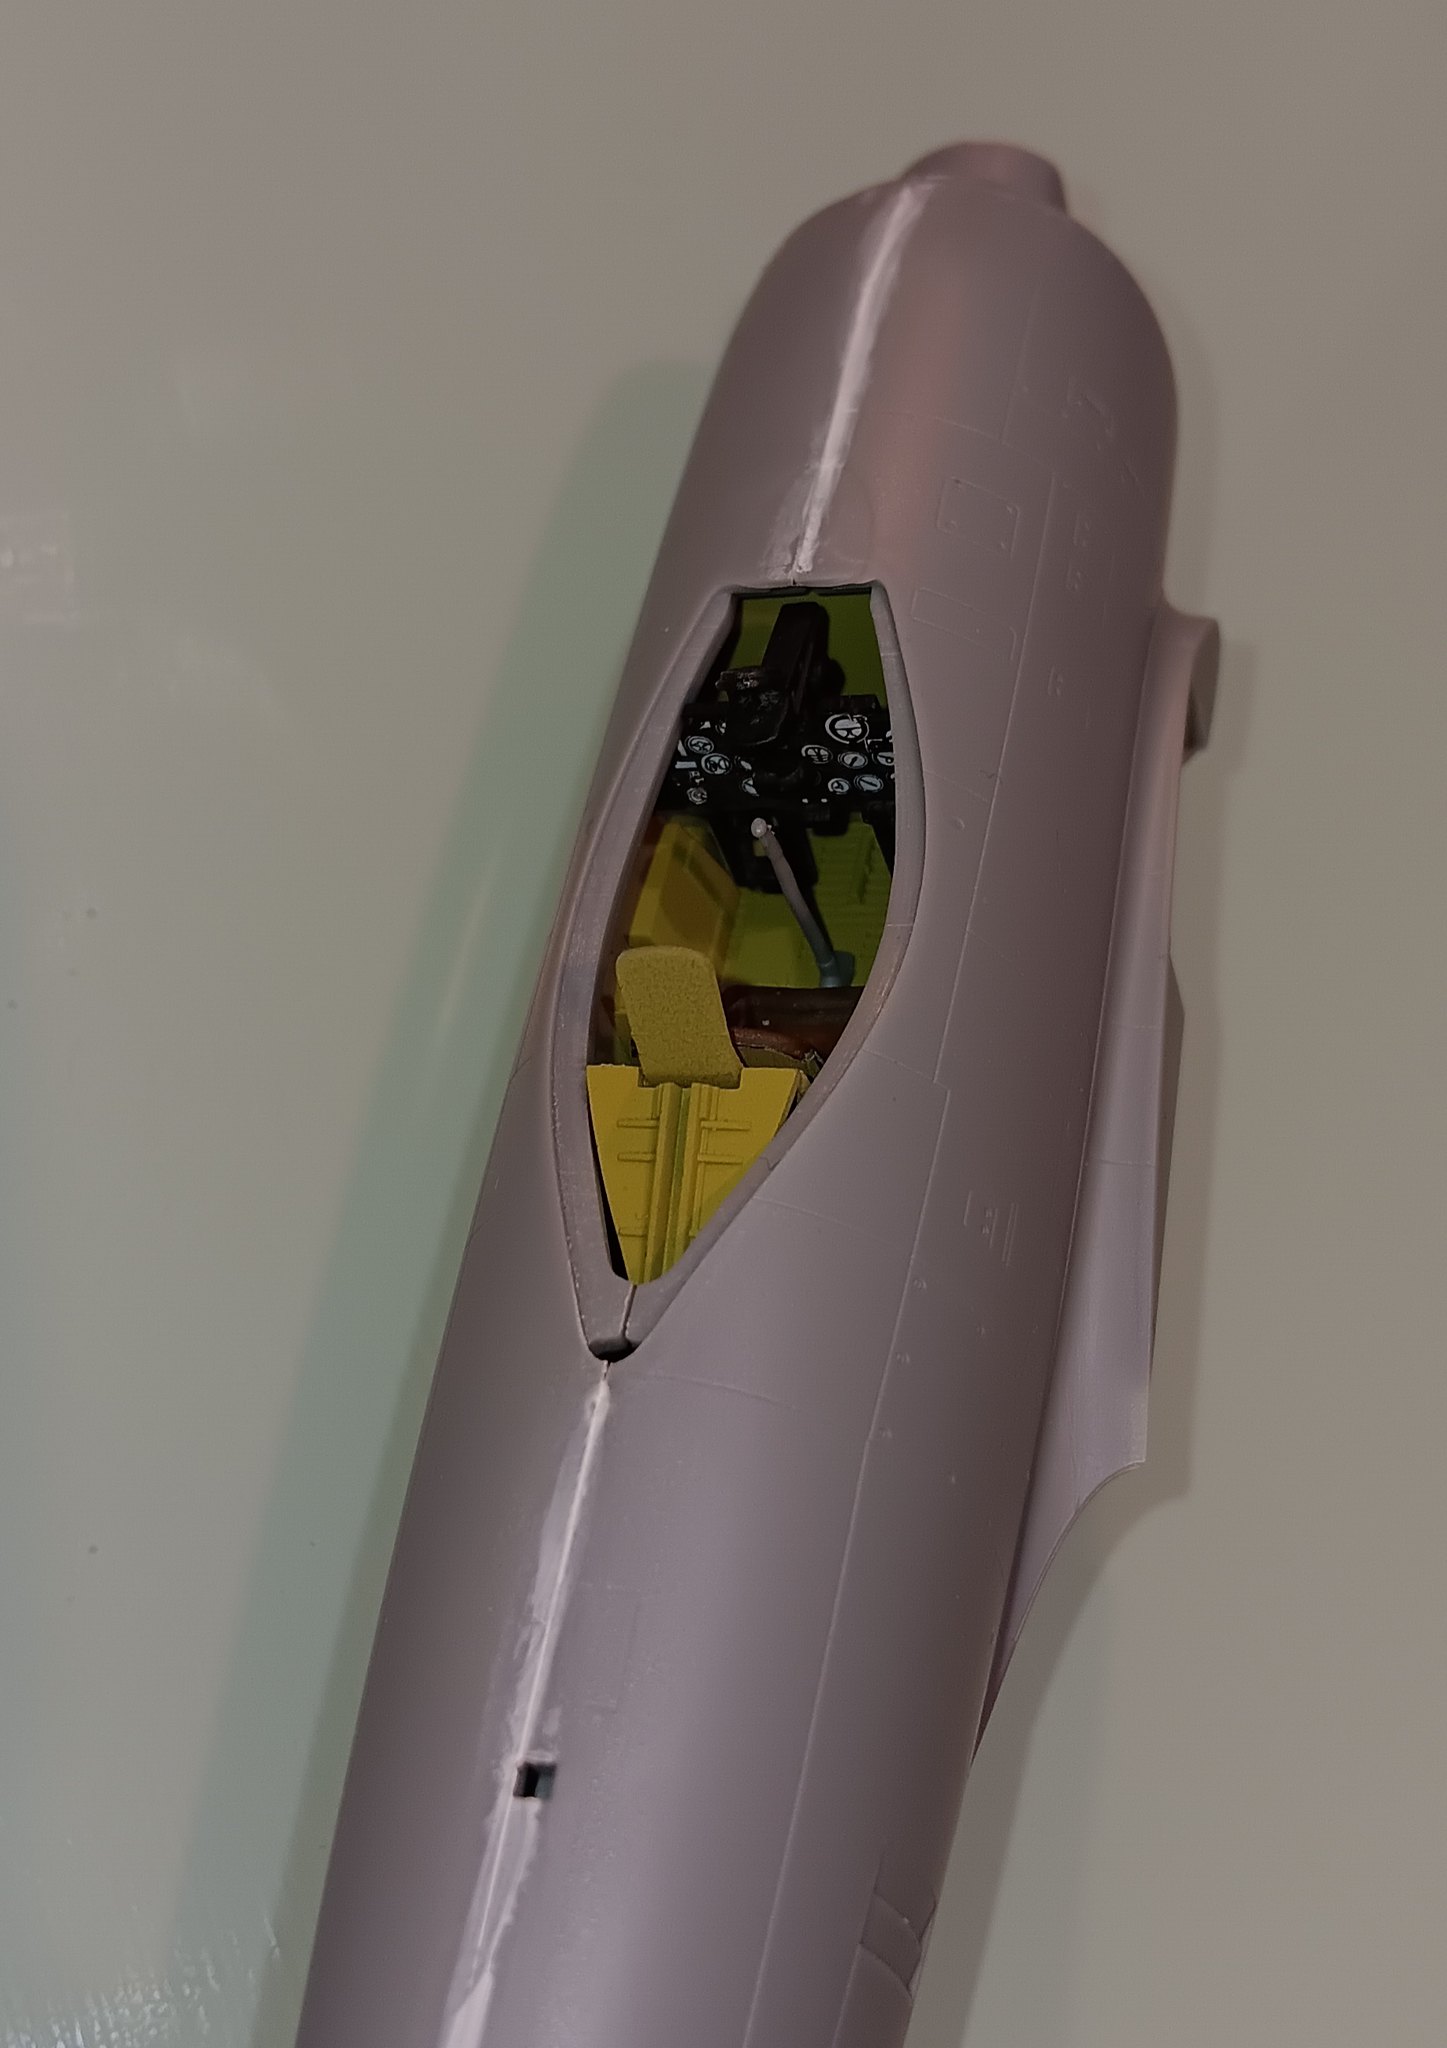
I painted the cockpit with craft acrylic and letting it dry. For some reasin the Folk Art olive green which I use for zinc chromate goes on way smoother than the yellow. It’s my go to for this purpose. I also noticed that the fuselage has the tail gear doors molded in the wheels down position. I don’t see any easy way to remove them and glue them for wheels up, so I guess this build will be wheels down. So I will be using more of the olive geen for the wheel wells.
So far the Hobby Boss kit seems good for the price. The parts trees are laid out pretty nicely, for example all the cockpit parts are located on their own little tree. On other models they are scattered on two or three different trees. And the sprues are nice to cut, with minimal filing and sanding to remove the residue.
Cockpit parts dried, glued them together today. Went together nice and easy. Detail is very basic as expected for this price point. Just went through the motions for this, it’ll be under a closed canopy. Not gonna bother taking and posting a photo. Hoping to put the fuselage together tomorrow, who knows maybe even the wings. From the reviews this should be a fast build. Hoping to spray the alclad in a couple weeks.
Hey bk, yeah, these HB T-bolts are basic kits, but they build up nicely. I built one a while back, and I think I may do another.

They’re fun little kits to practice on. I have a lot of P-47 schemes that I want to build, and these are an inexpensive option.
I’m looking forward to seeing how yours turns out. Keep up the great work!
-O
Hi oortiz10, that’s a beautiful P-47. I love the subtle staining from the oil coolers, the chipped paint on the wing leading edges. Also, details like the canopy framing and the propeller. If mine comes out half as good I will be very happy.
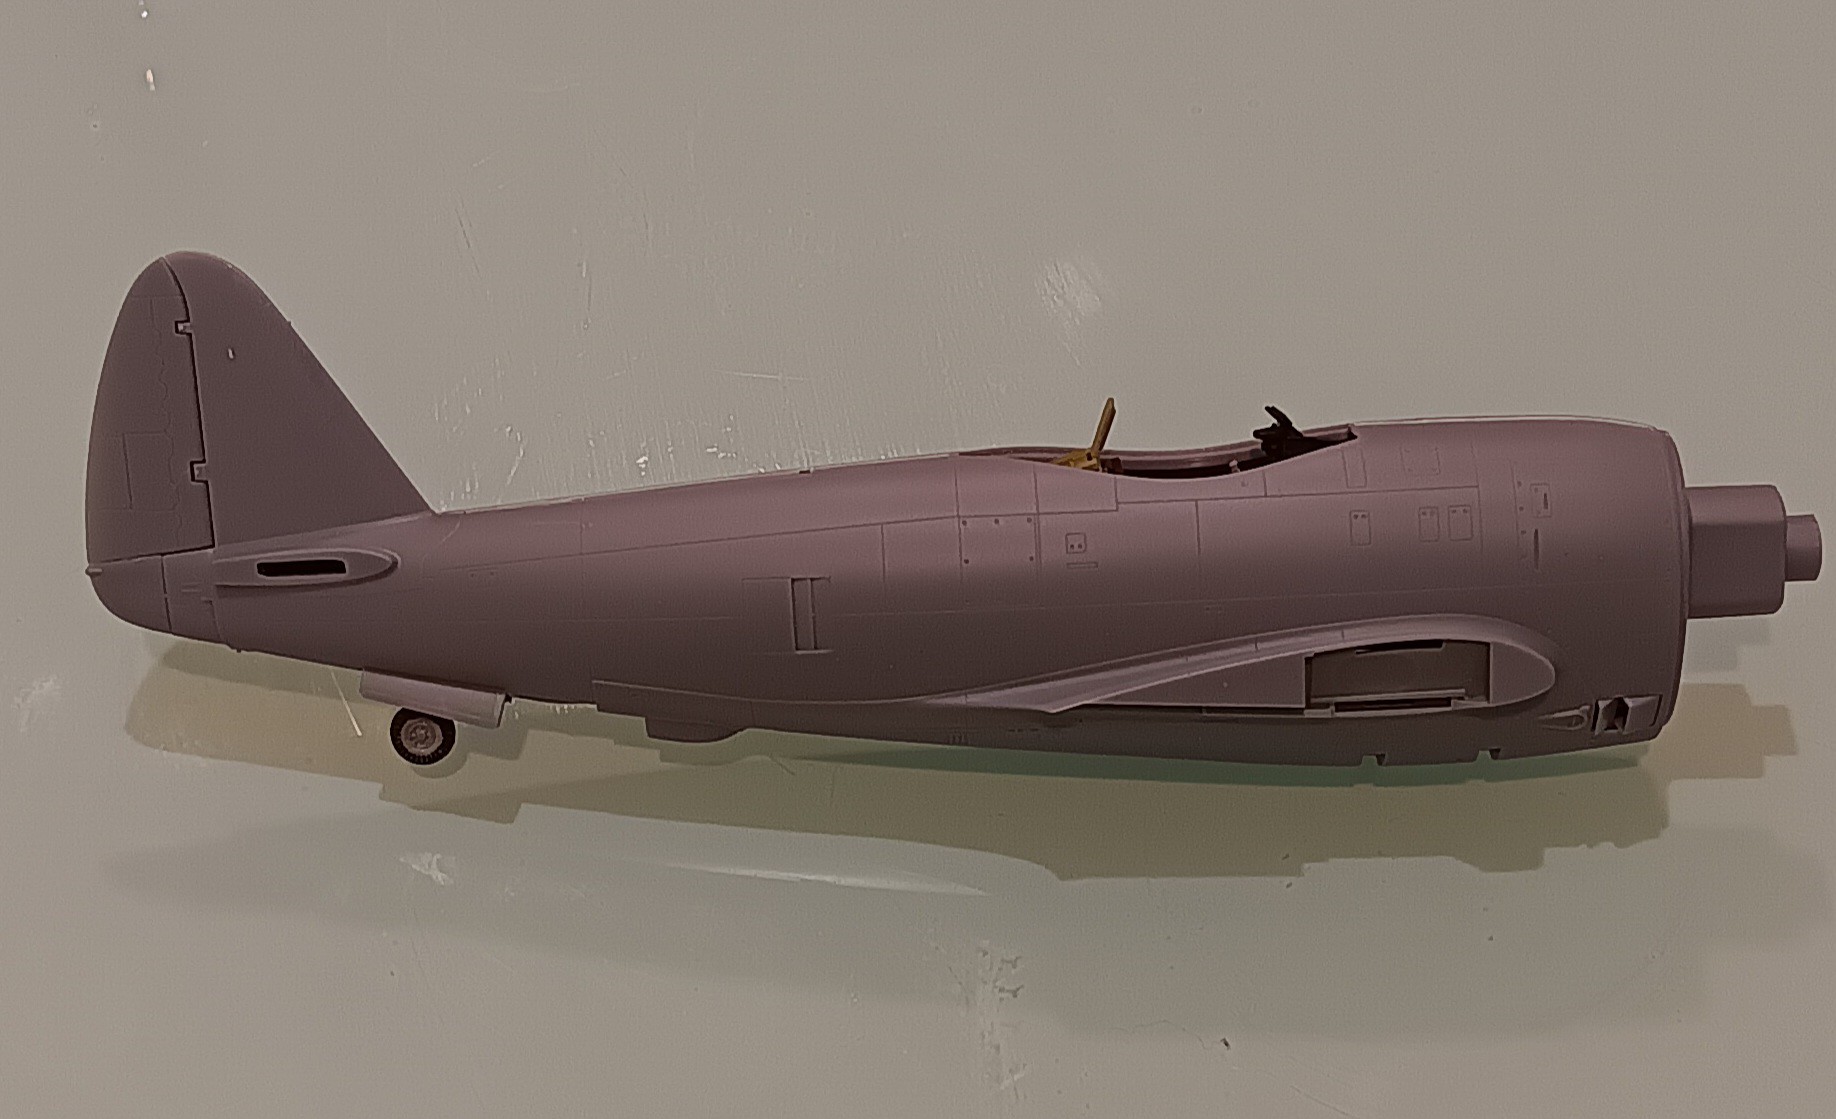
Here’s some of what I’ve been up to the last couple weeks. Just taking it easy and casual, doing the best a novice can do. The fuselage went together with no problems, the seams require minimal putty and sanding. I’ll see what happens with the wing roorts. Hopefully going to put first coat of primer by next weekend. The Hobby Boss kit had the tailwheel gears molded in the gear down position, it seemed too hard to cut them off to build it gear up. I haven’t built a plane with wheels down since I was a kid.


Coming along nicely
Nice work, BK! Love those Jugs! [:D]
Gary
Excellent work there BK! [t$t] Looking forward to seeing the finished bird.
Stay safe.
Jim [cptn]
Thanks guys for the kind words and encouragement! It helps keep me going through the setbacks and difficulties.
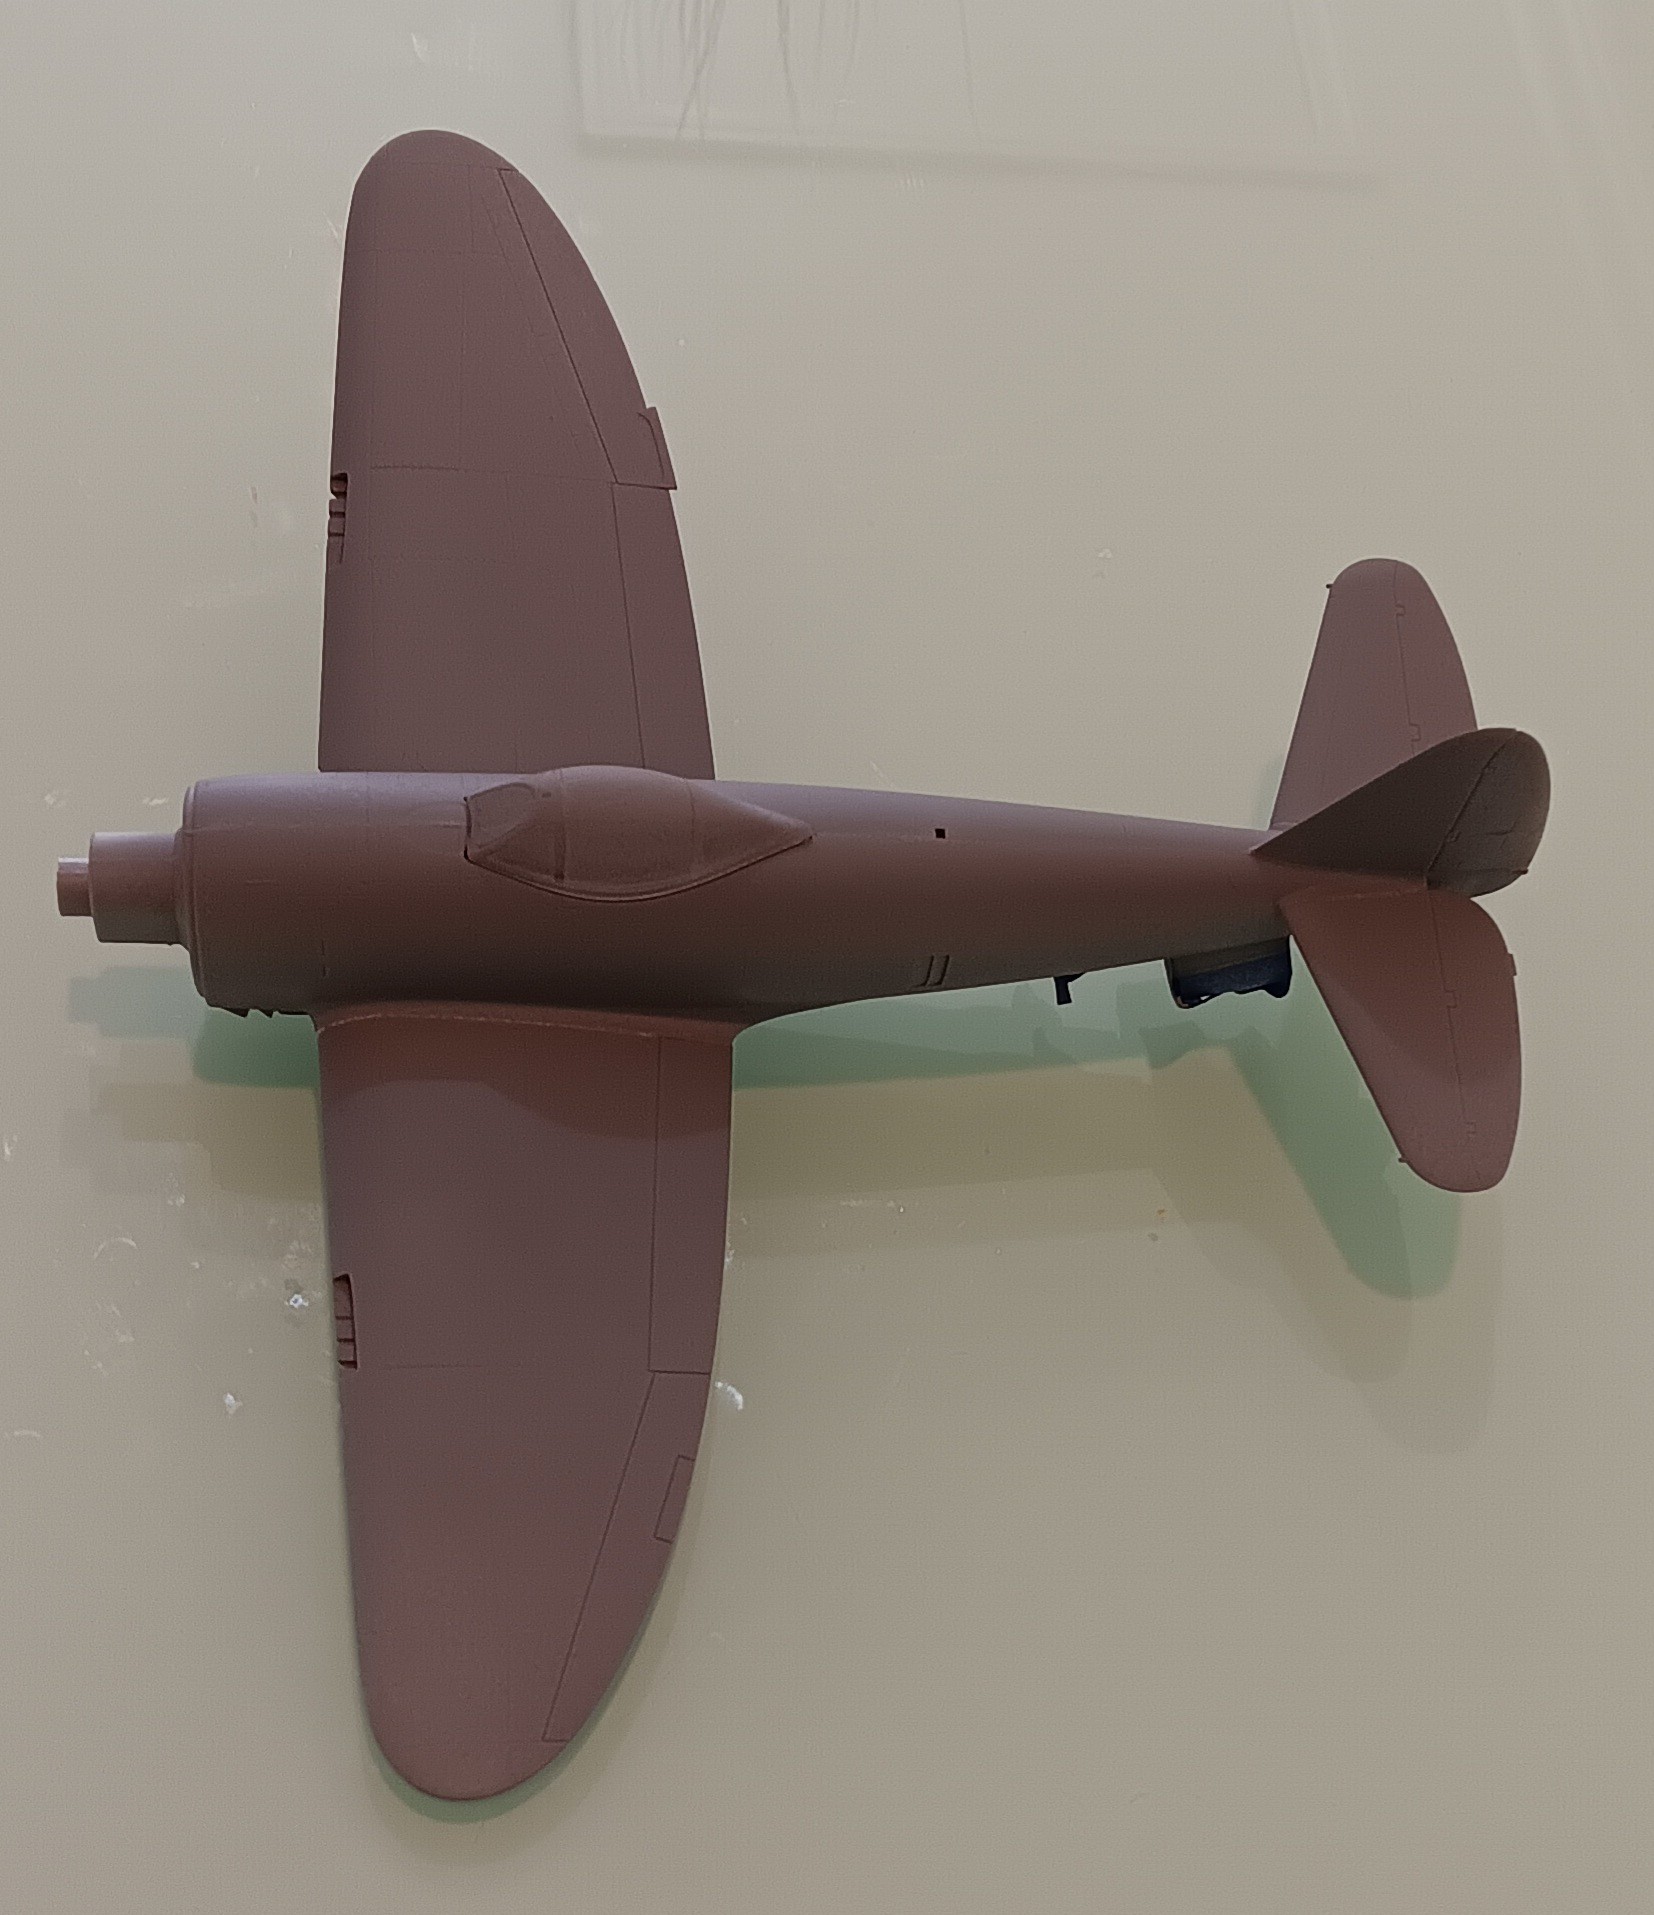
Glued the wing halves together, the left wing didn’t stick together too well, I had to apply a lot of glue and hold it pressed together with my fingertips until the glue set. I think for the future I will get some plastic C-clamps to hold things together while the glue sets.
The wing roots had a gap but it was easily filled with Vallejo plastic putty. Almost no sanding was required, maybe I am getting a little better at this. The sanding of the fuselage seams was also minimal.
Then I applied Krylon gray rattle primer. Tonight I’ll buff it out, and clean up some panel lines where required. If all goes well, I will spray the Alclad tomorrow.

You’re getting there! Plastic clamps and clothespins are always handy. I glue fine grade sandpaper in the grip part of my clothespins so they don’t slide off.
Hi John, thanks for the tip. I used my mom’s clothespins when I was a kid. I also had problems with the grip part sliding off. Now thanks to you I know how to fix that! Next time I’m at the 99 store I will get some clothespins.
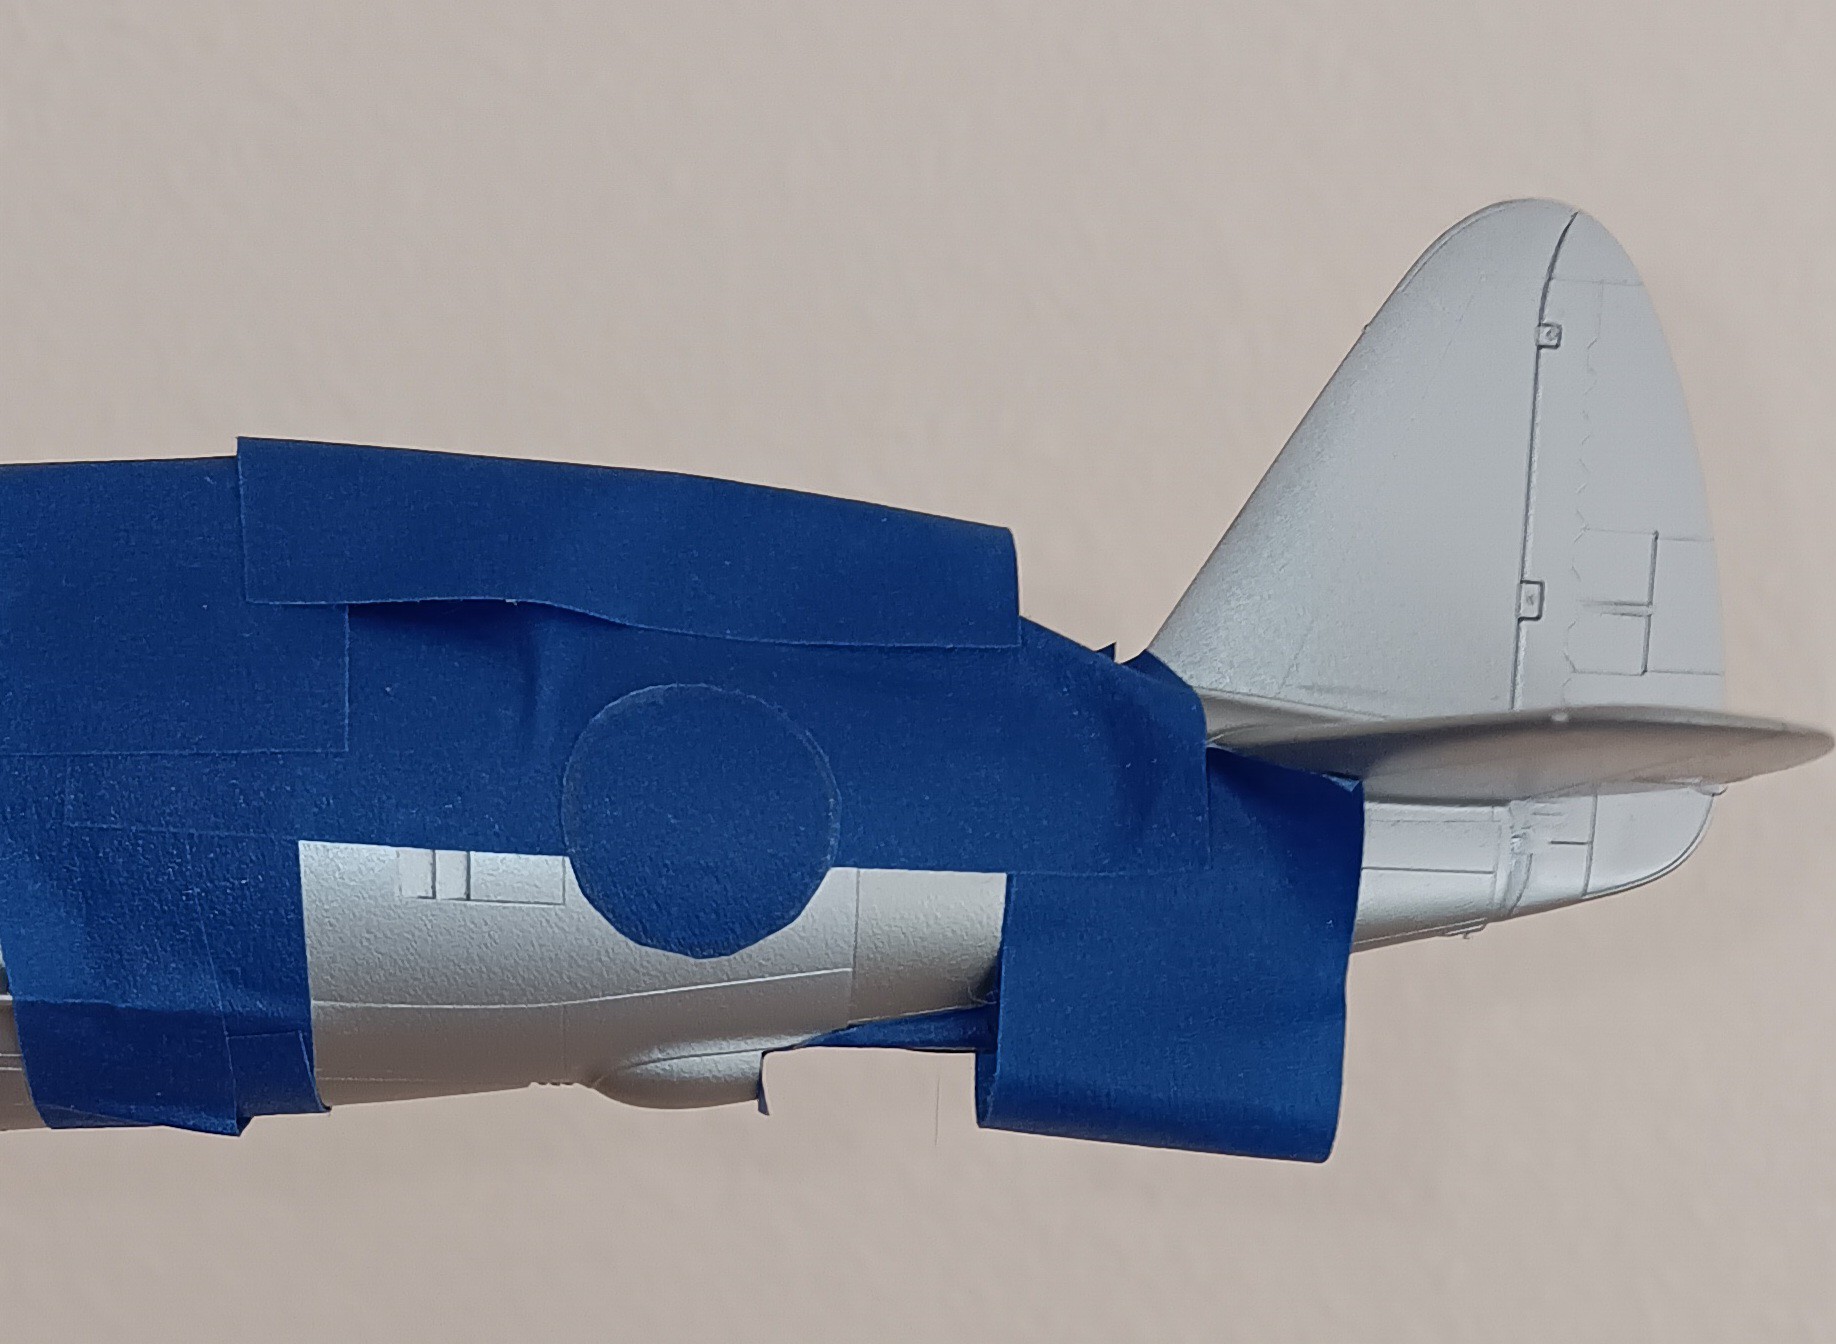
I applied the alclad aluminum to the Jug. The first try was ok, it was a slight improvement over the P-38, but still too grainy for me. I thought 1000 grit alone on the flat gray rattle can primer was good enough. So I sanded the alclad with 1000 and 3000, then did a buffing with some old blue jeans. The second attempt came out better. Even though I am not going for a polished finish in most cases, I think next time I will use a gloss primer. I used the alclad some of the landing gear doors directly on the plastic without priming, and that went on much smoother. I know alclad sticks better with primer, but I was too lazy to prime those little landing gear doors. But from that I learned surface prep is critical, even for plain aluminum.
Here is the P-47 aluminum finish. Still negotiating the learning curve, but good enough for now. Tomorrow I will mask some random panels for darker shading. After that I will try my hand at the D-Day invasion stripes. Also take exact measurements of the skull and eagle decals and make the final prints on the decal paper.

Comming along nicely. Happy National Burrito Day!
Hi keavdog, thanks for the compliment, and also for the reminder of National Burrito Day. Lots of promotional deals to choose from, I eventually settled on Taco Bell. To those who say it’s not authentic, i know you have a point. But the King does not discriminate, the King welcomes and appreciates all kinds of burritos. I’ve enjoyed Taco Bell since I was a kid, so there’s a lot of nostalgia there.
Applied darker shade for some random panels. For me the key is subtlety in the shading. Too dark does not look right. But I was too careful on my first attempt, it was almost invisible. I eventually settled on a 60-40 mix of aluminum and dark aluminum. I think I am happy with the results, but maybe after I sleep on it I’ll darken a few more panels. Tomorrow I will do more buffing, then start applying masks for the D-Day stripes.


Very nice work there! [B] [B] [B] I’ve never tried any of the new BM finishes. I guess I’m chicken to try. The closest I get to BM is Testors Silver Chrome. Looks good to me and it got me a couple of medals for a couple of P-51’s a few years back. Now I stick mostly to camo jobs.
Stay safe.
Jim [cptn]
Hi Jim, thanks for the encouragement. If you want to try BM (bare metal?) maybe you should give Alclad a chance. I read the forums and I was very intimidated at first. But then I said F it, I wanna try. I think the real challenge is polished surfaces. Imo the technique is much easier for regular satin aluminum finishes. My first BM build was a P-38. It didn’t turn out great, but it wasn’t horrible either. The surface prep is pretty straightforward. I use Krylon flat gray rattle can primer, then sand with 1000 grit, 3000 grit, then buff with old blue jeans, flannel shirt, etc. Spraying the alclad aluminum and dark aluminum is easy. I spray at 18 psi, with the dual action airbrush triggered to flow a small amount. I spray around 2 inches from the surface. The odor is very strong so I wear a mask. But other than that, it is easy to work with, easy to clean, etc. My next BM build will probably be a F-86, I will try gloss gray primer and see if I get a smoother surface (but not polished). One day I hope to try a polished F-104 with gloss black primer for a deep mirror shine.
Today I masked the general outlines of the D-Day stripes then sprayed the white portion with Testor’s enamel in the small square bottle. I will be masking it for the black stripes so I didn’t trust the white craft acrylic. Tomorrow I will do the masking for the black stripes and spray those with black testor’s enamel.
Painted the D-Day stripes. Defintely not a masterpiece, but I can live with it. Next week gonna do the skull and eagle decals, then start weathering.
