That’s looking pretty good. I like the stripes. Great job. Can’t wait to see it completed.
Hi lurch, thanks for the kind words! My first ever attempt with the stripes, they are a bit crooked but I am OK with it. I guess I could’ve measured and marked them before putting the tape, but I’m just not that disciplined.
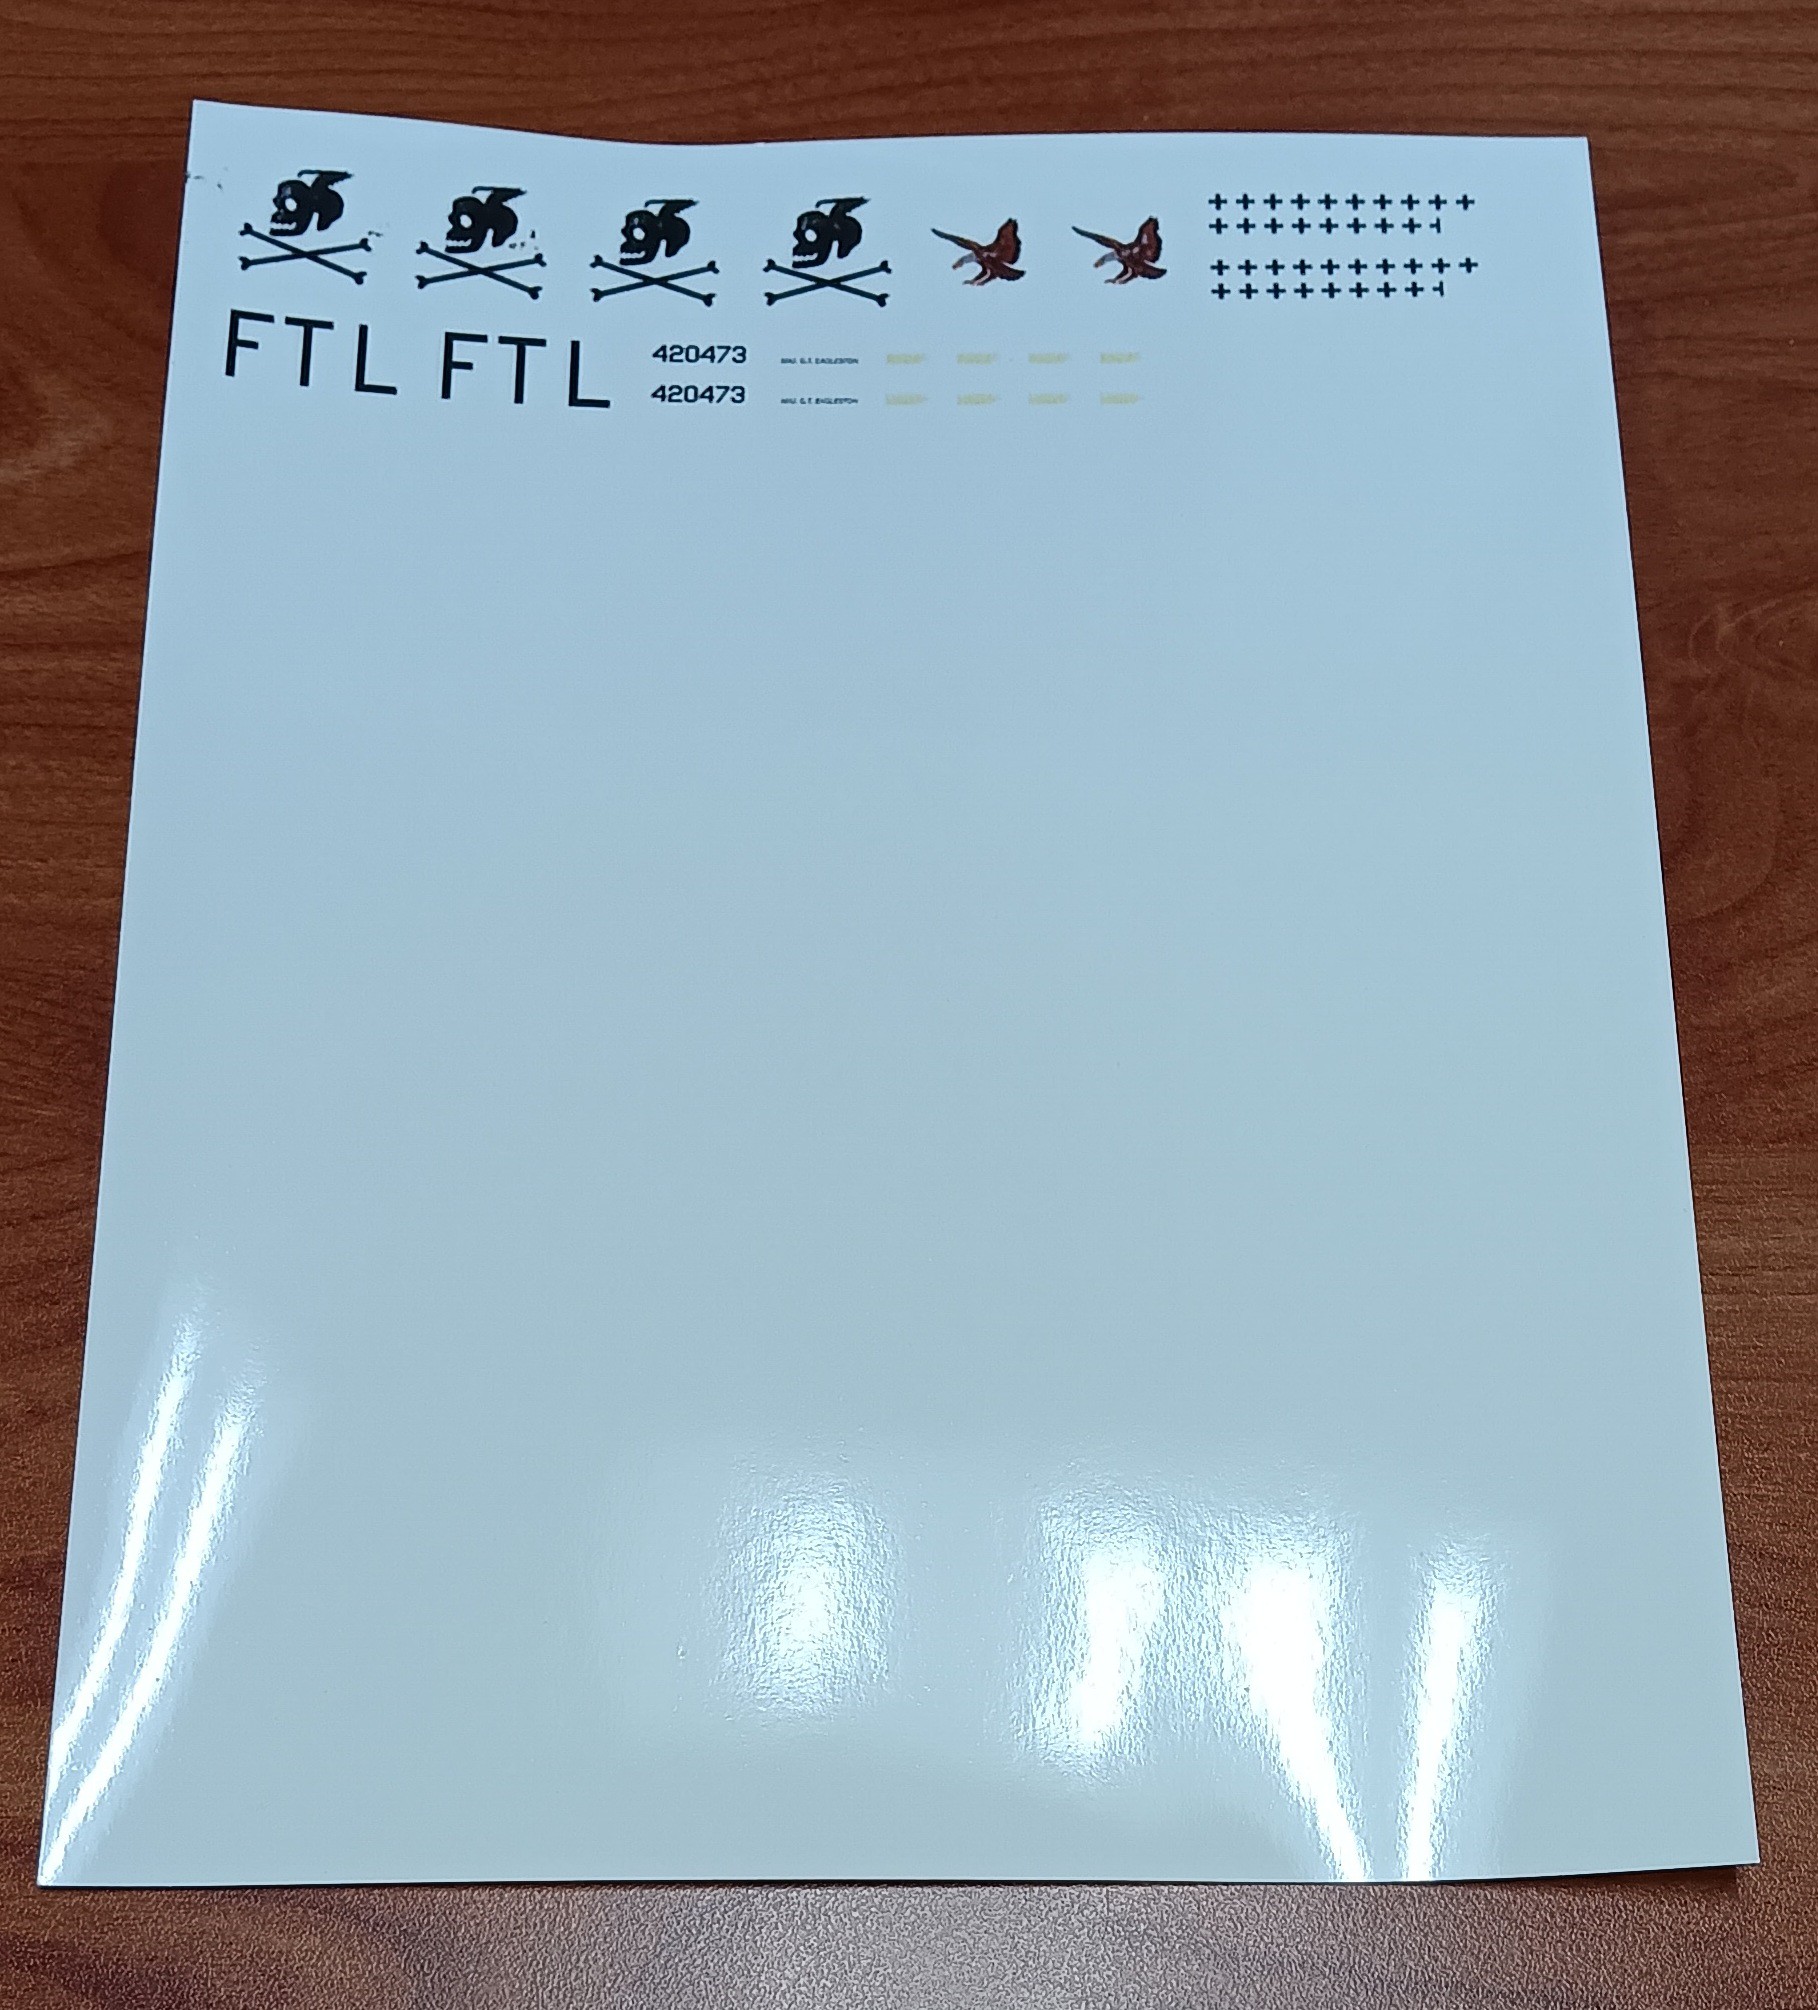
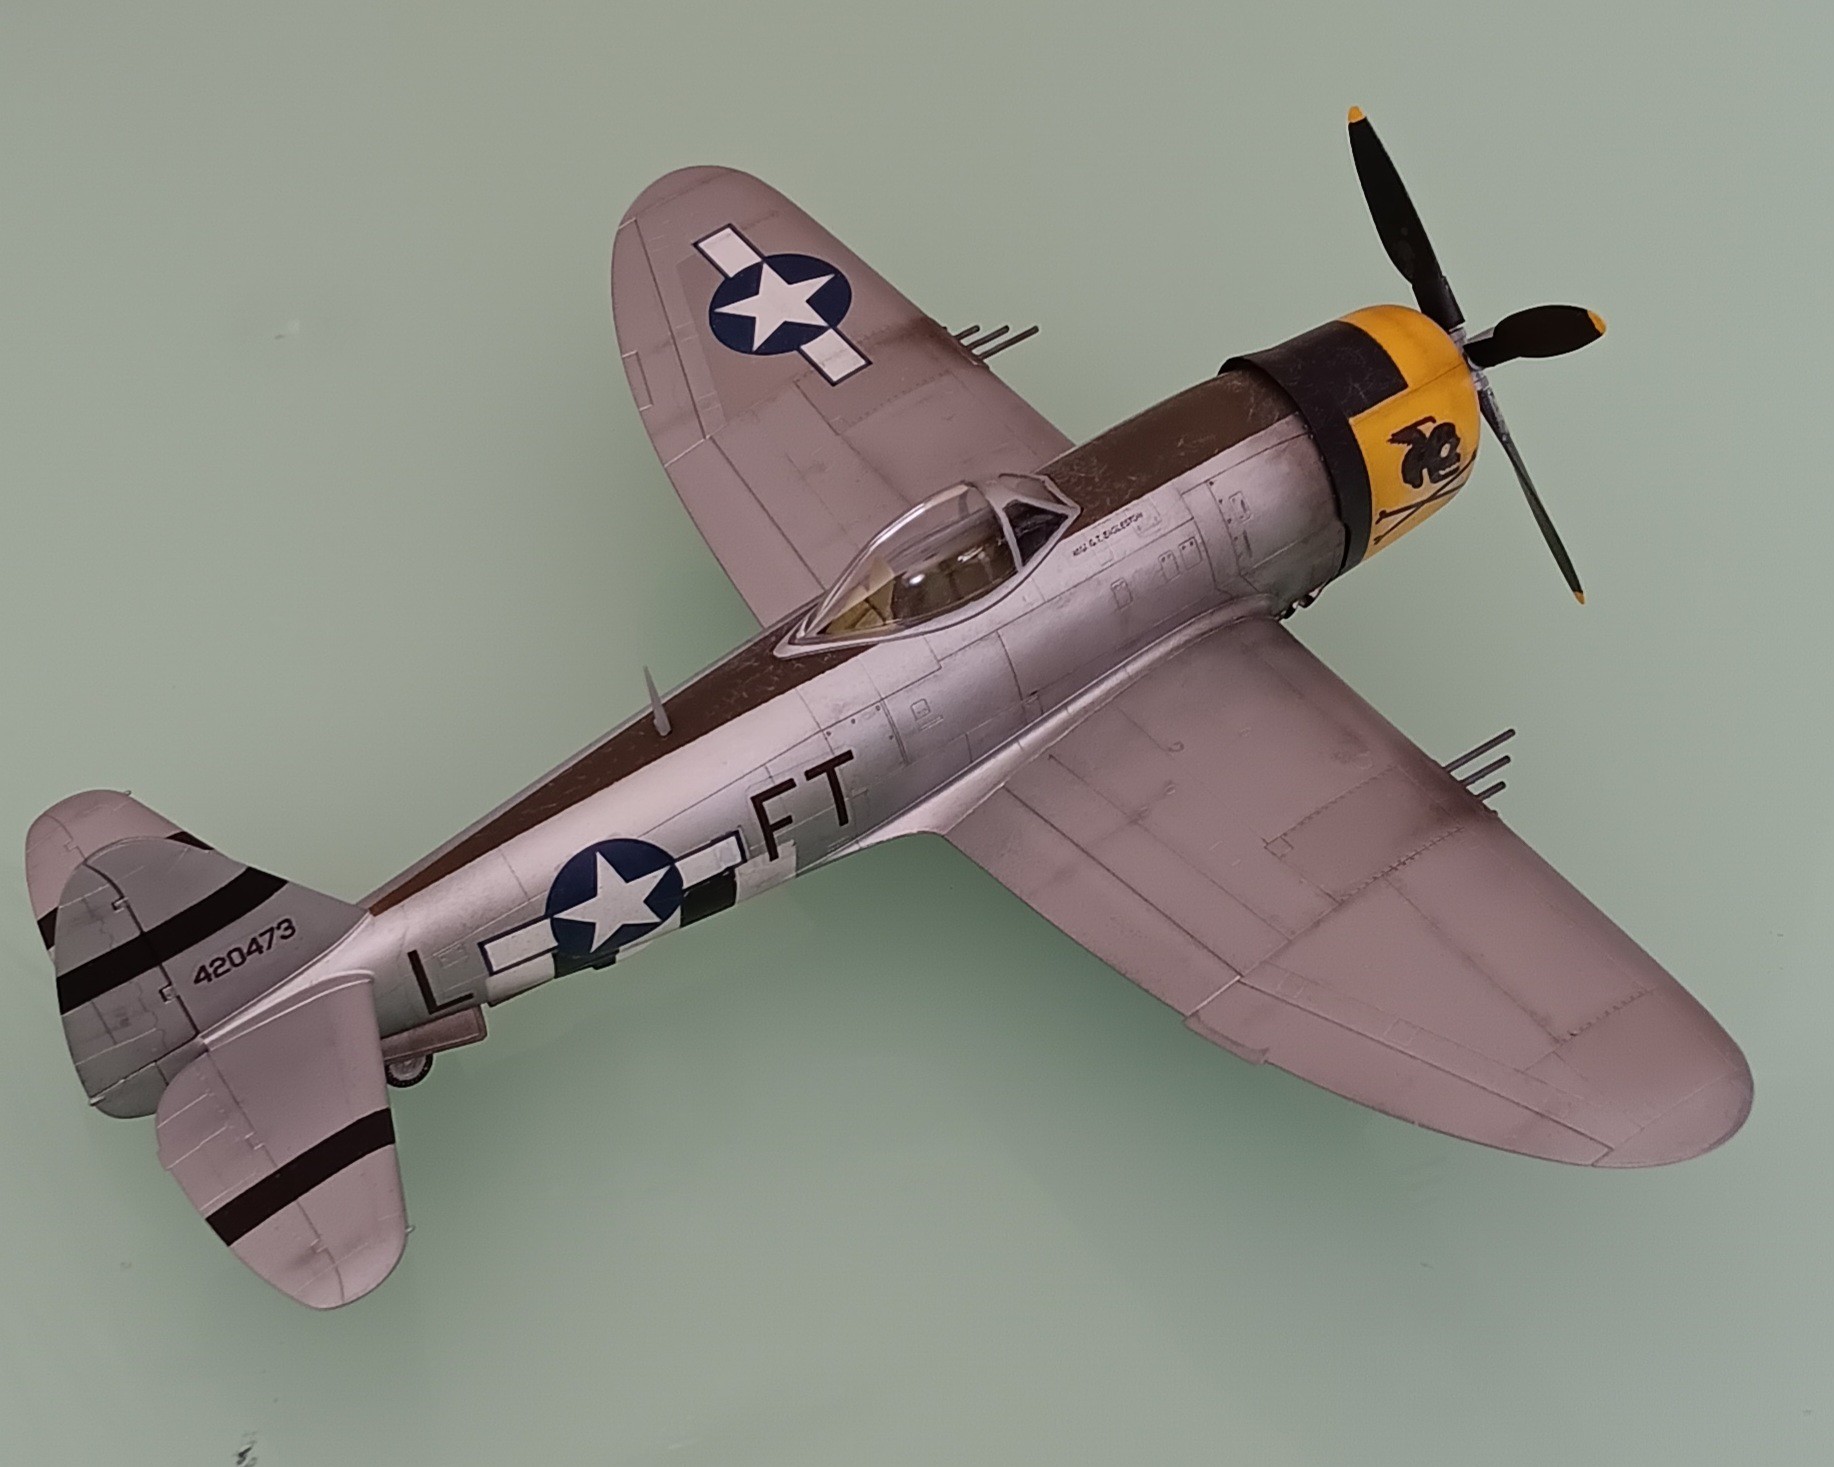
Painted the OD anti-glare panels on top of the fuselage, and the black stripes on the tailfins. Also printed the decals, gonna try them this week.

Looking superb, BK!
Gary
Hi Gary, thanks! Today I did the decals, and to my relief they worked pretty good. I soaked them for 2-3 minutes, then applied decal solution after they were placed, then finished with a coat of Quick Shine mixed with some Tamiya clear flat X-21. Not perfect, they seem on the thick side, you can see some of the clear edges, and there was some slight wrinkling on the curved front of the engine cowling. But I saved $25 plus shipping, so I am OK. Next is weathering and final assembly.
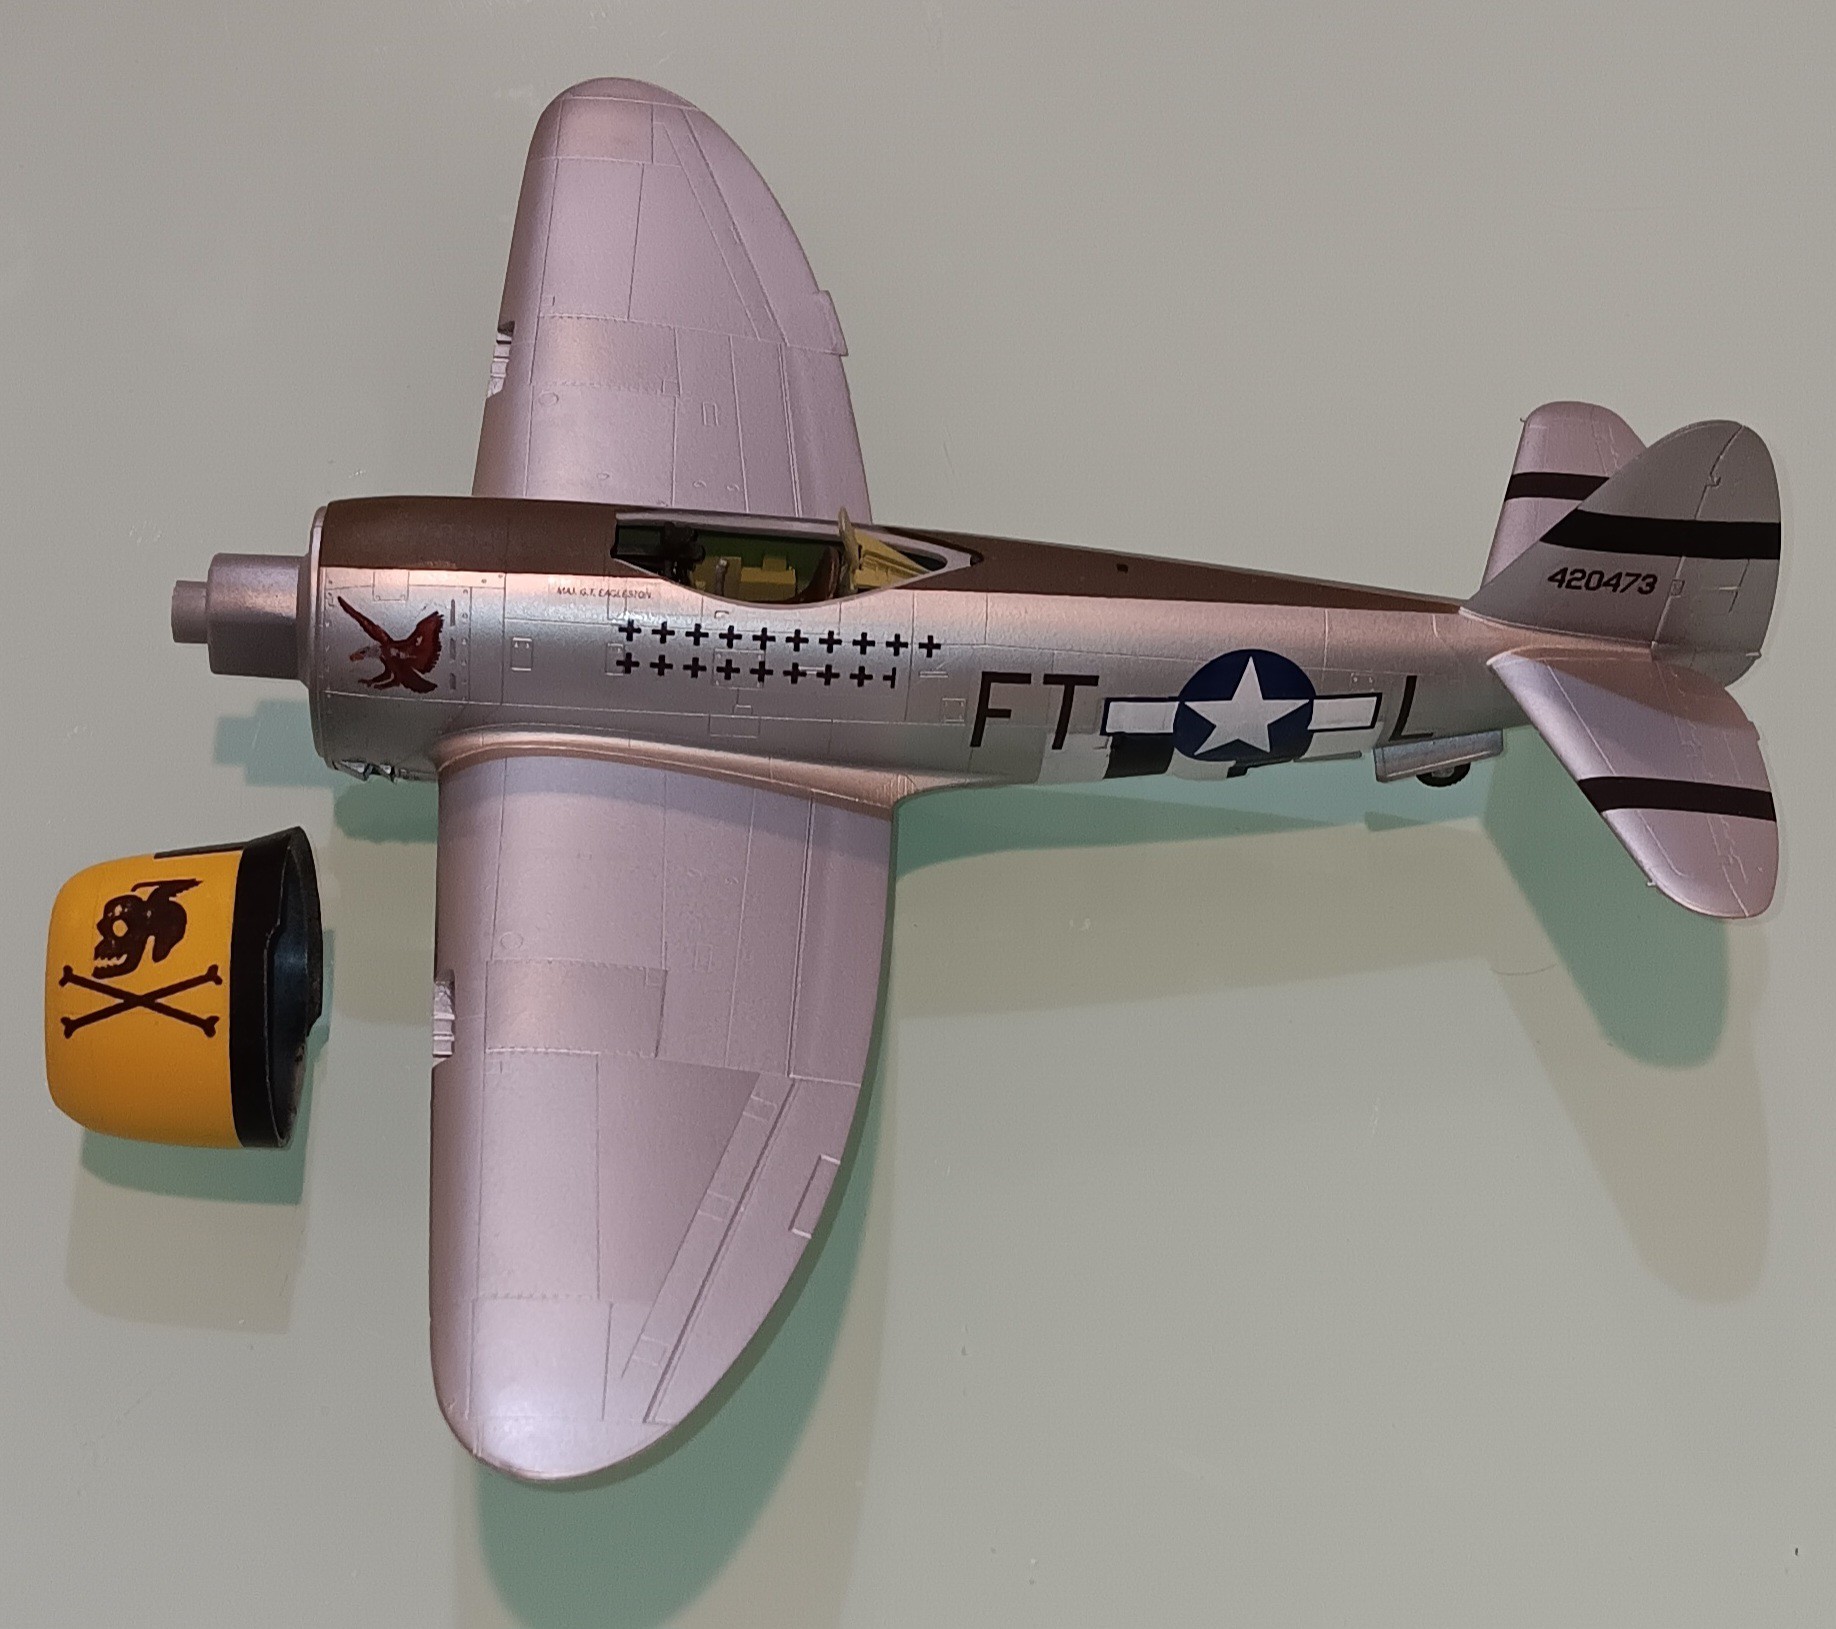
Here is a lame ass rookie mistake. I’m doing weathering and thinking everything is OK, then I noticed the skull on the right side is backward. The most embarrasing thing is that I actually applied the decal without noticing. I guess I was so preoccupied with the homemade decals and hoping they would work. I have to mirror the decal, print another one and reapply it. Live and learn.

The decals look great! I’m sure I would have done the same thing with the backward flying skull lol…
Another great looking build, BurritoKing! There’s a possibility you could save that decal and just flip it over. BlueTack is pretty good at pulling decals off, usually completely intact. You could then use a clear acrylic as an adhesive since it was reversed.
Hi keavdog, eaglecash867. Thanks for the kind words and advice. All the models in this forum are so awesome it’s hard to imagine anybody here making such a bone head move. And I never thought you could flip the decal over. I printed some extra left side decals already printed, so I took one and flipped it. Worked like a charm! Thanks again!
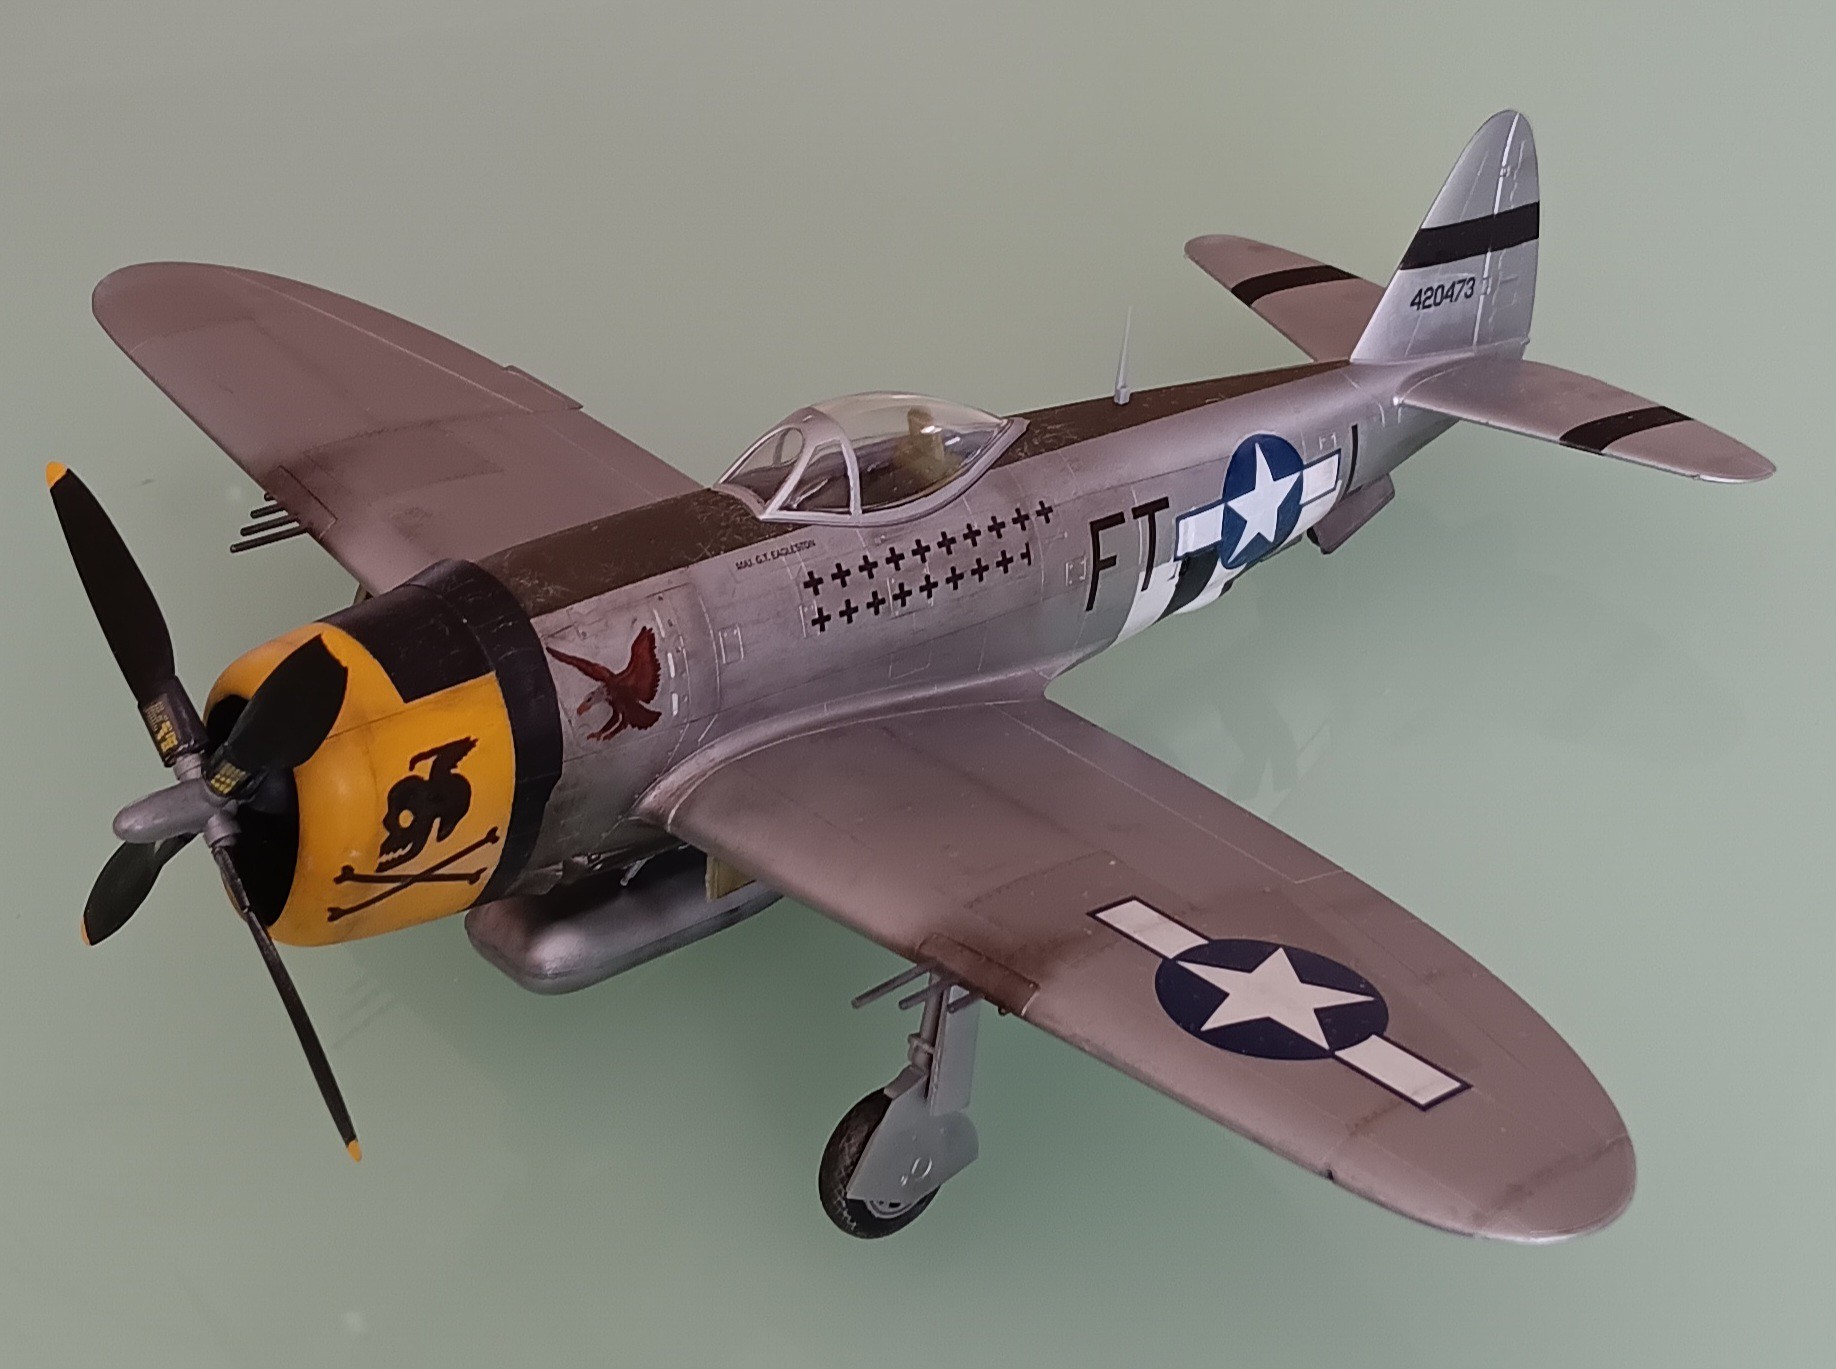
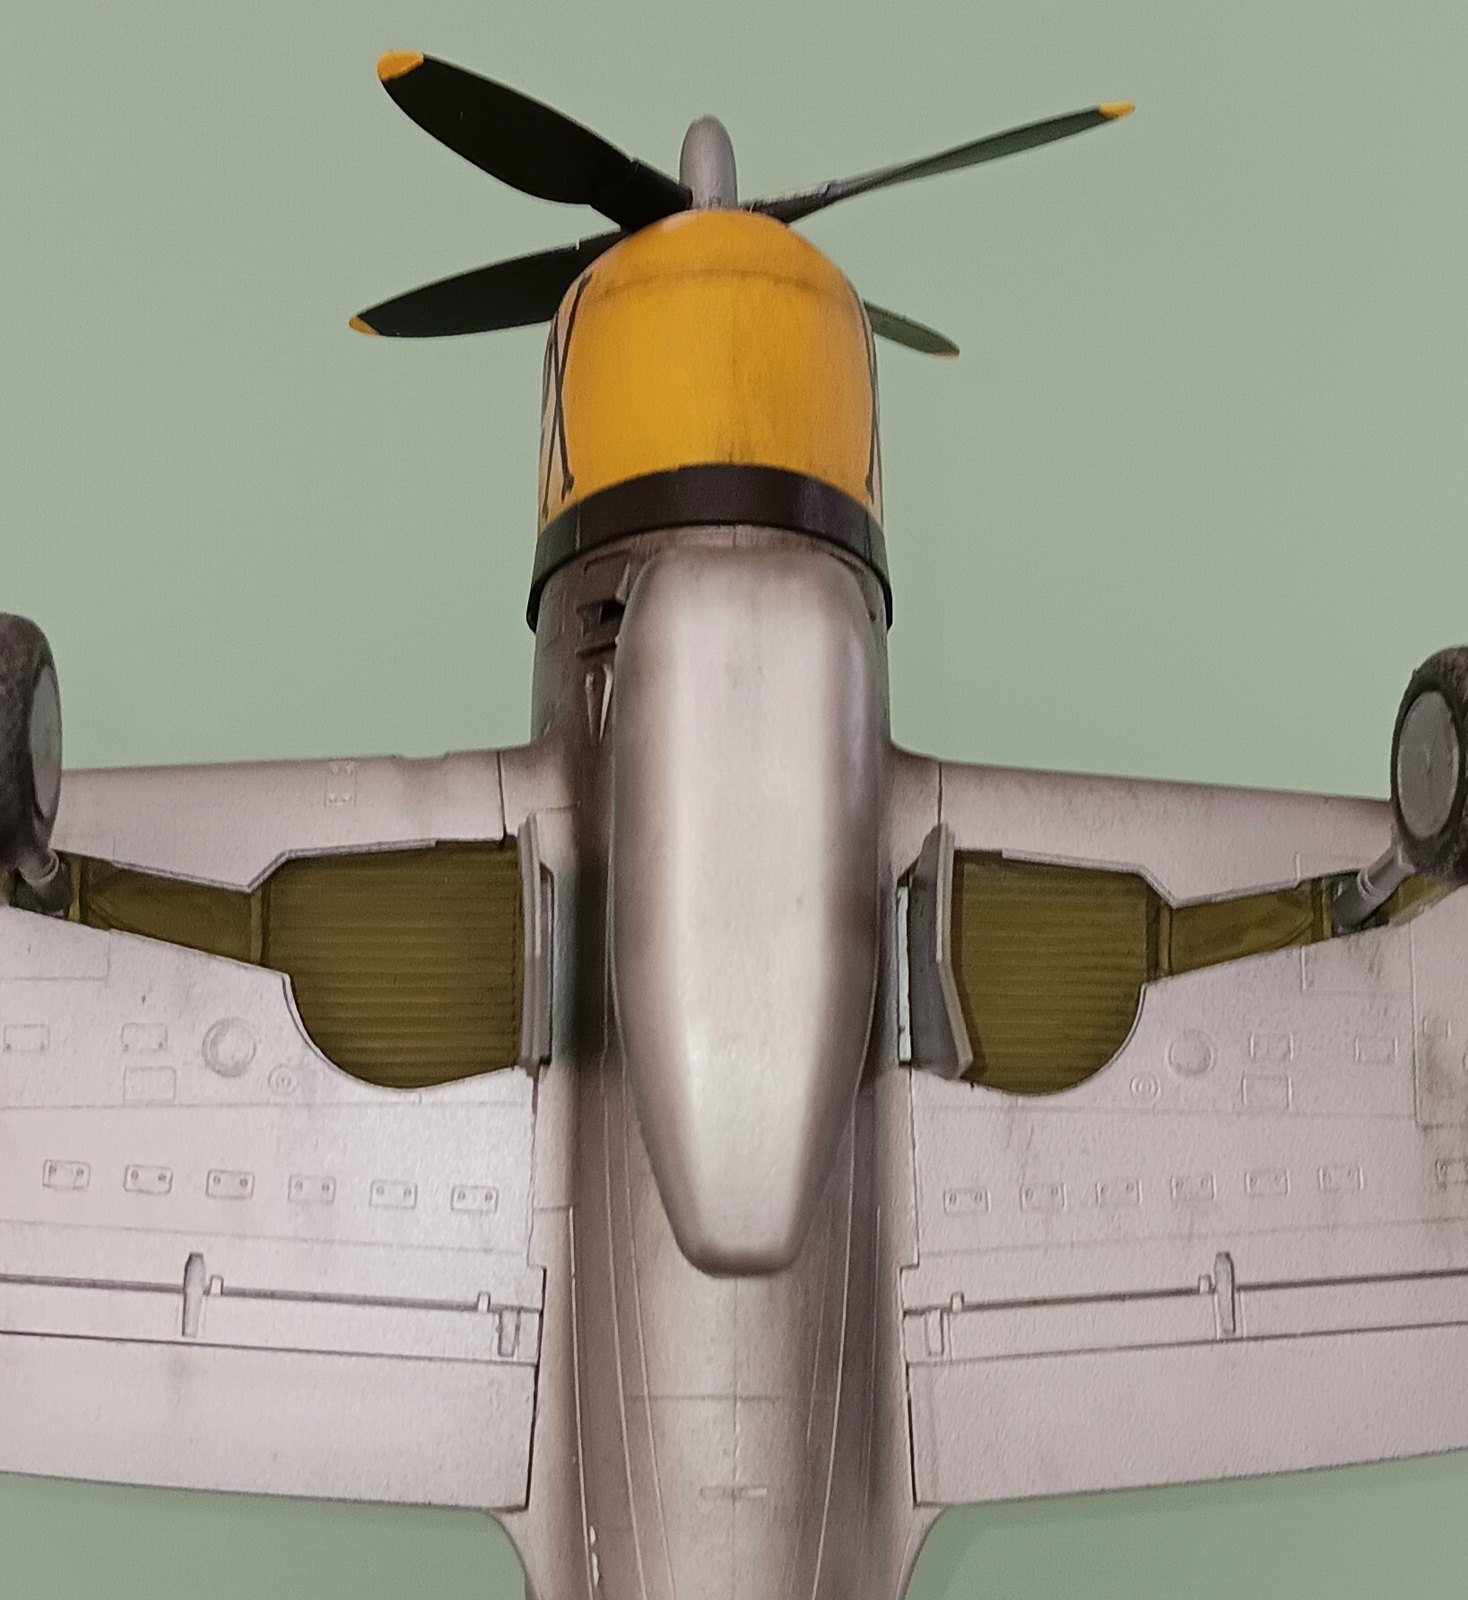
Another one completed. I think I am improving, but still so far to go. It’s a fun journey, which is probably all that really matters. I know real jugs didn’t have heavy staining from the oil coolers, but I think it looks cool on the model so I claim atistic license lol. Also the gunpowder stains are too heavy, but I kinda like it that way. And the Taniya makeup built up at the edges of the eagle decal, which looks lame. But from far away it’s not too bad. I avoided the decal at first, but the area looked too clean compared to the surrounding areas so I applied some. Next time I may try to use the airbrush instead. The staining around the cowling looks too heavy in the photos, but it is a bit less to the naked eye. Overall the Hobby Boss was fun and easy to build, I am looking forward to trying another one of their kits soon.


Awsome build! [t$t] [t$t] [t$t]
Stay safe.
Jim [cptn]
That’s not just the oil cooler shutters there, it is also the turbocharger dump gate so exhaust gases come out there except when those valves are fully closed. That’s only at very high altitude or low power settings. That’s why there is stainless steel on the belly aft of the dump gates.
Great looking model!
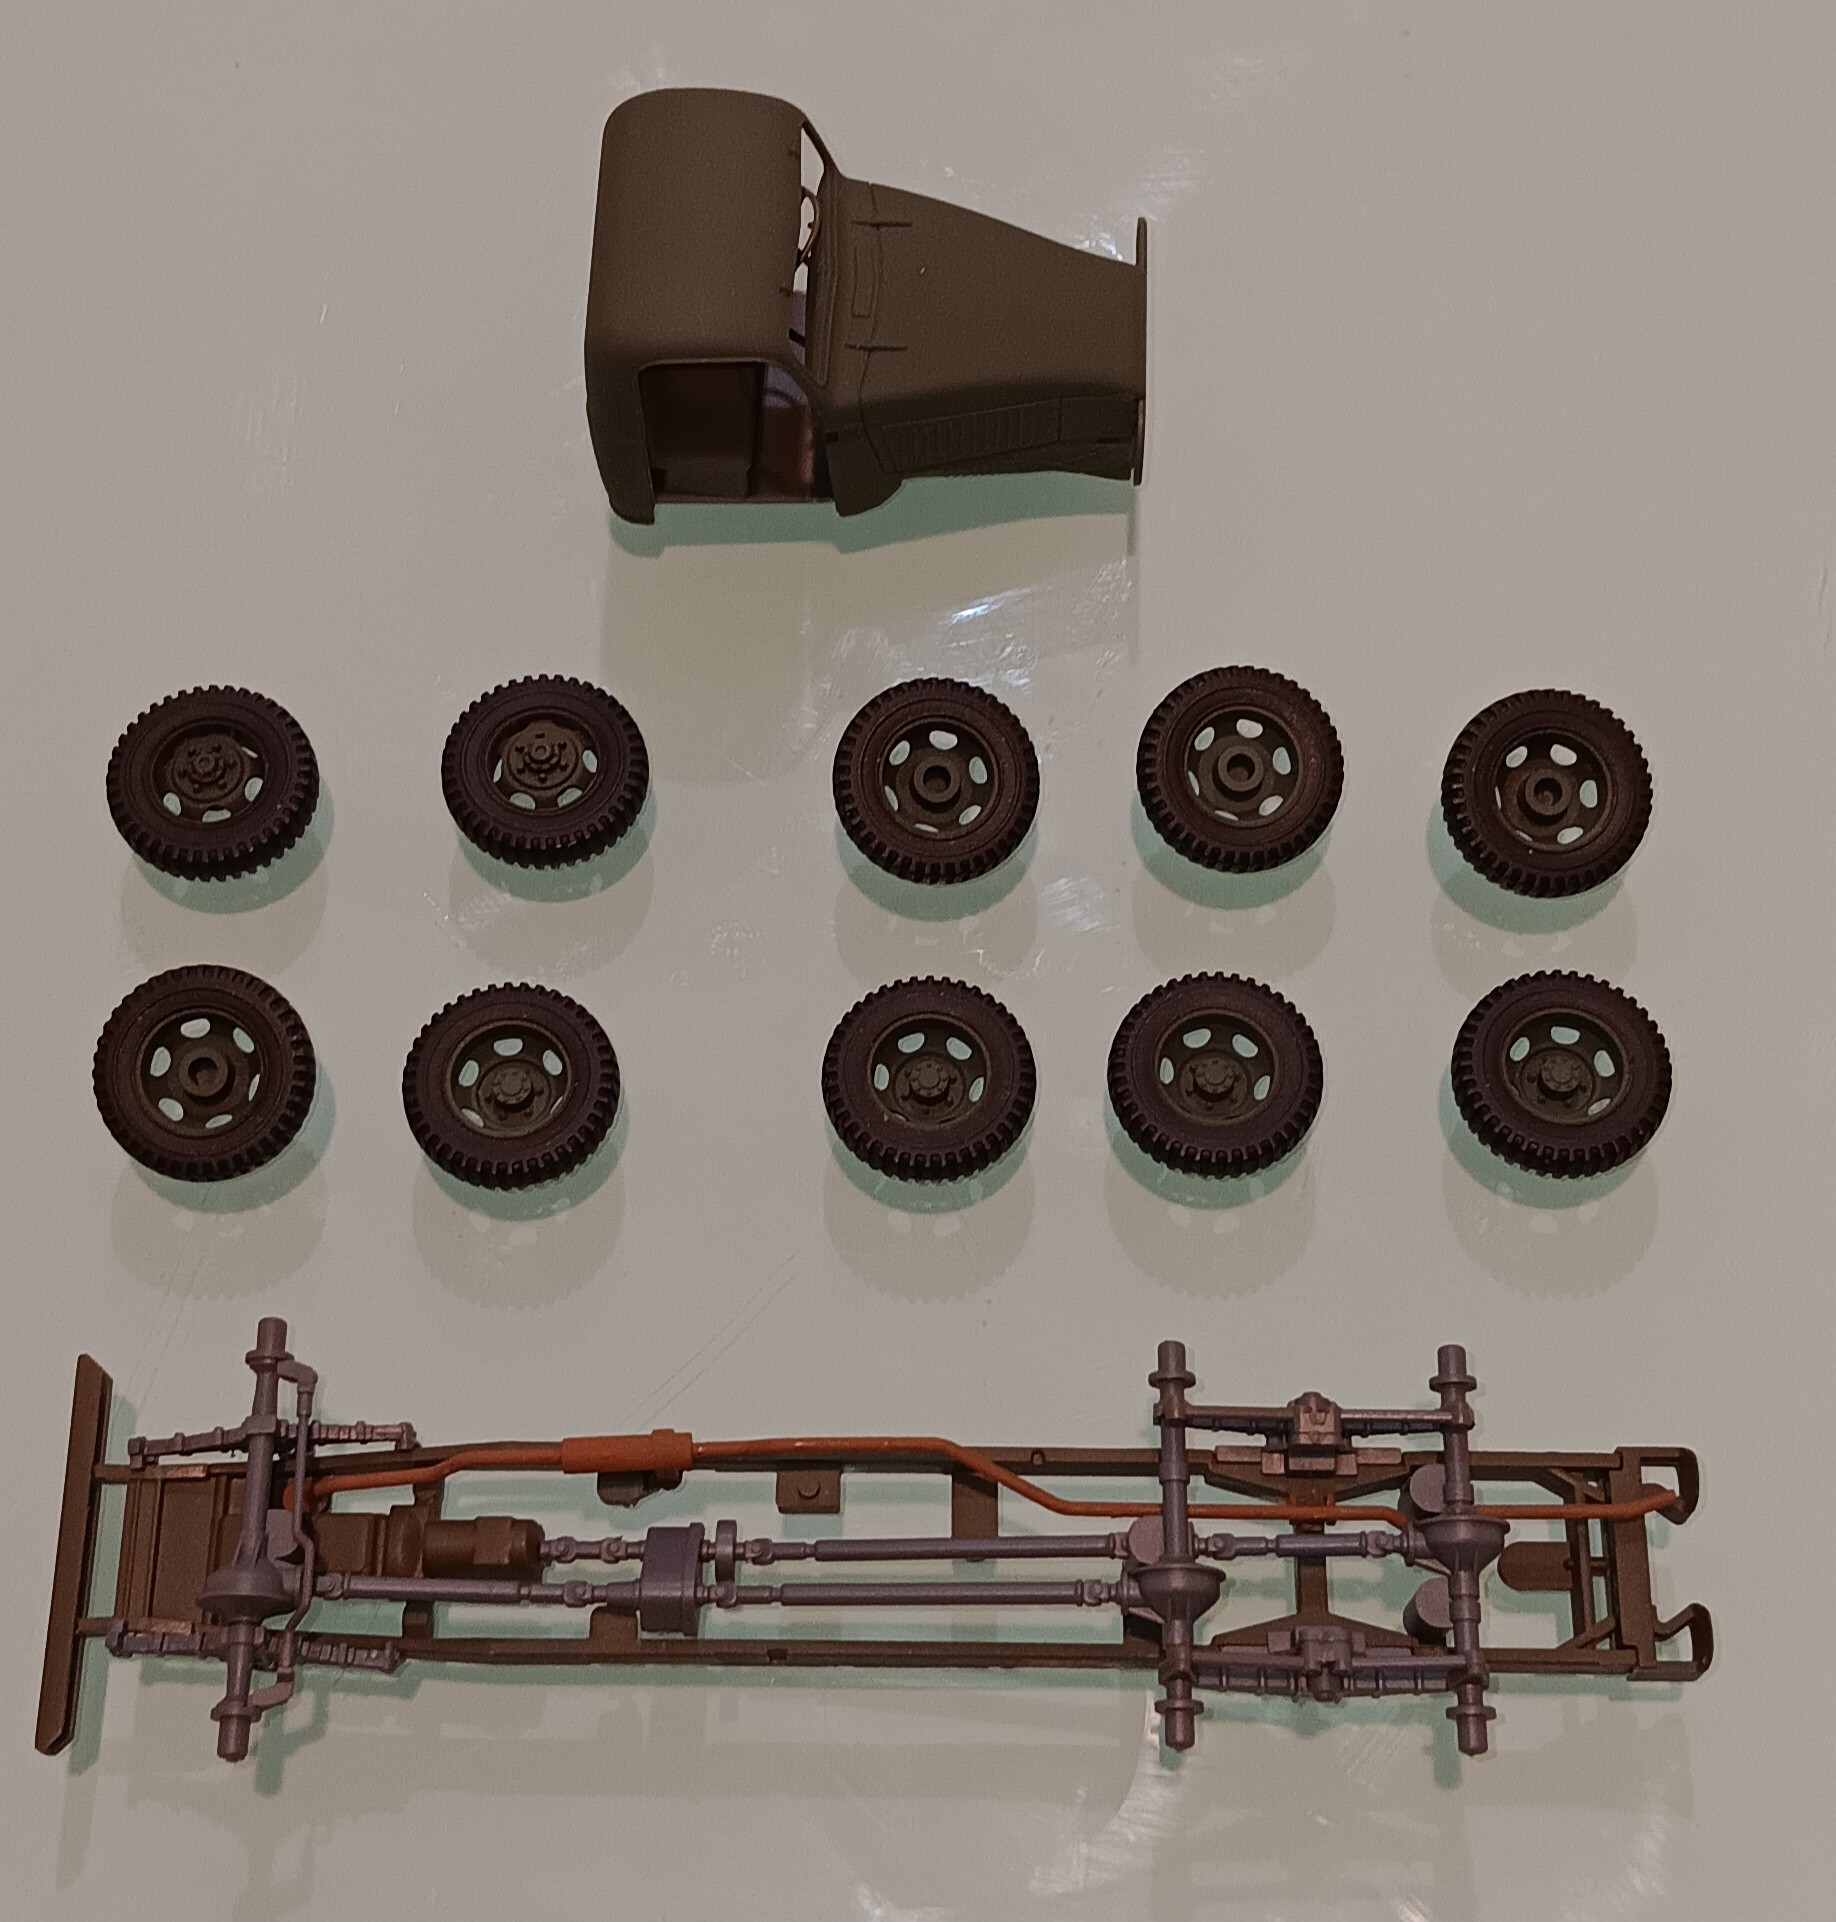
Hey fox and jeaton01, thanks so much for the kind compliments and interesting information. I feel better about the exhaust stains, and now I can even explain it to people who look at the model. Speaking of which, someone said since it is wheels down I should try a diorama. So I got the Tamiya 1/48 Airfield Fuel Truck. It is very small compared to the P-47, but it is very detailed with great fit and quality of the parts. It is a fun little build, I am taking my time with it.
It comes with two figures, one holding the fuel hose and nozzle and one with his arm resting on the fuel hose door. I am the world’s worst hand painter, even worse than airbrushing, but I will give a try to painting the figures. For the diorama itself, I am just thinking a simulated concrete slab. I am far too lazy for making buildings, grass, bushes, or dirt.
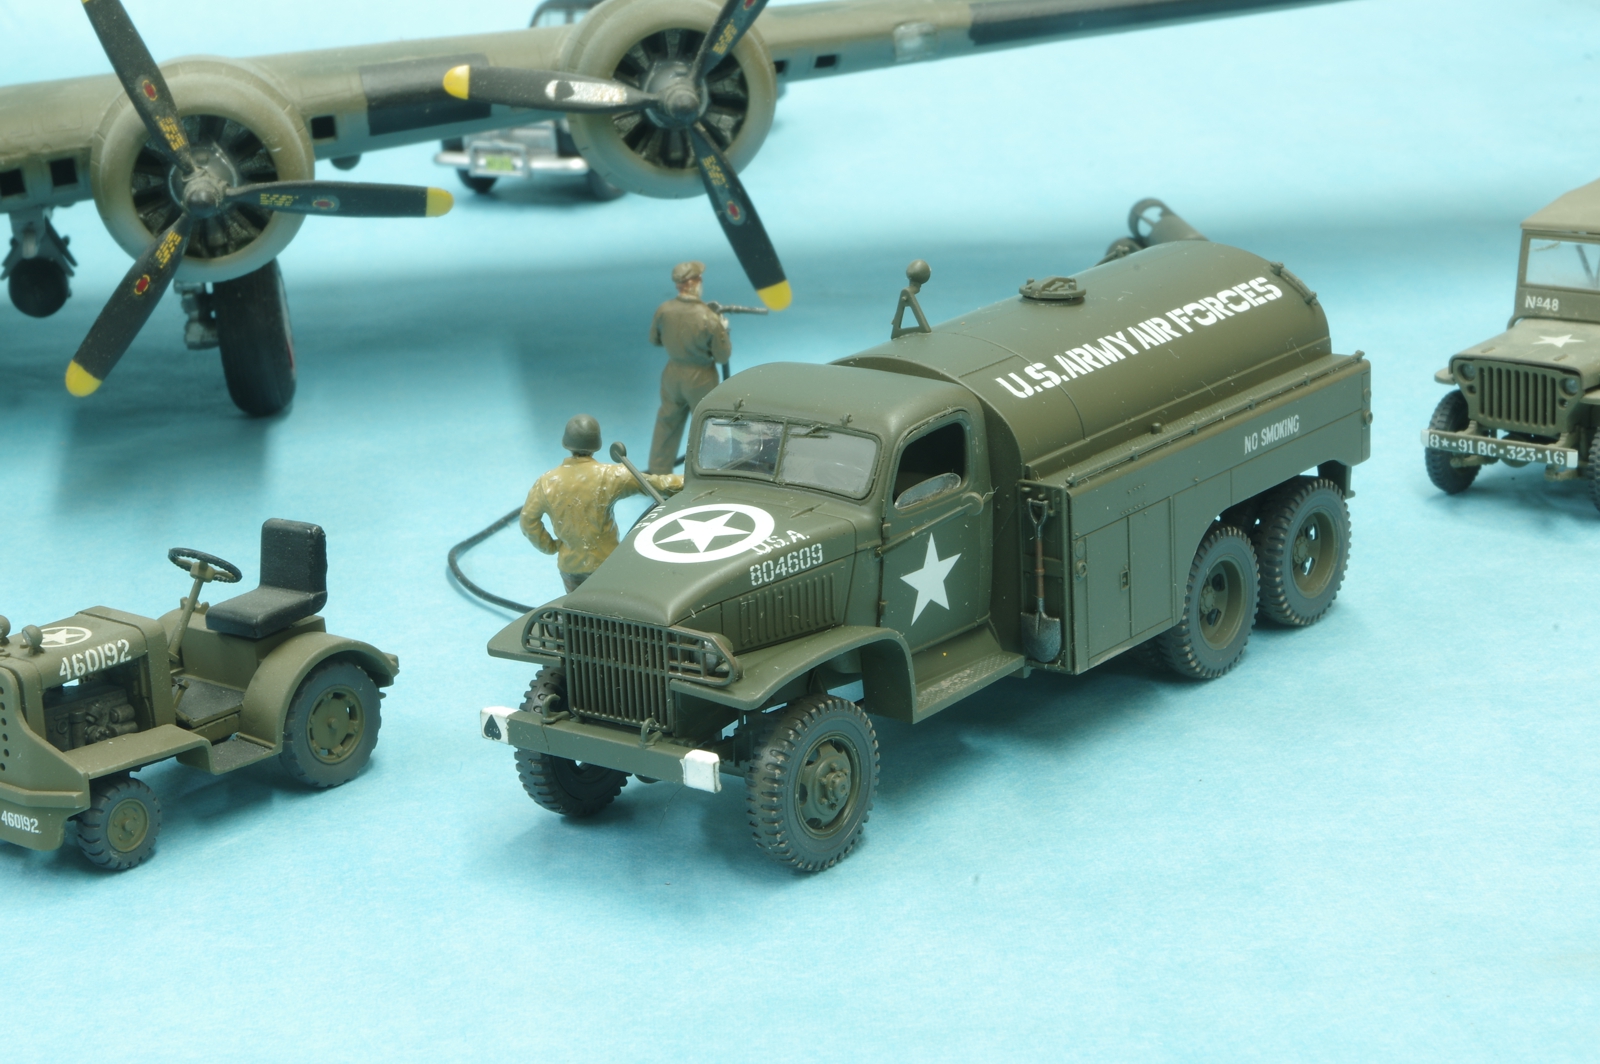
That truck is a great build. I’ve done one so far and have at least one more in the stash. I do believe if the scene is interesting enough people can enjoy it without focussing on my goofs!
!http://goldeneramodel.com/mymodels/armor/1gmcfueler/0181gmcfueler.jpg
Hi jeaton01, beautiful work and a very interesting scene! No goofs here. I love the detailing on the shovel, and also the partially rolled up window on the driver’s side. The figures look fantastic as well. If mine come out half as good I will be very happy. I’m still working on this truck, been really busy with other stuff.
Nice build, BK, and a great finish! Pretty good for a new guy [:D]
About the craft store paints-did you find the finish a little granular, and if you did, did you address it in anyway, such as buffing the surface to smooth it? I ask because I use craft store paints (eg American, Apple Barrel, Folk Art), among others, and I airbrushed them as an experiment. I found the pigments to be a little coarser than paints made for scale modeling, especially for use on aircraft. For armor, the texture wasn’t bad. I used a piece of coffee filter paper to rub the surface down a little and make it smoother. I’ve thought that I could mix a batch and let it sit for a while, for the larger particles to sink out of the liquid.
Your Jug turned out great BK! Really like the markings - I was considering doing his bird myself. I think your weathing on the natural metal finish looks great. Looking forward to your diorama
She looks great! Nice build.
Hi Baron, thanks for the kind compliments! For my recent P-38 Lightning I used Deco Art yellow for the nose and front of engine nacelles. It went on smooth by my standards, but I had trouble with coverage. I struggled to find the right amount of thinning and the right spraying pressure. Too thick and it would clog, too thin and it would run. I needed to thin it and apply several light coats to get decent coverage. It is smooth enough for my lower standards. Advanced builders would probably find it grainy. For the P-47 cowling I just couldn’t get the Deco Art yellow to look right. I ended up using Testor yellow enamel in the little square bottle, I think it was about $5 at Michaels, that worked a lot better for me.
Michaels also has a brand called Craft Smart, I have some in Spanish Olive which I use as zinc chromate. It airbrushes silky smooth by my standards, the cockpit below was sprayed with that, and Artist’s Loft black. I also used it on the P-47 cockpit and wheel wells. I also have Craft Smart in Graphite which I use for gunmetal, and Raw Sienna which I use for rust. I have had good results spraying and brushing those Craft Smart acrylics. These are about the cheapest Michaels has, $1.49 per bottle last time I checked.
I use Artist’s Loft black, white, and raw umber for washes and other stuff. I haven’t sprayed it much, but I think it would do good with some practice.
I used Folk Art metallic silver sterling and nickel for panel variations on NMF. The results were ok. I also use these for quick spraying on landing gear and other small parts. When all is said and done, I am willing to sacrifice some quality to get the economy and convenience offered by craft acrylics.


Hi keavdog, thanks for the compliments. Especially the weathering. I tried really hard to have good balance and not overdo this plane. Positive comments from experienced builder means a great deal to me. I hope you do this plane one day, I know it will be awesome! For the diorama I am probably going to do a simple concrete tarmac. I just don’t have the moxie to do grass, trees, fences, dirt, etc. I read another forum that had some simple and easy ways to do concrete. The thing that really terrifies me is painting the figures. My brush skills are pretty dismal, usually the canopy does a great job of hiding the pilot. But trying and failing is the only to get better, at least for me.
There’s a few companies that do either moulded or pre-printed bases
Check this out for tarmac: https://spruebrothers.com/cksc30030-coastal-kits-large-circular-display-base-airfield/