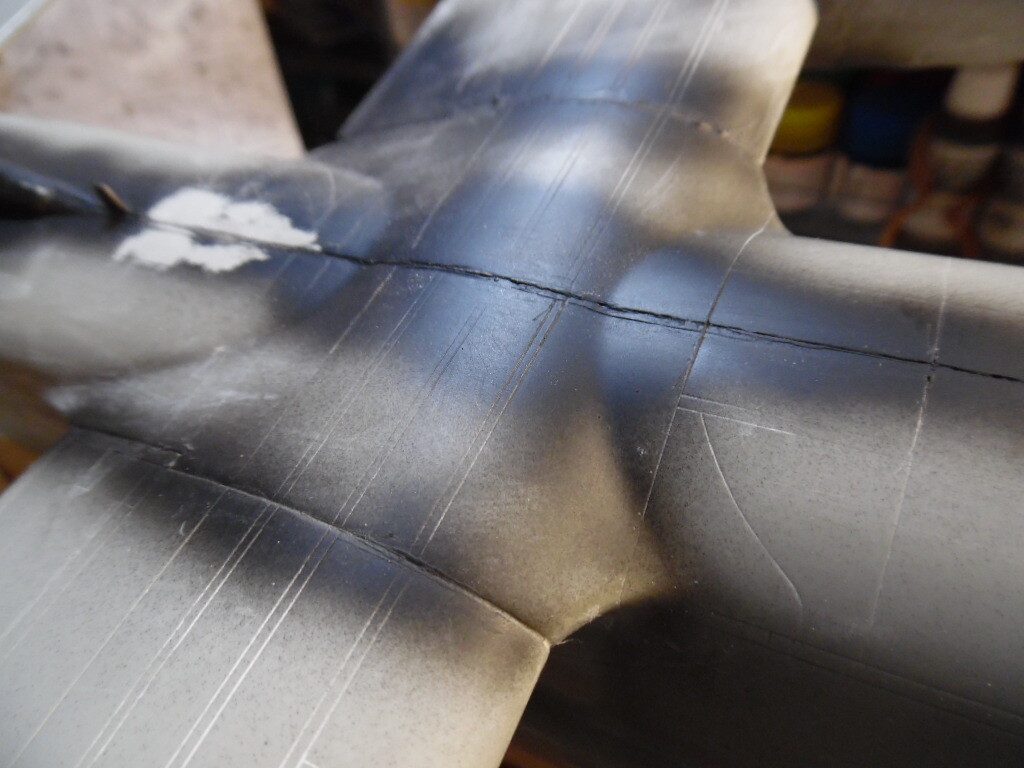
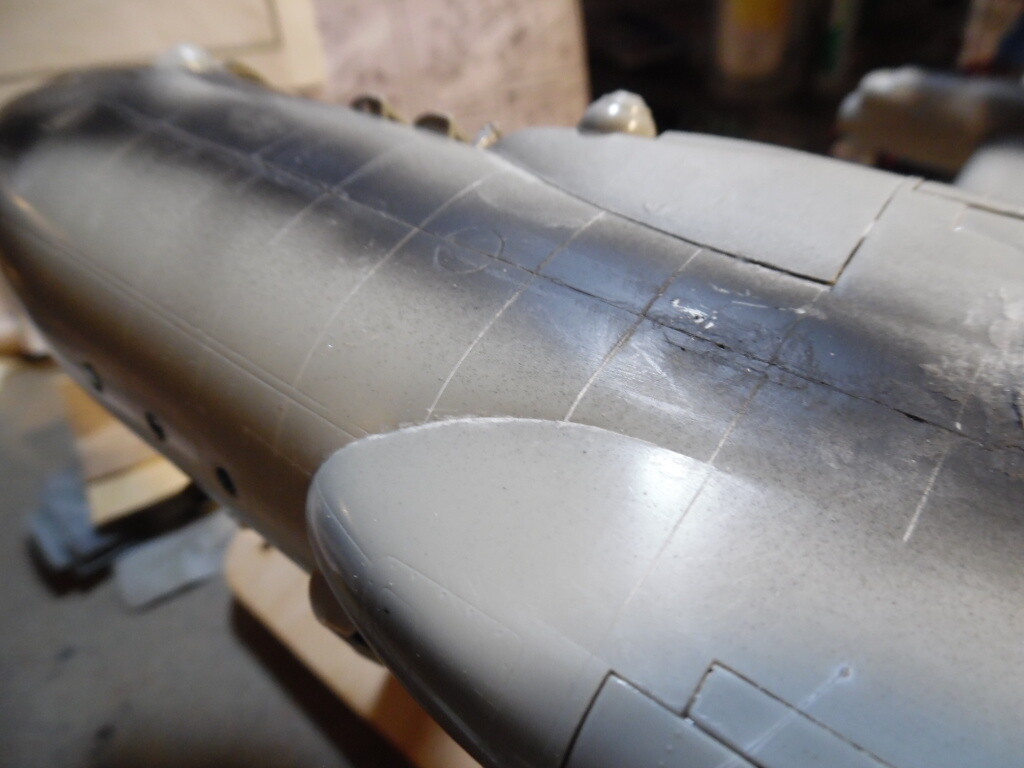
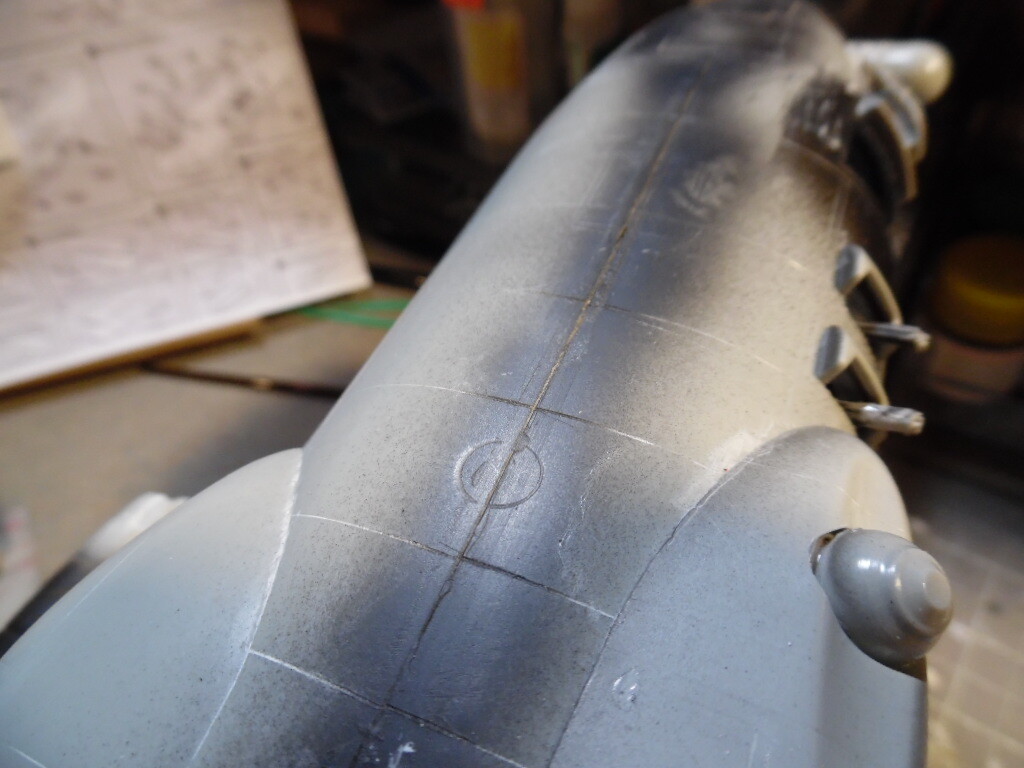
Okay, so I will have to say that filling in seams is a skill that I am still very weak on and somewhat hit or miss on getting right. For my 1/72 AC-130H build, I ran into an issue with the fuselage halves lining up, yet there were either slight gaps or a step. I tried to address as best as possible, yet with issues with the glue not setting it was just a clusterfudge. So regarding where I am at now, I figured a fresh set of eyes on this is the best. Does it look like more putty needs to be filled in and the panels re-scribed or does this look like a step in the join and it needs to be sanded down?
1 Like
First, use a putty that will not shrink much. I like Tamiya White. That said, the putty should always be higher than the plastic on either side to allow for minimal shrinking.
Second (and this is a tip I read in an earlier edition of FSM), mask close to the edges of the seam you are filling. This reduces the area the putty will be applied to, protects the surrounding area when sanding the putty and makes it easier to rescore any panel lines.
Third (my preference), use a sanding stick rather than a sheet/piece of sandpaper.
Fourth, spray the seam with a primer to check on your handiwork before any major painting. Repeat steps 1-3 if needed.
10 Likes
Okay, I can go back and redo the putty application. I believe my mistake was applying the putty and using isopropyl alcohol to blend the putty smooth while still wet. Lessons learned.
1 Like
I too have had putty issues. I’ve tried using various tools available on my bench, but the results have been less than stellar. I’m going to try these silicone clay sculpting tools from amazon for just under $6. Amazon.com: Yagugu Silicone Clay Sculpting Tool - 10Pcs Modeling Dotting Tool for Pottery Craft, Rock, Nail, Blending, Drawing
Saw a youtube video that demonstrated them, and they look promising.
2 Likes
Mr surfacer 500 works great and can wipe excess off with leveling thinner on a q-tip
Minamal sanding
3 Likes
I’ve had some success with perfect plastic putty. Wipes off with water
4 Likes
This guy is spot on with masking close to the line.
I would first fill with gap filling super glue then tape as close to the seam as possible.
As to filler you can also use spot putty for automotive dent repair.
2 Likes
I’d start addressing seams before this stage, during assembly. For a case like this, an aircraft fuselage in left and right halves, I would use liquid styrene cement, eg, Tamiya’s Extra Fine. I flow it along the seam, then apply enough pressure to extrude a bead of melted styrene along the seam. I use rubber bands, clamps, masking tape, anything to keep applying that pressure till the glue has cured. Then I use a knife blade to scrape that raised weld bead away, minimizing the seam. This makes it easier to address the seam as I proceed through the build.
I also like to use the kit sprue to stretch some pieces to fill the seam, then flow the liquid styrene cement over it. Again, this will melt and weld with the surrounding material, and make it easier to clean up the seam as I go on.
I like this method, rather than putty, because the result is the same material throughout, instead of styrene and a different material.
I do use putty, too, when necessary. I used to use the old Squadron white, till they changed the formula. I use Tamiya putty now. I tried Perfect Plastic Putty, but I found that it can reactivate with exposure to water, and it just didn’t seem as strong.
Hope that helps!
Best regards,
Brad
4 Likes
Just to clarify, the the seams were addressed during the assembly, yet I believe the process of using 91% Isopropyl alcohol to blend the putty took too much off. As for the glue, well this plastic was so resistant to Mr. Cement S glue that it literally would not bond. This showed up with building the cockpit and after a couple of days of drying the pieces would still fall apart. I had to go with Testors glue from the tube and in some places superglue. Occasionally Plastweld worked, yet in some cases it didn’t. This has been by far the weirdest build for me.
1 Like
As a side note, as always thank you everyone for the comments and tips. it is very much appreciated and I am thankful for everyone sharing their experience.
2 Likes
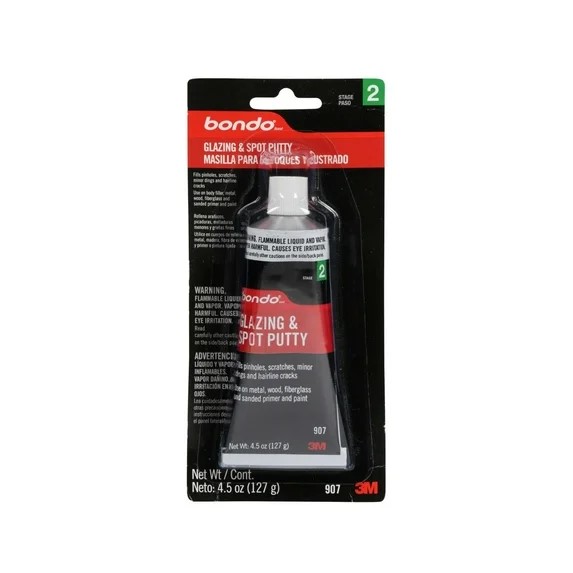
I’ve been using Bondo Spot & Glazing Putty for years to fill in my seams. You can sand it smooth or use Q-tips dipped in acetone (fingernail polish remover) to smooth out the seams.
Rob
Iwata Padawan
3 Likes
gag, choke, wheeze, cough ![]()
I used to use that Bondo putty long ago. But now, never again. That stuff stinks to hell. Even when I still had the windows open and had good ventilation. Bondo is some nasty stuff. ![]()
1 Like
Hmm, never noticed the smell and I’ve been using it for years.
Yes, it contains Xylene and Acetone, but so do many other putties.
What’s your suggestion for a replacement/suitable substitute?
Rob
Iwata Padawan
1 Like
Replacement? I’ll try TAMIYA putty, Squadron green putty, or Perfect Plastic Putty. But I will never go back to using Bondo. Period.
1 Like
I just got a tube of perfect plastic putty in the mail today!
1 Like
Tamiya smells exactly like the Bondo stuff. I do find that the Bondo tends to shrink more than the Tamiya, but both will shrink. I’ve been successful with the masking tape on either side of the joint to get some relief above the surface to help in many instances.
You may also want to try ‘sprue goo’. Mix some sprue tree bits in acetone (or Tamiya Extra Thin Cement) into a paste that you can fill holes and such with. Then maybe finish up with the putties when you get close to smooth on the part.
2 Likes
I had similar issues with an Italeri C-130. Too late for me, but a friend suggested cutting the locator pins off and taping the fuselage together, then using Tamiya fine to join the seams.
He also suggested I use the flexifile sanding strips to avoid flattening the top of the fuselage. It worked on my next build (Monogram F-102).
3 Likes
I usually make/use a “sprue goo”, apply, clamp, let it set. If that does not deal with things, I use tamiya easy sanding superglue on top. After drying, it handles a lot like polystyrene. With any classic putty, i think i tried all, i never got a uniform look and always ended up with “phantom” seams: no gaps or depressions, just a different “look”. And when re-scribing, the easy sanding glue is not as brittle as some of the putties, so you get crisp restored details…
1 Like
Flexifiles are a perfect tool for curved surfaces.
Rob
Iwata Padawan
2 Likes
I’ve had much success with Milliput. Admittedly, however, this still relative newbie hasn’t tried much else. One of these days, I intend to make and experiment with sprue goo.
Cheers,
Mark
1 Like