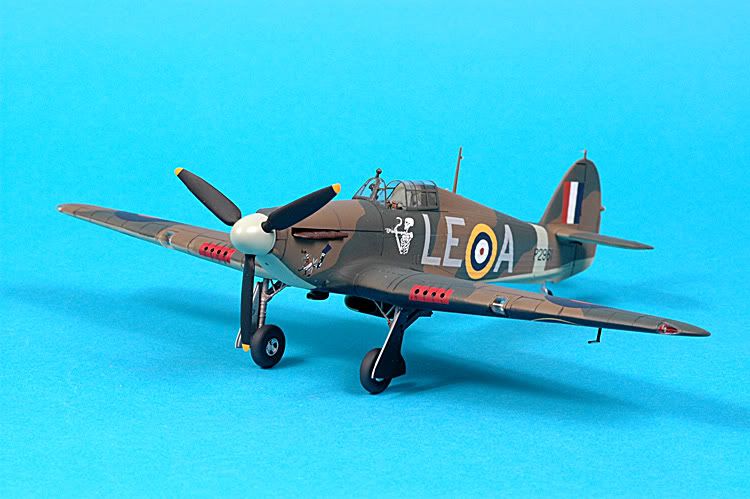
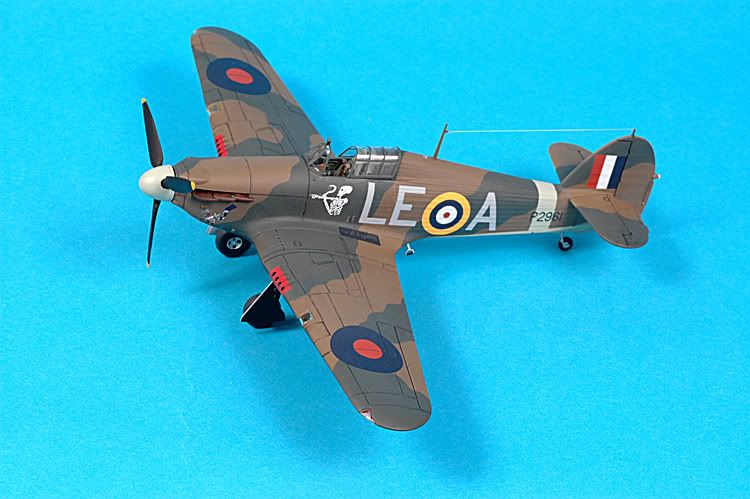
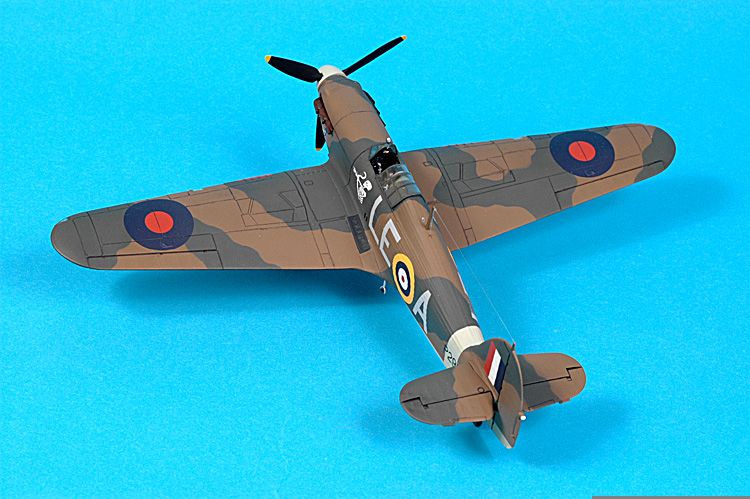
This build was recently completed for the Battle Of Britain GB, so thought I’d post it here as well for those members not following the GB Thread. The model depicts Willie McKnights’ mount as it appeared in December 1940. McKnight was the RAF’s leading Canadian ace with 17 confirmed & 2 shared victories. He was KIA flying this aircraft on January 12, 1941.
The build used After Market resin replacements for the seat, armor plate, exhausts & wheel bay from Ultracast, Vac Form canopy from True Details & decals from Aeromaster. Painted with ModelMaster Enamels.
Rick that really looks nice. Question though, I built one a few months ago but it was from hobbycraft. It looked to me like the propeller tips were “reveresed” compared to the way the prop spins. yours look the same, kinda taperd on the trailing edge if rotating and straight on the leading edge. I thought the hobbycraft was just inaccurate but maybe not? One thing for sure, your tips are not as exaggerated as mine was Does that make any sense?
Rick, it’s beautiful, and up to your always high standard. I have a question too: I’m having to start over after my Hasegawa Hurricane Mk. IId began to fall apart as the plastic began to crumble away piece by piece (still a mystery). Utterly bizzare and some people may remember my mounting confusion and hysteria as this unfolded. But a friend sent me a new kit from his stash, I salvaged my Eduard-enhanced color PE cockpit and now I’m starting over.
Question is, I tried the method of taping down the two parts of the fuselage halves to glass, then running some Tenax along the seam, rather than assembling the nose and the rear fuselage separately and joining them later. Well, I still got a misalignment. How did you do our fuselage? I sure don’t see any sign that it has a seam funning all the way around just ahead of the windscreen.
Oh, and I also have the True Details canopy (as well as their resin wheels, and some of those great EZ Mask pre-cuts for the canopy framing and wheels). Anyone planning to build this kit be warned: The model has a great cockpit right out of the box, but the thick, one piece canopy provided by Hasegawa will all but hide it. And it can’t be cut apart because it;s to thick to fit over the fuselage spine, so spend two or three bucks at Squadron or Falcon and get the clear vac-formed canopy for this kit. And they send two, in case you’re a klutz wth sharp instruments like II am.
Great work, Rick.
TOM
Thanks everyone for all the comments, much appreciated.
IronBrigade, The panel lines were enhanced with acrylic washes over Future.
CState Ram Fan, The prop is correct to prototype. The kit assembly is fool proofed, so I know it’s not on reversed [:)].
Fred, After spraying overall Dark Earth, the masking was done by cutting the camo pattern from card stock , placing it on the model with double sided tape & spraying the Dark Green.
Tom, I assembled the front fuselage sections by applying a little CA only on the tabs that hold the front sections to the main fuselage. Held the assemblies down on a flat surface until the CA cured. Tweaked the fit by calbrated eyeball & ran a small amount of Tenax7R on the inside surfaces. I still had a very minor mismatch on the top of the mating cowl surfaces, but it was easily taken care of with a sanding stick.
Chris, The overall build is typical Hasegawa, which means very good. Only two trouble spots are joining the front fuselage sections to the main fuselage halves and the underside join between the wing & fuselage.
A very clean build Rick, super job on the hard edge and decaling. Panel lines are a little stark for my taste, but that’s just me not you. Great effort and a real gem for the shelf.
Very, very nice Rick! Excellent work. I really like the markings you chose. Did you have any trouble getting the decals to lay down on the fuselage? Also, I’m assuming that’s RAF sky underneath? I’m almost finnished painting a Spit with the same color scheme.