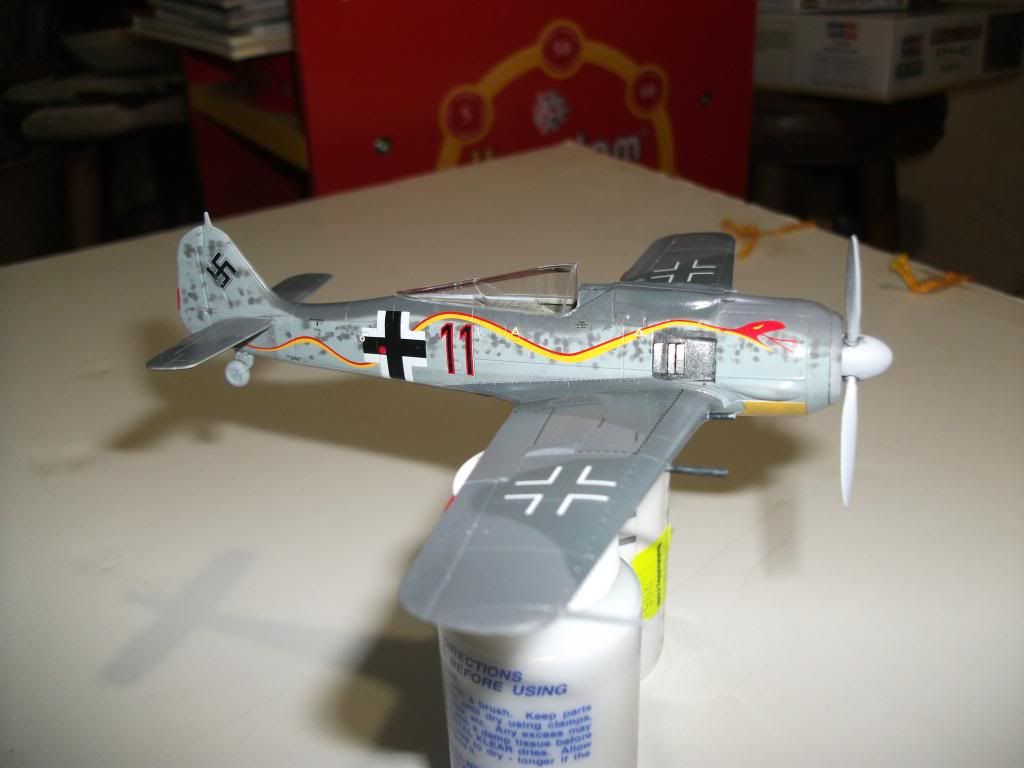
It’s about time I got around to sharing some update pics. It’s been slow progress lately but some progress nonetheless. I added a dusting of ISO thinned Tamiya Buff. Then added the exhaust stain using Tamiya weathering pastels. Just down to the last few bits. Weathering the bombs, gluing on the landing gear and adding the antenna. Also, some added effects to the guns.
Joe, that is a beautiful paint job, absolutely beautiful! That was great perserverance on the repair work. I can’t honestly say I would have stuck with it; I would have most likely tossed the whole thing out of frustration. [bnghead]
Those are some (of the many) things I really need to work on with my modeling; my patience and persistance.
Allen, I greatly appreciate your kind words. Thank You. There is no doubt that this hobby can test your patience. Trust me, I was close to tossing in the towel, sort of. I had purchased another kit just like this one and was on the verge of gutting the cockpit out of the old one and starting over. But. after I had stepped away and taken a “time out”,I simply began to formulate options for repairing it and to just give it a try. After the second go around though my pride came into play as I was not going to be deterred. I was bound and determined to give it my best effort There is an old adage that I often apply to my life, " It’s not about the mistake but, rather it’s all in the recovery". Although it was very costly time wise I can honestly say that, although not exceptional, I am very proud of the work I put into it and the resulting outcome. In the whole process I came away having learned some new skills and techniques. There is nearly always a solution as long as I apply myself to acting on it.
Props to you Joe! Like has been said, your perseverance on this build has to be commended. That finish looks better and better every time you post new pics! I am not sure whether I would have been able to resist introducing it to Mr. Mayhem had it been mine and that paint lifted like it did.
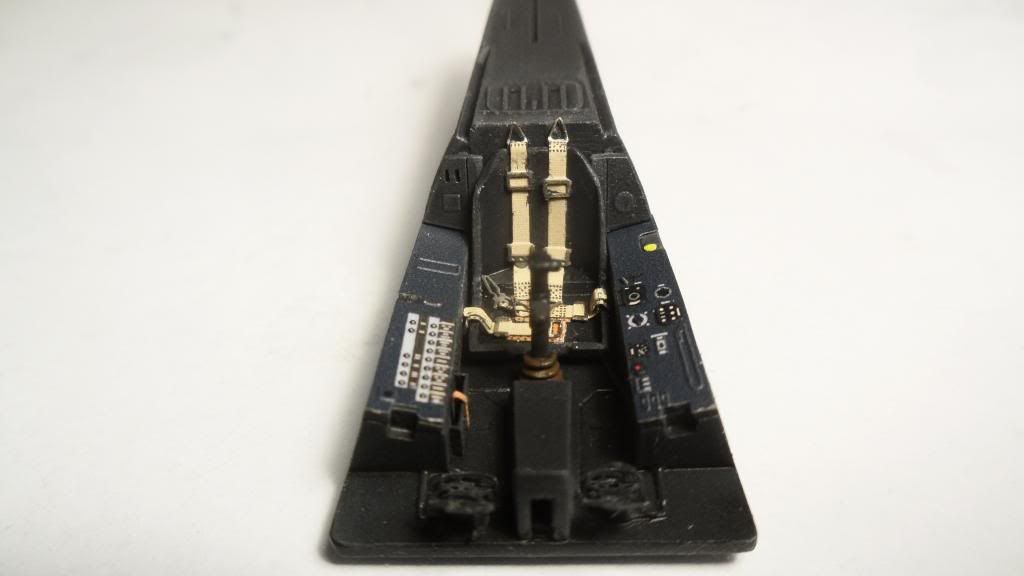
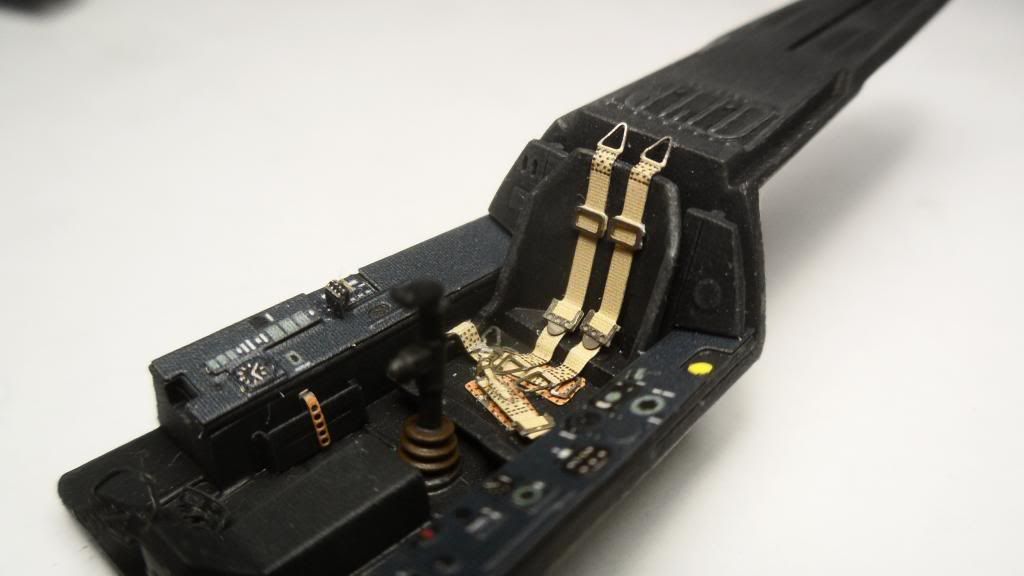
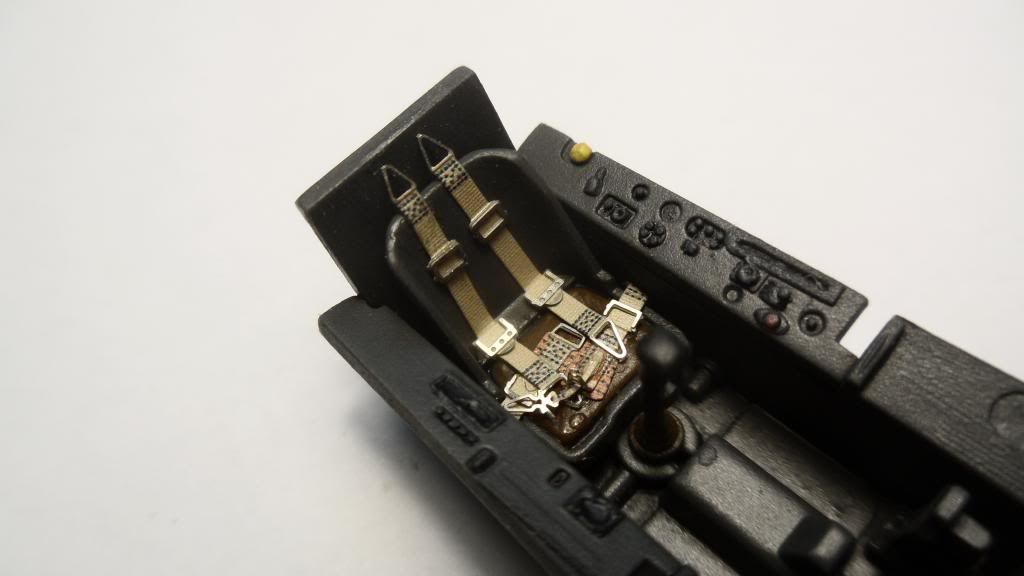
Ok guys, a short update. I started messing around with the PE seatbelts. The seatbelts for only two 190s took me 4 hours (and a lot of swearing), but I think they look OK.
I had to do a lot of touch-up work on the seat after finally getting them to settle down without looking too awkward.
My second attempt looks a bit better, but tested my patience almost as much as the first one:
After that frustrating experience, I decided to try assembling the HGW belts and I’m having a blast so far. Since I know HGW’s seatbelts, I’m starting to hate PE belts. Let’s compare my thoughts about them (I’m referring to complicated belt designs like those on the 190 here):
HGW:
They assemble like the real deal, so they look like the real ones
The material used lays down on the contours of the seat without any problems
a small dab of superglue on each end is enough to hold the belts in place
Eduard PE:
They lack a bit of detail in some areas (but still look good nonetheless)
Getting the belts to lay down on the seat is a royal pain (that’s what took me almost 3 hours today)
From now on it’s only HGW belts for me. I really like working with PE, but seatbelts are just not compatible with PE if you ask me…
Clemens: Despite your struggles with the PE belts you did a fine job of making them look quite nice. I agree that PE seatbelts can be unwieldy to install. I find that I have gravitated away from them myself. I now prefer resin seats with the seat harnesses molded on. But, I have a couple of sets of HGW seatbelts in 1/48 that I have yet to use and I am definitely looking forward to putting them to use.
I’ll echo what Joe said on the seat belts there Clemens. That’s a really good job on those things. How folks can make them lay naturally is pure talent. I’m looking forward to trying a fabric set from Eduard in my future builds to help out with that.
Thanks a lot guys! There’s still 2 more sets of PE belts to install, but then I’m off to the HGW belts [:P]
I’m so glad I decided to use extra thin superglue for those belts. It just makes it way easier to “remove” the glue visble on the seat by applying some paint with a fine brush. It doesn’t look perfect, but I guess it’s good enough…
Thanks, I’ll look around, maybe I can even order them from my LHS. I am not a fan of the PE ones,[bnghead] put a set in one of the last 190’s I did and really didn’t like it, to much bending to try to get it to fit nicely in the seat.
Almost done with my 1/72 snake head 190, so I will be pulling out it’s bigger brother snake head this weekend to continue working on it.
Clemen’s, I think your a bad influence, [:O] I think I’m going to pick up a Hasegawa combo FW190 set in 1/72 scale!!
I approve of your latest editions,[Y] I was just looking at the 1/32 one Tuesday at my LHS, I have no desire to do 1/32 scale but it is a nice looking kit. the other 2 I would love to do as well. really like those big bombs underneath.[:D] Right now I’m just going to concentrate on the 2 snake head 190’s I’m doing,[bnghead] then look in the stash to see what one to build next, maybe the blk/wht striped one, can’t remember off hand what squadron it’s from.