John, your snake motiff is looking really nice. Will this bird have the rocket tubes underneath? Seems like I read they were very common with this group?
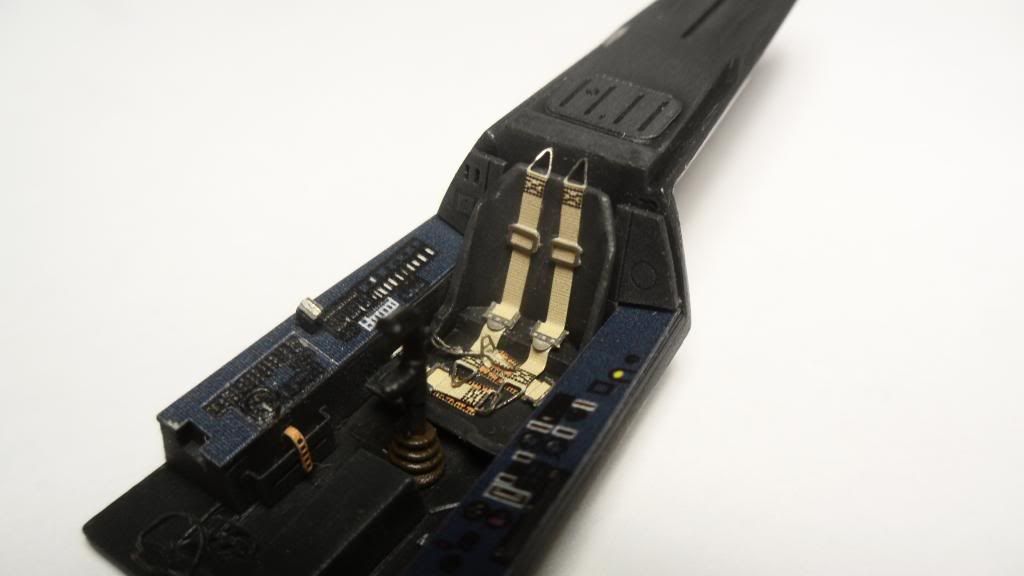
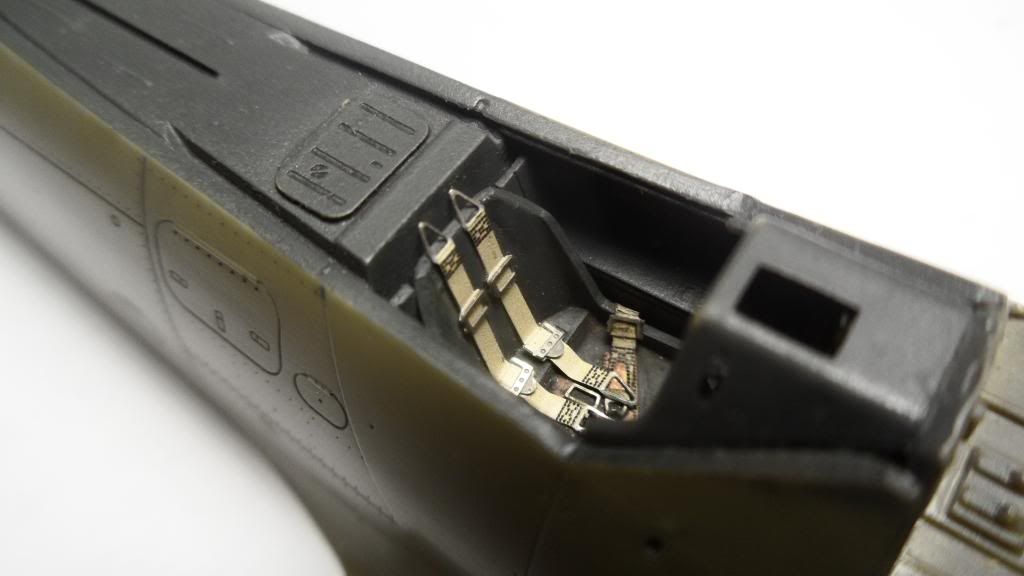
Clemens, those belts and pits look great! I agree those PE belts can be a pain to bend especially the pre-painted stuff as the paint can flake off. I am going to have to get a set of those HGW belts for a 32nd 109 I am working on.
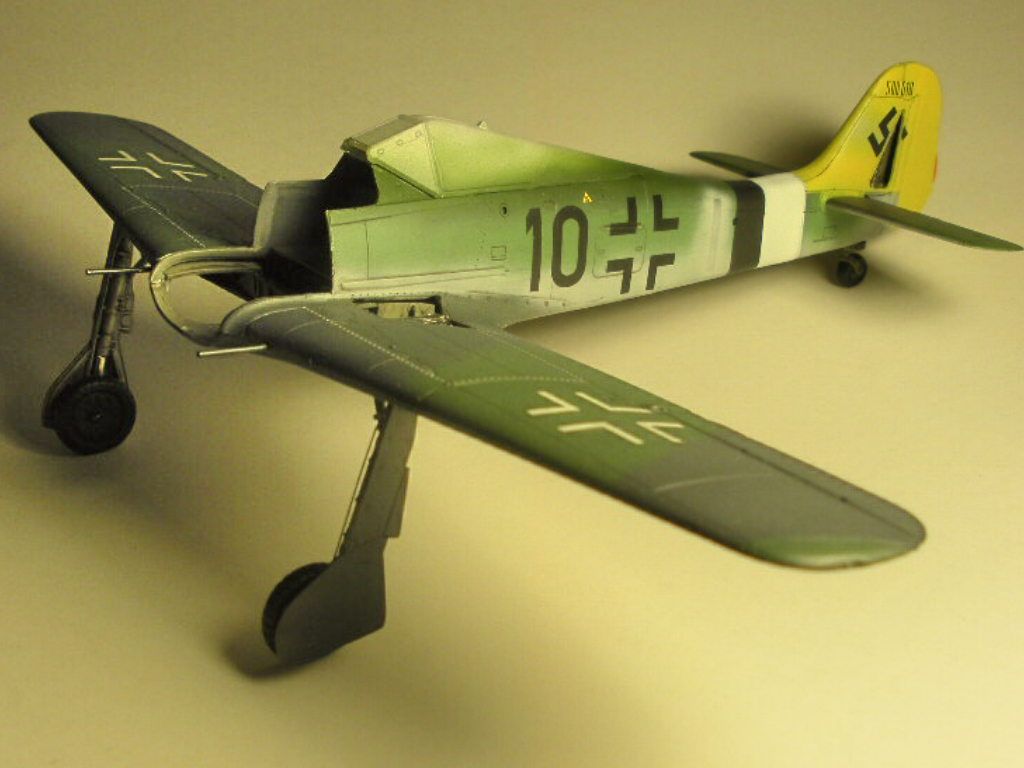
The F-8 isn’t in my collection because of the bomb. I found a decal set for a NMF (I’m not kidding) 190 and this requires a kit that goes together without many problems, so Hasegawa is my best bet.
The upper surfaces on the wings and fuselage are painted in standard camo, but the rest of the aircraft is left in bare metal… Looks sexy, doesn’t she? [:P]
Nice work there Clemens. You must have nerves of steel to do so many at once. I’m with Joe Rix- I really like resin replacement seats with a molded on harness. Just buy a good quality small paintbrush. But they do cost more…
I’ll step in on that one Clemens. First I am a huge fan of all things Ultracast. They just mold some really dynamite stuff, from wheels to seats. So, depending where you get them from they’ll run you roughly $15.00, give or take a few bucks. But note, you get 2 seats per package on average. Here is a link to the Ultracast site for their 1/48 FW 190 seats.
Both True Details and Cutting edge make 190 resin seats as well. True details can be found on squadron or Sprue brothers, the cutting edge stuff is rare, so you’ll have to look on ebay. Its just that Eduard provides the pe belts already in the kit, so I usually end up using them.
Thats a good looking set of belts you’ve got there Clemens! You’ve got your hands full with all of those builds pal.
Note to all who are considering an Aires interior set or the whole shabang update kit. Do NOT use the resing seat in that kit! That thing looks all wrong due to the fact that the seat back comes almost straight up and leaves about 3/16" gap between the top of the seat back and the rear bulkhead of the cockpit. I stuck with the Tamiya offering in mine as the alternative.
Thats some interesting info on that Aires set. I was in fact planning on buying it together with one of the Tamiya Doras, so this will bi vrey helpful when I get to building it.
Ok guys its update time. This build is now broken up into two sections: Section 1) The main airframe to include fuselage and wings from the engine firewall back and Section 2) which is the nose module from the firewall forward. Updates through the week have been in the form of painting the canopy frame and prepping the landing gear (painting and installing gear actuators) with what time I had. This morning saw the completion of the landing gear build up and other touch up to include painting the trim tabs red. Here’s where I’m at right now with section 1:
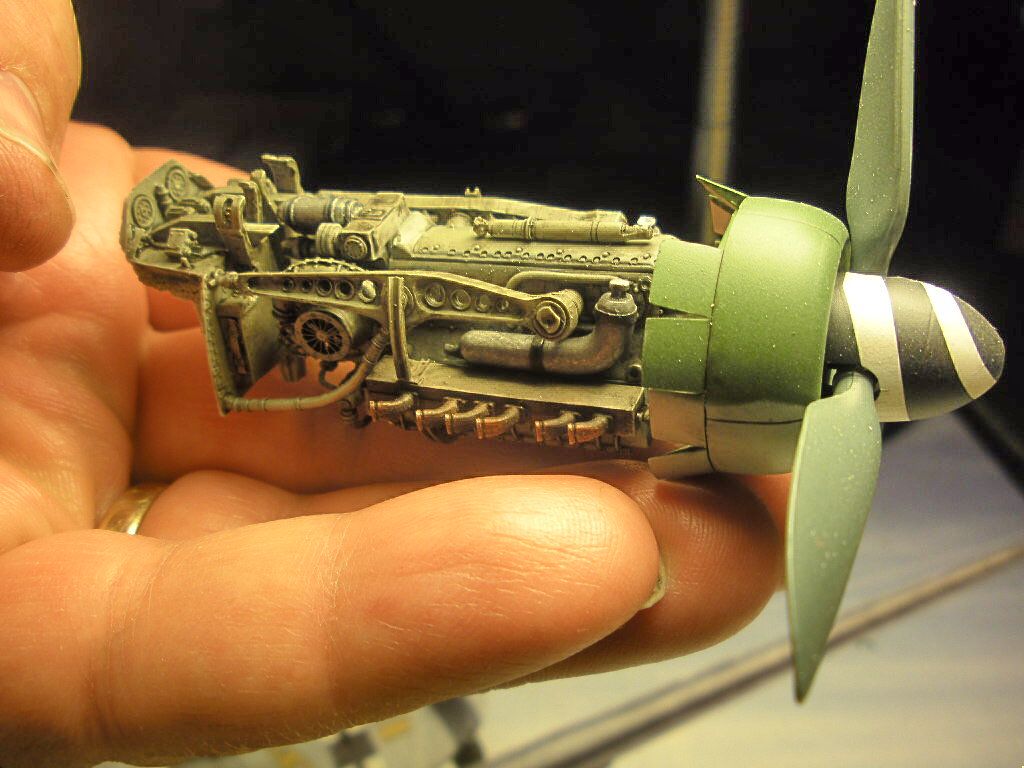
and for those of you who don’t remember or need a refresher this is section 2:
Thank you Joe, Eric and Clemens! I still have some more to go before that happens. I have to finish up the final touches because theres still alot of rolling the plane over on its back and handling it and I don’t want to risk screwing all that I’ve done to it so far. Thank you all for your enthusiasm and comments so far. I should have this thing wrapped up within the next week or so at this point if everything goes ok.
Clemens…damn nice work on those pits! Very impressive! Bravo… cant say any more then that… (grin)
Joe, marvelous. ! Simply marvelous! You know, I agree with you that you know when you can assy, You know that JJ puts antena on before paint! Couldnt do it… But… if hes used to doing it that way, more power to him! heck… the last part I usually inst is that @#:; pitot tube. If I put it on any earlier I would knock it off at least 3 or 4 times before the end! LOL…
Mustang - your 190 is looking VERY nice, can’t wait to see the completed product!! This group build has been amazing. Chock full of great information and wonderful tips/techniques and it seems to never stop!! Keep up the great work everyone.
That is looking so schweeet Joe - top work mate, More progress as well - primed it with Tamiya rattle can primer, then coated with Tamiya rattle can gloss black, bit of sanding and polishing and then Alclad Aluminium…