From SQ. #1 on an old kit (Mono SBD)

Hi Friends! (I hope!)

I was running into various troubles since getting back to this a few months ago…lack of supplies, new techniques, more lack of supplies…you get it. Plus being very rusty and wanting to emulate what I used to do!

There are four WIP’s right now, a couple are a bit over my head at this point. The rest I am tending to rush…so I took a breath. Deep.

Being off work today, I decided to reeducate myself the hard (actually easier) way. I took an old Mono SBD (all the ‘action’ options!) off the shelf and dumped the plastic into the dishpan to soak as I read the instructions and reviewed all my SBD refs. (I really need to hone my abilities!)

Plastic all clean and dry…I knew I couldn’t build this kit in the 4 steps outlined. So I started here:

The kit canopy is a 5 section molded in 2 pcs. Not anymore. Yes, I chose to lose a couple ribs, but they will be covered or ‘altered’ with paint.

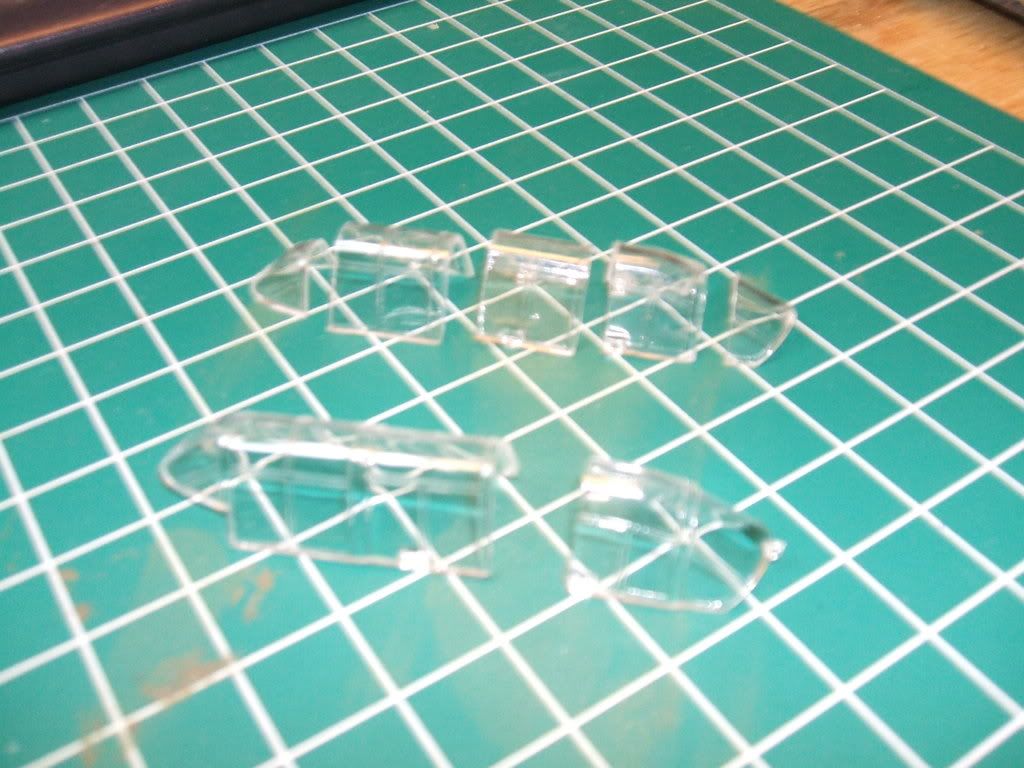
…and did it with this…no analysis, just going A to B:

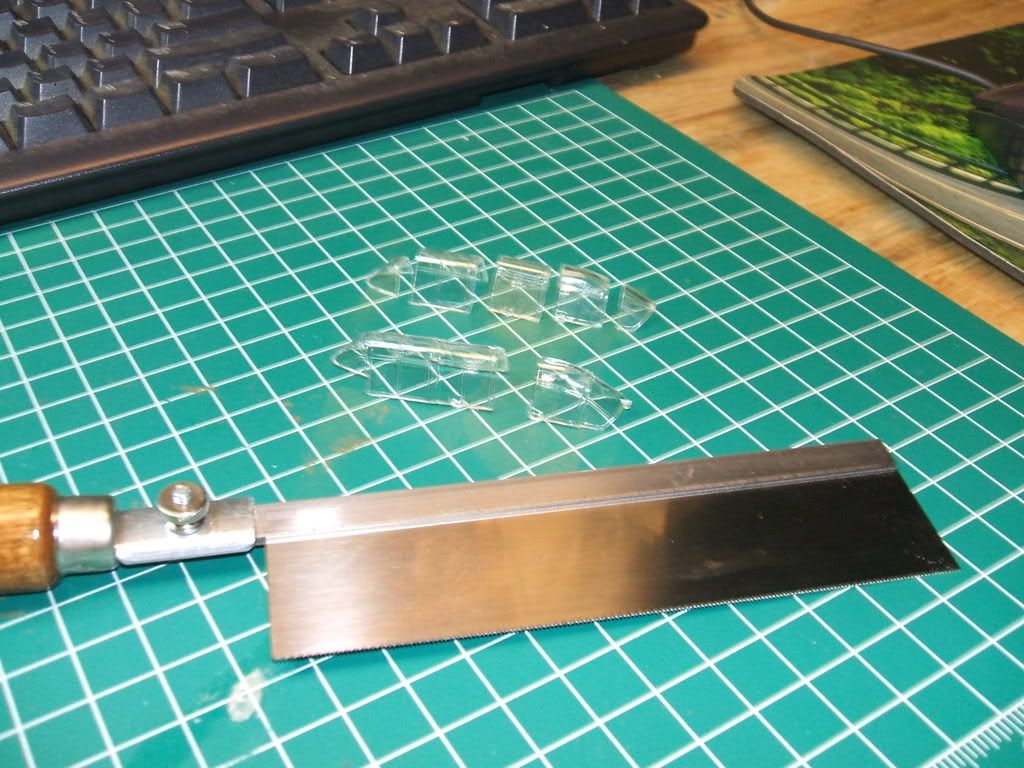
The fuselage is a nightmare of huge attachment points for the tailhook, swingarm and heavy sprue points! Out came the Zona saw and nippers again!

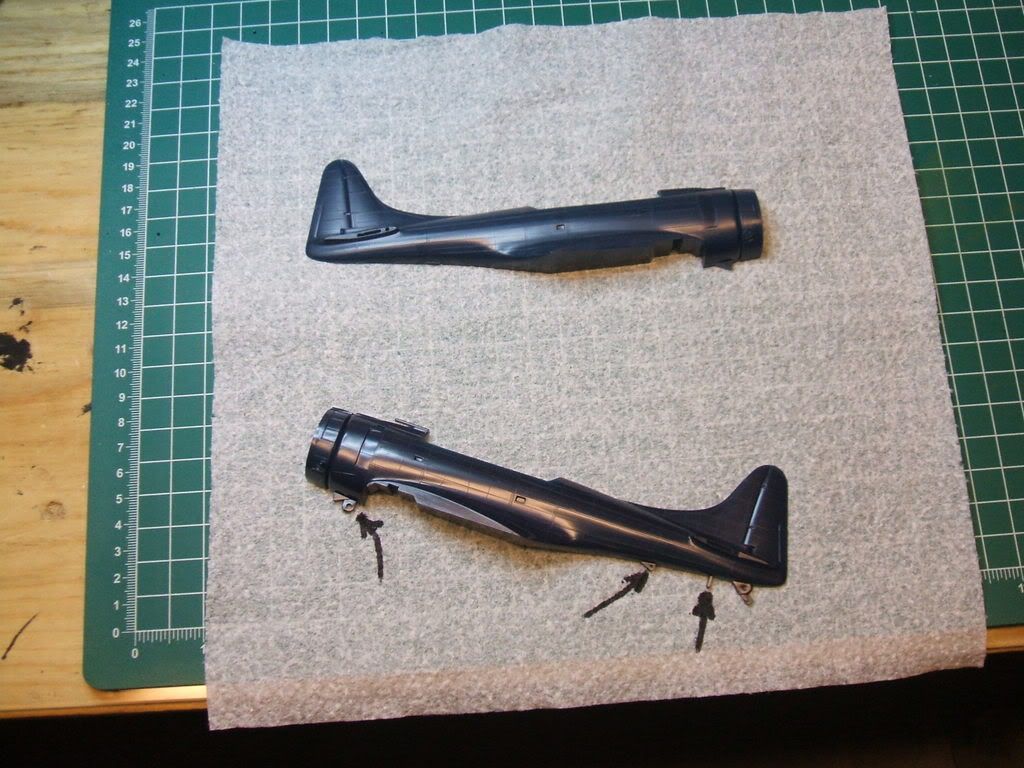
I cut that huge knuckle away from the oil cooler scoop…then hollowed out the scoop and opened up the exhaust pipes (you will see those later! I’m committed, or should be!)

It was obvious that there would be little room for added cockpit detail, so I’m mainly just trying to enhance what there is. I don’t care for pilot/gunner figs, so I took a pilot seat from a Tammy F2A kit that is close to the SBD…trimmed and fitted it to the ‘headrest’ piece (and sanded down the actual headrest pad!)

The headrest back is supposed to support a gunner’s seat and equipment, so I covered it with plastic card so I can work from there. That is the white that you see.

The other piece in the pic is the rear gunners ring. I drilled lightening holes around it (and broke it twice in the proccess!) but got it together and it will look fine when painted. (not 2 rows of holes…bad eyes y’know…but a convincing row of holes!)

Thanks for reading this…I figured it was time that I took charge over the styrene!

None would have been done without you folks though![tup]

That is a great kit! You’ll enjoy it. I built it a while back, with all the “toy” parts working! Great trip down memory lane.

Looks like you’re off to a great start so far. I had a lot of fun building that old kit last year. I want to pass a trick to you since you’re in the cockpit stage of it. I think I remember the decal sheet having an instrument panel decal on it. I cut a piece of thin plastic (.05 I think) for an instrument panel (I actually used the raised part of the dashboard to determine the width, and made it a little taller than the rest of the panel), placed the decal over it, and punched through the center of the instruments with a pin til it left a mark on the plastic. I then drilled out the holes in the plastic, cleaned it up, painted it black, cut a piece of clear plastic to match the new panel, then glued the clear plastic and then the decal sheet to the back of the panel. Add a couple of switches and it’ll look good. Takes less time than it took to explain it, and it really adds some spark to the front office. HTH

Glenn

Thanks Jon! Yeah, I built it many years ago…thought it was cool then…but now I’m 54![(-D]

…and it don’t look right. (Plus I have 2 excellent Accu-mini SBD that will need addressing down the road! Hence the self-imposed tutorial!

Ya know Glenn, I’d heard about techniques like that. Thanks! I already have the decal mounted to some plastic stock to just apply to the dash. (With all the fuse work upcoming, I am not going crazy on the pits…but I have another of these kits![;)])

Thank you!

OMG what did that poor model ever do to you?!?[:O]

Great progress! Gonna be a sweet build!

Excellent progress there Nam! Good to see you posting photos and beating that plastic into submission!

Question for you-

I bought a kit off of EvilBay last year that was signed by Ensign George Gay of VT-8. Is that the aircraft you are modelling? FOr some reason, I seem to recall that.

Anywho, the kit came with a sheet from Ensign Gay with the bureau numbers, call letters, and some other info about the aircraft as he recalled it. If you’re interested, I’d be happy to share it with you. [tup]

Thanks Frank and Aaron!

Frankie, that’s part of the reason I’m doing this Mono SBD…not so much that it’s an SBD, but I was rushing the Tex Gay build for the GB and getting frustrated. I had to sit back and relax…not force things. I have a great Accu-mini SBD for the GB, but I jumped in head-first and the plastic ate me!

That’s why this morning, I put all else away and took this kit down. I de-boxed it around 9 a.m…de-flashed every (reasonable) part…washed it and studied. Then I removed every objectionable pin ejector mark that might show later on…cut off the above mentioned monster hardware, (I can ‘scratch’ that much better)

Simply the most enjoyable day of modeling I’ve had since being back! No rushing…no pressure…planned and doing it right! And I’m glad I chose this old dog to do it with.

Look at what I did in one day compared to the past! If I can shine this raised detailed fuse up, IT may become Tex Gay’s plane! (so far, the only rivets I’ve had to wipe out are just fwd of the tail wheel…trying to keep it that way!)

Great to hear you have that autographed piece of work! Very important to folks such as we!

I know where to go if I need help! Thank You!

Hmmm I’m cofused but that’s not hard. I thought the re-box went back to the Corl Sea pilot that shot down 2 zeros then went on to become an Ace in a SBD. The name slips me but the decals have 4 victory marks and the white # 2. Later markings for National insignia as well. Say late 1943 or 44. Best part of those kits to me is they come with a crew!!!. The deck man with the flags and the running Pilot is just too cool!

That is right Aaron, I guess. No names are mentioned in the kit, but there are decals 2 pair of victory marks and the plane is #22.

BTW I mentioned Tex Gay when I meant John Waldron from Midway! Tex’s was a TBD, of course!

Sorry Frankie. The rum was upon me…you mentioned Tex Gay and I went with it![%-)]

This is an SBD that will prolly become John Waldron’s Midway plane. VT-8 was Tbd’s, of course.

SBD…TBD…

OOPS! Sorry buddy, gotta remember to try to think a little harder when I’m dog tired. Well, when you do Tex’s bird, I got some info for ya! [:D]

The info even mentions John Waldron (CO of VT-8).

How are you addressing the pilot’s canopy? Even cut, the plastic’s too thick to slide back without a one scale foot between canopy rails and frame. You plan on scratching the “open” sections? I’ve got this same kit, and I’d like to open the canopies as well…

The easiest way to get an open canopy is use the vacuform canopy from Squadron.

http://www.squadron.com/ItemDetails.asp?item=SQ9541

Easiest, True, but it’s not the cheapest… I don’t do AM parts when I can build 'em and I consider it “cheating”… Ok, ok, it’s not, I’m just a skin-flint, but you get the idea…[8D] I’m actually thinking about stretch-forming the pilot’s canopy m’self… Use the kit canopy as a mold, then pull a heated piece of acetate down over the mold. It doesn’t pick up frames as well as vac-forming, but it works… I was just wondering if Fenderman thought of another way…

I second the Squadron canopies fer sure. Using them to repair /revamp some of my old ones,

They ship quick as well! Just got some P-39 Vacuforms wonder who was my inspiration for that? [oX)]

http://www.falconmodels.co.nz/squadron48.html

The prices aren’t too bad if you look considering the work your putting into it,

I might look into it if I can get Doug at the LHS to order some of that stuff… I hate paying shipping of 6 dollars on 3-dollar stuff… (Won a 5.00 kit on eBay that cost 15.00 to get)

Yeah they do have a good deal if you spend 100 dollars no shipping charge. Easy to get to 100 bucks now days. What kills me is the Texas sales tax. Makes up for the free shipping but on the up side it is like next day service with UPS as it doesn’t have far to go. So much to consider. So much to build. LOL

Well, part of the goal of this thread was doing a very good job on a $5 kit. I have much better Accu-Minis…but I need to sharpen/regain my skills.

My plan for the open canopy is to chop the bottom rails off the center section so the pilot’s canopy section will fit right over it. With the framing painted…no one will ever notice the center section being ‘shorter’. But as stated elsewhere, I’m not buying AM parts for a $5 kit.

I simply want to get as realistic as possible and learn from doing it.

Thanks man, that’s what I wanted to know. Might do that m’self, never thought of it…

Hear, hear! Improvise, adapt, and overcome! The Creed of the Gizmologist…