That is Flippin brilliant! Nam! Very resourceful. Now for todays tip. Don’t put your hobby knife in your pocket! No applause please…
Hans…that all hinged upon my being able to separate the canopy sections in great shape…my Zona saw just drifted right thru! (and having a self-healing mat was a great help; to address another post of yours!)
I then played with the parts to mimic the actual fit…and that’s what I believe will work. I will also bevel the ‘new’ inside bottom rails so that they lay closer to the fuse and maybe make an air gap between the canopy sections.
Also…that ‘tab’ at the last gunner’s section has to go…it’s for a giant human hand to remove that section for viewing. I recommend sanding it off with sanding sticks…the base will blend with the frame and be painted over. This clear plastic is soooo brittle, I thing snipping might crack it. Just sand carefully.
Tausend Dank, mein Fruend…
NOW…to YOU my good Aaron!
How the heck are ya?[(-D]
Yeah, I checked and rechecked the canopy-on-canopy fit and I know this will work. Just a bit of sanding and fitting!
I cannot carry the hobby knife in my pocket. It is firmly implanted in my thigh!
AAYYYYEEEEEEEEEEEEE[oX)]
Alis Bitte
Is that right?
Close… “Alles”
Of course…“All”…jeeze I uzed to know that…all my grand or great-grandparents were from Germany!
Dumkopf!
Kein großes whoop…[:D]
Now I’ll hafta open a translator site![(-D]
I must say, I have just rediscovered the joys of drilling out dive flaps!
yay!
LOL, that should fade very quickly! [:D]
It did Daywalker…long before your post!
I did some detail painting during drilling breaks last night. Hopefully the fuse and wing sections will be closed up today.
Then comes the tricky part: Doing the inevitable filling and sanding without wiping out a bunch of rivet detail![sigh]
There were at least two naval pilots who scored more than one kill against Zeros and that took place in the same battle, the Battle of the Coral Sea in early 1942. Lt Swede Vejtasa of VS5 was credited with 3 Zeros, Lt John Leppla of VS2 was credited with 3 Zeros and 1 Kate (Leppla’s gunner ARM3 Liska is commonly credited with an additional 2 Zeros). Both moved on to VF10 where Vejtasa ended the war with 10.25 kills and Leppla credited with 7 kills before he was killed in action.
Natch I’ve read about both of those pilots Q. Butnever realized or remembered that they had been SBD pilots! Thanks!
They talked about Swede on Dogfights a while back. The last Zero he killed in that fight he took out with his wing.
That’s a neat project and the old Monogram kit can be built into a beauty with a little TLC. My Dad did a gorgeous one that was unfortunately destroyed in the big Bay Area quake of '89.
Mike & Mikey! Thanks for the comments!
I did happen to see that ‘Dogfights’ episode. Thanks for the reminder!
And yes, there are a few aspects that make this kit special. For PITA rivet detail…is is very beautiful!
Here’s an update:
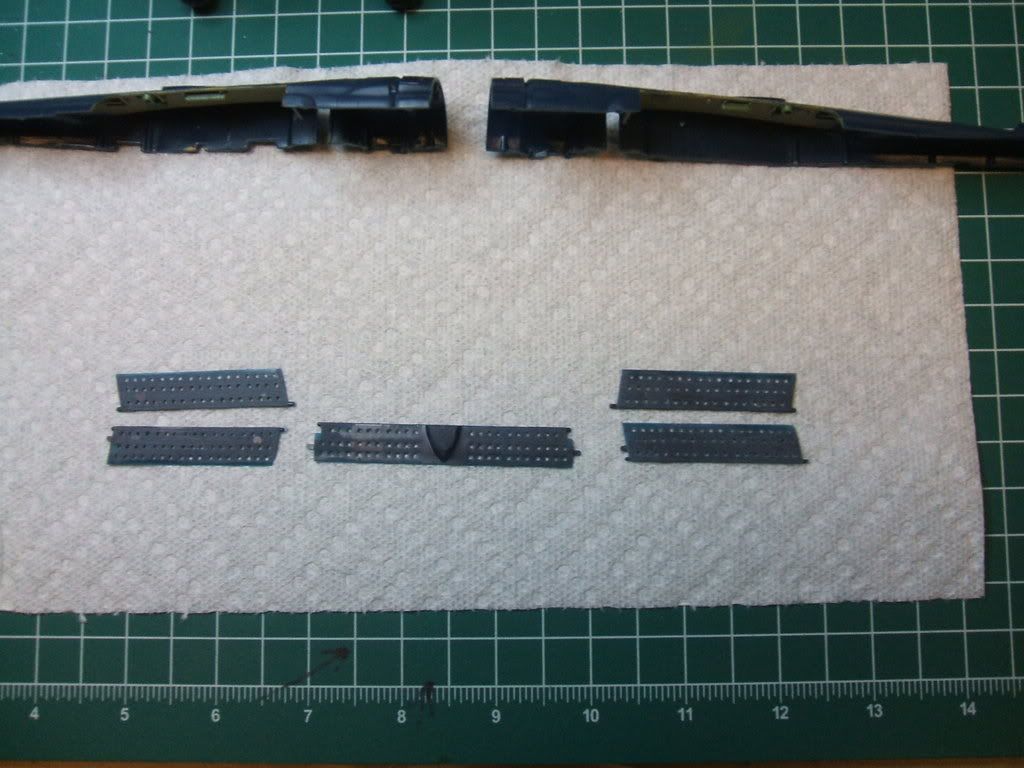
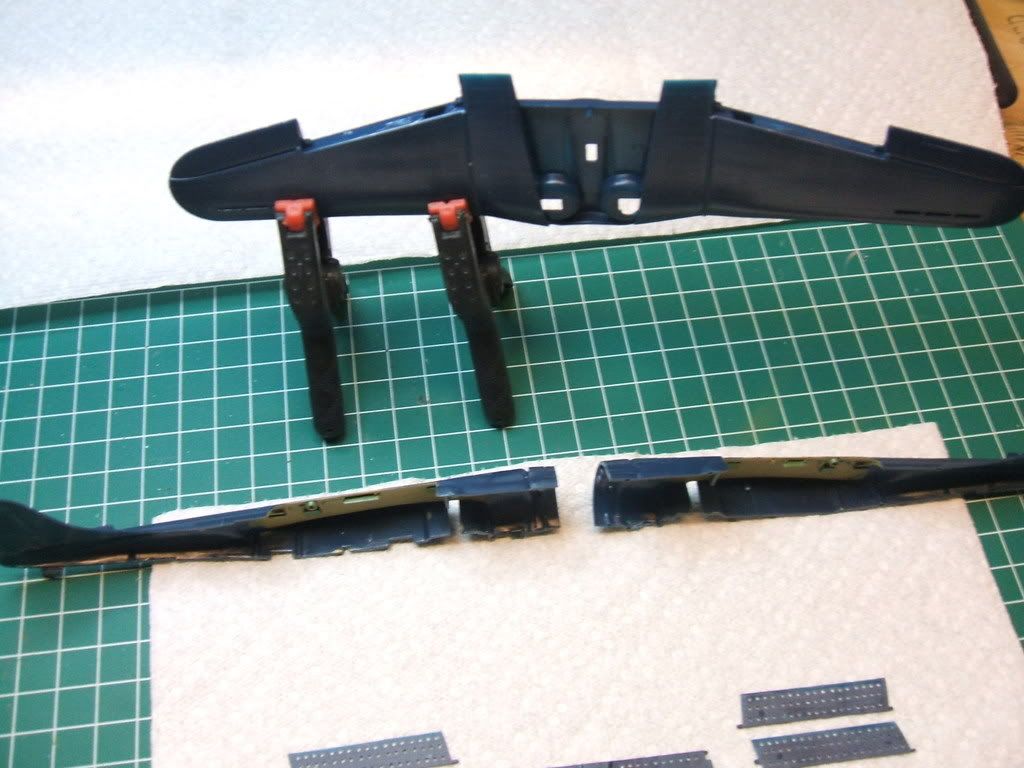
I have a few details to let dry in the pit, but here are the fuse halves, wing assembly and the (ugh!) drilled out dive brakes.
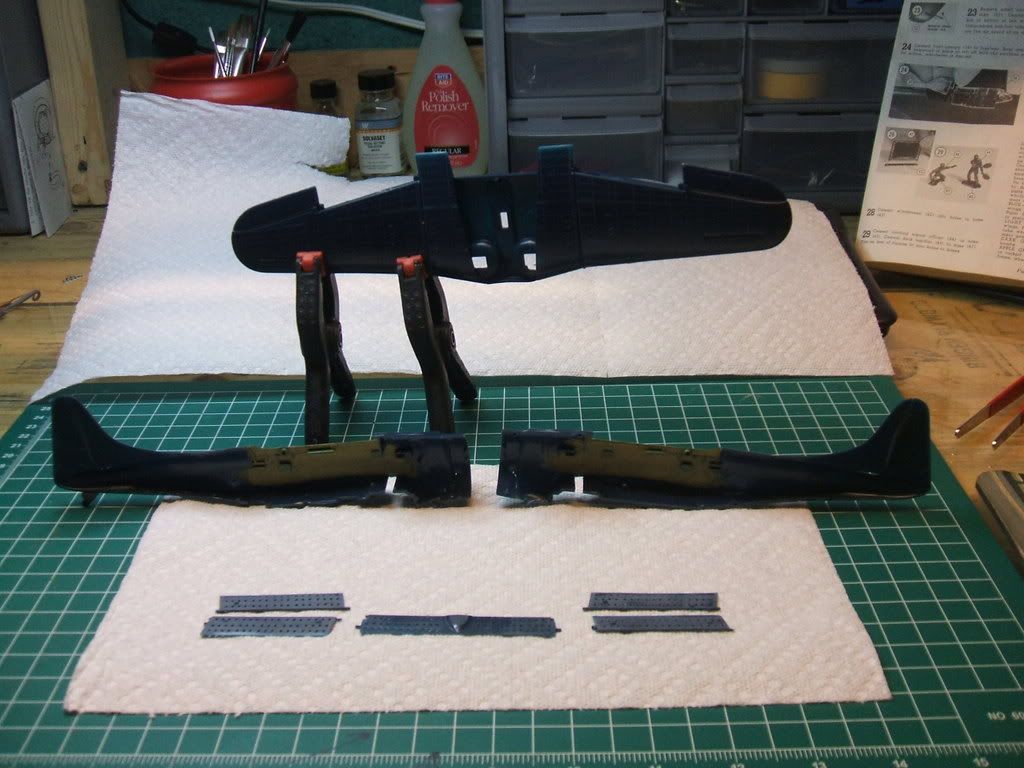
The dive brakes really are tedious! 250+ holes…then, as styrene is styrene, sanding required to remove jagged hole edges and reduce ejector pin marks. After sanding, most of the holes have become clogged with junk and dust. Sooooooooo, haul out the pin vise and run it through each hole again!..these parts are very thin to begin with but are molded very well, and I think I have every hole clear of scrap and debris!
The wing ass’y fits together very well. I welded one side at a time trailing side first, clamped with the El-Cheapo clamps you see. They have just the right pressure and floating jaws. Once the back edges have set, the leading edges lay right down perfectly!
I am using Tammy orange cement with a paintbrush. I really need to try another method. I have Tenax but need to buy an applicator. But I’m getting things together!
While I haven’t tried or wanted to go crazy on the pit…after opening the canopy up…the pit needs a stick and a real seat for the gunner and some suggestion of rudder pedals…so that’s what’s on the side right now.
I really appreciate your viewing and comments! Doing things this way may seem pretentious, but it has helped me immensely!
Thank you!
That is a lot of drilling and clean up!. Wow but they do indeed look much better. Will add a lot to your final result!. I’m not sure how your going to go about adding details to that pit? Seems like once you get going it will be one of those scratch building events that just keeps on giving!. Good Luck! Really bringing back memories!. Thank You! [tup][oX)]
Thanks Aaron! Actually, some of the dive brake holes couls use another pass with the drill! Drills tend want to make tri-corner holes when hand-held. About 20% of mine are trinagular and I’ll most likely fix them. (worried about appearance after painting!)
With the pit…I’m ‘suggesting’ a couple things, but the stick is simple…the gunner seat a bit more problematic, but not tough. I’m not adding levers, hyd lines and cables![(-D]
Given my past lack of hard results…look how far I’ve come since Friday a.m!
Thanks!
Rather than drill ‘em out again with the pin vise, try giving the ol’ X-Acto blade a few quick twists. I always finish rounding out holes with the knife. Especially if I got a bit off-center…
BTW, here’s a link to flying the CAF SBD… Thought you might enjoy it.
http://www.dixiewing.org/aircraft/sbd/Hirschman_SBD_article.htm