Can anyone point me to a site that goes through how to assemble Fruilmodel tracks. I paid a lot for these and I do not want to screw it up.
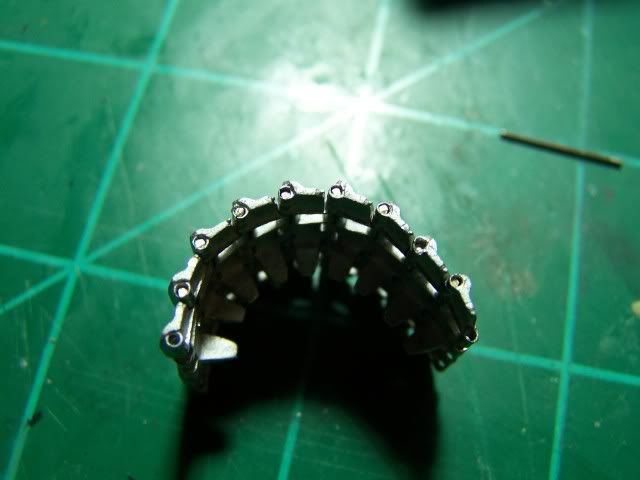
It’s not so difficult. Start by cleaning and flash that may be on the link. I then make a long balsa jig to assemble the links on using double stick tape to hold everything in place. Look at the link and you will see one side has a hole and the other is close up. Put them on the jig so the holes are out to get to them. This make it easy to just go down the line with a drill to drill out the holes for the track pins. Not everyone drills them but I always find enough that are not fully open that it’s worth the effort. I usually use the wires that come with the set. A cut all the pins just a but longer than needed. Using tweezers… so you don’t stab yourself when they get stuck. Now just insert the pins and clip them off flush.
Hows about I just tell you? Friulmodel tracks are easy as pie to build, and they quite relaxing and add the most realism to your tanks. So, heres what to do-
-
Wash each little baggy of tracks in warm, soapy water for a few minutes. Make sure you do them seperately so you do not mix the “right” and the “left.”
-
Let them dry. this is the worst part.
-
Grab a drink (i prefer sprite), and pour one sides tracks into a little bowl. Take a pinvice with a .021 size bit and drill through the holes on the link. The very end is solid for a reason- dont drill all the way through the link, just enough for the trackpin (wire) to go through all the slots. (see PMMS on this, link included below)
-
Do the above with another link, fit them together, and slide in some of the wir until it stops. Pull the wire out just a millimeter or two form where it stops, and then clip it with wire cutters, you pull it out so the track pin doesnt stick out of the track.
-
Finally, using a tooth pick, add a drop of thick CA glue to the hole to lock it in place. Keep going and enjoy!
http://perthmilitarymodelling.com/reviews/vehicles/friulmodel/atl-87.htm
As wingy and beltfed say they are pretty easy to work with,just somewhat tedious,but the results are worth it.I paint and weather mine the same as plastic tracks,and then carefully sand some paint off the high points revealing the bare metal to show wear. good luck.
I’m not sure i totally understand. Do I slip the wire through and clip it? If so, how do the tracks stay together. The instructions are not real clear. Obviously a bad translation from the original Hungarian.
Dude,
That link was awesome. I think that will help a lot. I bought some blackenit to weather them. I’m tired of the rubber band tracks and the individual plastic tracks are just to tough to mold.
Thanks for all the suggestions. I’ll put pix up when I get 'em done.
Here is a good step by step
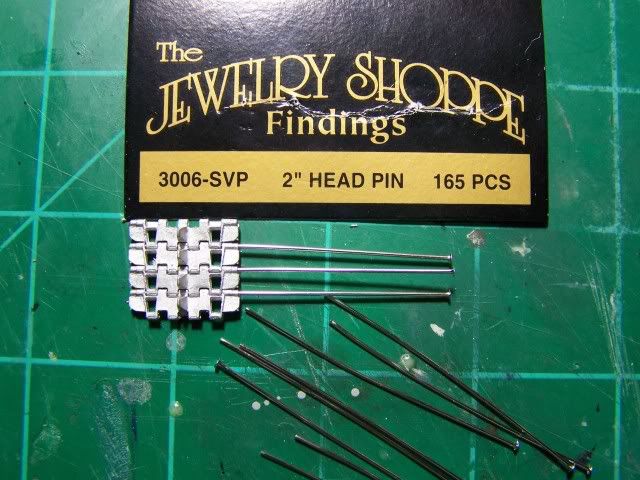
Here is a tip I picked up here from Tony the Mutt…use 1/2 inch Sequin pins for the assembly instead of the wire. you can find the in stores like Michaels. A box of 500 might be $1.50 but it makes the assembly so easy

Rounds Complete!!
WOW!
This is perfect!
I’ve ordered the Fuils for my StuG III Ausf.A WIP this morning (it’s pay-day today) and also some 46(?) Links Per 1" blackened chain too.
I am yet to use aftermarket tracks so this thread & the links should be very handy indeed! I’m hoping we’ll have post around gere tomorrow but Saturdays are a bit ‘iffy’ at the best of times, so Monday is looking more likely.
Great link-thanks guys!
ATVB
Ben [t$t]
Just some notes on the Friuls based on my experiences with them… they use two different gauges of wire, depending on the tracks in question. Smaller links like Pz. I or Pz. II use the smaller gauge and the track holes are smaller as well, so using straight pins or whatnot may not work so well- I’ve used the supplied wire for the little links because drilling out the holes for thicker pins removes too much metal and weakens the links. Larger tracks, like the Tiger 1 middle/late, use a slightly thicker gauge and straight pins will work quite well in this application, but the supplied wire is perfectly usable as well.
When assembling a run I cut the wire into a pile of slightly longer-than-necessary pins, then string together a 5" section and rinse and repeat until done with that. A dab of CA then clip flush as mentioned. I’ve found that having the pins pre-cut speeds up my assembly time considerably over clipping the wire after each link joined. Just pinch two links together, insert the pin and move onto the next link. I knocked out a run of Tiger 1 tracks in a little over an hour last night with these methods. If the links require a lot of drilling out (and some sets will be nothing but this!) then your time is going to be considerably lengthened- I use a Dremel tool with the appropriate drill bit for this work rather than a pinvise because it’s a lot faster.
If the kit comes with rubberband tracks, you can use a ruler to get a ROUGH idea of how long your track run should be- I always leave a few pins long and unglued so I can get the right tension/sag once I have wound them around the running gear- I don’t like using an adjustable idler for this if I can help it.
A safety note: BEWARE OF YOUR EYES!!! Clipping the pins will send small metal missles a’flying. I set an open plastic bag in my lap and put the work inside the bag when flush cutting the pins so I don’t blind myself and to avoid having a carpet full of metal splinters.
A final word: WASH YOUR HANDS thorougly afterwards, or use gloves during.
I can contribute here as well…
I like to use .020" steel wire in place of the Friul-supplied soft wire. Depending on the size links I’m working with, I do the assembly w/o a jig, but I haven’t built anything smaller that the Hellcat tracks.
I insert the wire into the links to be connected, make sure it’s all the way in, then pull it out about 1-2mm and clip it with small end-cutters. I use the end-cutters to push the wire in also. This clipping action usually “pops” the wire all the way back in. If not, a push with a small file will seat it. Since I usually don’t drill the links before inserting the wire, glue is usually un-necessary, but if it is, I use white glue, since it shrinks up nicely, and is more controllable (for me) than CA. If I need to clean up holes before assembly (varies with different sets) I use a piece of the .020" wire in a pin-vise. with the end clipped at an angle. It seems to be quicker that a drill bit, and the hole is the perfect size.
I have used BlackenIt, but now prefer to use acrylic paint after assembly, since BlackenIt corrodes the metal and makes assembly more difficult, at least in my experience. Using BlackenIt after assembly has corroded the pins to the the point where the tracks may come apart.
Normally, I’ll leave one pin long enough to remove until final assemble time, so that I can easily remove and re-install the tracks, and make length adjustments, to get the appropriate tension, or sag, as the case may be.
I truly enjoy the look of Friuls on vehicles with normal sag, simply can’t be beat.
Thanks for the input.
So how to you “age” or “weather” your tracks if you do not use blackenit?
For German and Soviet WWII armor,I use Tamiya XF-64 as a basecoat,heavy wash with enamel burnt umber + Black,dusting with apropiate Mig Pigments,and finally carefully sand to reveal bare metal on wear spots,and high points.
Hope this helps
This thread couldn’t been timed any better, I’m waiting on my first set of Fruils to be delivered and I think all the questions I had have been answered here. Yeah!!
Tom
Well I’m glad I asked then. I got off work early yesterday and went aroudn to Hobbytown, Michaels and Lowes and bought all the specialized stuff I needed. The tracks are turning out great. If I can get the camera away from my 13 year old, I’ll send pix.
Does anyone know how to paint sherman friul tracks? I plan on hitting them with blackenit but do i paint them black first or after?
Jim
Dont let them intimidate you, I was the same as you when I first used them. many of the same guys here gave me the same great advice. Once you do a set or two they are a breeze. One thing I found is that the wire they include is a little flimsy. I discovered an article that talked about using stick pins. They work grreat. Just drill out the links as normal, slide the stickpins in, clip off excess, and CA in place. Here is a sherman that I finished recently with Friuls.

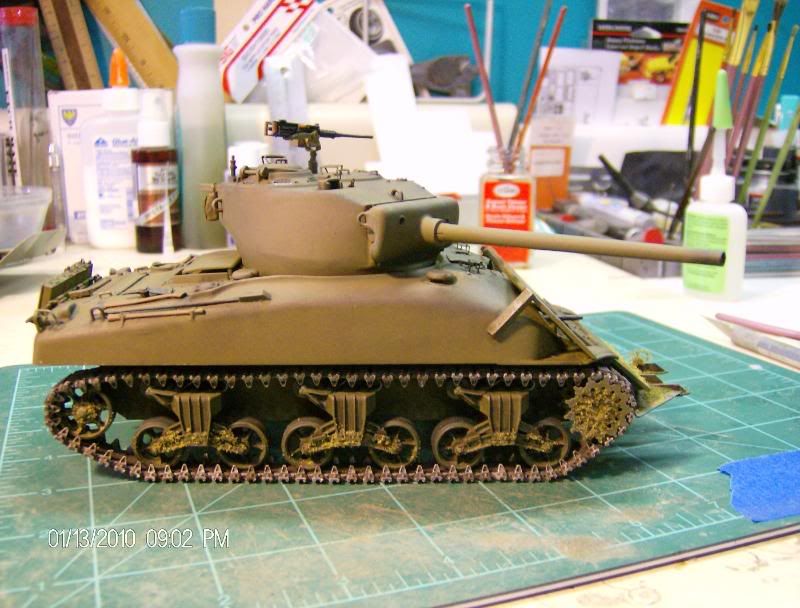
Hello there I felt that same way when I got my first set of these track. (For this high cost they better be worth it) An they are! I used thick pins to link them.
On my friul tracks box It tells you, you needed to use a 0.5 drill bit and all I had was a 0.6 bit. I found these pin/rods came from my local hobby lobby store and I like the tite fit unlike that thin week wire that came in the pack. I must say it take some time to link all the tracks.
See here the pins make for a more realistic look.
I had a lot left over links, an I love the way you can make the tracks have that sag look. It’s to bad one one can see them under the side skirts. Man these tracks look good.
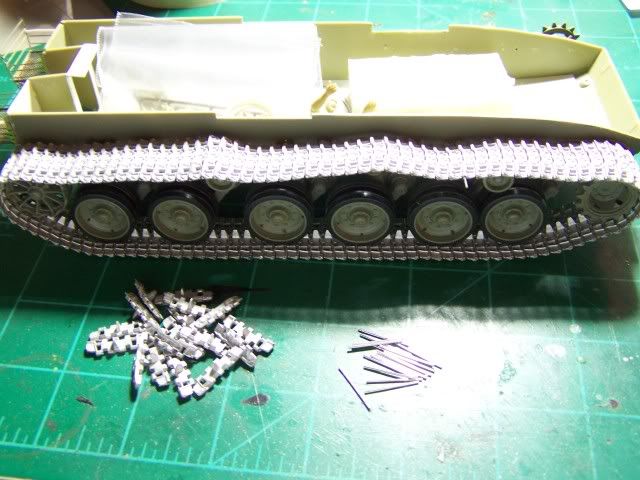
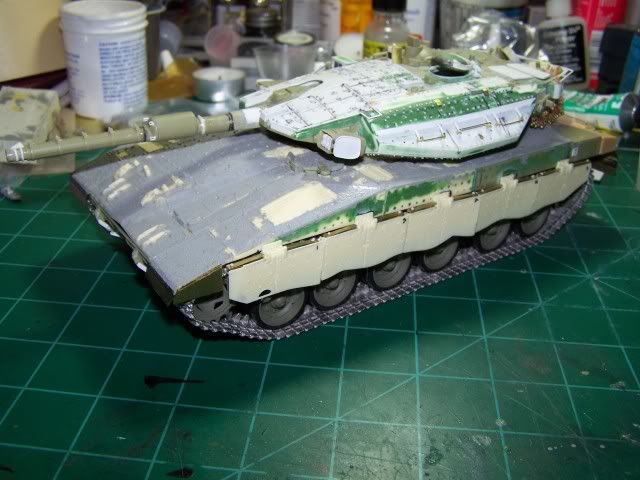
So far so good. I am about 25% done with one track. This set of tracks, ATL-12, for a Sherman does not have a left and right side. Pretty interesting. You assemble the whole thing and THEN glue the type of tread onto the assembled track.
I’m using a hybrid technique that all y’all mentioned. I built a balsa jig, drill it with a 0.02 bit, then use the sequin pin. I then clip it flush with the tread and push it just a tad further in. It’s a pretty tight fit. I probably don’t need the cyan.
One drawback though. Even though there is not a left and right side track, Friul did include links for the area around the guide and return wheels as the angle is sharpe at that area. But I get good articulation without these special pieces. Rather disappointed with that.
Thanks for all the help and advice guys.
I found the same thing on my Sherman tracks. The “precurved” blocks are not really needed.
Sweet! This thread just got bookmarked. I have a Tamiya Tiger I that came with these. (and no, I will never admit to how much I paid for it) This will come in very handy. Thanks for posting all the links fellas.
Regards,
Jeff
What’s done is done,but too bad you got friuls for a sherman,they work best for tracks with a sag,like the german+soviet armor,you really have to try them on those types of tanks.