PJ, that’s the one.
BK is right, this is something very new to me so it’s allways great to learn a new trick.
MM
Here’s my Arado I did a while back and was featured as an article in FSM. It has the markings you will be using:


Steve
The kit’s plastic base got the hair spray treatment to show some rust coming thru. It was kid of small so I attached it to a round wood base.
Found a better picture of the base:

Wow, beutiful work PJ. I must have missed that article.
Thanks Steve. It was the September 2013 issue.
Ok, I quit!! What a superb finish. Is that the Sword kit?!
LOL MM thanks. No it’s the ROG 1/32 Arado with the Eduard Bid Ed pe set. IMO the pe was an overkill cause the molded details are fantastic.
Wow PJ, that Arado just looks stunning. Certainly worth and honerable mention in the completion list.
BK
I remeber the article, PJ! It’s a 1/32 RoG 196! He showed the ware marks on the floor boards of the cockpit. Looked fantastic! I’ve gotten some great ideas from the article, now I need to put them into practice!
BK and Bruce
Thanks to both. Yes I sprayed the pit black then the RLM02. I then took a fresh #11 blade and carefully scratched up the 02 showing the wear on the floors.
I entered it in the 2012 IPMS Nationals here in Orlando and won a Bronze in the 1/32 Axis Prop category.

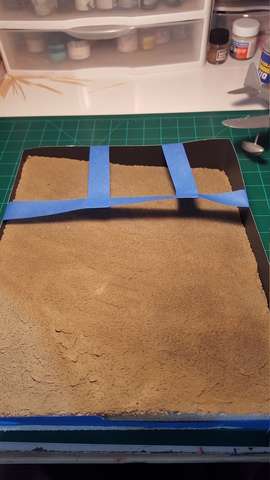
I completed the beach and painted the sand. I then taped some poster board around the edge to prepare for a resin pour
.
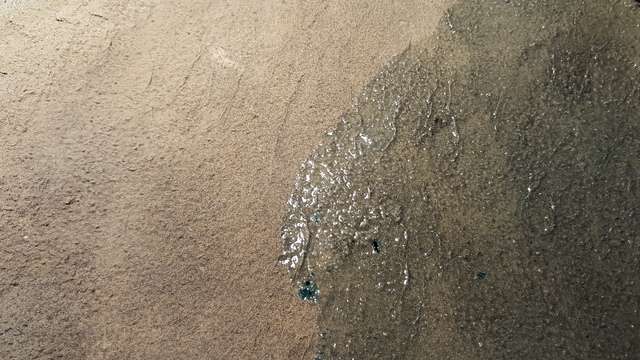
I made my first resin pour, and now I know what not to do.
First off, I used a few drops of blue water color to try to tint the “water”. It was like mixing water and oil, just slower. I finally was able to mix it by using the paint mixer. The turquoise color I wanted didn’t materialize, more of a light blue. Not bad but not what I was looking for.
Second, I was hoping the resin would harden fast enough so that running a sealer around the poster board would not be necessary. I apparently did not put enough hardener in the mix for it to harden fast enough and I had leaks. In fact, most of it leaked out. Oh well, this may actually work to my advantage

Ok, lessons learned…so far.
- Seal the edges. I’m now using white glue.
- Put in more hardener.
- Put in a few drops of turquoise if you want turquoise.
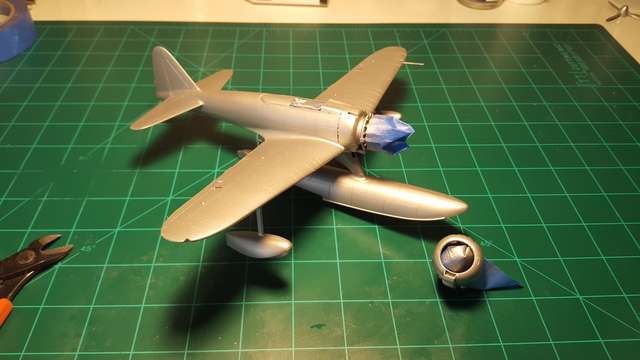
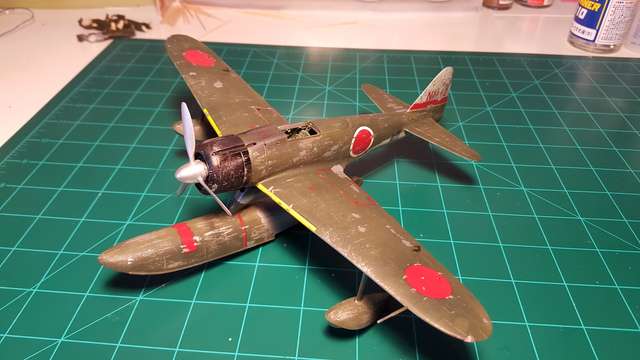
Also, I painted the Rufe silver, air brushed the Worn Effects and am ready for the exterior colors.
Steve
Steve, would clear packing tape work for sealing the dams? I use it as a barrier for CA glue, as it will not bond. The tape is smooth and fairly wide, which would seem suitable for your application.
Possibly G. Although getting any tape to adhere to Styrofoam is problematic. Lesson learned, trial and error. The difference this time is, I’m showing everybody my boo boo’s and we are learning together.
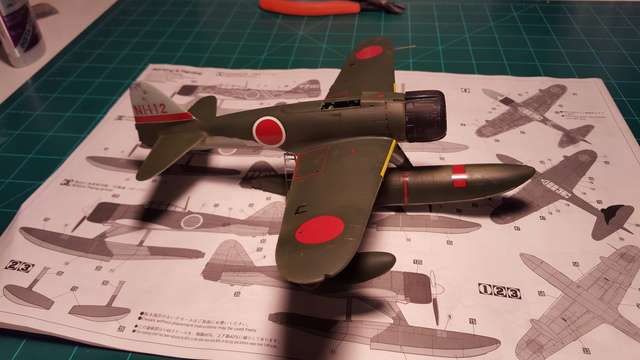
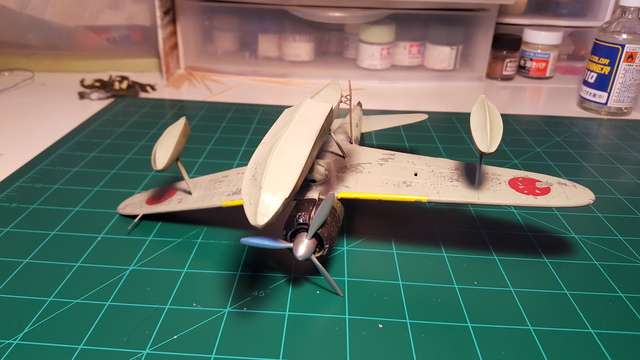
New progress on the Rufe and beach. I sprayed the Worn Effects, let that dry then sprayed the IJN Grey, let that dry for about a day and a half. This morning I masked and sprayed the green and applied the decals. Interestingly, after pulling off the mask, some of the gray peeled off, which is just fine and adds to the effect. This was probably due to the Worn Effects. The cowl was not glued on yet but it did work on its weathering…
The beach is turning out very well in my opinion. I mixed up another layer of resin and mixed in some turquoise, maybe a little too much, but it is at depth so again this should work to my favor.

Steve
That is one sweet loking Arado PJ. I will have to go back and check out that article. Still can’t get hold of one of these, rare as Unicorn droppings at the moment.
Steve, great work on the plane and the beach. And thanks for showing us warts and all. Some great lessons there.
What product are you useing to colour the water.
Its an acrylic mix I made myself. It dosn’t mix well in the resin, however this works to my advantage in the end.
Gawd Steve, that plane and beach look sooooooo good. Stunning work going on in here.
BK
Thanks. And as long as the end result is what you want, thats the main thing.
Here’s another update. I believe I’m done with the Rufe once I finish the canopy.

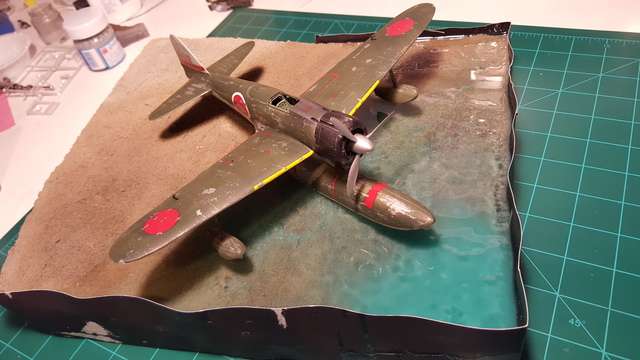
I was able to pour quite a few more layers of resin and just about ready to install the build. In fact, once this last layer sets up enough I will set the Rufe on the surface so it sinks into the last layer a bit.

Steve
OK guys I put the Rufe on the “water” and OMG! I am soooo pleased with this. This is actually looking like water! I will give this a few days to dry before I apply the last few layers. I will blow some waves in the last layer for some small surf. Oh boy, I can’t wait!

Steve