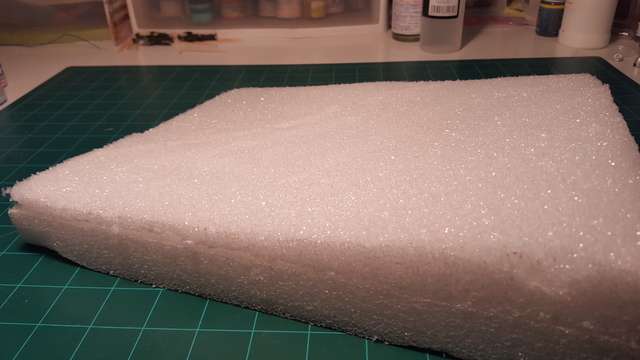
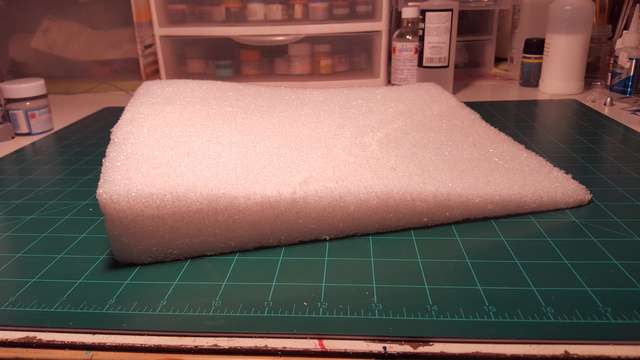
Well, I got some work done on the floats. These things have huge panel lines that you could hide a 1/48 rifle in. All my reference photos show them being pretty smooth, with rivets more than panel lines. So I decided to slather the putty on them, fill them, then run my new ponce wheel over the putty.
I was more than a bit heavy-handed in applying the Perfect Plastic Putty.
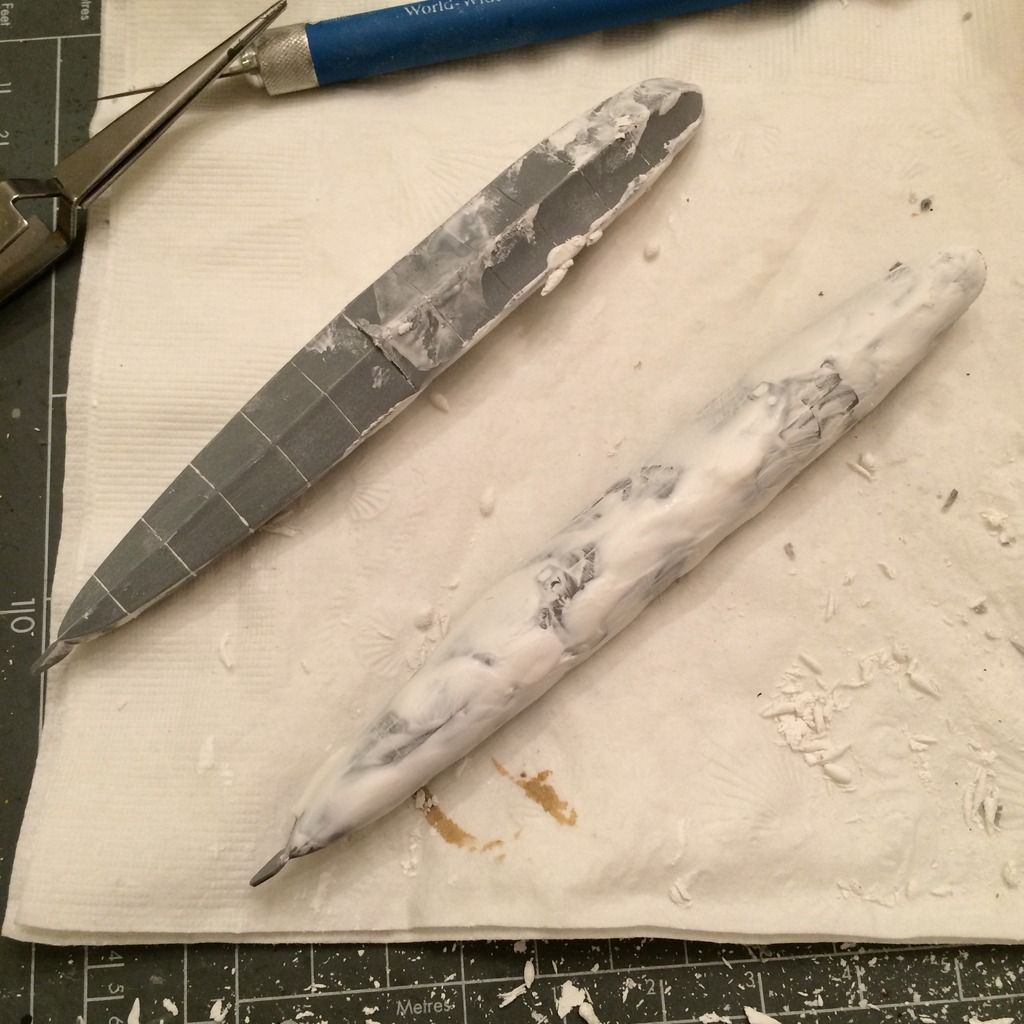
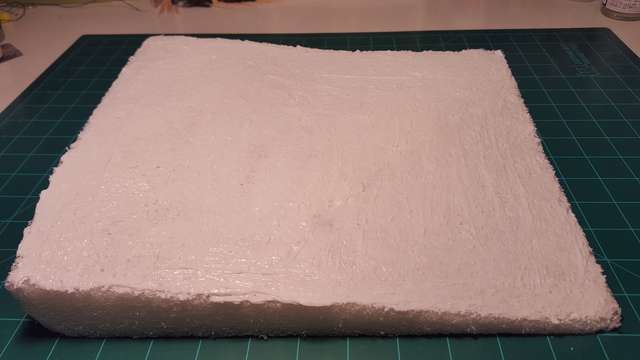
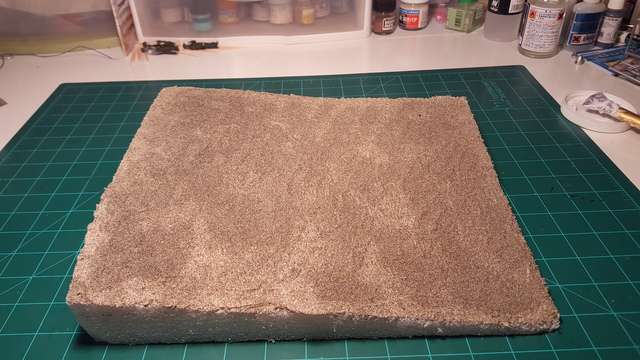
But after sanding and the ponce wheel treatment, they came out like this. They’re currently drying after being sprayed with primer.
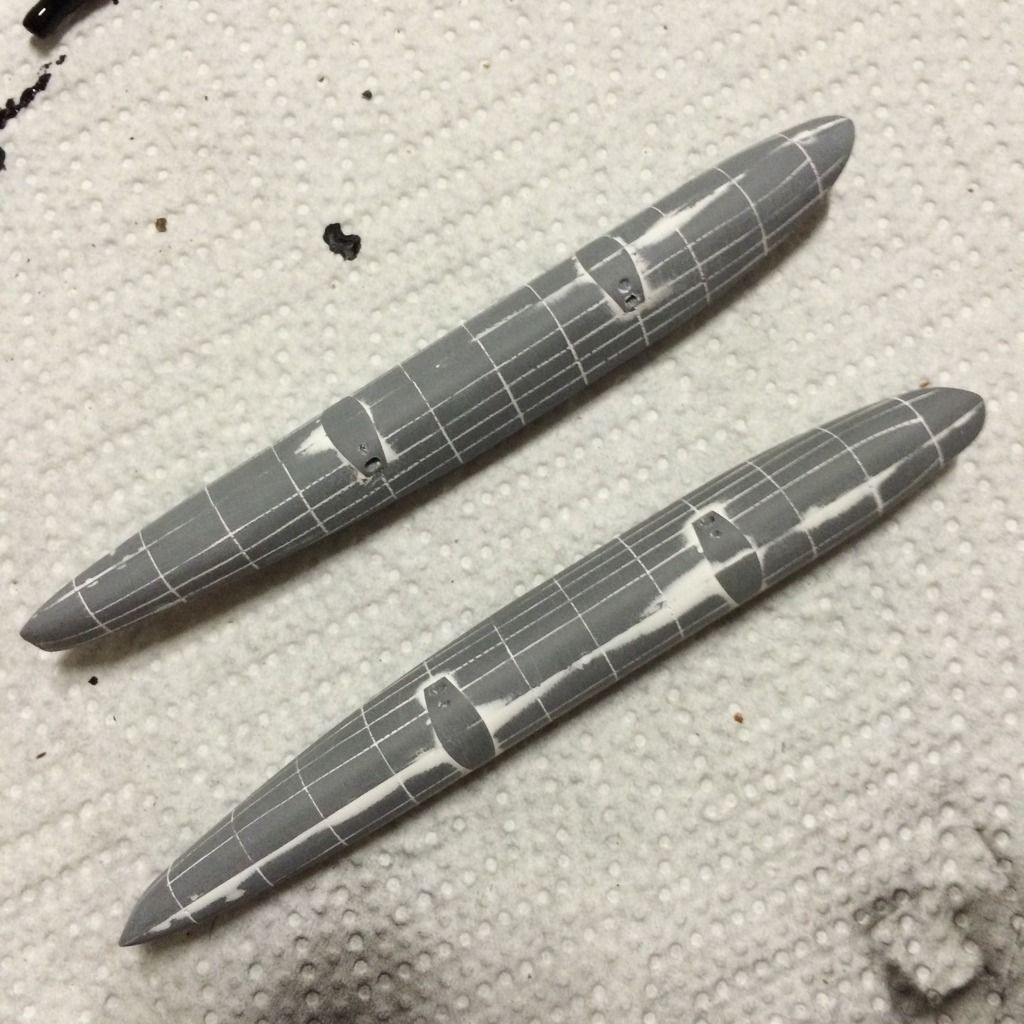
The floats are bare aluminum, so I will most likely need to do a little more seam cleanup on top, since they were a little rough.
-BD-
Nice work BD, yikes what a mess that started out.
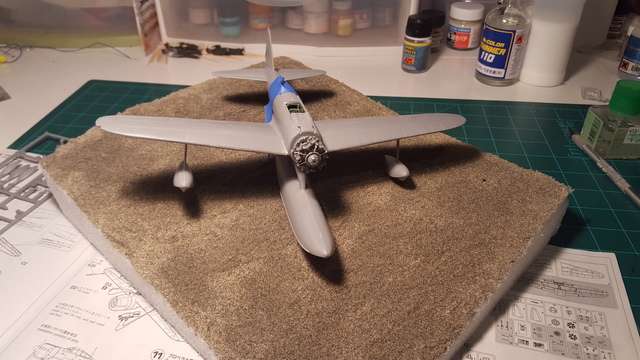
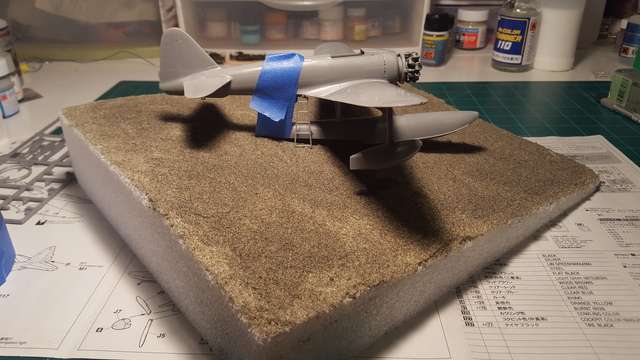
Well, this is where I’m at with the Rufe. It’s going together as expected, pretty easely. Low part count, the only tought part will be the painting.

Steve
BD
You can apply PPP and let it dry completely, usualy about an hour or less. Then take a damp paper towel and gently run it across the panel lines. This will remove most of the PPP and a little sanding will complete the surgery. Along curvrd areas such as wing to fuselage joints i slop on the PPP and let it dry. Then come back with a damp Q Tip and no sanding is necessary. You have better control when the PPP is dry than when still wet.
Steve
I will be interested to see if you try the AK Interactive product for the weathering as opossed to the hair spray method. I think they are about the same thing as far as the chipping effect goes but just curious.
BD, there is no simple way around filling in those panel lines. Putty, fill, sand, repeat most likely. Looks like you have a handle on it now. That is gonna be a nice kit.
Steve, I too, am interested in how your chipping works out. I’ve used the HS method with good results, but never the AK way. Please let us know.
BK
I’m making progress on the Pete. I have the pit completed and the fuselage is now closed.
I painted the pit a mix of XF-61 and XF-71 1:1 ratio of make a close estimate of Mitsubishi cockpit color as I don’t have any yet. I then hand painted the rest of the pit and added the decals for the instruments. I then used a new technique with pastels in the pit. I want it to be nice, but still somewhat used, but not worn badly.
I used a rust orange color and heavily dusted whole pit and then blew it off and brushed the remainder away. I then used a green similar to the pit color and toned that down some. Again, I blew it off and brushed away the remainder. I then used a cotton bud and twist wiped the whole thing. This slightly polished the flat areas and high points while leaving dust in the resesses. I like how it turned out and it changed the color just tad to a more rust tone, more befitting a water bound aircraft. More to come later.
BK
Here you can see the before and after effects of the pastels.


Steve - thanks for the tip on the PPP. I started toying with my Trumpeter Mig-3 last night, and it looks like it is going to have some wing root issues. I will definitely try that method on it. Your Rufe is looking good. Can’t wait to see some paint on it.
BK - Really nice job on that cockpit. I’m envious of the skill in that.
-BD-
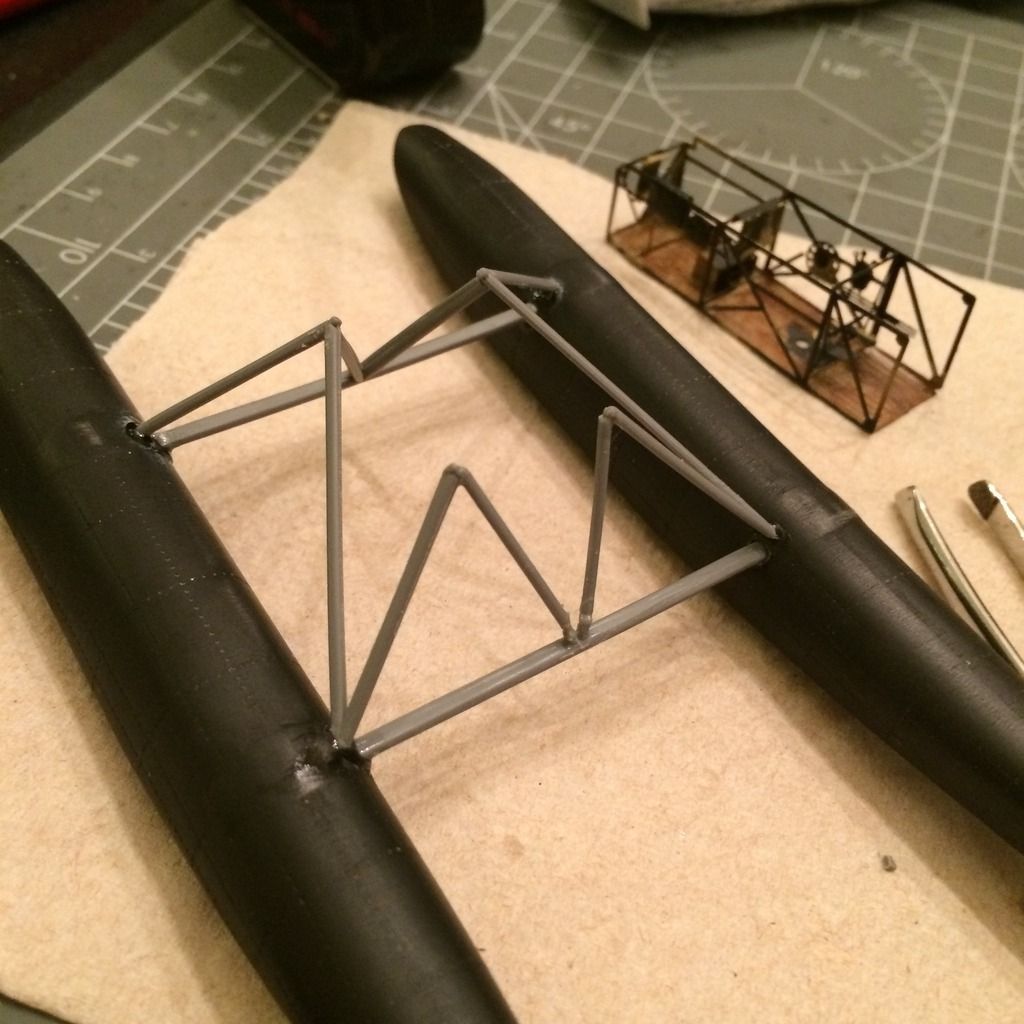
I was working on the Lublin last night and got the floats where I wanted them to be, primed them and went to add the braces. There were some minor fit issues, and one problem with the rear bracing being warped.
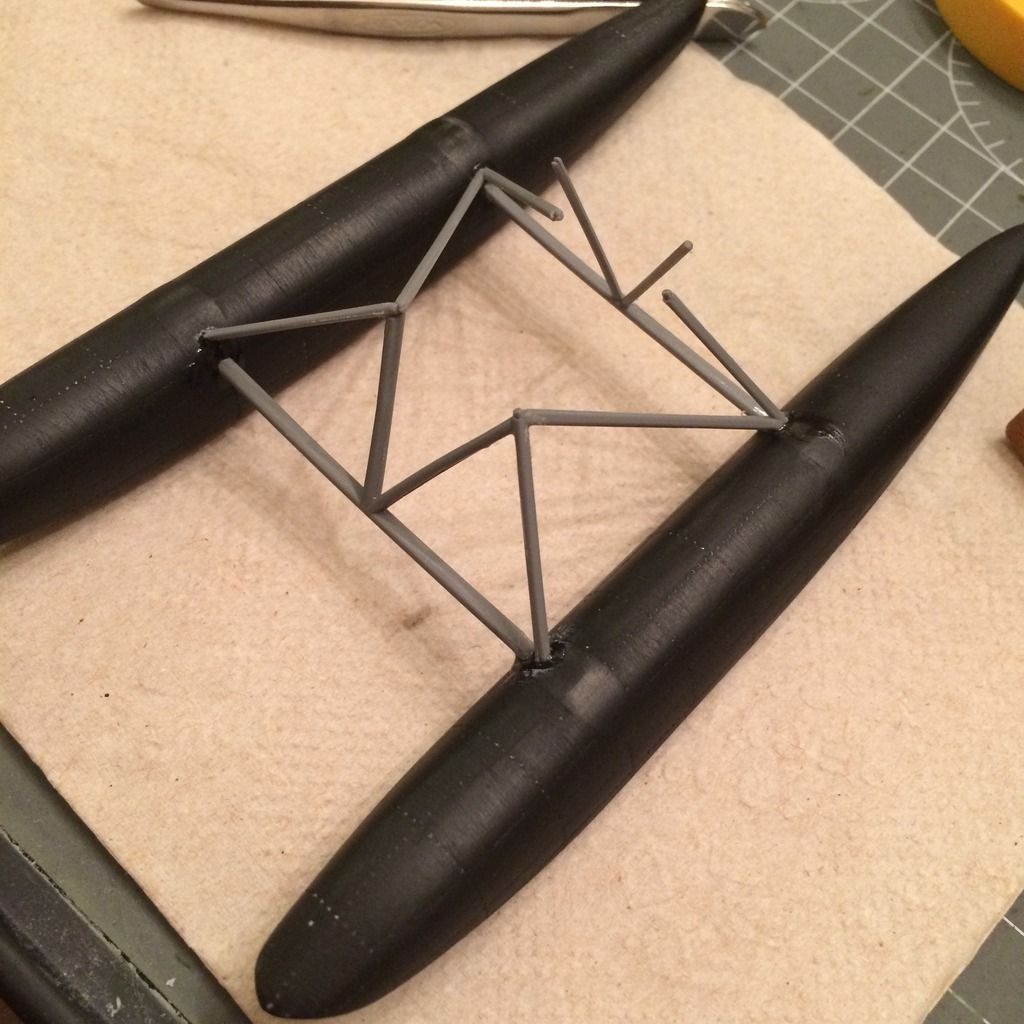
I decided to cut the struts and re-glue them. I used solvent glue to melt them together, then super glue to strengthen the joint. Test fitting the the fuselage looks good at this point. Some cleanup will be needed on the lower attachment points, but hopefully not too bad.
Next up was finishing the cockpit. These had wooden floors, and I’ve never painted one before. I painted the whle thing Tamiya buff, then came back with Tamiya flat brown brushed on really thin, leaving brush strokes to hopefully simulate wood grain. I’m ok with where it is, but it’s no work of art or anything.
I have to say, switching to Micro Kristal Klear as an adhesive to PE changed my life. This cockpit went together really easily. The Part PE fret didn’t include belts, but I am assuming there was some sort of lap belts on these, so I added some from an Eduard set I have.
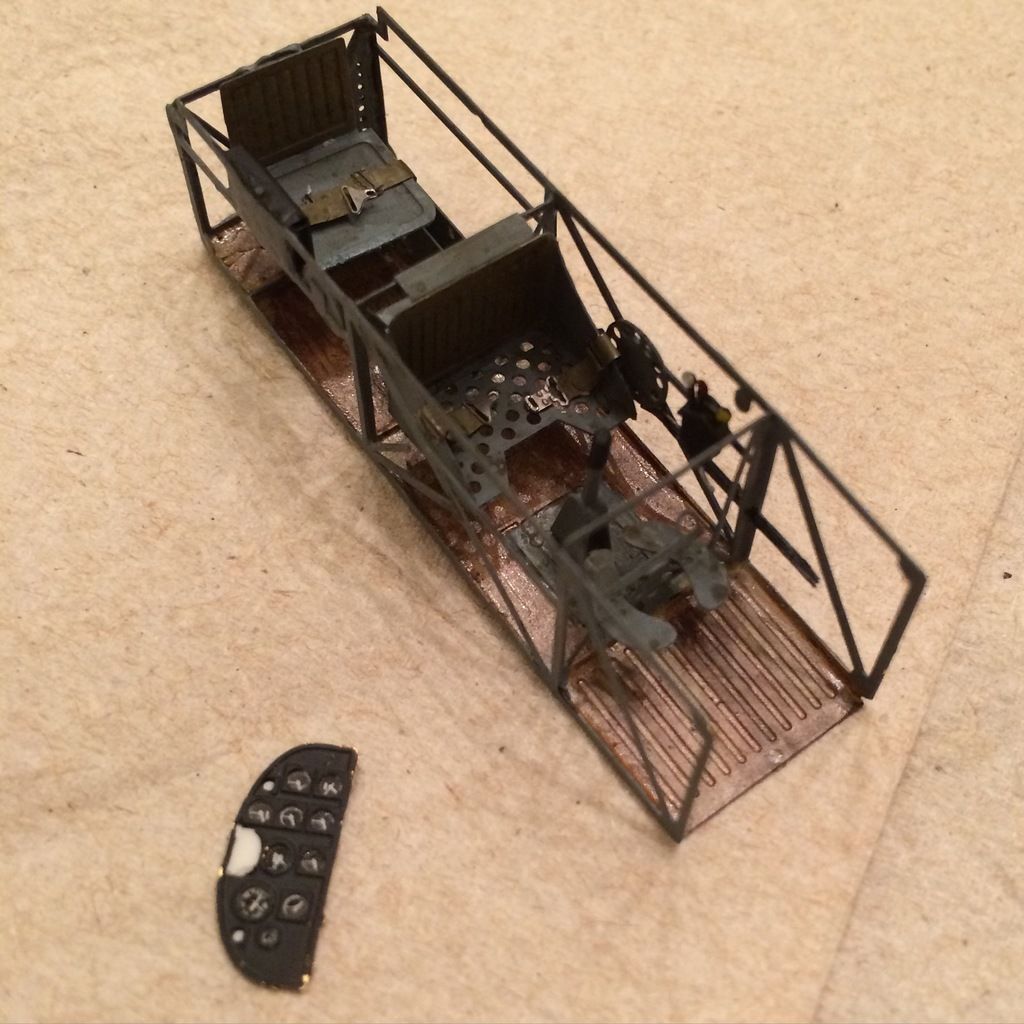
Now all that’s left in the pit is mounting the instrument panel and putting it in the fuselage.
-BD-
BD,
Is that the 1/48 Trump Mig 3? Mine gave me fits when I built it earlier last year.
As far as the woodgrain, I always had luck with some thin brush strokes of Burnt Umber oil, thinned slightly with Turpenoid.
Steve
BD, that looks really killer. The PE pit is awesome. You’re really flying on this one.
Steve, as expected the water looks stunning. You may motivate me yet.
BK
Brandon, both the pontoons (need to get a shot of ponce wheel in the photo) and cockpit look pro. I would never of thought of using a rust colour inside there, but I’m probably wrong to think all cockpits were made of aluminum.
regards,
Jack
Steve - Thanks for the advice on the oil. I’ll have to pick up some of that. Yeah, it’s the Trumpeter Mig-3 (early version). I’m thinking of adding it to the 1941 Group Build.
BrandonK - Thanks! I have been looking forward to this build since you first posted the feeler, so it was my first priority when the year started.
MoparMadness - Thanks!
Jack - I just have the Trumpeter ponce wheel with four wheels you can switch out (pic below). As for the colors, the framework is a light grey color, and the inside of the fuselage I painted with buff and added a filter to make it look like doped fabric. The floor itself was wood, and I was going for a dirty wood look. I don’t believe there was steel on this plane outside of the engine and weaponry.

Now I’m off to the bench to hopefullt get the instrument cluster sorted and the fuselage halves together.
-BD-
Lol , i used the same picture as reference for my Rufe and wishing too to complete with a beach diorama. As i’m not used in diorama will follow with attention 

Not yet decided about the subject for the group [:S]
LOL, confusing with two Brandons [:O] BD and BK both have excellent results as usual.
Steve
You need to be renamed the “water king”. Man that U Boat is a stunner and can’t wait to see what you do with this Rufe. I hope my Jake comes out half way decent in that water setting I want to do.[*-)]
Thanks PJ. I hope so too. Being a new method, I’m sure I will have some teething issues.
I’ll be watching this one for sure. I’m thinking something similar for my Arado 196 but moored to a wooden dock. The water will be quite similar since my aircraft will be from a unit near Krete in the Southern Aegean Sea. Great start! I might “borrow” a few of your design ideas. But credit will be given to whom its deserved of course!
Great progress and the slope looks very good. You used Oregon sand and I will be using Florida sand LOL. How does the AK effect product compare to the hair spray method? (assuming you have used it in the past)
MM
Will your Arado be from III/KG 100 stanioned at Kalamaki, Kreta?
PJ,
My guess is that Florida sand is lighter and finer that Oregon sand. The AK worked very well. I was very happy with the results. I have never use the hairspray method but suspect that it’s similar.
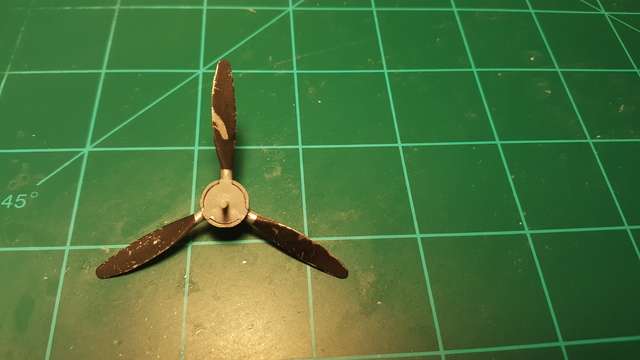
Here is the prop.
Honestly, I’ll likely be copying much of the work on the dio, Steve. You are teaching us how to do this. The GB is the push many of us need to do something new. Thanks for showing us the way.
BK