Im considering it, although ive never done it before and im unsure if it will even be visible. Im taking the hour and a half drive to the closest model store to see if they have anything that i can use to replcate them this evening
Because you have a view of both sides of the engine, you’ll be able to see them. Fine lead wire would work well if they have it in stock. I’m excited to see what you do!
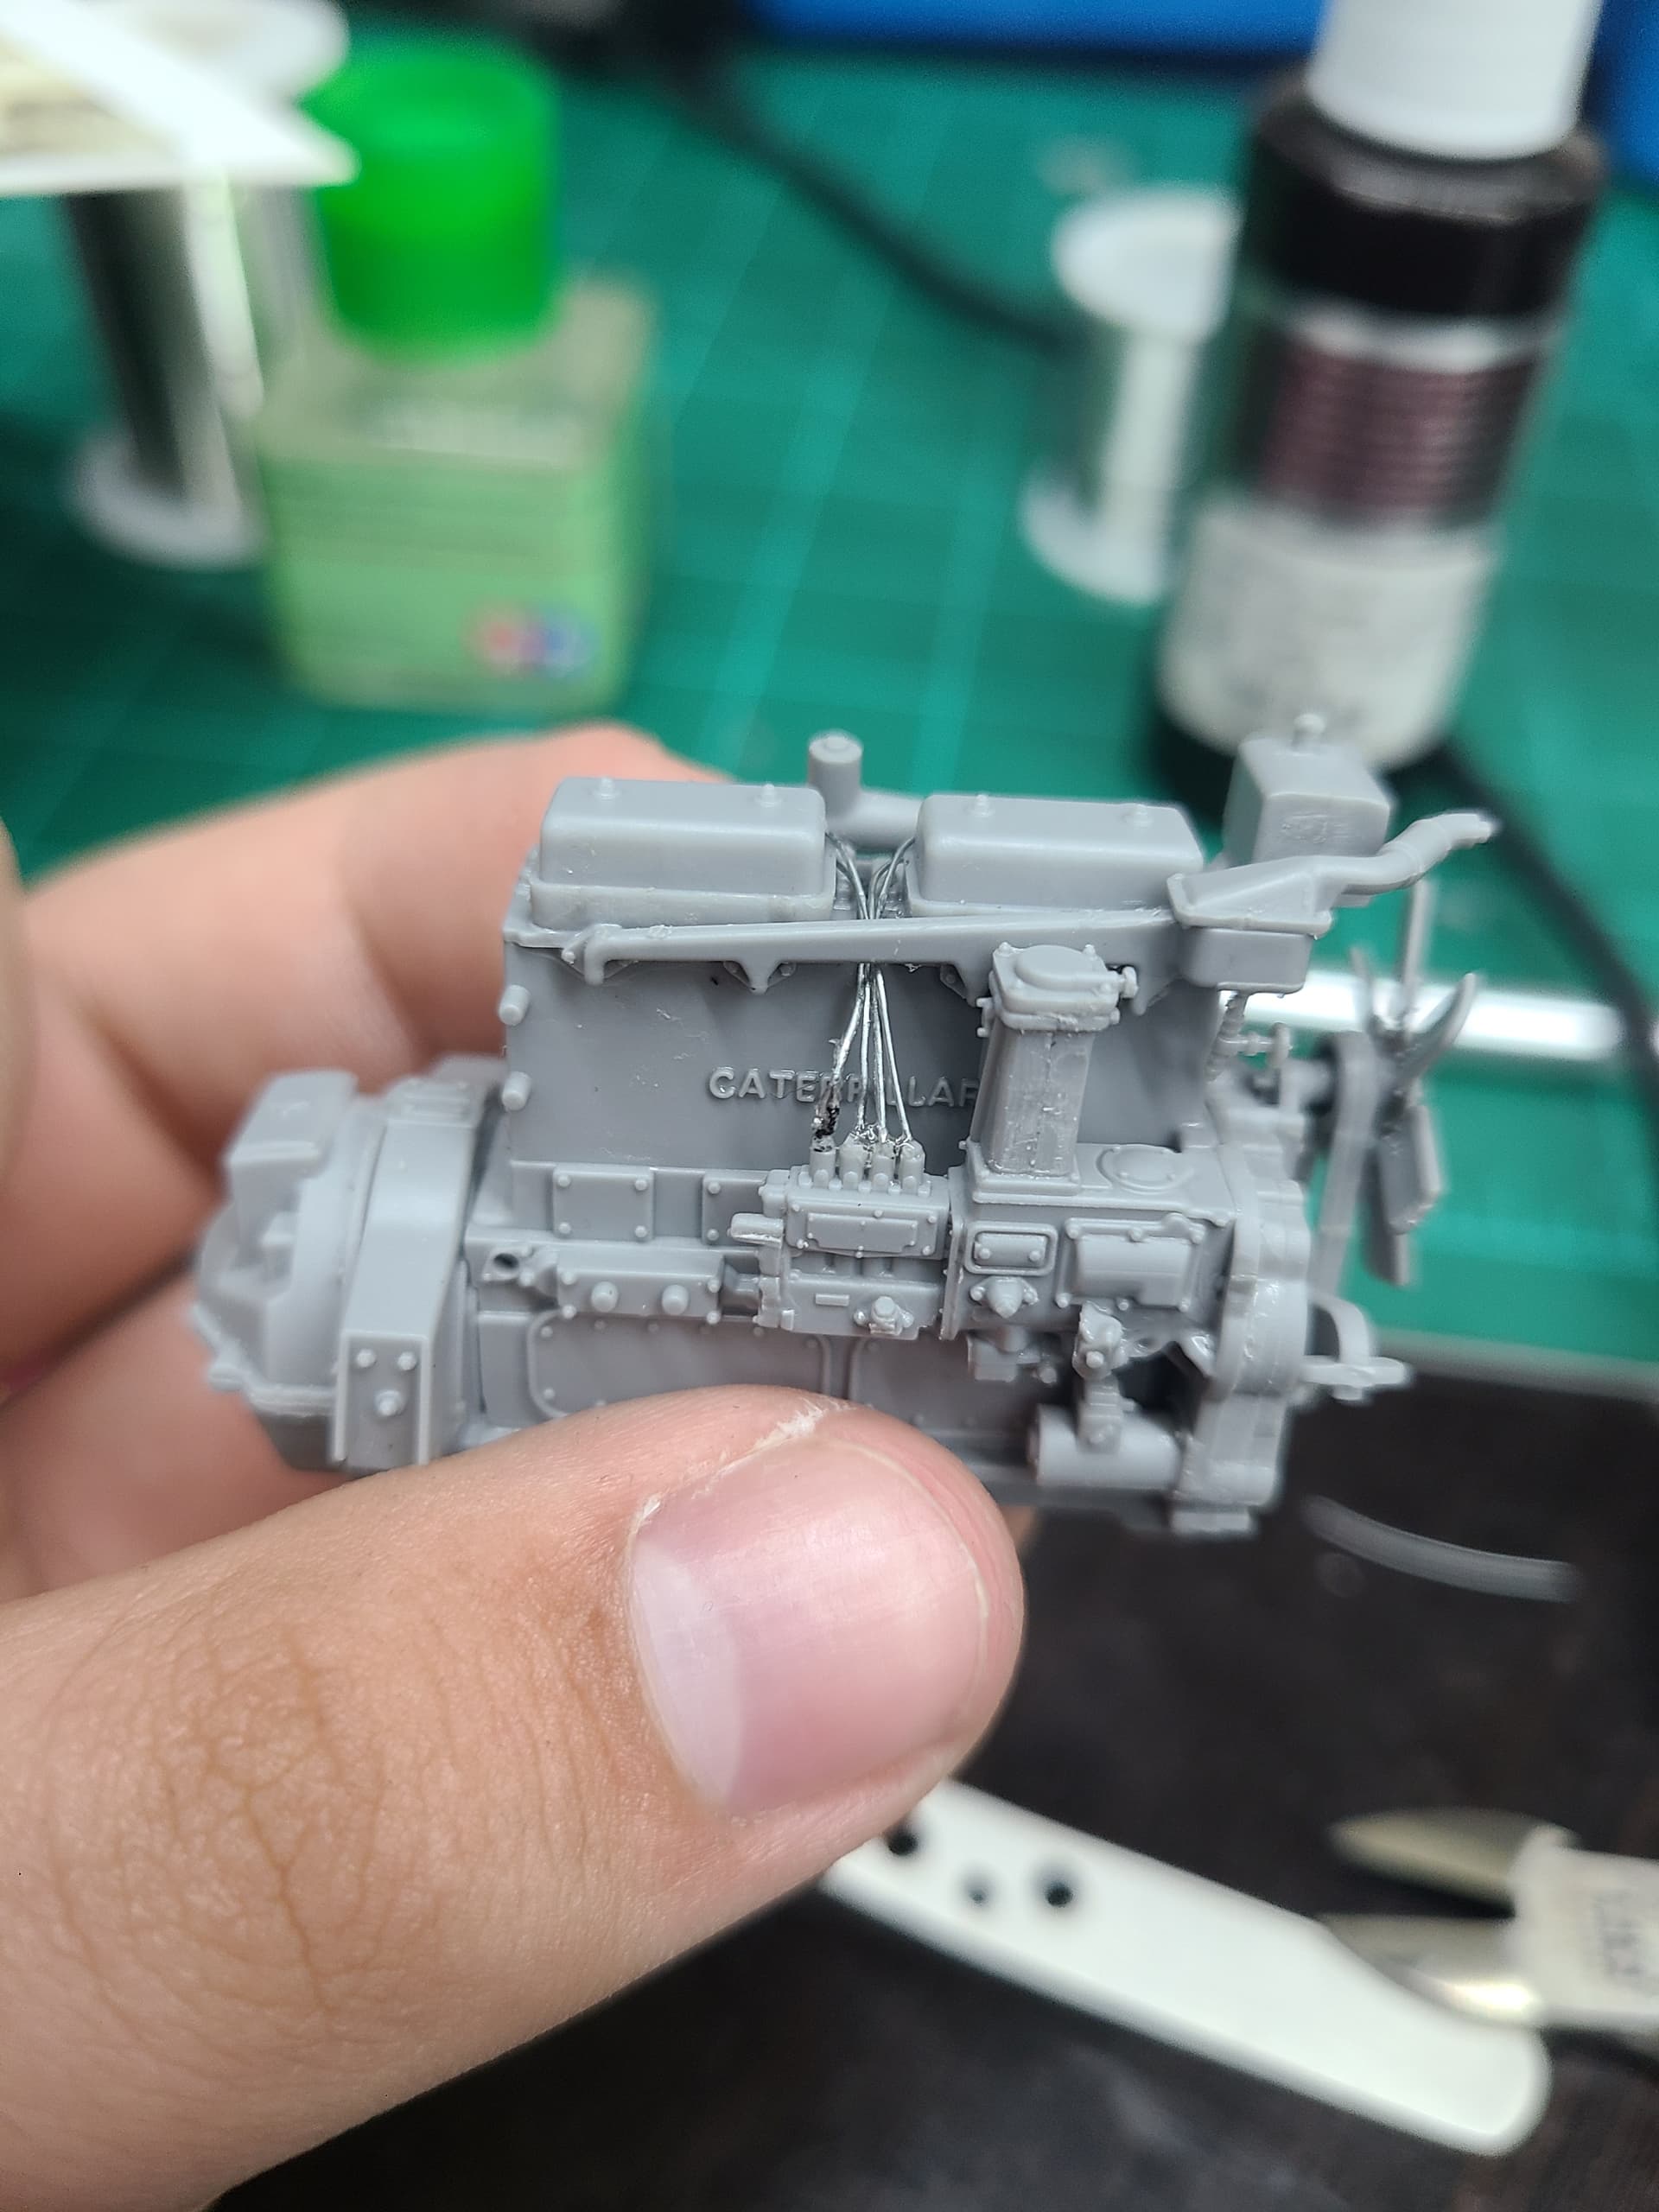
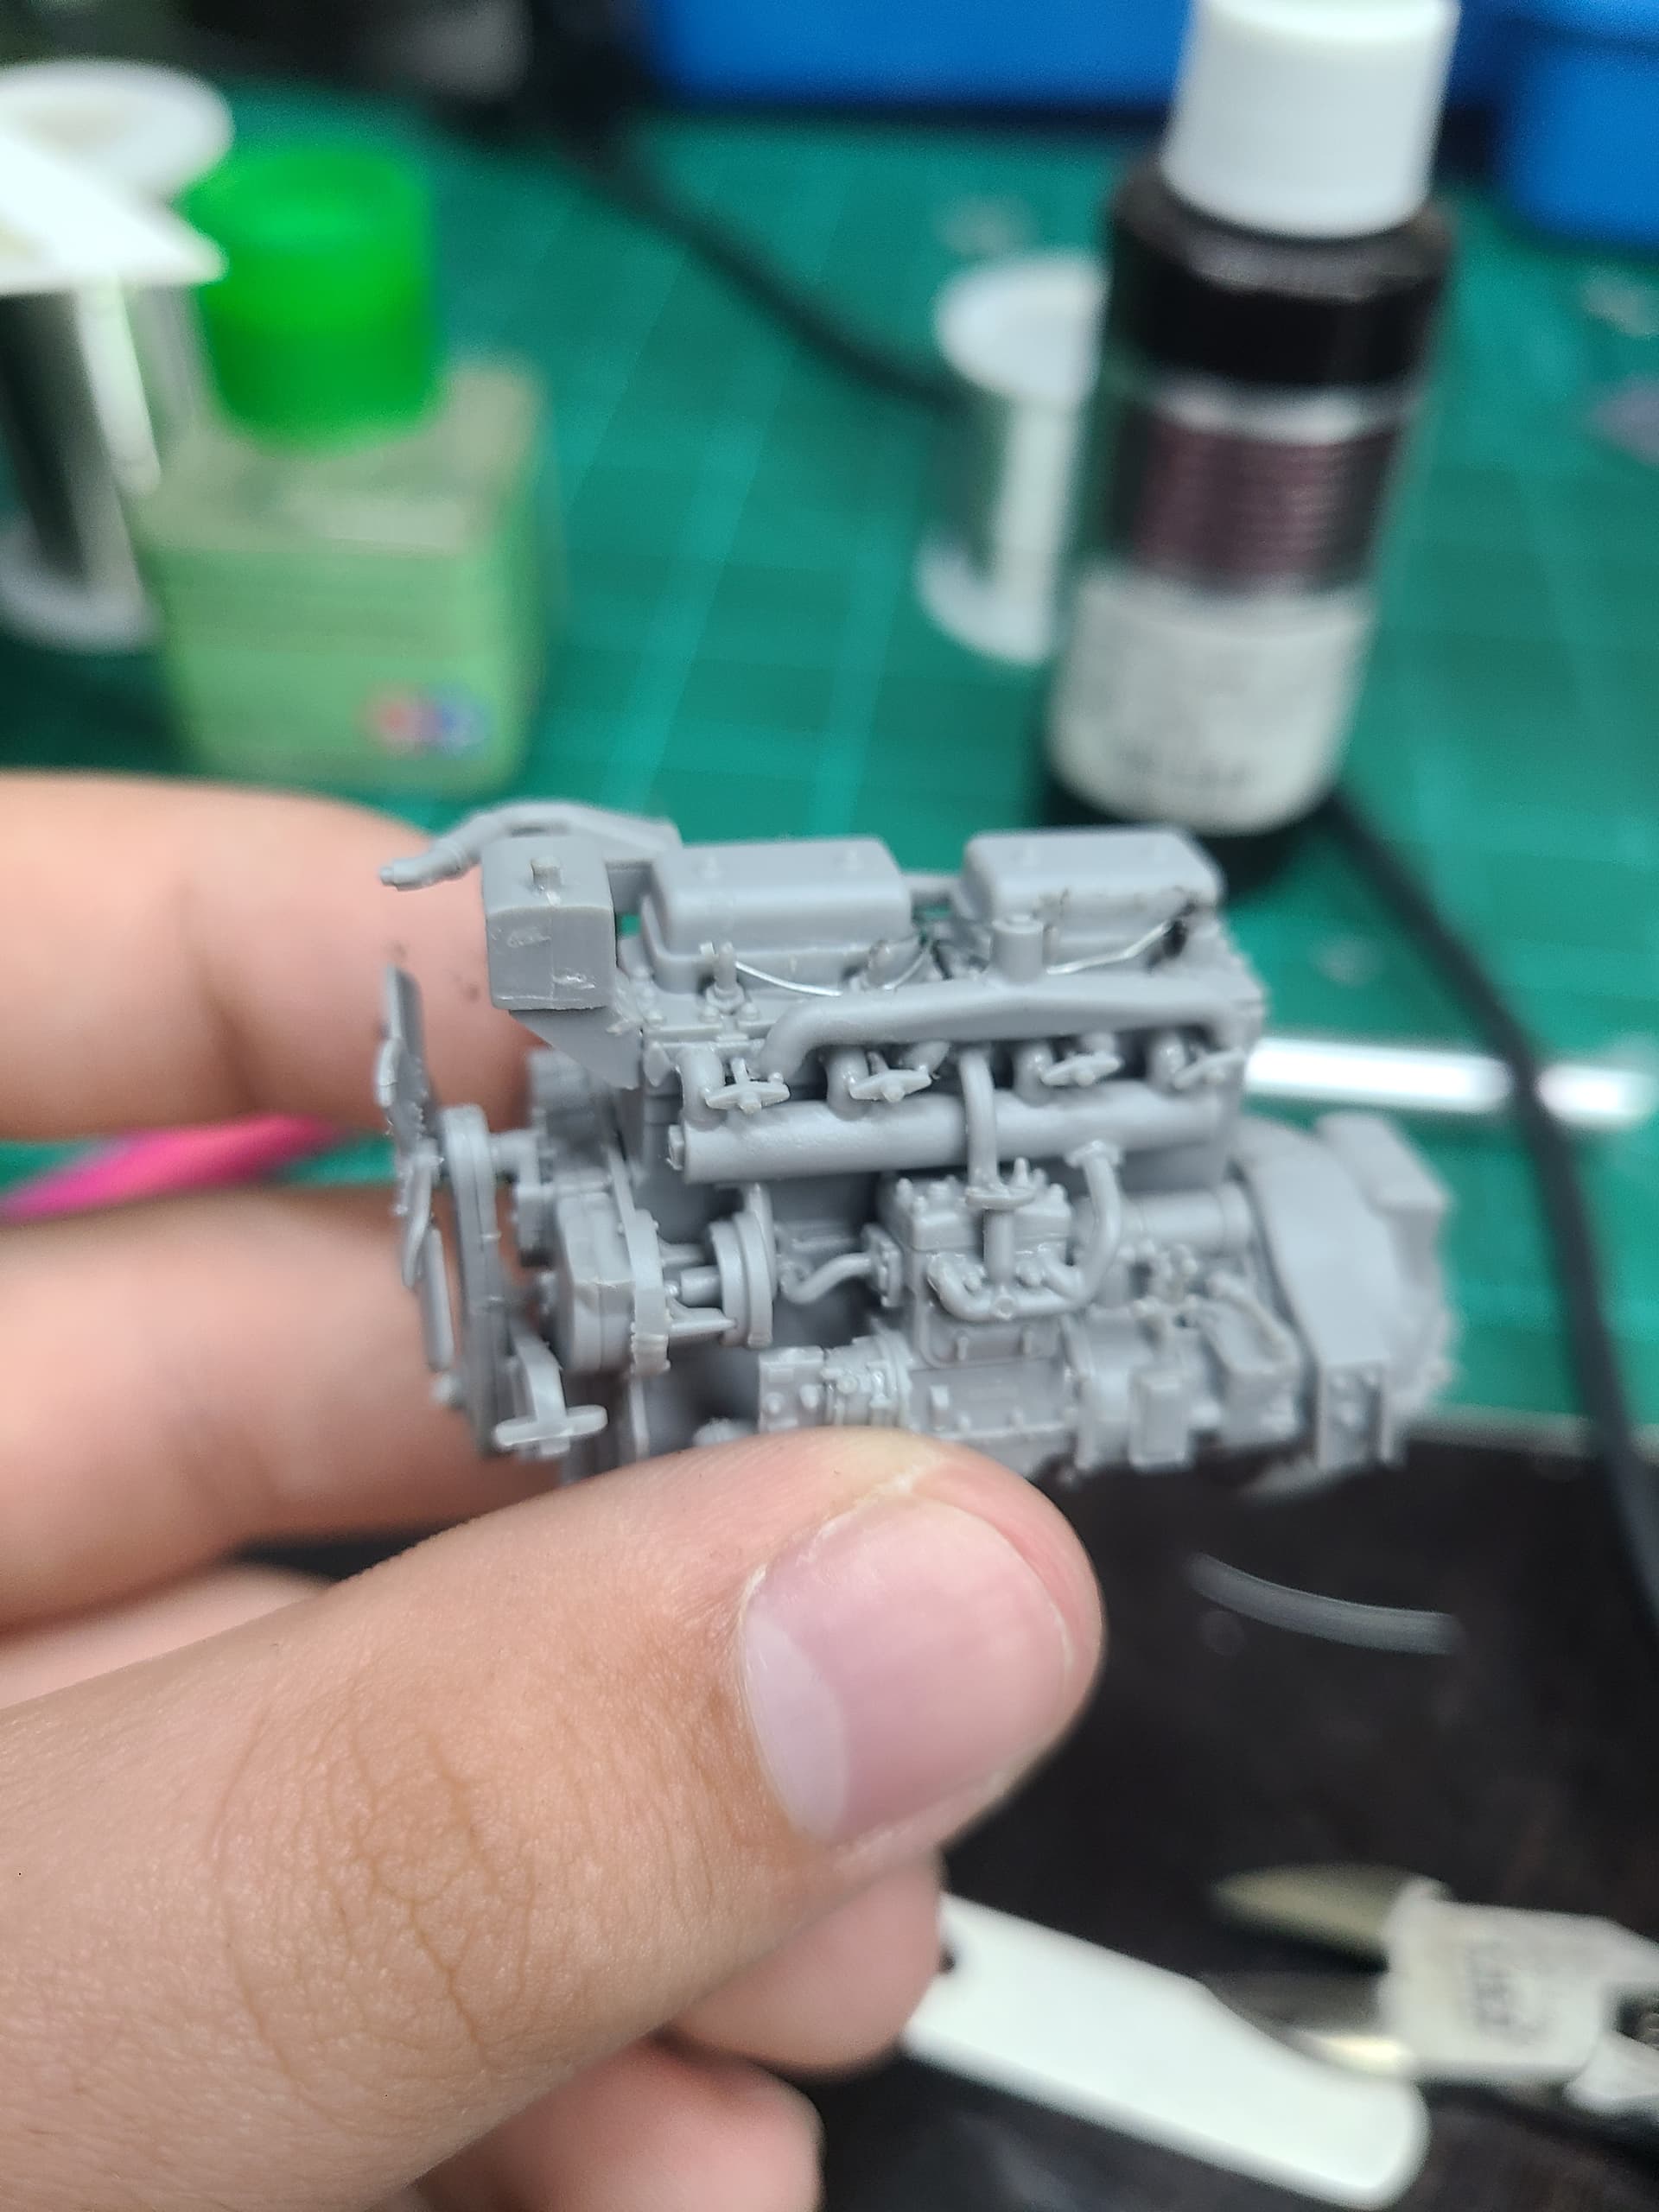
Had to use crappy copper wire from hobby lobby, but it worked. My superglue has decided its to to cold to exist and becomes gummy seconds after leaving the bottle, so this was basically torture.
2 Likes
Sorry that HL didn’t have what you were looking for. OTOH, that is not bad at all for a first attempt. I wish I had pics of my first wiring to show you. Nice job and way to work through the challenges!
So wish I had seen and joined this earlier! Started my first plastic model build with the Hasegawa Yamaha RZ250 (big mistake!!). Got it partly finished but went on to try the AMT 1968 Shelby GT500. Still not finished and continue working on it a little bit every week. The fitment is certainly not making it easy.
I am over 50!
1 Like
You are welcome to join! The Group Build runs all month long!
Welcome to the forums Daryl!
The Friulmodel metal tracks for the D7 came in today, so ive spent the better part of 3 hours getting one side assembled, my first time with metal tracks and it honestly wasnt terrible. Ive still got to put the track pads on, but thats not hard. Unfortunately i seem to have come up short 6 pads and 4 links both left and right, so ill either need to order another set or somehow incorporate the plastic ones into the metal track. Whatever the outcome i know it will be time consuming, and with school, a farm and 2 businesses im streched thin. Im starting to play with the idea of finishing the M26 first before the d7 so I know ill have something done, but i dont want to come up short. Not enough hours in the day Unfortunately

1 Like
Tac, that’s a huge step! Didn’t expect the metal tracks. Know what you mean about the time in a day. School has been a big thing this week for Shushu. We should be back in the nook tomorrow. You’re doing great work and I’m impressed to see you tackle such an ambitious project. Way to go!
Ive decided that while i figure out the tracks for the D7 ill go ahead and prime and base paint the m26. Ive got it all layed out for primer, Hopefully tomorrow, and it takes up my whole desk!

3 Likes
So I think I ruined the m26. I wanted to try Hairspray chipping, but the Hairspray is making the paint overtop crack, just about the whole model is like this. Im not sure what to do, and idk if i can fix it, id really appreciate any advice or tips here
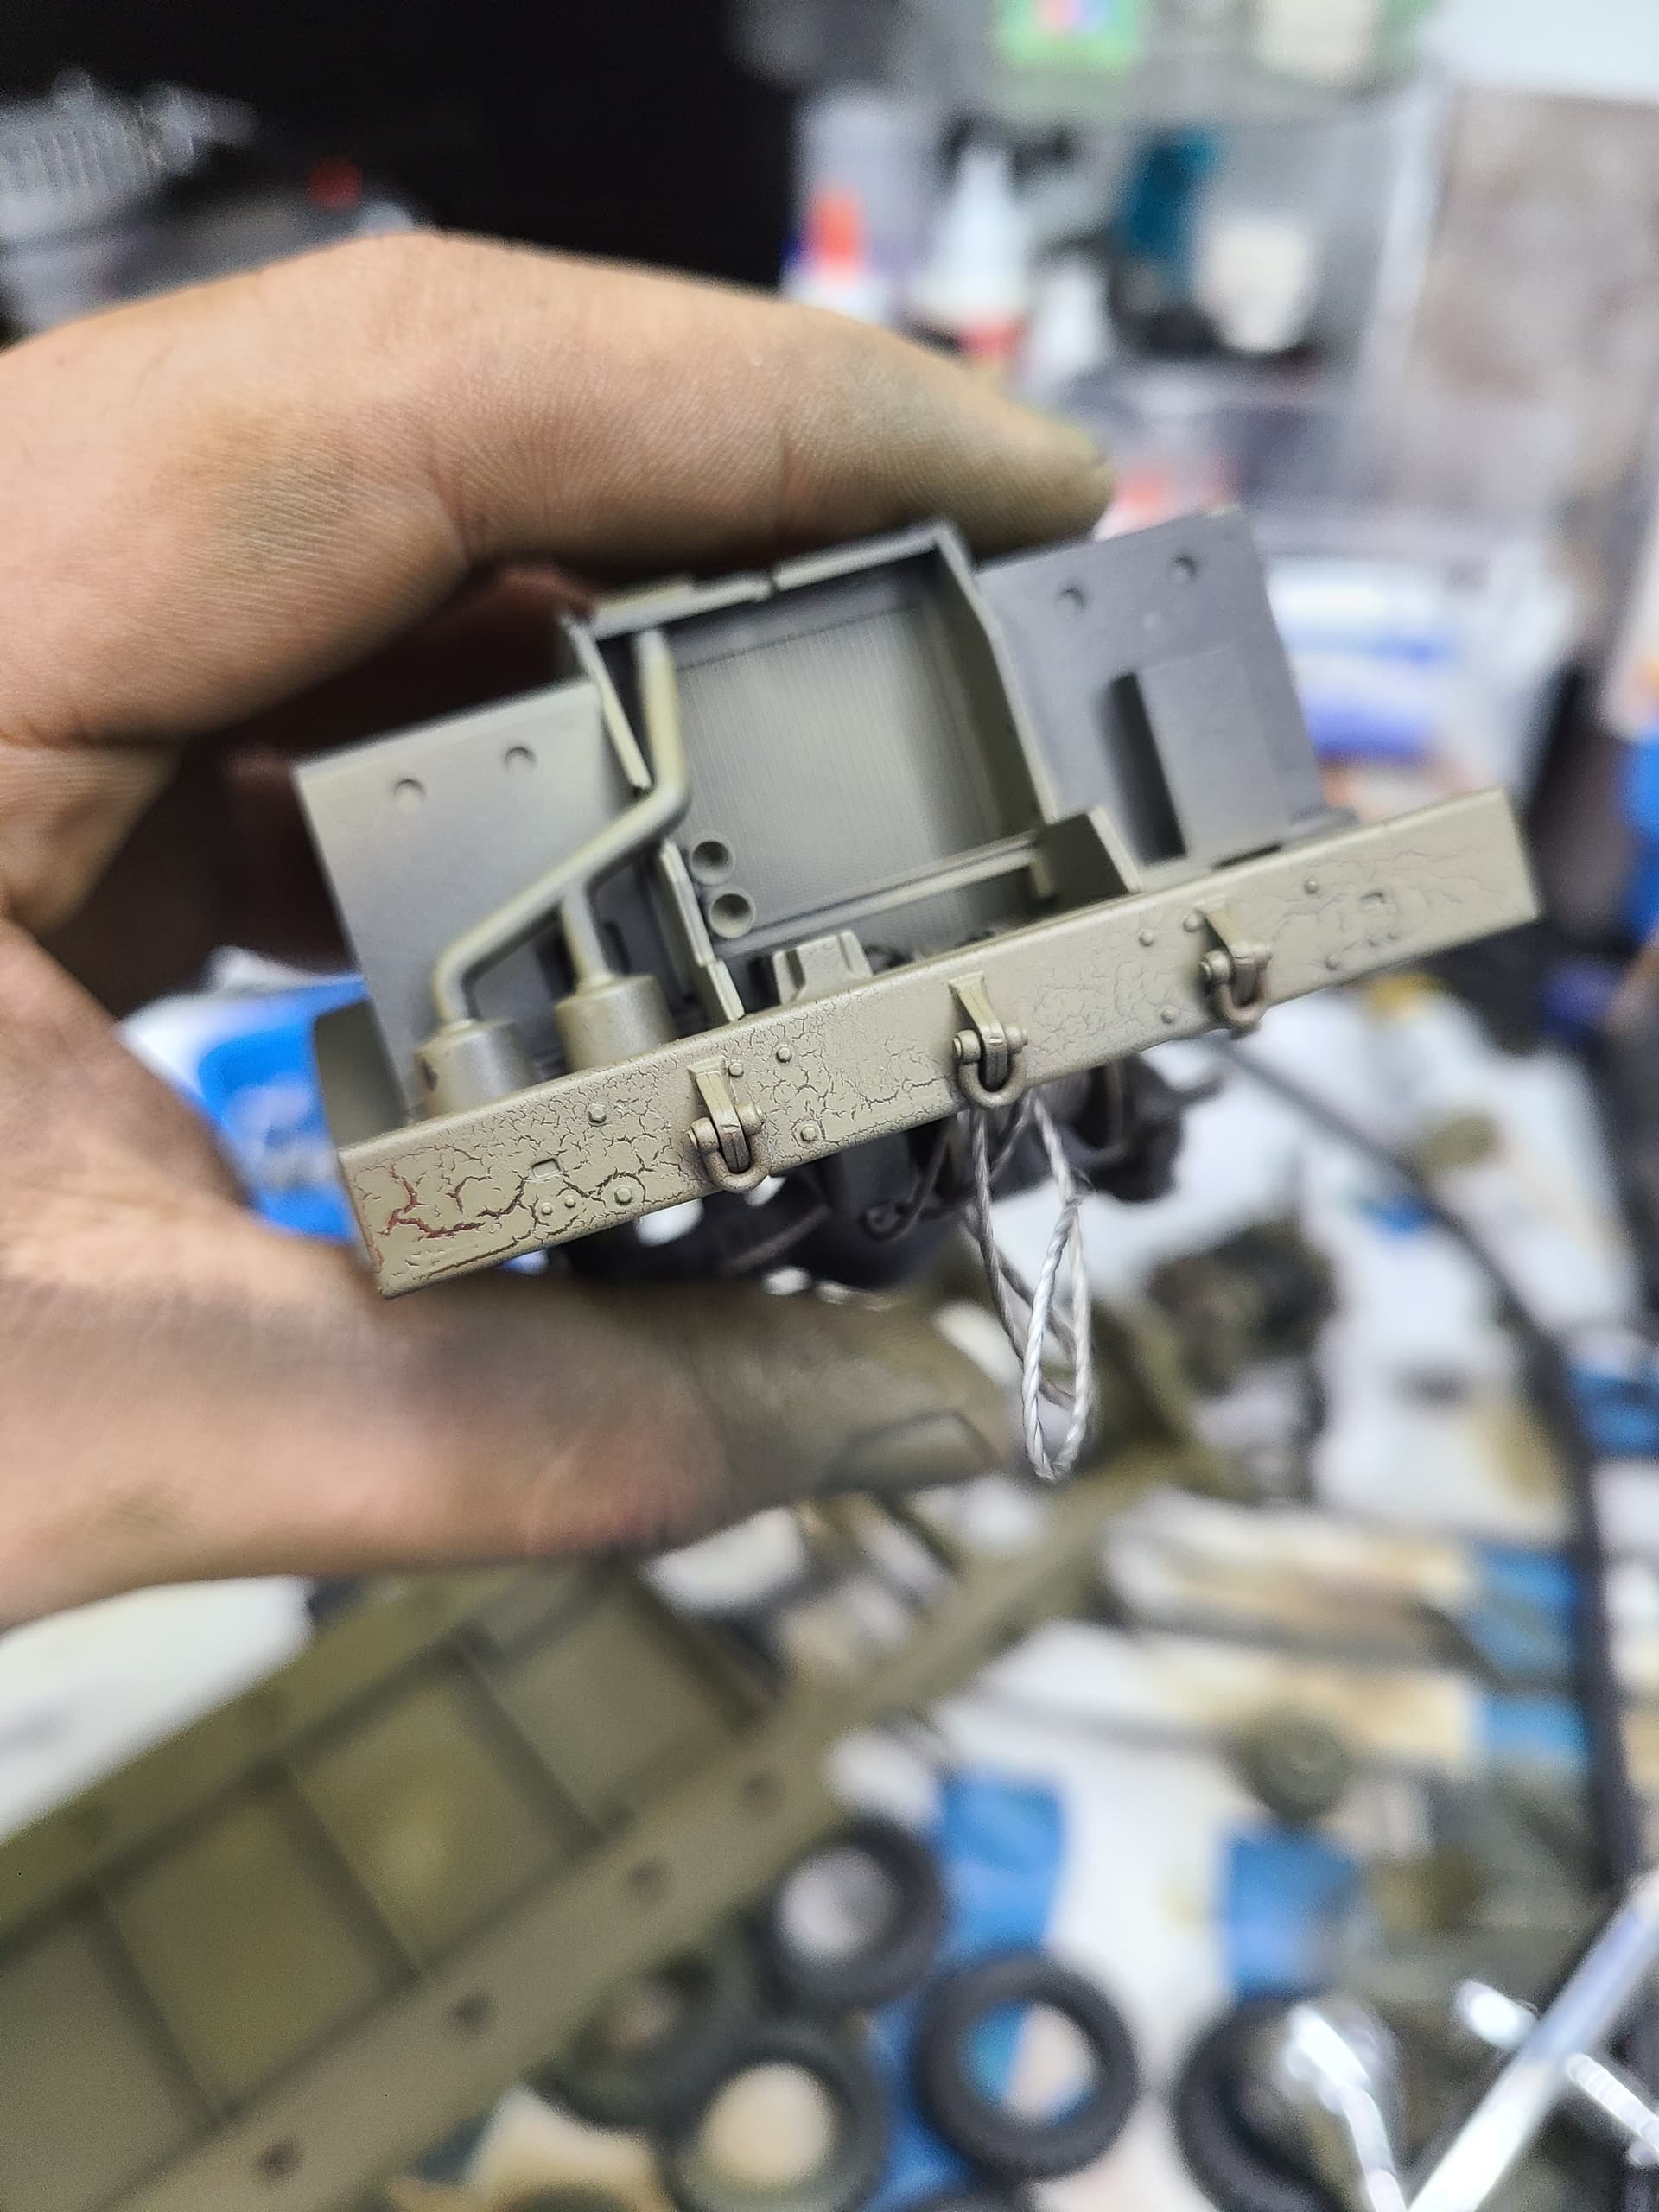
Update: the whole thing is an absolute f****** disaster, paint is cracked and pealing on the whole model, and most part’s are unfixable. Im leaving tomorrow for a hunting trip, so im going to leave the model sitting in alcohol to strip the paint while im gone, and hopefully the damage wont be too severe. If that fixes it ill restart the painting process, itll be a big waste of time, paint and precious rare Mrhobby 1500 black, but it will hopefully fix the problem
I’m not an experienced modeler, but, on first glance, other than the fact you did all the steps in less than 24h, which could be too short for the primer to properly cure, I will hazard a guess : did you use a water-based acrylic like Vallejo or Ammo over your hairspray layer ? I wonder if an unfortunate alchemy of too thick the layer of hairspray, too soon for the paint, too much water in the paint didn’t immediately start melting the hairspray and destroyed your topcoat.
Also, if you applied hairspray all over the model, you probably can just put it in water rather than alcohol, since water is the medium that will strip the hairspray and everything above it, and shouldn’t touch the Mr Finishing Surfacer which is lacquer based underneath.
I have only used the process once so I can’t really be SURE, but I was precisely re-educating myself on chipping techniques for my Shturmovik. Fortunately I’m using Tamiya paints, which are a bit more controllable.
Step one - don’t panic.
We all understand how frustrating this is for you, we’ve all been there with one or more projects. The kit isn’t ruined, you’ve just a setback with paint, which can be fixed.
Stripping the paint is probably going to be your way forward, but don’t just toss it into a bucket of stripper and walk away. As mentioned above, soaking in water may just remove the hairspray and top paint layer, allowing you to salvage the primer and lower layers, thus reducing lost work. If that doesn’t work out then take the next step of stripping it all, but make sure you keep an eye on it so that your issues aren’t compounded.
I once taped a set of decals in a window to reduce yellowing first time trying this) then promptly forgot about them. End result, six weeks in the south facing window, no yellowing left on the decals but also all the rest of the colours on the sheet were bleached out rendering the decals useless to me. Add in the fact that the sheet is original to a kit from the 70’s, no one makes replacements and the kit was never reissued = huge disappointment, lesson learned and kit on hold for indeterminate amount of time.
You should be proud of the progress you’ve already made on this kit, so far you’ve done a very good job on it in a very short period of time. You are using many techniques that you’ve never tried before, usually there is some kind of learning curve to each one. This is salvageable using the right techniques and patience.
Don’t give up on this, take a step back, try to let go of your frustration with it and look at it from a fresh perspective. I’m positive, based on what you’ve achieved so far, that you will overcome this setback and will have a very sharp looking M26 when done.
Lastly - happy hunting this weekend.
4 Likes
I definitely agree with most likely not allowing enough curing time. I’ve had paint cracking very similar when I’ve used incompatible solutions over one another in too short a period of time.
I would say once the paint is striped, let the hairspray and primer sit for a minimum of 24 hrs before putting anything over top them.
Ive done some testing, and it appears the hairspray reacted with the Vallejo paints, even after 24 hours of cure time. Im going to have my brother add the alcohol to strip it about 24hours before i get home, so hopefully ill come home with a new buck to hang over my bench and a freshly stripped model. Thanks all for the advice and tips, hopefully i can salvage this disaster
2 Likes
Its never a disaster if you learned something new.
2 Likes
This is excellent advice.
1 Like
I would like to enter. I’m 14 and will be building Revell’s 1/48 scale A-10 Thunderbolt II.
3 Likes
Welcome to the forums and good luck on your build!
1 Like