Richie,
That would be the relatively recent Trumpeter kit. Hasegawa’s kit is late 70’s vintage, it don’t compare.
Sub,
The pit’s looking good. Got one in the stash, looking forward to watching yours come together.
Richie,
That would be the relatively recent Trumpeter kit. Hasegawa’s kit is late 70’s vintage, it don’t compare.
Sub,
The pit’s looking good. Got one in the stash, looking forward to watching yours come together.
Thanks Buddy!!! Still, want one, just a bit more now.[proplr]
OK, a few pictures for the curious… Speaking of curious, my you can see my “helper” in the first picture…
brushpainting cabin details etc., starting to look at wing assemblies.

Lining up the wing halves, leading edge slats and various actuators after cleanup. (I just wanted to go right to the wings while interior paint was drying.)

Yup, great detail right out of the box - I feel like an armour guy lining up individual links… OK, maybe not quite the same! ![]()

Ready for slats…

Slats in place, flaps & ailerons next up.

Wow, looks like half of the wing is made up with control surface, it really must have looked like a Stork flapping away while it was taking off!


Interior pics should be up in the next few days.
Looking good Vance.
I have run into a brick wall on my Lysander. I can see why the kit was so cheaply priced, as it is the next best thing to a hunk of garbage. It’s fighting me every step of the way and almost achieved airborne status this afternoon. I have determined that I will finish the build at the bare minimum, no major efforts will go into this thing, and I’ll move on to something else.
Thanks Aggieman, I think I’m at the other end of the spectrum with the Storch - everything is dropping into place almost perfectly. Even those actuator arms have a positive lock-in position. ![]()
So what’s going on with the Lysander? The interior is looking good from what you’ve shown us so far.
Well, the fit is horrible. The landing gear attached to the fuselage via small stubs but refused to fit snugly. The wings had separate ailerons that did not attach as the instructions indicated, so I ended up having to sand off the attaching stubs, and at that point one of them simply did not want to stay in place. I’m not looking forward to attaching the wings to what appears to be a woefully small mount atop the fuselage - looks like it’s going to be a lot of fun. But I’m going to persevere and see what I can make of this turkey even though I’ve realized that this is not going to be a banner build.
But all is not lost as today I learned that my high school senior son got a scholarship that will help fund a portion of his time at Texas A&M starting in the fall. It’s a bit of a load off more for my wife than for me but it’s great news just the same.
Vance that Storch is looking great so far!!!
Aggieman, that’s GREAT news about ur son!!! WELL DONE!!! Hope the Lysander will start behaving for you soon.!!
Hey Aggieman - if you’re worried about the wing attachment point, might you be able to build up a little more structure inside the cabin? Maybe not accurate at that point, but certainly better than having the wings remove themselves later on.
Congrats to your son also - so is he the football player, or is that your A&M helmet I keep seeing?!
The helmet is just a gif file, not a photo of a real helmet. My son played football through middle school but decided at that point that he wanted to be able to walk without any knee issues later in life so gave it up to concentrate on (a) school, (b) girls, (c) baseball and (4) basketball. This was a minor issue for me given that I love football and was really hoping he’d continue in the game, but that was purely selfish on my part.
Vance cant wait to see more of your Storch, she is lookin sweet so far.
Aggieman congrads to your son thats awesome, lotsa work on his part too. My hat is off to him and the proud Dad. I am also sure Aggie that you will force that Lysander into submission and end up with a nice build.
I wanted to ask if a TBF Avenger would fit in here as they were used as both sub killers and spotters in the Atlantic from some of the reading I have done on them.
Hello Aggieman and all,
Congrats on your good news, Aggieman-I know that you musty be feeling great on many levels. As you may recall, I am also doing the 1/32 Lysander for this group build. I am not as far along as you (got the pit done and installed into the fuselage. I can testify to the problems with this kit also-I thought it was just me with my recent return to the hobby. I did make a couple of mistakes, mainly because the instructions regarding the pit were not too clear. I am also really concerned about the really sketchy attachment for the wings at the top-it really seems that gravity alone will be holding most of the wing structure.Anyway, I will be working on it this weekend and hope to have some pics up by Sunday.
Randy (vetteman)-good to see you here on this GB.I really enjoyed the NMF build for the GB thread you moderate, and thanks again.
Regards,
Stenscience
Aggieman-congratulations on the news of your son receiving a scholarship. We have a 10th grader and I can only imagine the feeling of relief that the news gave all the family.
No idea when I’ll be starting on my Mustang. Still out of work (6 months) and not in the frame of mind to start any ‘non-job search’ activities. A lot of nice work being displayed though…good job guys.
Thanks everyone regarding my son.
The Lysander is a garbage kit. It seems that some of the pieces just aren’t molded to go together properly. I have been making a go of it, but what I’ve been doing is basically just going through the motions. Gonna get this dog built so I can move on. The landing gear shrouds did not match up with the legs, and not to beat my own drum here, but I don’t feel like I did anything wrong in putting it together. I did finally get the wings attached and had to use a lot of CA to get them to stay.
I’ll try to take some pictures in a little while to post to exemplify some of the issues I’ve had.
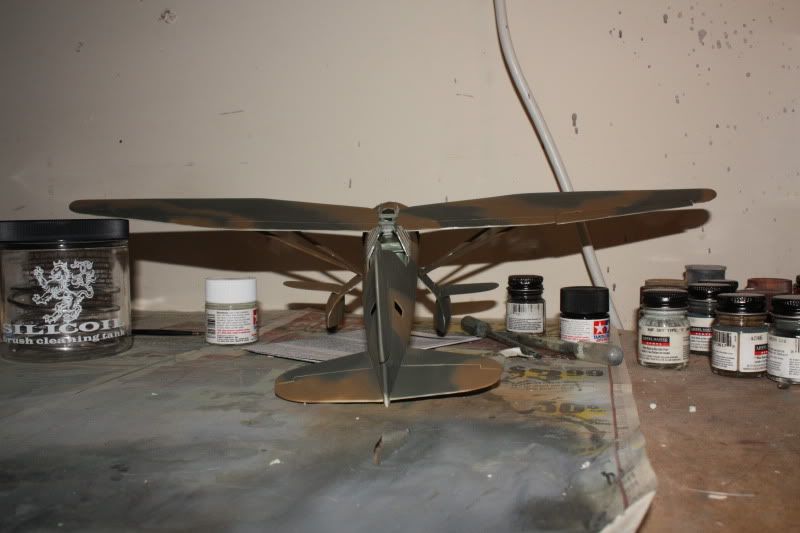
Here are some photos.
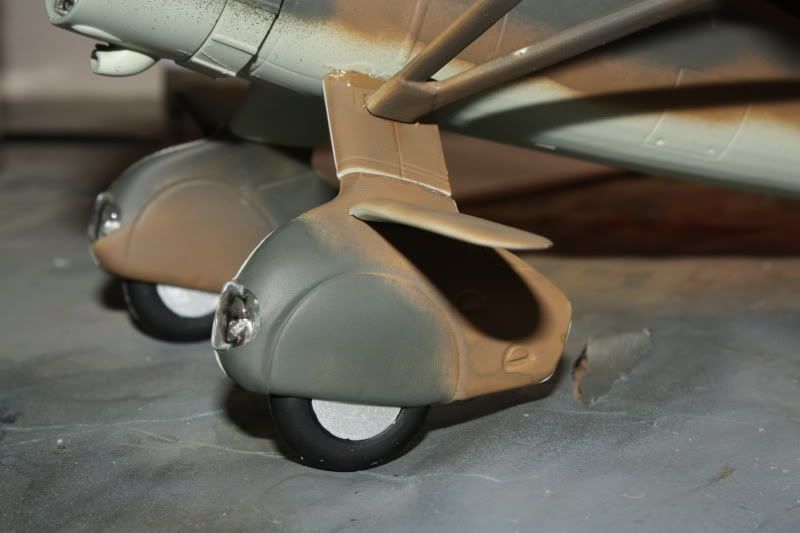
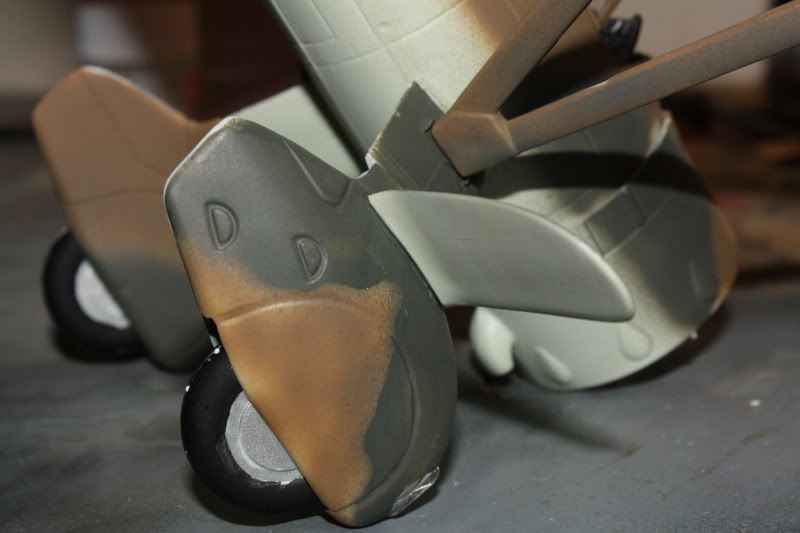
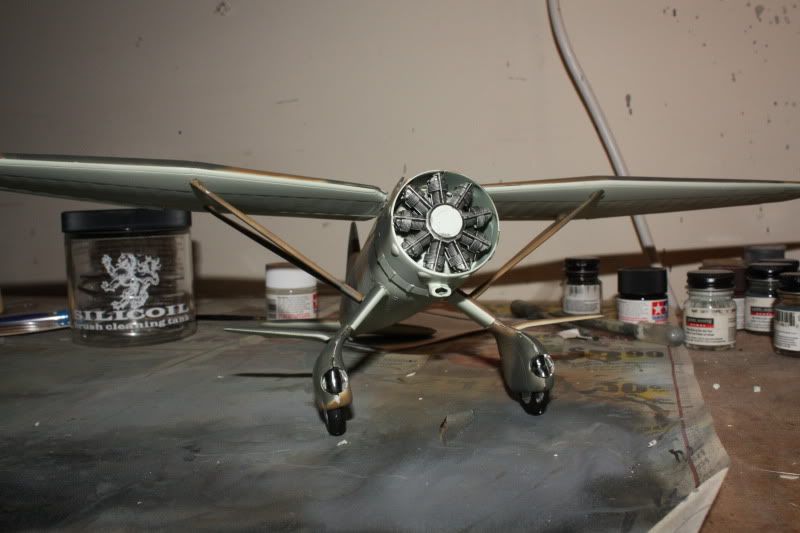
Note the horrible mis-alignment between the tire cover and the leg for the landing gear, particularly in the second photo. These parts were put together exactly as called for in the instructions and from the molding of the mating tabs appeared would go together flush. This is something I could fix with some extra effort but I’m just not feeling it at this point. True disgust with the kit has surfaced in me.
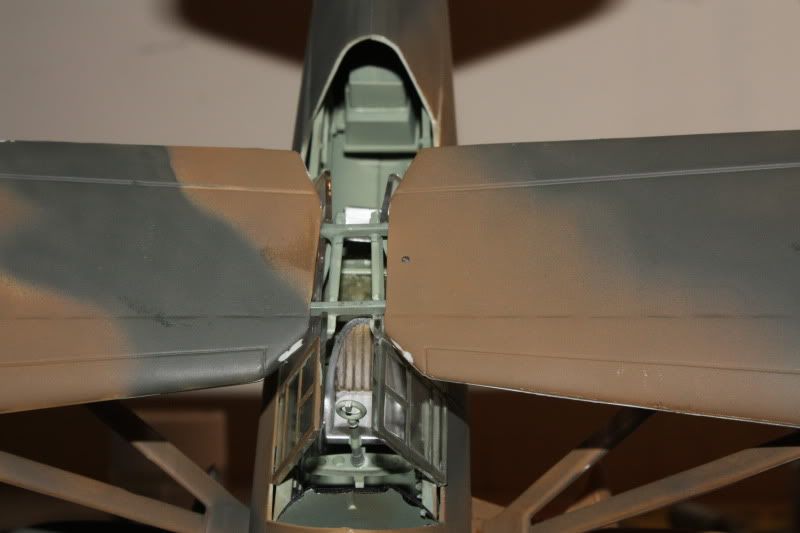
This photo shows the wing connections to the fuselage. The starboard wing is aligned properly and snug against the wing spar but note that it does not take up as much of the spar as does the port wing.
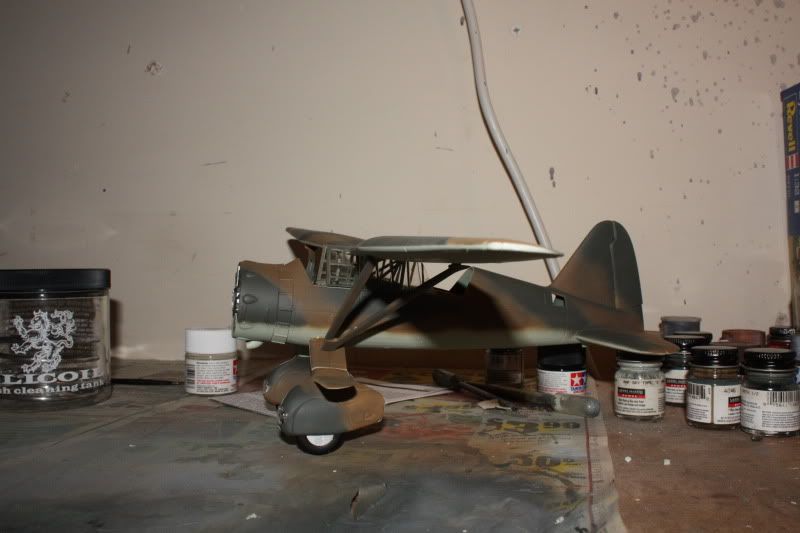
A couple of other shots to demonstrate the paint scheme.
The engine
Aggieman-it does look like you’ve got your hands full…looks like quite a challenge. However, you’re doing a great job…looks good.
Alright gents, couple questions for my Vigi-
It comes with a couple weapons and pods as optional. I can’t decide if it would look better with or without them.
I want to build it with the wings folded up, which is an option, but there is no detail at the fold, like I assume they would be. Any suggestions?
The wing leading edges call for a color called Burnt Iron. I also used it on the exhaust and it loks like, well, burnt iron. Works well for exhaust, but I can’t imagine a wing edge really being that color. Thoughts?
Thanks guys.
Sub, from the A-5B onwards they had a boundry layer control system on the leading edges. Typically they would leave the leading edge flaps unpainted because of that. They take bleed air from the engines so it would be hot. The pictures in the book I have doesn’t show any close ups of the leading edges of the wings. Nor any detail shots with the wings folded. As far as the weapons and pods, well, if it’s the recon bird I would just put tanks on the wings and the recon canoe on the bottom of the fuse. The book I have is Aerofax Minigraph 9 North American Rockwell A3J/A-5 Vigilante. HTH!![Y]
Ok, I’ve had it with this Lysander kit! Got a bit of bench time this morning and the canopy pieces did not match up. I really don’t have the desire in me to force this kit into compliance, so I’m calling it a day on this one.
I’ll get started on my Storch pretty soon but in the meantime I’m giving consideration to a 1/48 kit of the Lysander. And there was a new release from Italeri coming of an Arado sea plane that would probably qualify for this build.
Hi Aggieman and all,
Stenscience here. Sorry to hear that the problems with the Lysander are boiling over. I looked at your pics so far, and honestly I would be happy to do the job you have.OTOH,you are much more experienced than I am and likely have much higher standards. Why not put it to one side for a while?
I am doing the same kit and can attest to the difficulties.I am going to continue on, for a variety of reasons (one being that I paid full price for the kit).It is strange-there are some parts that are extremely well made,like the 2 part engine cowling.Then, when you put it together, the after ring (to attach to the fuse) is one honking big chunk of plastic that does not fit the fuselage,even with sanding etc. I ran into the same problem with the landing gear attachments to the fuselage as you did.The stubs, when you insert them, run into the cockpit framing.I had to cut them mostly off, and then I had to slop on the glue to get them to stick right.They are drying now, but I am not happy at all. I wonder if this is an old mold with tiny alignment issues that make it impossible for a lot of parts to fit. Anyway,I am going to finish this kit, but I am not going to pay for a custom decal set to be made as I originally intended.No point in putting lipstick on a pig.
Pics tomorrow,I think. Regards,
Stenscience
Well, it’s comforting to see that it’s not just me. Not to wish ill-will on your build, mind you. I think that mold is an old one, but considering that I only paid about $15 for it, it’s not a big deal to just let this thing go.
And I’m discovering that the 1/48 kit I had seen is actually quite expensive, so I’m not sure that I’m even going to pursue that idea.