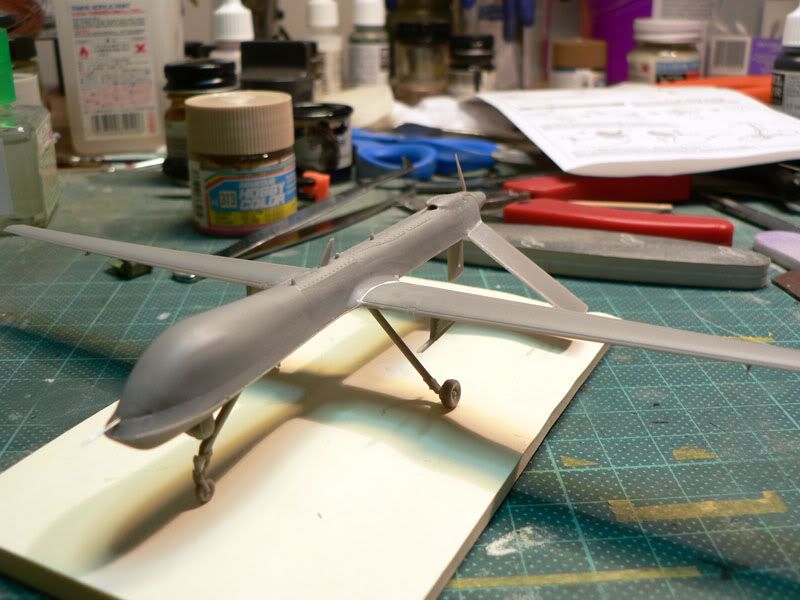
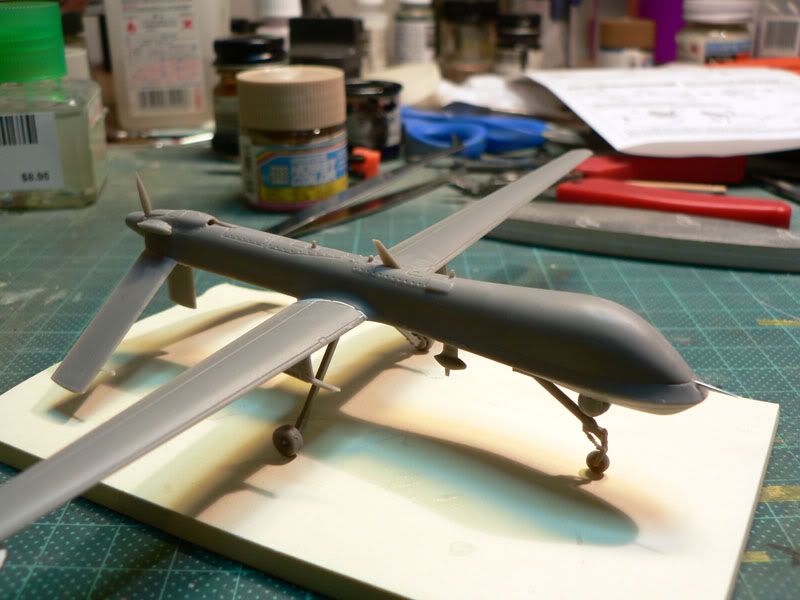
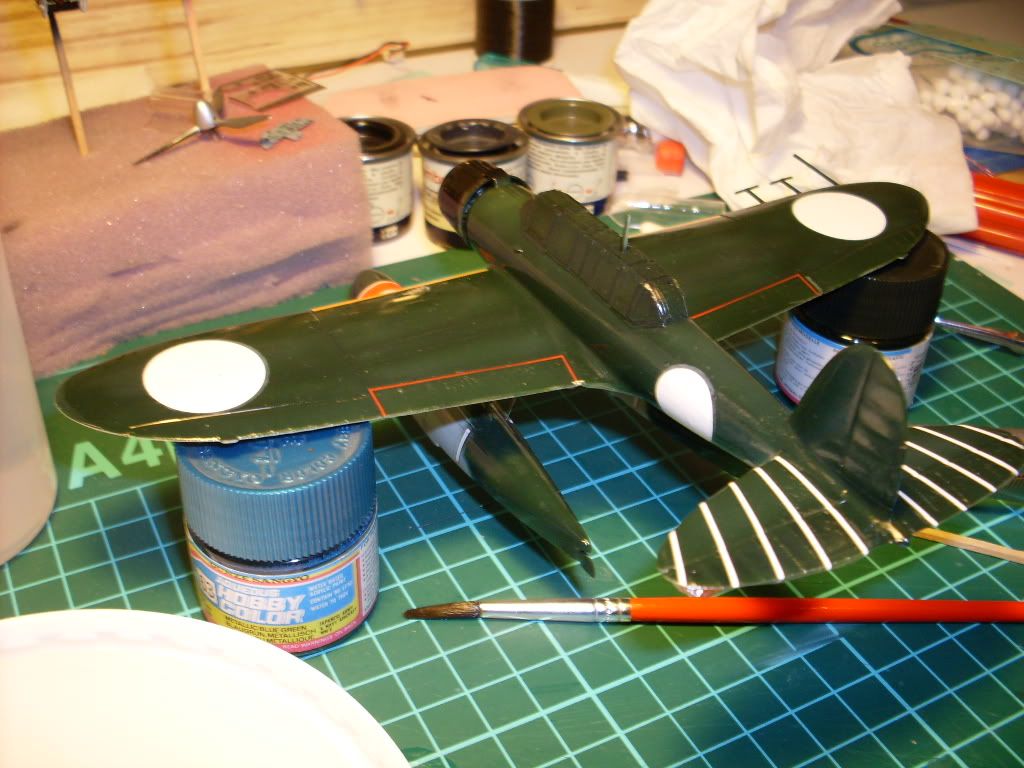
Here she is, fresh out of the paint shop and decalled. I used the new Tamiya light ghost gray spray can. It looks a little too blue to my eyes, but is close to several of the predator pics I saw. The decals release from the backing paper pretty quickly, I had several separate from the paper before I pulled them out of the water. My only complaints about the decals are that one of the WA’s was slightyly out register and that they have a glossy finish to them. Hope to have her landing gear painted and up on the sticks later today or tomorrow. Now for the pics. Hope ya’ll enjoy.
Hey Aggieman, me taking my sweet old time over Christmas may have allowed me to stumble into this GB! I’ve signed myself up for the Winter Warriors 2 GB that Dupes started. I’m committed to the Tamiya 1/48 Storch (same as you I think?) with a winter camo scheme on it. I’ve cracked the box open & done two quick sessions - painting the engine & priming some cockpit details. Am I too far along to join in on your Eye in the Sky GB? I’d love to go 2-for-1 on this kit!
Nice to be in on this side too - an unusual subject pays off! I’ve been too busy to do much to it this week anyway, I’ll have progress to share over the weekend I’m sure. Talk to you later,
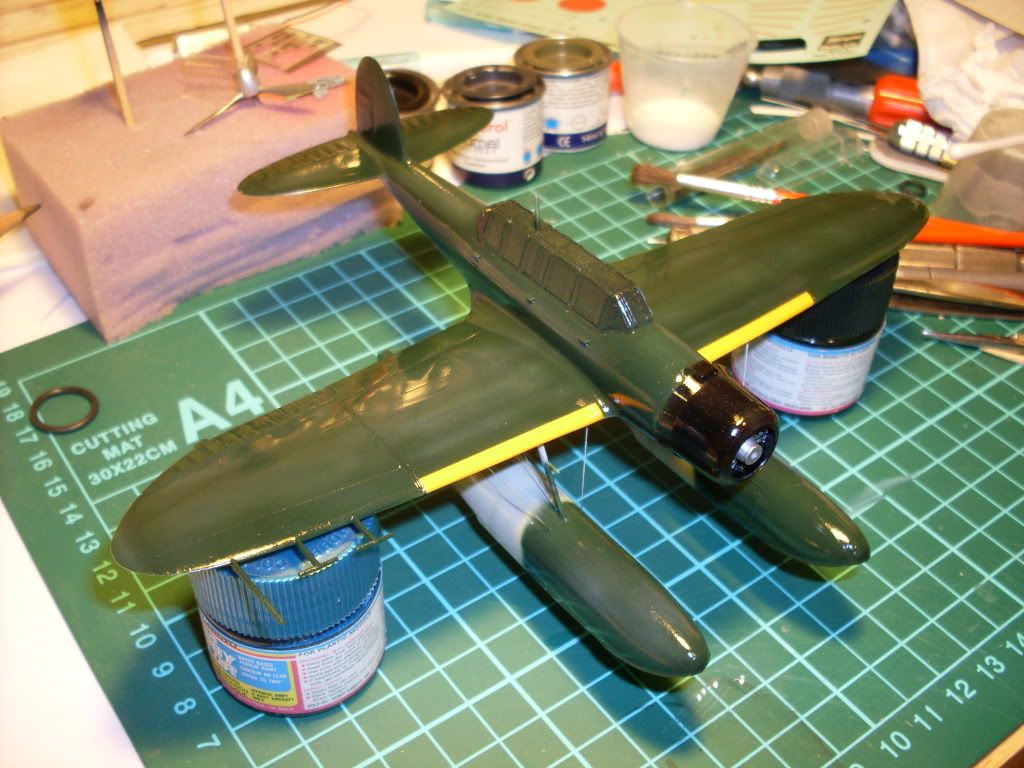
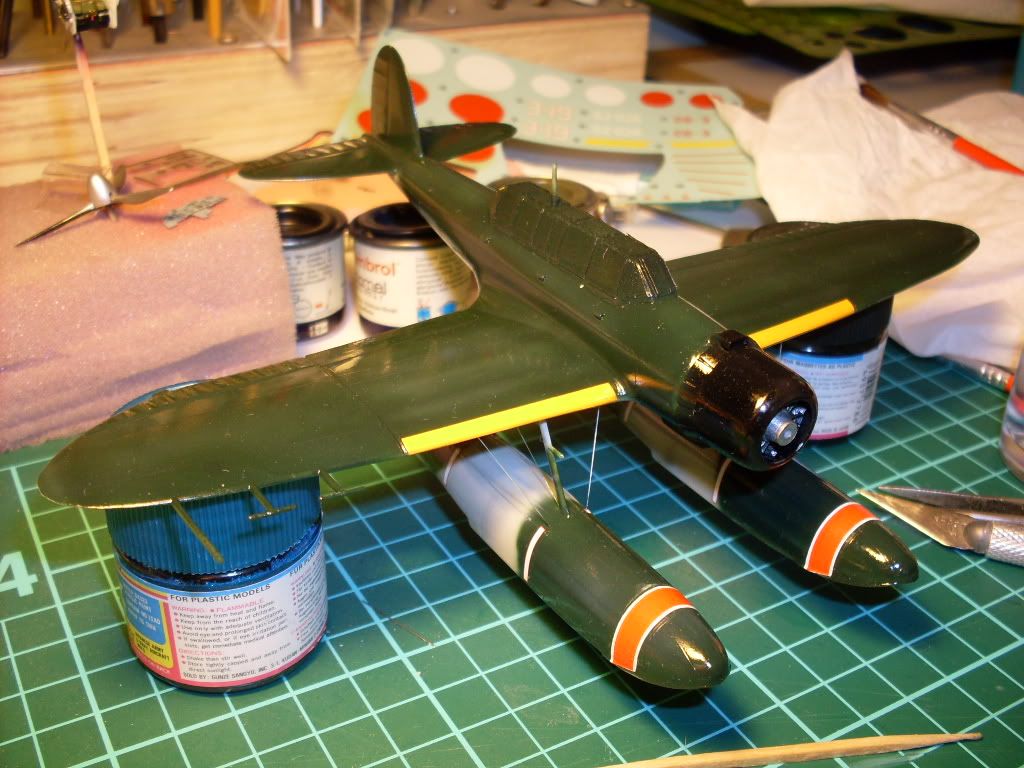
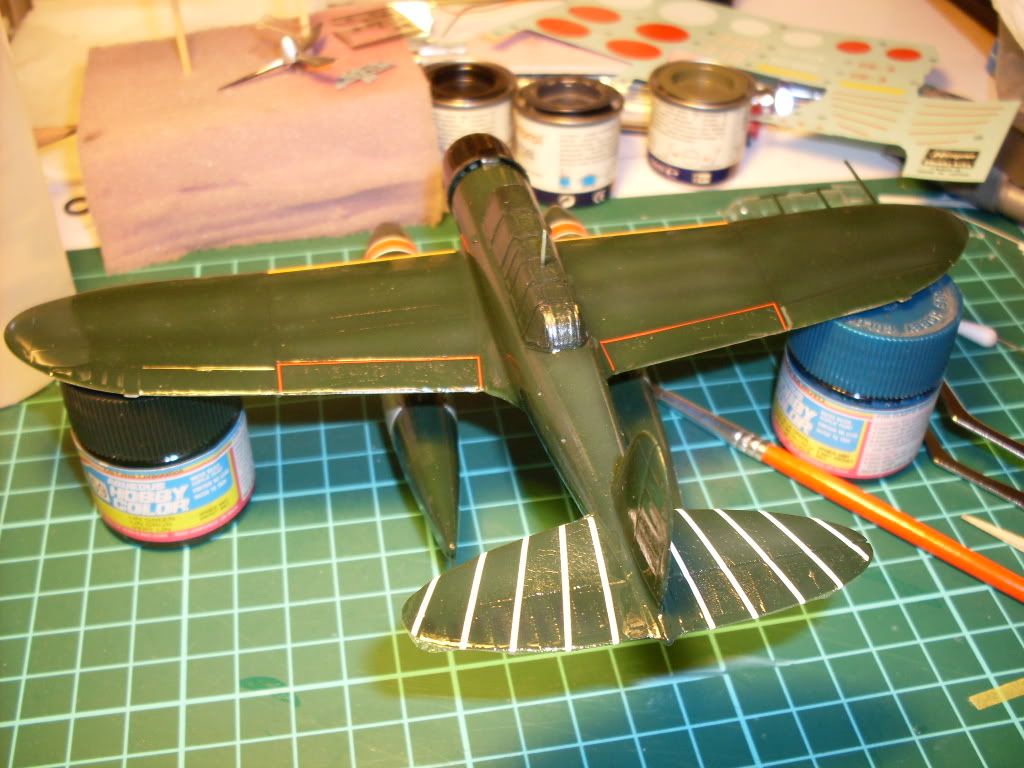
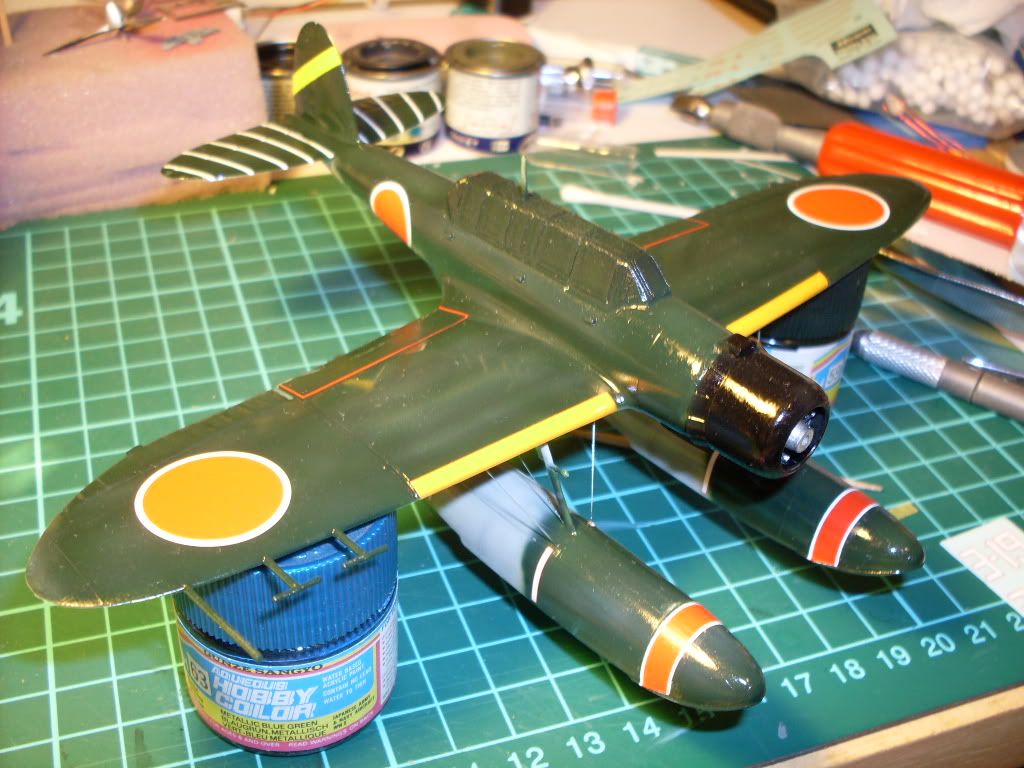
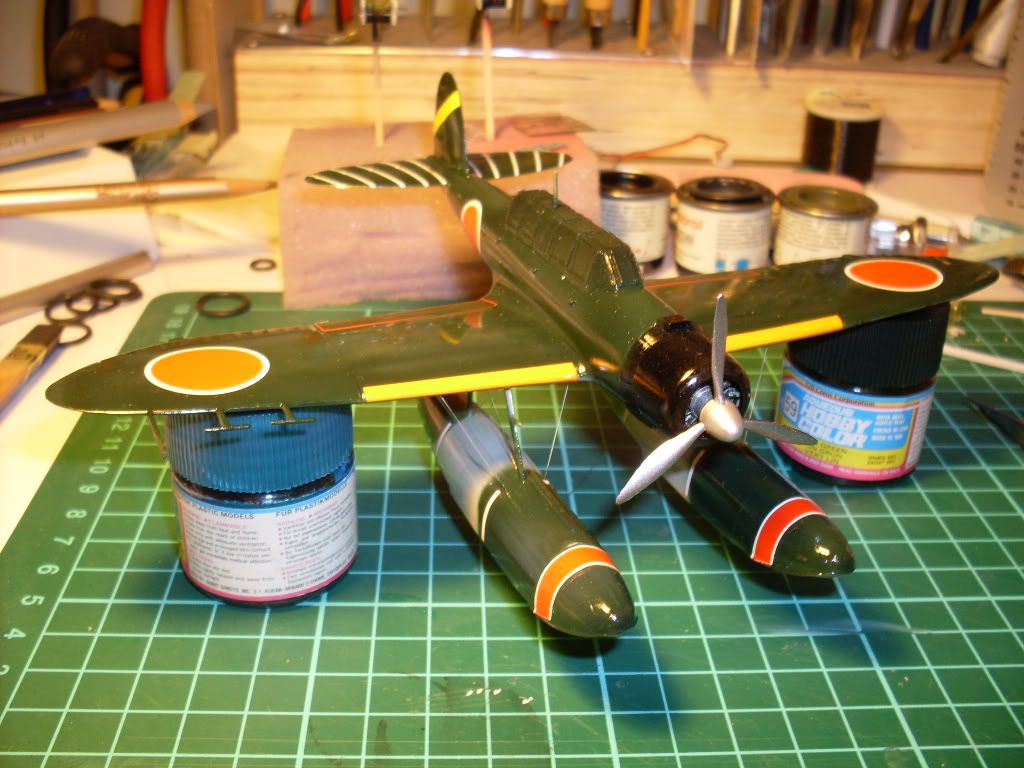
I calling this one done. It was a nice little kit, but had a couple of things bite me in the butt. You need to watch the angle of the rear landing gear, otherwise it’ll sit on its tails. The other thing was I lost a couple of decals after they were applied and hit with Solvaset, and misread the instructions and put the nation insignias on backwards. Other than those two things, I have no other complaints about the kit. Here’s the pics.
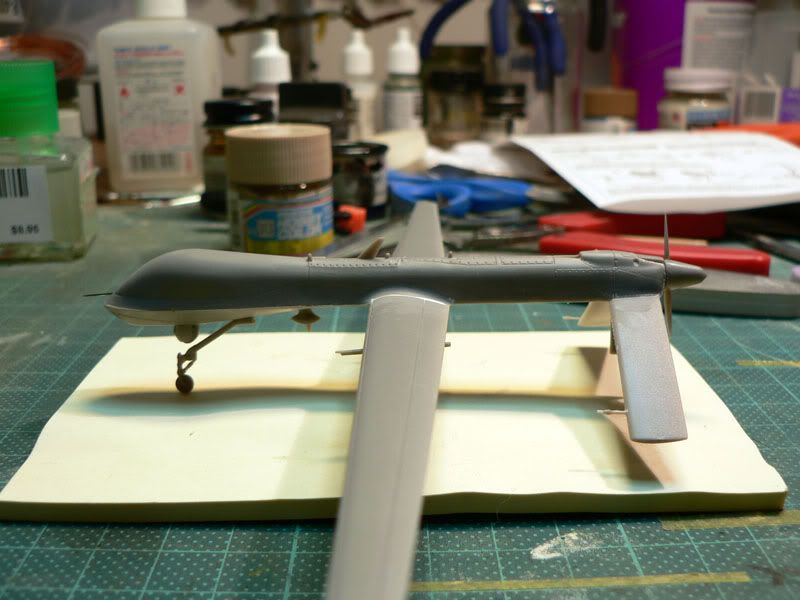
Great work Lewbud and incredibly fast as well [Y]. One thing I noticed is your Predator doesn’t have a pitot tube, did yours break the same way mine did?
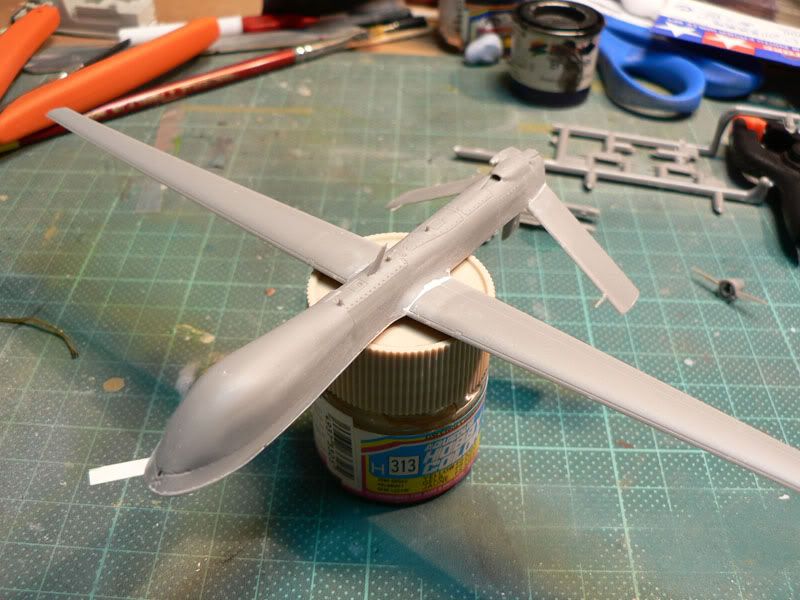
Here’s some progress shots of my build so far and aside from some of the parts being almost microscopic it’s been reasonably trouble free.
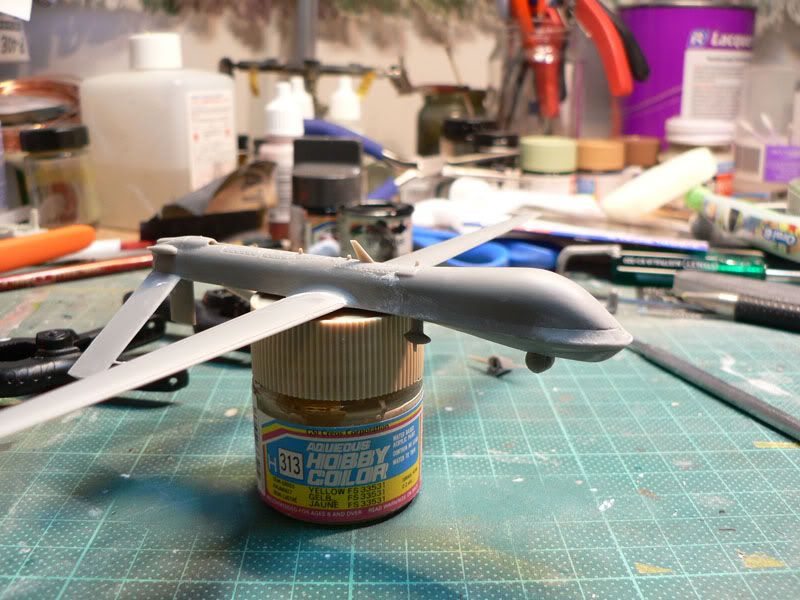
I was worried about the kit being a tail sitter so even though the instructions made no mention of it I added some nose weight with a blob of Blu Tack
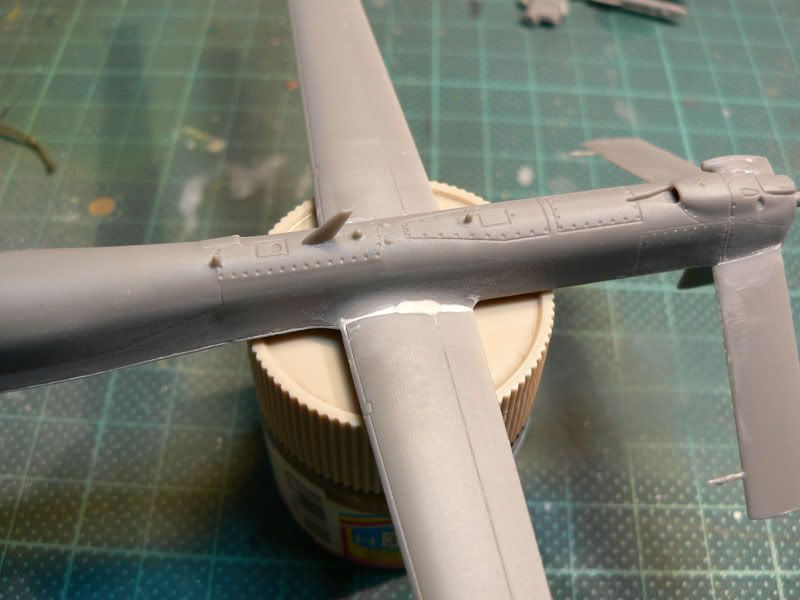
The main areas of the kit that needs filler (at least on mine) were the wing and tail roots. This shot was taken before I finished sanding
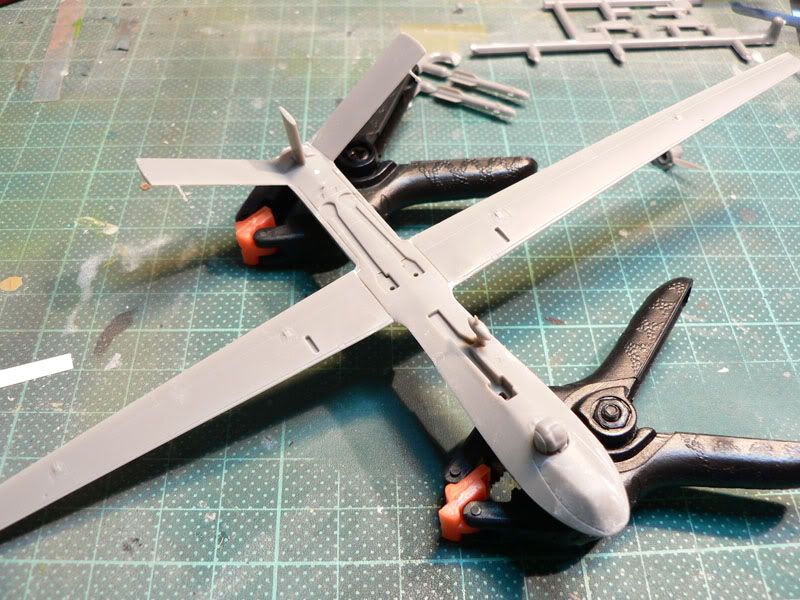
The underside had no real issues apart from the face that the rear wheel bays are little more than indentations in the fuselage, but I’m not even thinking of trying to fix them.
The final lump and bumps along with the weapons pylons will go on once I’ve finished sanding the puttied areas so I don’t bump them off by mistake.
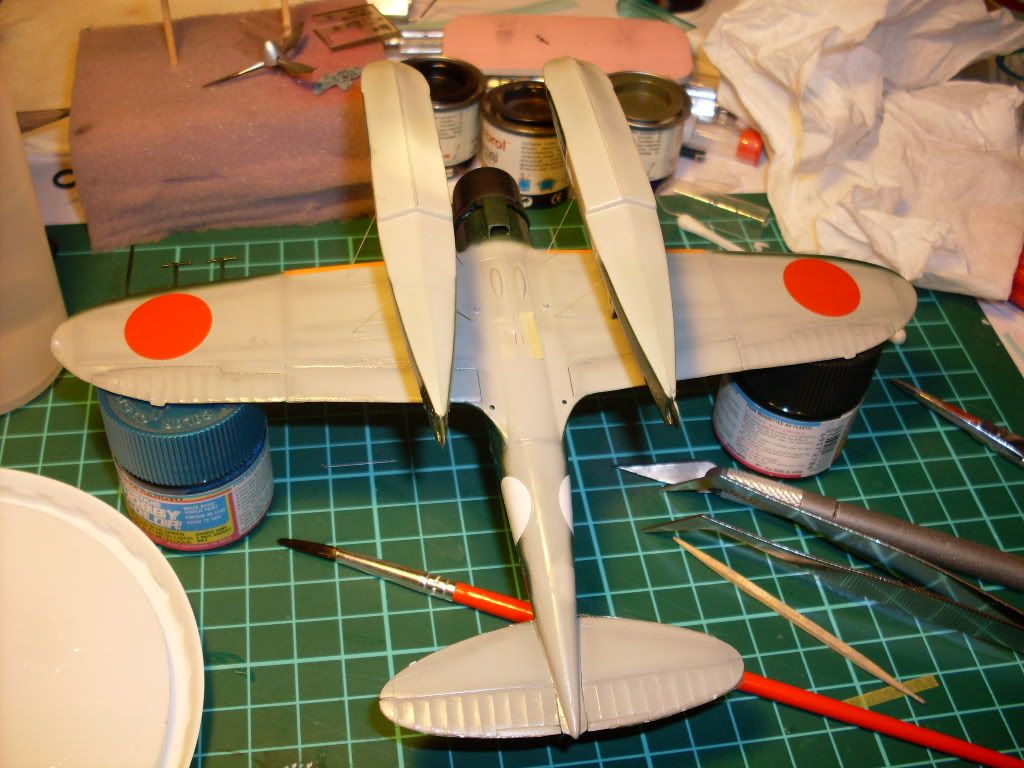
Your Predator’s looking good. When I was building mine, the seam that bothered me the most was the one on the bottom that ran through the landing gear bays, I didn’t have a problem with the wingroot/fuselage join. After I got her painted and decalled, that was the seam that kind of jumped out at me. Oh well. I was looking at the problem of the landing gear yesterday and I thought that had I test fit the nosegear, I might have been able to shave a little off it’s mounting point thus dropping the nose and raising the tail. Looking at it again, that wouldn’t have worked, the problem is I’ve got the mains too splayed so watch your angle there. For a moment, after I had everything buttoned up I had a flash of worry about not having enought weight in the nose, so I balanced her on her wingtips and when the nose dipped I figured I was ok. The carpet monster ate the pitot tube, so hopefully it’s satisfied for a while. Hopefully you won’t have any problems with your decals. In one of my earlier posts, I was worried about the Tamiya spray can light ghost gray being too blue. Either I’ve gotten used to it, or the color shifted as it cured over the last couple of days-probably a little of both. Looking forward to seeing yours and Rufio’s come together.
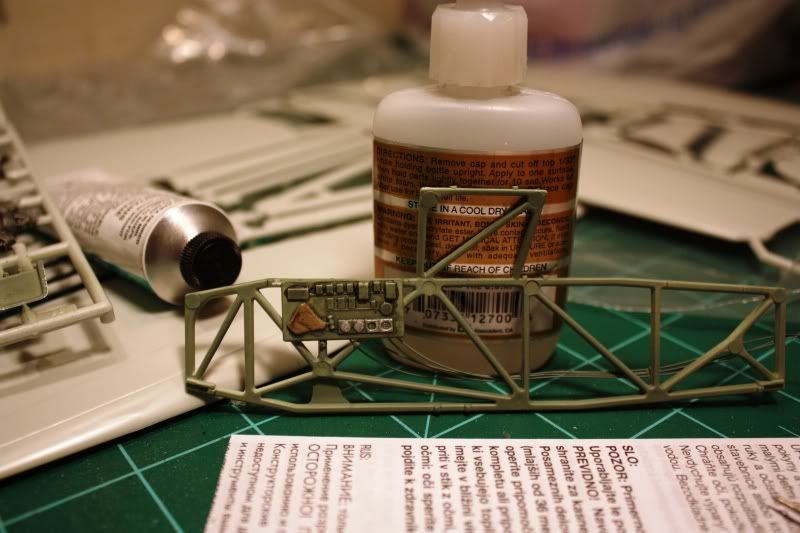
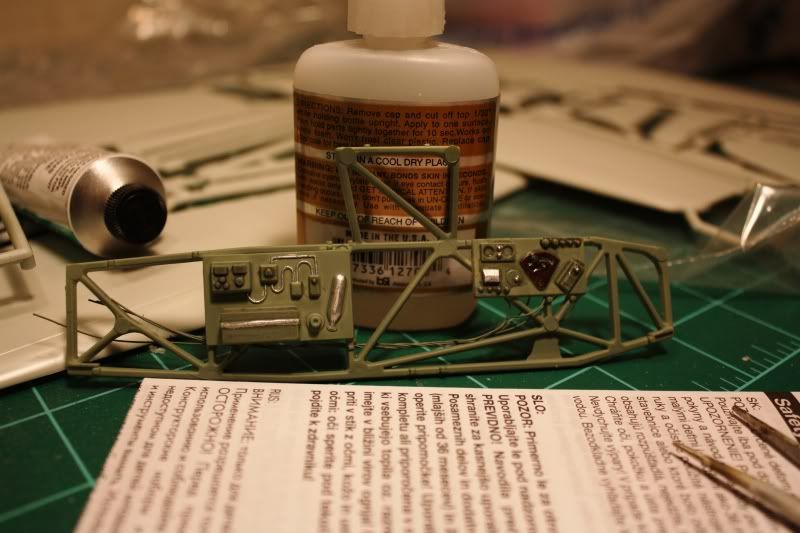
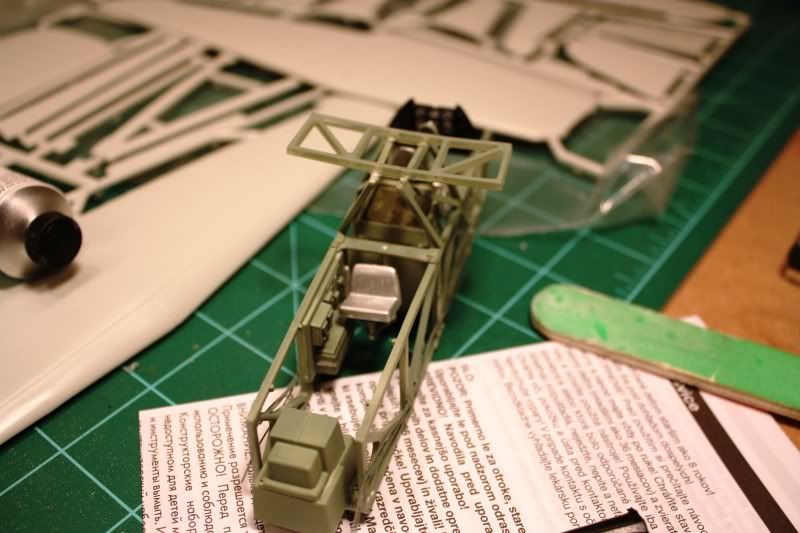
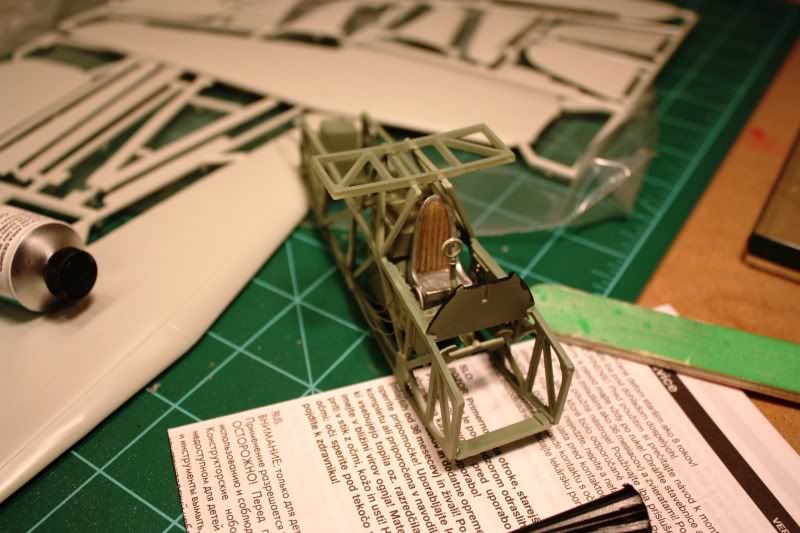
I have started working on my first entry to this group build, the Revell 1/32 Westland Lysander. I have completed the cockpit and buttoned up the fuselage. I added some wiring behind the panels and stringers but none of that is visible.
I purchased a new camera, a Canon EOS Rebel xSi DSLR, so I will be practicing a lot with it on this build. These pictures are all huge (~4MB each) so that tells me I probably have the resolution set very fine perhaps. With my older P&S Olympus I was using the pictures generally measured out in terms of KB but with the various photographs I took over the holidays that were out of focus even though the on-screen display indicated I had the subject in focus, I decided I’d had enough of that.
Wow some really nice work going on!!! Hope I can see to joining in but have several committments going already. Will be keeping an ‘eye’ on these builds. Sorry bout the pun.[clwn]
I am doing a Hase 1/72 Jake for Darren’s War in the Pacific GB that is being decaled at the moment and would qualify here but really too far along I think to join here with. Anyways looking forward to seeing more!!
When did you start work on your Jake? If on/after Jan 1 then it’s fine to be included in this group build. And go ahead and post pictures of your build anyway, I’m sure we’d all like to see it!
LOL thanks Aggie!! Well Darren can attest it was last July when I started. Anyways, I will post a few pics here as well. Having a hard time with some decals at the moment on it. Didn’t let them dry thouroughlly before applying sol, so have wrinkles that won’t… err i mean that are being stubborn. Will try and allocate some solvaset maybe and see if that works. I have read that is a last resort sol. The last pic is the dilemma, but is a lil better since taken. So I might just keep adding sol and hope it all settles down.
Will put the first stage Hinomarus on tonight and let them dry thouroughlly and then if I see i need to use sol, see the diff. This build really is a guinea pig and it’s paying for it and just gonna make it the best I can and will get an award winner one day![t$t]
I am also doing the 1/32 Revell Lysander, and started a couple of days ago. I got about as far as you did.I am a recent returnee, so my skills are still developing.I had a little trouble getting the pit assembly into the fuselage. I could not find any AM parts, so this is basically OOB. I am going to try to modify the decals to do Hugh Verity’s Jiminy Cricket from the 161st Moon Squadron. I left out the guns/gunner, because I want to model this as one used to drop off/pick up Resistance agents.I will post pics next week.
Storch update - cockpit sub-assemblies are slowly being painted, just need to assemble, wash & highlight these for the most part. Just for the change of pace I moved on to the wings last night. Lots of little attachment points for the slats/flaps/ailerons needed to be cleaned up but the fit was darn near perfect. The leading edge seams just needed a little swipe of sandpaper & will basically disappear behind the slats anyway. I’ll add some progress pics in the next couple of days.
Oh, winter update - snow all day here today, expecting 8-9" of the fluffy stuff, just enough to inspire the Winter Warriors!! Keep up the great work gang,
Well not more to go decal wise on the Jake. I am struggling with the tail feathers and flap lines but that’s only because I din;t let the decals dry thouroughlly before applying alchohol. I think with enough alchohol they will eventually settle down, like me LOL[t$t] Here is a few more shots with the Hinomarus in place, they are two piece affairs and was quite surprised with the fact I got them D*** near spot on!
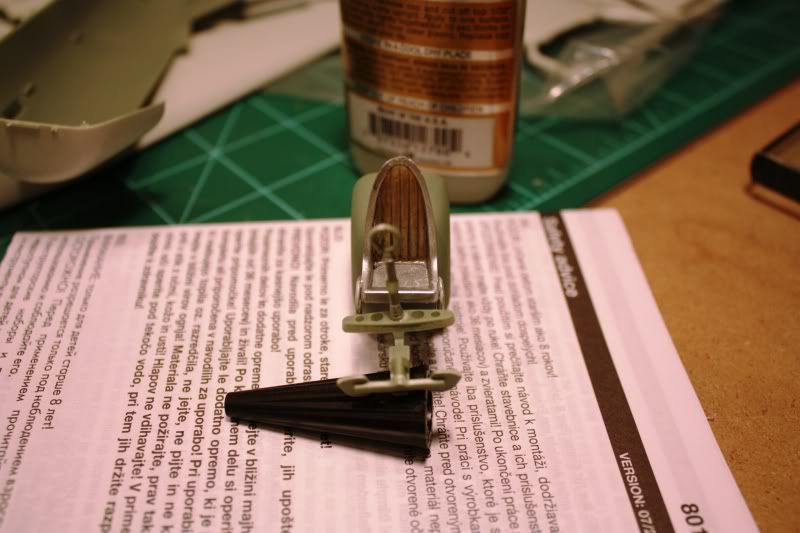
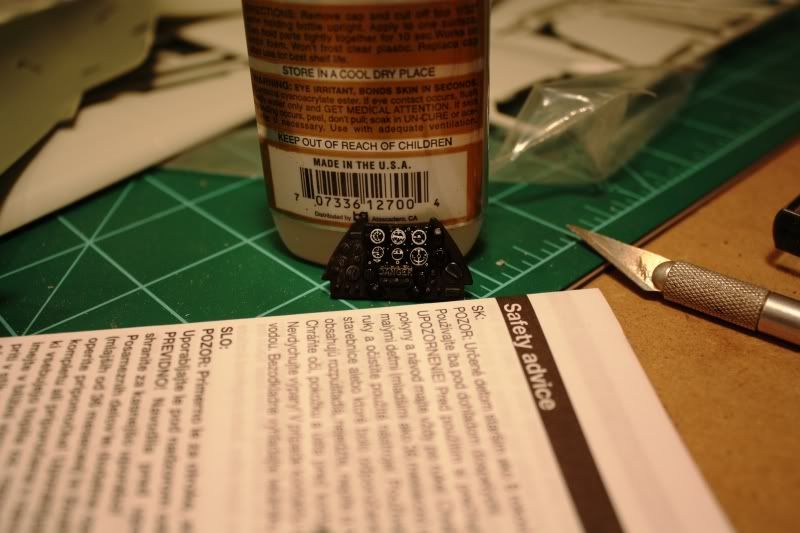
So here is my cockpit work on the Vigilante. Started working on some other sub-assemblies tonight. I still can’t believe this one section had 32 parts!