Steven - Shame about the Lysander as I’ve wanted that kit for some time now. Each problem looks fixable but add them all up and I’m sure it’s overwhelming. Fudge it the best you can and hang it from the ceiling in a dark corner. [:)]
Here’s my offering for your fine group build…
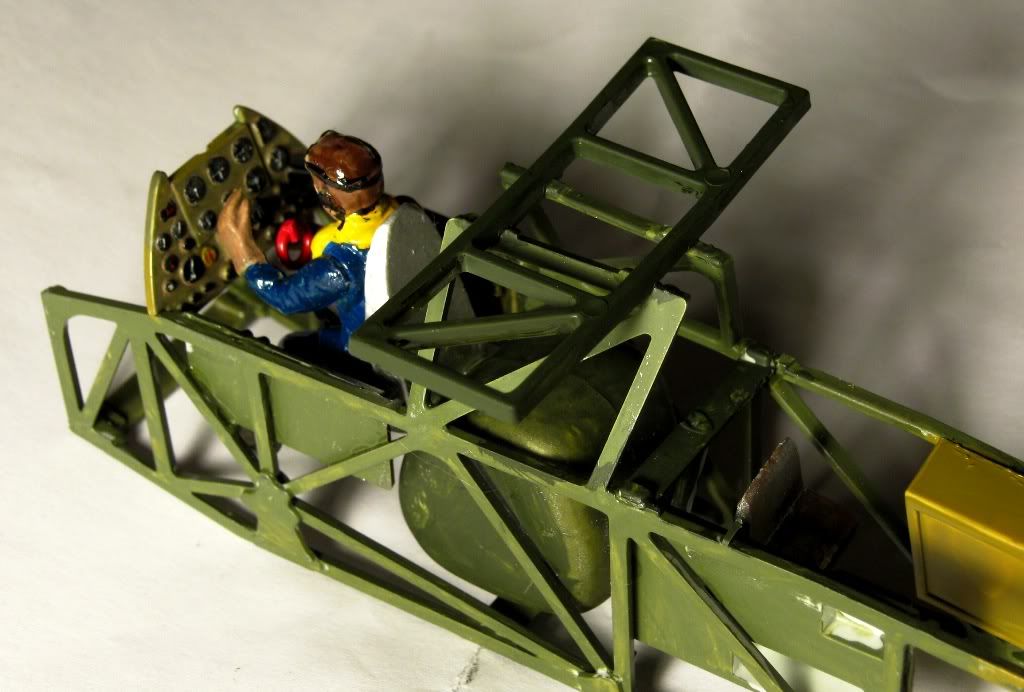
Eduard 1/48 Bf-108B Taifun. (as if you can’t read the box [blkeye])
I’m a slow builder but I managed to pop her open and get the cockpit mostly finished…
Nice kit so far and I’m shooting for an OOB build with this one, so no frills and frazzles. Hopefully we’ll see her together in a few weeks. I’ll keep you posted on progress as it happens. [Y]
Stenscience Was a pleasure having you in the NMF group, thank you for joining it and for the complement. Had to get into this group as there are some interesting planes being built here one doesnt see very often. Looking forward to your build.
Aggieman Sorry to hear about the Lysander, its such a neat looking aircraft and was hoping you could finish it. That kit seems a nightmare that just gets worse, dont think I will be trying to build one.
Jmabx wow cant wait for this build, isnt it the one James Garner flew in the movie " The Great Escape" ? Looks like a great start you have going there.
Randy - I don’t remember if it’s the same plane in the movie or not. I don’t think I’ve seen the movie in over 10 years. [:O] A quick internet search yielded no results. I’m sure someone else knows.
This kit may go quicker than I expected. So far it’s been a real joy to build.
Here is the cool little engine it comes with. I brush painted it because I don’t think much of it will be visible.
If all goes well, I’ll close up the fuselage tomorrow and this old gal will be looking like an airplane. [ap]
Well you could use the excuse “I know it’s there” to detail the engine further!!![whstl]LOL seriously, looking good mate!!! Haven’t heard anything bad about EDUARD kits so should be a good build!!!
No detailing for me Richie… oh no, you can’t make me. [;)] I think we should see you do some super- detailed engine and close it up so no one can see it and we’ll both know it’s there. [:(DD][:D]
Coming along nicely here…
I absolutely love this kit so far. I have another one in the stash that I want to do as a civilian version and I can’t wait. She’s going together so quickly that I might have her masked up for a nice splinter job by this weekend and maybe even completely finished by next weekend. [hdphns]
Jmabx awwww bummer man thats such a sweet looking engine too [:|] Too bad we cant see it once its all closed up. Hey maybe you can…ummmmm never mind [:P]
Aggieman can you sign me up for a 1/48 Monogram TBF Avenger for the group ? I will now have to find some markings for one from the north Atlantic. Anyone know of any available ?
LOL I see what you mean Jeremy!!! Not one single bit of detail would be seen at all, so no point!!! Really only cowled radials deserve that treatment, at least you can see the front of them. Looking great mate!!![t$t]
This one fits in here perfectly a flight in a U-2 at 70,000 feet
What I wouldnt give for the back seat in one of these, I just had to share it with all of you. The video is a bit long at 10 minutes but well worth the look.
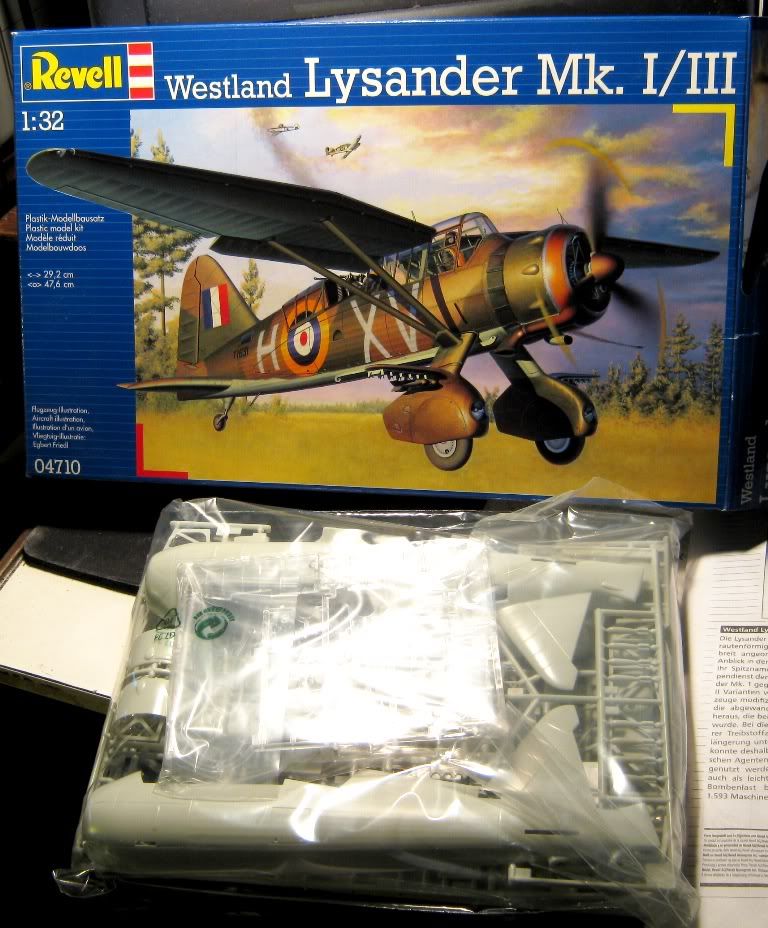
I got caught up on taking and uploading pics so I ould post here as promised. As you may recall, I am also doing the 1/32 Westland Lysander (Revell). I began the model around Jan 15th.Here’s the beginning pic:
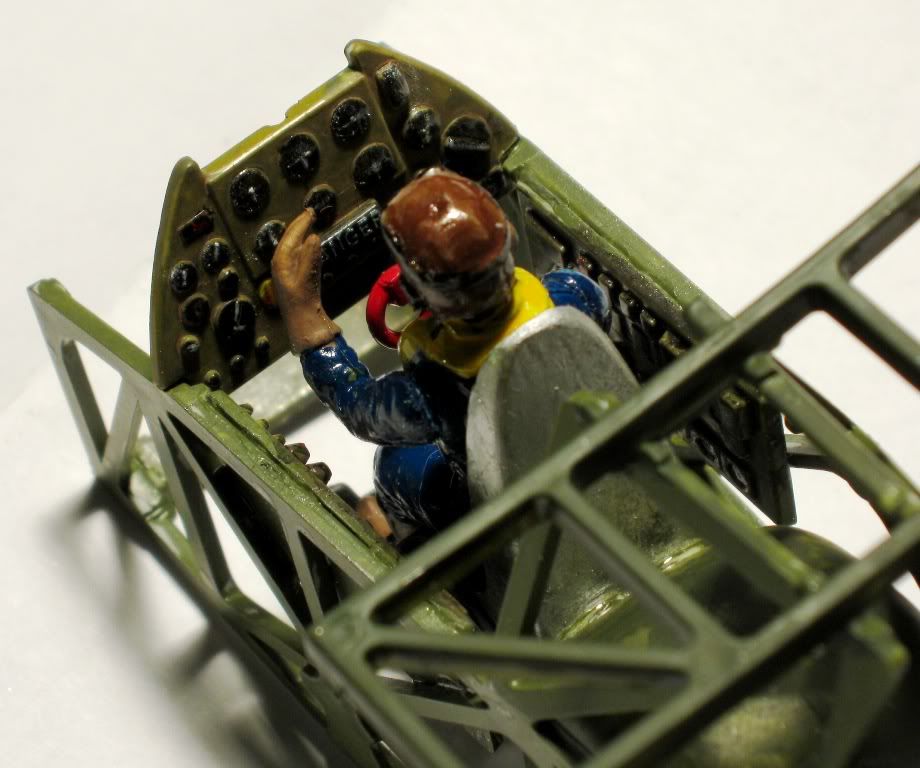
I put together the cockpit and framing as directed.As I later found,most of the problems with this model started here.Since I am doing a closed forward canopy, I didn’t spend a lot of detail time here.I am satisfied with the IP, but should have spent more time on the figure:
I tried to follow the instructions for the pit,but they were pretty vague.Looking through the entire instructions,it became clear to me that the most important part was the placement and angle of the wing spars. That meant an awkward fit of the forward part of the pit and IP into the fuselage
.
Let me post this now and get to the rest in a few,
Had some ISP issues, but got back online this morning. So, I got the pit and interior framing assembled and painted.When I put it into the fuselage, I found that the forward part fit nicely, but the IP was too low and forward, and the pilot seat/figure was too high.I don’t see where I went wrong on the instructions,but I went ahead,trying to make sure the wing spars were where they should be.Also note-to make sure the engine and cowling fit correctly and was at the right angle, I needed to put some putty in the seam forward of the canopy and sand the daylights out of the nose:
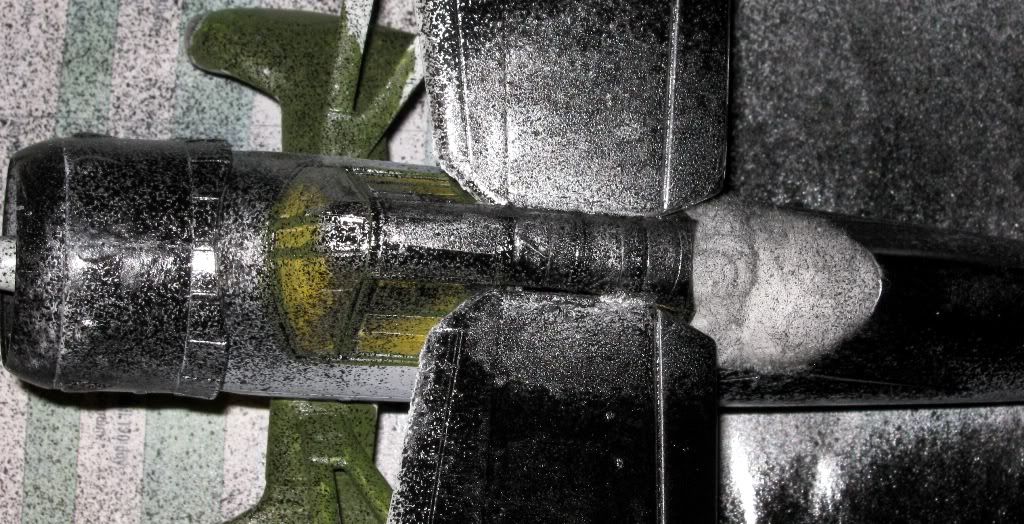
I put together the fuselage,wheels and cowlings,installed engine/cowling/prop, and masked and installed the cockpit canopy pieces,As you did, Aggieman,I started to get really frustrated with some poor fit issues.The side canopy pieces needed some surgery, as did the wheel assemblies. I noted exactly the same fit roblems with the wheels and struts as you did, Aggie.Here it is looking really lumpish:
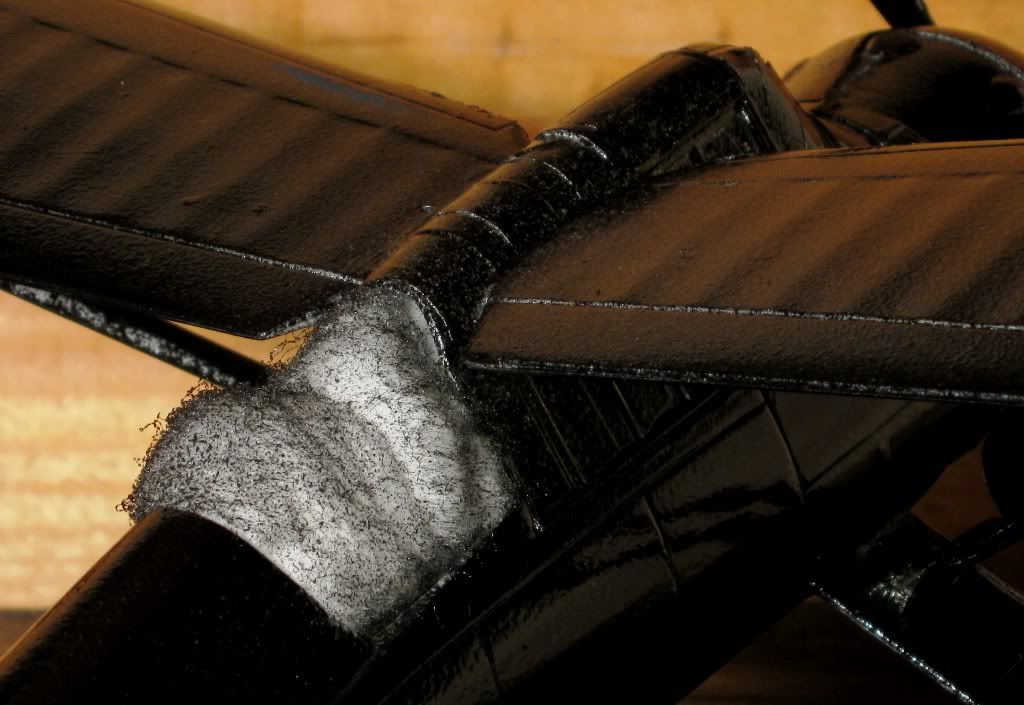
Even though I was discouraged, I decided to keep going and try to fix the problems later. The biggest issue was the wing fit. There was a pronounced tilt to the model, so I stuck the model over a radiator for an hour, then glued the bottom of the wing struts to the wheel legs,then the tops of the struts to the wing sections. I sanded off most of the positioning flanges (should have sanded it all before gluing), then used an old brush to put CA on the wing spars. Then I put on the wings, and sat for 45 minutes holding the wings in the right position. This did the trick, putting the wings in the right position. I then spread a thin layer of CA in the seam between wing and canopy and feathered it out. I really hope this ‘sticks’ because there is not much surface area. This pic shows the area (a little later on with the priming undercoat)
So I let that stuf dry, and started in with fixing problems.I started to like this model at that point. More in a few-Regards,
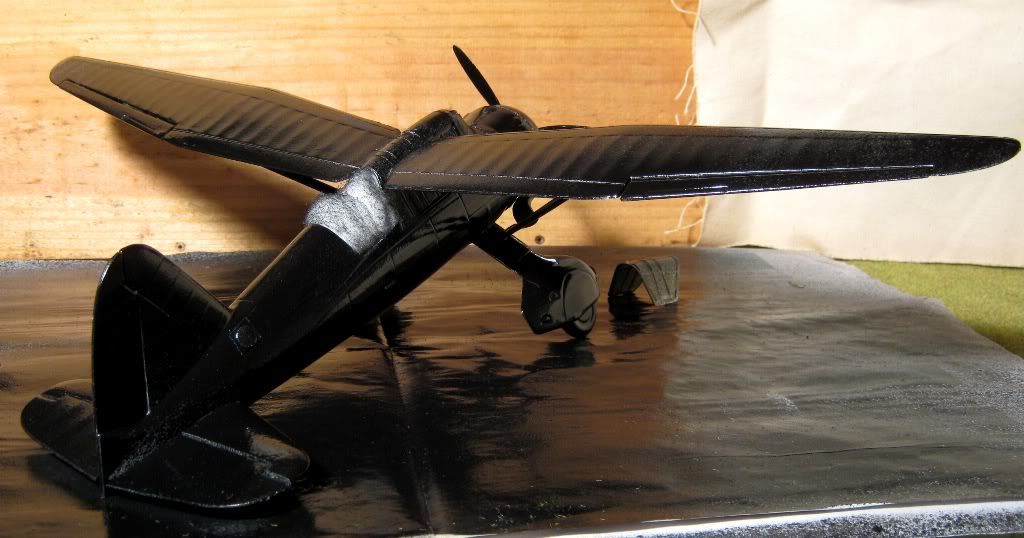
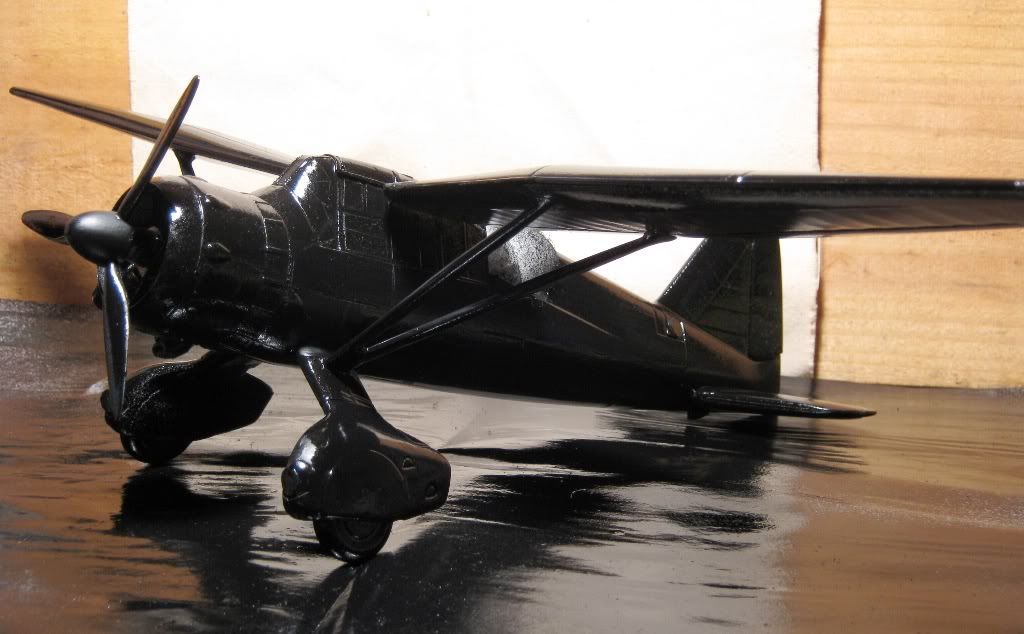
So, the previous post show the progress up to last week. I let everything dry and cure, then set out to fix problems.The main issue,alignment, was taken care of by making sure the wings were set properly. I am happy with the result. The flaps got sanded thinner and installed just slightly dropped.The wheel cowlings took a bunch of sanding,putty, and fiddling.The lens covers are too big and chunky-they got mostly sanded down flush and I will polish after the painting is done. I used globs of CA to fill the gaps in the wheel assemblies, and at the bottom of the struts. I hand painted the interior canopy frame colors over the mask. I did a bunch of sanding and a little fill on the engine cowling. I then hit the whole thing with Mr Surfacer 1000 (primer), then a sprinkle coat of Testors metallic aluminum and gloss black enamels from rattle cans. Let that dry, then 2 coats of gloss black enamel over the whole thing.I am going to let that dry/cure for about a week. Next will be grey and green acrylic brush painted camo on the top and sides of fuselage, decals, and finish coats.Since I will be away next week, the next progress will no be until the end of Feb.
Here are some pis:
Happy with the wing position and slight dihedral:
The model from behind:
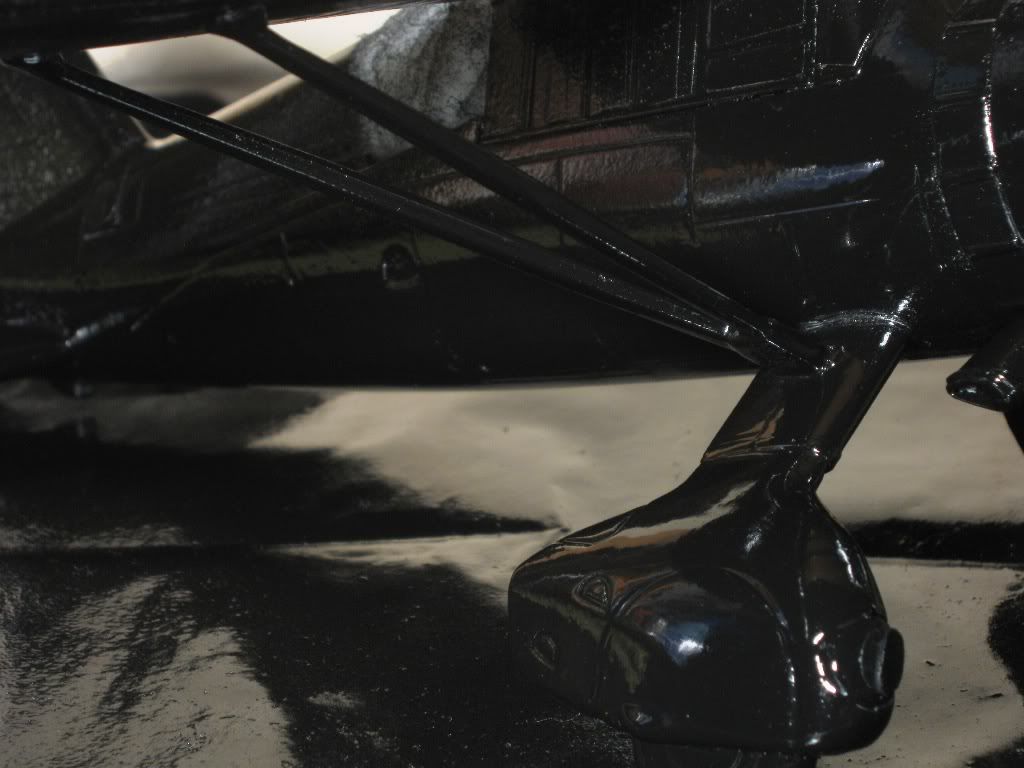
Most of the wheel problems fixed:
I think it is starting to look good:
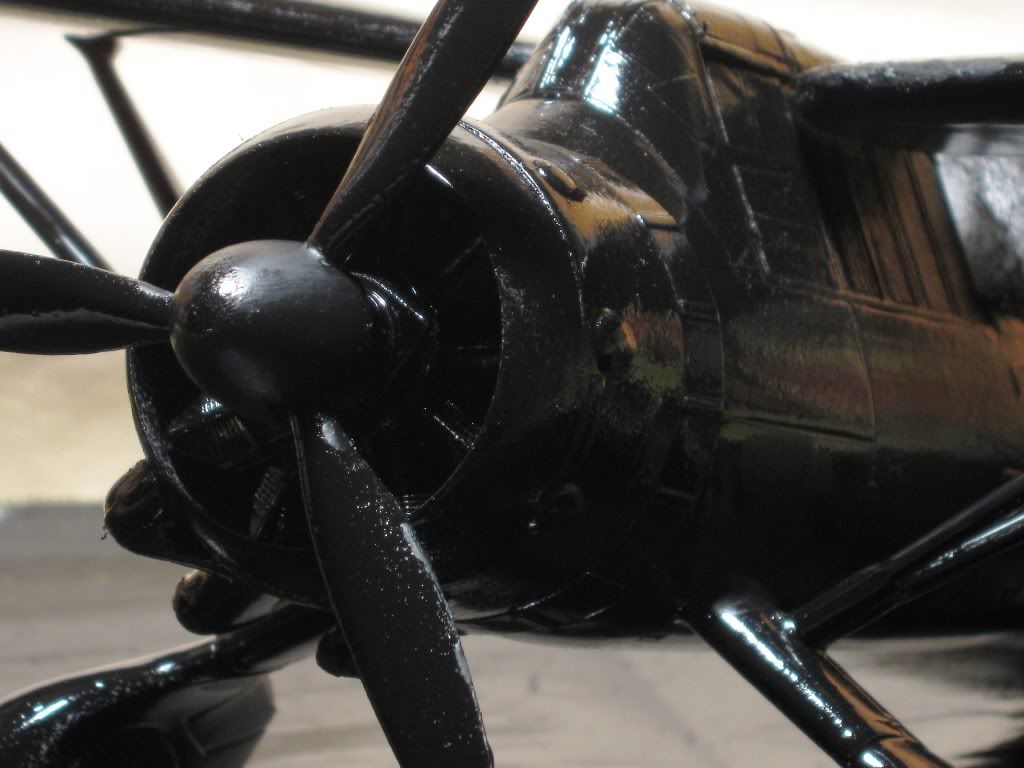
A closer look at the front end-I lost a lot of detail painting on engine, but easy to get back later:
Stenscience, you are doing well with this turkey. I see some of the areas that I had difficulty with where you appear to have had more success than I did. Glad to see you stick with it since I threw in the towel on this kit.


 .
.