Amen!!!
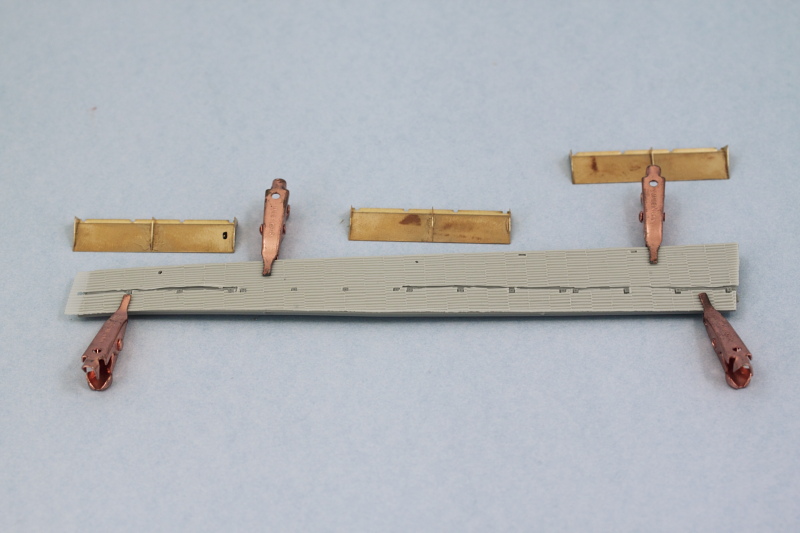
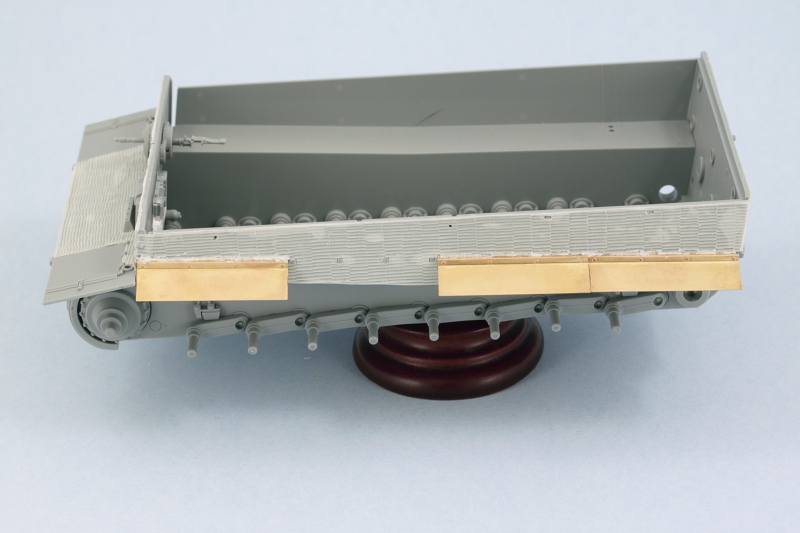
This round of effort focused on getting the remaining zim work done on the hull. First up was the left side. The kit includes pre-formed brass fenders with PE braces that need to be added to them to construct each fender portion. Dragon designed them to sit on the little mount tabs and the Atak zim set sits flush around them, so it’s necessary to cut the Atak panels to allow the fenders to sit correctly. I decided to leave one of the fenders off on this side to show the detail and the zim extending down the full hull side for a little variety.
Because the hull side integrates with the front plate, I went ahead and installed it along with the glacis plate so I could get everything lined up. The three fenders were installed and some Squadron White putty used to fill back in the gaps on the zim panels where needed.
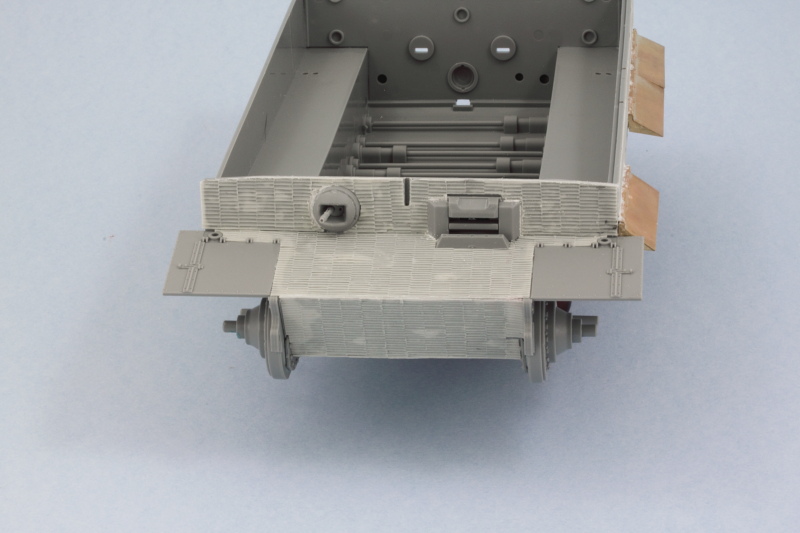
The front hull plates received their zim panels as well and the ball MG mount installed along with the driver’s visor. Just a little bit of putty was needed to match things up with the zim and fill a couple of gaps.
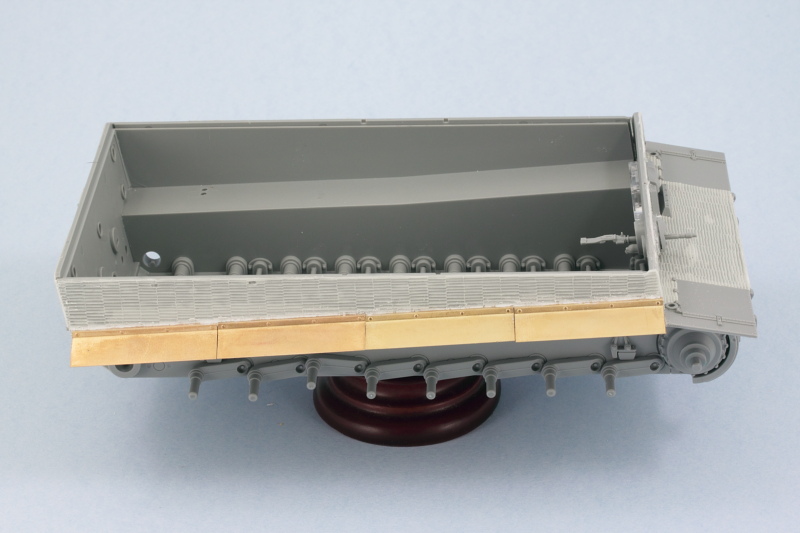
Then the right hull side received its zim and fenders using the same approach as on the left side.
Next came the details for the engine compartment as called out in Step 7. The kit provided PE frames for the fans are a very tight fit into the space available and they also make it impossible to fit the radiator hoses (parts G13), which isn’t a big deal for me since all of this disappears under the hatches and screens regardless.
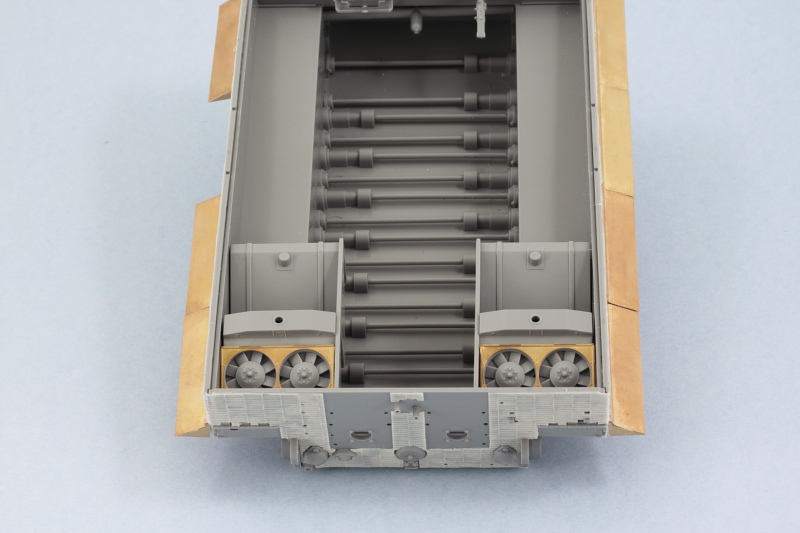
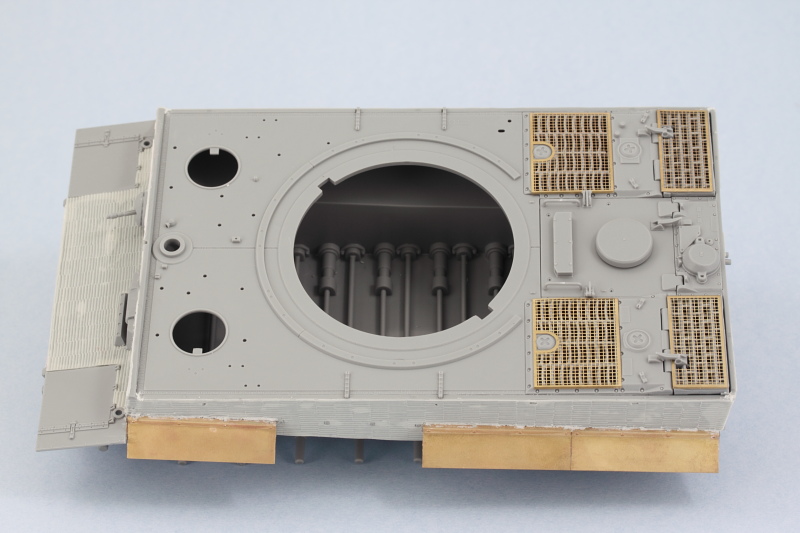
I installed the roof plate for the hull next, working at the front using liquid glue and moving slowly toward the rear to get the hull to close up properly along the edges. The engine compartment hatches were assembled and installed. It’s worth noting that the part numbers in Step 11 for the fan hatches are reversed in terms of which side they belong to but nothing that isn’t easily figured out with a test fit. The kit supplied larger intake PE screens were bent so some careful straightening with pliers was required before they were installed.
Rounding things out for the day, I added most of the rear hull details outlined in Steps 5 and 6. The tools and other remaining gear will be installed later on after painting.

Still more work to do on the hull before heading over to the turret.
Smooth work with that zimm Bill! Going to have to try that one of these days…
Thanks Eric! Atak’s the best stuff to work with IMHO, give it a shot, you won’t be disappointed. [B]
WOW, Bill----COOL to see you doing a mighty Tiger! I think I can’t help but echo what everyone else said about being excited to see what it’s going to be in the end!
I predict…an FSM cover?!
As always Bill looking great. Just out of curiosity how long did it take you to assemble 1 run of your MK’s? Just curious.
That odd-shaped plate between the mufflers; it should be aligned vertically. Everything else looks good.
David
Karl thanks buddy! It’s been a while since I’ve done a big cat so figured might as well tackle this one. [B]
IB48 this particular set took a little longer because of the need to attach the guide horns but I’d say about 4 hours per track run. That includes of course the necessary sprue removal and clean-up of the links as well as the actual assembly.
David Good eye and catch! It had come loose from one of the mount posts and was leaning as a result. Easily fixed, appreciate it! [B]
Up to your usual standard Bill,Metal looks great.
Thanks Anthony, Dragon packed this kit to the brim with all kinds of goodies. Ah, the good ol’ days! [:D]
Bill, looks like a good day for a Tiger.
!http://media.moddb.com/cache/images/groups/1/3/2074/thumb_620x2000/images.1.jpg
(Of course, any day is good for a Tiger)
I hear you there DM! [B] Thanks for dropping in.
I still want to get some of that Atak Zim it seems really easy to work with. The rest of the Tiger is coming along nicely too.
Thanks Clint! Atak’s the way to go IMHO. Not only do they typically include the zim panels but they also provide full resin replacement parts for things like the gun mantlet that would be very difficult to zim otherwise. Well worth the price to produce a zim finish. [;)]
Dang Bill! I had no idea you were building this kit! I’ve had mine in the stash for 6 yrs…I think it was the 5th kit I bought when I returned back to the hobby. I was too intimidated back then to build it and it still intimidates me!! [:S] Some day I’ll work up the courage to attack it, but for now I’ll live vicariously through your top notch blog!
Hi Ernest! Glad you found it, still in the early stages yet so you’re not far behind. [;)] This one was also one of my early stash-building kit acquisitions that has been sitting patiently waiting its eventual turn at the bench. You shouldn’t be intimidated by this kit, it’s got options of either styrene or PE for most of the parts in question so there’s no reason not to tackle it whenever you feel the urge! [B] Happy to feed your Tiger-fix needs until then though.
More progress in the hull details in this session. First up was the front Bosch headlight and platform. The kit part doesn’t accommodate the addition of zim, so the little tab on the back needed to be notched at the top for it to sit properly. The kit-supplied pre-bent steel wire for its conduit falls into the same trap, so I replaced it with 0.5mm solder bent to shape and installed with CA gel.

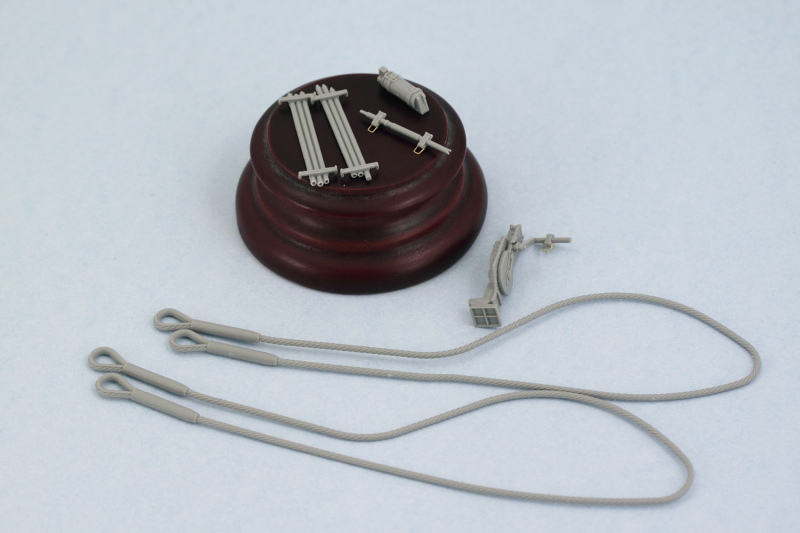
Then it was time to work on the tools. I used the kit-supplied ‘clean’ tools for the most part, the only one that wasn’t usable was the pry bar, TA2. That’s because this is a generic tool set sprue and the pry bar there is a much shorter bar than the one used on the Tiger. Griffon PE clamps were used in place of the kit clamps because I find them easier to work with. For those tools with molded-on tool clamps, I removed their thick handles and replaced them with Griffon handles. The kit-supplied brass tube antenna holder was attached with CA gel to round things out.

The tools that attach to the rear hull were also dealt with, receiving Griffon PE handle replacements. The jack is a multi-part assembly and beautifully detailed but the handle has to be placed just so to line-up properly with the mount hole in the rear. I also cleaned up the large tow cables and prepped the cleaning rods. The rods had their solid ends drilled out with a #76 finger drill to create the ‘female’ ends where appropriate.
Next up will begin work on the turret.
I want MORE
I want more
Tex give us MORE
Tony lee[;)]
YEAH!!
Looking good Bill! Thanks for the heads up on the parts that need mods or replacement due to the zim!
Tony careful what you wish for! [B] [:D]
Ernest happy to be of assistance! It’s not an uncommon thing for those little types of things to pop up since of course the kit designers can’t know what the actual thickness of AM or DIY zim might be, so the parts are designed to fit without that consideration. Makes life just a little bit more interesting but that’s all part of the process of adding mods anyhow. Thanks for the comments as always! [B]