Dragon 1/35 M1A1 AIM Build log

Hello FSM forum readers.

I have decided to make my first attempt at a build log of my M1A1 Abrams kit by Dragon, for a couple of reasons.

  1. Reading some of your threads has inspired me to do so.

  2. Some of you more experienced modellers may provide some great feedback to a novice (good or bad). All is welcome, as I am learning and attempting some of these techniques for the first time.

  3. I use advise, tutorials and other testimony so much, I felt like I could give something back to tis awesome community.
    Now the disclaimers!

  4. I’m just back to modeling after about 30 years, so bear with me.

  5. I’ve never posted a thread before this one, anywhere.

  6. Almost all of the techniques I will be using are new to me, I mean all of them from airbrushing to weathering to and custom mods. As a kid I glued, brush painted (not well), and decaled.
    So, here we go!!!

Looking forward to it. Commence modeling.

A couple of things to remember since you are just returning to model building: Dragon’s instructions are notoriously confusing and often wrong. Many Dragon kits include optional parts for other variants; just because it is in the box doesn’t necessarily mean it is for that kit.

As for the AIM kit, there are differences between an Army tank and a Marine tank or an Australian tank. They all use the AIM (fancy acronym for a rebuilt tank) but in slightly different configurations. Also determine what time period you want to build the kit to represent. A lot of changes occurred between the start of OIF and the end of ground combat operations. Better to ask about a part first than it is to have to cut it off because your version didn’t use it.

Rob offers great advice—take this build slowly and do your research, and don’t be afraid to ask questions of the expert members here, many of whom have crewed similar tanks or served beside them.

Thank you all for the encouragement, feedback and tips.

@Rob, I did study the instructions at length, and noticed the several points where parts are optional.

Most of it I can do from memory (I crewed) but it was pre-“AIM” back just before the first gulf war. Fr example, we tested one of the first APU prototypes that hung off the right rear deck. This was a poor design but we were happy to have them when our batteries died. I never even saw the bustle rack mounted APU until I saw it in a model.

I guess I didn’t think of time period, but I definitely want it to be Army. I did find a great site that has tons of photos of an Army M1 from desert storm I am using for reference as its a pretty good walk around gallery.

http://www.primeportal.net/tanks/rob_mccune/m1a1/index.php?Page=1

sorry I haven posted pics yet. The ones I took, are all in my iCloud, and I don’t seem to be able to post them from my iPad. So I’m going to send them to my email and post them from a PC sometime tomorrow.

I also can’t set tags from the iPad. iPad weirdness I guess.

Again, thanks to all!!!

Thank you all for your patience. Took me a while to get to creating a photobucket account and getting the pics loaded. I had a very busy couple of weeks, but I have made a little progress.

Box Art (I think this is the traditional start)

Here is the beginnings of some pre-shading on the hull underside and road wheels/arms:

After preshading, I tried some dry brushing and then filled in with the airbrush. I wanted to accent the seams and bolts, but also give it a dirty appearance. I am not sure yet if this was necessary, as I intend to do some additional weathering later, but it definitely gave me the base effect I wanted (for the most part J ). Also, I found that dry-brushing with the Tamaya acrylics was very difficult (I’ve seen many threads on this) without some thinning. Even then it was difficult.

A little over-spray toned it down so that this effect wasn’t too over-pronounced.

YES. The tension adjustment arm moves! These pieces were very small and difficult to glue without freezing the adjustable arm in place. The instruction sheet offers nothing in regard to this part of the assembly.

At this point, before going any further on the road wheels and track assembly, I wanted to get the engine compartment fitted and set, so I am departing from the instructions to the customization of the lower hull. I am quickly learning new things with custom resin pieces. Maybe some of you can relate, but because of the additional cost of things like this, and never having departed from the box instructions in the past, I was really nervous at first, however, I decided to shake the fear of the unknown and plow forward, good or bad.

I found some fit issues, of course and started chipping away to get the engine compartment down into the hull and get the deck plates to sit correctly.

Note the gap on the left back deck.

I had to shave the engine base paper thin, and still had to shave/angle down the top left and right of this piece to get the right fit. I also cut out the right side wall and replaced it with the resin piece that came with the engine kit.

I also started pre-shading the engine components and hope to glue and detail very soon.

Stay tuned!!!

Ktkrow,

Looking good, man! The painting and weathering looks really good for a guy coming into a hobby which is, for all intents and purposes, brand new (with the new materials and paints, methods, etc). It may not have been necessary to weather the insides of the lower hull, as they’ll be hidden anyway, but it makes for good practice and experience with the unfamiliar paints.

Tamiya is notoriously difficult to drybrush, and even to brush-paint, due to its formula—it’s actually a lacquer-acrylic blend, which makes it wonderful for airbrushing (I use it almost exclusively) but too quick-drying for other purposes. You CAN brush paint small parts with it, even things like tires/road wheels, details, etc,–but if you want to brush paint with it on a bigger piece, you MUST add thinner to it and keep it “wet”.

As far as drybrushing, here’s what I do. Go to a craft chain store, like A.C.Moore’s or MIchael’s, and get yourself about $20.00 worth of “light” colors of their regular “craft” acrylics—light tan, light brown, light olive green, light gray—and use those for drybrushing. MUCH cheaper, and just as effective as using dedicated hobby paints. If you have a god eye for color, you can mix just about any color you need. You can also get yourself some “essentials”–Black, White, “Dirt” colors, etc—and use those to paint small pieces when needed. While you’re there, stock up on some essential oil weathering colors too–black, raw umber, ochre, white. They’re much cheaper than dedicated modeling products. I just use plain ol Low Odor mineral spirits to do washes and filters with them.

I DO recommend using dedicated thinners for things like spraying certain paints (like Tamiya). I think that you get a more predicable behavior from the paints when you use them.

Thanks for the compliment and the suggestions. I’m a huge fan of tips like this. I find myself frequenting Micheal’s lately, so next trip, I’ll check out the craft acrylics. Thanks. I was surprised to find replacement parts for my Badger 200! I was cleaning my gun 2 weeks ago and it fell off my bench. It landed on cardboard, however, it landed directly on the tip creating this perfect little 1mm 90 degree bend. I was able to straighten out the pin, but it notched the tip bushing ever so slightly. Enough to make it unusable.

So here is my tip, no pun intended!!! Michael’s has badger parts. I got a general purpose needle kit and a super fine needle and tip. They both retailed for $25 each, but you can always find a michael’s coupon for 40 or 50%. I got them for $12.50 each!!!

WELL!!! I can’t believe it has been 22 days since I posted anything…moreover, I can’t believe I hardly had any time to work on this in 3 weeks.

I was able to get some of the engine work started, in that 3 weeks, but that was about it.

Work was crazy, but is calming down finally, and I made some progress today and yesterday. I was in what I like to refer to as “stupid busy” mode.

Here is what I was able to do in the past 3 weeks:

Some engine work

A little road wheel painting

So yesterday and today, I was able to get a lot more done on the lower hull assembly:

Son Of a B&^@#$% - I was cutting the clear hub oil level site indicators and one of them went flying. Hope I can find it!!! (you can see it missing on the last wheel LOL)

So I go the wheels on and the first track fit, but not glued yet.

I have a bit of touch up to do on the wheels where some black ran over the edge of the rim.

AND a little more on the engine. I have big plans for this part, but we’ll see [H]

Anyway, it’s GREAT to be back and thank you all for your patience!!!

Quick tip–you can use a dab of clear parts cement to replace clear parts. Testors brand works real well.

Keep up the great work!

Klik

If you want to add a hint of realist you can always simulate some duct tape on that bub if you cannot find the old one or don’t want to make another with clear cement.

There was a time or two when a tank I was on had shattered or sheared off a hub and we just used some of the hundred mile an hour tape or any other duct tape equivalent to cover the hub till we could get a new one on it. Simple part just screws on but every once in a while we would lose one and would not have a spare on hand.

Not to common mind you but it has happened a few times.

Great tips everyone.

Not sure a dab would do as the hole is rather large, but I was considering using a clear sprue as filler, and maybe a dab on top of that would do. It’s funny. I almost didn’t want to put this part on, because they looked like little gemstones off the model. I thought, I don’t want to give this tank a “bedazzled” look! HA! After putting a few on, I am satisfied with the look. I think painting black inside the well before attaching them mutes it enough, since you’d be seeing dark oil when looking in the real thing.

I like the idea of the tape too coldsteel. It’s the little things. That never happened on any of my tanks, but 100M an hour tape was used on almost everything else…LOL.

Thanks guys.

Yea, would only look right if you had the thing set in a field or maybe active combat setting since such a fix was of course temporary but it’s always an option.

Minor update:

The engine compartment is driving me nuts, so like I said, I have some big plans (hope they turn out)!

I hollowed out the flat top where the air induction filter system is. The idea is that when you lift the deck off to see the engine, you will see better details than the resin kit offers. I have a few other small mods in mind, but this is the first of them.

Tool work was difficult to get smooth, so I laid in some Mr. Putty White to make the base of the hole smooth. When it is sanded and ready, I’ll add some shallow holes with black paint laid in, then put a mesh screen of some sort over the top. This should make it look pretty close to the actual thing (in my mind!) lol

That may be all for the day, but it took a while

Squeezing in time for the more monotonous work.

The tracks are glued and setting. I’m thinking they will be set enough tonight to start painting.

I am definitely anxious to get the engine bed done and the top of the lower hull on and get to detailing it.

I am trying to locate the interior detail set from Verlinden (kit 1967) but it appears to be out of stock EVERYWHERE!!!

Does anyone out there have a line on a source for this kit? I should probably post this question in another thread.

That’s looking pretty nice so far.

One question–are you sure about that steel color on the engine? I’d have a hard time believing that the engine was left in bare metal and not painted in some kind of protective paint?

@the doog - good eye…

The exhaust ducting (which is basically the entire top) and the heat shielding that surrounds the turbine is aluminum sheeting.

The problem is that it is very muted and flat and milky looking. I used flat aluminum. By contrast, this is way to shiney.

I agree that it needs to be changed or washed over with a dusty milky looking aluminum color of some sort. Haven’t decided my plan of attack yet, while I work on other parts.

Thanks for looking in.

Hey guys,

Made some progress last night, as I had trouble sleeping.

I want to get the engine done so I can get the interior started when I get my kit in a day or 2. Yes…I found the old DML M1A1 kit that includes the interior stations on eBay. it was only $15 bucks!!!

Anyway, onto the build log!!!

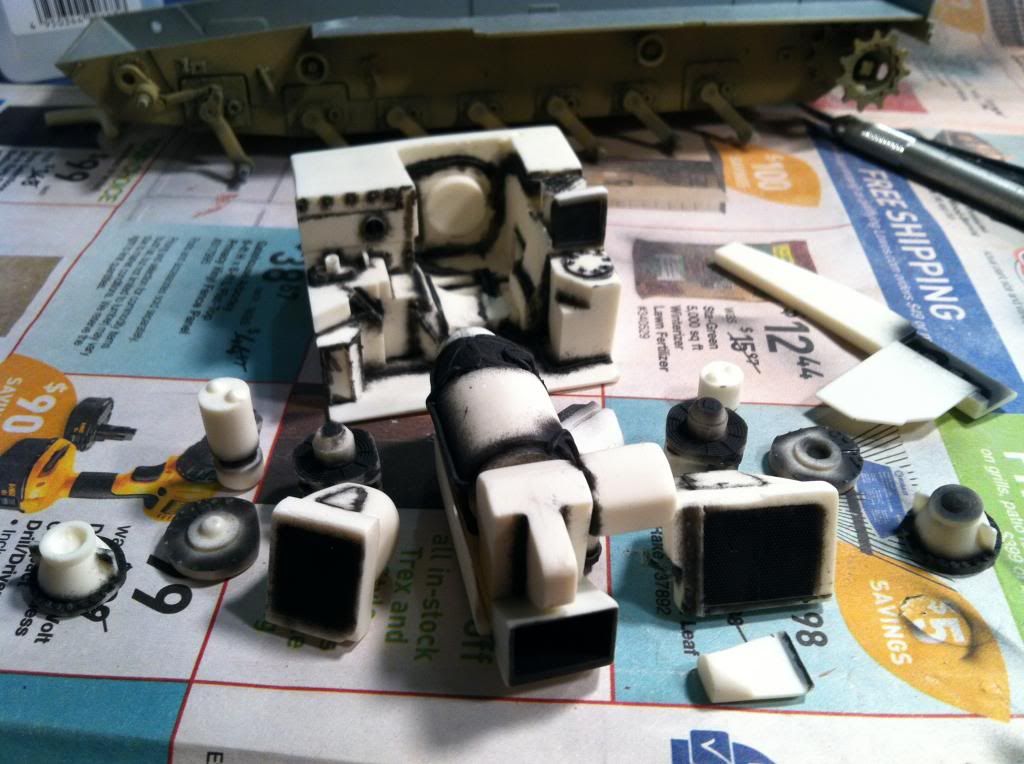
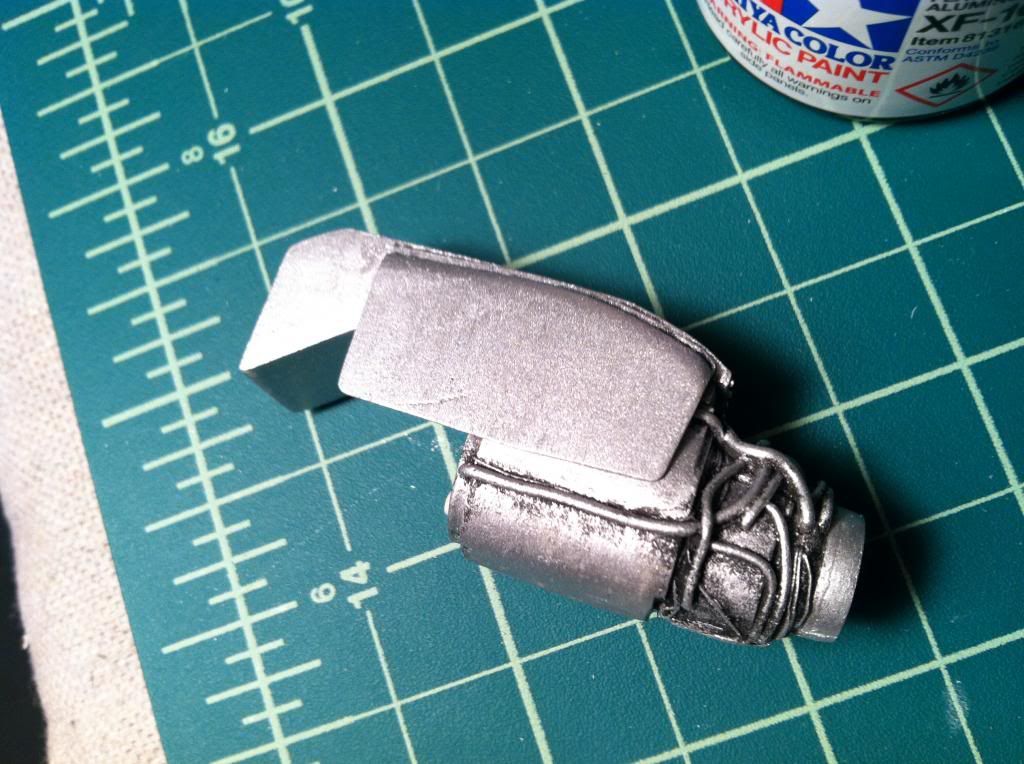
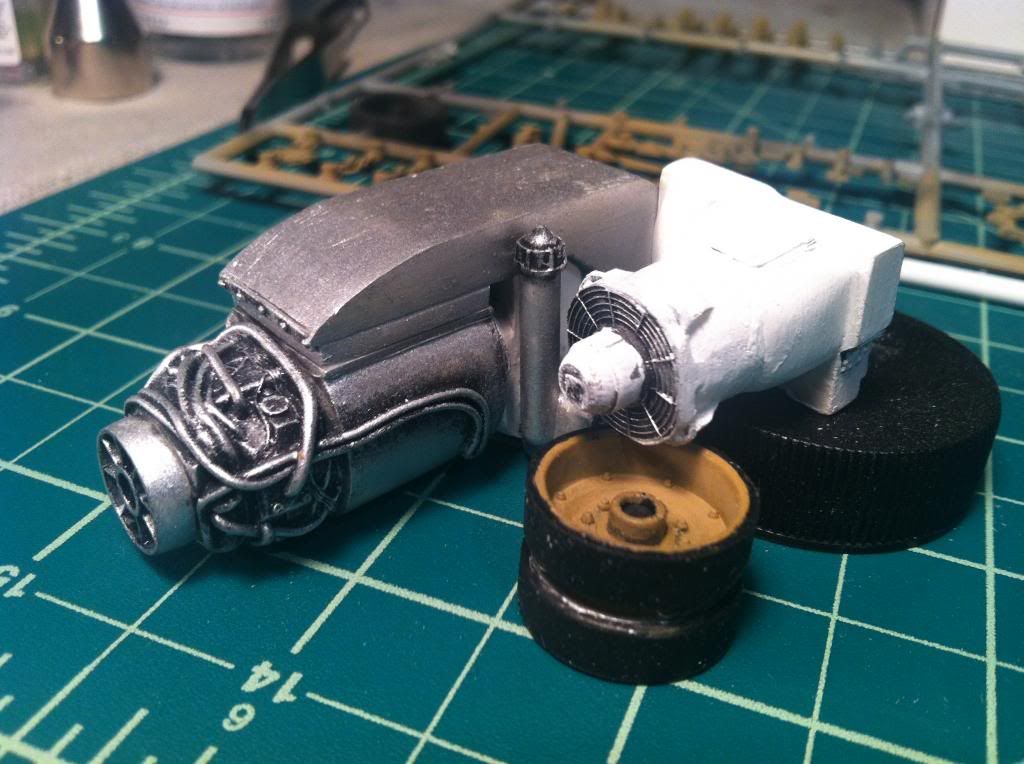
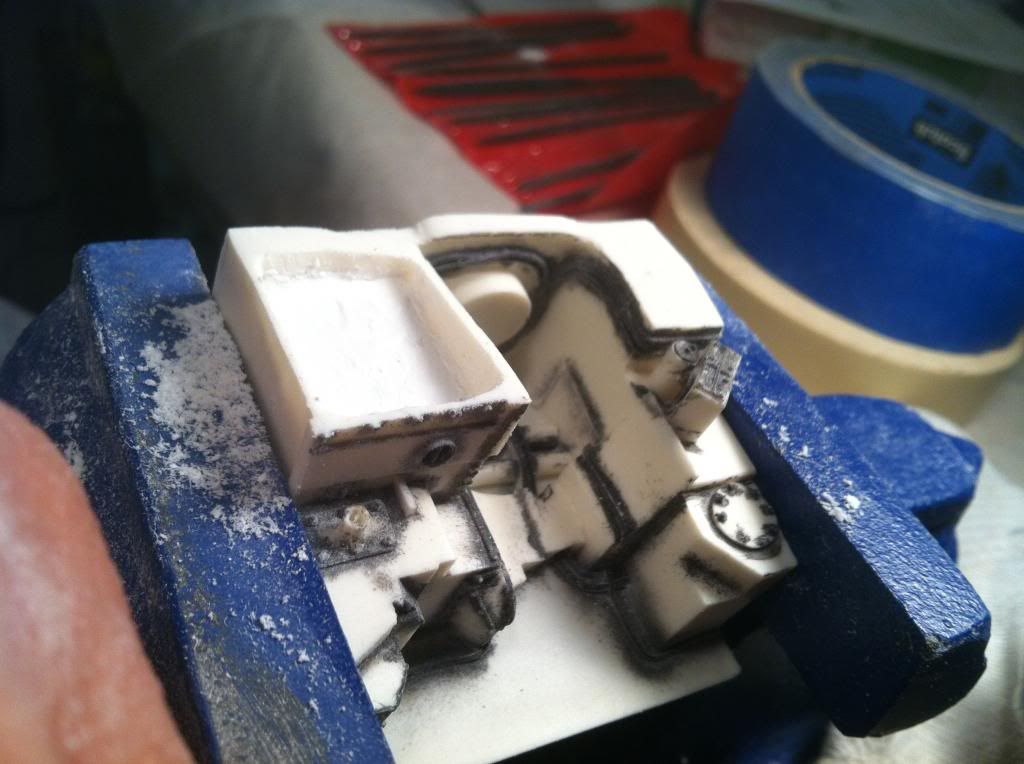
I have mixed feelings about the engine kit - Legend part# LF1028

There are many shortcomings, but on the other hand, I have found it easy to modify, change, destroy [:P]

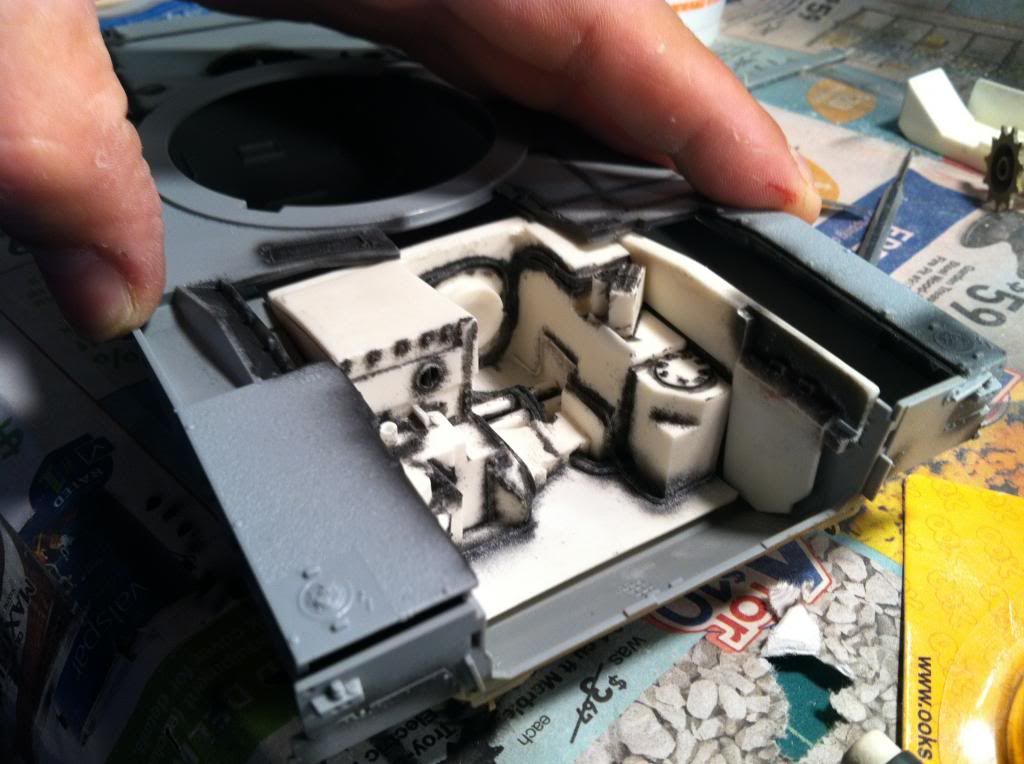
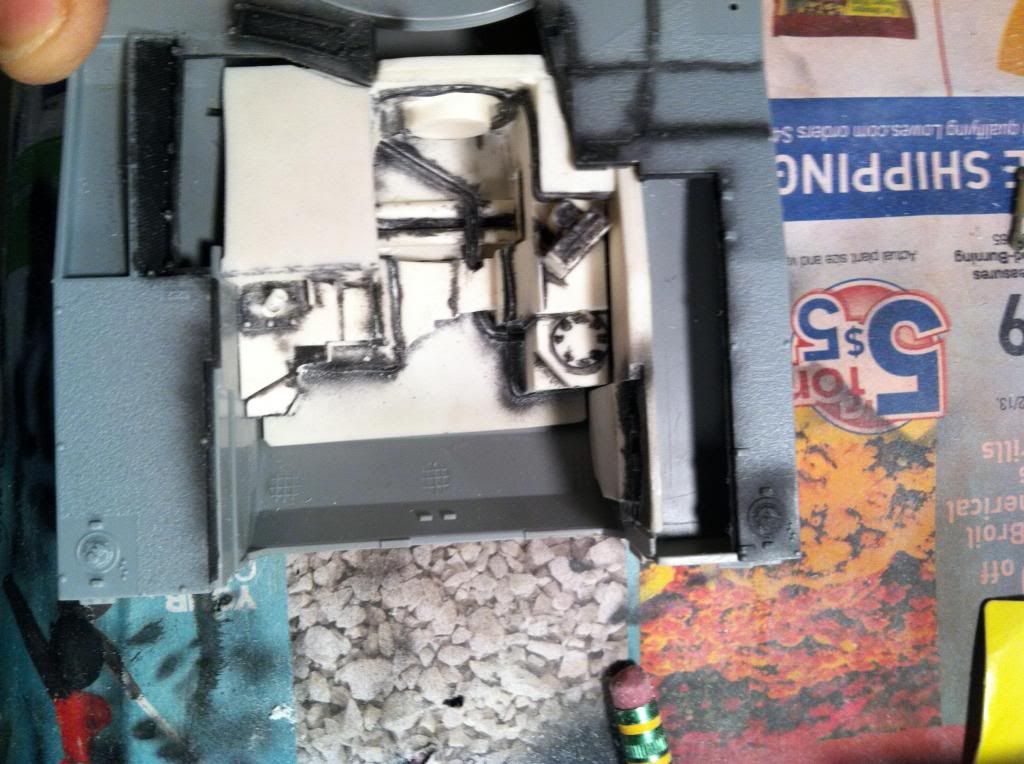
I had some fit issues on the right hand side with the turbine drive conversion and cooling system.

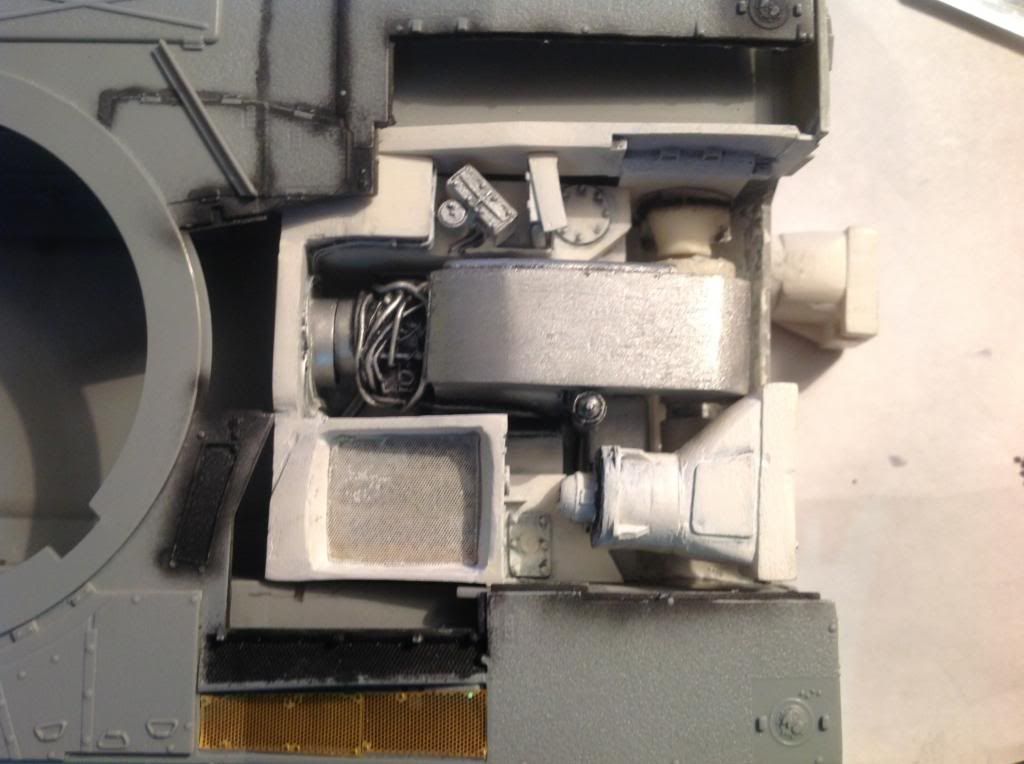
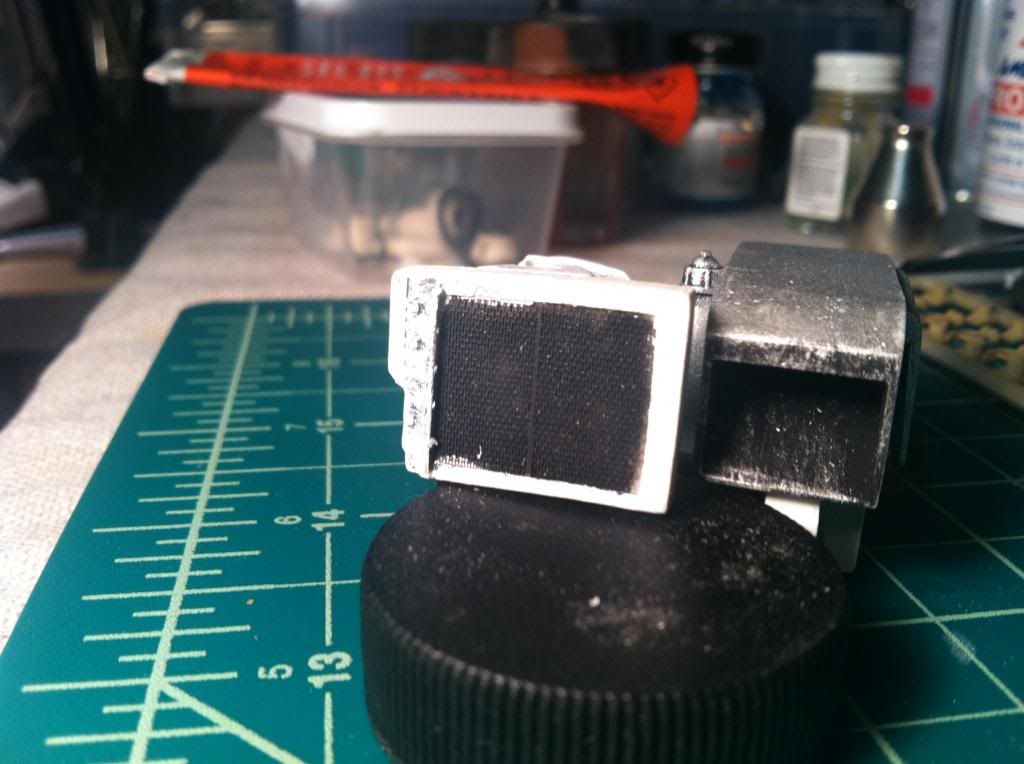
Note the obscured airholes beneath the screen (just some scrap PE screen my local hobby shop had as a discontinued train item).

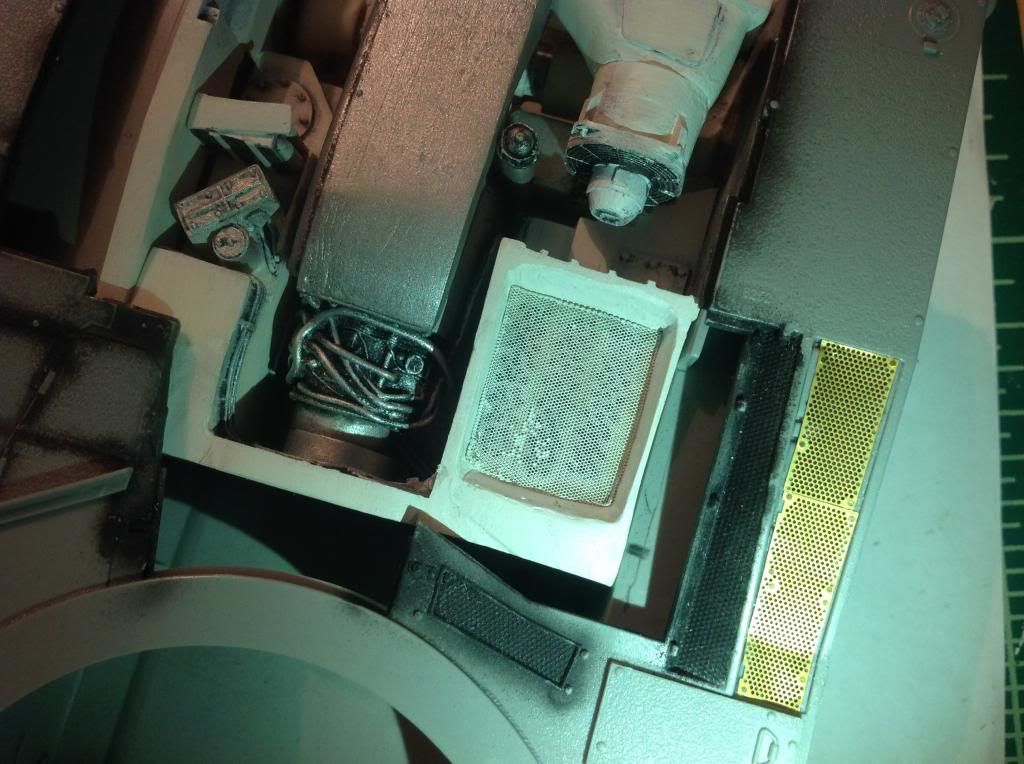
You can also see my handy work on the air intake/filter system that was non-existent. I ended up pulling out what I had completed and repositioned some things to get a much better fit.

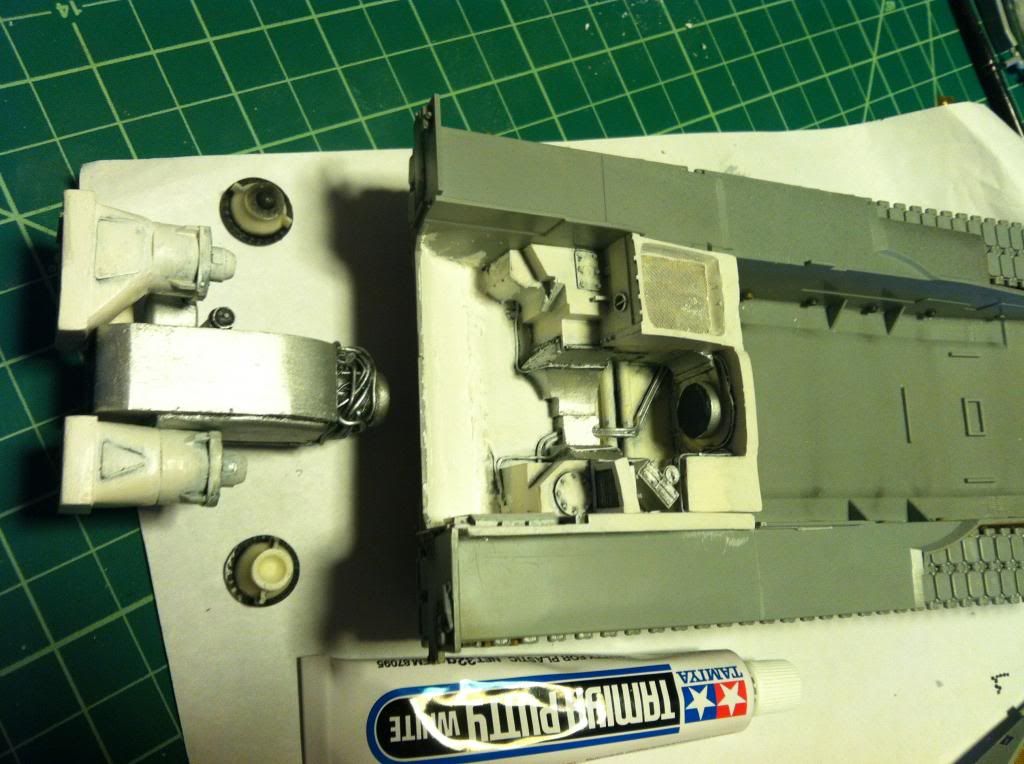
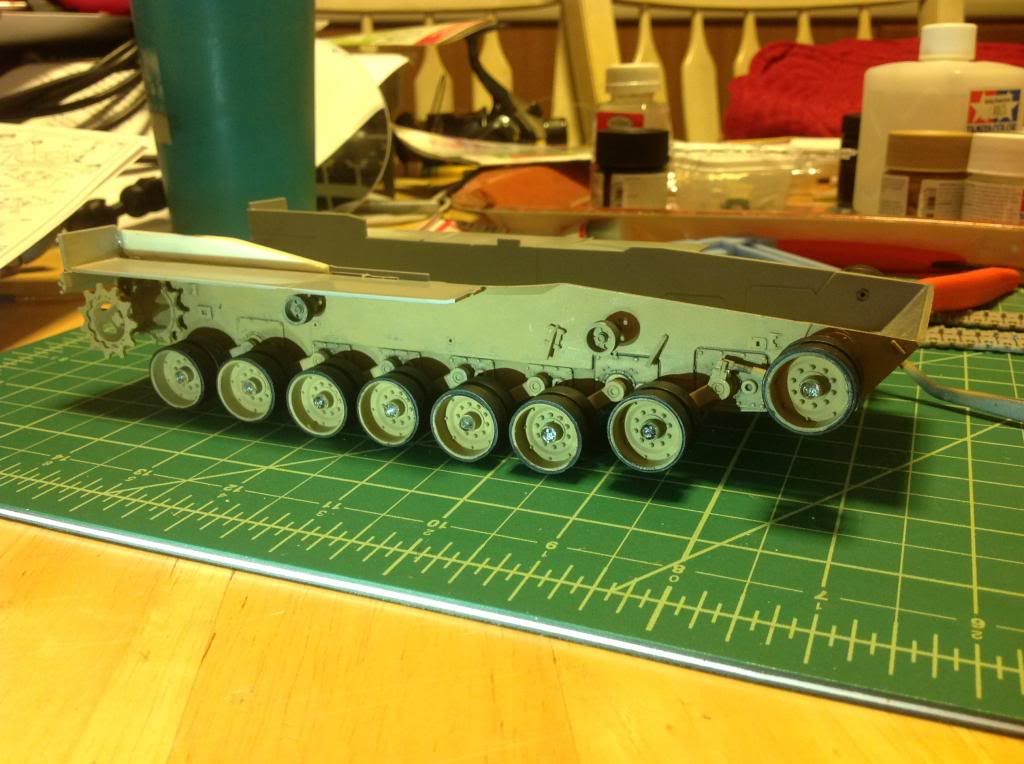
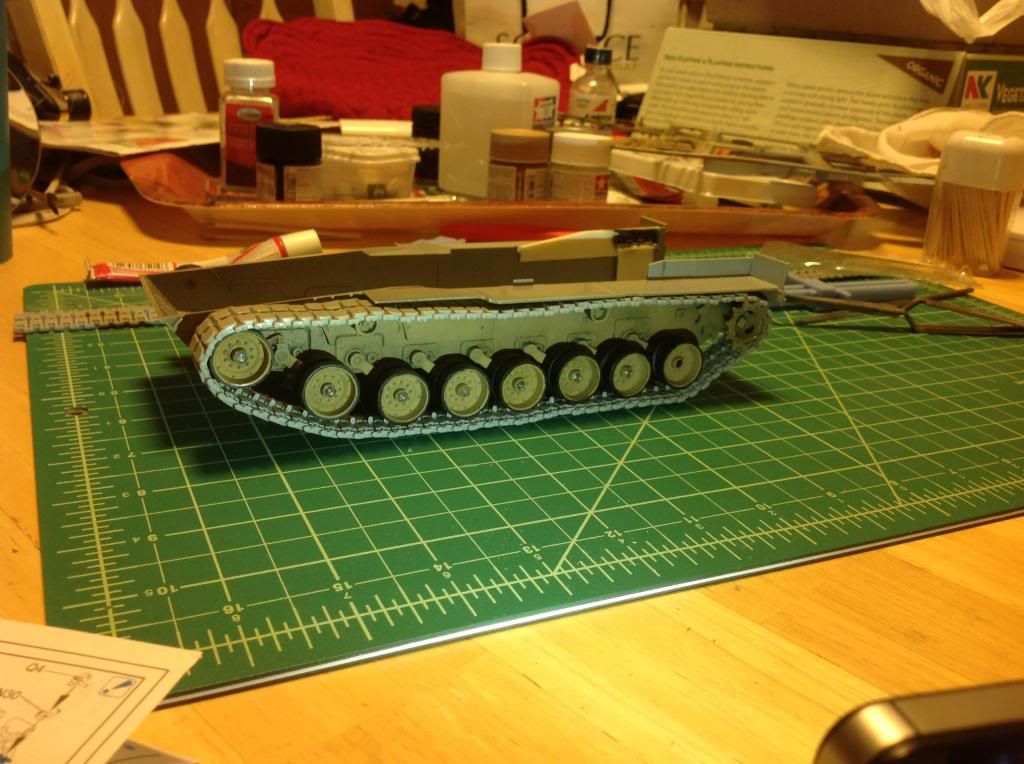
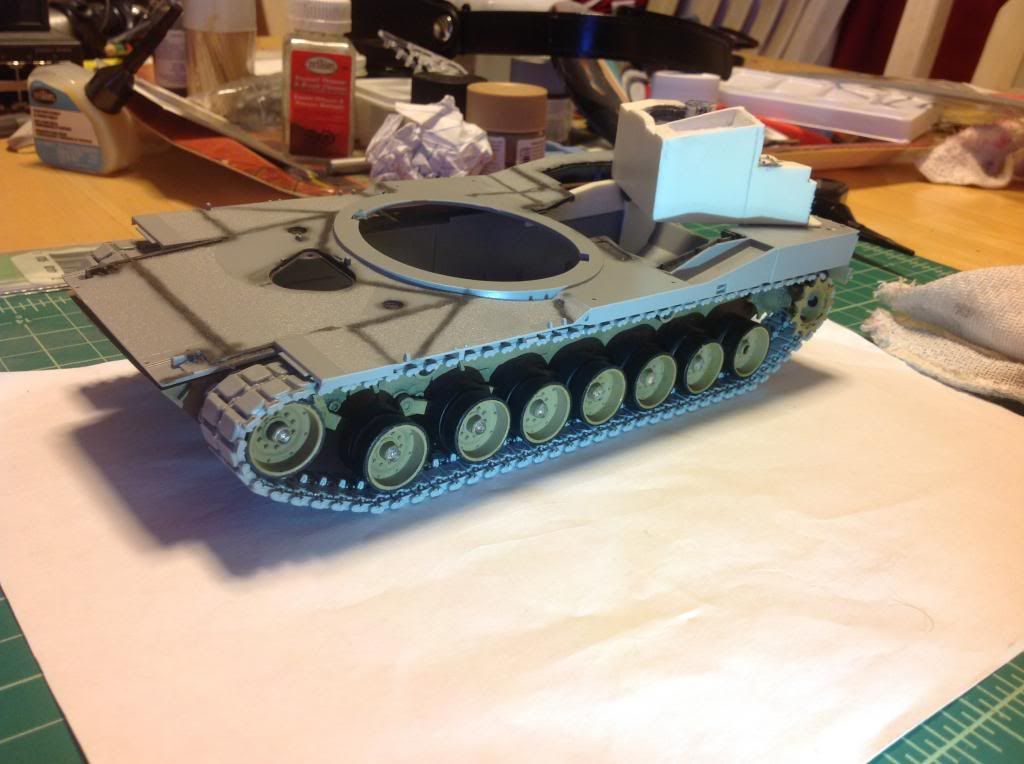
NOTE the WARPING of the top hull plating. Must be the change in weather. I had to move up from the basement until I get a space heater down below in man town!

Any tips for dealing with warping polystyrene? I figure the glue will hold it down when I attach.

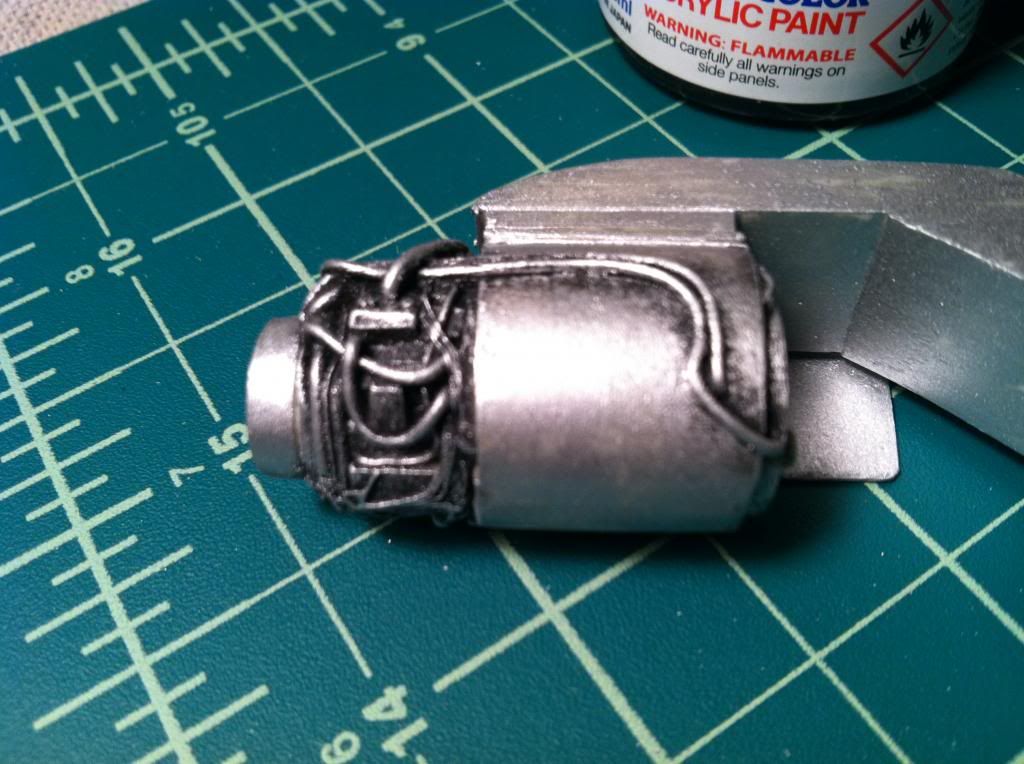
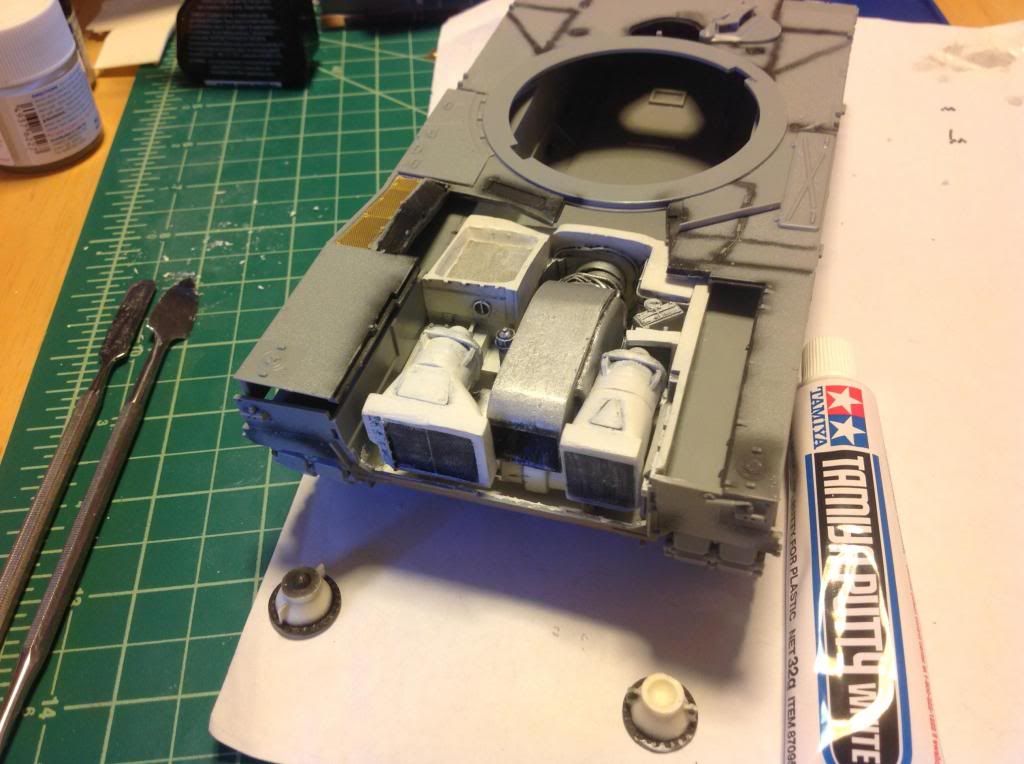
There are many more choices to be made in regard to the engine, however, it all comes down to how MUCH time do I want to OR CAN give to just the engine. At a minimum, I intend to add some line colors and connectors that more accurately reflect the real thing. Not sure I want to spend the time building out the back exhaust port. It is SO FAR BACK it is making me mental. Plus I have to redo the aluminum finish.

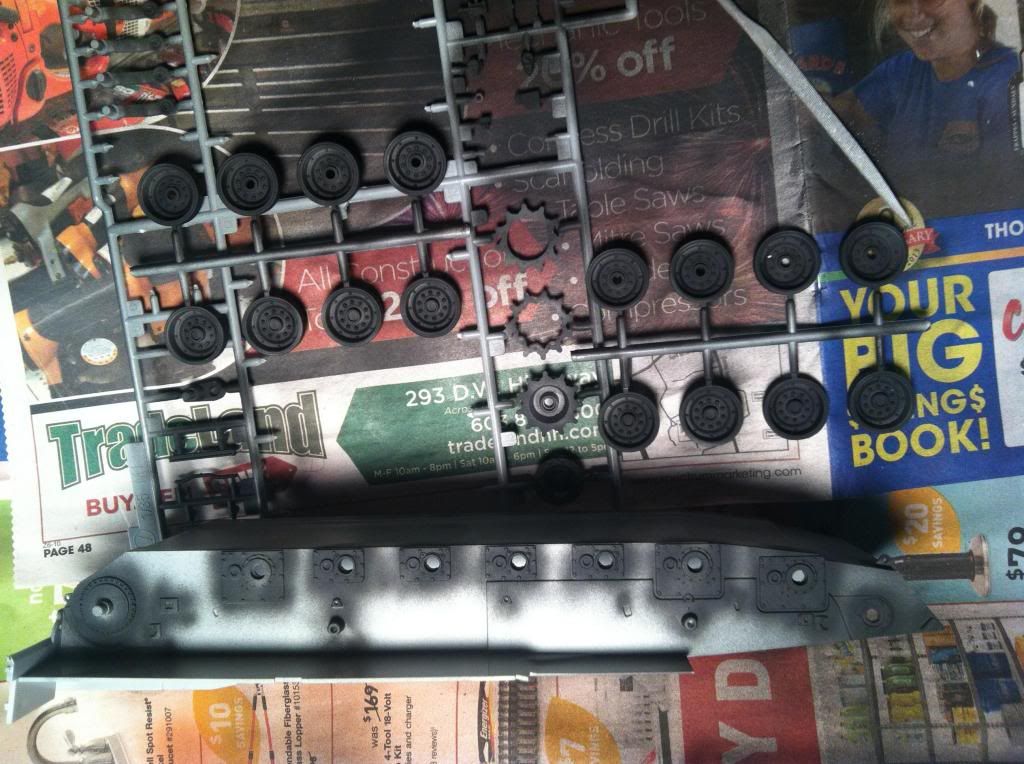
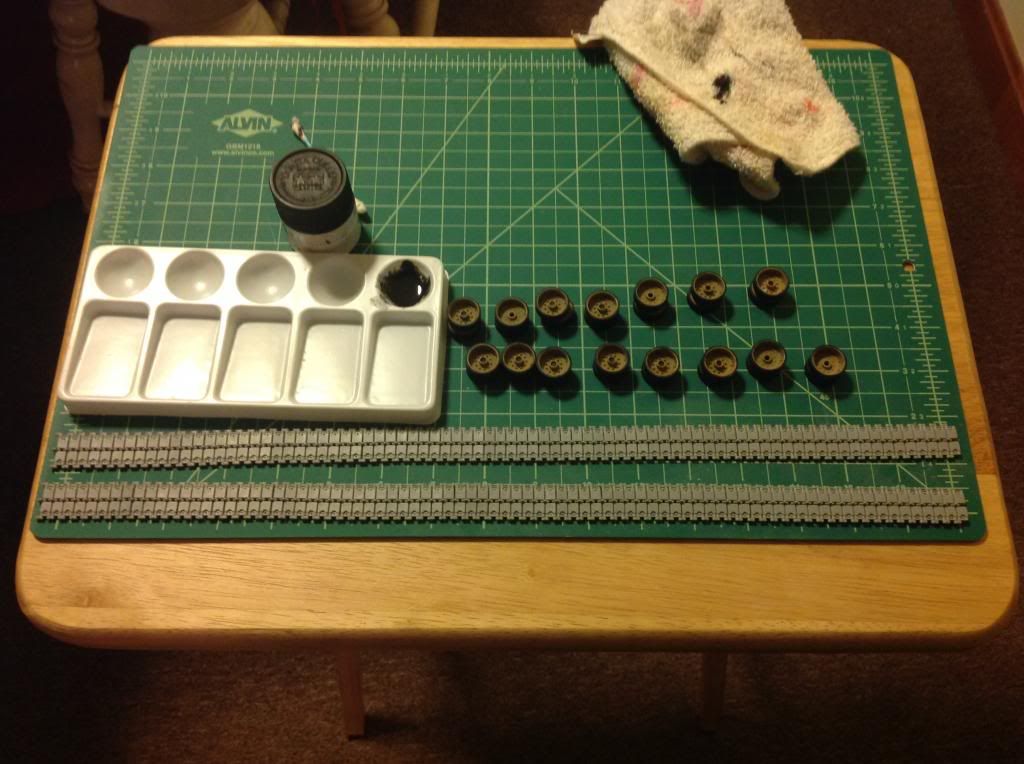
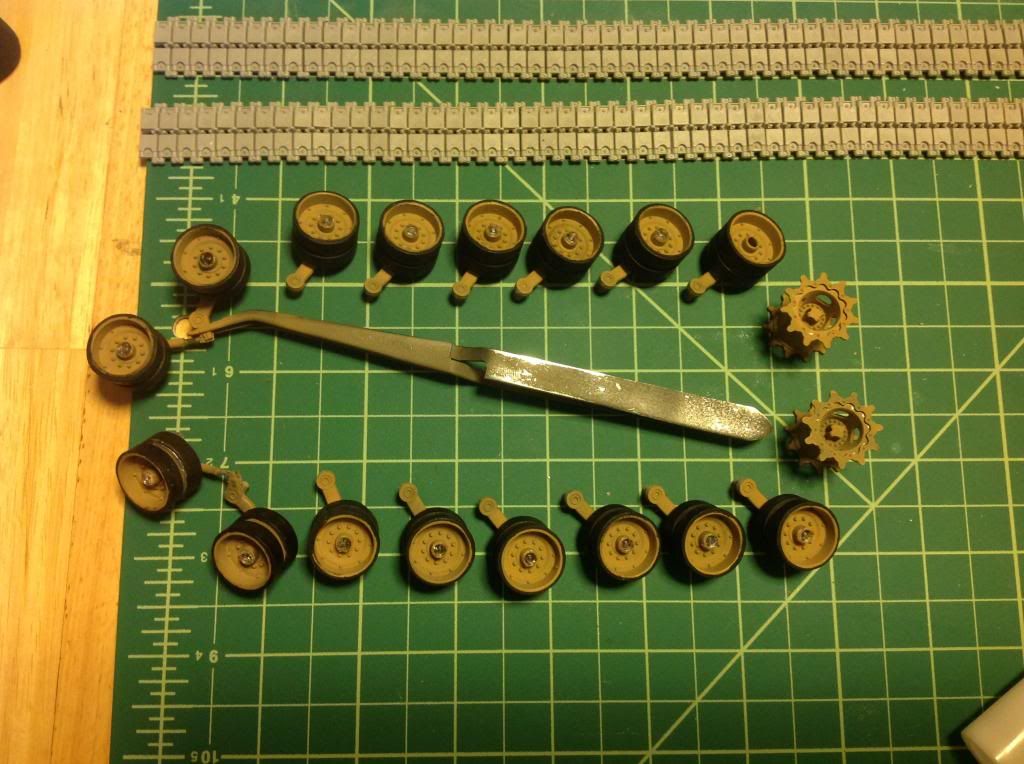
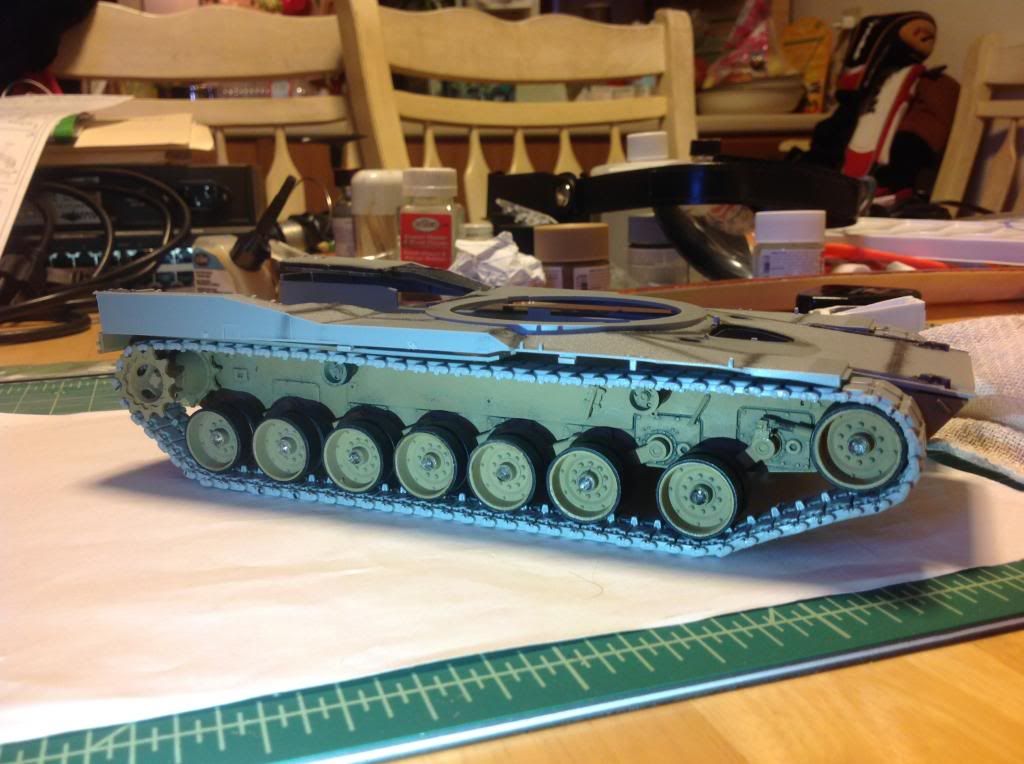
Finally, I am going to start painting the tracks (AS SOON as I get my heater downstairs so I CAN paint). Then I expect to have the interior pieces to get the drivers station in to complete the hull.

Not only am I excited to be making some progress, I am going to be in an Auto GB starting next month that I want to be able to focus on without taking away from this major undertaking.

As usual, thanks to all for following and supporting.

Ken

Hey,

Very nice!

Im not a detail guy, specially if everything is going to be closed not to be appreciated.

Will you leave the hatches of the engine opened?

@Garzonh,

Removable deck plates, as they come off for engine removal.

I also plan to leave the turret attached but removable.

Thanks for looking in and for your kind words.

This is my first attempt at real detail, so the engineer in me is enjoying it, however, I’m not going to do every model this way.

This one is special for 2 reasons.

  1. I crewed on an M1 my first 2 years in the army.

  2. It is going to be the center piece of my new sons room as we decided to do a camouflage/Army theme. He will be born any day now.

Thanks again

Ken