Double 1:72 OH-6A Loach WIP - FINISHED AT LAST! - Page 3

Hello!

Long time ago I have built the Italeri 1:72 OH-6A. It was the model that started my interest in the Vietnam War. Back then I have built it quick and easy and made a few mistakes, many of them already built-in in the kit itself. I’ve been thinking about improving on that, and so here we go - another try. And one more :slight_smile: You see I had two kits in my stash - the Italeri kit and another, from a company called AZ Model. It’s actually a modified copy of the Italeri offering. In all the photos below if you see olive drab plastic it’s from the Italeri kit, gray plastic is the AZ Model parts and white plastic is my scratchbuilding.

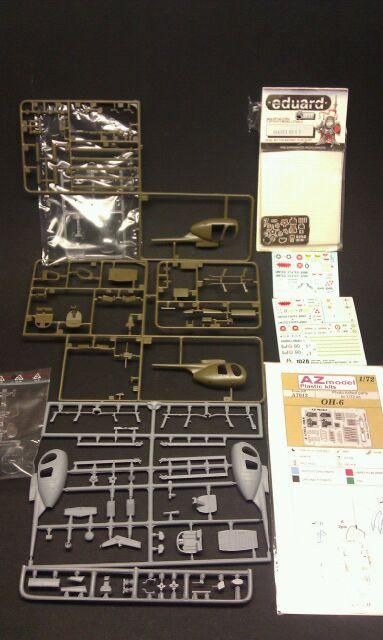
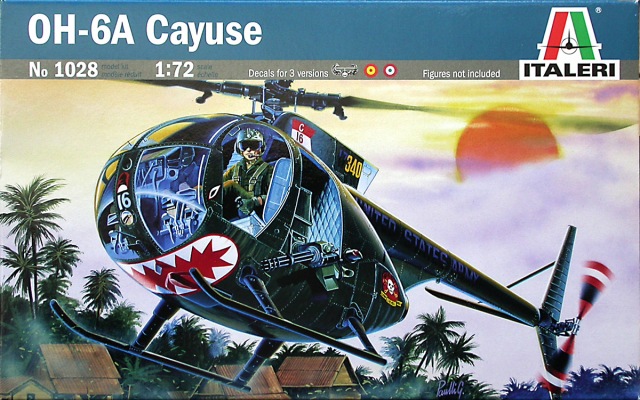
We’re talking about those two kits:

Italeri 1:72 OH-6A

AZ Model 1:72 OH-6A over Vietnam

OK, so here’s what we get in the boxes:

1:72 Italer/AZ Model OH-6A Loach/Cayuse by Pawel

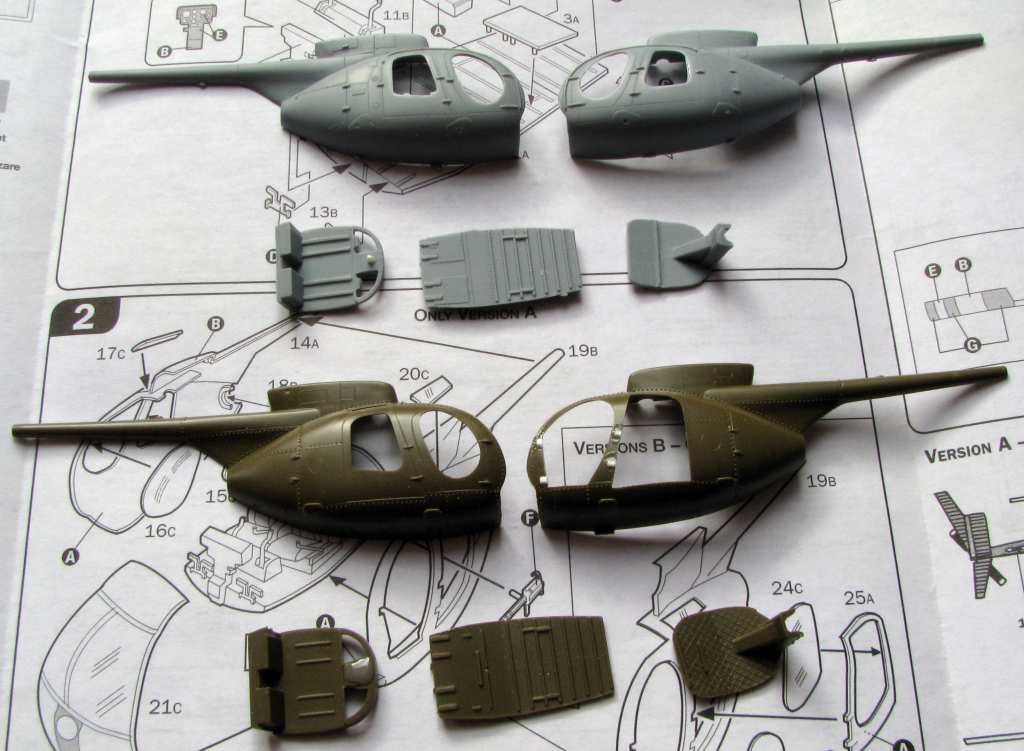
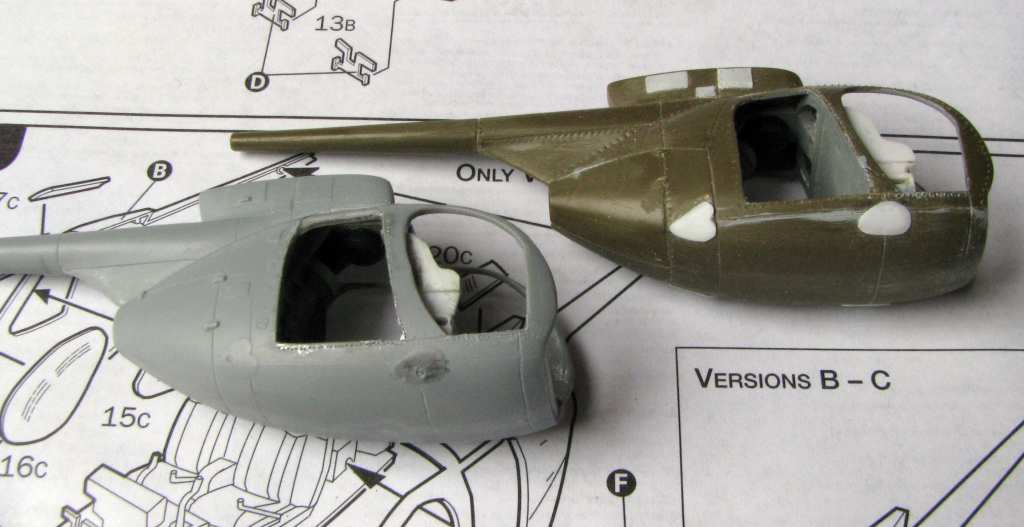
As you can see the AZ Model fuselage has all the doors on - they have to go for a Vietnam chopper. The Italeri also has the doors on the right fuselage half - the one that least needs it. The left Italeri fuselage half has nasty notches in places where the door hinges would be - and those notches shouldn’t be there. But the biggest problem with BOTH of the kits is that they actually show later civilian Hughes 500 fuselages instead of the Hughes 369 / OH-6A that flew in Vietnam. The most noticeable difference is seen in the rear window and the shape of the rear door. On the OH-6A the rear door was significanly lower than the front door which allowed for a big rear window. On the Hughes 500 the rear door had a height equal to the front door, and so the rear window was smaller - and this is how it looks like in both kits. The AZ Model also has a drip rail above the door - many newer Variants of the Hughes 500 have that, but the OH-6As didn’t.

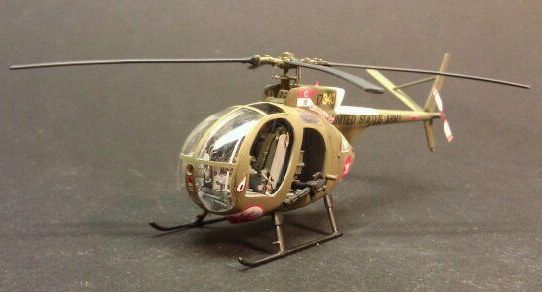
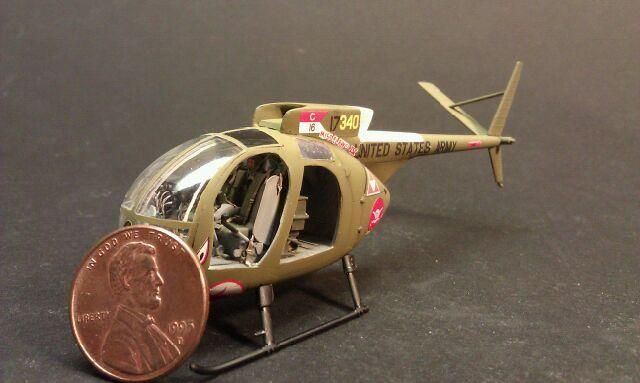
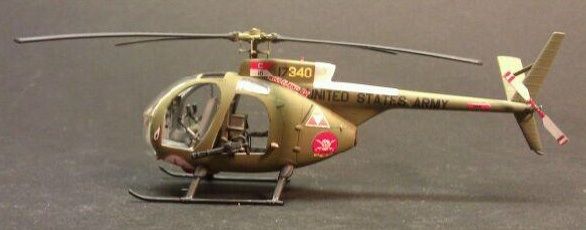
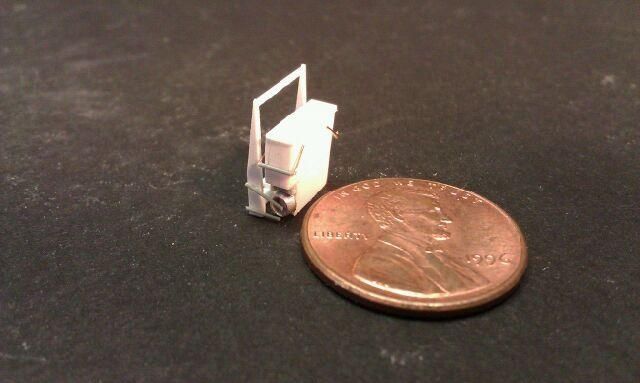
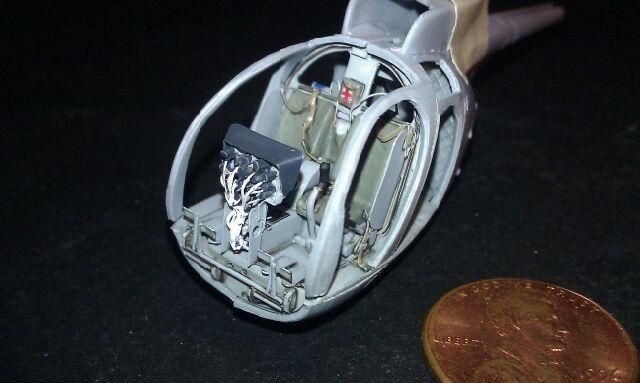
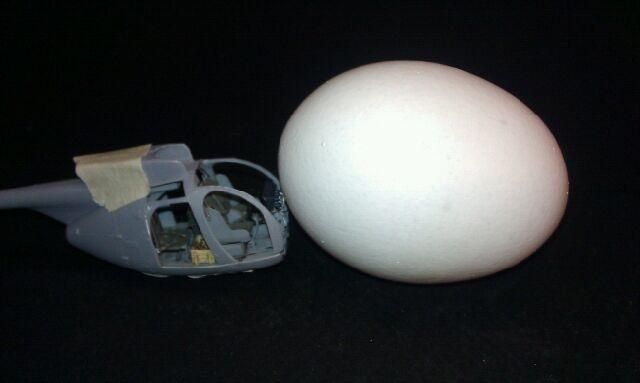
I’m trying to model one “Egg” with the “music box” - minigun in the rear and the rear windows patched over with sheet metal. The other “Egg” will have the rear windows and no “music box”.

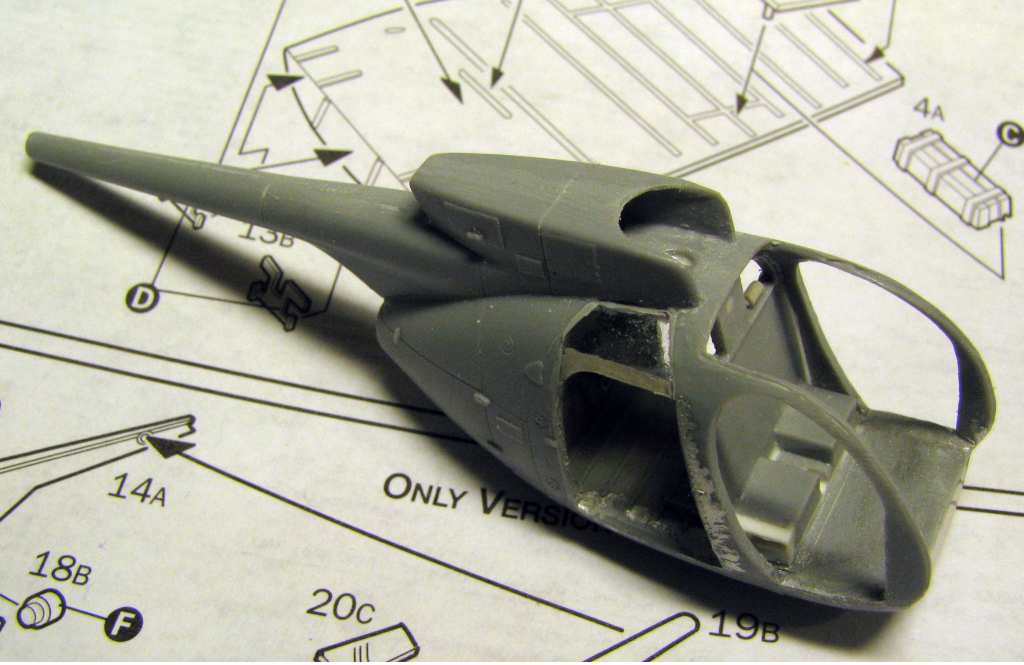
I started cutting out the unnecessary doors from the fuselage halves. It was the time to think about the corrections for the problem mentioned above:

1:72 Italer/AZ Model OH-6A Loach/Cayuse by Pawel

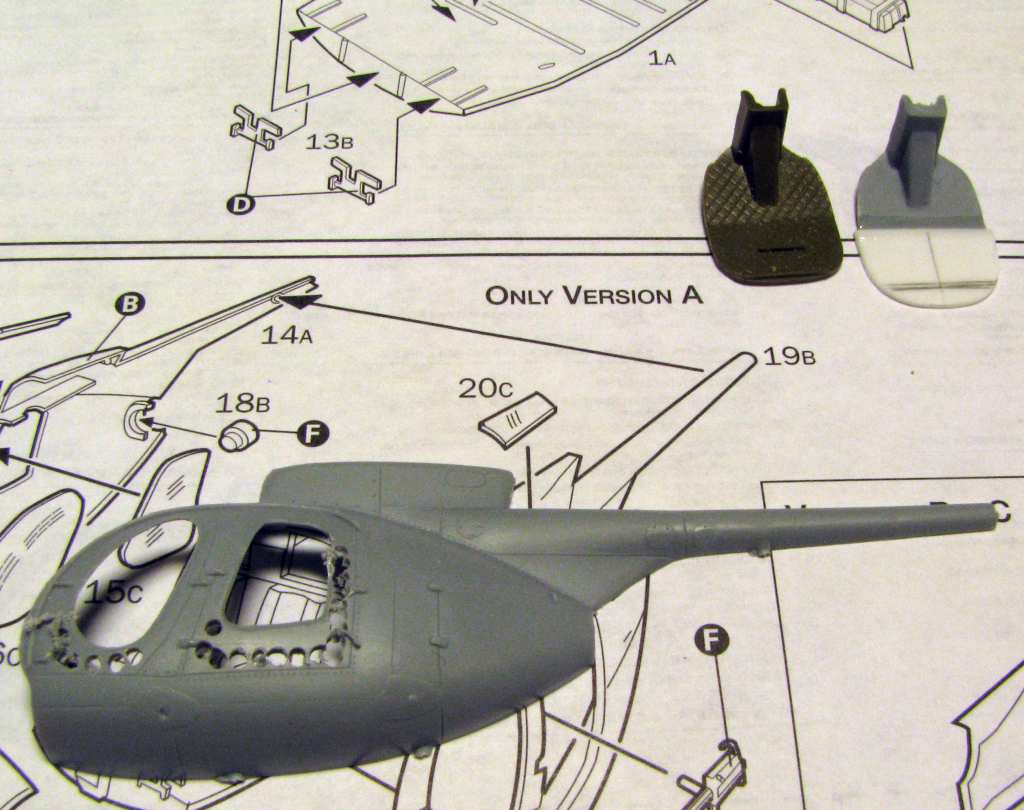
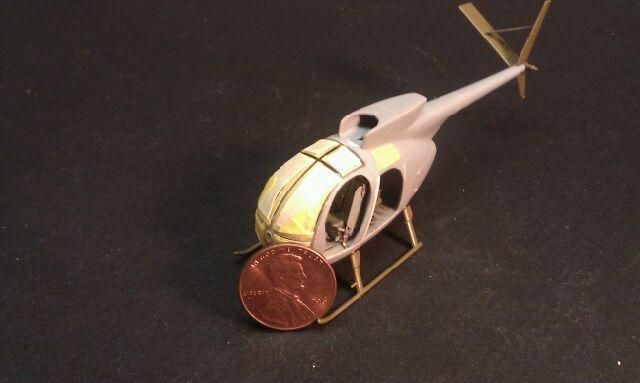
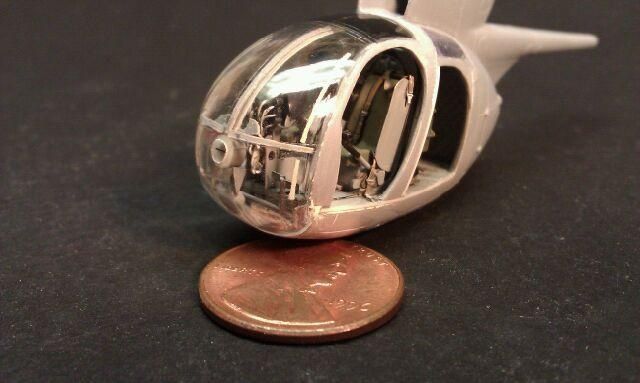
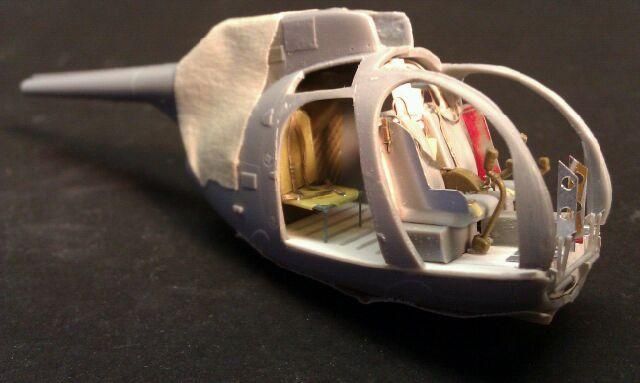
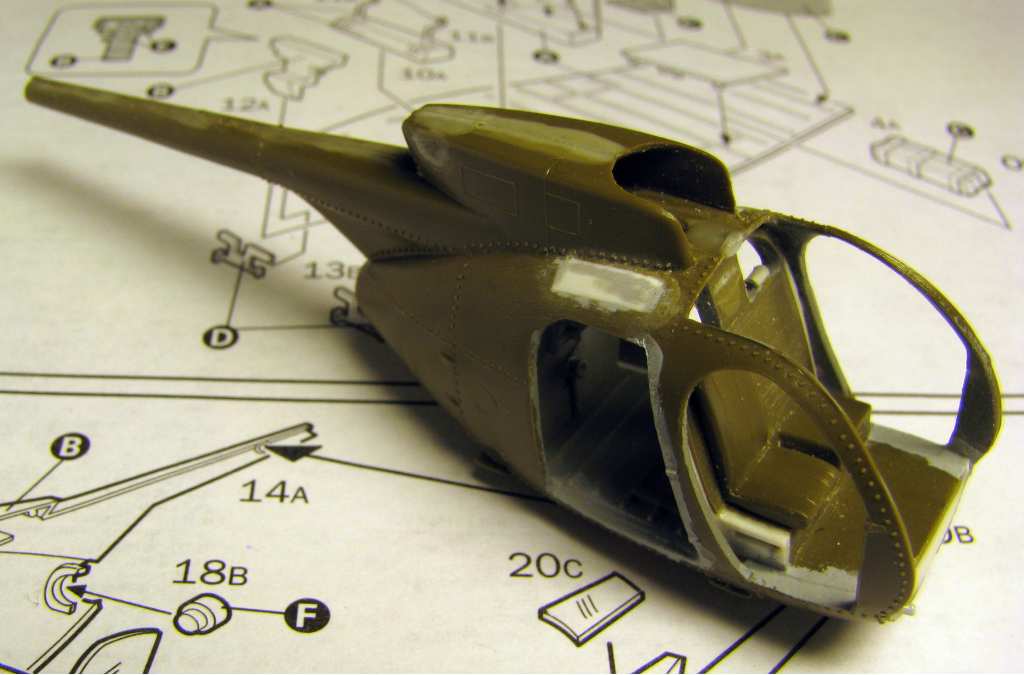
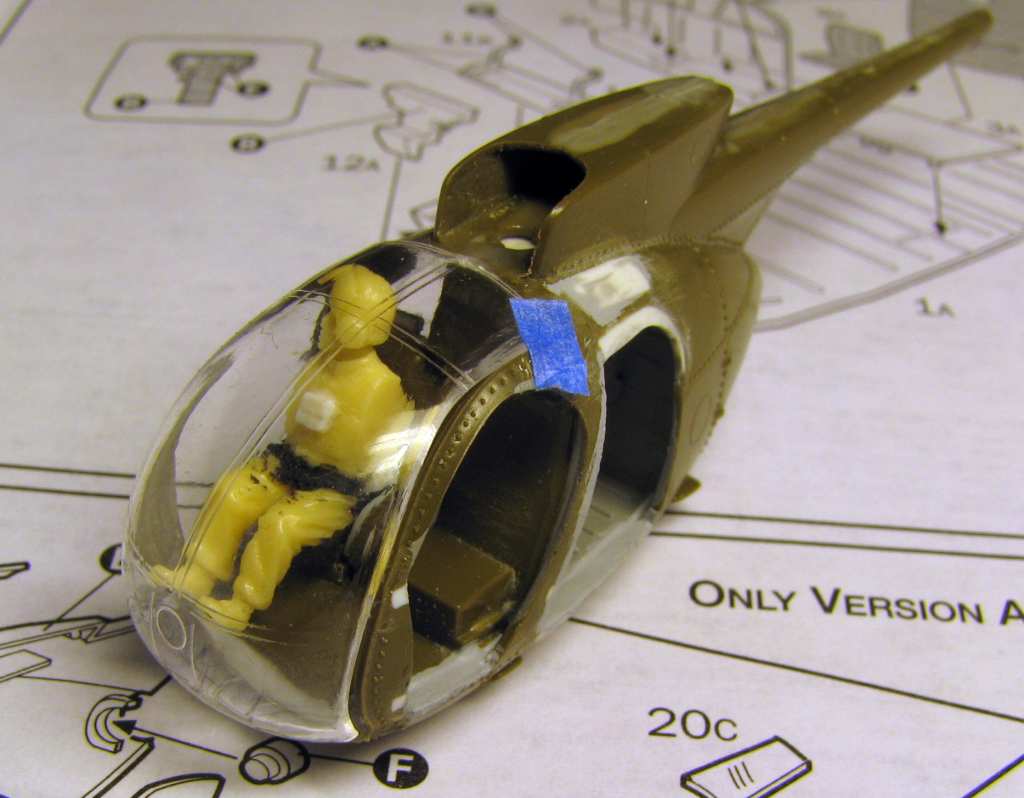
In the above photo you see the holes I drilled to remove the extra styrene. I also started to enlarge the rear bulkhead, that is way too small for the fuselage. In the chopper with no rear windows I blanked them off with sheet styrene. In the other one I cut out a portion of the fuselage around the windows and replaced it with pieces of bent clear plate. That should give me nice, smooth seamless windows. I also lowered the upper edge of the rear doors:

1:72 Italer/AZ Model OH-6A Loach/Cayuse by Pawel

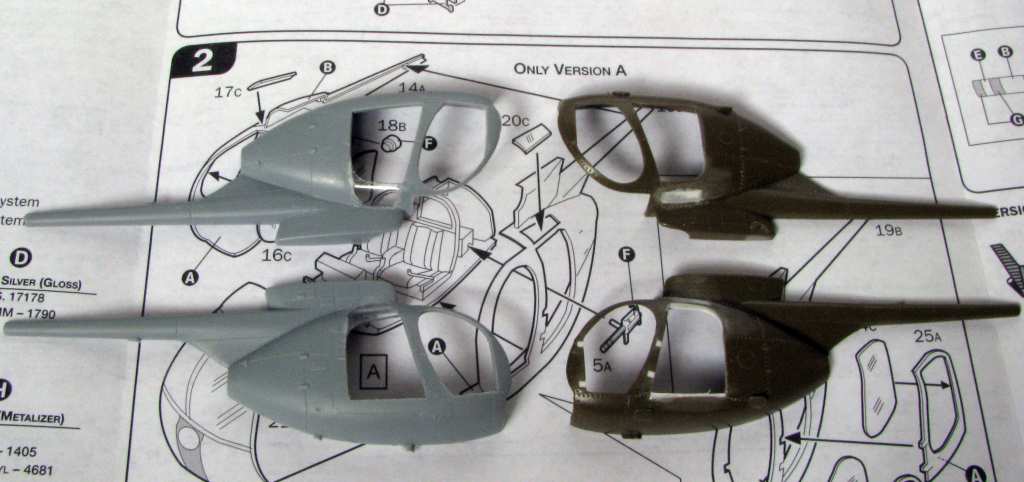
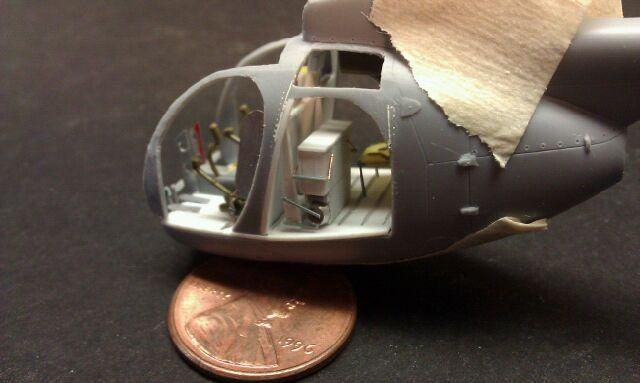
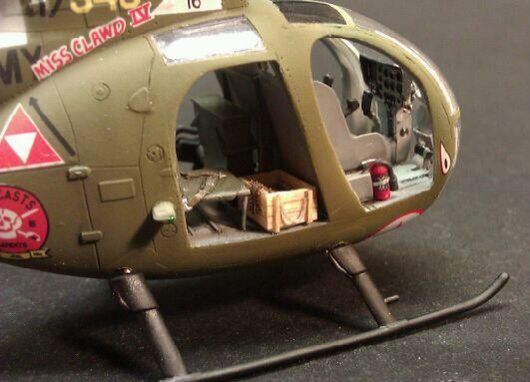
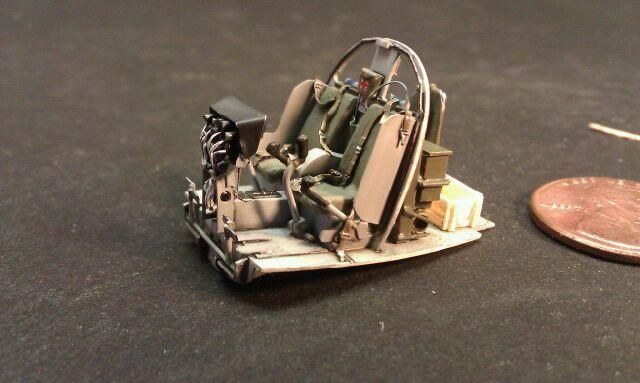
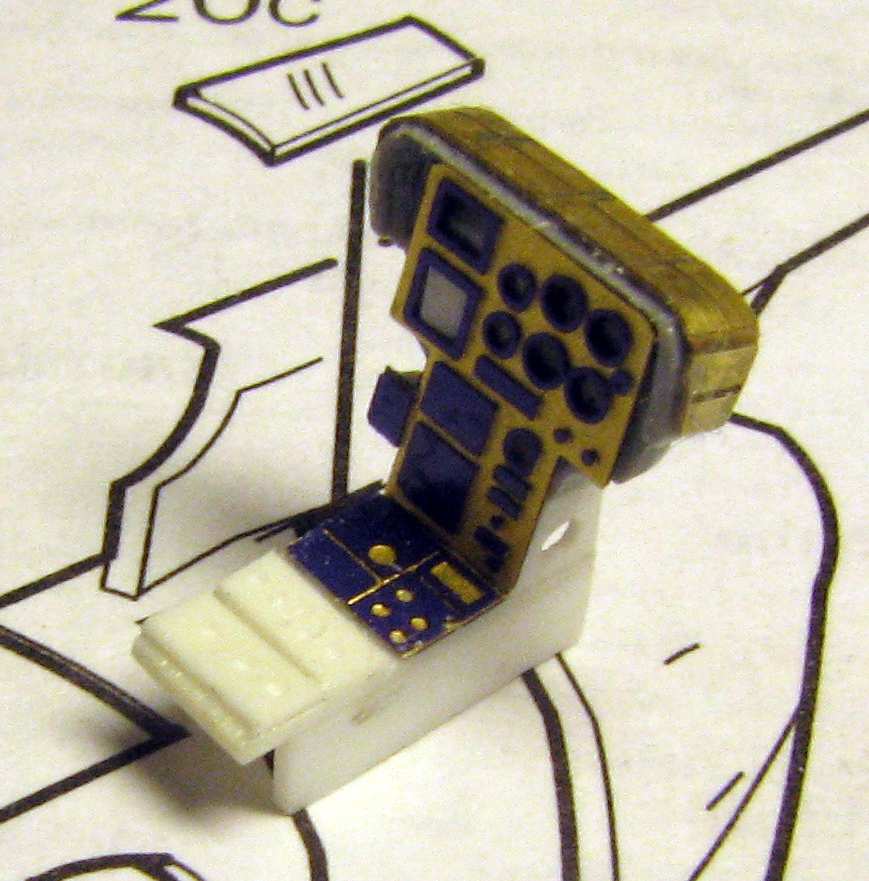
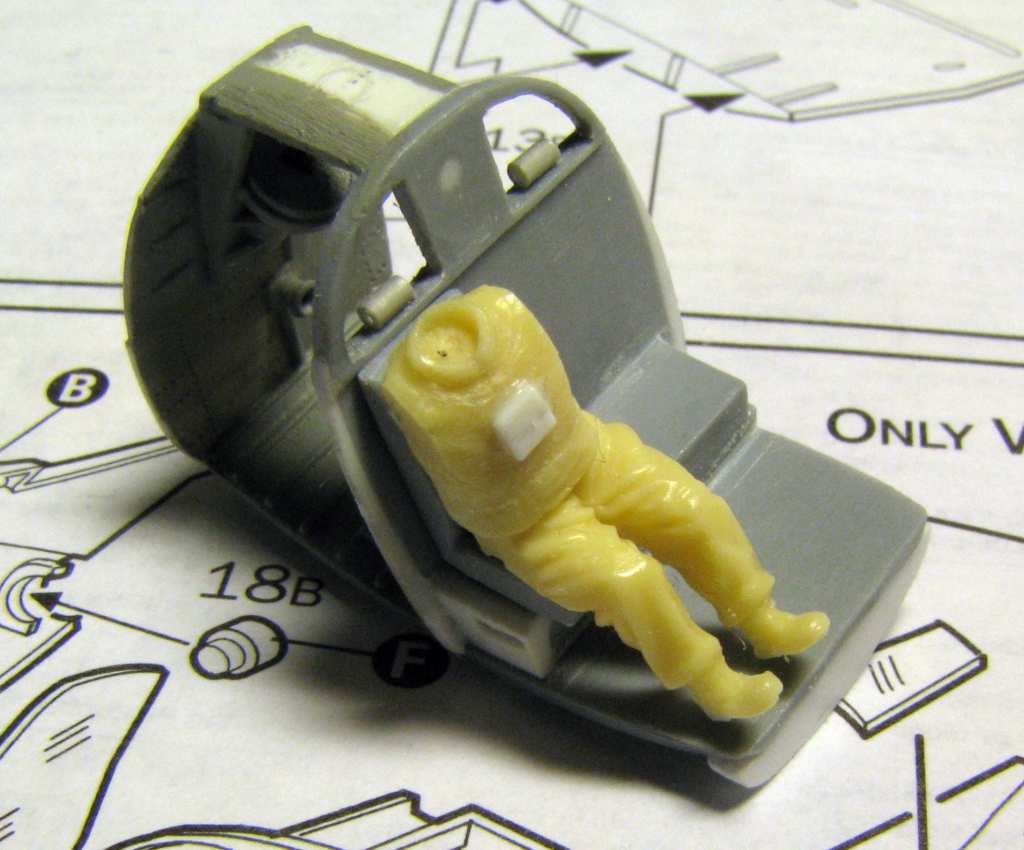
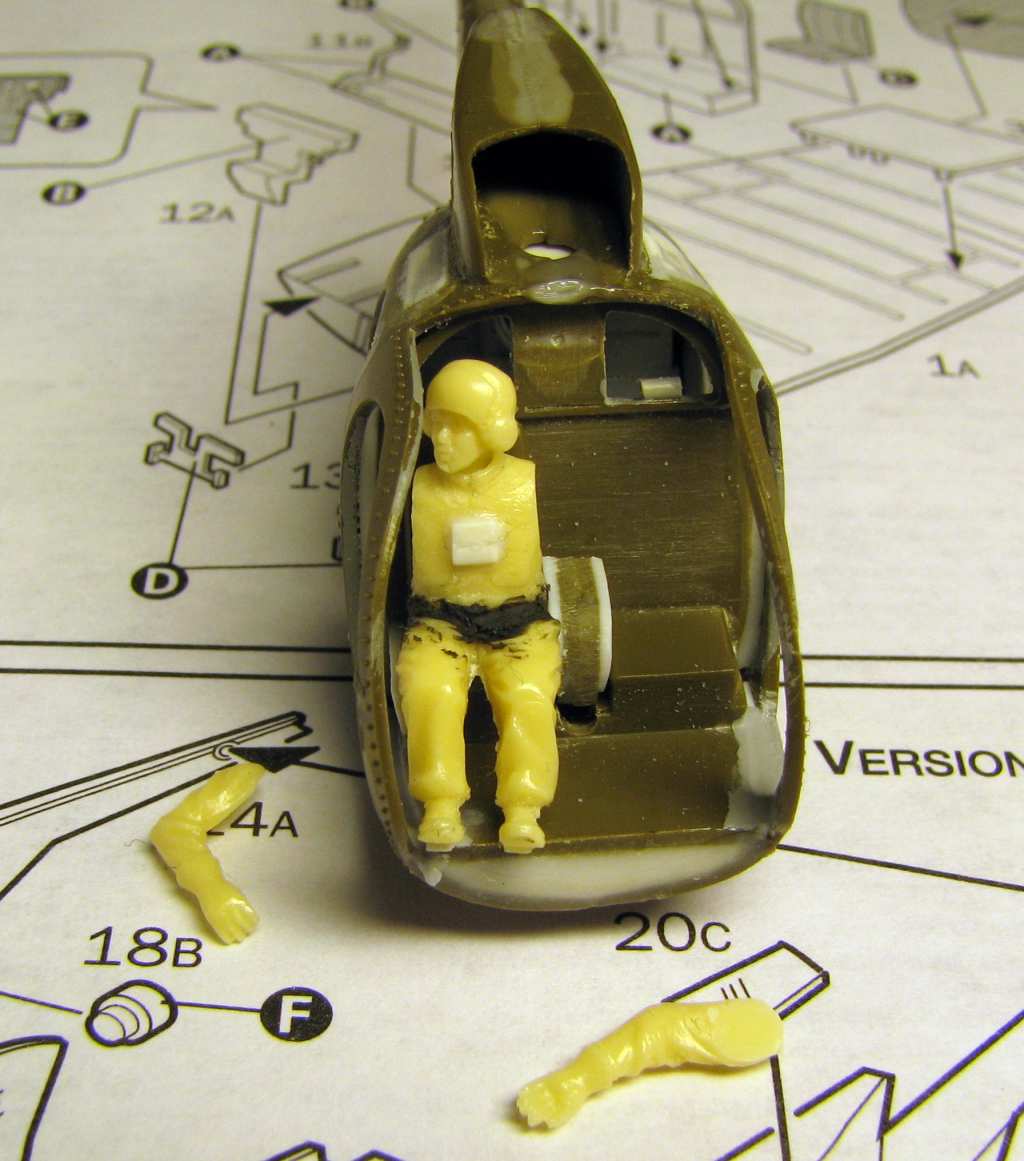
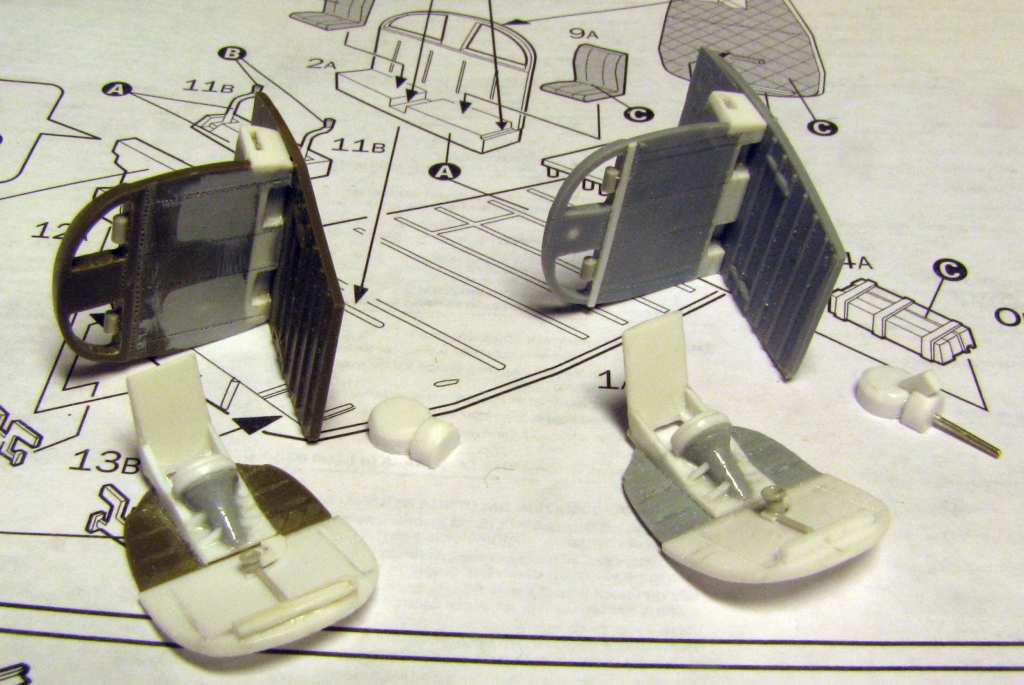
I also started detailing the rear compartment. Both of the kits give you a civilian main transmission cover - and in Vietnam the airmen flying the chopper tried to get rid of extra weight - so they removed most if not all of the interior lining, and so the main transmission was exposed - I tried to show that. But first I had o enlarge the bulkhead to make it fit the fuselage and put the floor at the right level, flush with the door threshold:

1:72 Italer/AZ Model OH-6A Loach/Cayuse by Pawel

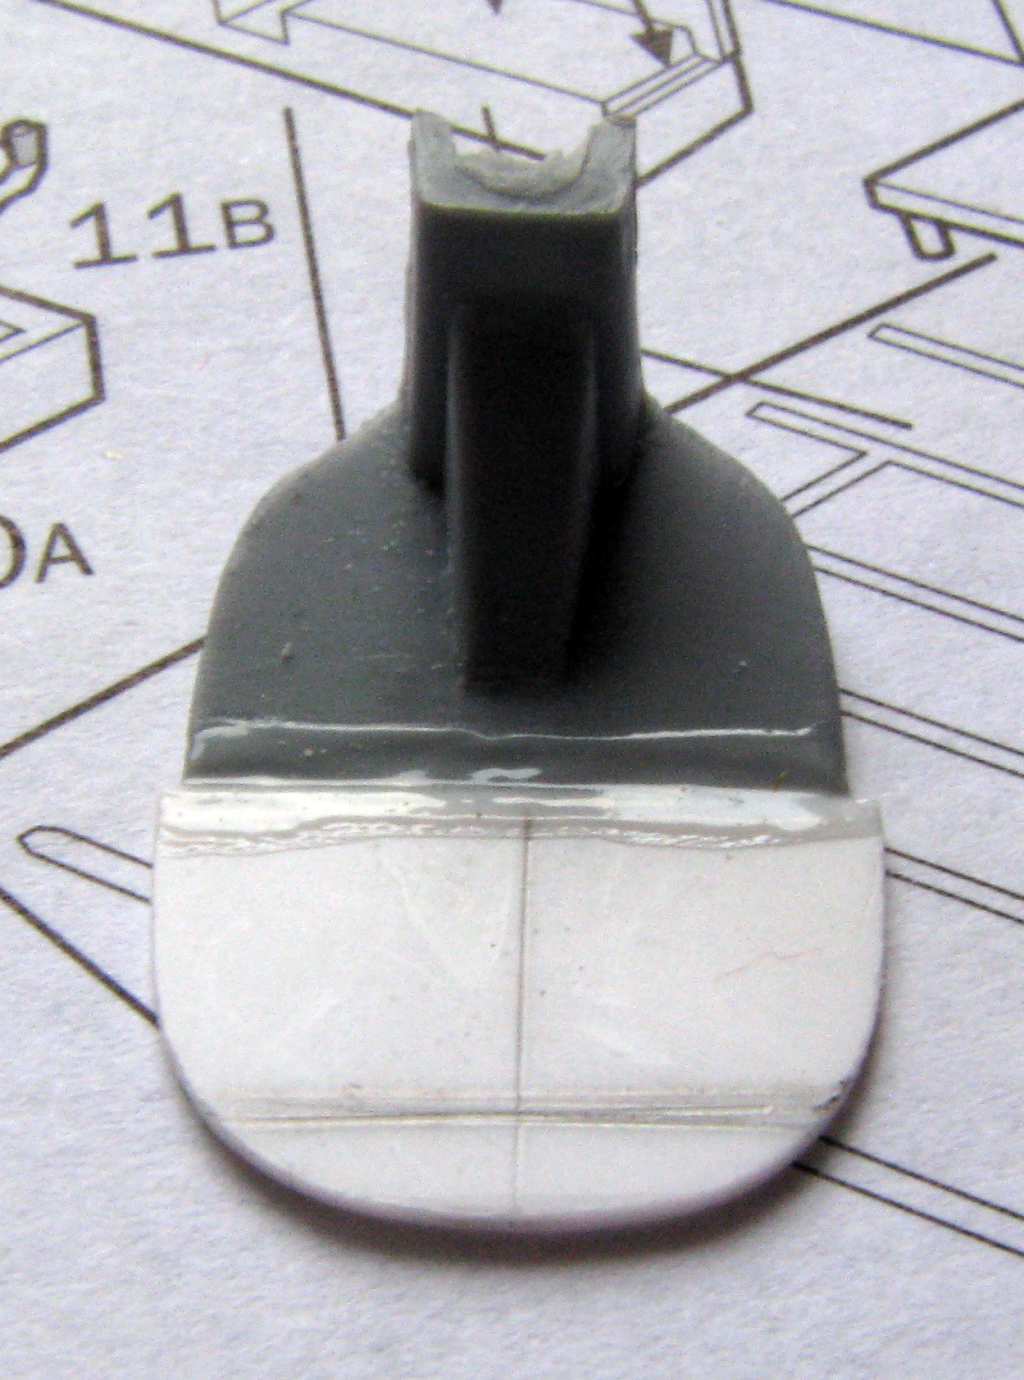
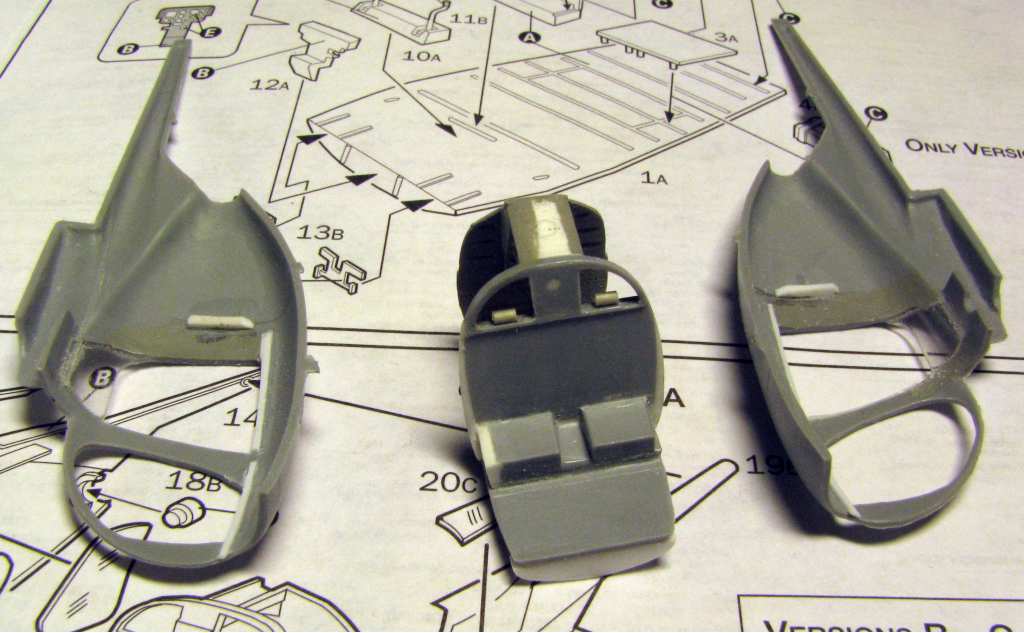
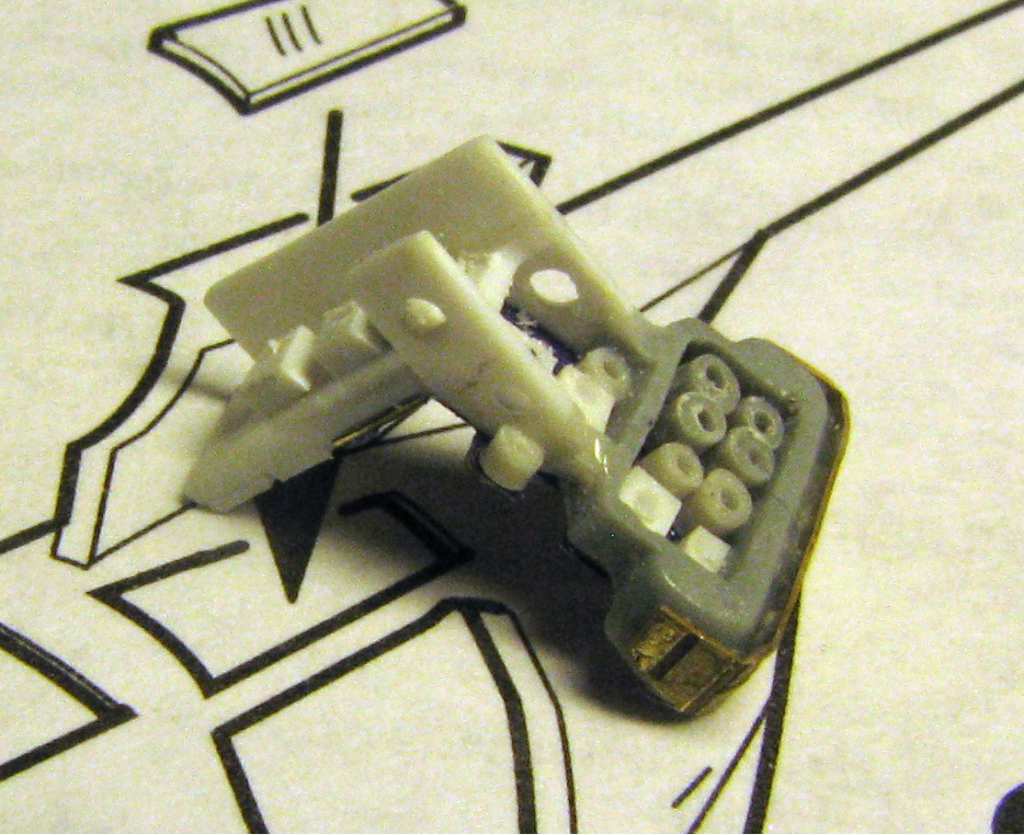
In the photo below you can see my reworked main bulkhead with the unnecessary void spaces filled, notches that should be there cut and the slot for the external electrical connection added. The rear bulkhead has the engine shaft cover and the main transmission added:

1:72 Italer/AZ Model OH-6A Loach/Cayuse by Pawel

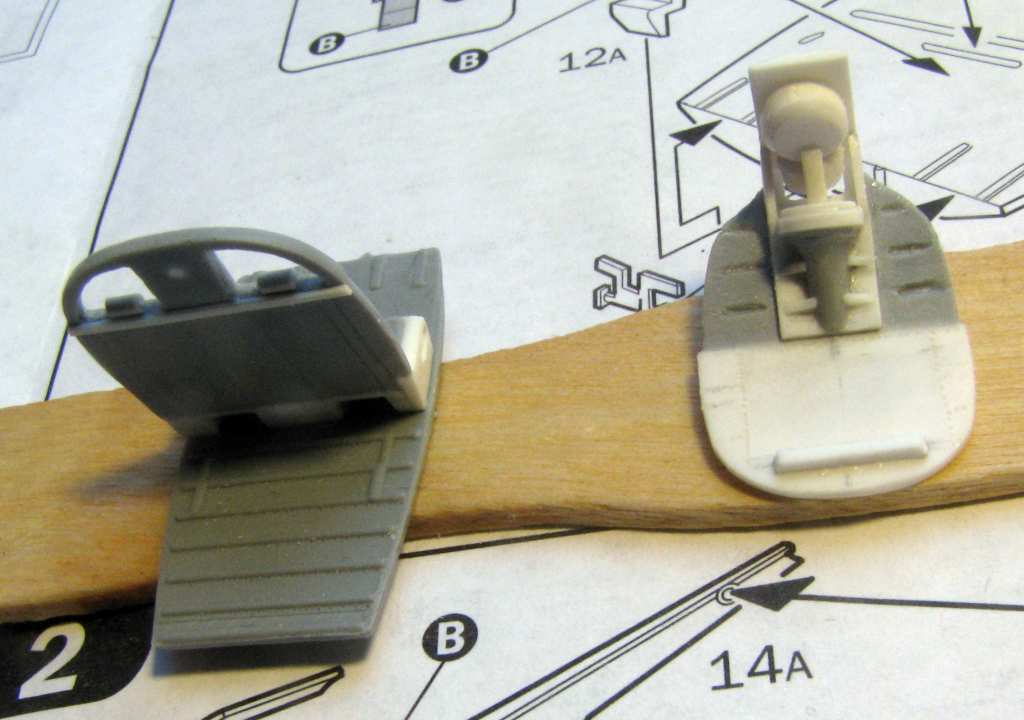
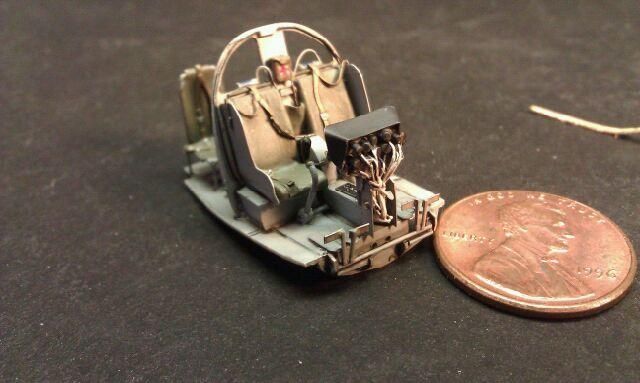
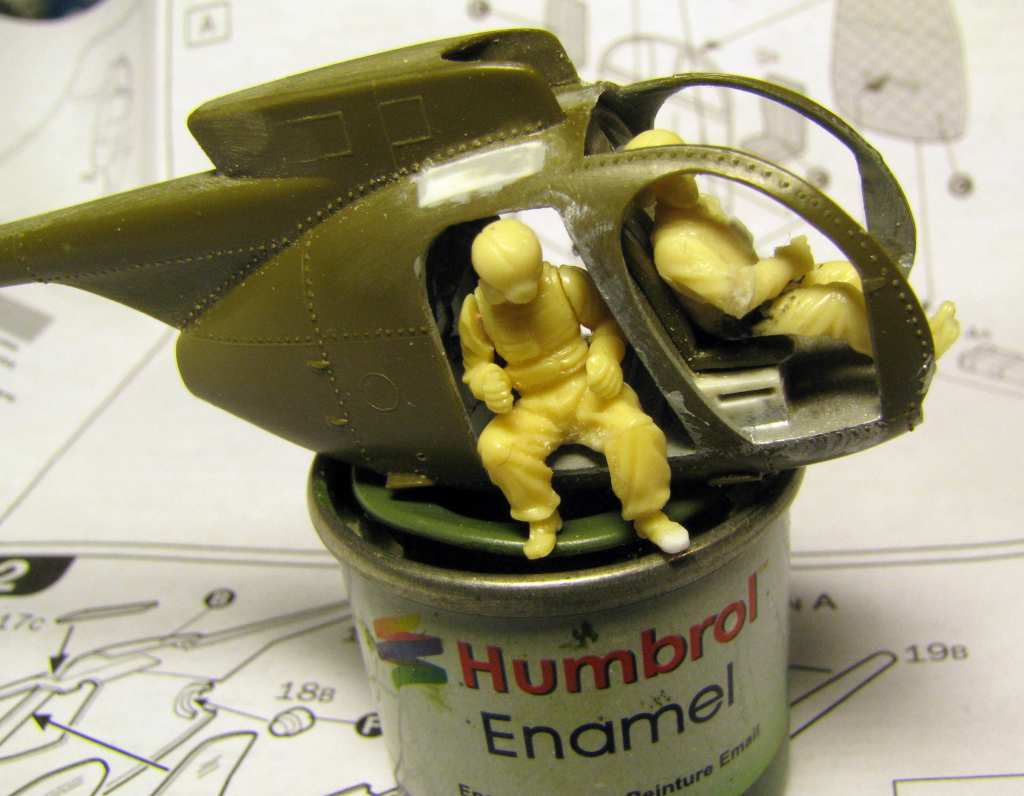
Now I had to do it one more time, this time for the Italeri model. I also added one more detail to the bulkheads - looks like some kind of heating duct. The “trannies” are not fixed yet - to make painting easier. The interior is gray and the “trannies” should be black:

1:72 Italer/AZ Model OH-6A Loach/Cayuse by Pawel

And that would be all for now - now I’m working on the front of the interior. Thanks for looking and have a nice day

Paweł

Great. I am gonna follow with interest.

Me too [:)]

the pilot of that helicopter, Miss Clawd, still posts once in a while on modeling forums.

Hey ! Pawel !

What do you call a Loach with Gun Pods -" A hard boiled egg ! ! lol.?

Hello!

Thanks for the comments!

Glenn, Patryk - you’re welcome, let’s just see how often I can post a worthwhile update on this one (those two) - fitting that interior is really tedious!

Rob - I don’t know if he still posts, I’m sure I’ve seen posts by mr. Mills here on the forums. I sure would welcome a tip or two from him in this thread, it’s hard to imagine better info. But I’m not doing Miss Clawd IV - everybody else does, I hope mr. Mills doesn’t mind. From his unit I’m doing “The Enforcer” - a machine in similar markings but still different.

TB - that’s a good one, I think I’ll start using that phrase regularly!

Thanks again and have a nice day

Paweł

Tiny!

Nice work Pawel…looking for more!!![t$t]

Didn’t you “bash” these two kits?

Now that you mention it…yes…

Won first at 2015 Nats…

Hello!

That looks REALLY nice! I see you corrected the door problem, too! In the end you didn’t use much of the Italeri kit, did you? Thanks for sharing and have a nice day

Paweł

Hello!

Work is going on slow, but I have an update for you:

I’m preparing to close up the hull, I mean minus glass. I’m going to detail the insides after it’s closed (without glass) to avoid breaking the details in process. I had to use a lot of various shims to get the interior to fit without major gaps:

1:72 Italer/AZ Model OH-6A Loach/Cayuse by Pawel

Beefing up the front bulkhead (along the front floor edge) helped to align the floor with the door thresholds.

I started building up the instrument panel. I had to scratchbuild the central tunnel that is not there at all in the Italeri kit and only hinted at in the AZ Model kit. I have hollowed out the kit instrument panel of both kits and I’m using PE Parts from Airwaves (AEC72125):

1:72 Italer/AZ Model OH-6A Loach/Cayuse by Pawel

1:72 Italer/AZ Model OH-6A Loach/Cayuse by Pawel

I’ll wire it later, too, but first I have to paint it a little bit before the wires make it impossible. I’m also working on the crew - I want to have a pilot an an observer in both of them babies. I’m using the helicopter crew from the CMK kit (F72080) and from the PJ Productions (721129). For now I have cut up one of the CMK pilots. He is shaped to fit an armored seat of a Huey, and he’s a pretty large fellow, doesn’t really fit the Loach, so I had to reshape him a little. I also wanted him to wear a “chicken plate” so I have modified the torso a little:

1:72 Italer/AZ Model OH-6A Loach/Cayuse by Pawel

That’d be it for now, thanks for looking and have a nice day

Paweł

Hello!

Another update!

I’m working on the instrument panels. I want to do the wiring of the individual instruments, so I have glued thin copper wire in the holes that I have drilled before:

1:72 Italer/AZ Model OH-6A Loach/Cayuse by Pawel

The wires are painted with white Gunze paint - looks kinda funny, doesn’t it? After that I have bent the wires and painted them. I have also painted the instruments - the bezels are flat black and the faces are gloss black. The radio switches got a white wash and now my babies look like on the photo below:

1:72 Italer/AZ Model OH-6A Loach/Cayuse by Pawel

I have also managed to close up the hull of the Italeri one, now the seams are filled with molten sprue and the thresholds of the doors are filled with Surfacer 500:

1:72 Italer/AZ Model OH-6A Loach/Cayuse by Pawel

Now I have the basic dimensions I’m going on with fitting the pilot in. I have managed to lose like 3mm of his height and now he fits in. As you can see the hands are way to long now, I will have to shorten them:

1:72 Italer/AZ Model OH-6A Loach/Cayuse by Pawel

It’s important to do it early, so I have also test-fitted the glass. In the Italeri model it fits quite well:

1:72 Italer/AZ Model OH-6A Loach/Cayuse by Pawel

Now I’m planning to close up the fuselage of the AZ Model Loach, let’s see how this goes. Thanks for looking and have a nice day

Paweł

…nice…dig the pilot. Wiring is a bit thick…

Hello!

Thanks a lot!

Abot that wire - yes, I realized it was a bit thick just after painting. By the way, one wire represents a several wire bundle here.

Thanks for looking, have a nice day

Paweł

That is quite a job you’ve taken on. I built Miss Clawd IV from the Italeri kit several years ago and it is a tiny model.

Very impressive to see someone adding the level of detail that you are to this kit.

Pawel,your eye for detail is exemplary.

Aaron, templar1099 - thanks a lot for your kind words! The model is indeed tiny, but I like detailing stuff like that. Good thing there are references on the 'net to help me!

And I have another update for you. I managed to get the other fuselage closed up:

1:72 Italeri/AZ Model OH-6A Loach/Cayuse by Pawel

It needed a whole lot of clamping to fit the interior in, and the top of the front bubble opening is now a bit too narrow - somebody messed up the engineering here. I’ll rectify it. The transparent bubbles of both models are so close dimensionally, that after cutting them from the sprue I can’t tell them apart now. Now I’ll work the seams and I’ll have to rescribe both fuselages - just lightly on the AZ Model one, and fully on the Italeri one.

I have also more or less finished the poses of two figs and now I have the crew for one of the “Eggs”:

1:72 Italeri/AZ Model OH-6A Loach/Cayuse by Pawel

Boys are still poseable, I have pinned them with thin copper wire.

And that would be it for now - thanks for looking and have a nice day

Paweł

i am doing one for a friend so looking forward to reading about it

Hello BIGBOB!

Thanks a lot for your comment and I’m sorry you had to wait so long for an answer - I’m a slow builder!

I have a small update on this one. I have rescribed the hulls and I also have built the pilot’s armor:

1:72 Italer/AZ Model OH-6A Loach/Cayuse by Pawel

I have also fit both crews and I have started painting them:

1:72 Italer/AZ Model OH-6A Loach/Cayuse by Pawel

1:72 Italer/AZ Model OH-6A Loach/Cayuse by Pawel

1:72 Italer/AZ Model OH-6A Loach/Cayuse by Pawel

The seatbelts are PE parts from a comapy called Kuivalainen, kit no. KPE 72024, they are very nice.

Now I’m working to put the cockpits together.

Thanks for reading and have a nice day

Paweł