@laubin - thanks a lot for your comment! I like to show my models to people who “been there done that” to make sure they look right. Can you write more about your service? As for the red dust this is one of my “dustiest” models so far, please tell me if it looks right to you:
6 Likes
You are doing an awesome job with this vehicle.
Thank you very much!
I drove several different fuel trucks in my career in the Canadian army including an M49 with the UN Peacekeeping mission to Egypt.
As established there were three separate compartments but not sure how “potable” the water would be since all three compartments went through the same pump, filters, hose and nozzle. Unless there was some other way to get the water out that I am not aware of there would really be no way to mix and match the load without fuel in the water or water in the fuel. Both these situations are not really desirable.
The truck I drove in Egypt.


My fuel pod truck in Germany. These were used for all different materials (gas, diesel, jet fuel, av gas, water) just by lifting the pod out and dropping the appropriate one in. This meant you just flushed the pump system once and were good for the new cargo. In this picture I had “Motor fuel” (gasoline) as indicated by the chalk note on the tailgate.

4 Likes
Hello!
Thanks a lot for your comment!
Like I already wrote, the best explanation for the “potable water” markings that I heard is that the truck has been cleaned up ad pressed into service for carrying (smelly) water, and the original markings haven’t been painted over because they didn’t want to redo them in case the truck reverted to it’s original mission of carrying fuel. Of course, only a theory, no proof whatsoever…
I like your model a lot, that white scheme must be challenging I imagine… Can I ask you about that box on the cab roof, what is it and what does it do?
Thanks again and have a nice day
Paweł
All the same leaving both markings on the truck seems like a recipe for disaster to me.
The UN white is actually easy to do since it is more like a heavy whitewash than paint. Since it was juts sprayed over the camo often with no prep it was often pretty rough looking and would peel off if you looked at it wrong. You can see the big piece I peeled off the door just like my truck had.
Unlike the US vehicles all Canadian trucks have steel roofs. The box on top is a steel mesh cage officially for storing the camo nets so that they could be quickly deployed by just jumping up there and pulling across the truck.
The real world application was that they held three cases of beer perfectly.
You will note here that the camo net is NOT in the holder. That is me walking to the left with the helmet on as I had already parked my truck at the POL area on the edge of town (the picture above) and was headed for dinner.

2 Likes
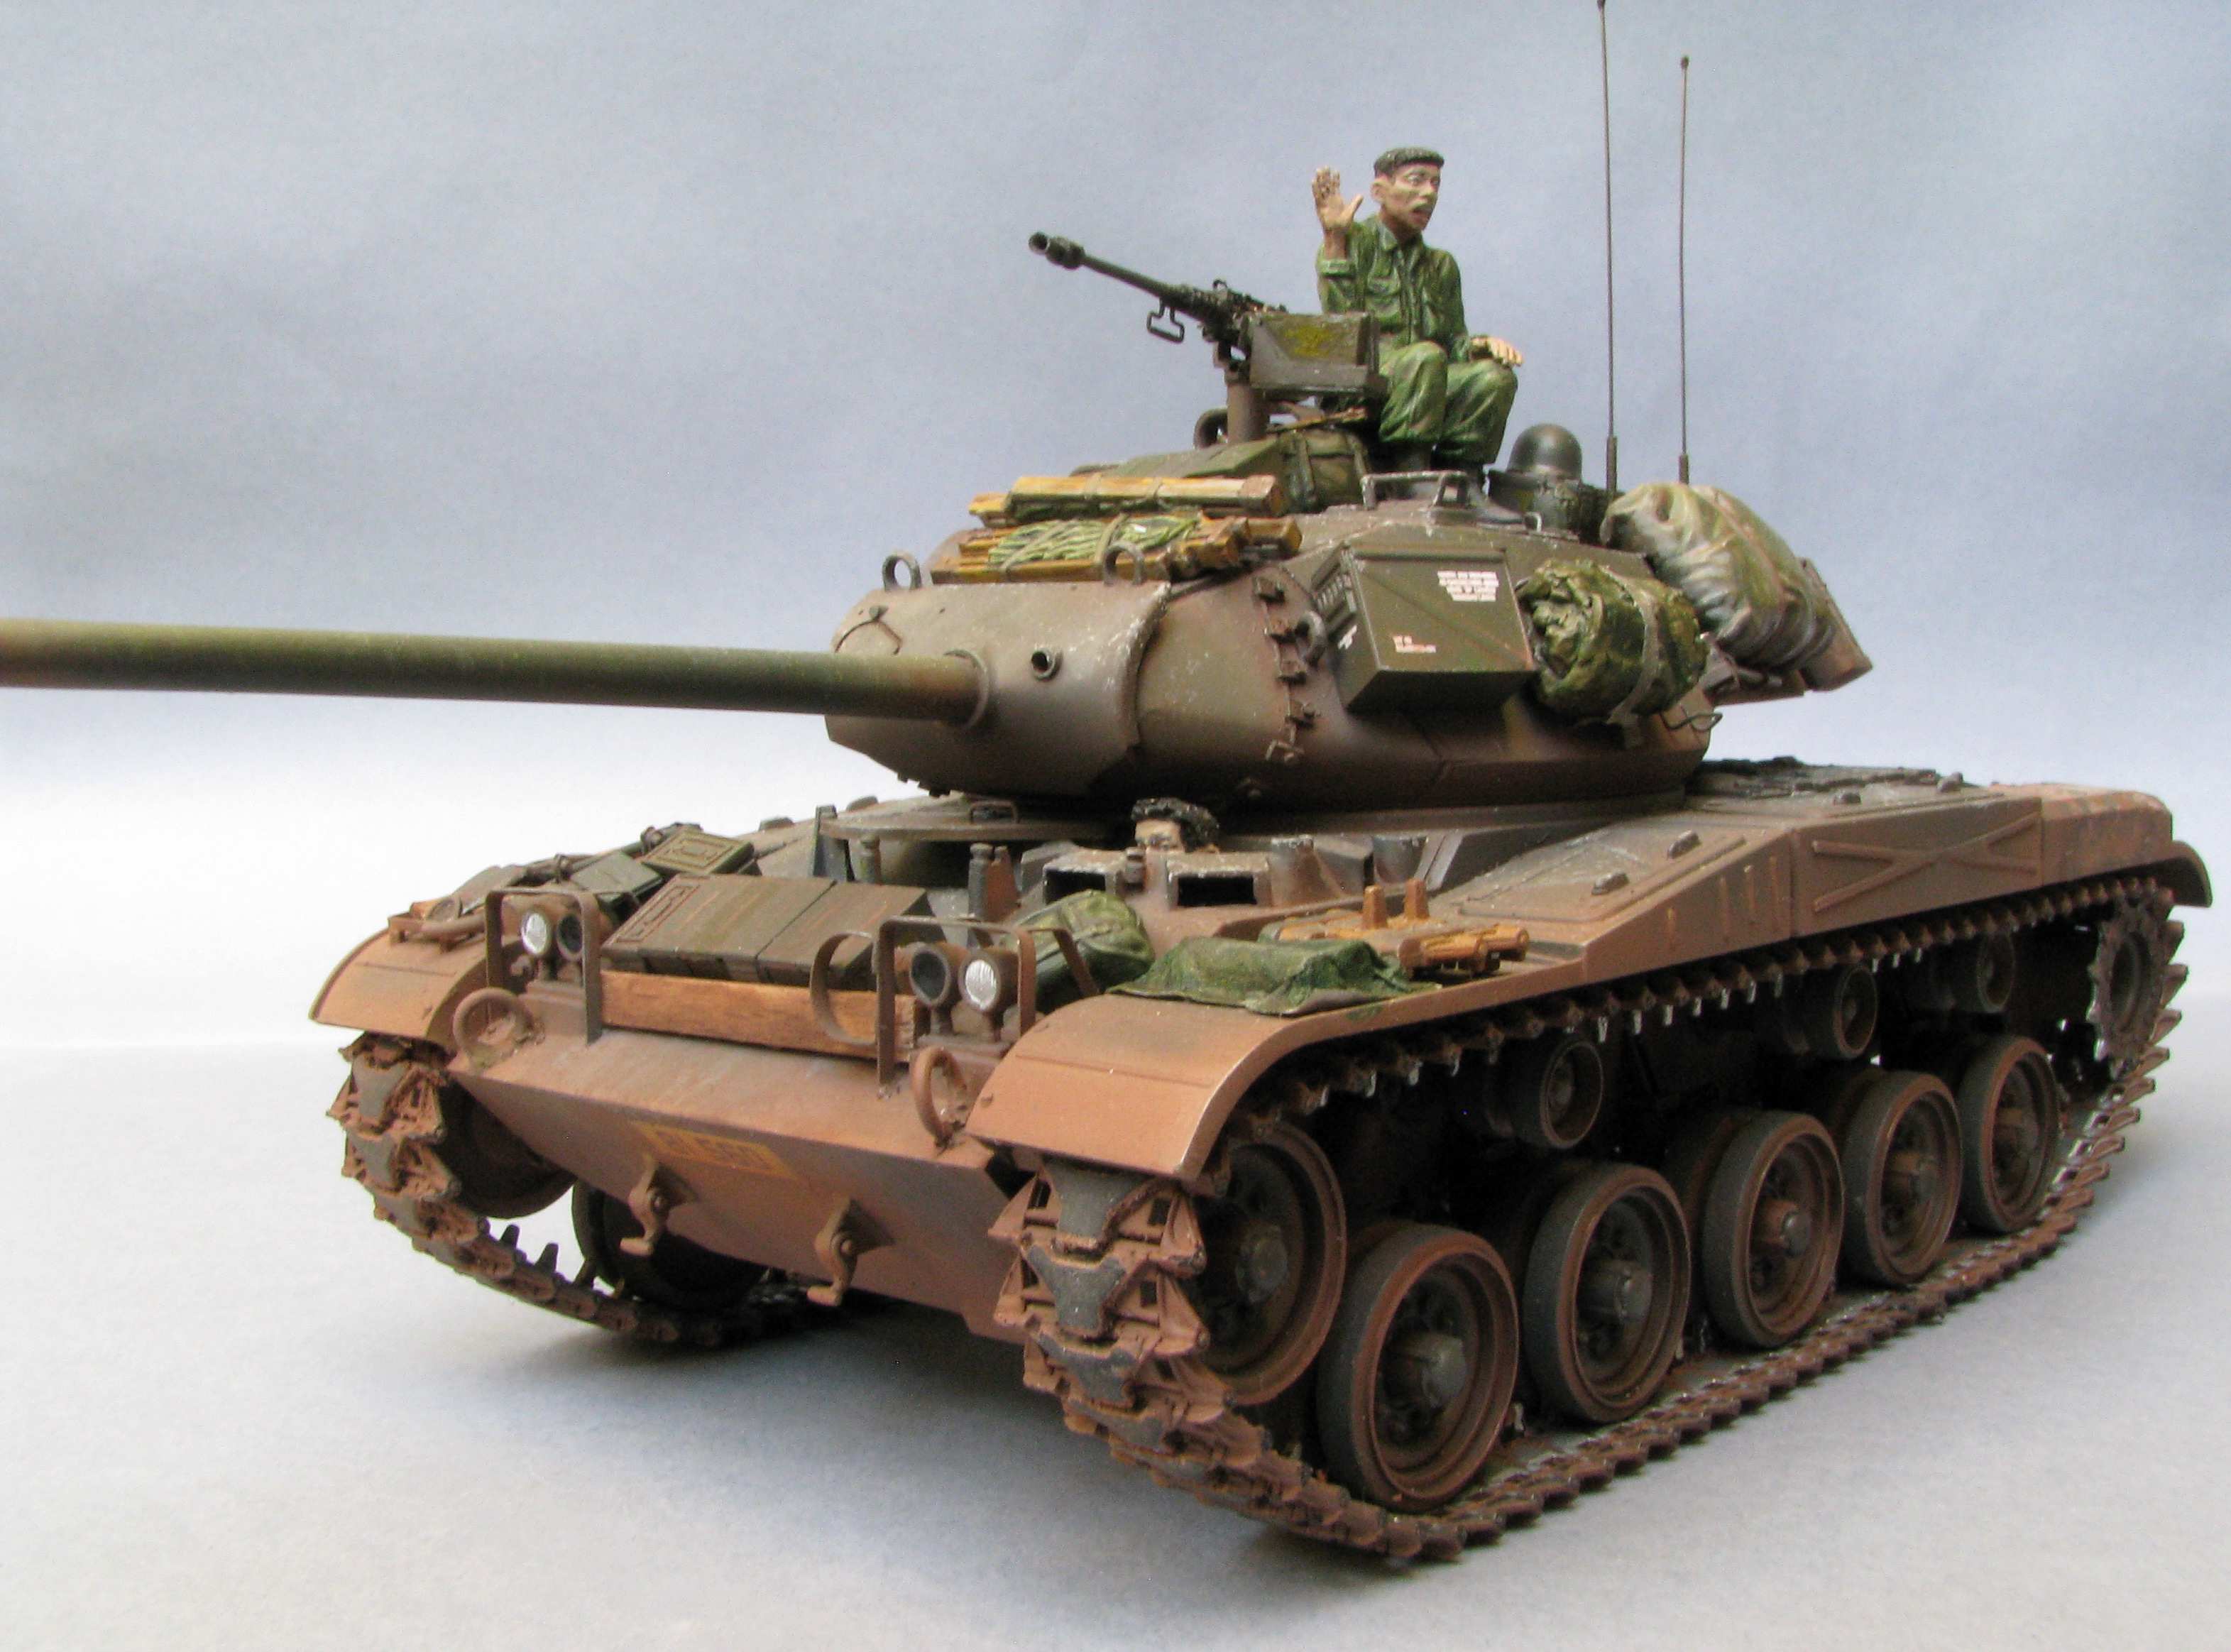
Hell yea, that sure looks like what I used to see all the time. The soil in the Central Highlands where I was stationed was a red clay. In the warm months there’d be inches of red dust everywhere and in the cooler wet months that dust would turn to a very sticky mud. It would build up on our boots and add what seemed to be pounds of additional weight. It was also very slippery. On one of the few paved roads running by our base trucks would be barreling down the road and when they hit the area where our trucks went out on the road they would end up spinning out. You have the look perfect on the tank. The dust was so fine that when I finally returned home after my year in 'Nam my watch had red dust inside the crystal!!
Hello everybody!
@Tcoat - thanks for the explanation about the roof! Yeah, the inscritions on the tank are really weird, but like somebody said this will make this model a great conversation starter ![]()
And I have another update here… I’ve sodered the hose rack out of thin copper sheet metal:

I also added other details - most tricky were those tarp hooks I made out of really thin copper wire:

Before installing the tank on the frame I dirtied it up… @laubin - I hope it looks right to you! Dust inside of the watch crystal - yeah, that has to be a really fine dust… And it gets everywhere!

So as soon as I install the tank on the frame I want to start painting everything OD.
Thanks for looking and have a nice day
Paweł
3 Likes
@Pawel Wow! That is a lot of great detail. Looking forward to seeing this come together. You must be a very patient person to work through all this detail.
@dadoffour - thanks a lot for your comment and for your kind words! What I say to that is: Patience is something you can practice! Come to think about it I practice it for 40 years now, so I should have some at this point…
And I have another update:
I started painting - this is how my model looked like before preshading:

Preshading of Humbrola 113 brown went on top of that (in the heat of battle unfortunately I didn’t make a photo) and then OD - Humbrol 66 on top of that. This is how it looked like afterwards:

I also installed the mudflaps and step (yet to be painted) and started to apply the decals:

Now I’ll put in some more work in the decals and painting - thanks for looking and have a nice day
Paweł
4 Likes
Looks awesome. Great job on it.
Thanks a lot for your comment Gino! I’ve got the decals on, now I’m clearcoating them and adding some more weathering.
Have a nice day!
Paweł
As a former member of this board used to say “Not enough dust!” ![]()
Gary
Hello!
@GAF - Sorry I took so long to reply… I think you will see there is plenty of dust on this one…
And I have another update:
I’m done applying my custom decals:

I have also painted the headlights:

I was also working on the cab - I painted the convertible top and built the windshield with new wiper motors and the vacuum line supplying them:

After the windshield was installed (but no roof yet), the cab interior looks like this:

After installing the grille the front looks like on the photo below:

Looong time ago I designed this PE fret:

It is supplemented by the tools from the kit:

After adding the straps and painting everything it turned out like this:

Let’s hope it won’t be long now until this one is finished.
Thanks for looking and have a nice day!
Paweł
6 Likes
The preshading looks really good, the decals tunred out fantastic and i love the tools!
Looks good, Pawel! The decals came out great.
Gary
Hello everybody!
@Demolition , @GAF - thanks a lot for your kind words, I’m so glad you like my work!
It took me so long to reply, because I was fighting with the mirrors. You see I bought this kit on discount, precisely because it was missing mirrors. So first I made this, patterned on the mirrors from the M54 kit:

But then I took a look at my reference photo and it had different mirrors! I aslked around and found out “my” truck had mirrors taken off an M123 10 ton! So I took my soldering iron again and I cranked out another set. These were harder to do and if you look at them you’ll see I was struggling, partly because my Chinese soldering iron turned out to be sh!tty… Here’s what I got:


Fortunately after painting them, they don’t look so bad I hope:

So let’s see how fitting them is going to go…
Thanks for looking and have a nice day!
Paweł
5 Likes
I think your mirrors are going to look great once you get them mounted on the truck. And your soldering is far above anything that I can do. ![]()
Thank you so much for your comment and for your kind words!
Those mirrors fought me some, but now they are finally done and lok like this:

Thanks for looking and have a nice day
Paweł
2 Likes
Better than the kit parts! A fine example of making do with what you’ve got.
Gary
1 Like