I’d like to start a new topic with a photo that has already been posted previously:
Funny thing about it is that at the same time it is inscribed “Flammable” and “Potable water”. The best explanation I came across for this is that a fuel truck has been pressed to transport water (in war that happens) but they didn’t get rid of the “Flammable” inscriptions because they expected to get back to hauling fuel some day. I sure wouldn’t want to drink that water…
At the same time we have here a “gasser” version of the “deuce and a half”.
The base for my build is the AFV Club kit:
The kit shows the later version of the fuel tanker, so there will be some converting…
I started with the chassis:
I replaced the grabhandles on the frame to match the photos of a “gasser” that I got from a collector owning a similar truck.
When assembling the axles it’s good to put the whole thing on an even surface, to prevent some of the wheels from hanging in the air later:
As you can see I have scratchbuilt a new frame crossmember under the cab (the mounting of the transfer case will be a little different). I’m also building a different front engine mount crossmember for the gas engine.
The engine itself is simplified in the kit and I think I’ll stick with this solution, but I’ll have to rework it a little, to show the gas engine. Now it looks like this:
I filled the ejector pin marks and I closed up the hole in the fender for the exhaust stack. From what I see I’ll have to make a new oil pan and maybe this will be enough.
So that’s it for now - thanks for looking and have a nice day
The AFV kit was more often called a TPU or Tank & Pump Unit. Together with the M35 series truck, the end result is the M49 fuel truck.
The notion of non-purpose built fuel trucks is that if the truck itself is down, theoretically, you can put the TPU into the bed of another truck and continue to provide fuel.
Being in armor units, our fuel trucks were HEMTTs and 5 ton TPUs.
Hello everybody!
My best wishes for you in the new year!
Thanks a lot for your comments and for your kind words! @jeaton01 - looks like the 3D print is your only option here if you insist on 1:48! @Rob_Gronovius - yeah, that makes sense. Still they had a number of dedicated fuel trucks back then in Vietnam.
And I have a small update here:
I have installed the air tanks to match the photos I have, the transfer case is also installed as are the propeller shafts and the rear crossmember. The front crossmember is ready to be installed as soon as I figure out the details of the front of the gas engine.
It occurs to me that they are taking advantage of the separate compartments in the main tank to carry water in one and fuel in another. Not recommending that…
@Striker8241 - good to see you on the forums again, Russ!
@jeaton01 - in that case the products would constantly contaminate each other, wouldn’t they? I already previously wrote the explanation I like best - that this is a fuel truck pushed to work as a water truck, but they didn’t paint over the “Flammable” signs, because they thought it might be used a s a fuel truck again…
@mustang1989 - it’s a nice kit although it’s showing it’s age a little. Let’s not forget it was one of the very first kits of AFV Club and they were just learning how to design plastic kits back then. After 30 years still the best styrene kit of the Deuce…
I didn’t write recently, because building this model went over to 3D:
But soon I hope to be done here and then I’ll just wait for the prints…
Pawel, the tanks are separate compartments so different fuels or oils can be carried on the same trip. They should not mix unless the drain valves are operated incorrectly. Water trucks are not made that way but they have bulkheads every so often with openings at the bottom of each, that is to prevent sloshing which can upset the truck. Tankers require special endorsement on most commercial driver’s licenses if not all.
Thanks for explaining! I still don’t think they simultaneously carried water and fuel - but I don’t have a way of knowing for sure.
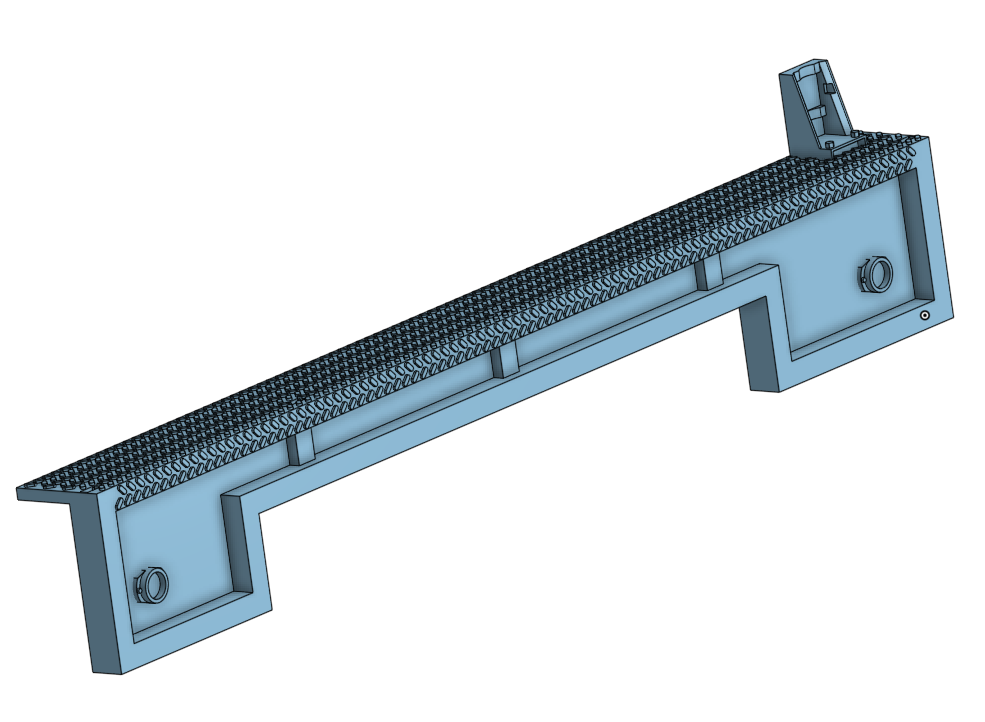
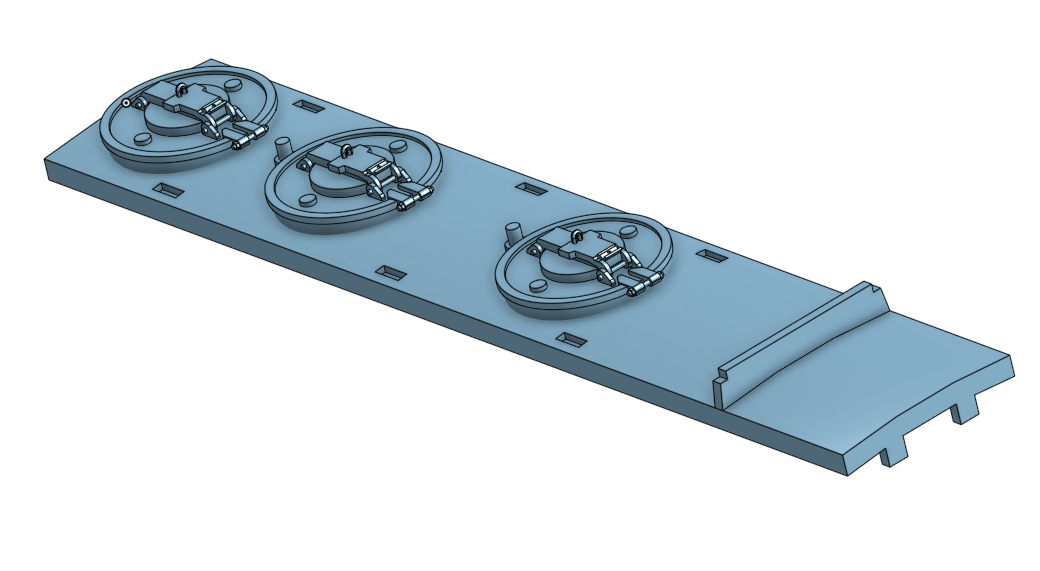
I have another update: The real fun begins now - I got my 3D printed parts from the printer today. Here’s how they look like:
The thread-plate looks a little coarse in 3D and in close up, but in person it’s just fine. There’s a whole jungle of supports there - removing them is a bit like solving a puzzle, that can be fun, too! I hope to post some assembly photos soon!
@mustang1989 - thanks a lot for your comment and for your kind words!
Yeah, 3D design and 3D printing is a major game changer in this hobby!
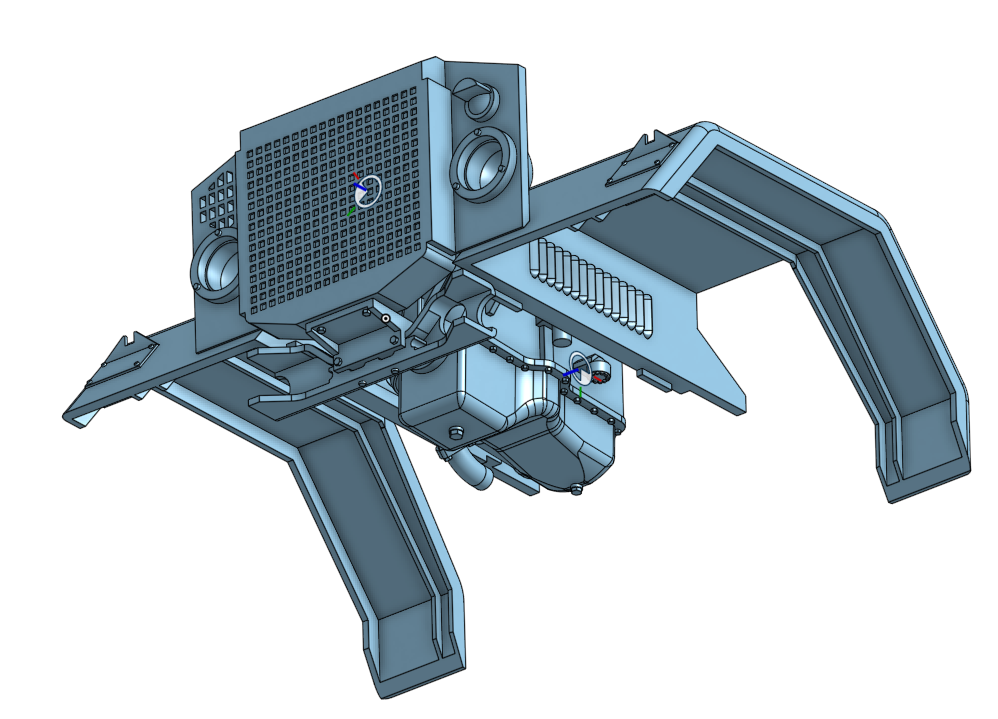
And here’s some “real fun” for ya:
I put the wings on the frame:
I printed them with the supports that help to keep them straight. After the glue (CA) sets, they will be cut off at the red lines.
Then I dry fitted the parts:
Looks like everything fits, yay!
In this case I can start putting everything together:
The photo above also has the 3D printed steering gear and the front exhaust pipe made of 2mm soldering wire and also muffler made of leftover sprue and plastic sheet.
I’ll try to fit more parts now - thanks for looking and have a nice day
That is the correct assumption. These tankers had like 3 or 4 compartments. Could carry both, plus that setup reduces surges of the liquid. The picture is obviously of a tanker in Vietnam. I’d know that red clay anywhere. Had to deal with it for a year’s tour. 1965-1966 Pleiku, Pleiku Province, SVN.