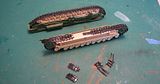
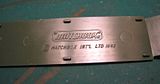
The tracks are great actually. Detail looks good BUT I screwed up by installing them on the wrong side. I put them on in the correct direction, but I put the Left tracks on the Right side and Right on the Left. [:(DD]
Pictures later today will illustrate why this is an error…
DM - yup that was then. I think I used to sand off seam lines and putty against the sidewalk back then [clwn]
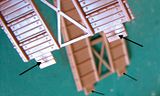
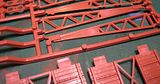
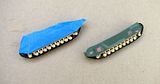
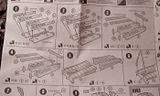
The Small Box Girder (S.B.G) Bridge assembly is done. The girders had some seam lines, ejector pin marks, and subtle flash but all in good places because after assembly, I couldn’t see them anyway. The ‘wooden’ planks had sink areas at each end that needed attention, so I used putty and sanded flush.
The cross beams had sink marks too but were filled with putty and sanded smooth before assembly.
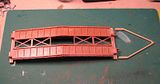
This Bridge sub-assembly is done and waiting for paint.
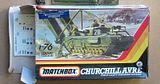
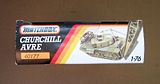
Among the last of the 1/76 scale Matchbox kits produced along with the British Challenger tank. The subsequent Matchbox kits were made by Revell in 1/72 scale and were released under the Matchbox name. I have several of them, and they were pretty good for their time.
Man, you are treading on hallowed ground here, for me, anyway, Sprue! These little Matchbox diorama-kits were hugely important to my modeling roots. I think I built maybe a dozen or more? My favorite was the Jagdpanther kit busting through the brick wall–probably unrealistic, but I thought it was the coolest thing I had ever seen! I actually bought one a few years ago and then replaced the old mold with a 1/72 DML-Revell kitbash and updated figure. I LOVE these kits, still!
I still have a good number of old Matchbox armor kits, built and unbuilt. They were very well done for the time. My personal favorites were the M40 SPG and the Firefly.
Karl, Are you referring to this kit? Very Cool indeed. I bought this one because it had a bridge laying element to it on the box art !
Robin, They also seem to be well designed to hide all of the ejector marks after assembly. I’ve only found a couple sink marks (illustrated in above post) on the think parts
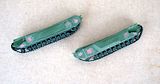
I glued together the one piece road wheels / suspension part(s) with the outer and inner side parts. Then the fenders on top.
After the cement cured, I masked off the painted the base coat color on the under and back side of this sub-assembly. I did this because it would be difficult to get the paint there after complete assembly and I didn’t want bare plastic spots to show.
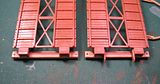
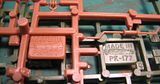
M. Brindos, this is where I put the tracks on the wrong sides of the model. The tracks were attached to a central sprue section. This section of material had to be cut off of the LEFT side of one and the RIGHT side of the other.
The side that was cut off from every approx. 5th link or so now look ugly. I should have positioned these respective side to the inside and under and not seen ever again place. No, I glued them on so that this ugly side is on the outside to be seen by all who view this forever [:|]
A clear example of the clever design of this kit. All of the puttied and sanded spots will not show after final assembly so none of that work was needed anyway.
It is not very clear in the above photos. I hope I can cover it up with weathering. It might be a “I know it’s there and it’s killin me, even if no one else can see it, I know it’s there”
 Modeling was just beginning to crawl out of the stone age.