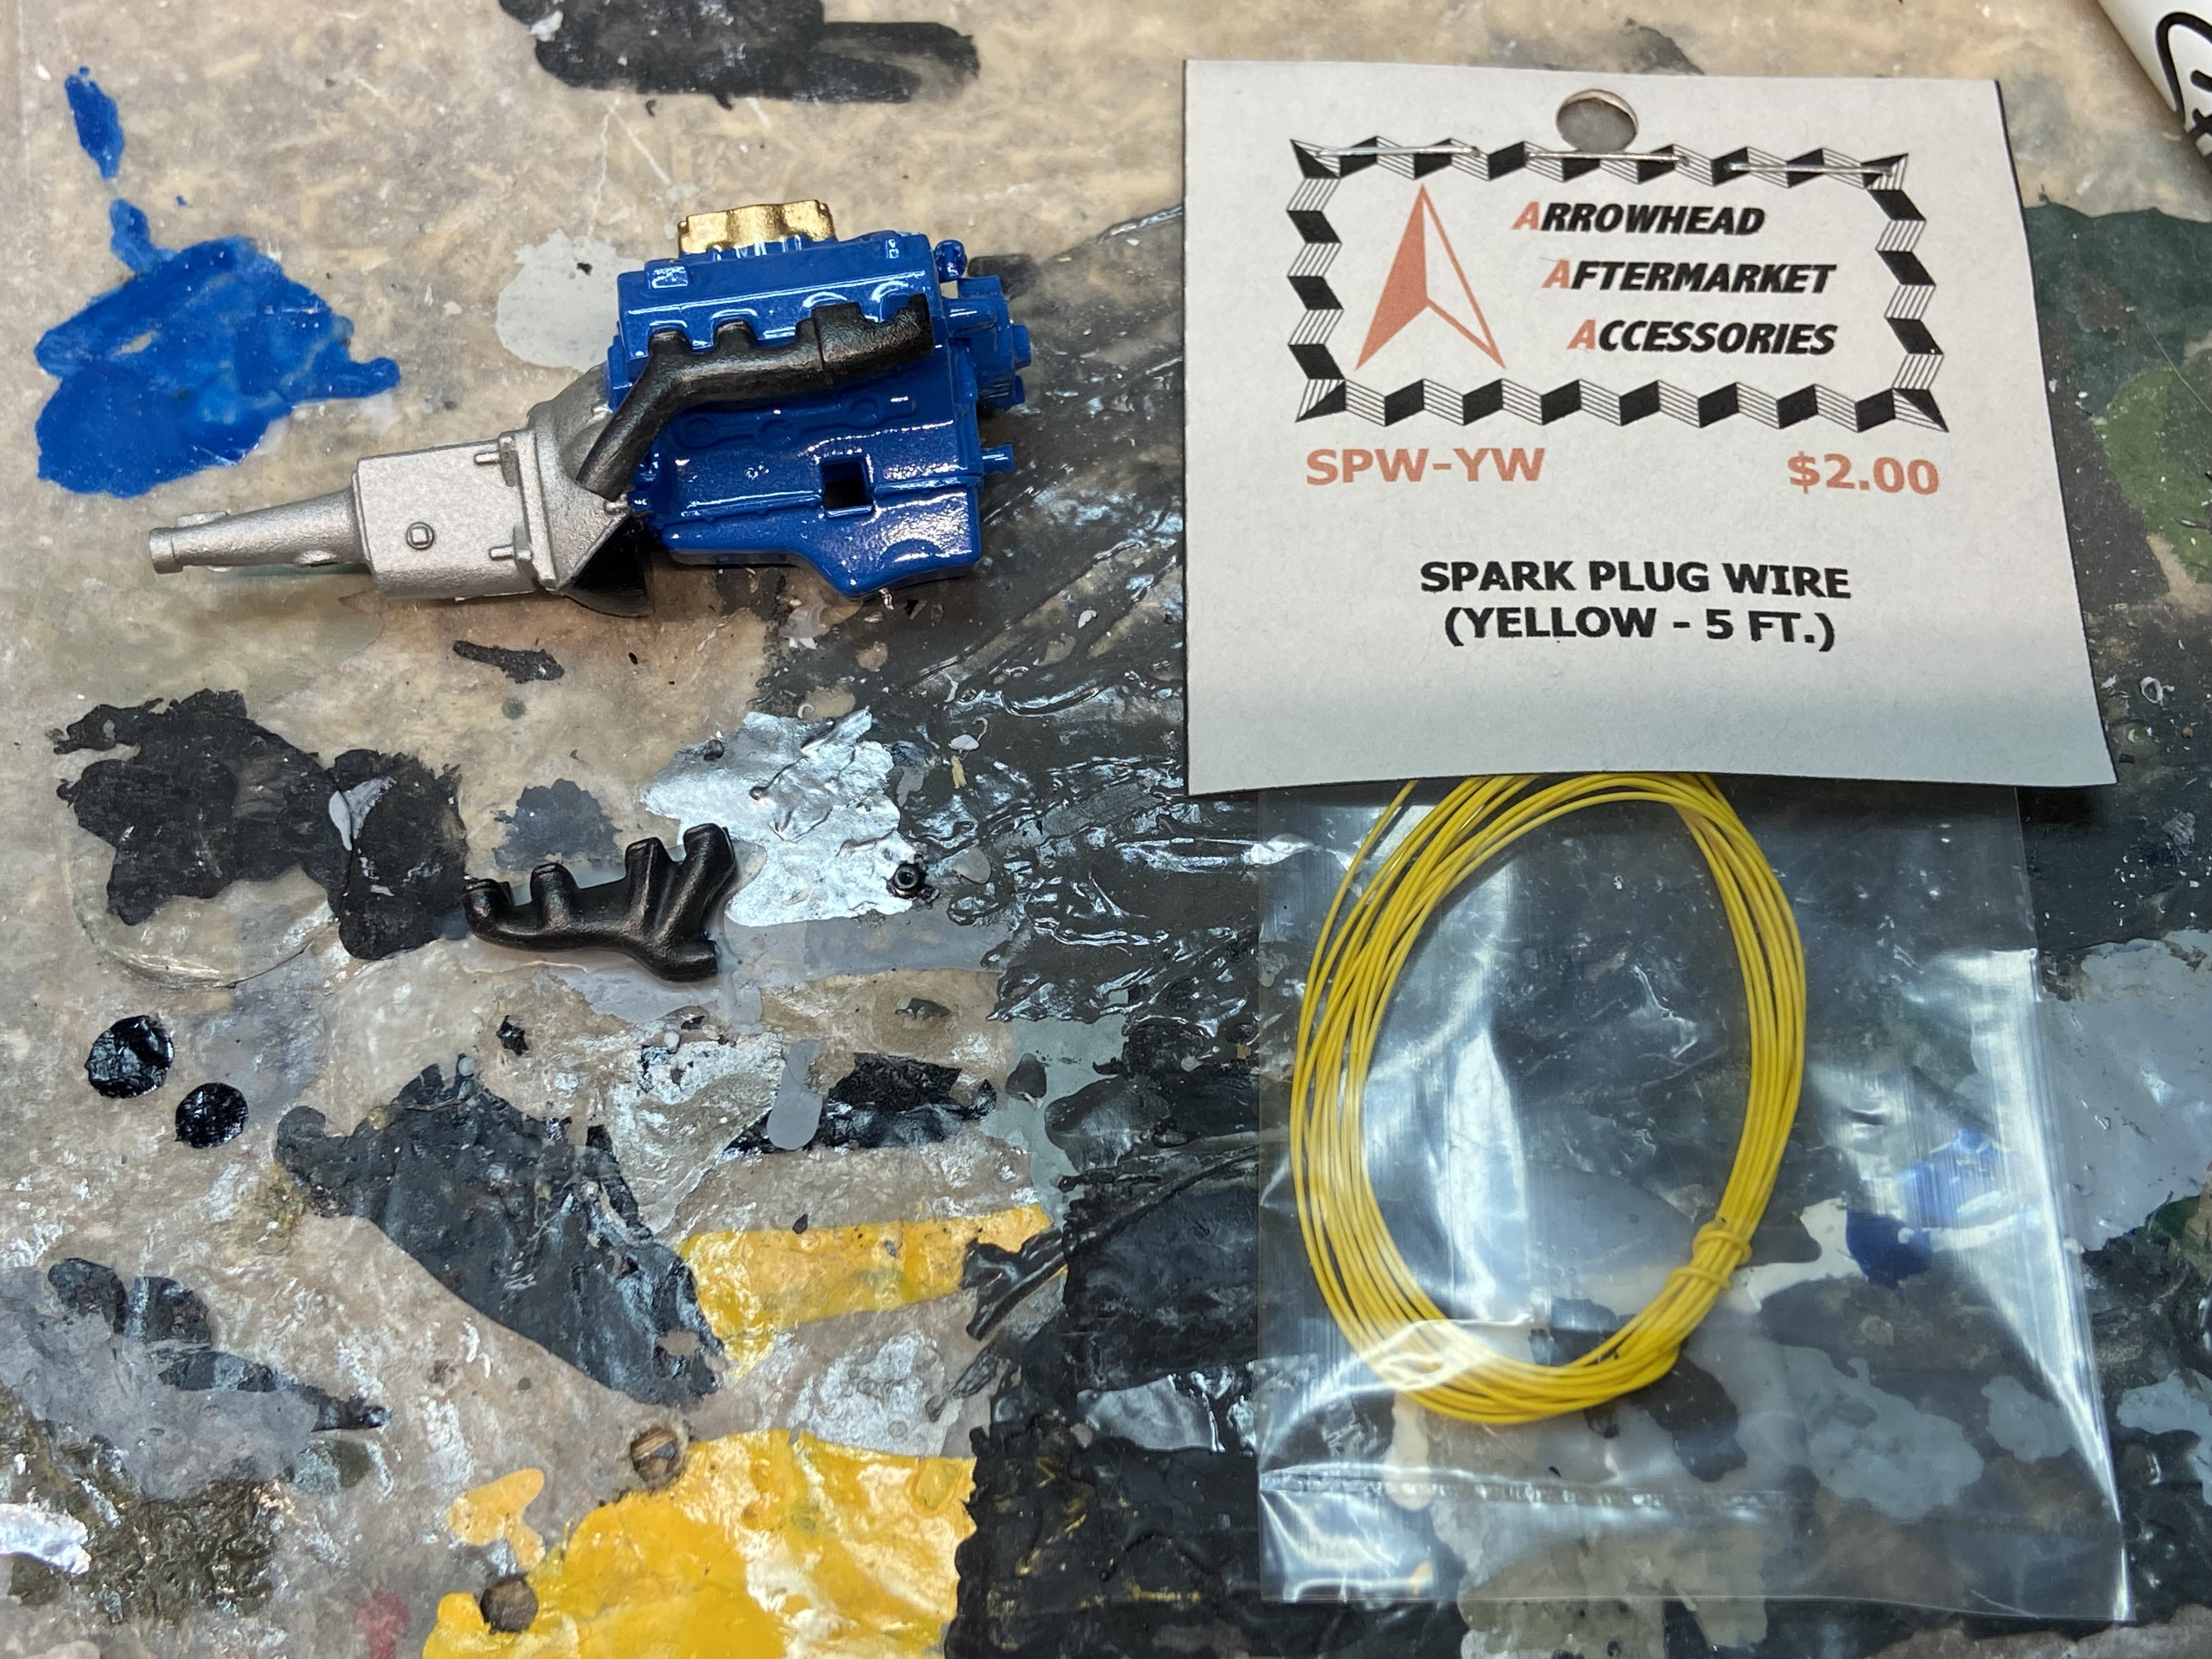
I haven’t done spark plug wires in a while so here we go.
5 Likes
How did you ever make out with the JTLV?
Haven’t ever used any of the Arrowhead plug wires before but DANG…5 feet of wire!!! That outta last you for quite a long while Ed.
Good start on the engine man. ![]()
1 Like
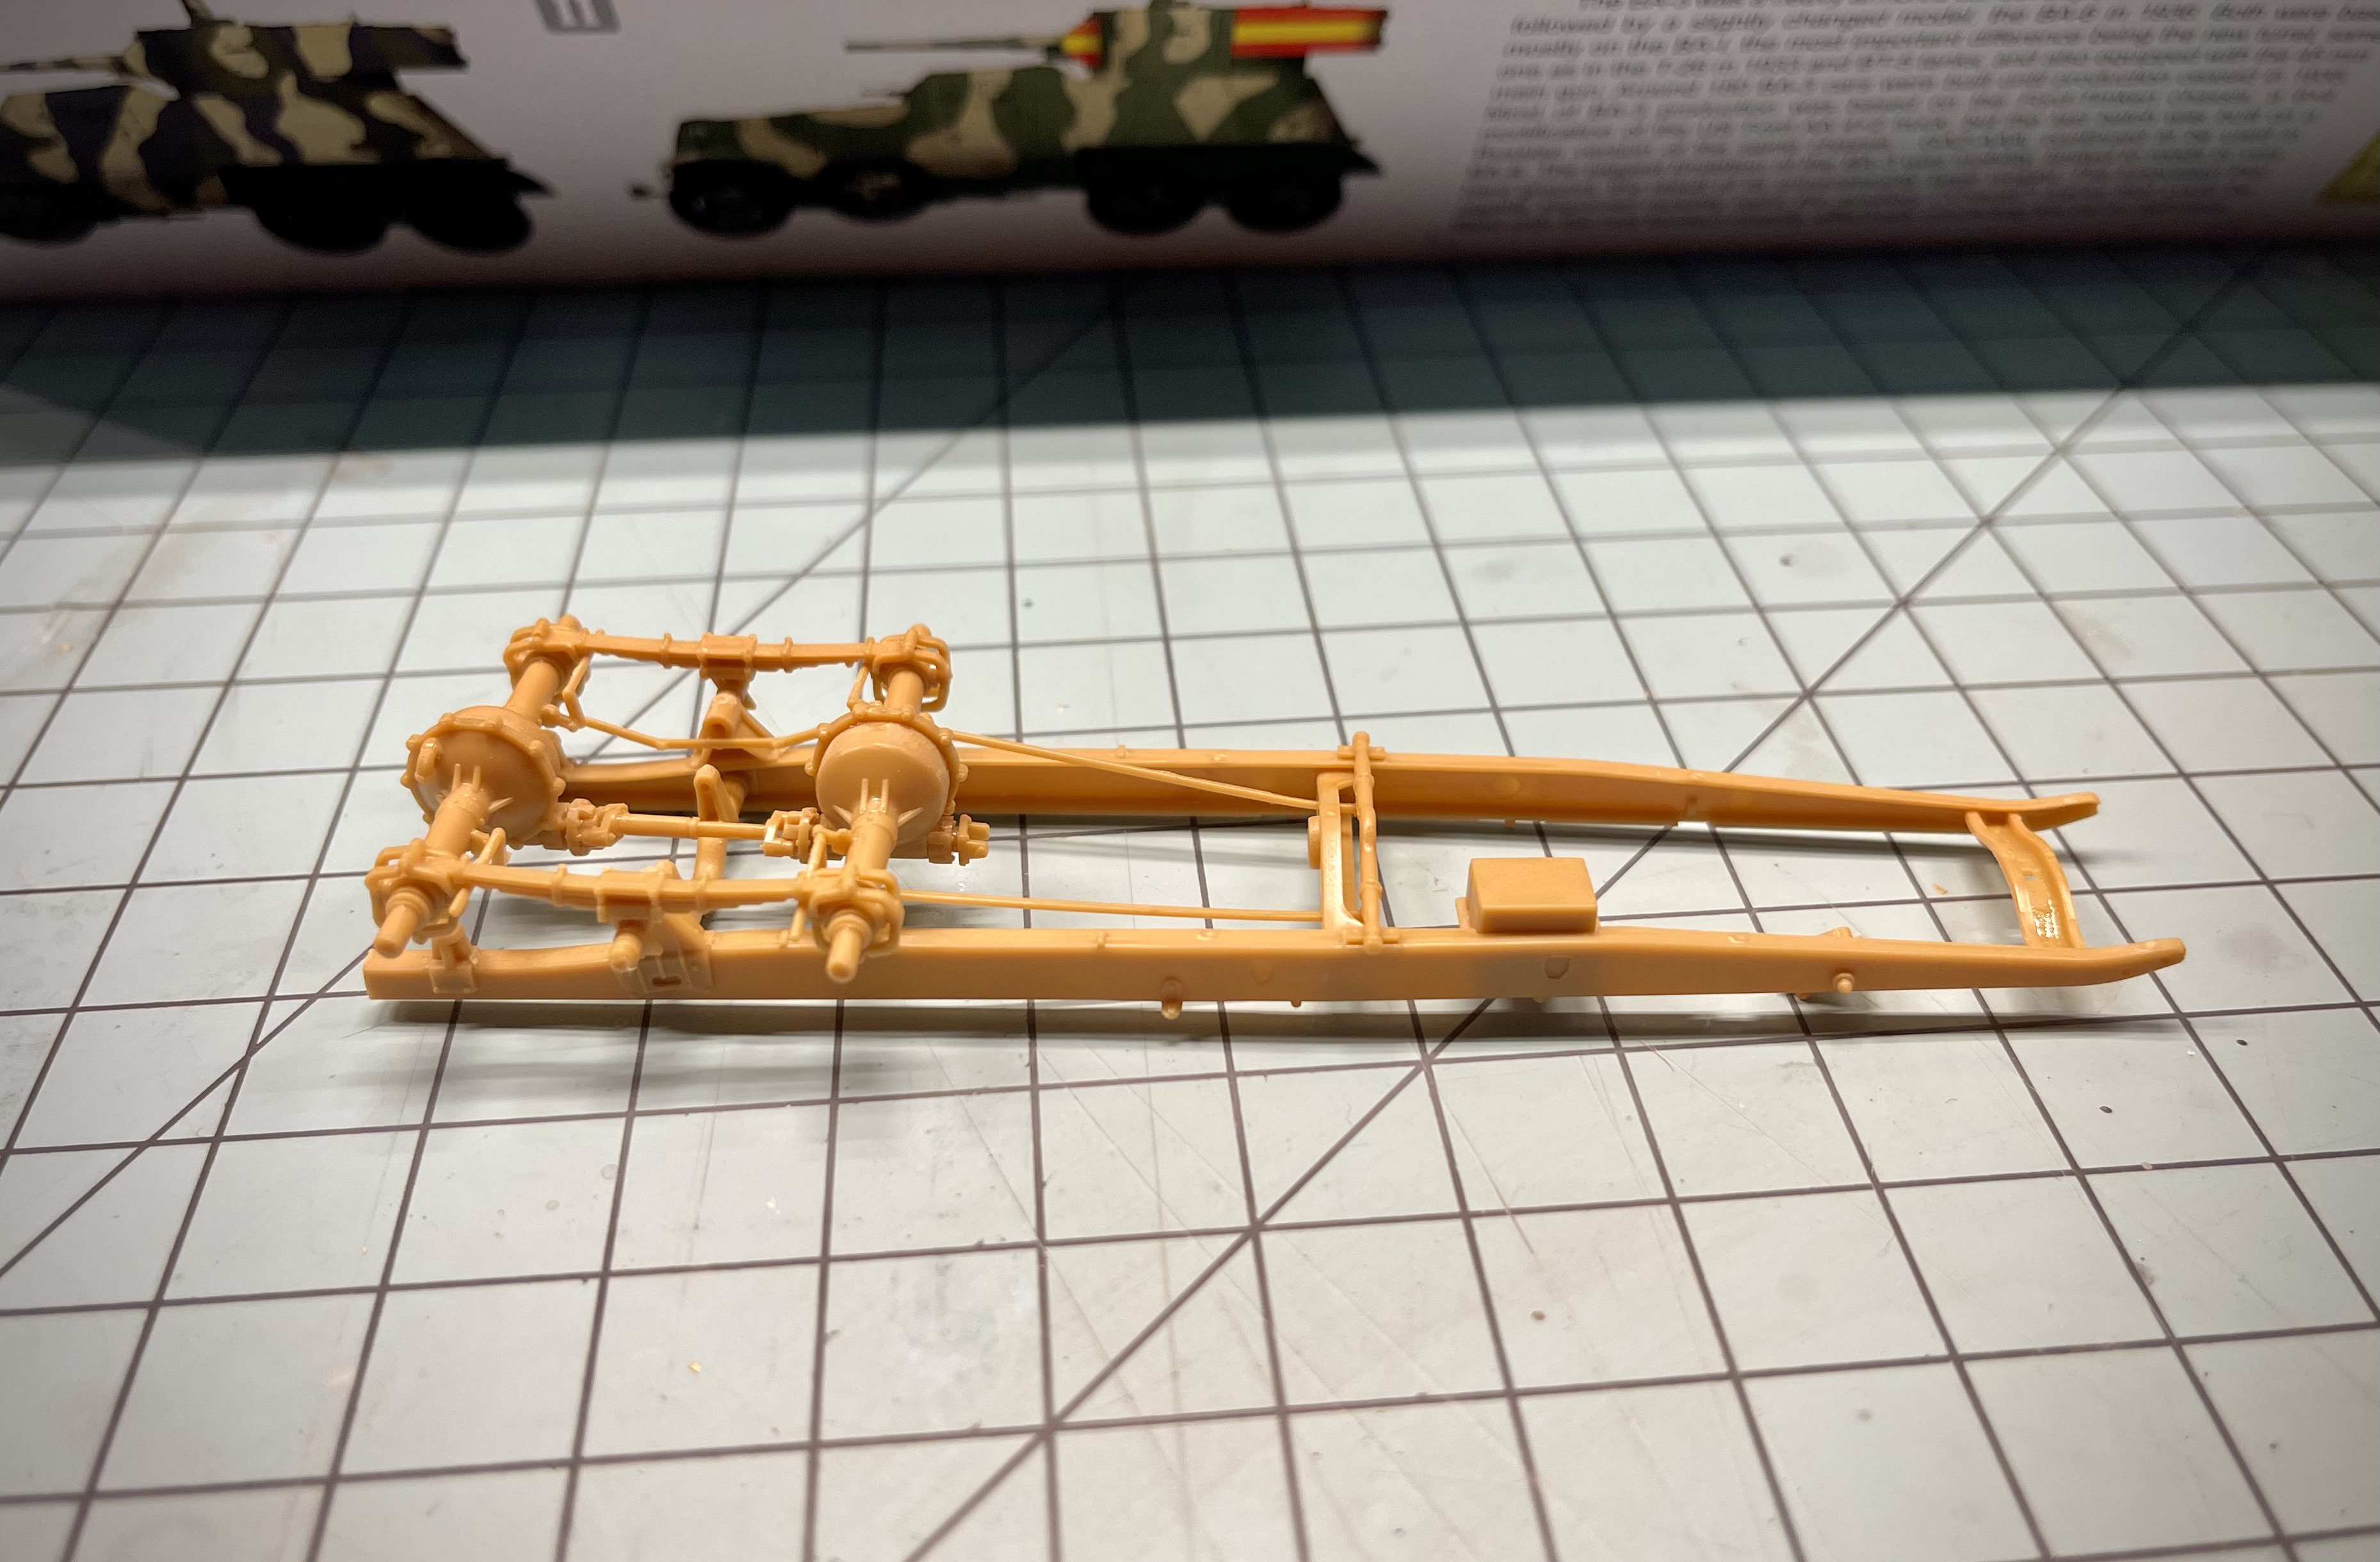
Got a little start on this little kit today. I say little — the car itself will be small, but the parts count is actually huge. It has a full suspension and frame setup, and a complete engine.
Whoops — post went up a little early there!
Initial impressions:
- The plastic is soft and I actually broke a part while filing a sprue gate off. Easy fix, but will need to be more gentle.
- Either the instructions are a little confusingly-drawn, or I’m too used to simple aircraft kits.
- The locating pins seem to be oversized for their corresponding holes.
This kit might be a little more work than I thought! Which is just fine with me ![]()


5 Likes
Off to a great start here @Toimi_Tom . It’s going to be interesting to see just how far Hobby Boss goes with the details on this little guy.
1 Like
Yeah, I’m feeling about equal parts excitement and trepidation while looking ahead in the instructions. Also… need to do some more research into what colors they may have painted these internal parts. I suspect the Finns wouldn’t have repainted anything other than the external color (and they didn’t always even do that), so it’s time to dive into the web again.
I’ll be posting a more in-depth WIP thread on the Armor forum with research notes etc. in case any want to follow there.
2 Likes
I’ll be looking forward to that Tom.
The JLTV is on the “someday shelf” still. I made good progress and was nearing the finish line during the forum hiatus…then a family member knocked a box onto it and broke all the antennas off. I bought some resin replacements over Black Friday, I just need to find motivation for it. Thanks for asking.
3 Likes
[quote=“Glamdring, post:69, topic:261082, full:true”]
The JLTV is on the “someday shelf” still. I made good progress and was nearing the finish line during the forum hiatus…then a family member knocked a box onto it and broke all the antennas off. I bought some resin replacements over Black Friday, I just need to find motivation for it. Thanks for asking.
[/quote] GEORGE!! Great to see you back on here buddy!!!
Here’s a link to the full WIP thread. And here’s the short version:
Got the frame and most of the rear suspension built up tonight. There are some mighty small parts in here, and it was a little frustrating – some of them fit with a locator pin so tight you almost don’t need cement, while others don’t even have a reference mark to let you know where to glue 'em on. I found the trick was to work rather fast, so that you could make adjustments to earlier steps if a later step revealed an error.
Mostly the same story for the motor itself, although with careful study of the instructions it did go together just fine… with a lot of tweezers use. ![]()

Next, I gotta fit the engine to the chassis, and then the firewall and deck can go in… but when and how to paint? That’s where I’m a bit stuck.
4 Likes
Tom, you just don’t see much love for the armor cars. It’s refreshing to see them getting attention.
1 Like
George, stuff happens but I’m glad it wasn’t too bad and you have a solution.
I’m going to keep an eye out for more.
Thanks! Your reply reminds me … is it proper to say “armor car” or “armored car”? I’ve always assumed the latter, and that the box label was a mistranslation (of which there are a hefty number in the instructions), but it is possible that in all my years of WWII reading and research I’ve subconsciously appended the “-ed” to the end of “armor” every time I’ve read the word.
Ive never even gave it much of a thought until you mentioned it. I do the same armored.
Construction continues. Definitely the highest parts count of any kit I’ve ever made. Plenty of broken and repaired parts – especially those dang brake lines.
While waiting for cement to dry I have been able to sneak ahead a few steps and get started on the turret, which has gone together pretty well. One big cement thumbprint to sand off once it cures. ![]()
Made me feel like an 8-year-old again, working on the carpet with that orange tube of stringy glue…

4 Likes
That thumbprint adds character.
1 Like
![]()
Not exactly the kind of character I’m aiming for.
1 Like
LOL!!! Right??!! Moving right along on this one Tom!
I am happy to report that the thumbprint polished off with minimal effort and left no extra “character.” ![]()

Chassis and interior are ready for primer! Fiddly but fun…. Is the theme of this build for me. ![]()
2 Likes
Not sure what I’ll get done by the end of June, but I’m working on four cars right now. Three are “heritage builds” of cars that my father, brother and I owned:
- 1960 Corvair 500 4-door sedan (opening the engine hood and adding an AMT engine);
- 1961 Corvair Monza 2-door coupe (ditto);
- 1962 Nova 400 4-door wagon (converted from a 1963 wagon and 1962 convertible for donor parts).
I purchased these as “junkyard” kits or parts online. Removing old paint, restoring them and adding accurate details has been…fun ![]() But I figure that if I’m getting back into the hobby I might as well go all in.
But I figure that if I’m getting back into the hobby I might as well go all in.
I’m building these as showroom stock, even though none of them were new when our family owned them. I’m also working on an AMT 1963 Corvette Sting Ray coupe.
3 Likes