Looks delicious! It’s really starting to take shape and your vision is coming through in the photos. Keep it going!
1 Like
That looks surprisingly edible! Coming along nicely.
1 Like
Hello!
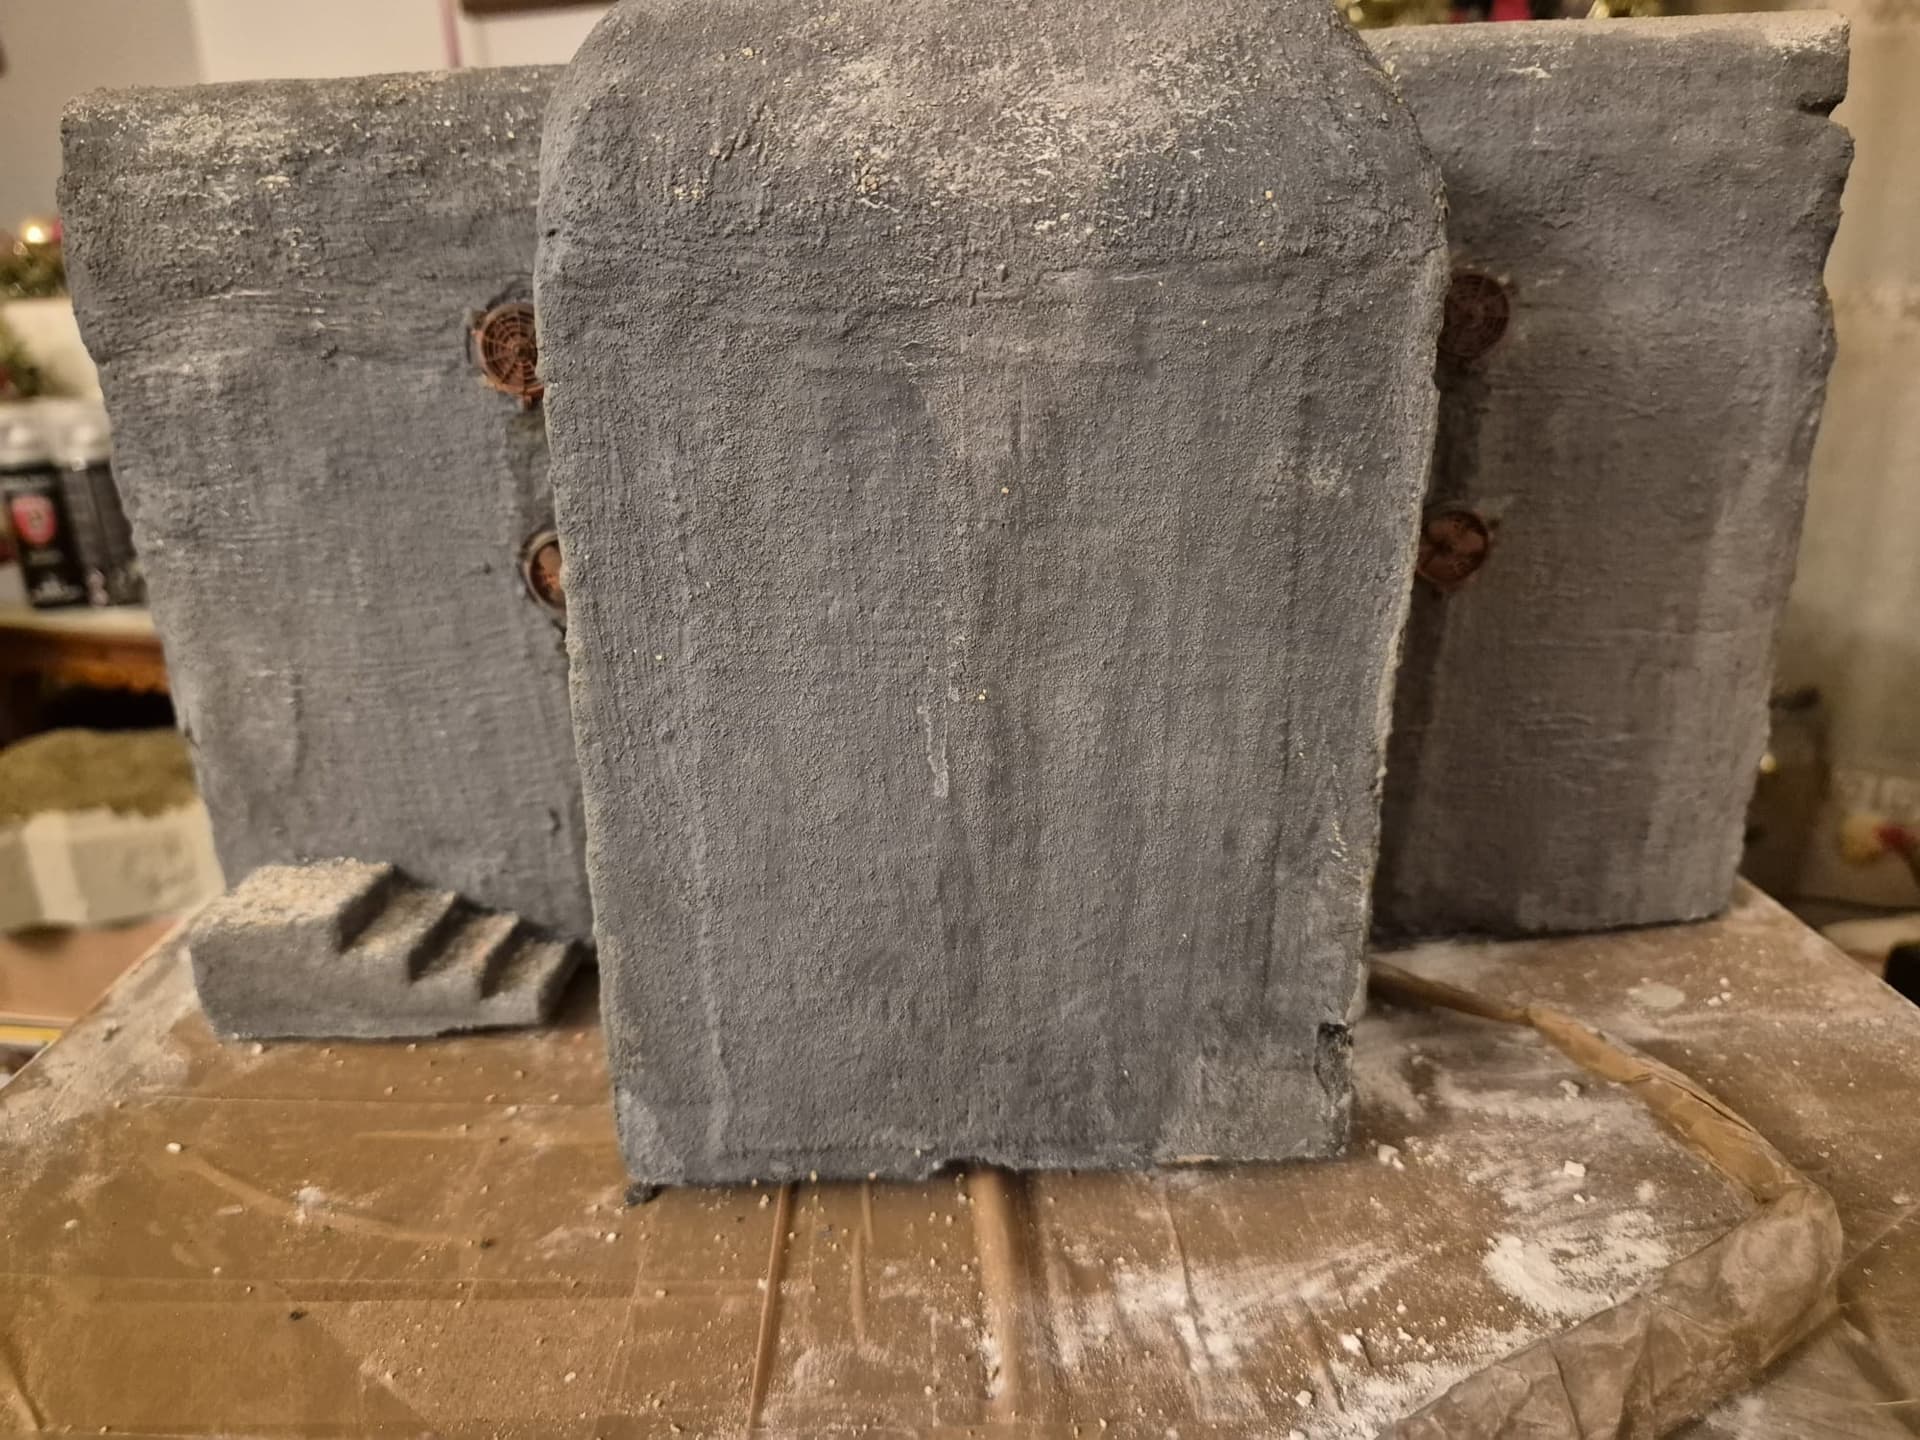
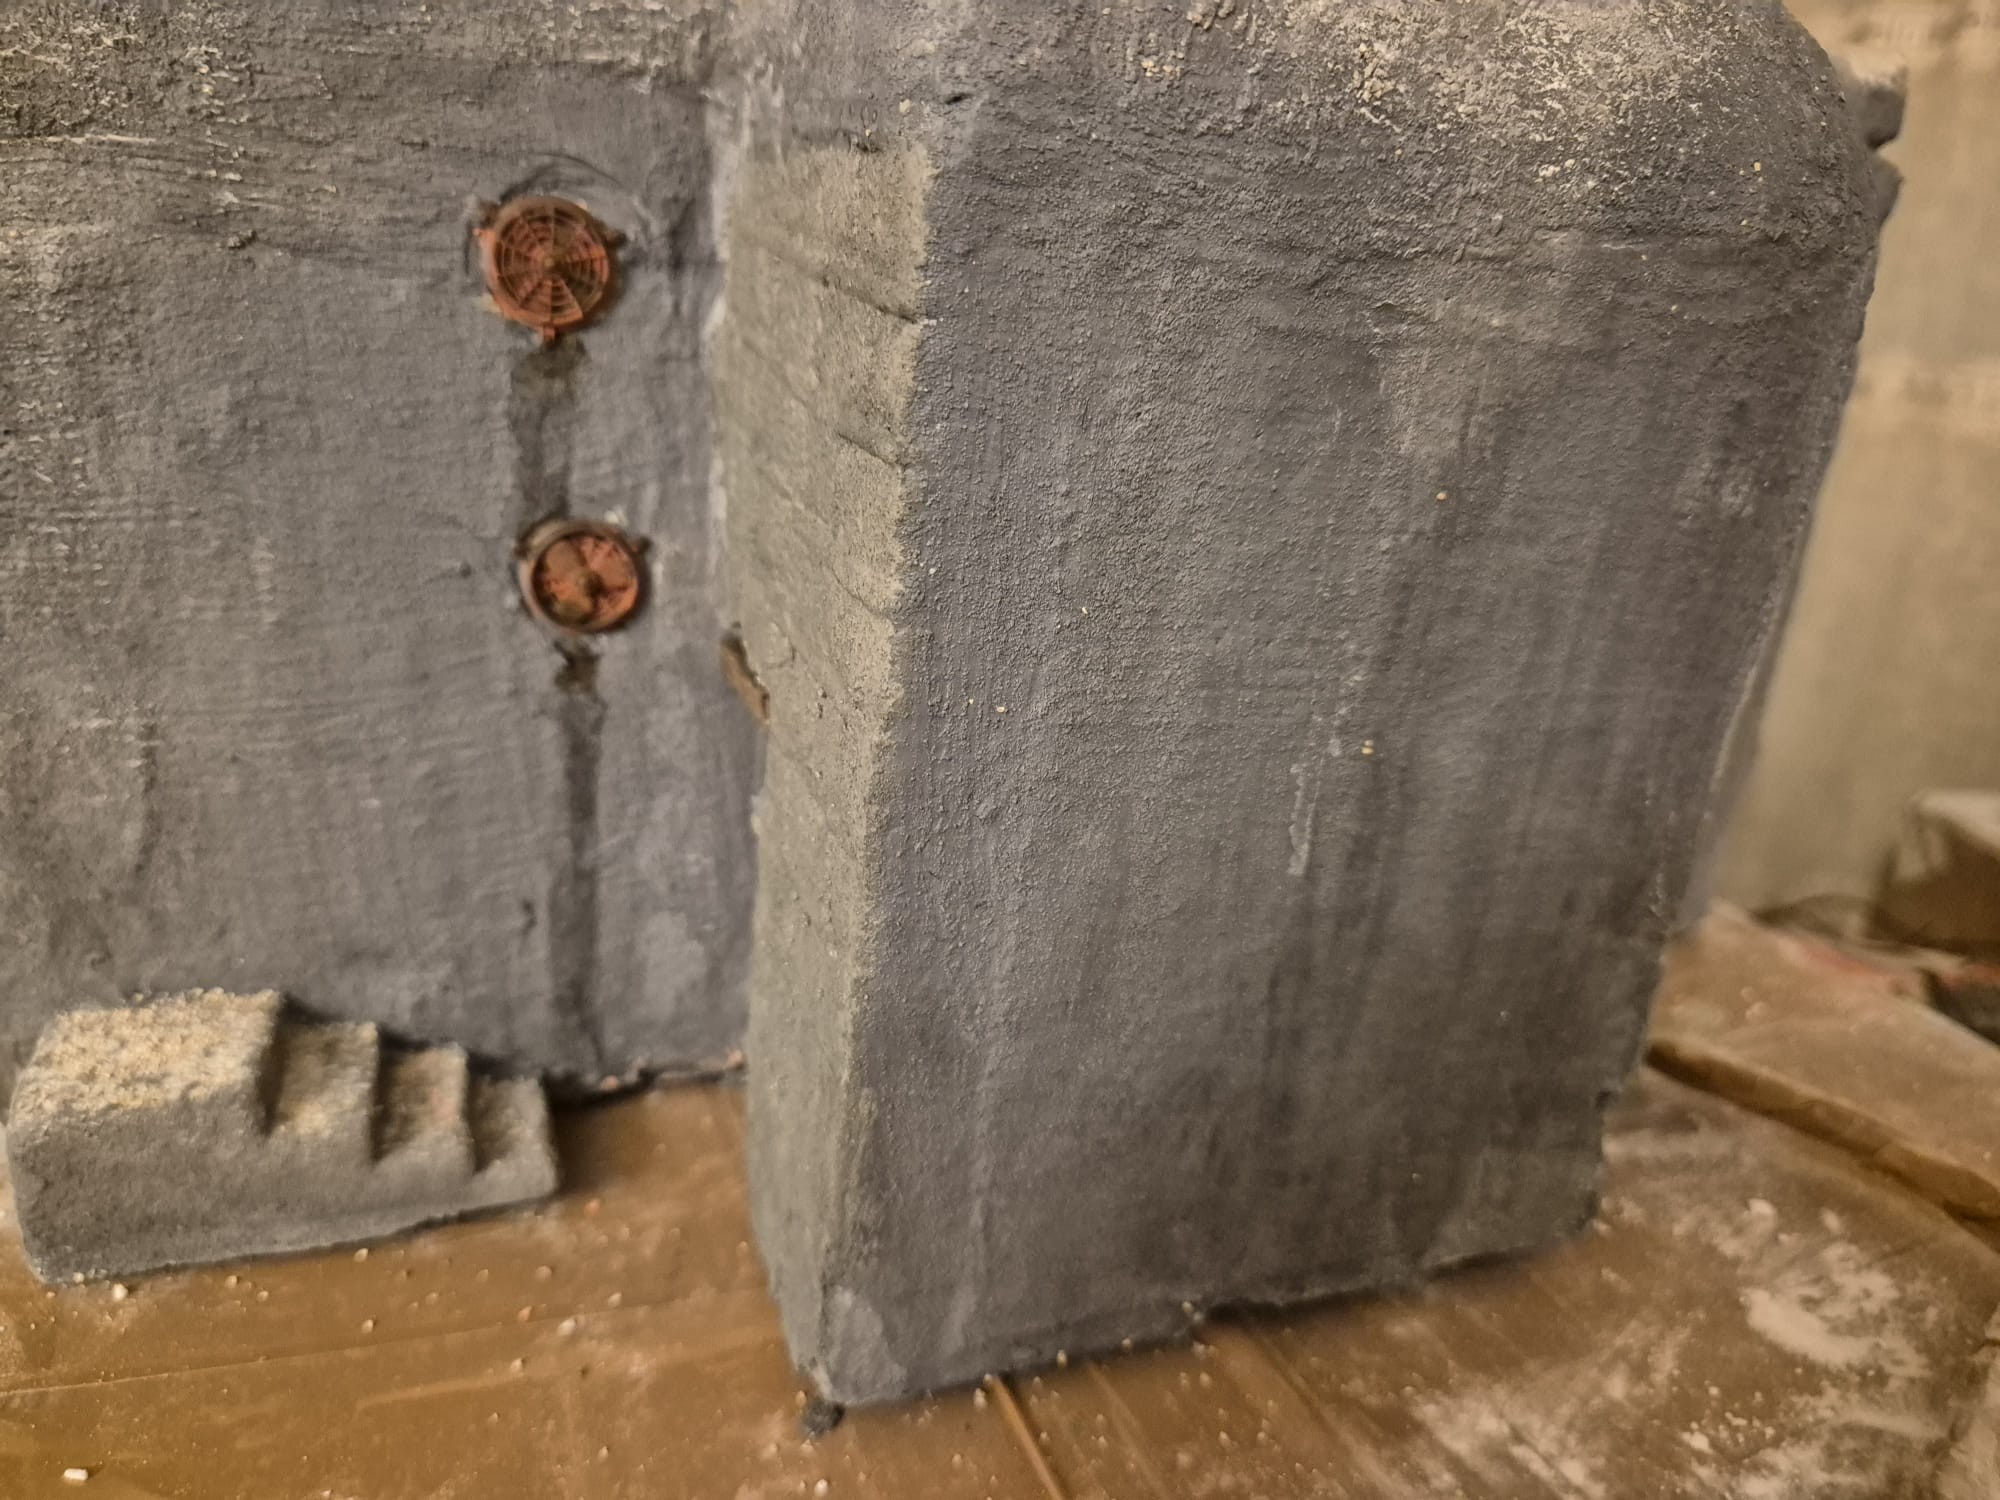
Great work here! I especially like how you show how thick the concrete really is on a bunker like this!
Reminds me of the bunker I’ve built once:

Good luck with your project and have a nice day!
Paweł
2 Likes
Interesting quad depiction using a bunker top and of course, very well done as well.
Well yes, it is slowly all coming together and indeed it is massive, but I had to do it because except for an Italeri 1/72 scale which somewhat depicts an R677, although its sizes are questionable, there are no 1/35 scale ones on the market and since I don’t have either the skills nor the money to afford a 3D printer I had to resort to my own manual skills, which to me anyway is much more satisfying.
The reason for that is that it is not a machine doing it but my own mind and my own hands. There is nothing more enticing than to see something that appeared impossible to do at first glance slowly take shape and grow into an actual historic replica of the original.
Beyond that, it is wonderful to have to find always more original solutions to the problems and hurdles that present themselves during a construction. I am particularly fascinated by the variety of materials one can come up with to find the right solution to those problems.
I also like to find my own paint colors for my washes, since the industrial ones might even do the trick, but creating one that actually looks natural and adapts to the terrain and weather of the model one builds is yet another reason to use one’s own creativity.
I can see the very same creativity on your model as well and indeed it looks fascinating to my eyes as well.
I thank you for your wishes and be reassured that this is not really the end of this one, because this was only the first step to a much larger project I have in mind to recreate one of the Omaha Beach landings during D-Day, which will include four landing crafts at sea and already landed, a segment of beach with all the accurate obstacles planted in it, an anti-tank ditch, this bunker plus two others at its side, plenty of terrain and vegetation stuff leading up to the steep slopes of WN61 only to receive two more interred bunkers (Tobruks) and two open emplacements. Of course there will be a whole set of figures and vehicle to be set in it.
At 1/35 scale it will probably become a museum piece, take a lot of space and of course be very, very heavy.
So please stick around for a little while longer until I will have finished my current “The Last Warning” diorama, which is actually the opening of a whole series of North Western European campaign set of projects I plan to do, among many others as well.
My best wishes to you too and I hope of seeing more of your builds in the future.
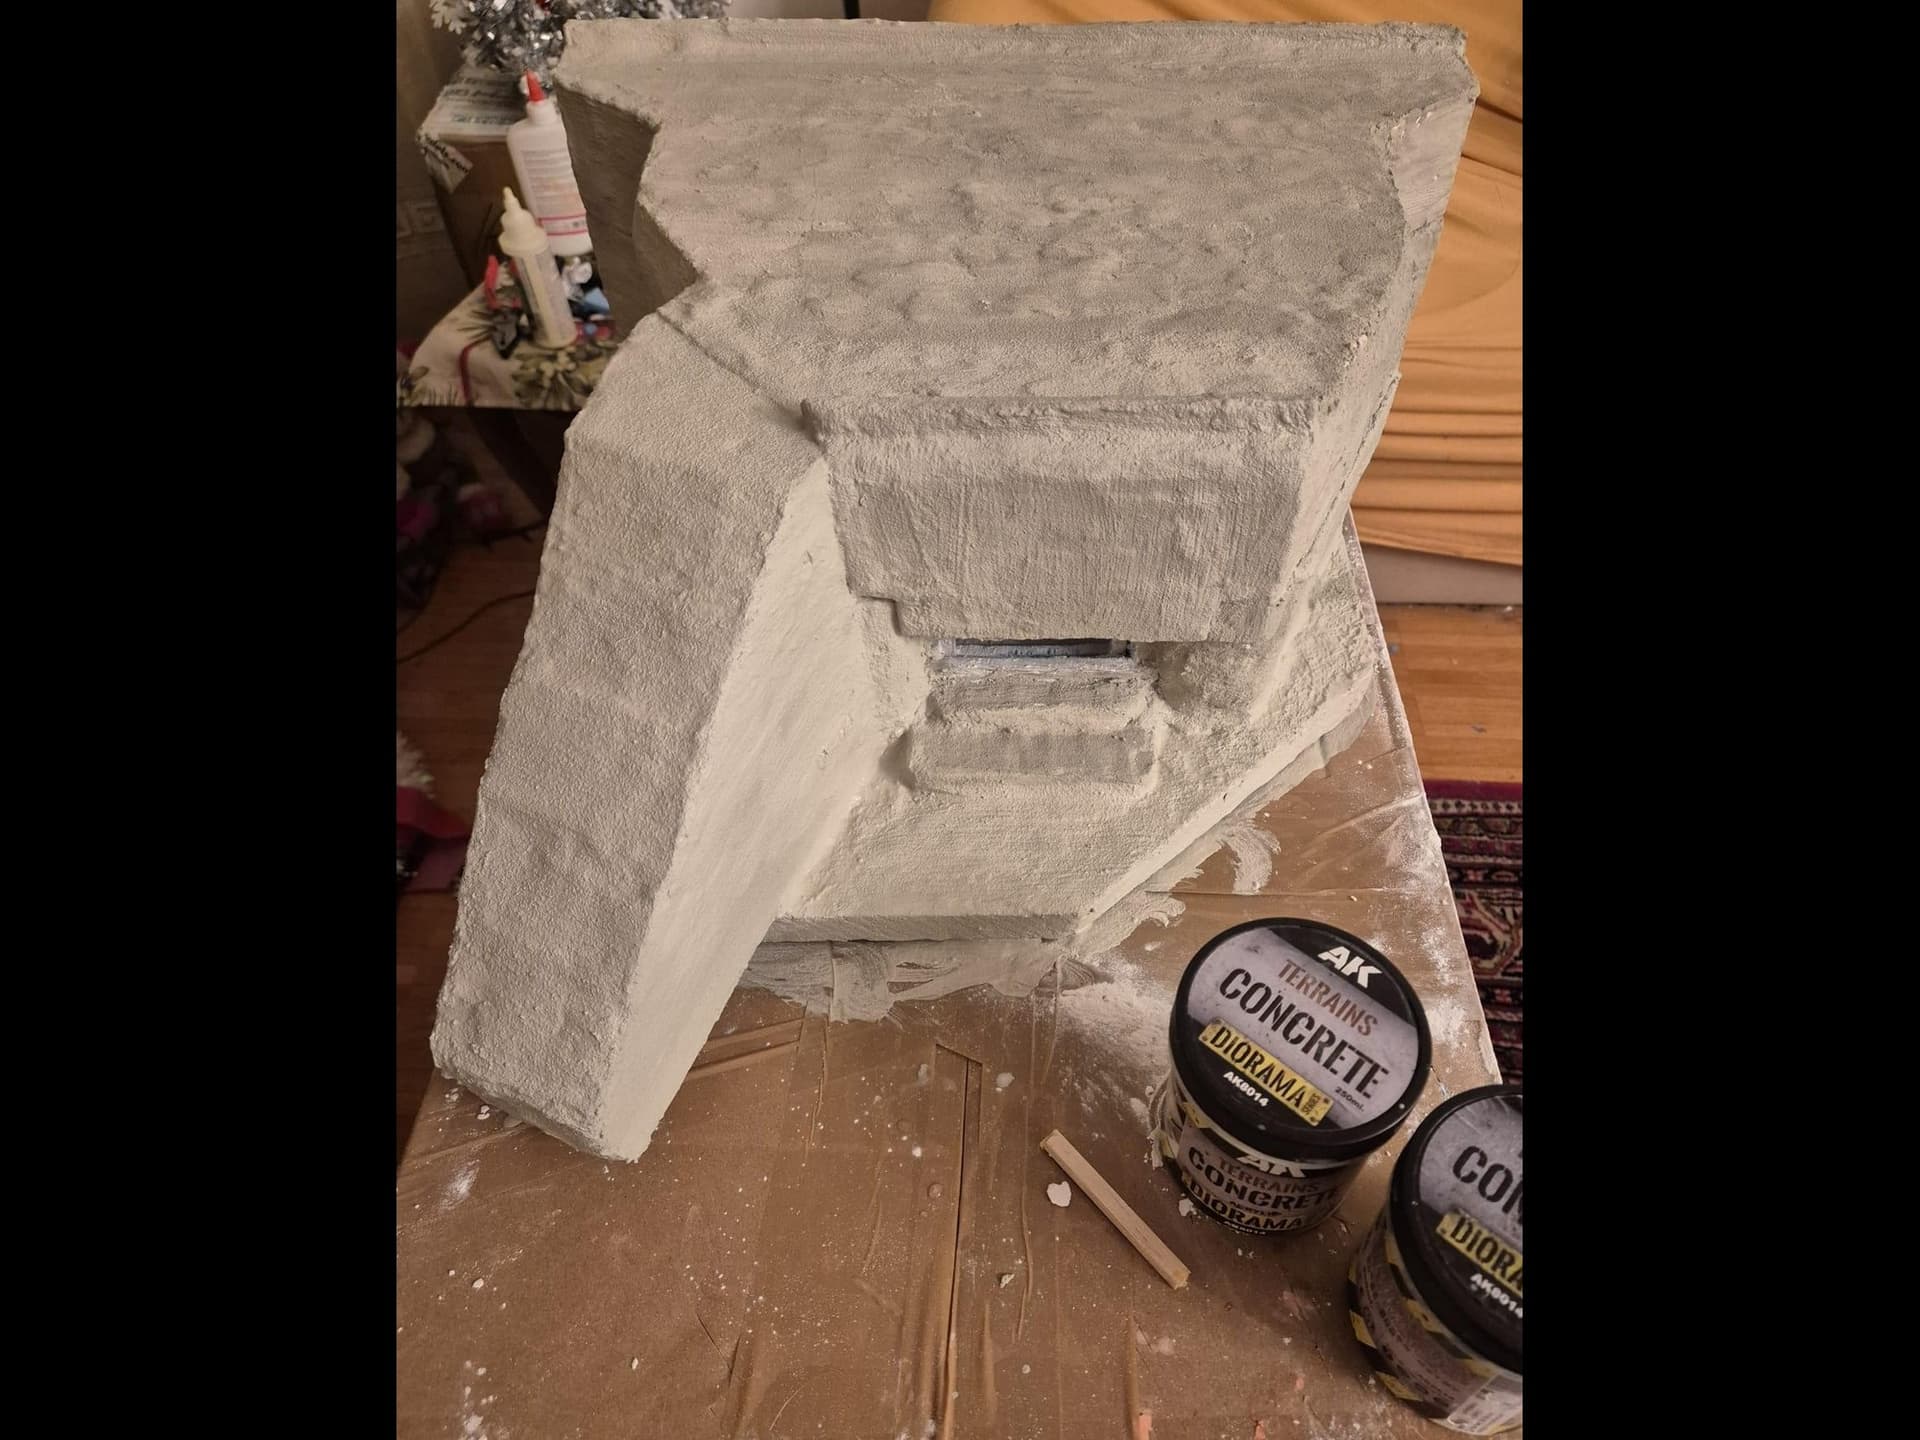
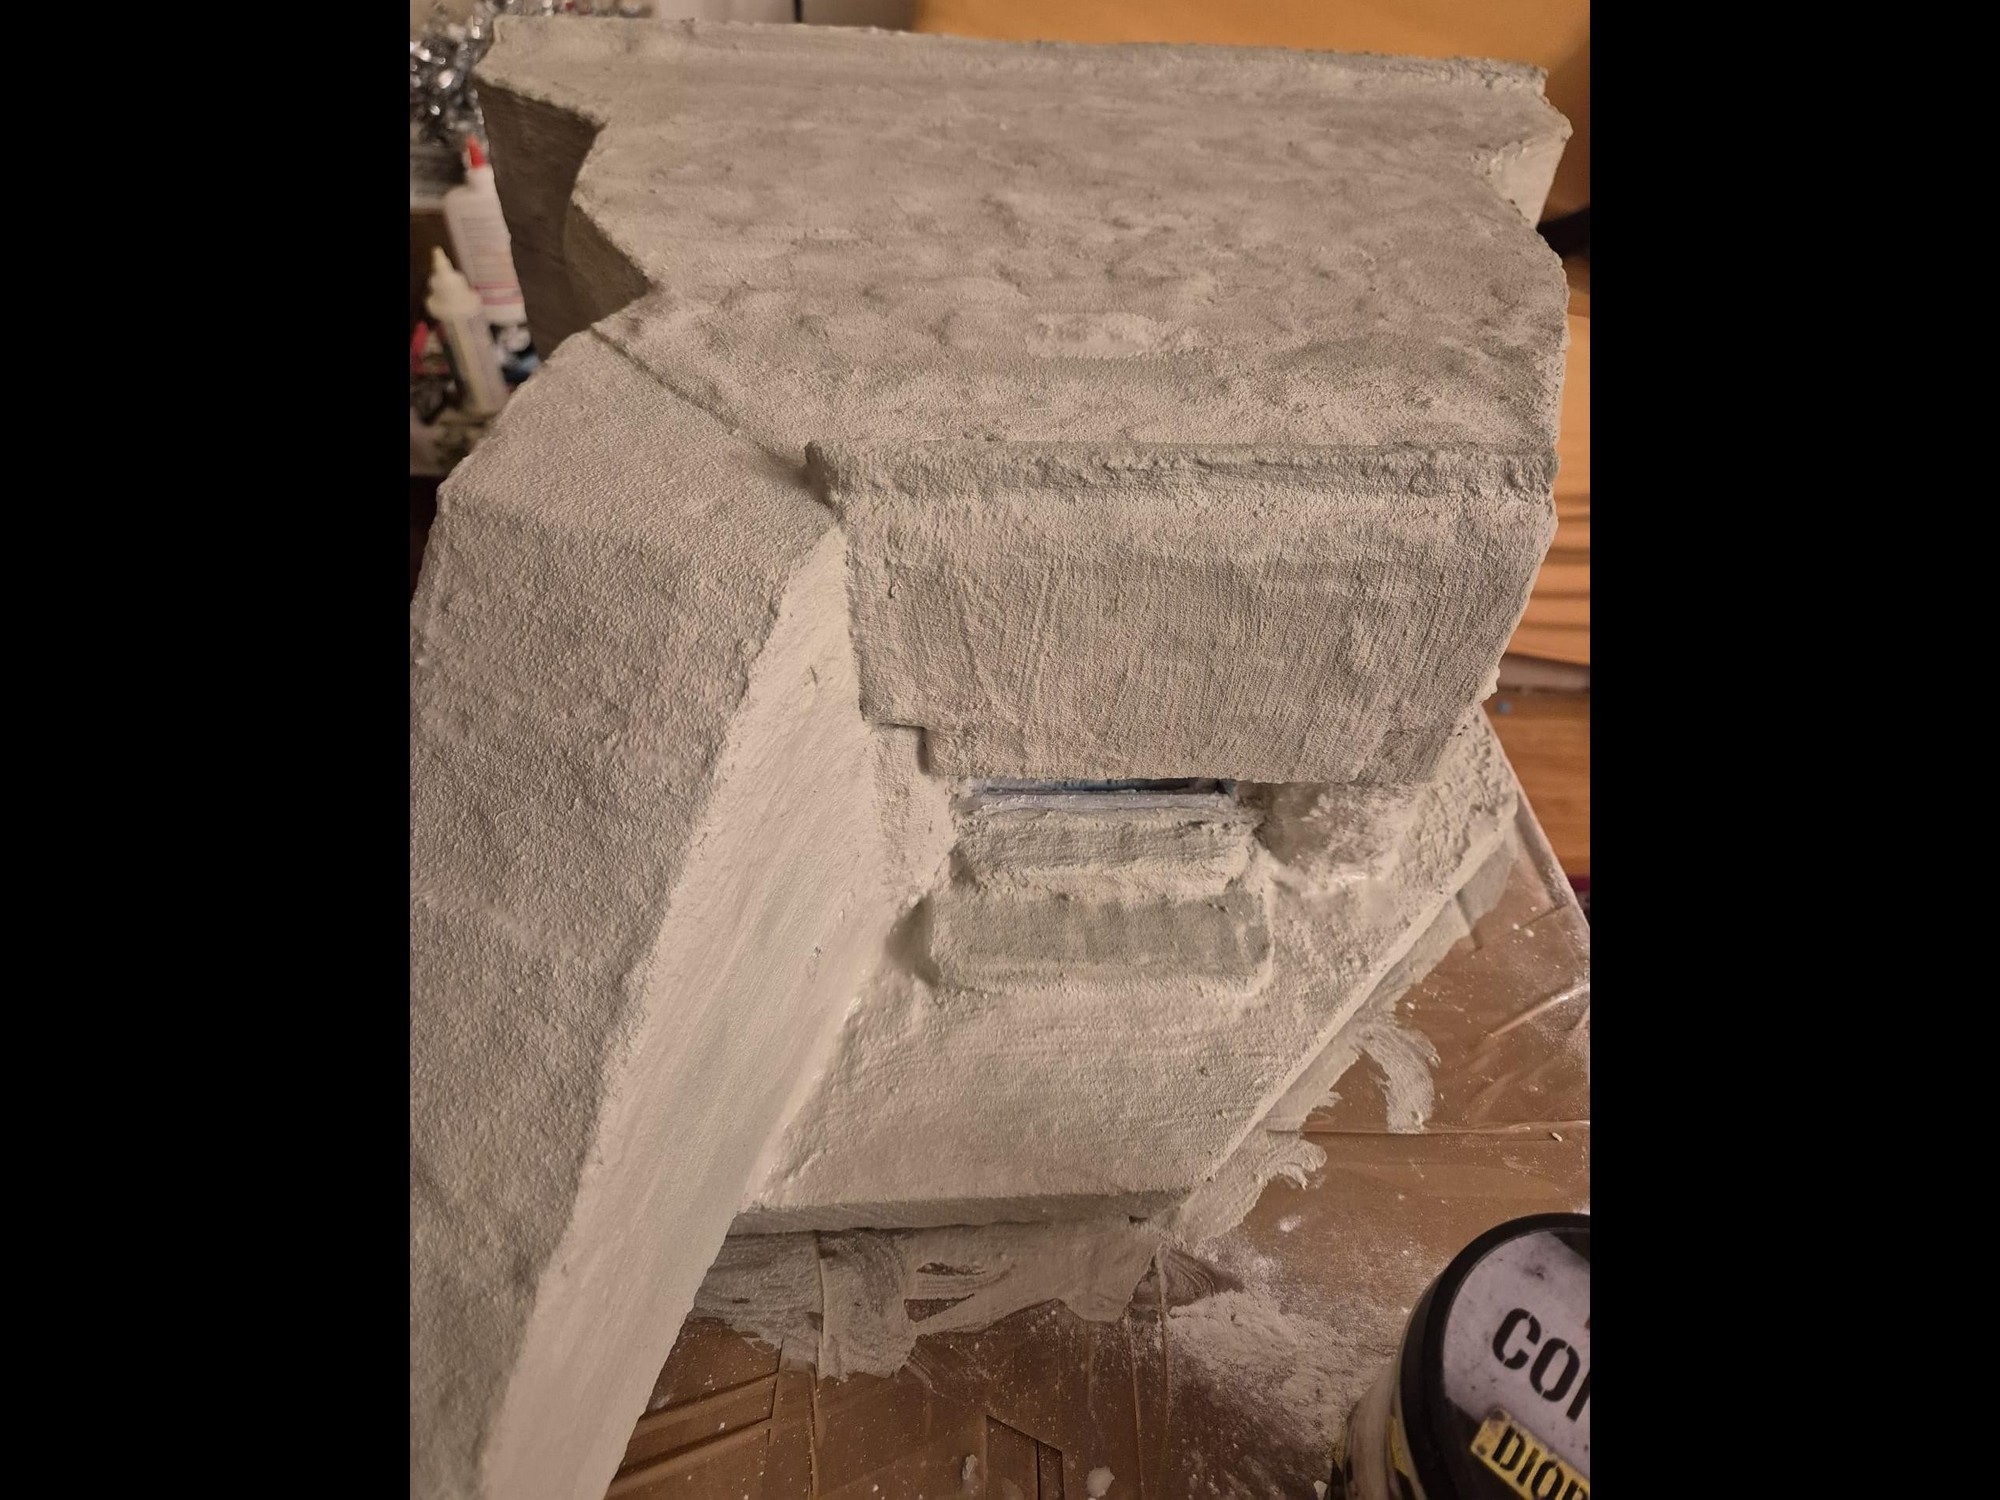
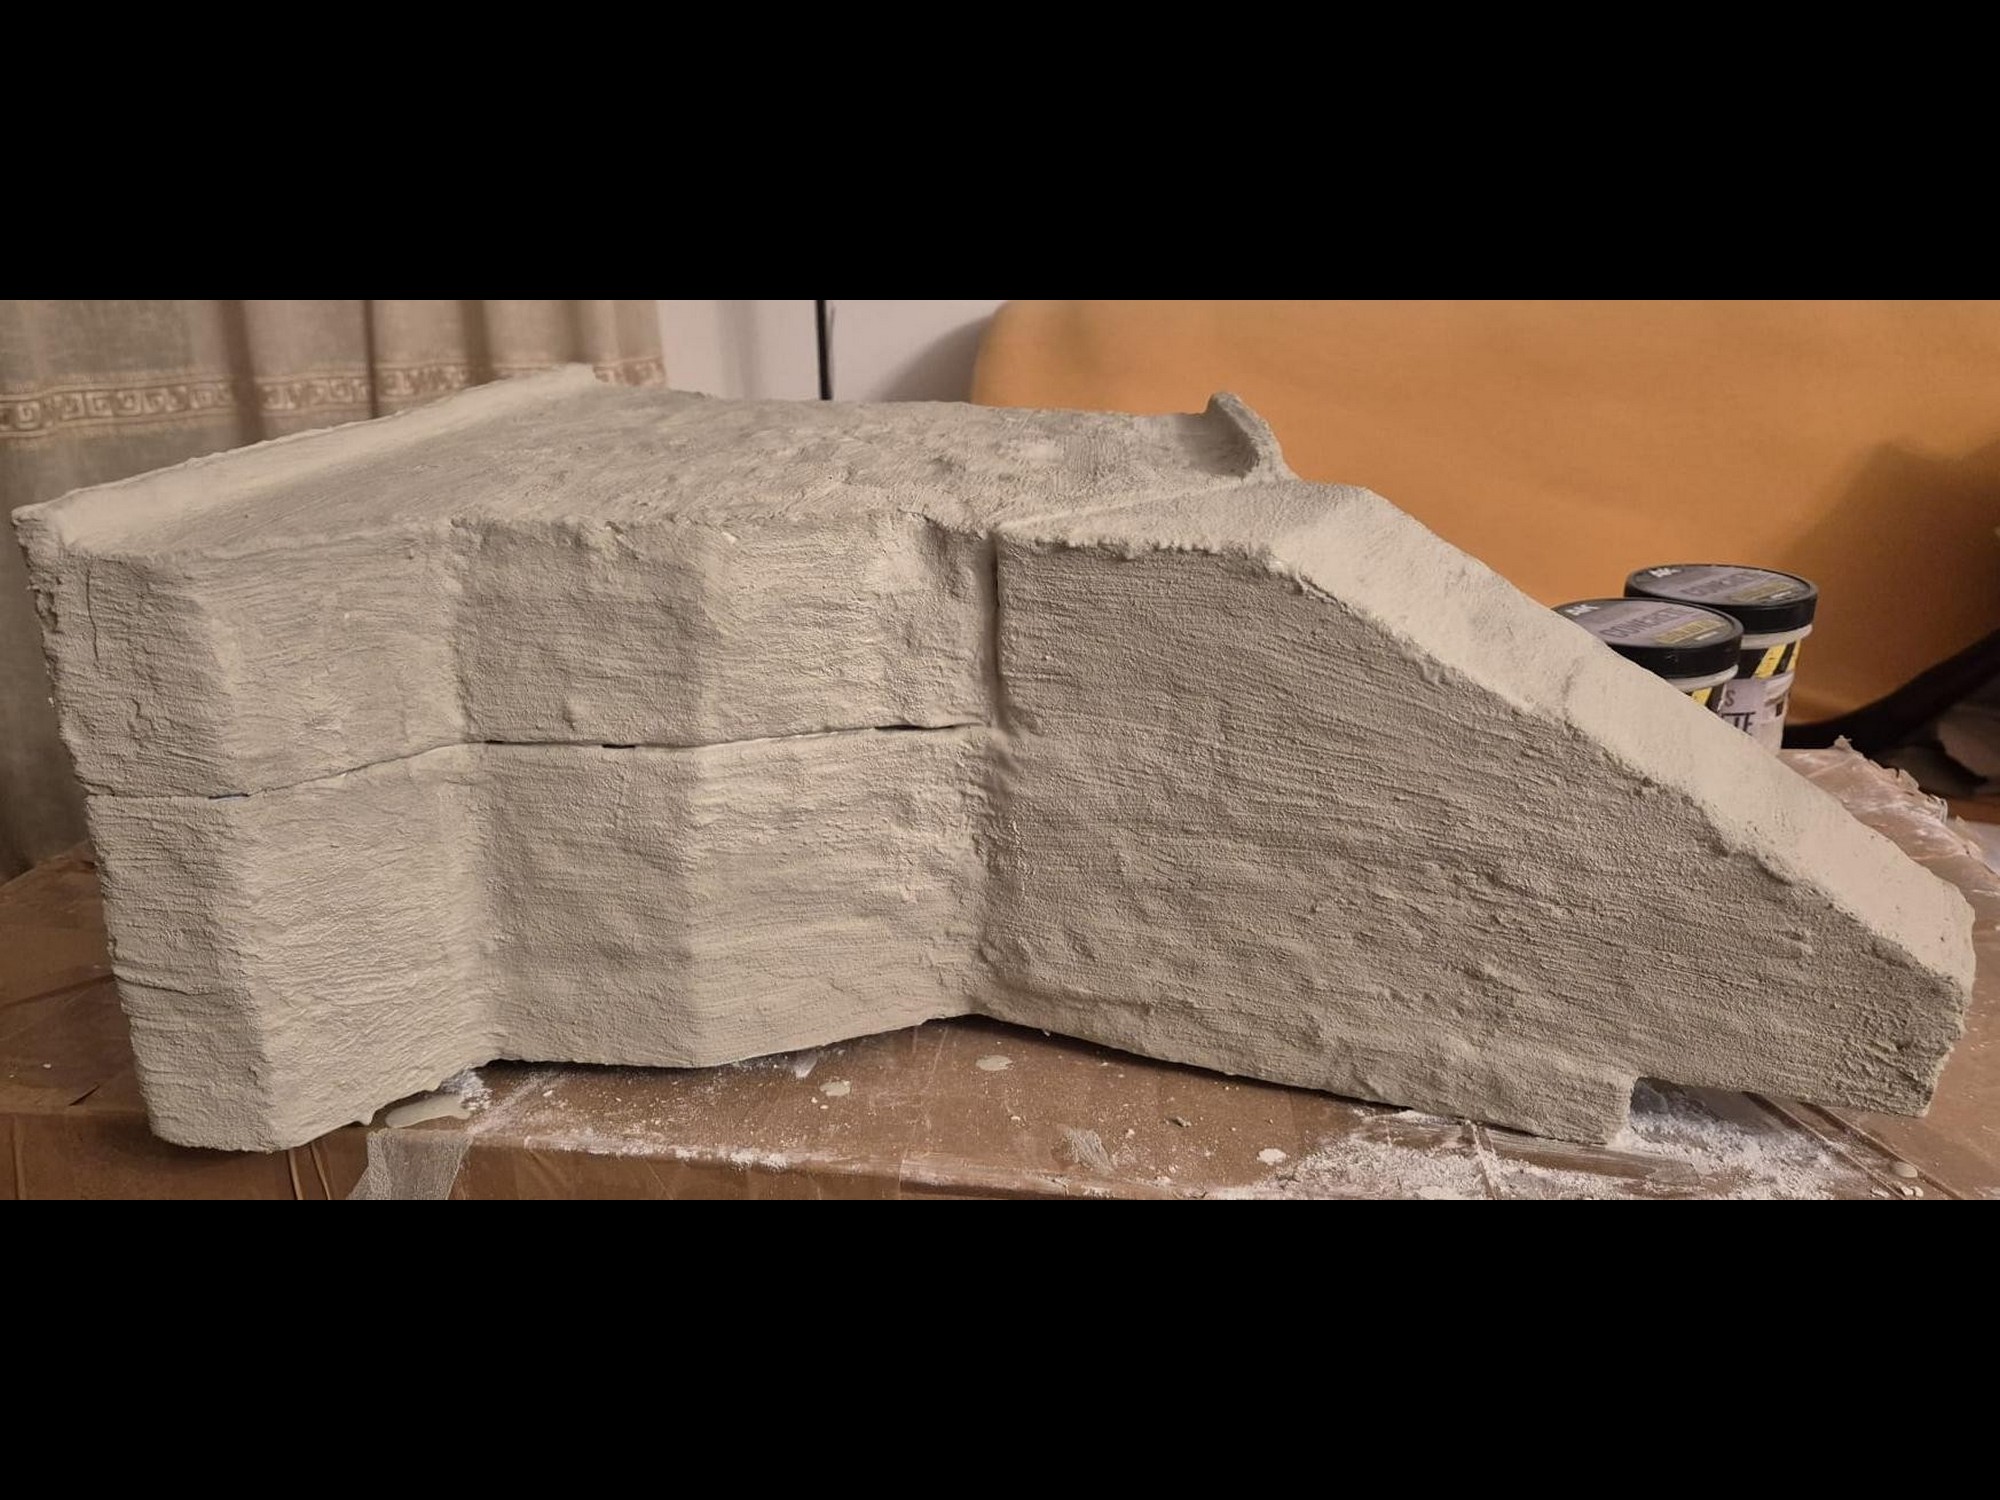
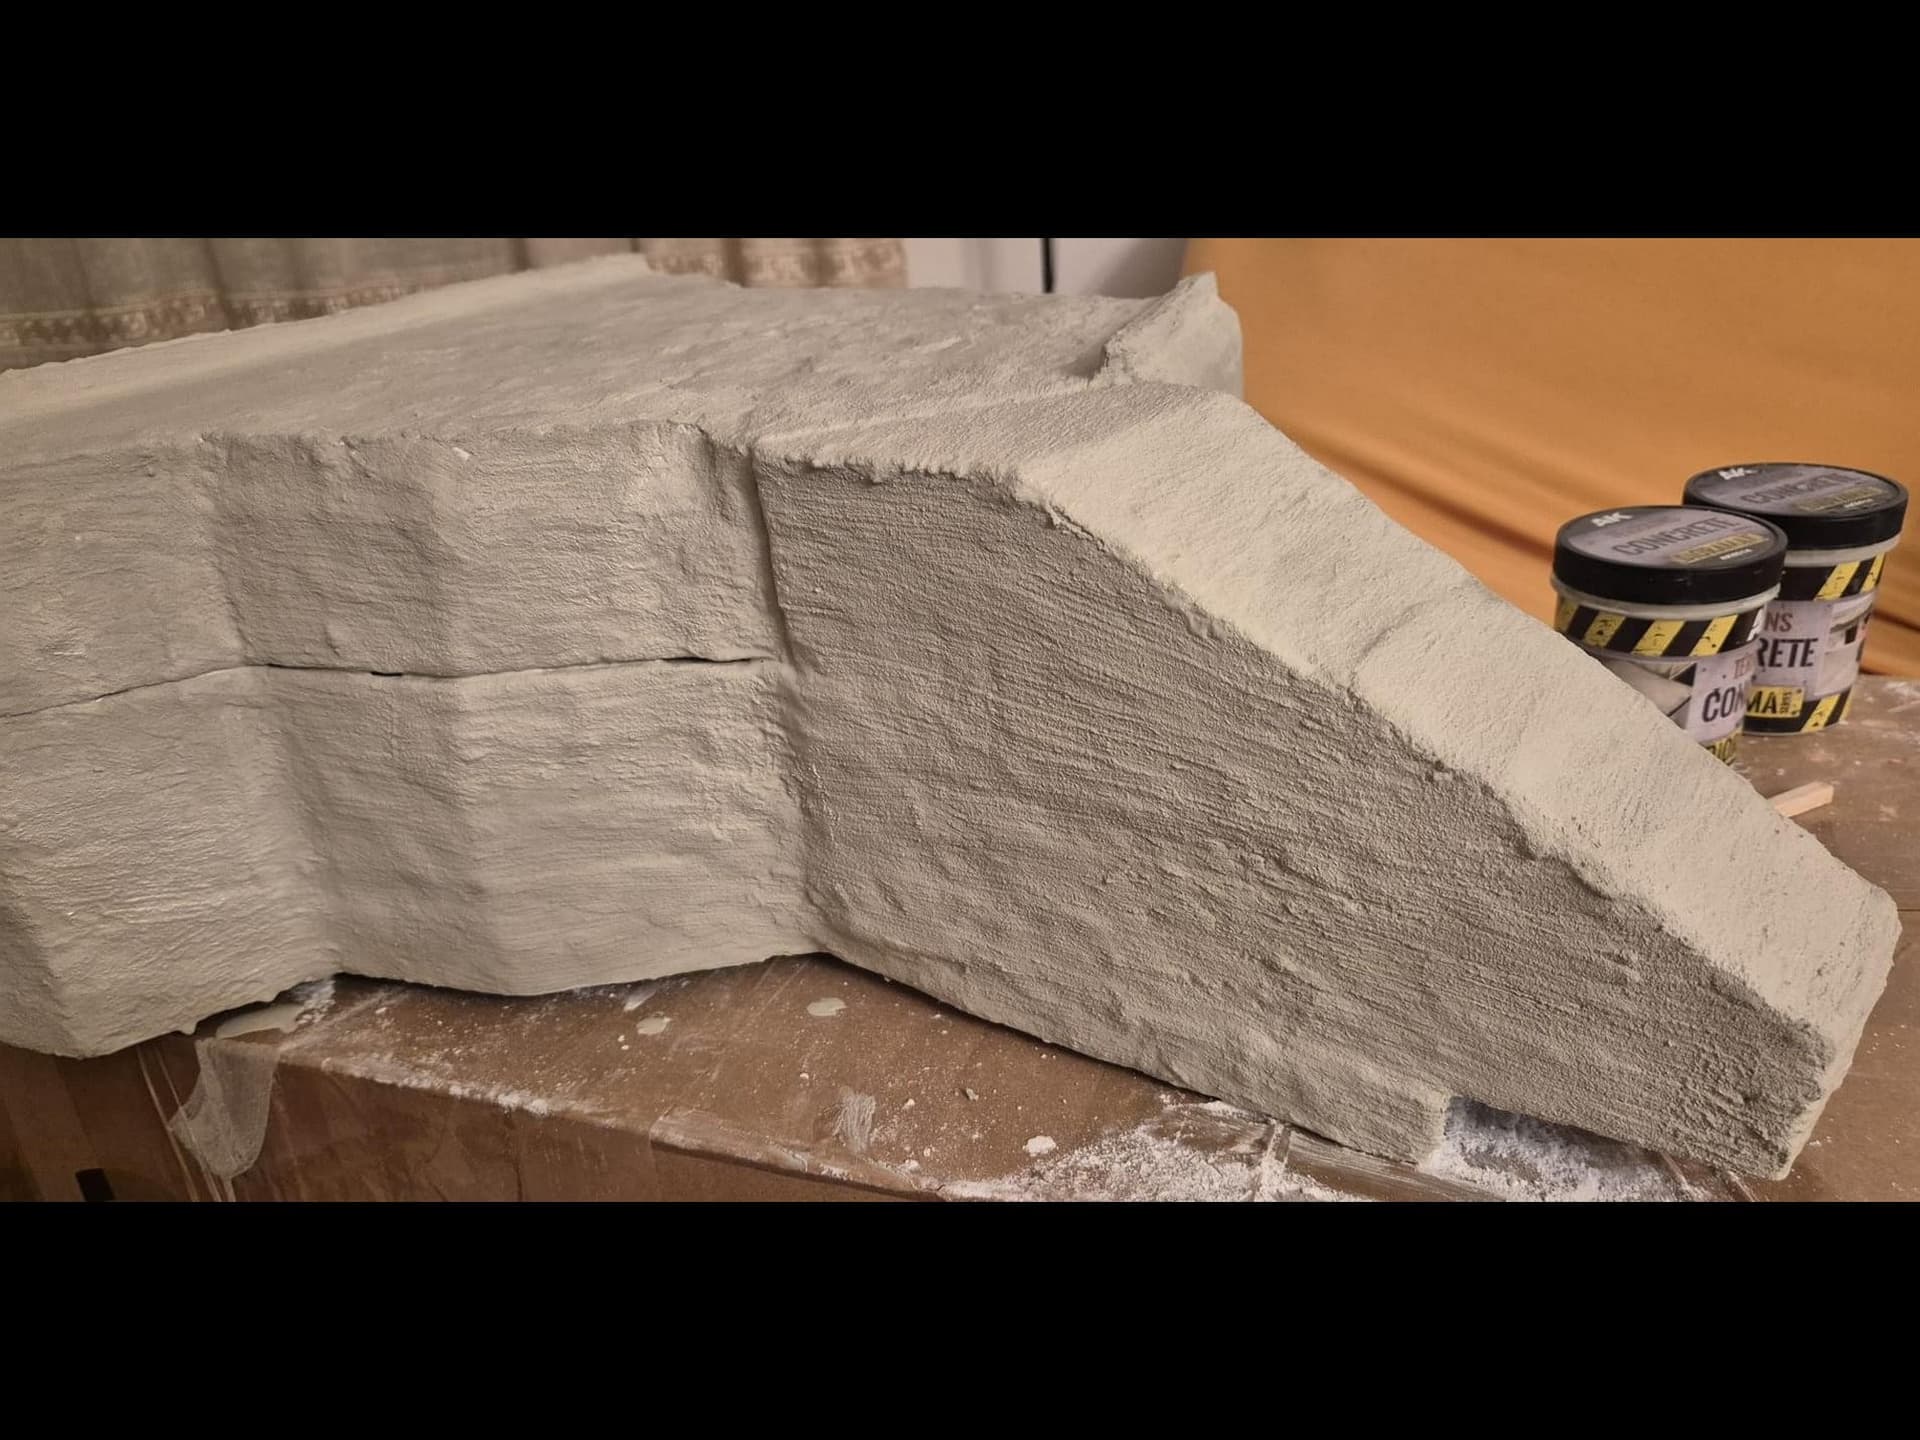
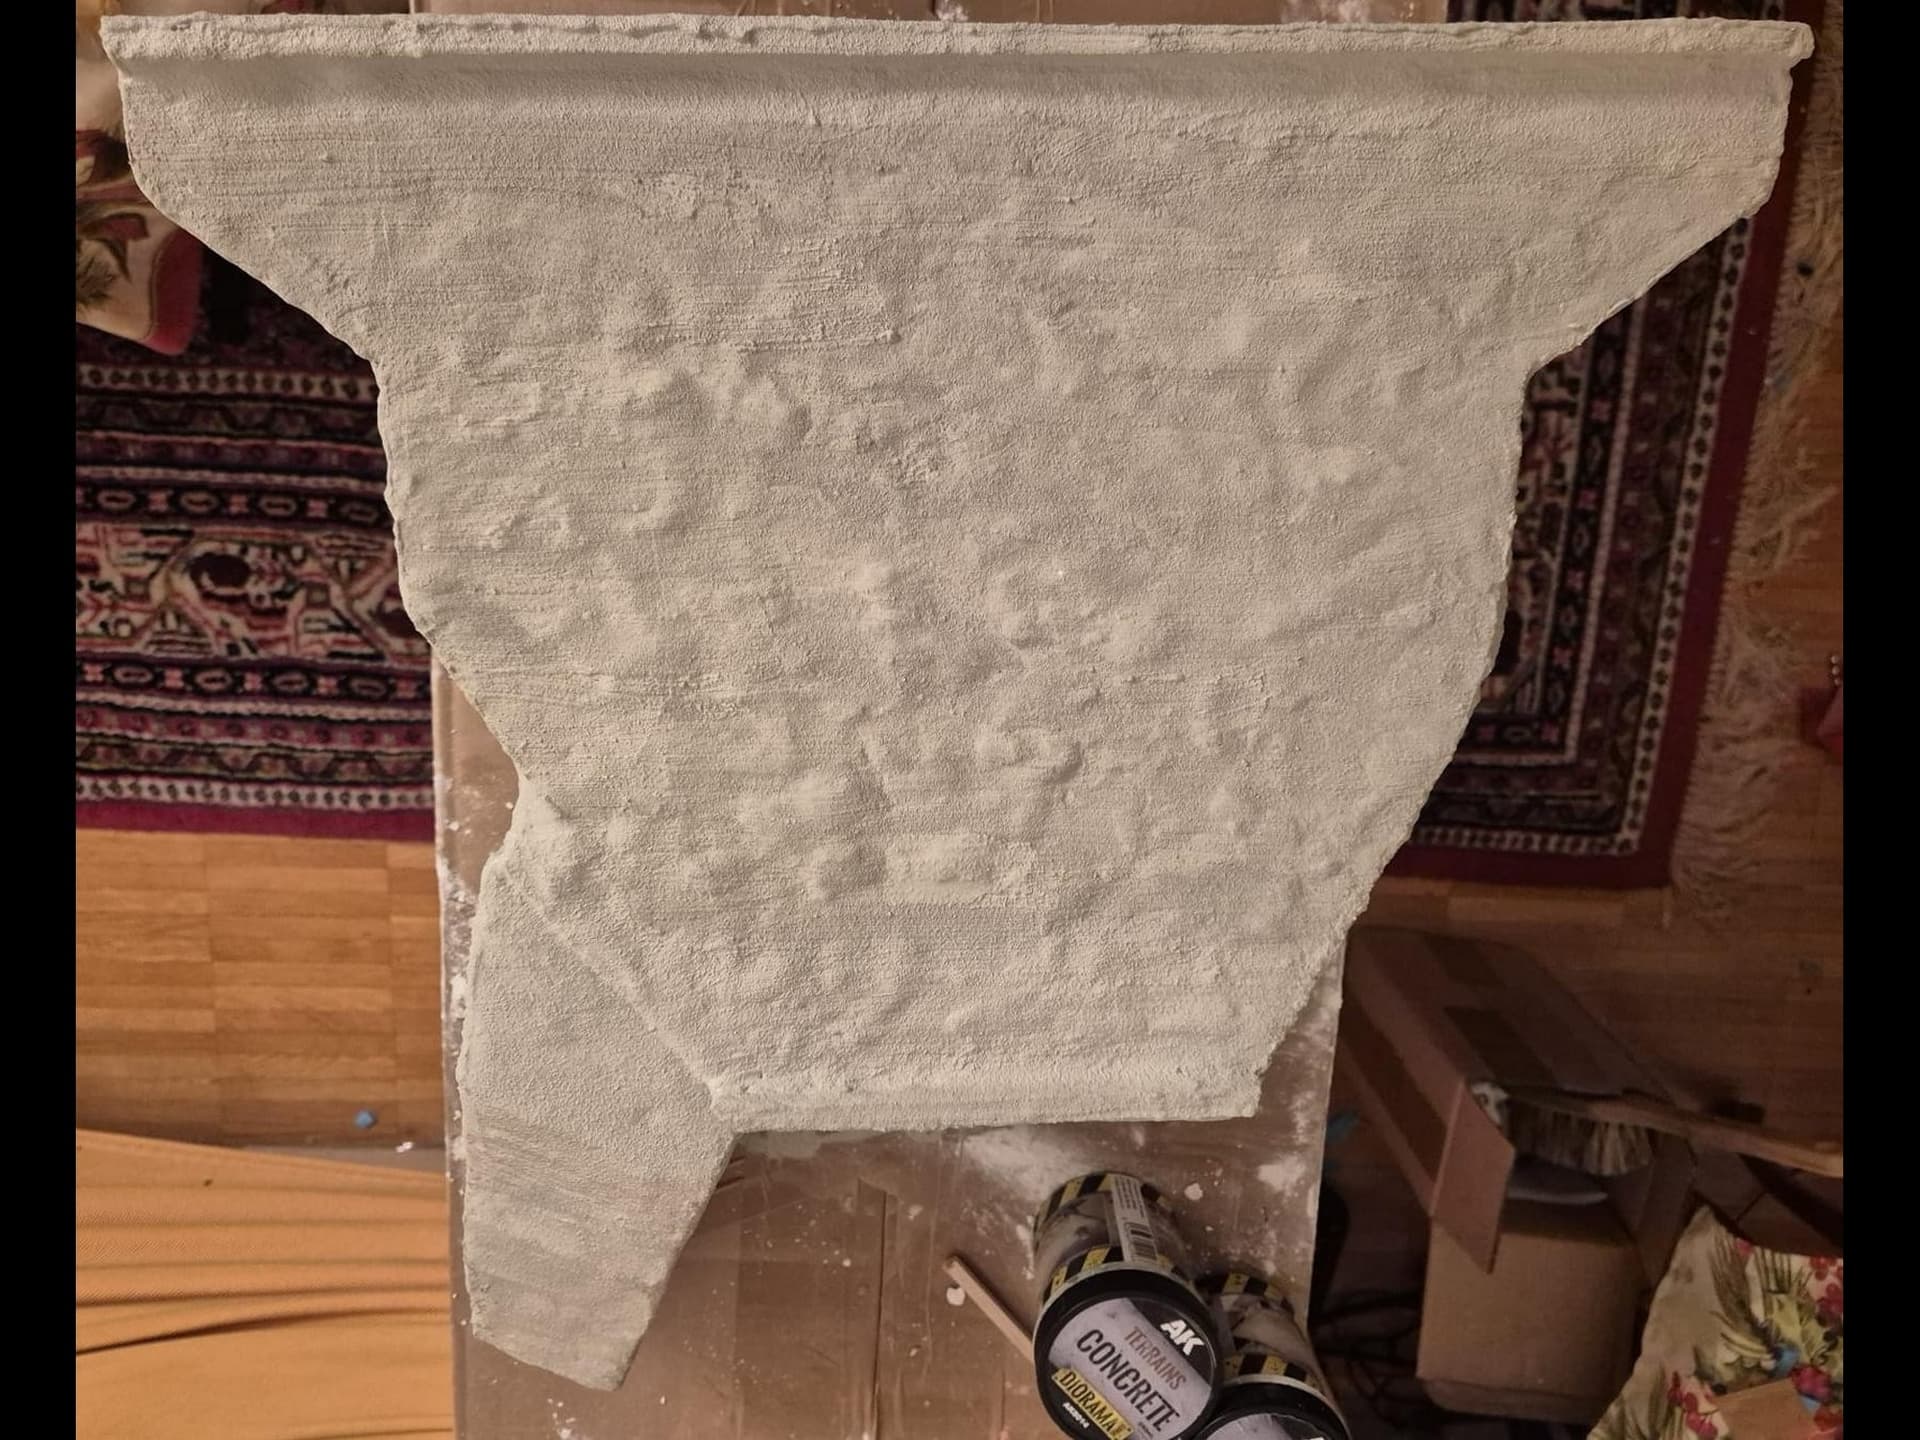
It’s Wednesday: Concrete Time. If it were Thursday, this would be Belgium.
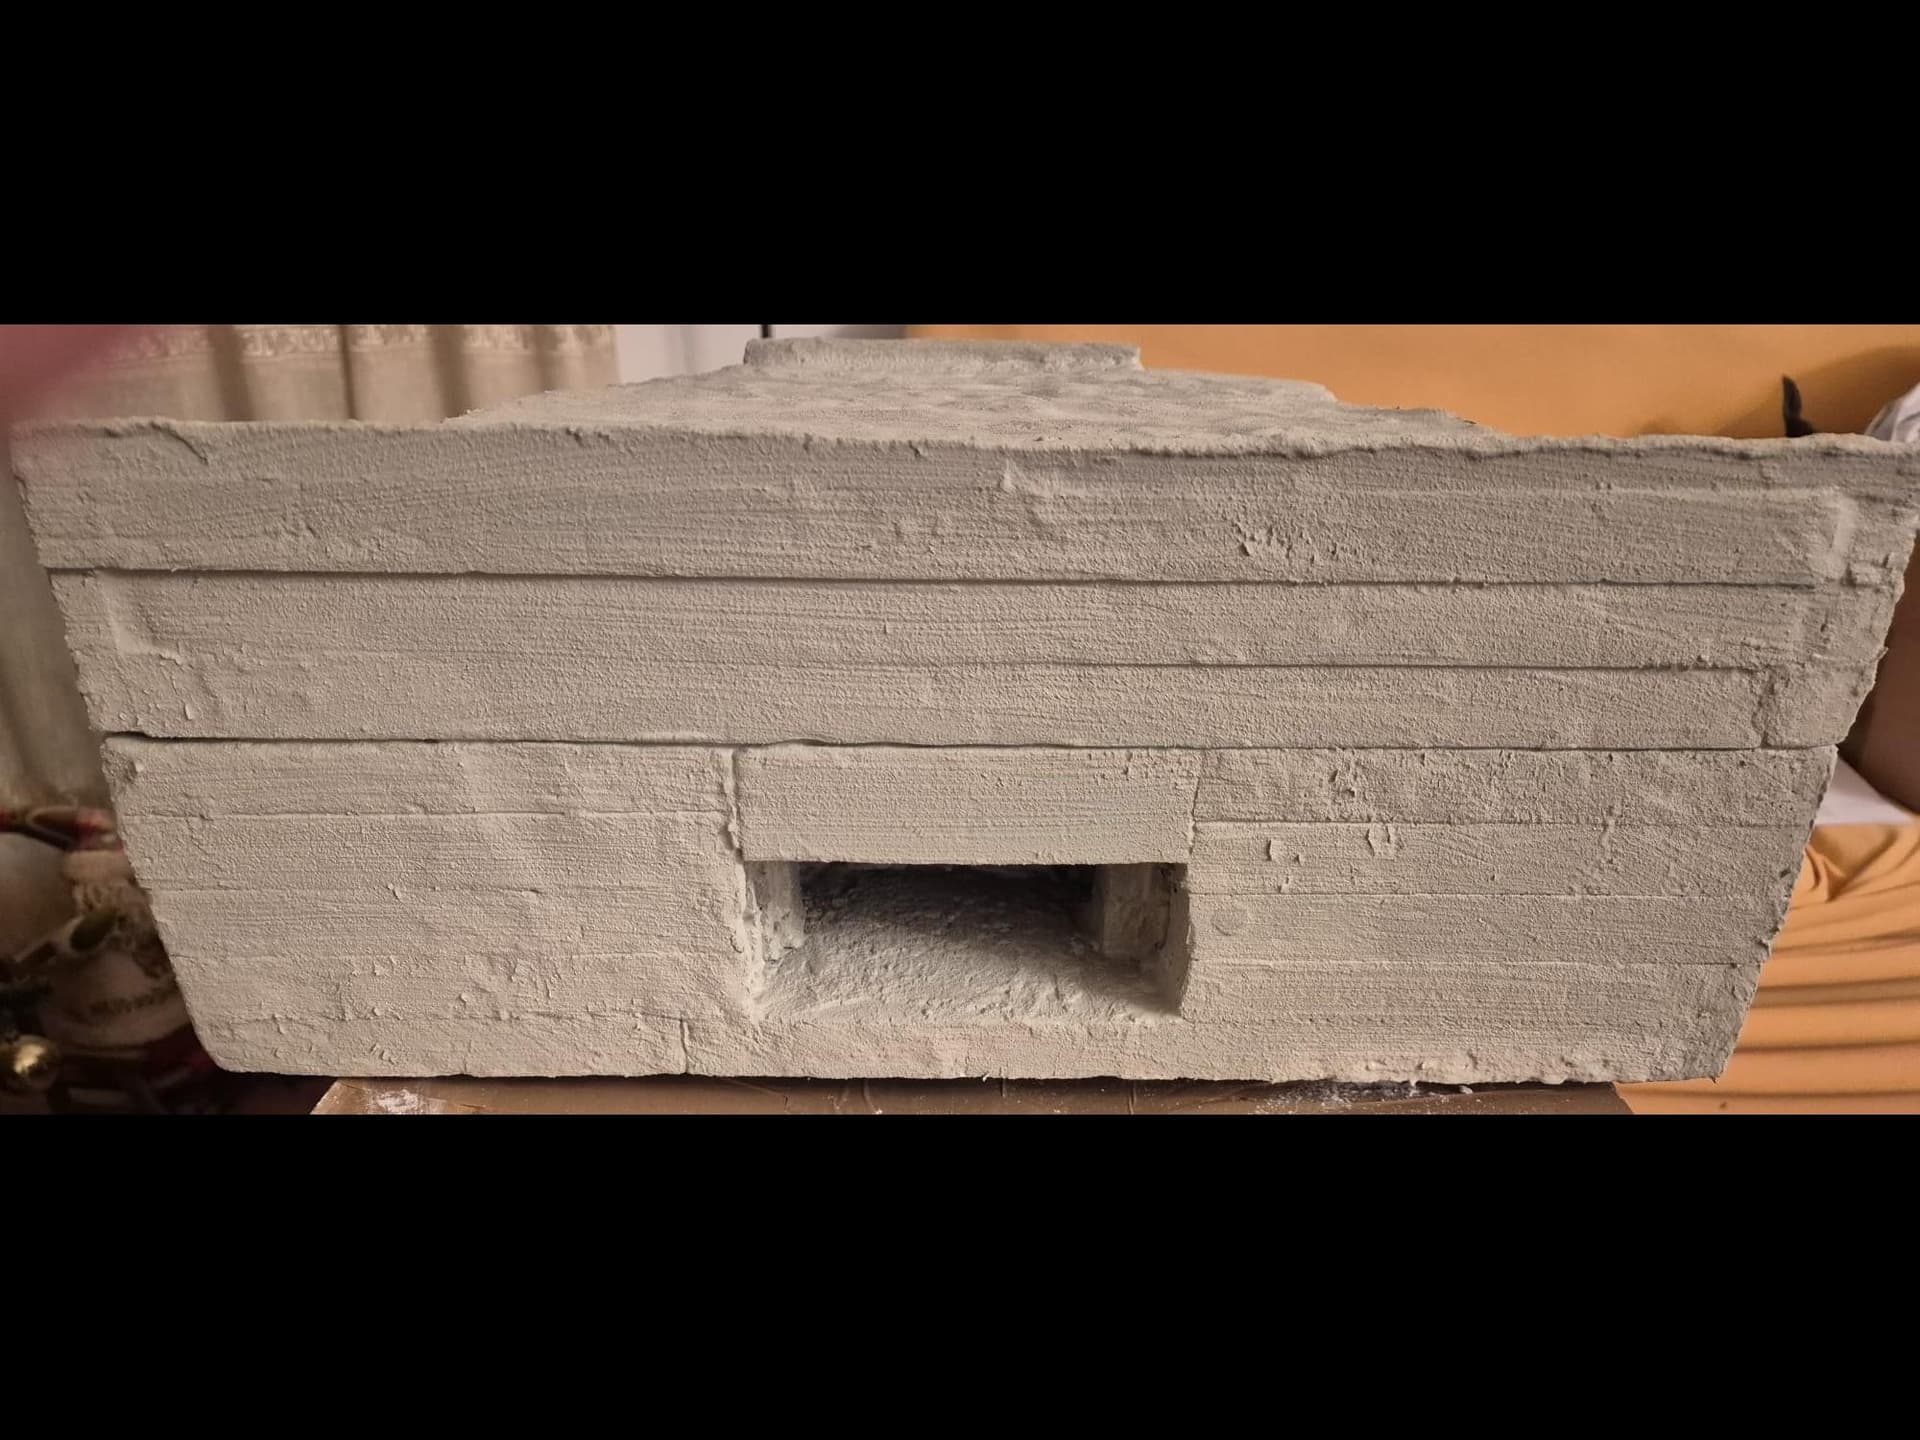
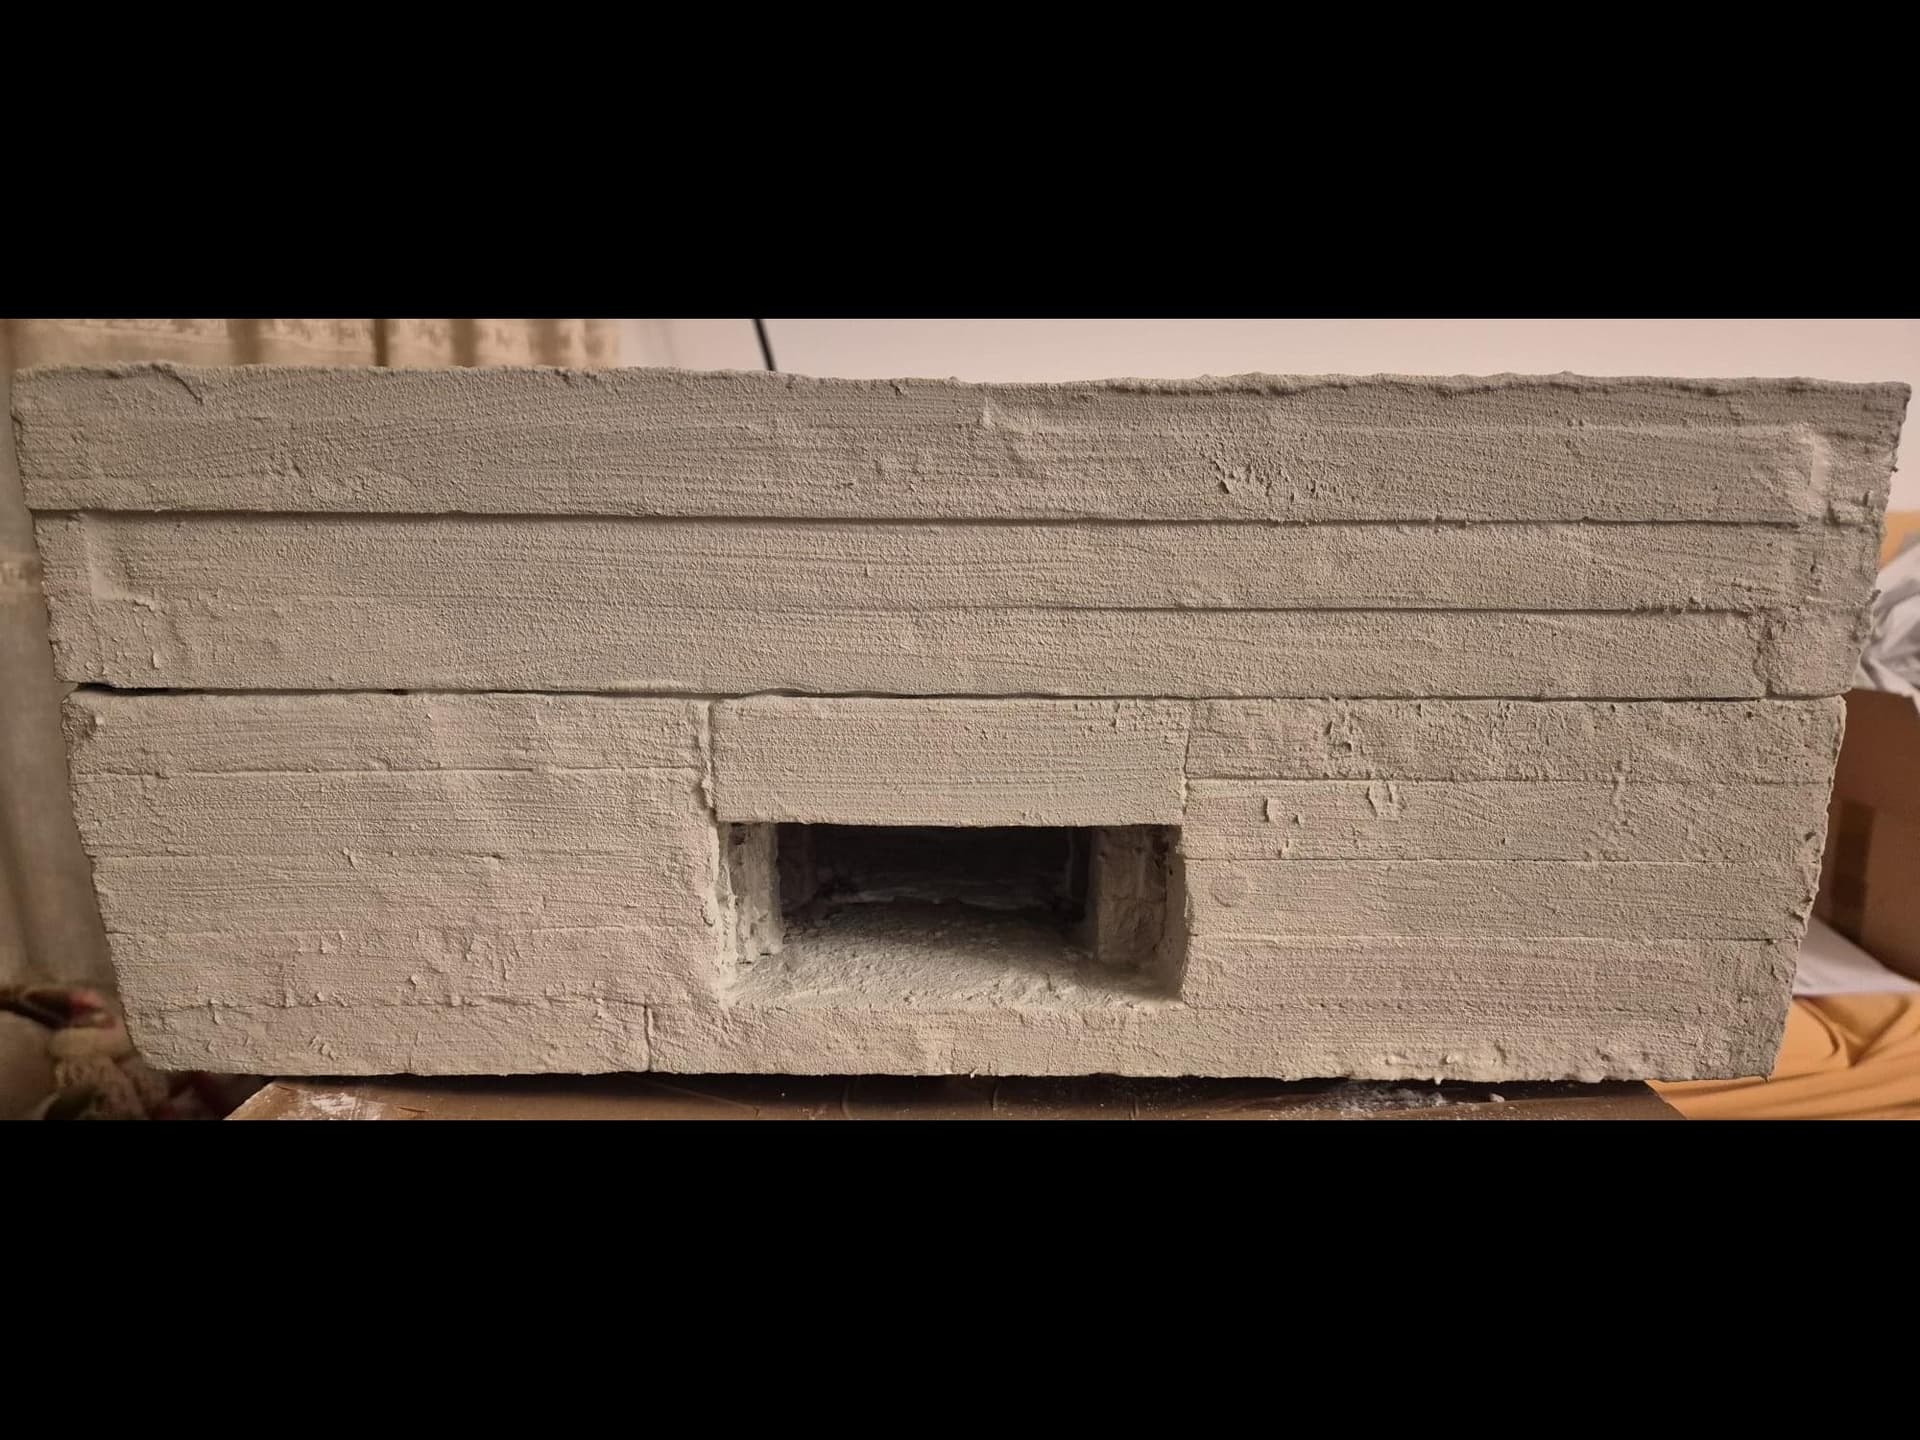
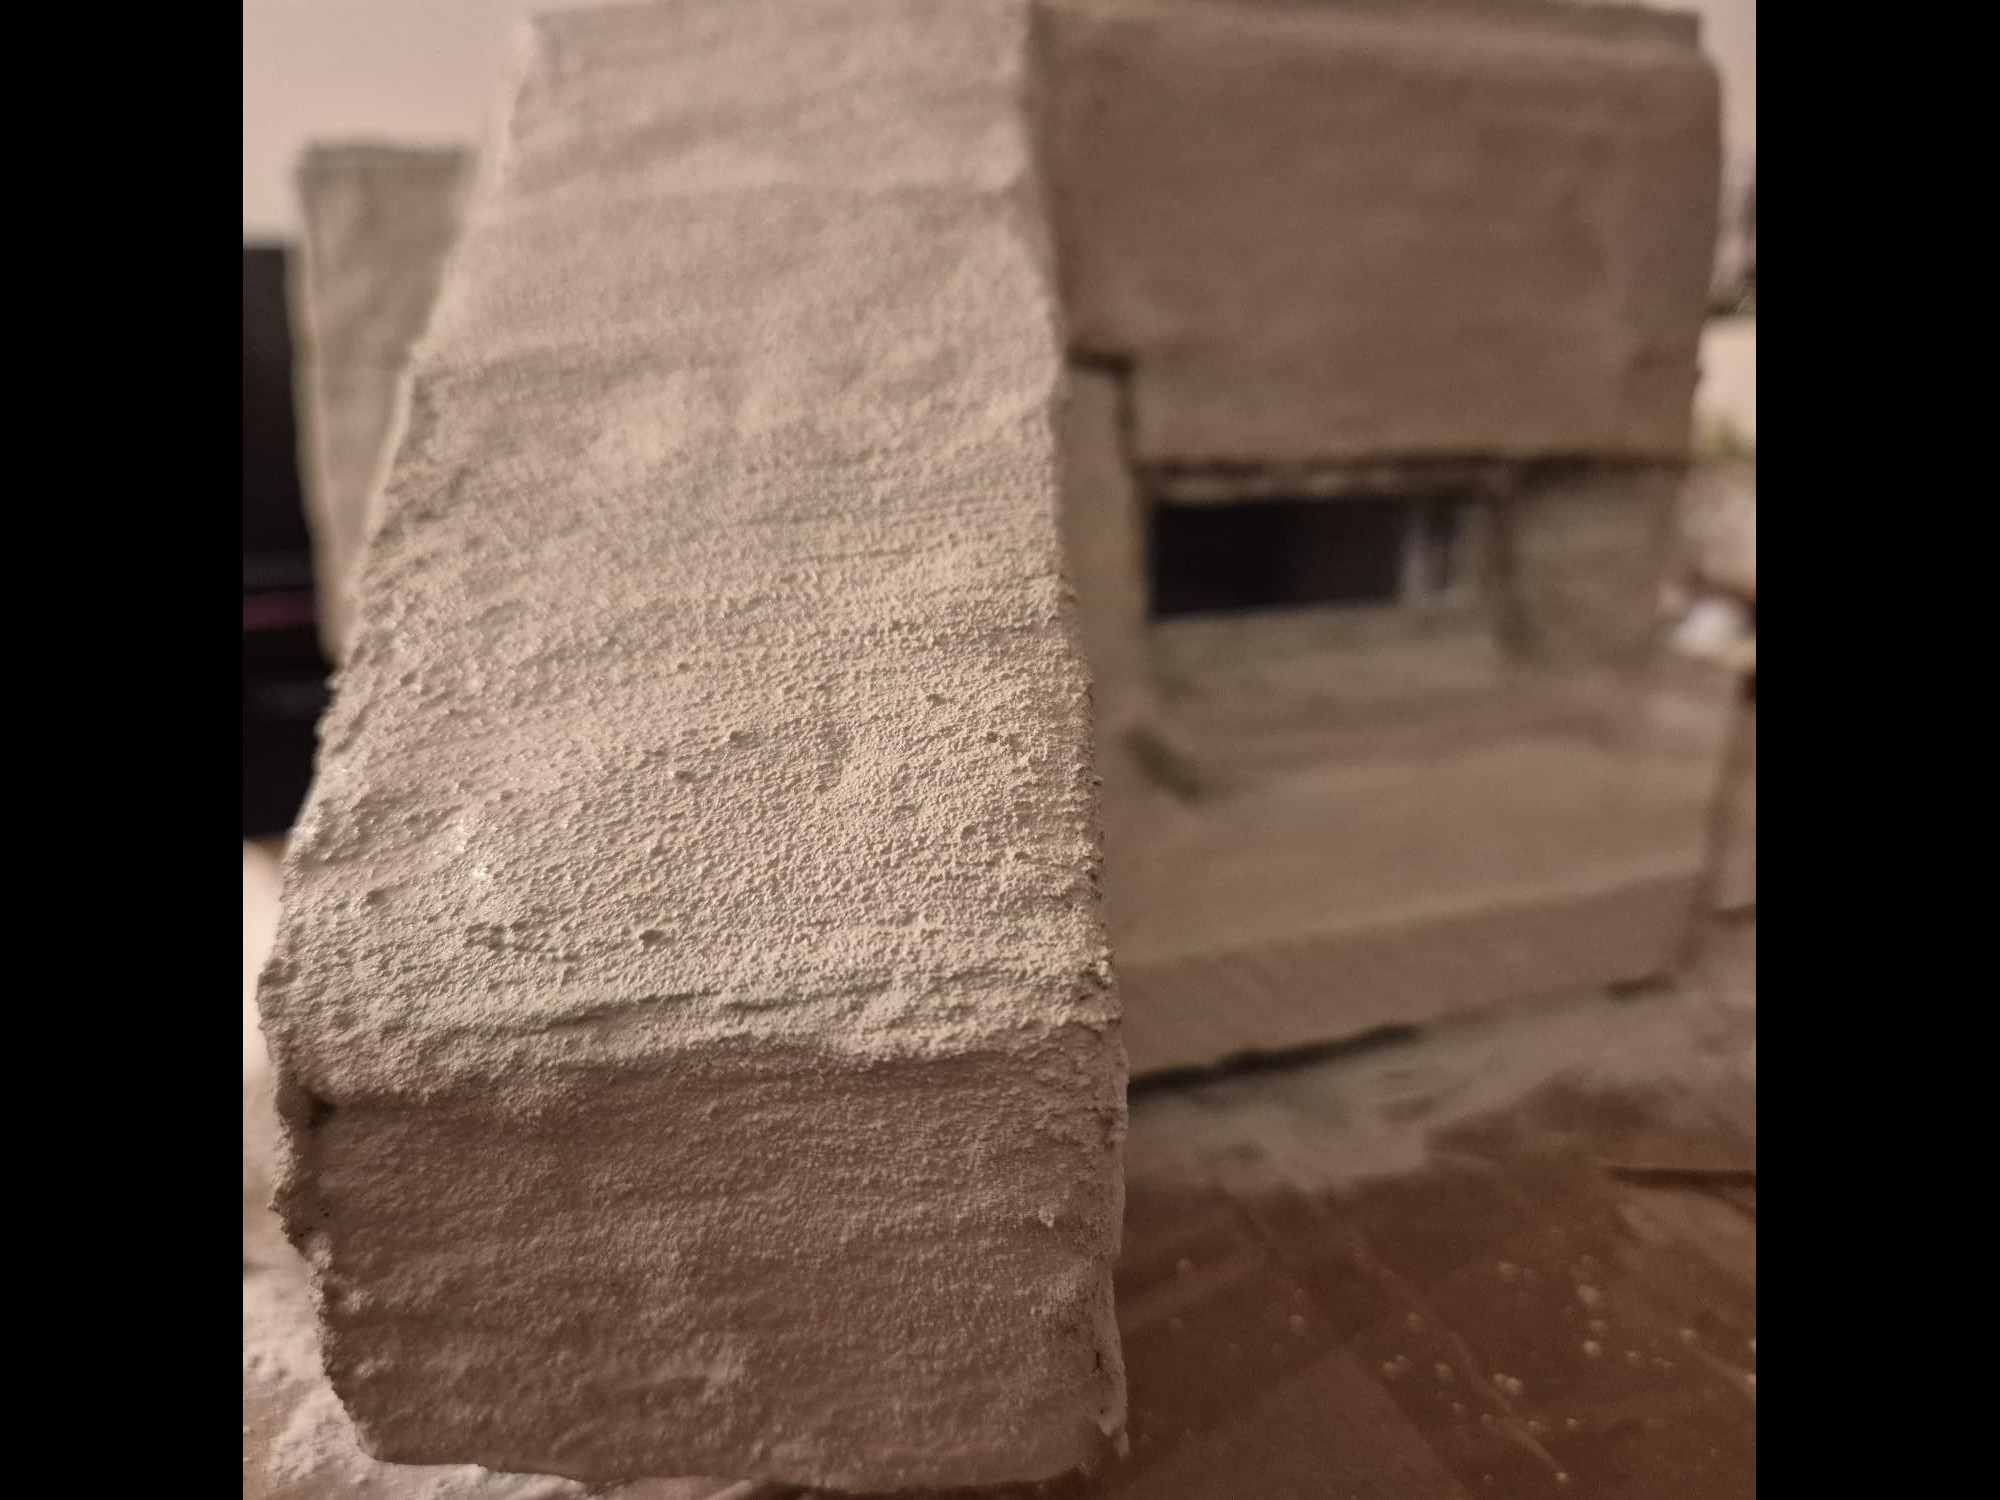
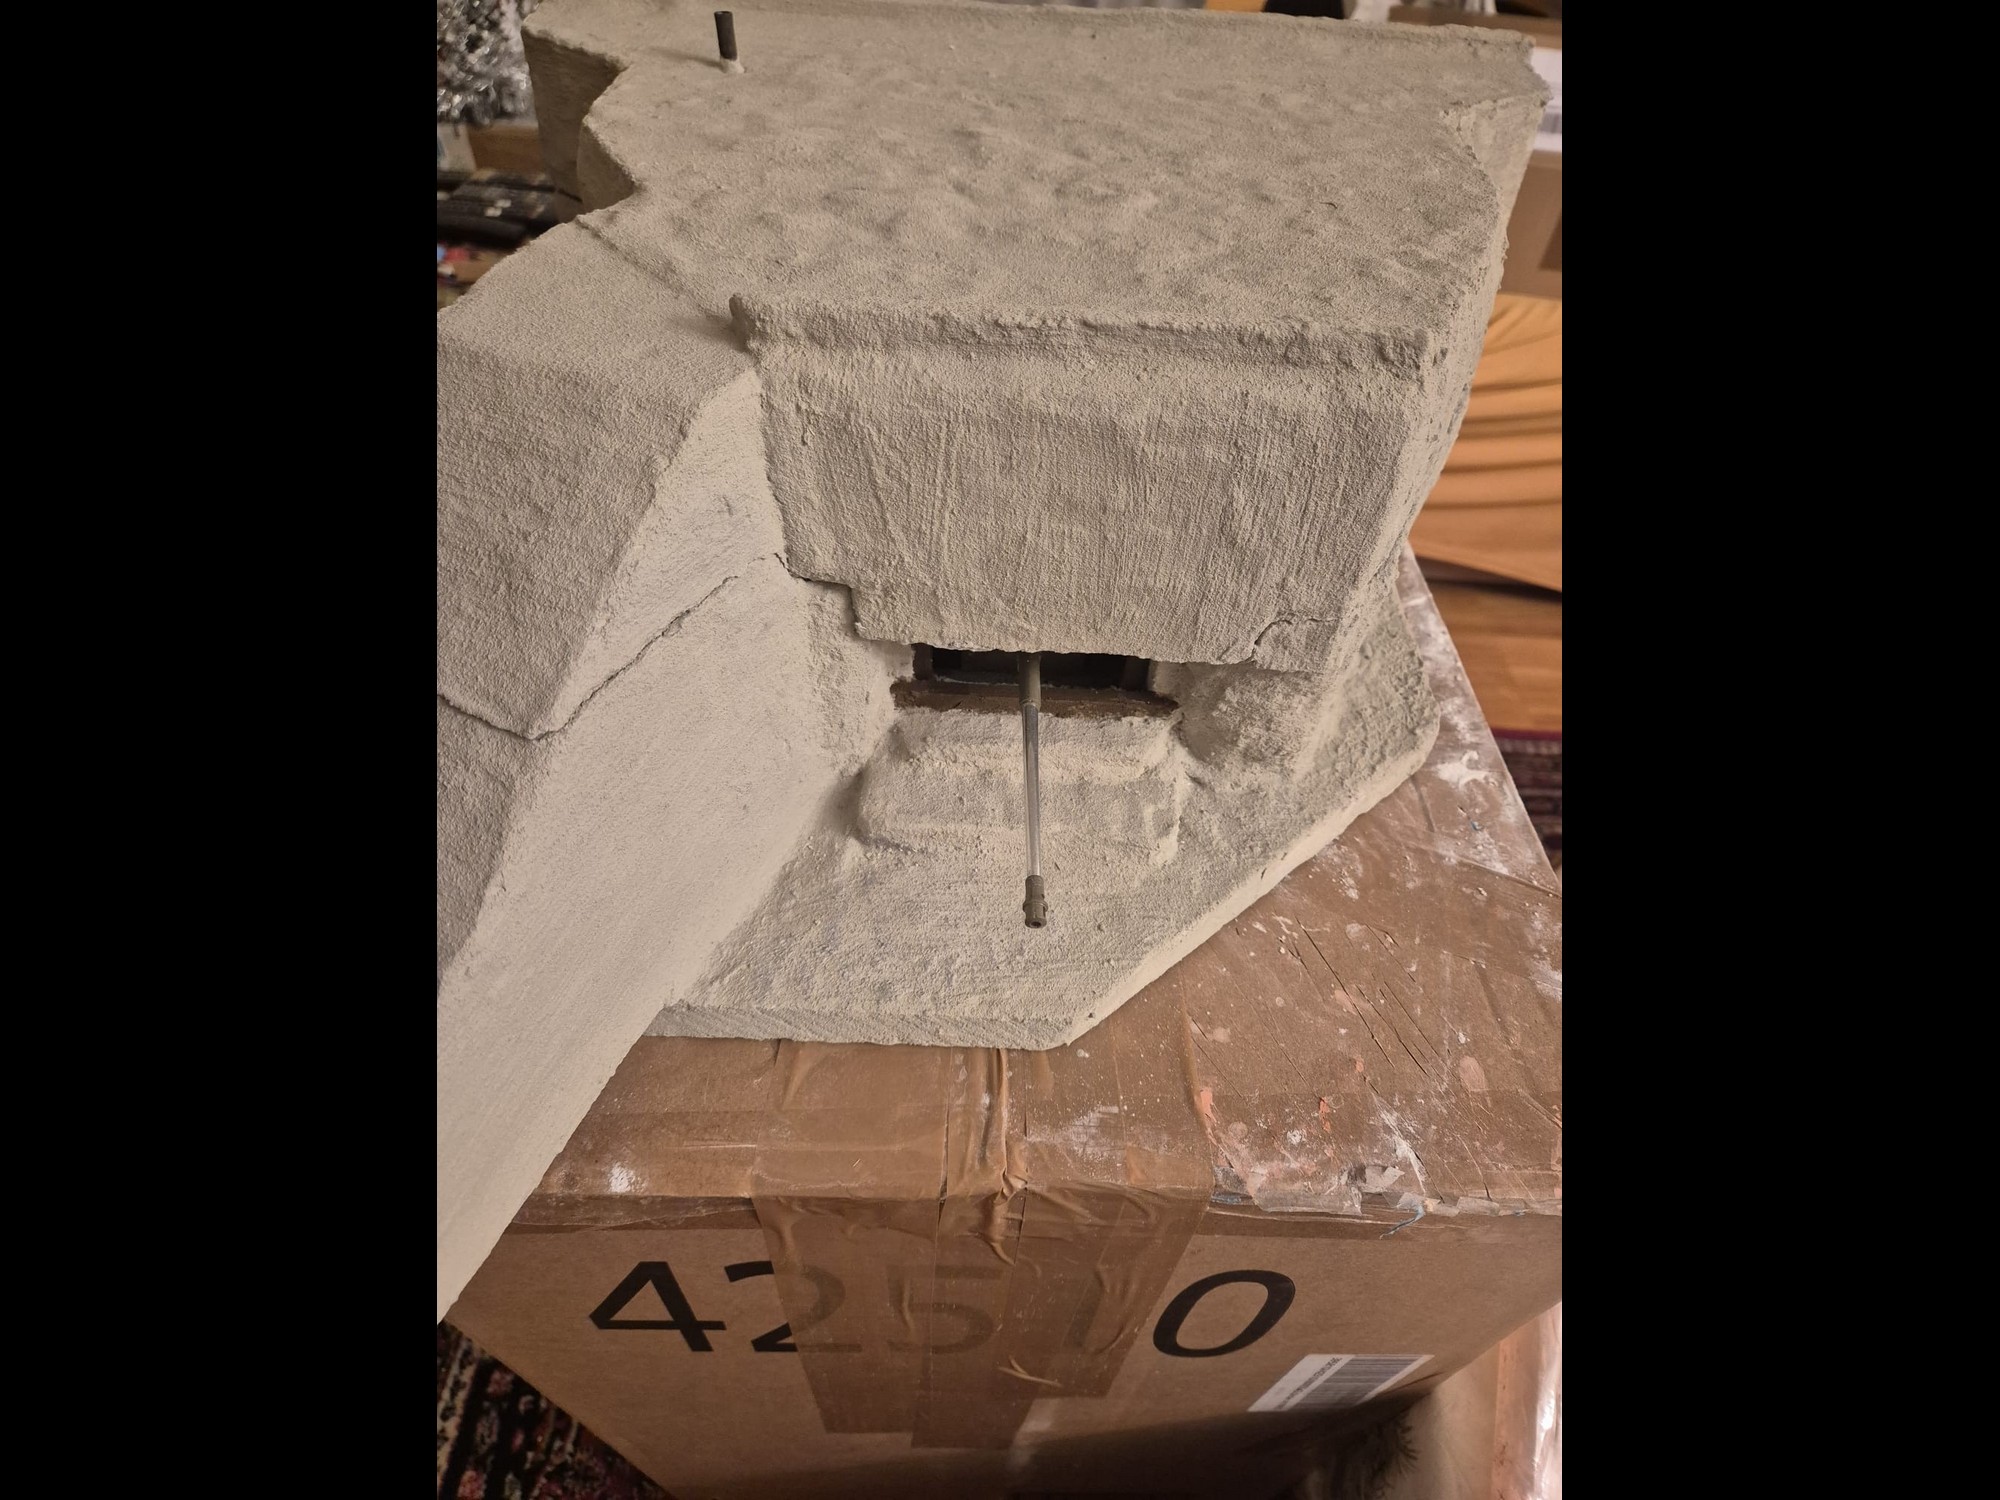
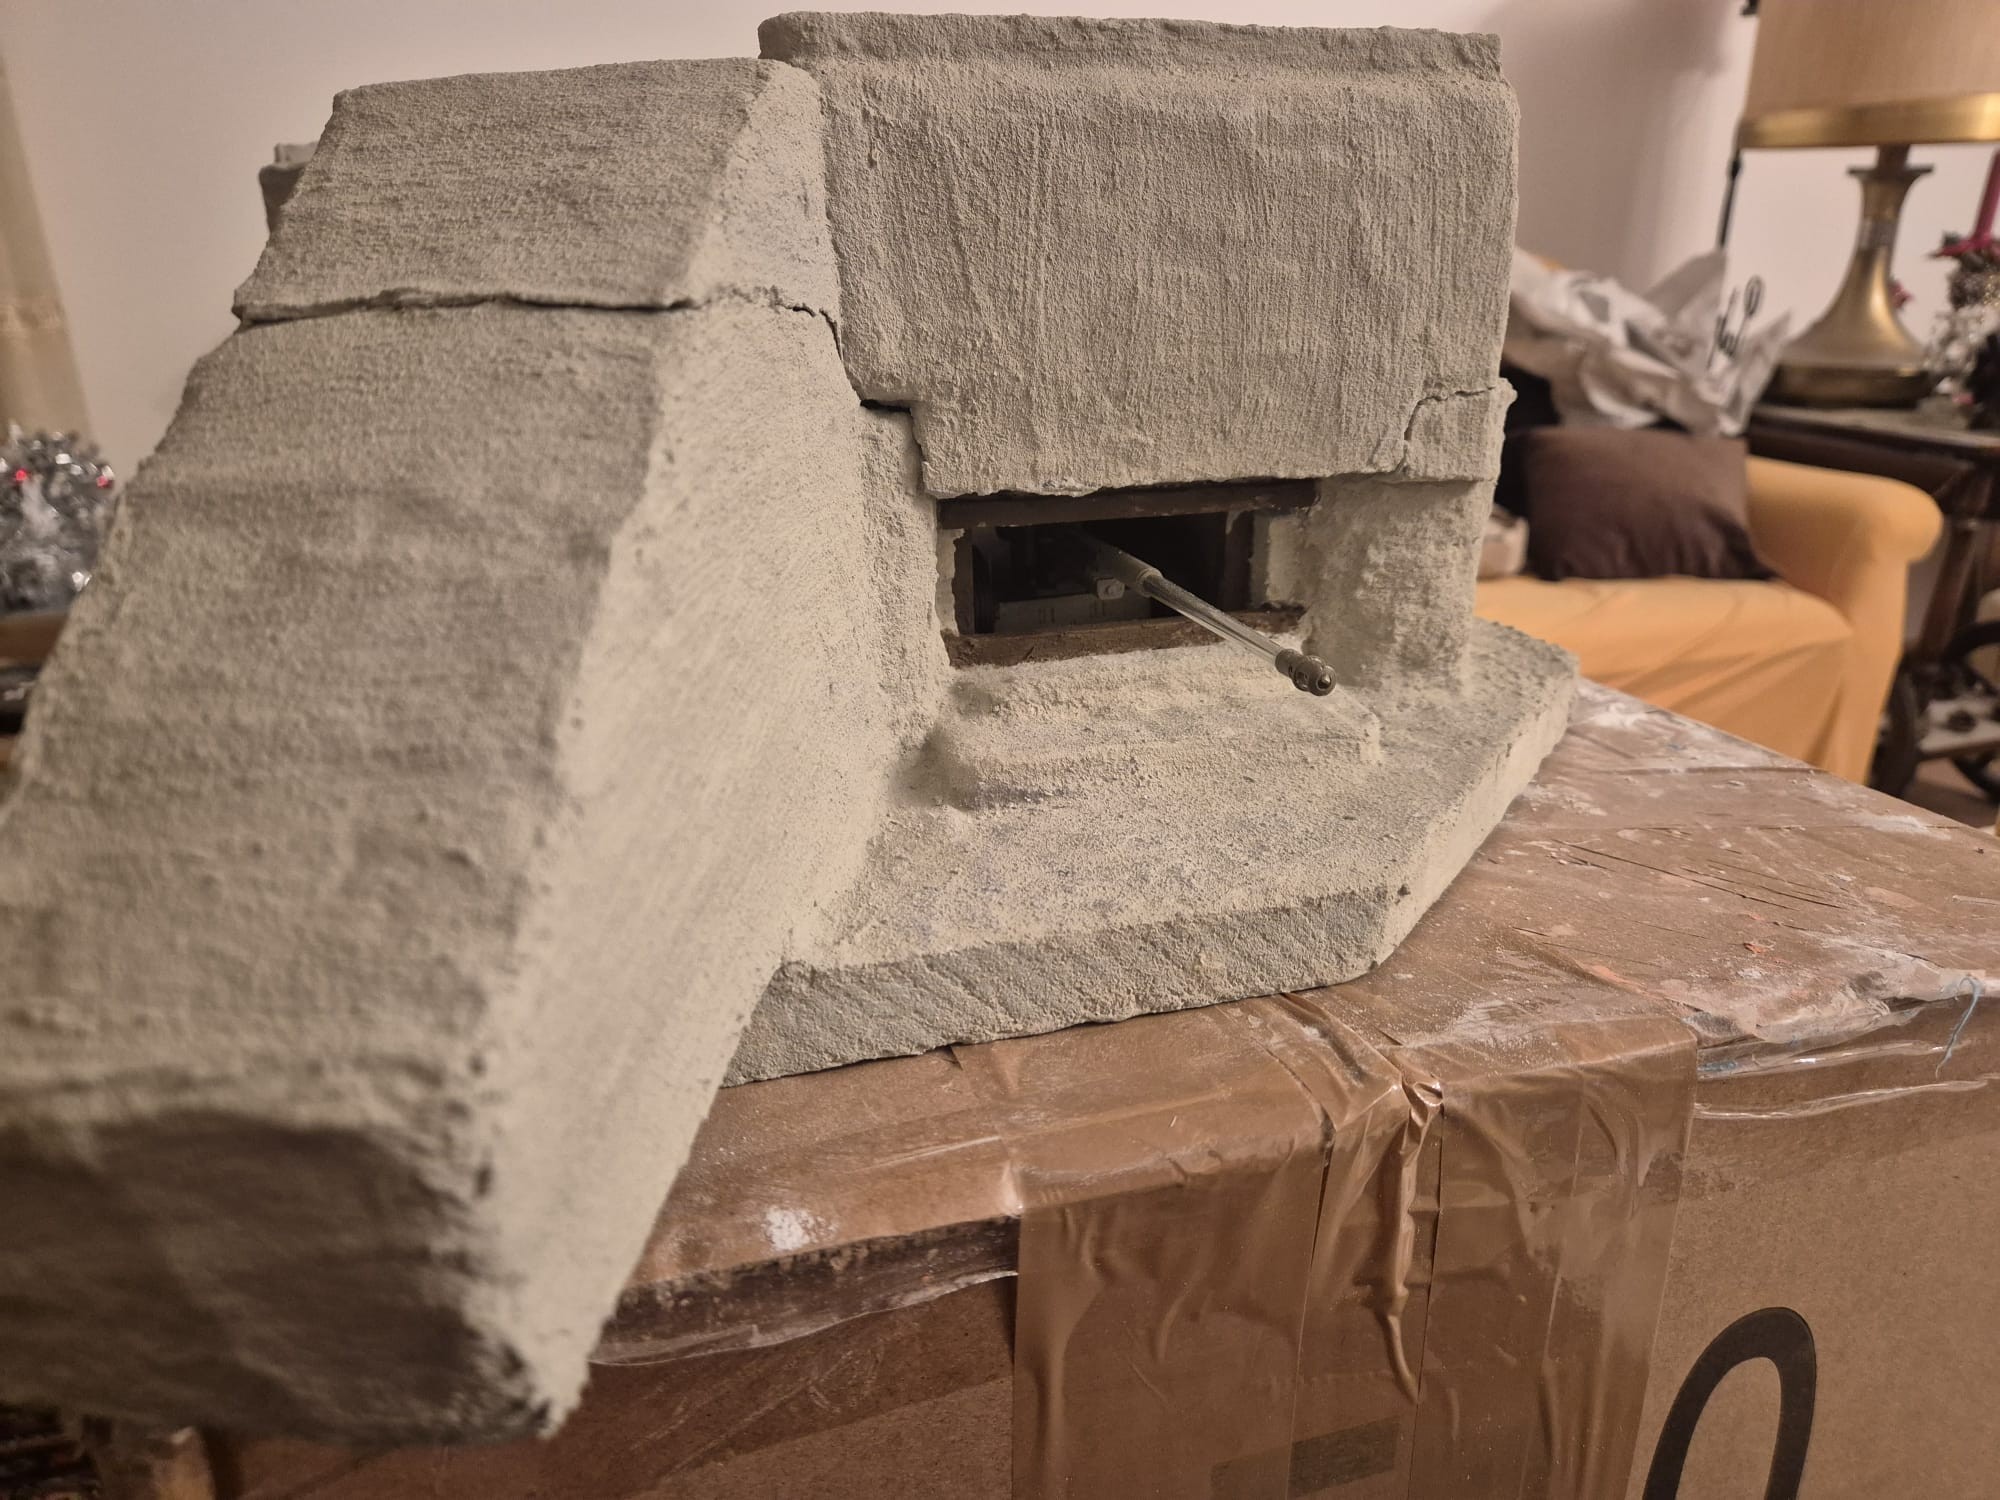
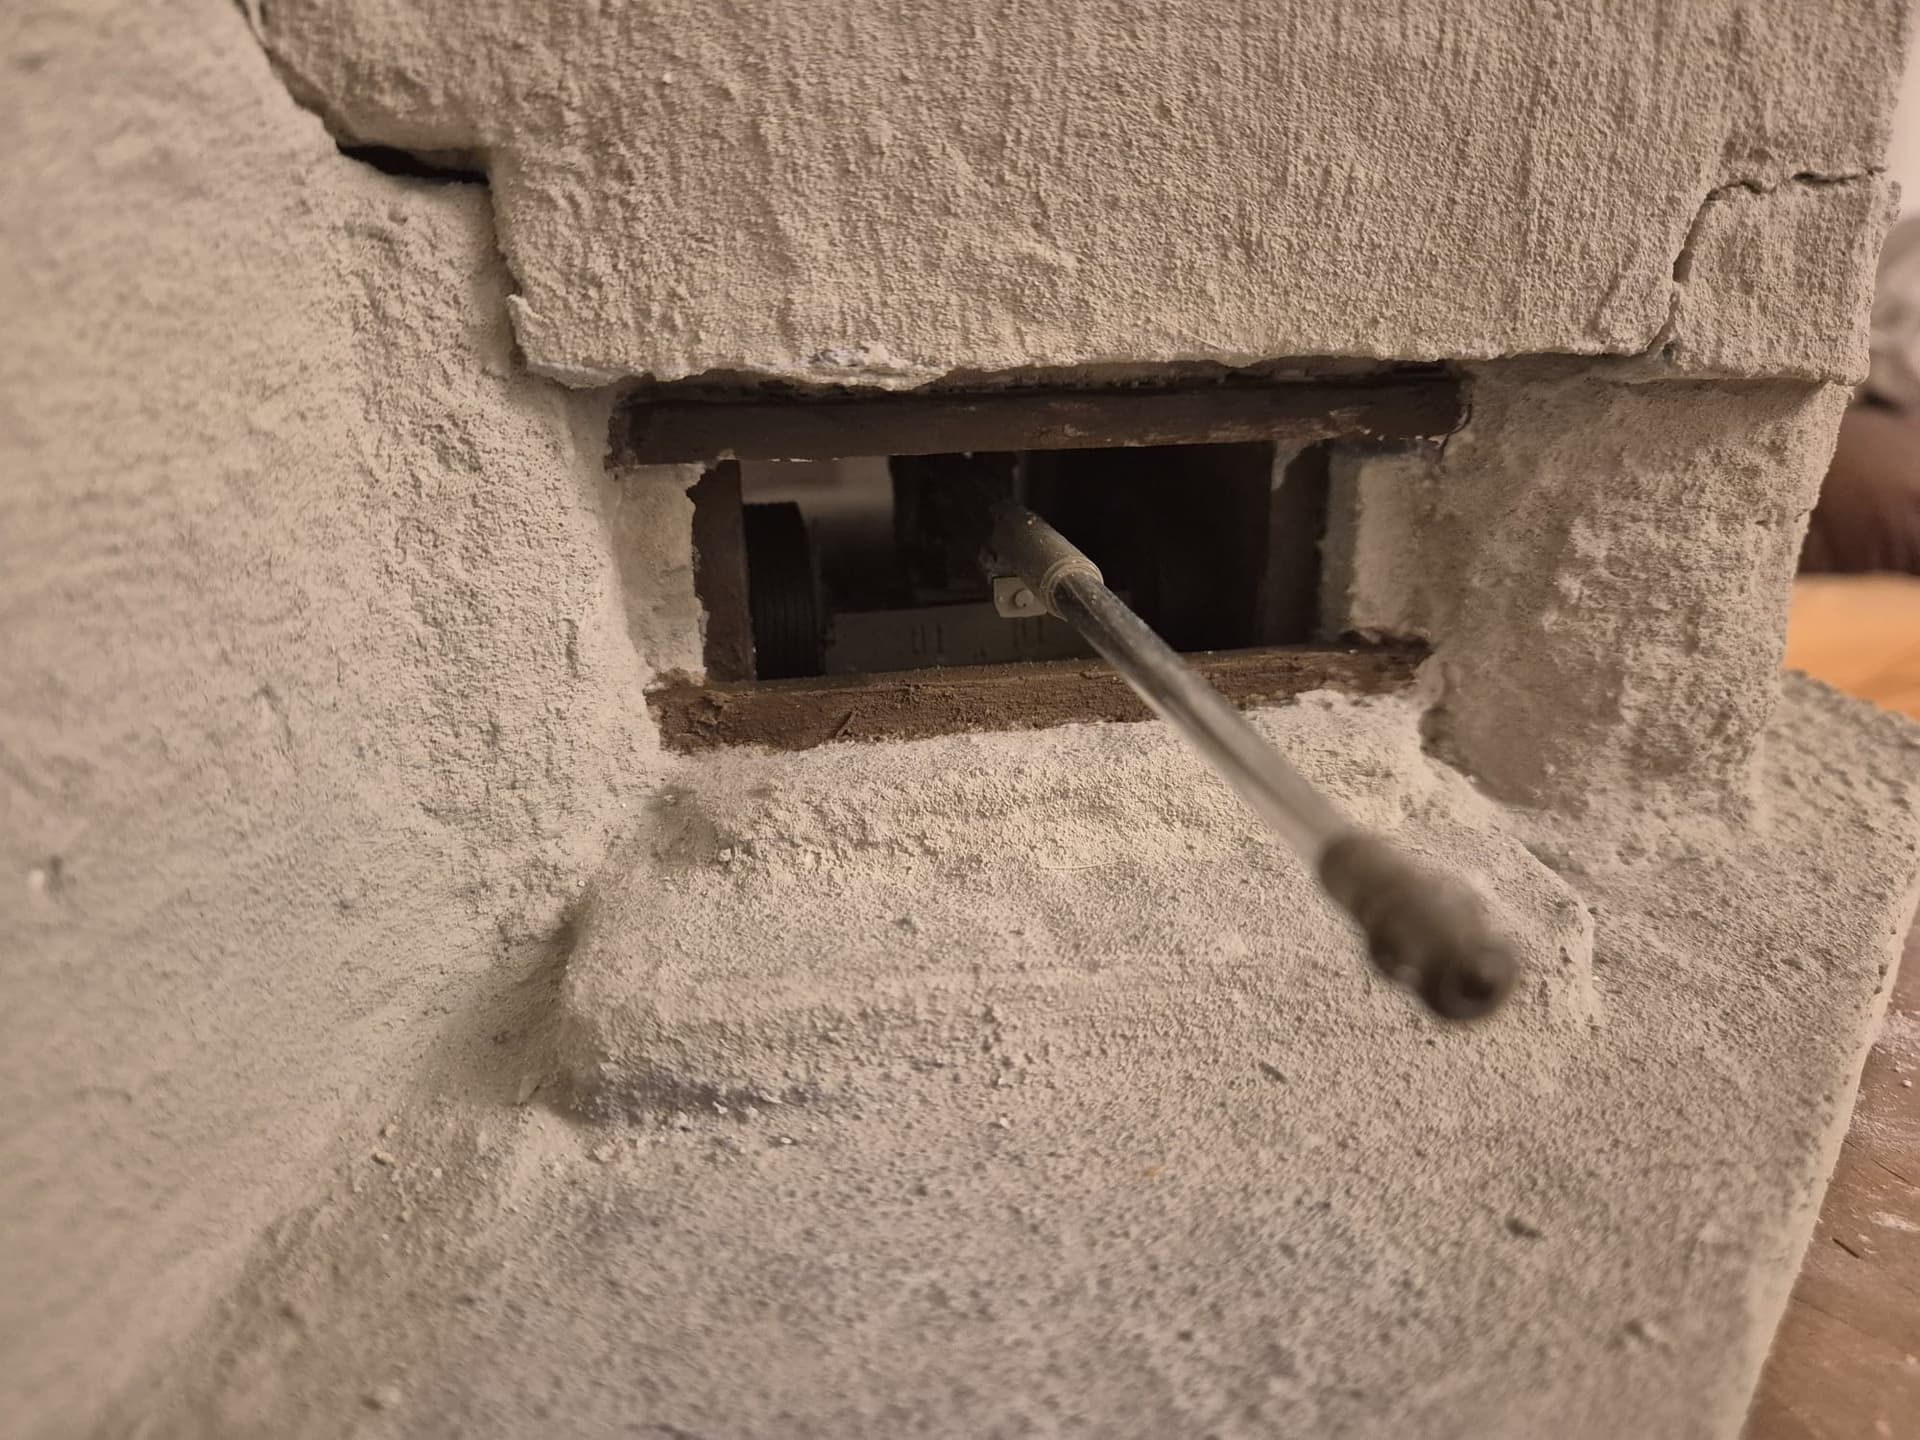
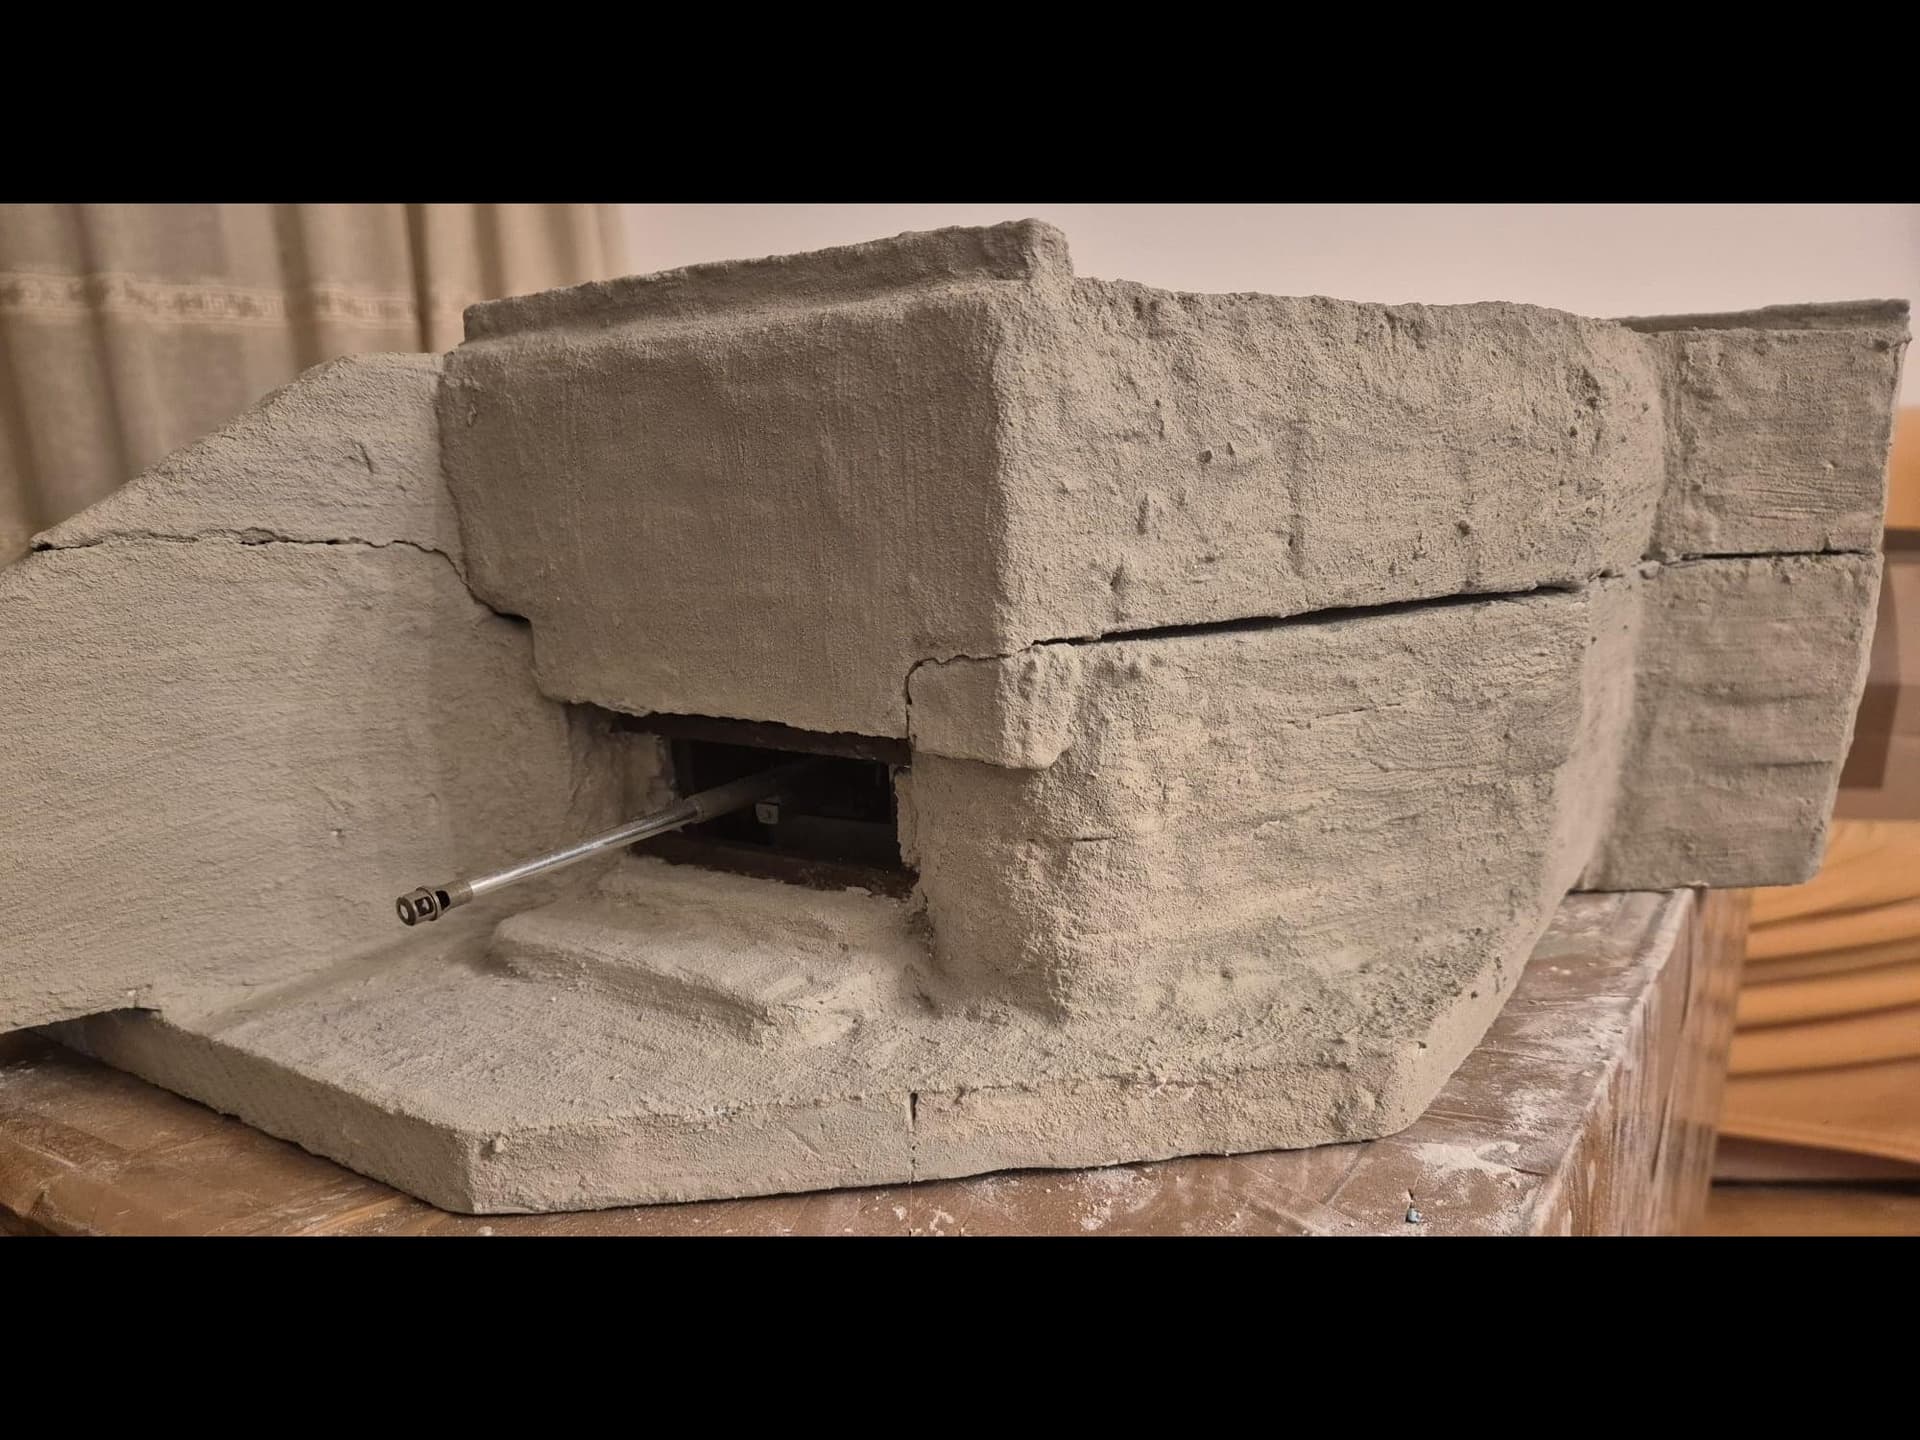
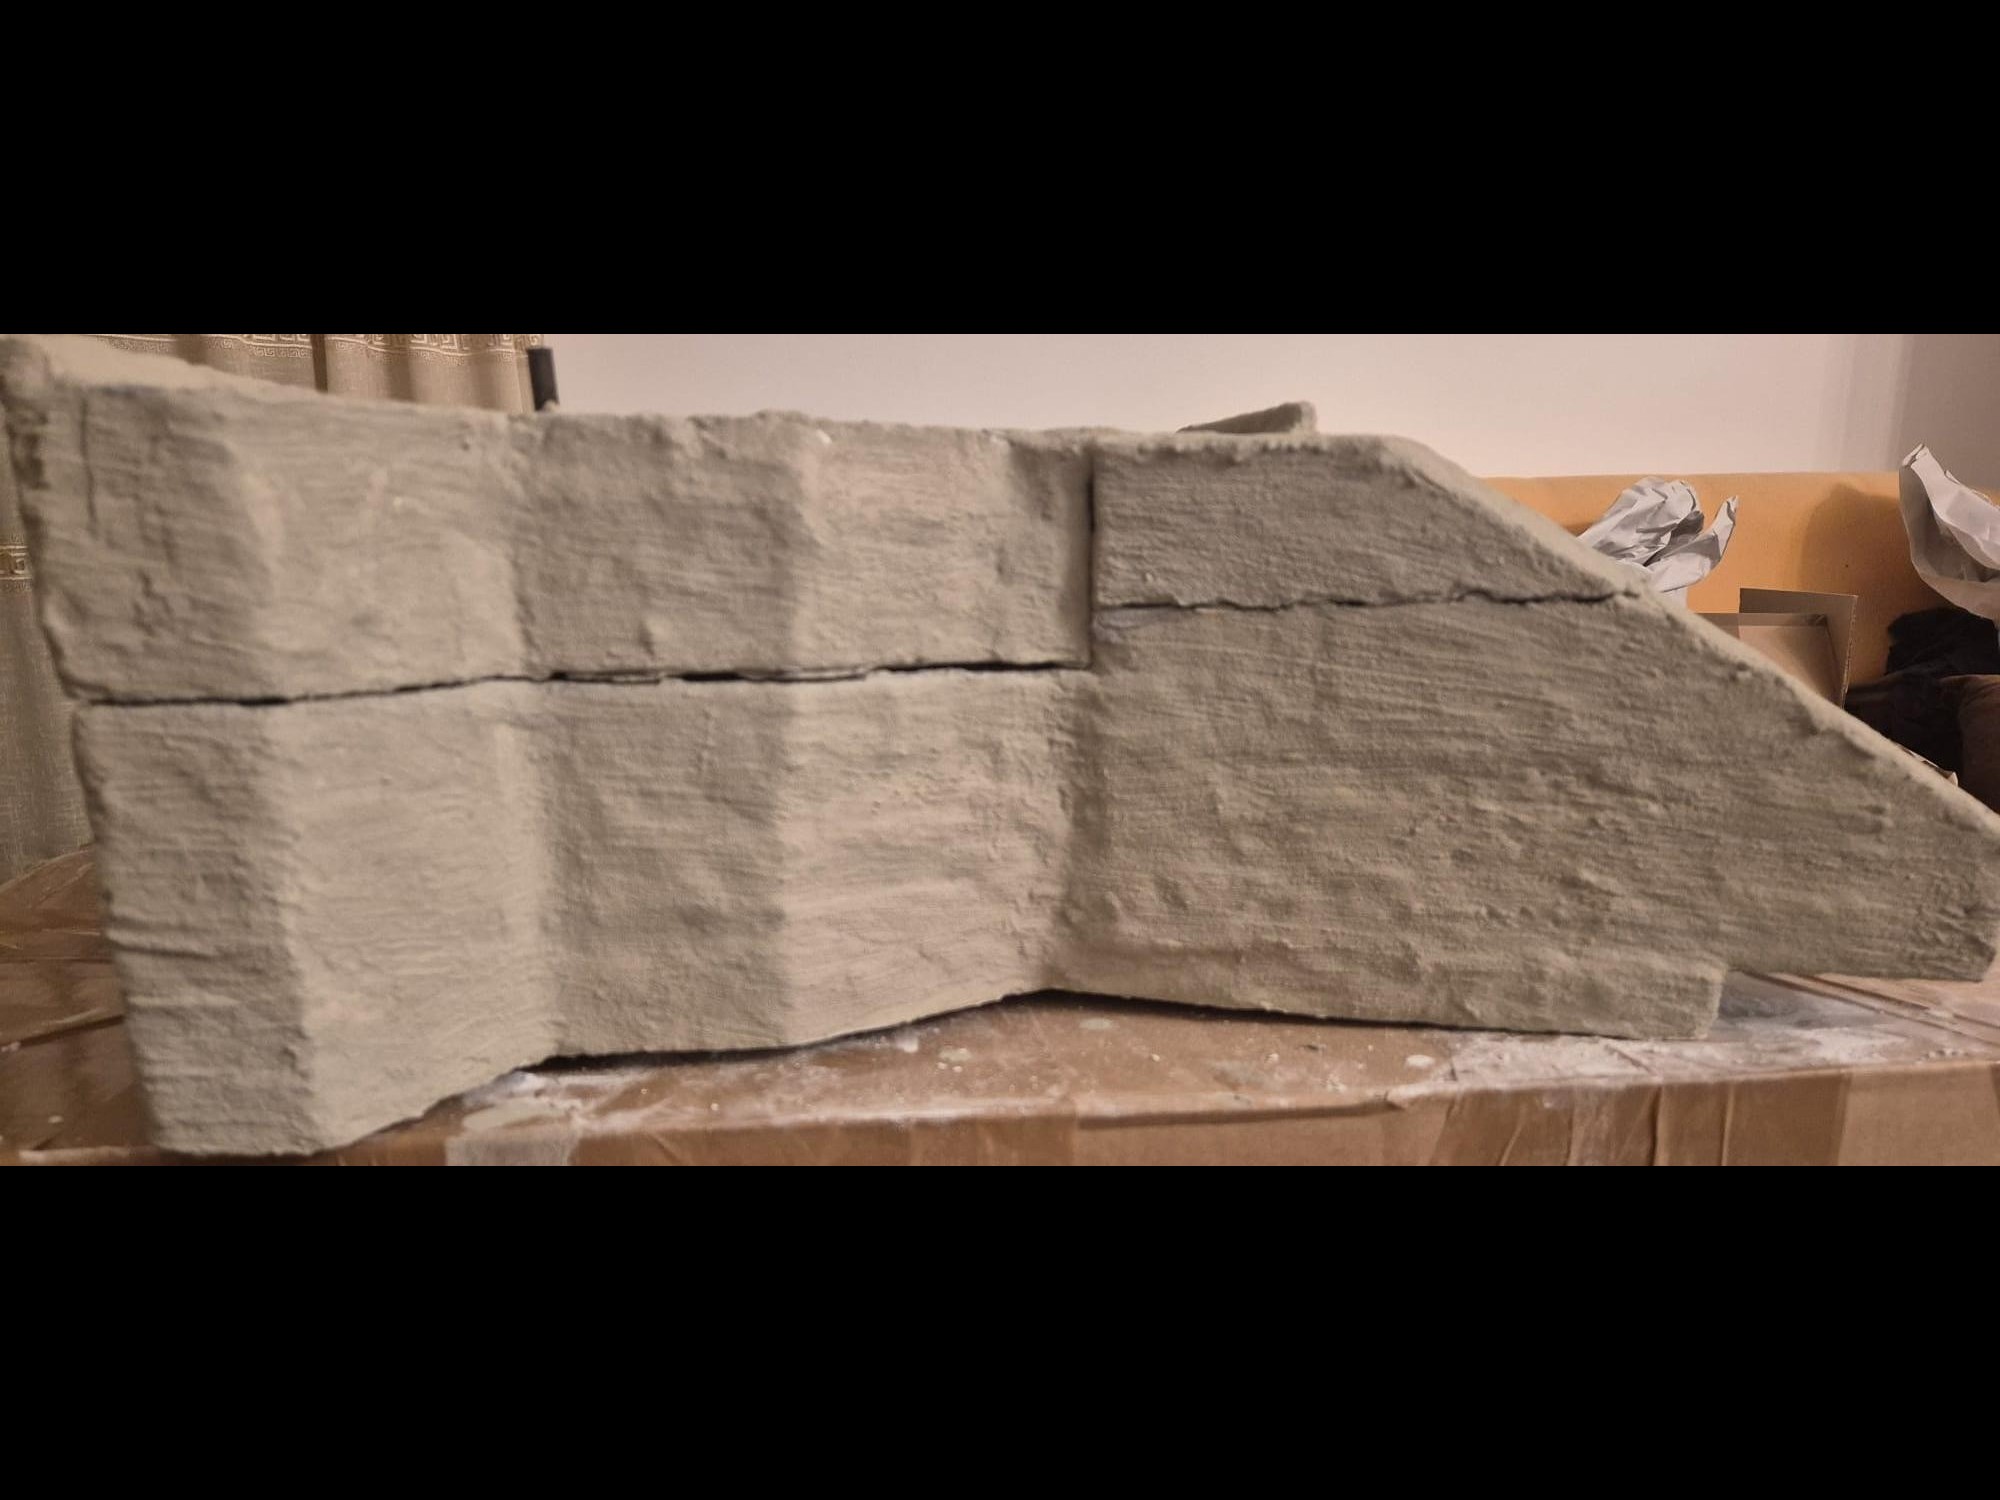
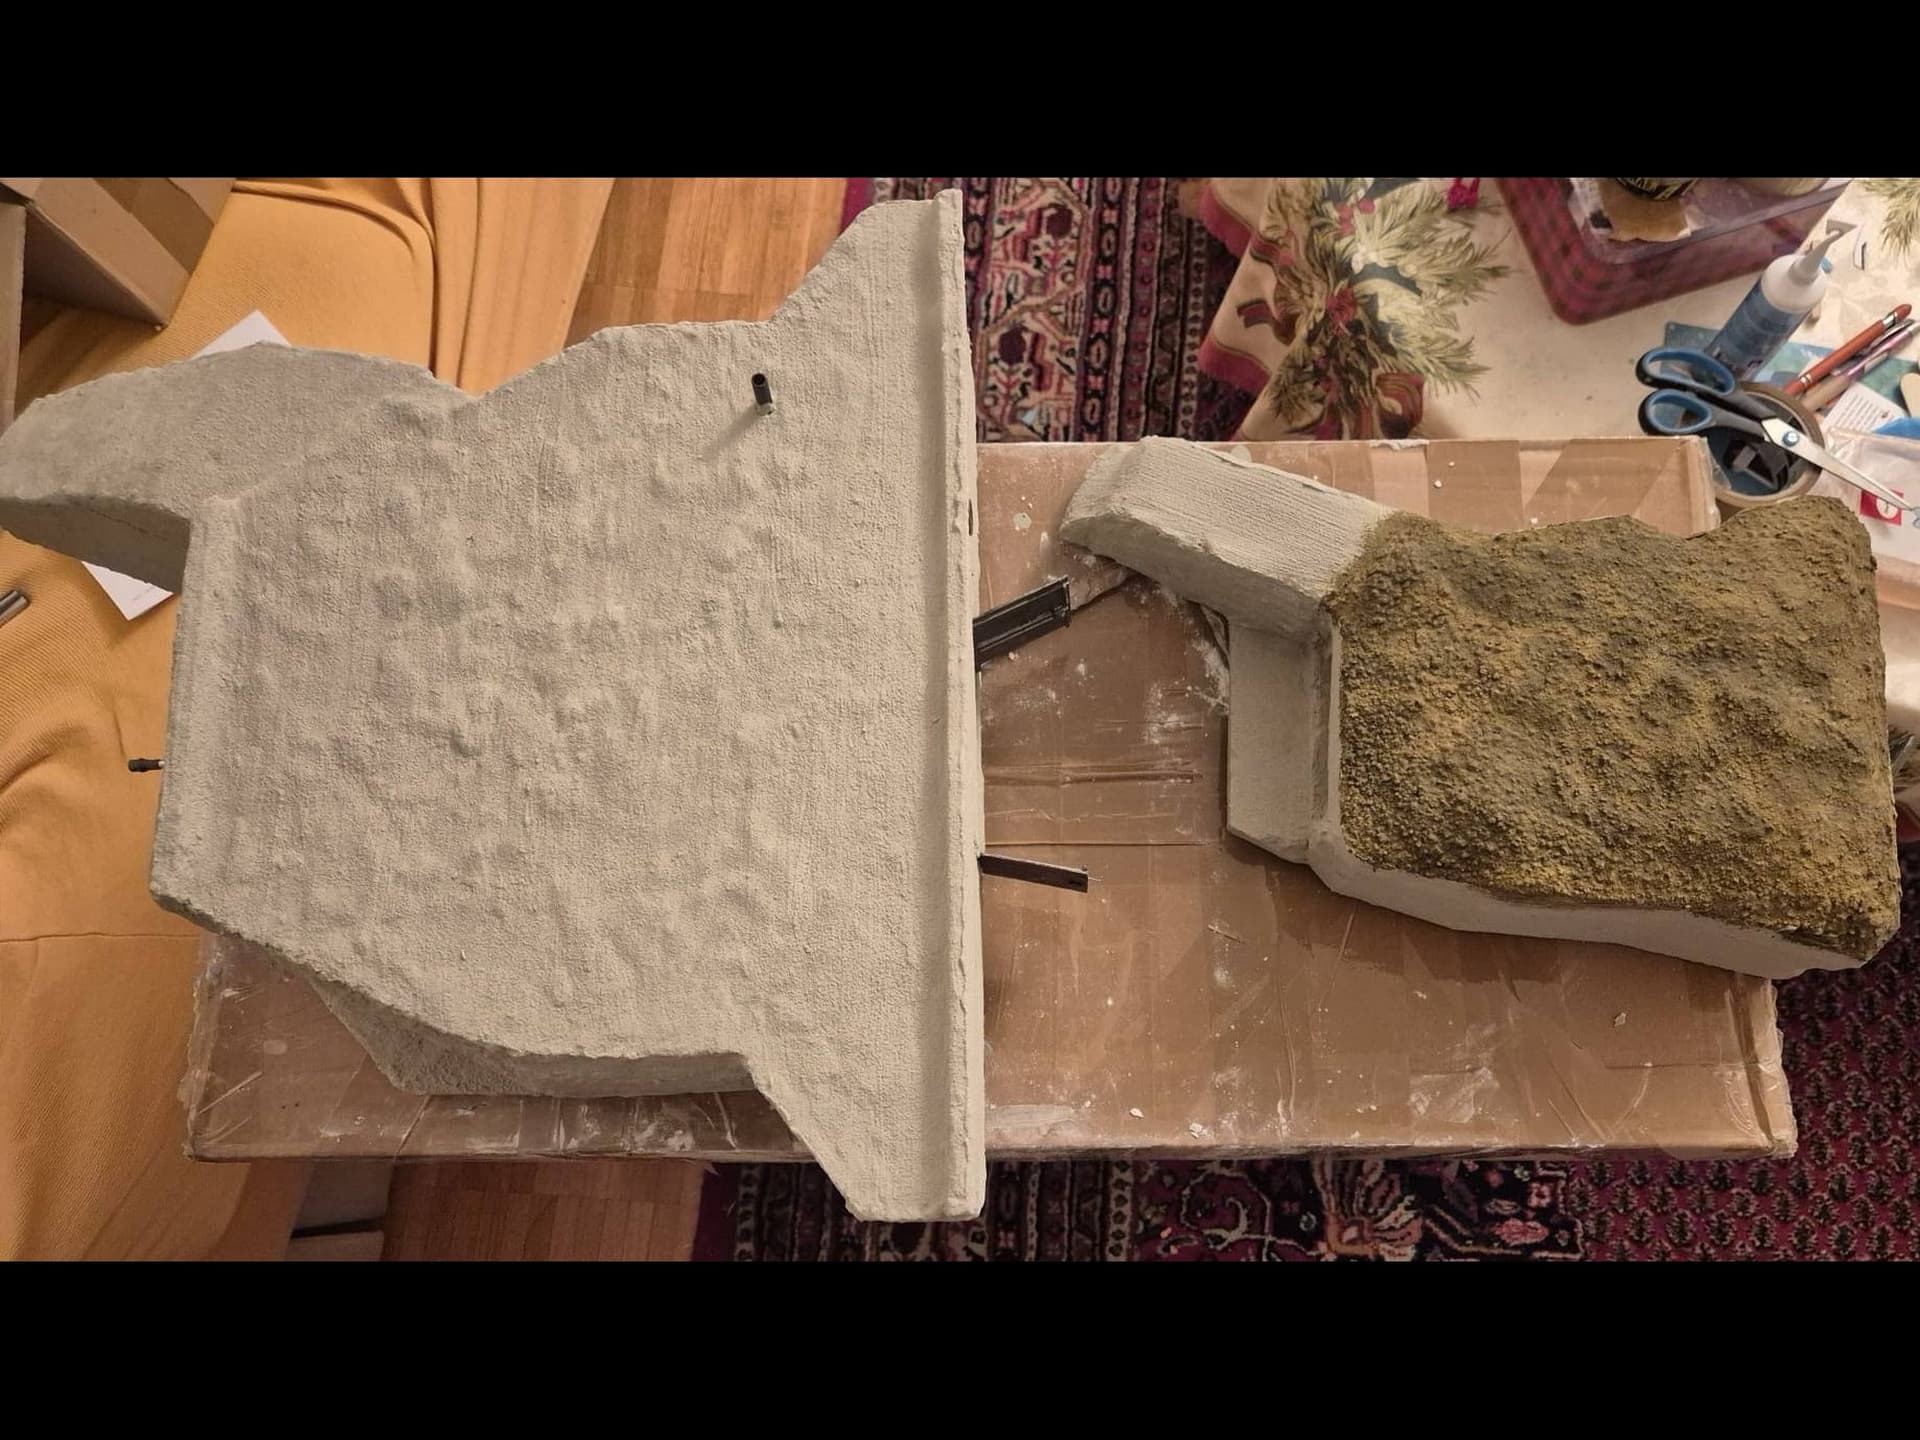
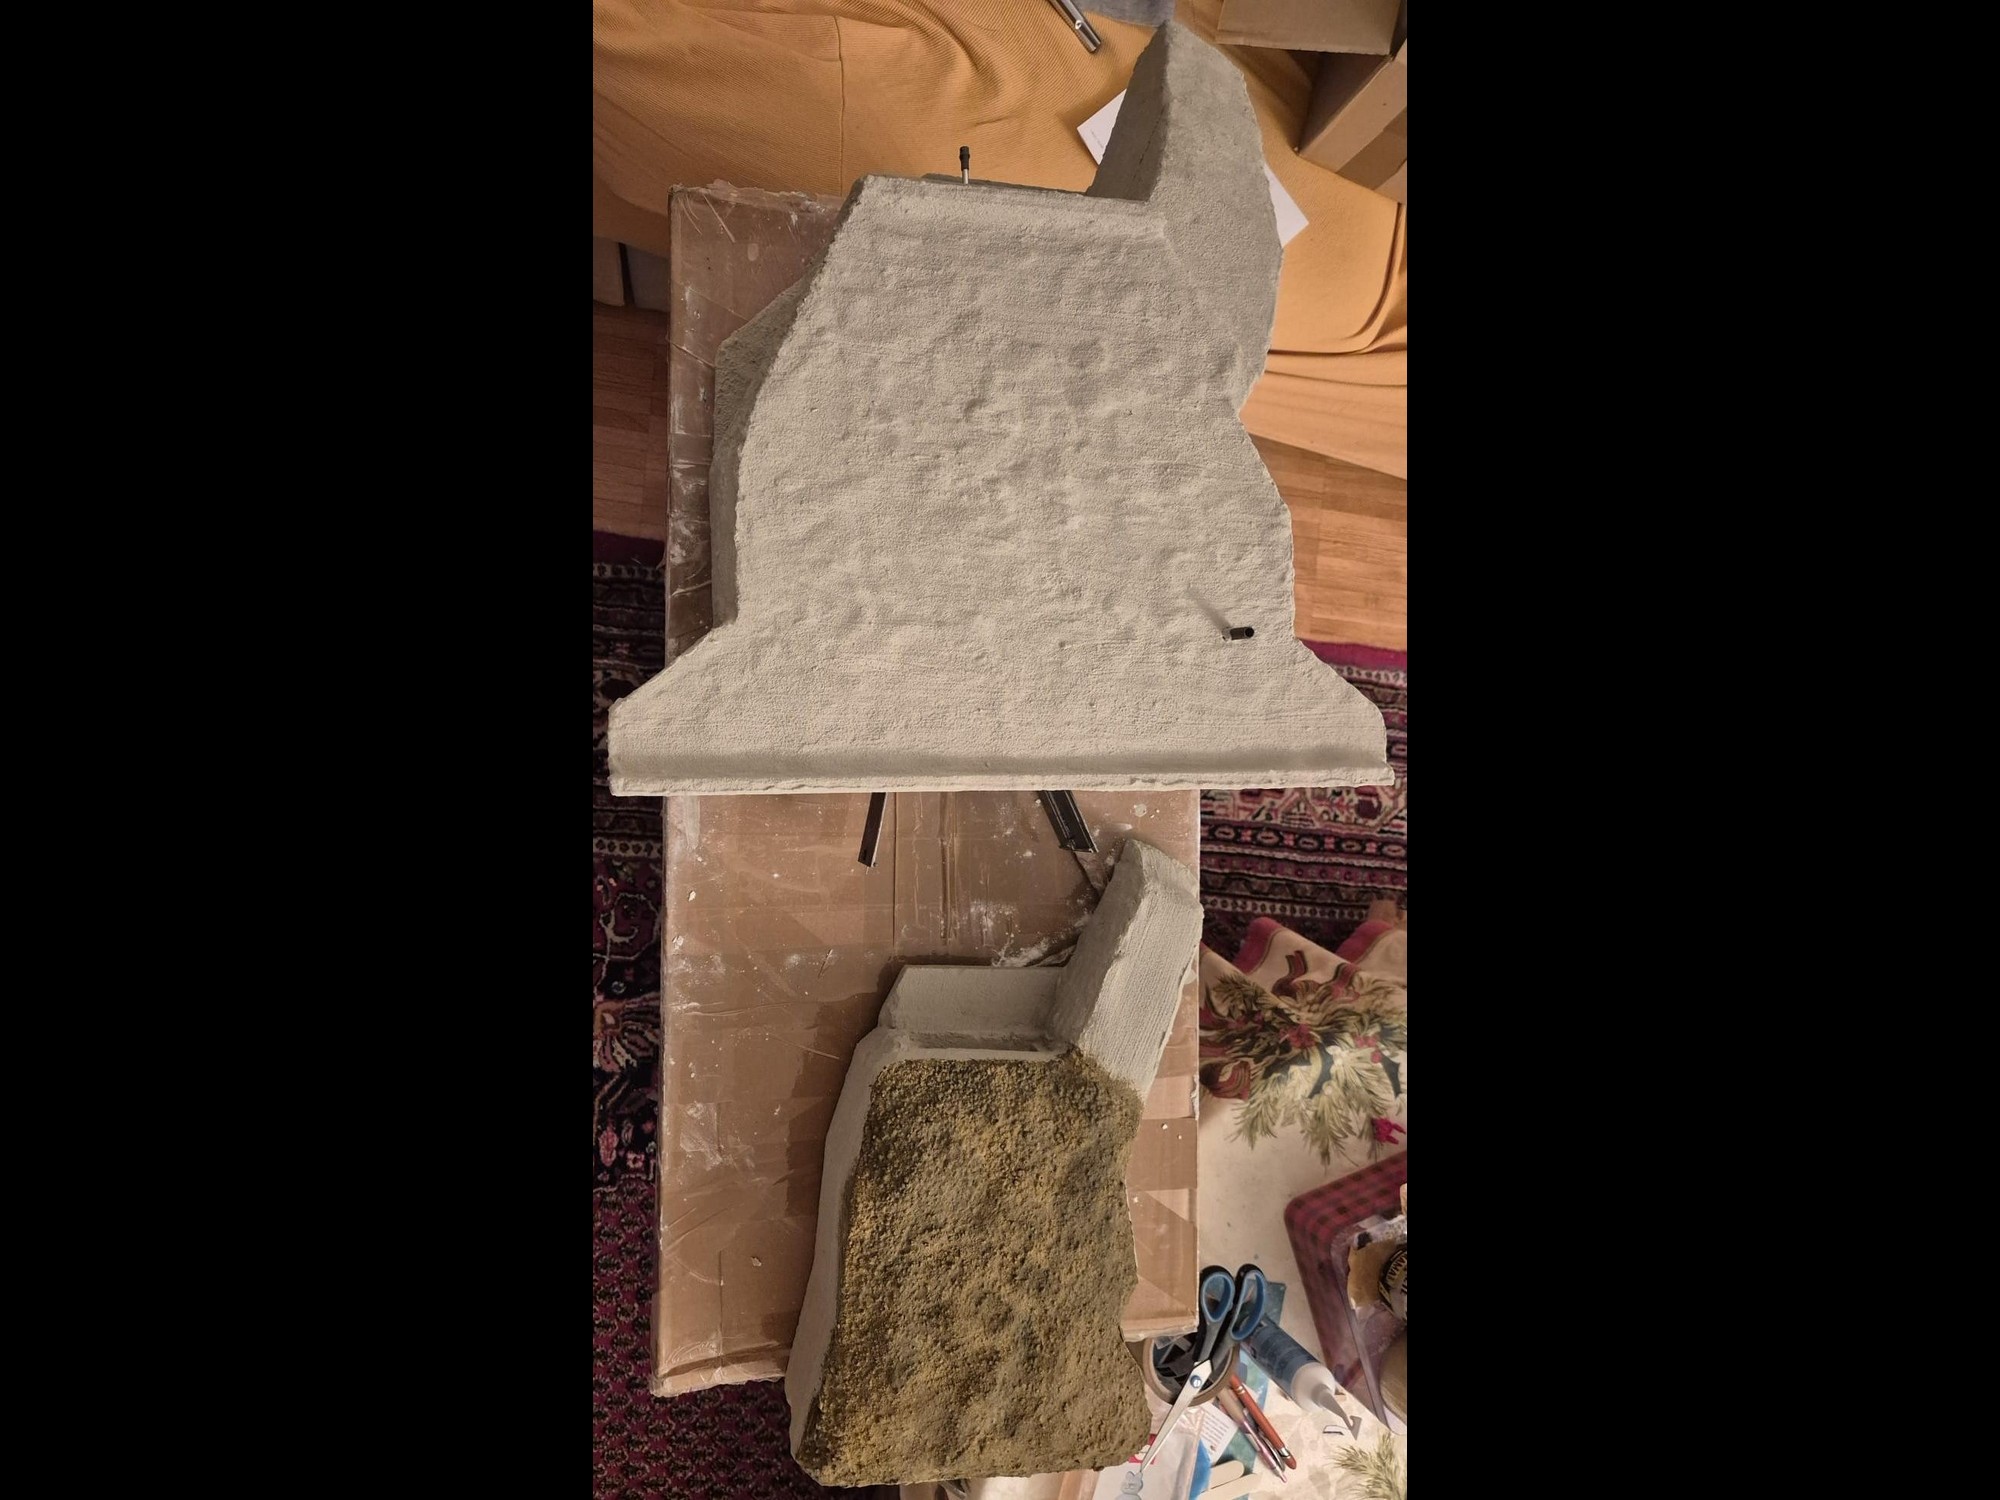
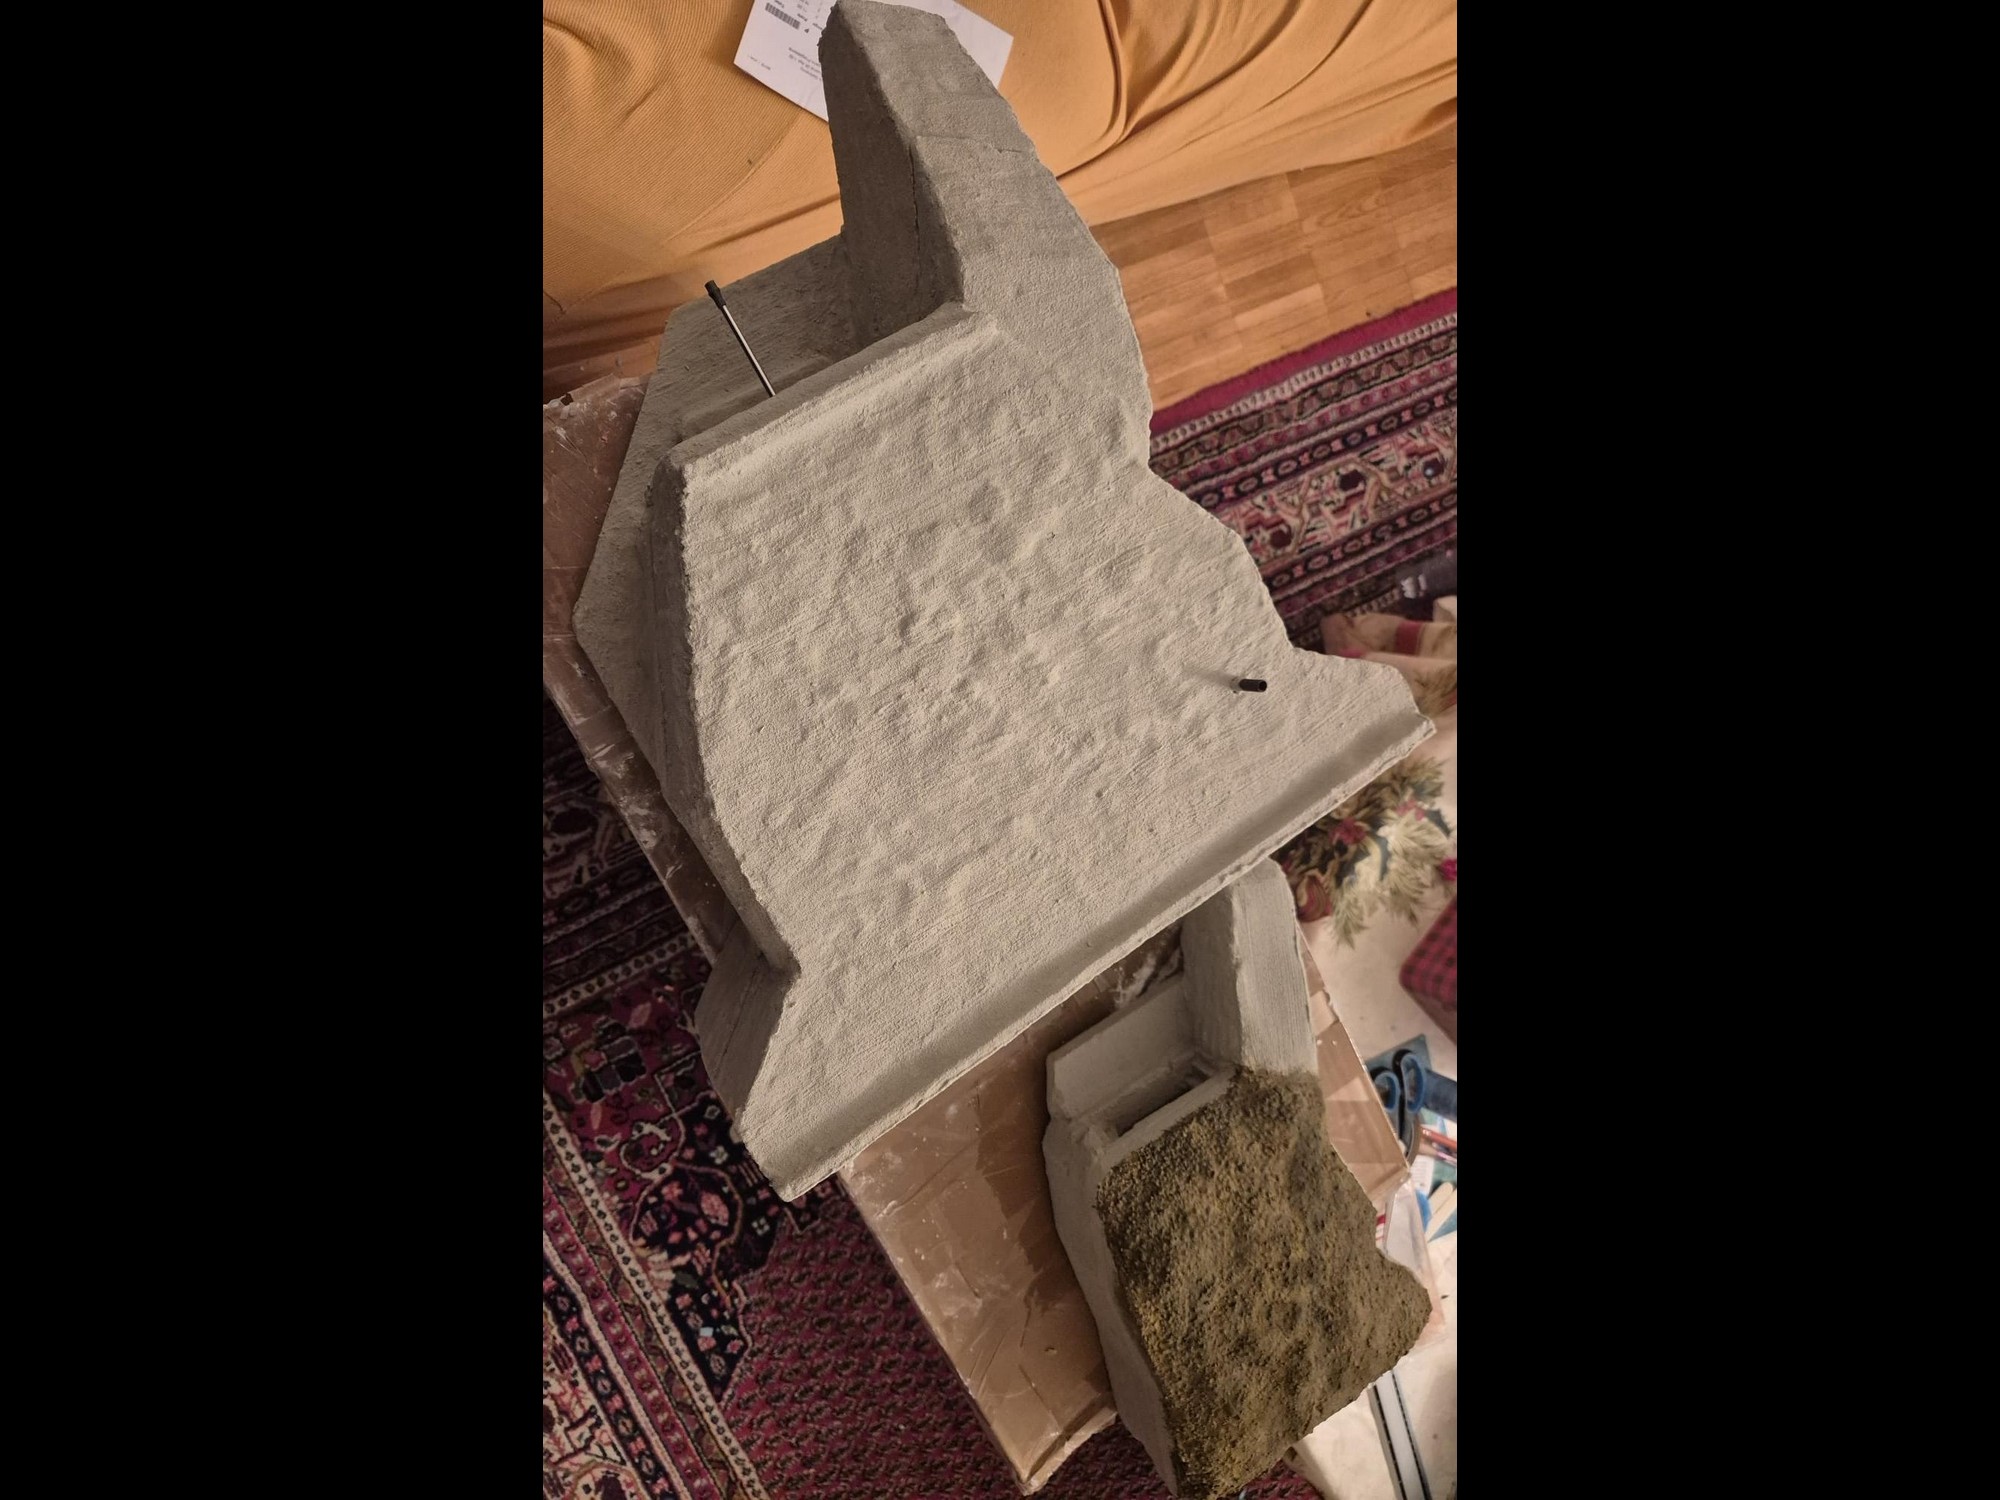
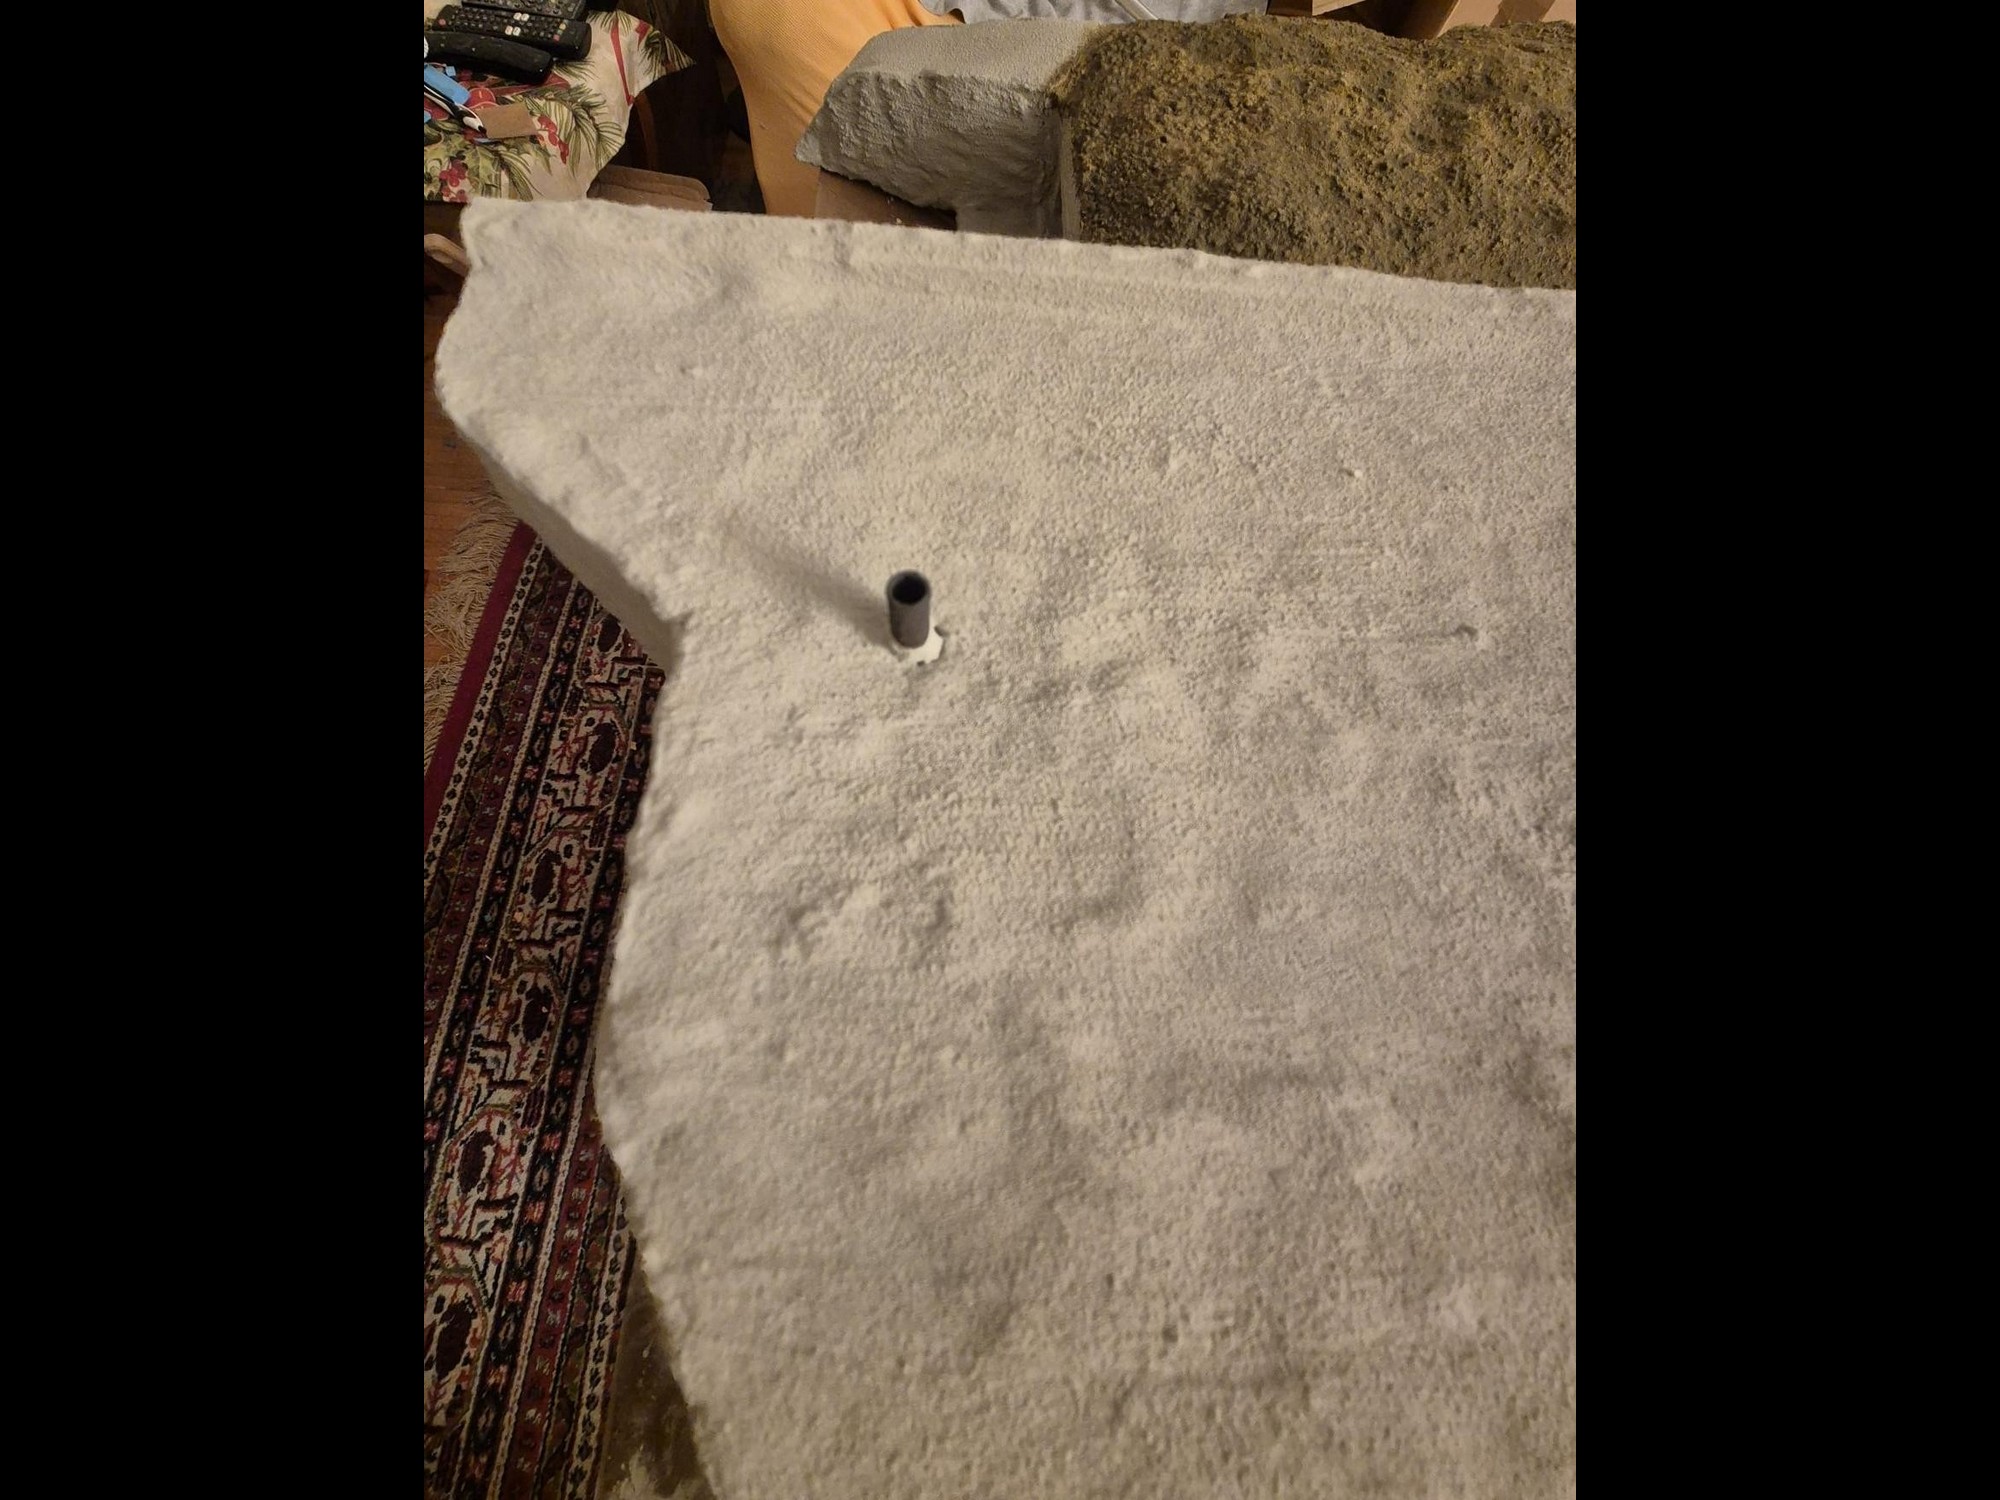
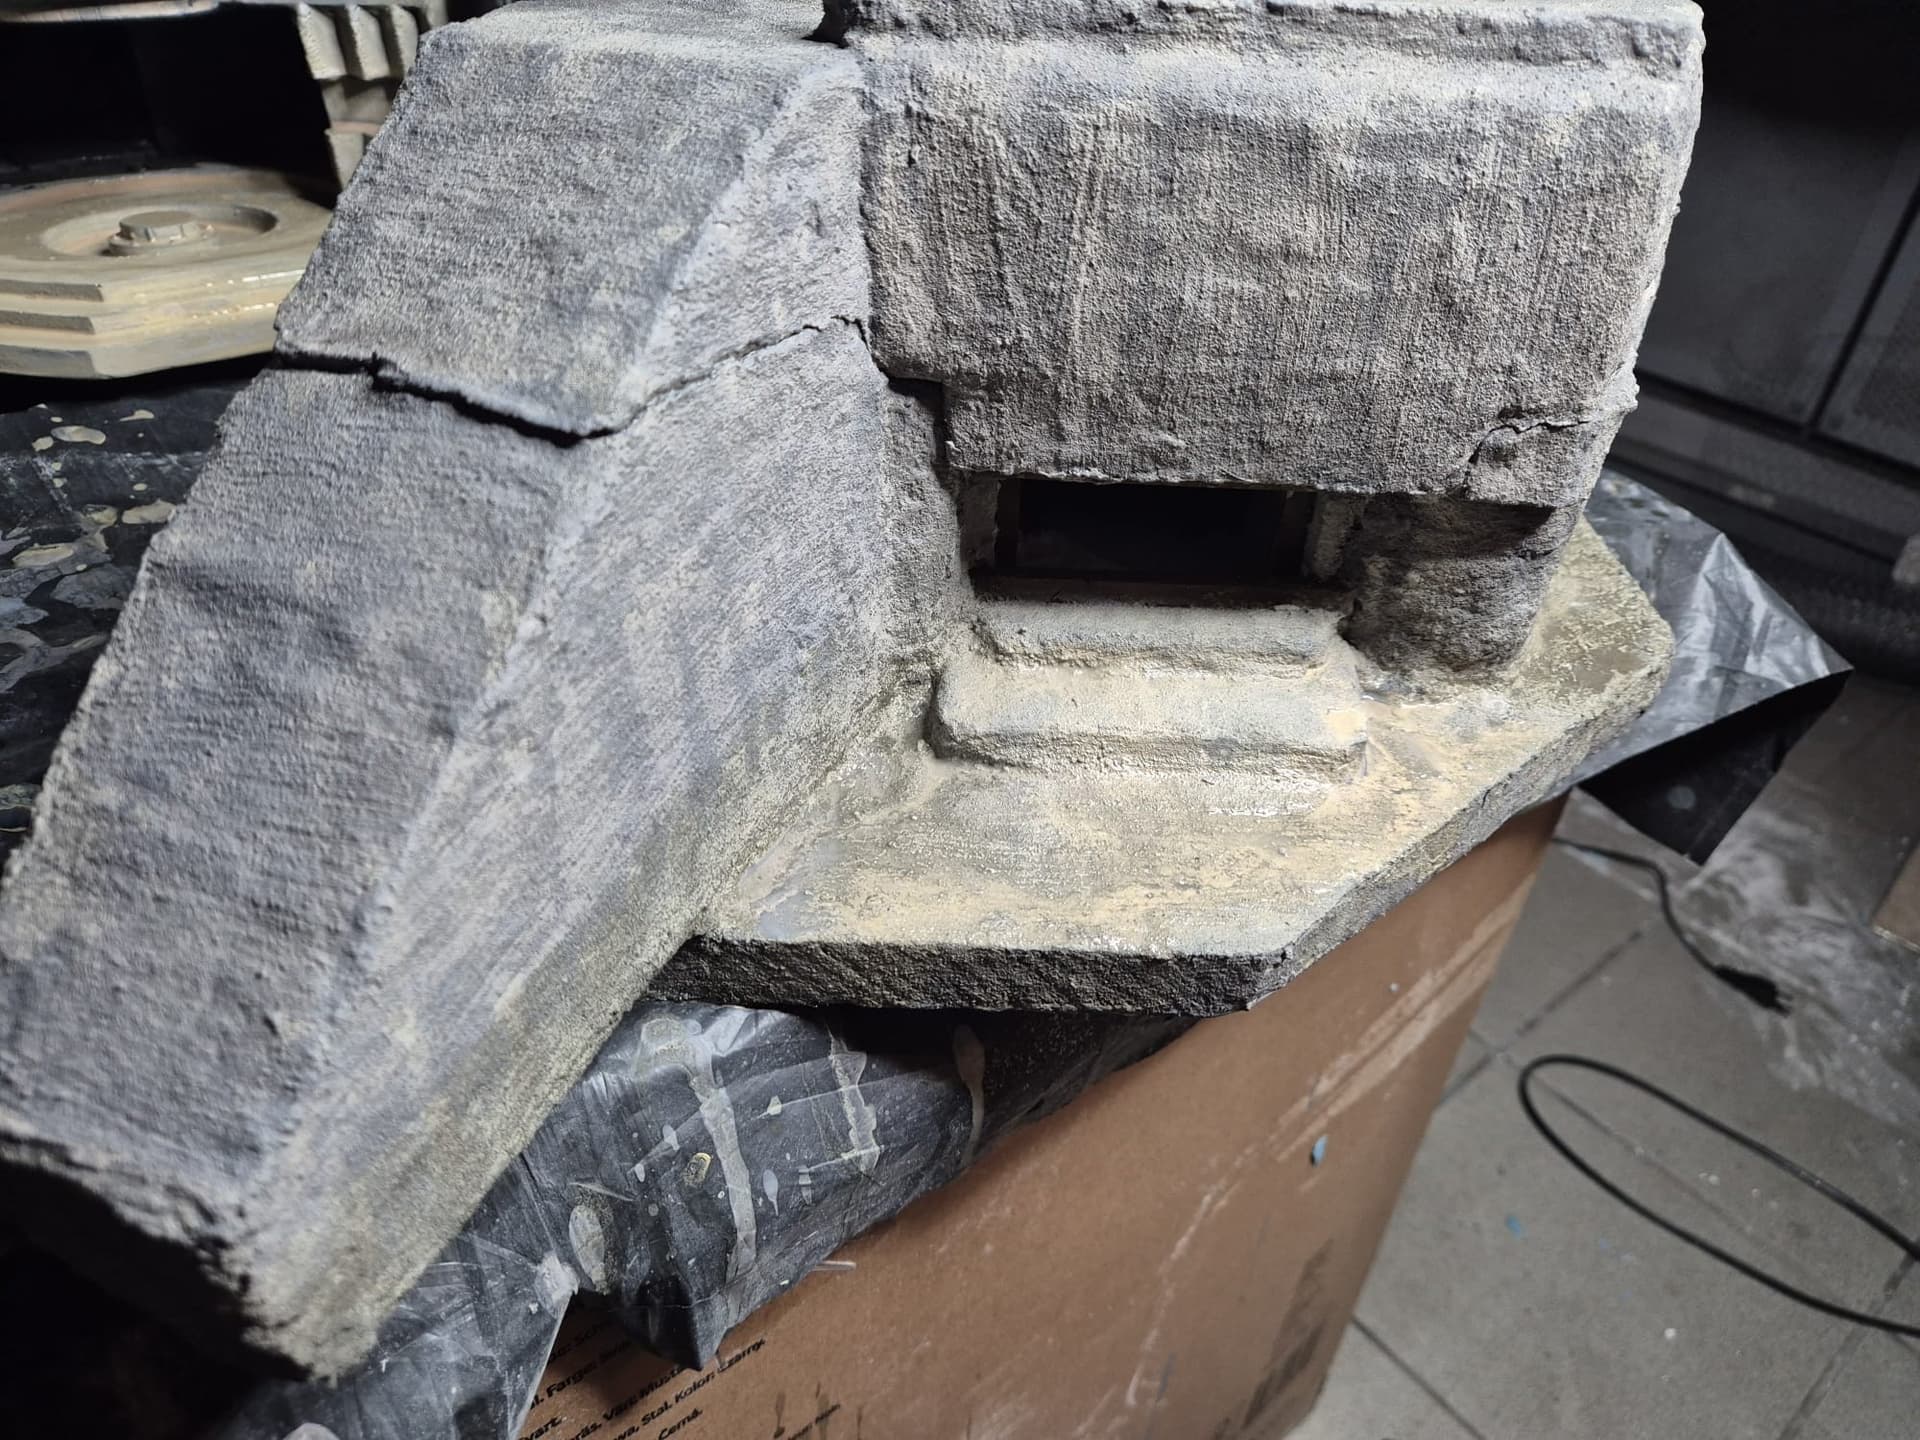
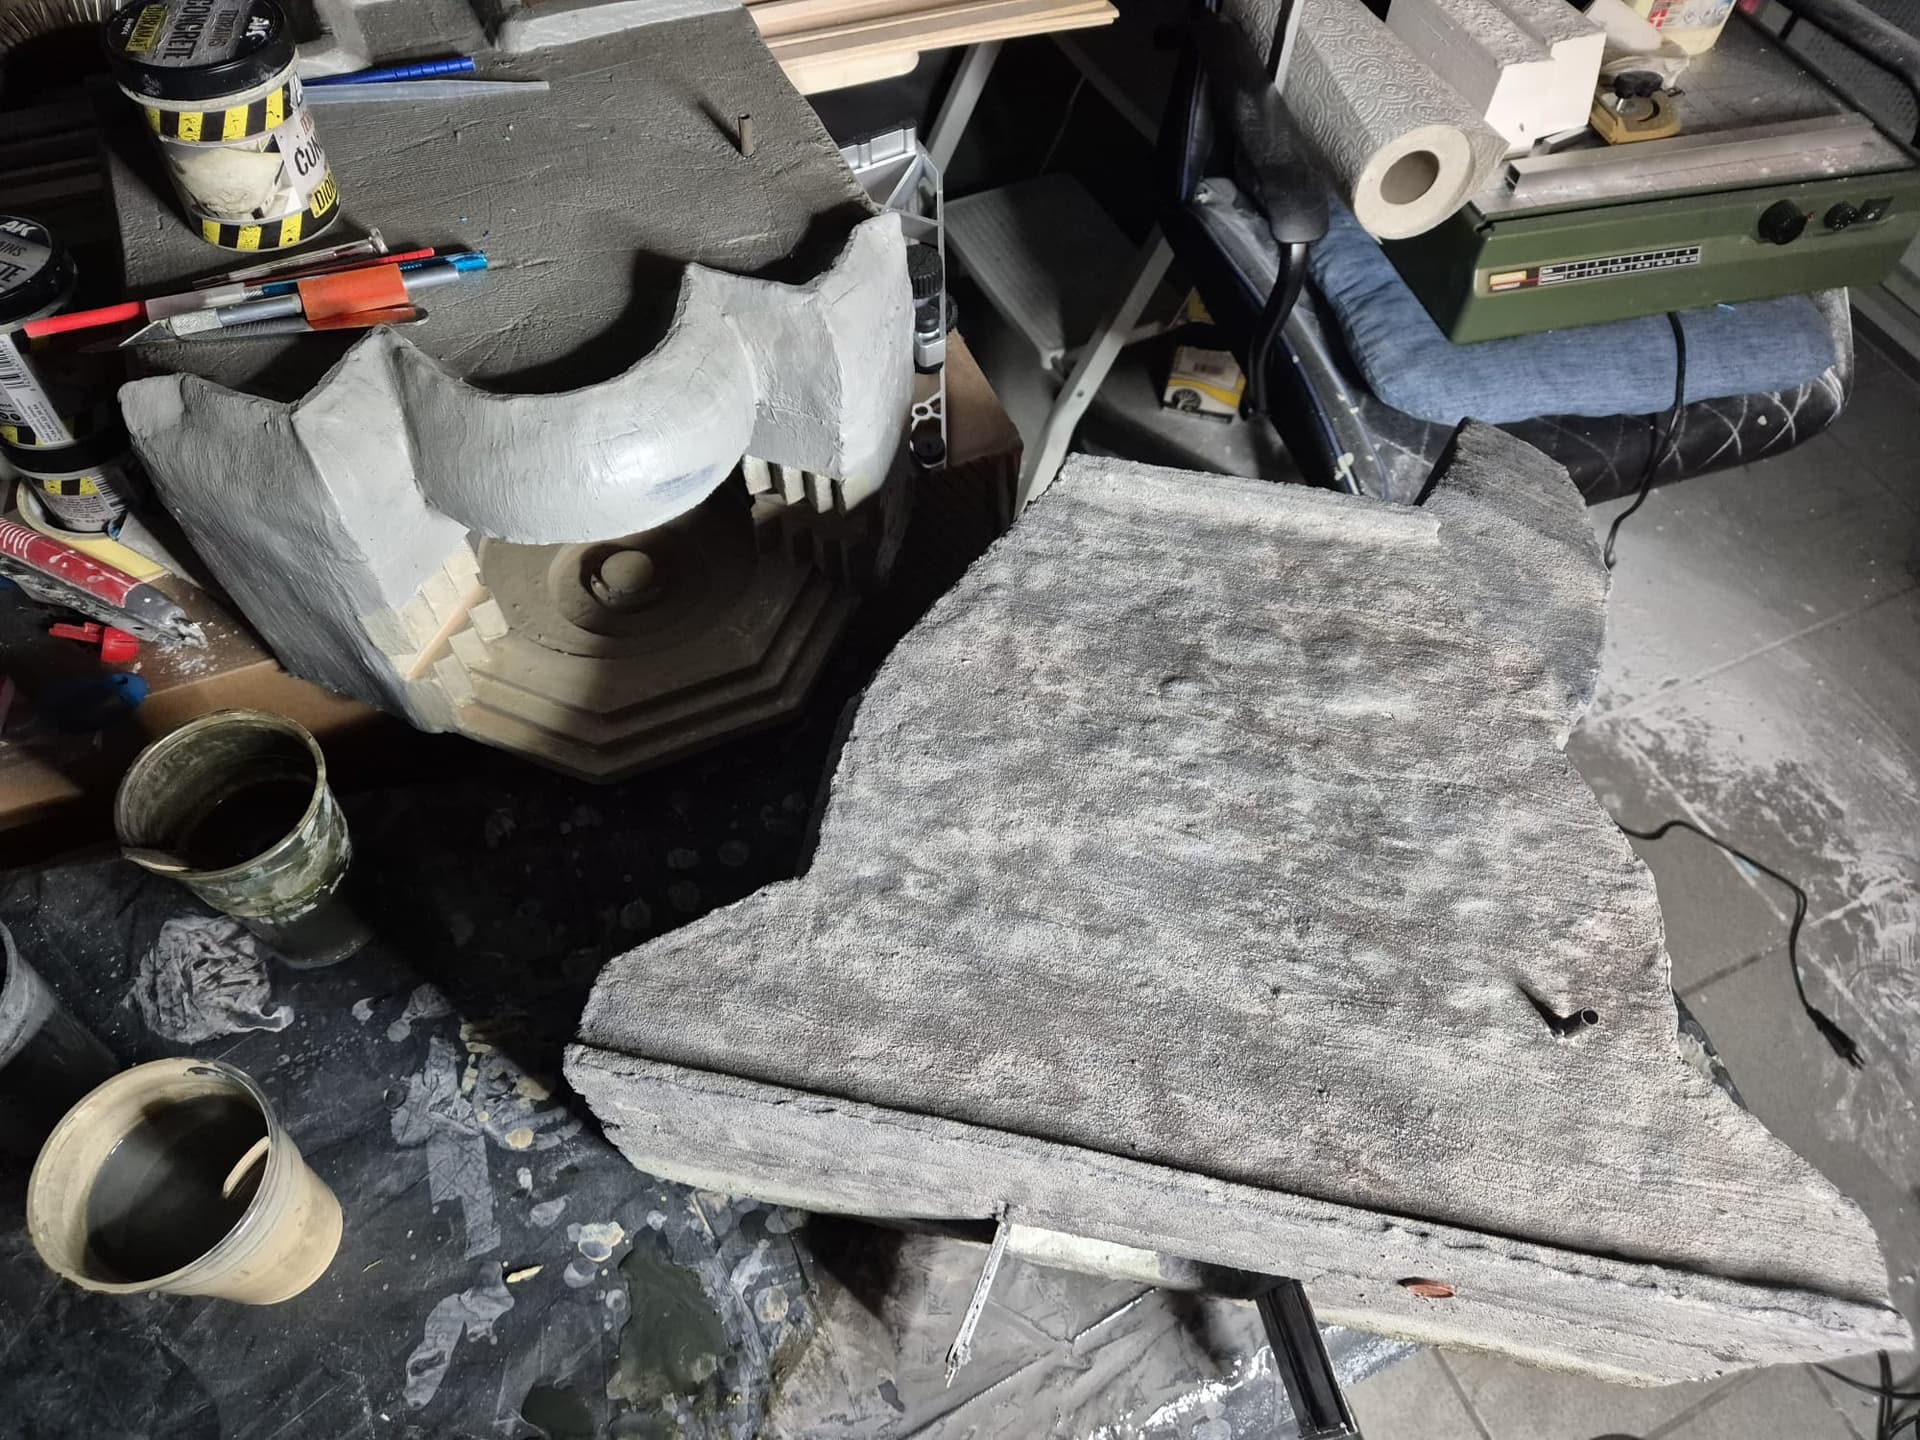
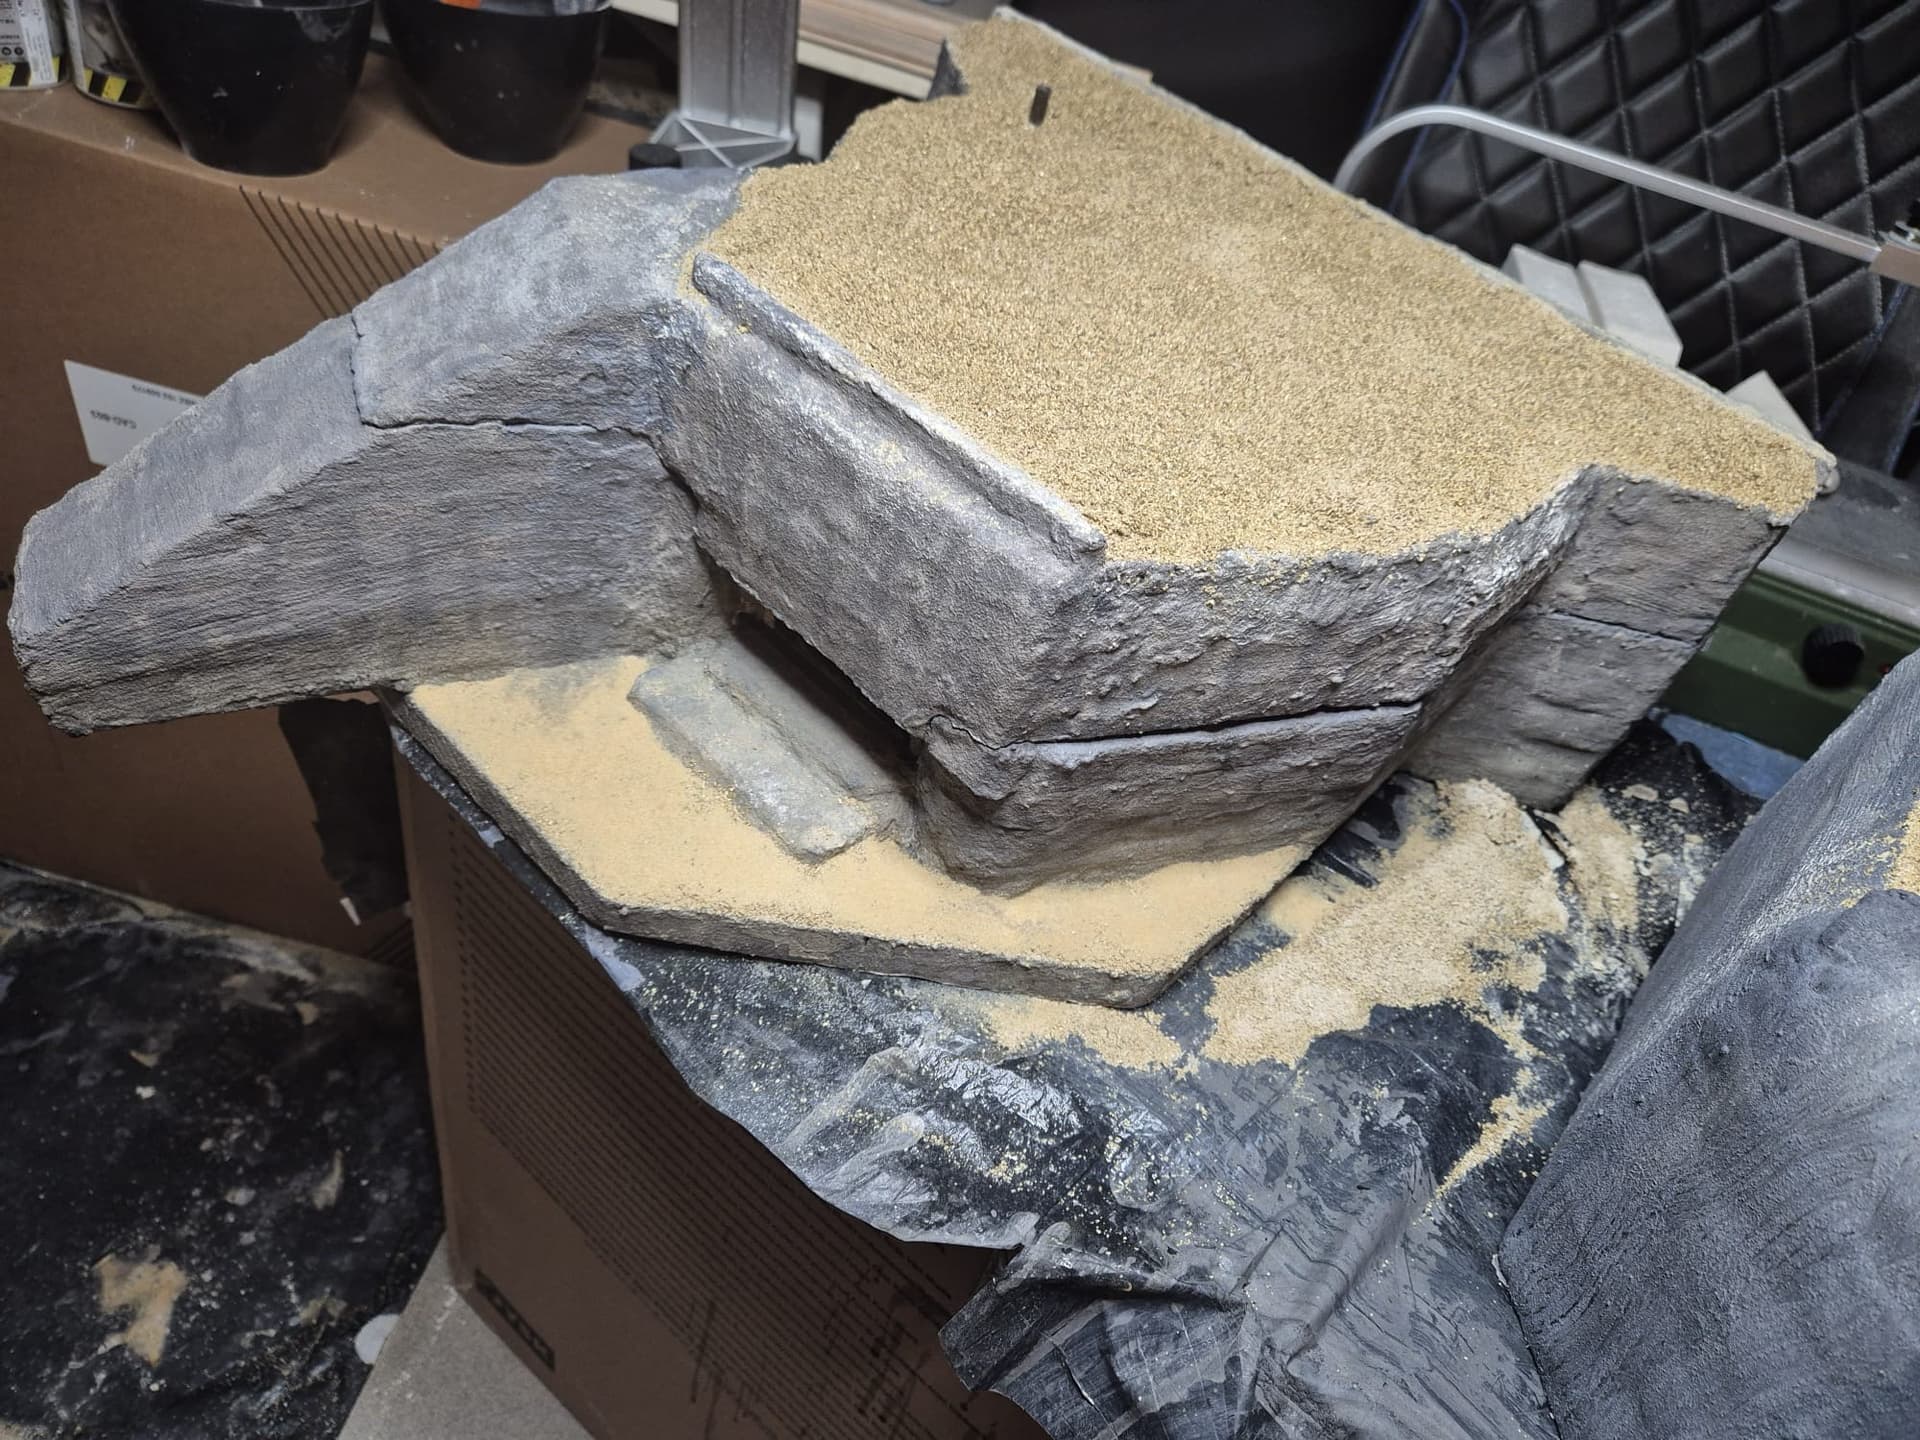
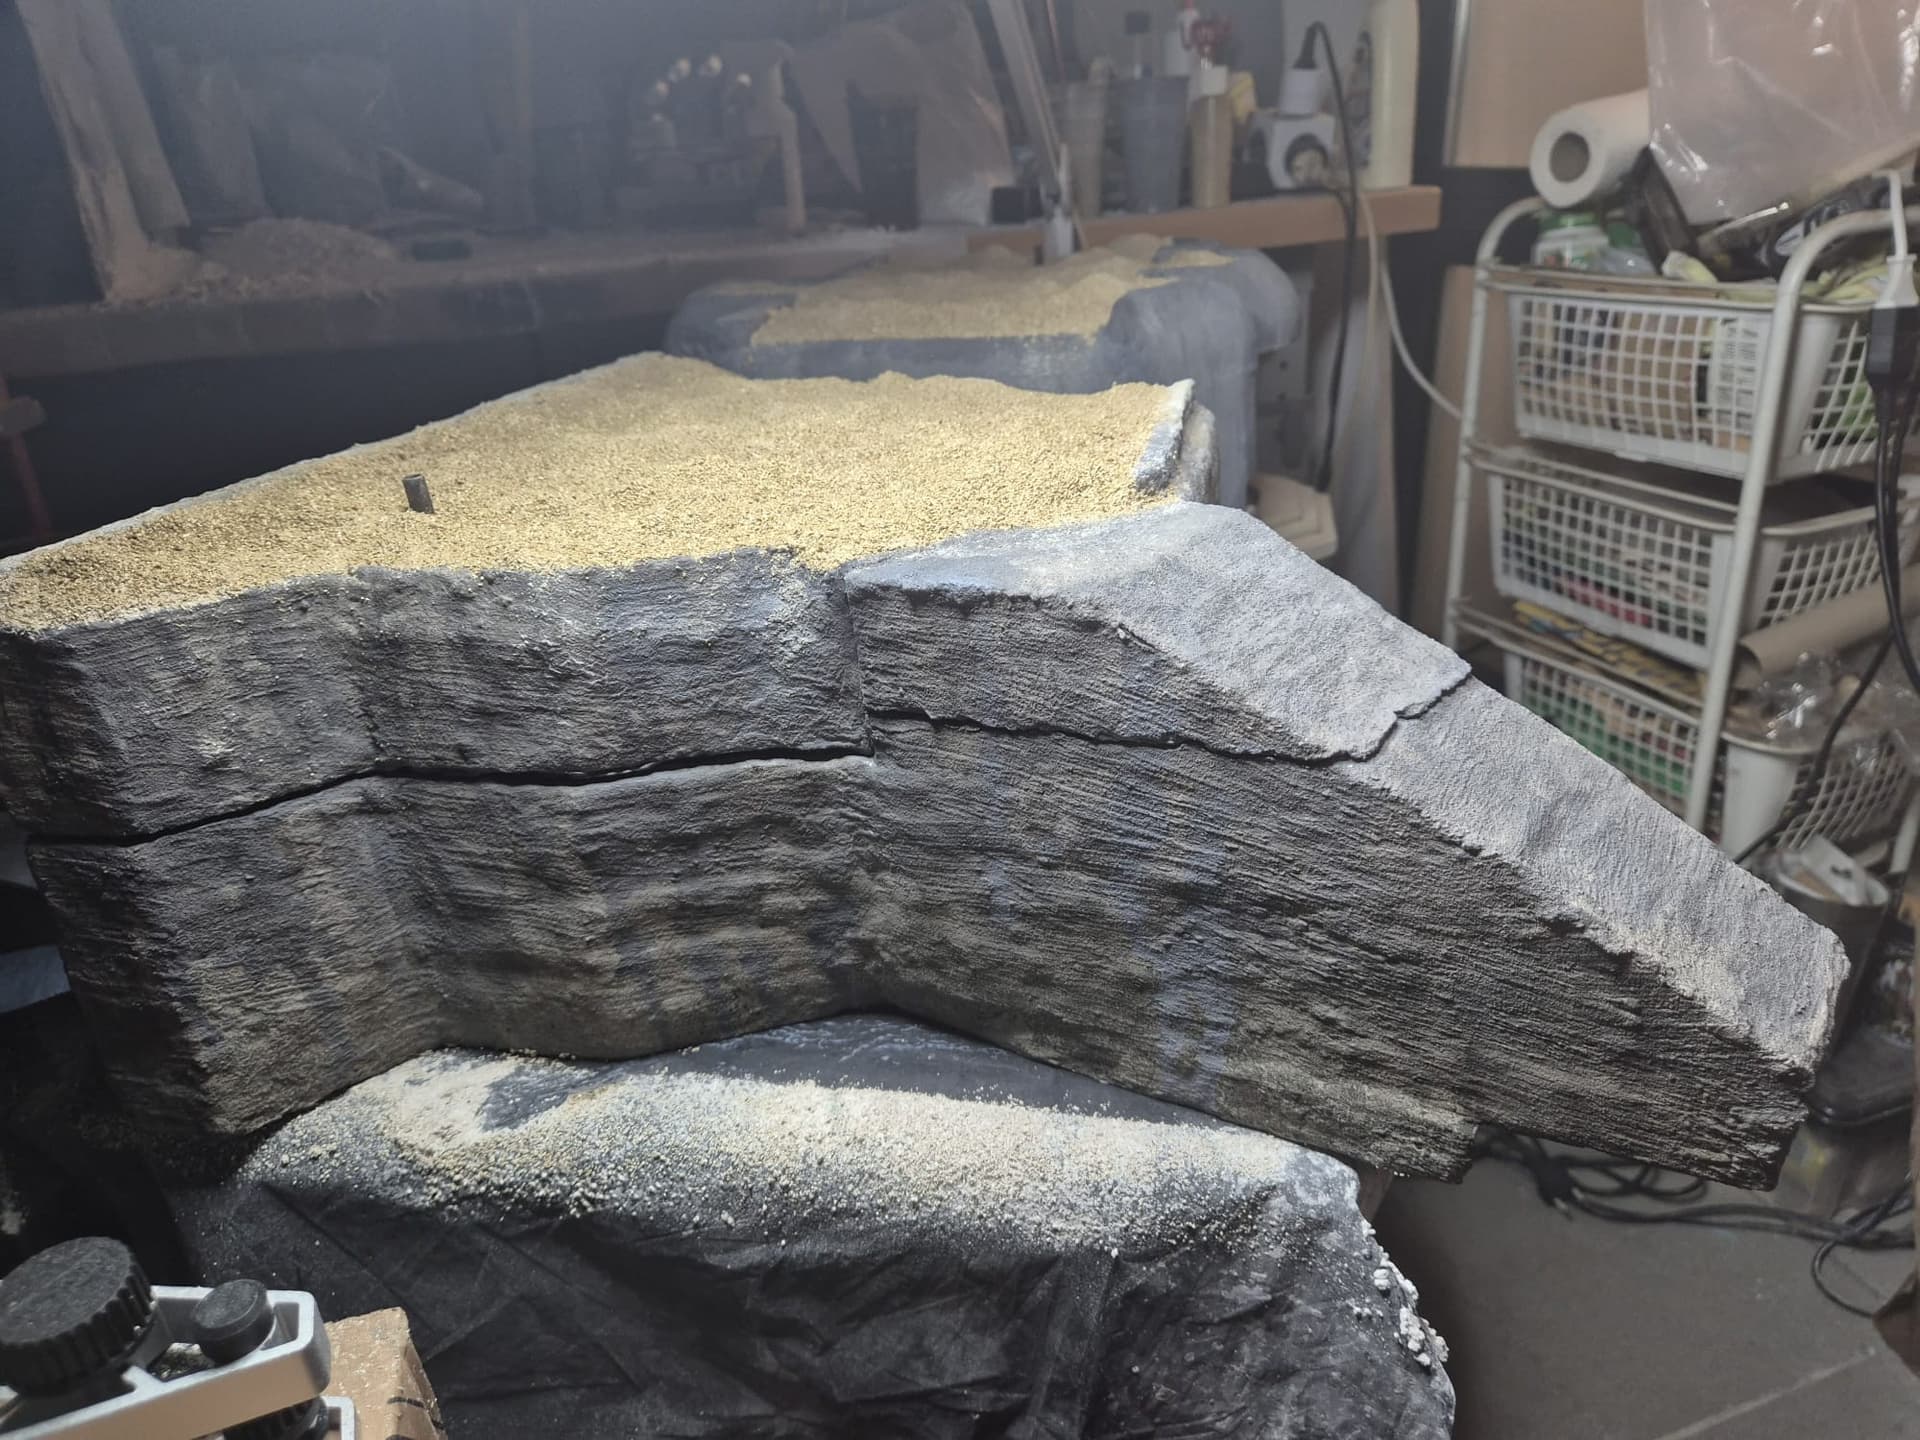
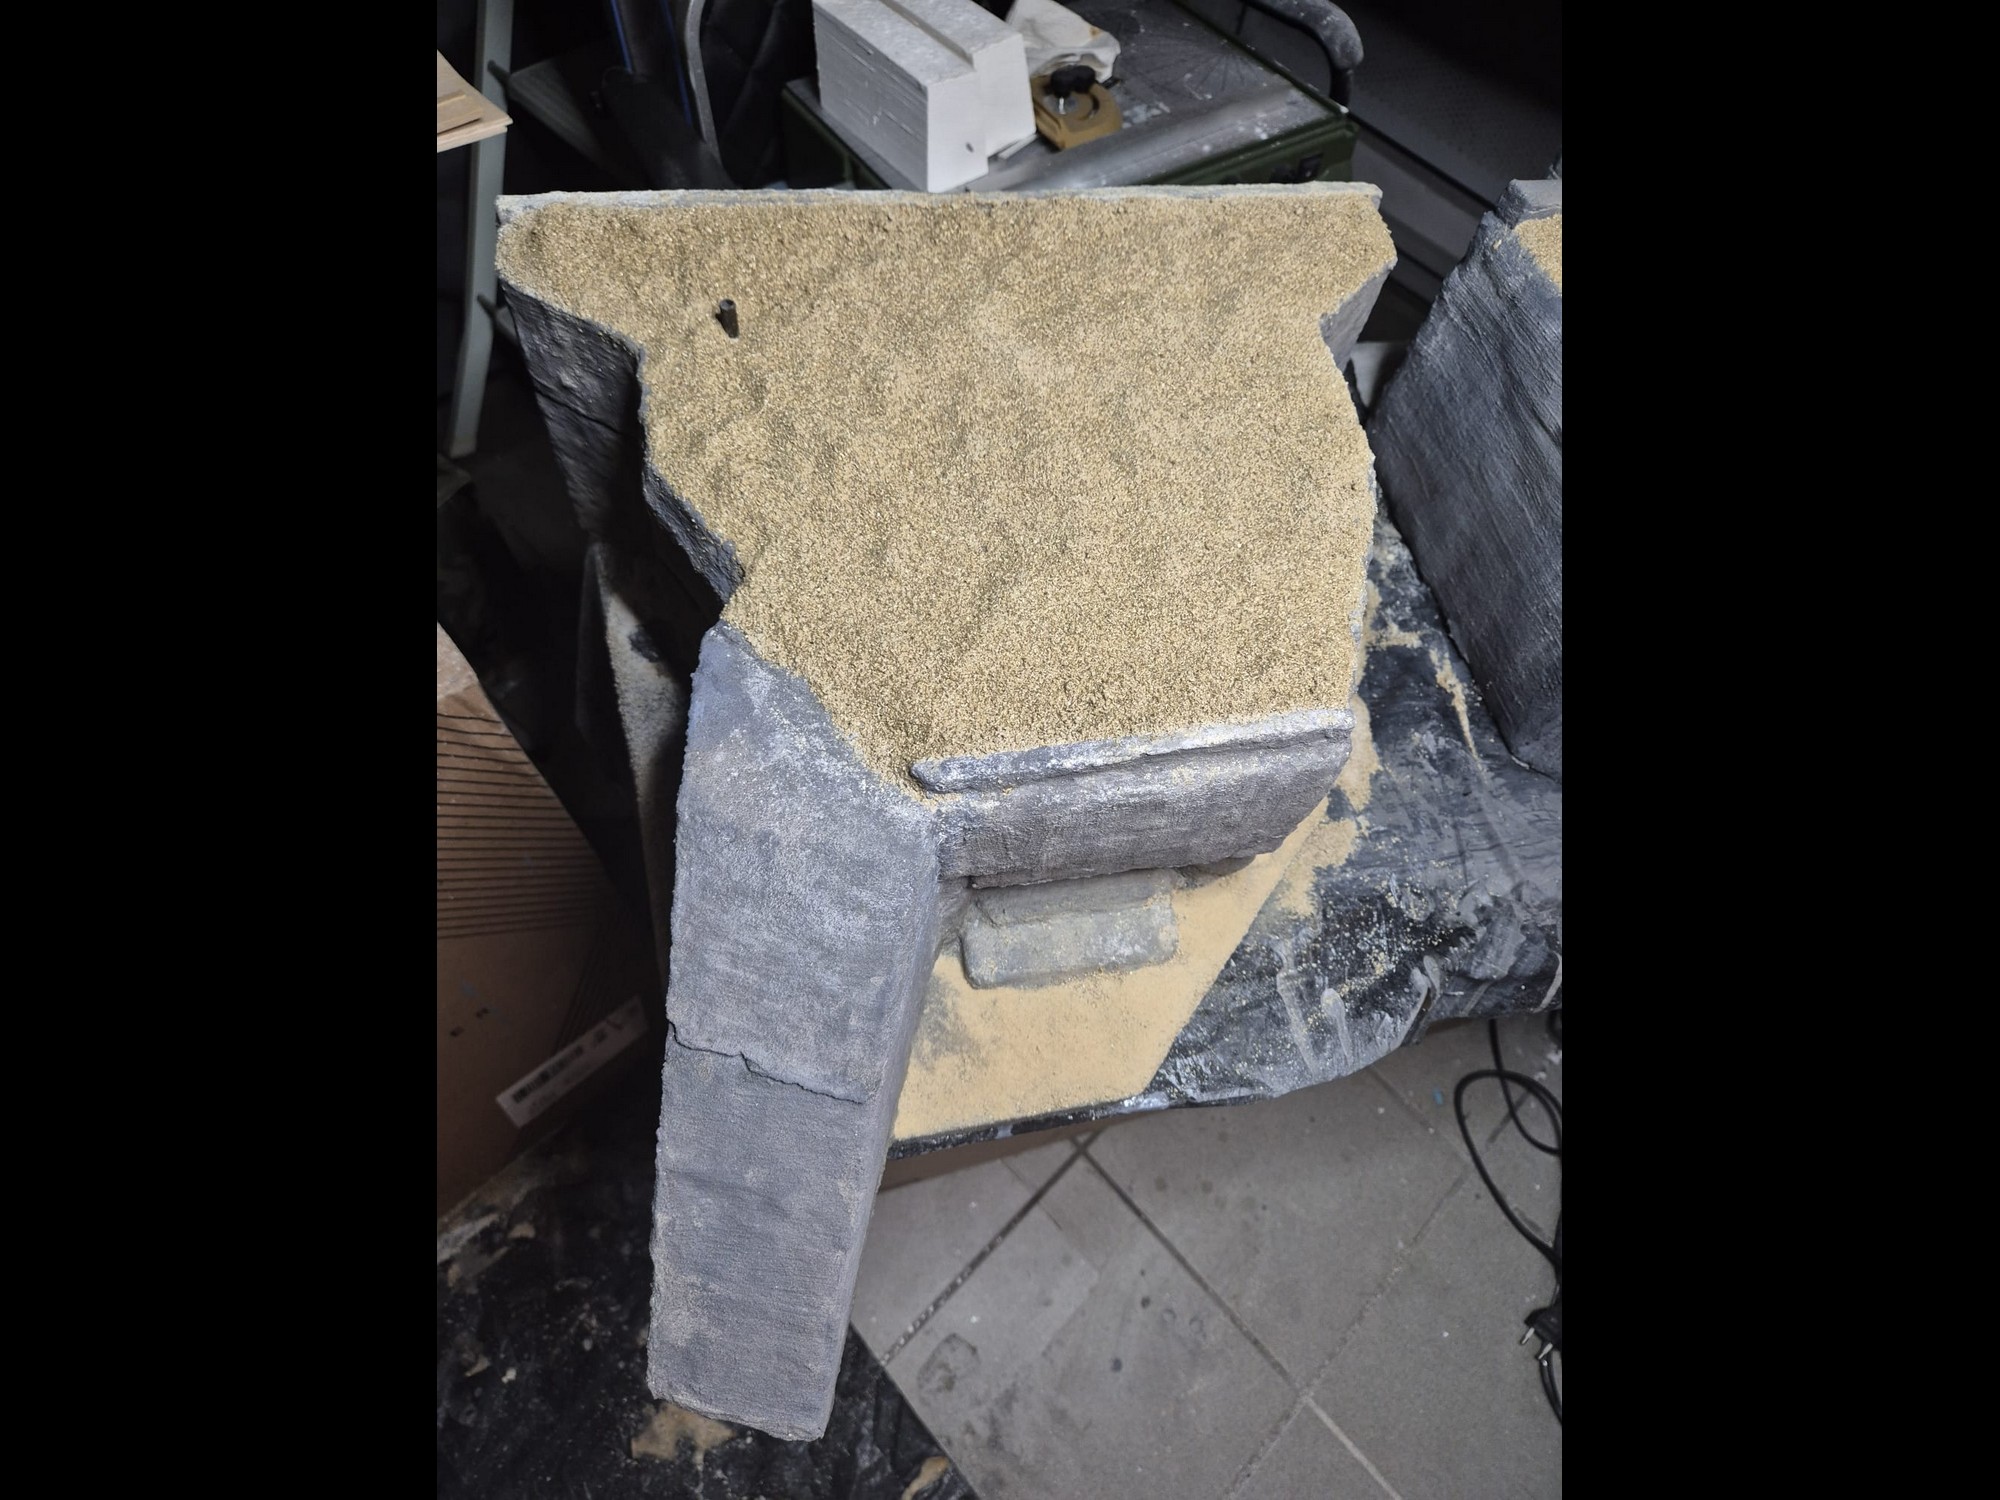
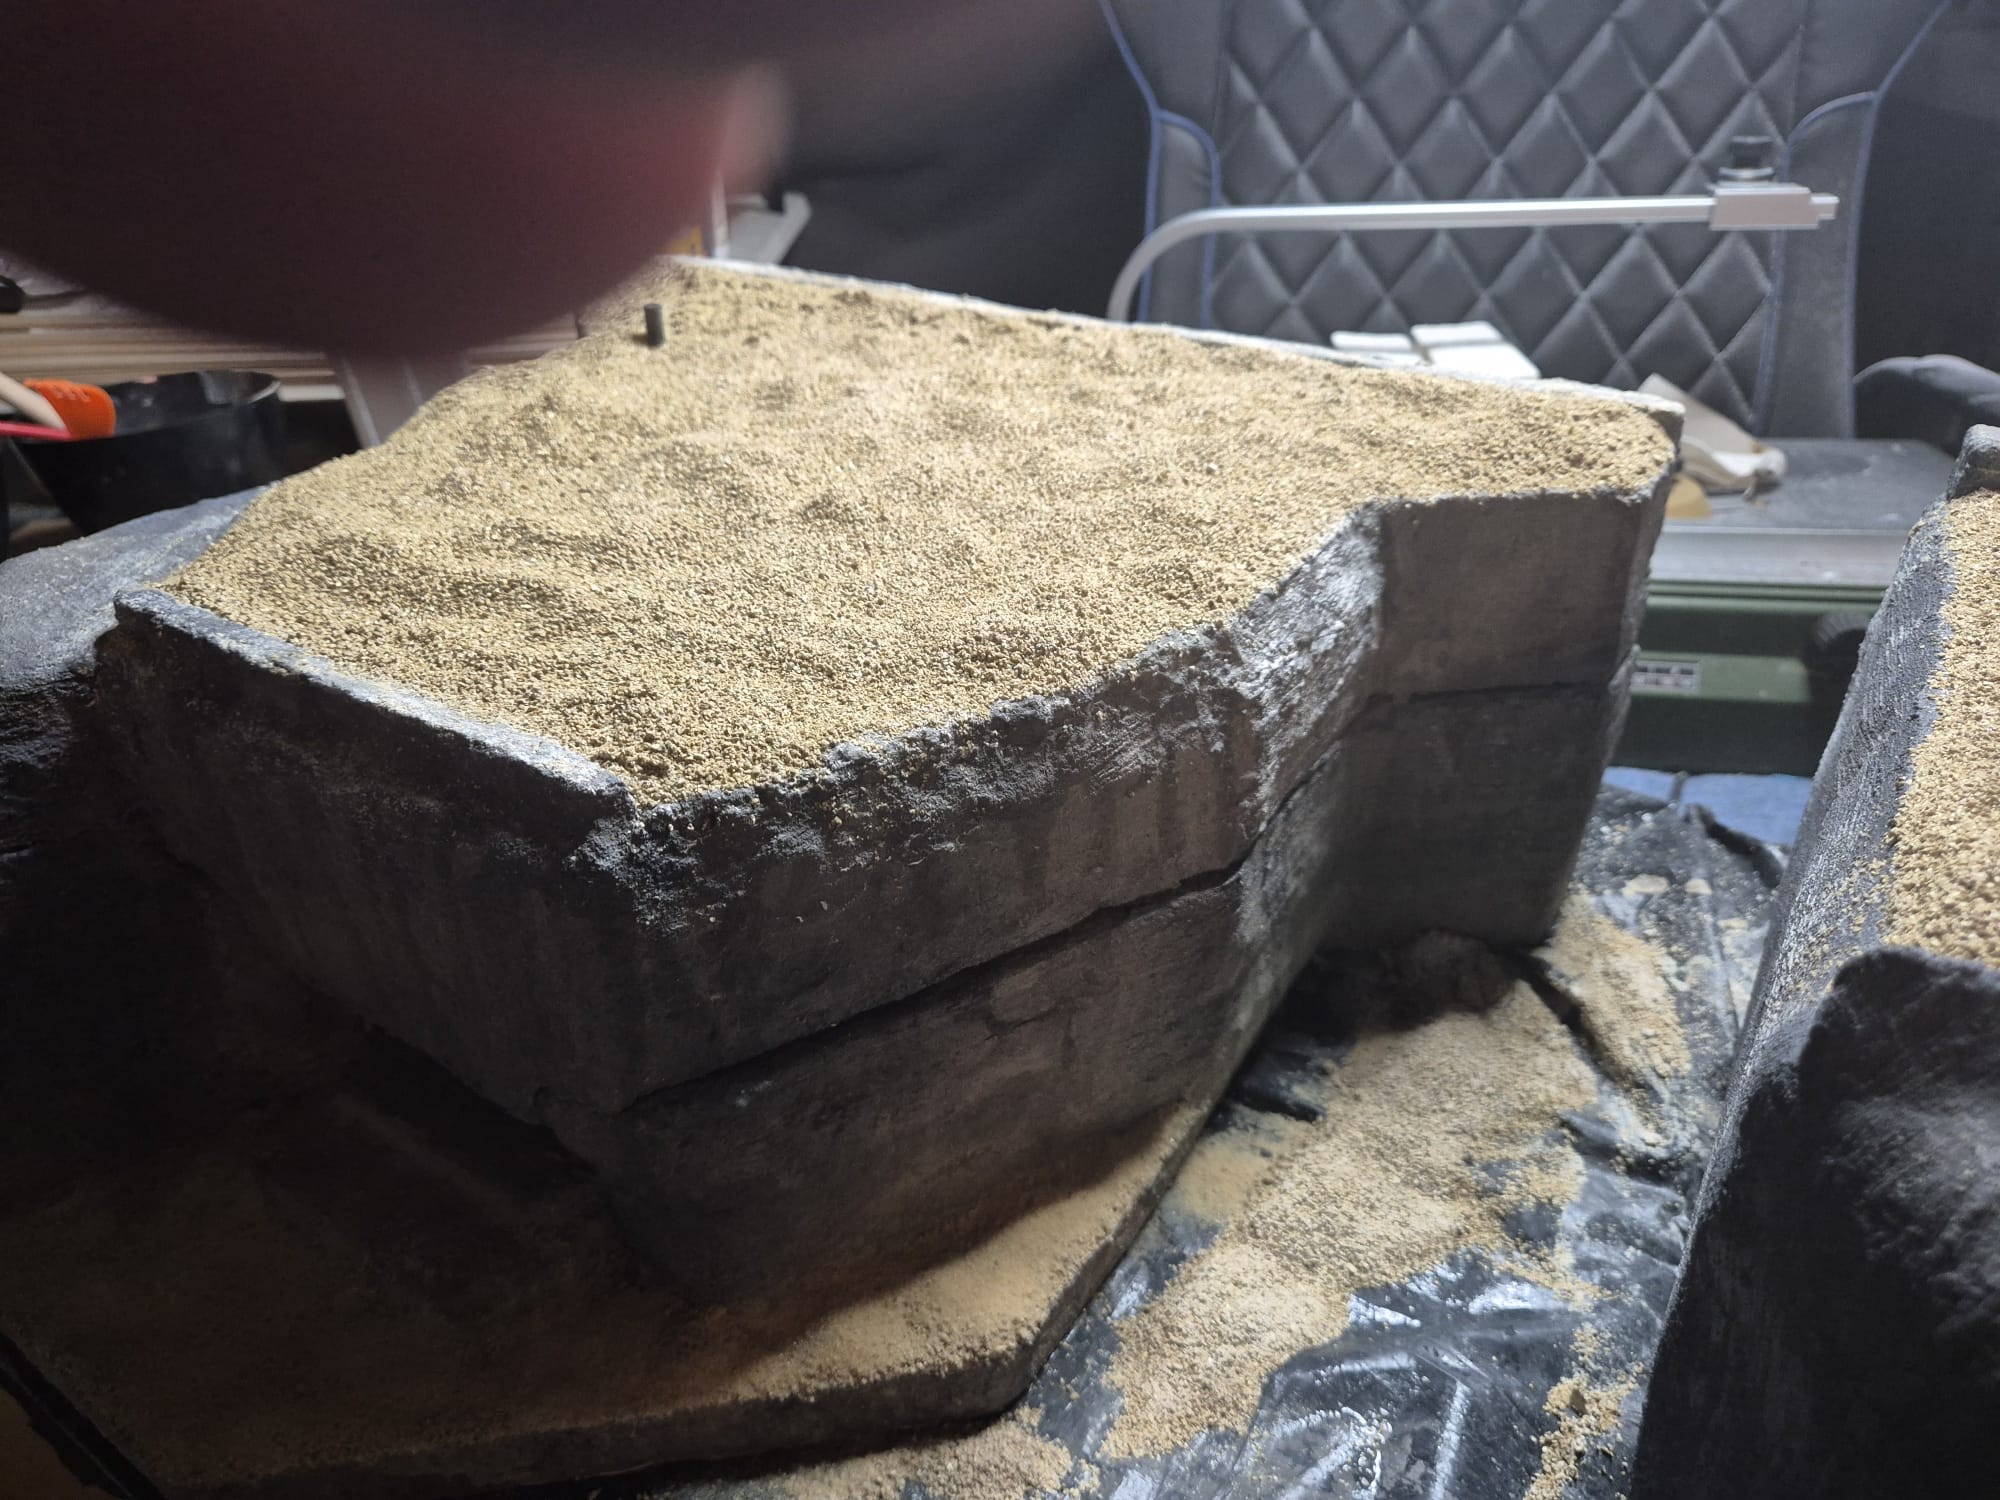
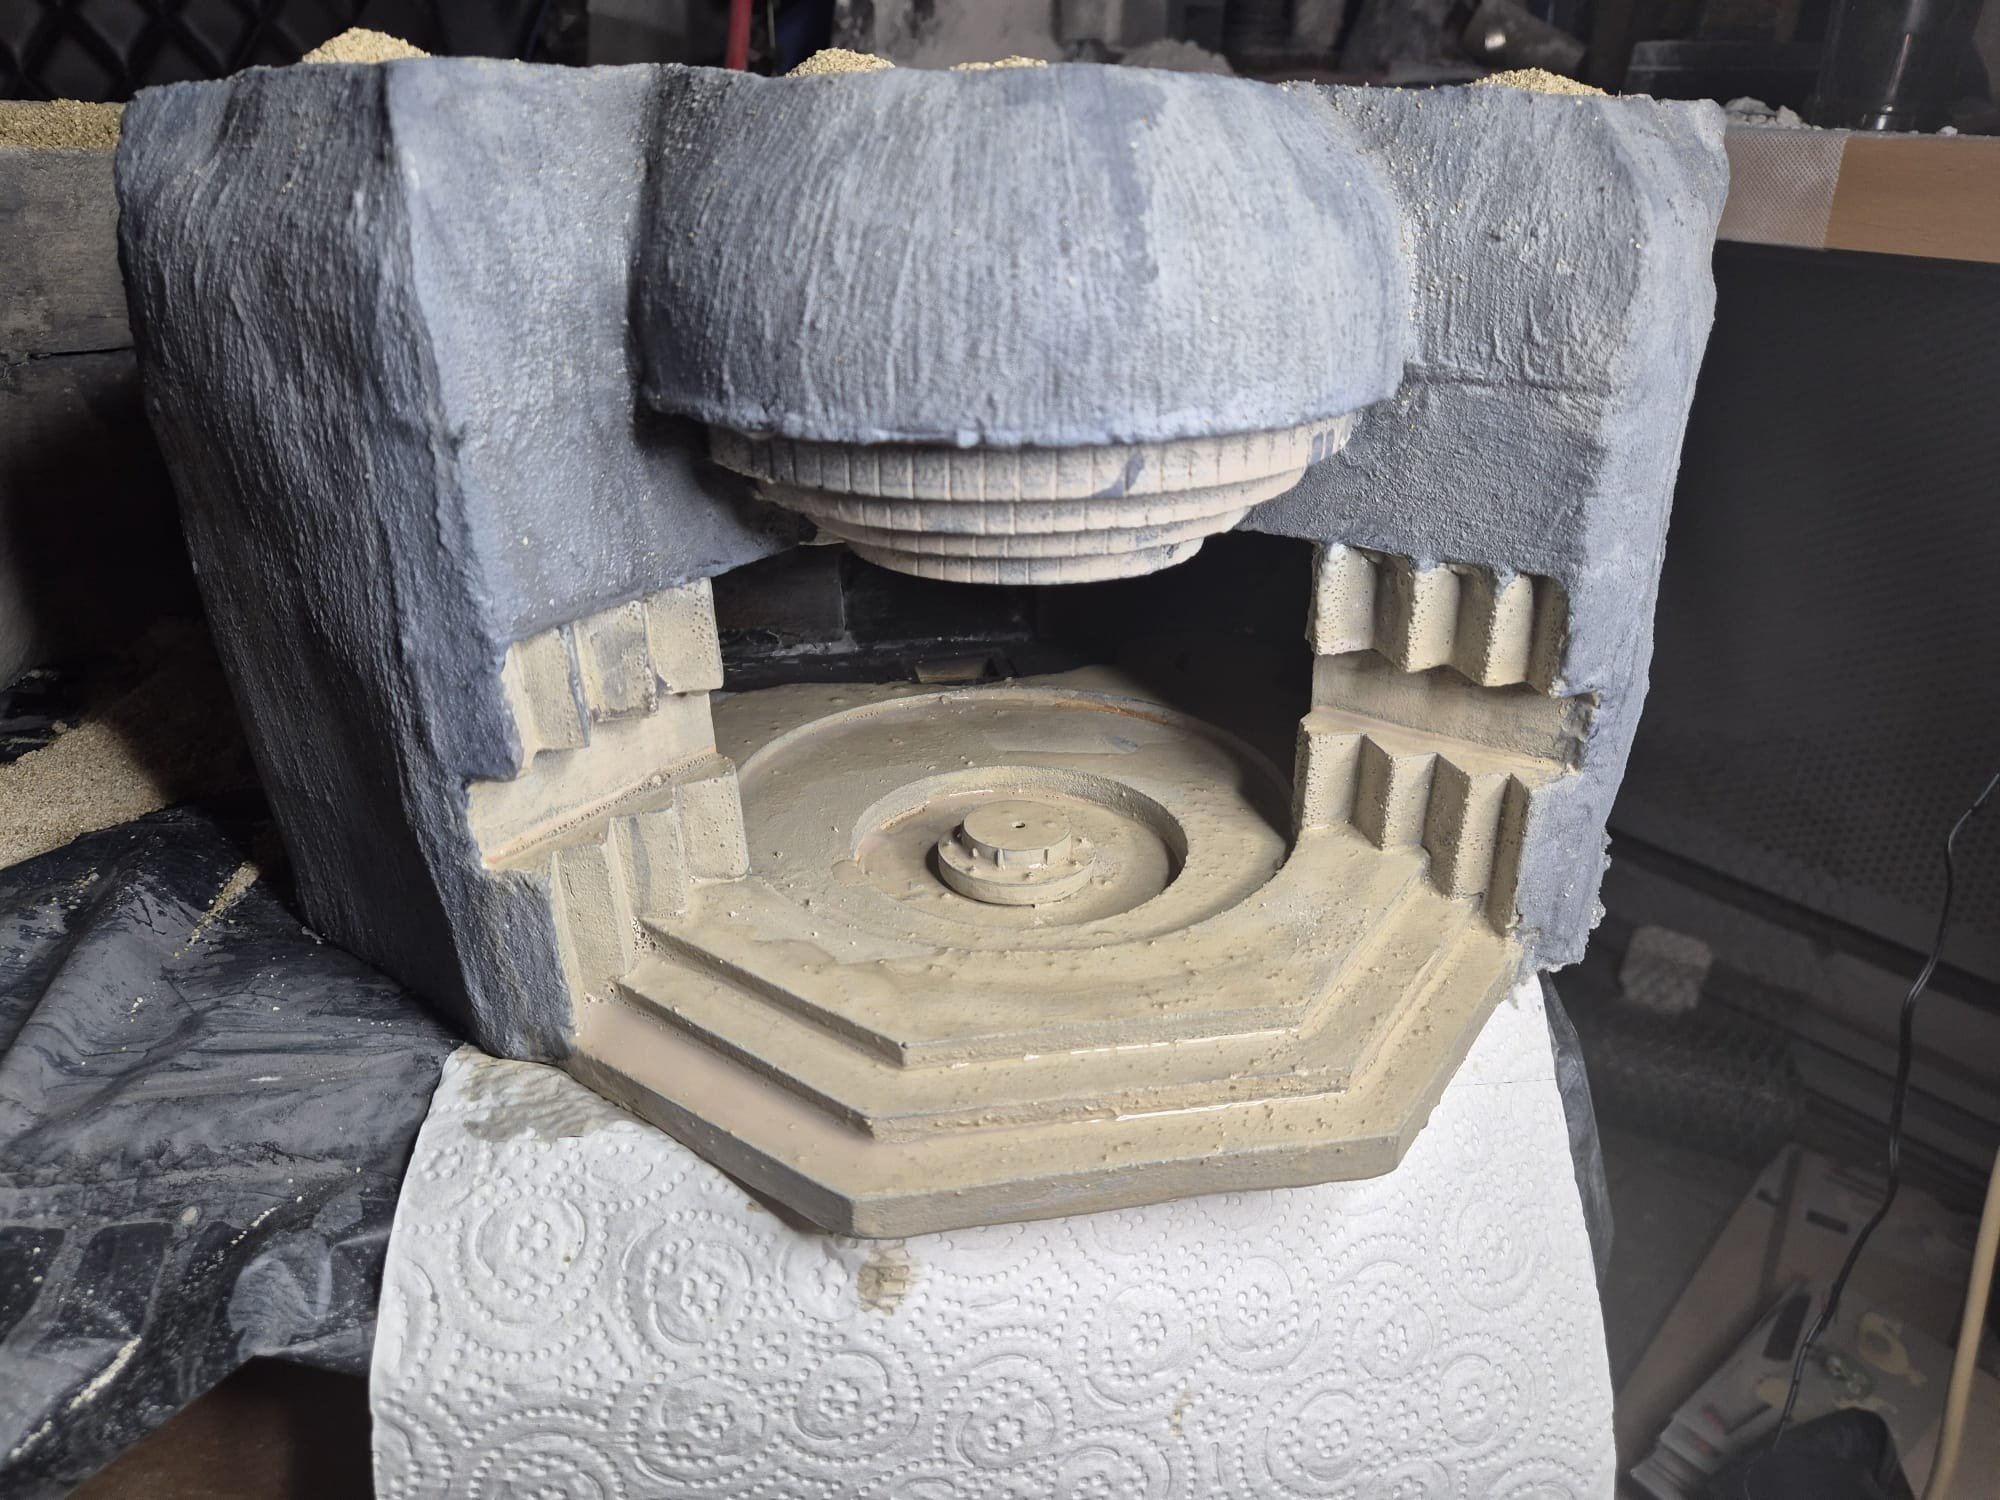
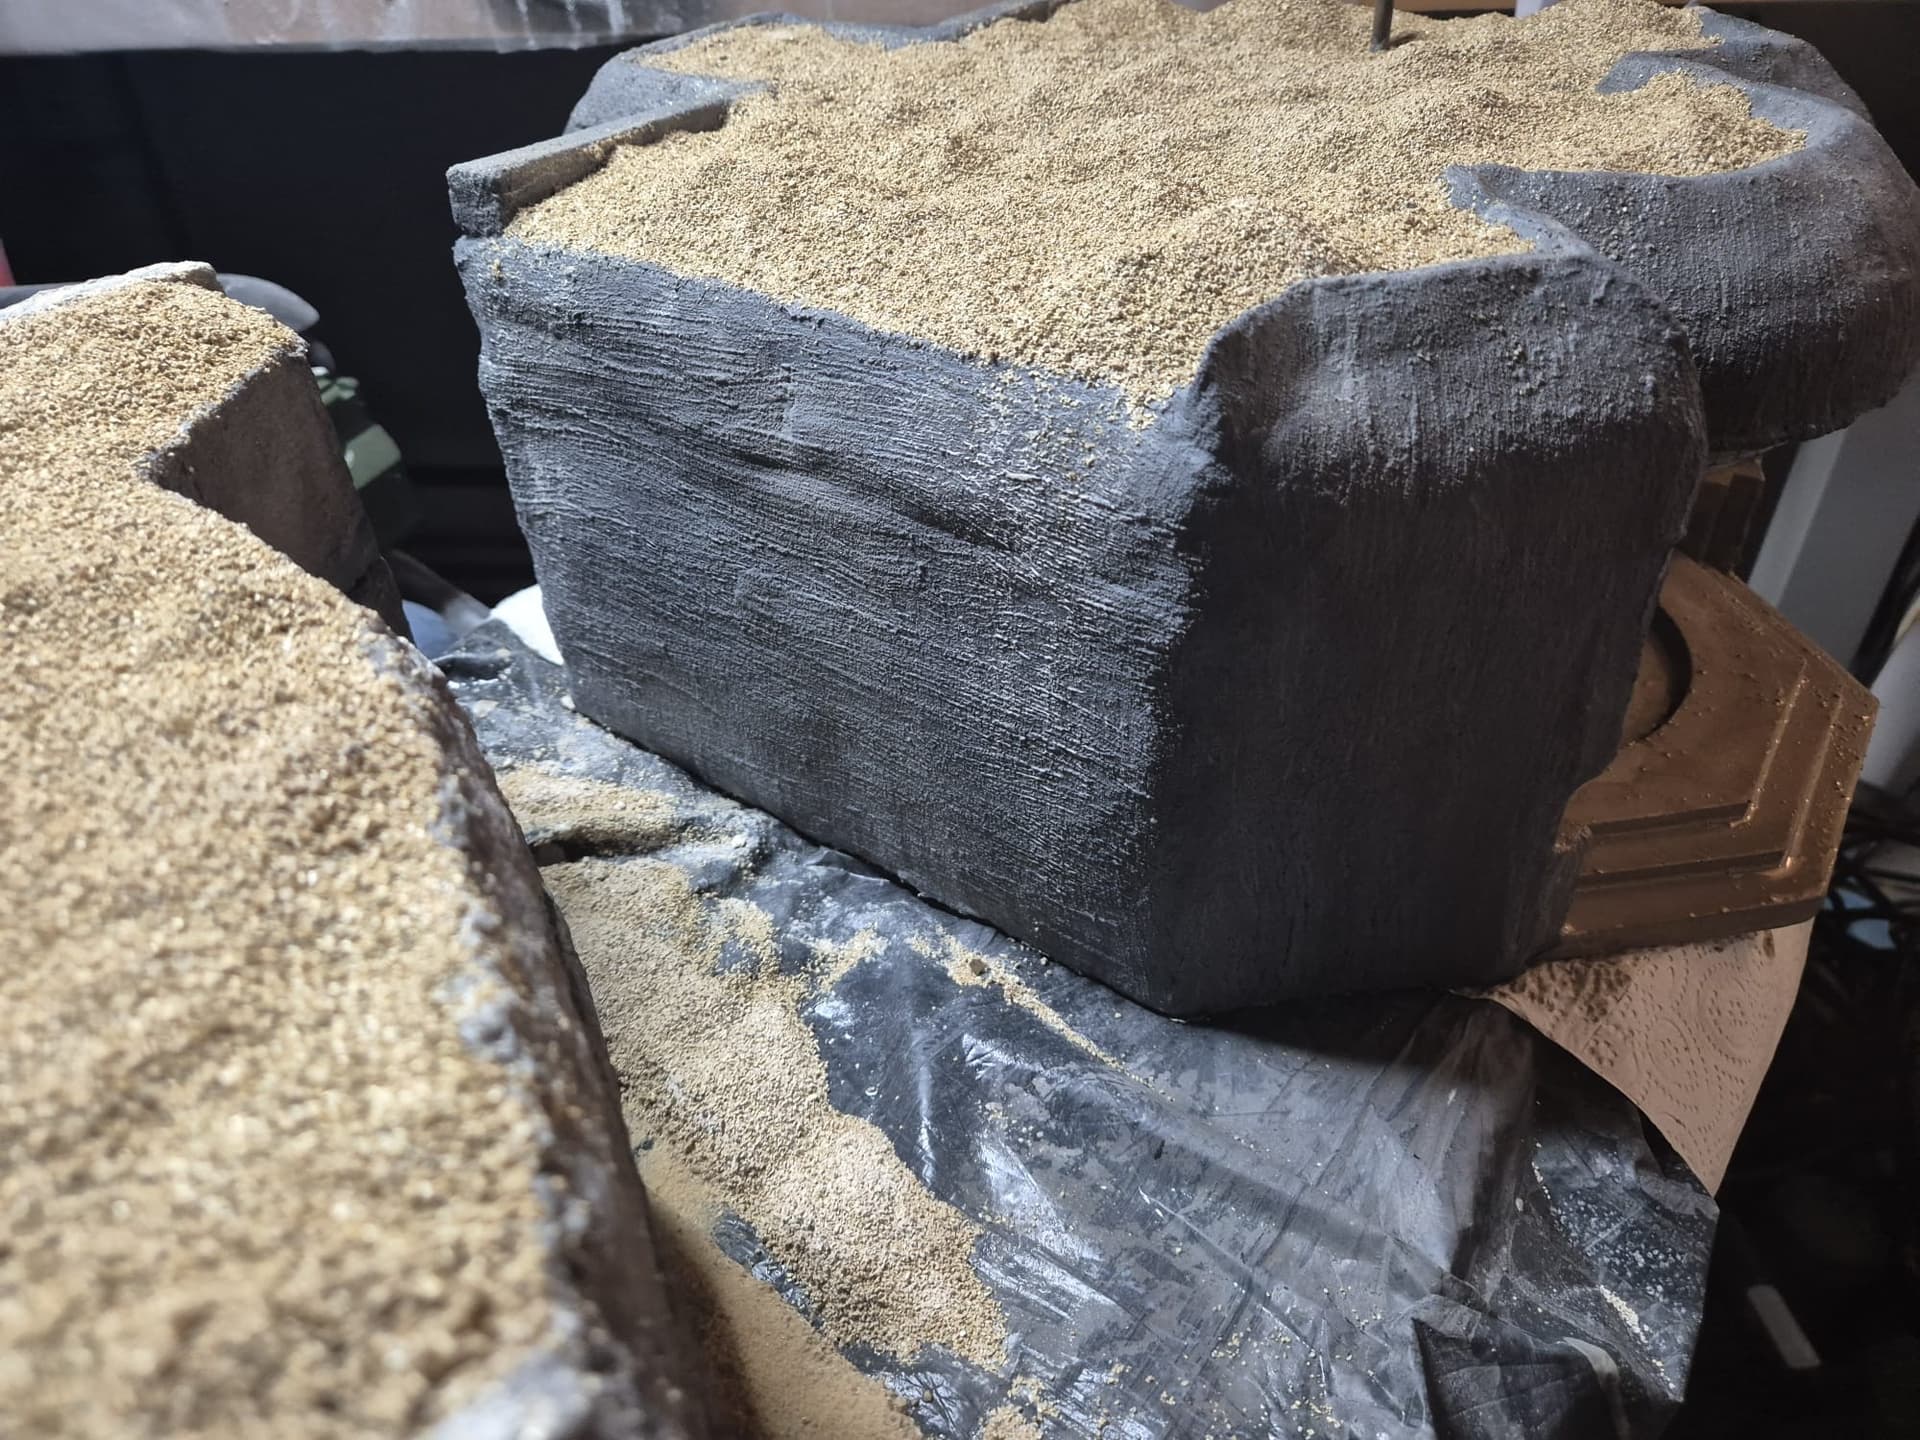
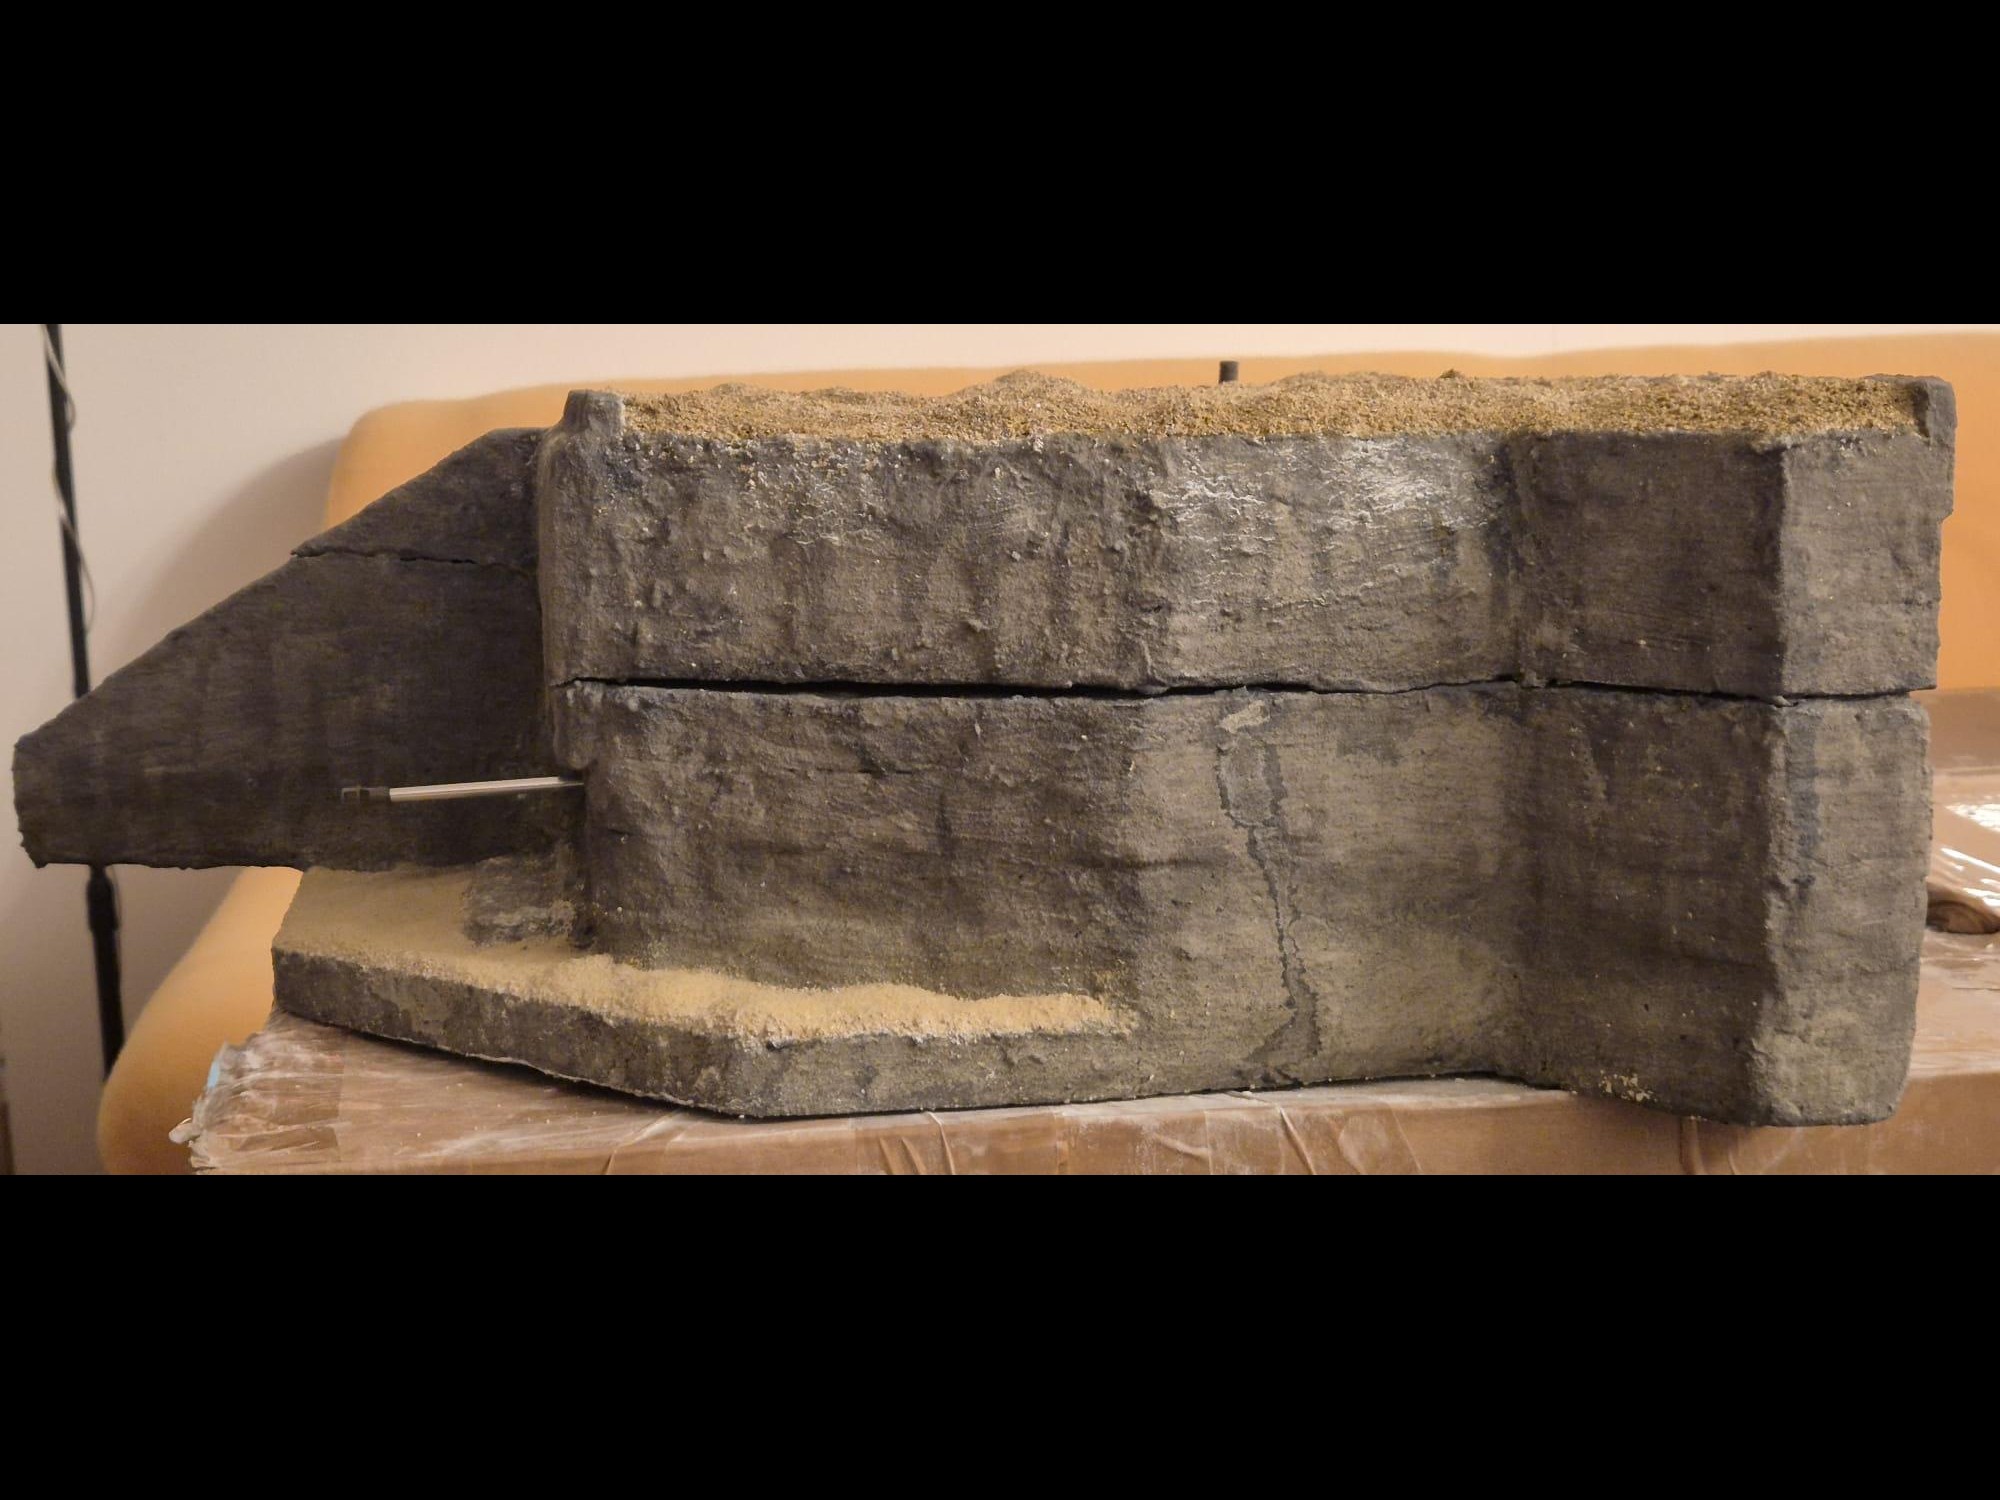
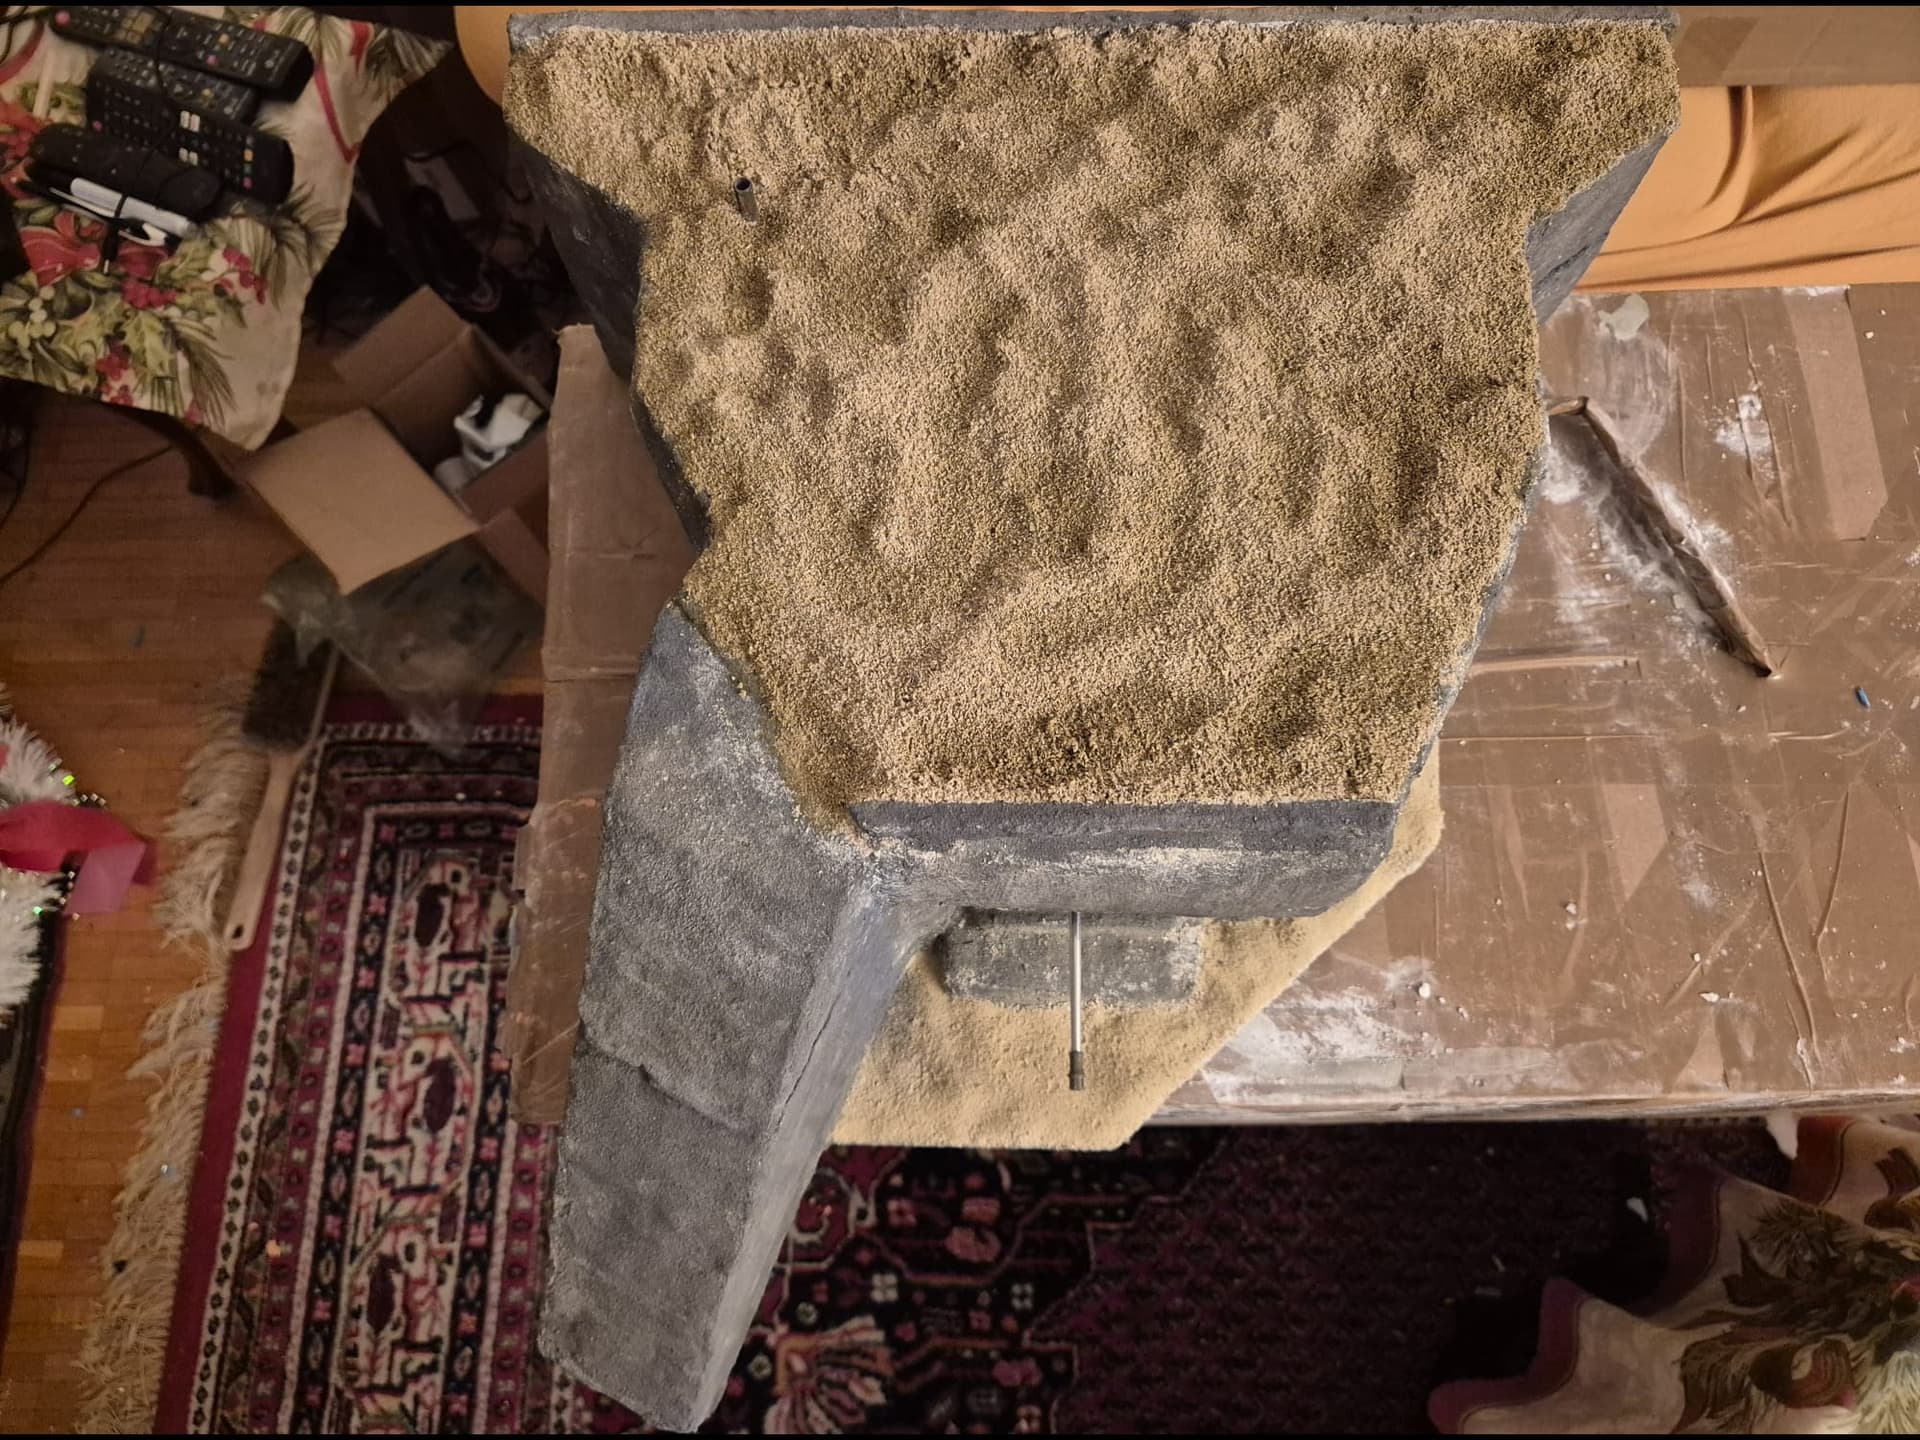
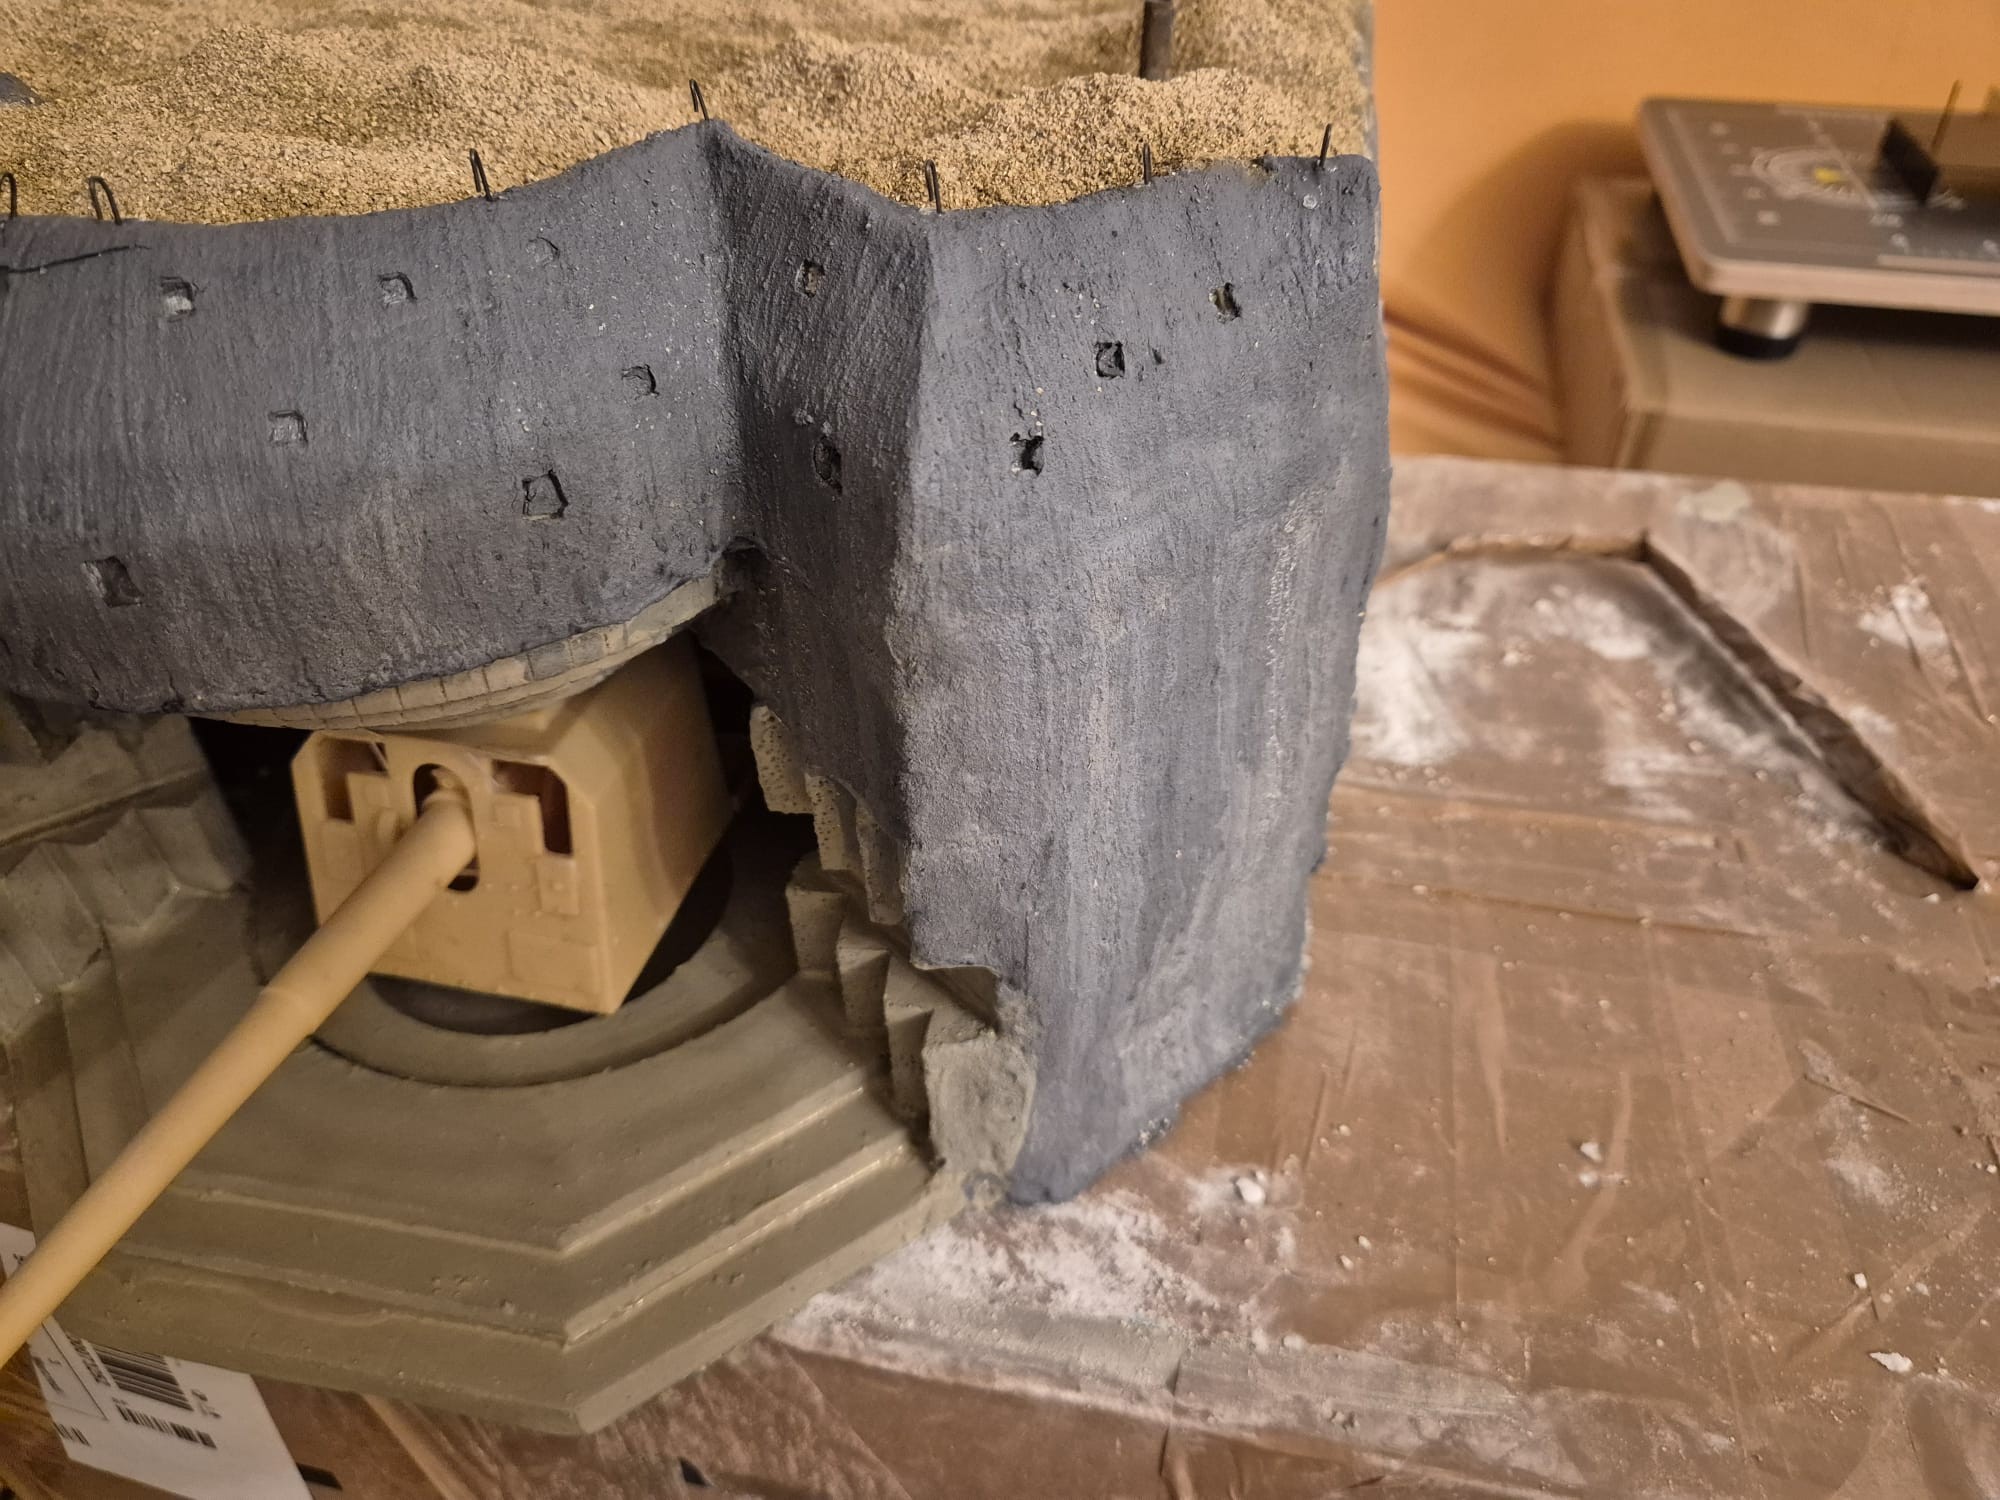
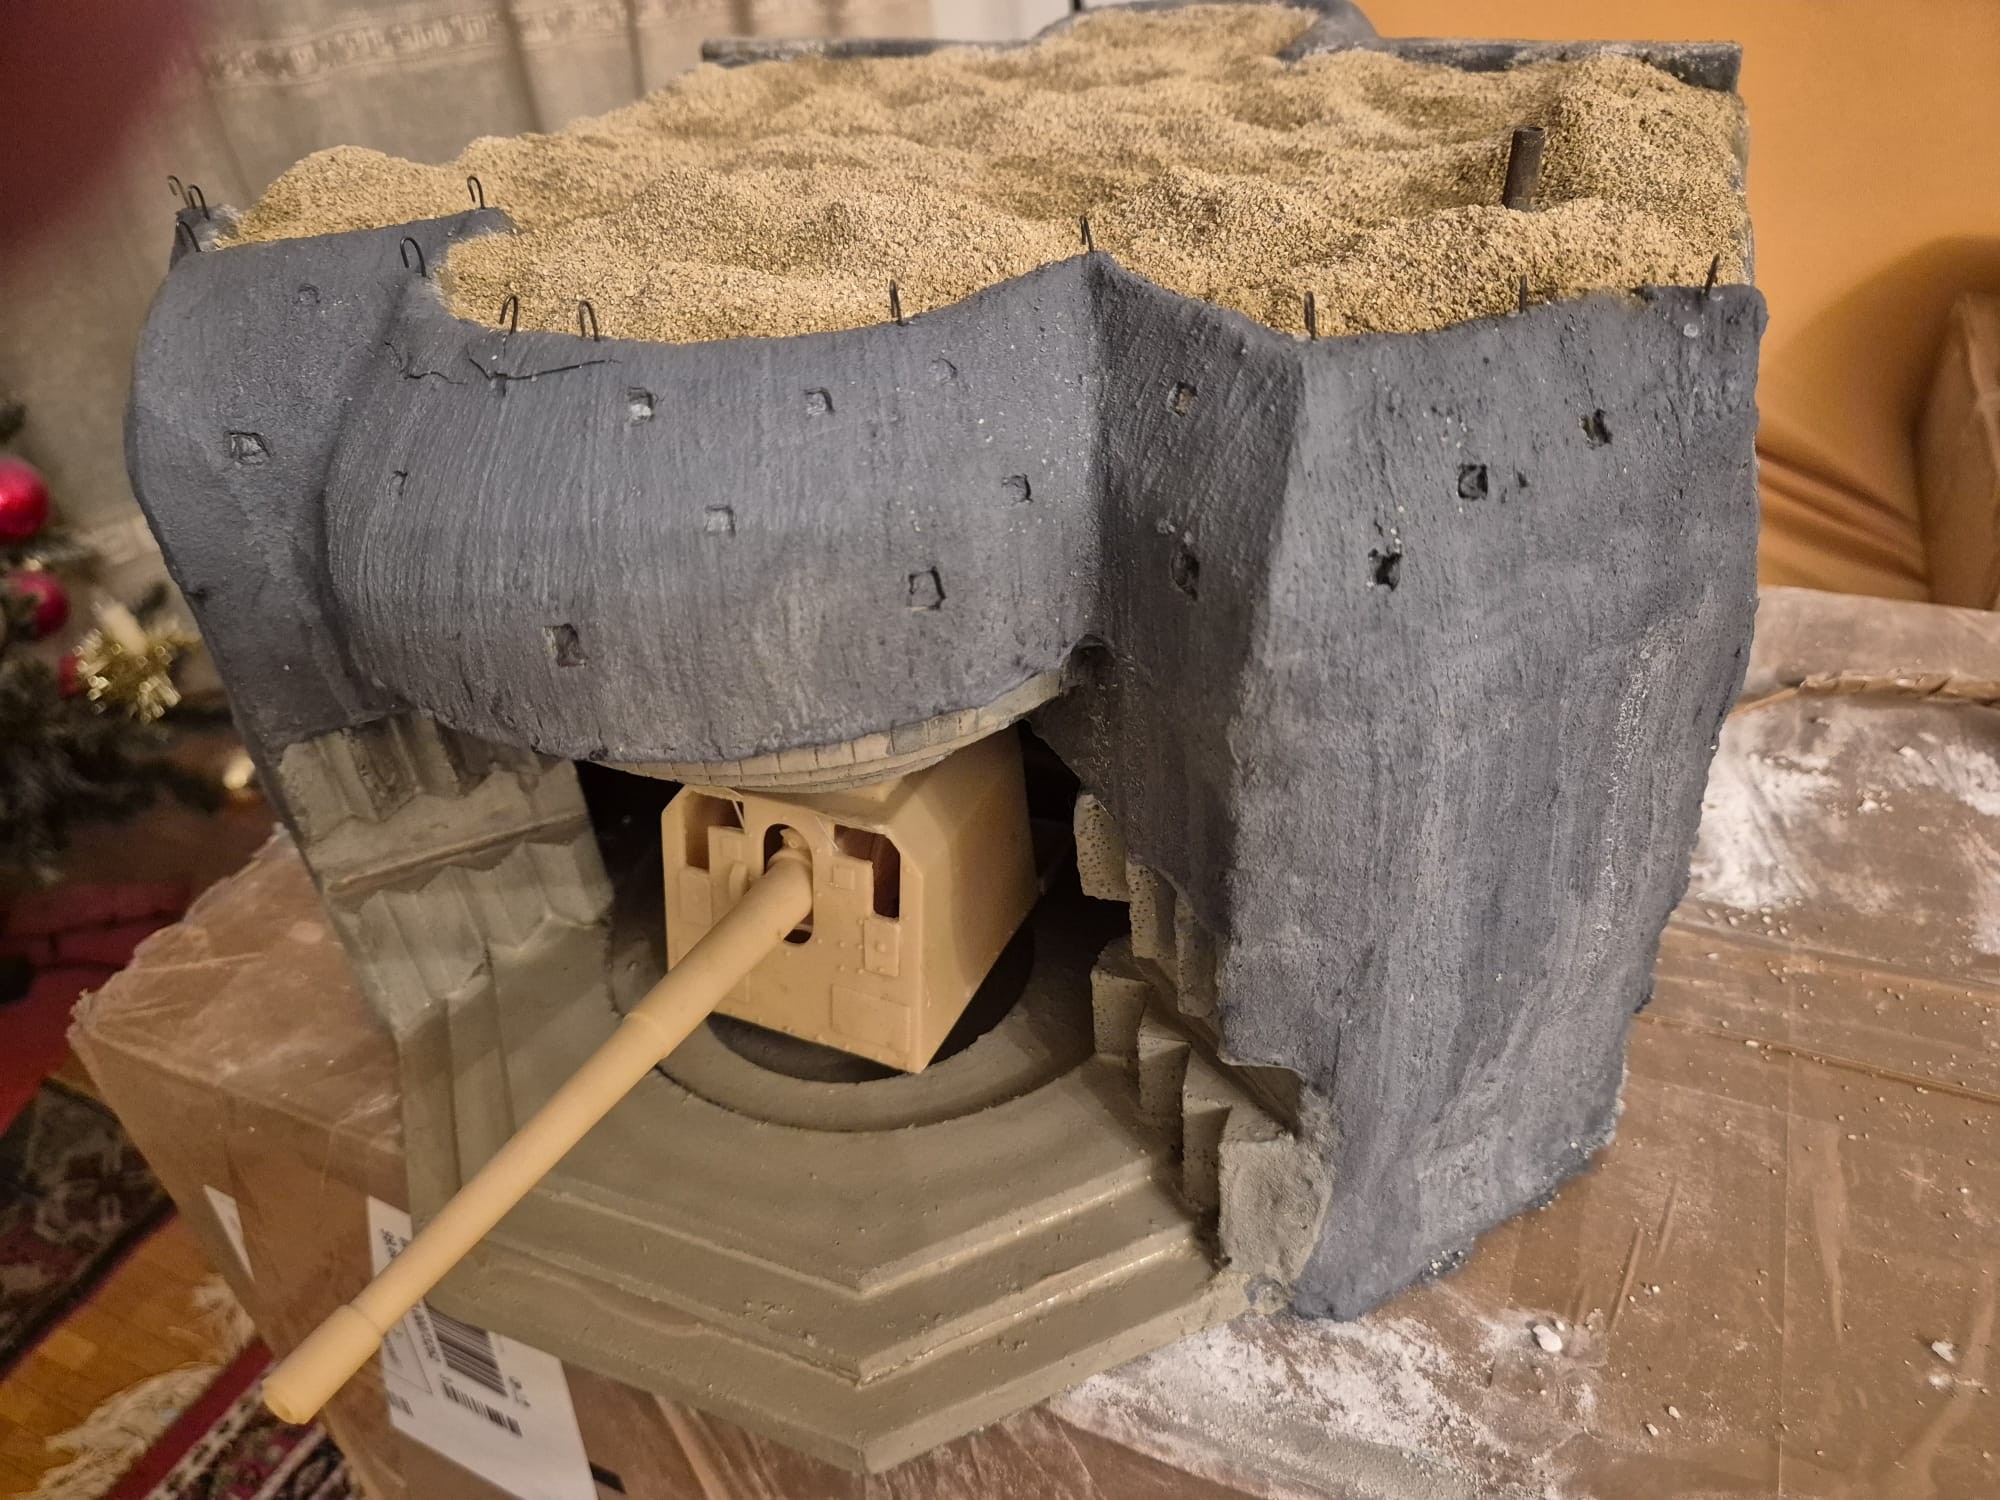
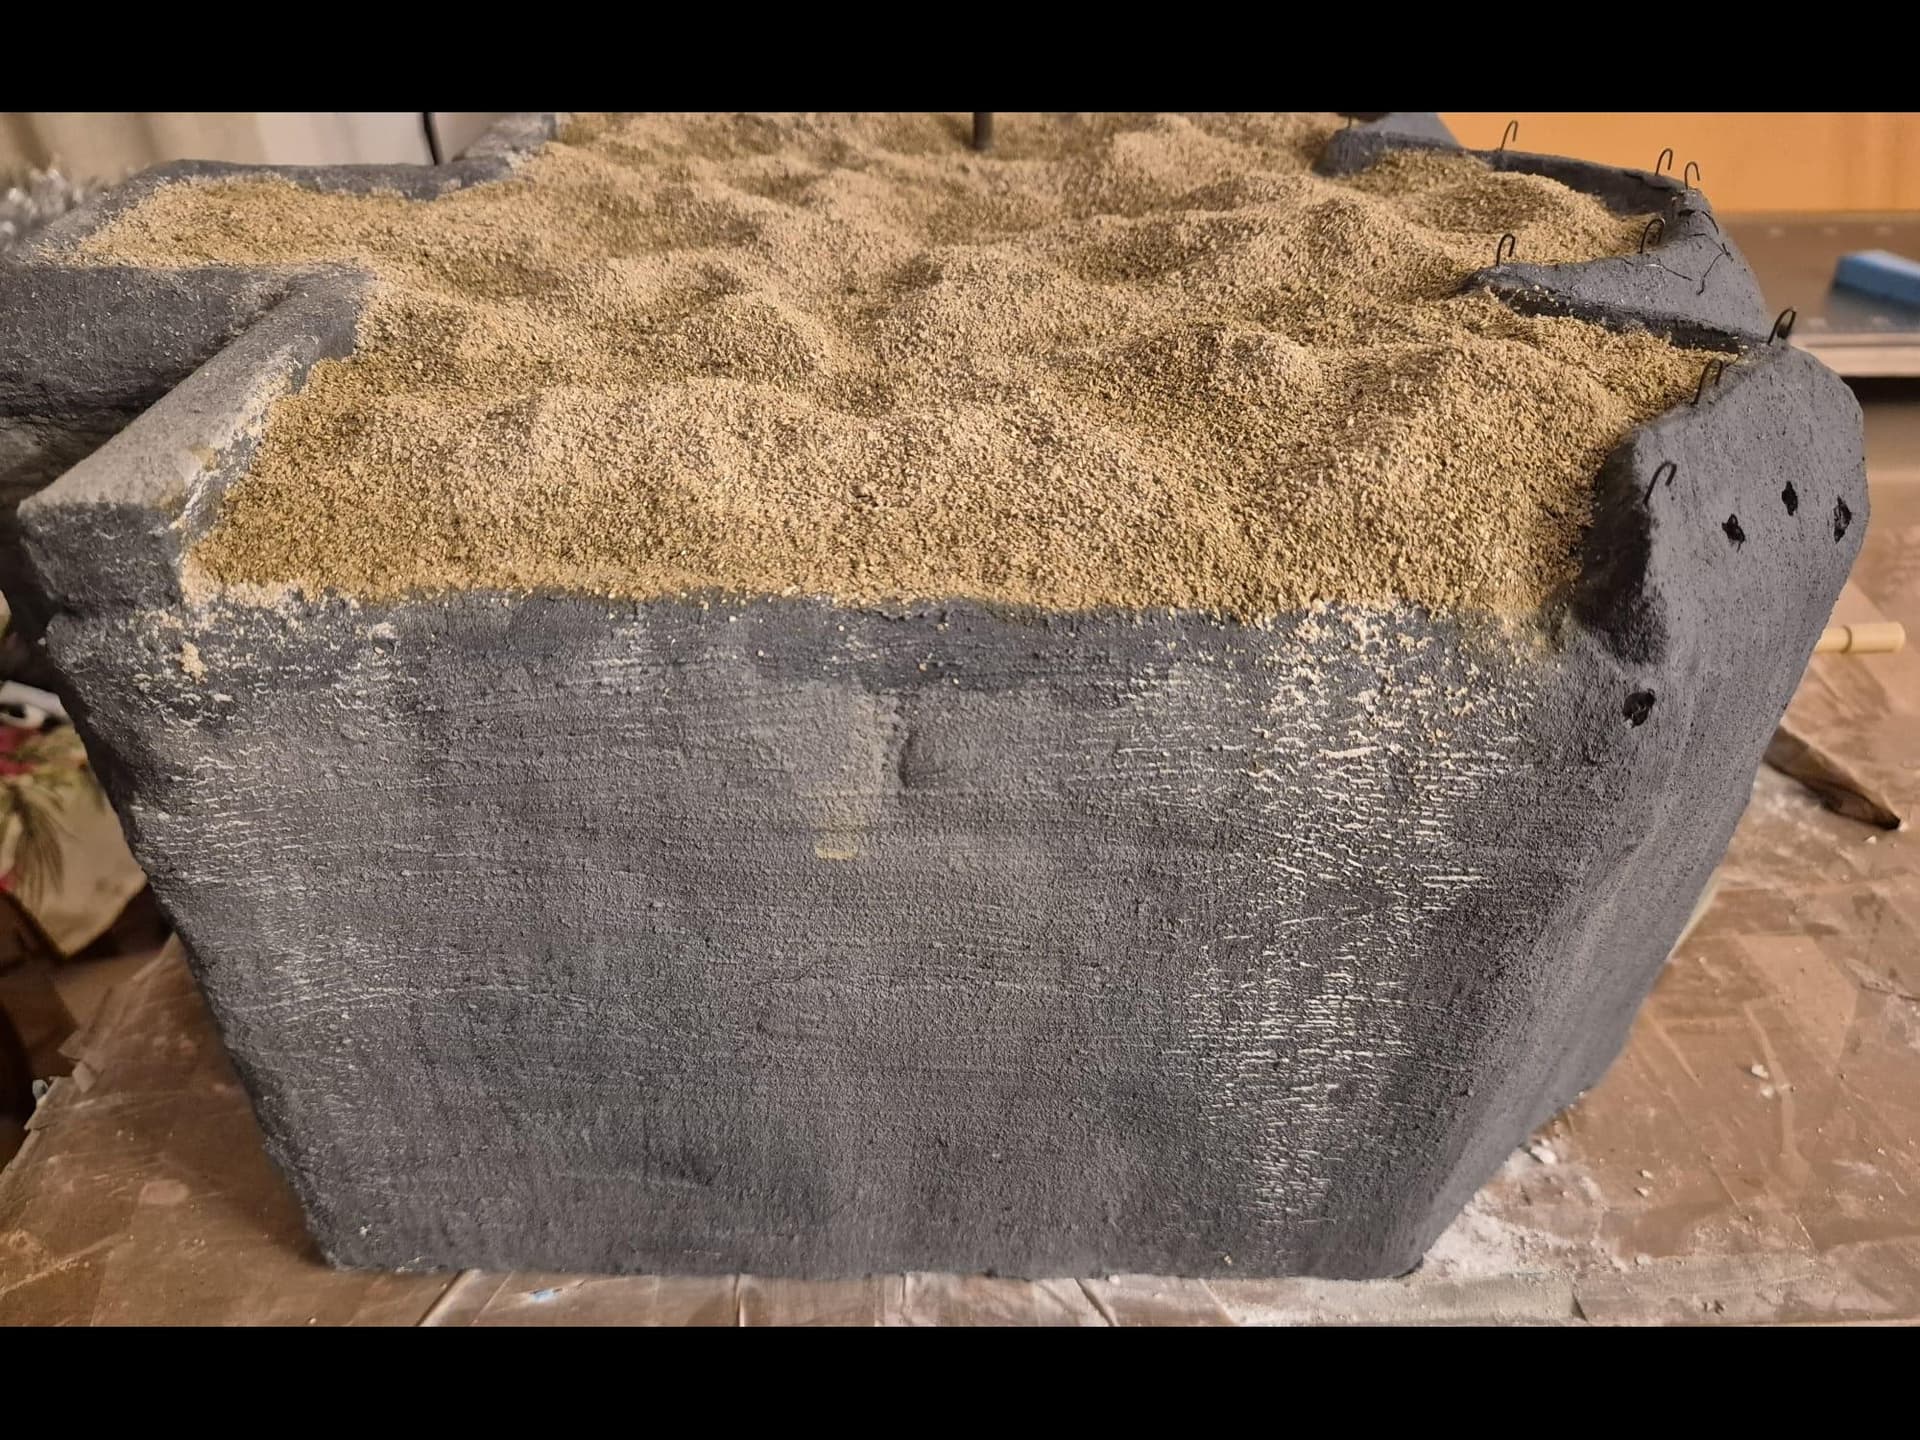
Well, cinematic jokes aside, the first application of the AK Interactive Concrete acrylic compound has been completed, at least on the outer surfaces.
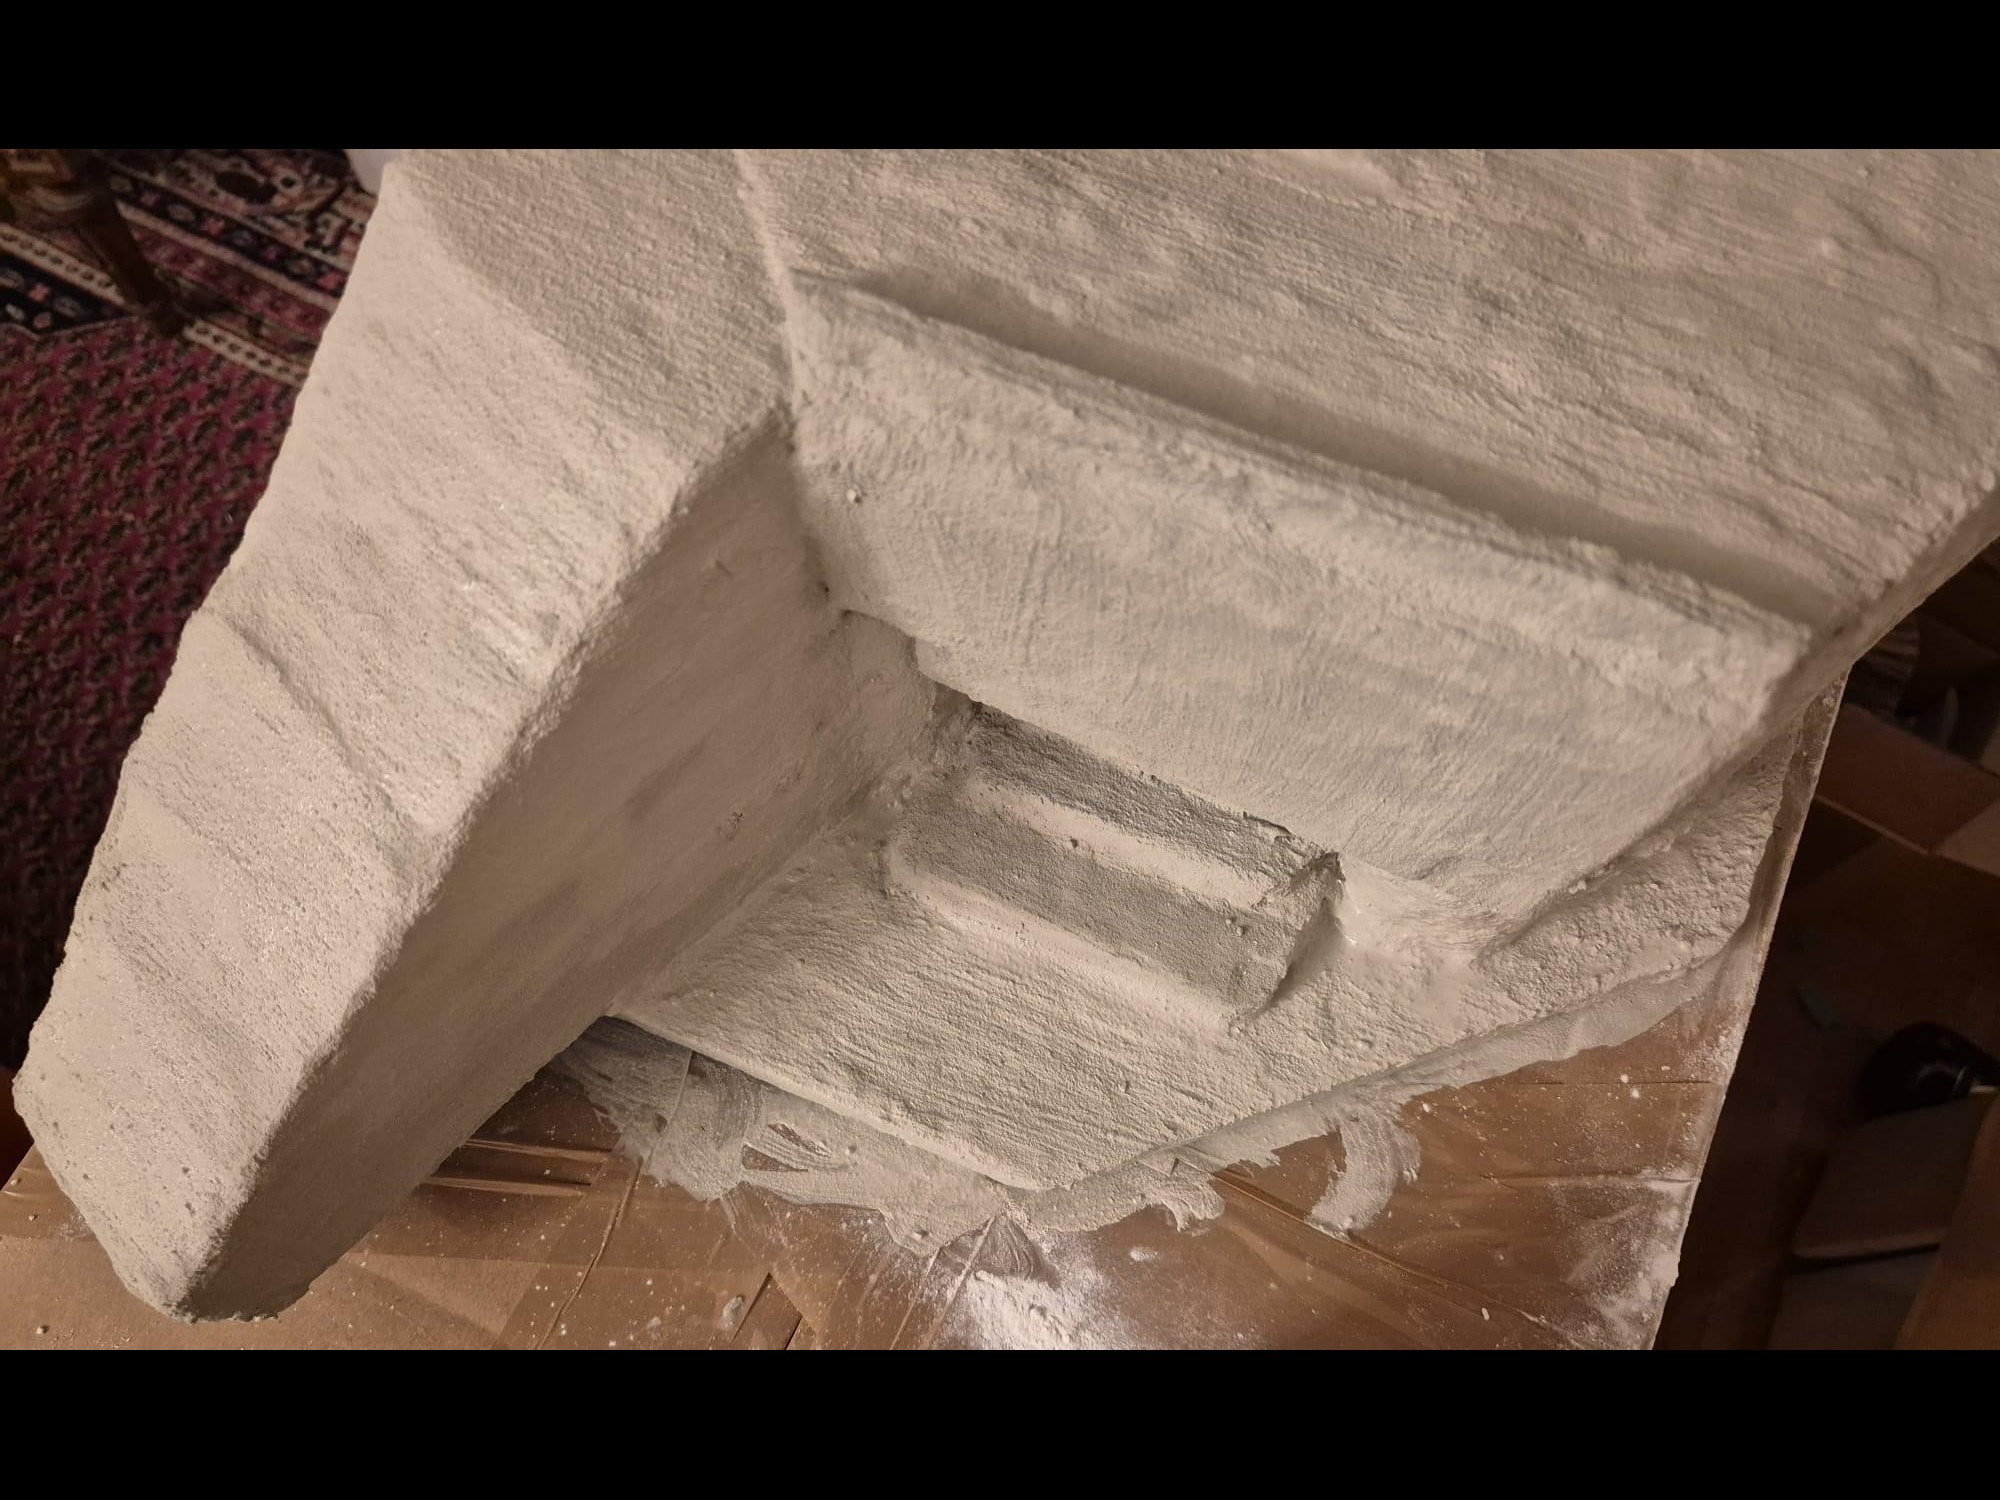
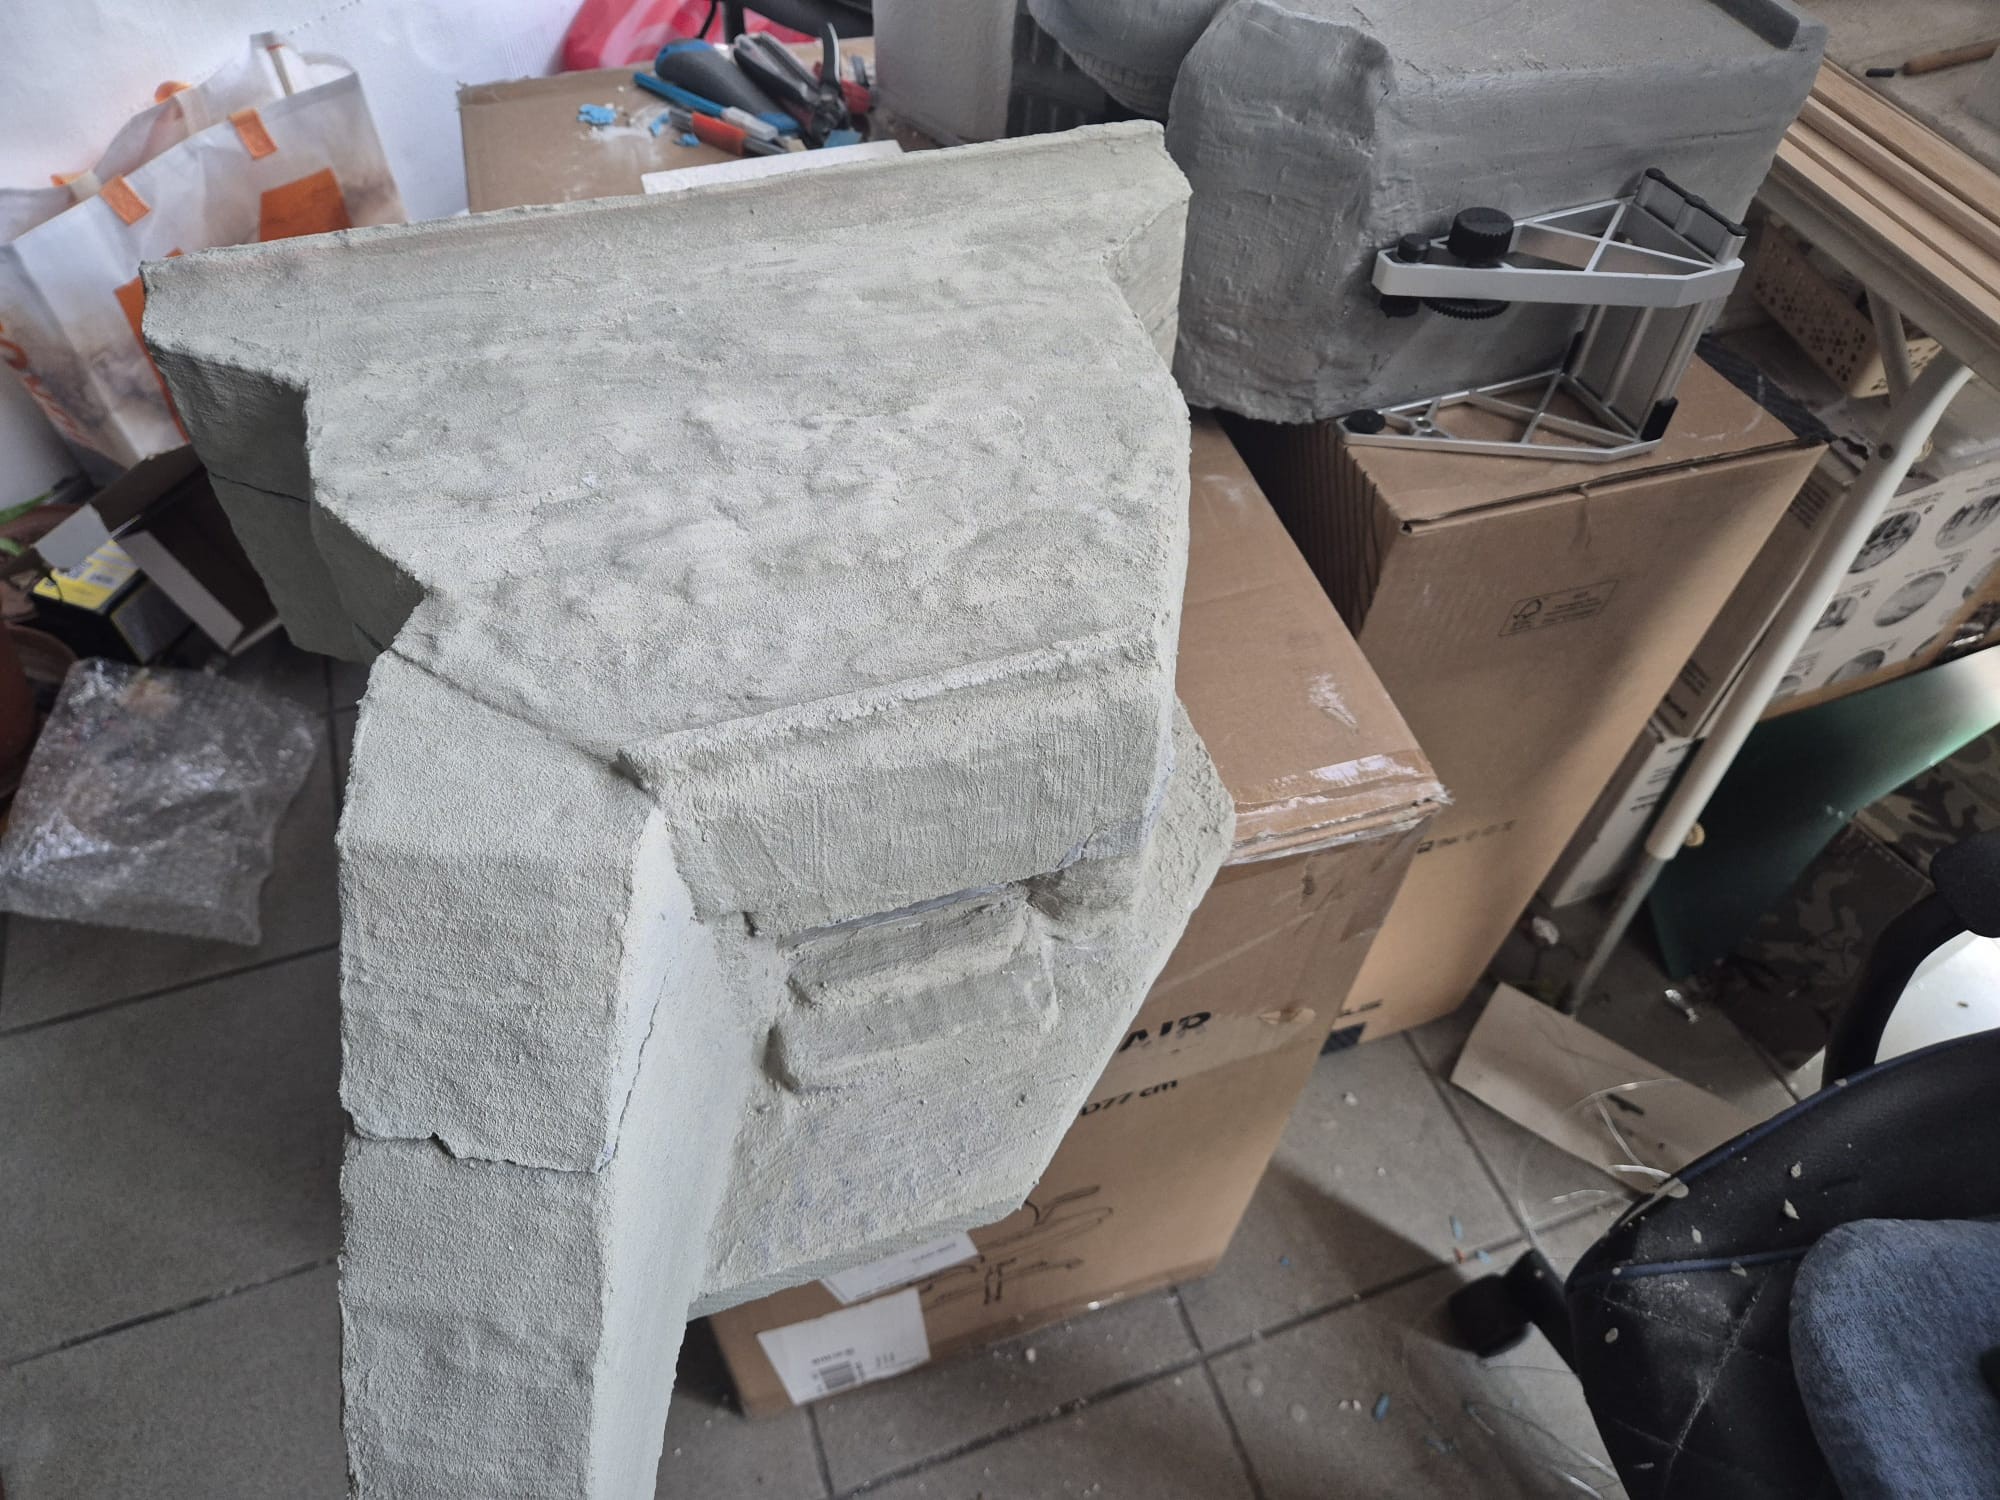
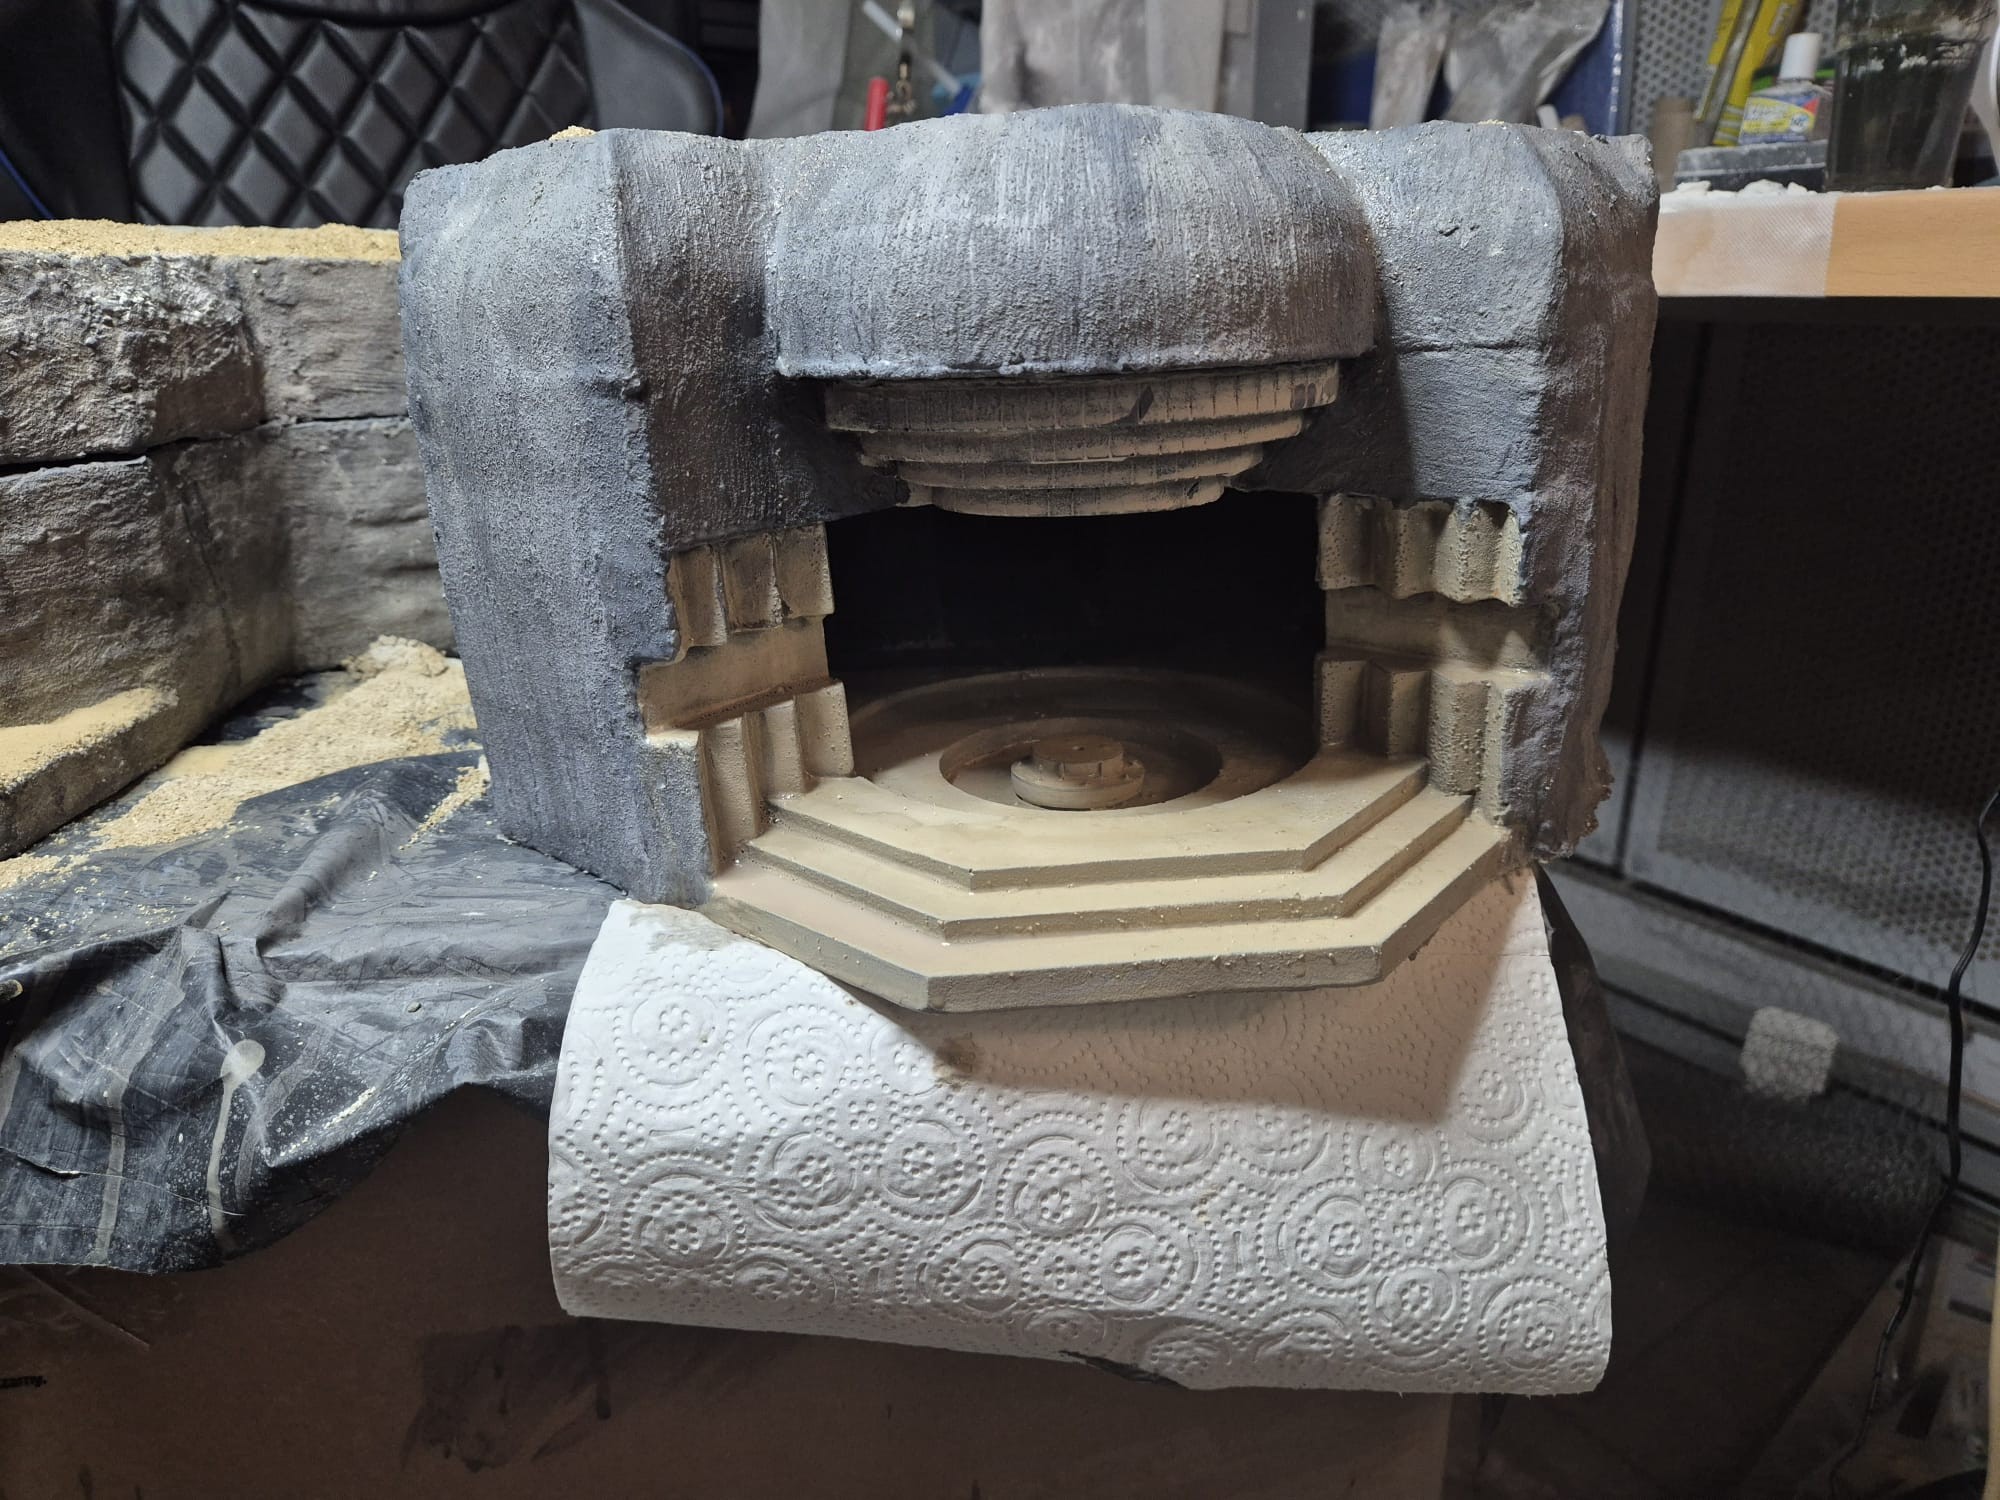
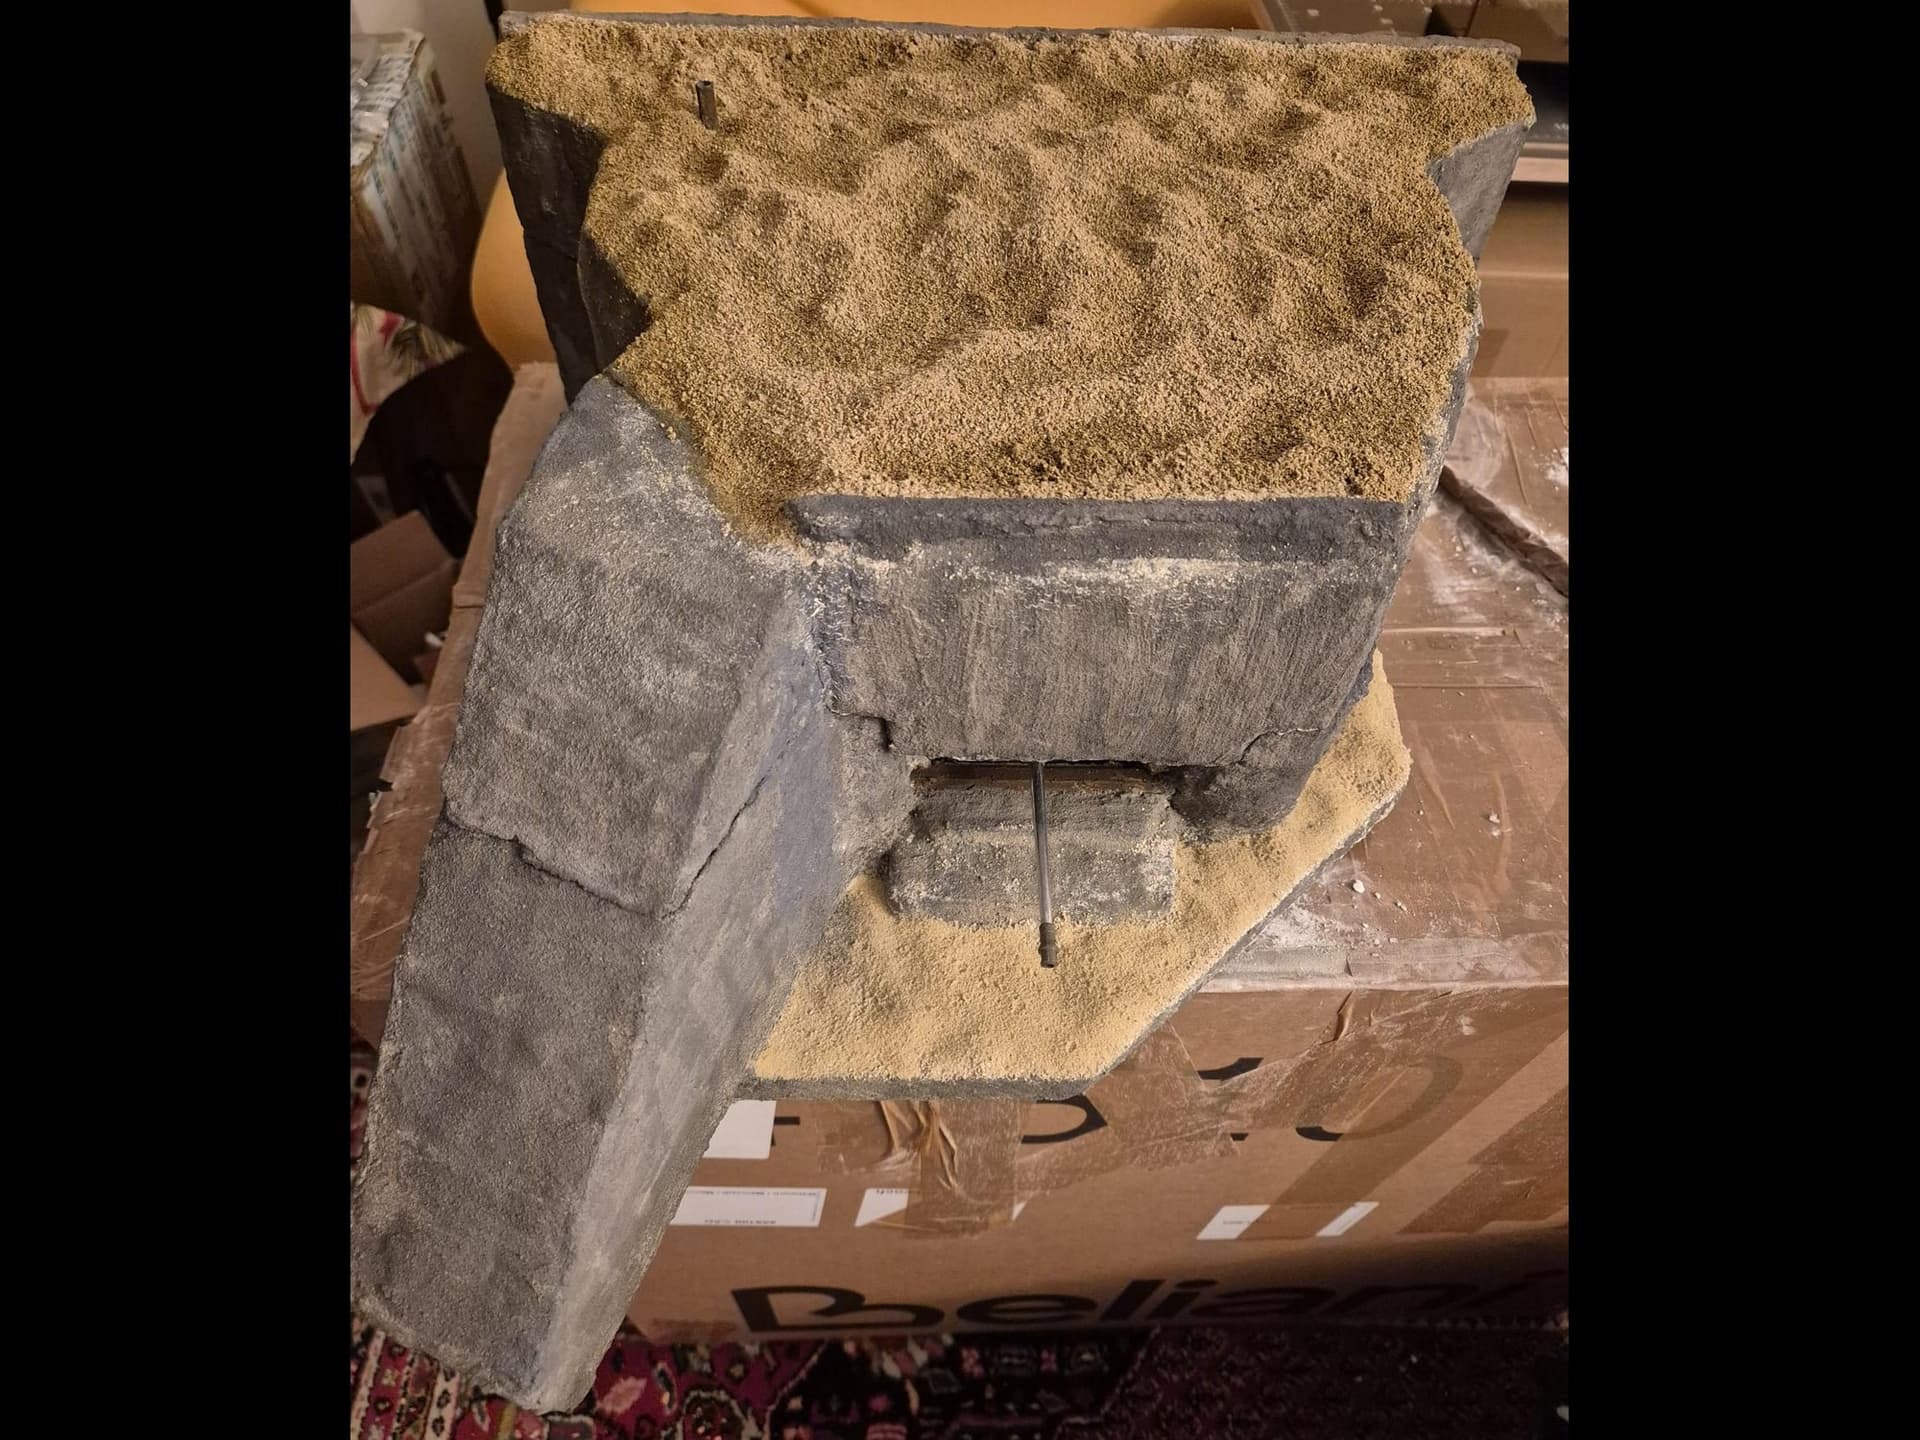
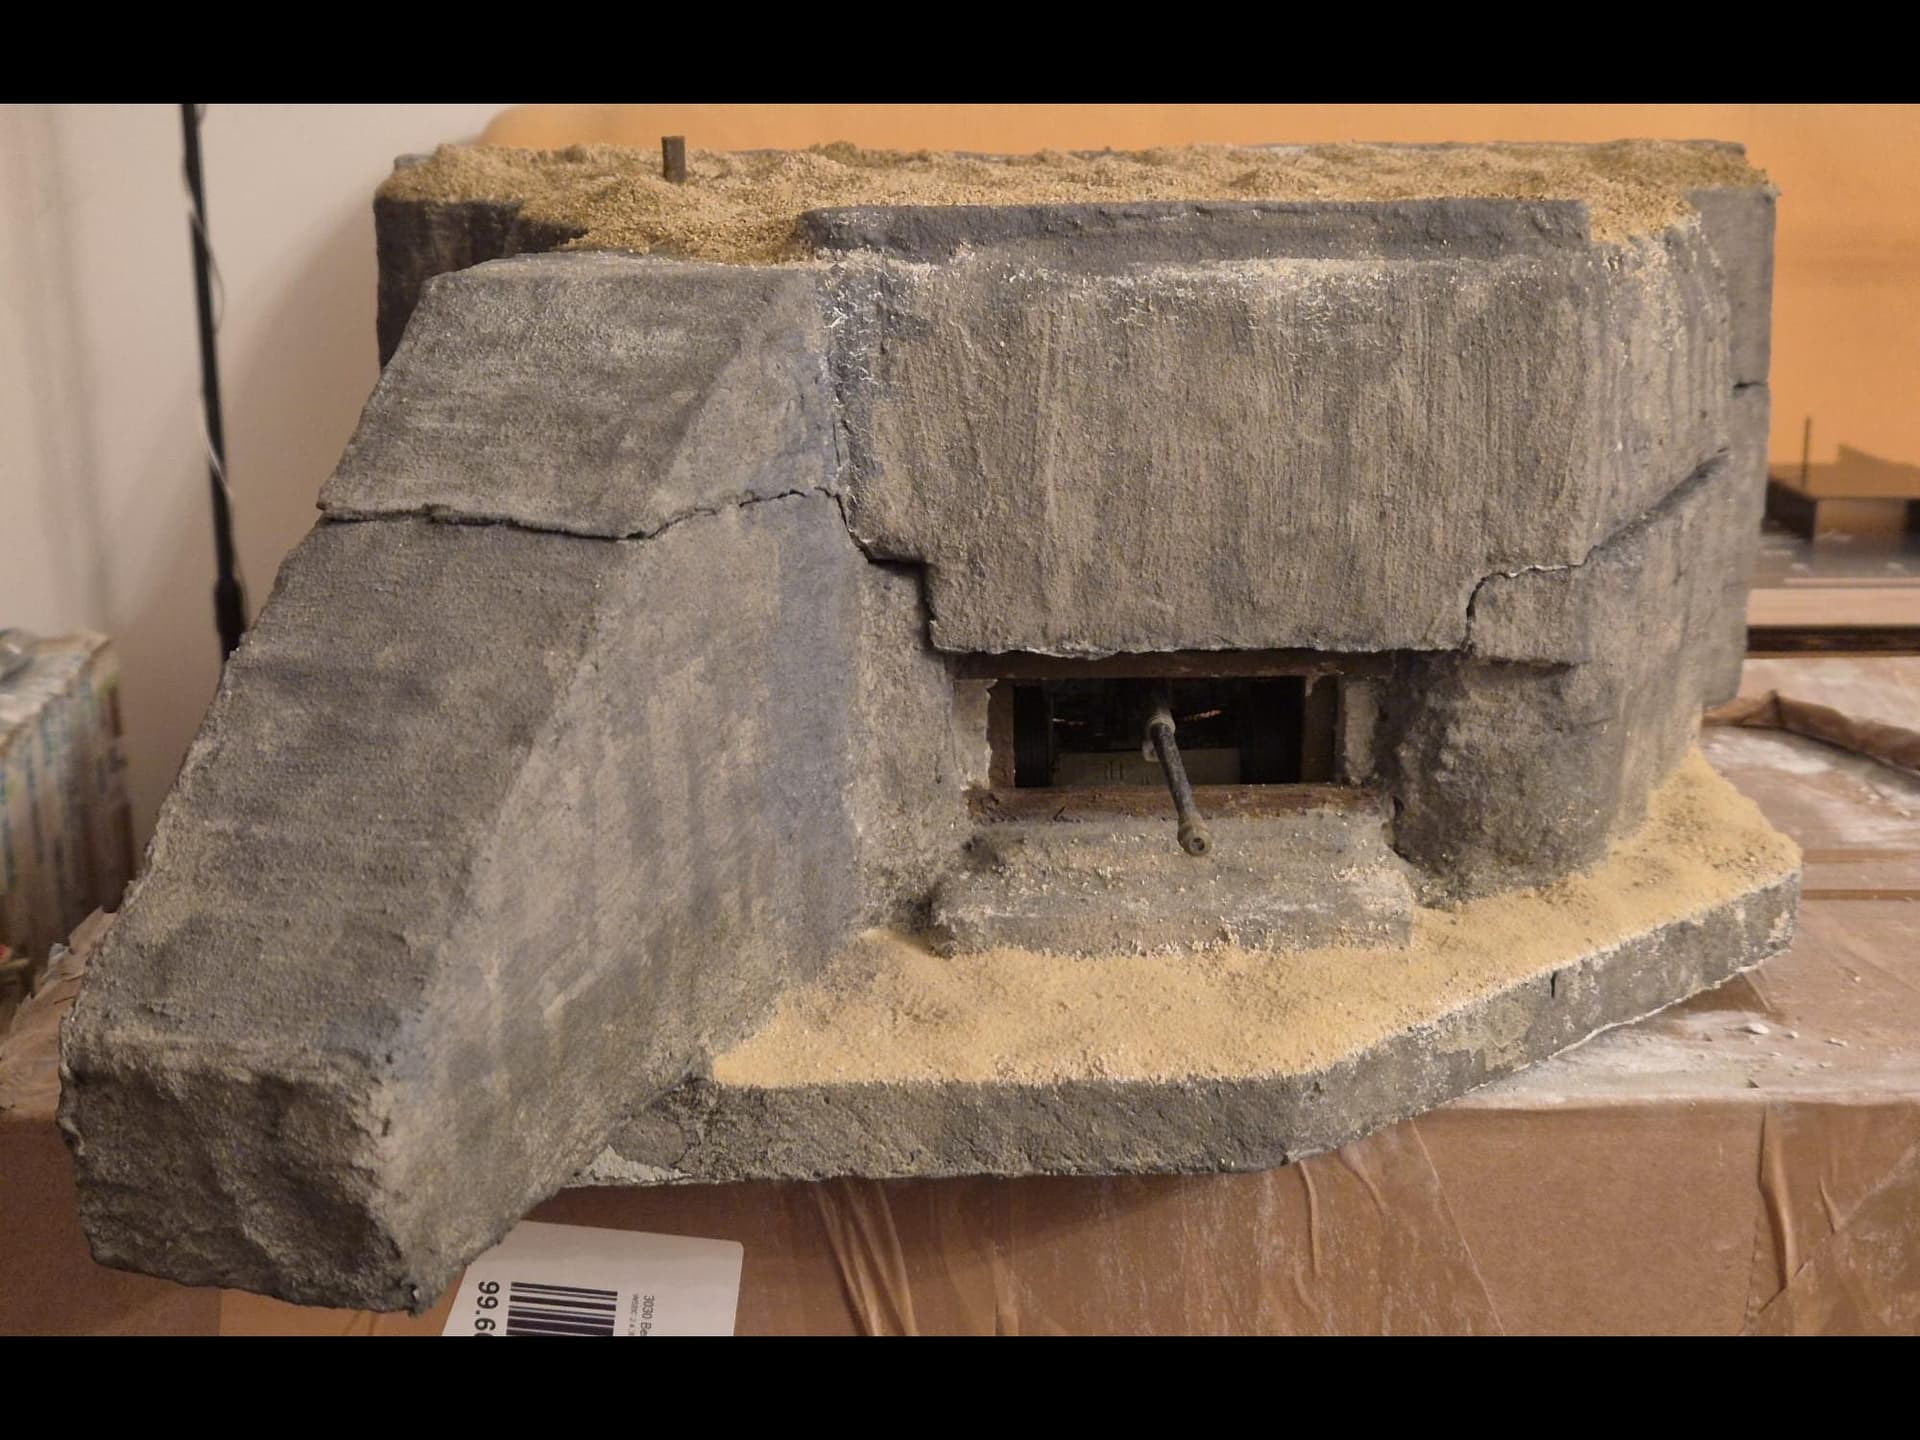
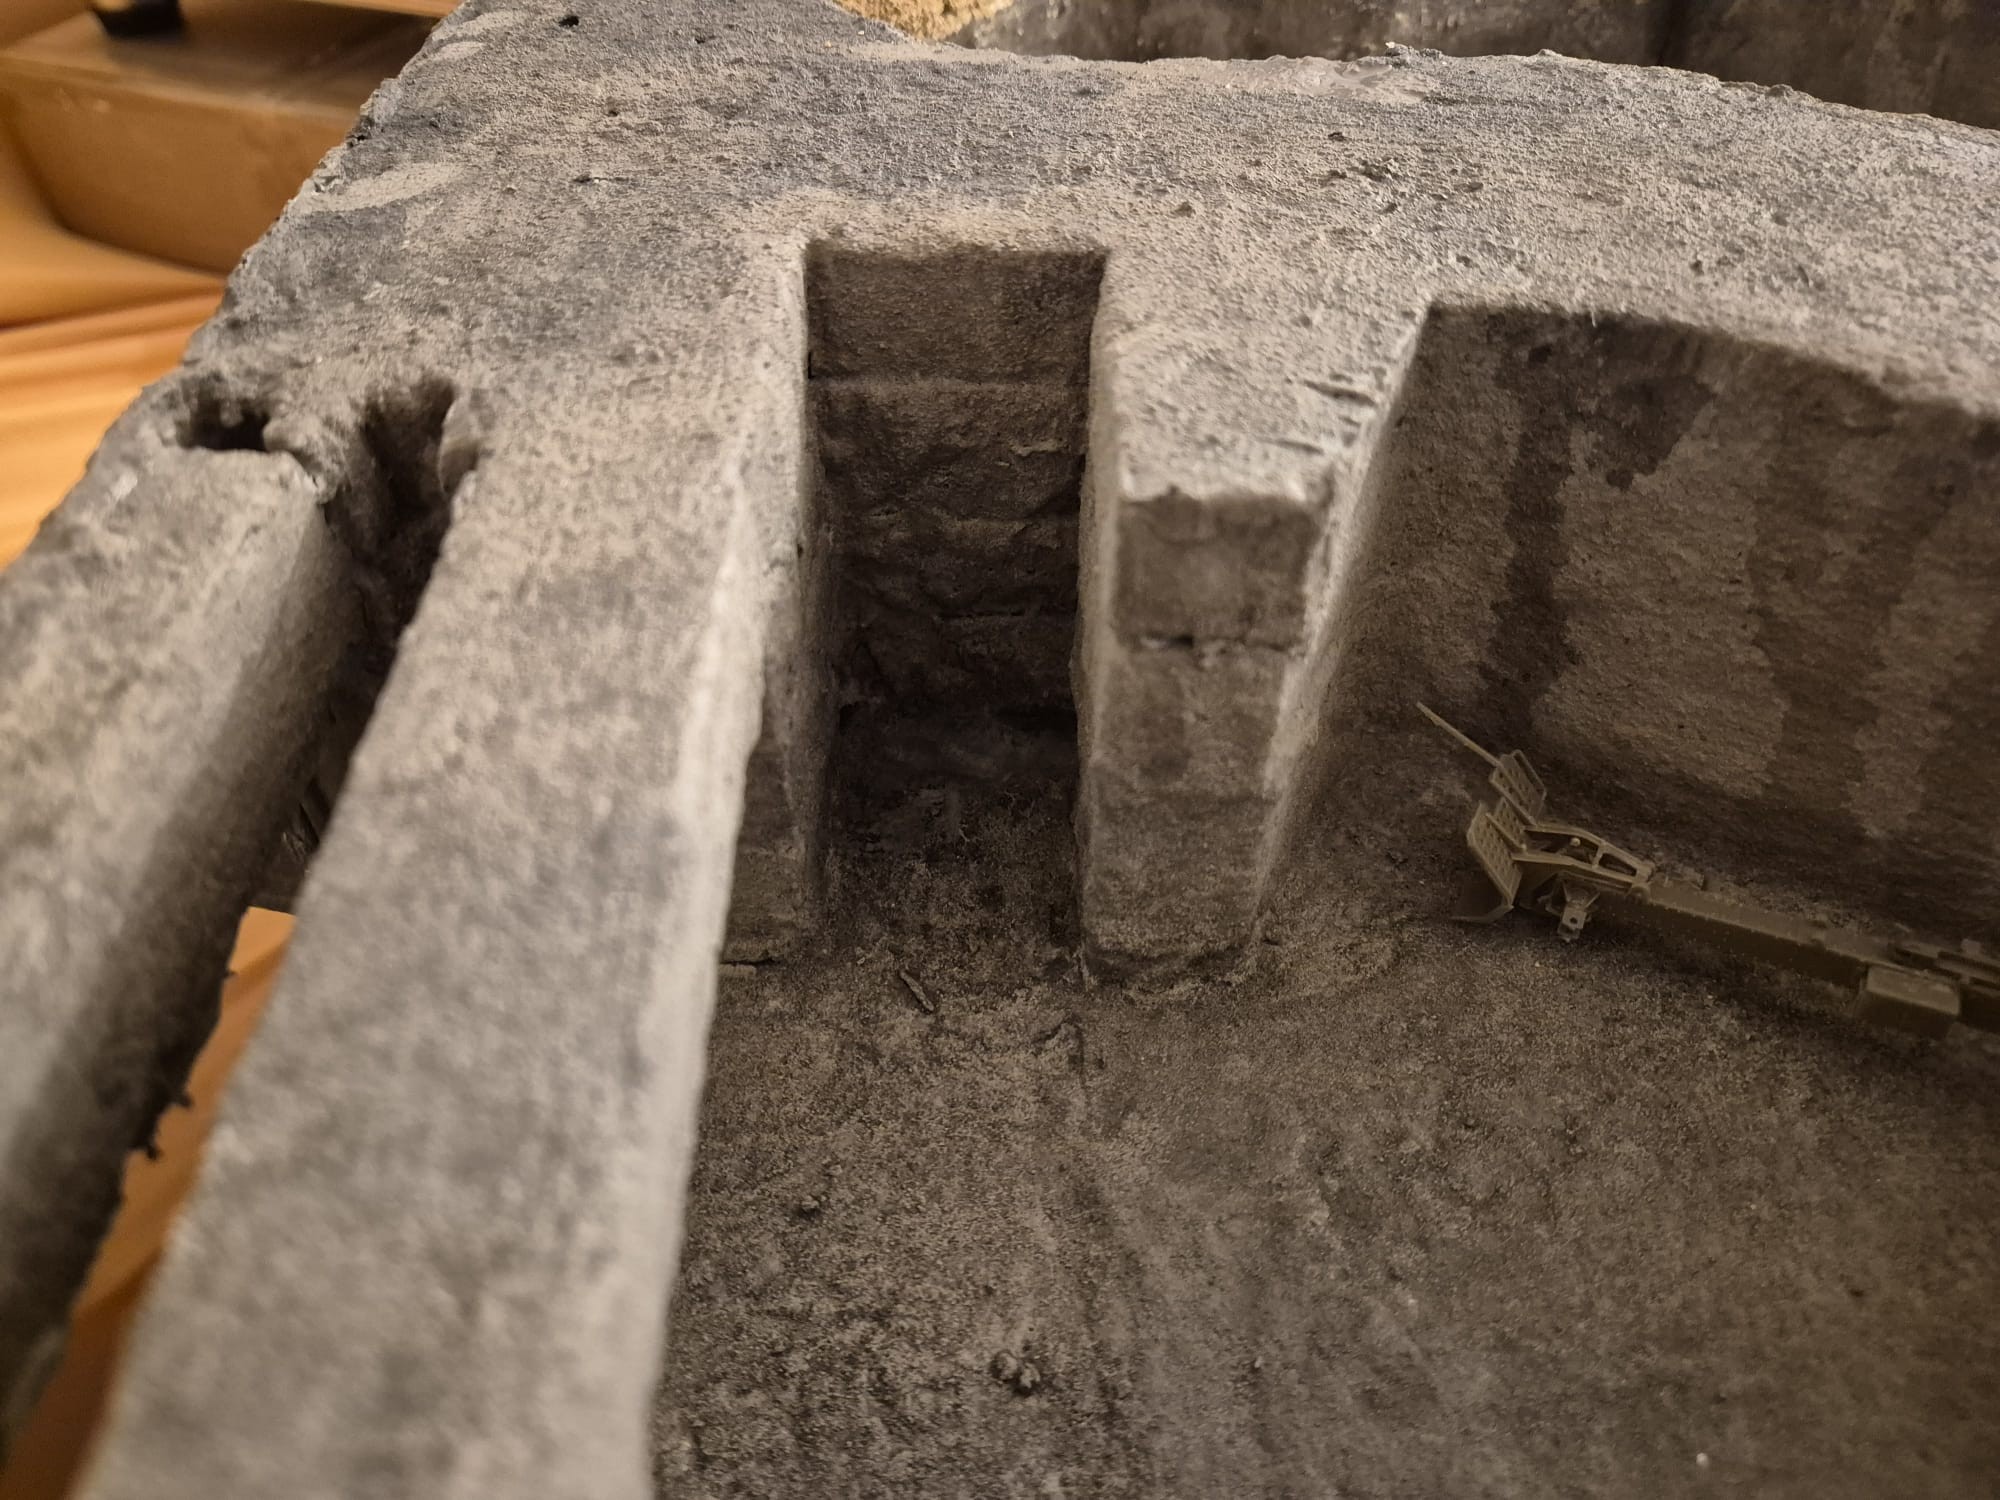
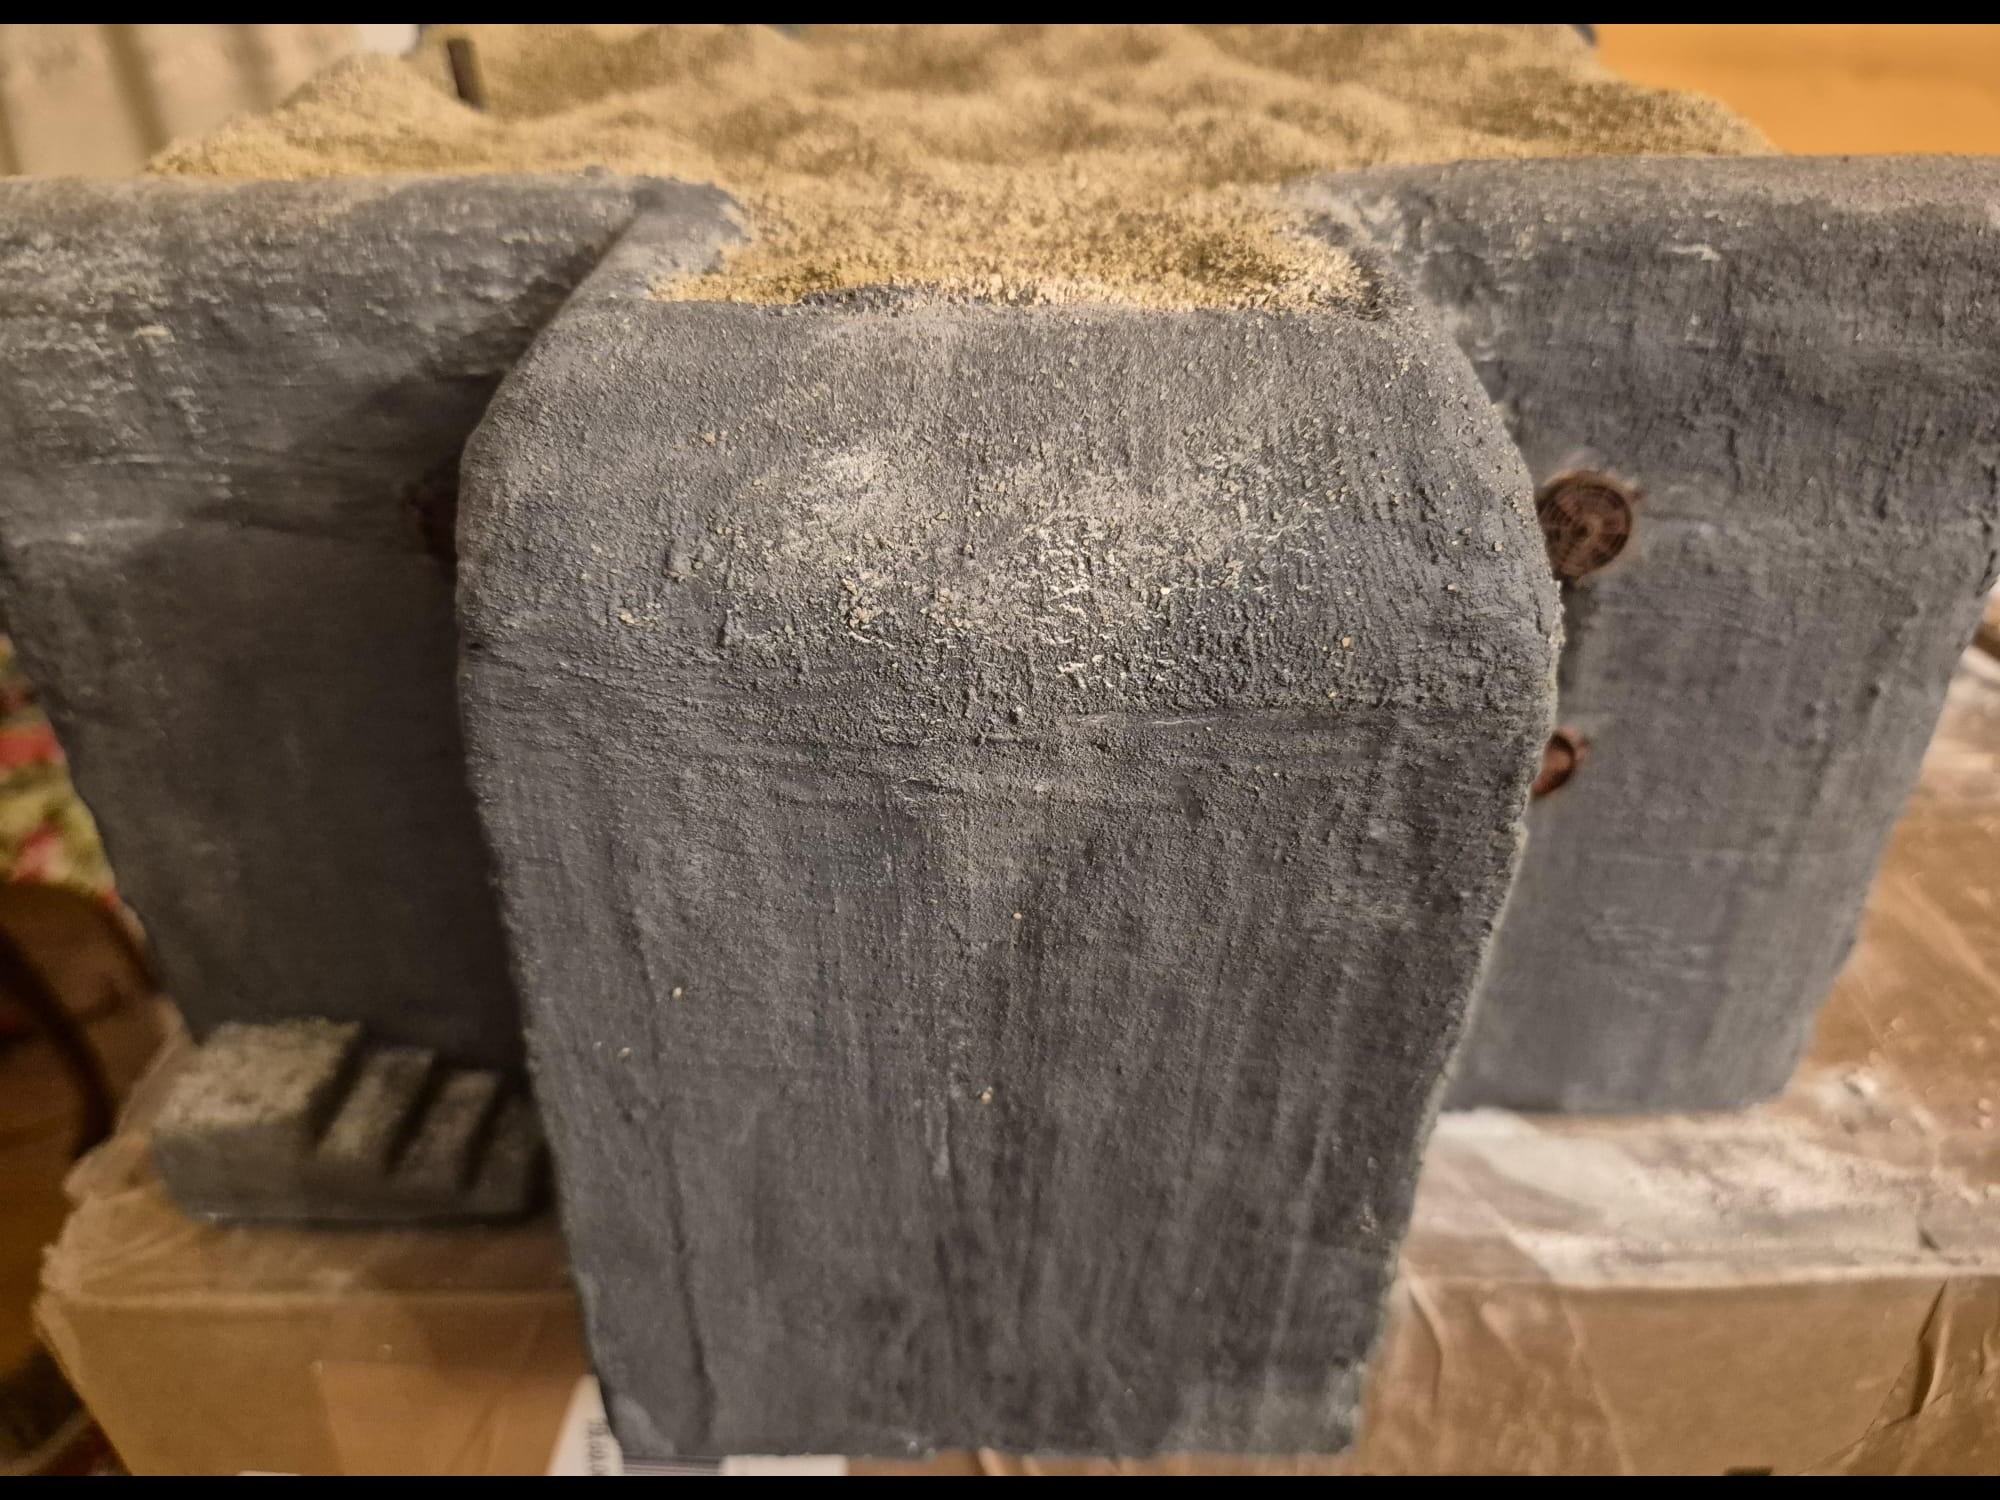
I discovered two things: first, it is easier to apply that compound directly on the hard foam than on the dry plaster because the plaster continues to want to mix the Concrete compound and therefore I had already to apply various applications to cover the plaster completely (good to know for the next time); second, through the application of the plaster on the rear of the Bunker, where the entrance is, I noticed that the right exterior wall was badly cut and has a curvature which I will need to fill with putty to straighten it.
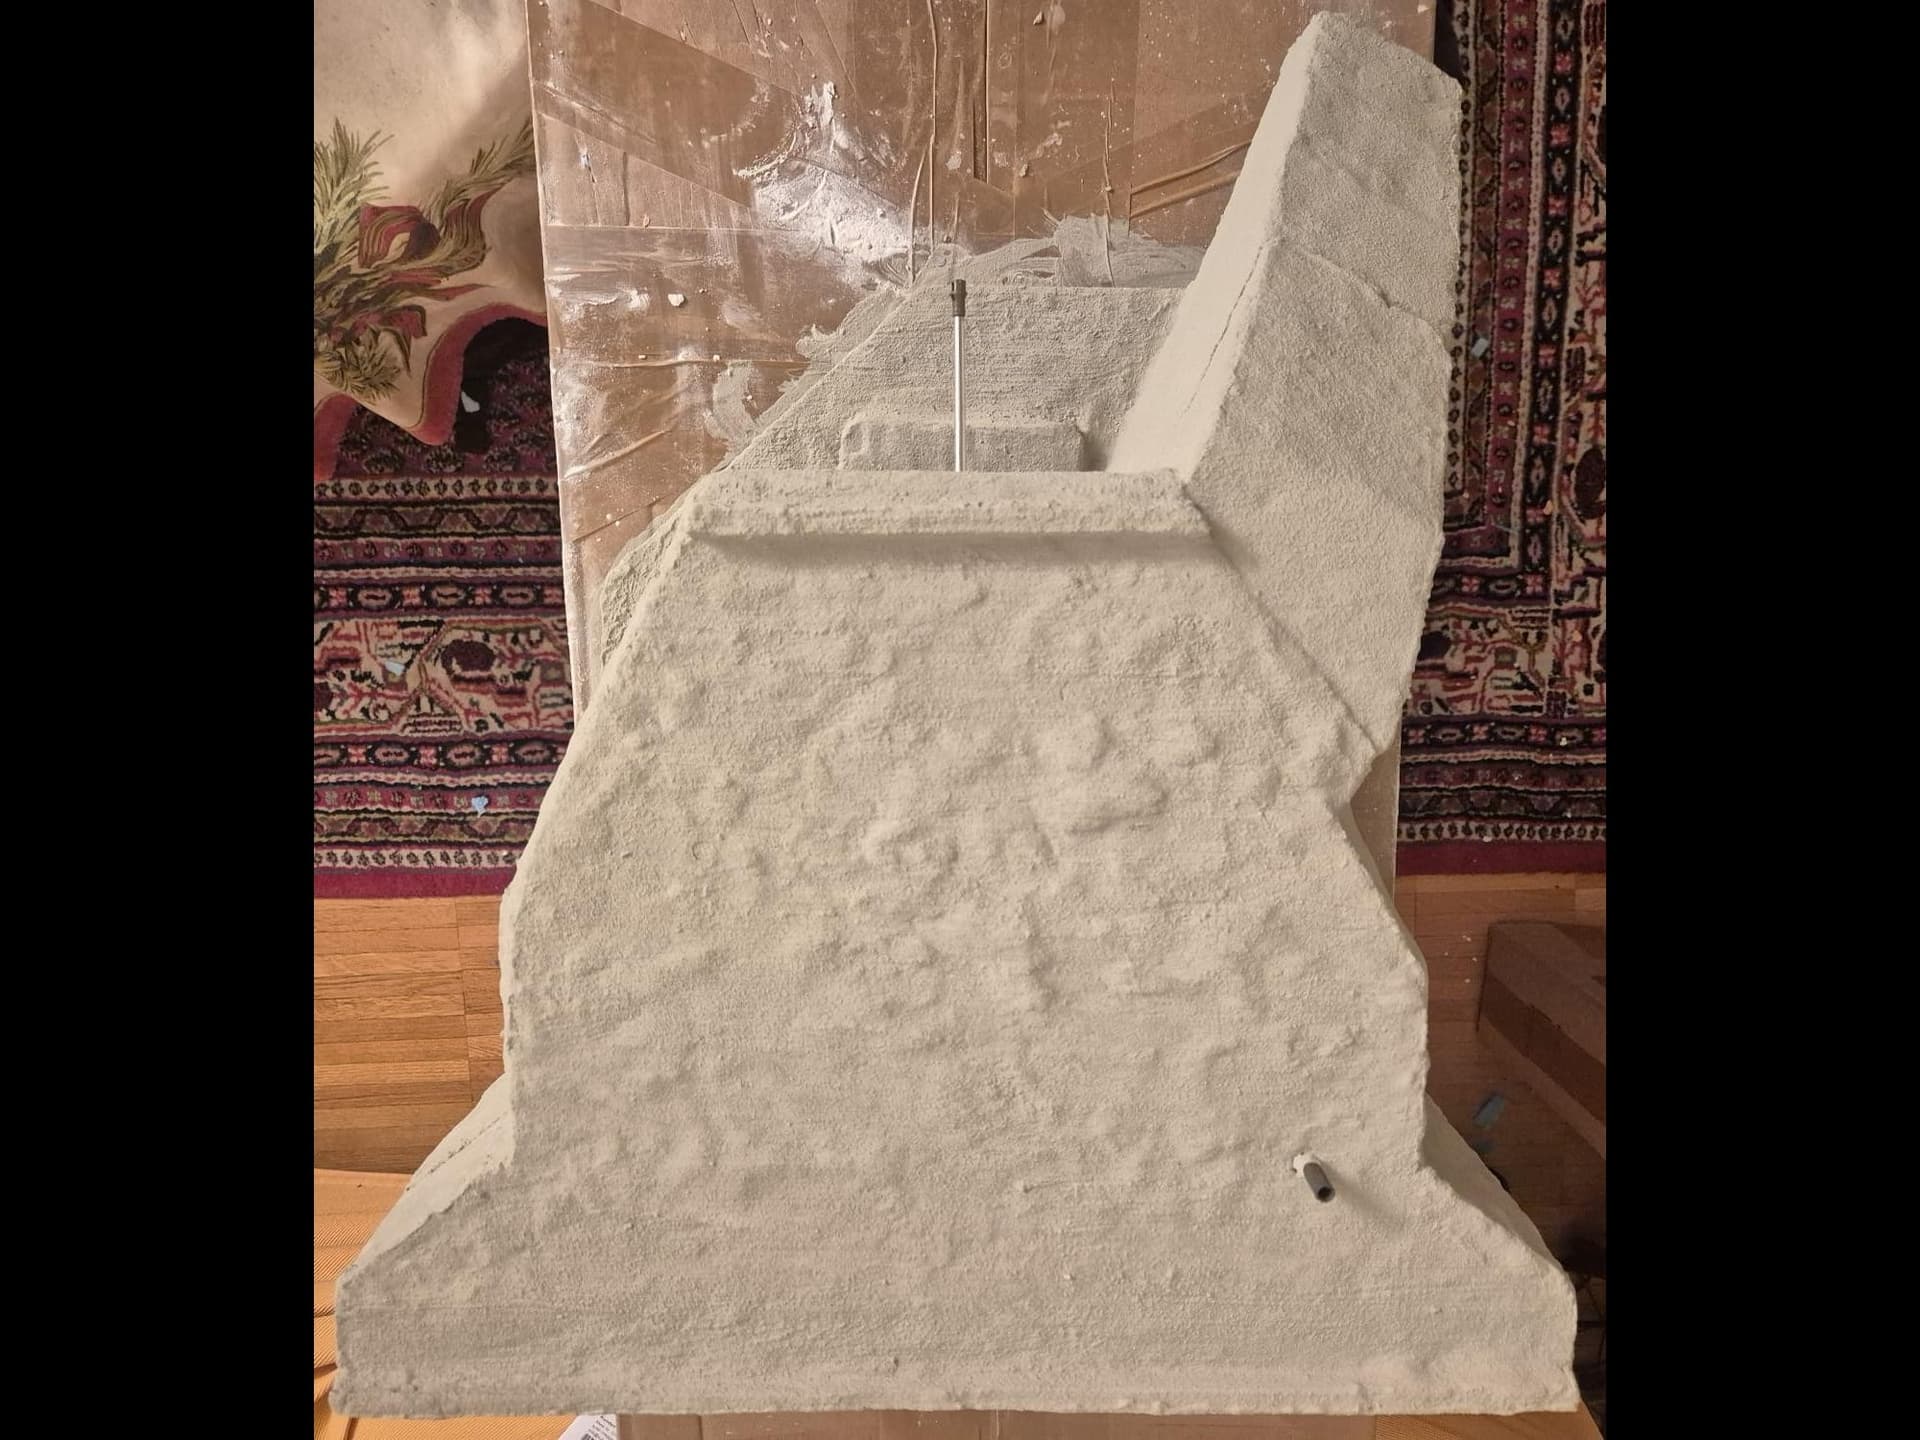
I cleaned as much as I could the interior parts and tomorrow I will proceed to cover even those with Concrete compound.
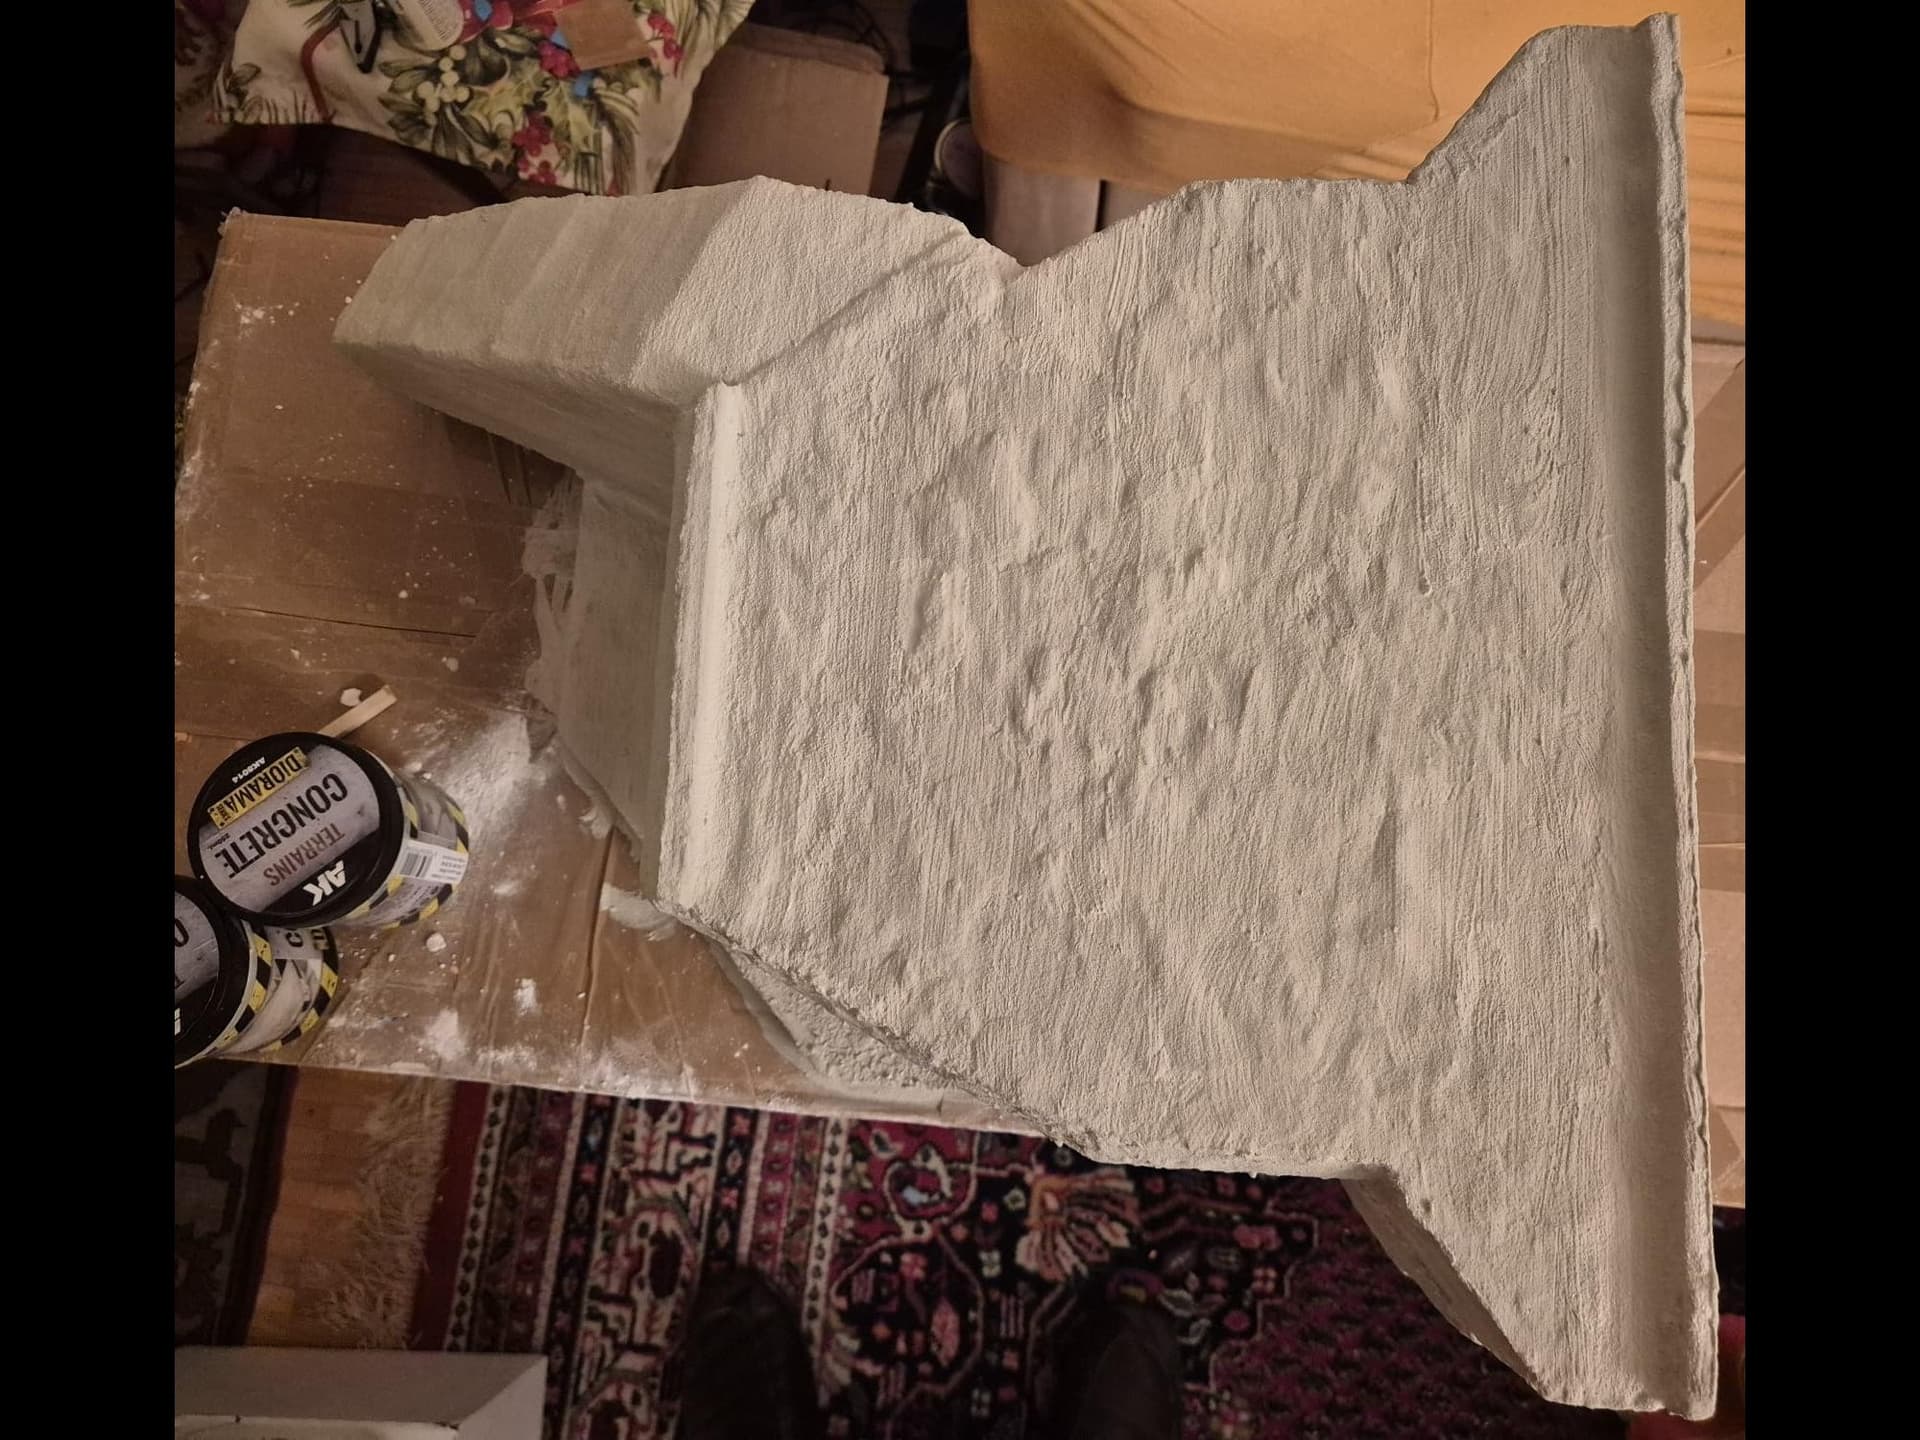
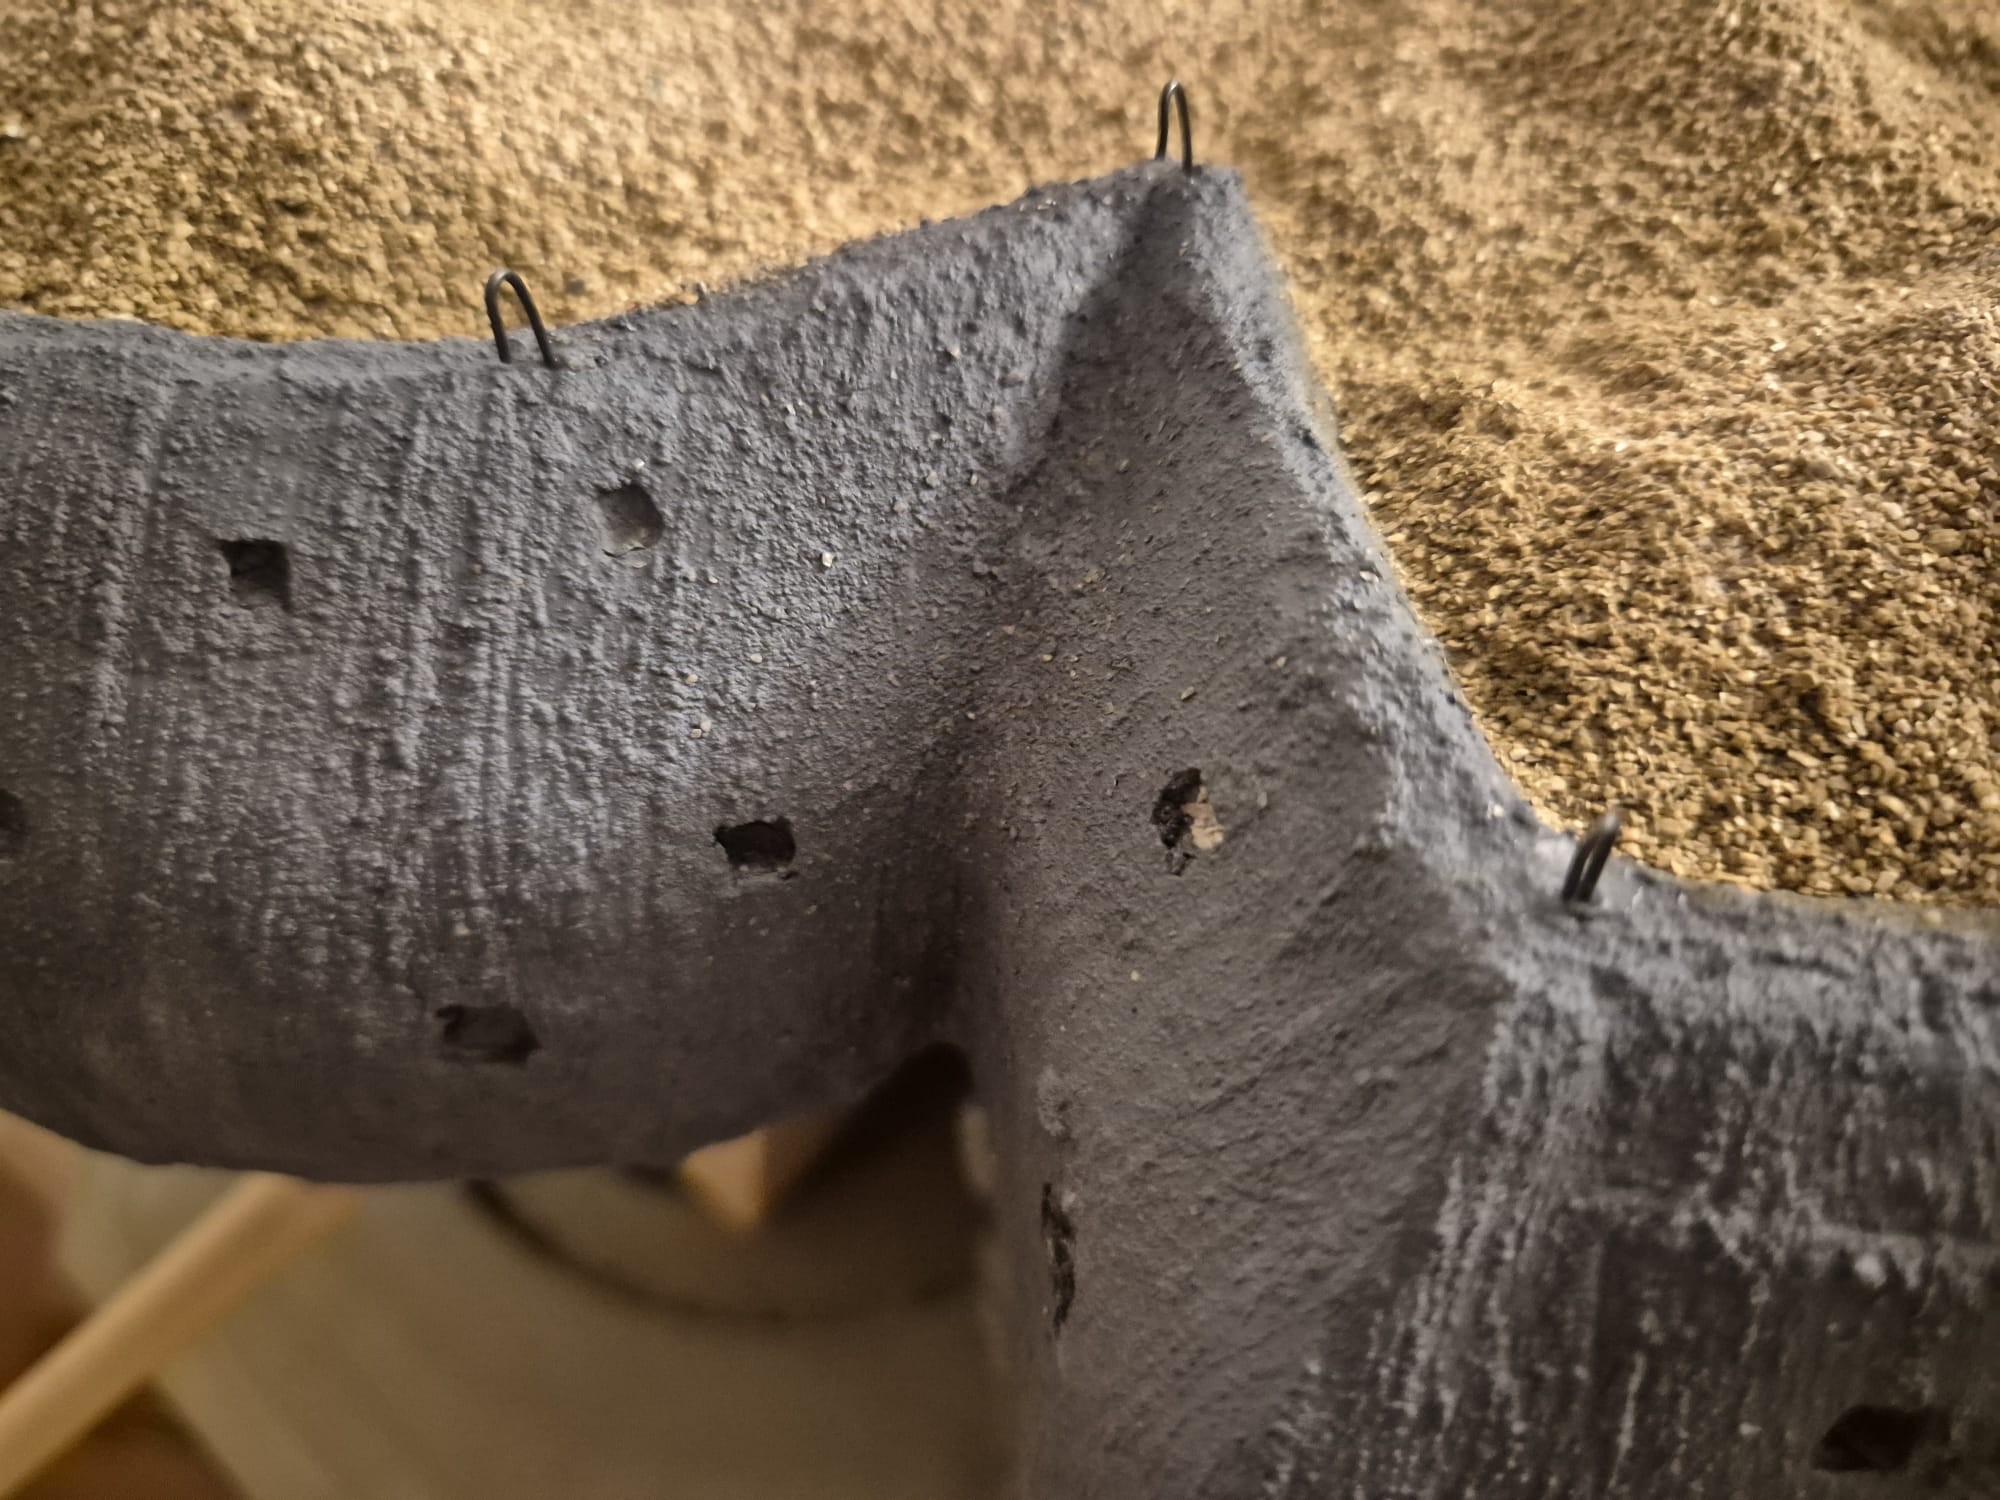
All in all, it is still a bit of a mess and indeed some parts have been “fused” with the Concrete. I am talking about where the roof touches the main structure, but that’s easily solved by just taking either an Xacto knife or a scalpel to divide the two.
It was necessary to do so in order to make the entire Bunker more uniform.
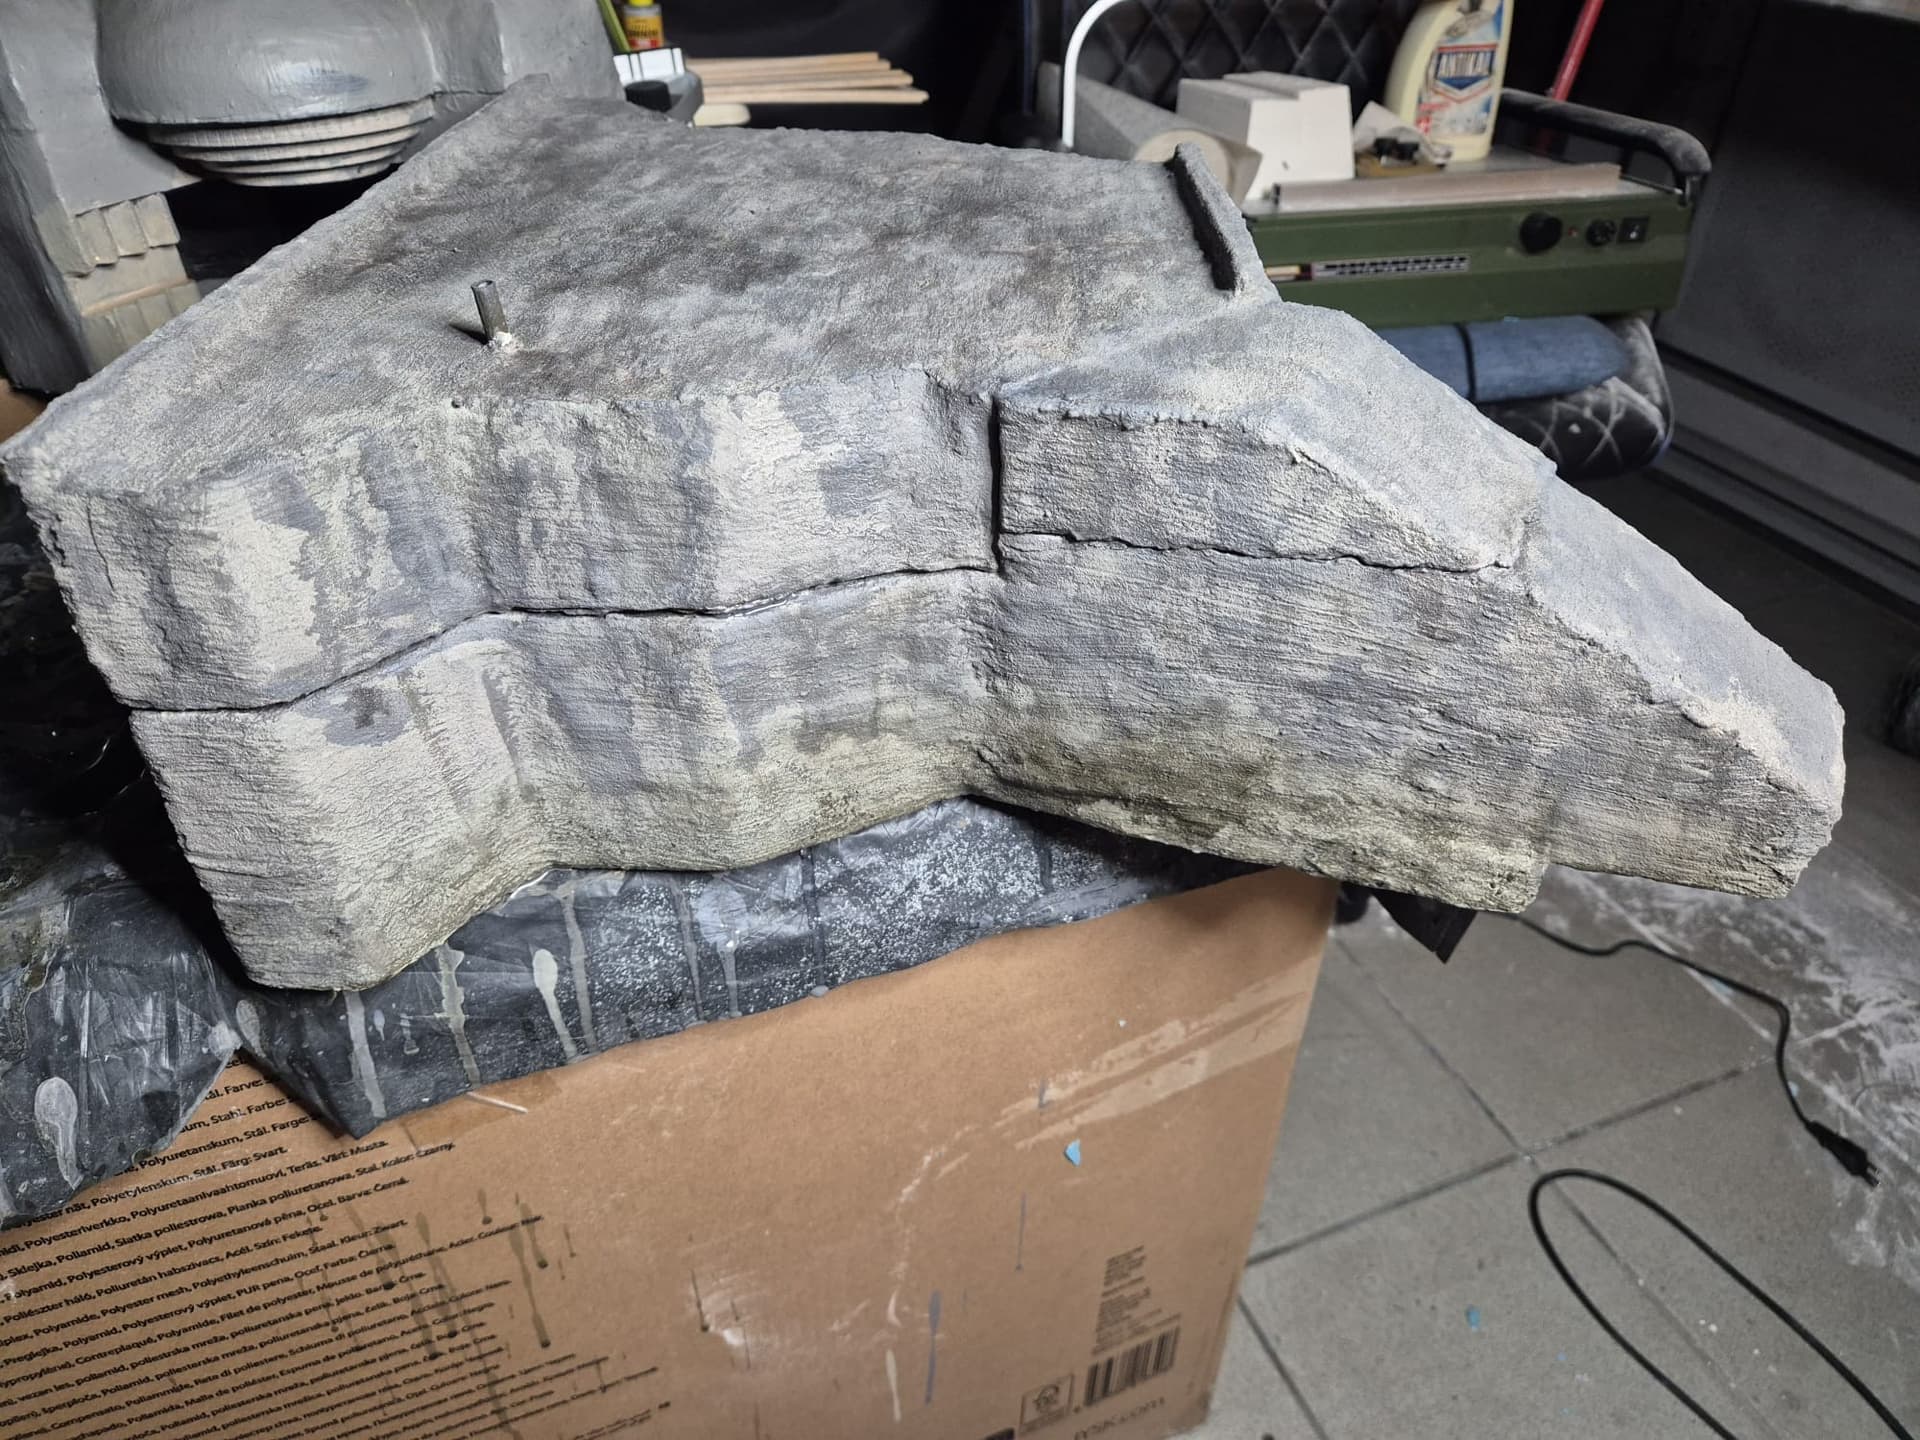
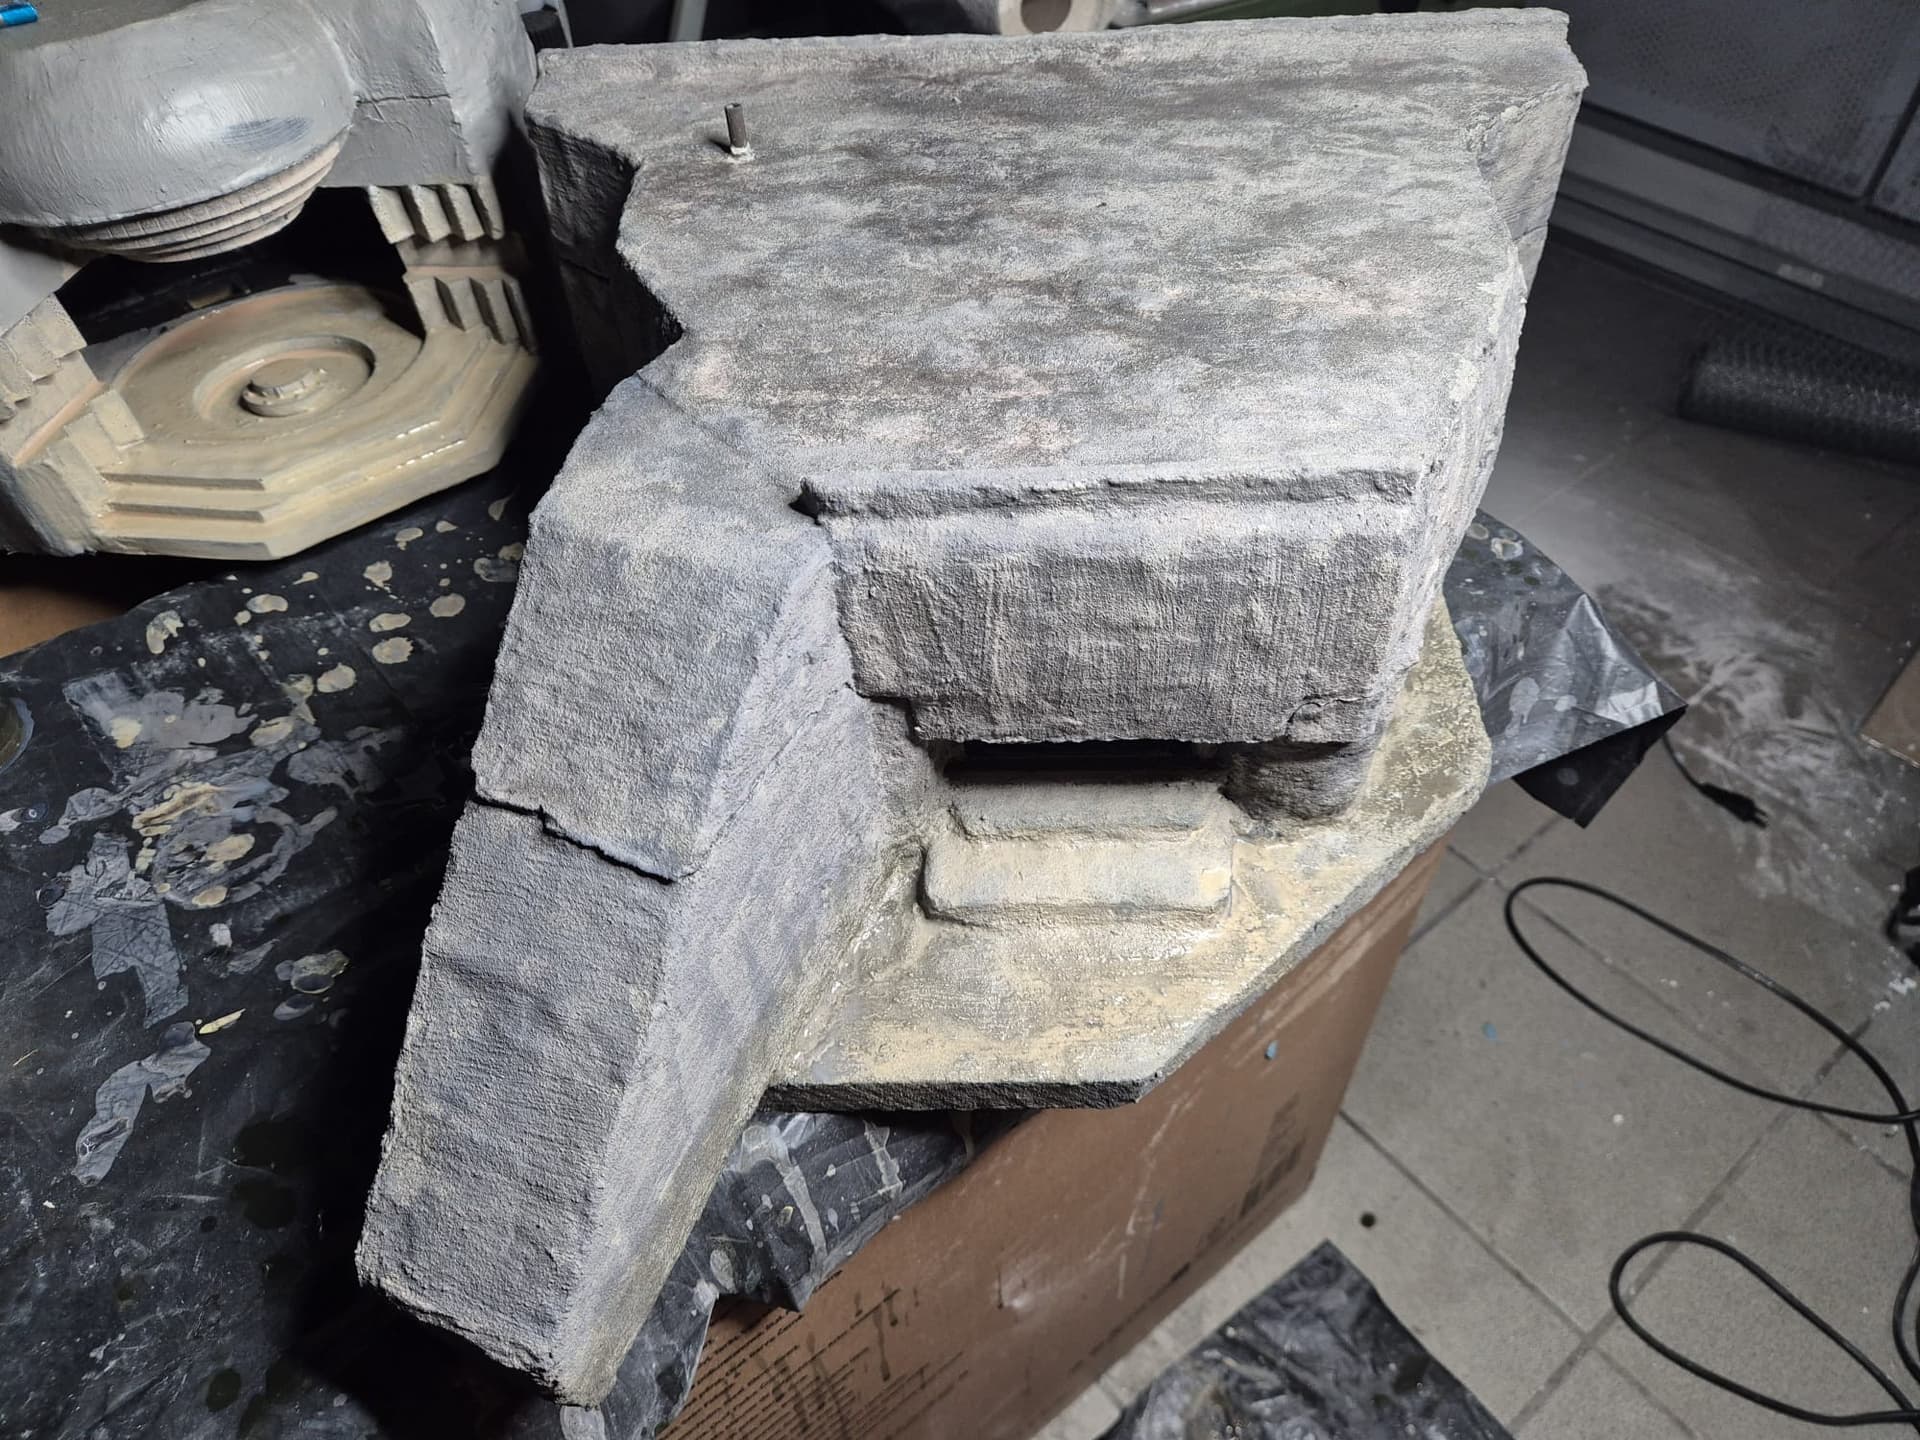
Tomorrow, if time allows, I will also rectify the two front and rear parapets with air drying clay which I will more correctly shape into bent-in wedges.
Once dry I will once more apply Concrete unto them to mask their redness. After that I will apply washes all over the Bunker and unto the interior walls and floors. I will also redefine the front and read wooden beams of the embrasure and return them to their original worn state.
In addition, I will have to paint the wheel stops and the wheel bumpers in a darker color that more resembles granite rock, rather than concrete.
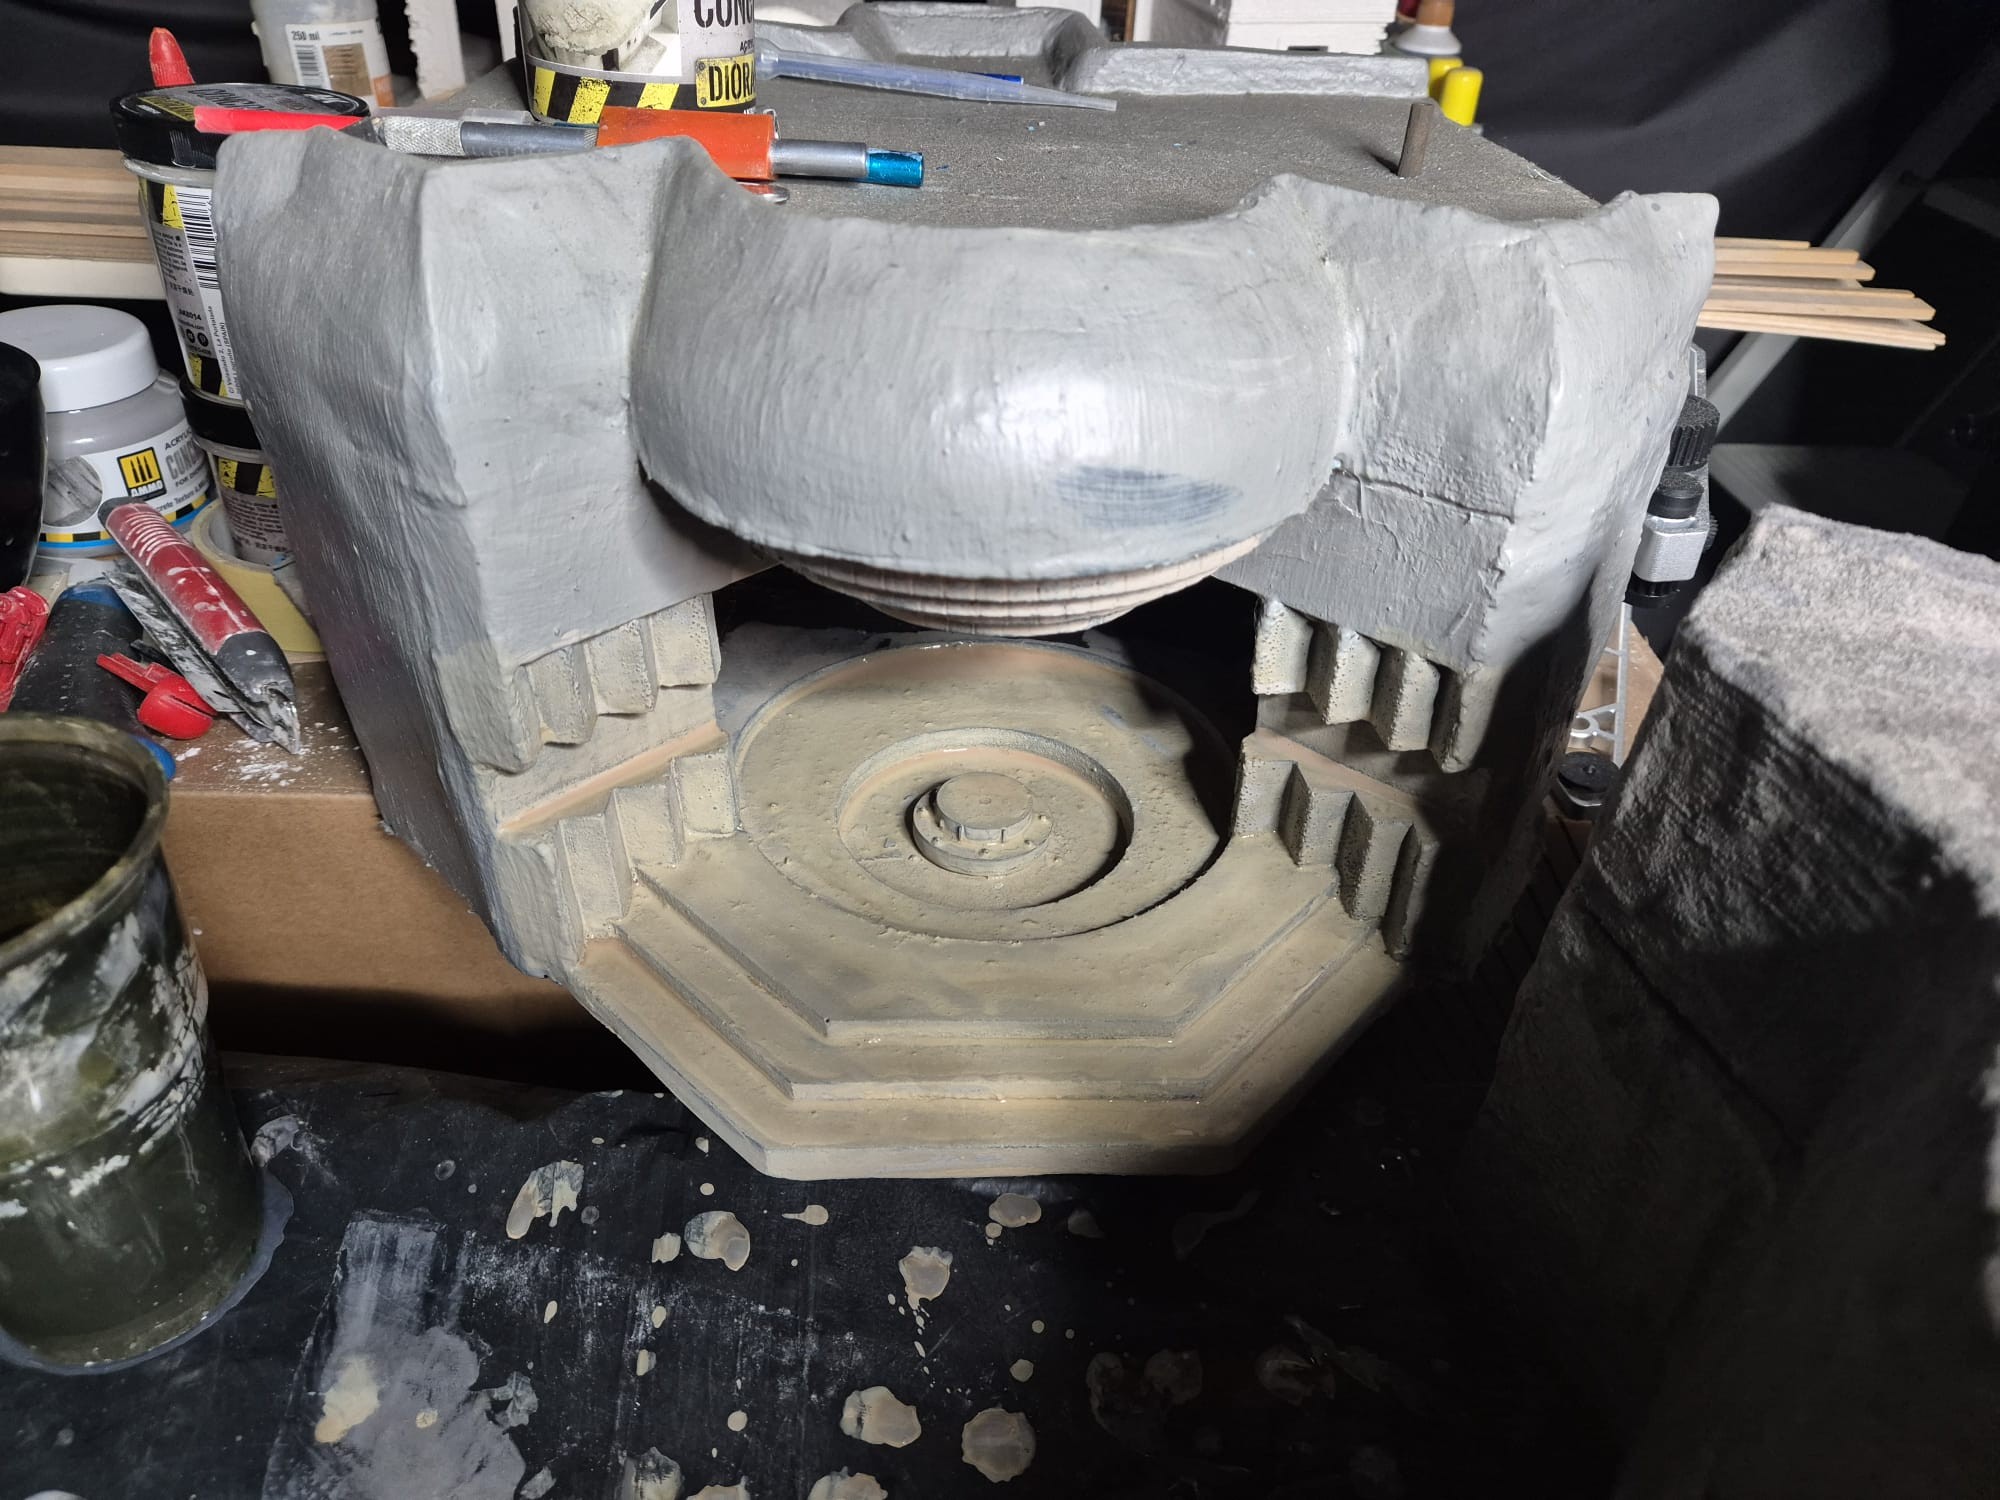
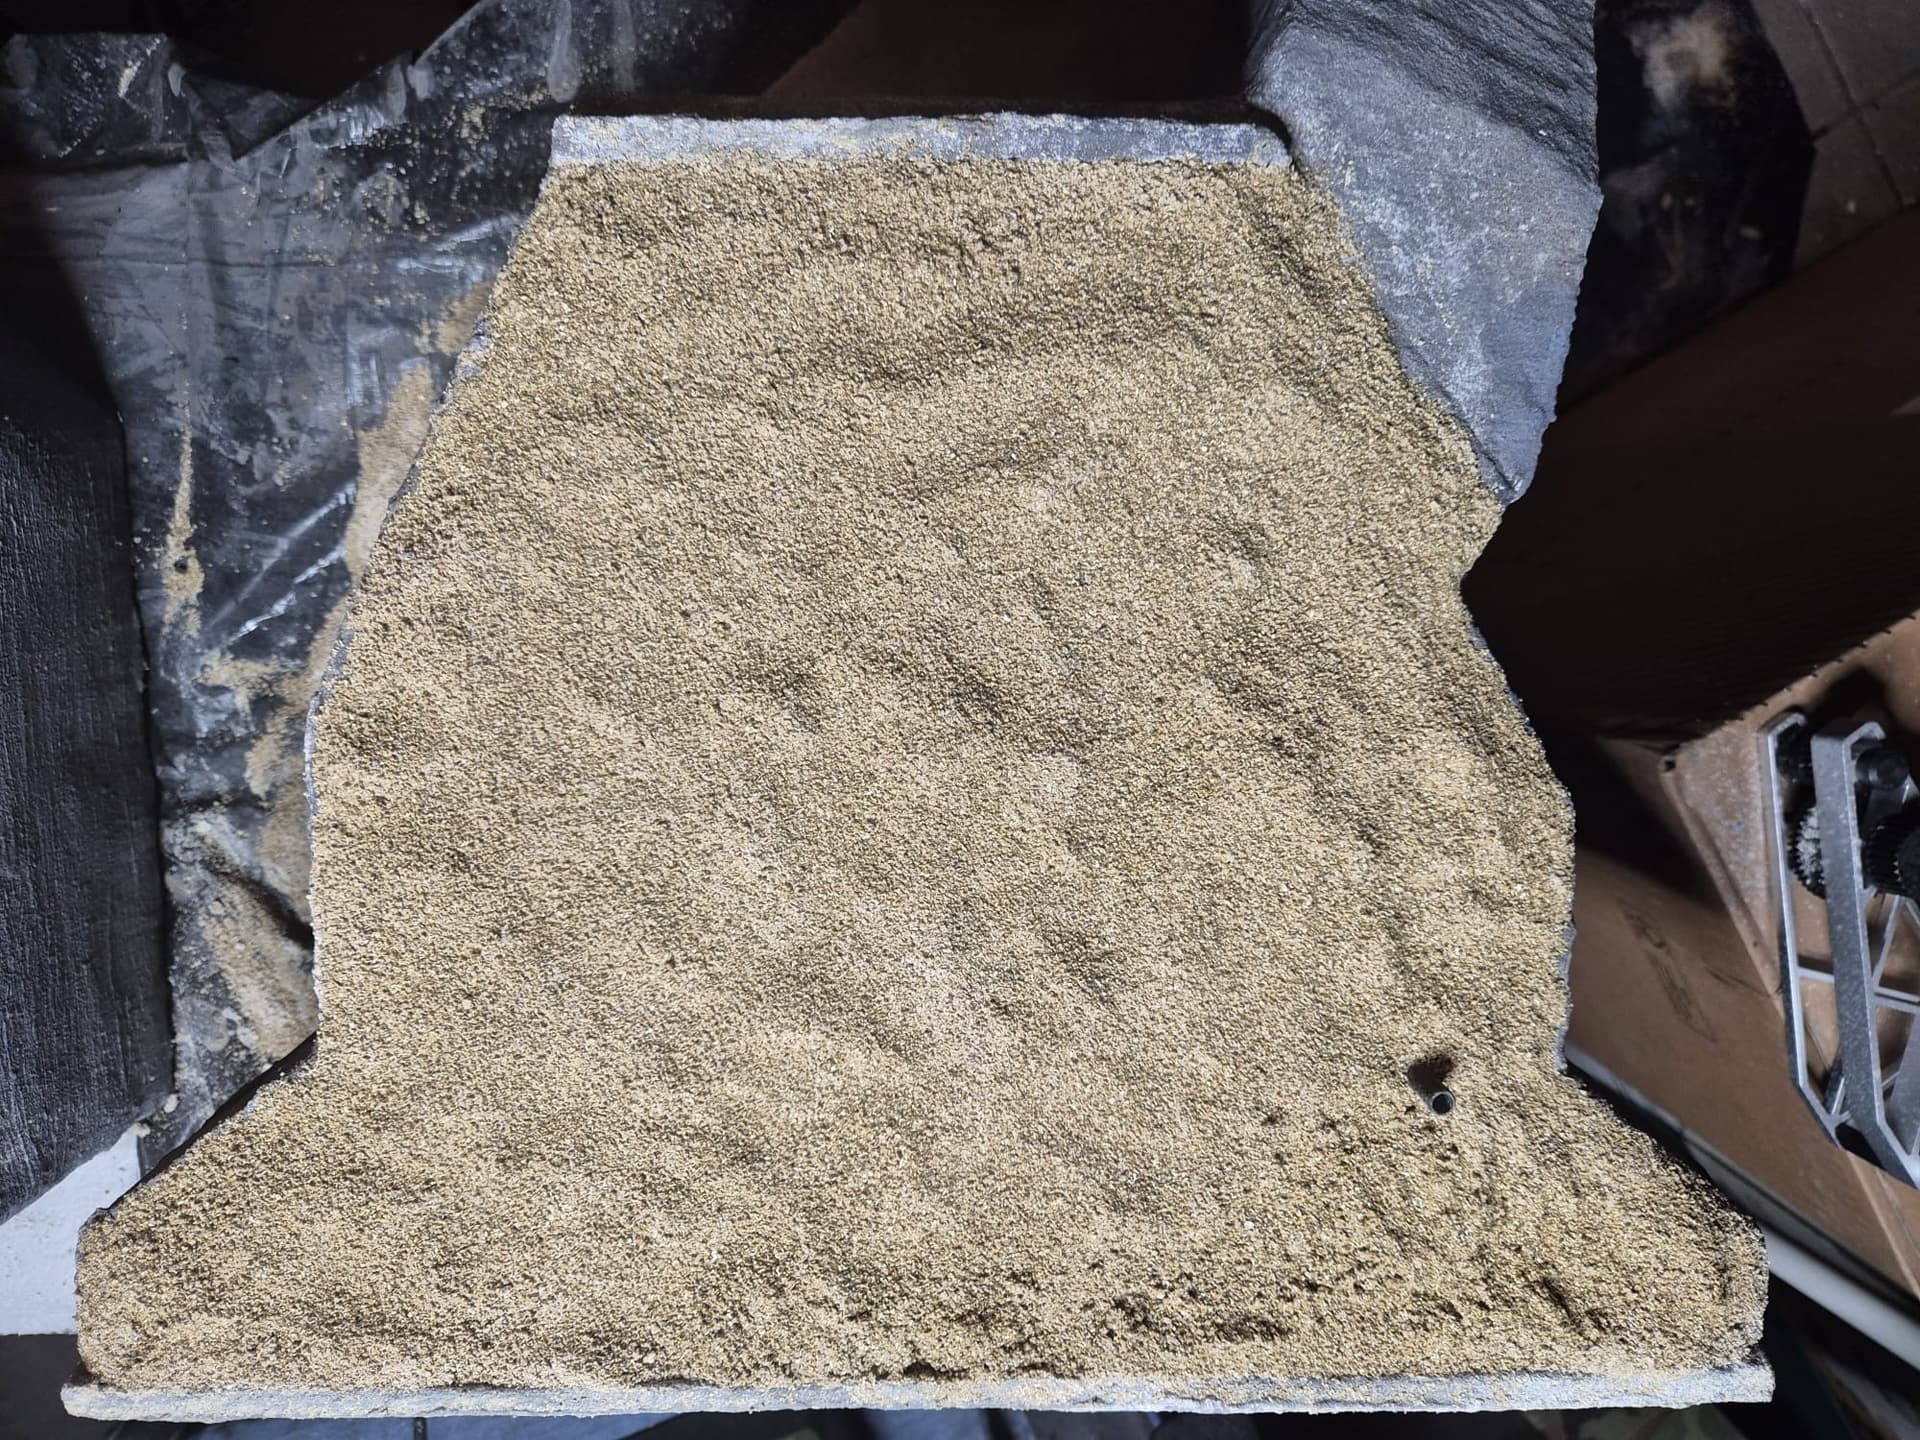
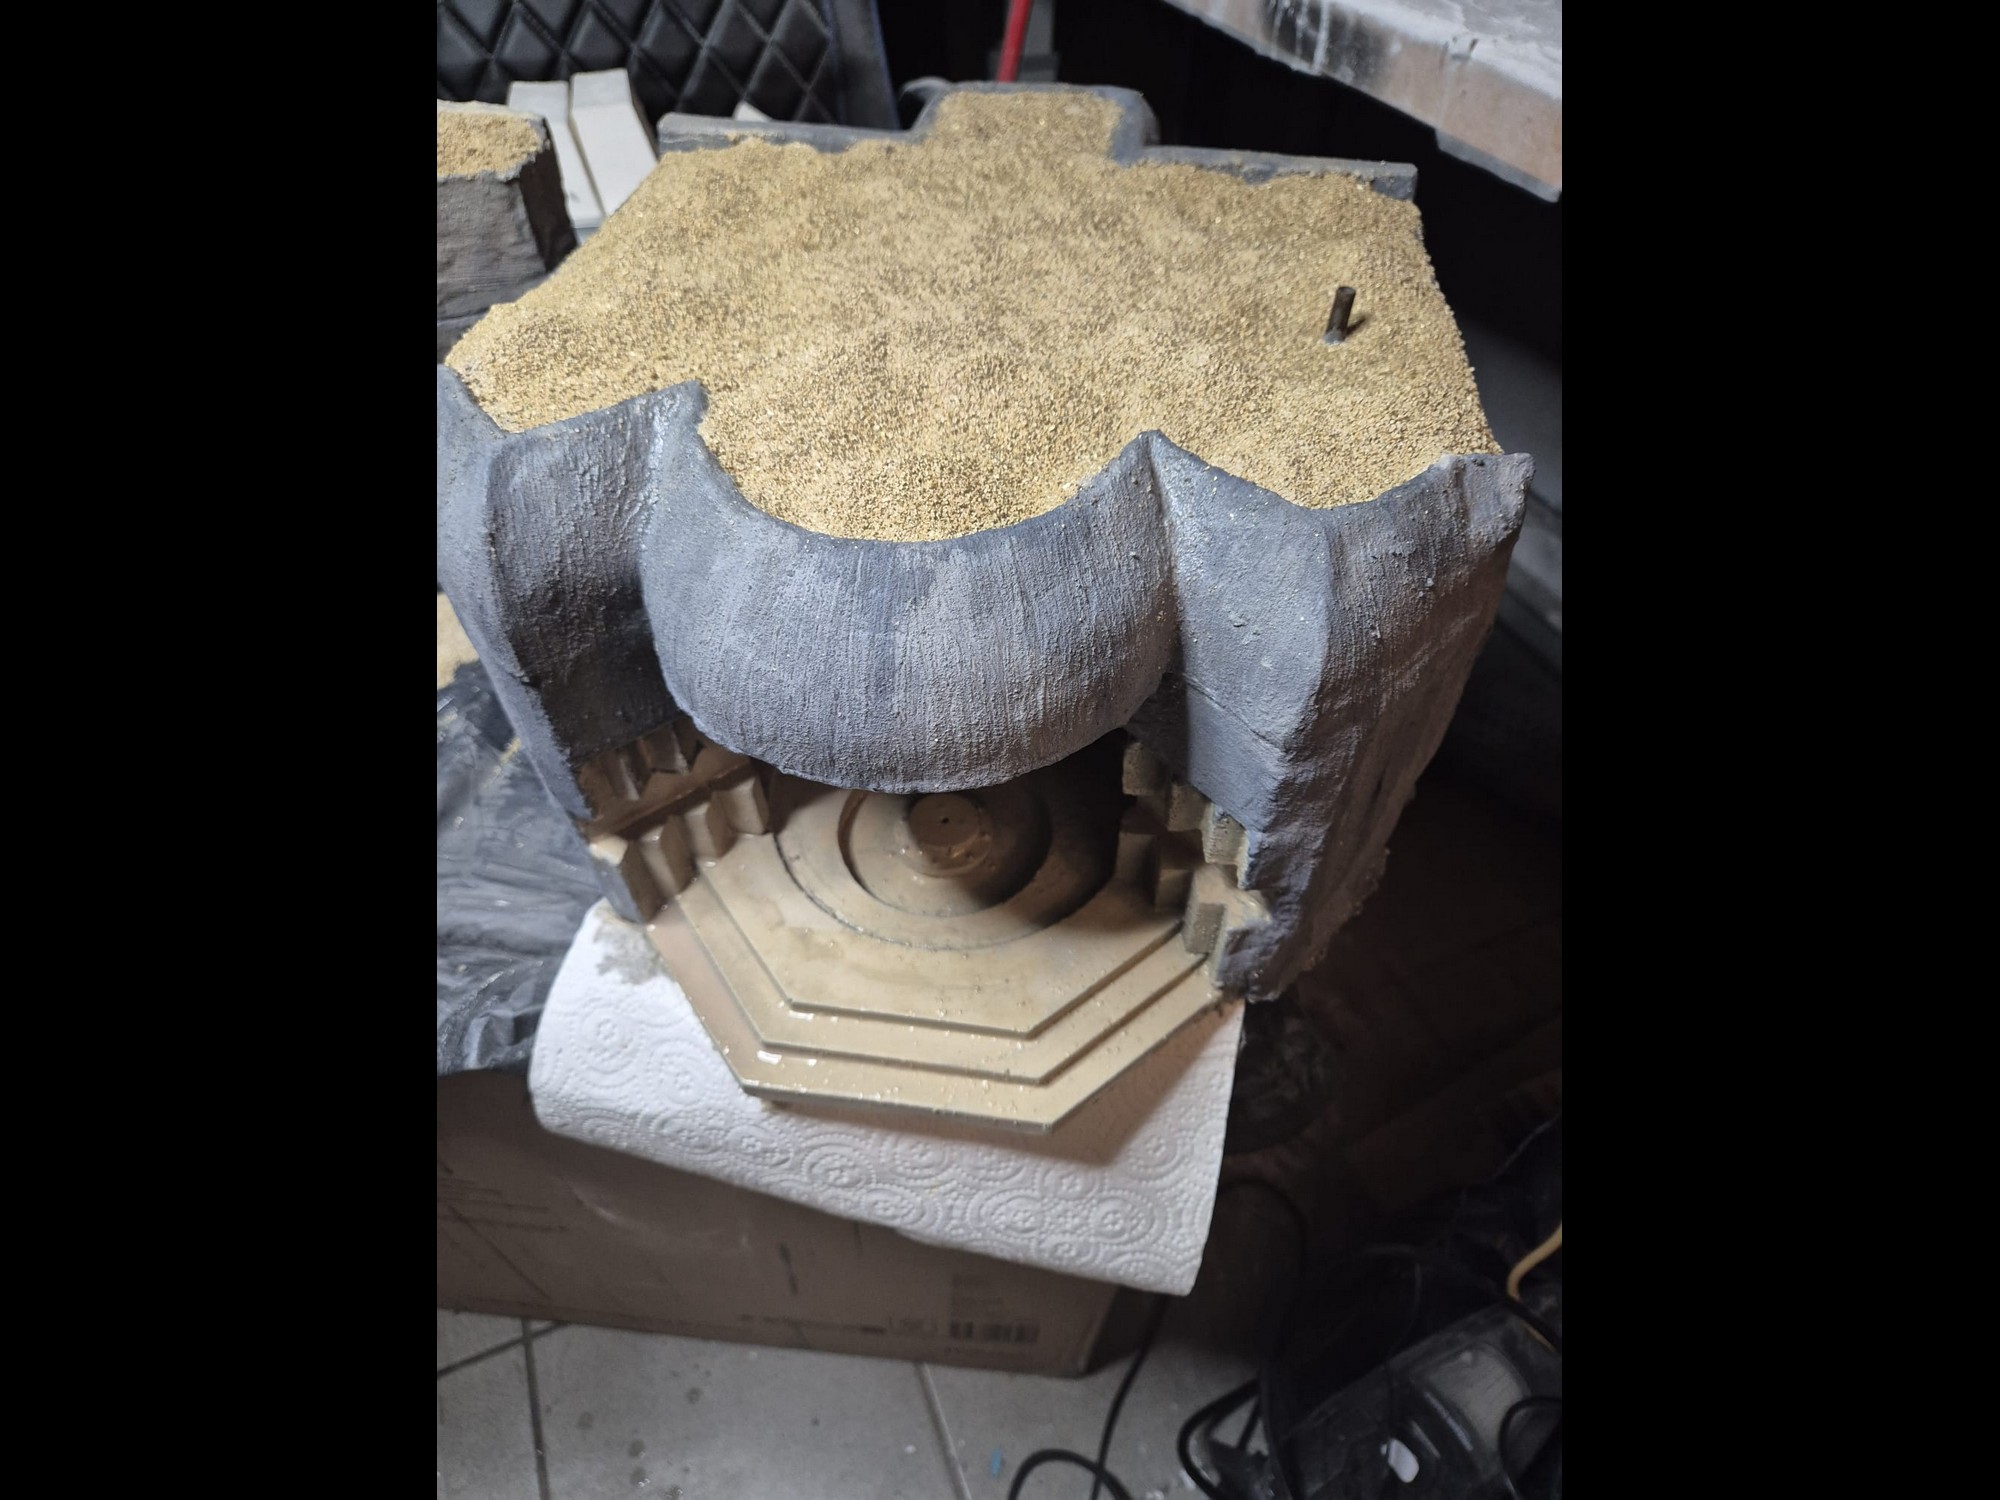
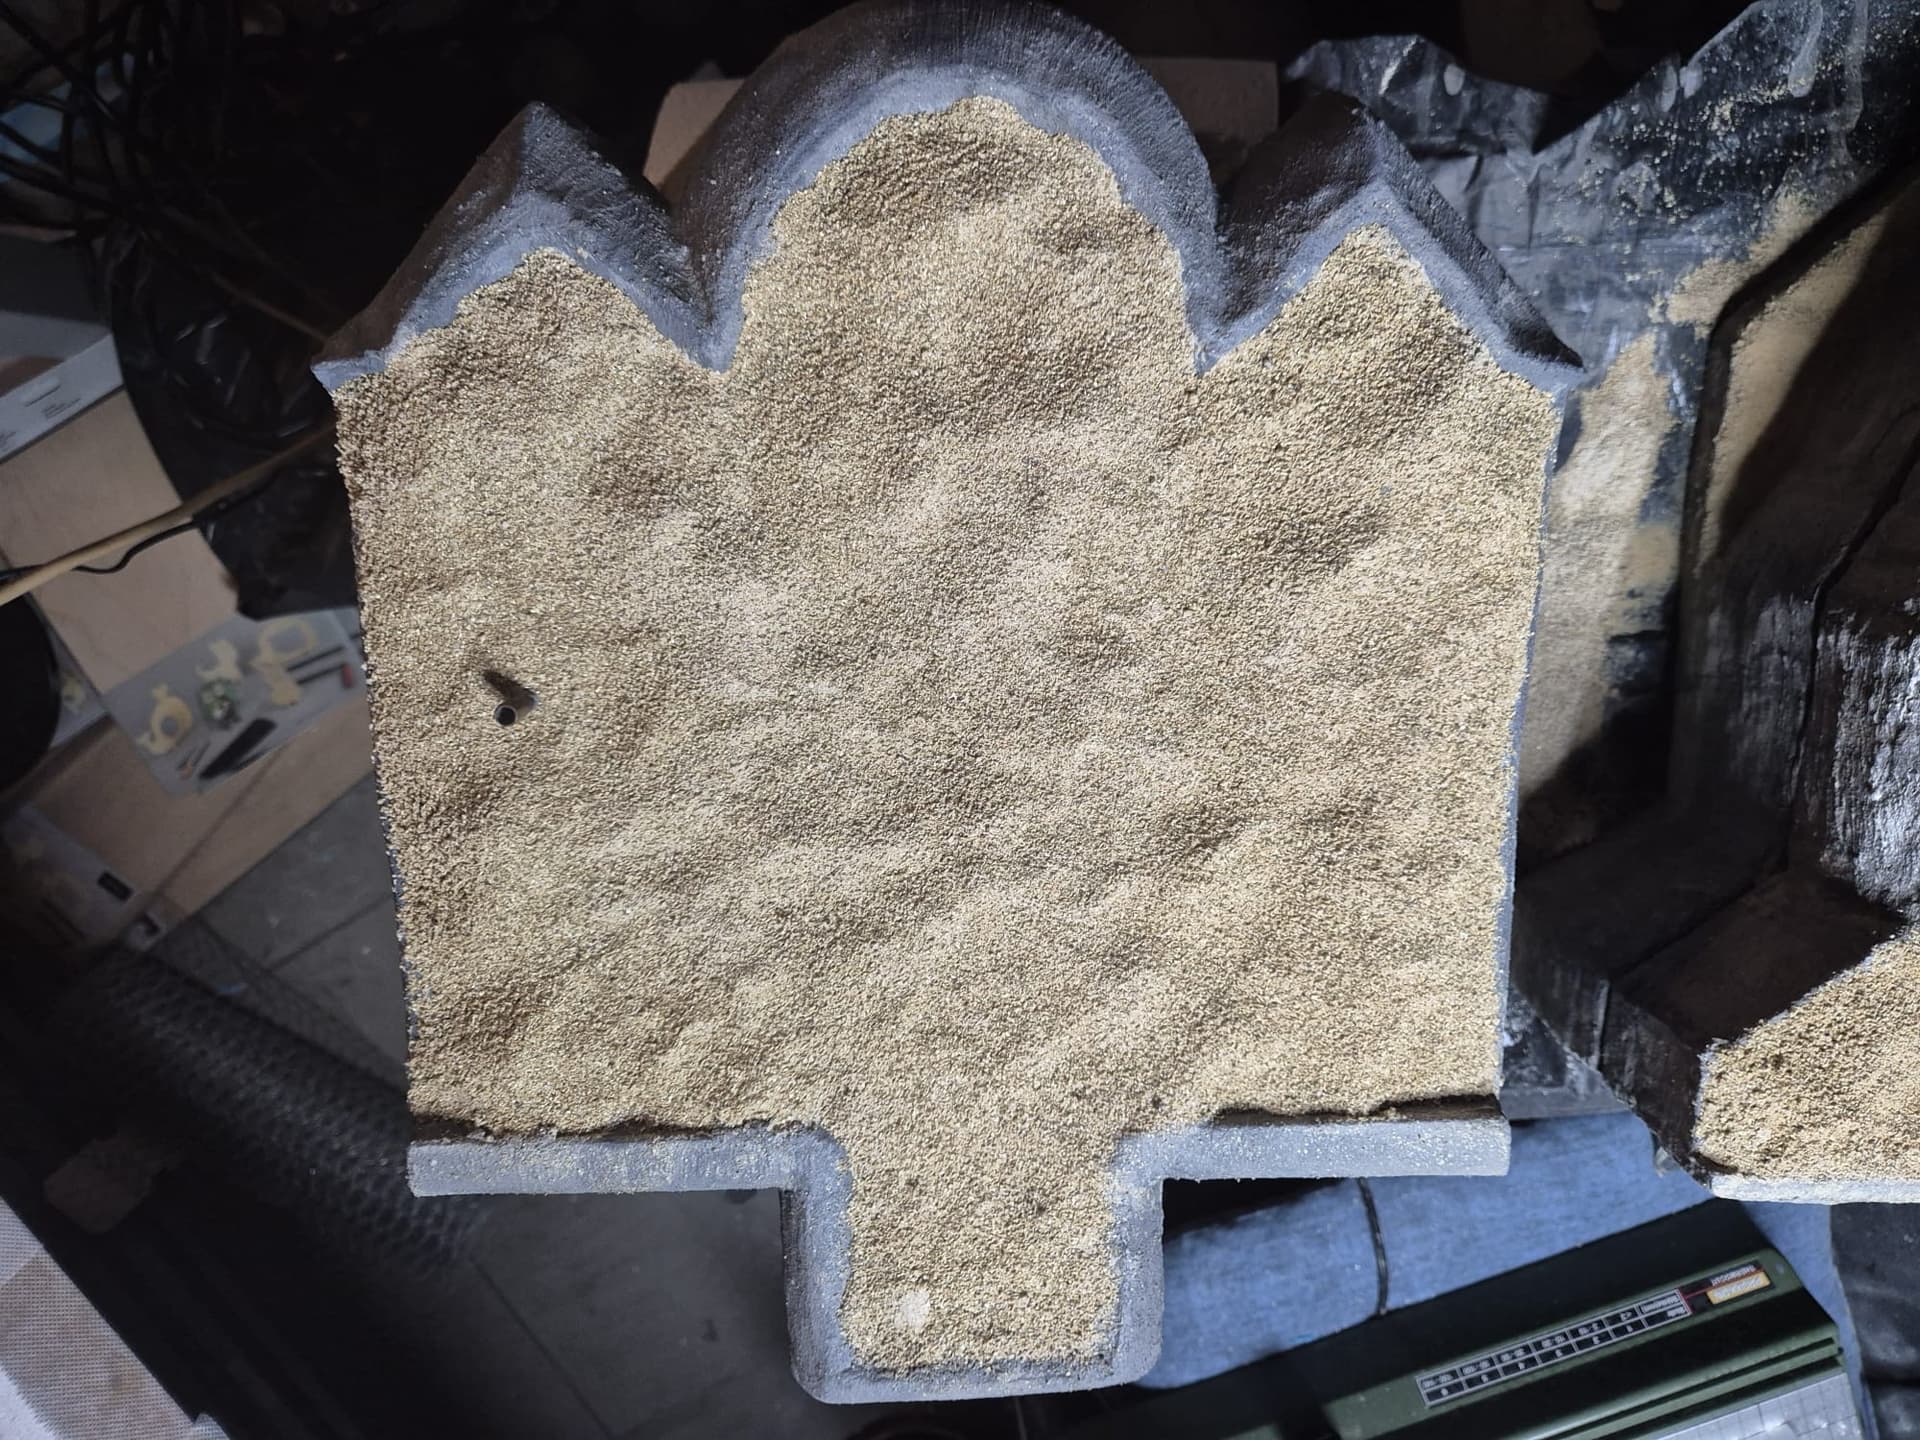
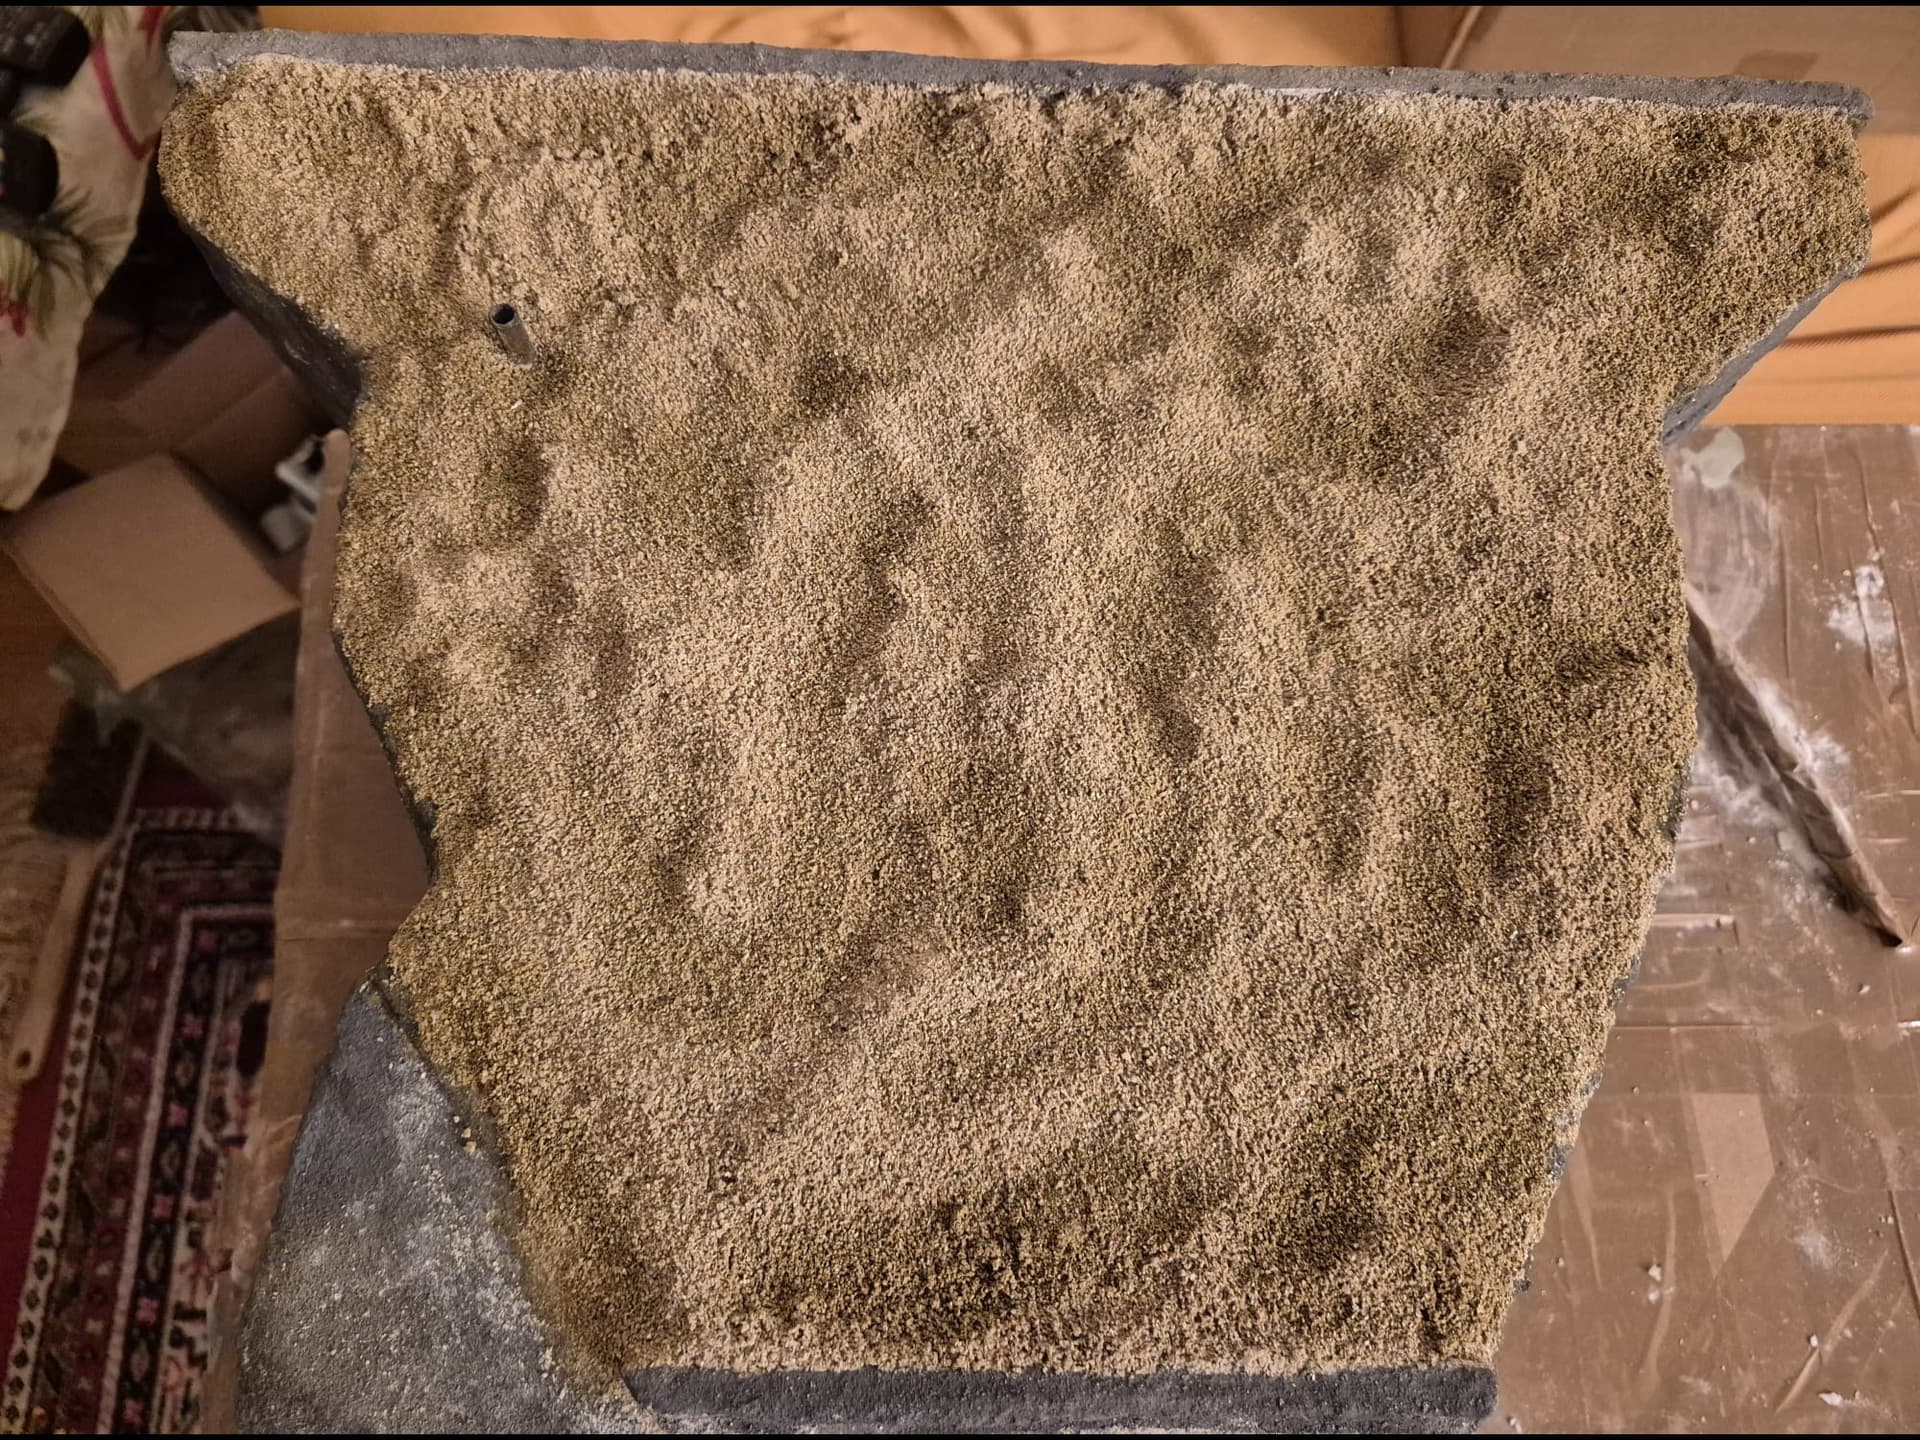
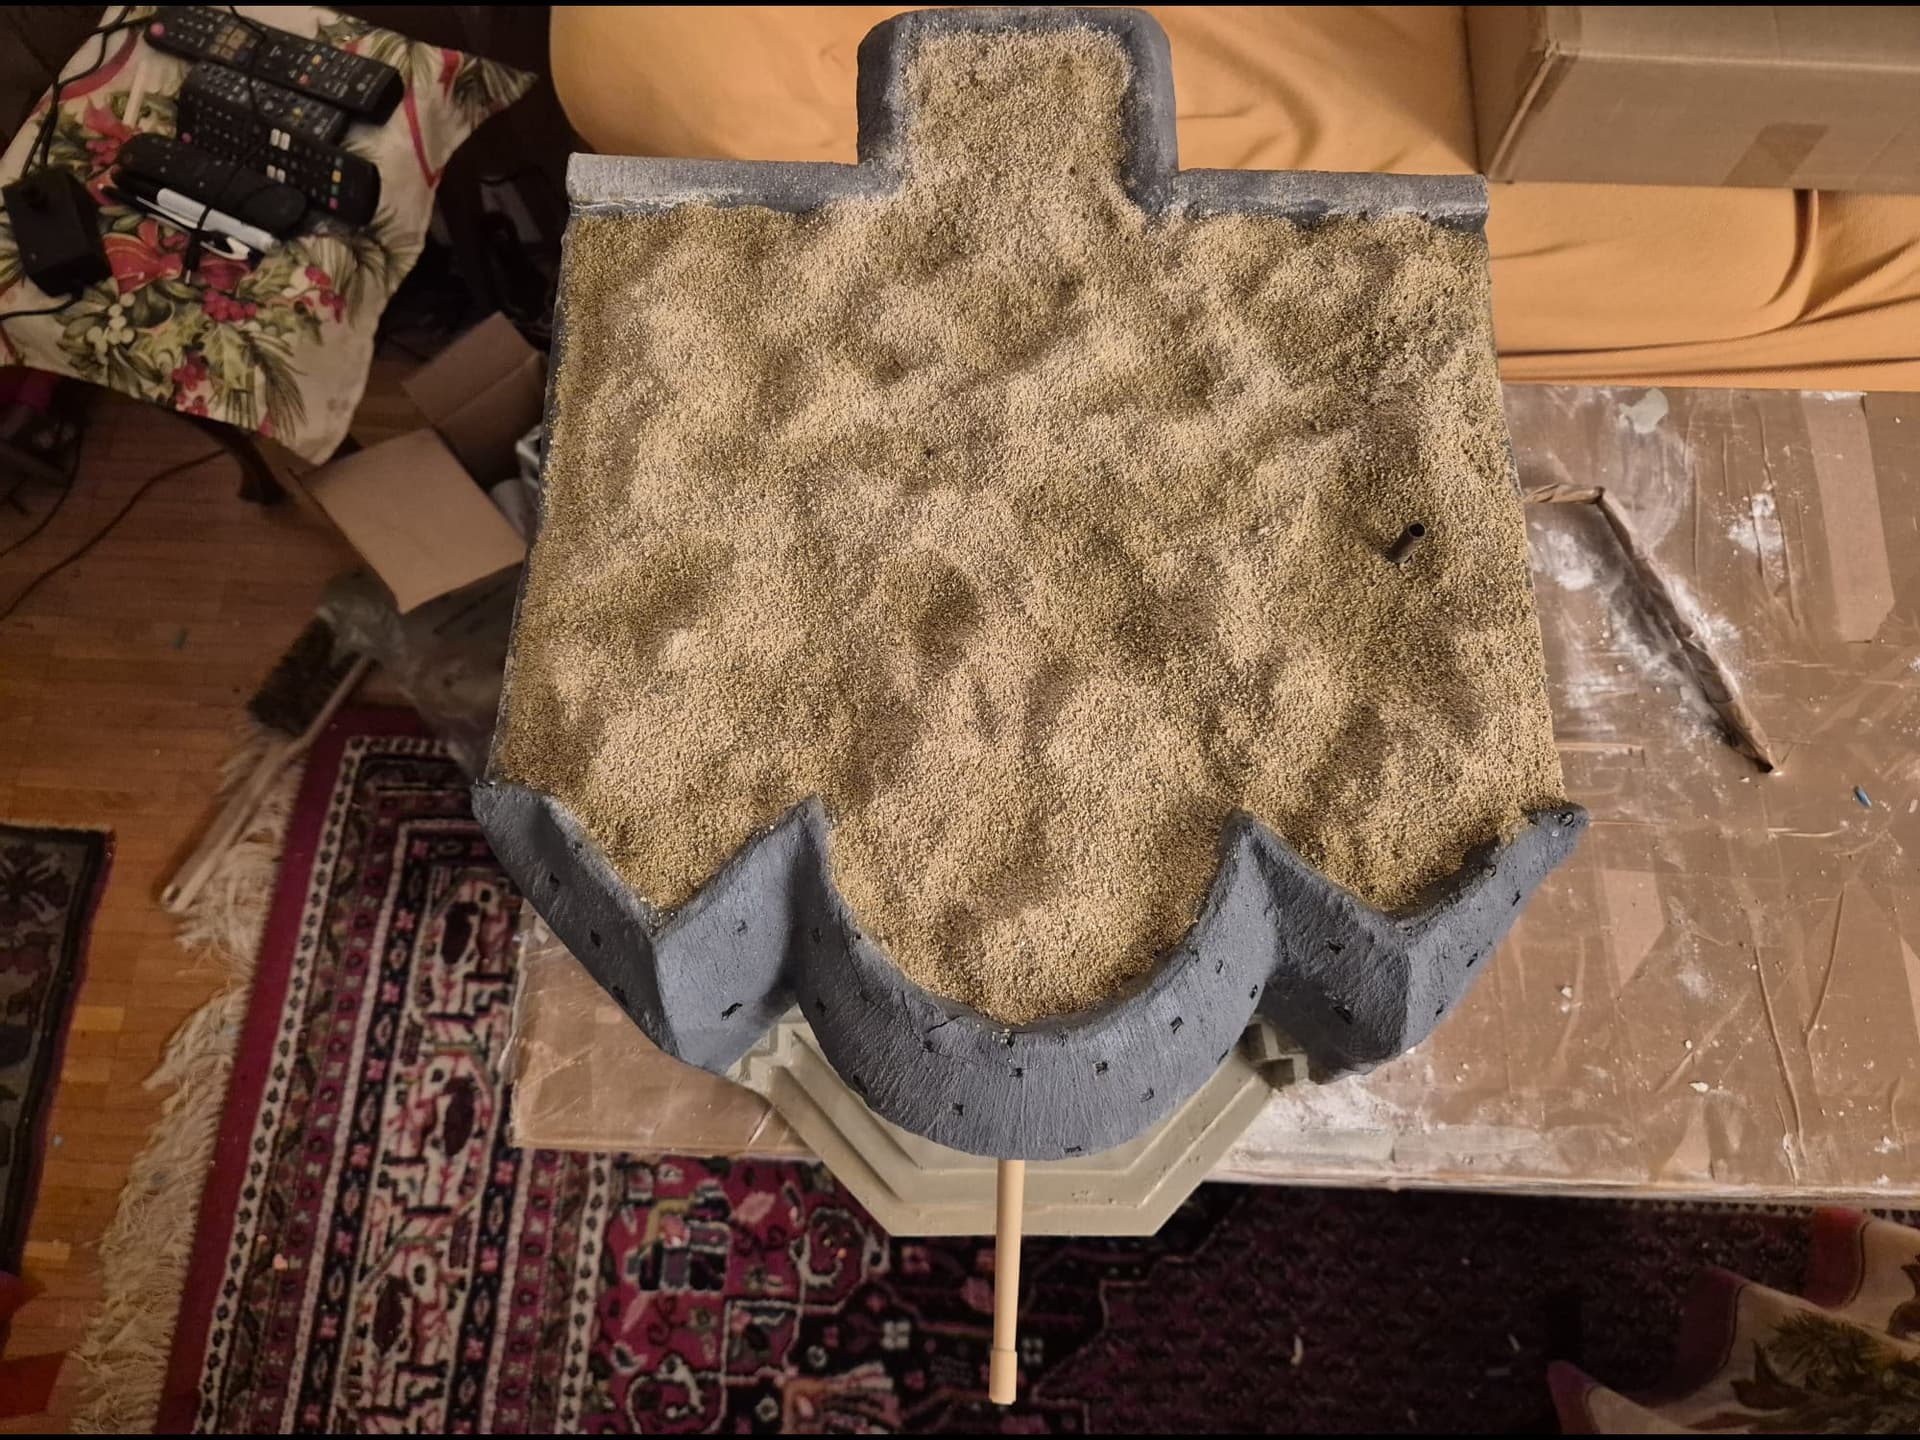
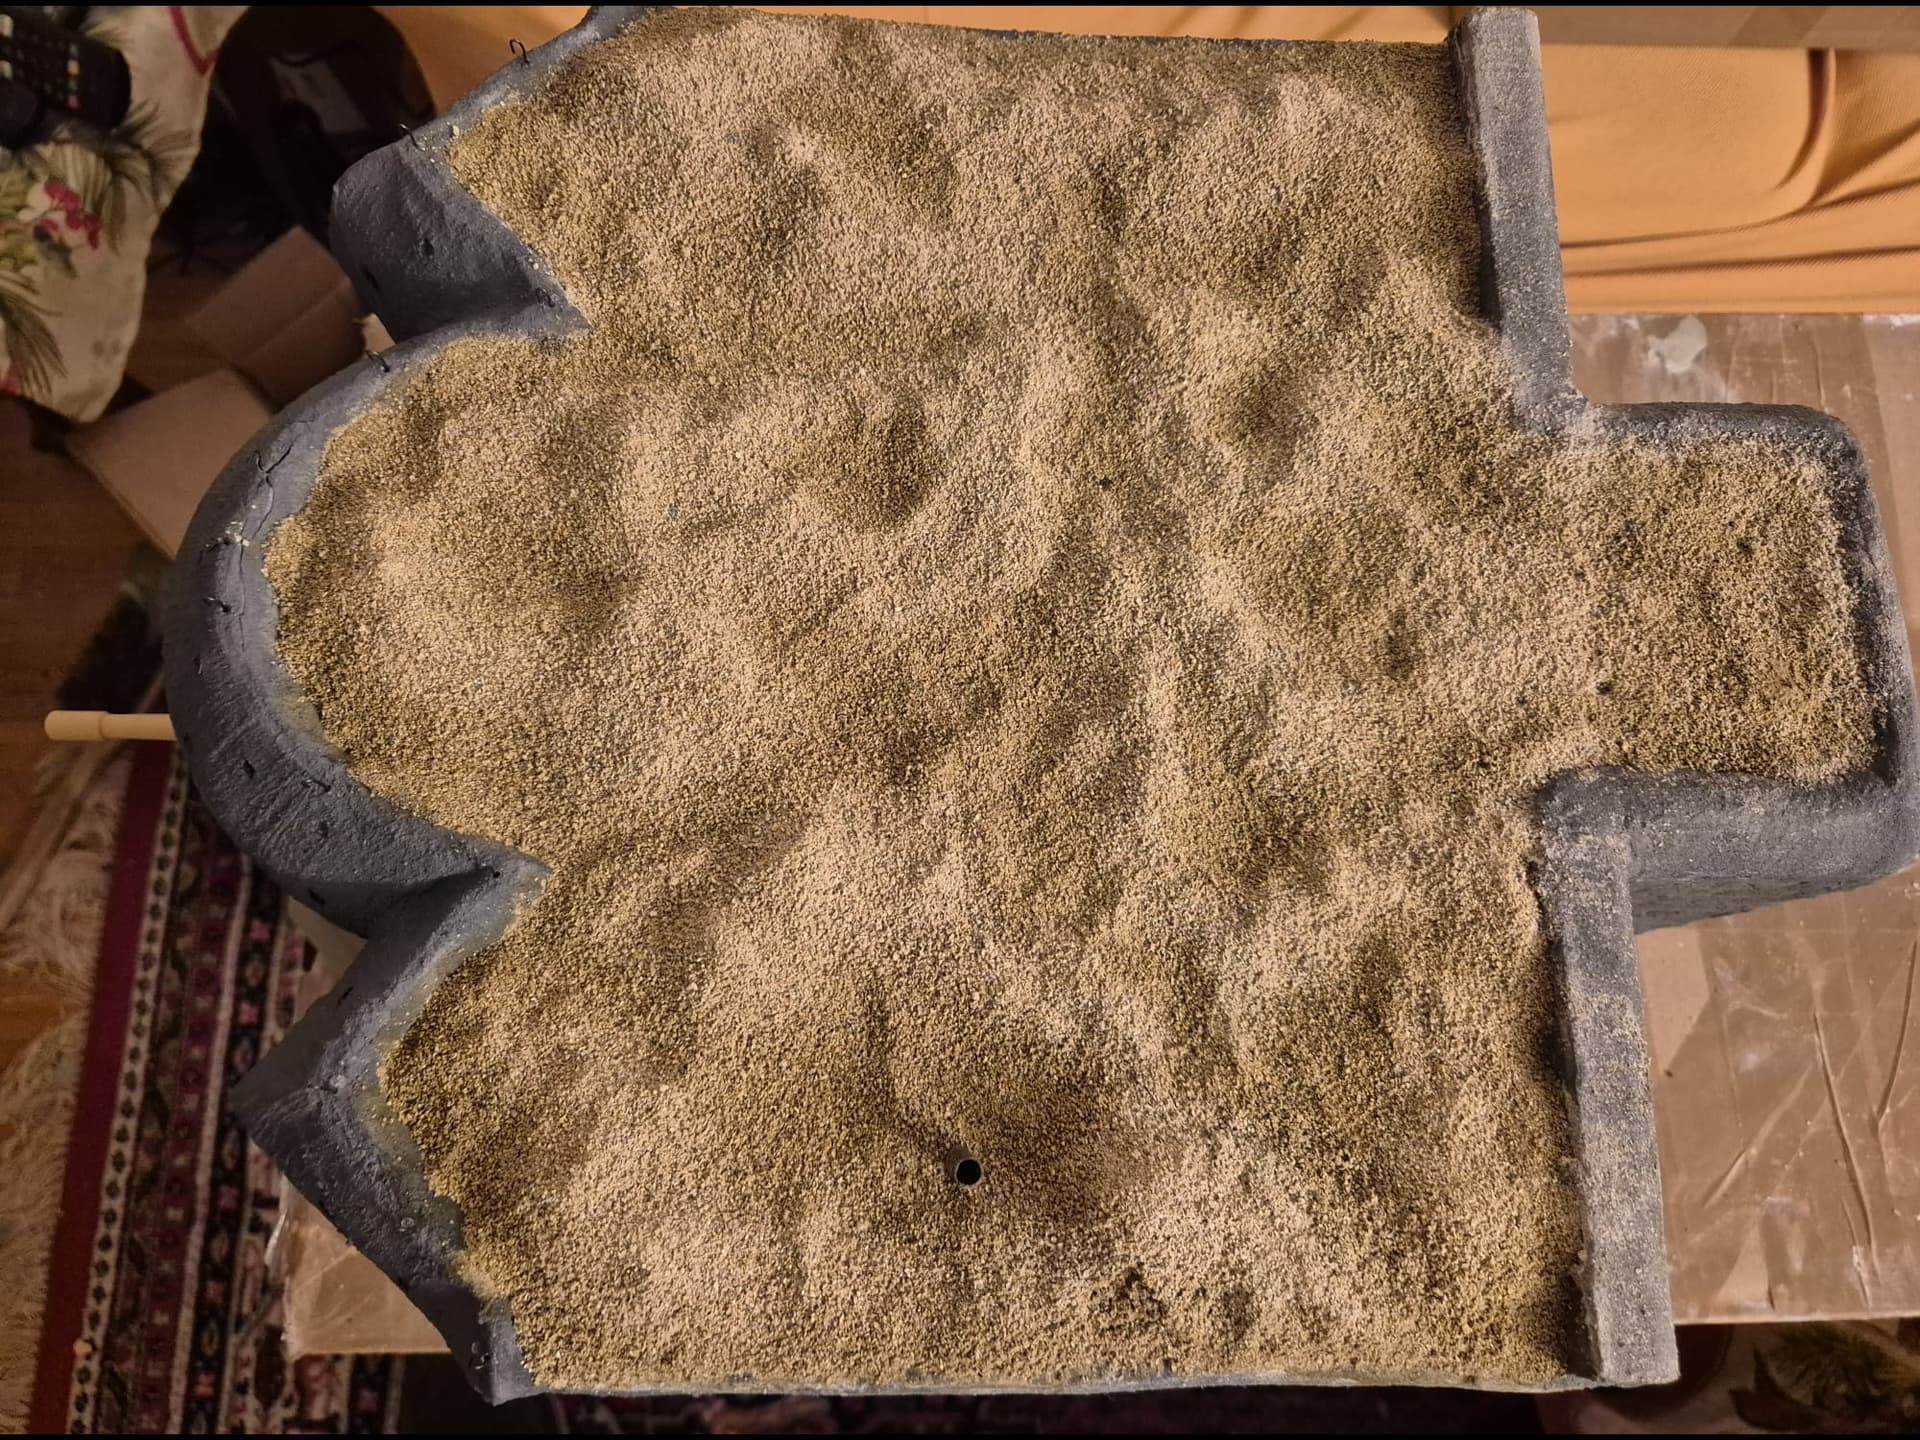
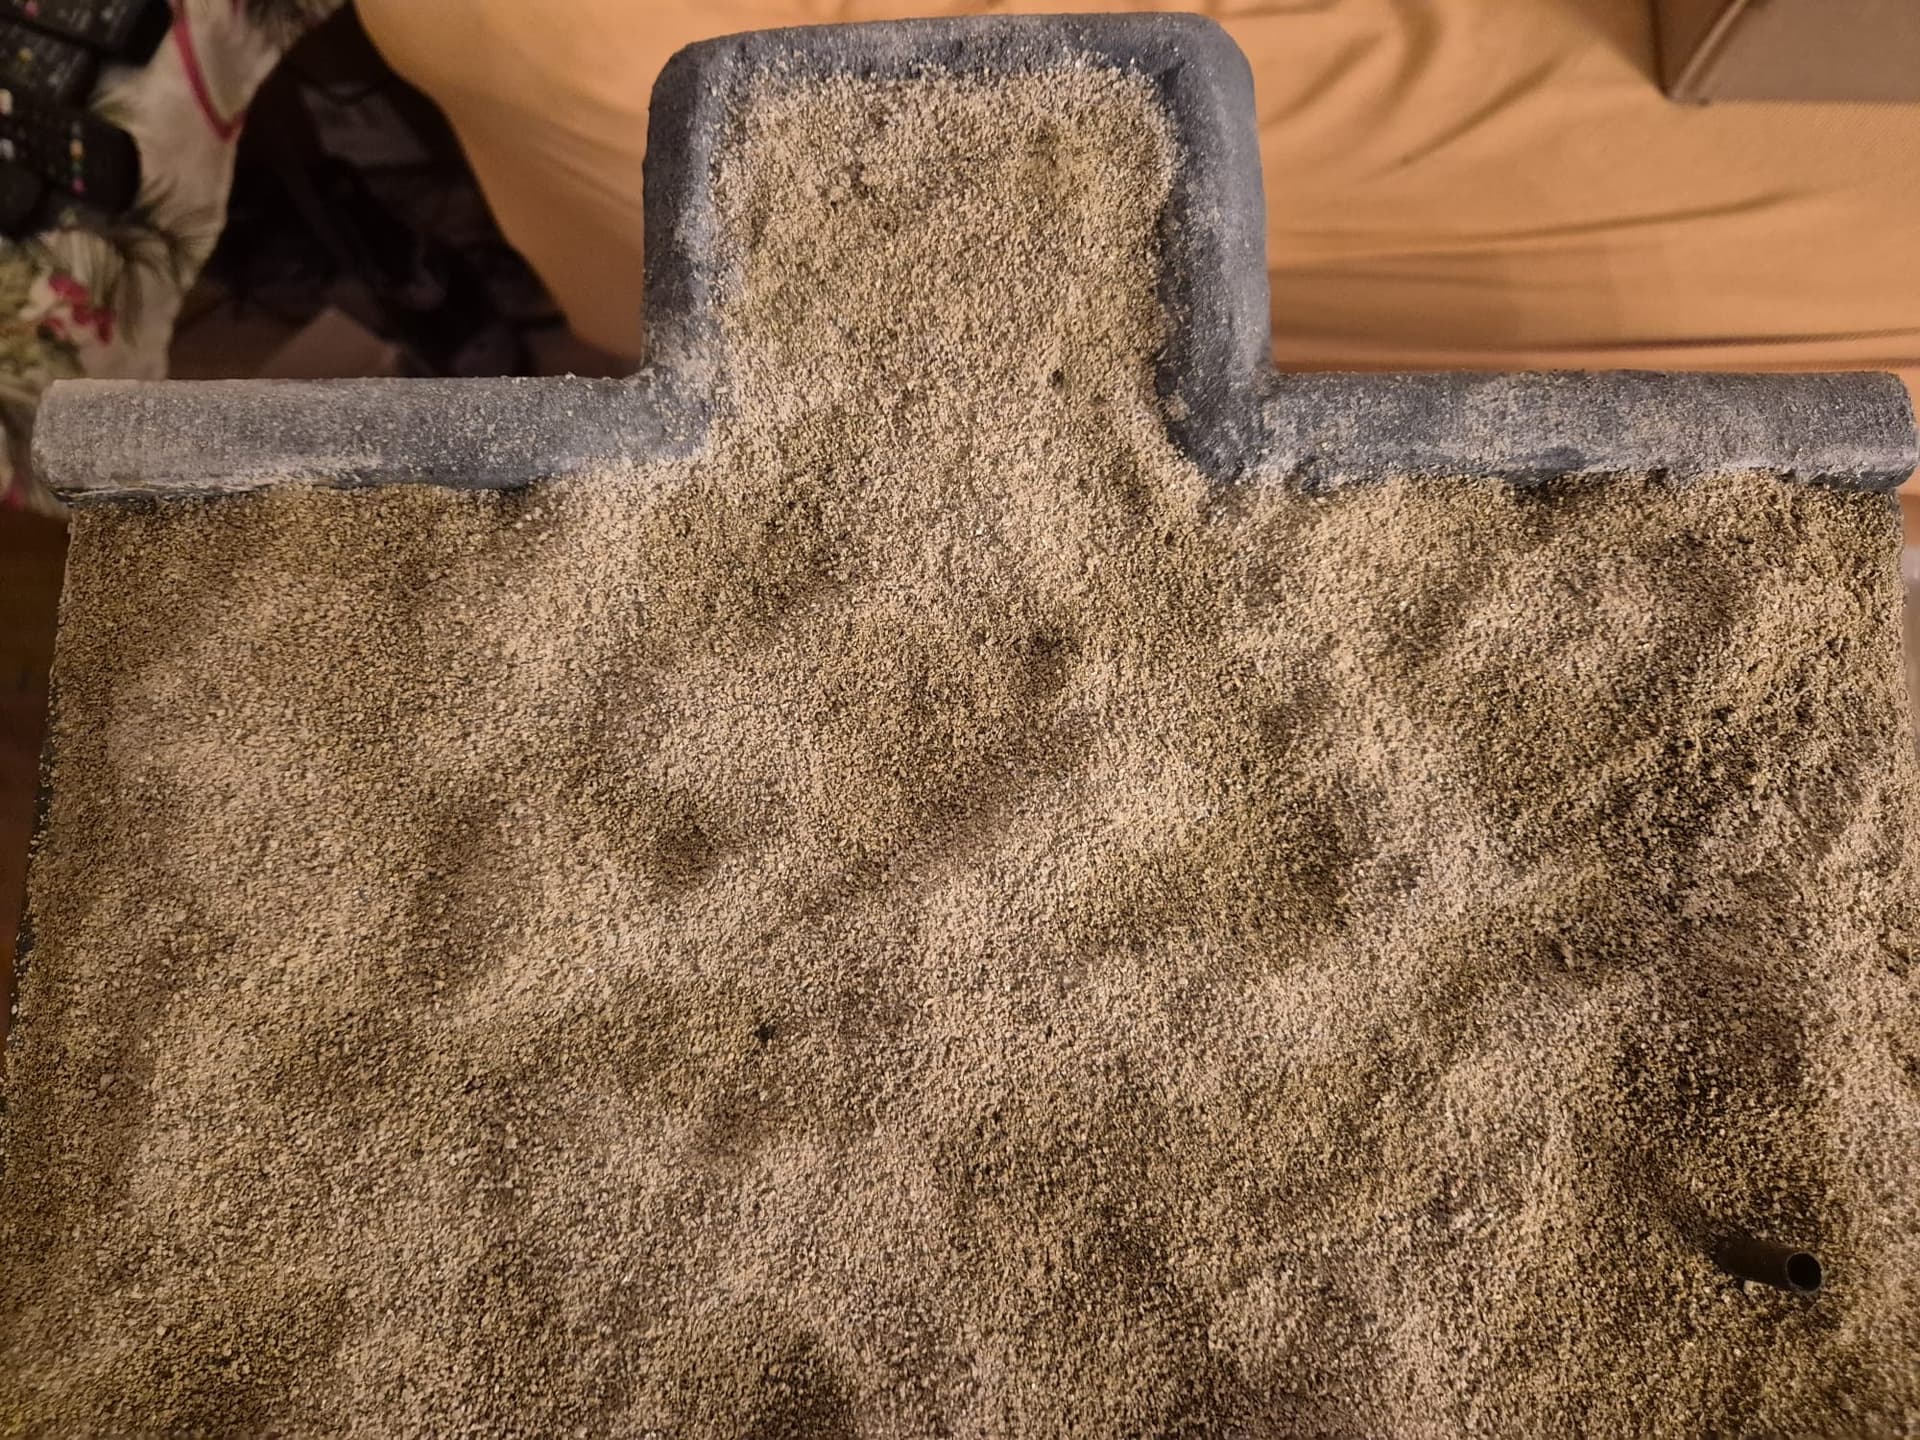
Further on I will apply Wooden Scenics Mold-a-Scene plaster, which is a sort of granulate sort of plaster which I discovered reacts quite well when amply sprayed with liquified PVA glue forming an ideal primer depicting soil on top of the roof. Once this material is dry it is simply so porous that it “swallows” well mixture terrain colors by once again Woodland Scenics.
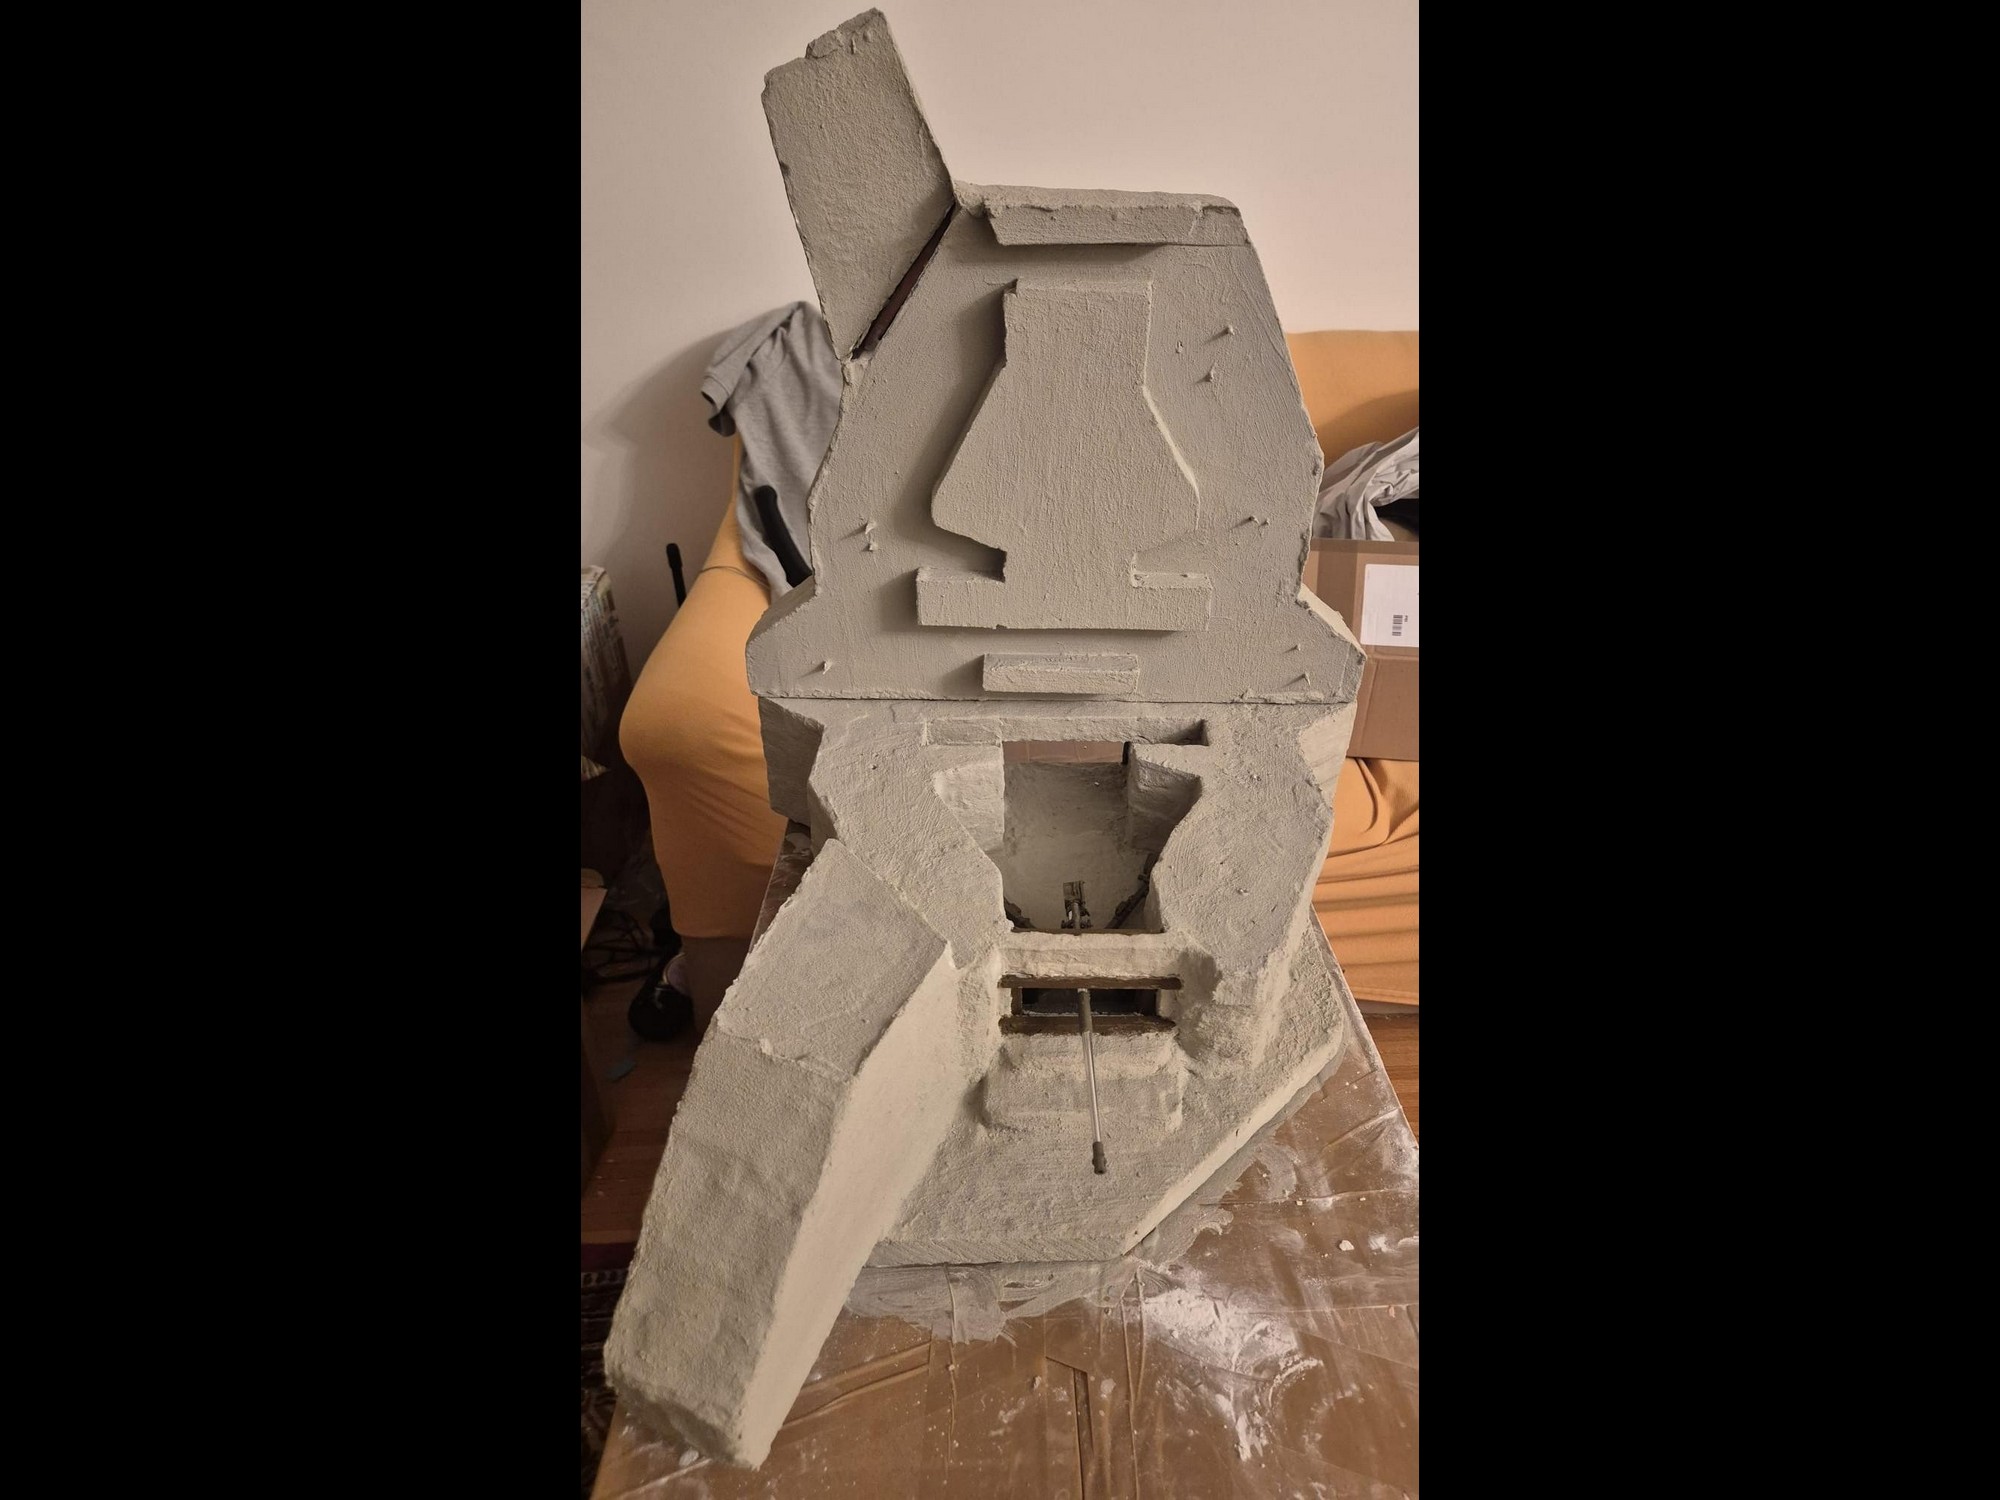
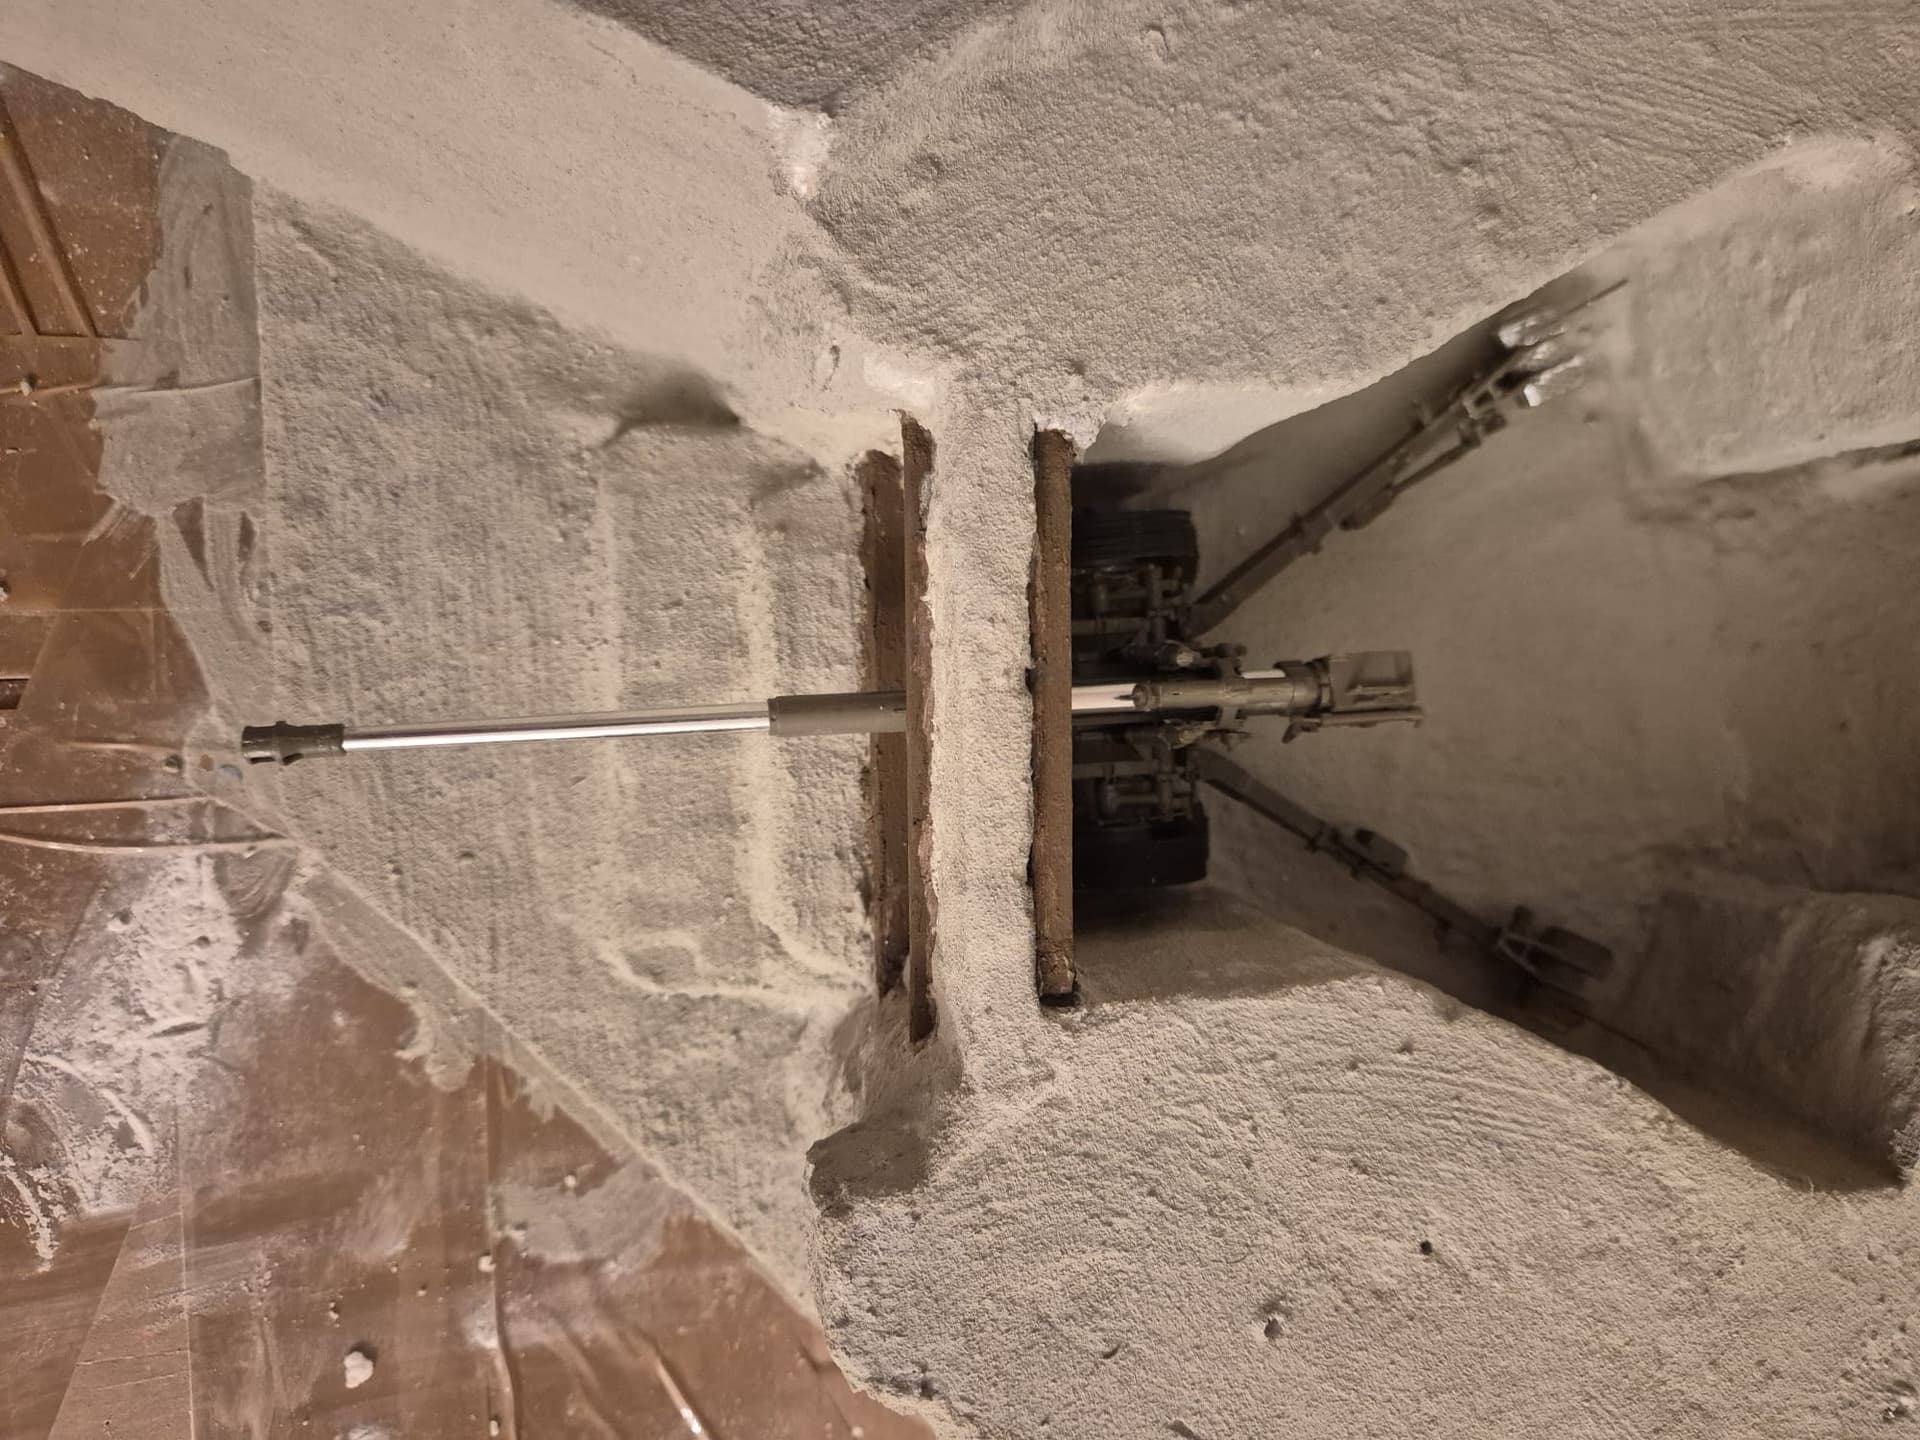
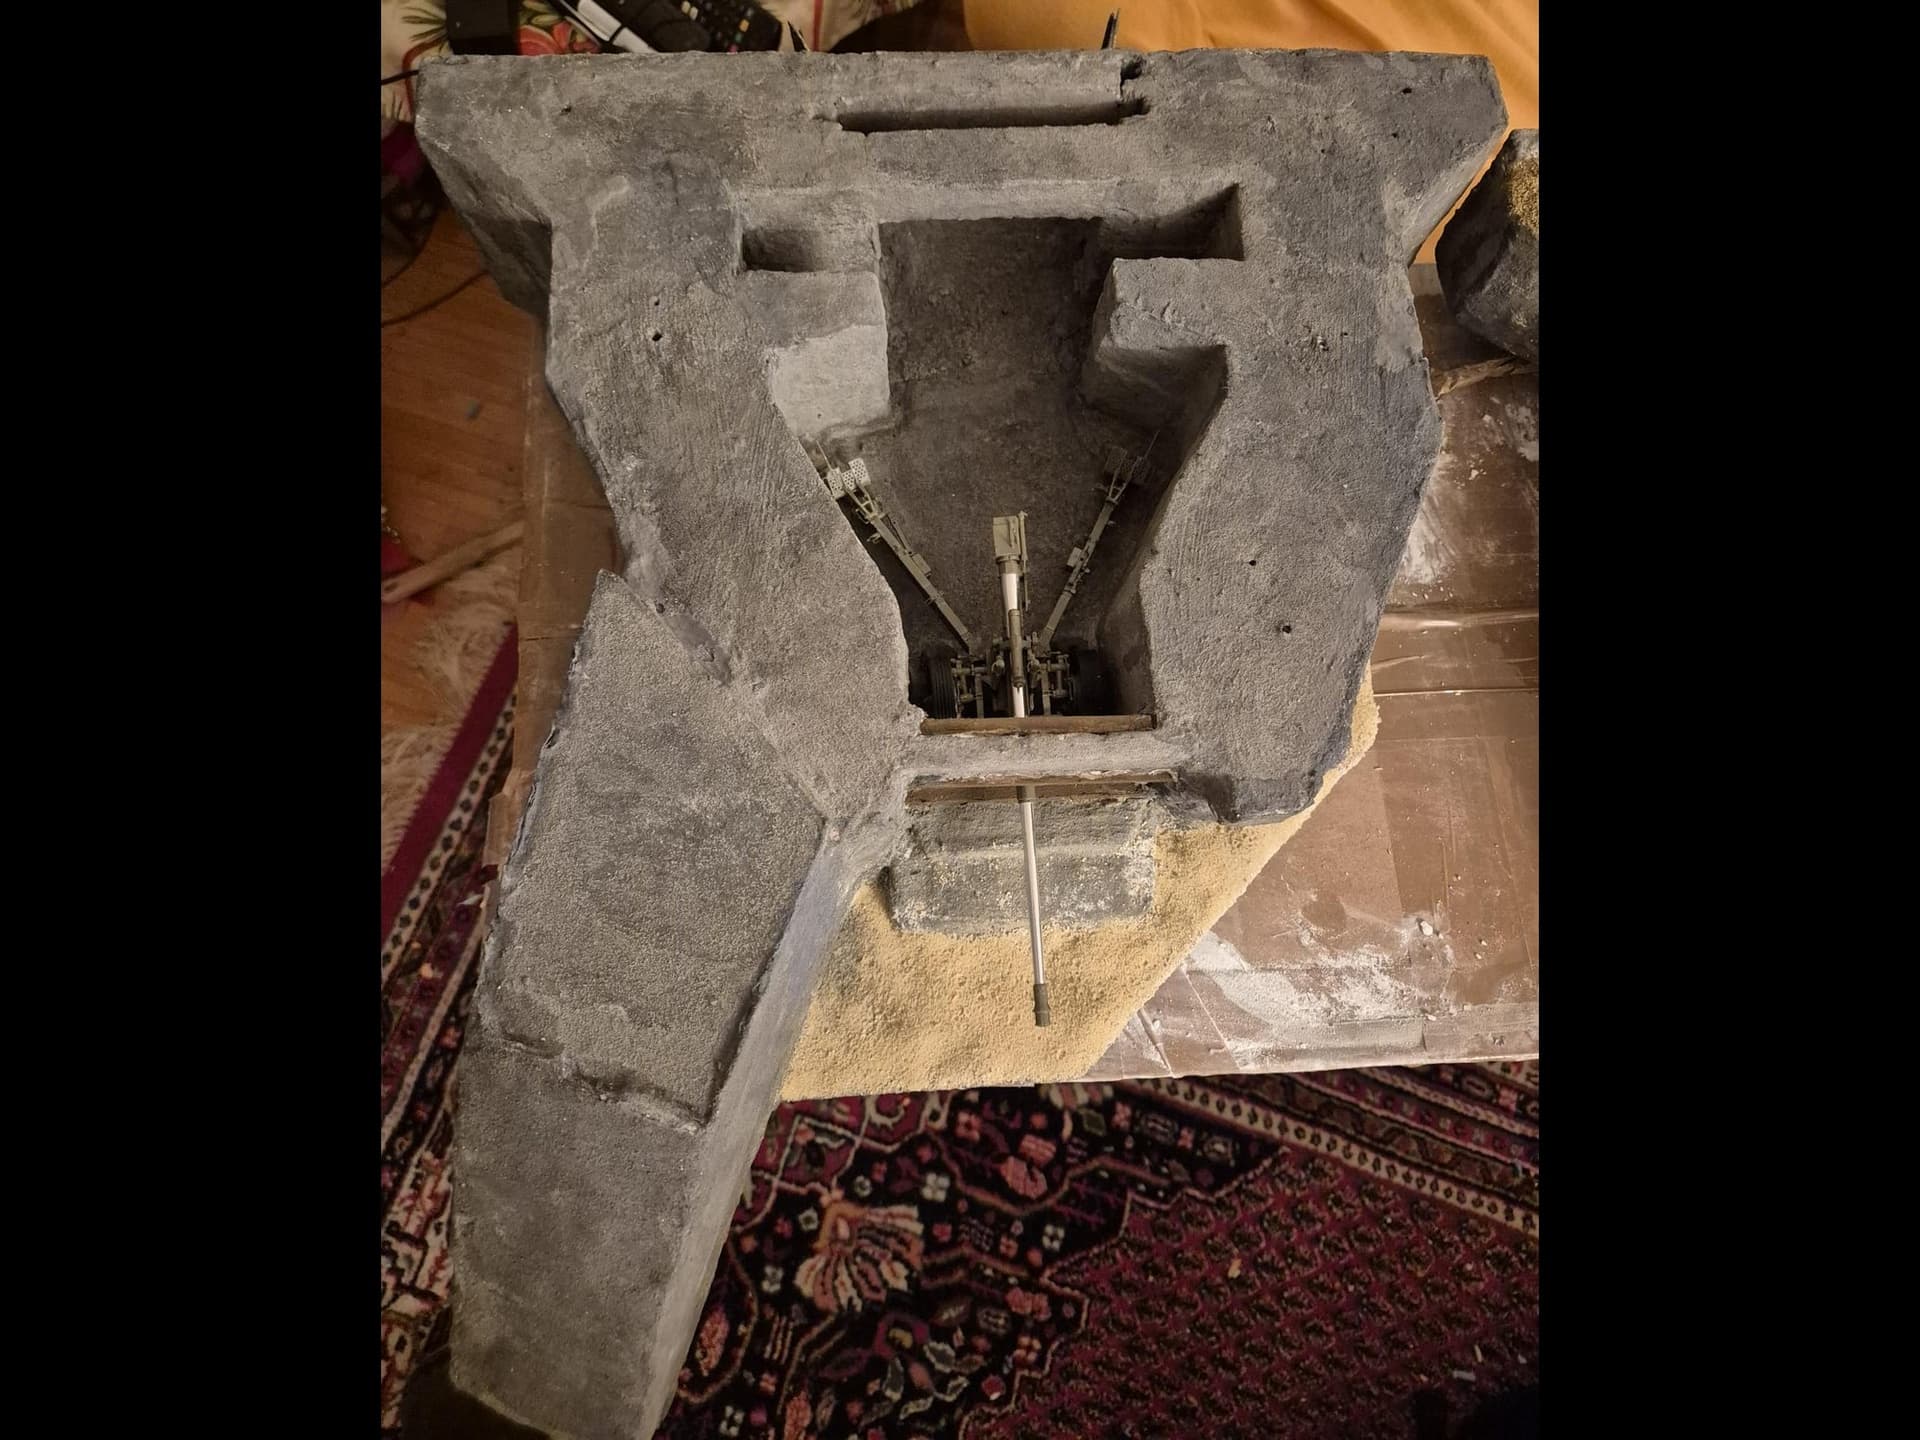
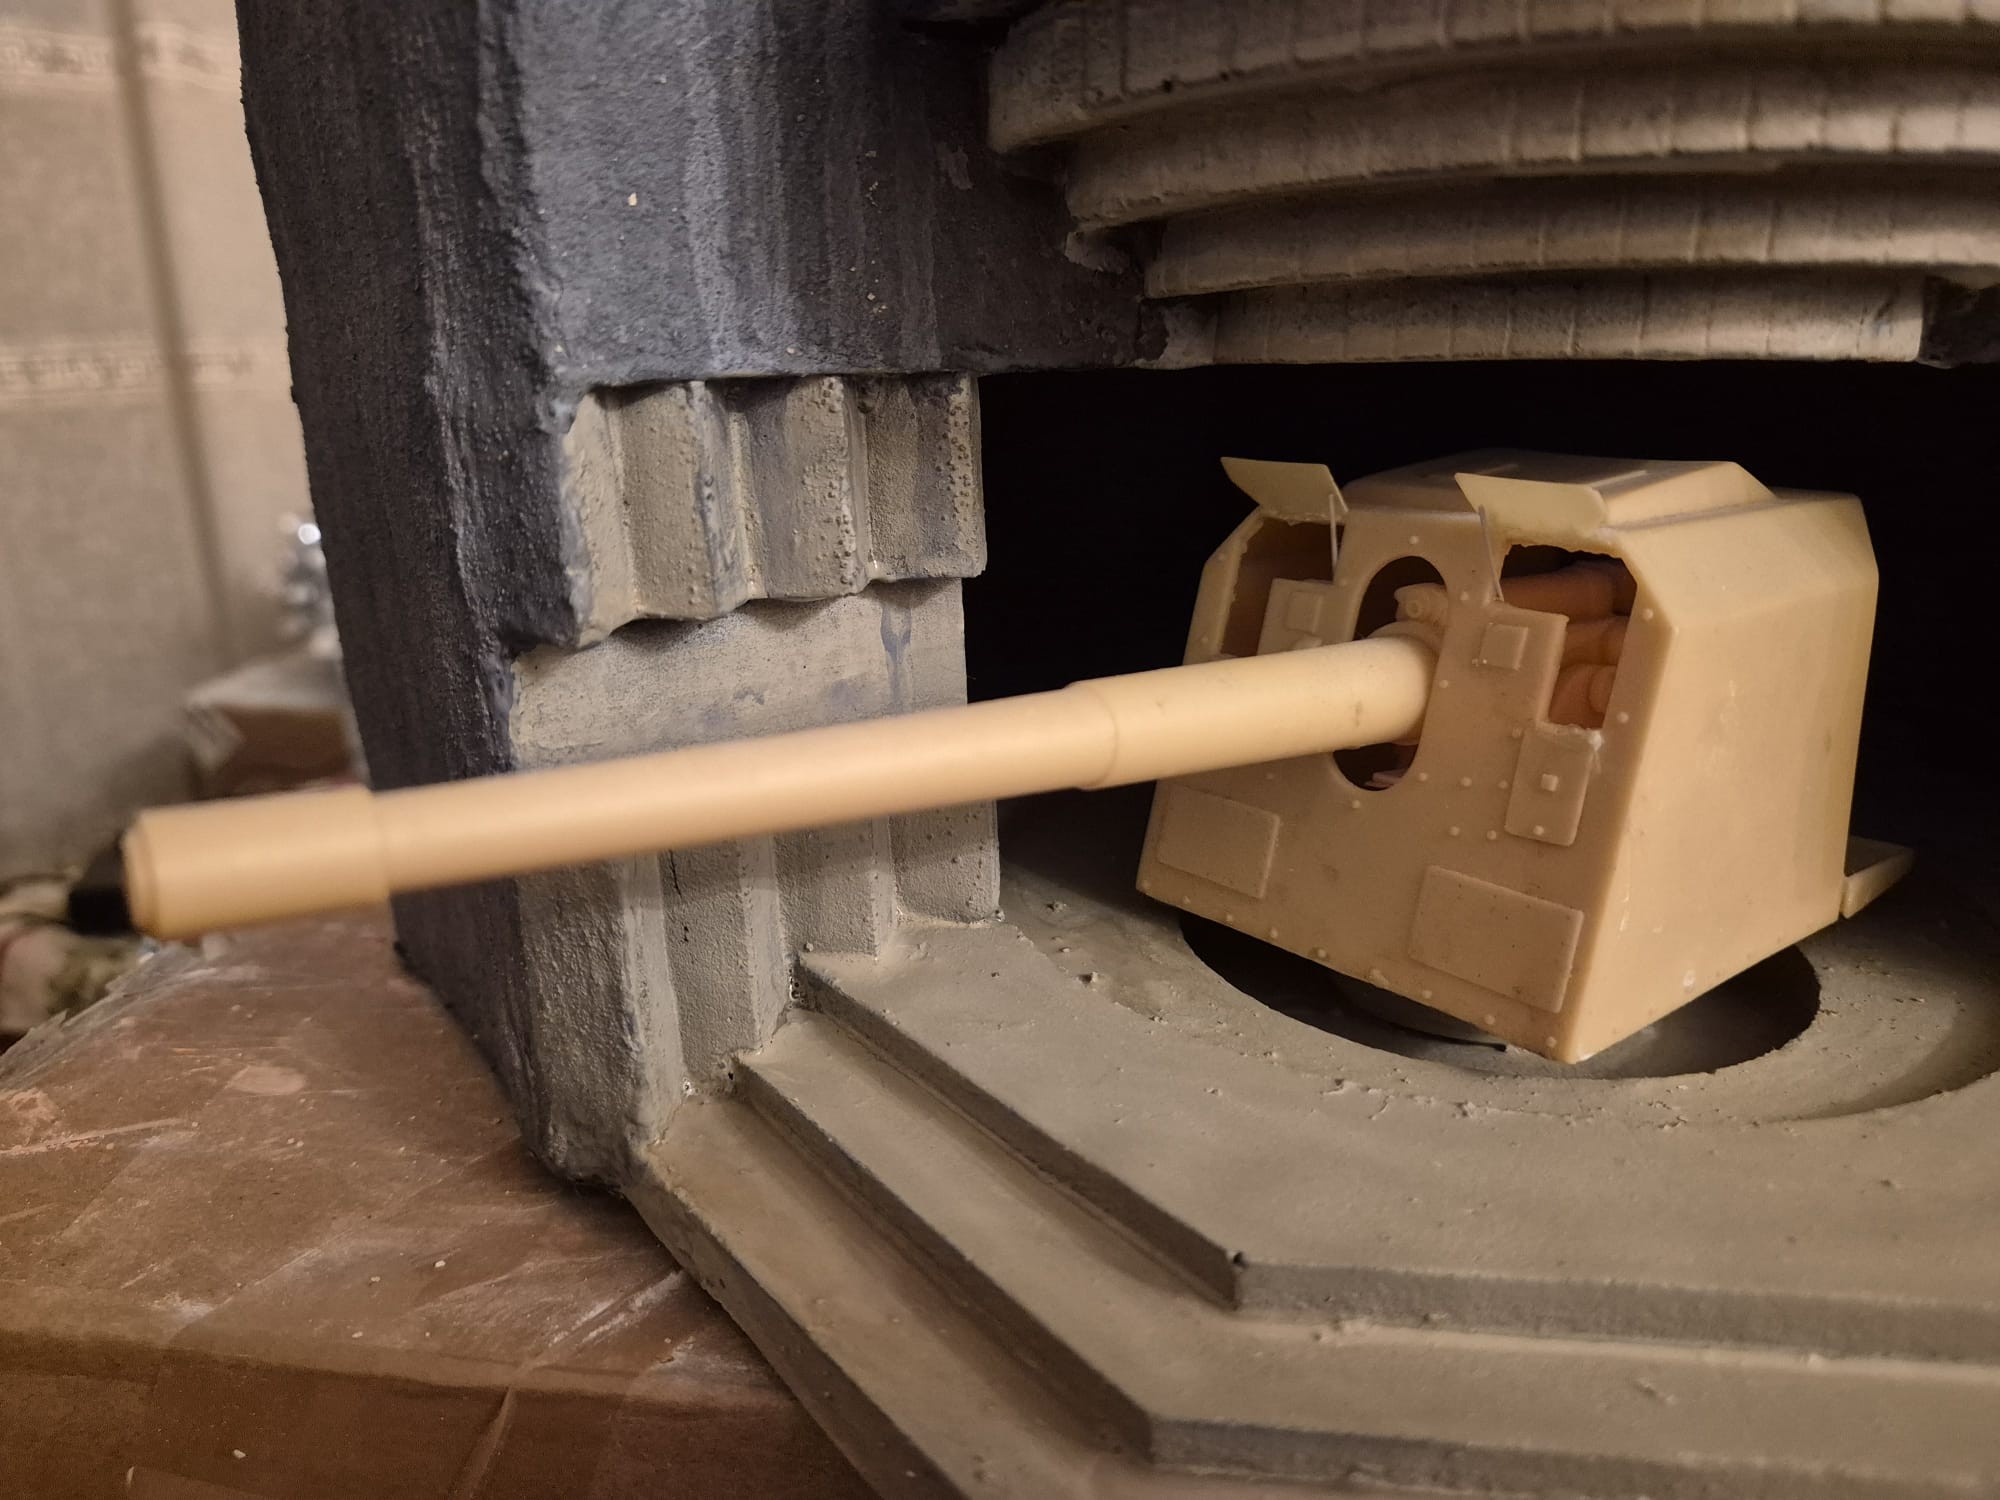
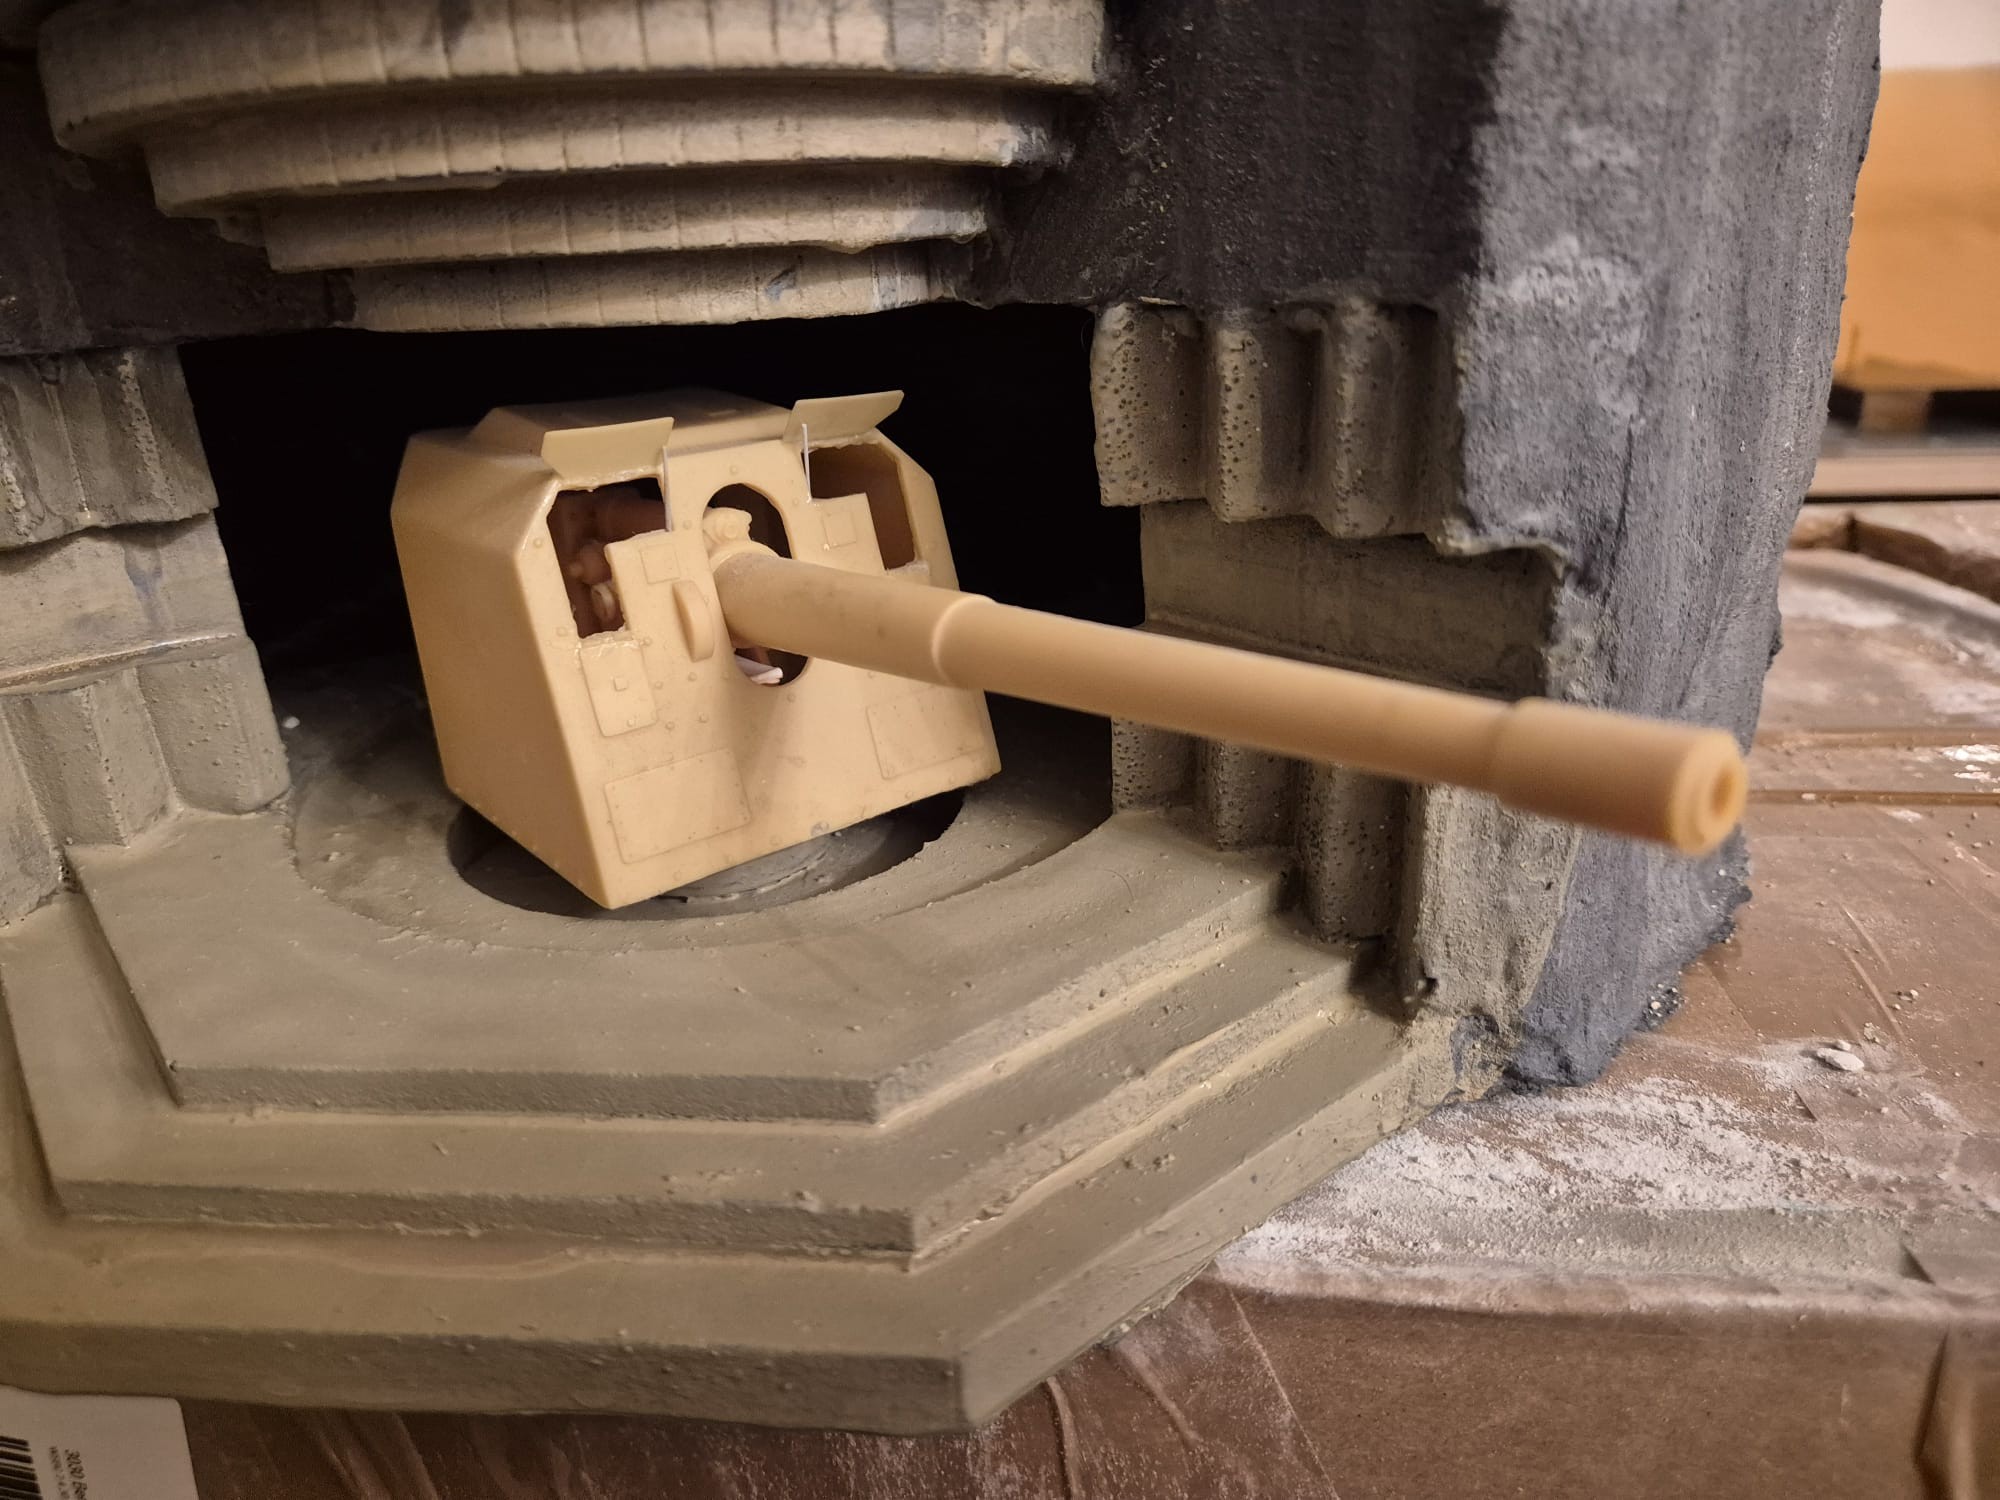
Once all this has finally be accomplished, I will proceed to build the Iron/Led doors leading into the Bunker and their frame. And finally, I will complete the PAK43/41 and fix into the Bunker.
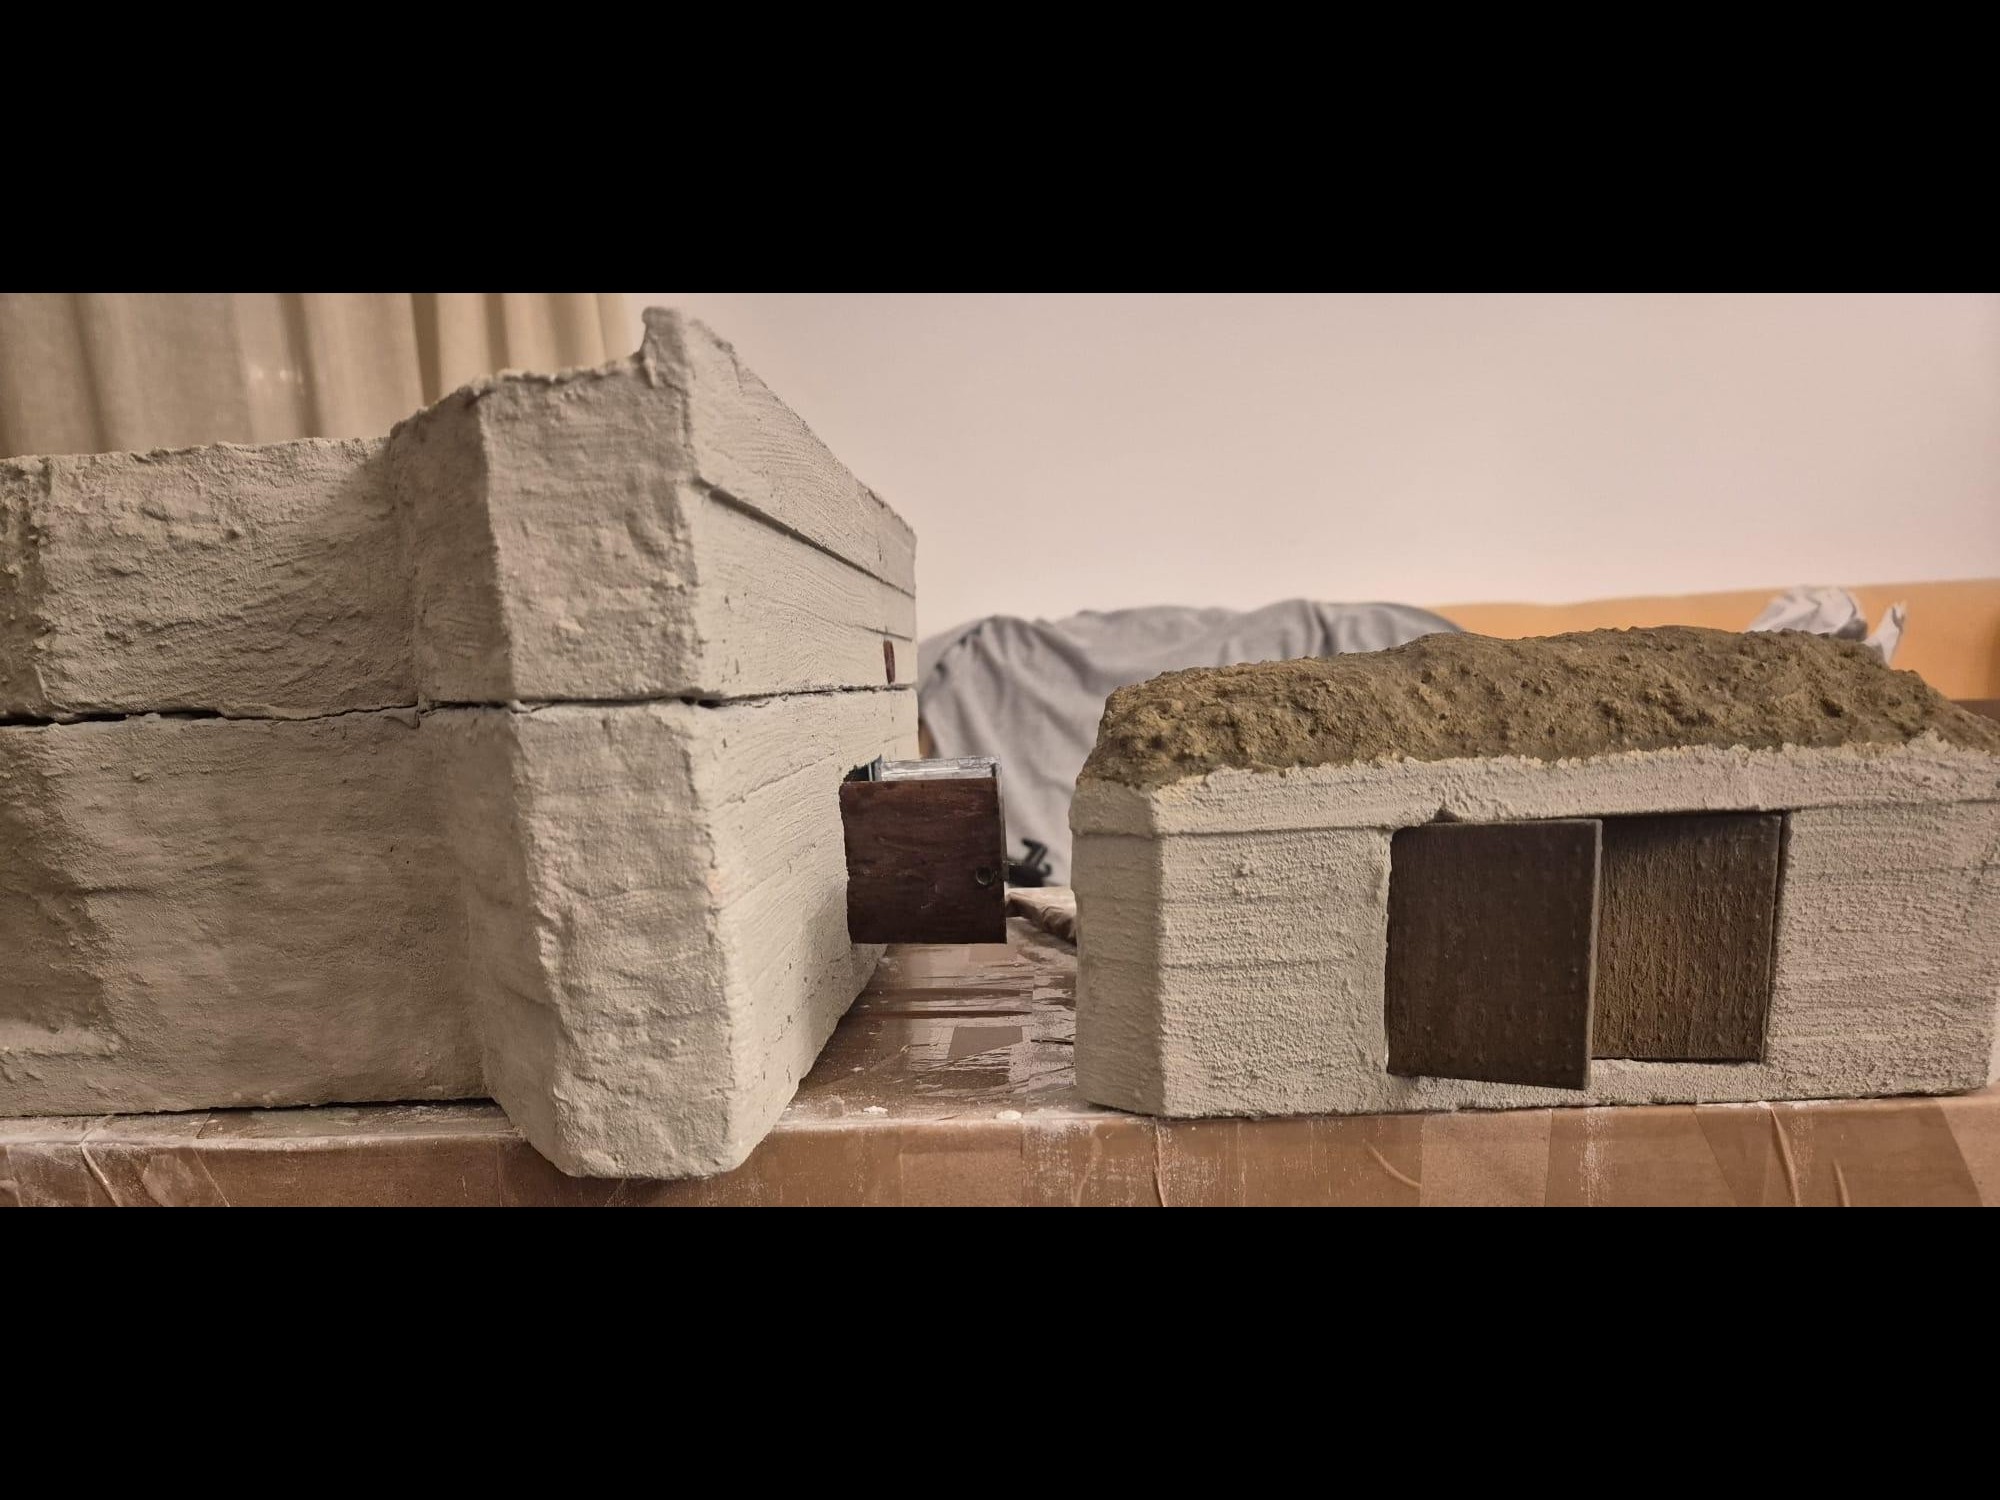
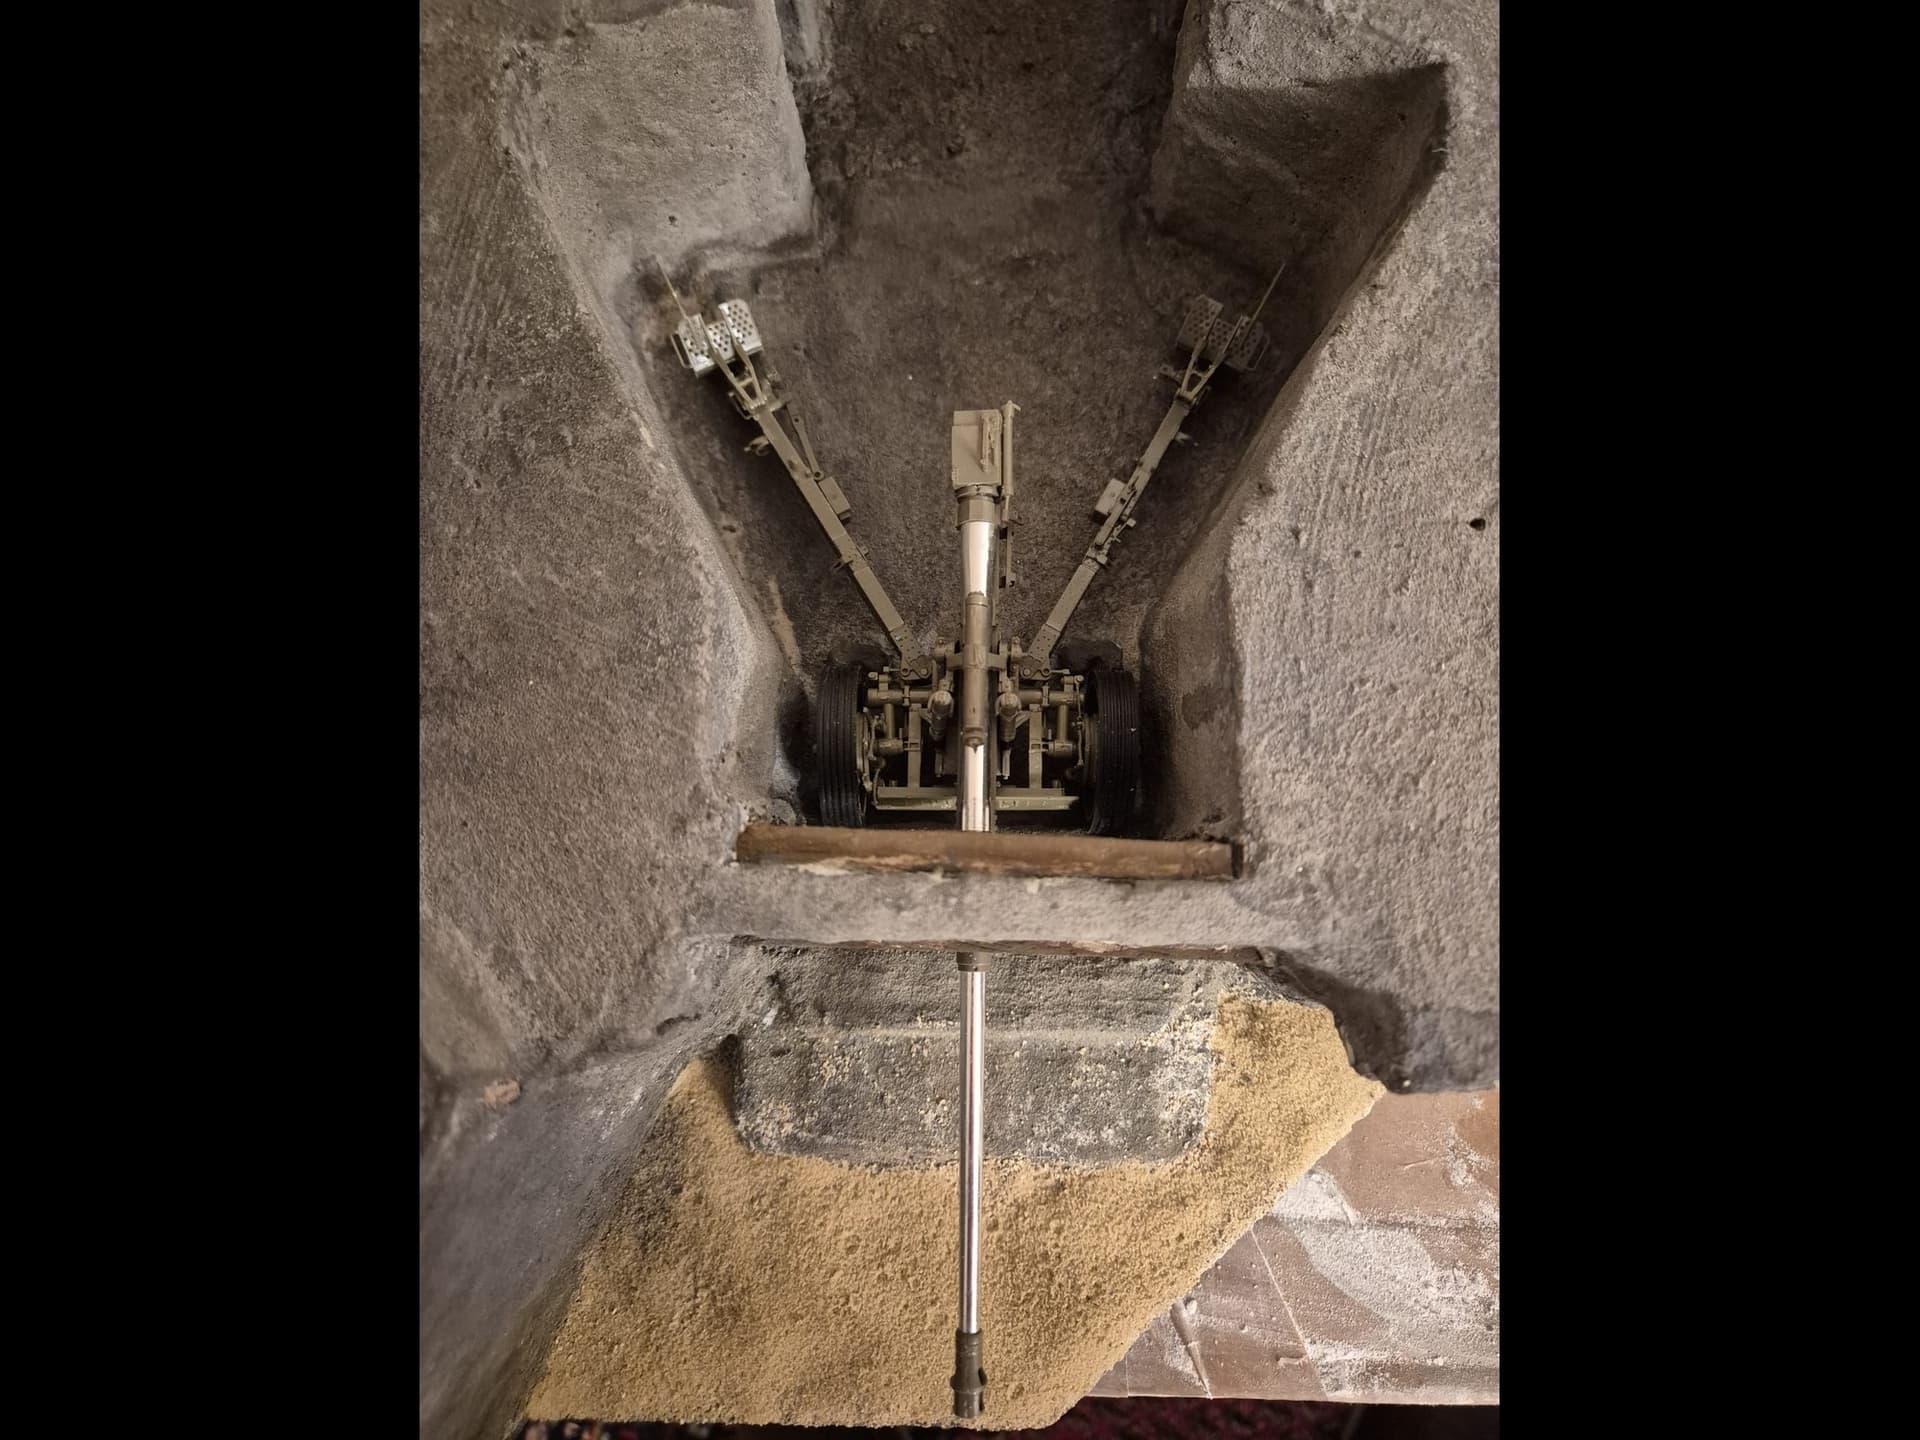
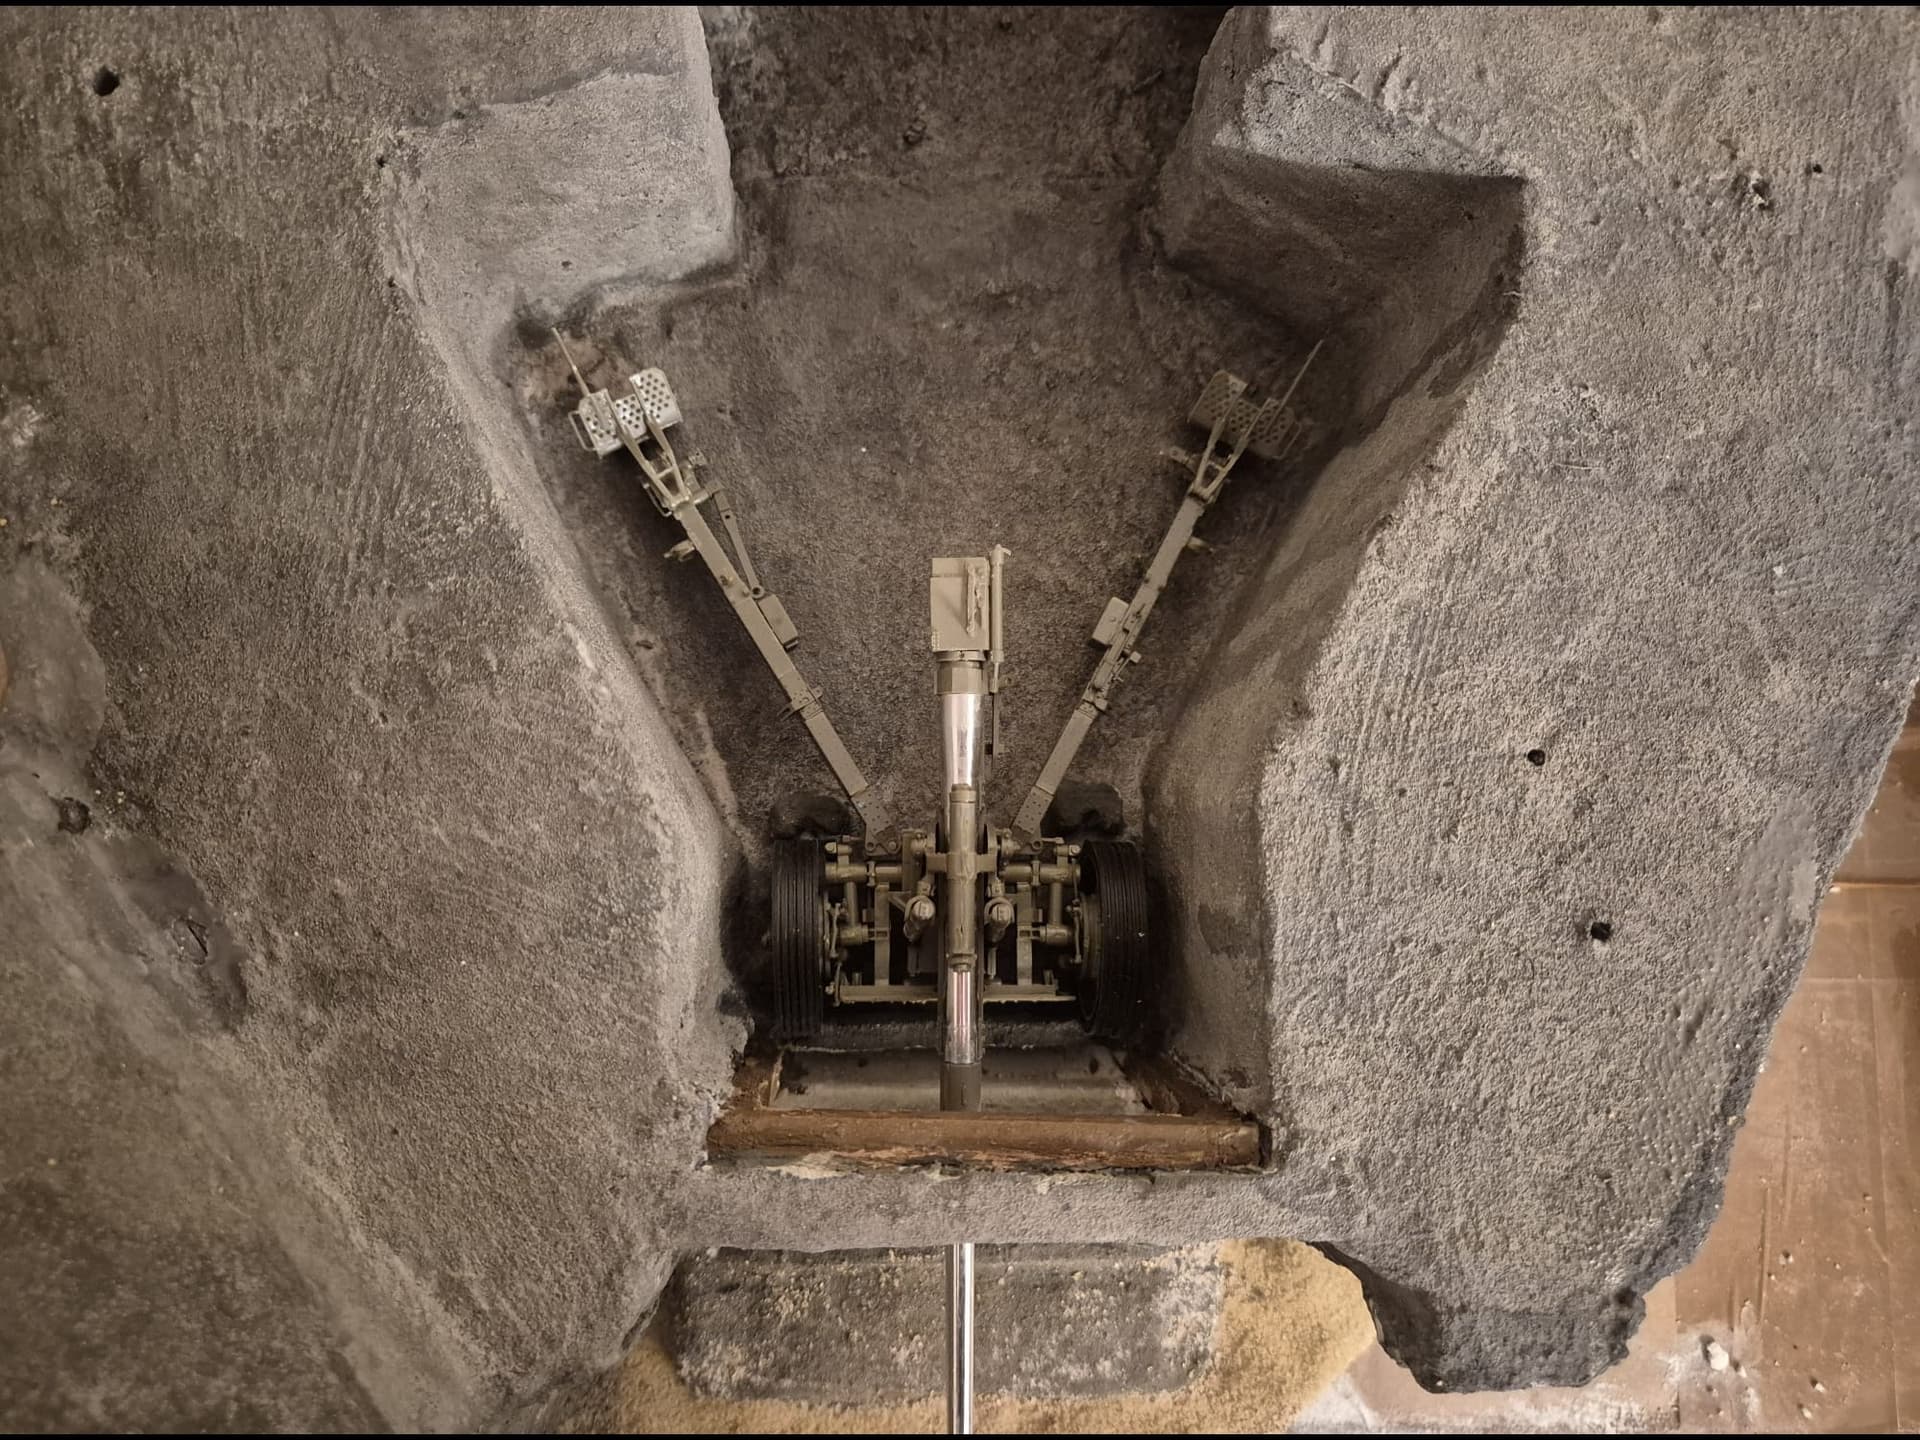
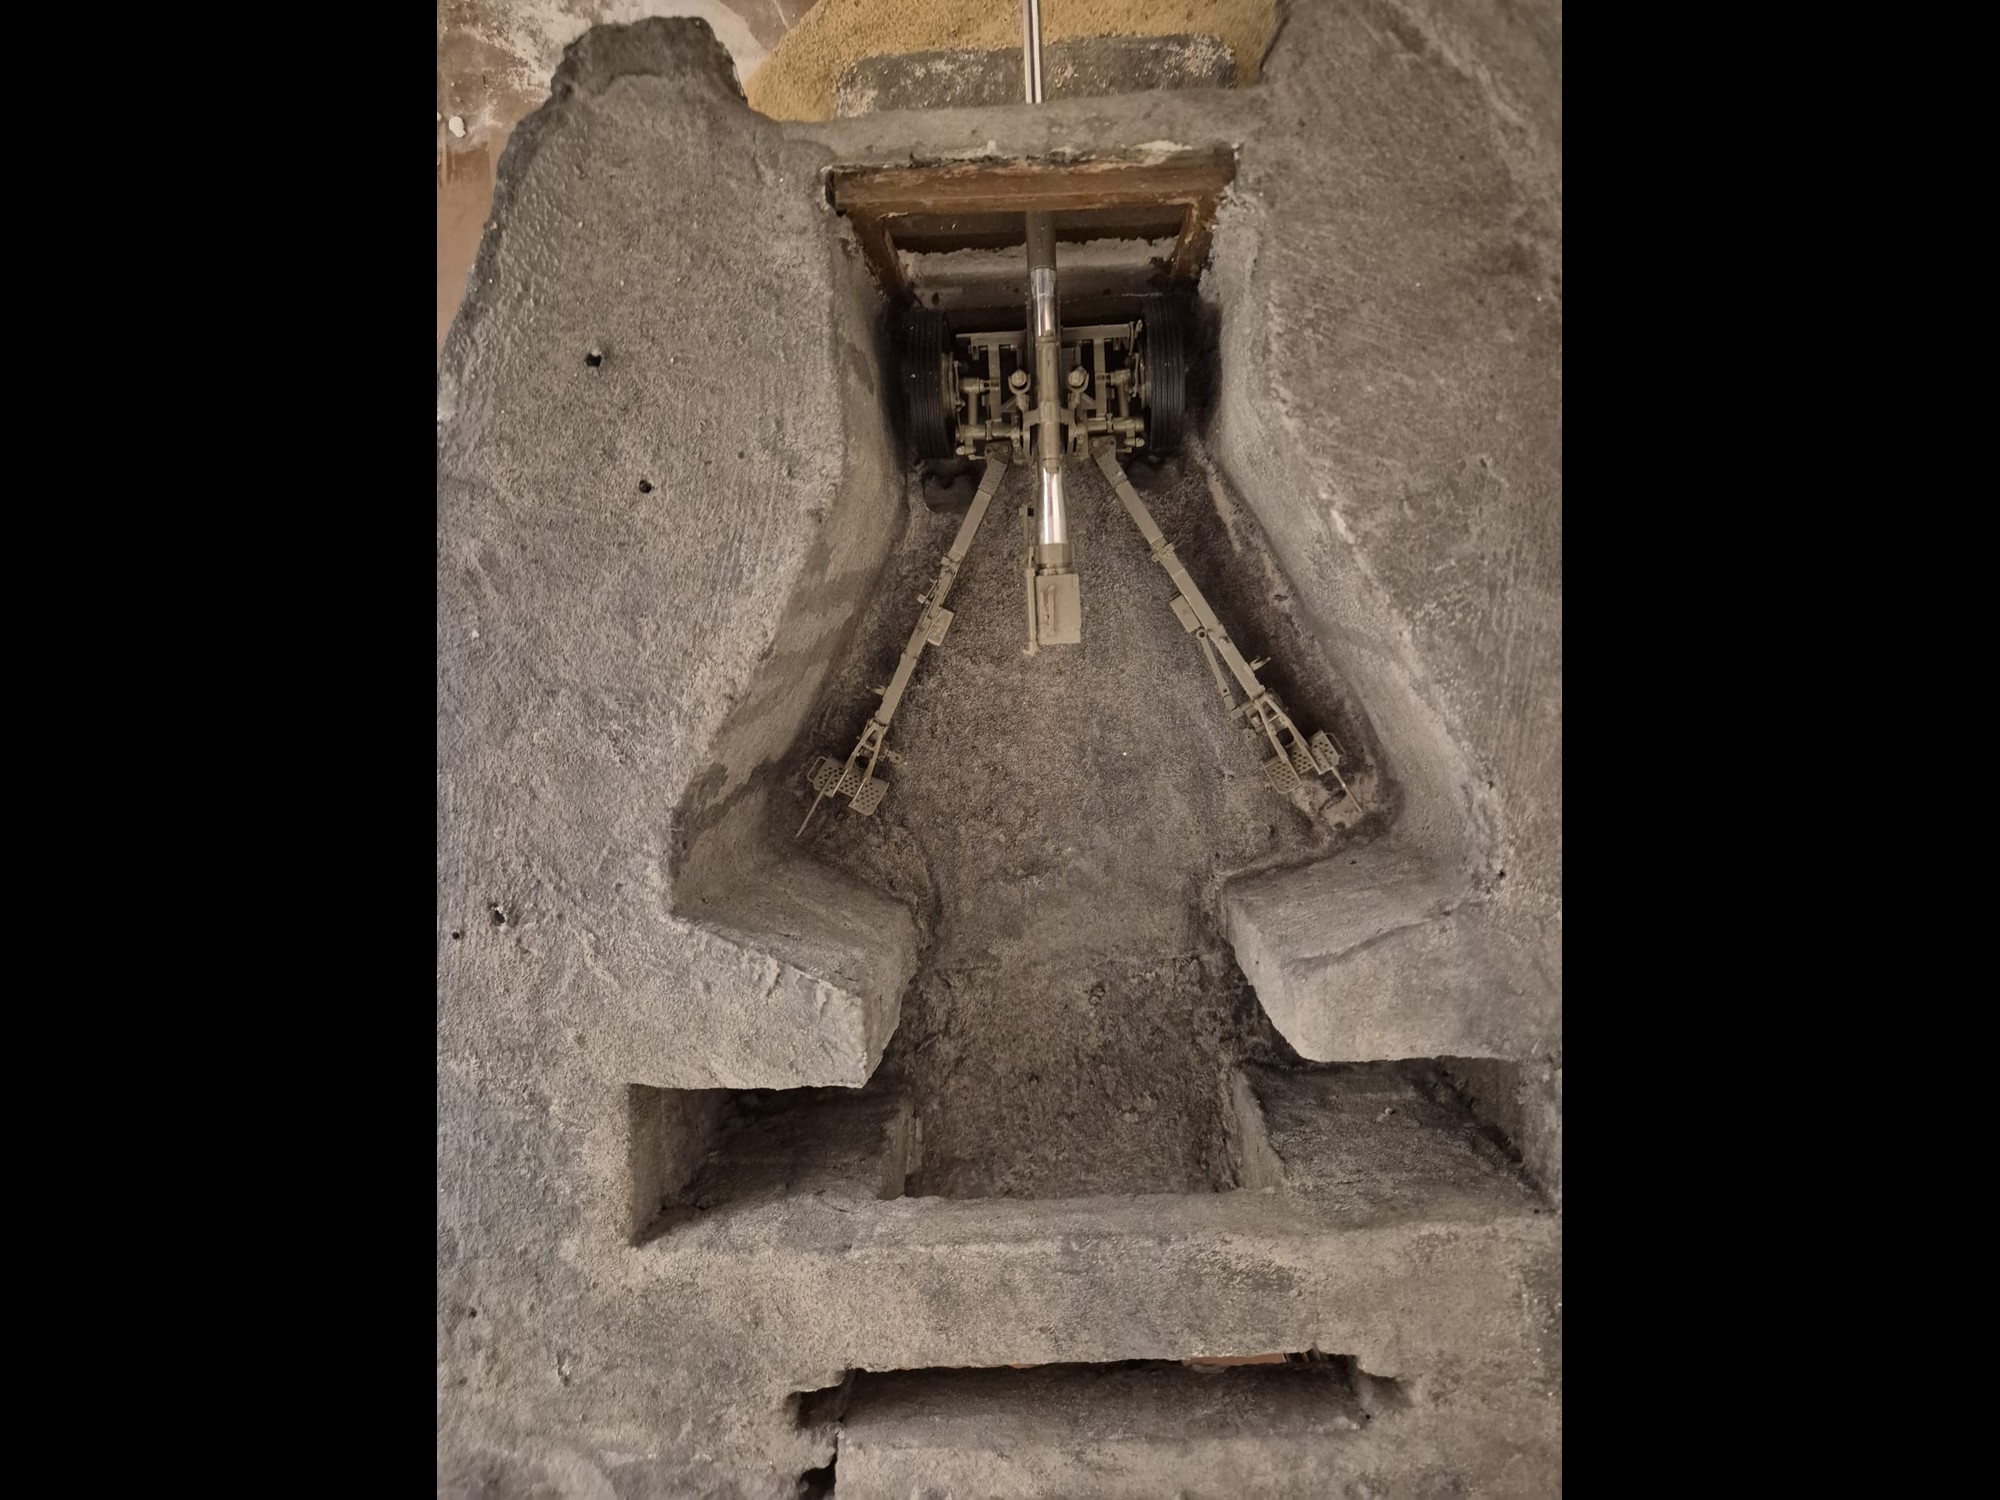
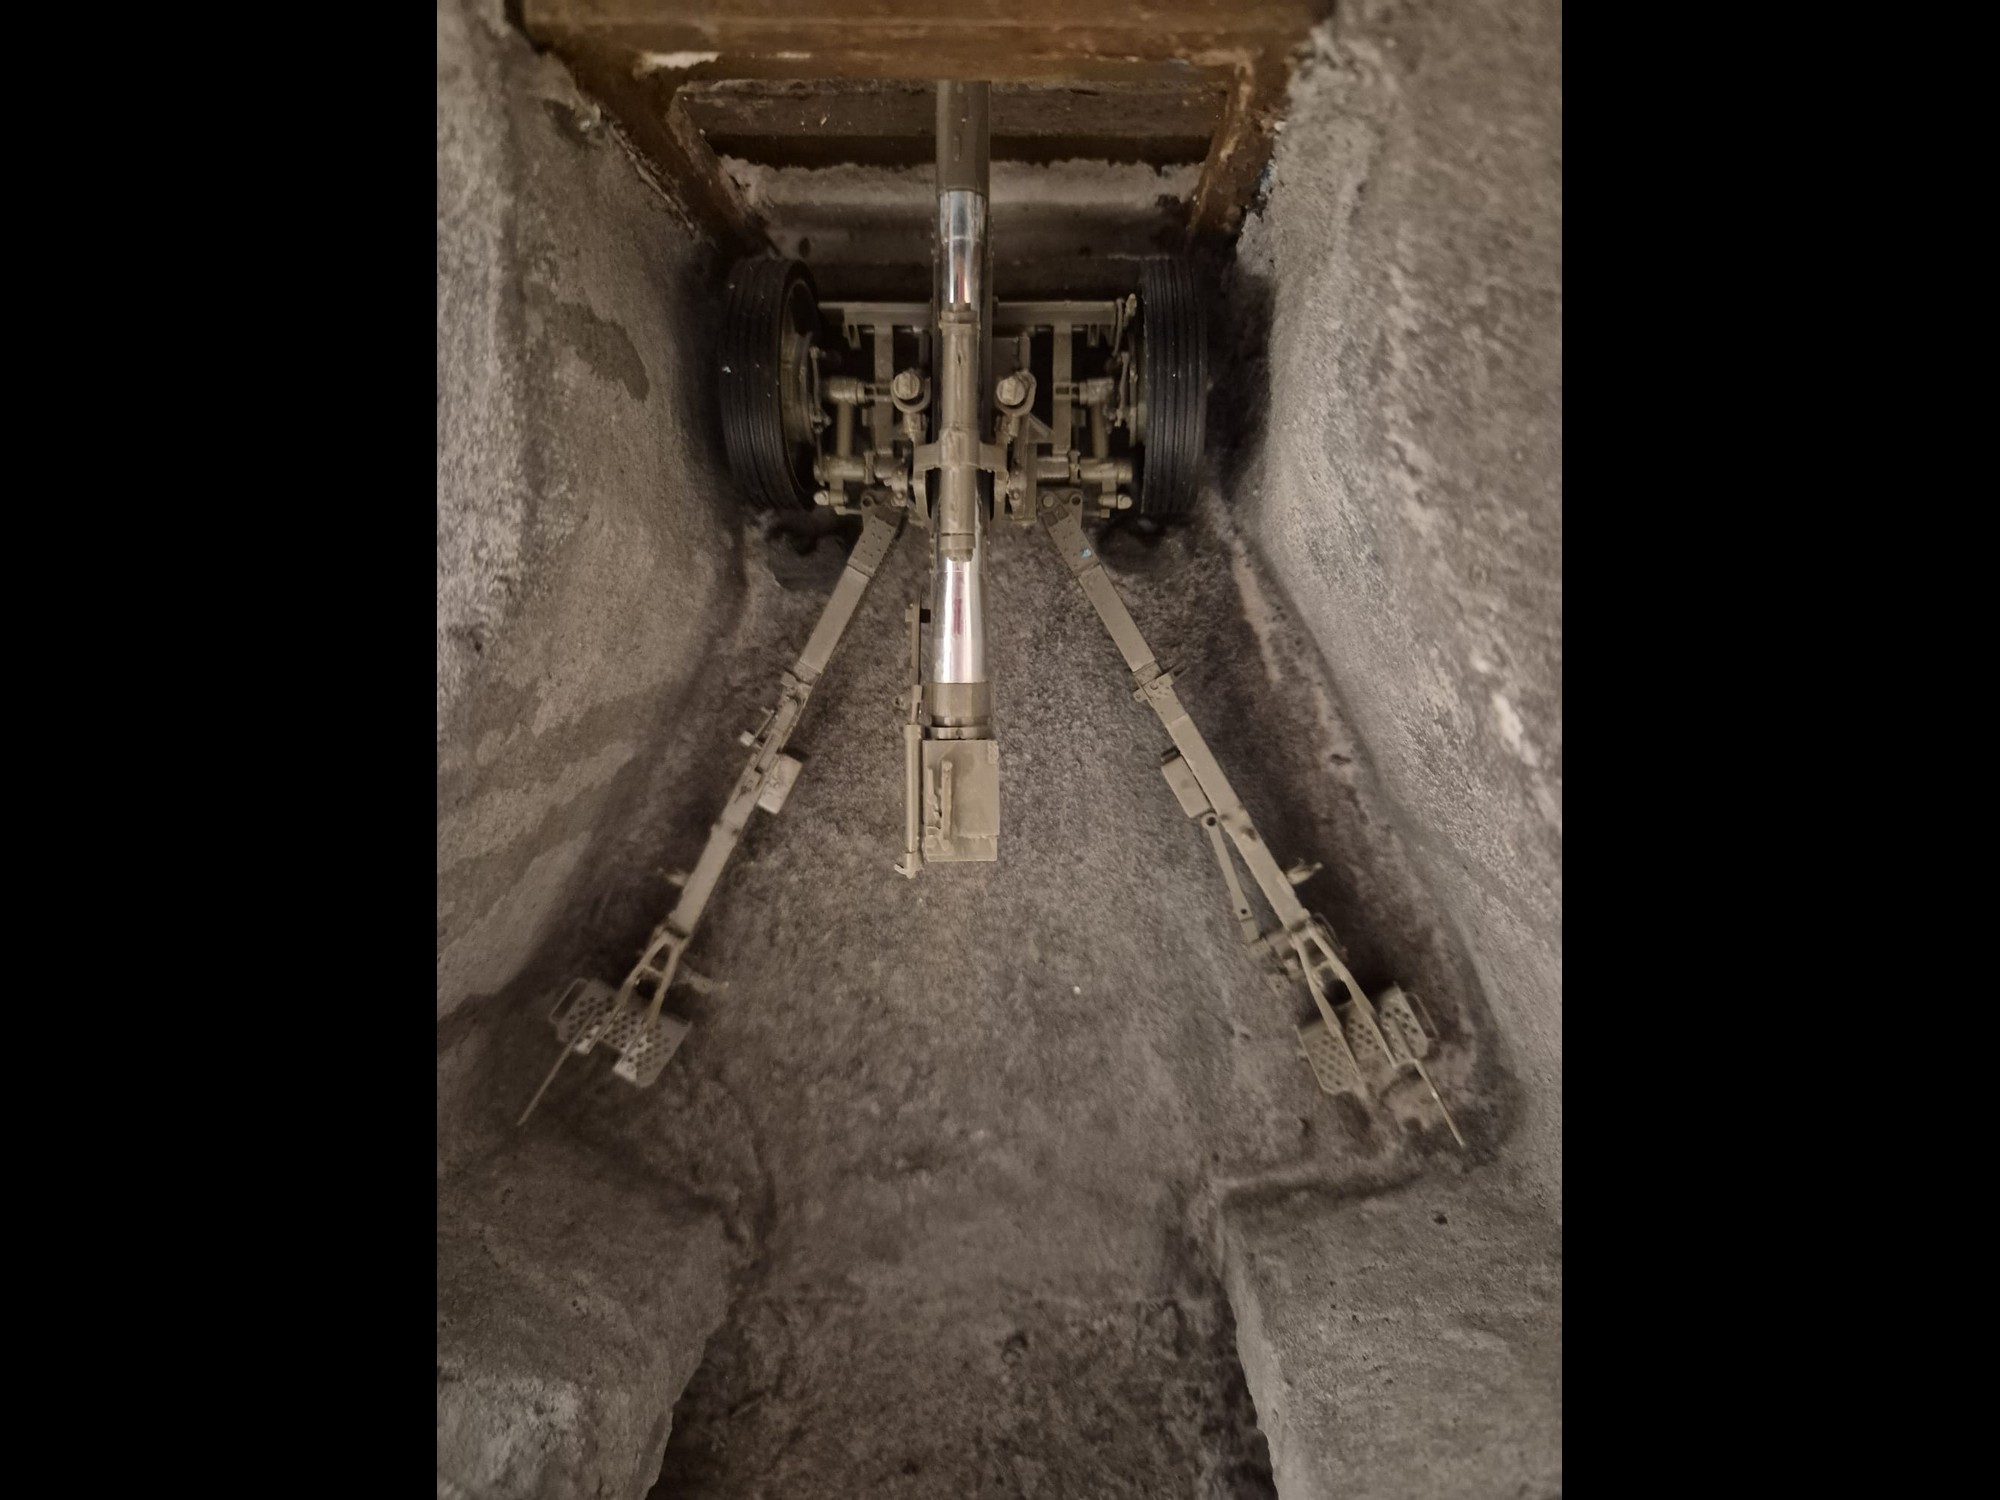
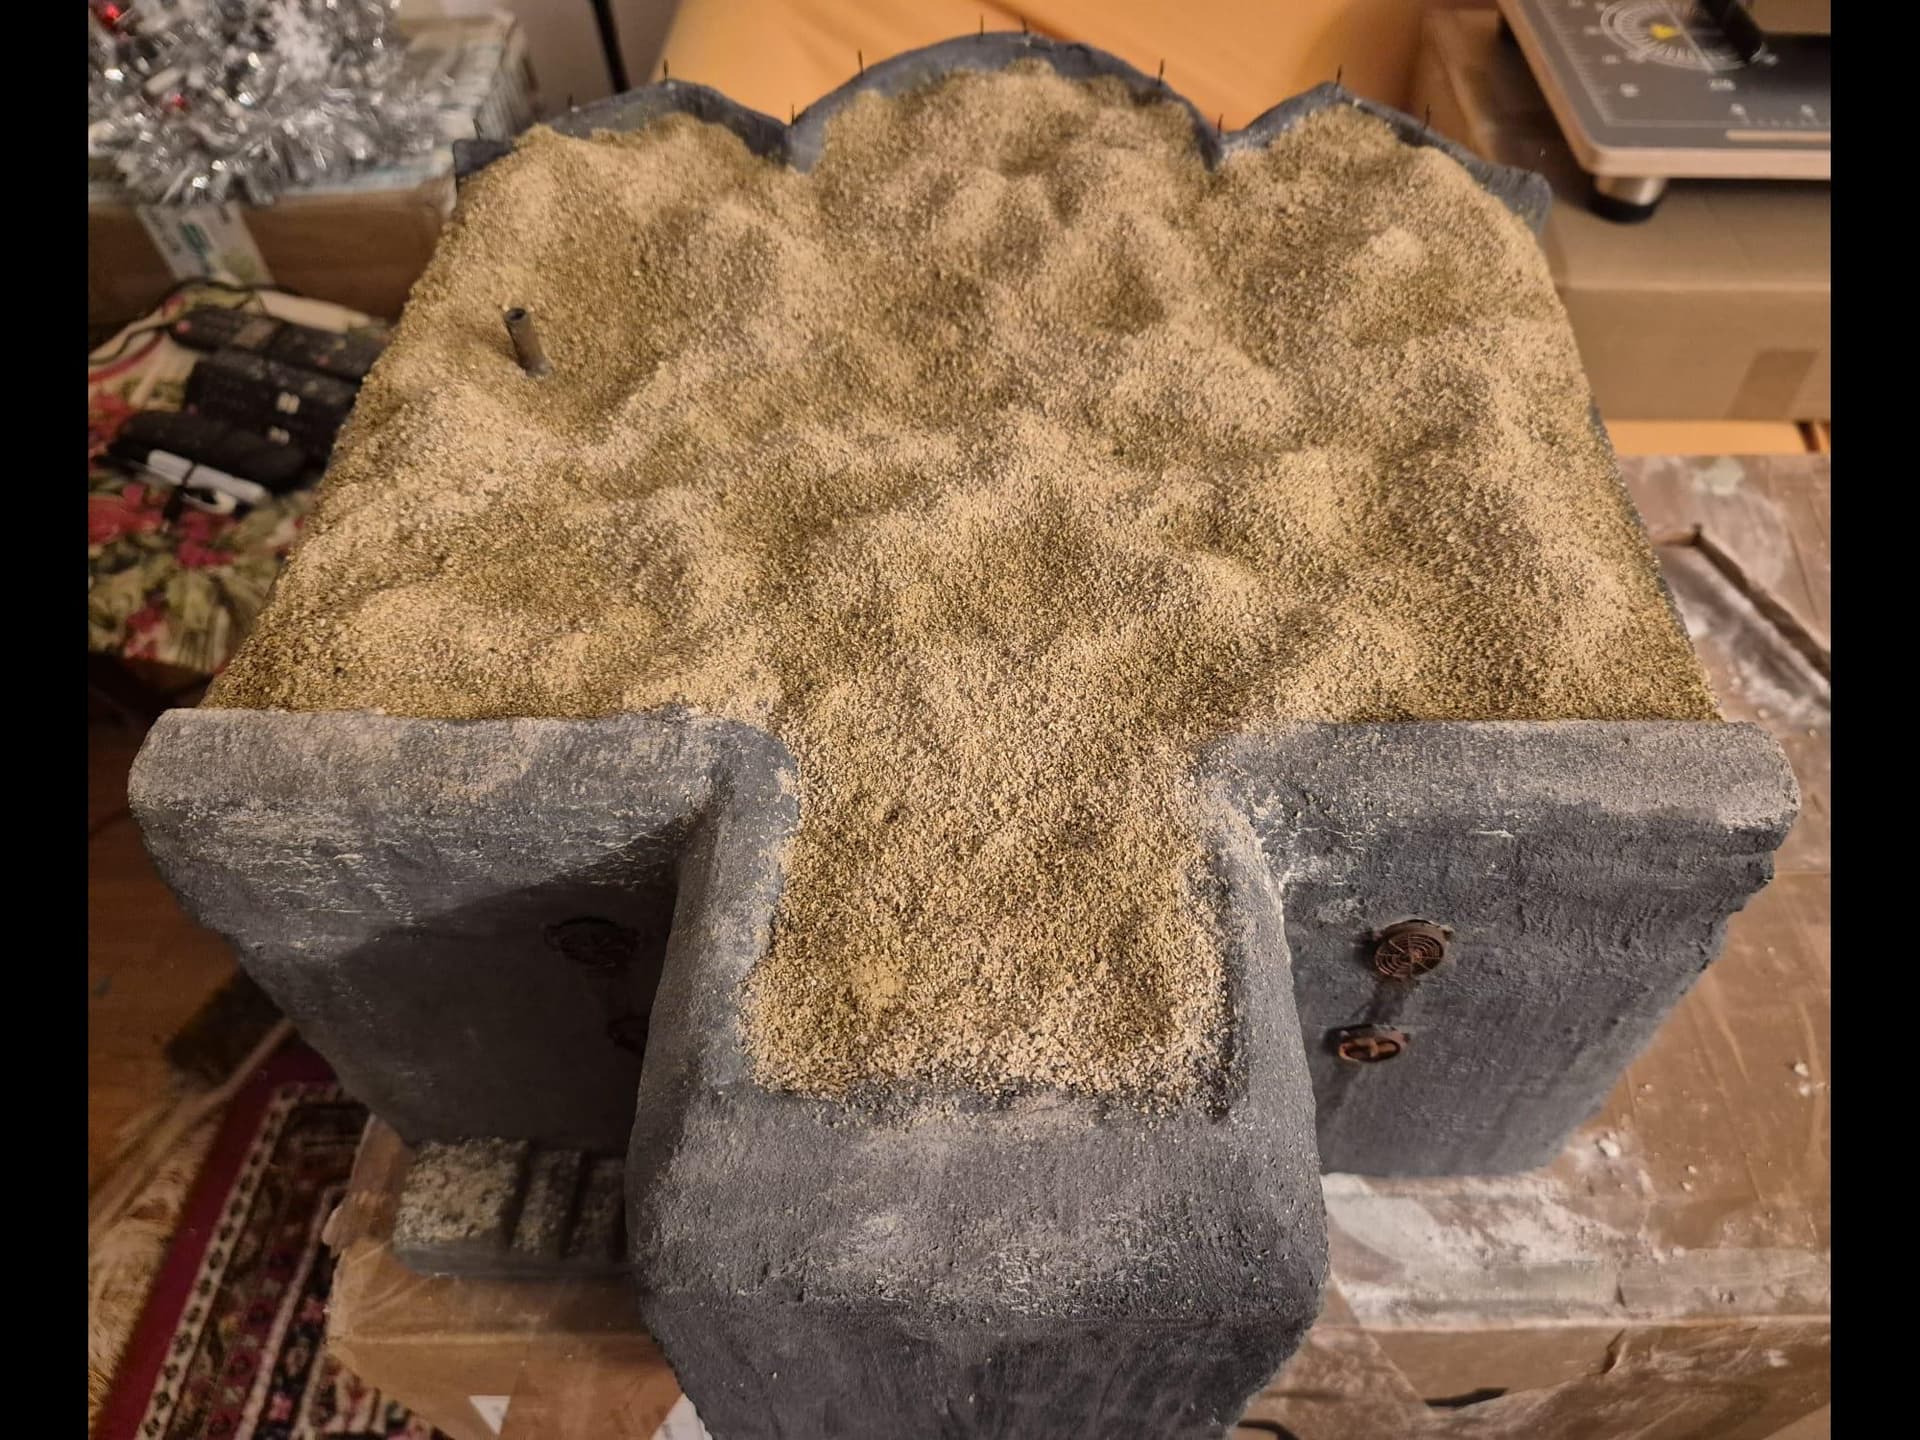
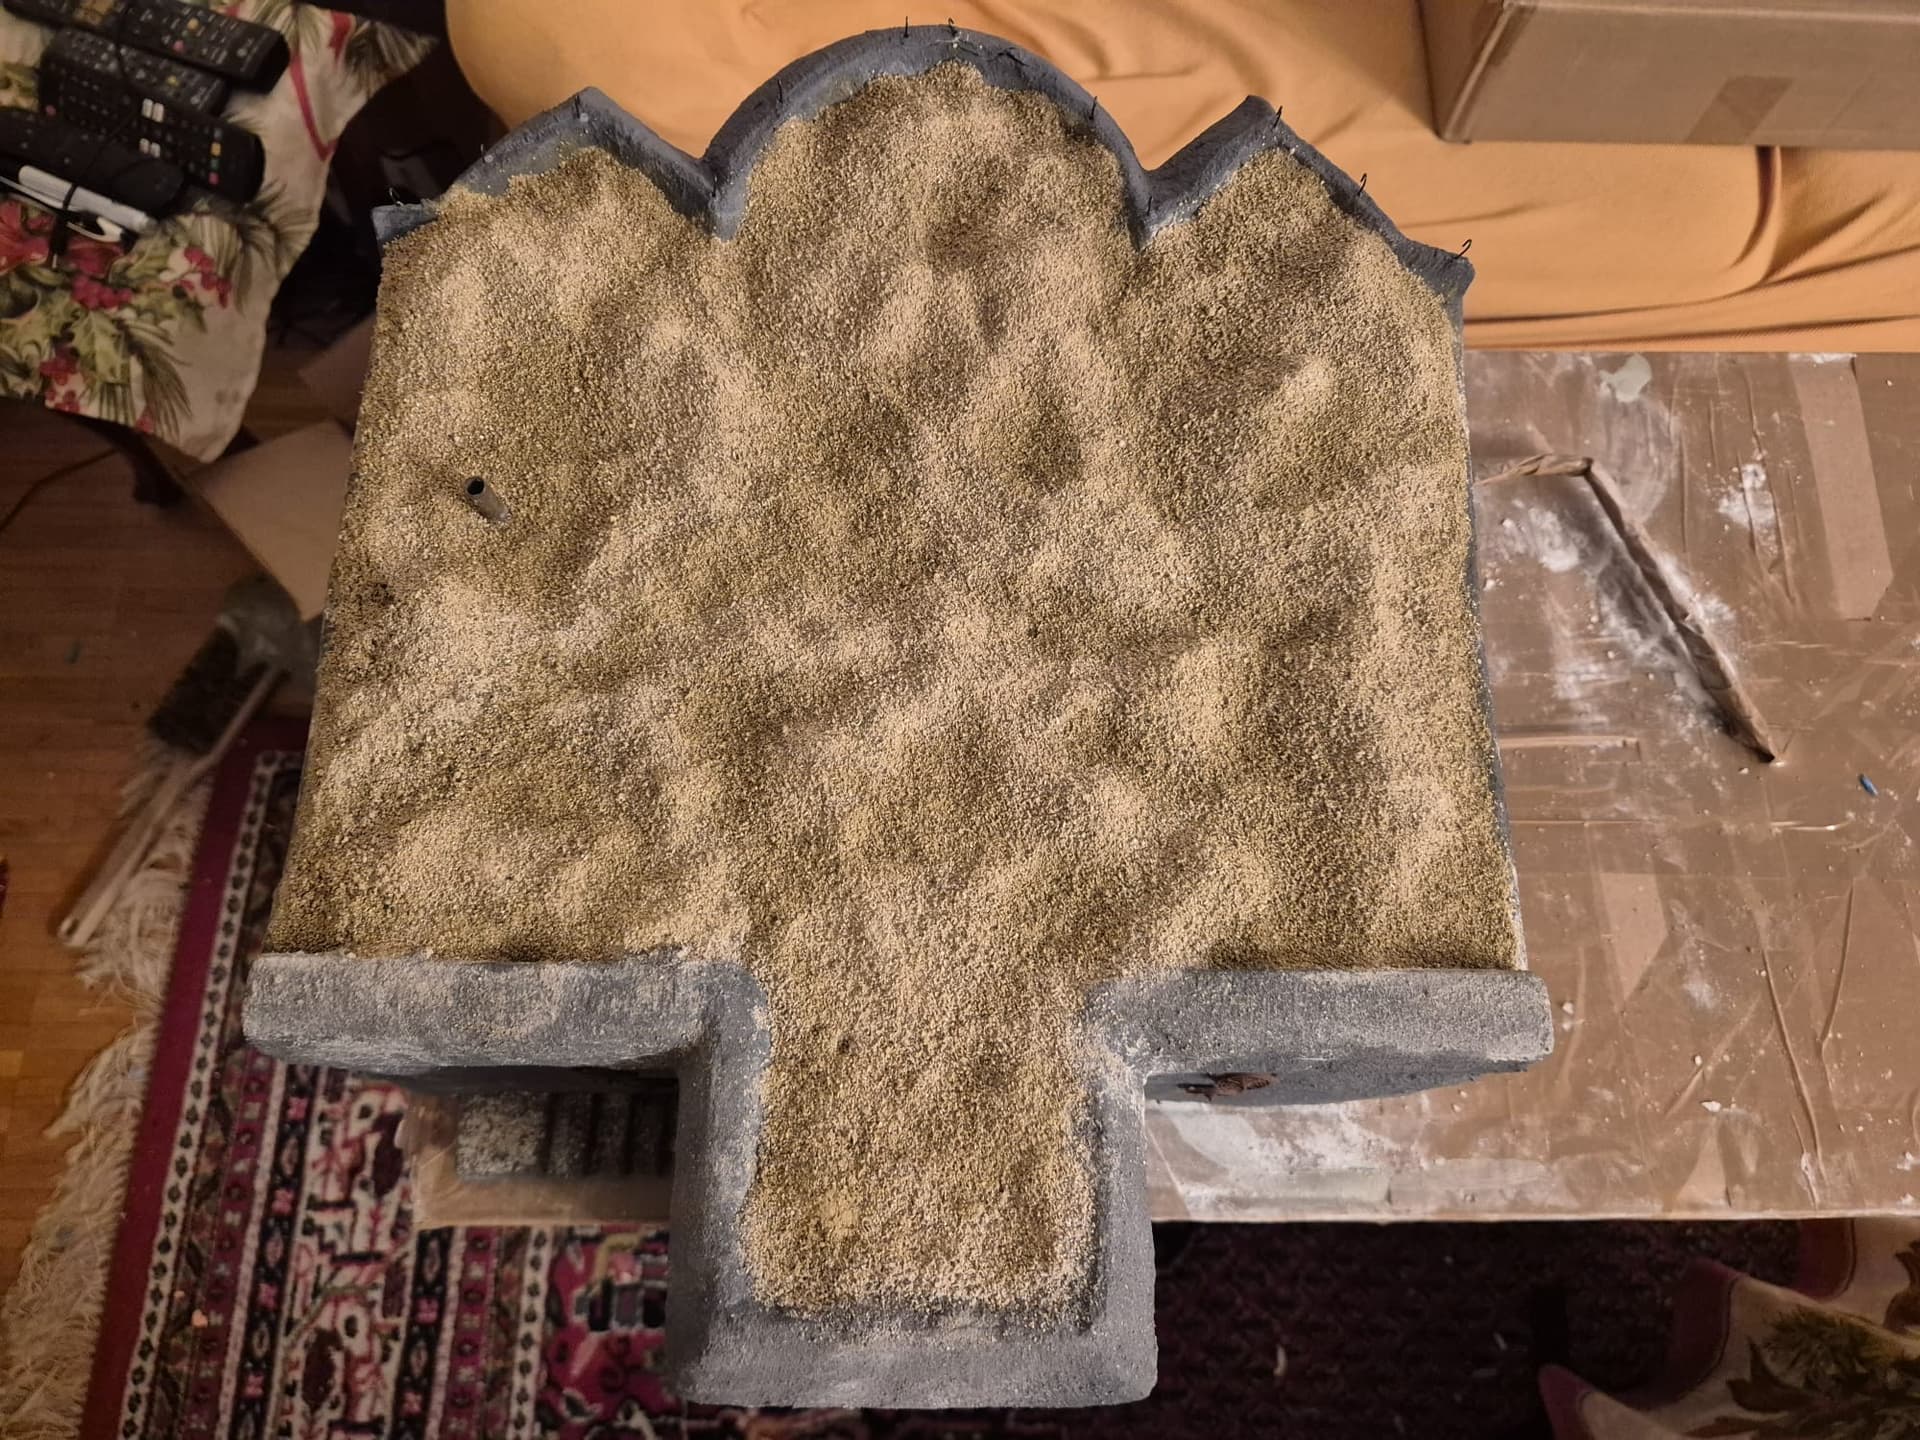
But for now, look at the outer faces of the Bunker covered in Concrete…
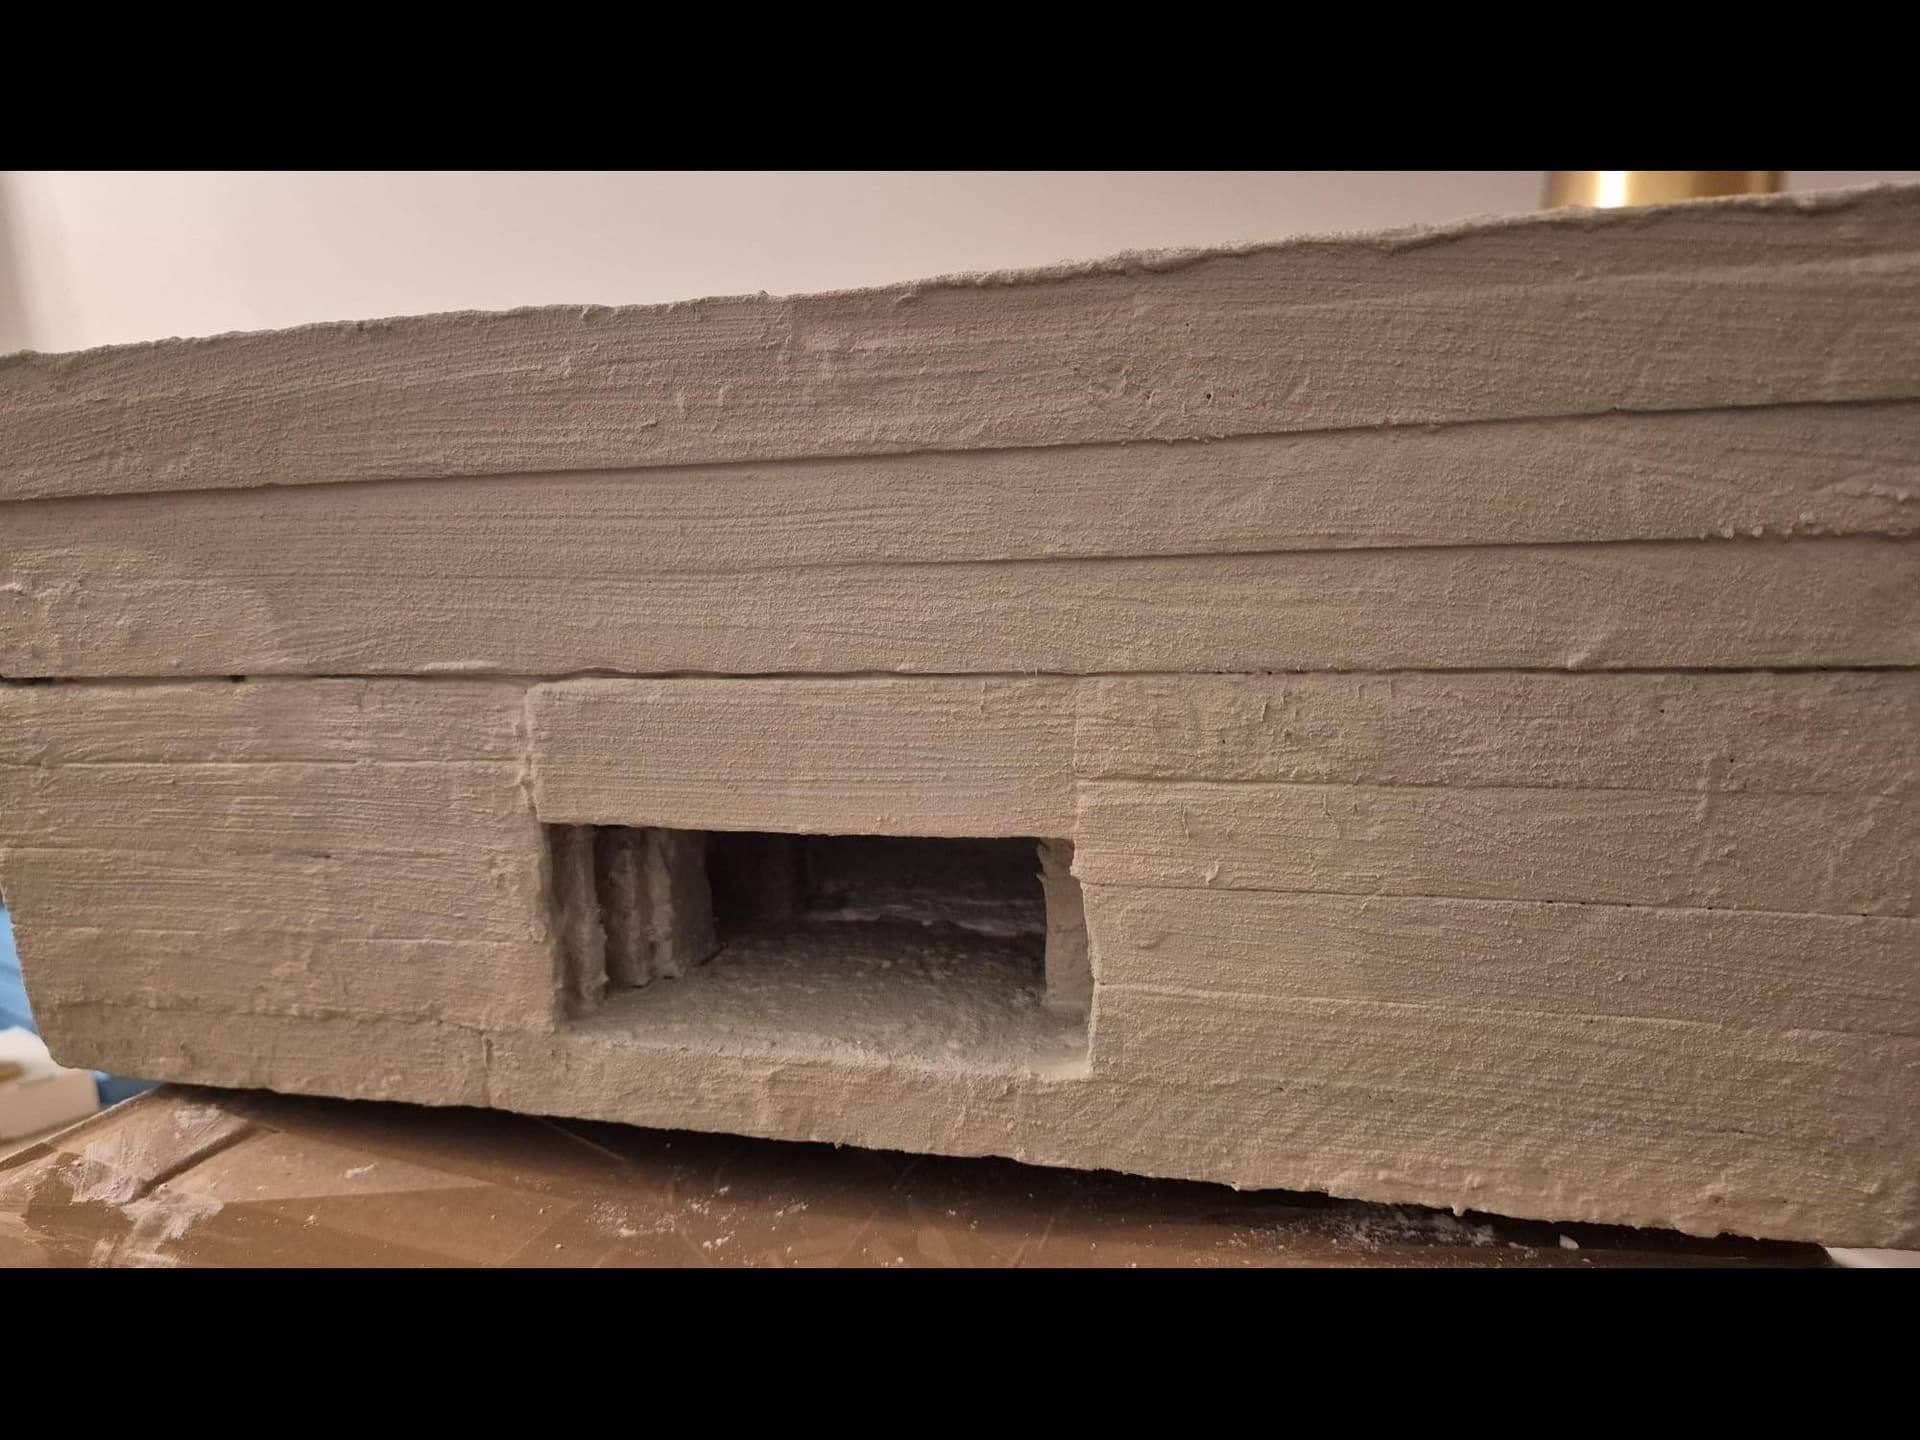
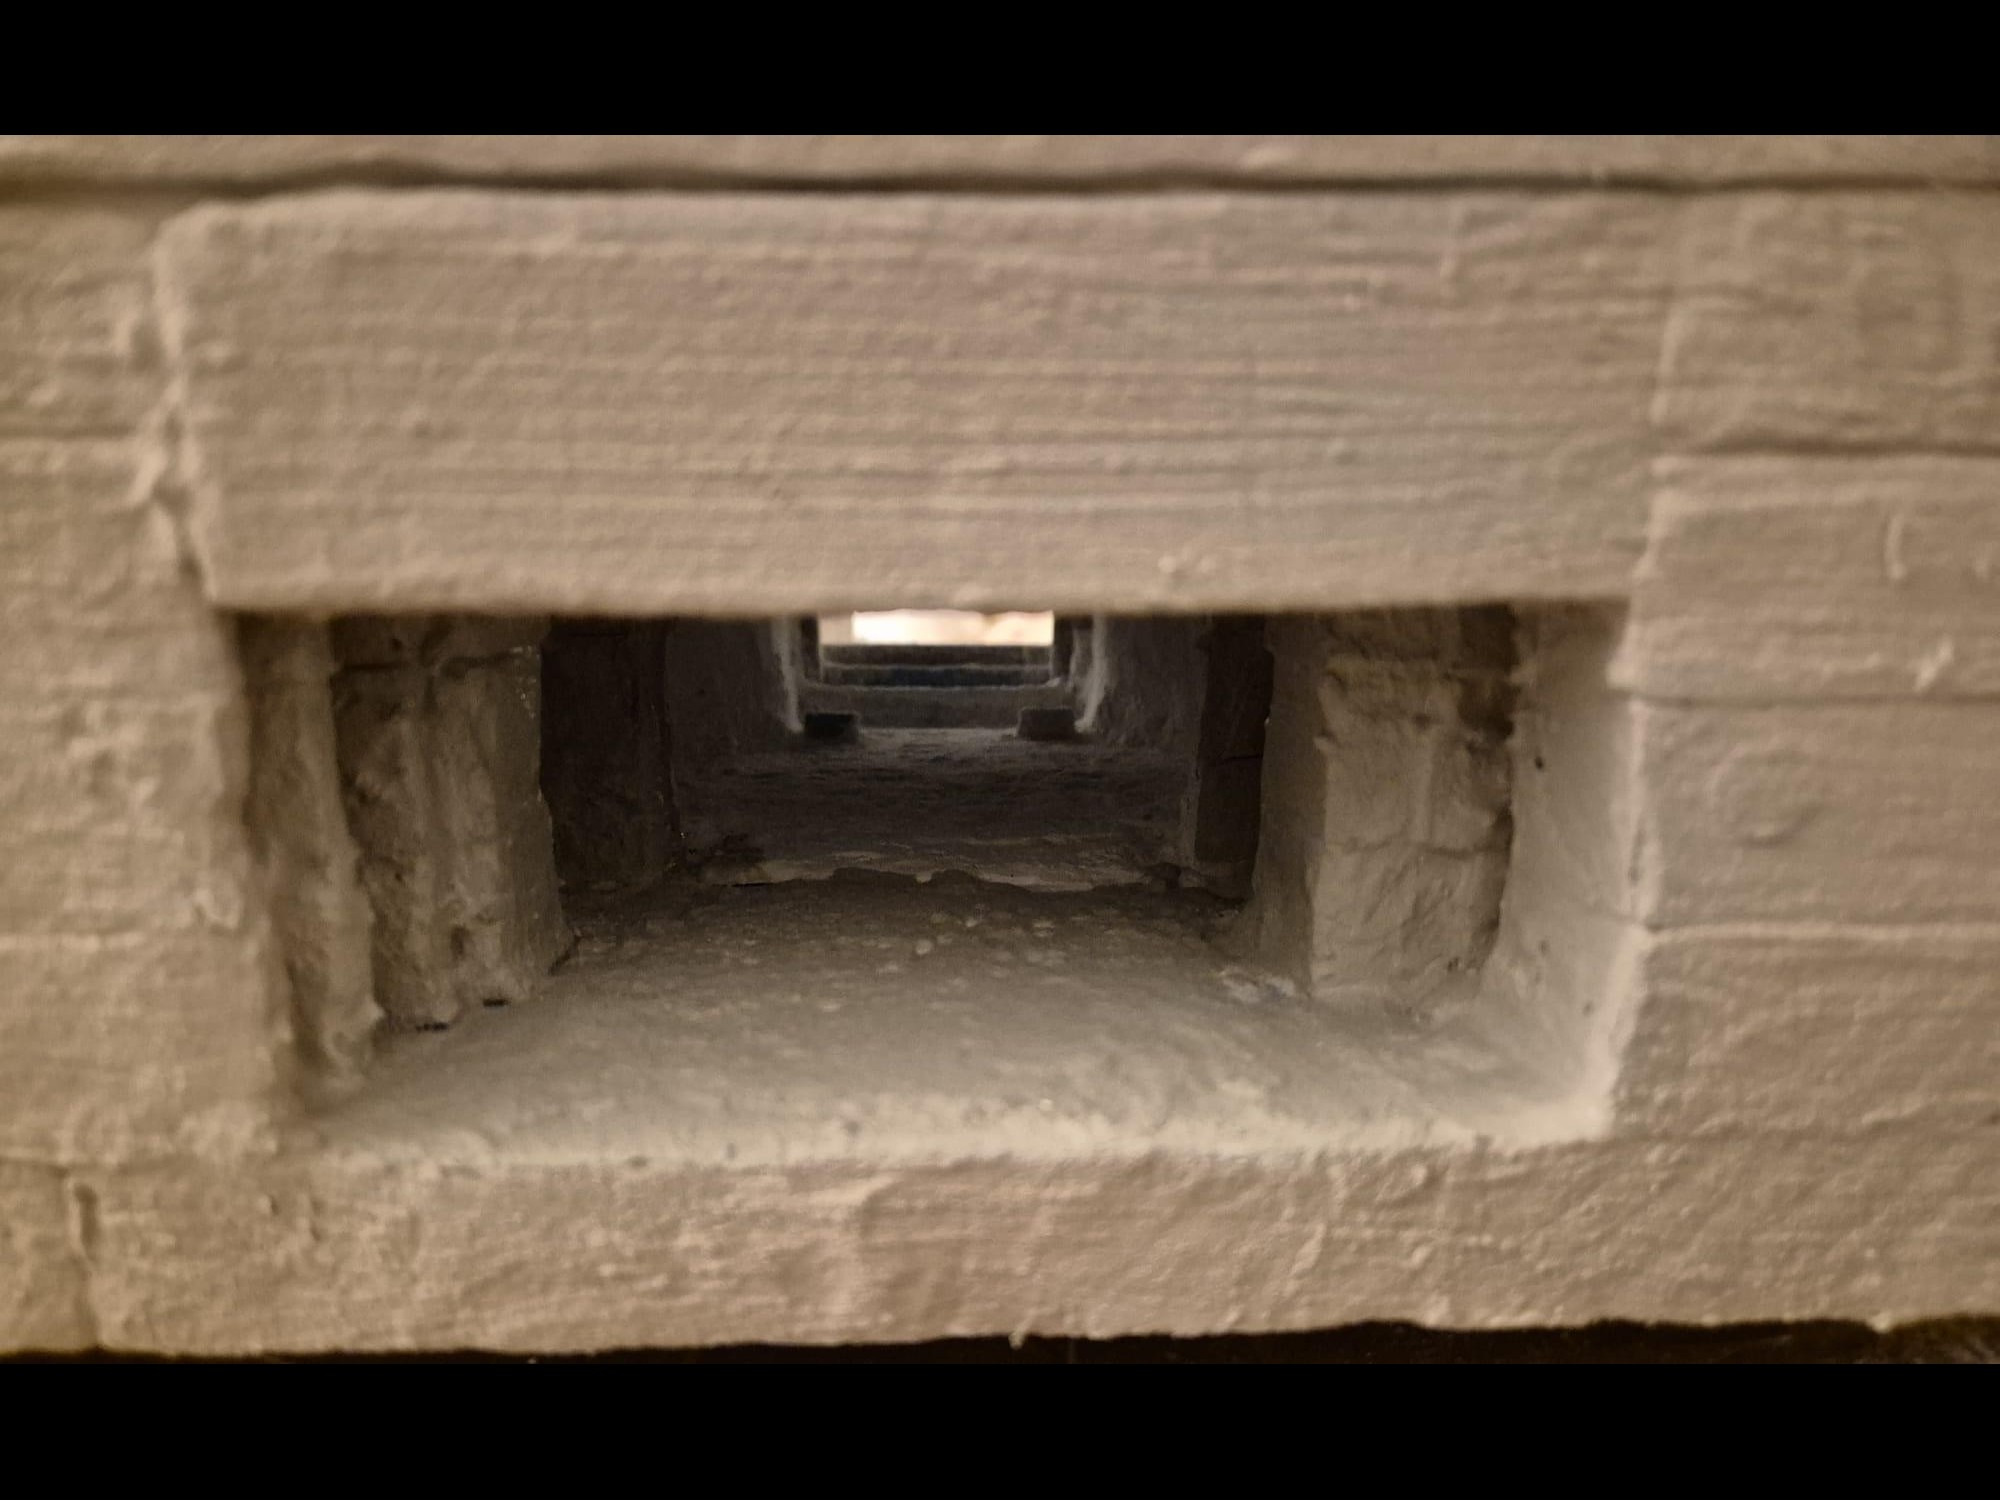
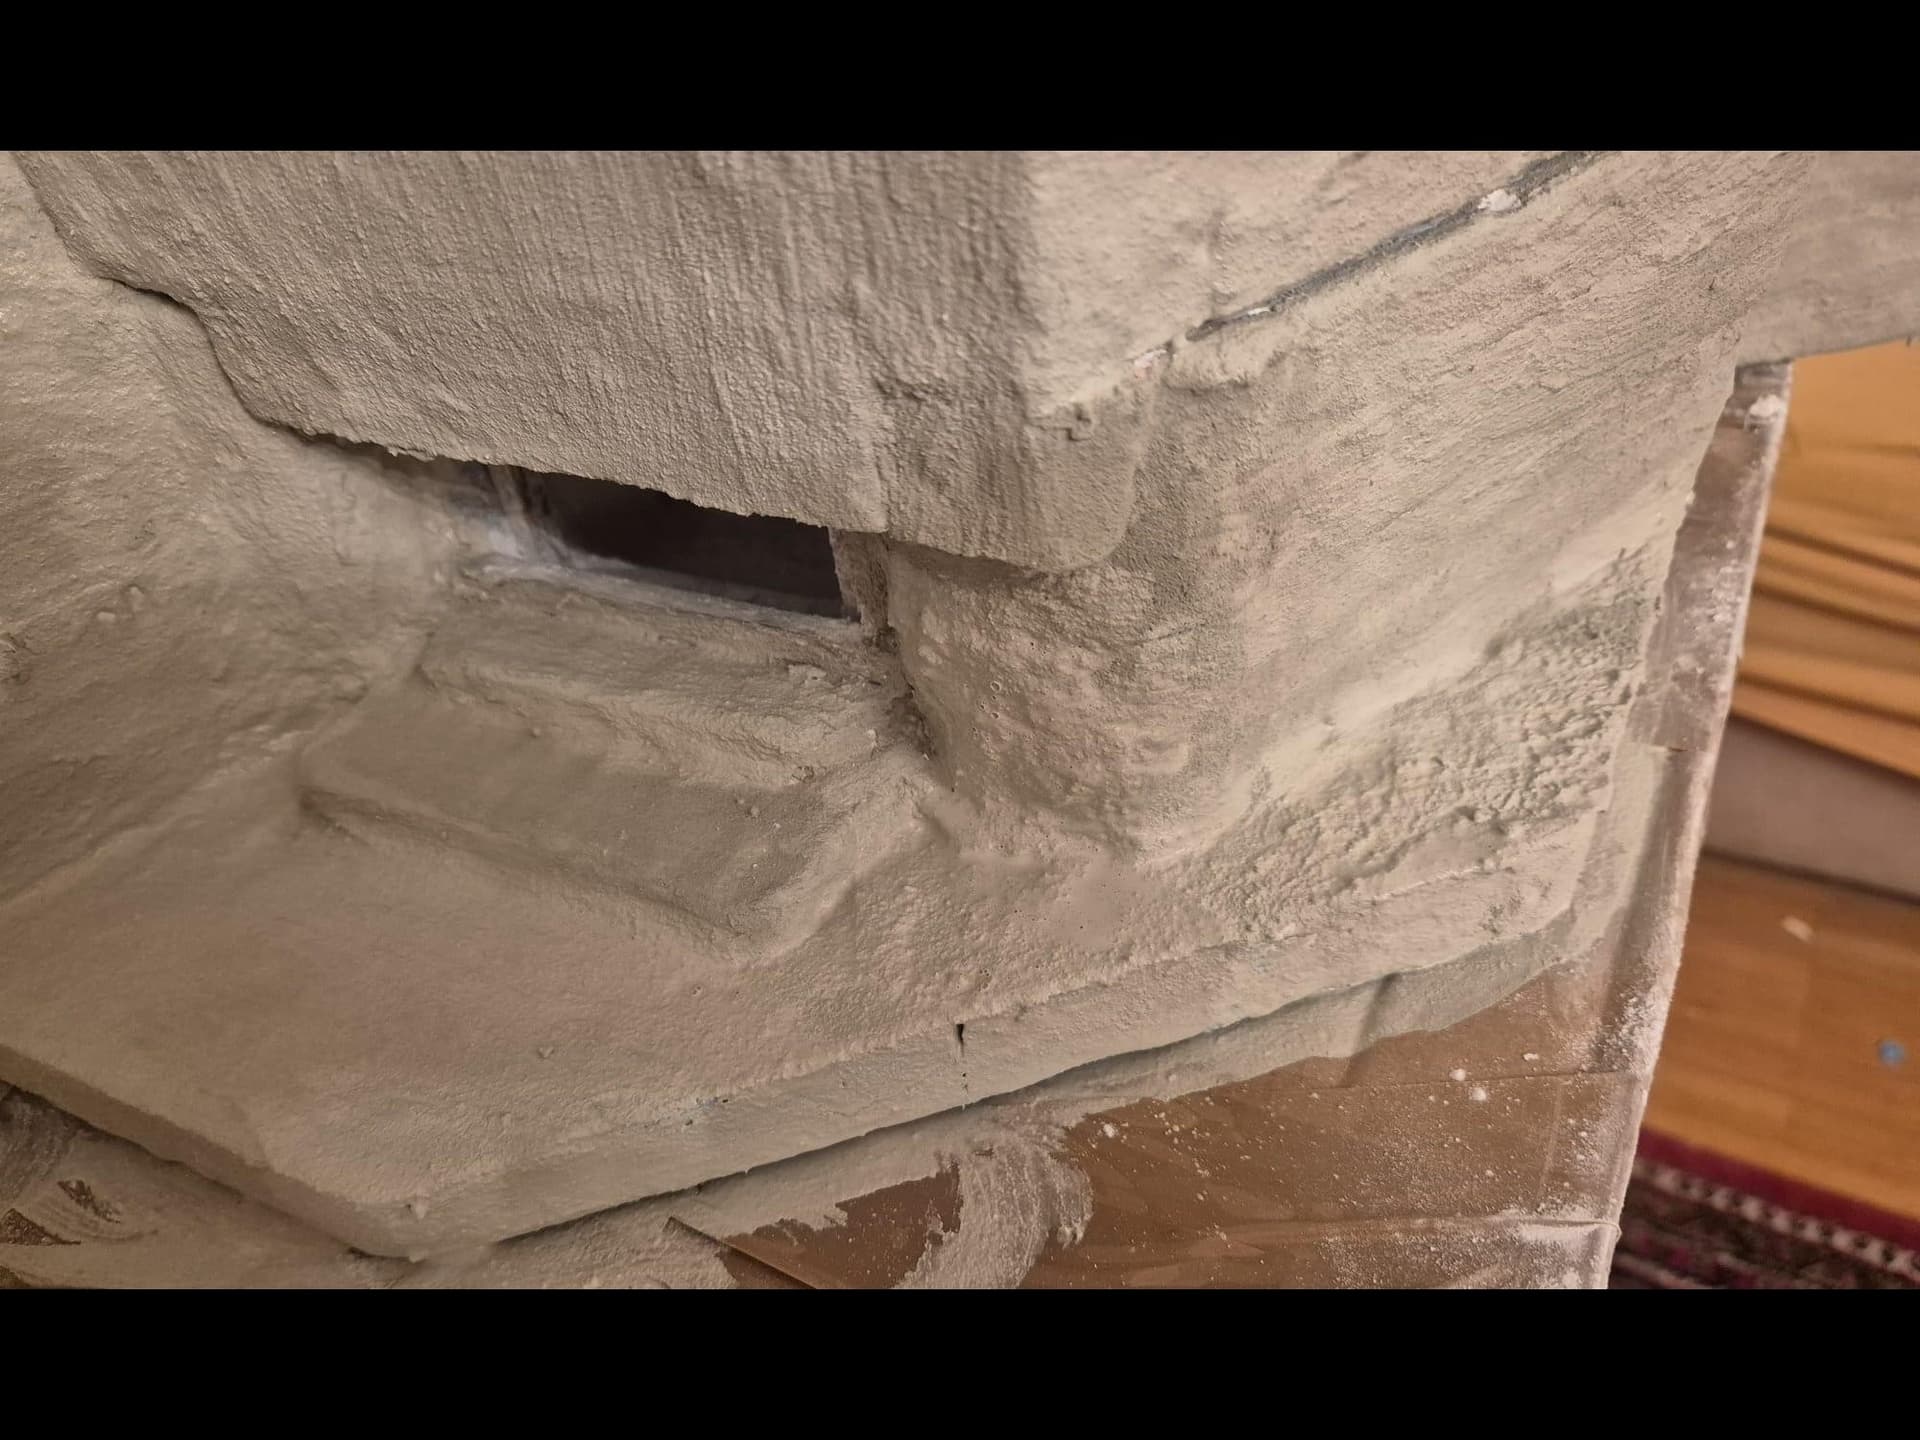

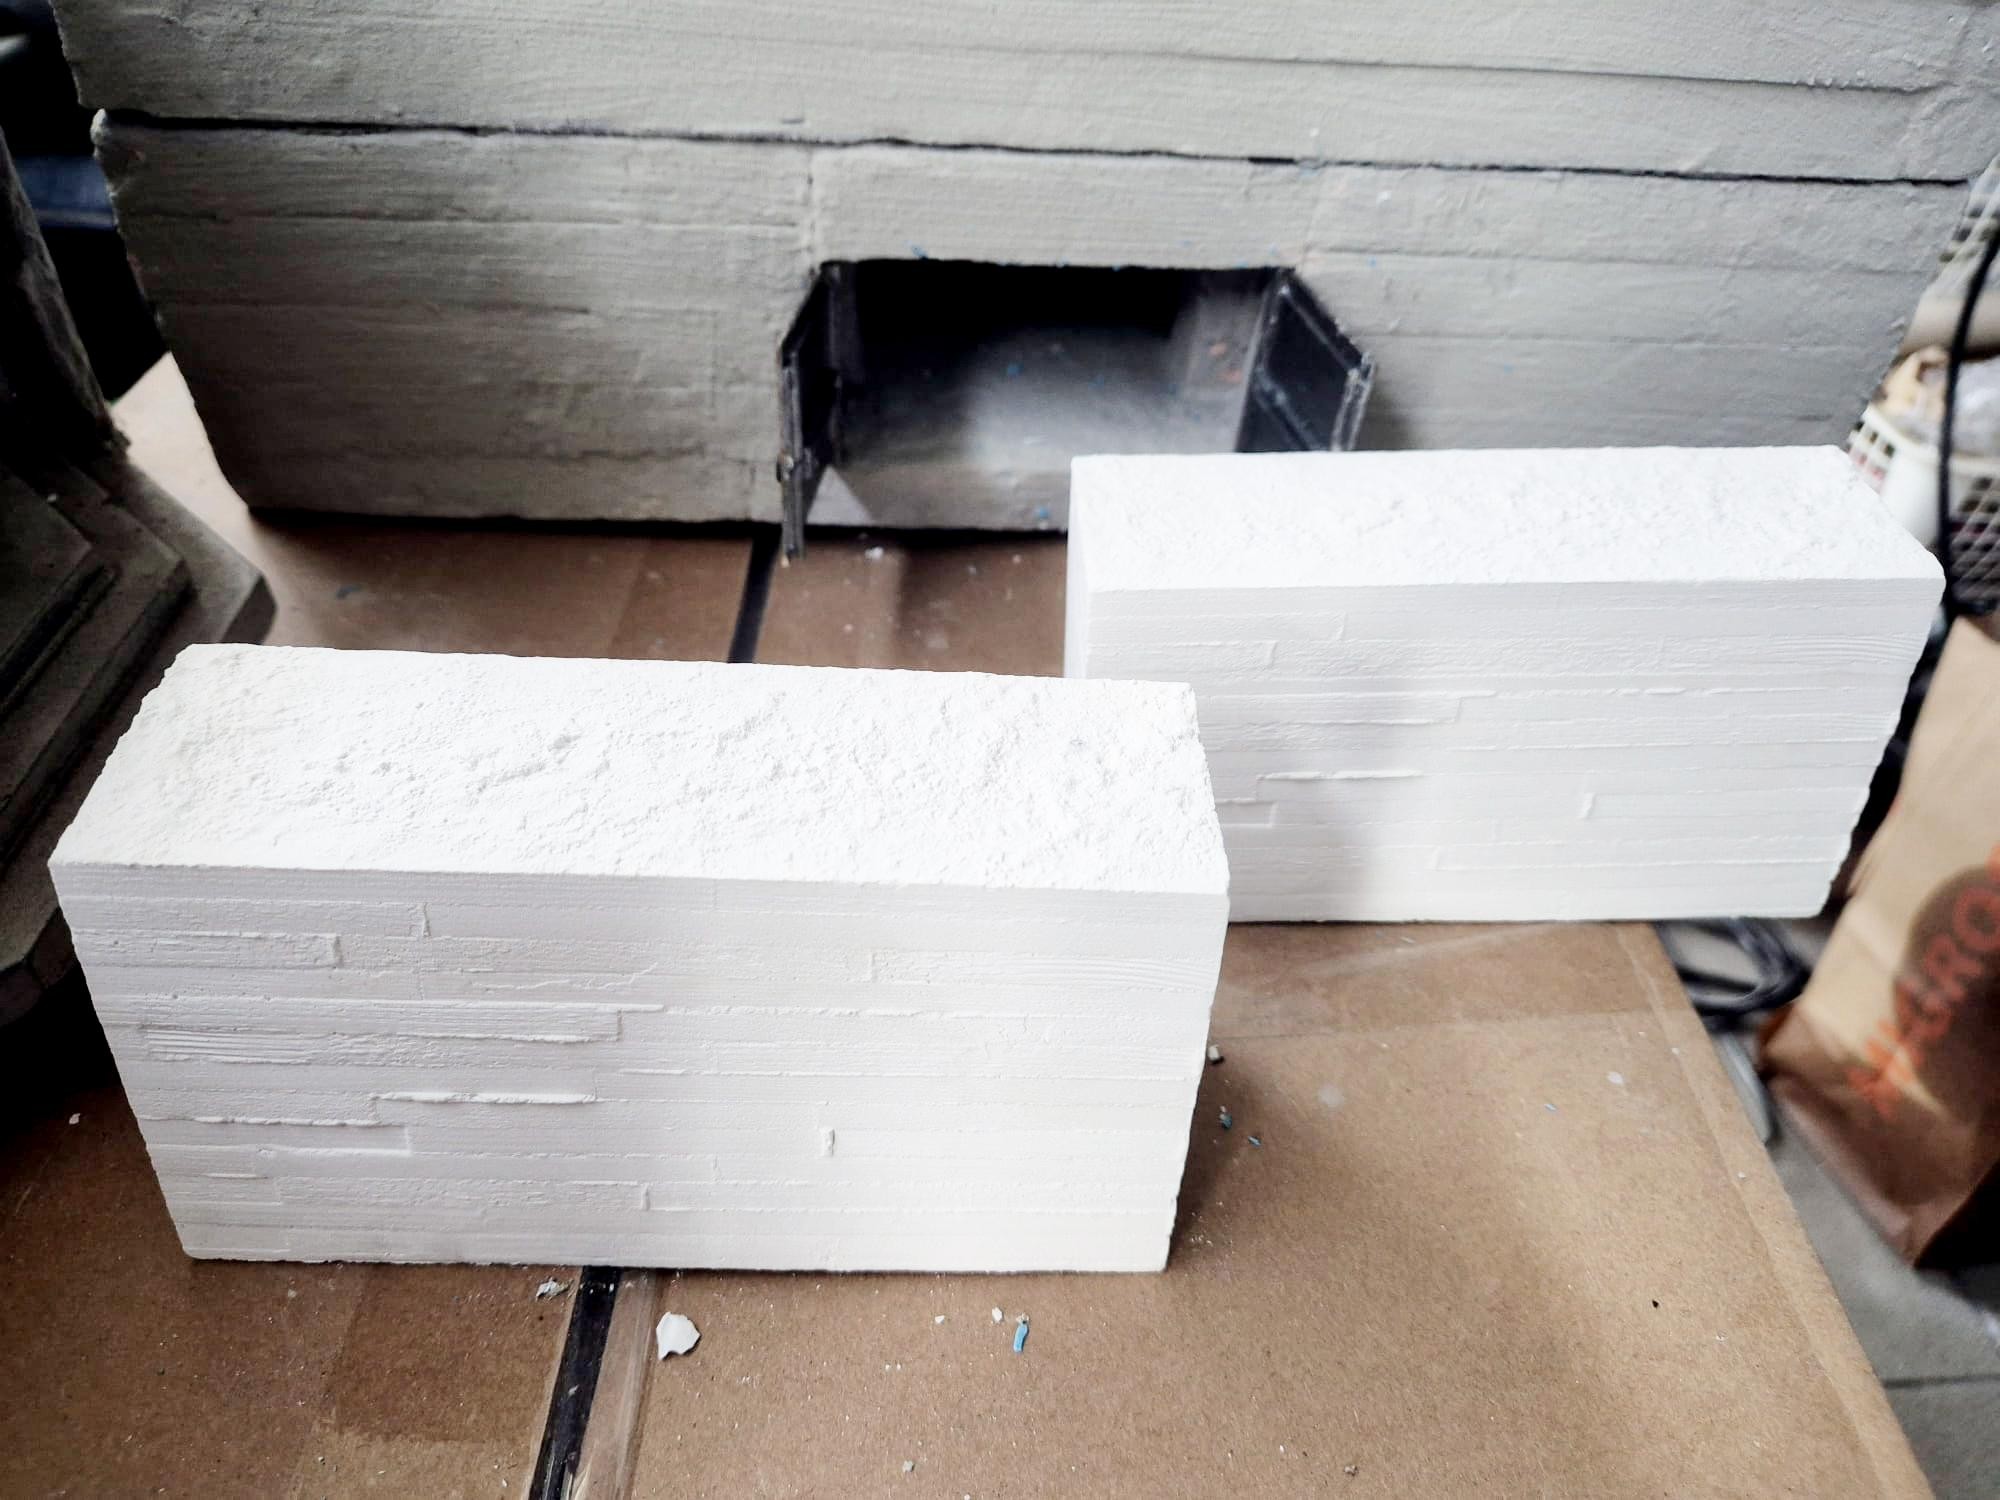
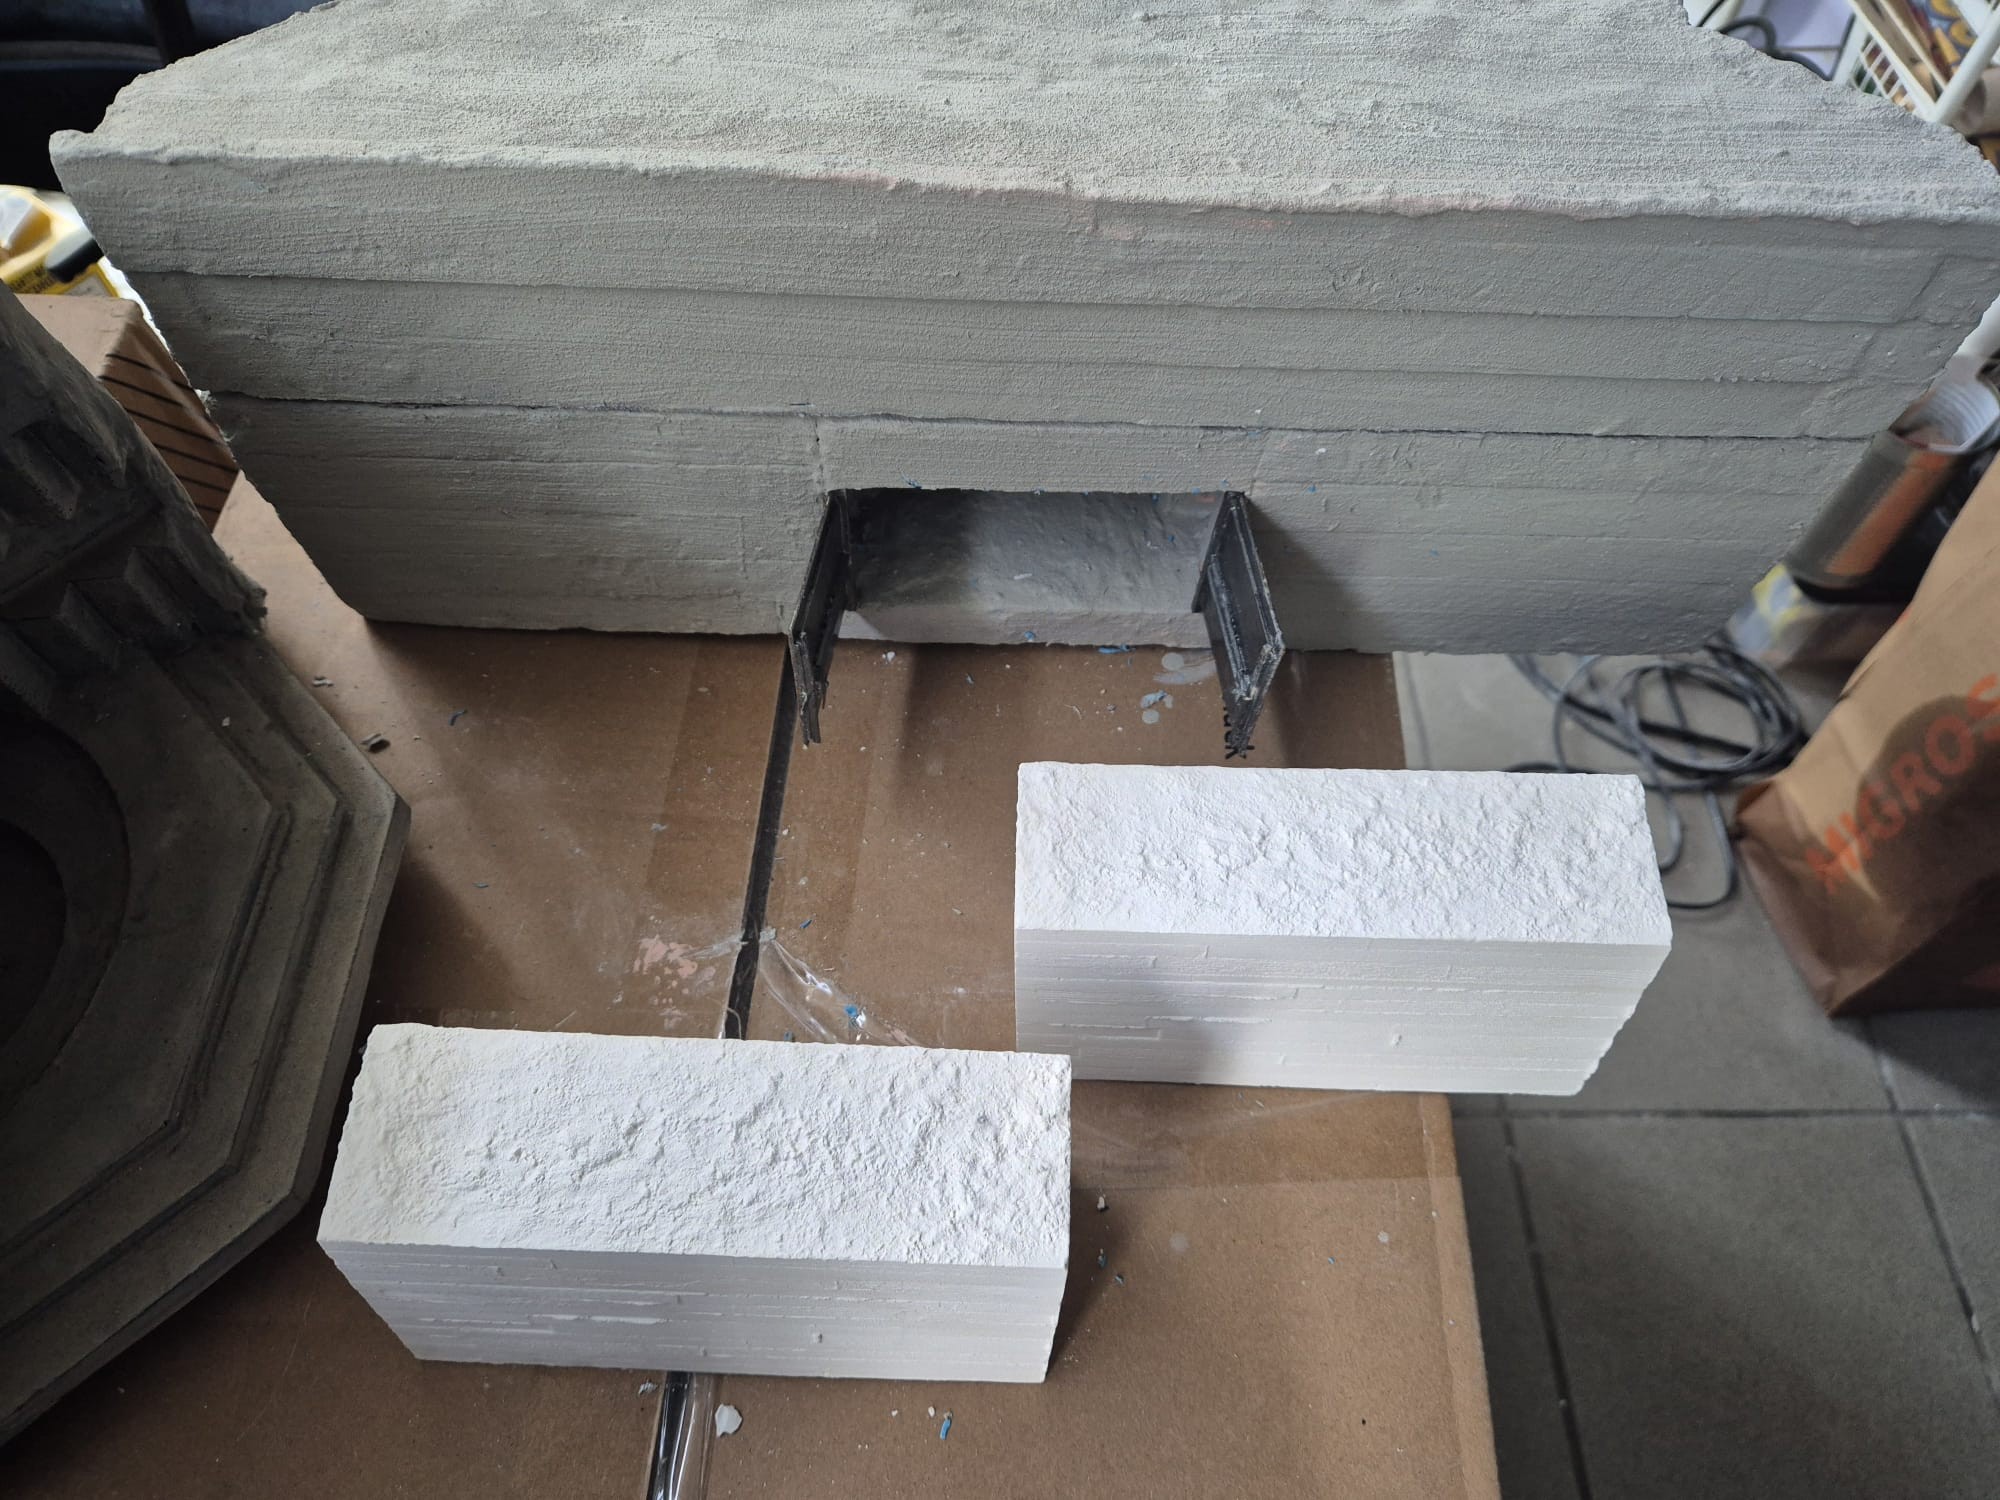
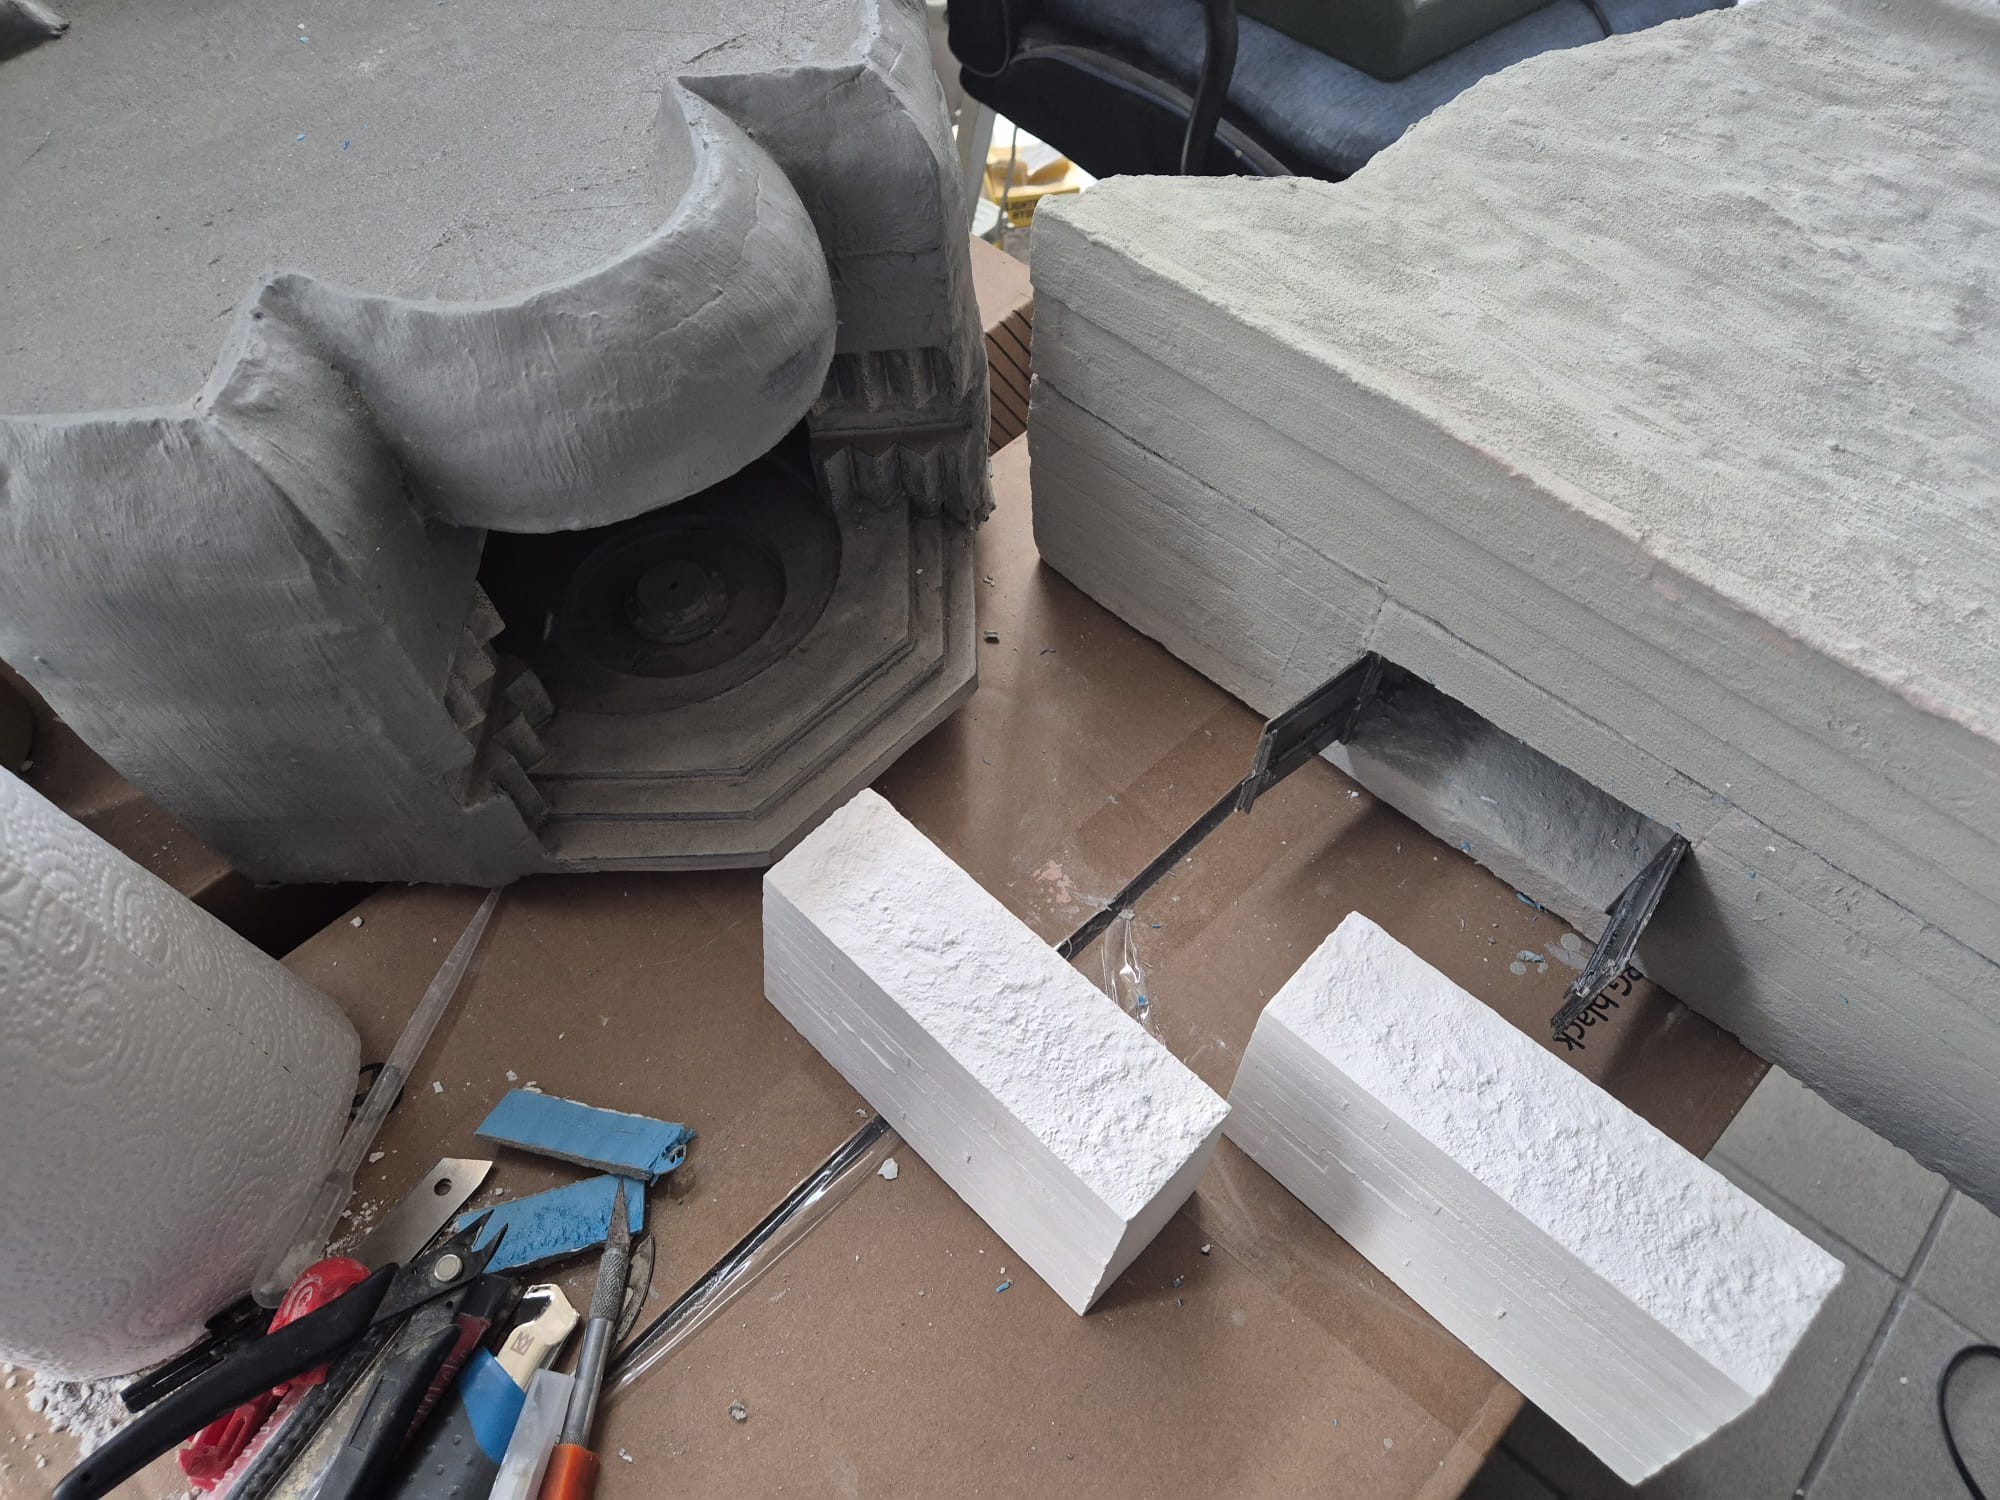
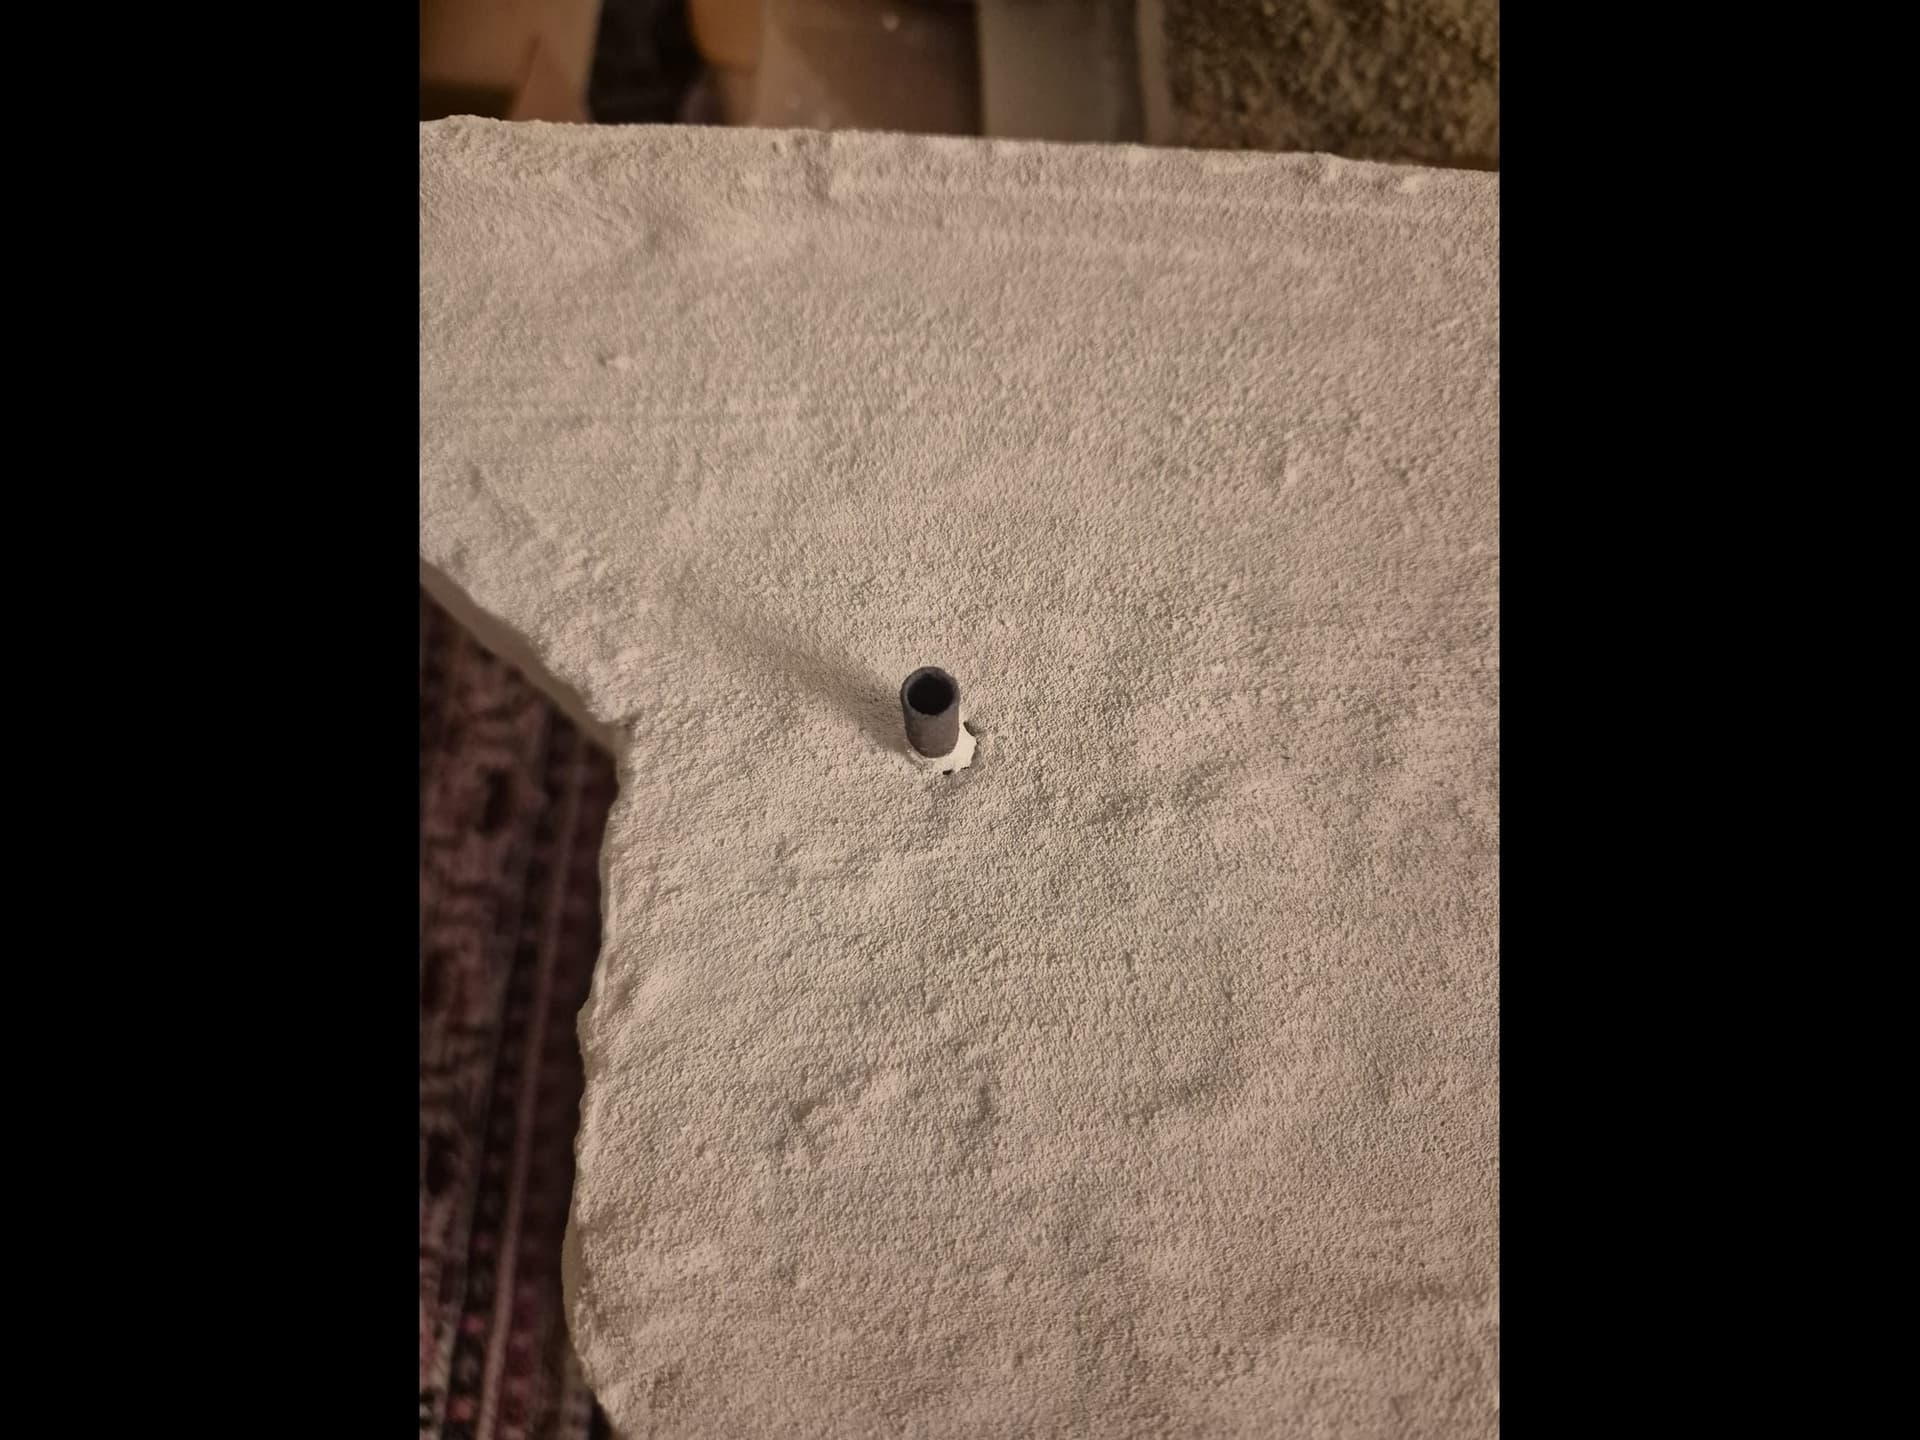
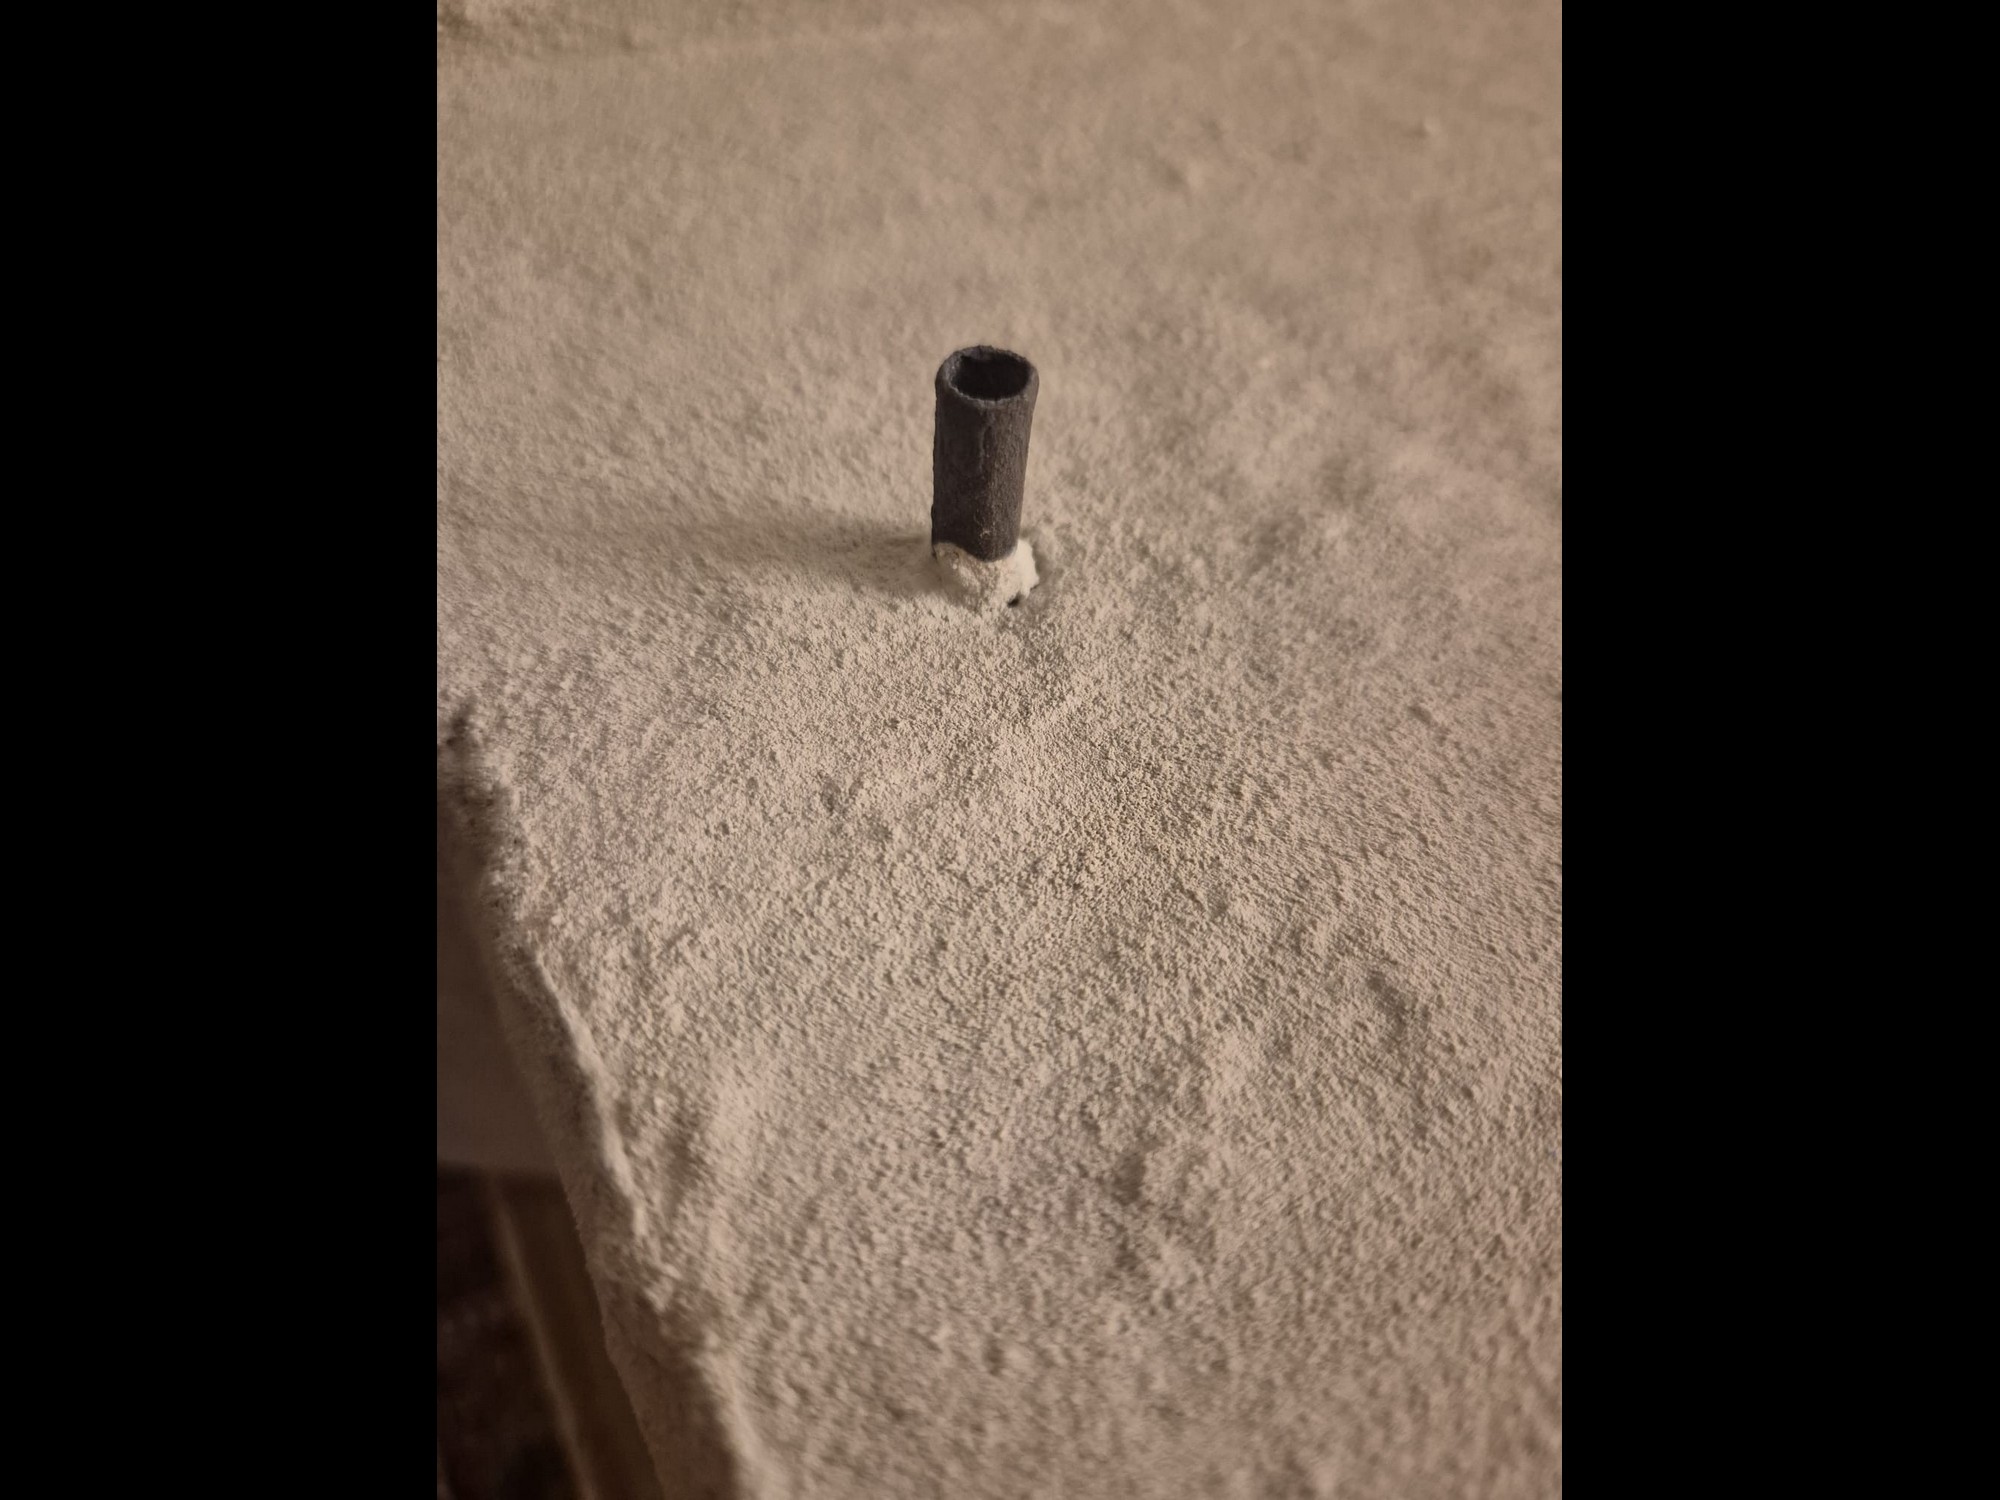
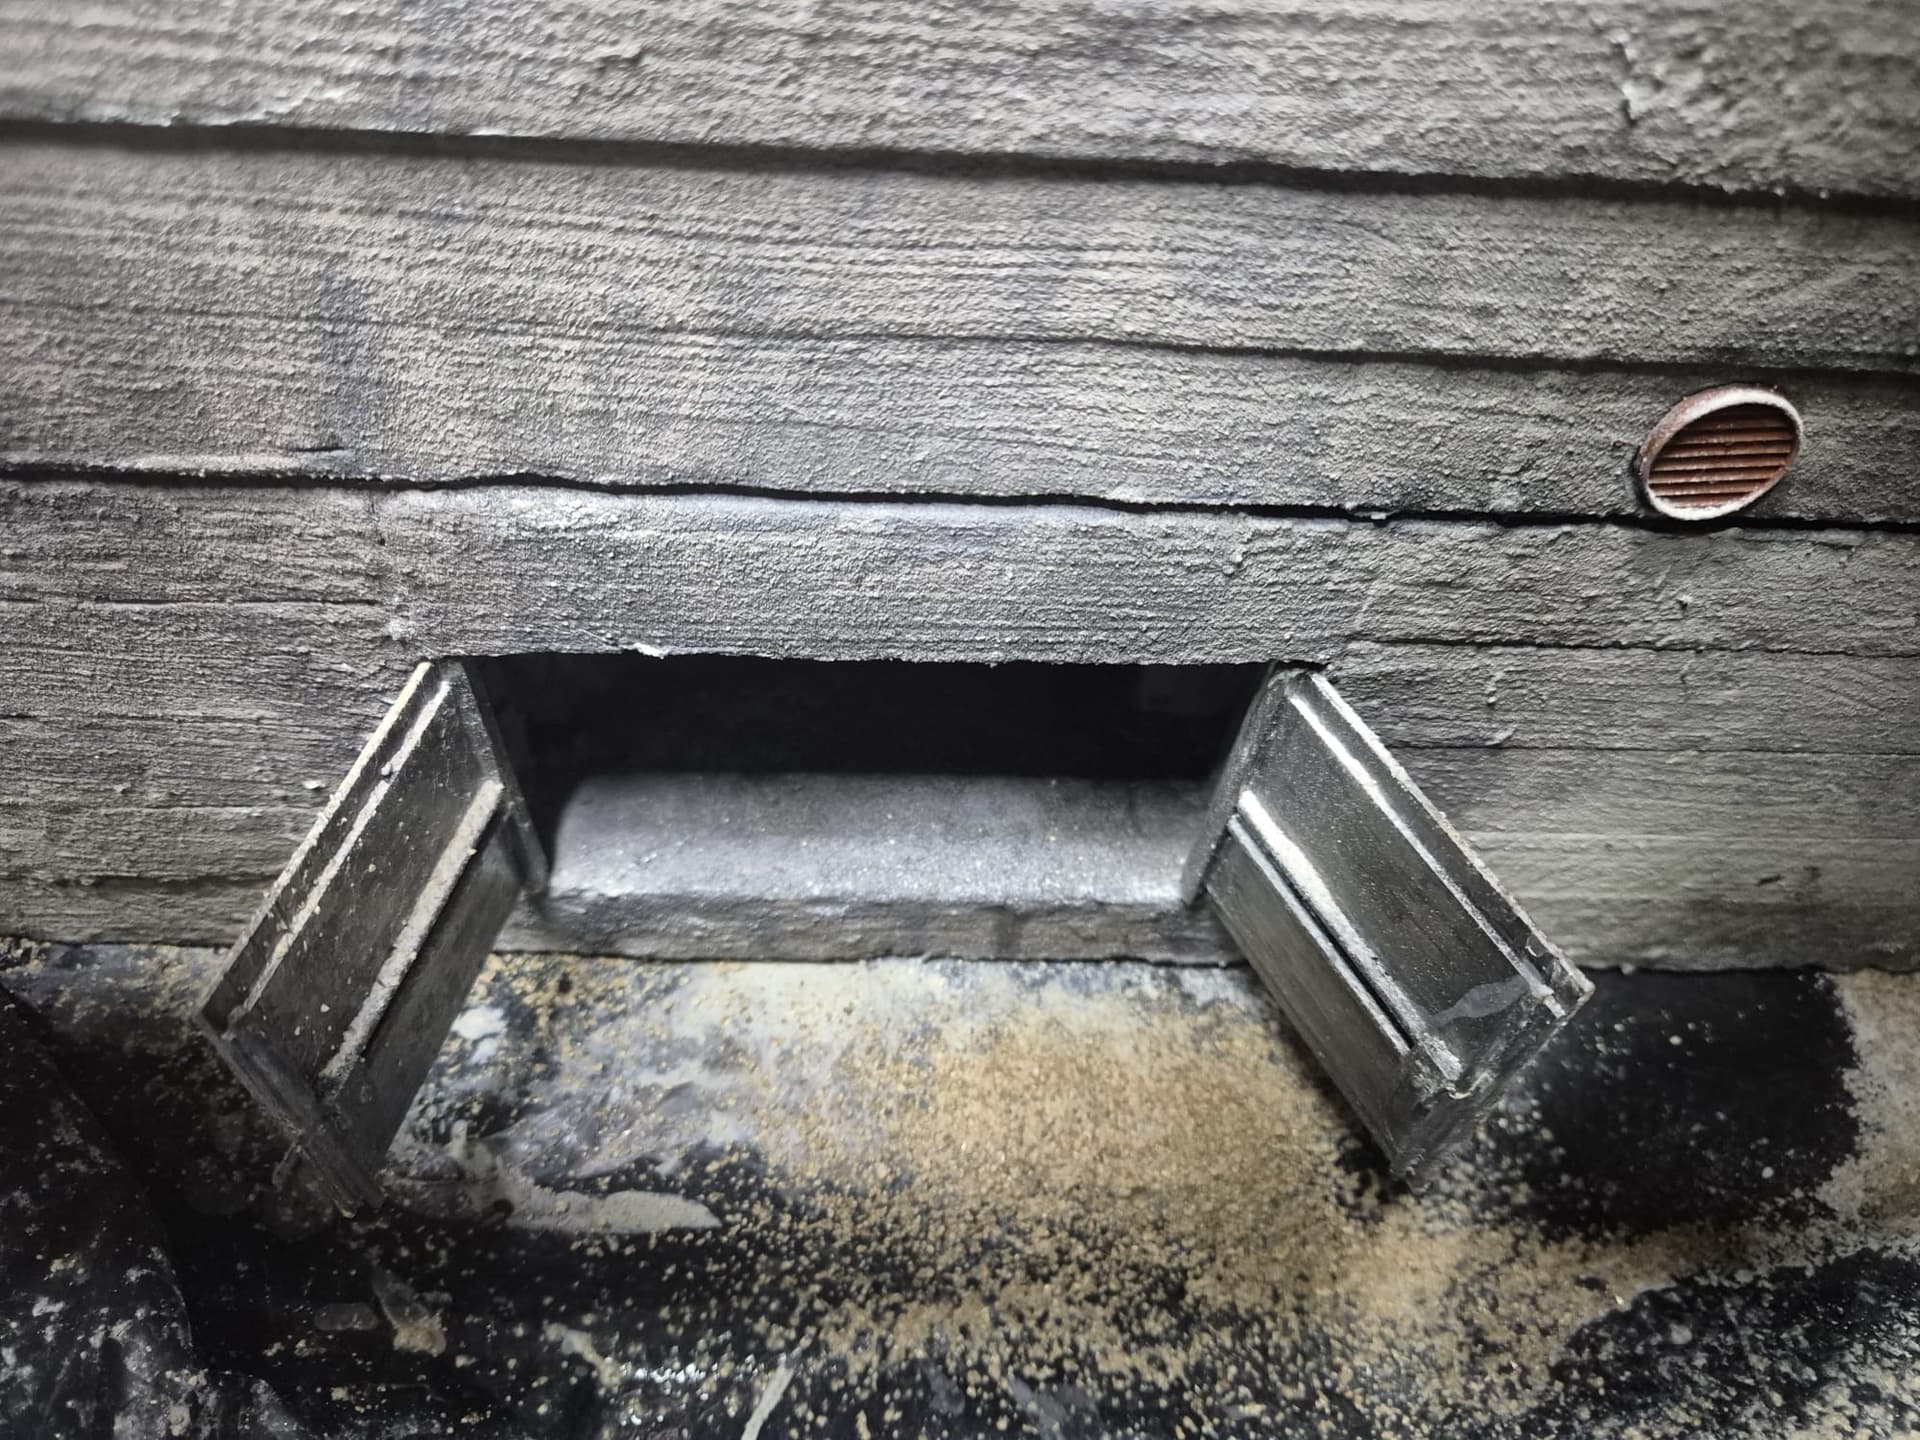
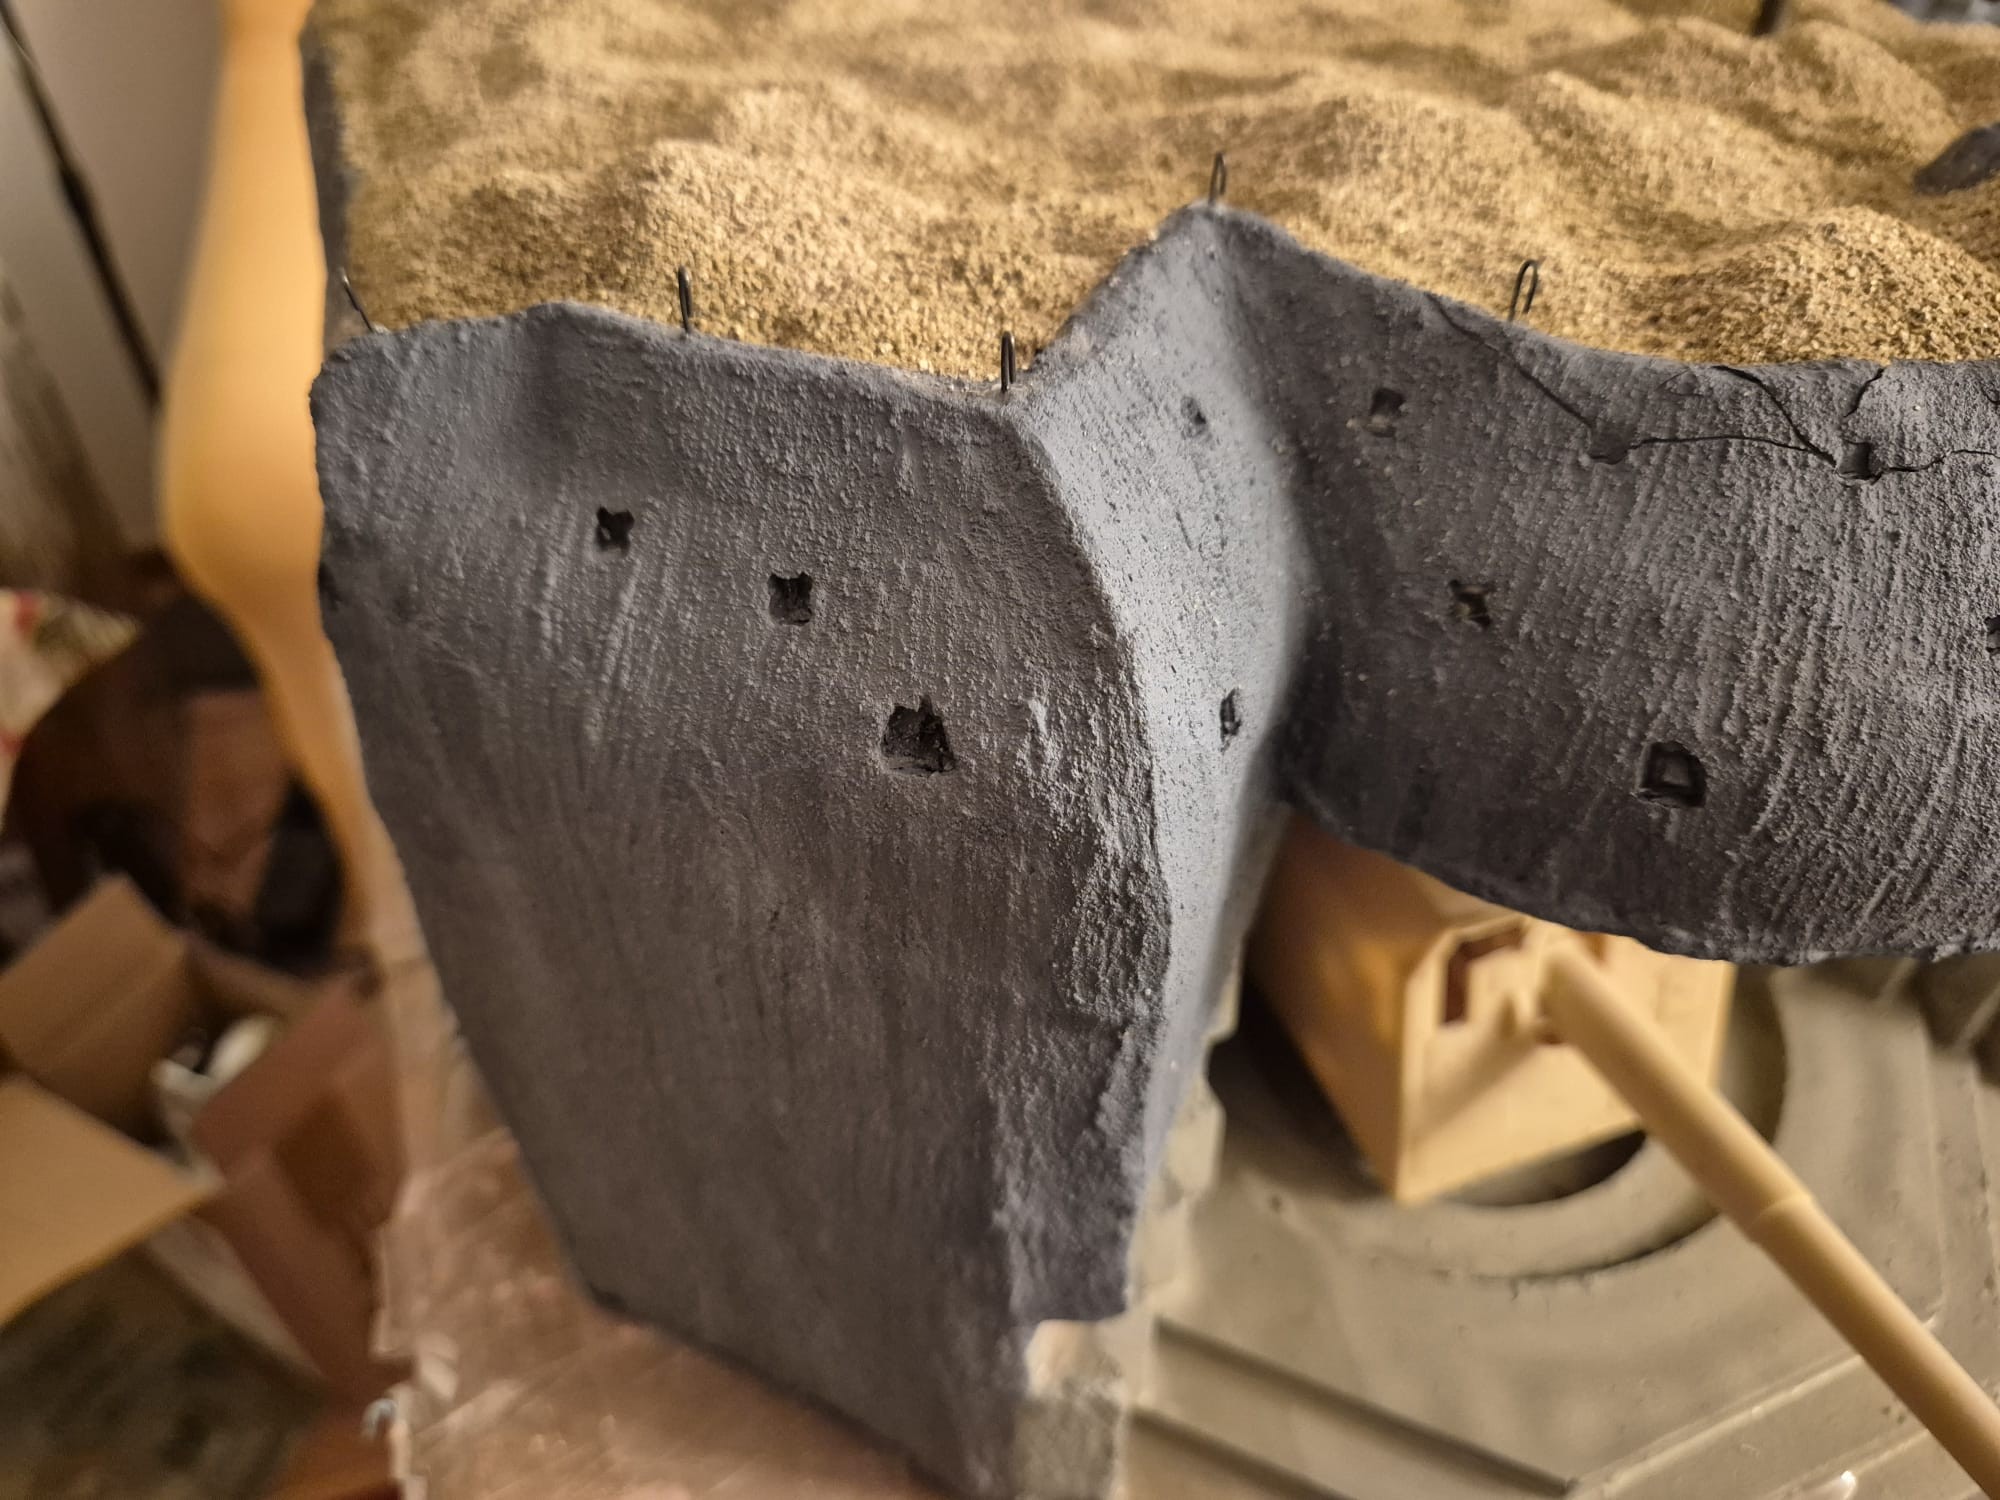
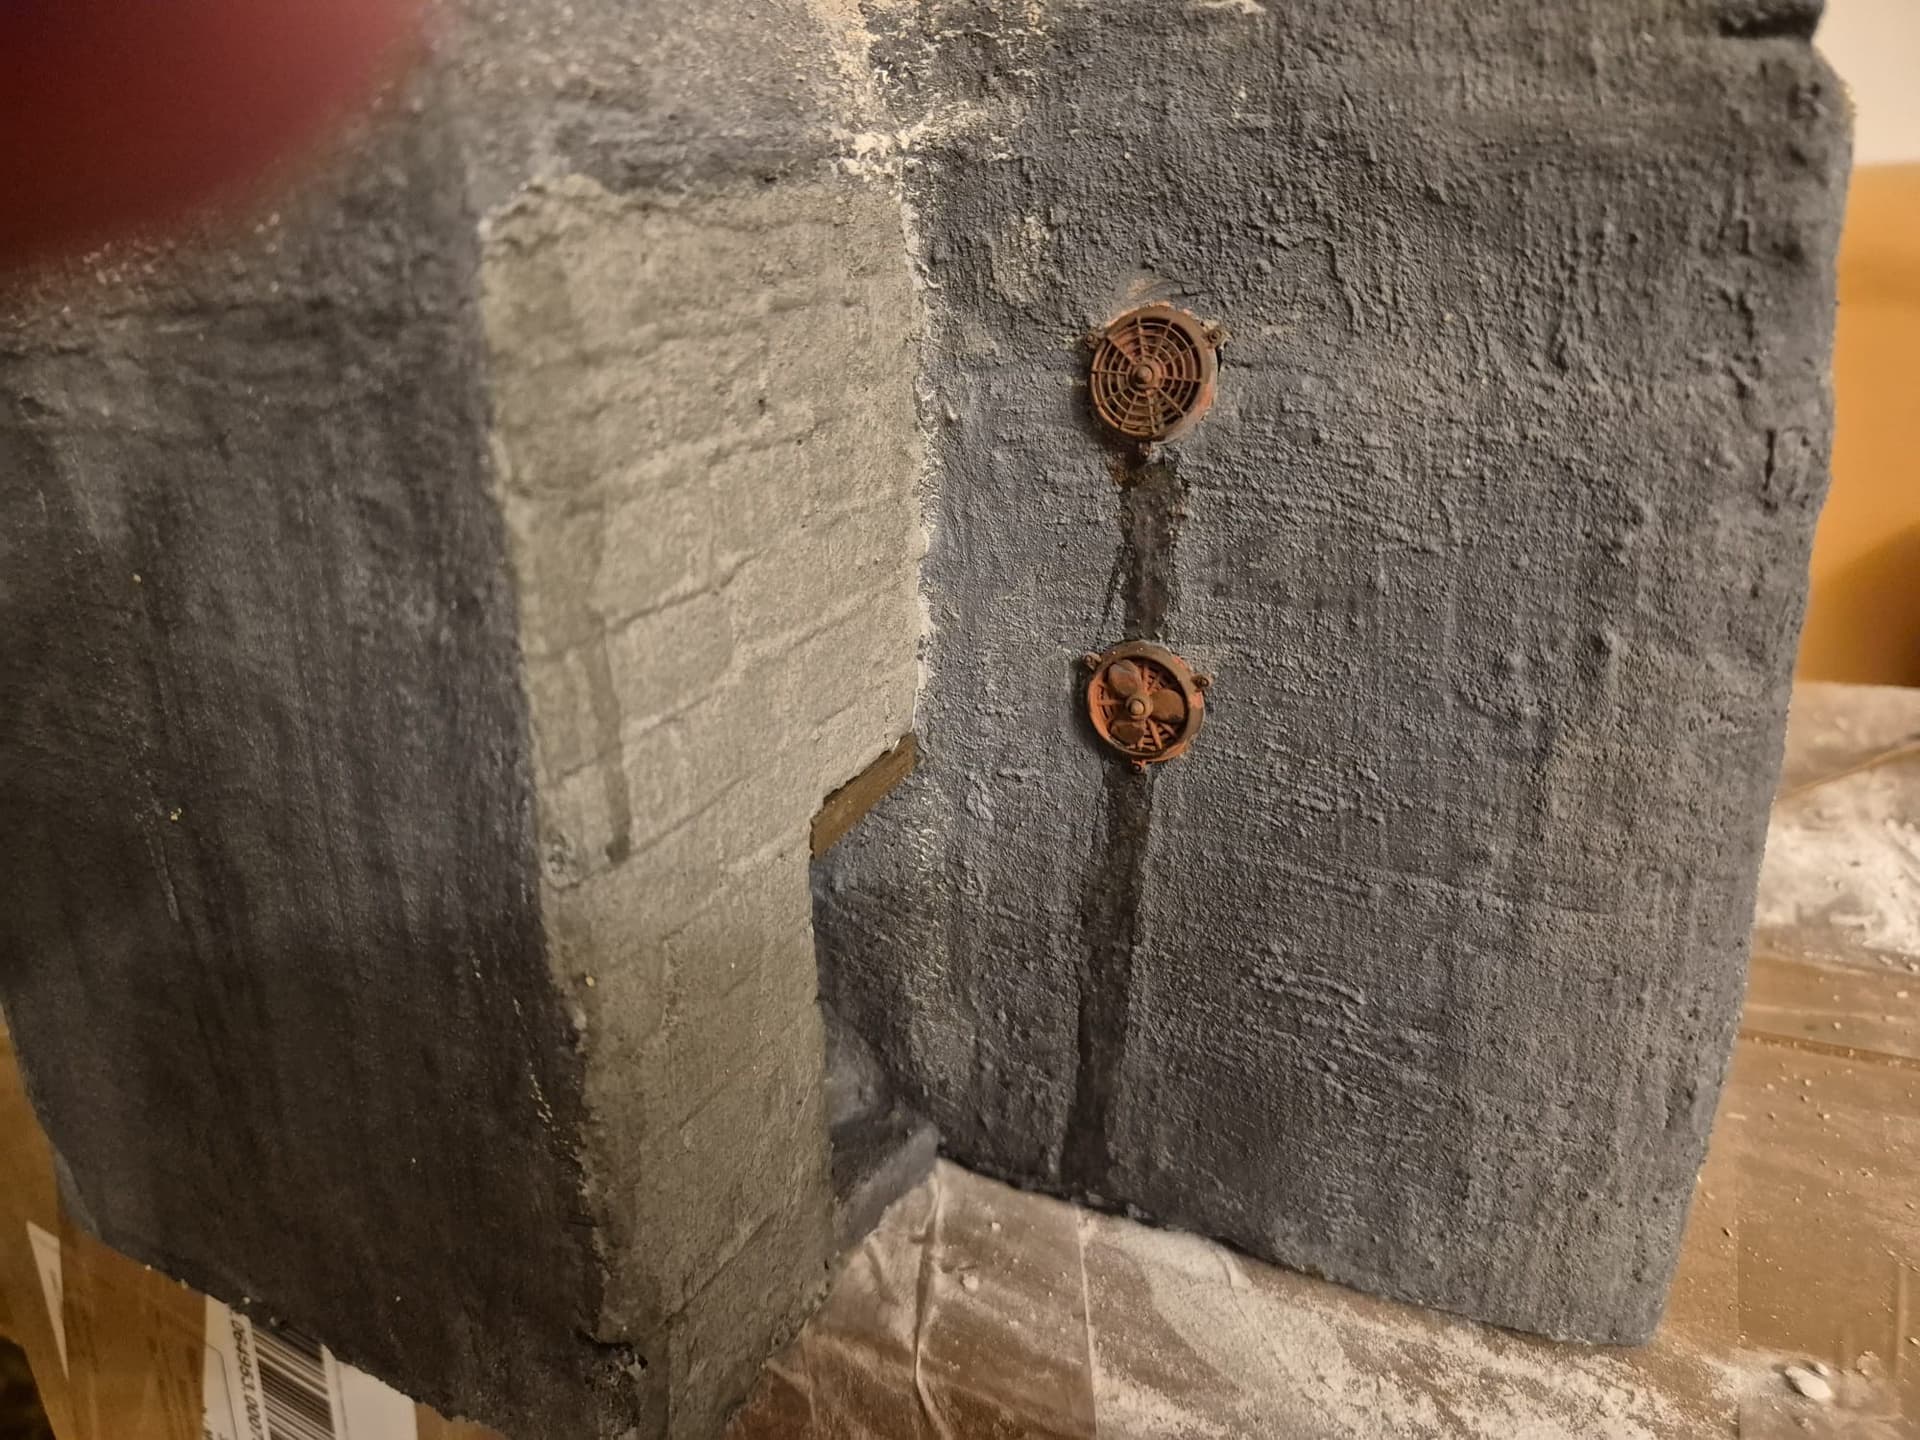
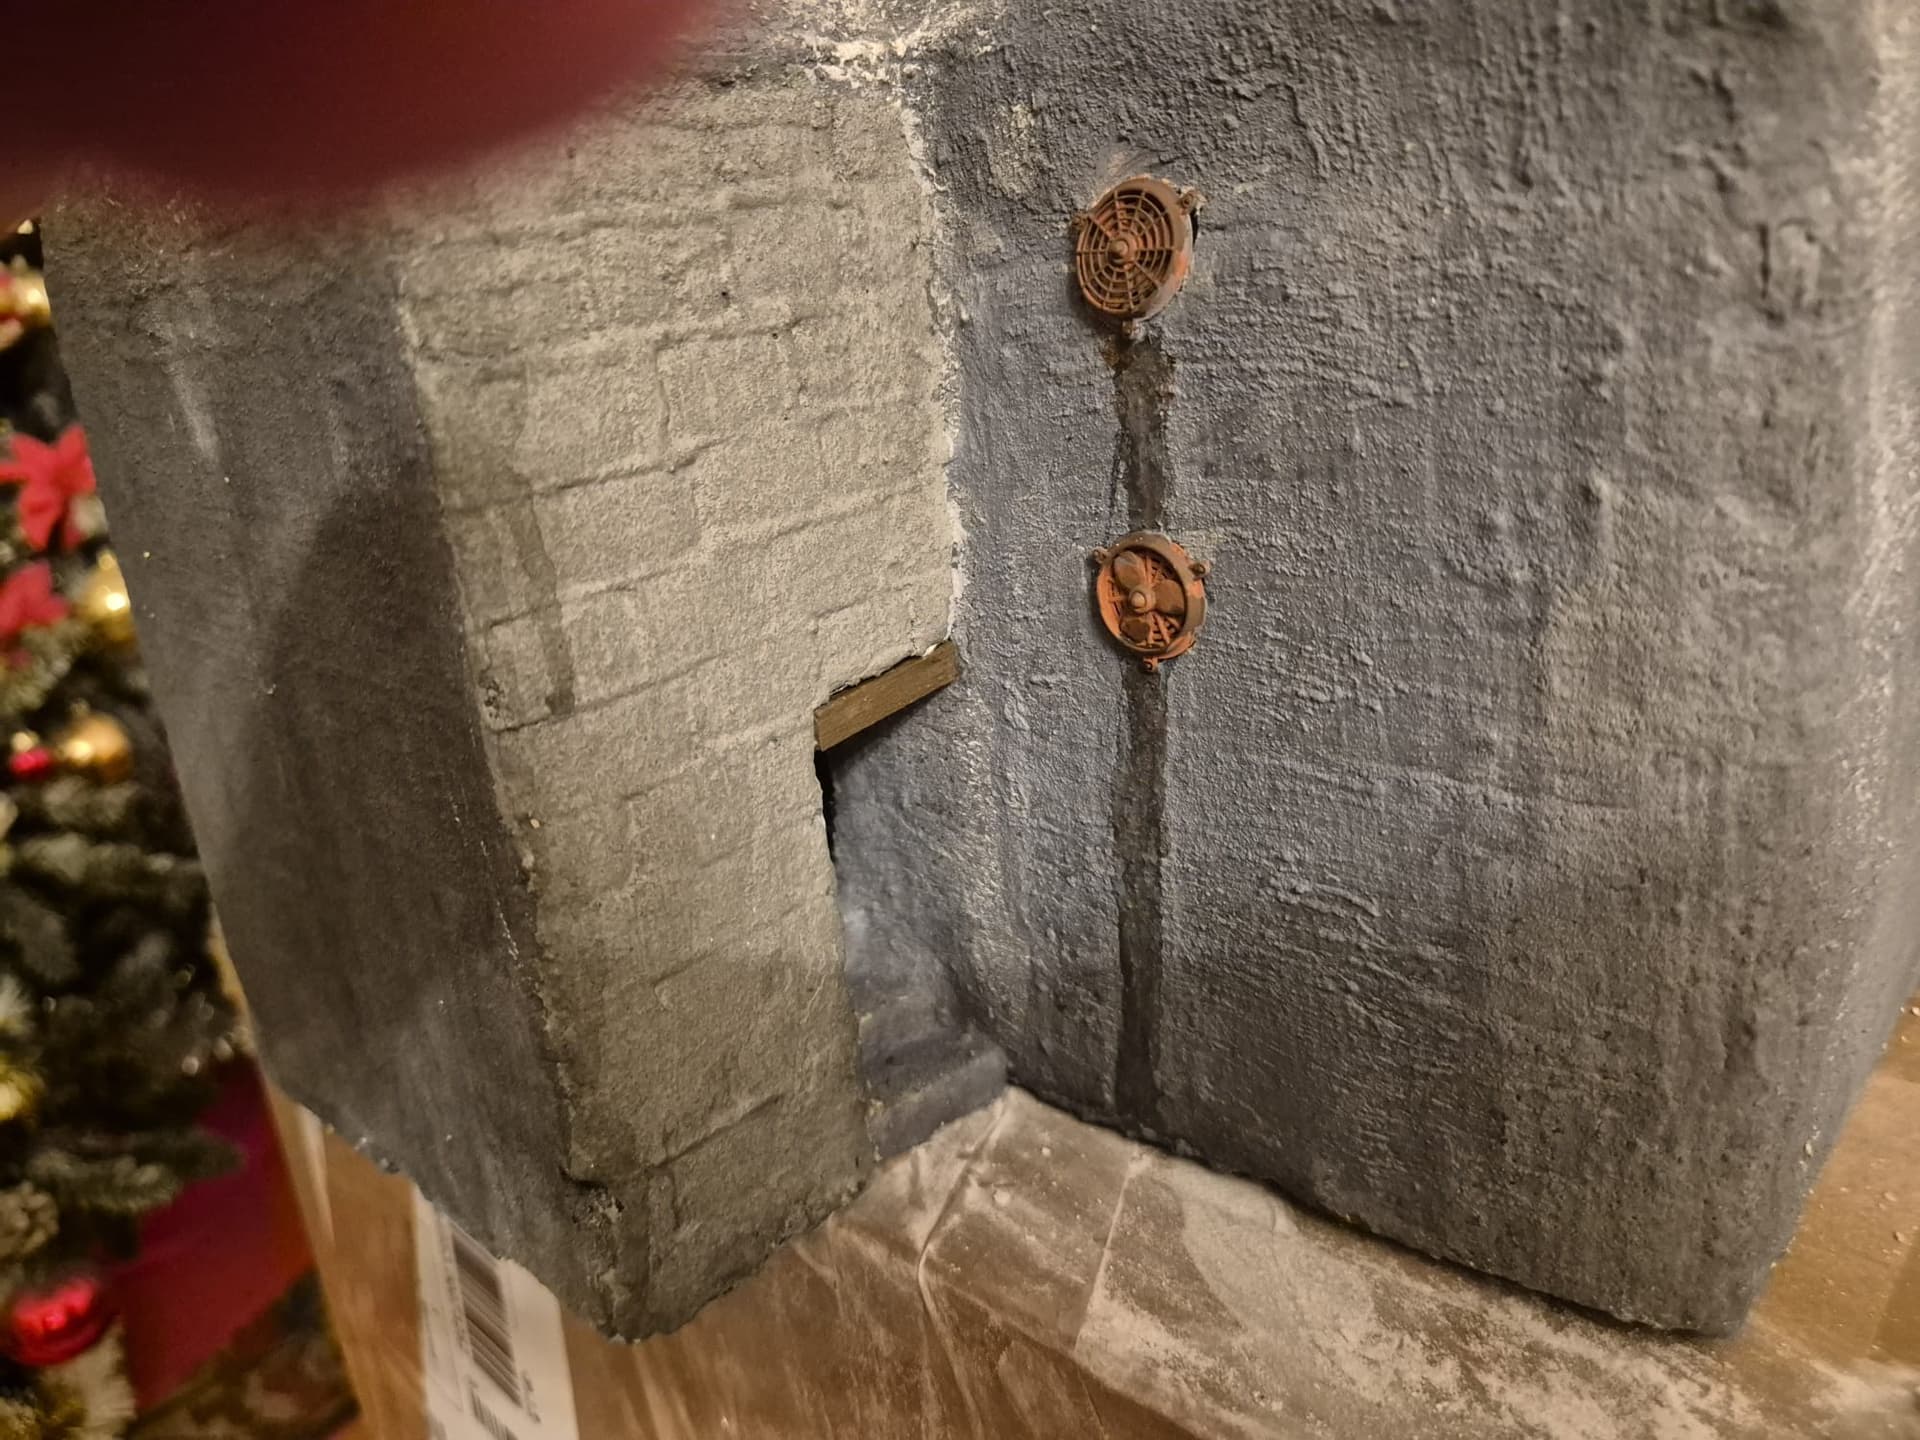
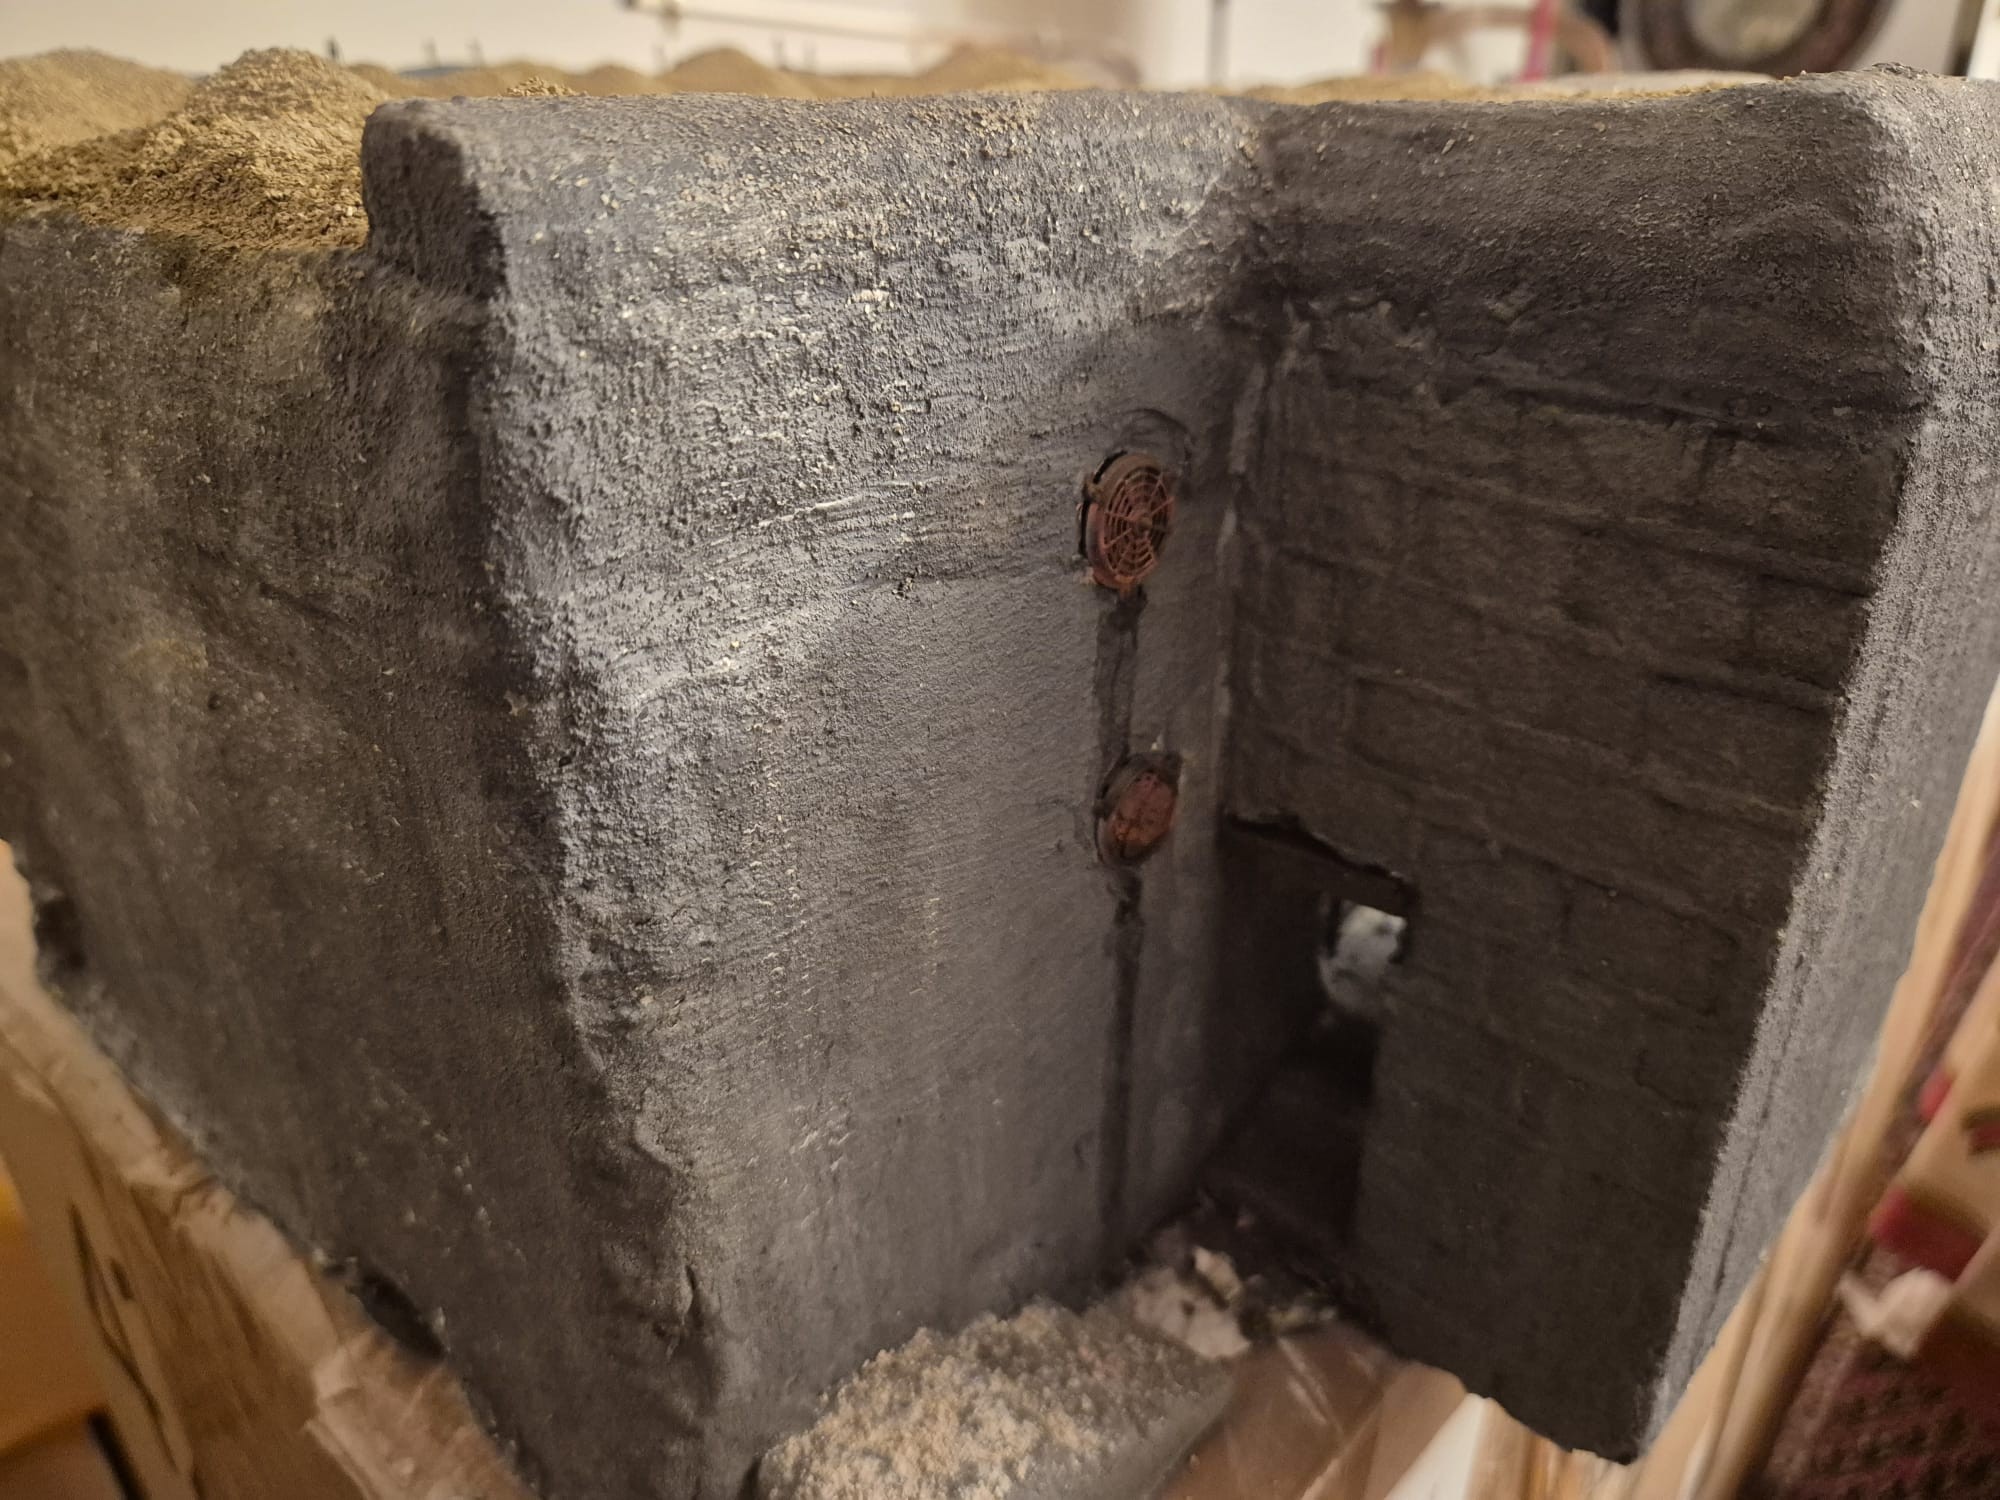
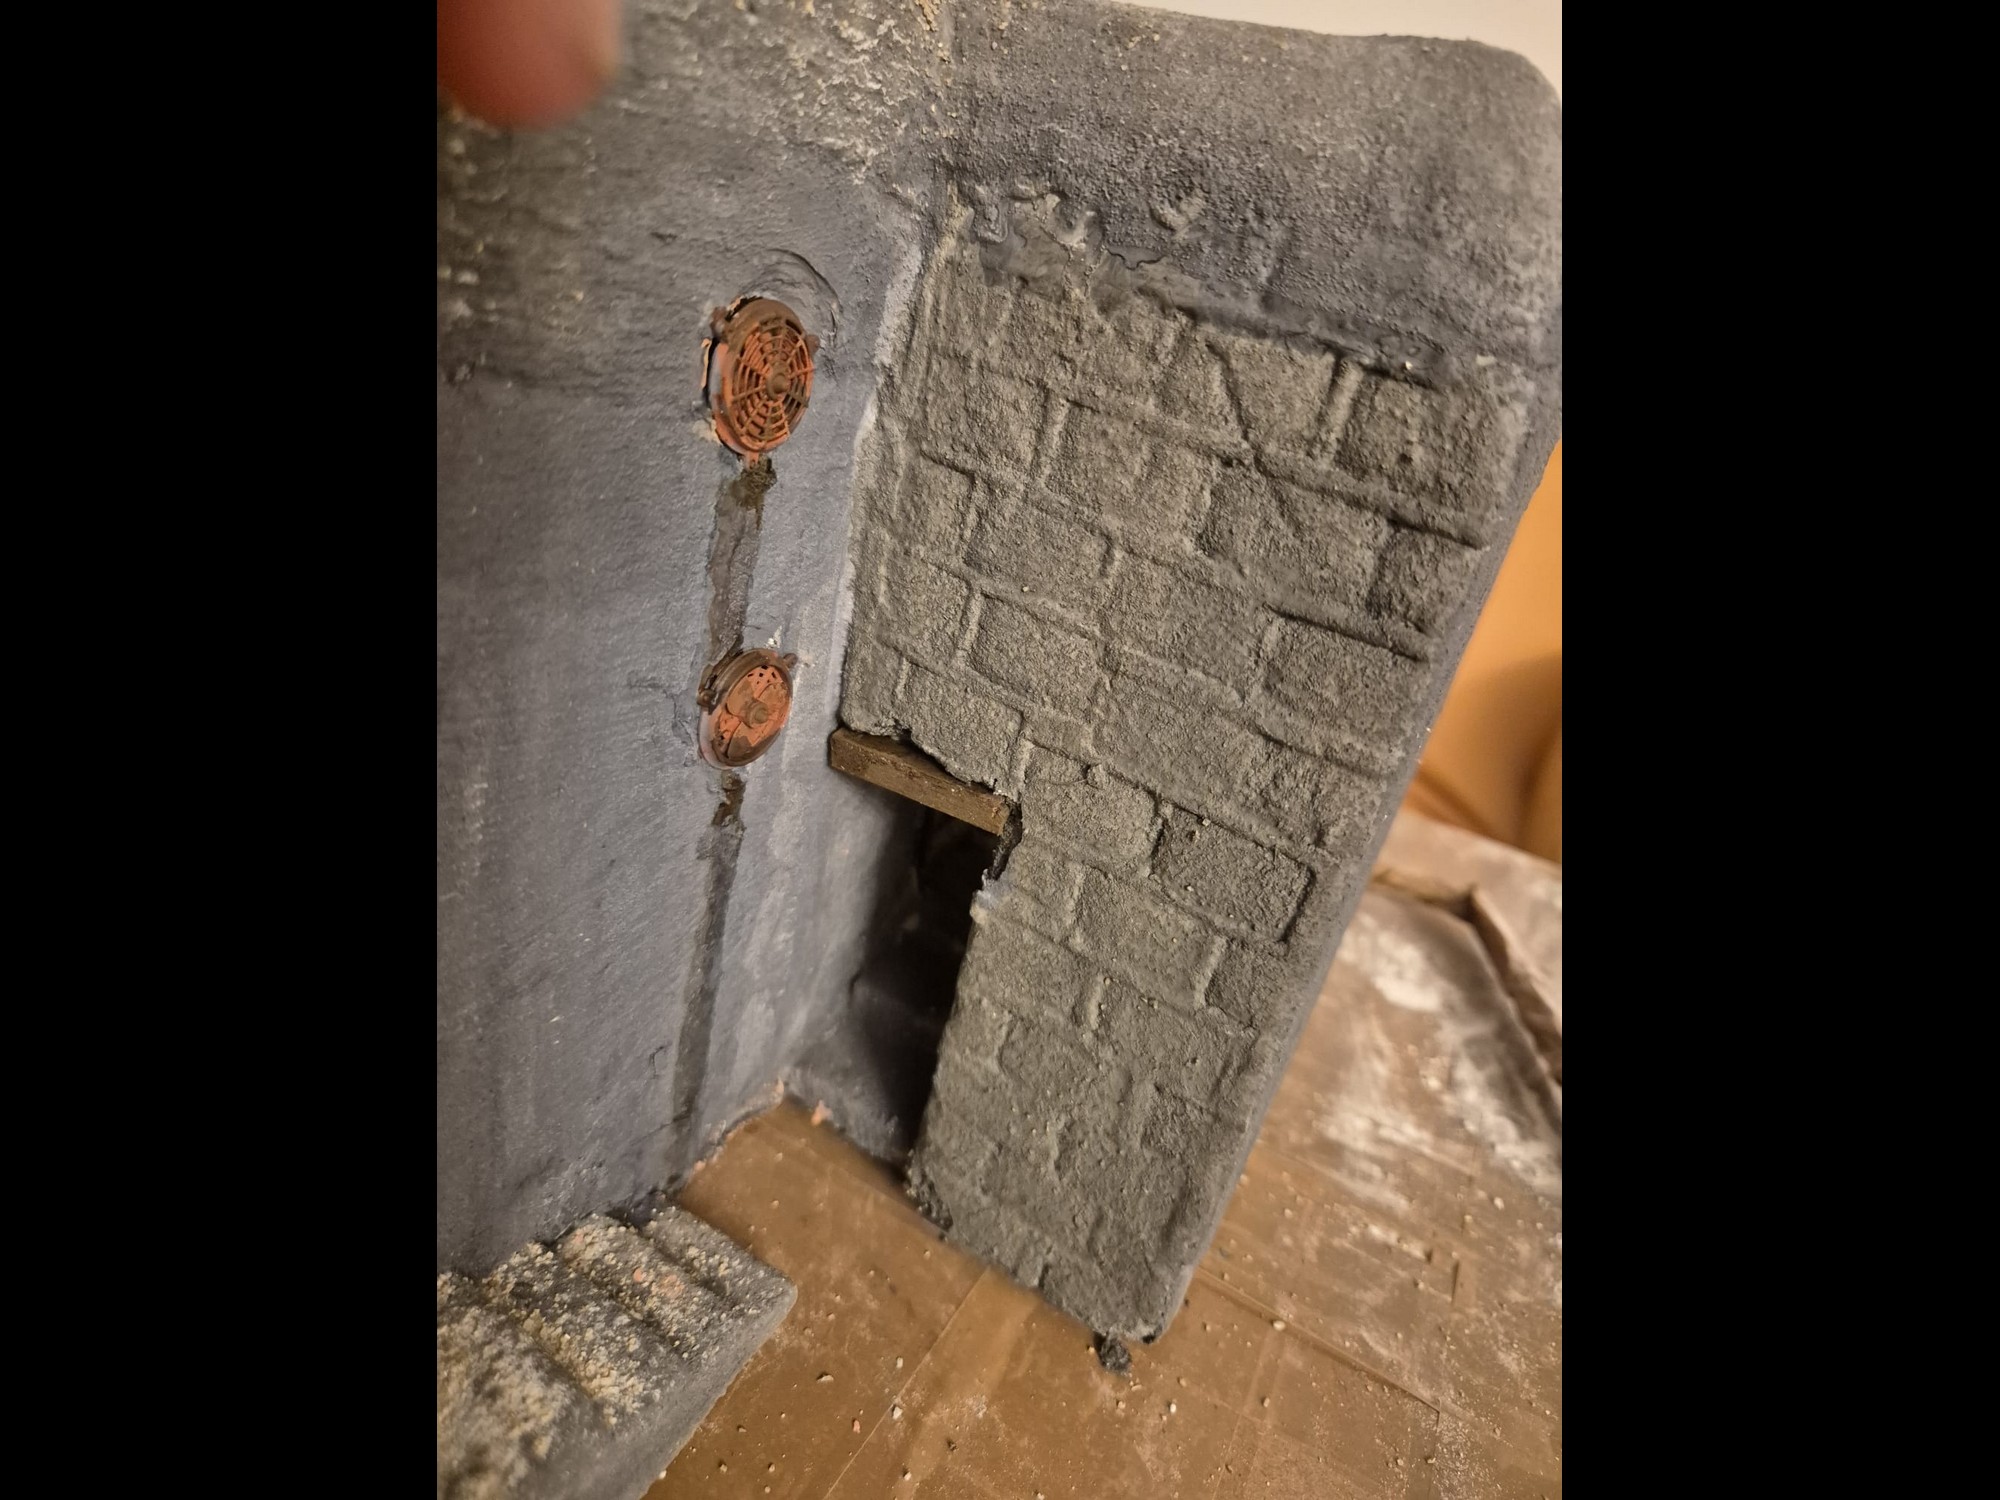
One more addition.I will also add an air vent to the rear wall, a chimney tube on the roof and scribe the protection wall, subdividing it into intersecting rectangular stones as clearly visible in the historic pictures of the R677 in Normandy.
But this will only happen a bit later on, once everything is in place, except the gun.
For now I hope you will enjoy these new pictures of the monster. Please keep of coming back because there will still be lots to see and evaluate.
Be well and keep on doing what we all do so often with joy and satisfaction. See you soon.
4 Likes
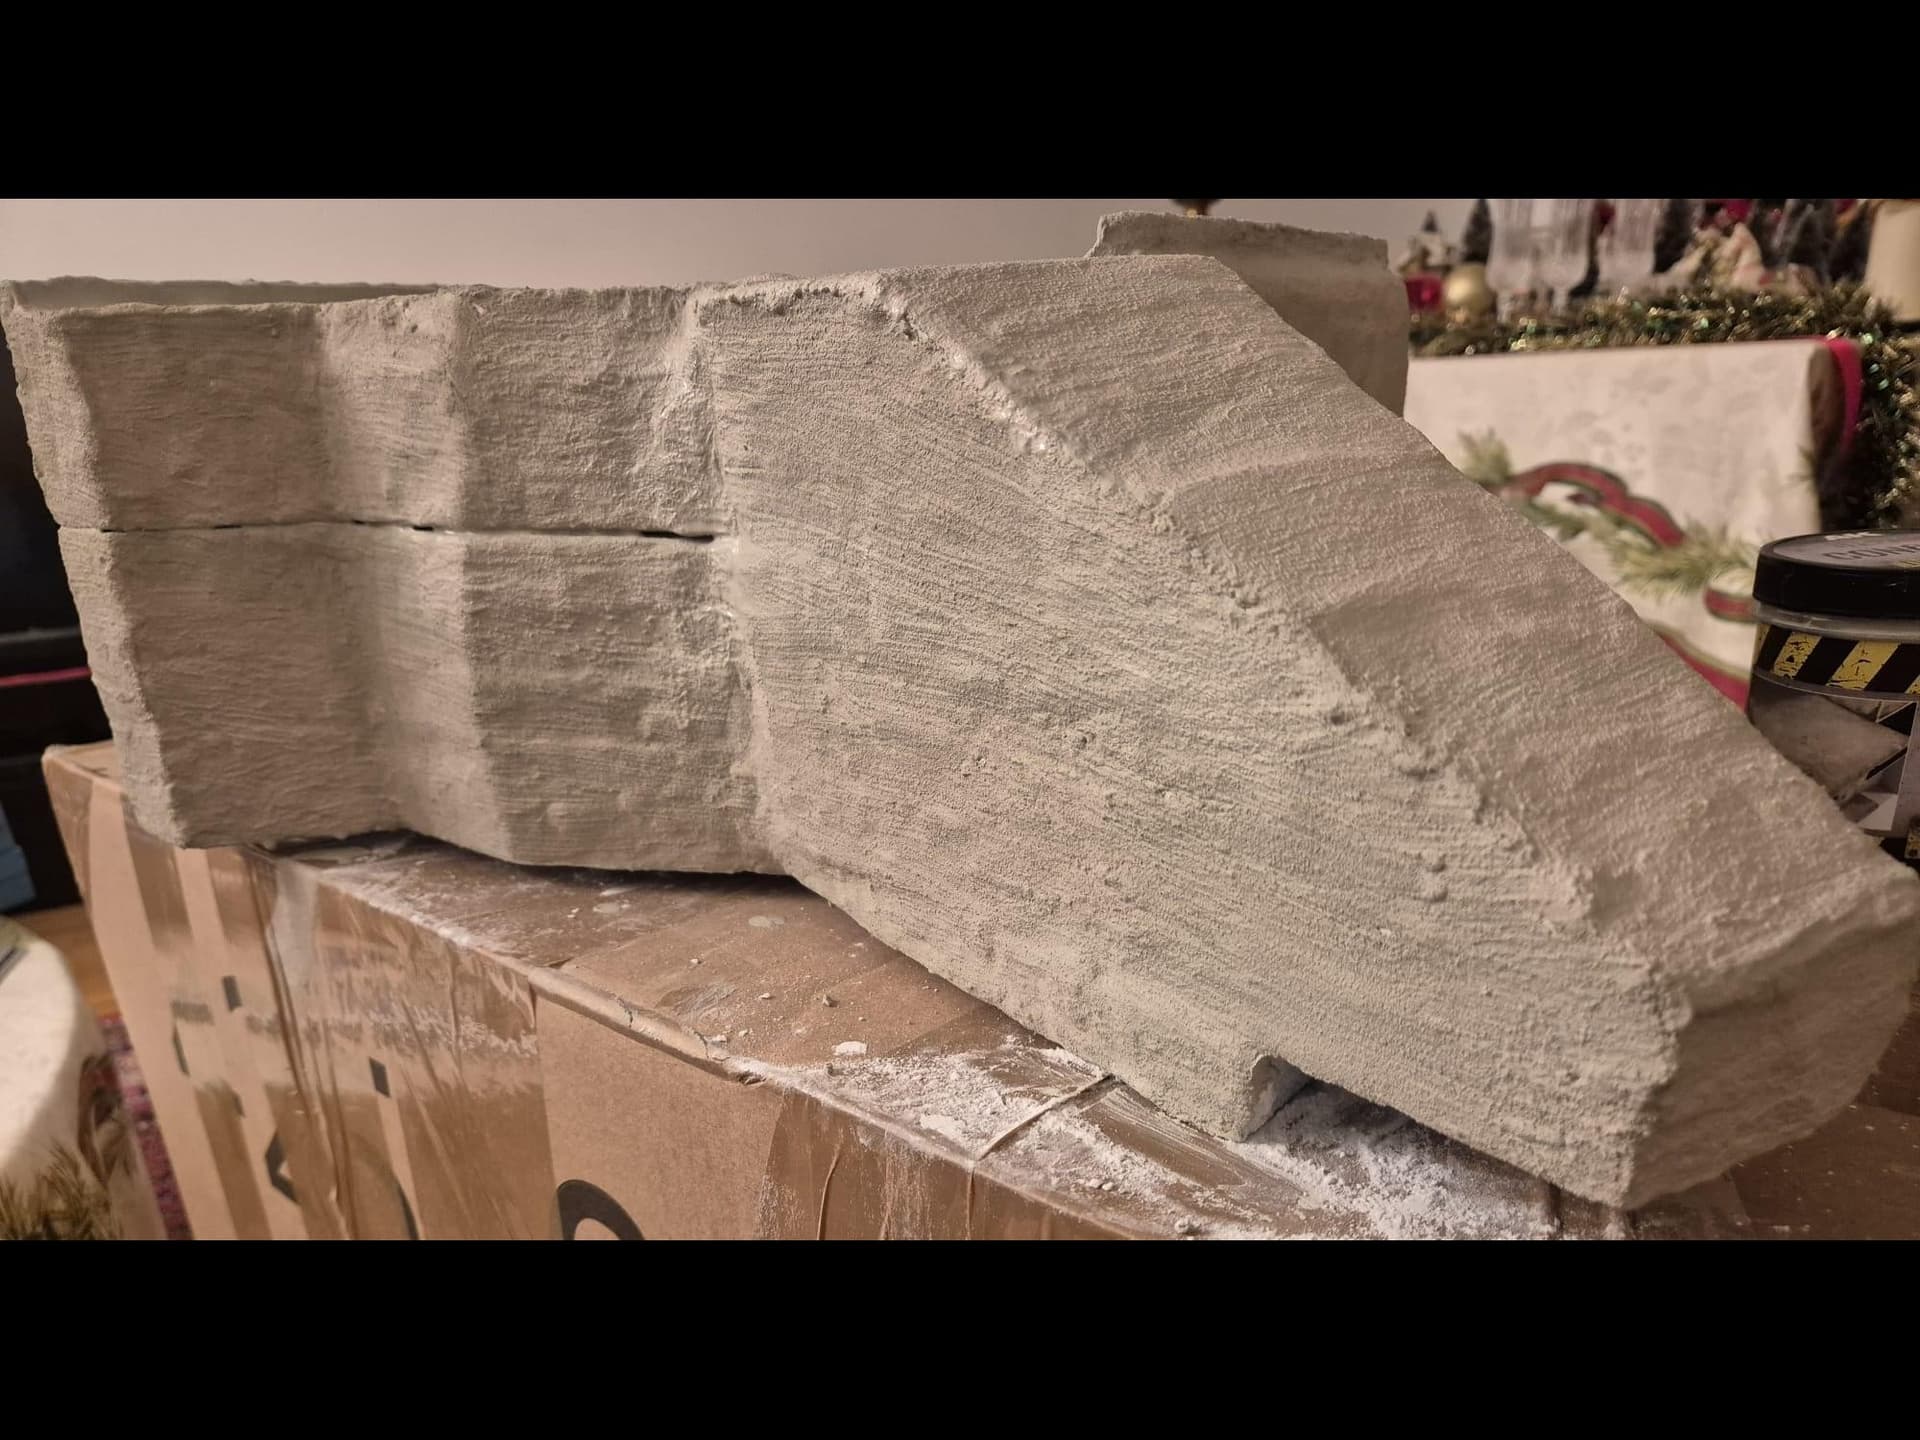
Looking good, the concrete has nice texture.
Hello!
You’re right, I have that philosophy too - if I want to do something, I will often improvise and do problem solving instead of looking to buy everything off the shelve.
Your concrete is lookin’ good! I think you have, on some surfaces, achieved something like impression of wooden planks used as formwork, that is often seen on concrete surfaces. I made a special “stamp” for myself, out of a cut down popsicle stick in order to get that effect. I’ve also found out that I can use white wall filler and put soem black wash on top of that to get nice “concrete” colour. Like you said - there are many solutions to one problem.
Thanks for sharing and once again - good luck! Have a nice day!
Paweł
1 Like
Hi! I did the same on my previous bunkers, cutting an ice cream popsicle at its ends with a Dremel forming it as a plank. I also made stone “stamps” with a rubber eraser cutting it in various shapes for my Naval Bunker at Longues-sur-Mer and pressing it into the foam.
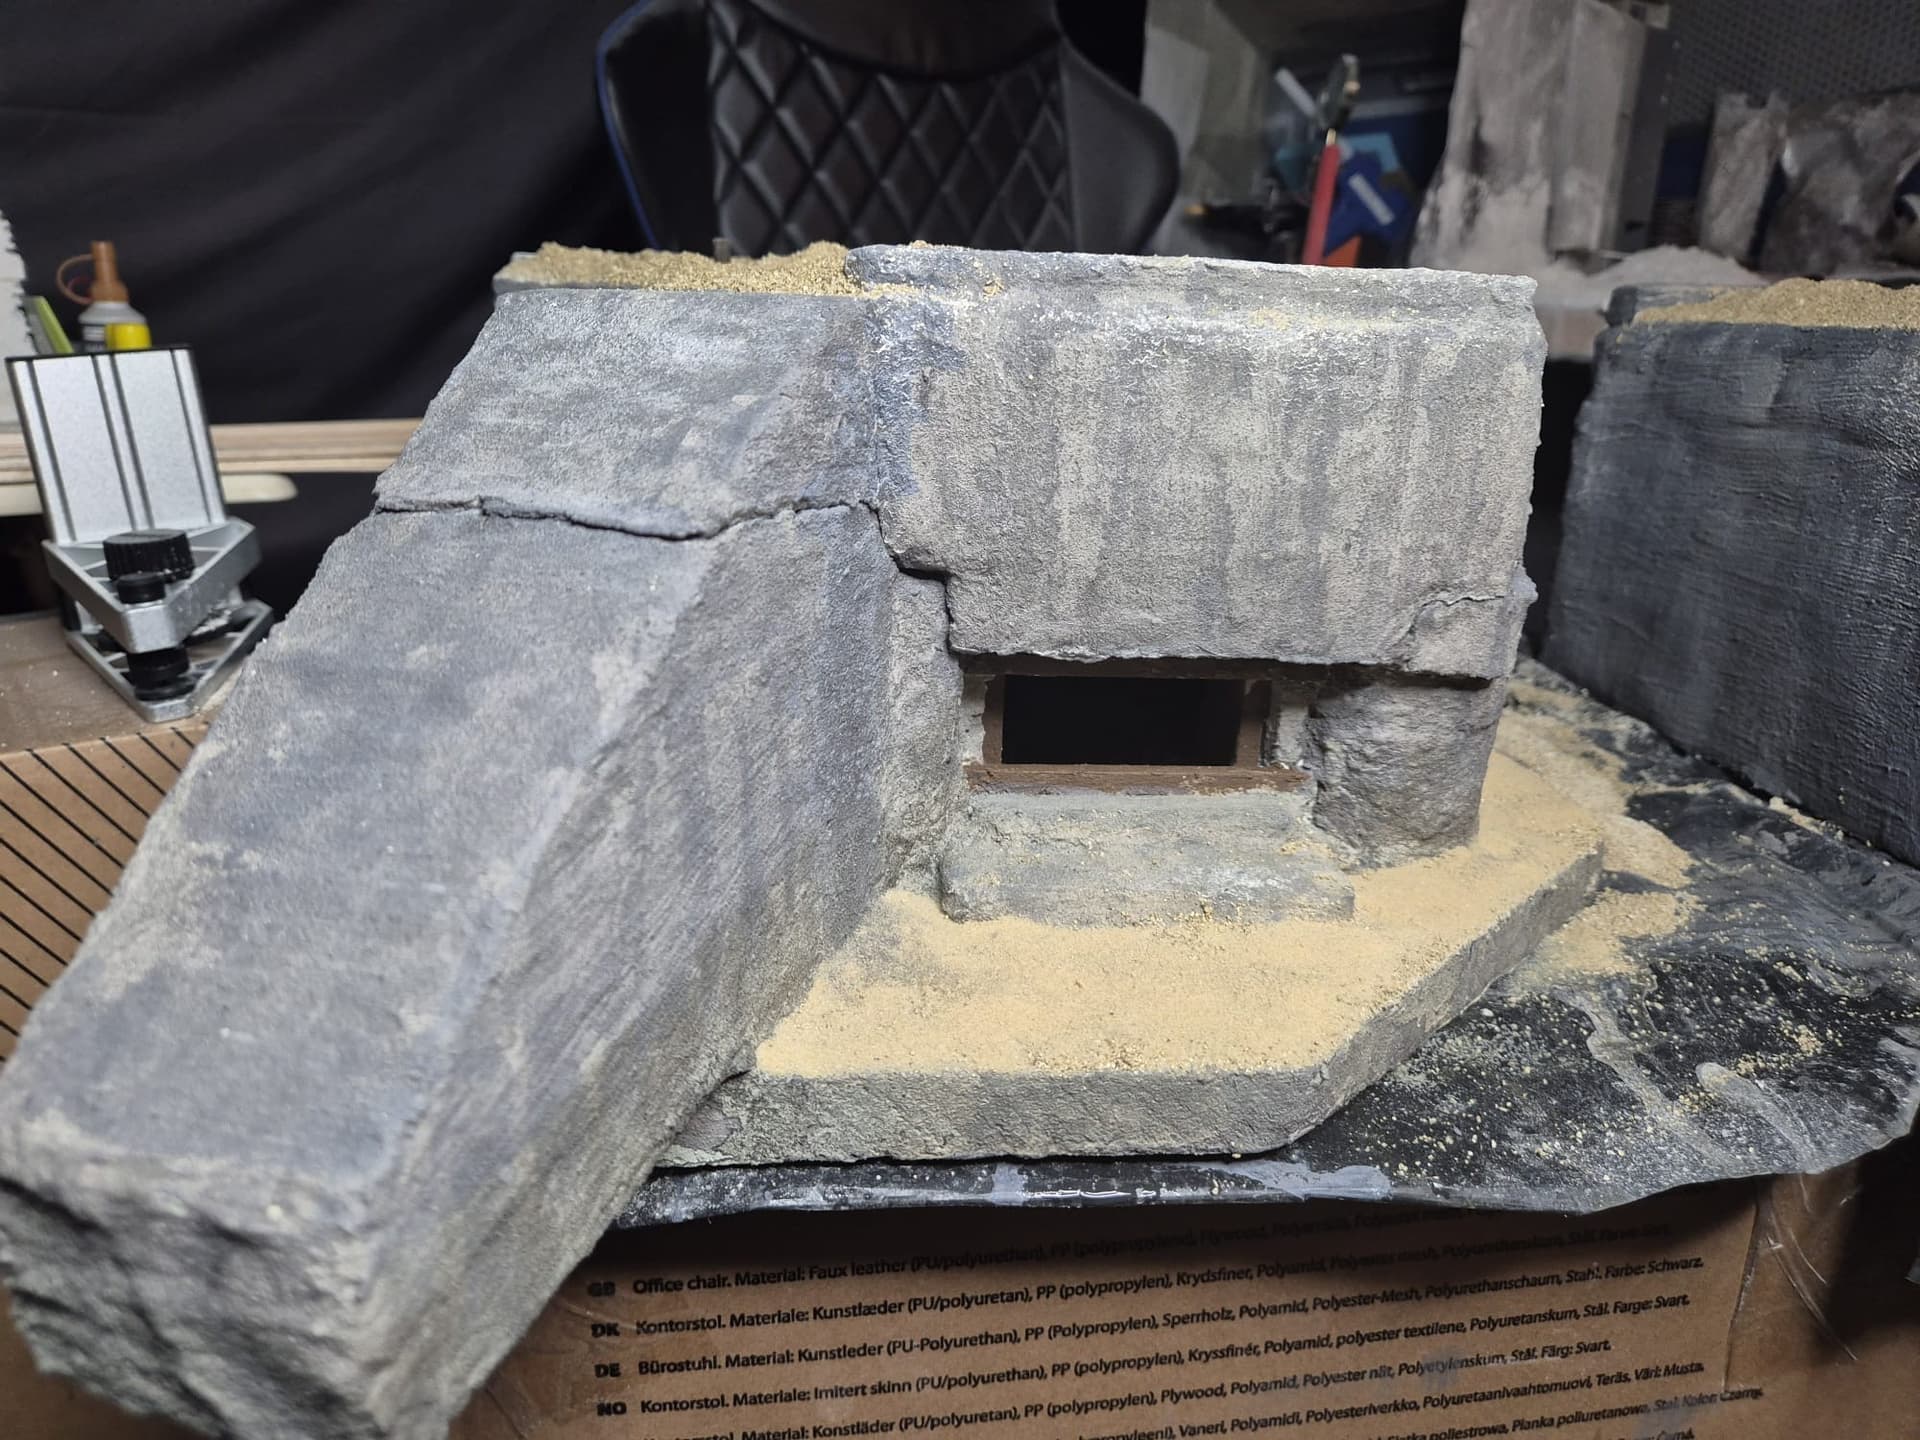
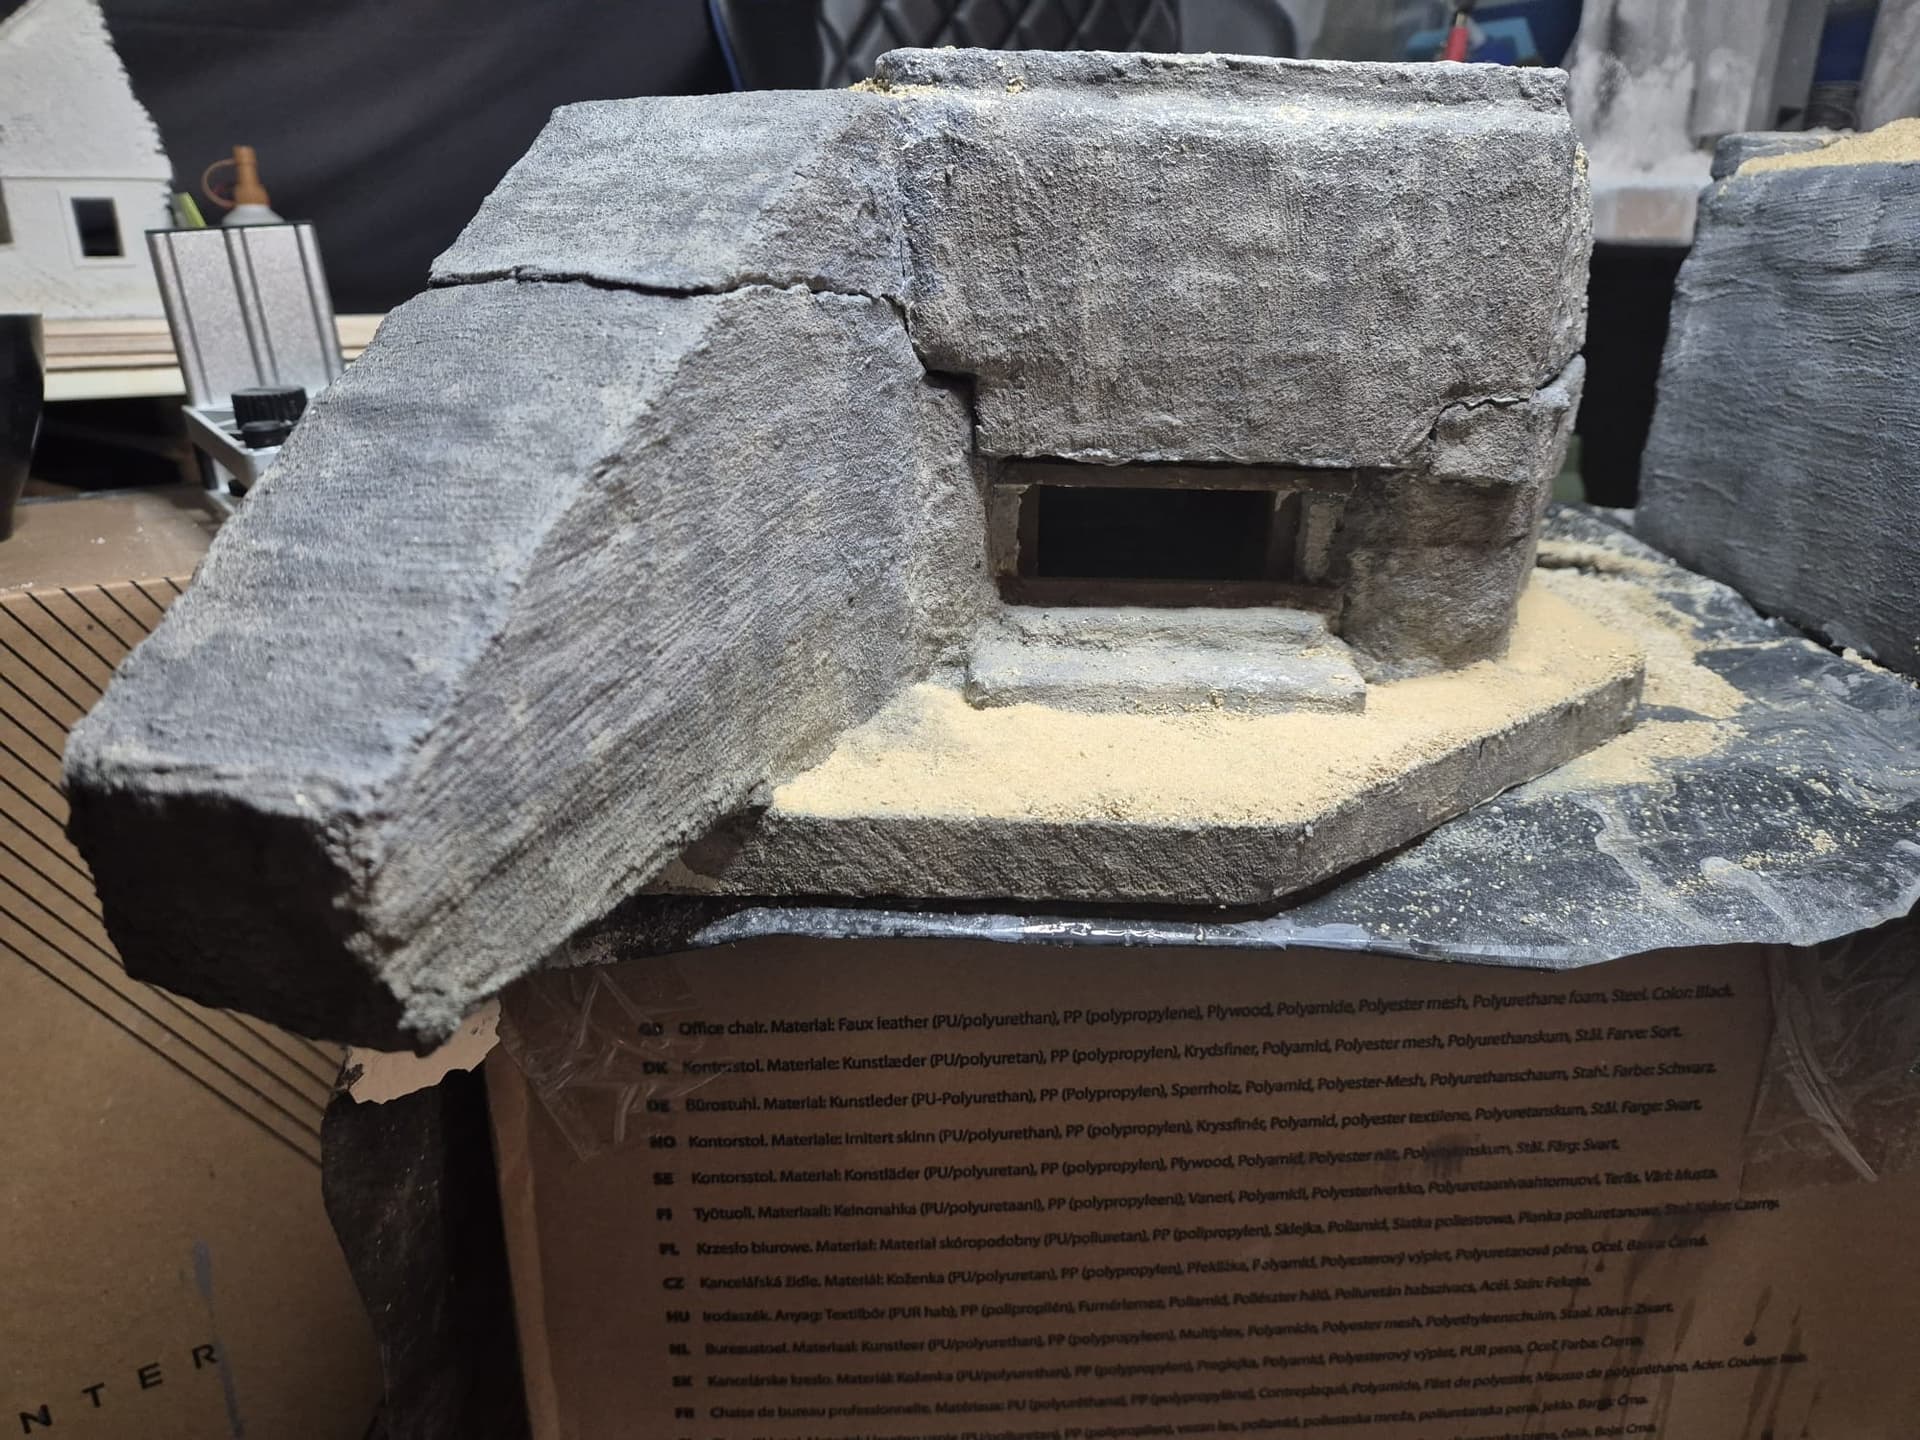
I won’t do more on the outer side faces of the walls because they will finally be interred in the diorama that I will be building. In fact, the Bunker was well protected not only by its very thick walls, but also by the terrain in which it had been built, offering thus a double protection against naval attacks.
And as you could see, even the roof was highly armored and deep, and again covered with soil - something you will see further on, although I already put the framework for it on top with both plaster and concrete.
Only when the roof will be removed would one fully recognize the threat that this bunker represented on D-Day for the Allies.
Today I will fix a couple of things and do the interior walls, covering them with concrete as well, including the floor. Then I will build the more appropriate parapets which for now are just hinted, but their shapes on top back in 1944 were completely different. I will do them with air drying clay and be helped with a rounded dowel in order to get them to be curved inwards as per construction specification.
If time allows I will also start to build the iron/led doors for the entrance to the bunker, but first I will have to correct that warped right wall with putty.
Then, always time allowing, I will weather the entire structure with various washes in order to make it look more real and influenced by both sea and weather conditions.
So this is my plan for today. Should I manage to do something useful I will make sure to post some more pictures of the bunker right here.
Again, thank you for your good wishes and return them to you by wishing you a great modeling moment today.
Patrick
For today not much to see, since I am still doodling around on specific points of my bunker.
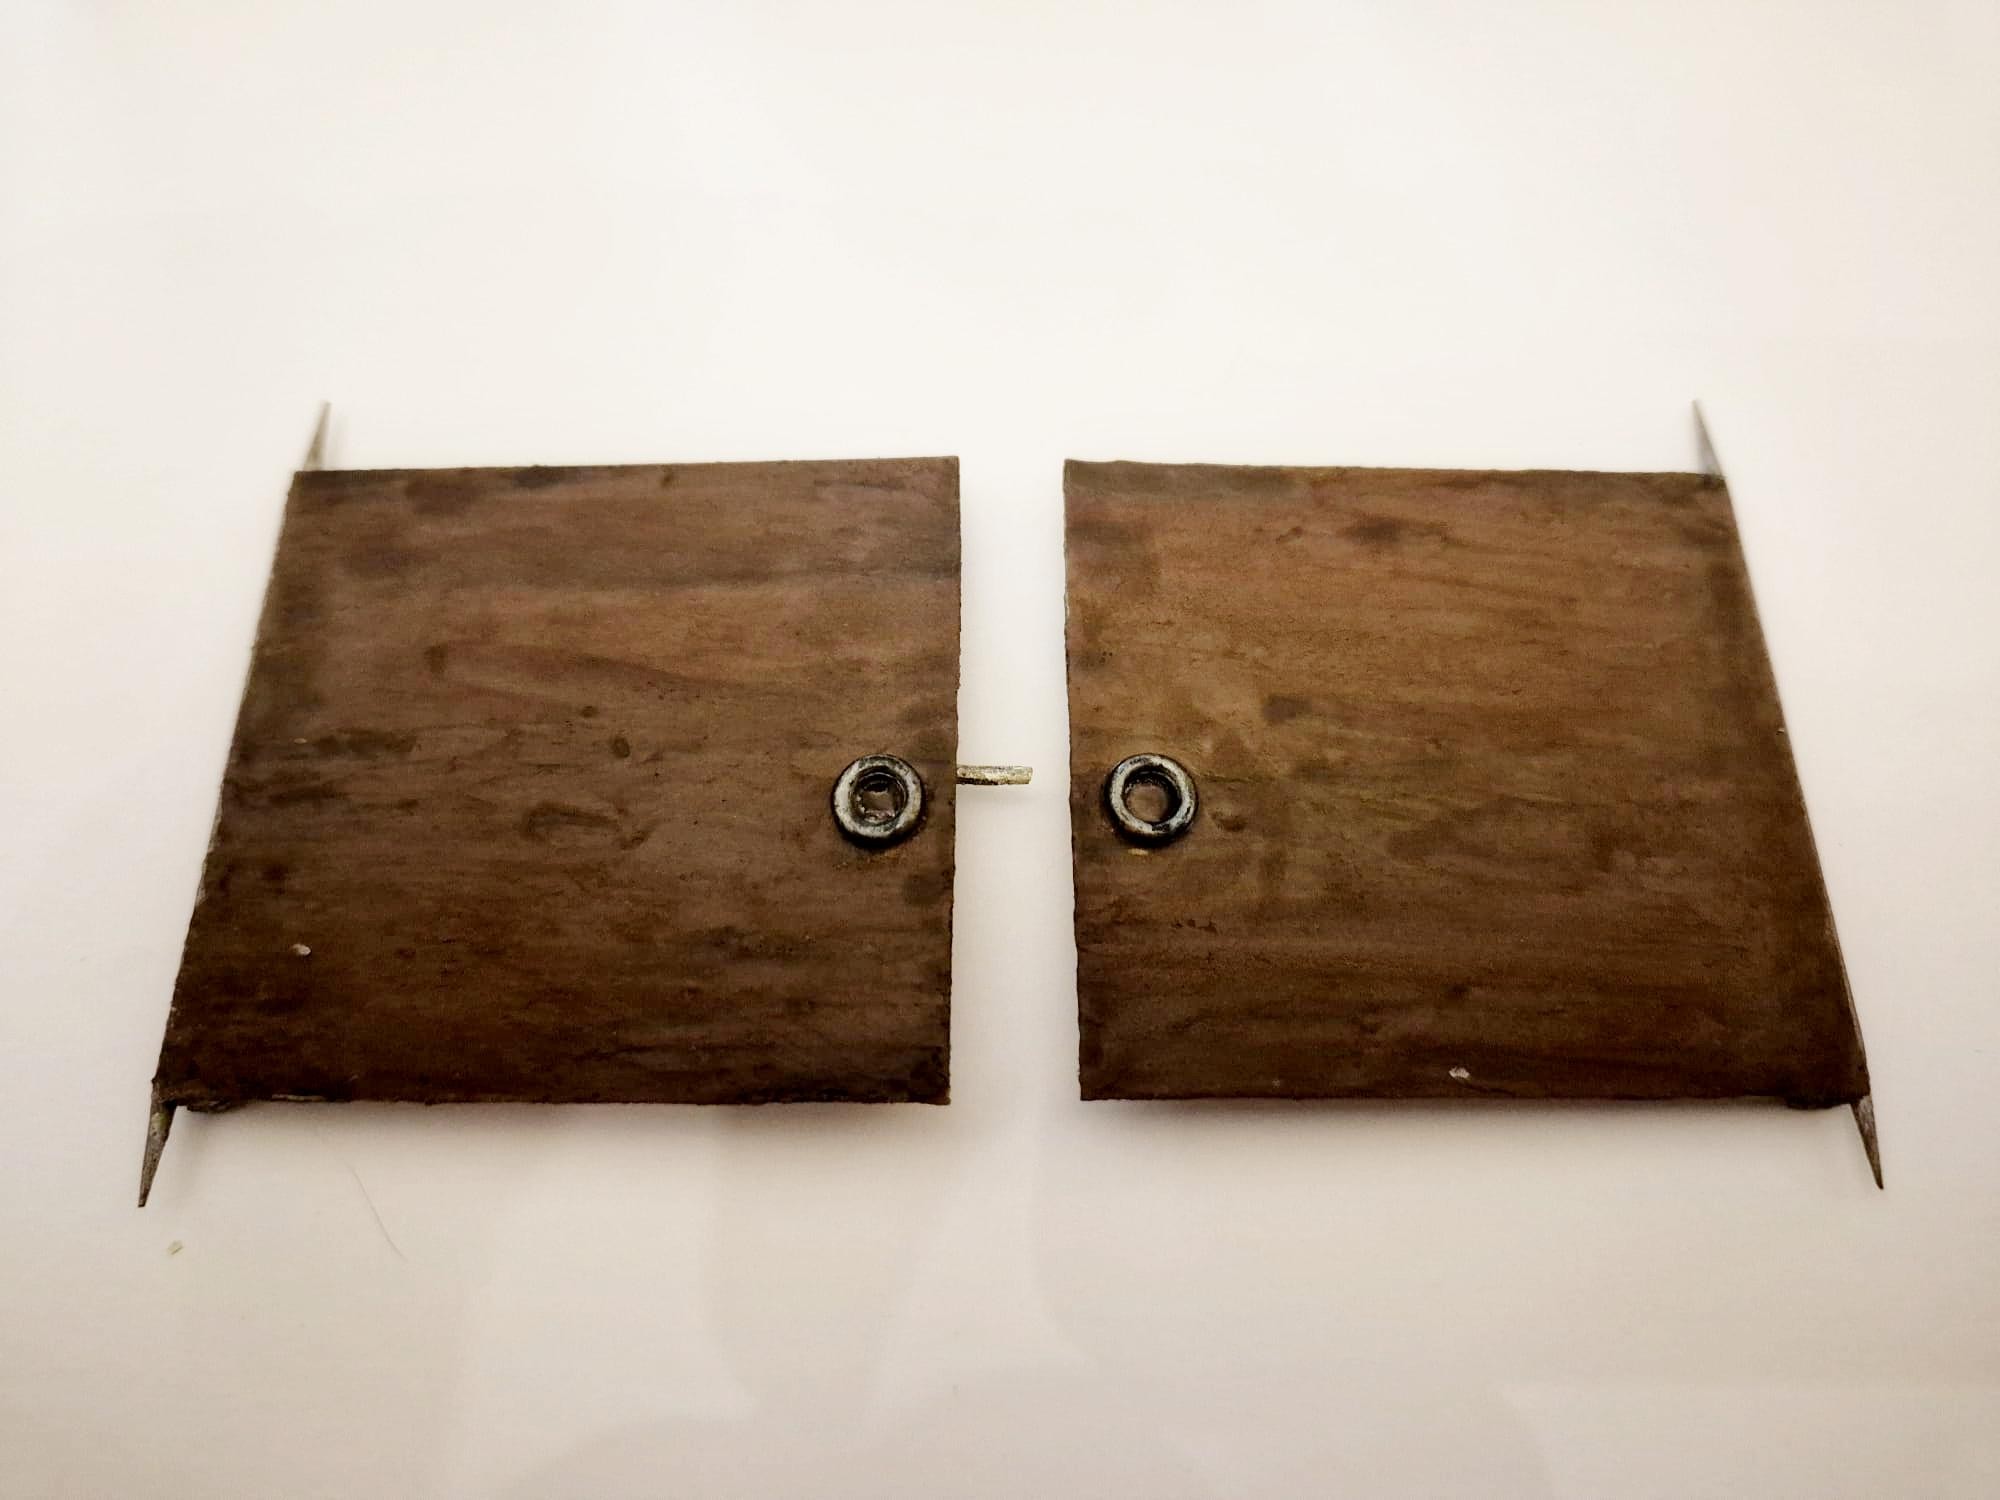
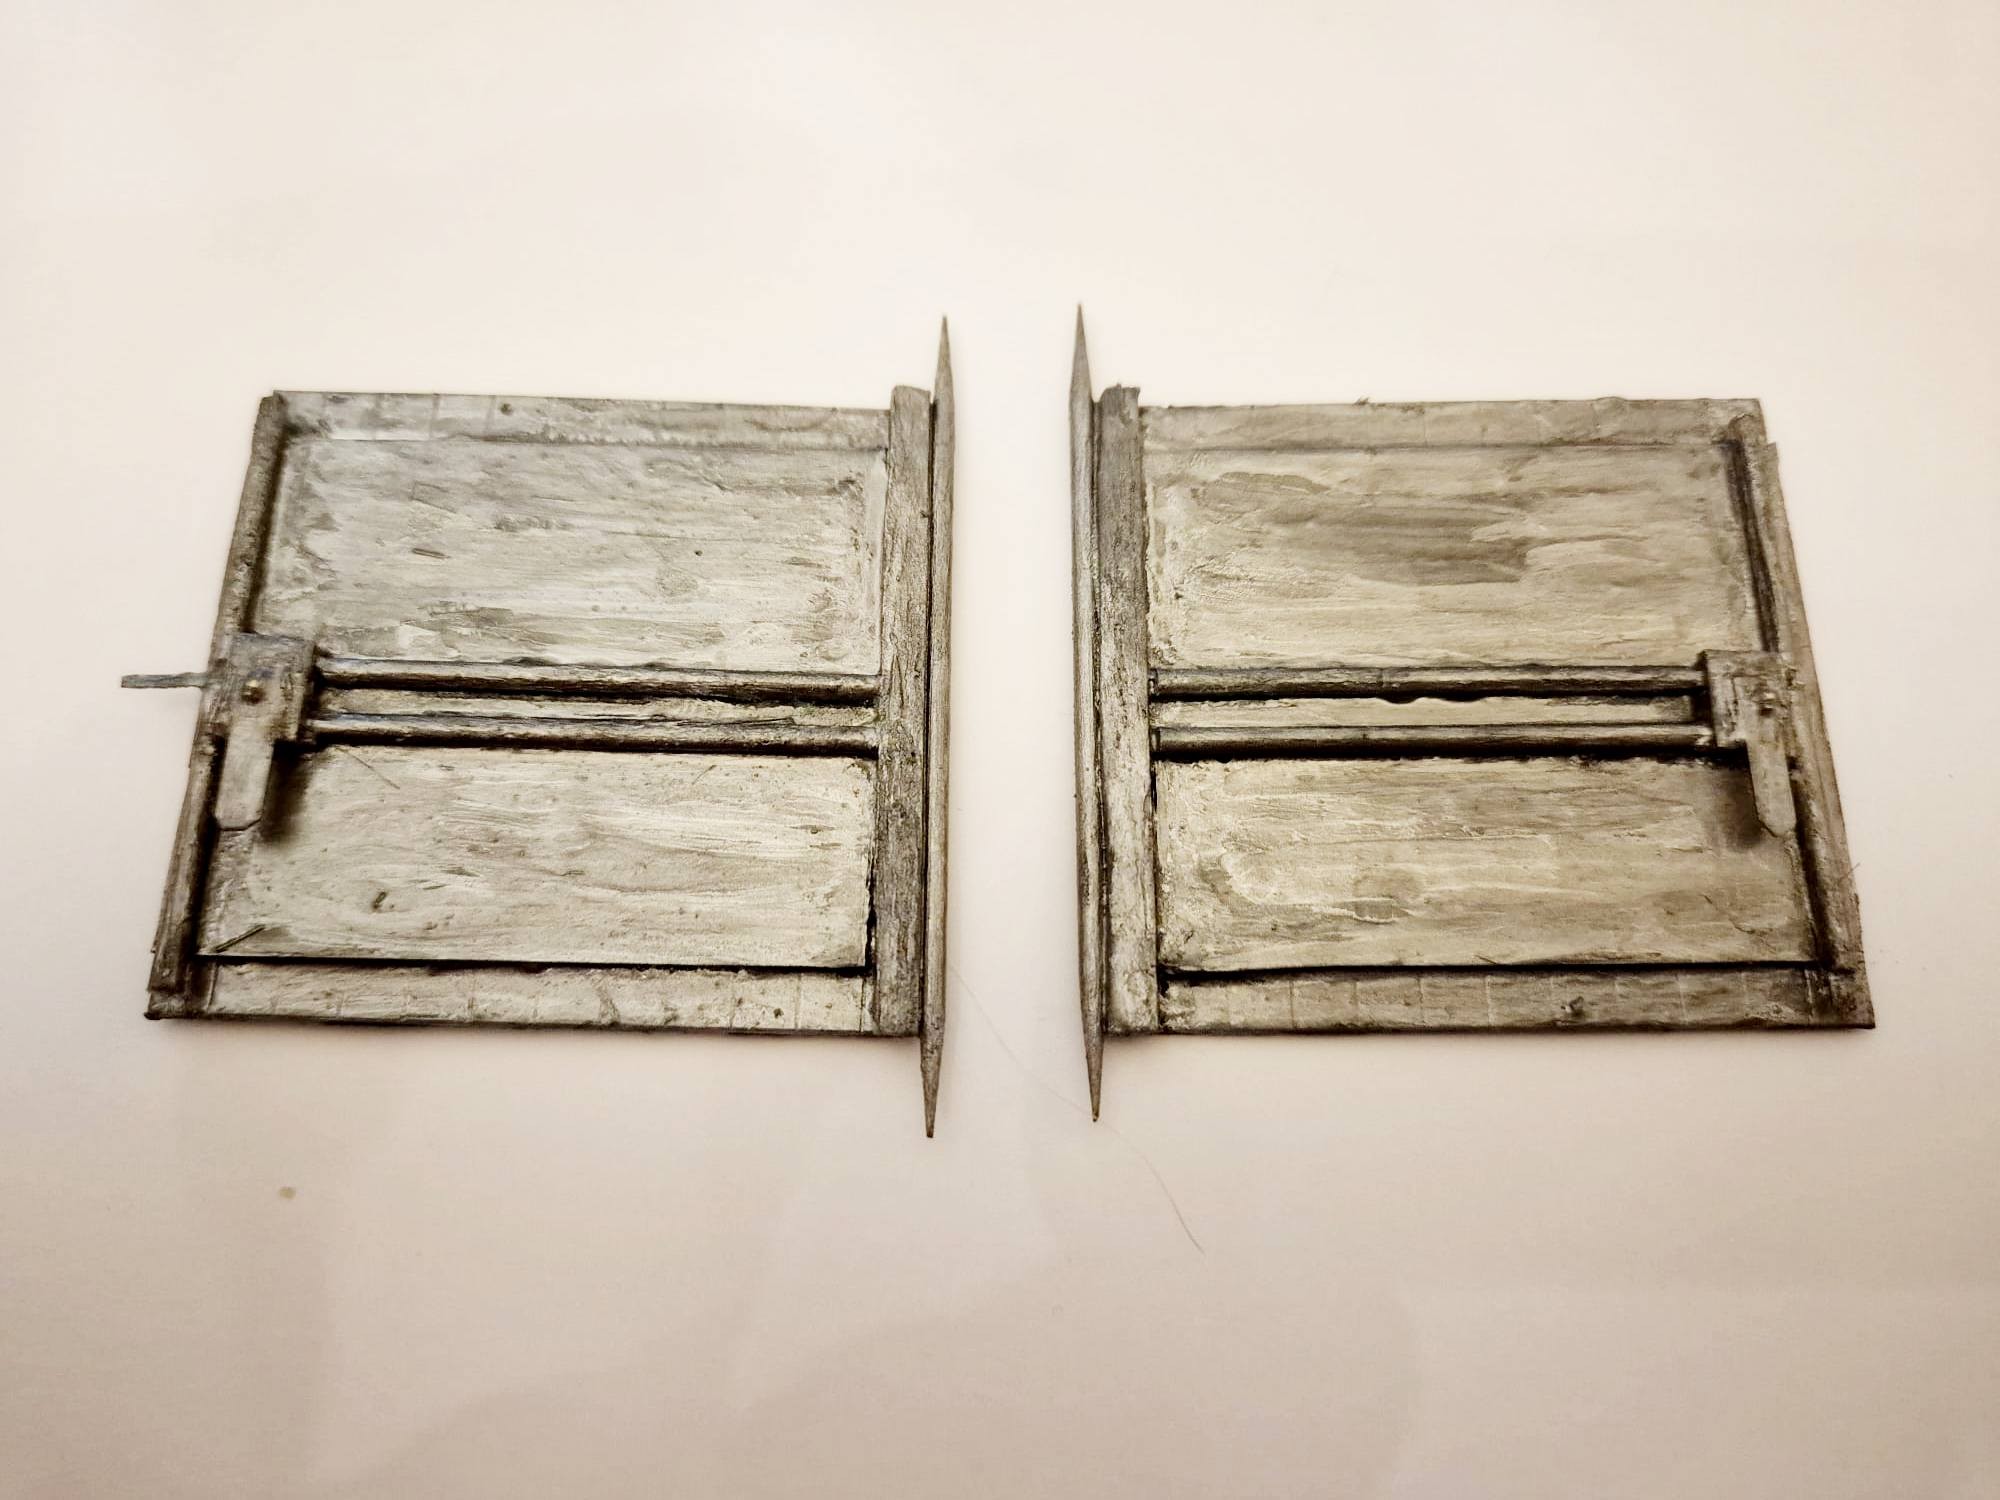
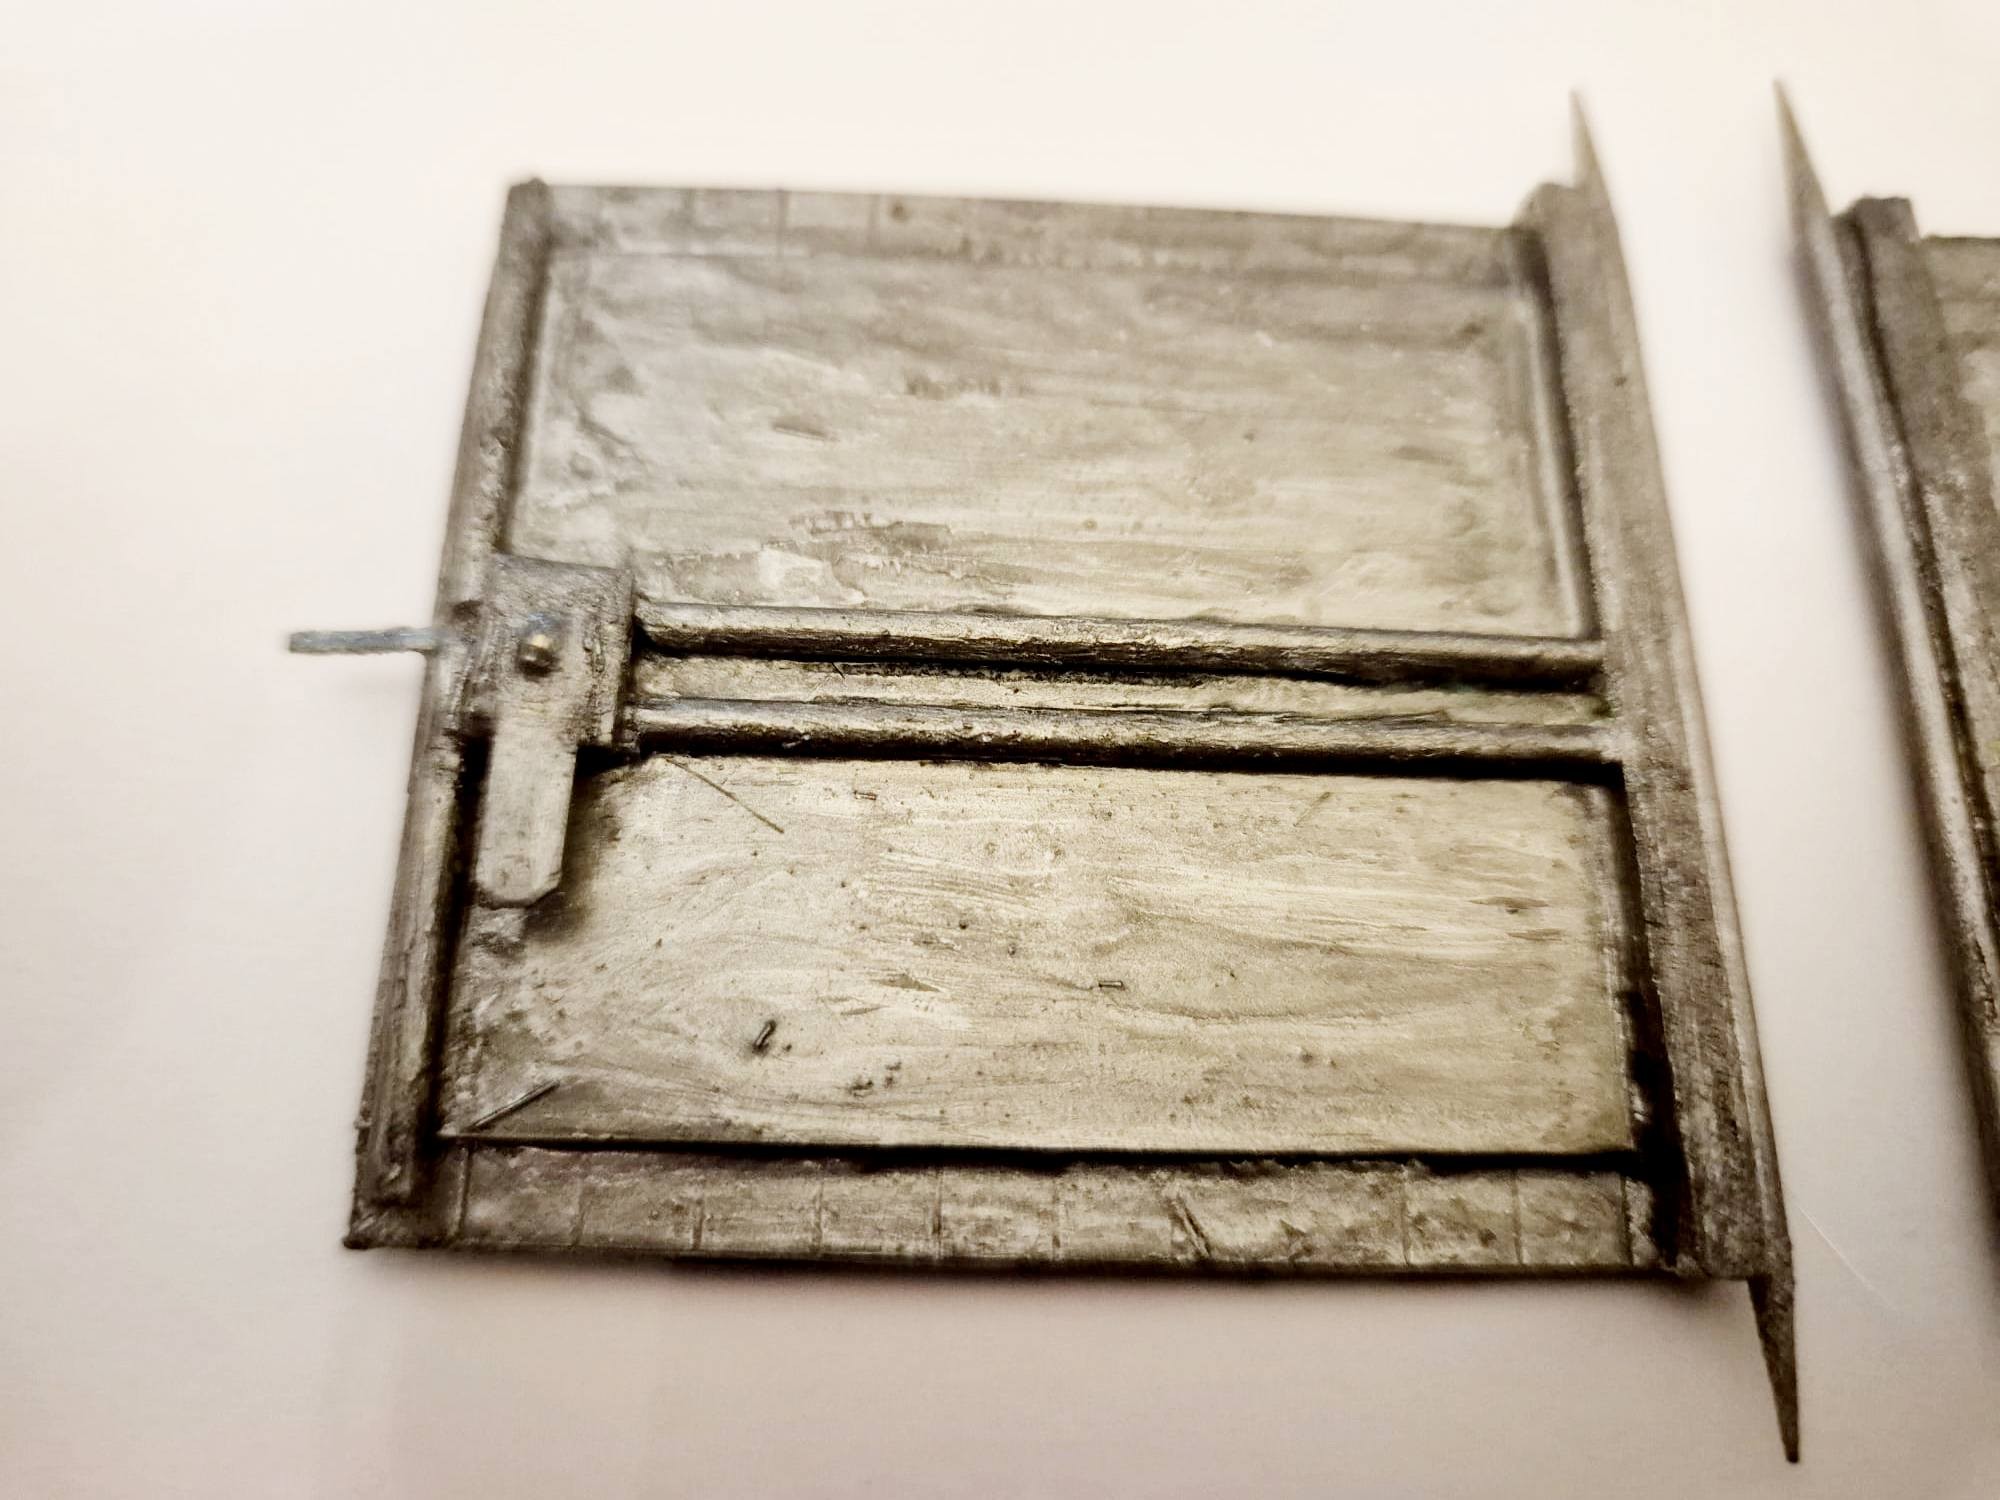
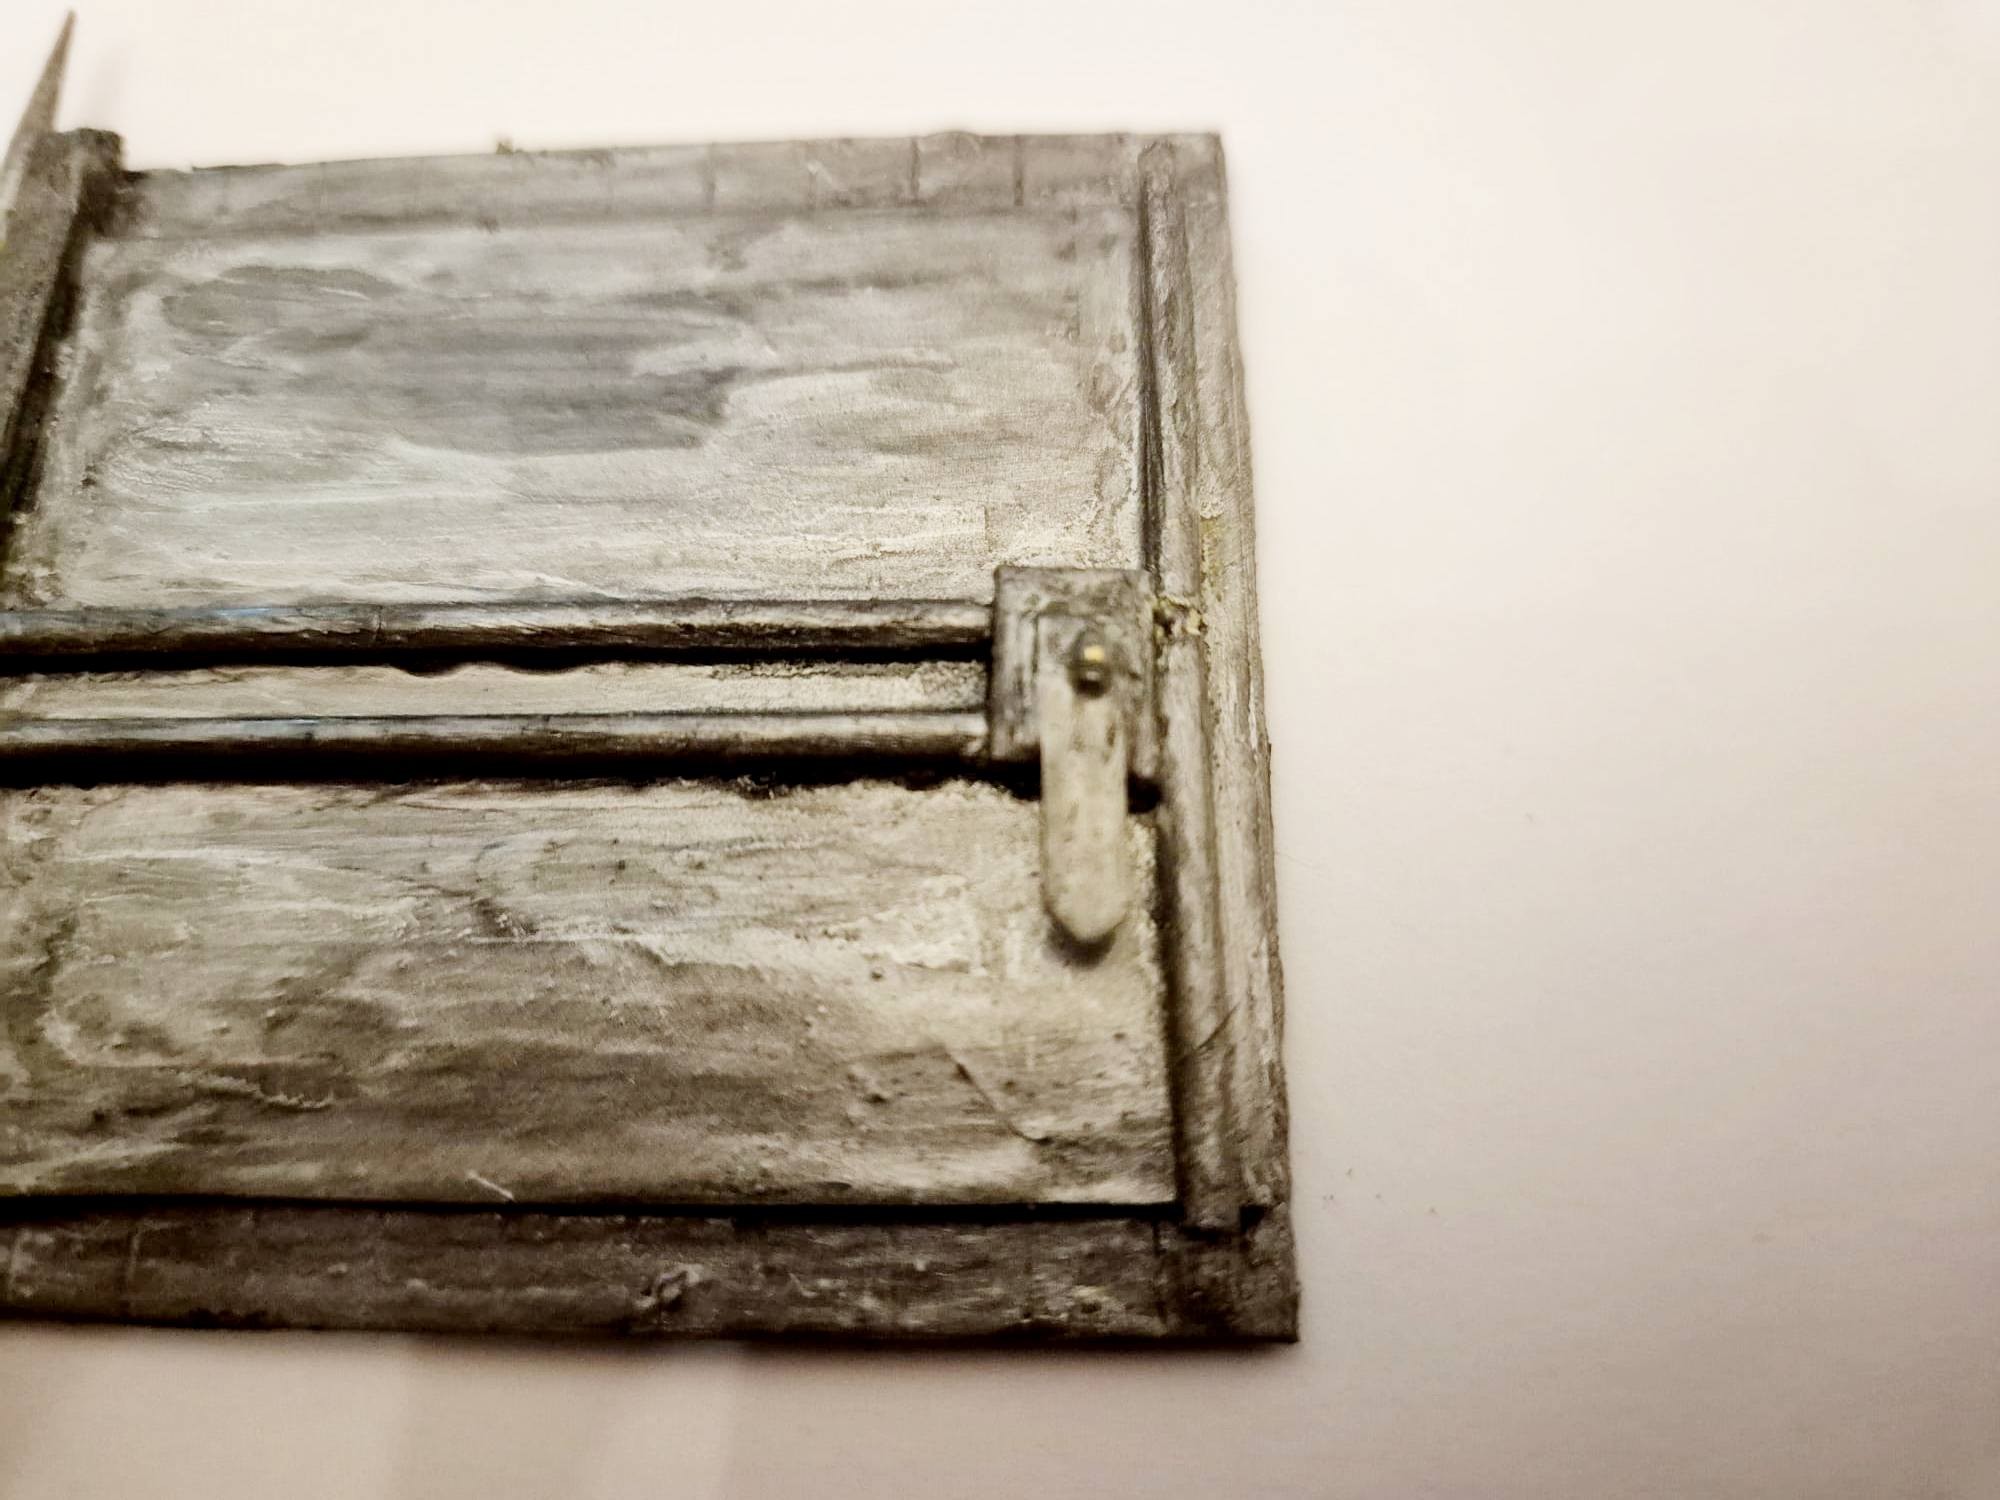
Suffice it to say that the Steel/Iron doors, or gates, are finished and that I will soon mount them into the rear entrance to the Bunker.
I will also show you a preview on how the rear part will look once fully mounted into the future diorama.
So, for today, only the finished doors, and the preview…

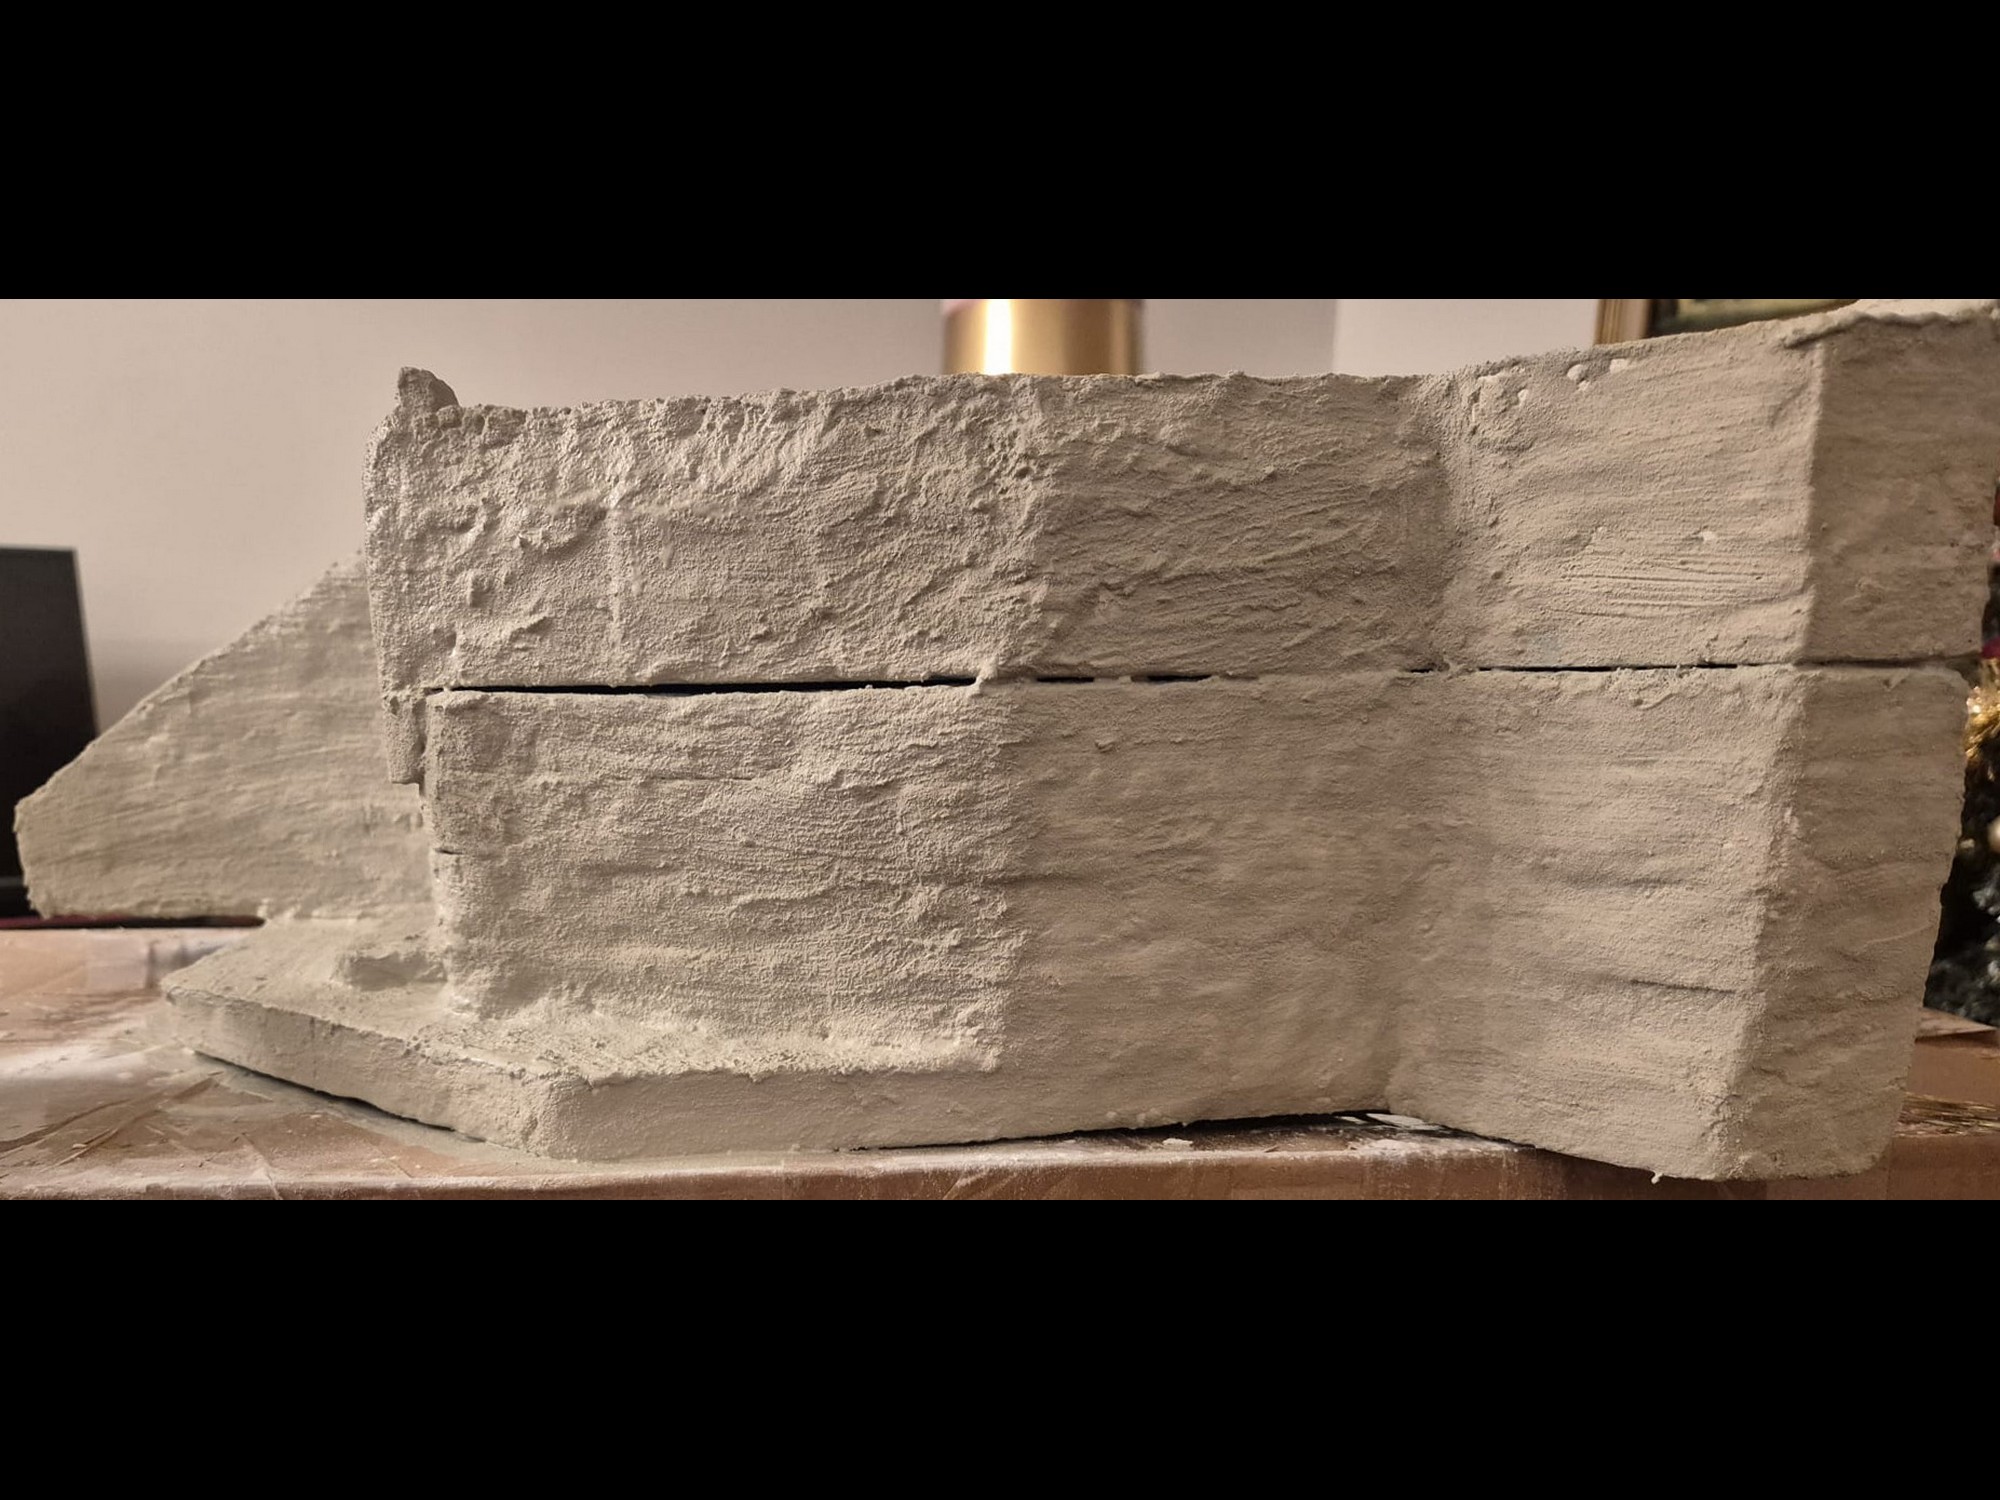
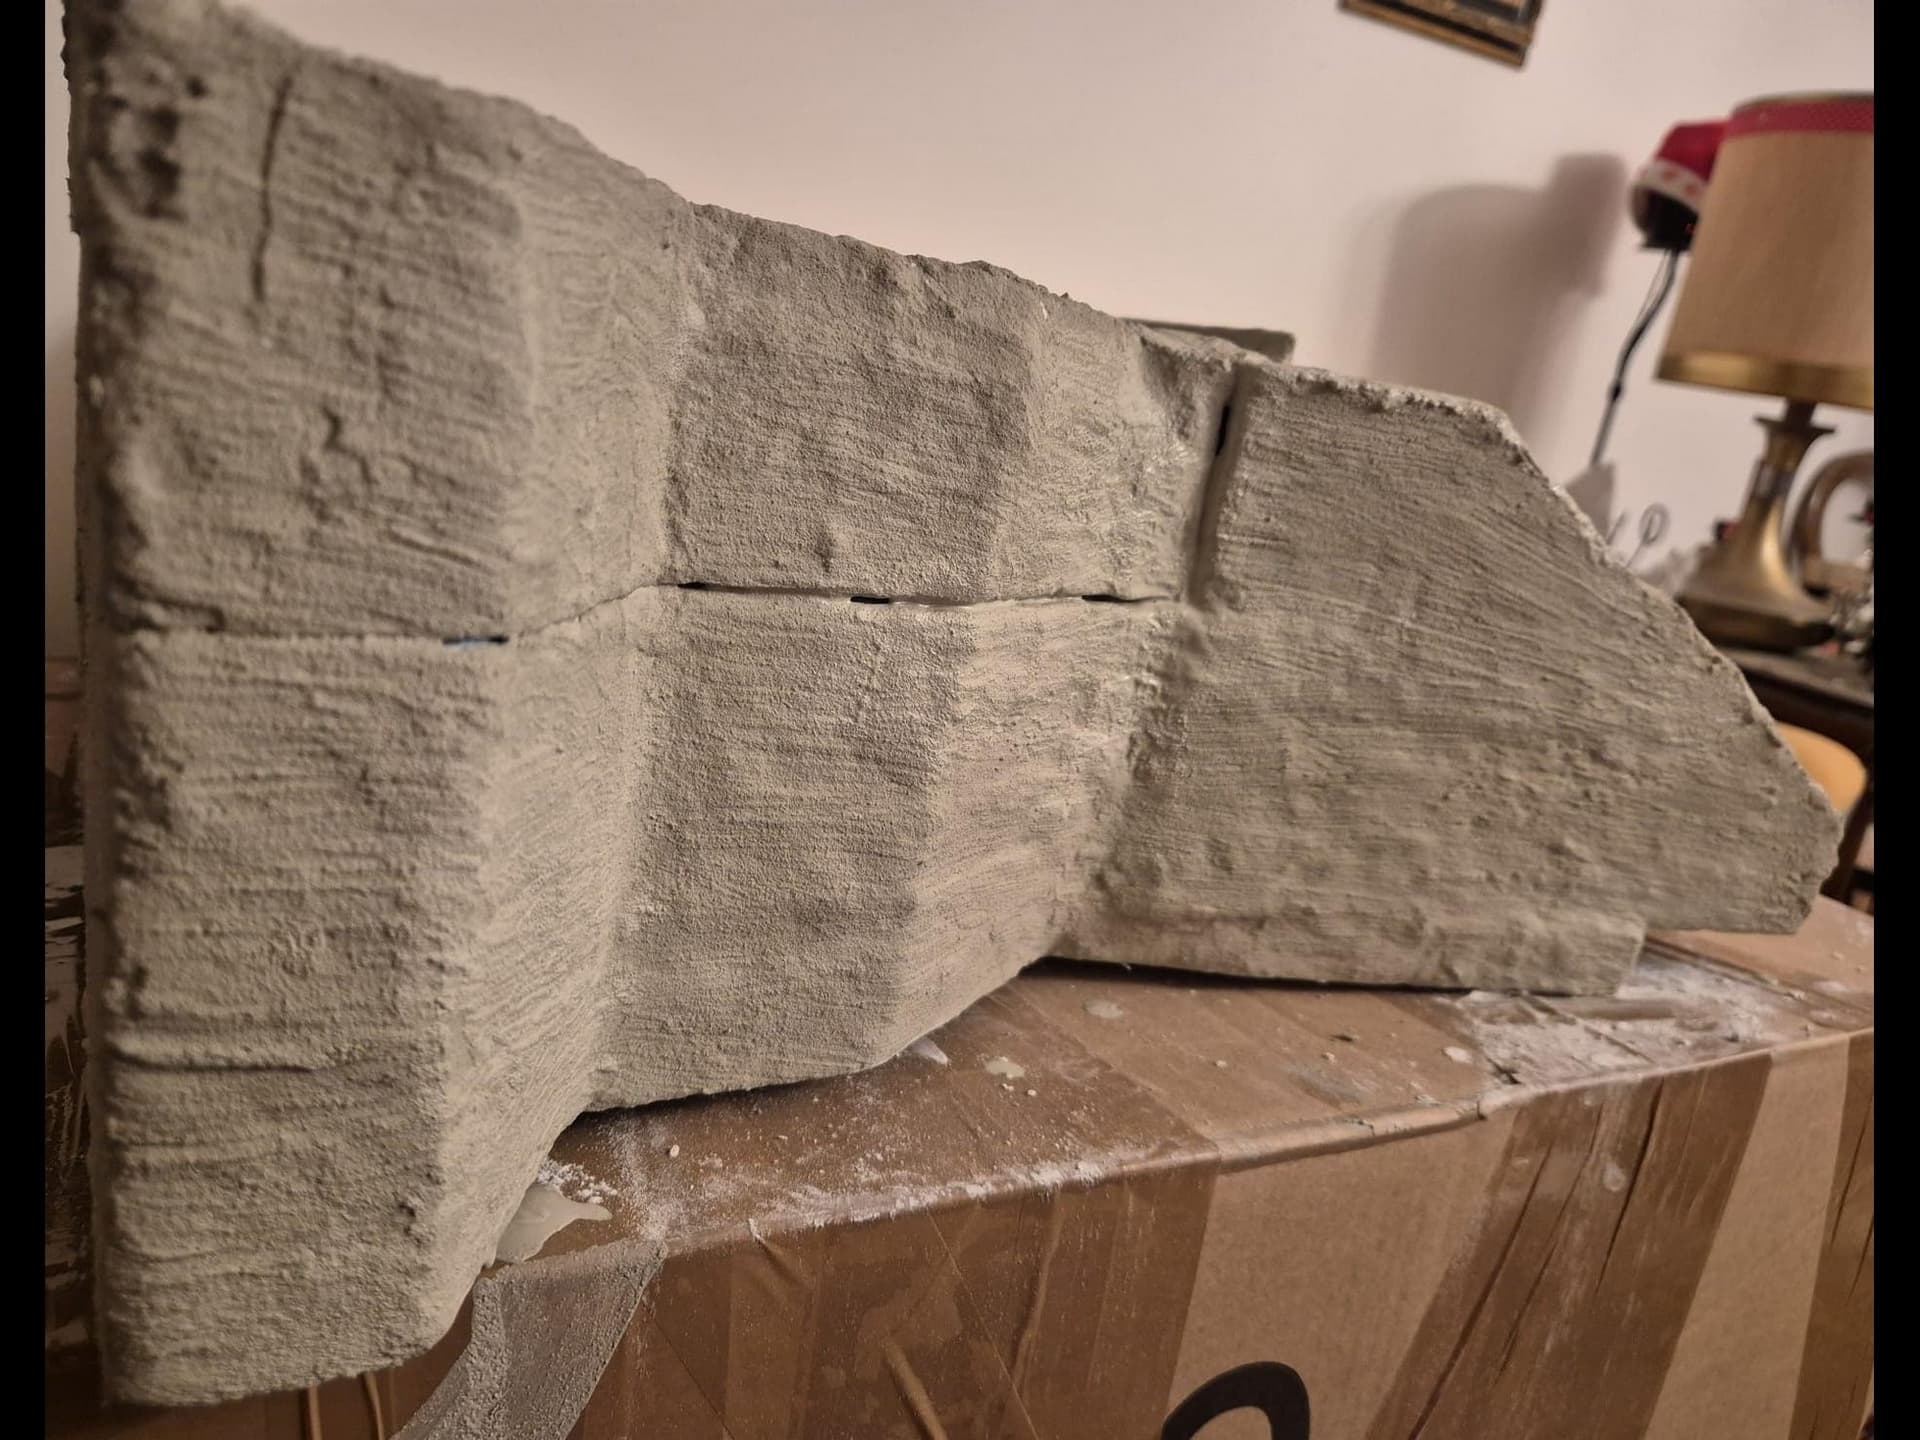
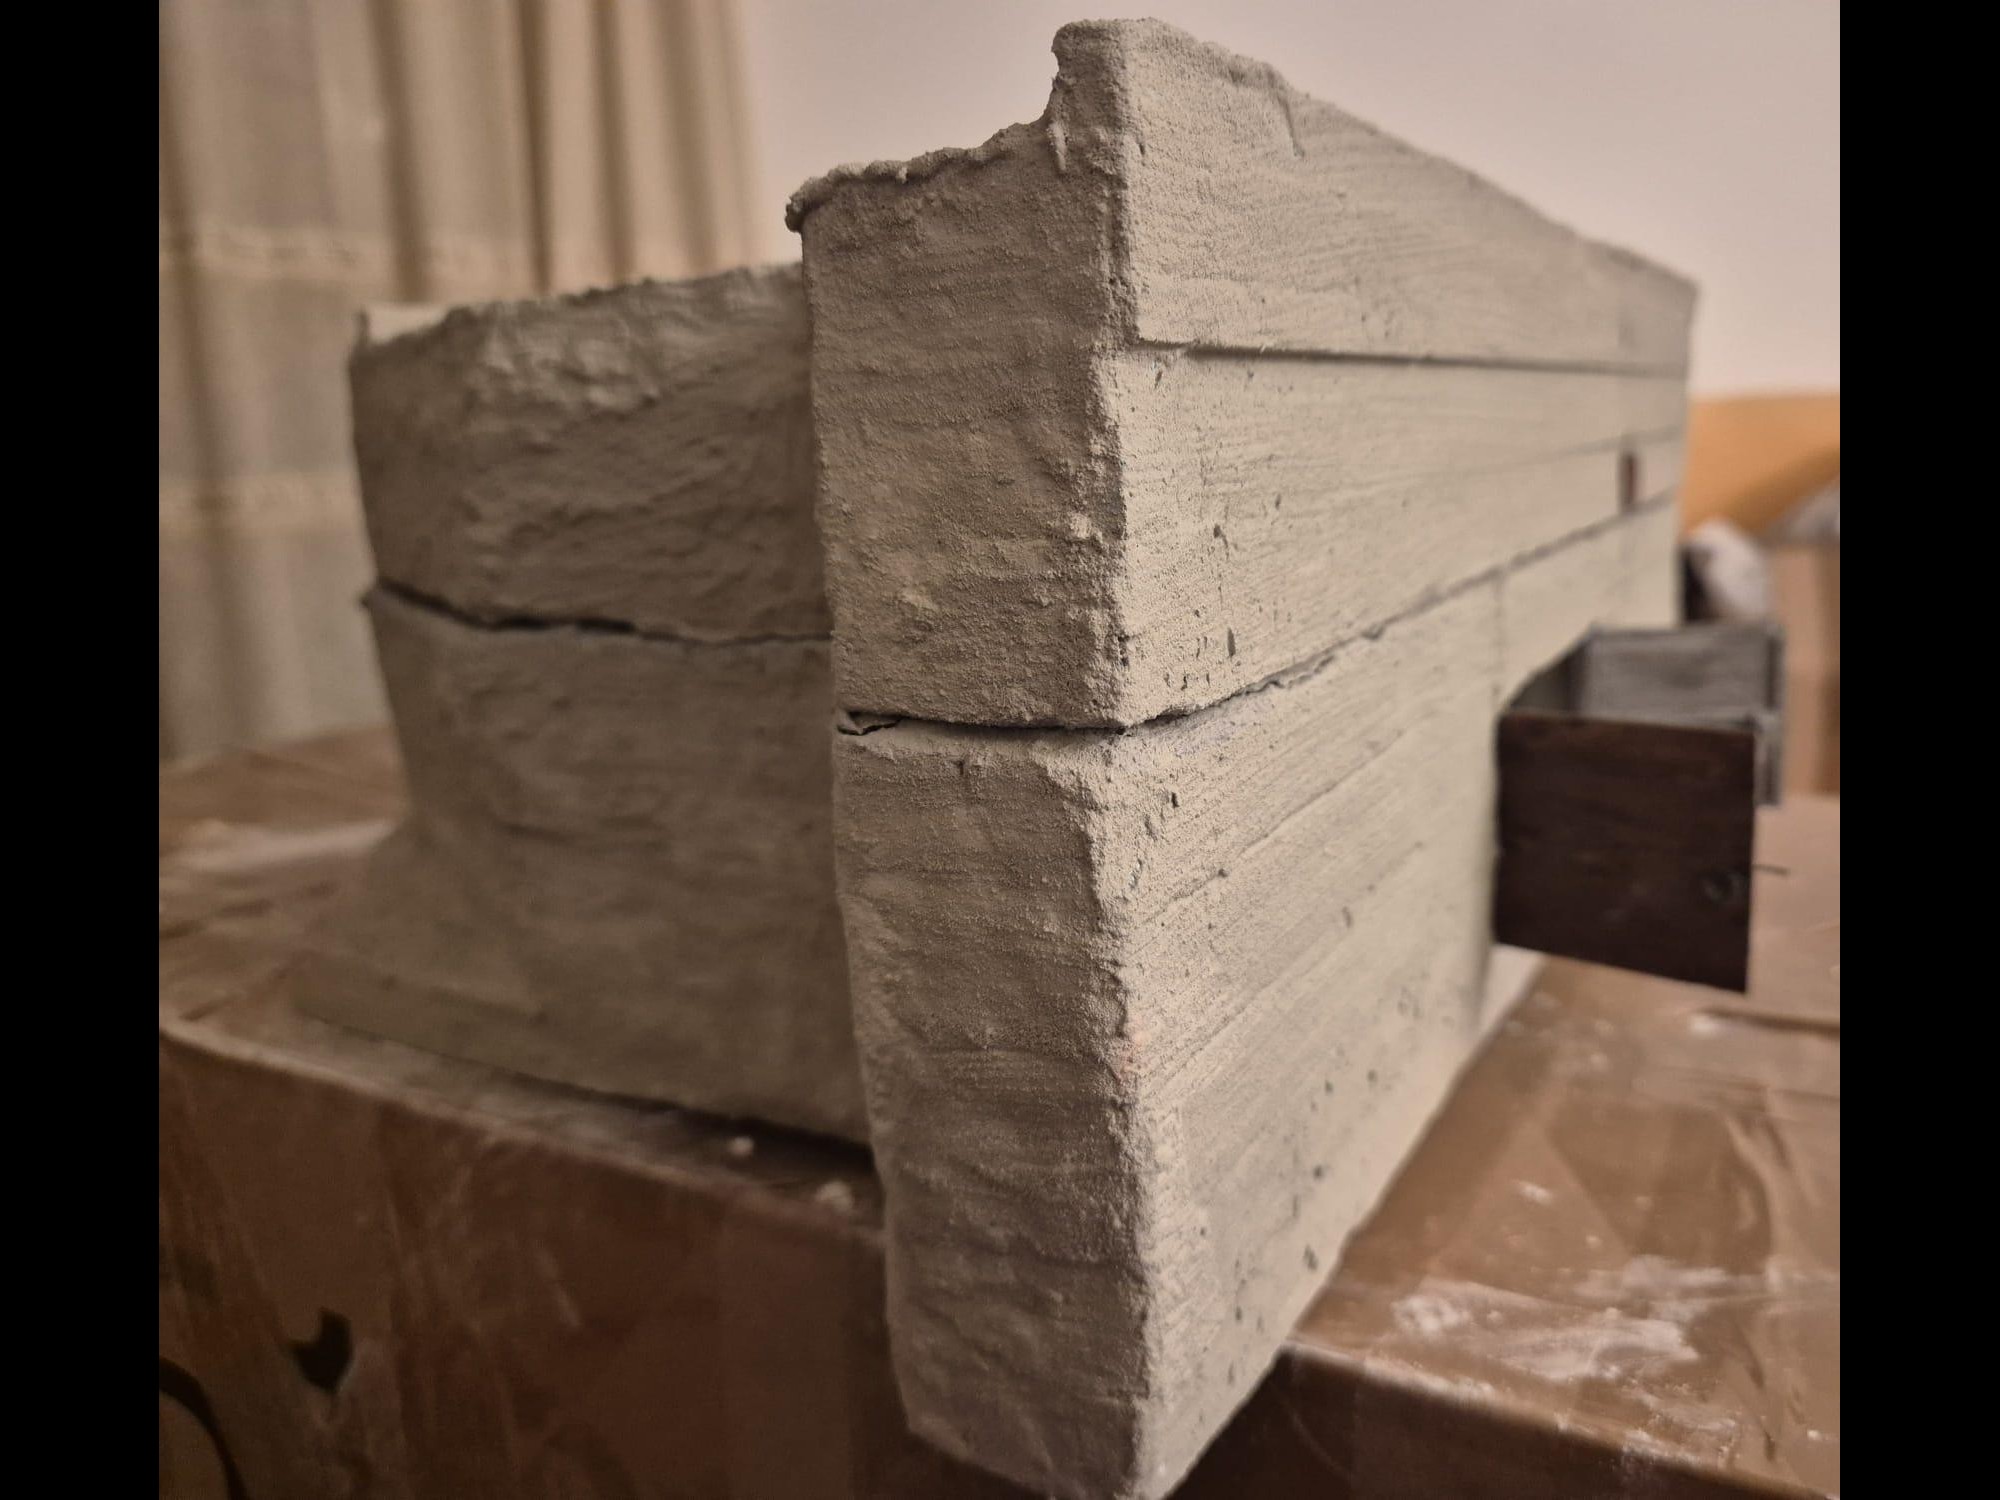
Now, about something very curious that happened after applying the acrylic concrete on all the model.
It happened when I tried to open the roof and separating it from the main body.
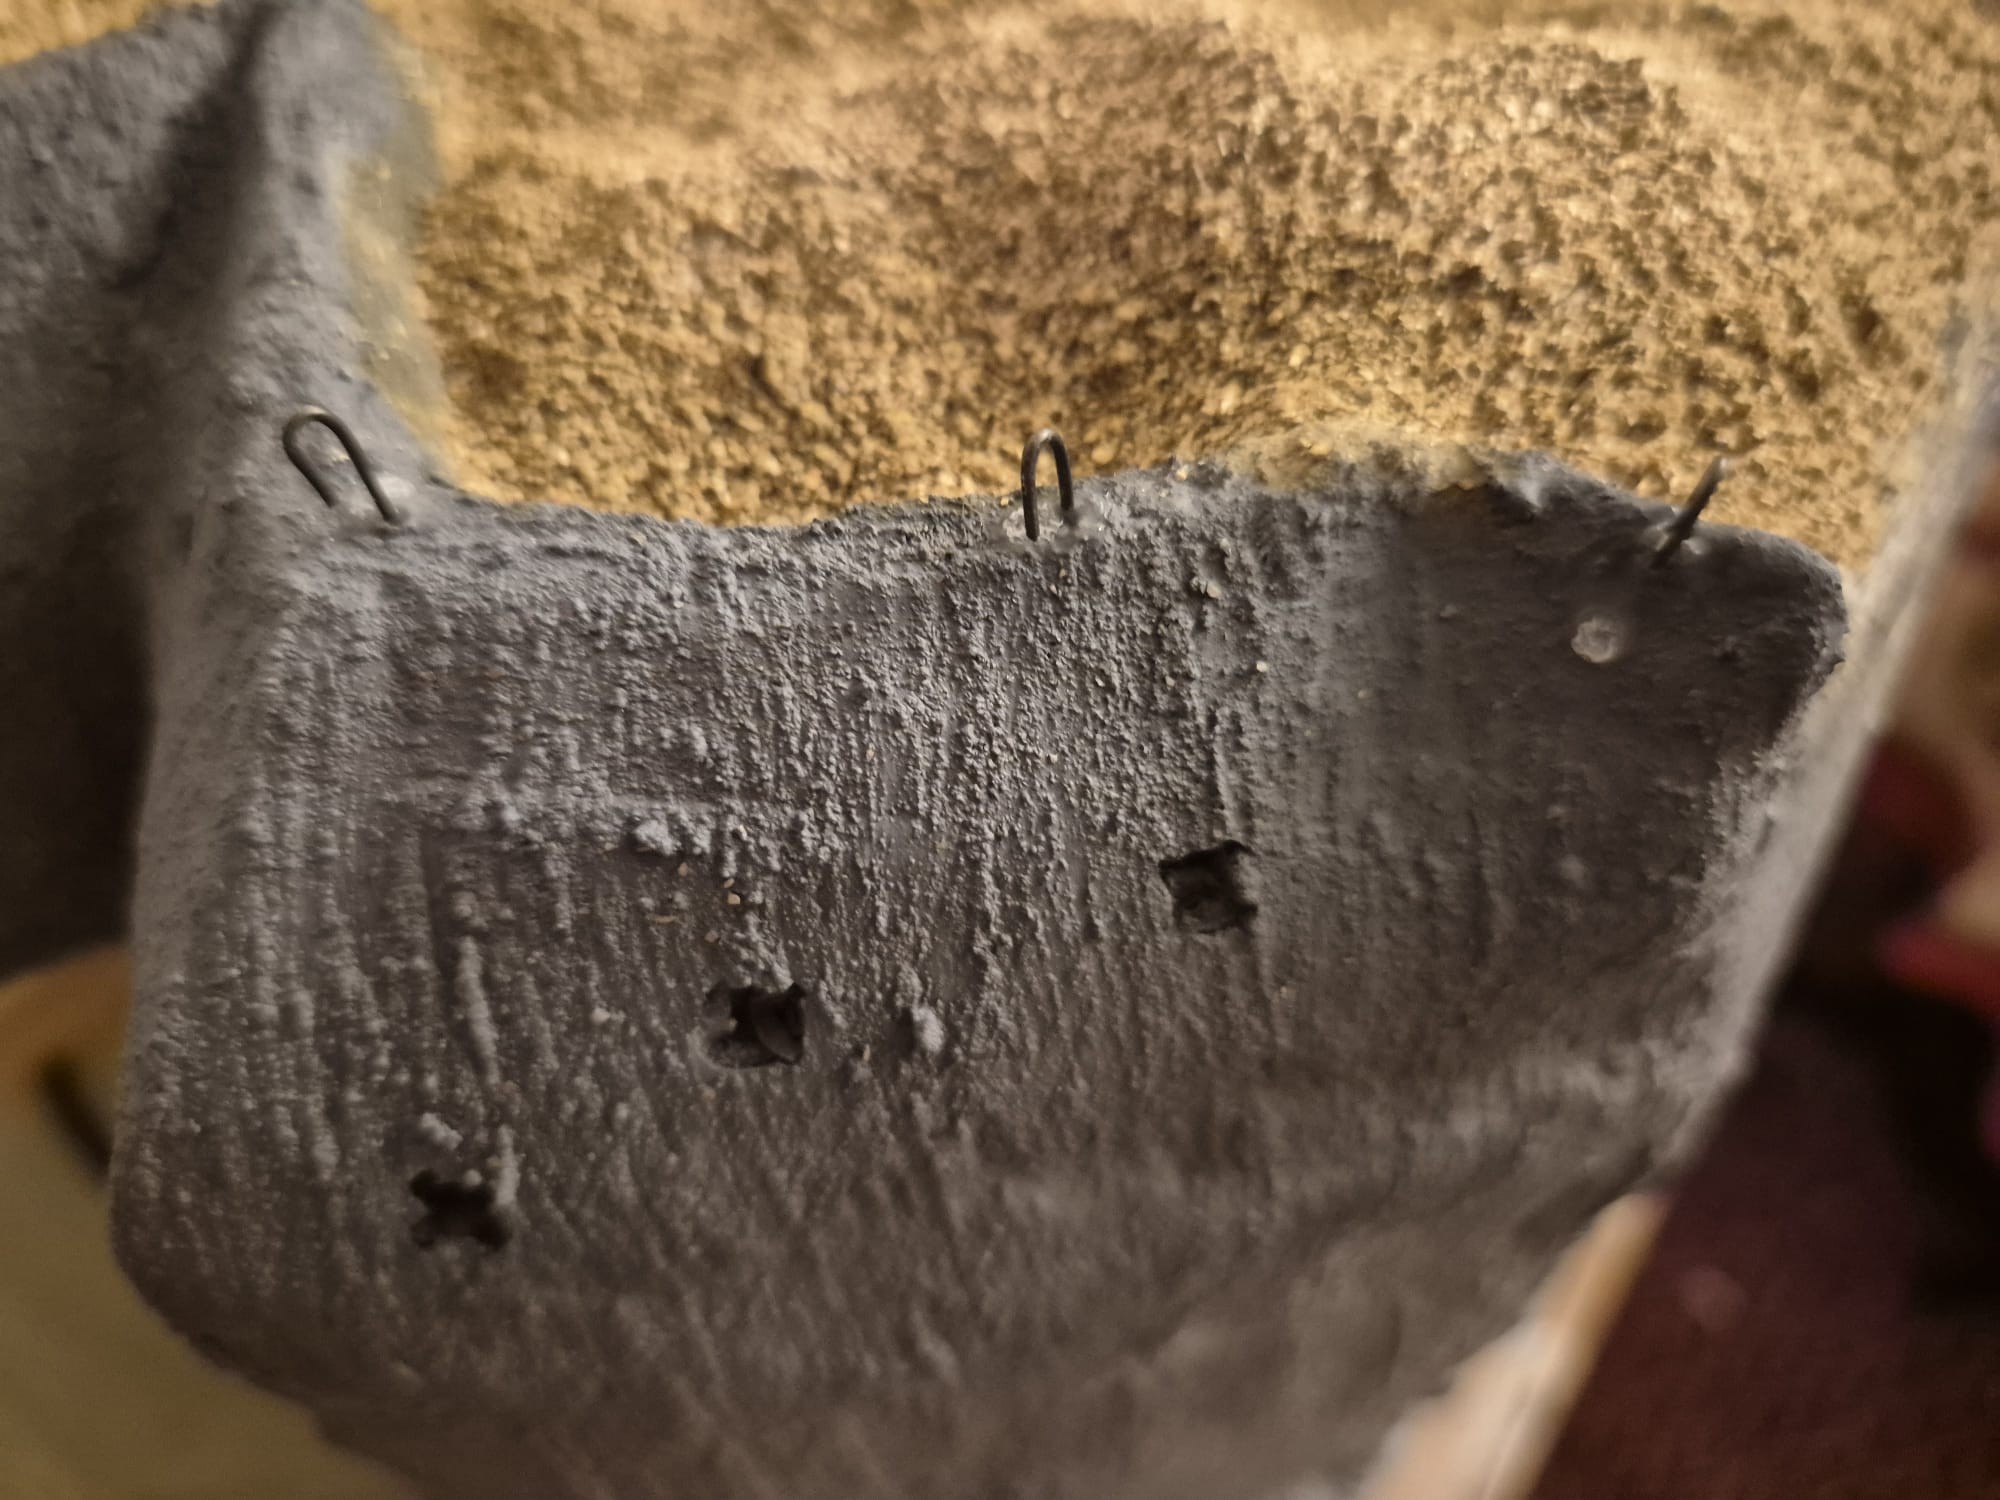
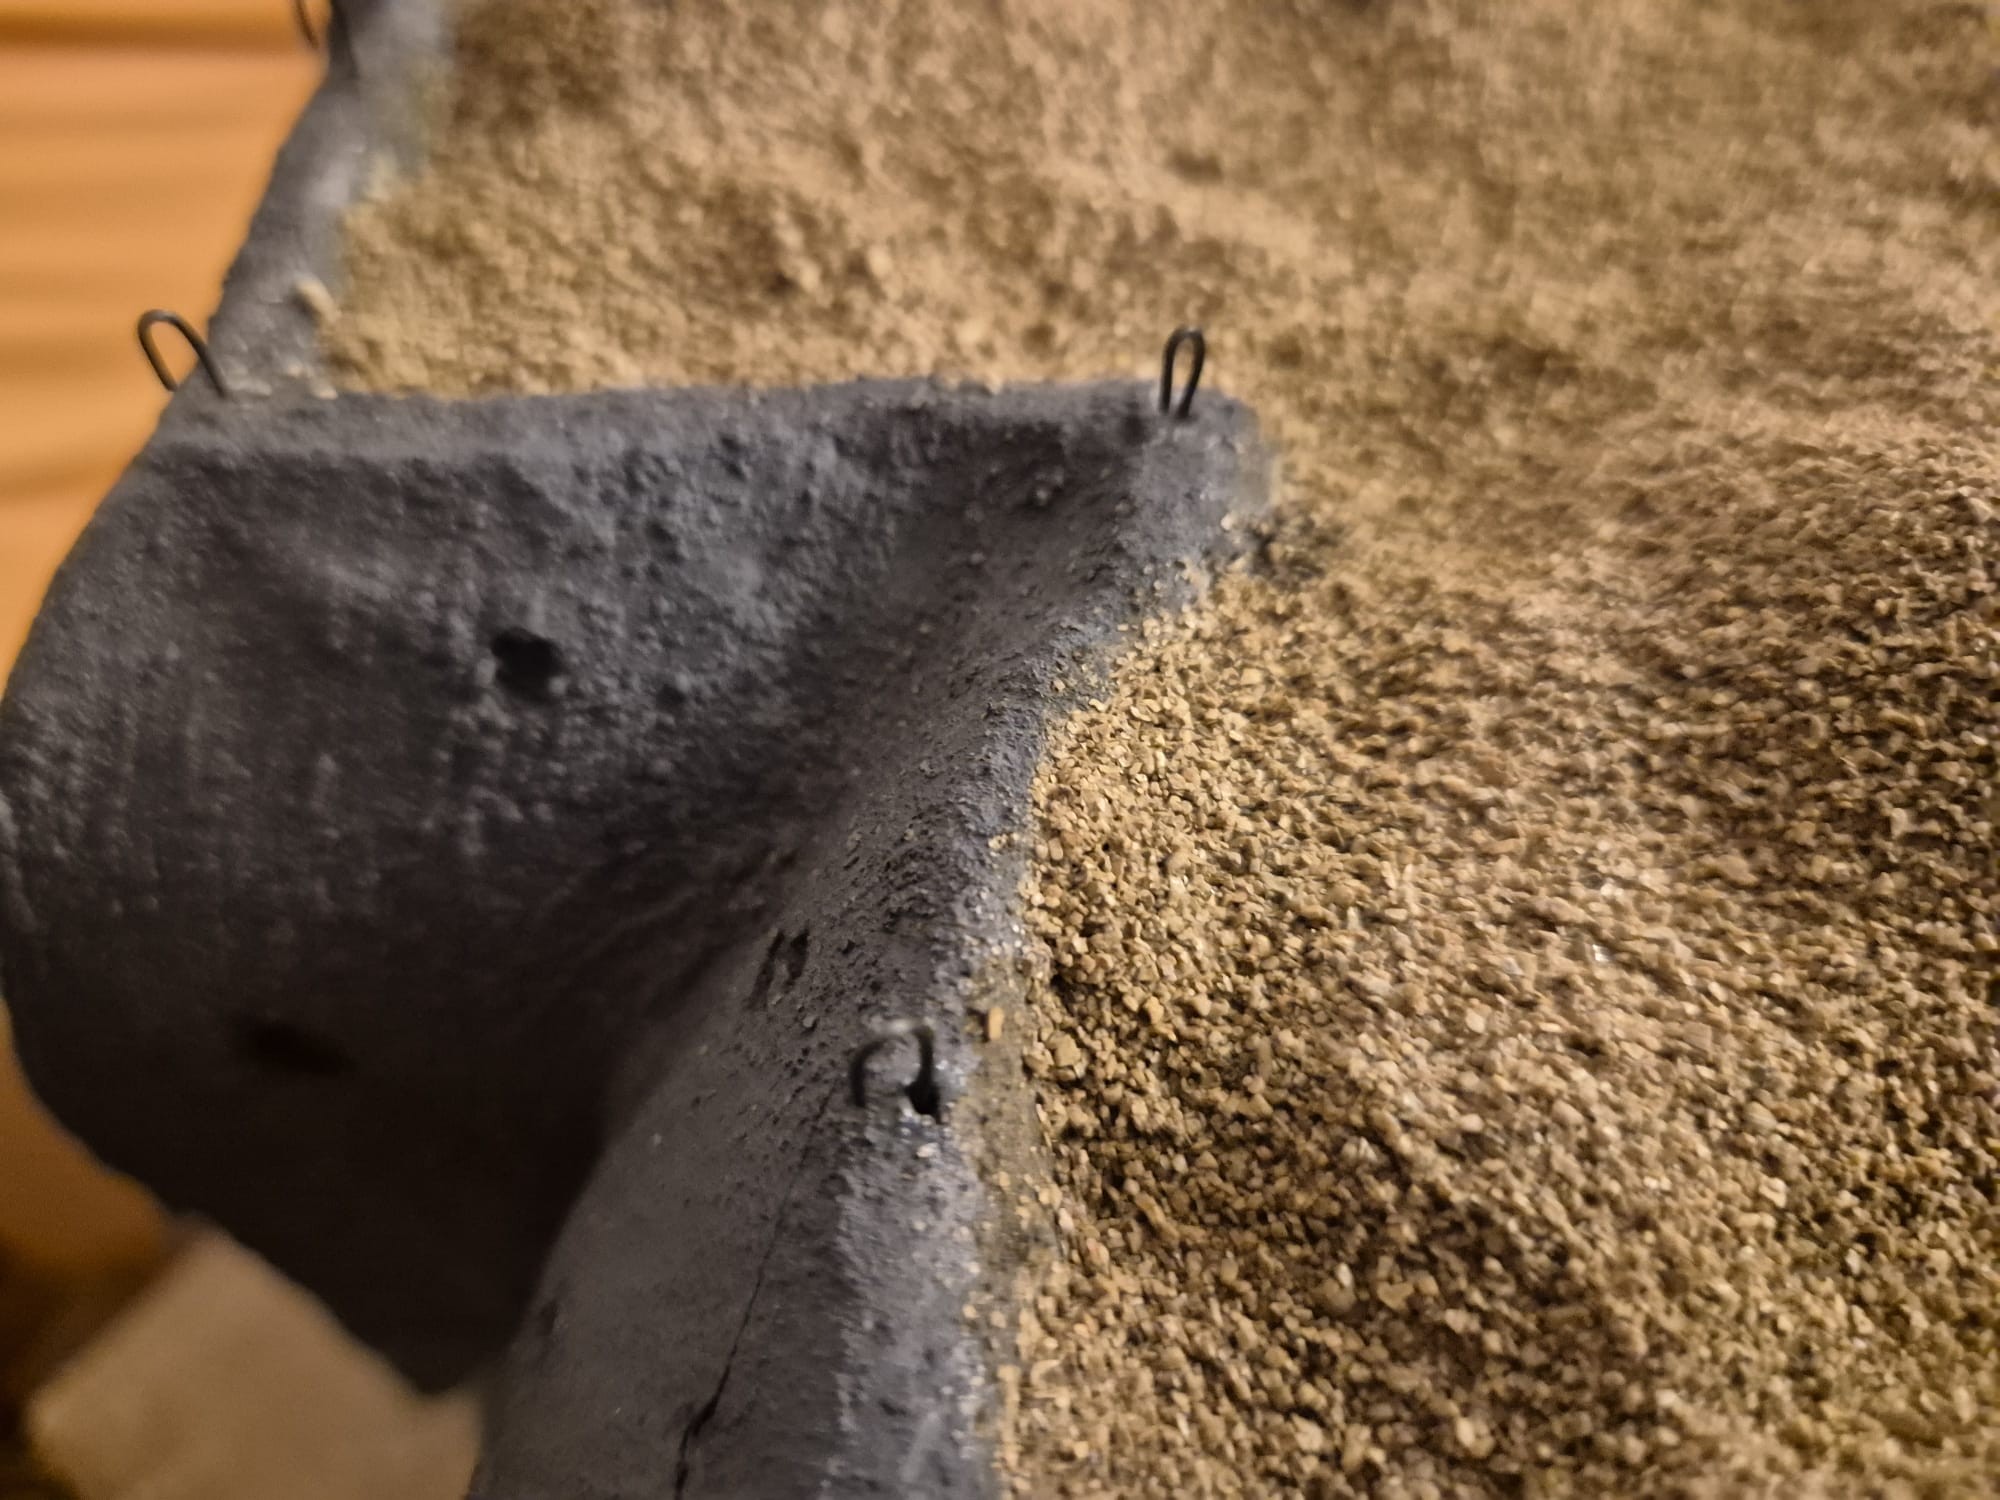
Suddenly, one of the segments of the protection wall came loose all by itself, and that’s where that crack, you can see in the following picture, happened.
Nothing else was either damaged or distorted, only that now, when I open the roof it opens in a different way, but nevertheless I will need to fix it in some ways so that it won’t look like a crack, but rather like another segment of the protection wall, perhaps a teensy weensy shorter than the rest.
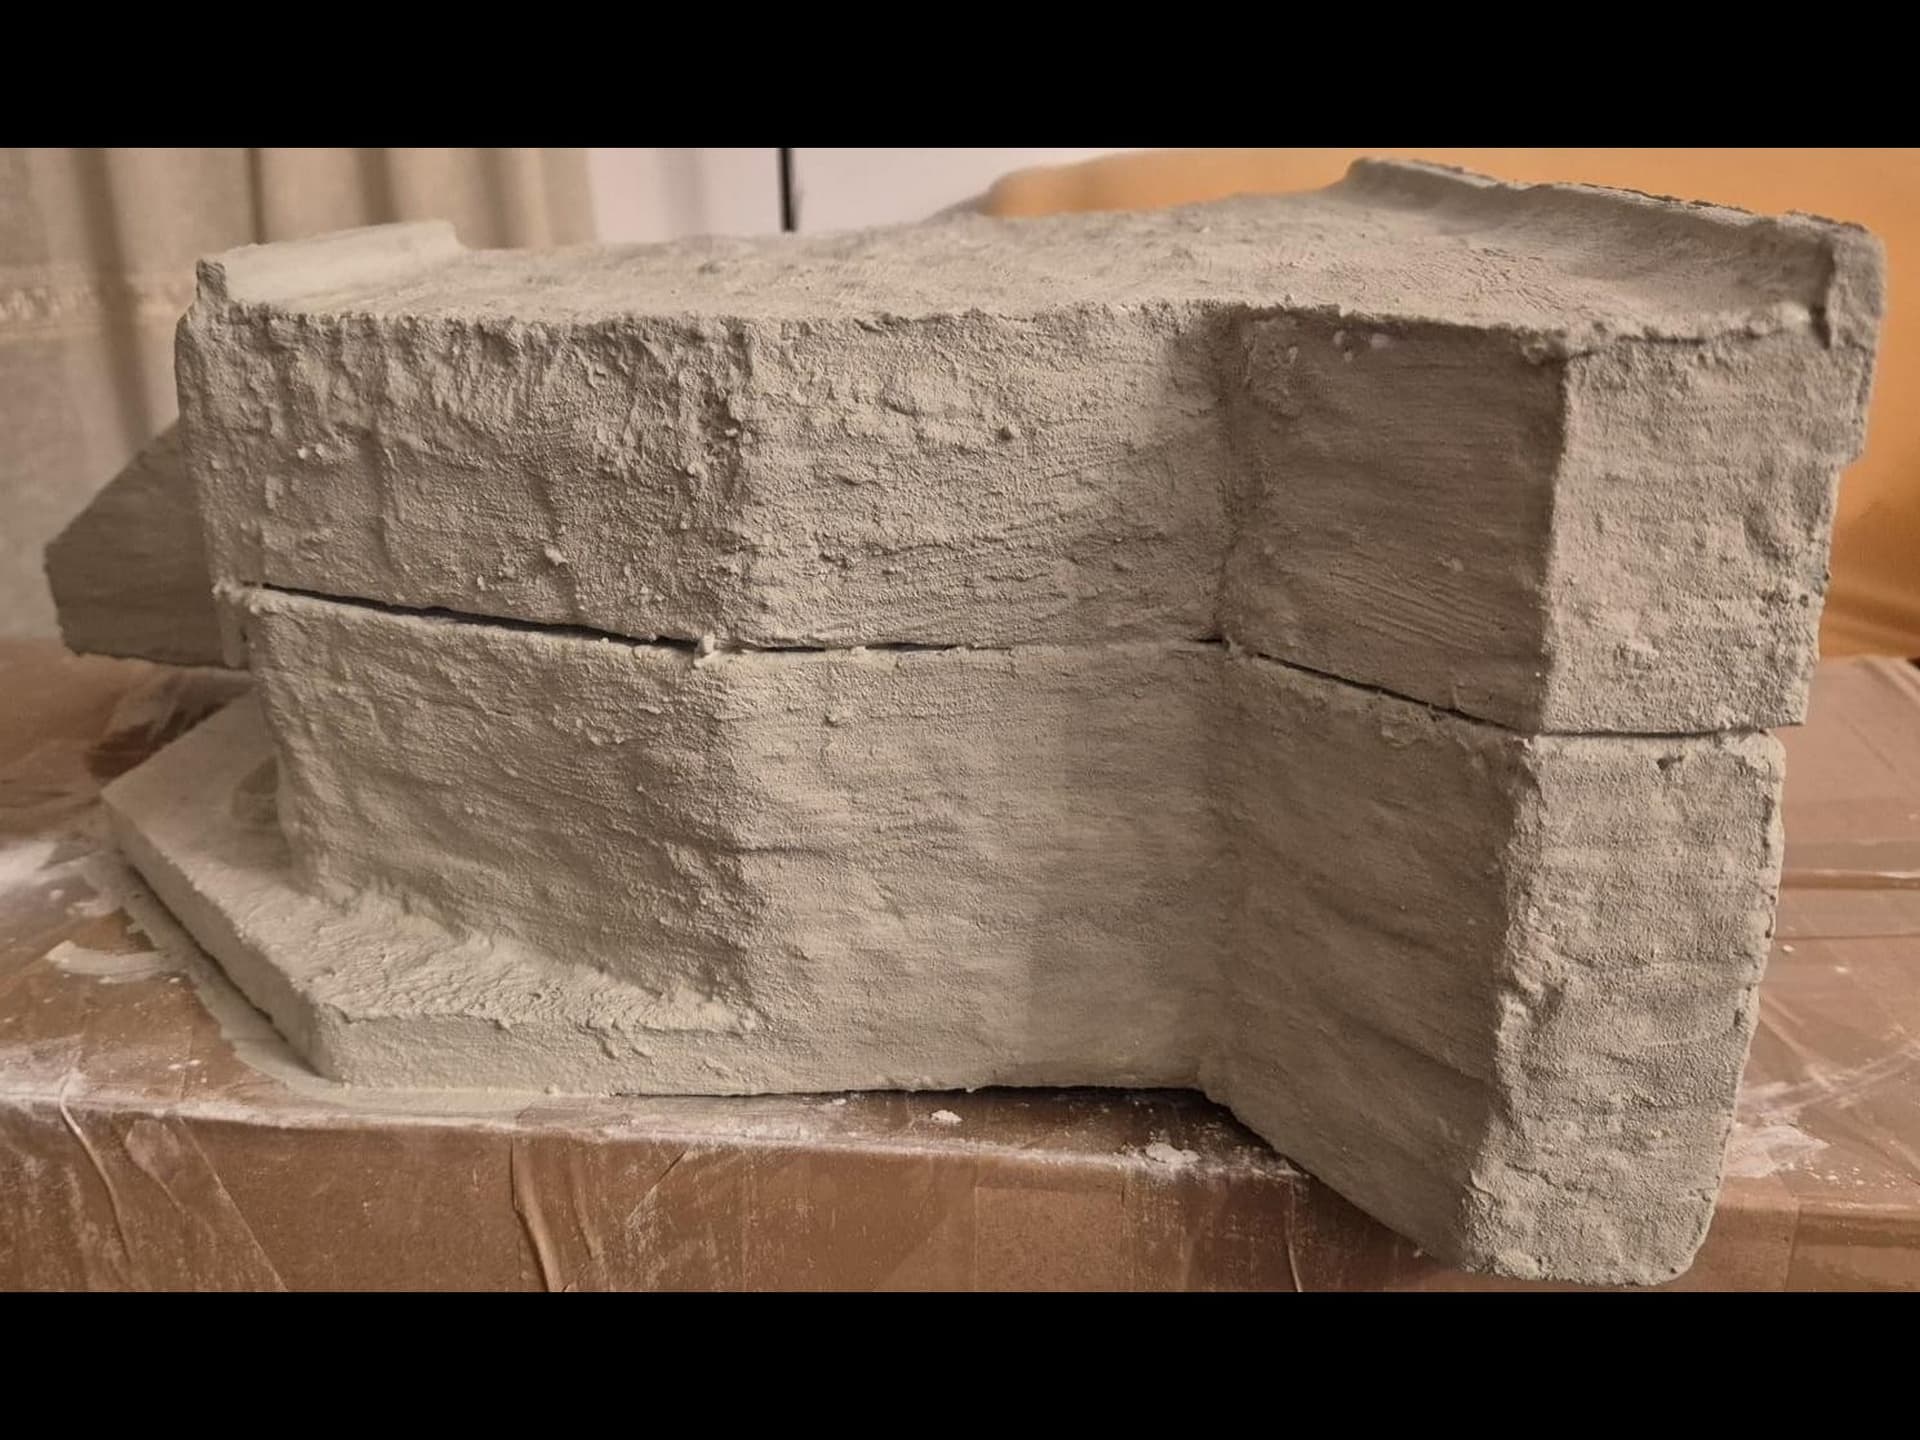
And here is the picture of the closed Bunker, On its right side you may spot the Naval Bunker at Longues-sur-Mer which still needs more details to be applied. But that’s for the future…
Please note that I have already proceeded with the interior cover of acrylic concrete and I will show you the open bunker so modified in a later post, since I am still working on it for some minor details to be applied.
Be well and and remember to always cheer up when you handle your models, 'cause they are all precious. ![]()
PS: I gave up on the parapets, since I found an actual documentation that shows that those prescribed in the original plans were never applied in Normandy, meaning those arched into the roof.
Only straight small parapets were set on top, exactly as those that can actually be seen in current pictures online (although those have been reconstructed according to their former ones).
Good to know because I attempted various ways to reproduce the arched ones without completely succeeding in doing them correctly in scale.
So, those you see are those that were actually fixed to the R677 in Normandy late in 1943.
1 Like
For today I am pooped and already it is tomorrow.
Well, since I am still up after midnight, I can show you my latest progress.
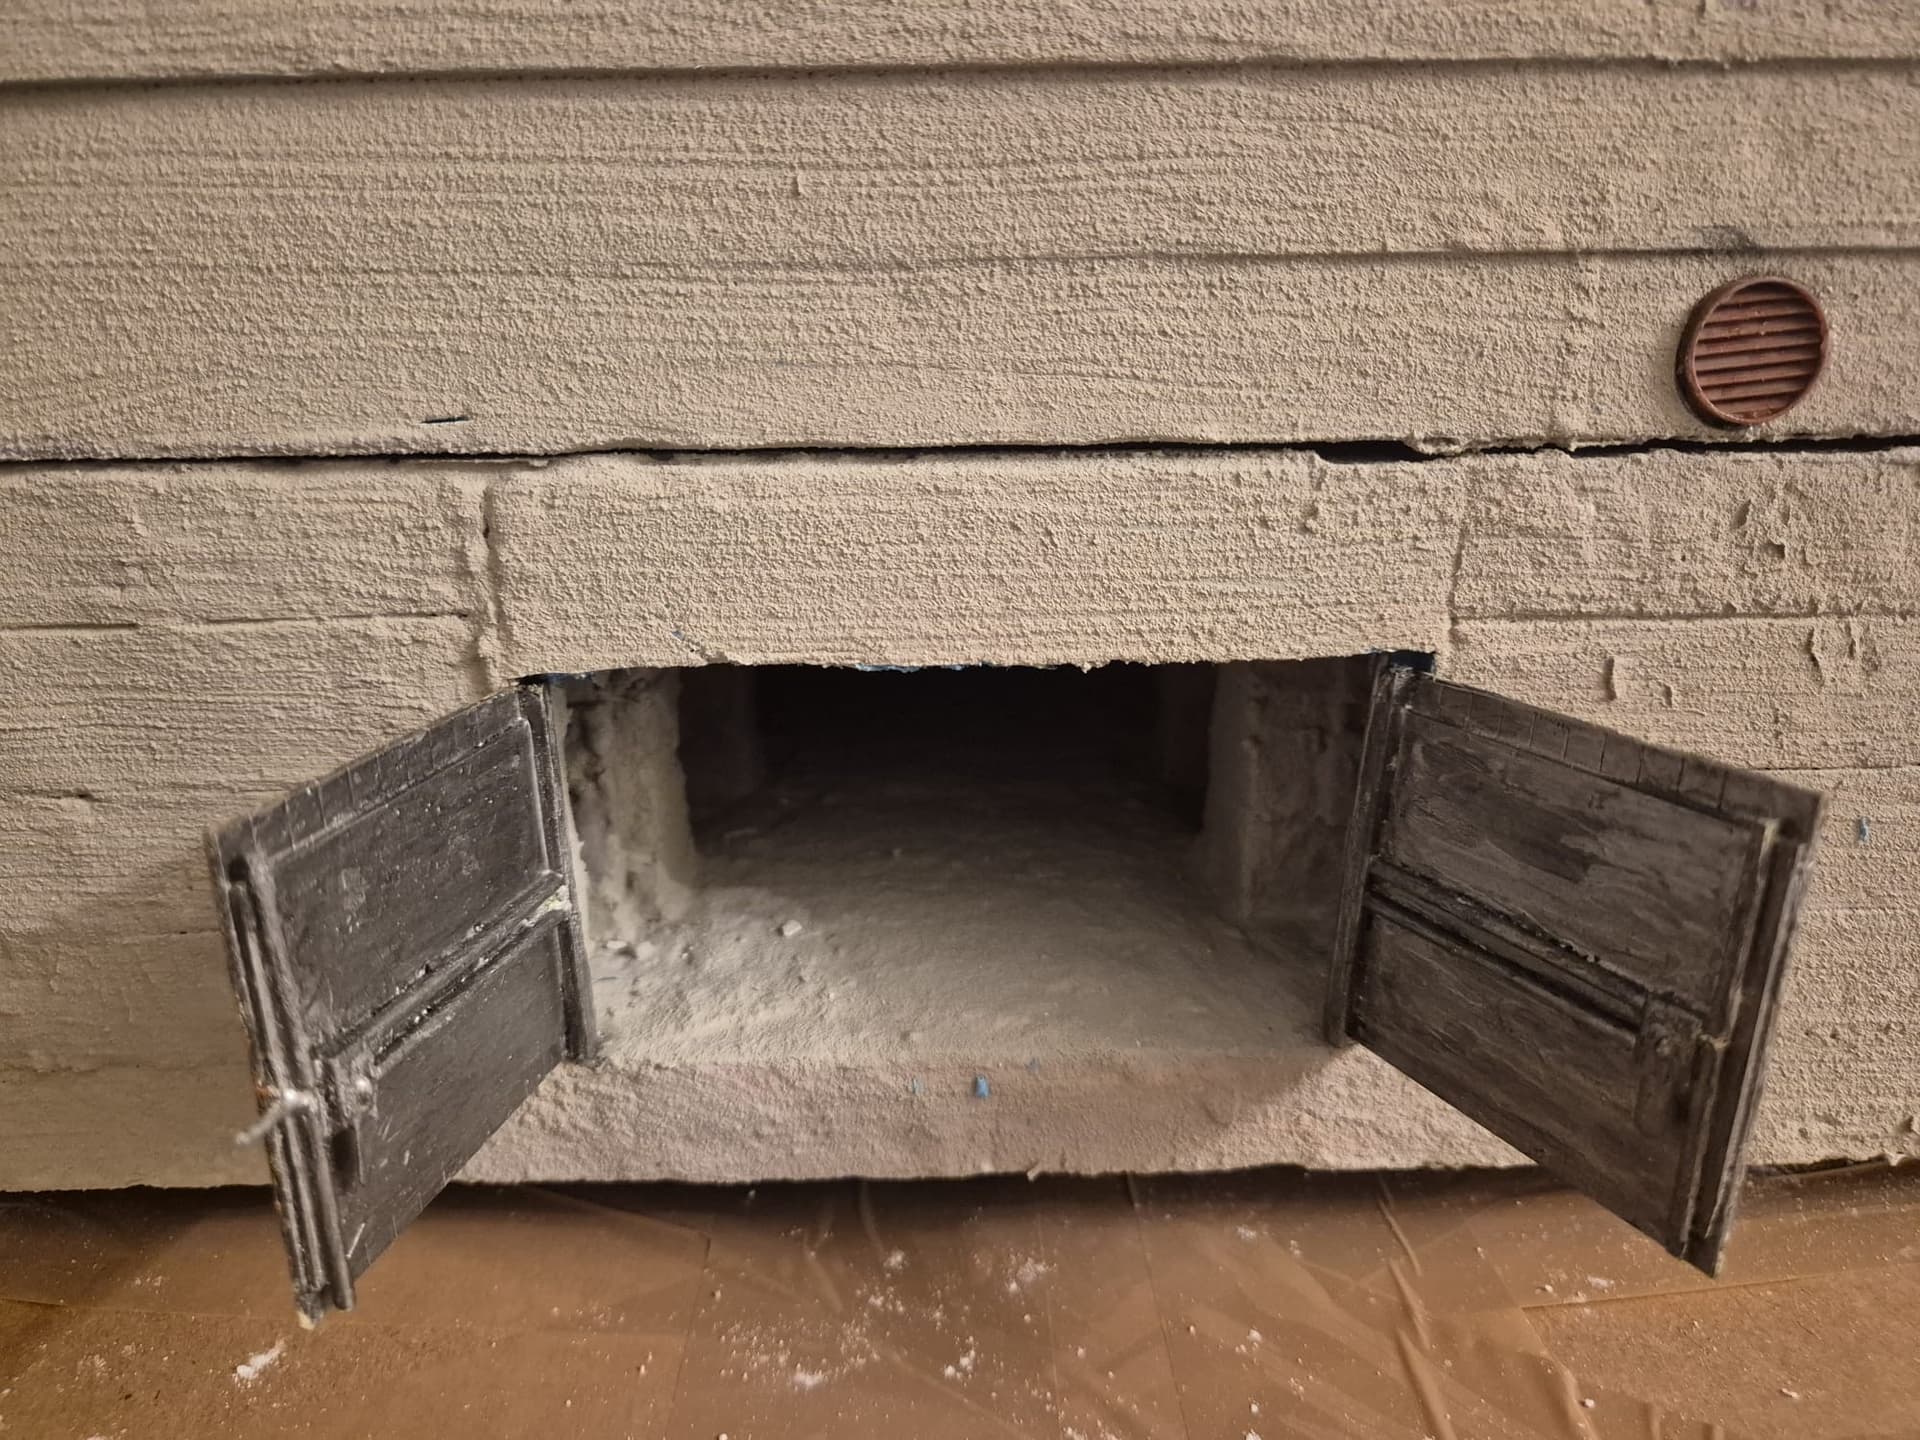
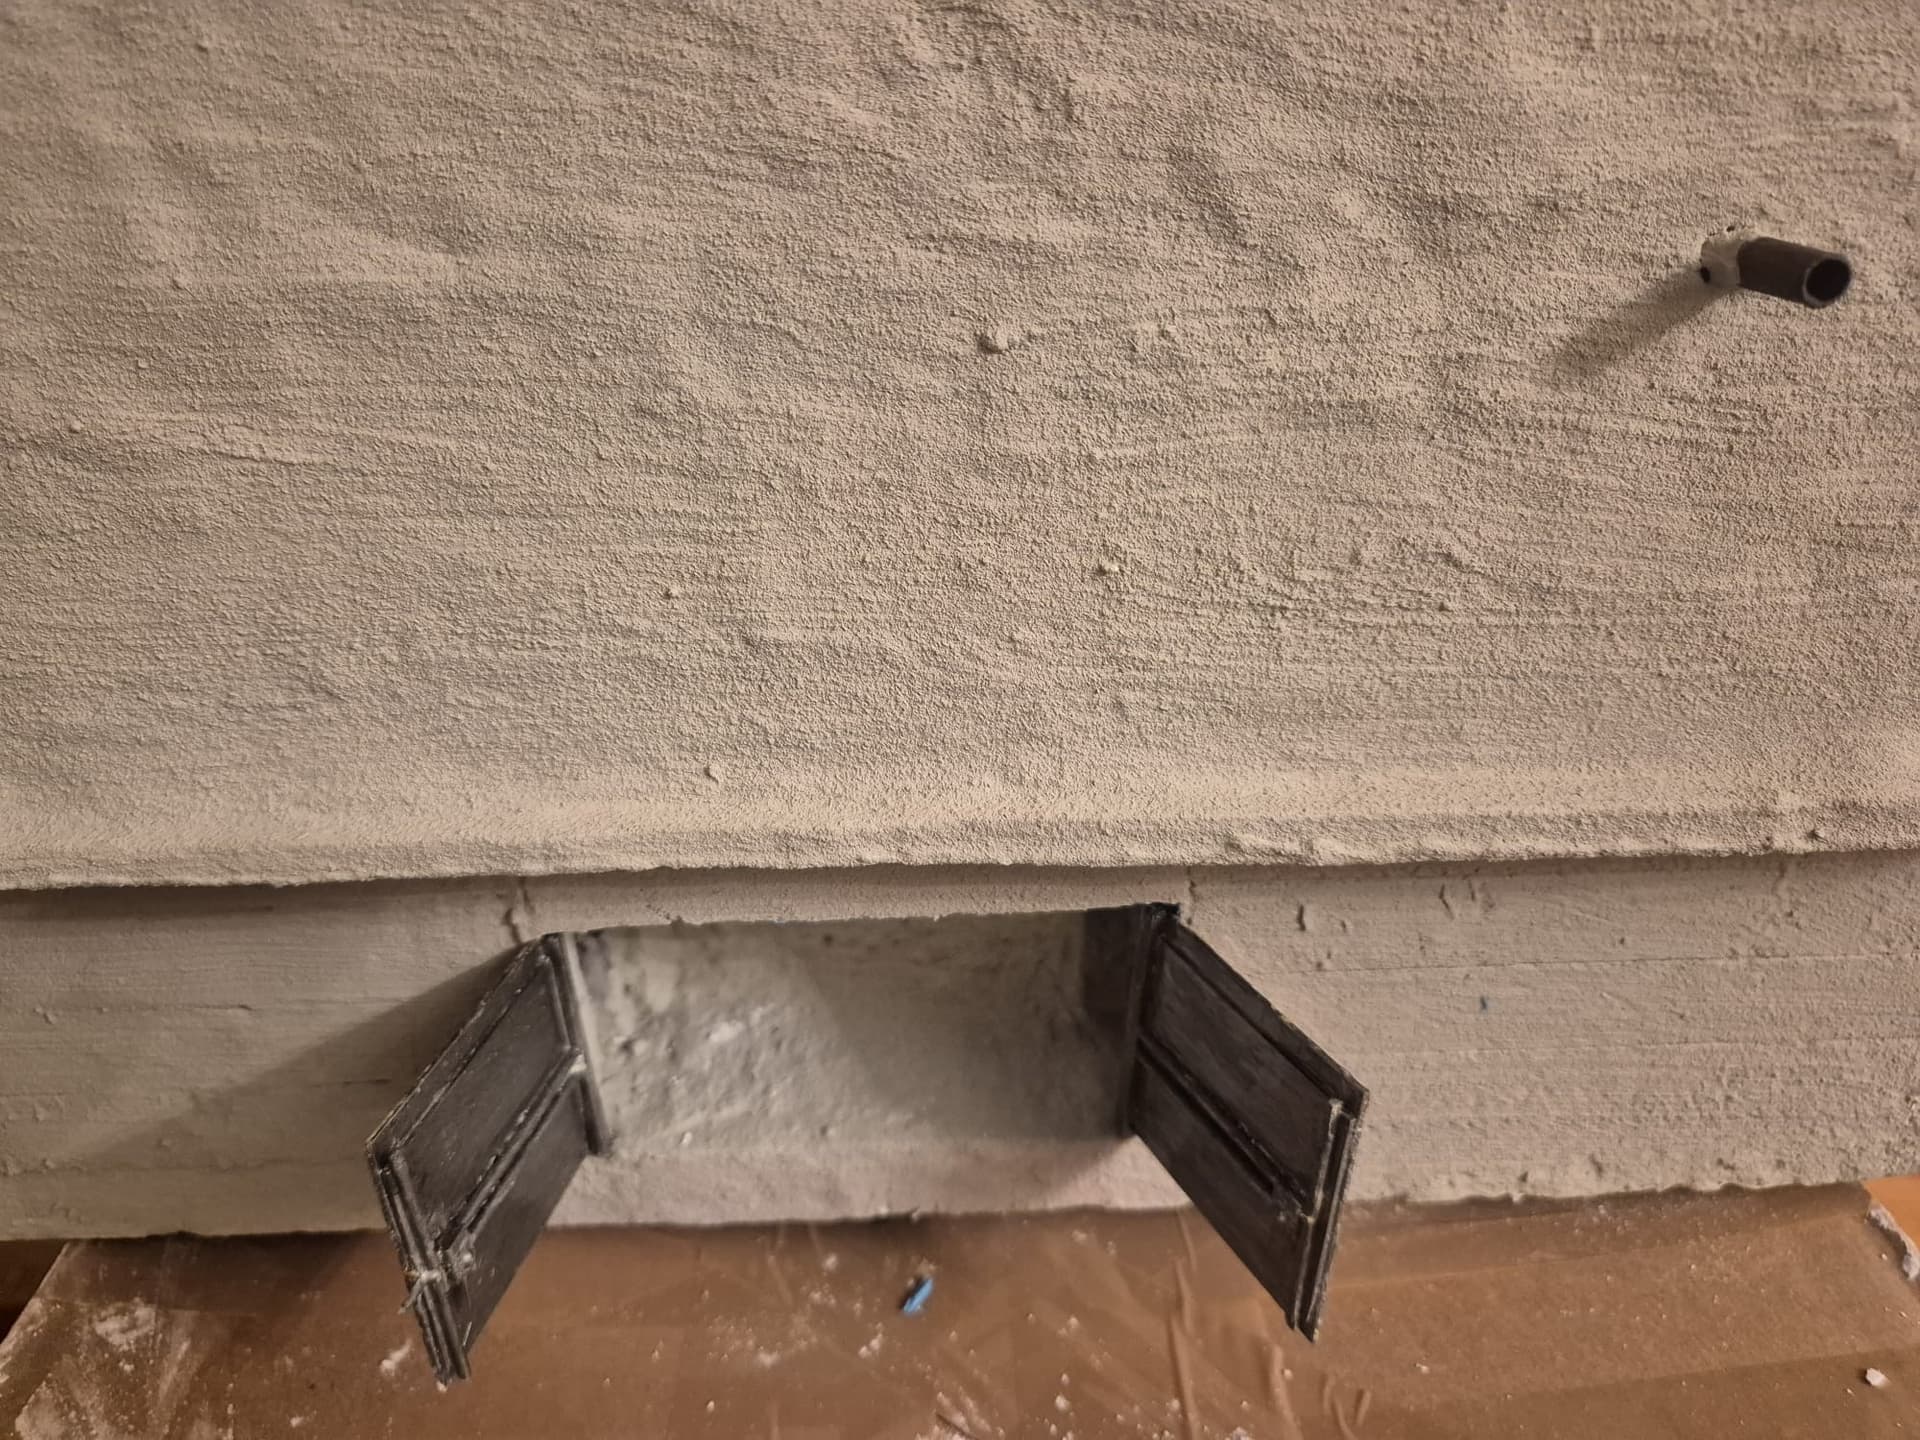
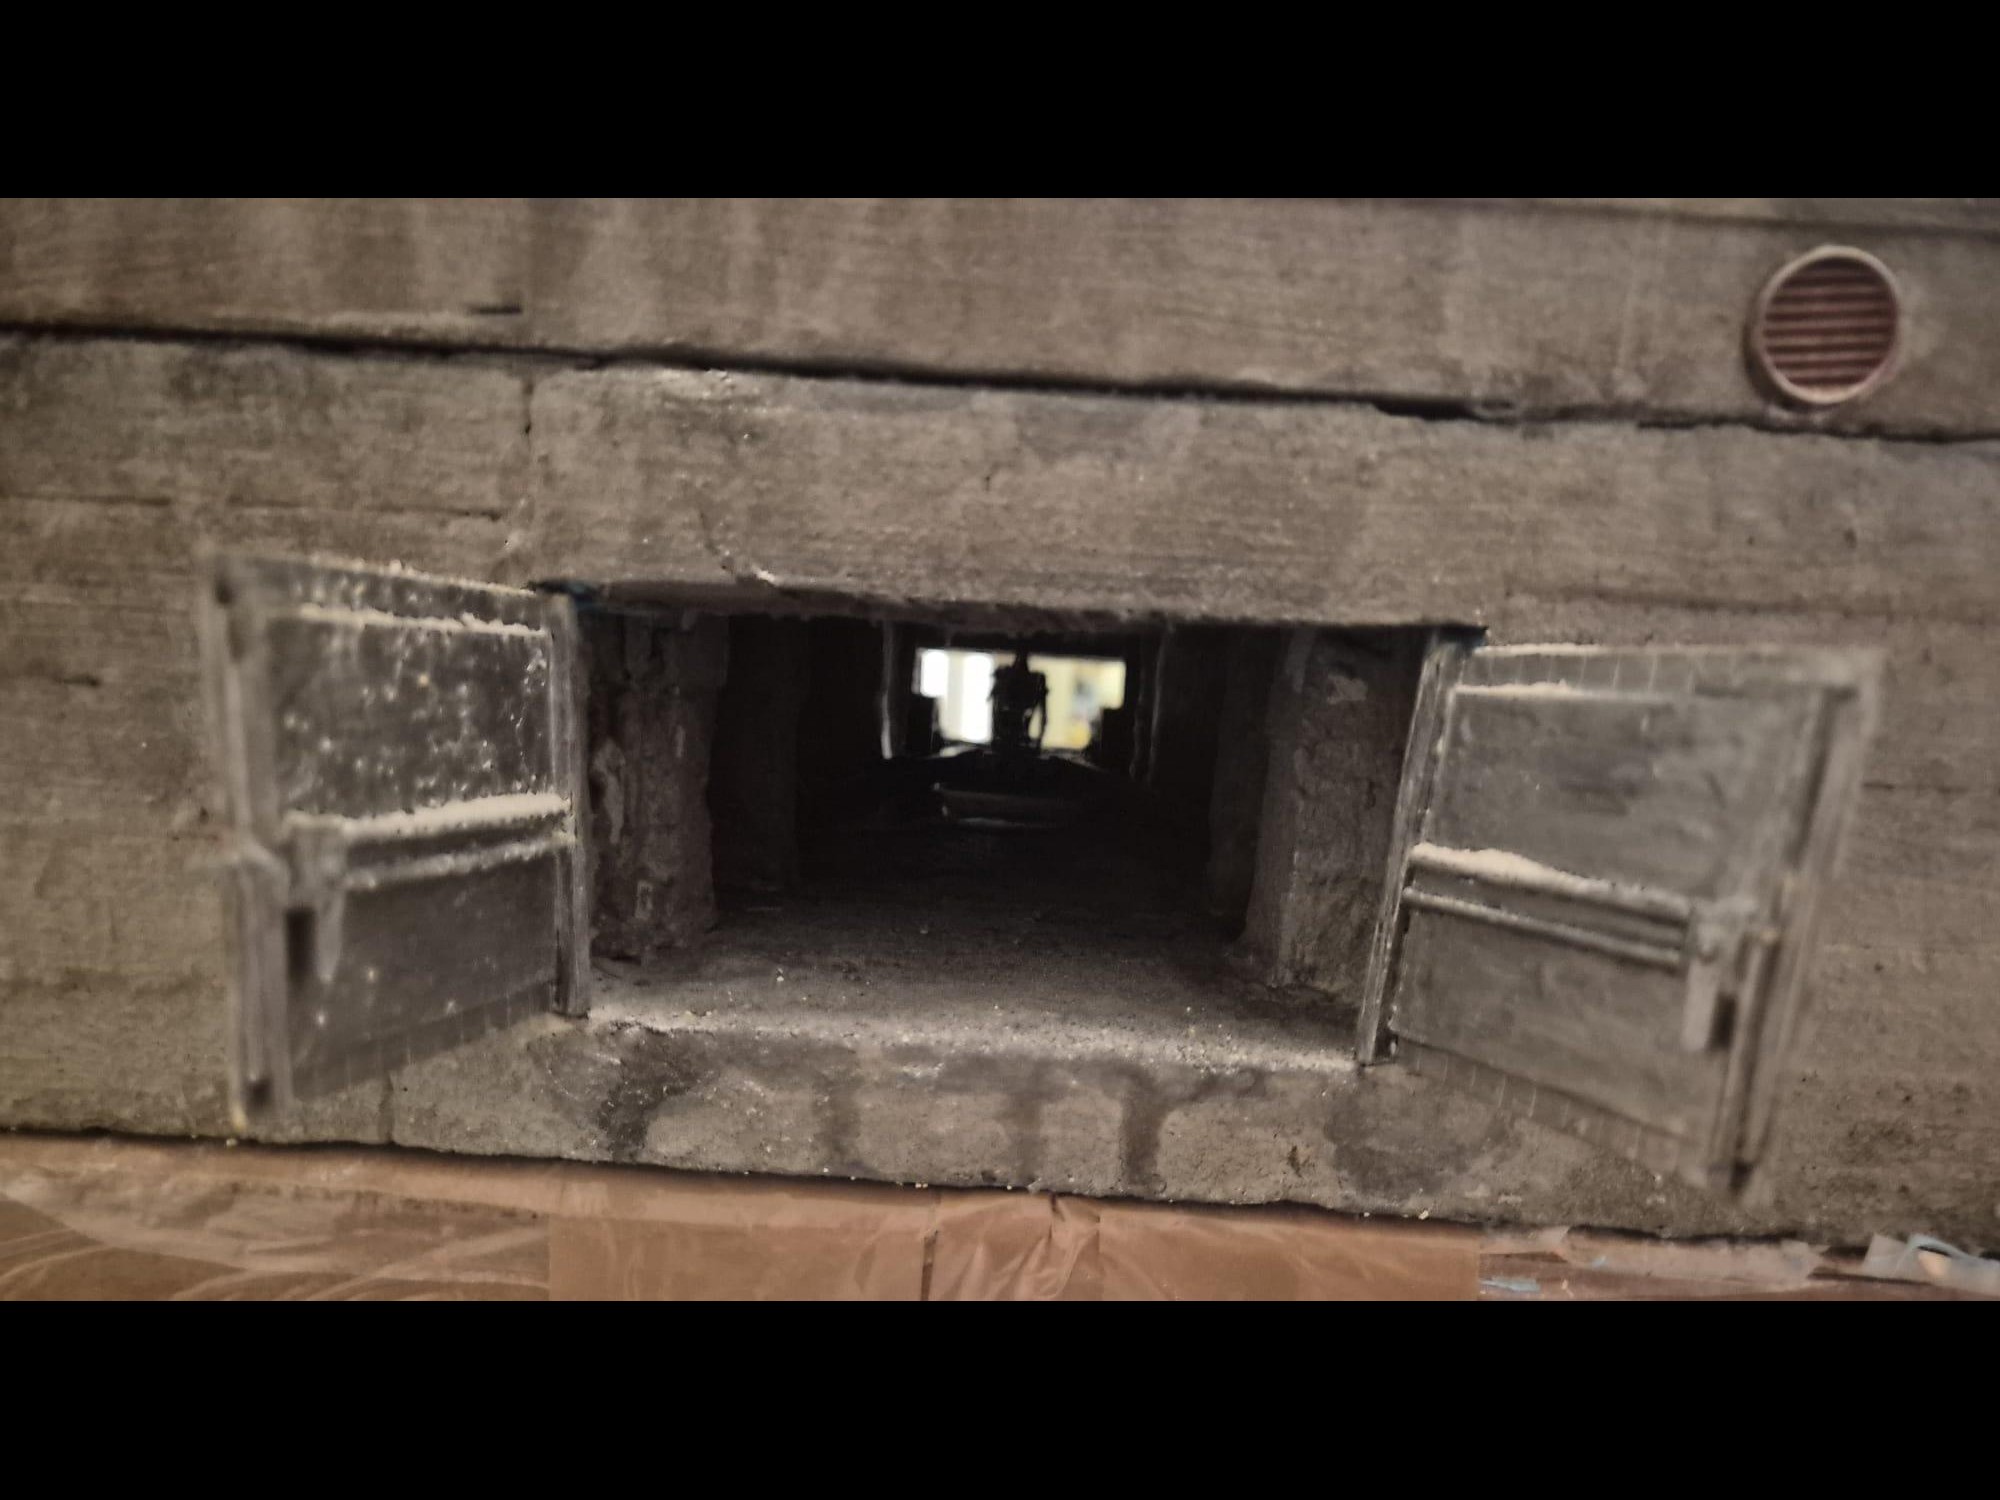
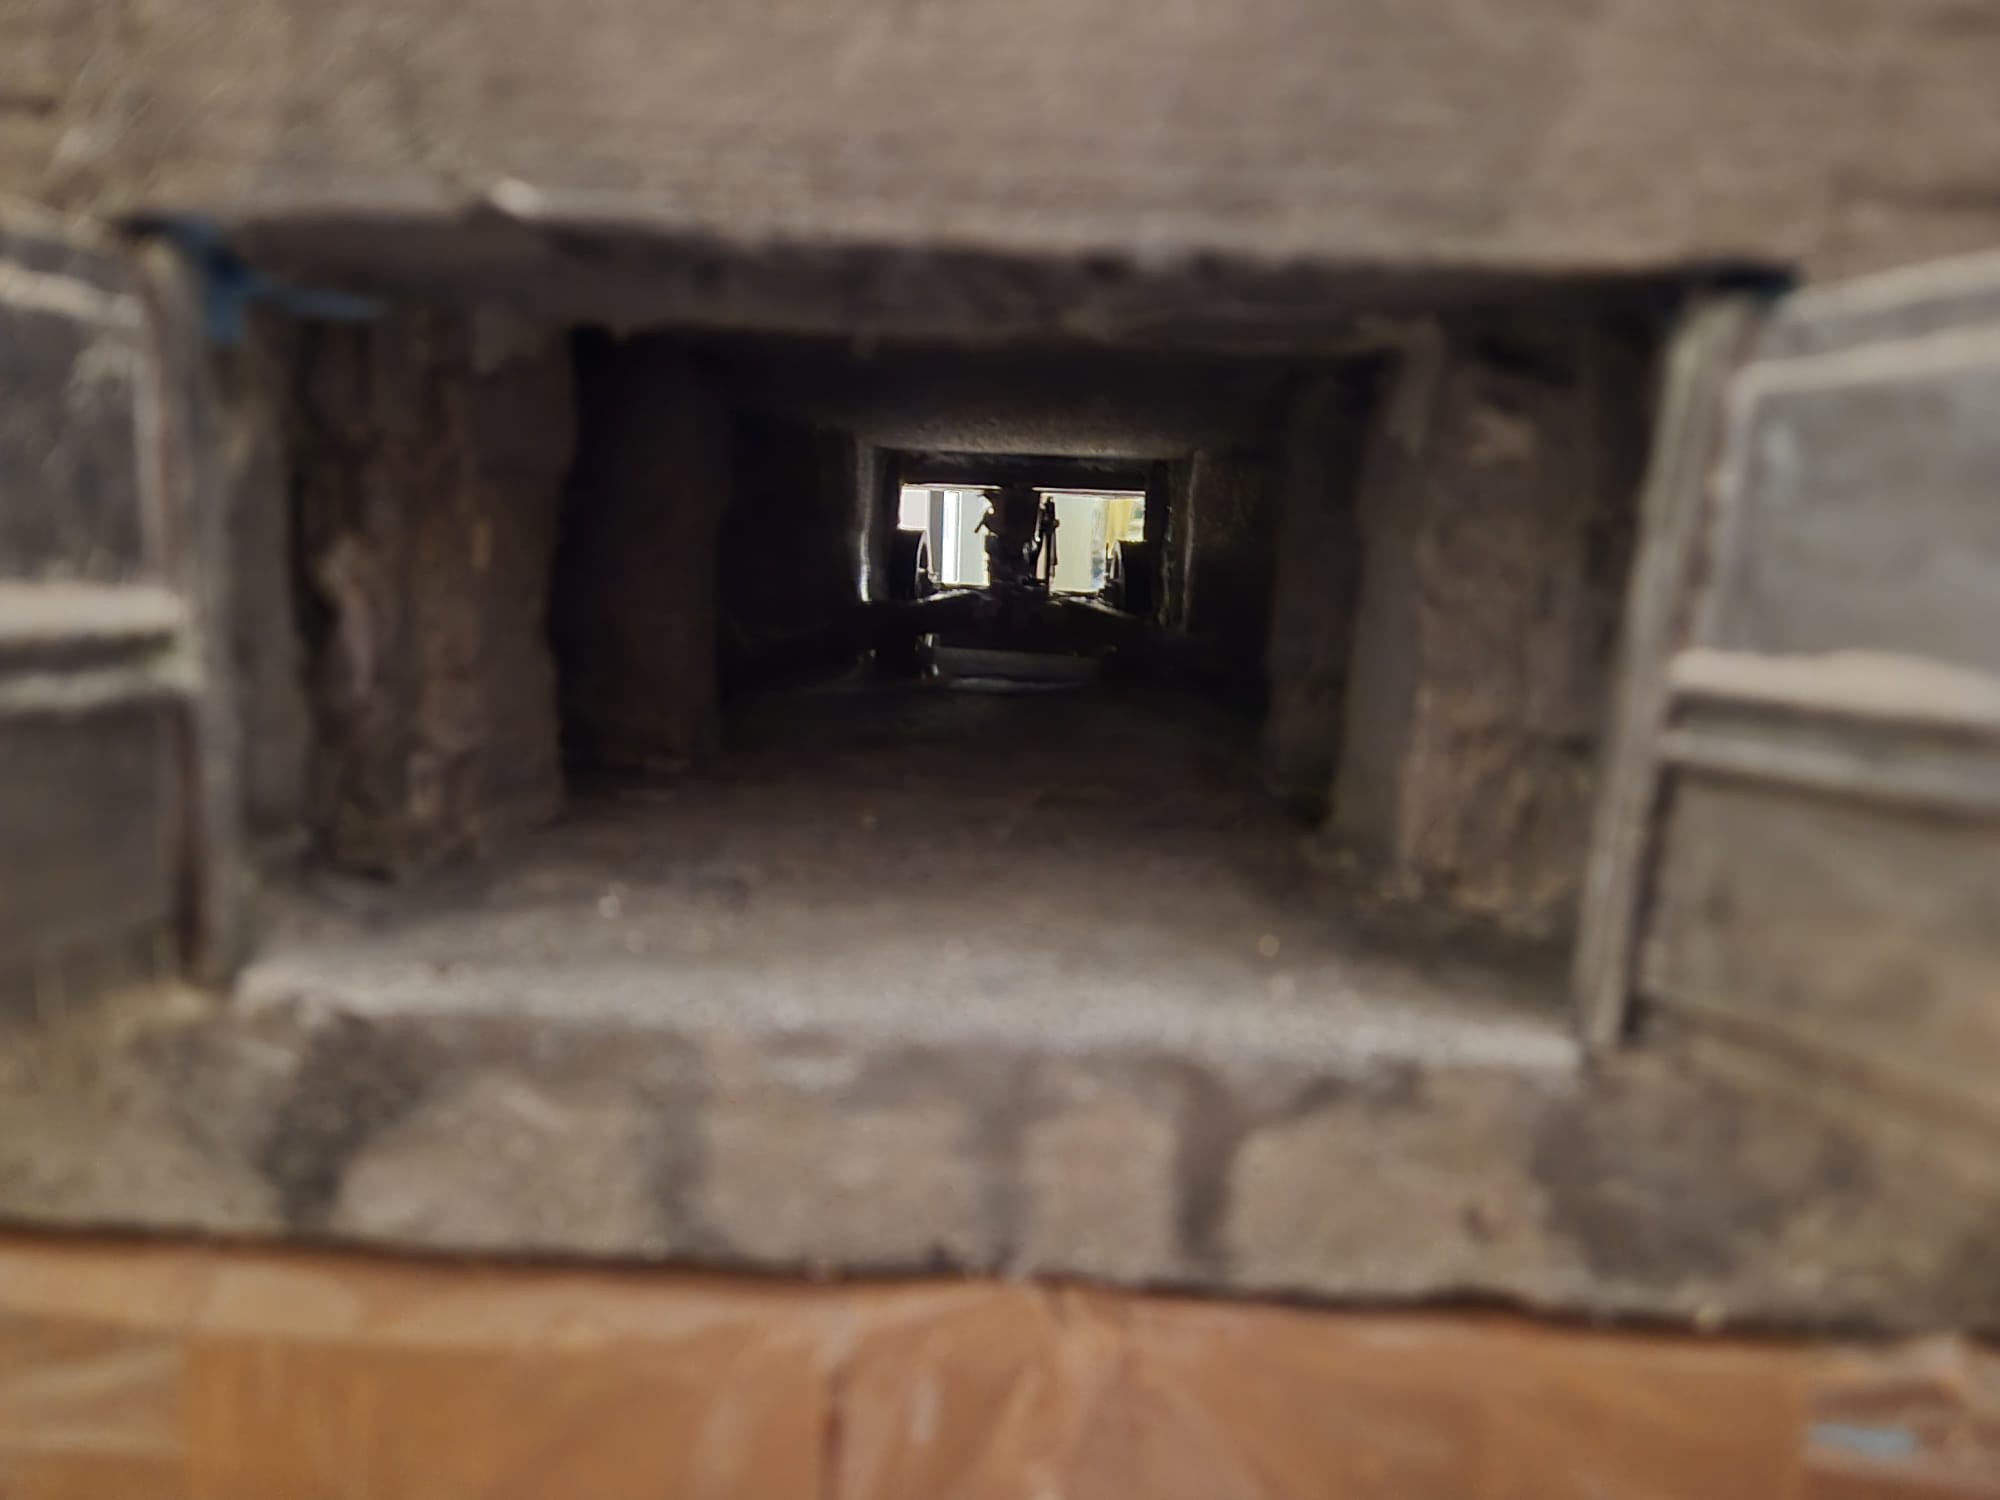
First of all I have finished the Iron doors for the rear entrance to the Bunker.
I studied a few and one in particular jumped immediately in front of my eye and these were the present ones. A rather easy configuration - not common with German bunker constructions - but this appeared to be the most suitable for such a large bunker.
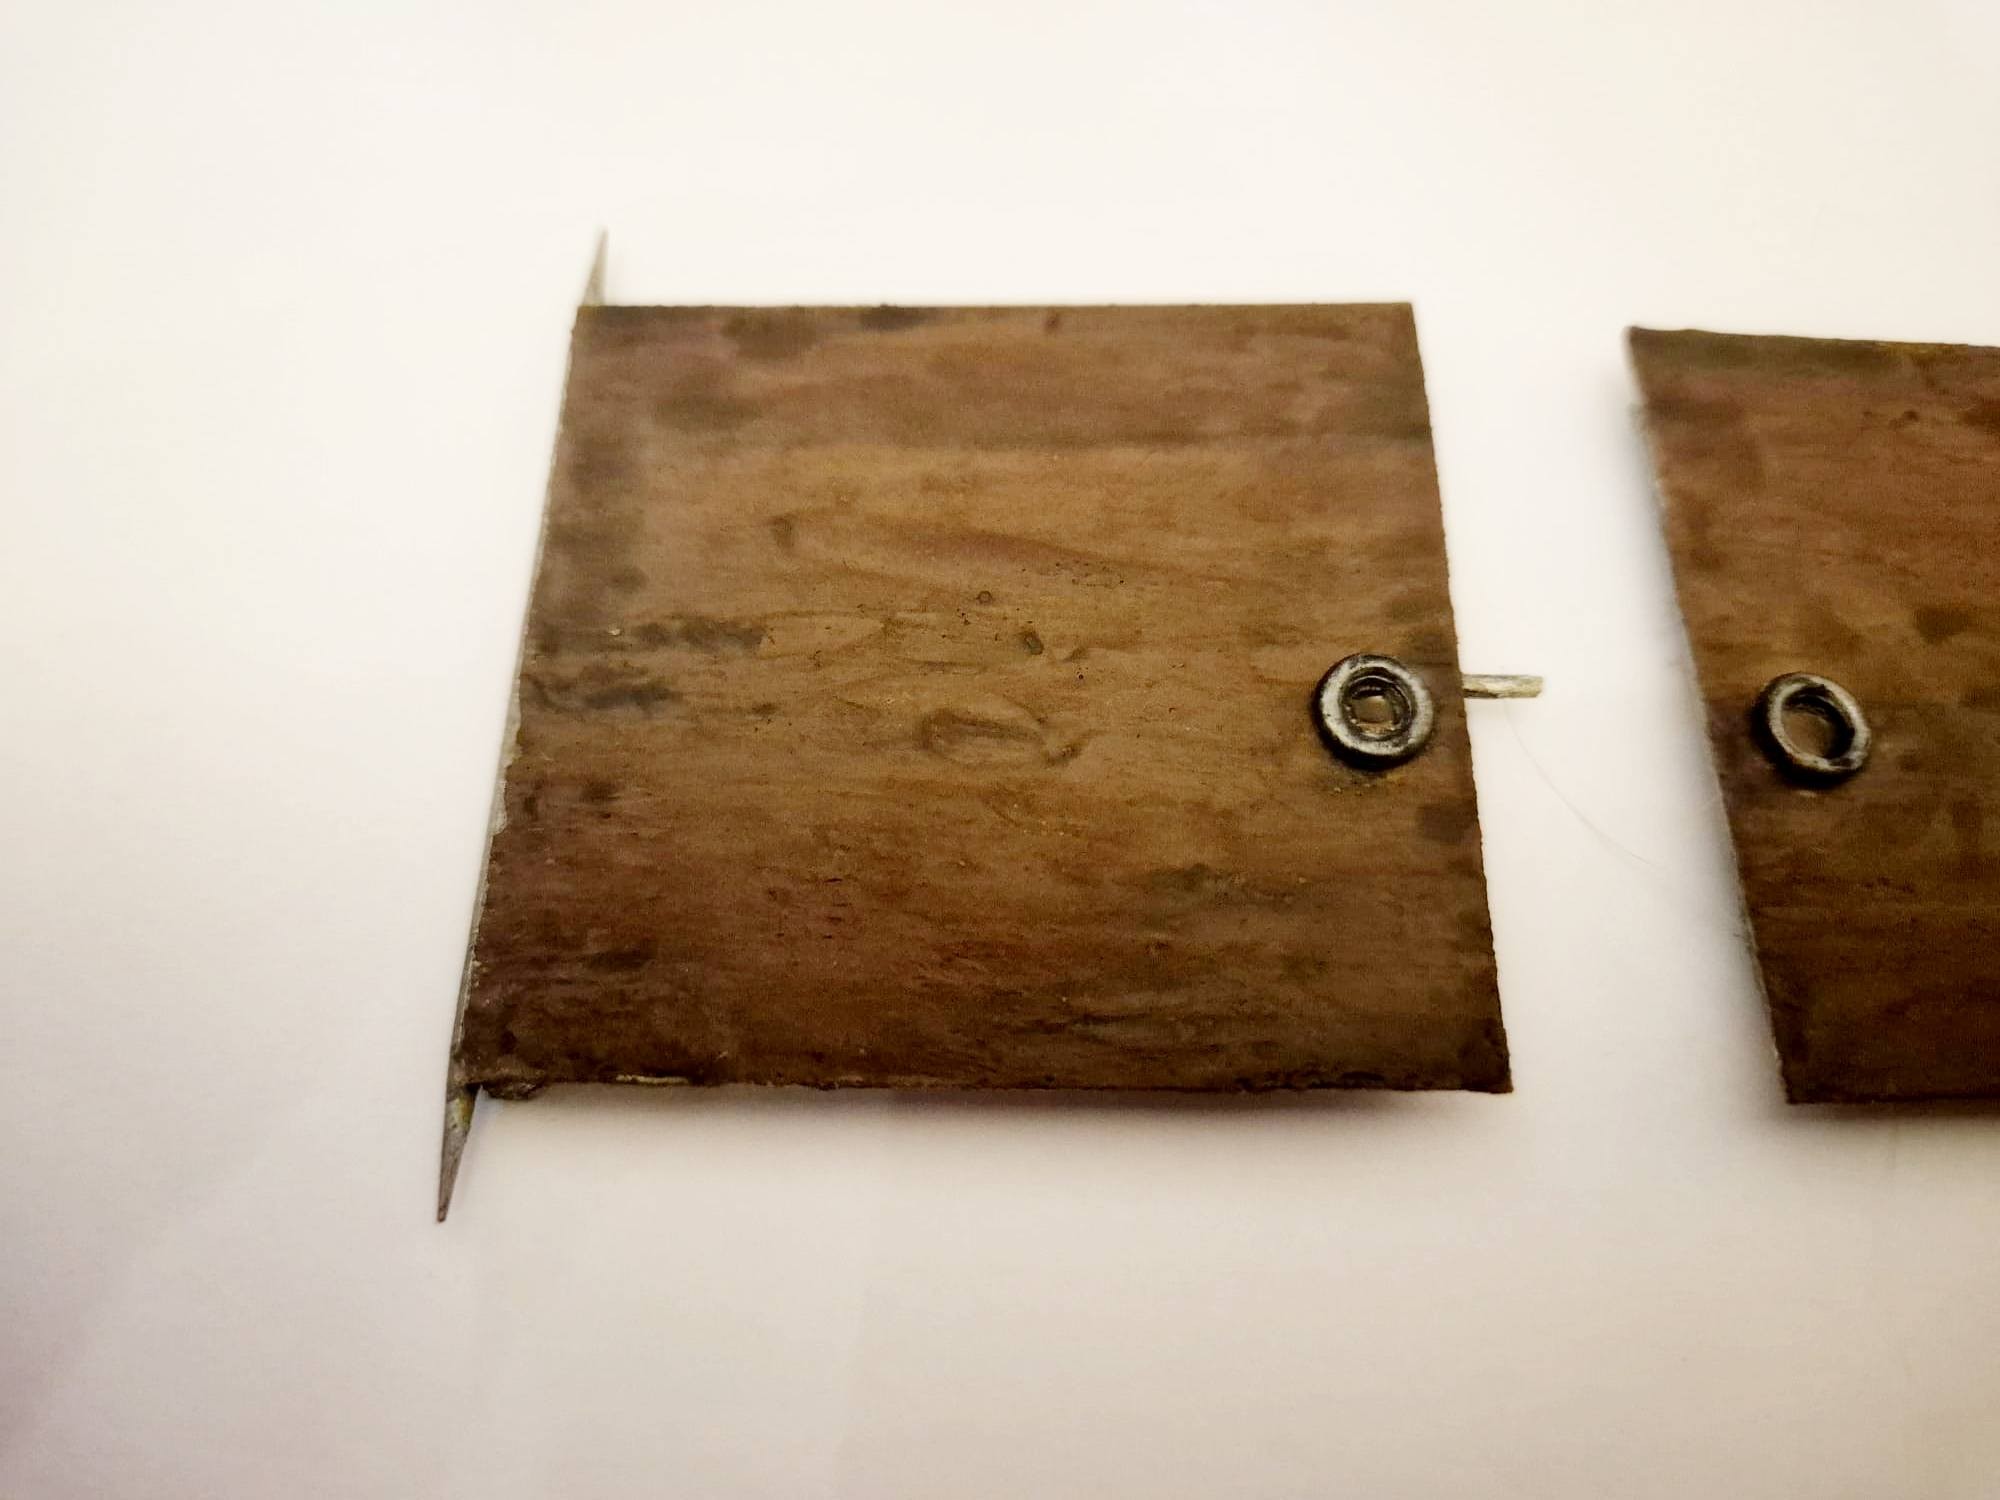
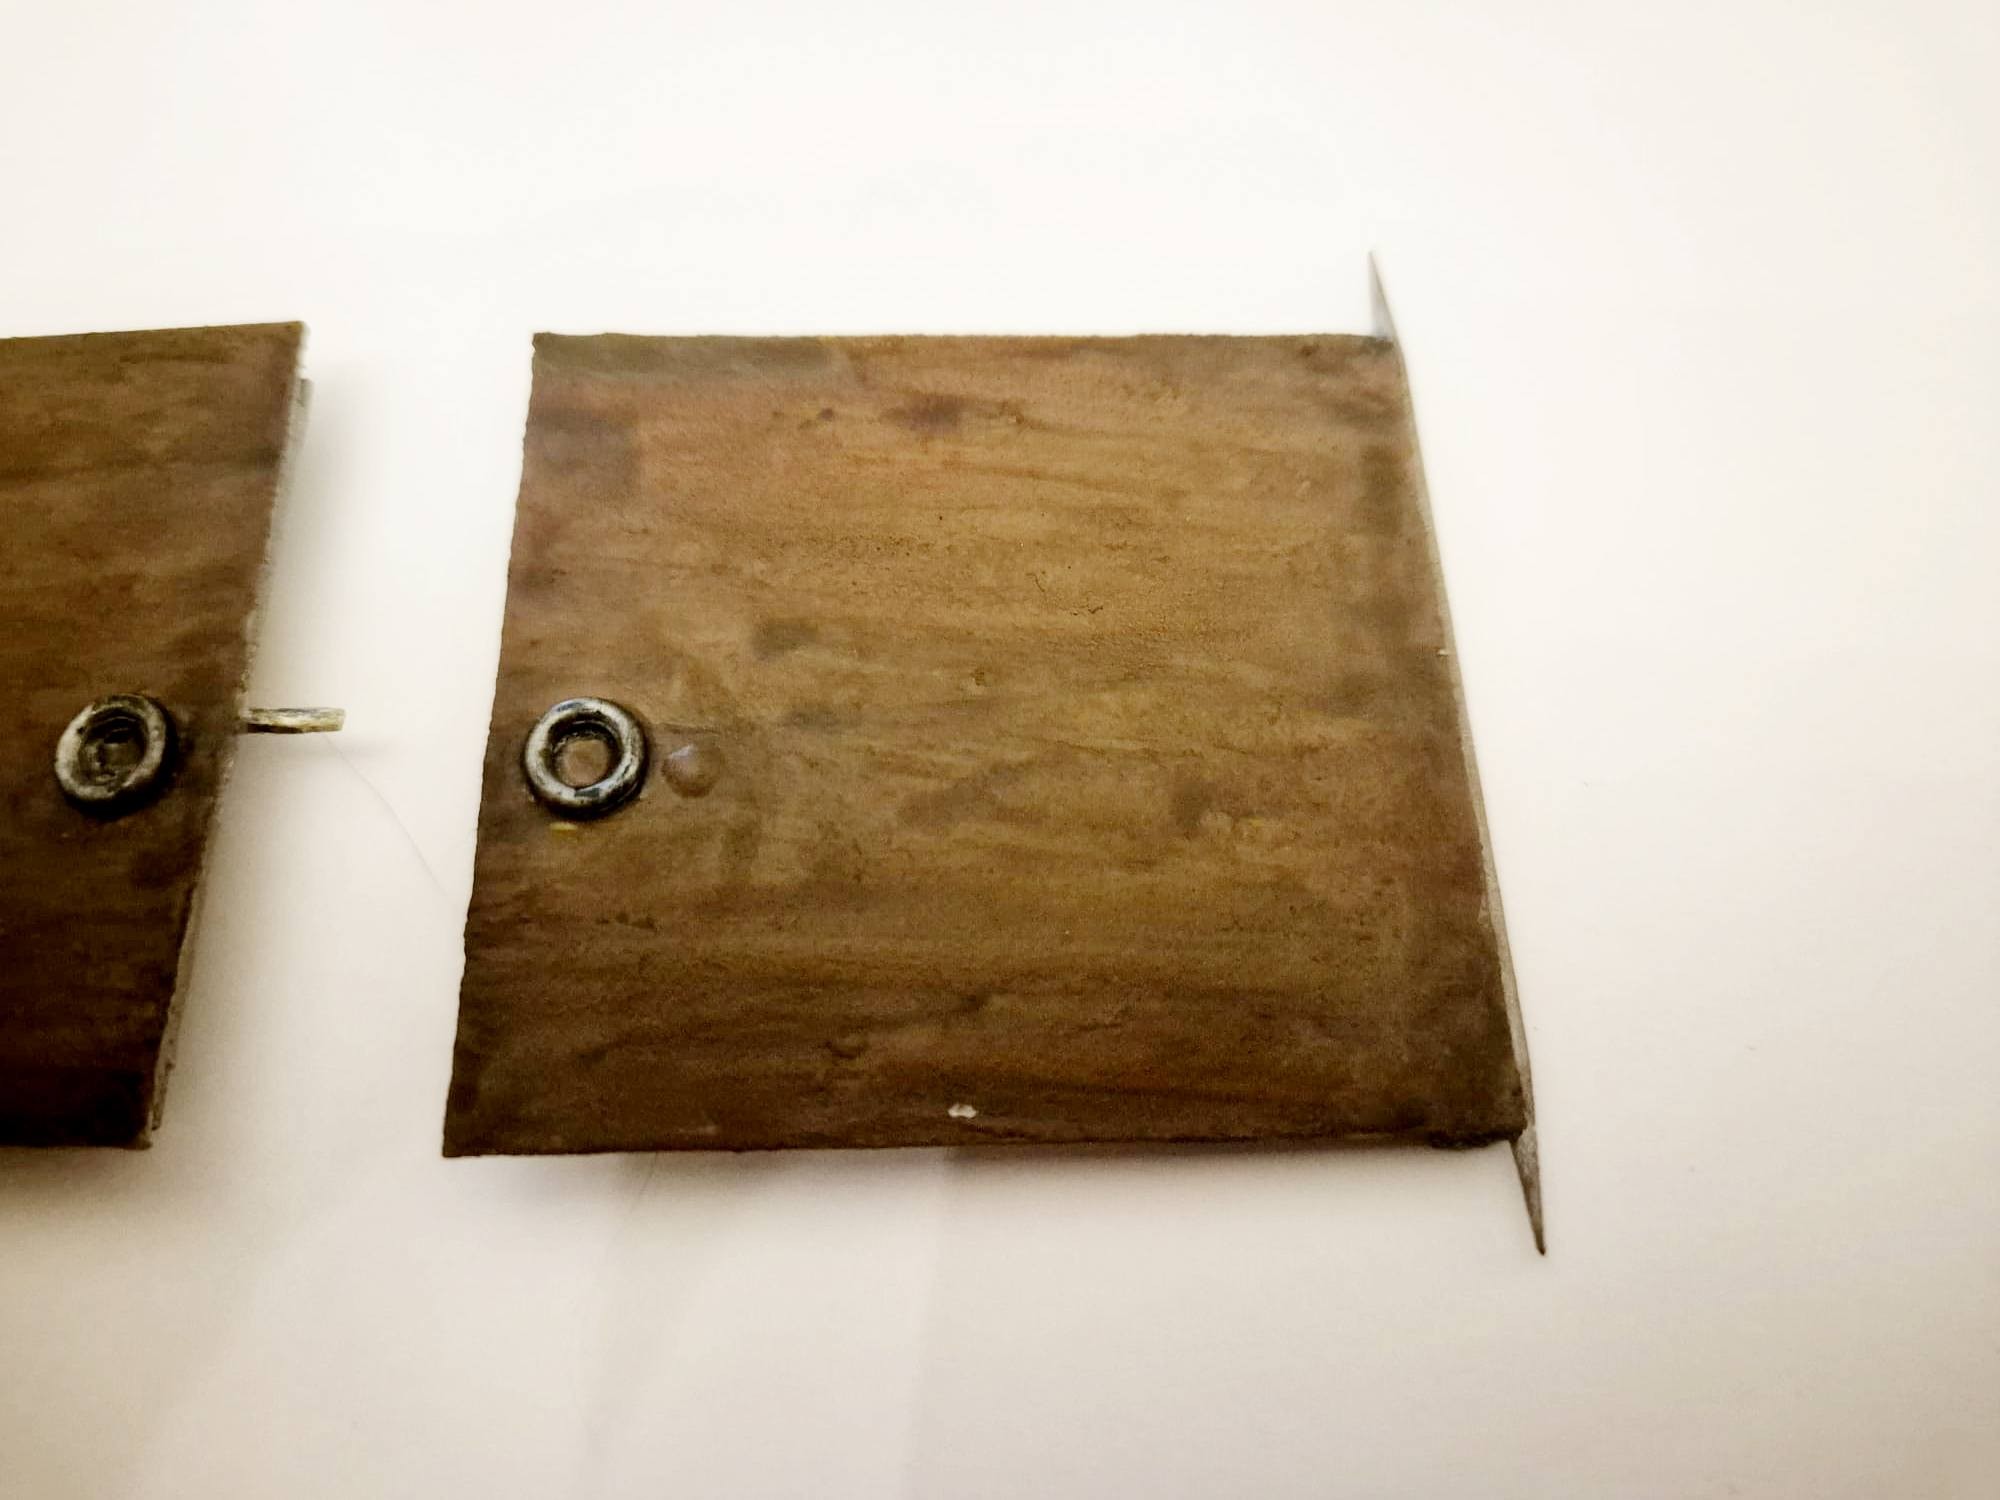
It is one with a dual operation depending on four steel rods interlocking with each other once the doors are shut and only the crew manning it can either open or close them from the inside. On the outside they had two huge rings to help the crew to open them completely, which I replicated with two common washers just painted in gun metal.
As you will see, the outer parts of the doors are in iron and susceptible to be corroded by weather and sea condition, while the interior parts are all in hard steel with levers to activate the four rods to either lock them or open them.
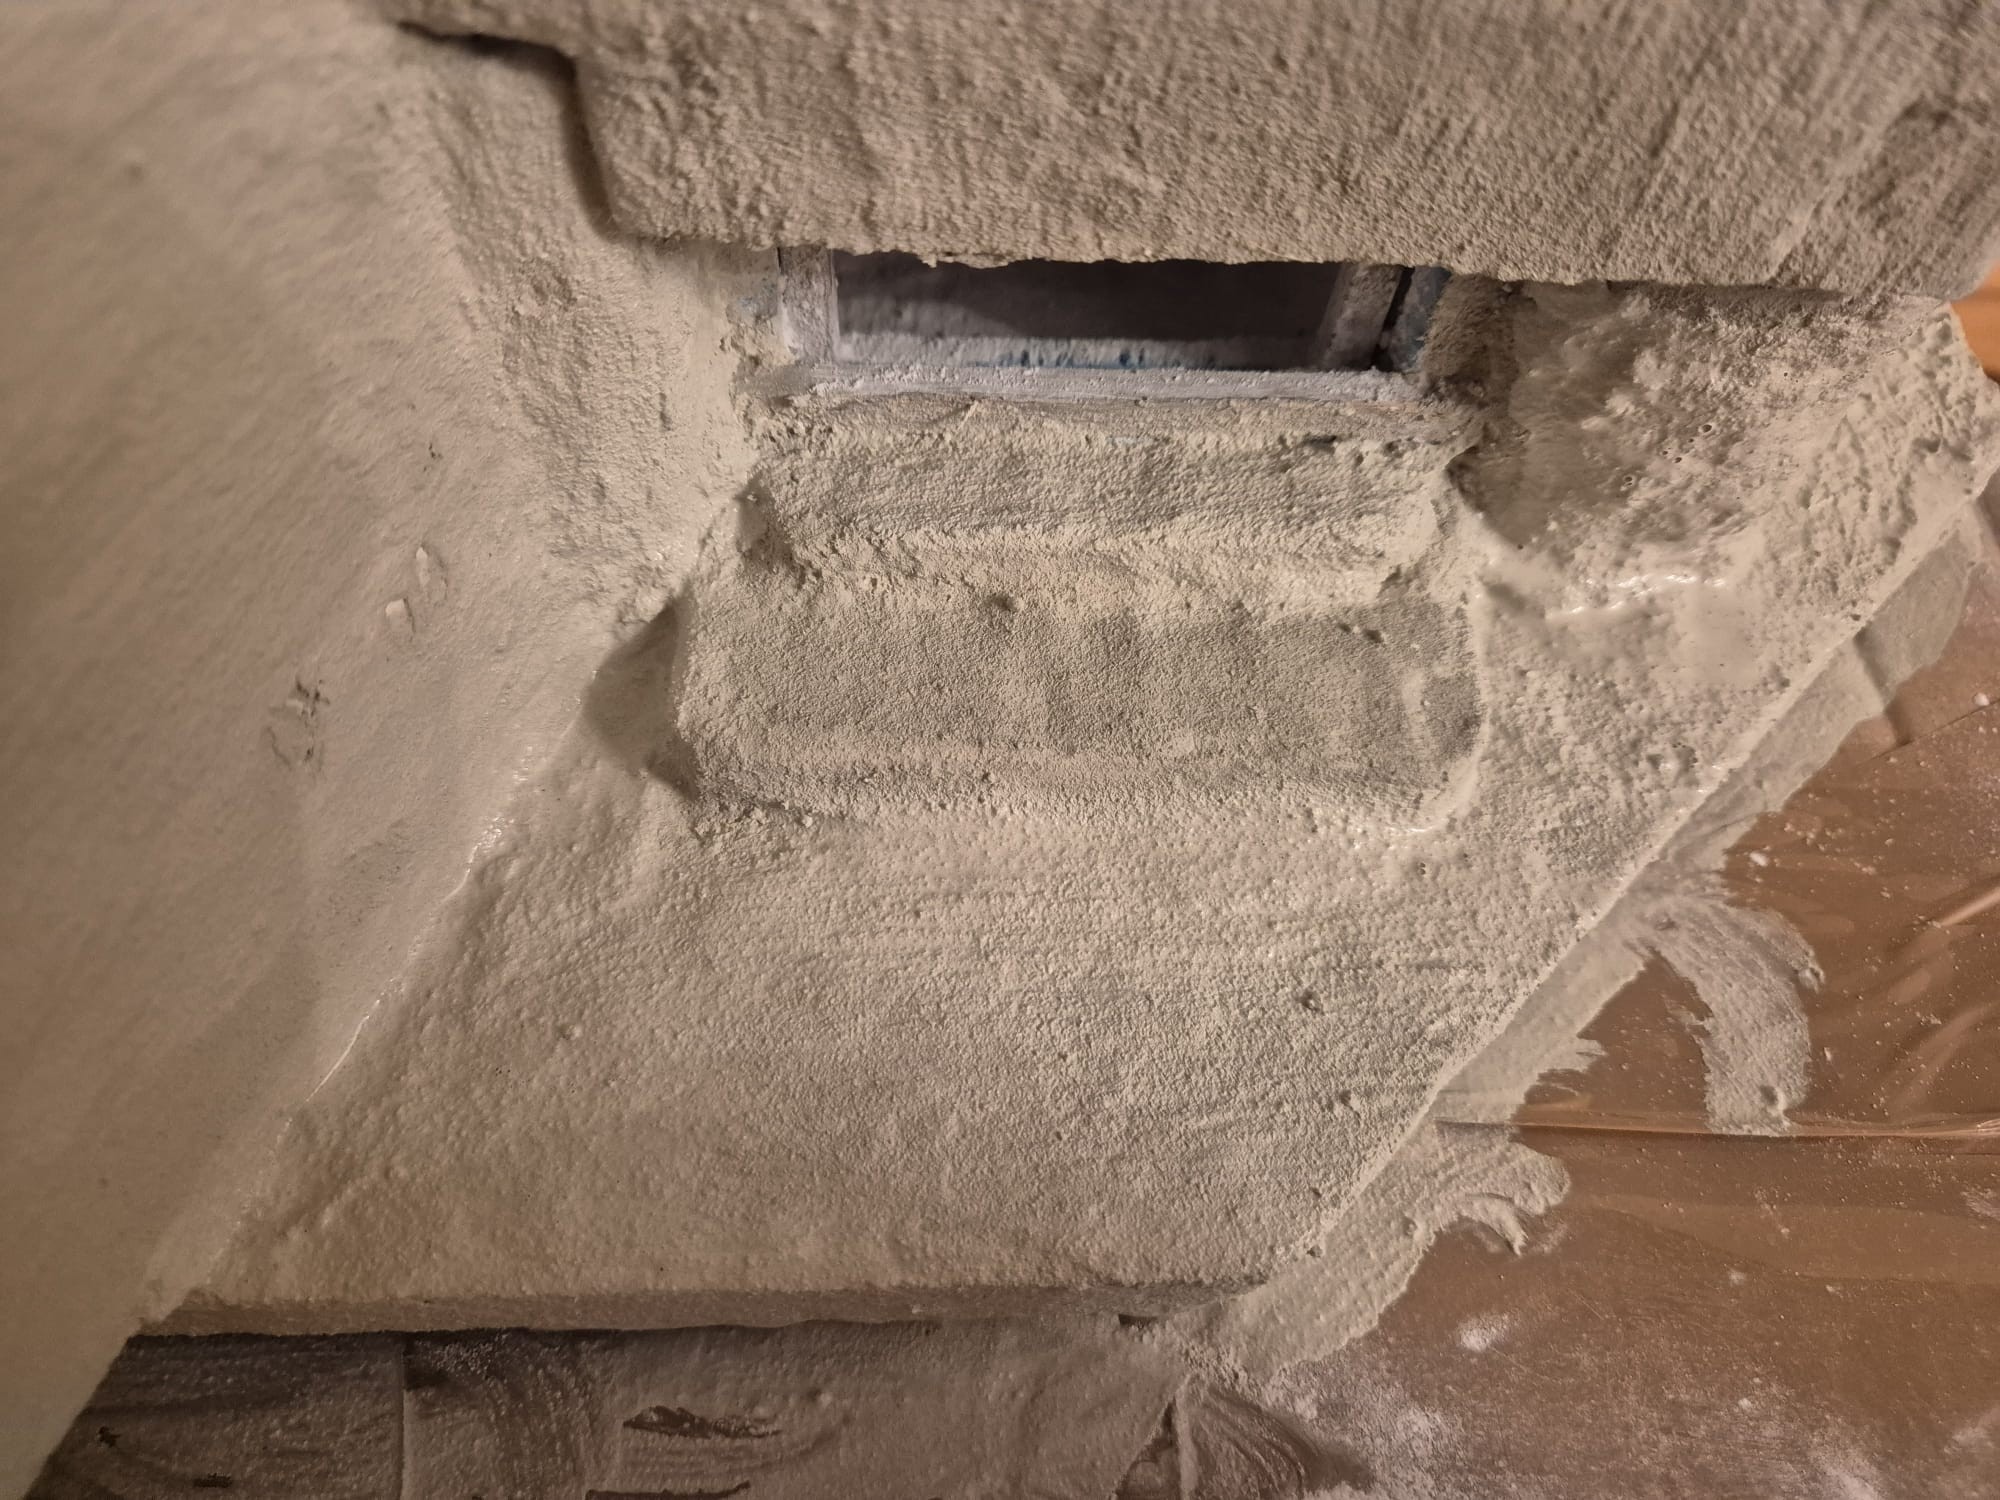
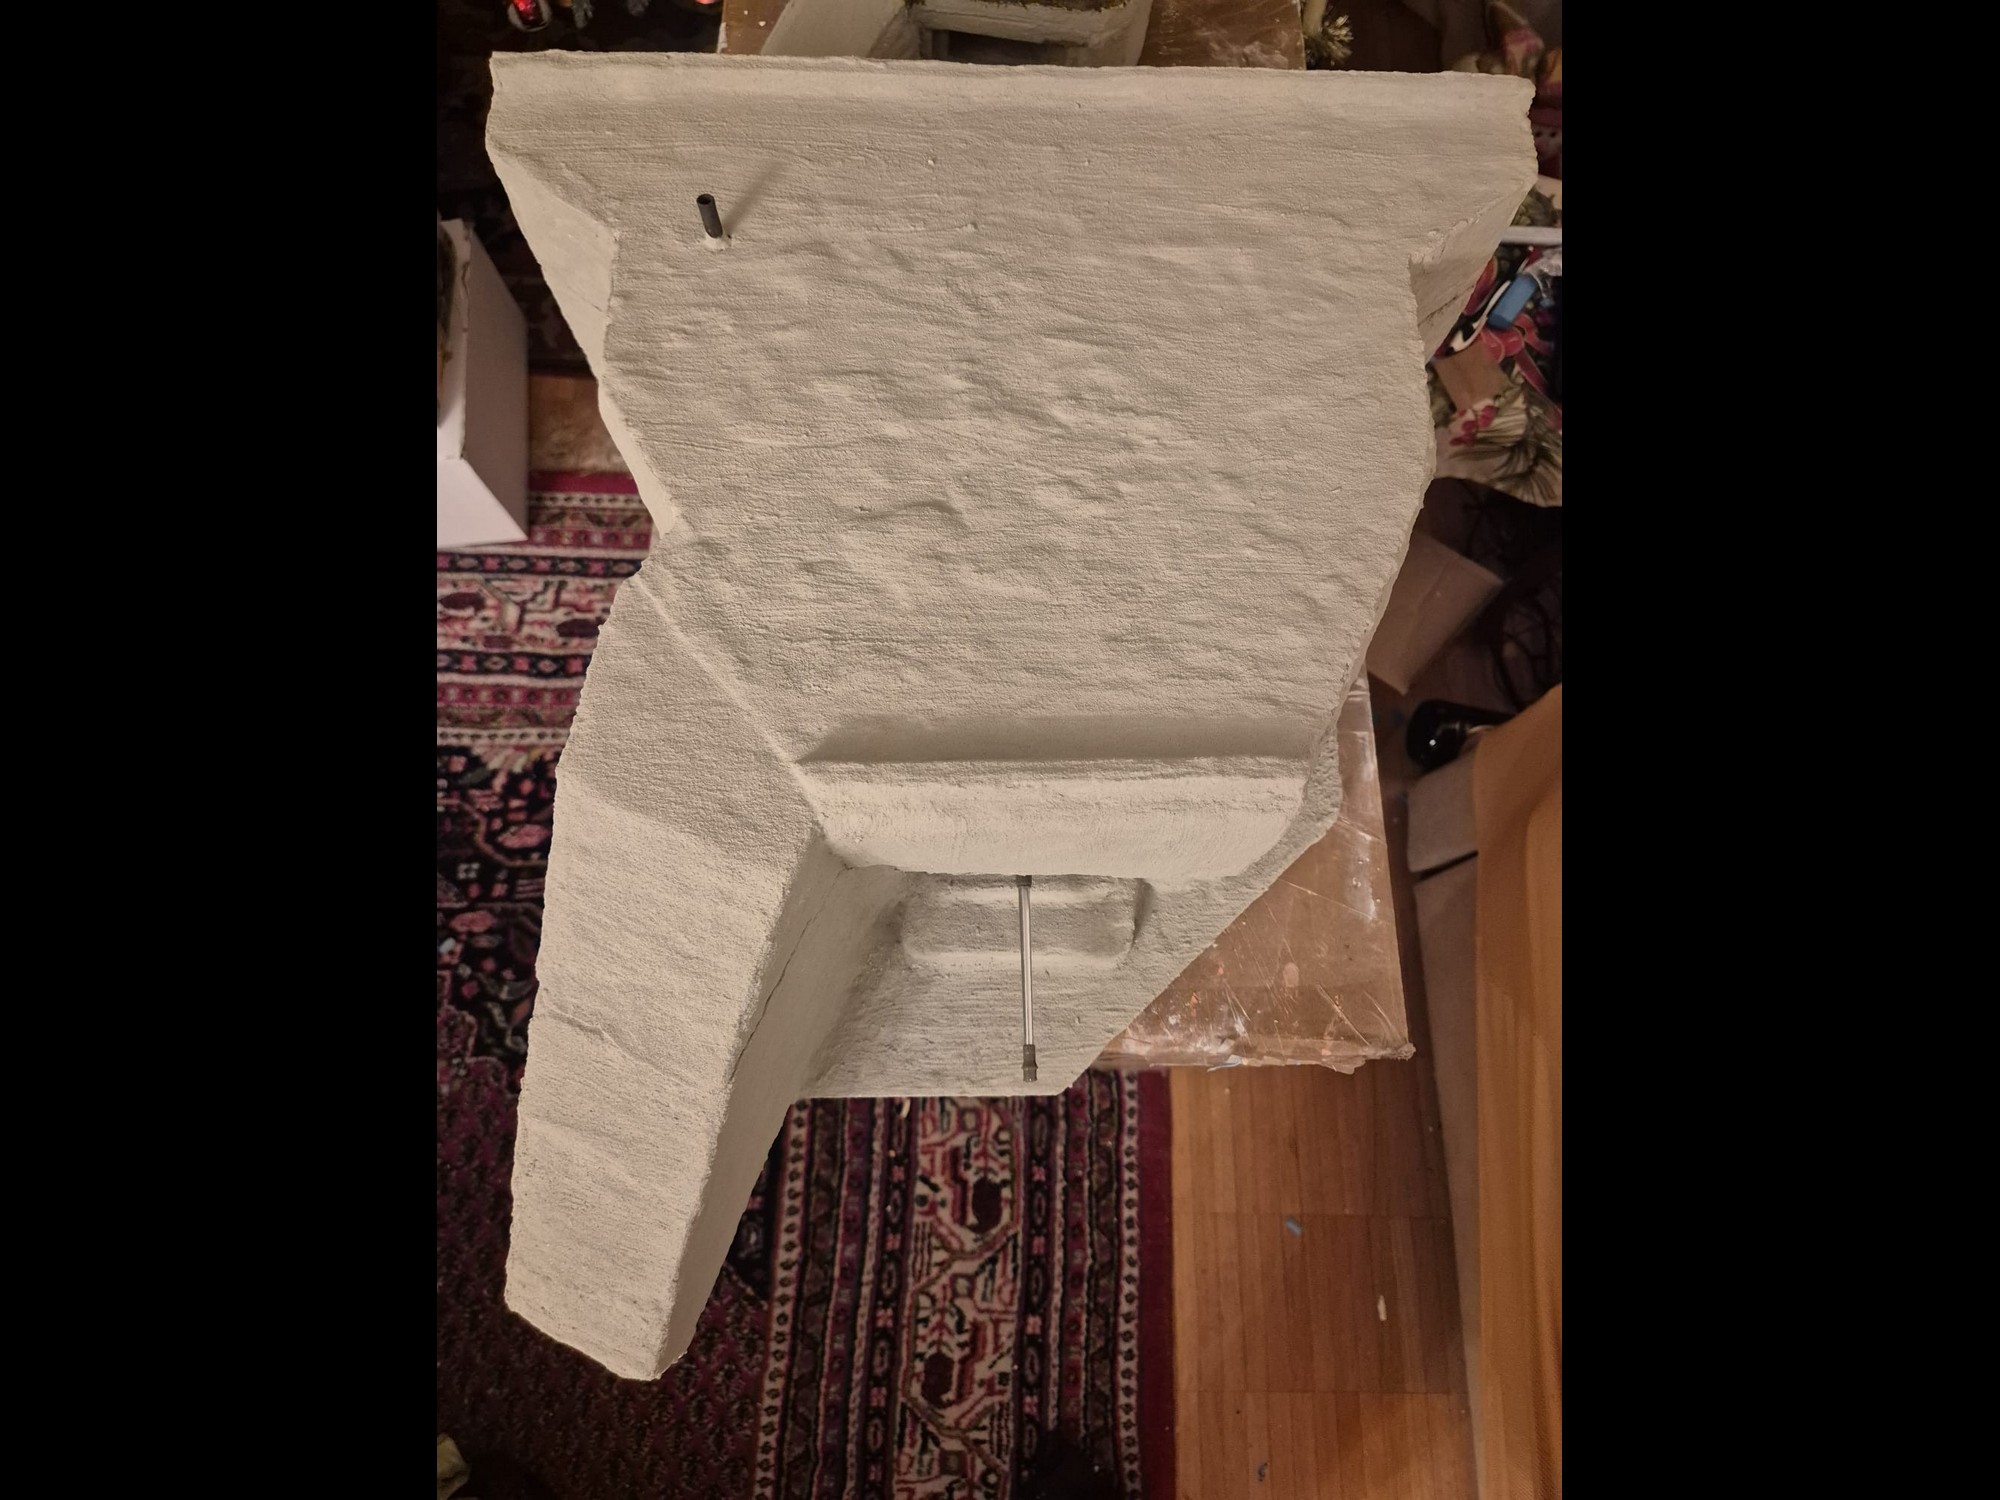
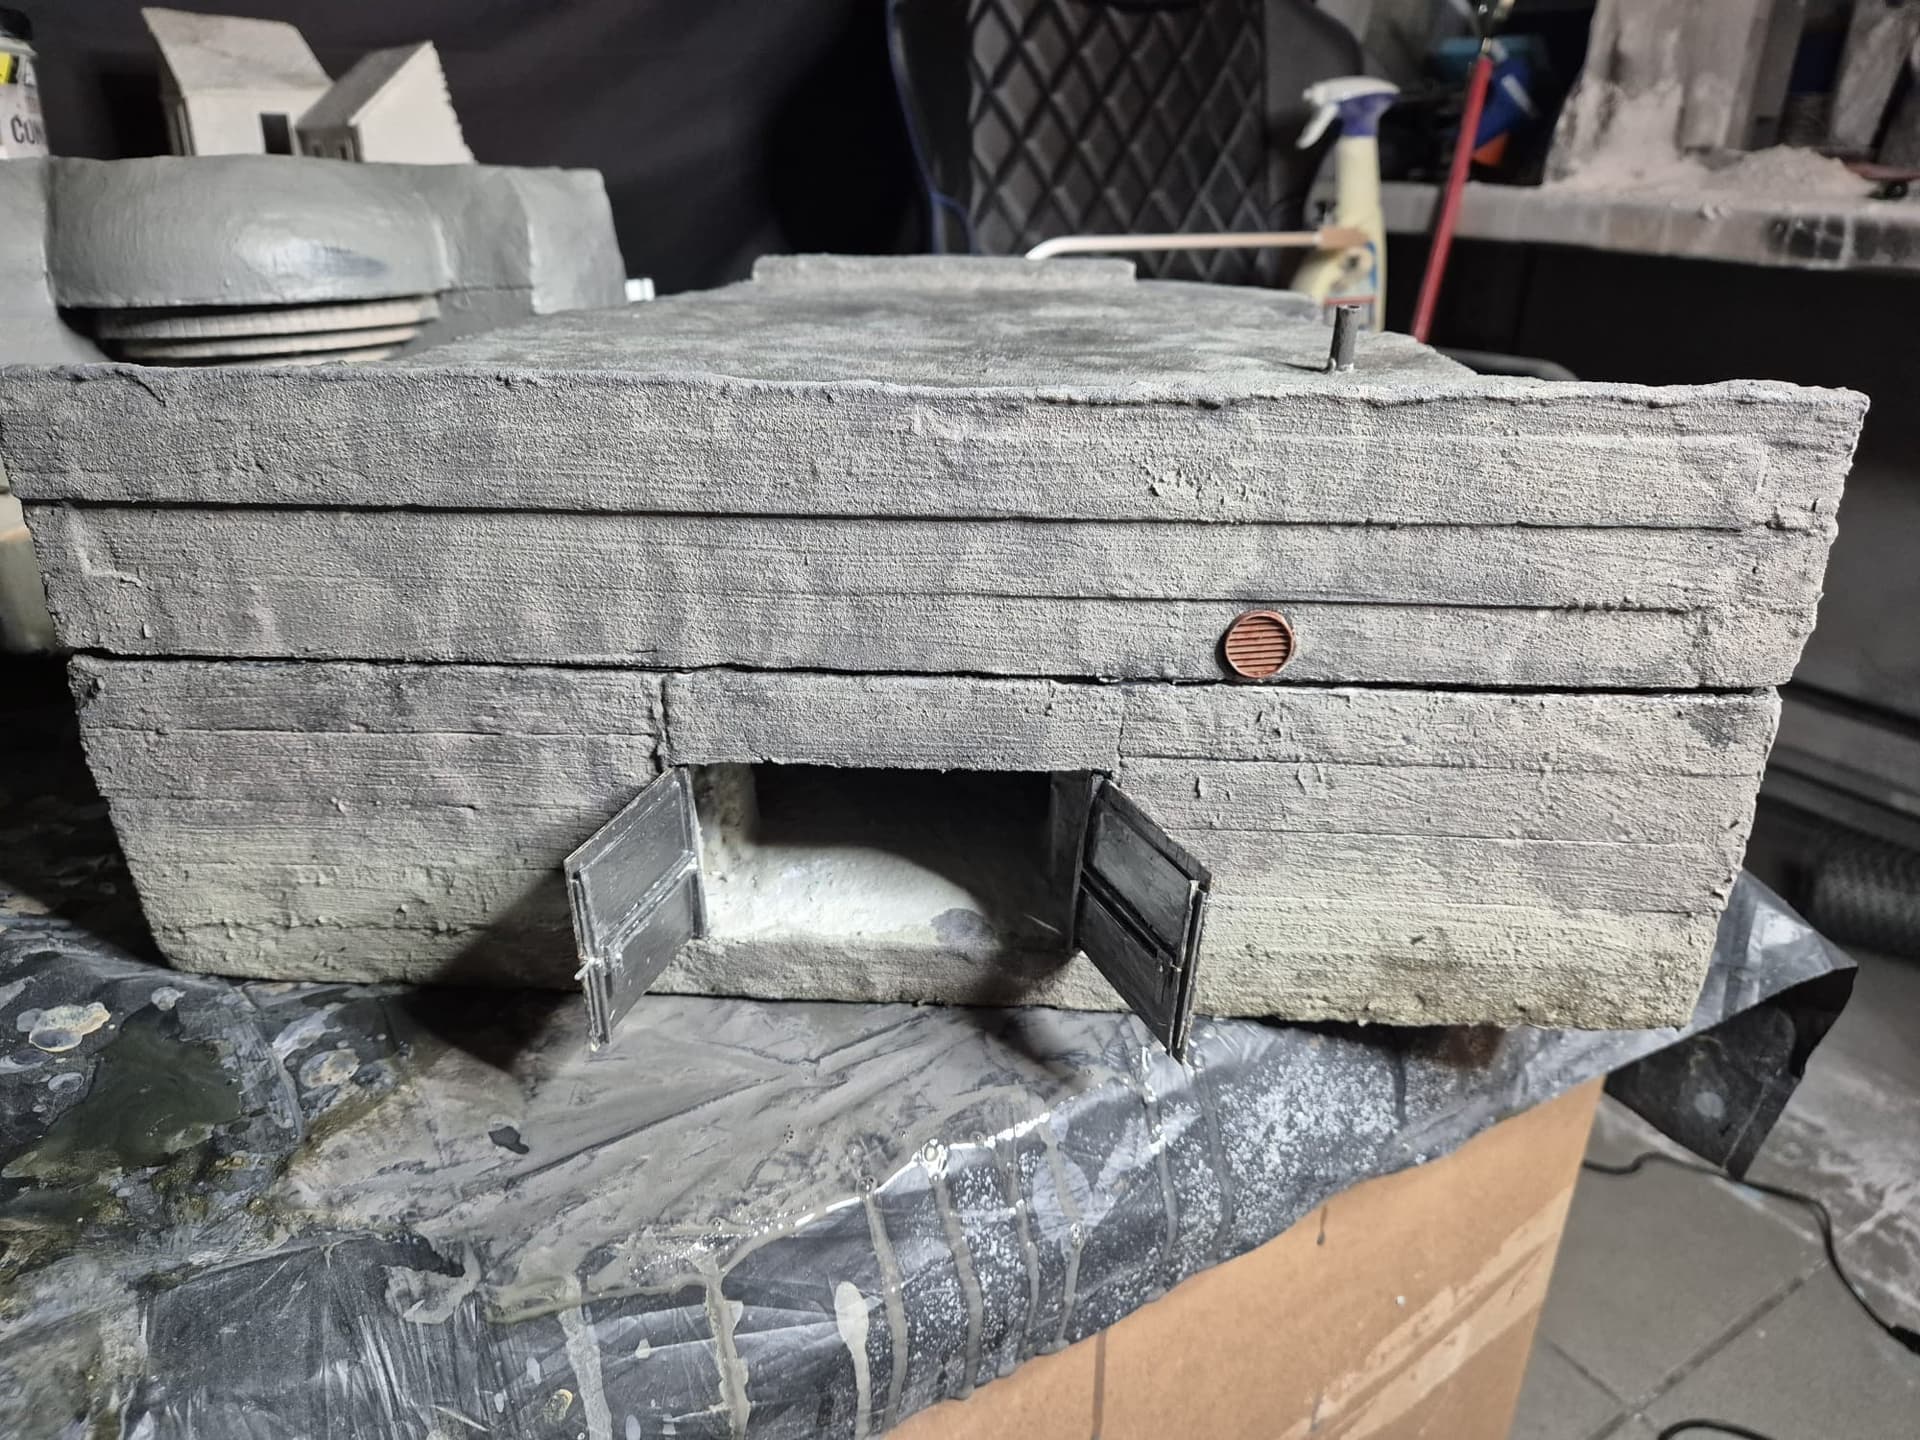
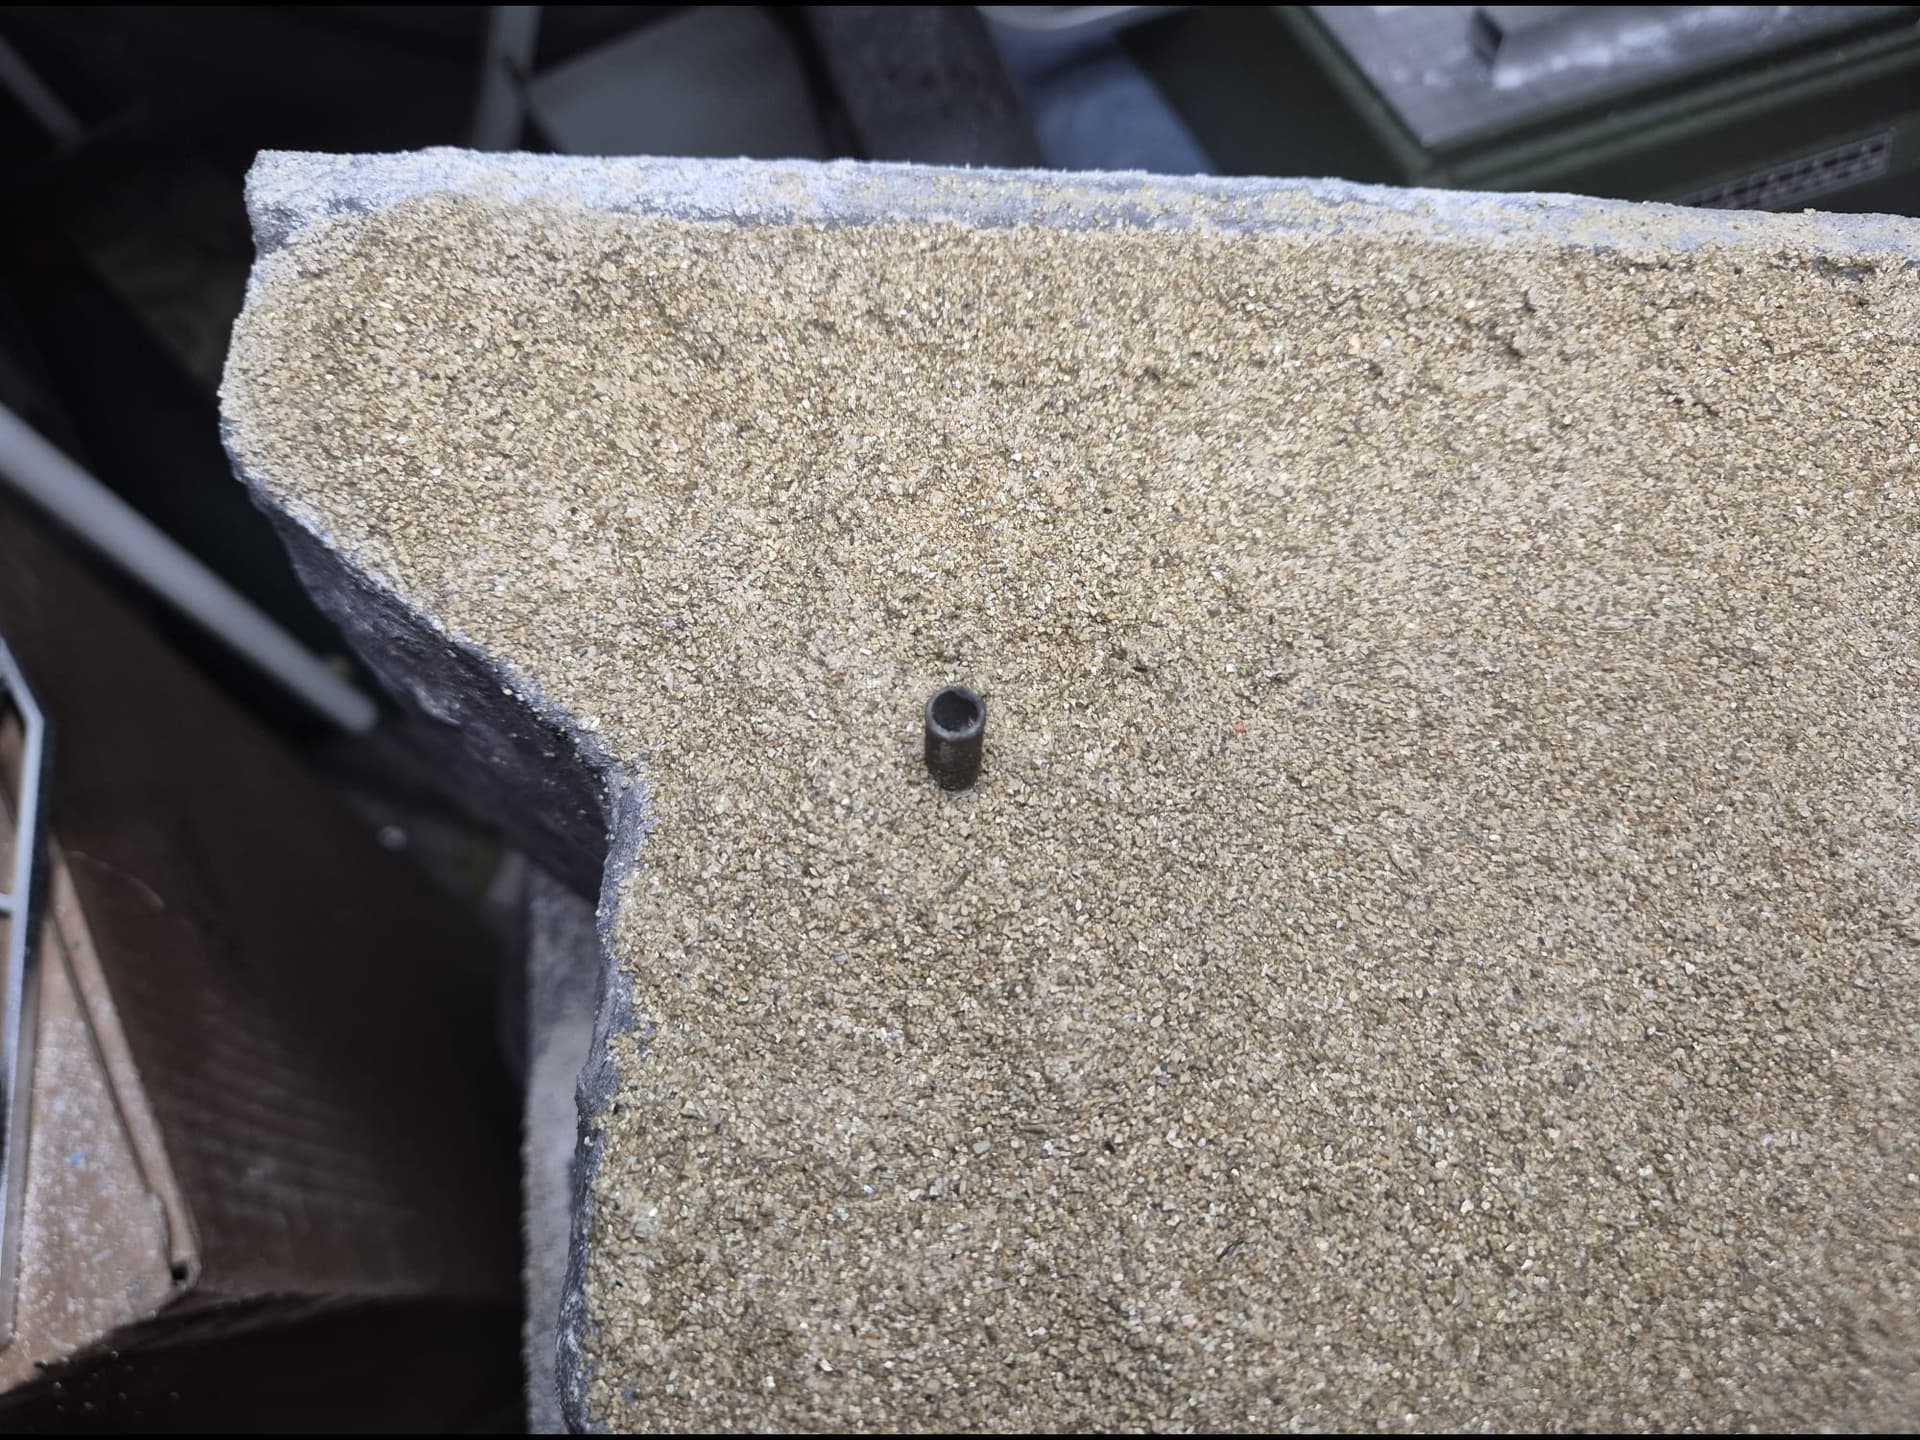
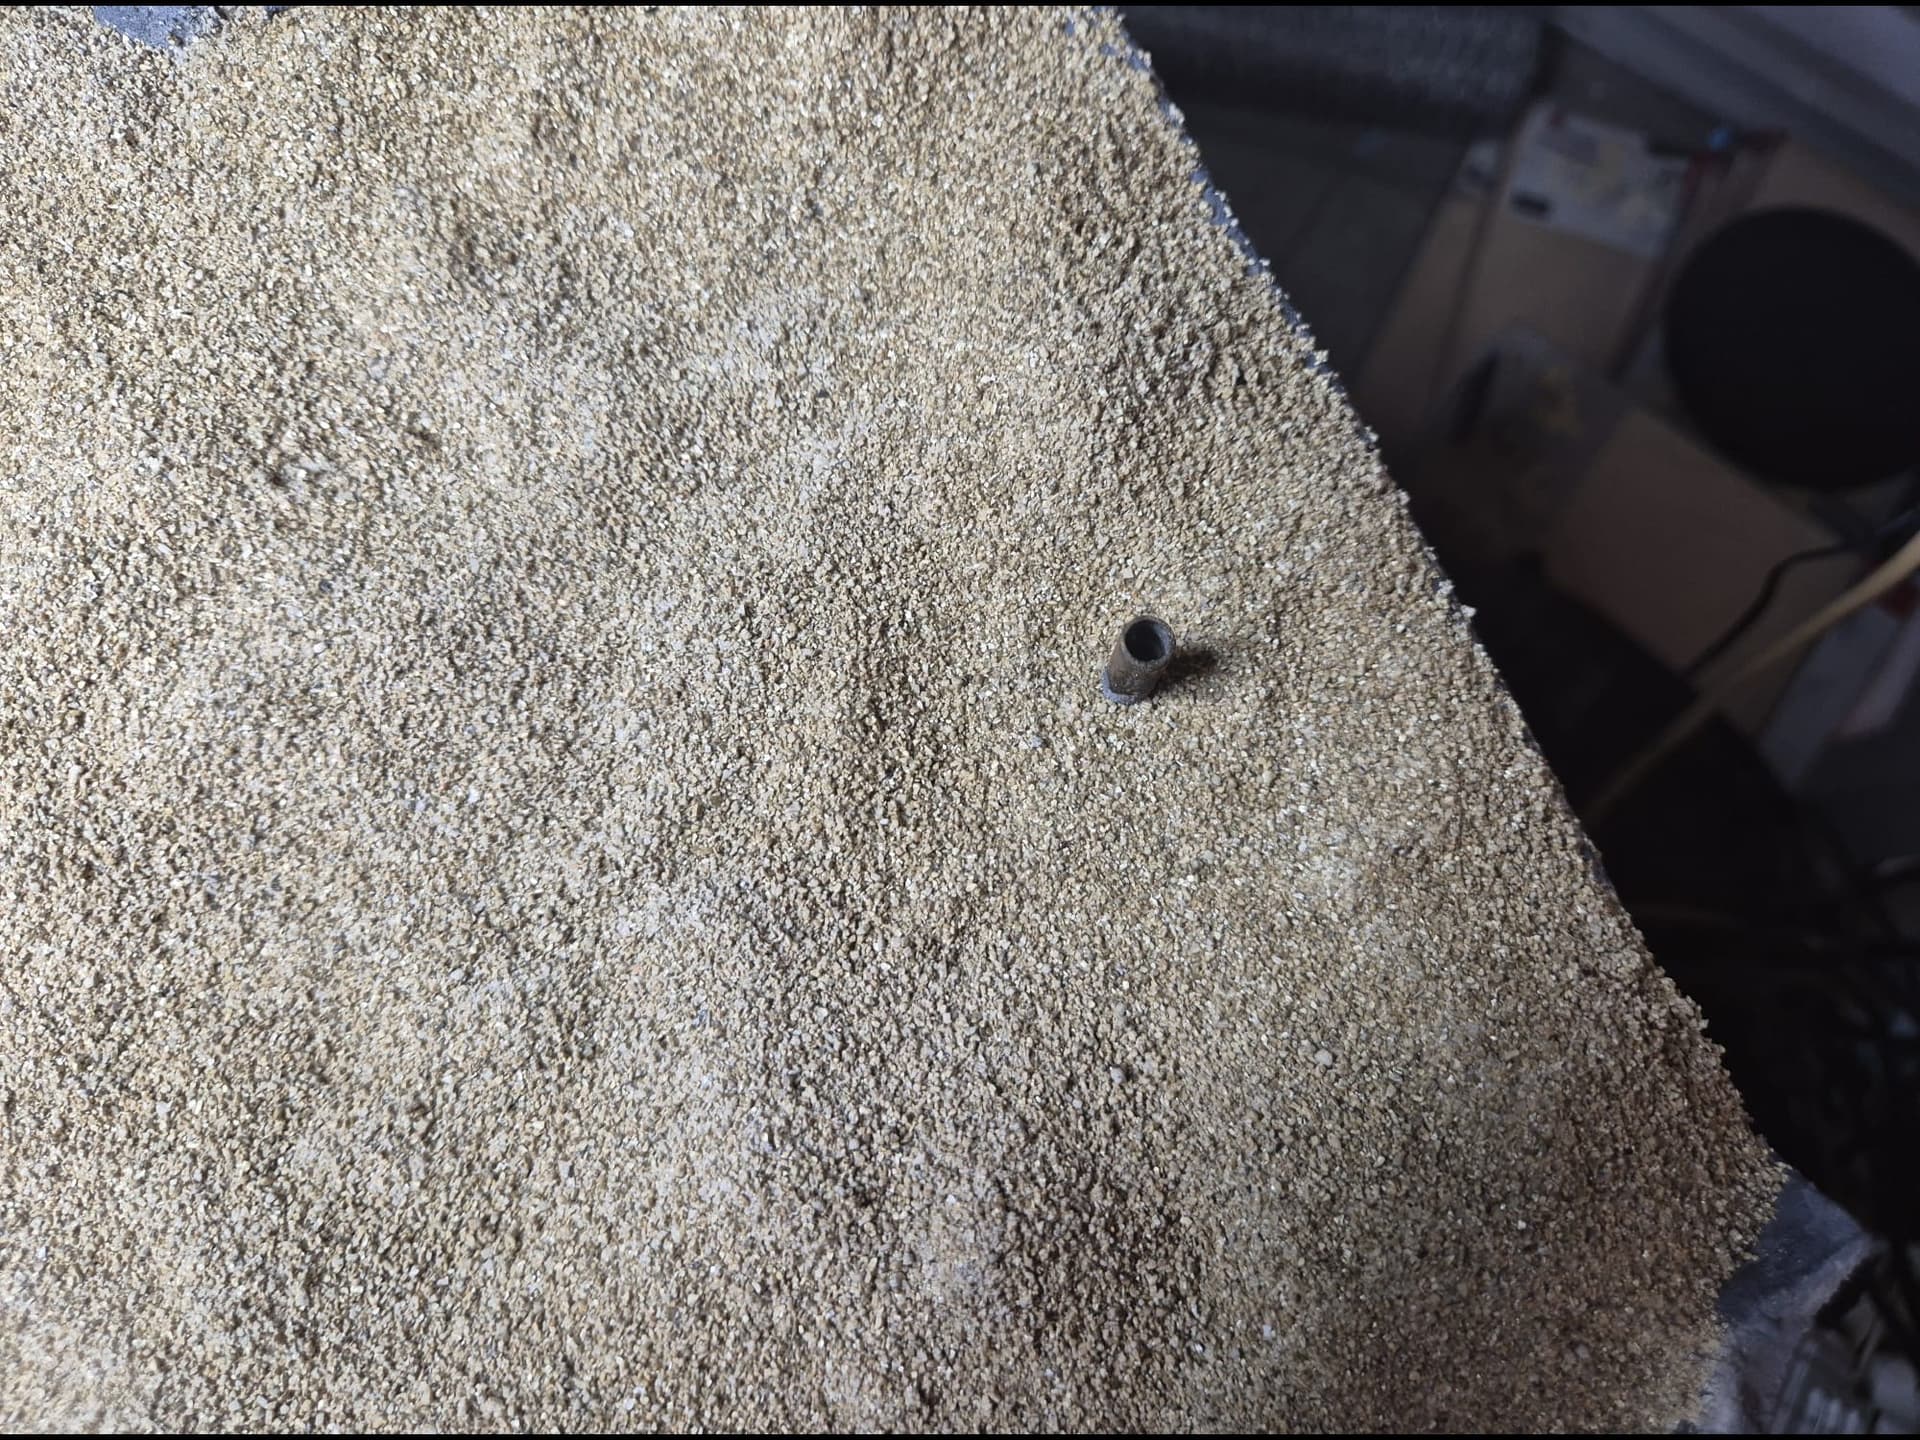
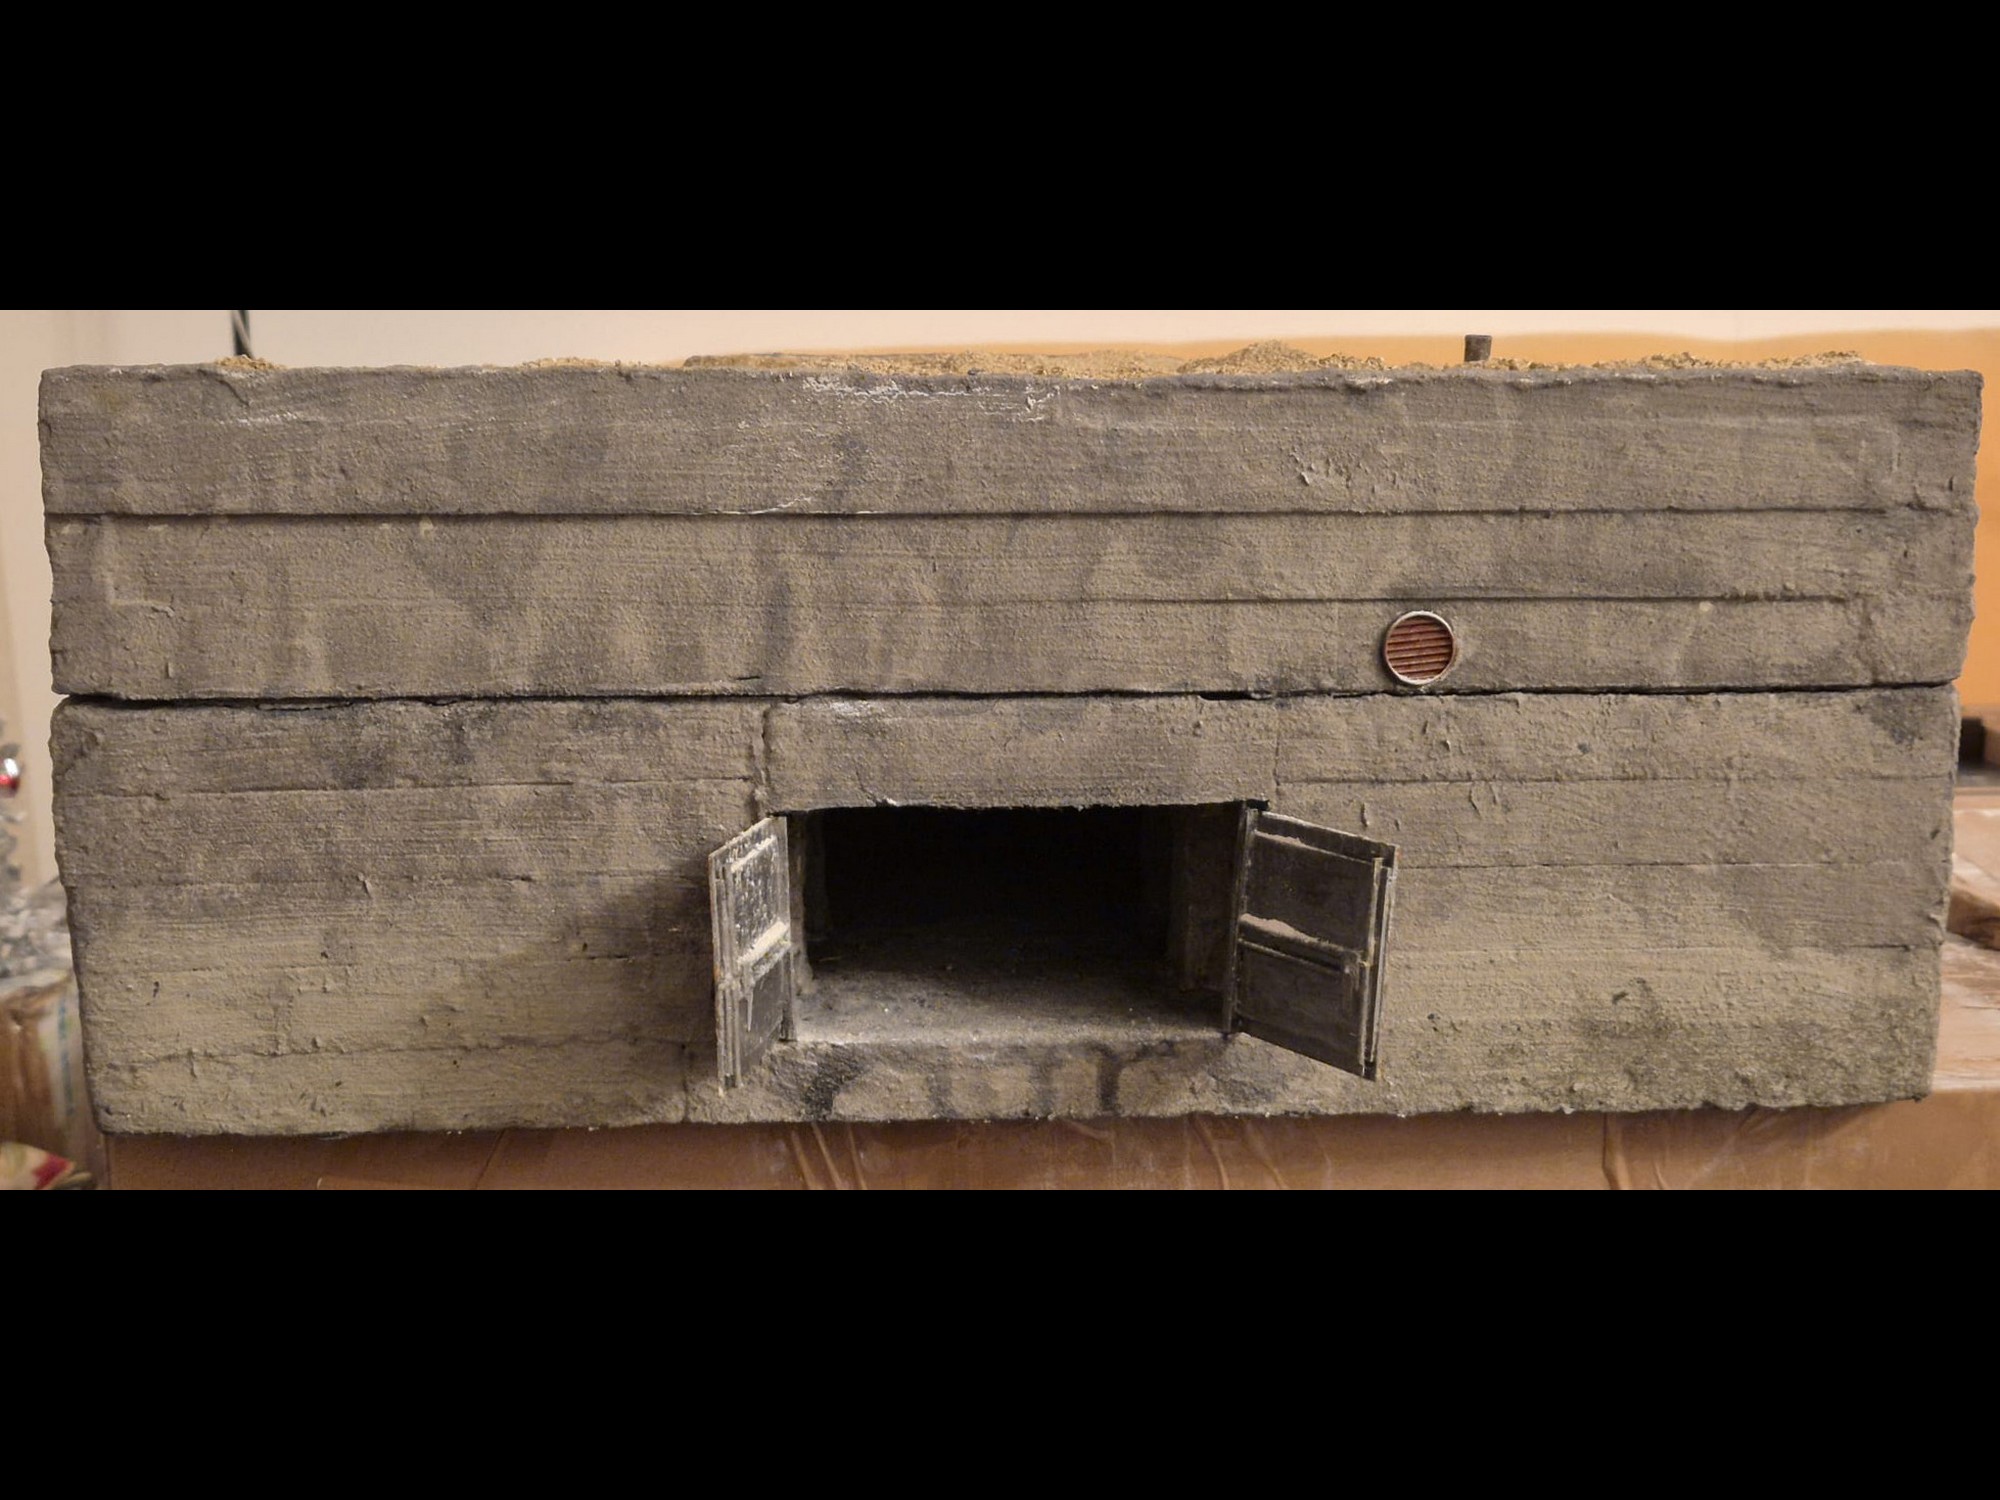
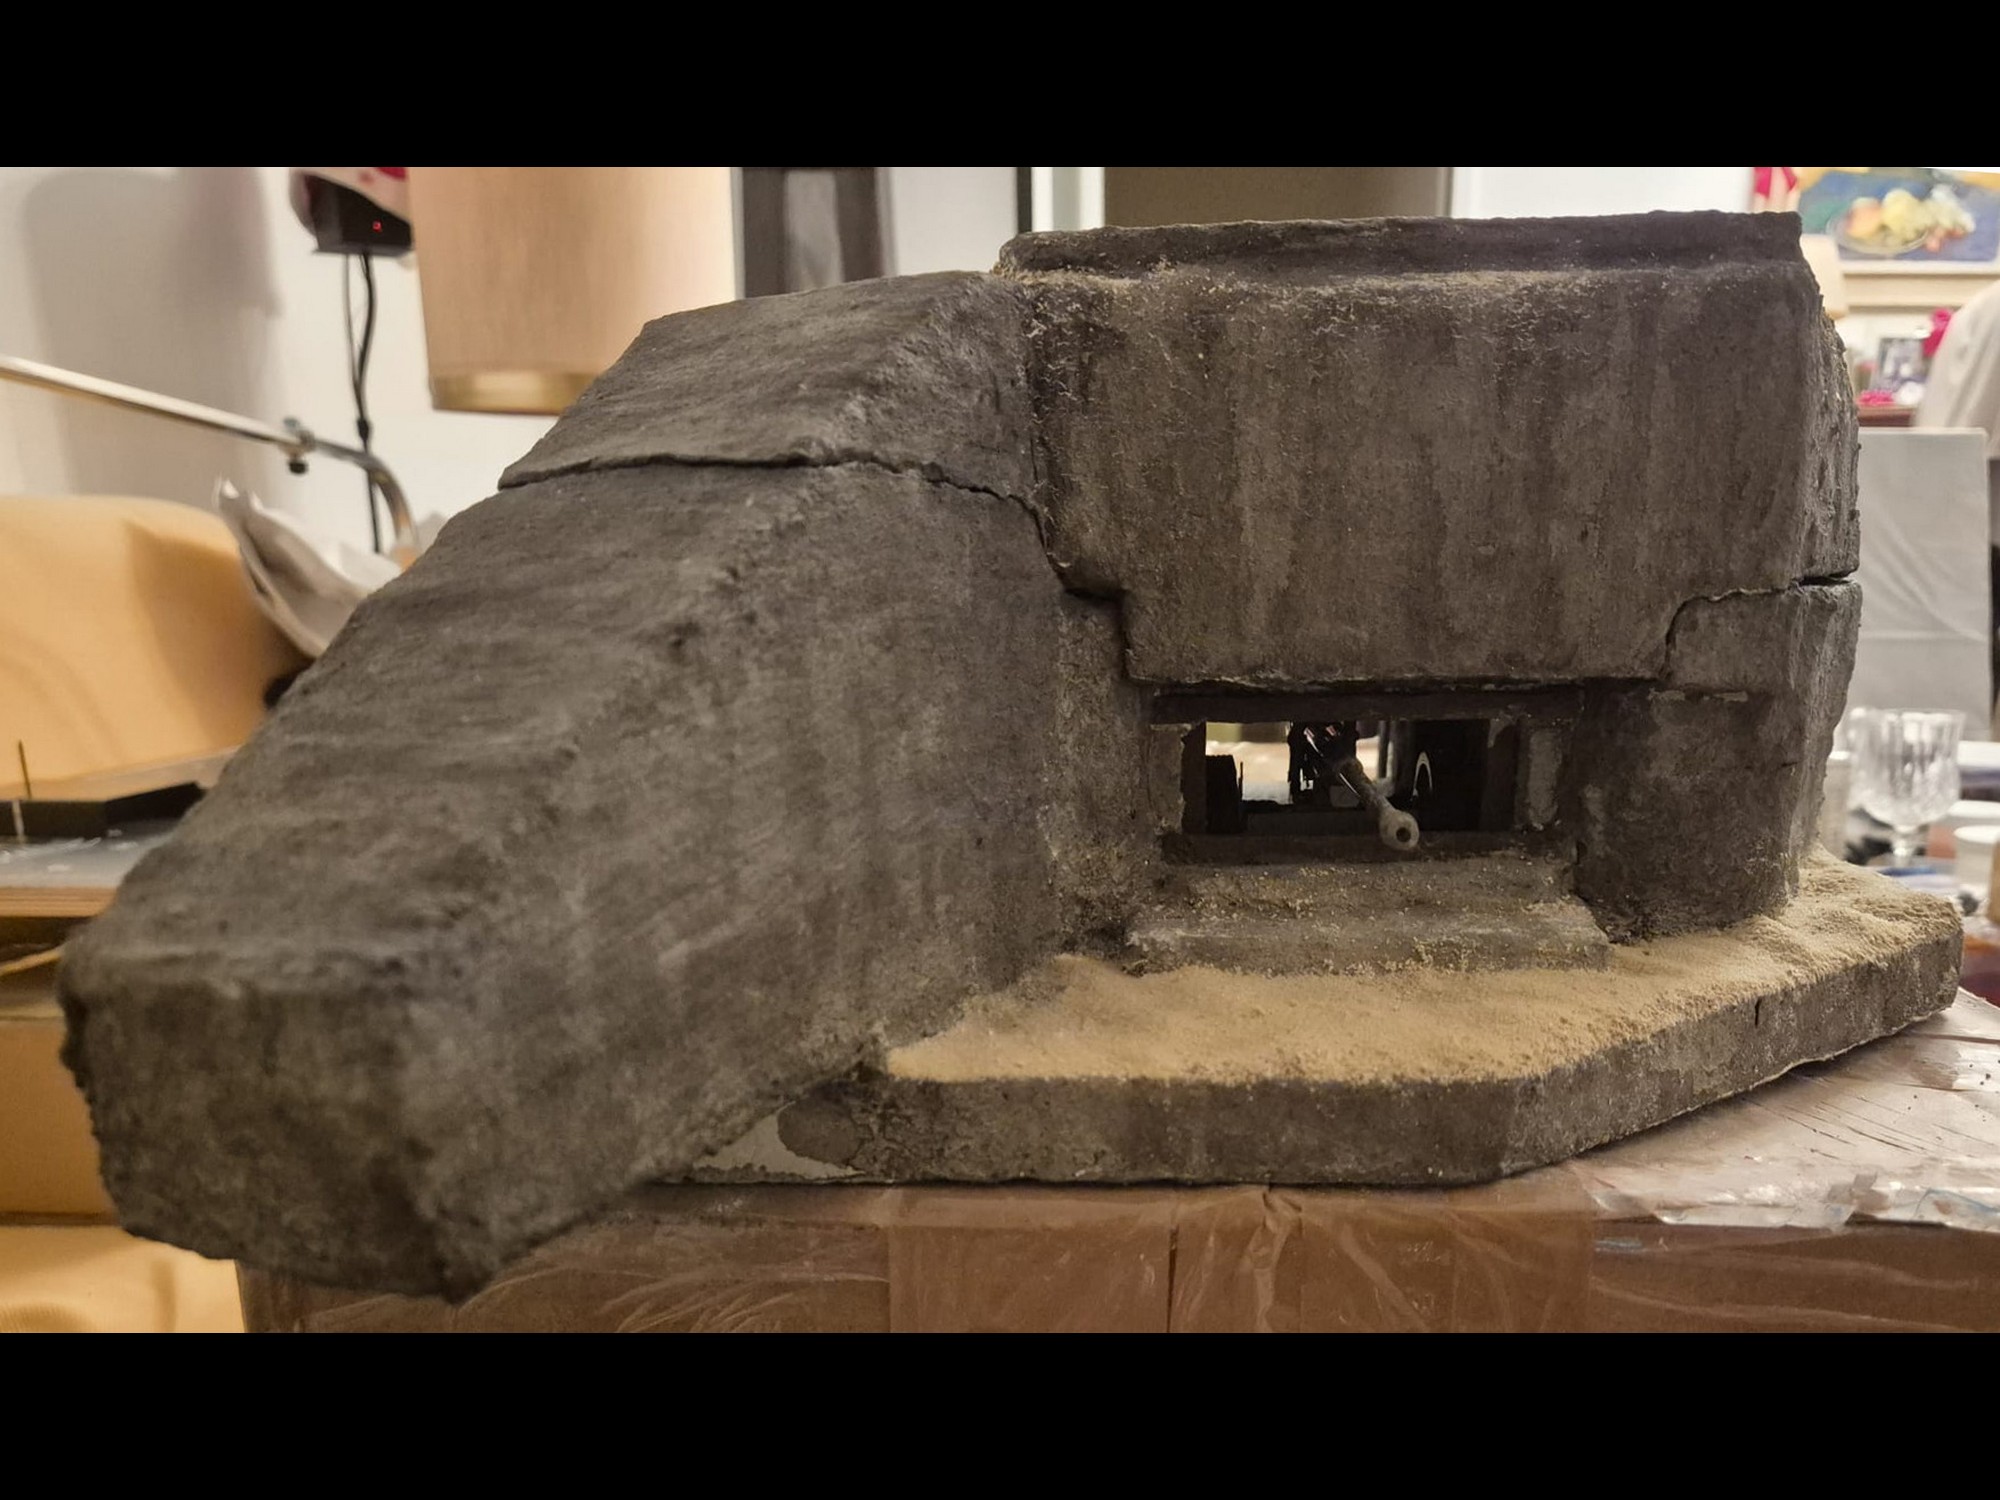
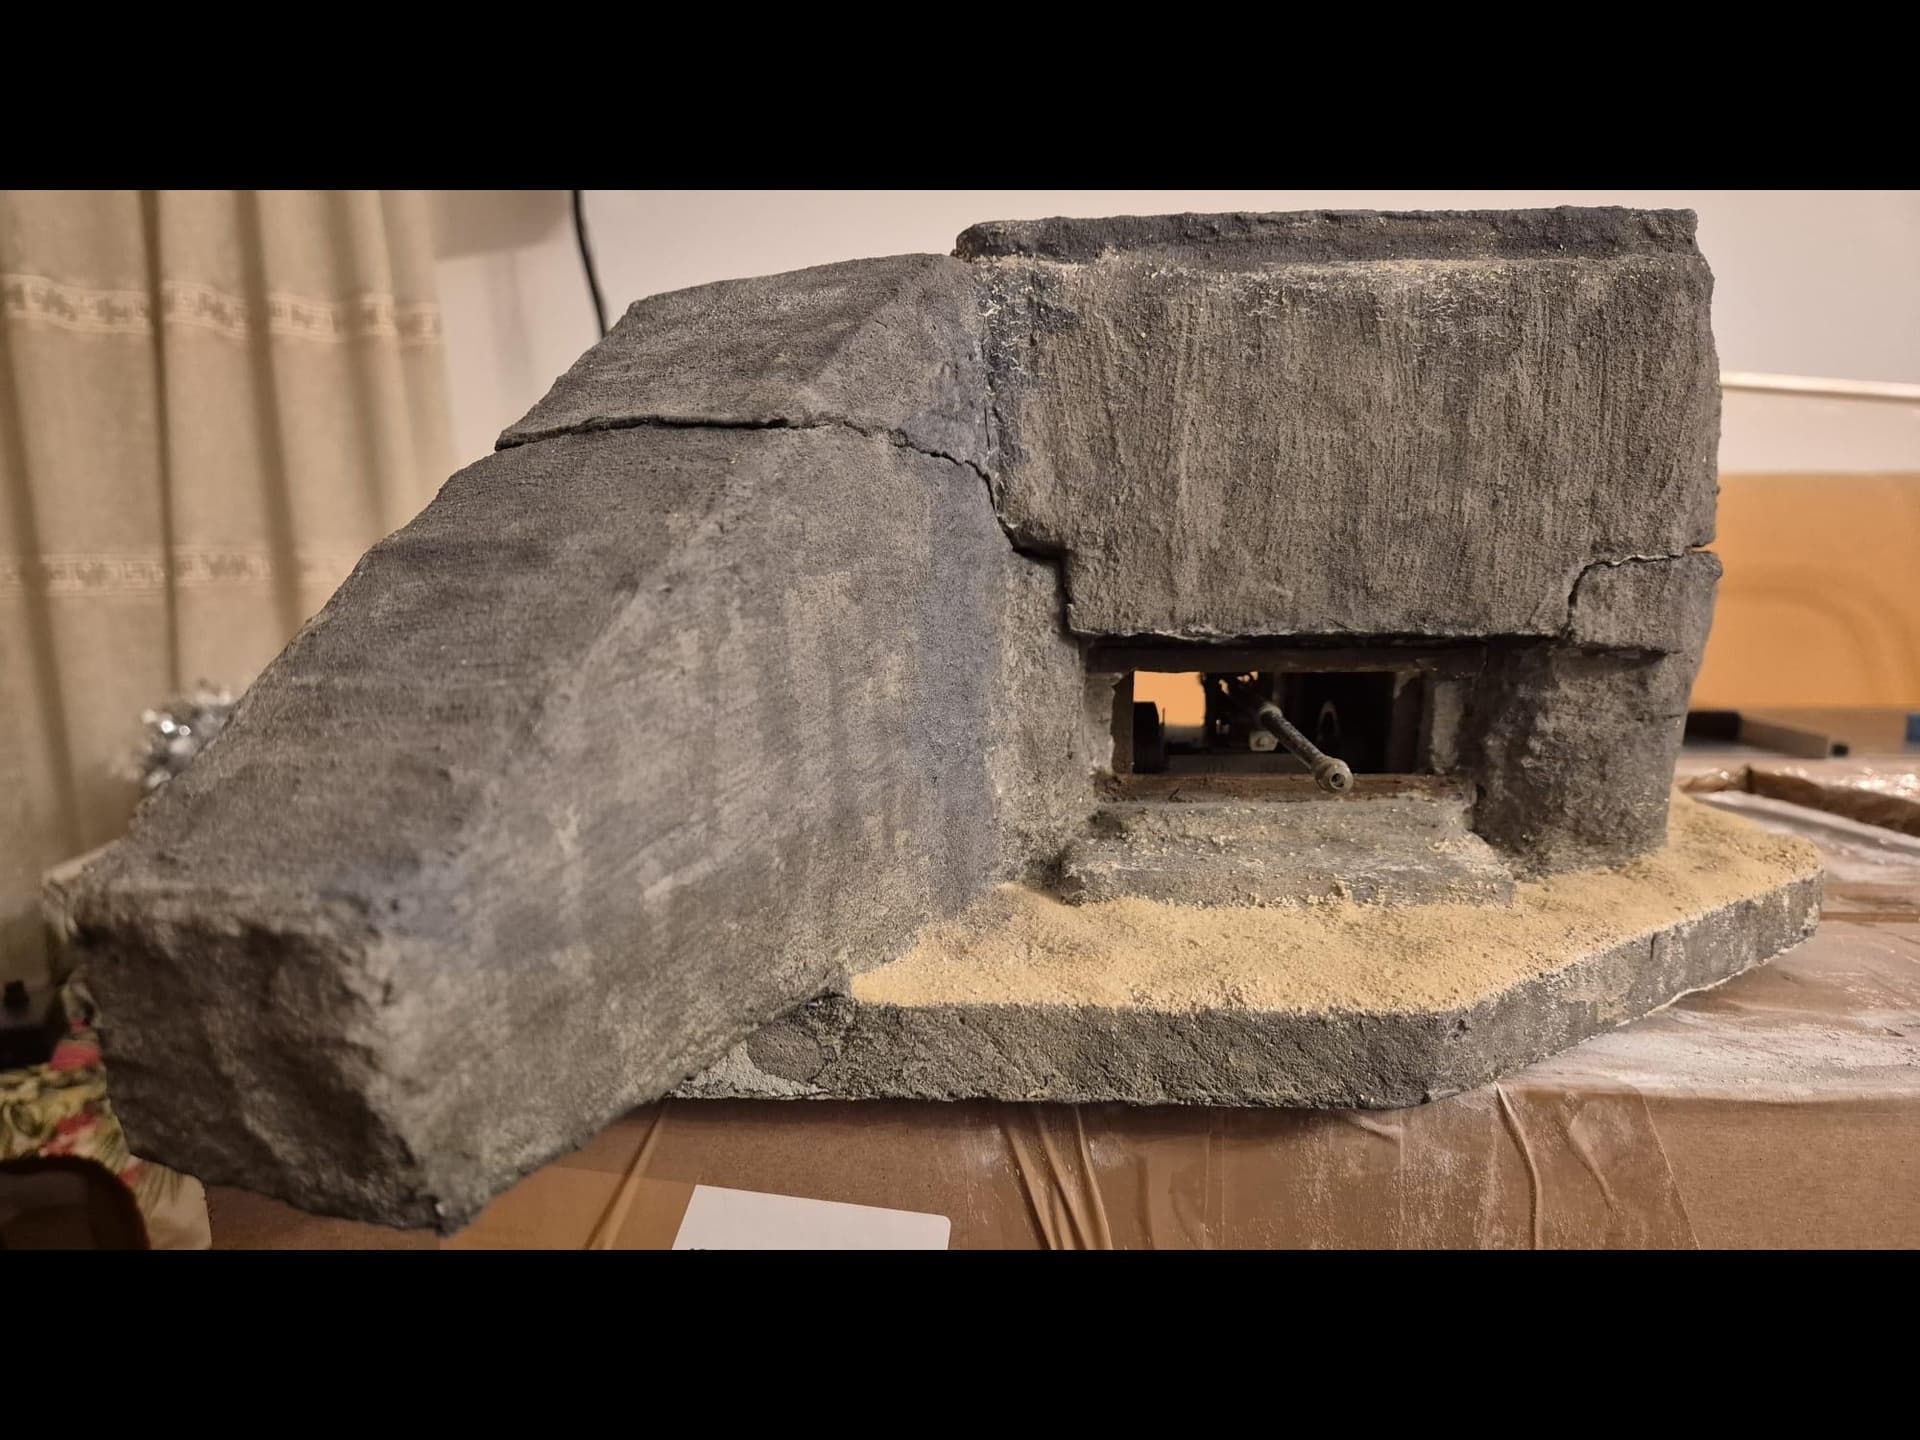
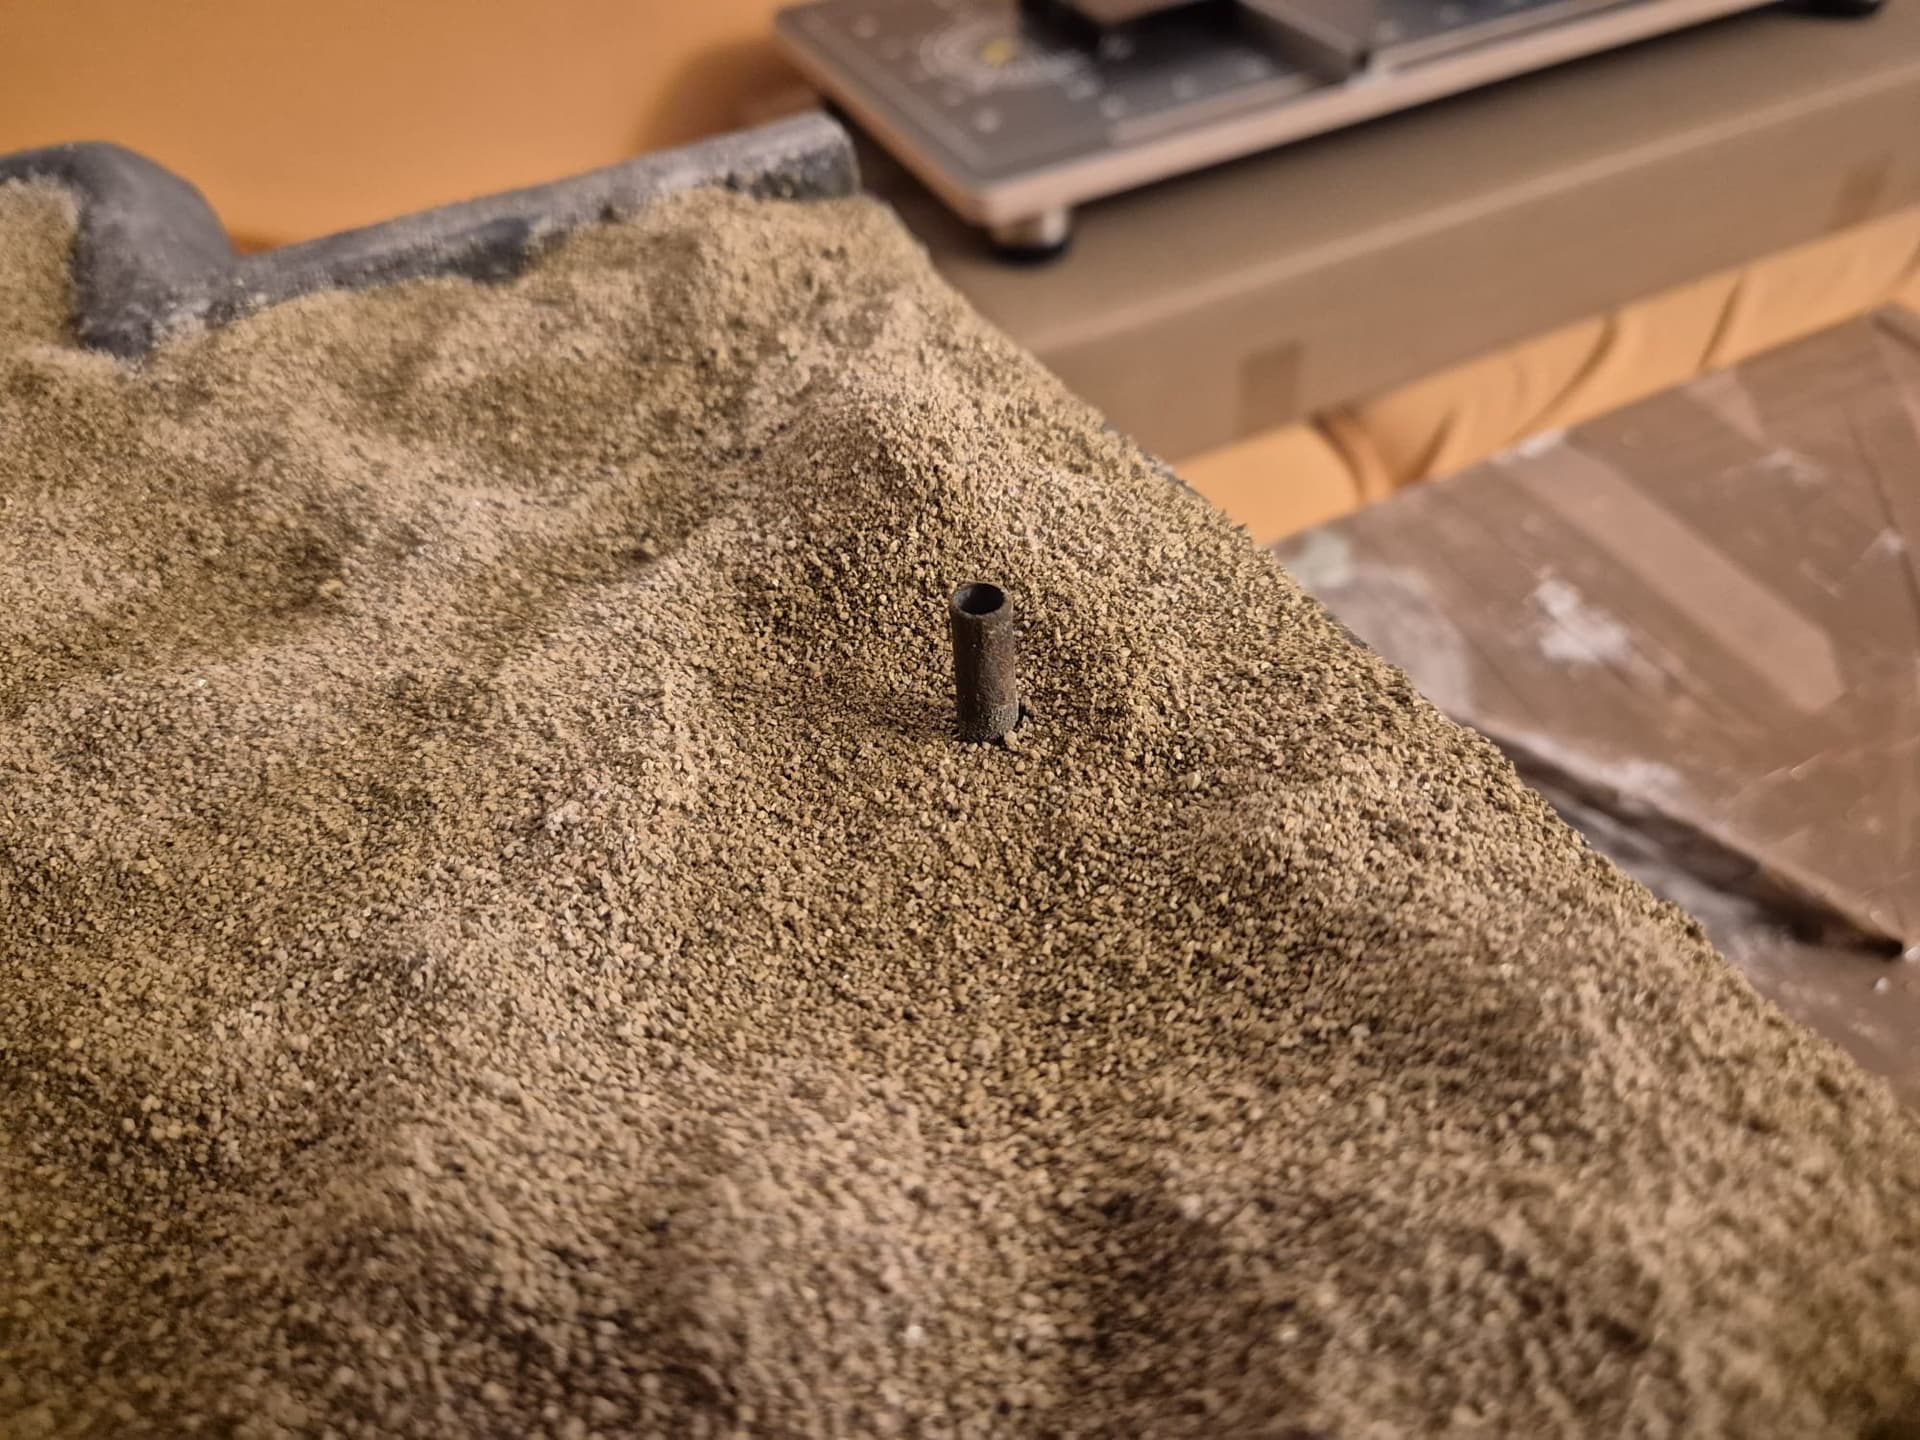
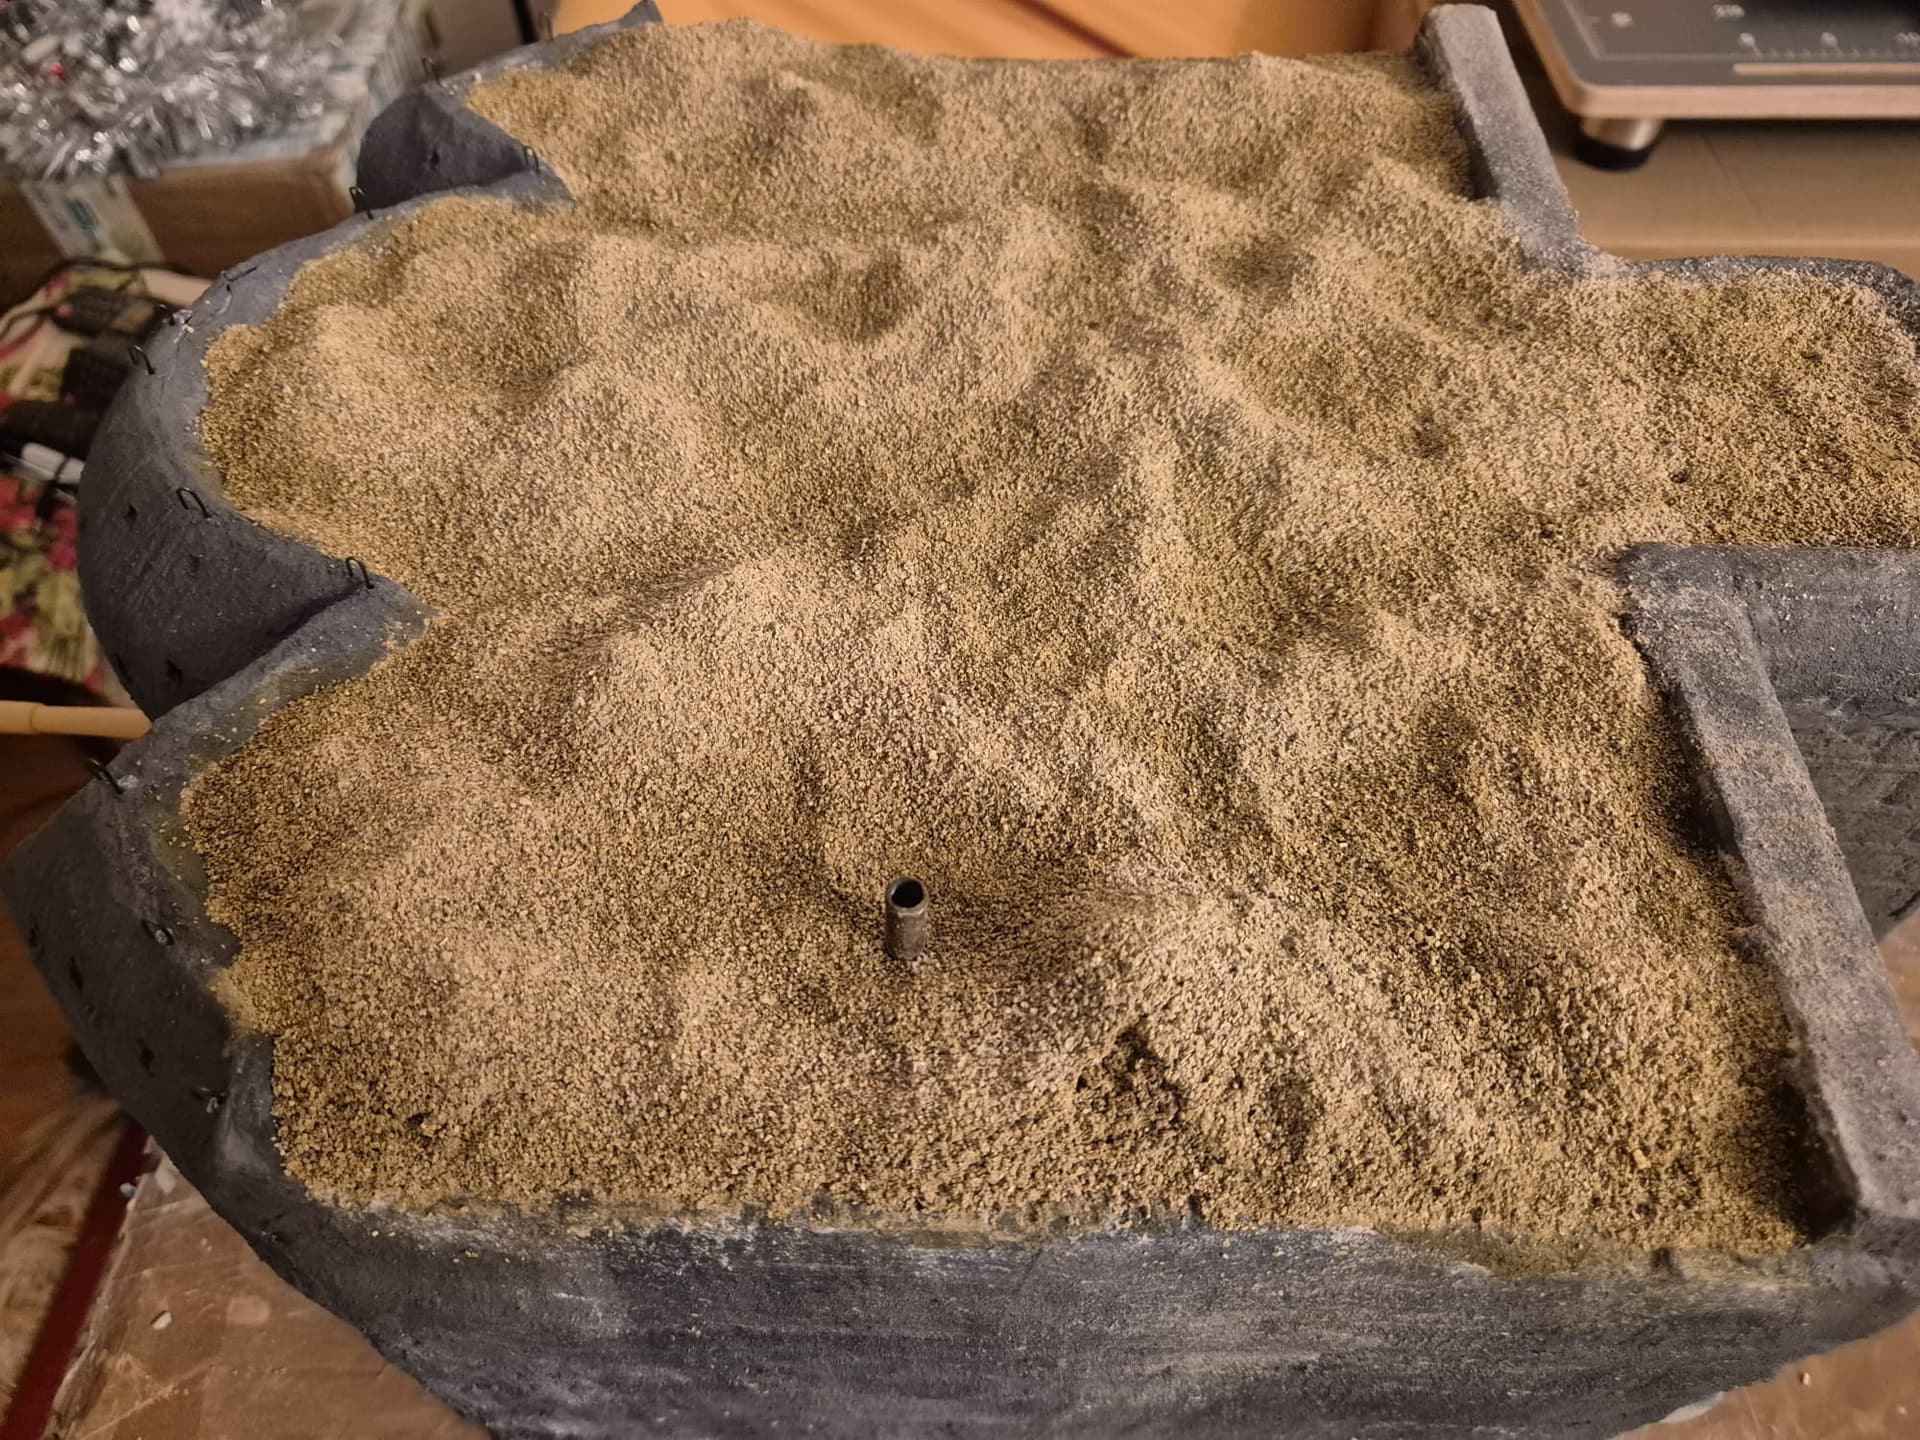
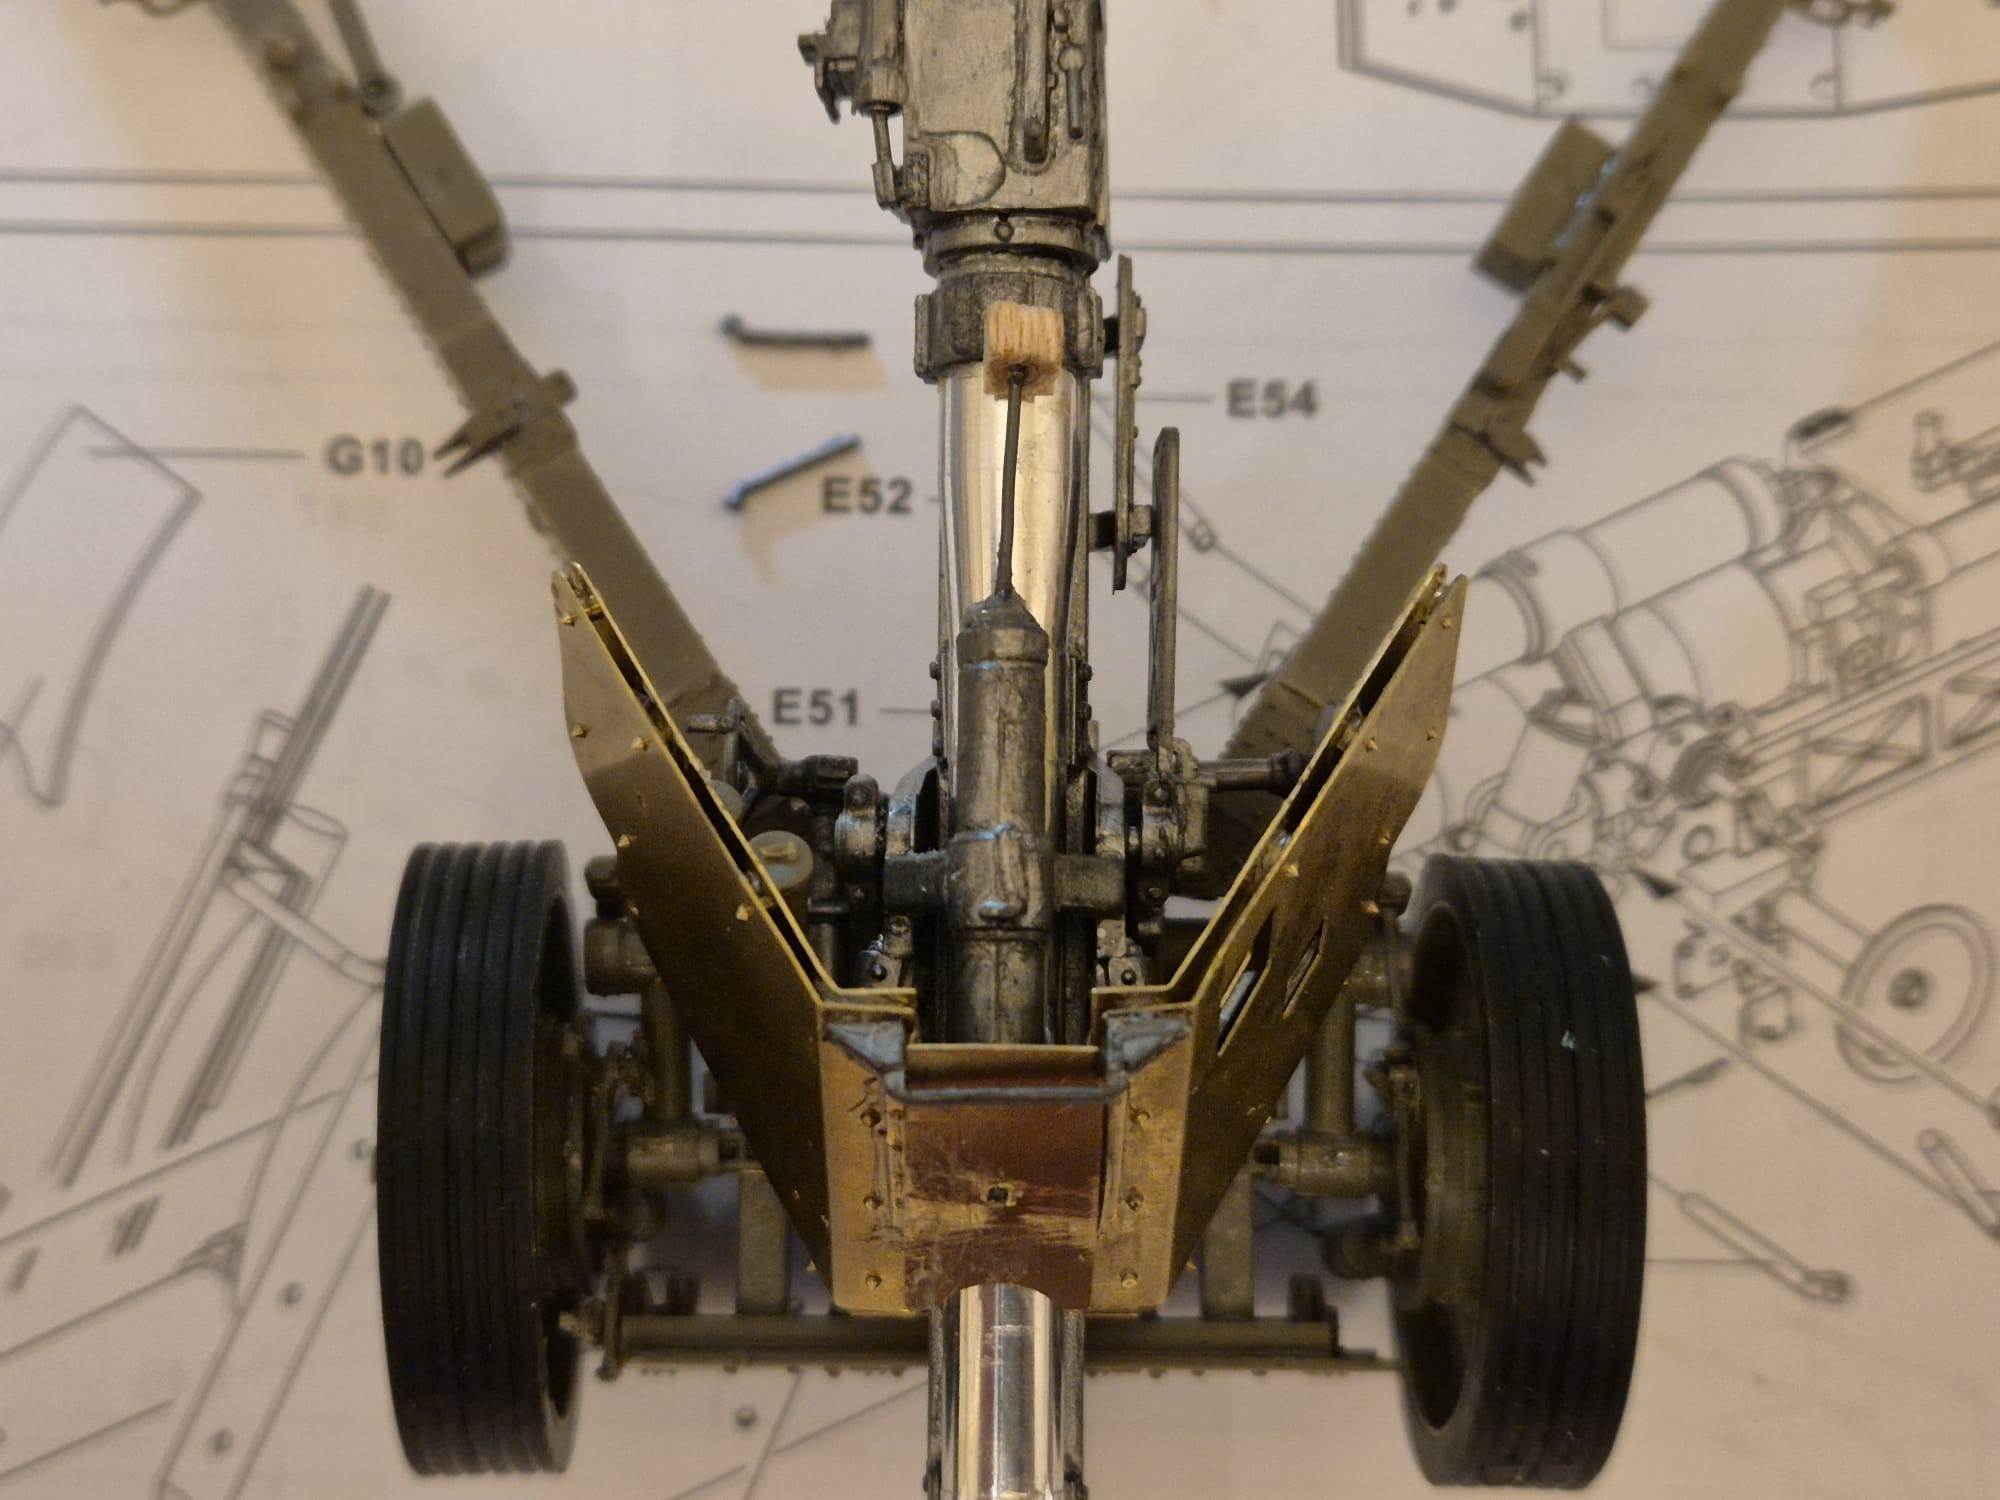
Then I practiced a hole in the roof and inserted a chimney tube sealing it with more acrylic concrete. The tube was produced from a common drinking straw cut to size, painted first in Gun Metal and then covered with an acrylic Iron compound by AK Interactive (AK11266) which actually has Iron particles in it.
Finally, I used one of the resin air vents produced in 3D by RT-Diorama in Germany, boring a hole into the rear wall with my Dremel and after painting it with Rust colors and washes, including some grime wash, glued it with CA glue into the hole.
The doors were then also glued in the open position with the same glue, because I plan to show the bunker while the gun is being fired. In such cases German crews always left the Iron Doors fully open to allow the gases emanated by the 88mm gun to exit the room more swiftly.
Finally I repainted the cradle wheel bumper and wheel stops in a mixture of Stone Gray and Slate Gray by Woodland Scenics to replicate the hard stones placed in front and to the rear of the cradle wheels as to maintain it in place while firing without necessarily banging against the rear walls.
I also returned to apply the original color to the wooden beams protecting the embrasure which is a mixture of Vallejo’s Panzer Aces New Wood (311) and Model Color Burnt Umber (70.941) preceded by an AK Interactive Woodgrain Wash (AK19318).
Now, all that remains to do is to weather the entire bunker with the three washes I had introduced in a previous post around here, including the interior walls and add the roof soil on top of the roof which will be made by simply pouring Woodland Scenics Mold-A-Scene on top and then thoroughly spray it with my own produced PVA glue mixed with water and then color it with the usual Woodland Scenics terrain pigments.
There are still some little things to fix inside of the bunker and when those are dealt with the bunker will be finished. It is then that I will finish to build the PAK43/41 88mm anti-tank gun and paint it in German Yellow (or if you will, Sand color), except for the steel parts to the rear of it. Since the rubber tires can be detachable It won’t pose any problem to paint the supports as well.
Once this will be finally completed, I will go on a long holiday, and when I return I will finish my previous “The Last Warning (Normandy 1944)” diorama.
Lots of pictures will also follow of that one, but on a separate post than this one.
For the time being though, please enjoy the current ones, as well as a few additional ones which allow you to compare the previous bunker I had in mind for this D-Day diorama, but which revealed itself to be the wrong one for this specific scenario. Especially watch for the difference in sizes.


Once the entire construction will finally be ready, including the gun, I will return to this post to show the results of my efforts.
Please note that although there are some fitting irregularities on both the left and right sides of the bunker, once the building will be placed within the future diorama, they will completely be hidden by soil and surrounding vegetation. This is why I will not add more modifications, since they won’t be seen once completely covered by the surrounding terrain.
Give me a couple of days before I can finally show you the final results, since I want to make sure that once you get to see it in its completed form it will actually represent the actual one on Omaha Beach.
Until then, I wish you well and hope to succeed in convincing you of the reality in scale I am trying to achieve. My very best to you all.
3 Likes
This is looking fantastic mate! These textures are going to look so good once you lay a primer down
1 Like
Hi Darren, thank you for your enthusiasm and for your appreciation, but I am baffled by what you may mean by laying down a primer.
I thought that what I have shown was already the primer, unless you meant once the bunker will fully be shown within a complete diorama, in which case I concur, It really would be, since despite being a well crowded and crammed with details diorama, the bunker in itself would certainly be the centerpiece of it all, due to its massive size.
What I am planning is indeed huge and probably also very heavy diorama concerning one segment of Omaha Beach which saw heavy combat and heavy losses on Fox Green or, for the Germans, WN61 near Colleville-sur-Mer.
It will be both long and rather wide.
Long because it will have to contain a segment of the Channel with four landing crafts (one LCM-3, two LCVPs and an LCA); the entire stretch of the beach with the correct obstacles in place, including an anti-tank ditch; the first rocky ledge on which this bunker will be interred together with two Tobruks on each side (one harboring a grenade launcher, the other with a Renault tank turret mounted on it); behind them the initial slope leading to the top of the bluffs with two partially hidden pathways; and finally, on top of the bluffs, one open heavy MG emplacement, another interred Tobruk with another grenade launcher and an open concrete emplacement with 50mm KwK gun formerly belonging to a Panzer III.
Of course all this built with the addition of a lot vegetation, talus, sand and resin water, not to speak of the many figures and a few vehicles disembarking all over the place.
I decided to build such a huge diorama in commemoration of all the men who on D-Day either lost or risked their lives for our freedom in Europe.
Although this is just one little stretch of the D-Day landings, it symbolizes all the others as well, which also contributed to liberated our continent from the Nazi scourge.
Moreover, it won’t be the only one I am planning to build.
In fact, there will be others that will involve both British/Canadian operations around the Caen area and U.S. operations performed either by Armored/Infantry or Paratroopers in the Contentin and St. Lo areas.
All this then followed by a couple of dioramas concerning Osterbeek and Arnhem during operation Market-Garden, then the taking of Aachen, the Battle of Hurtgen Forest and various operations during the Battle of the Bulge only to reach the Rhine River at Remagen.
Every now and then I will also take a breather and dedicate myself to some planned construction of both Star Trek models and Real Space ones.
And when time allows me, also the building of Battle of Britain aircraft during the final aerial campaign on September 1940, together with some involved in Operation Desert Storm in 1991.
Lots to do and so very little time to do it all, but at least a full day’s work for a guy who by now has all the time in the world being fully retired. ![]()
![]()
And then they call me Crazy-Creator,… well, actually it was me who called myself that so what am I complaining about? ![]()
![]()
![]()
Suffice it to say that I must have been gone gaga with all this, but there is no more pleasure in life than creating something of value from tiny pieces of either plastic or other materials.
It keeps one’s mind alert and wide open to other possibilities.
Wish me luck with all that stuff, because I really need it.
Be well and please keep on following my foolish efforts, they are all worthy of a straight jacket and a padded cell. ![]()
![]()
![]()
1 Like
Oh, you did too! My mistake…
1 Like
![]()
![]()
![]() Yes, I did… call me Chief Inspector Clouzeau… Kill! Kill! Kill!
Yes, I did… call me Chief Inspector Clouzeau… Kill! Kill! Kill! ![]()
1 Like
Sunday, Bloody, Sunday… well, not really, but a very messy one?.. Oh yes!
By now I have applied three different washes on top and to the sides of the R677 bunker, but only on the exterior parts, and as you will see, it still is rather wet with them, but by tomorrow I believe they will have completely dried off and the result is what I actually expected it to be.
The washes have completely broken off that “clean” factory made effect I made with the acrylic concrete compound by AK Interactive and now it really looks “lived in” and fully exposed to weather and sea conditions all around it, since Normandy is well known that during the Fall and Winter seasons it receives a lot of rain and is very damp.
Moreover, even the salinity of the sea contributes to its corrosion which can be seen on the chimney pipe on the roof, the exterior parts of the locking doors to the rear and the rusty air vent, especially on all metallic objects.
Tomorrow I will also proceed in the interior but more subtely than on the outside faces.
You will also see a hint of mold to the lower sides of the surrounding walls, although they will then be covered with terrain, but will still be seen where they are not covered, that’s to say on the front, inner side of the protection wall and to the rear.
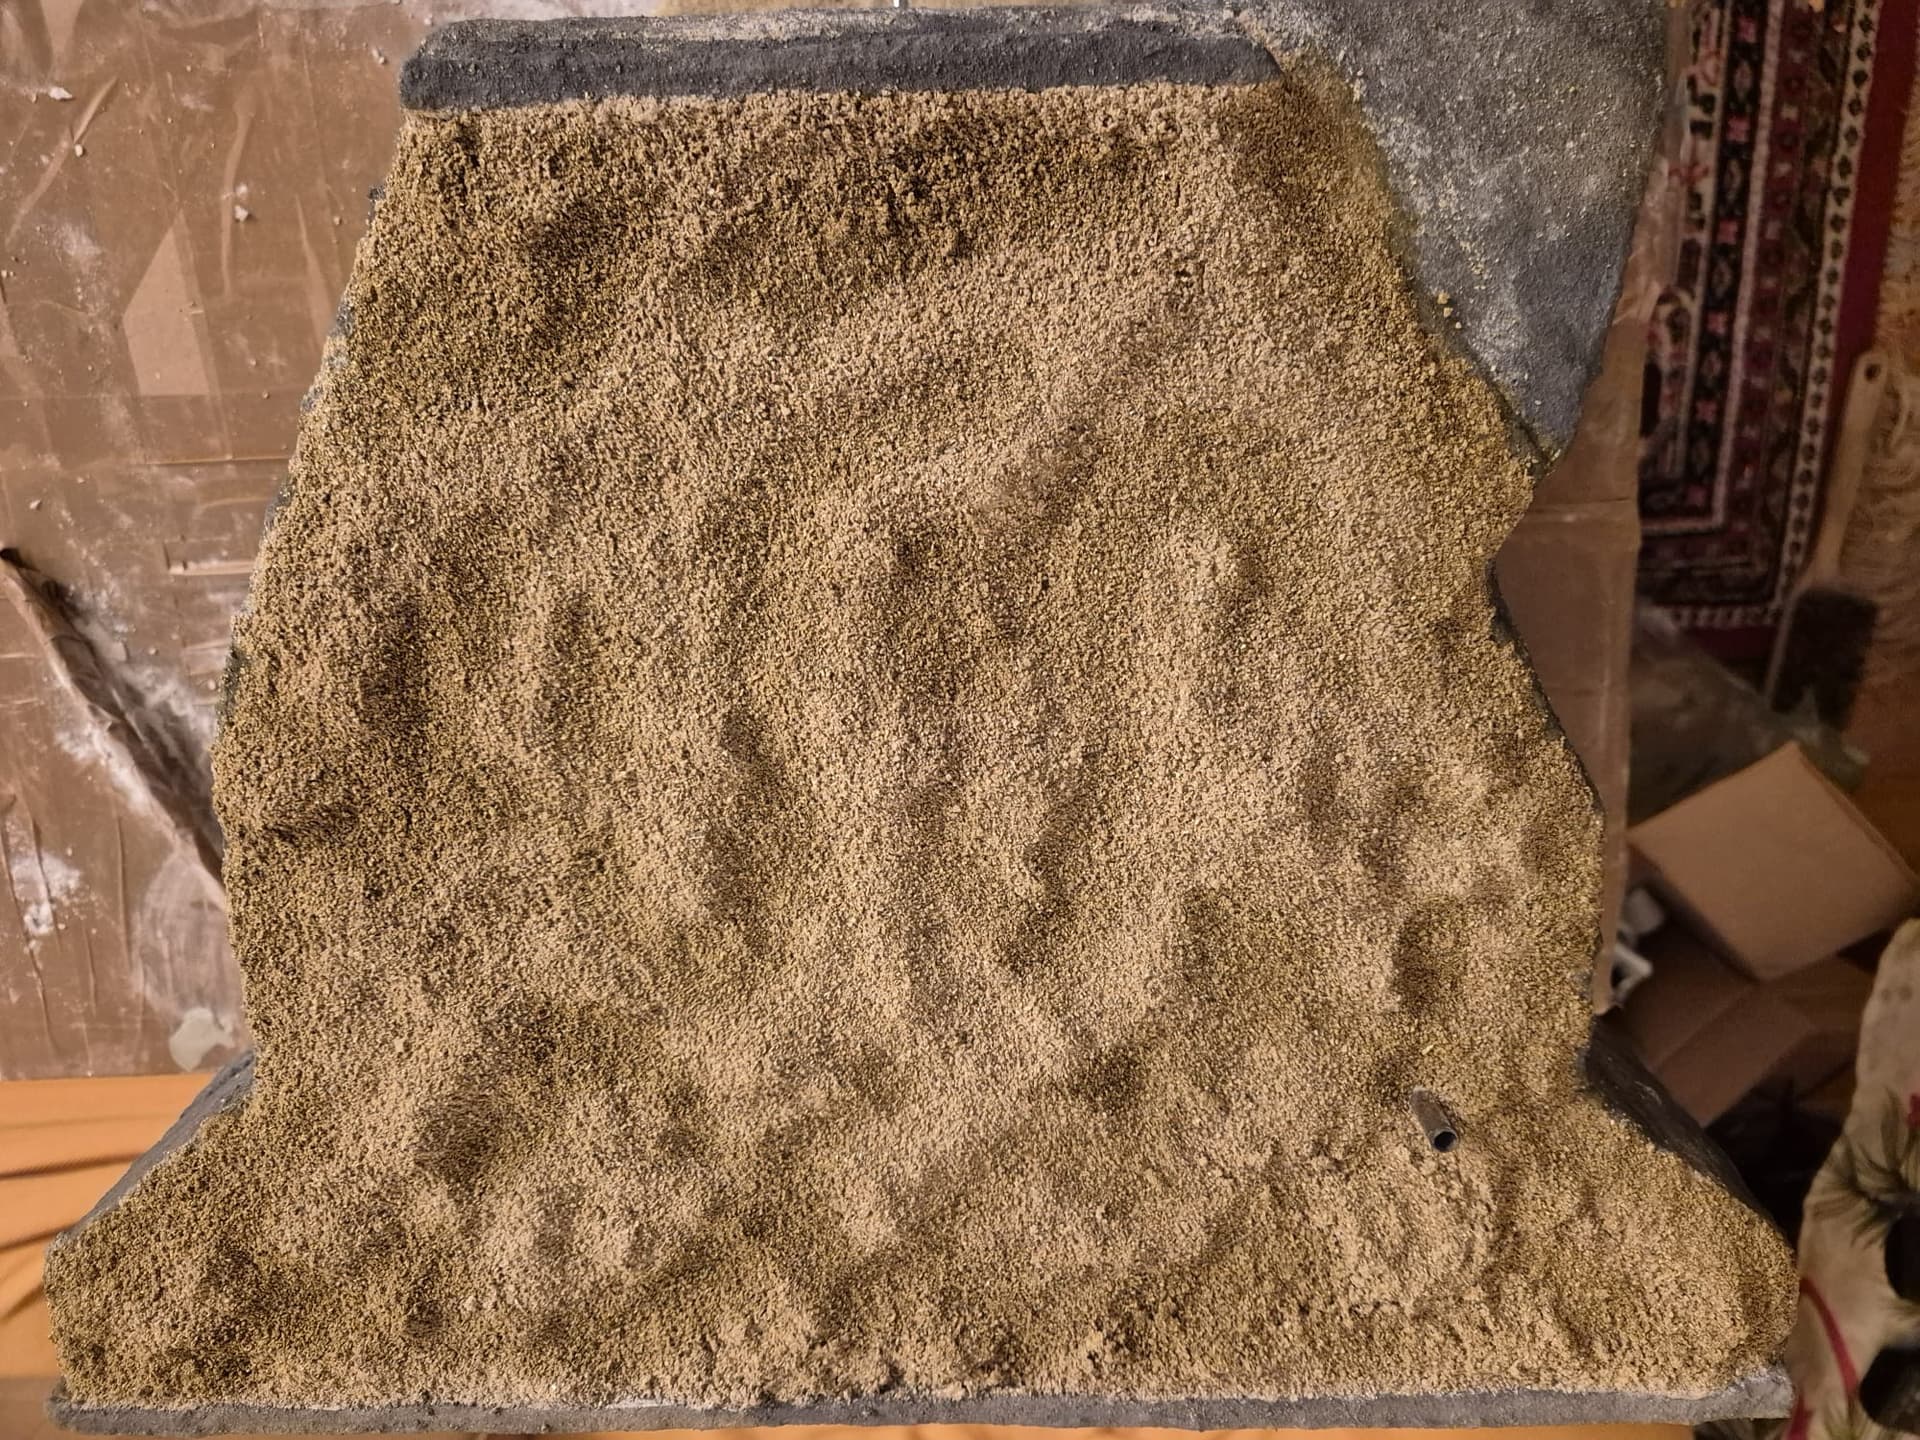
I also already somehow hinted to the surrounding terrain, which will actually be a sandy one, but this will come just later, when the washes are completely dry. Some sand will also be sparsely distributed within the bunker interior floors.
But before I will proceed with interior weathering I will apply the Mold-A-Scene plaster on top of the roof, spray with the already announced personal glue mixture that will inflate it and then stain it with Woodland Scenics various pigment Earth tones, just like you could observe in the little wrong bunker I have shown you in my last post.
In addition to the pictures I am adding right now, showing the exterior appearance of the bunker, I will also show you an initial modification in appearance of the Longues-sur-Mer gun battery number 3, in which I have applied an ample beige/gray wash to the exterior platform and the interior Gun platform wich closely resembles the sandstone with which that area was built.
Later on the entire Bunker will also be covered with acrylic concrete only to be washed down like the R677 you are seeing here. And again, it will also receive the very same addition of Mold-A-Scene plaster to depict soil on the rooftop.
The only difference between the two will be that the Battery will receive an ample addition of vegetation as well, while the R677, which was built much later, will only receive a few touches of tiny vegetation barely growing in it.
I hope you will like the effect that I have obtained like this… and here they are… the pictures.


Please also let me know sincerely what you think about my results so far, because four or more eyes see much better than just my pair. While I may find it somehow satisfying others might not really and therefore I would really like to hear from you all, what could be done better or perhaps, in a completely different way.
You are the judges, not me personally. I completely confide in your opinions and let it open to you to comment freely about the entire procedure I have exposed thus far.
Remember, I will only be grateful for that, whether for bad or for good, I will seriously consider everything you will write about it and heed your counsels for my next projects, or even for the current ones.
Be well, stay safe and in health and continue to have fun with your own creations as I am.
Until my next post…
2 Likes
Monday, the day of torture for many… but for me another day of more finished work.
Today I worked on the two bunkers at the same time. The two being the current R677 and the other the Naval one at Longues-sur-Mer which I neglected for much of my time, but today I decided to finish it with the present one.
Unfortunately I did not manage to really finish it, since working on two humongous buildings at the same time requires some time and patience.
First of all, I have applied acrylic concrete to the M272 (the Naval Bunker), then I washed it with a much darker shade of gray, I then gave a second hand of the beige/gray wash to the interior gun platform and to the exterior one.
Finally I sprayed the roof with abundant liquid glue and poured the Mold-A-Scene in place in irregular batches to simulate soil. I then sprayed more liquid glue all over it to consolidate and fix it completely.
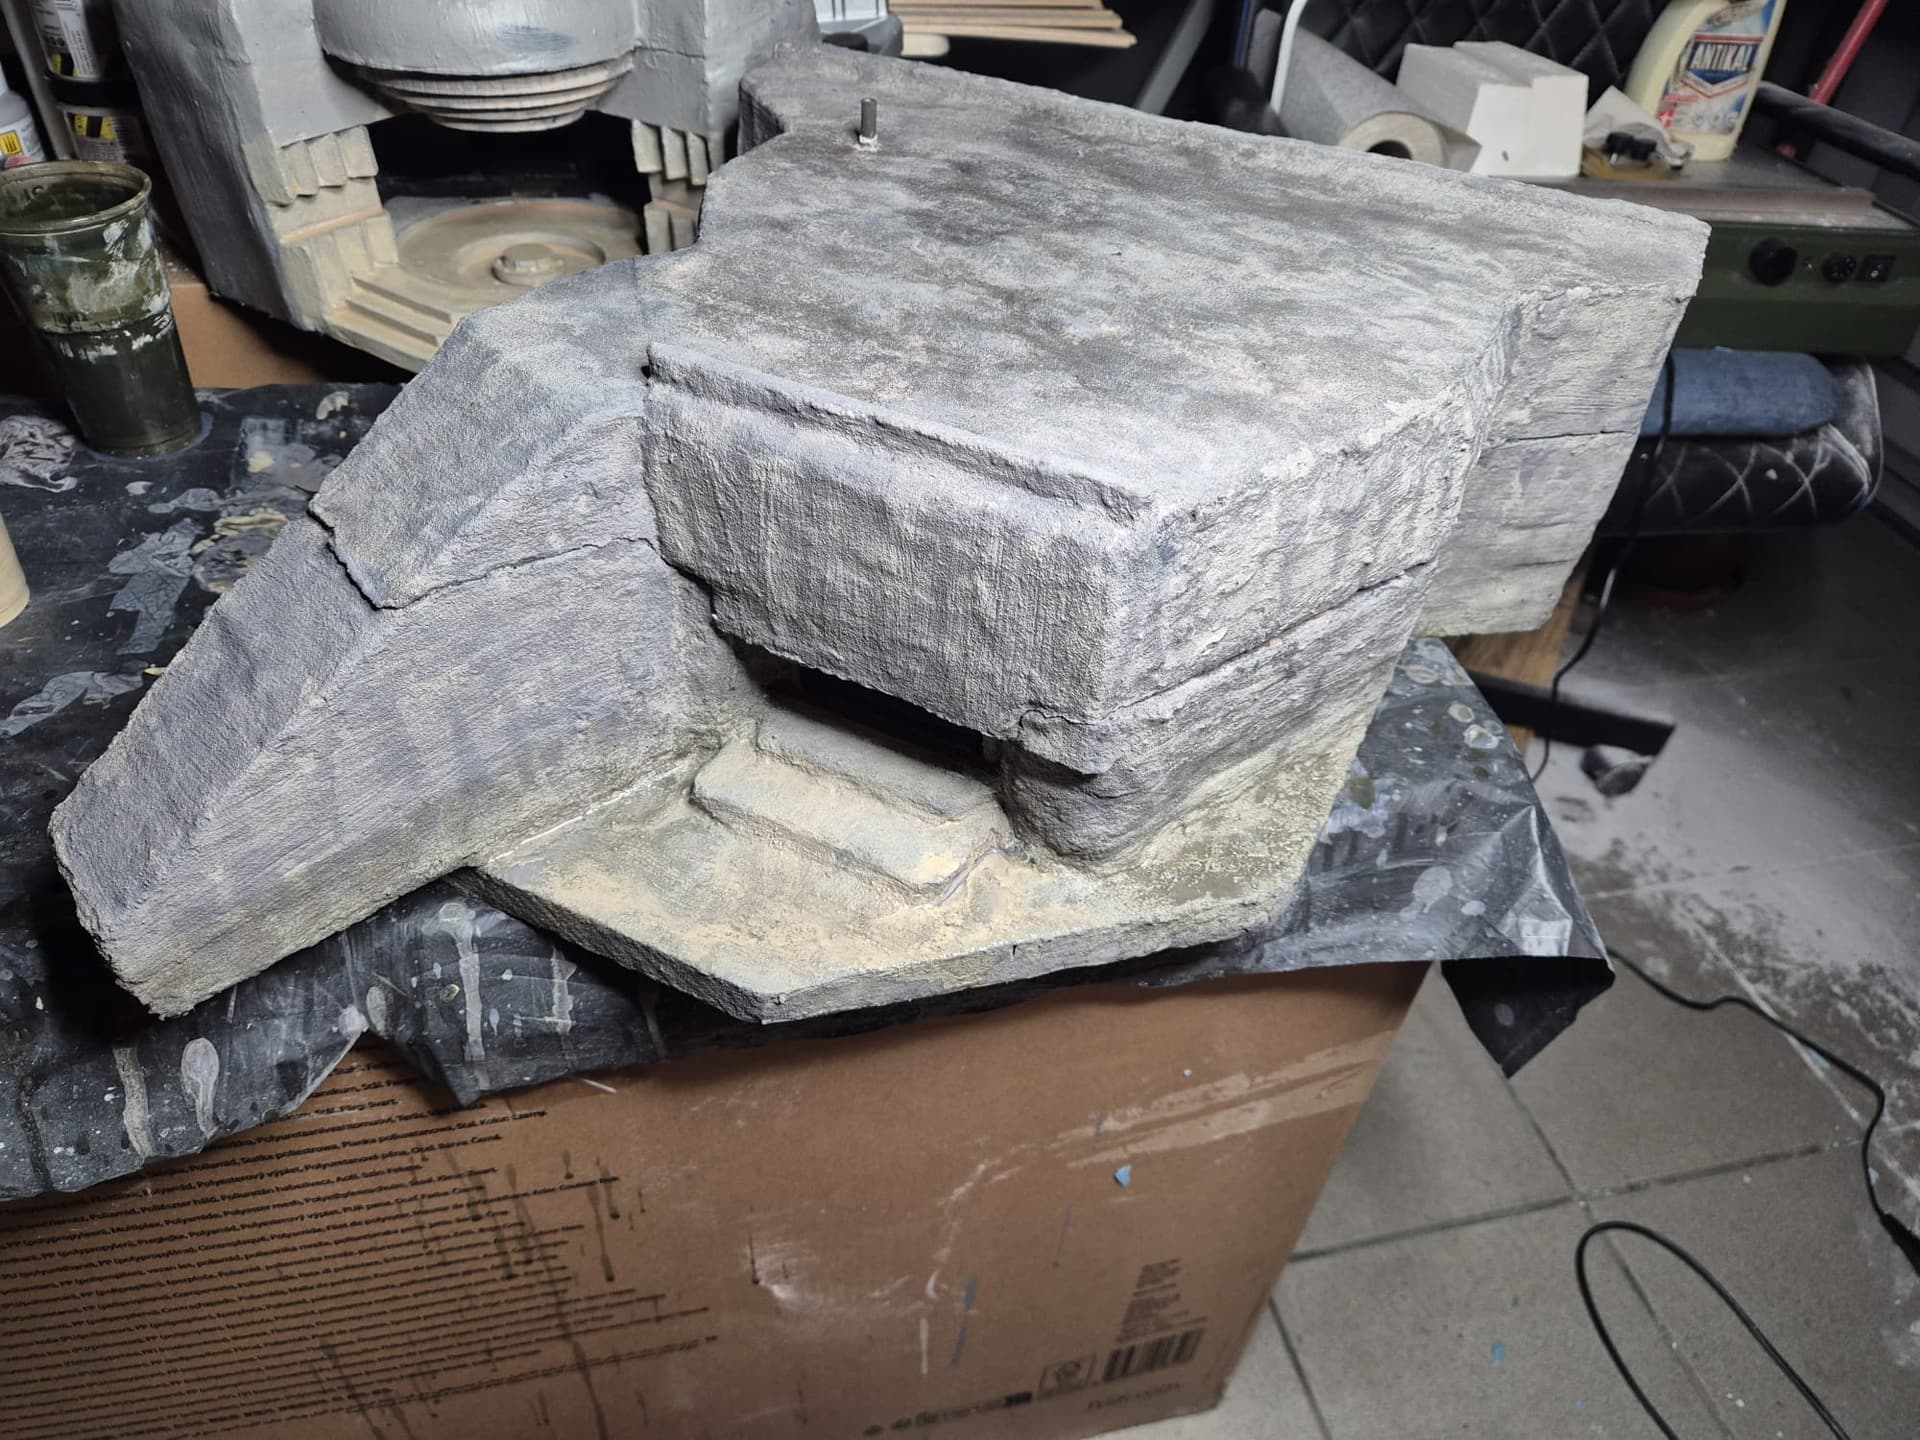
I then went back to the R677 Omaha Beach bunker and applied a complete wash of medium/dark gray to the walls and floor, as well as the underside of the roof.
Unfortunately at this time I cannot show it because then I did apply the same procedure as the one above on the top of the roof of this bunker and it needs to dry thoroughly before I can again lift up the roof revealing the interior which will most probably happen tomorrow.
I also added more of the Mold-A-Scene to the front platform and sprayed it as before. On top of it I distributed real sand and once again fixed it with the same glue.
While the R677 is practically finished it still needs some minor adjustments, but the M272 naval one, still needs a retouching of the rear protection wall on which I will paint the lateral stones in a granite color using some pigments by Woodland Scenics and define the mortar that holds them together with AMMO MiG acrylic concrete, which tends to be more gray then its AK Interactive one, which is more a tannish gray.
Once that’s done I will also have to drill for circular holes (2 on each side of the protective wall) for the air vents which will be painted in a rust color but then aged by adding grime and a dark gray wash and then glued into those holes.
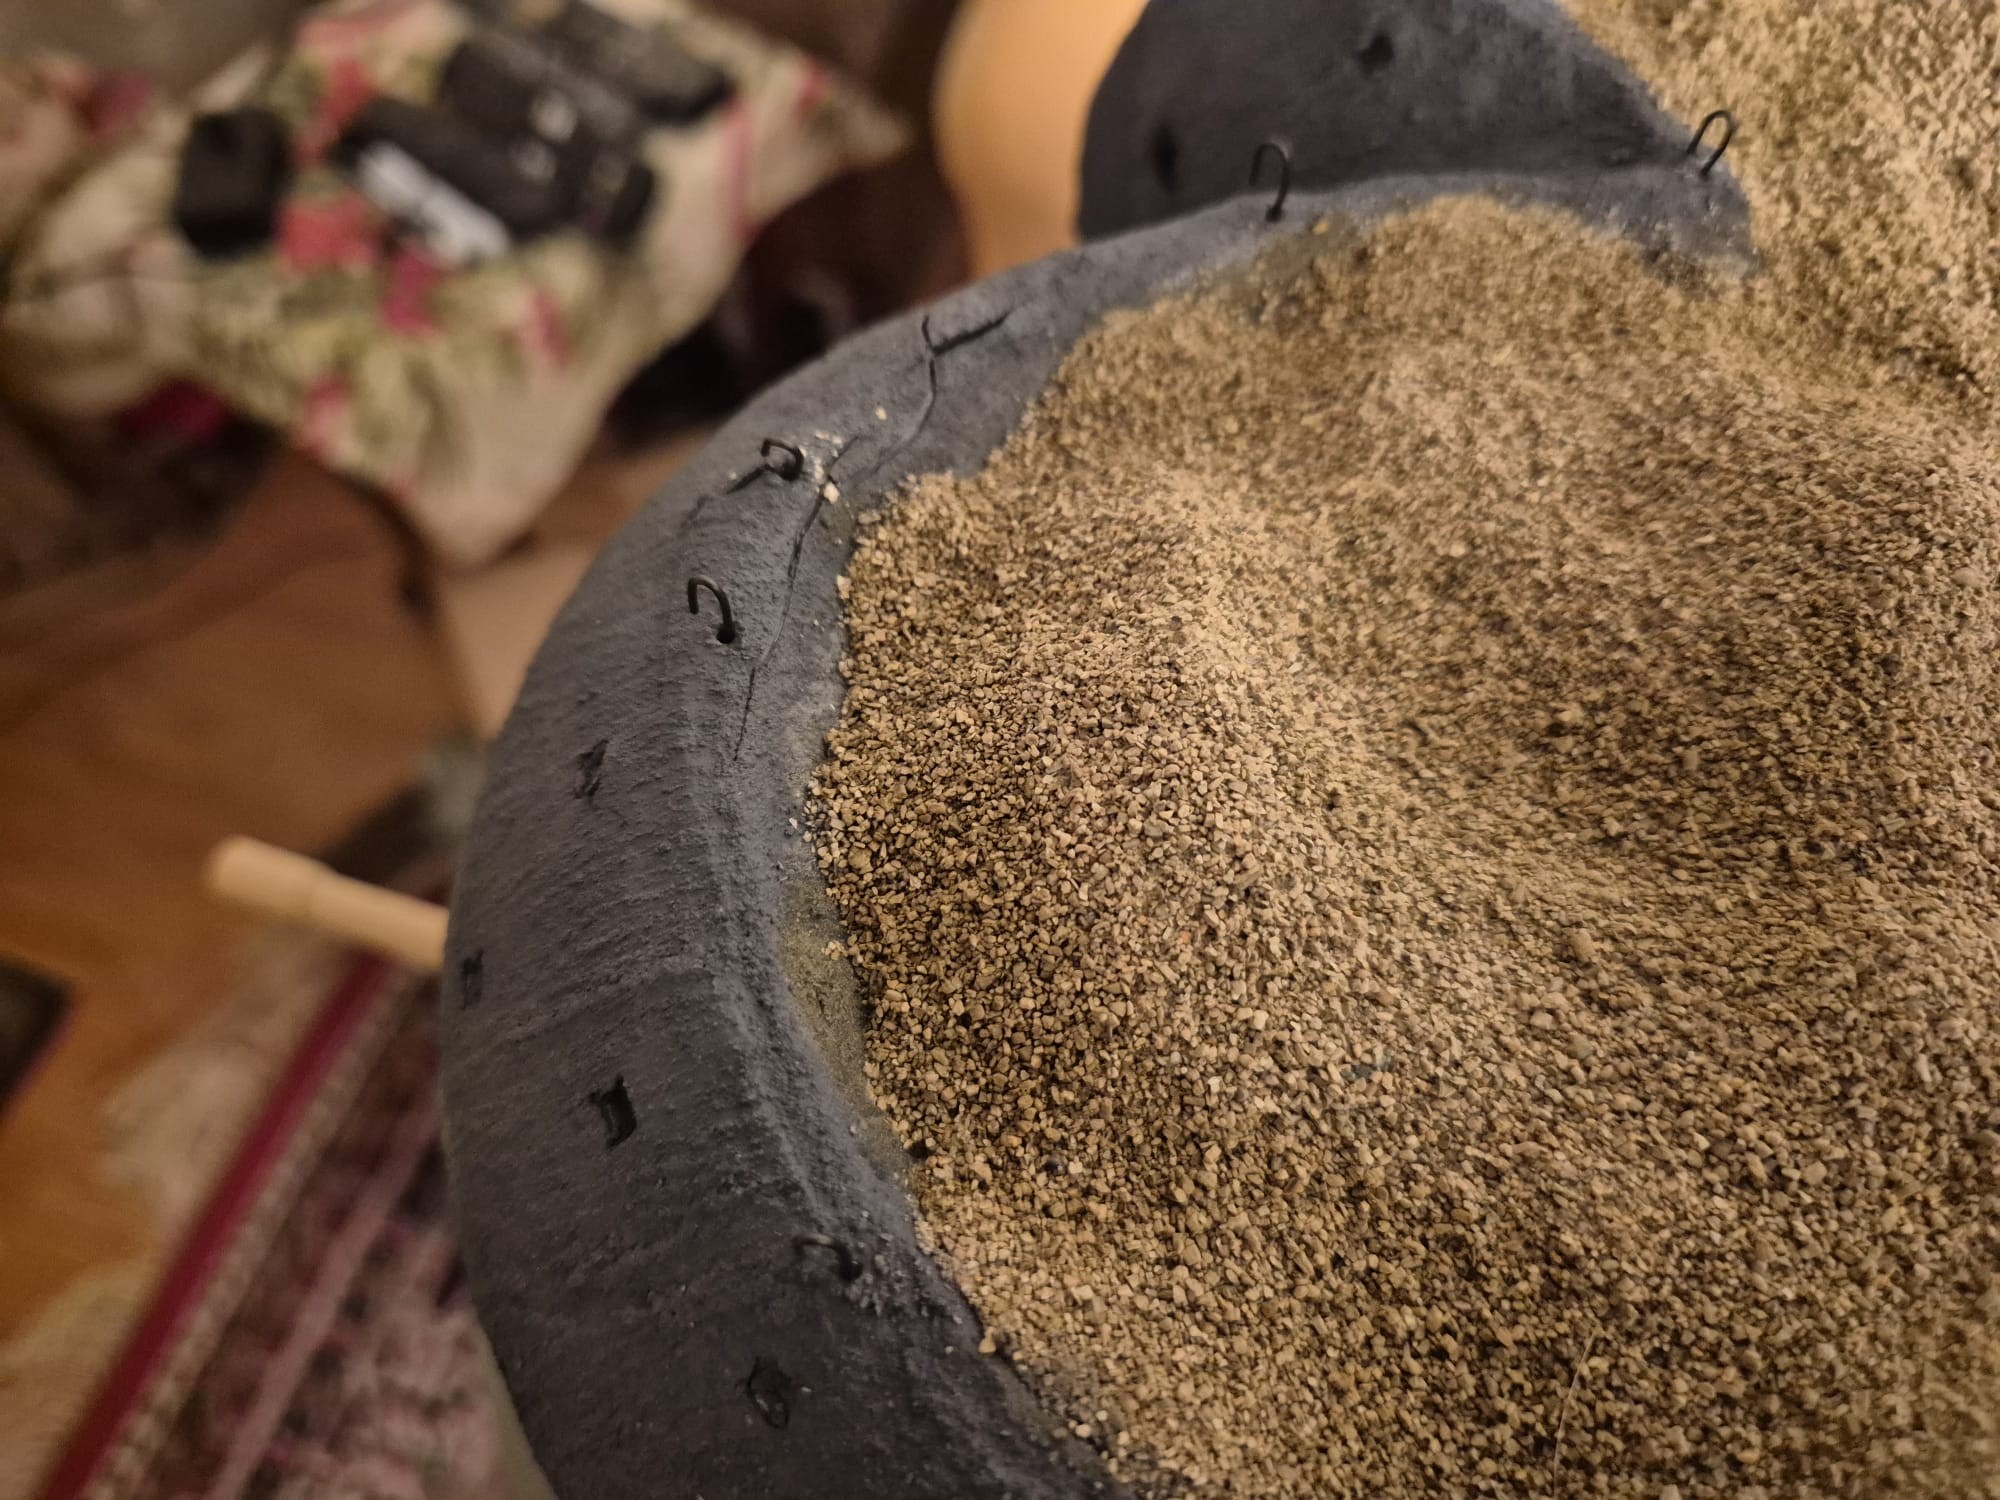
Futher on, I will punch various square holes on the top and on the sides of the roof and parapets, And speaking of parapets, I will then fix in both the front and rear ones a number of brass hooks which I will paint with an Iron compound. They serve to hold the camouflage net in place.
And as if it weren’t enough, I will then fully stain both roof soil covers with Earth tone pigments which will prepare both roofs to receive some vegetation (grass, tiny bushes, twigs and even some wild grass).
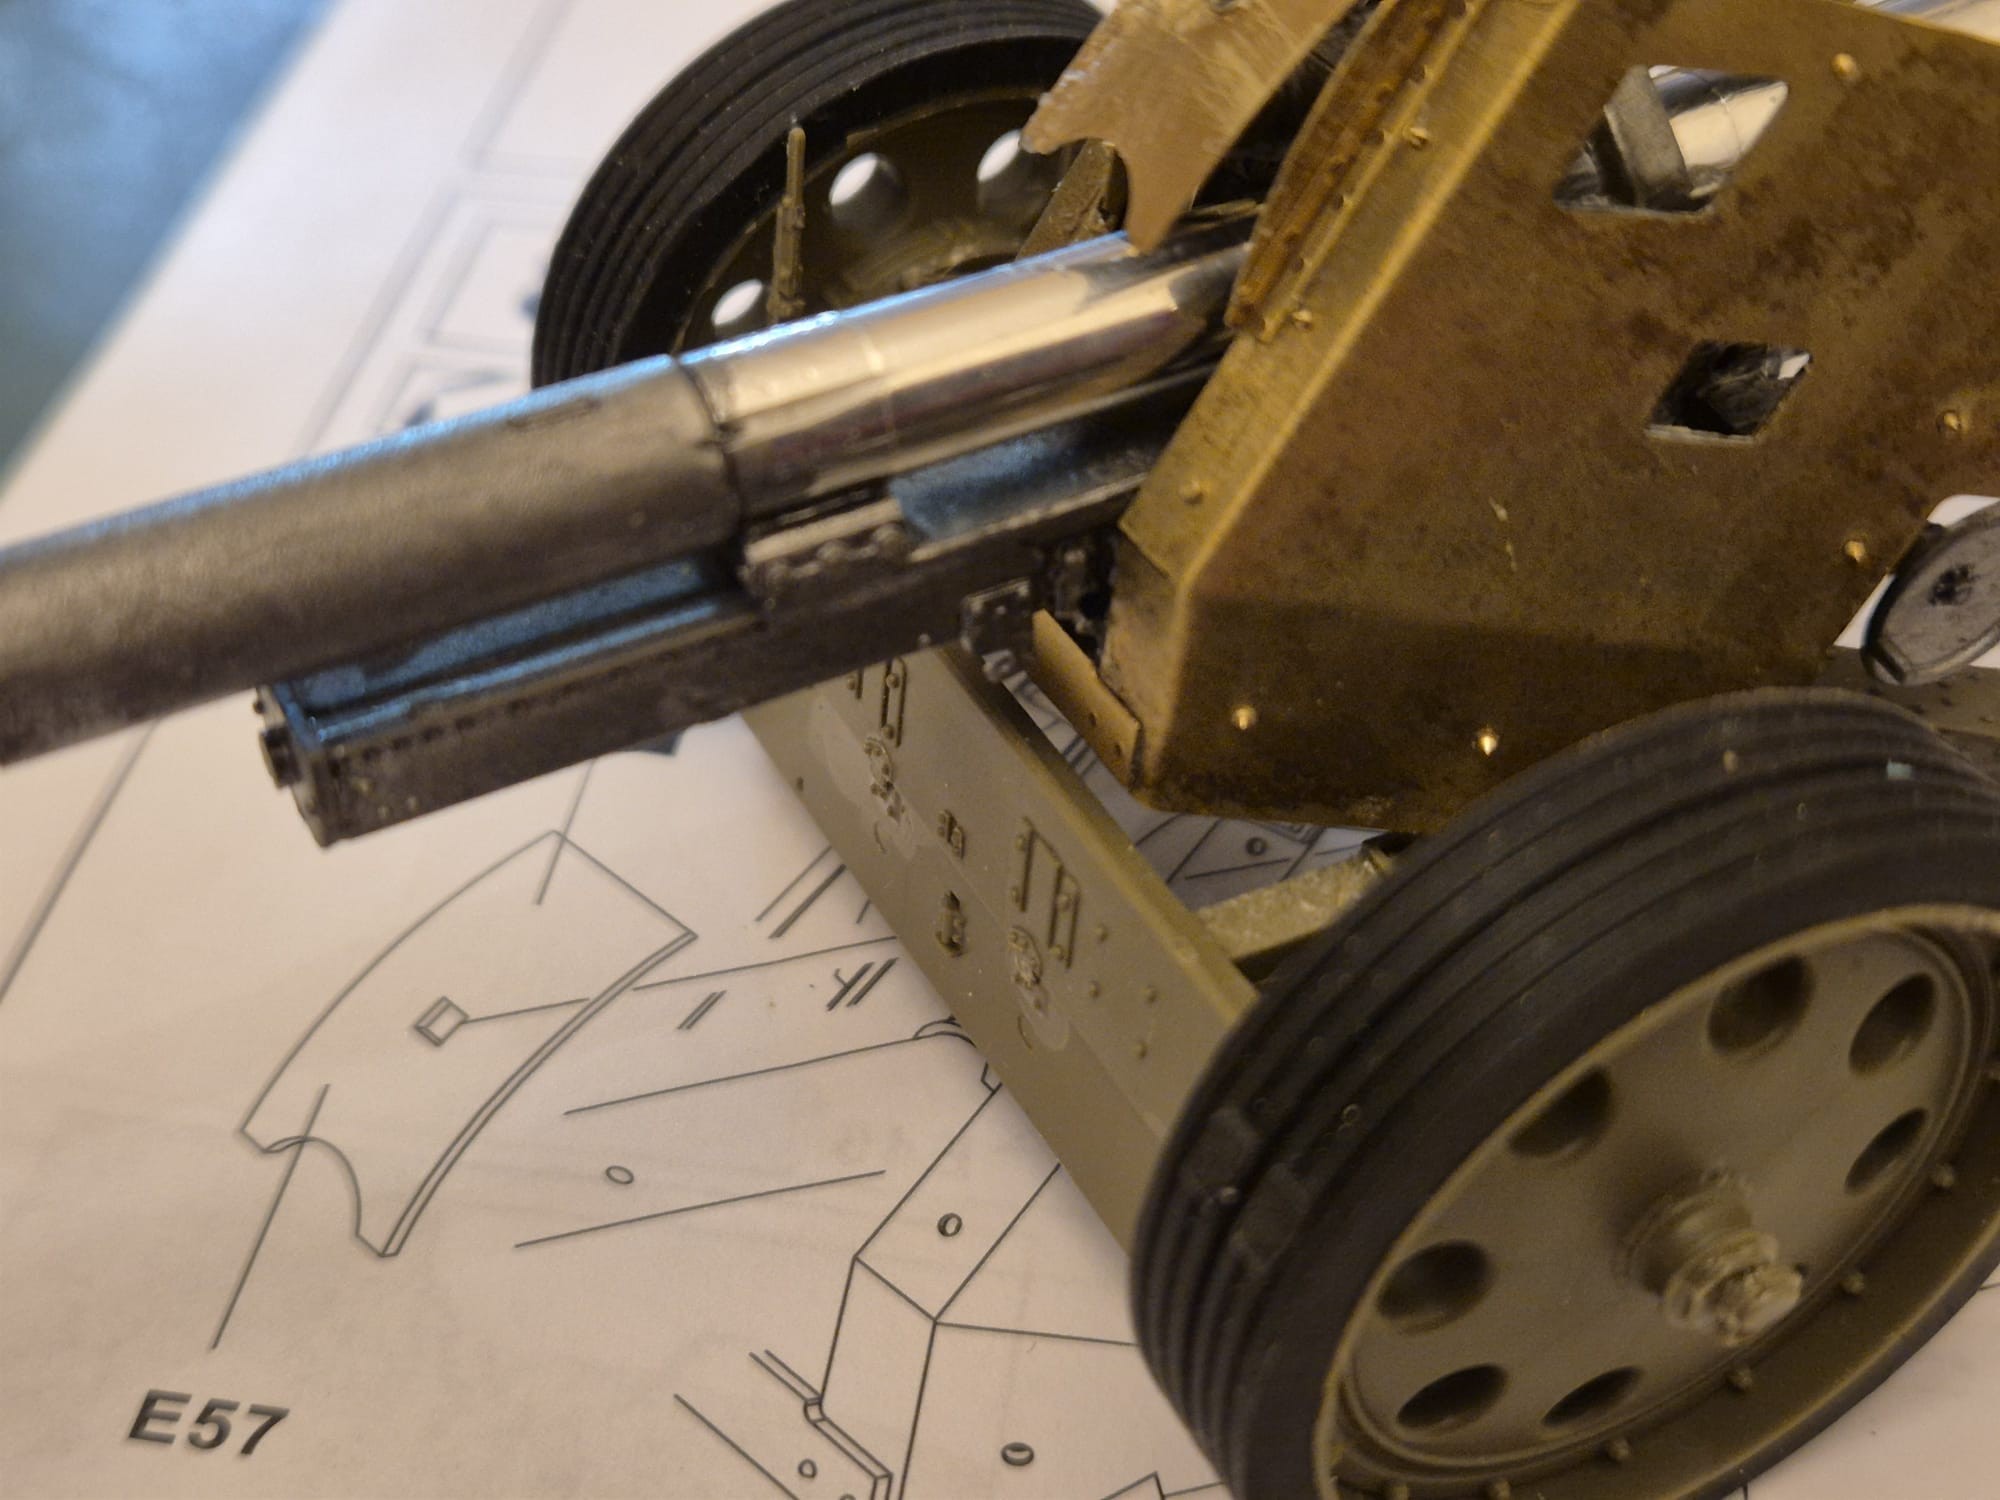
Only after that work is finished will I dedicate my full attention to both guns. While the 150mm naval gun is already in its own casemate, the PAK43/41 88mm AT gun needs some more tiny pieces to be added and its final shield mounted, which will take a while, due to the microscopic bolts that compose it holding two shields together.
Once this operation will be finished I will paint both in Mid-War German Yellow, which was the standard regulation paint used in Normandy and place them both in their respective bunkers. The naval gun is a movable one, meaning that it can turn on its socle, as well as lift or lower its gun, while the PAK43/41 will be static glued in position within its bunker but will also be able to slightly turn on its cradle and lift or lower its barrel as needed.
And now for the current pictures I have promised…

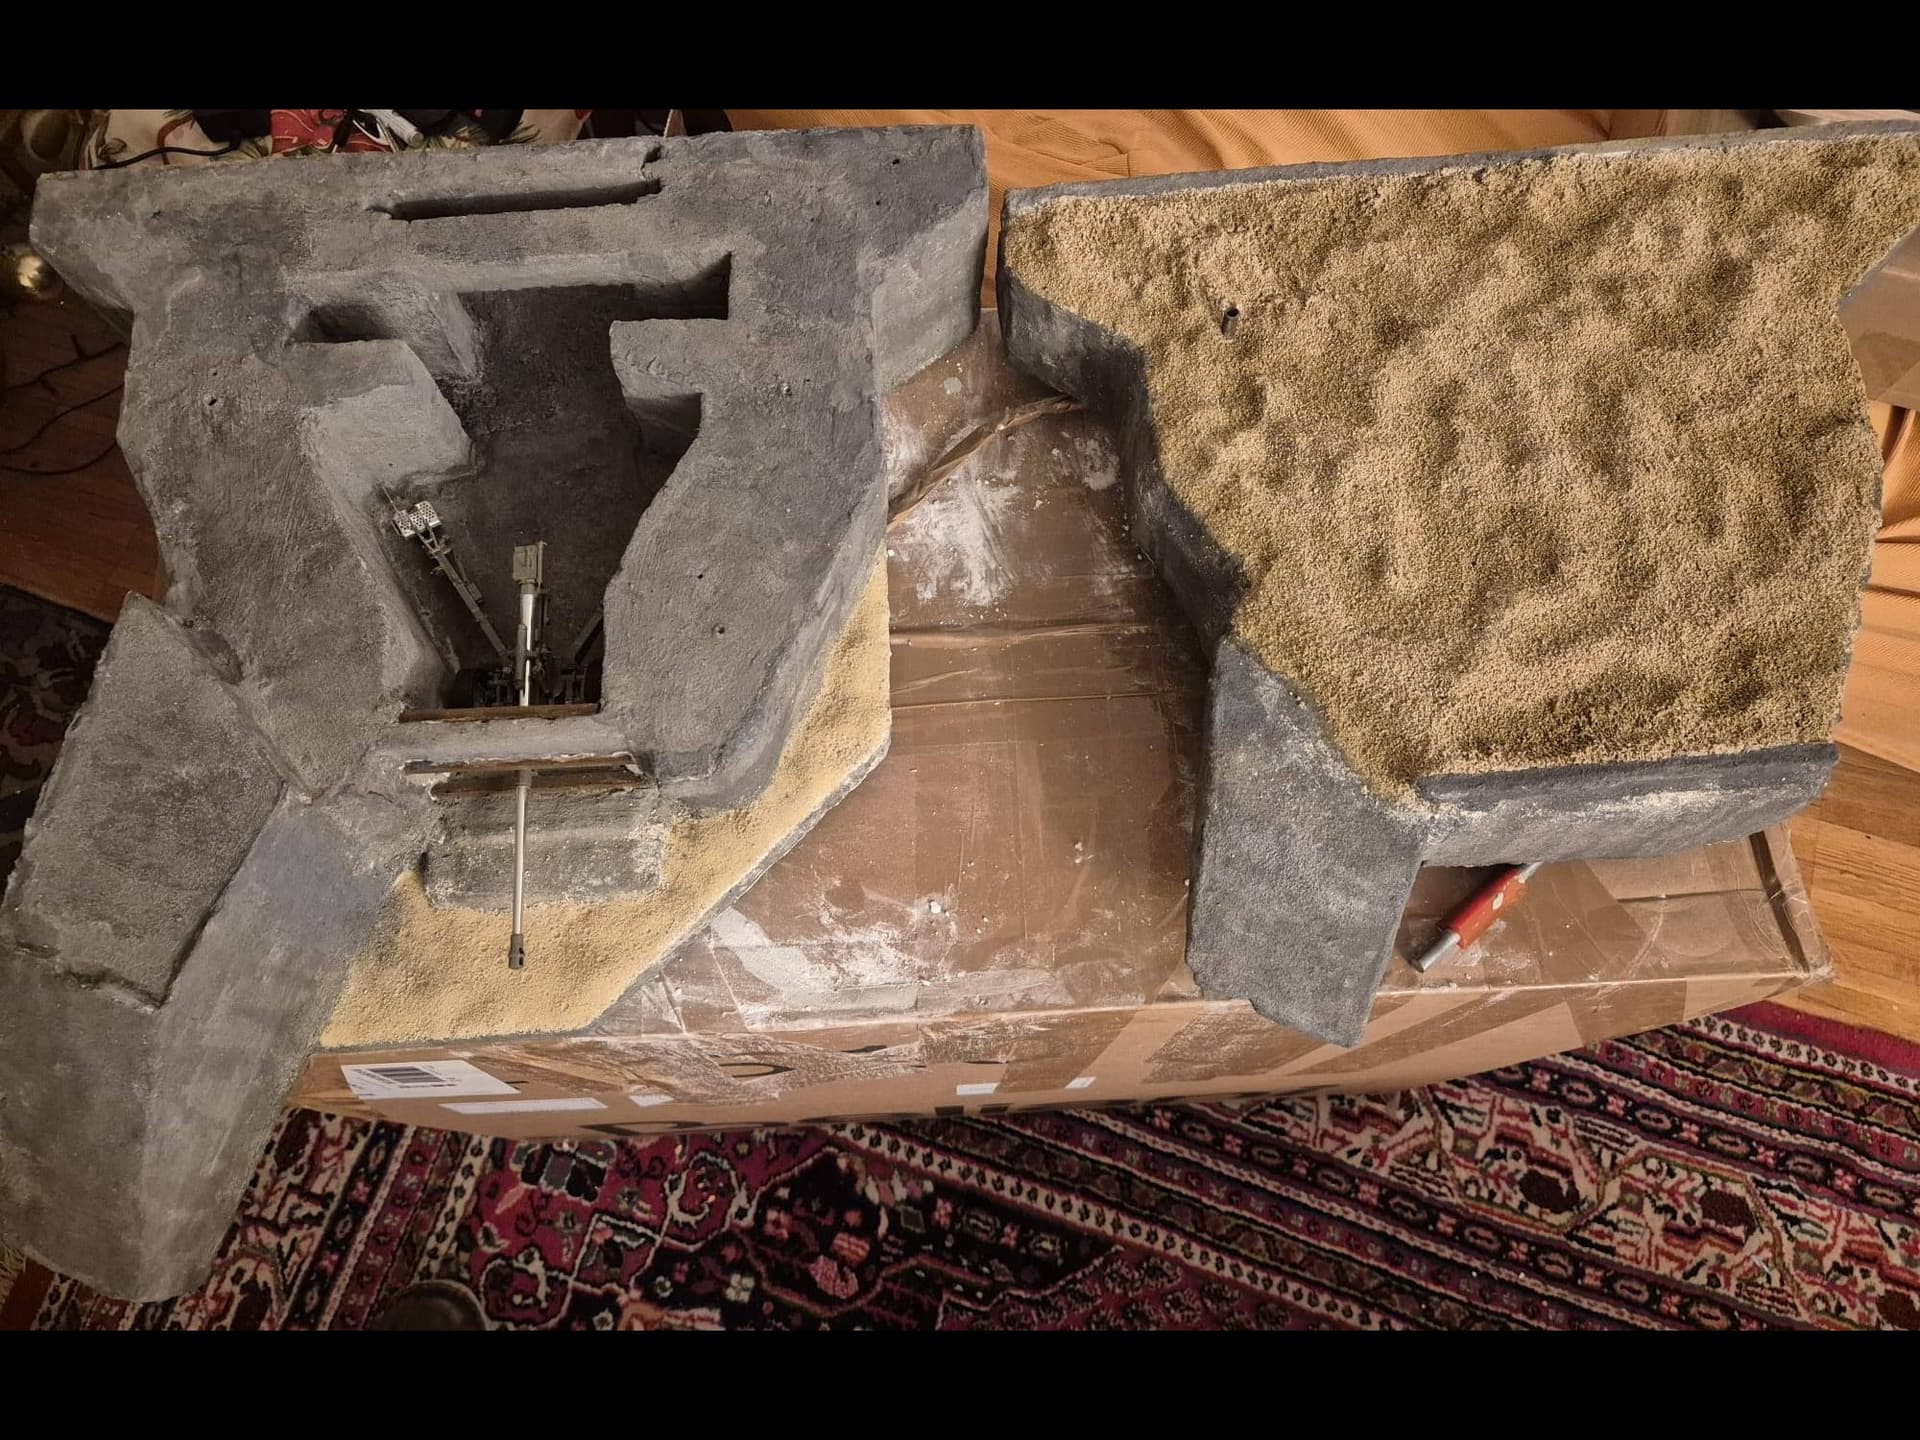
Now a comparison of the two bunkers: the R677 against the M272…

And here is what I have done with the M272 naval Bunker:
And so another day has passed having achieved what I had planned to do, although not completely.
Tomorrow, if everything goes my way, I will finally show you both the bunkers in their completed and finished way. The guns will still be on their current state, but do not worry, they will soon reappear in their full glory.
And remember, after that I will go on holiday until the end of May, but in June we will see each other again with my previous project which is “The Last Warning (April 1944, Normandy)” in which I will start building all the still missing vehicles and figures as well as completing it with a generous amount of vegetation.
Until my next post please stay safe and be well, but above all have fun with our common hobby. ![]()
![]()
3 Likes
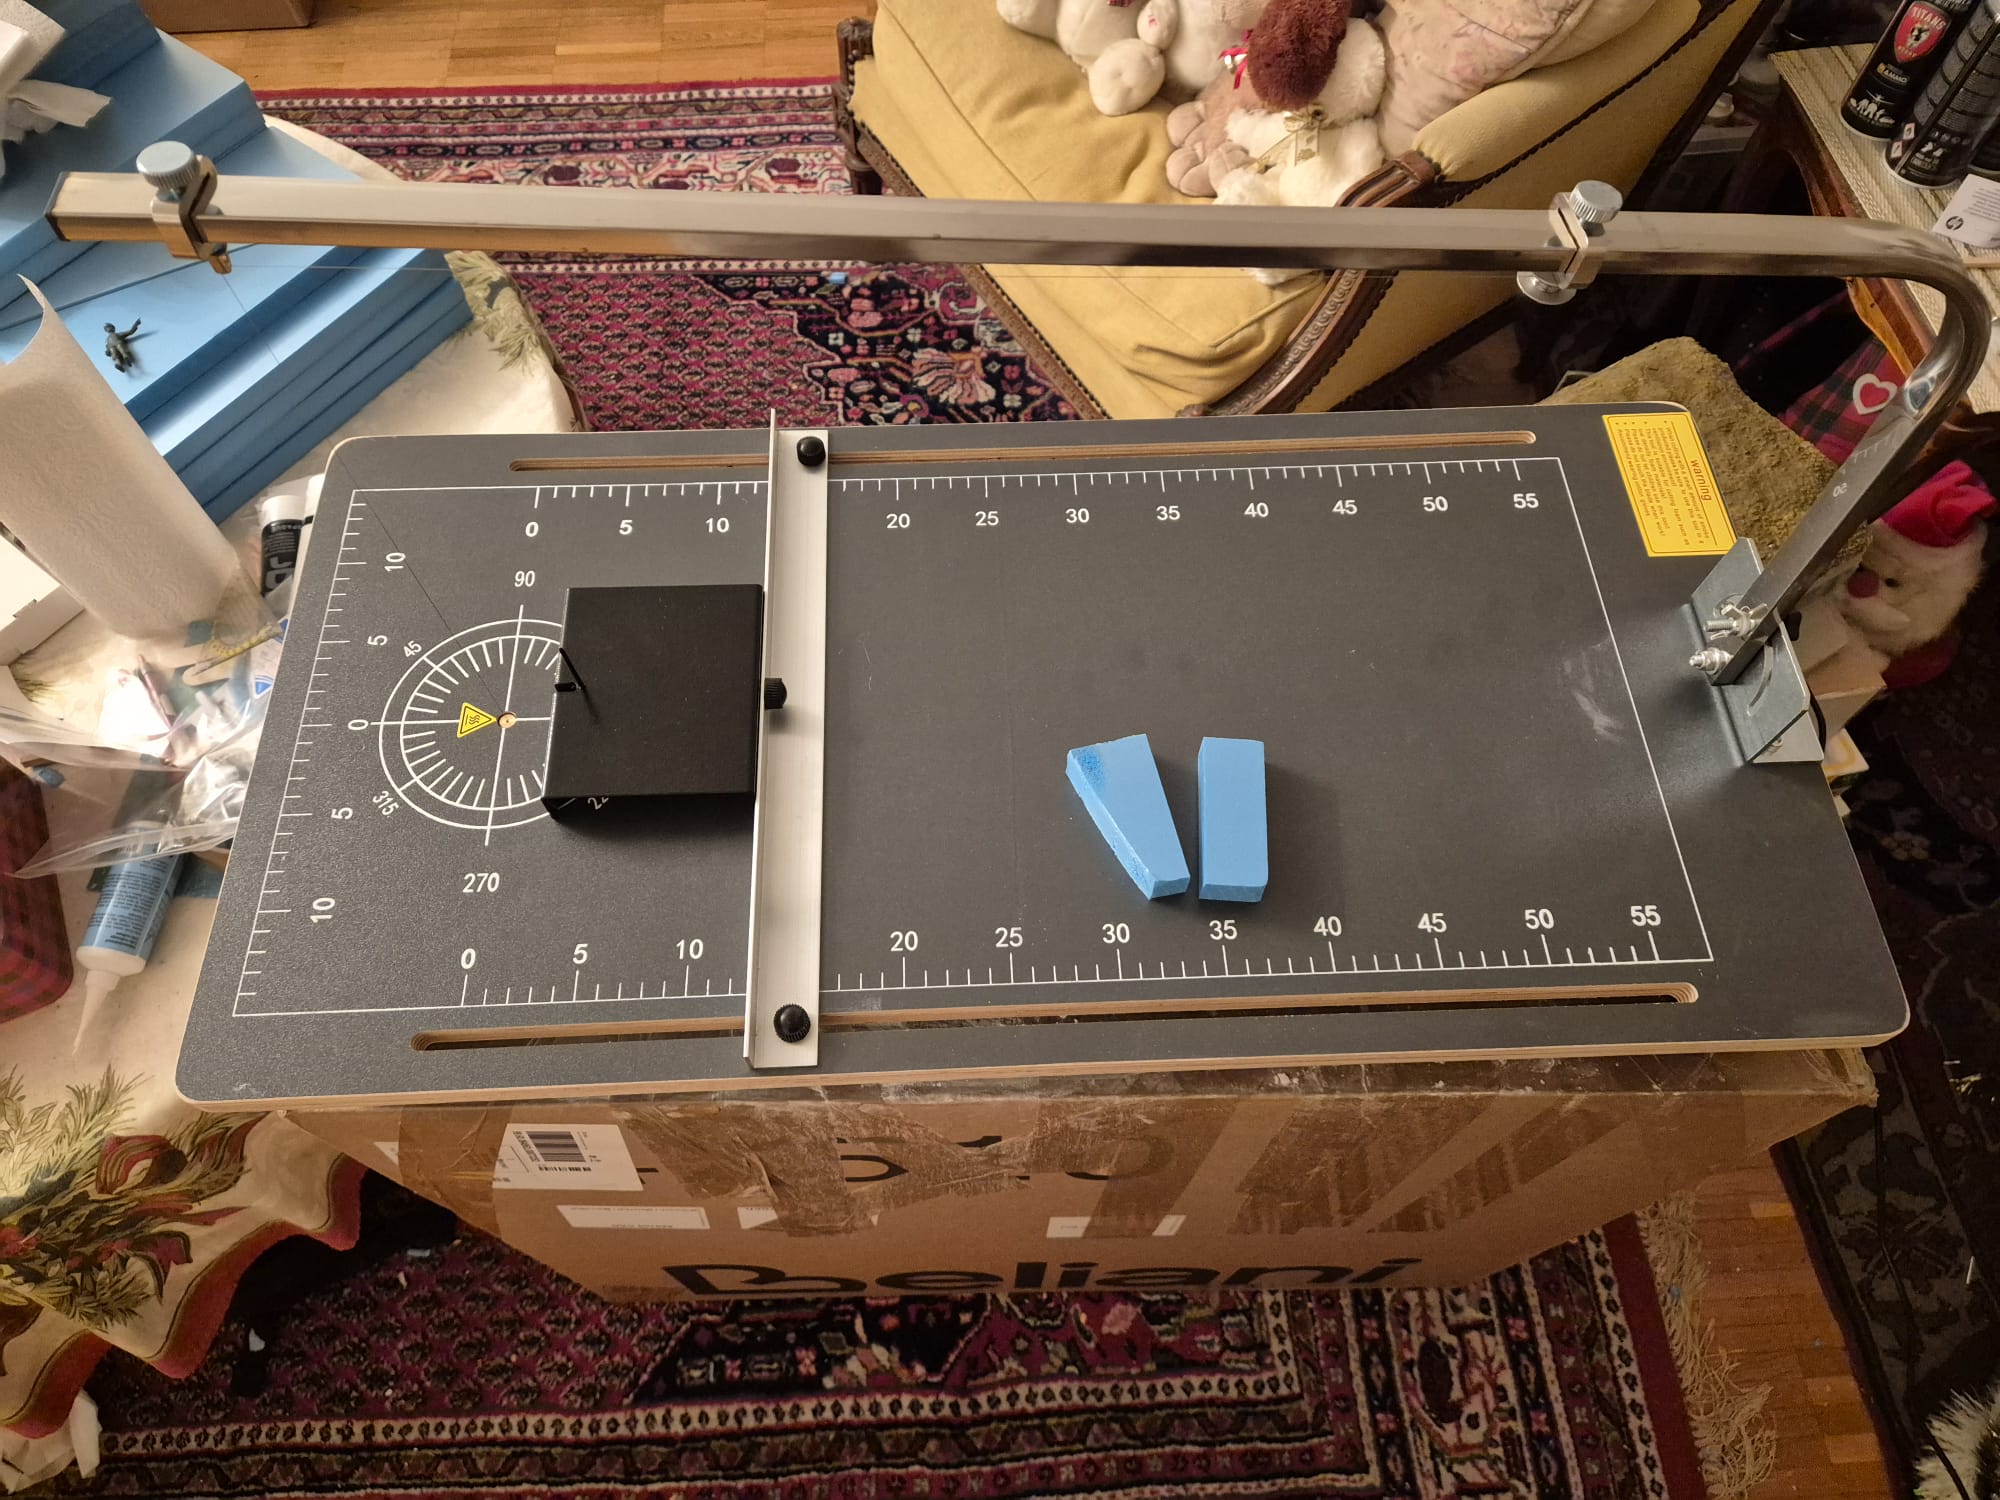
Last rites before the finish,… but Eureka! I finally received the right hot wire cutter. A much better one than the Proxxon that didn’t work.
This did work from the start once mounted together.
Practically the same operation as with the Proxxon only that it has a much large surface to work on (really large). It is also more expensive, but really good for my projects.
It only has one downside. Its wire has a rather fiddly way to be operated from the suspended arm, but nothing one cannot control with a bit of patience and a triangle ruler or a steel carpenter square.
But the advantage to also have a long arm that can pivot at an angle side to side is a great advantage when cutting large polystyrene plates having a slant in them. Had I had it prior to my construction the bunker would look quite different and much better detailed, but I am happy anyway.
And these are the pictures of my proudly owned brand new hot wire cutter.
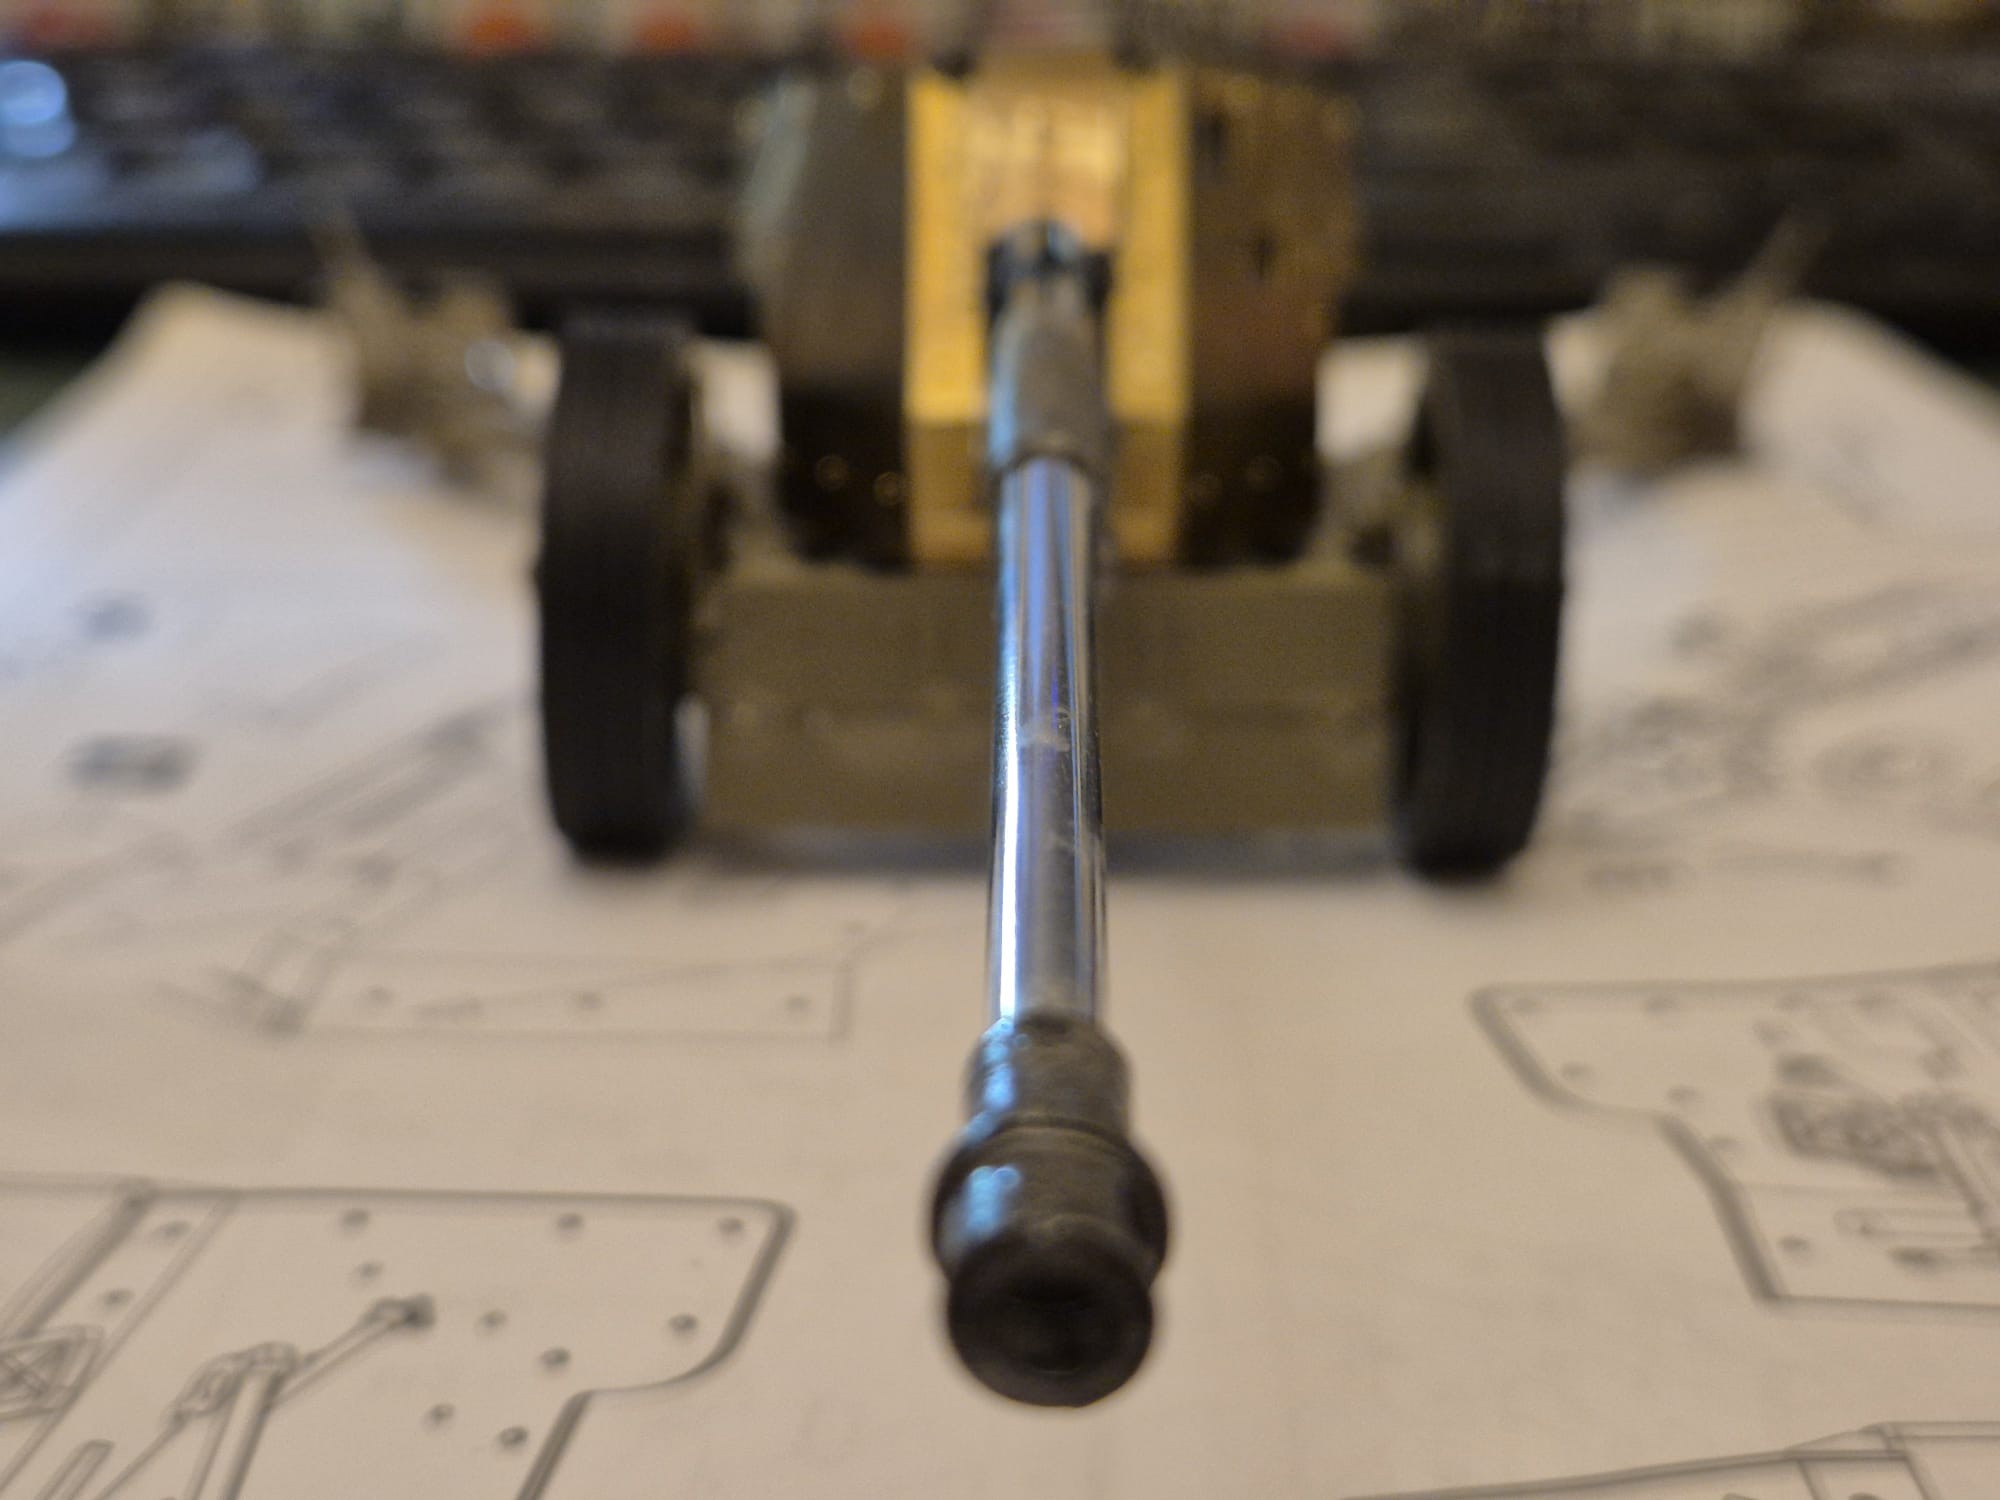
And now to the main meal. I have finally completed both bunkers. The R677 reserved for Omaha Beach and the M272 naval bunker reserved for the later Longues-sur-Mer diorama.
Now, all that remains to be done is finishing the PAK43/41 and paint it together with the naval gun as well.
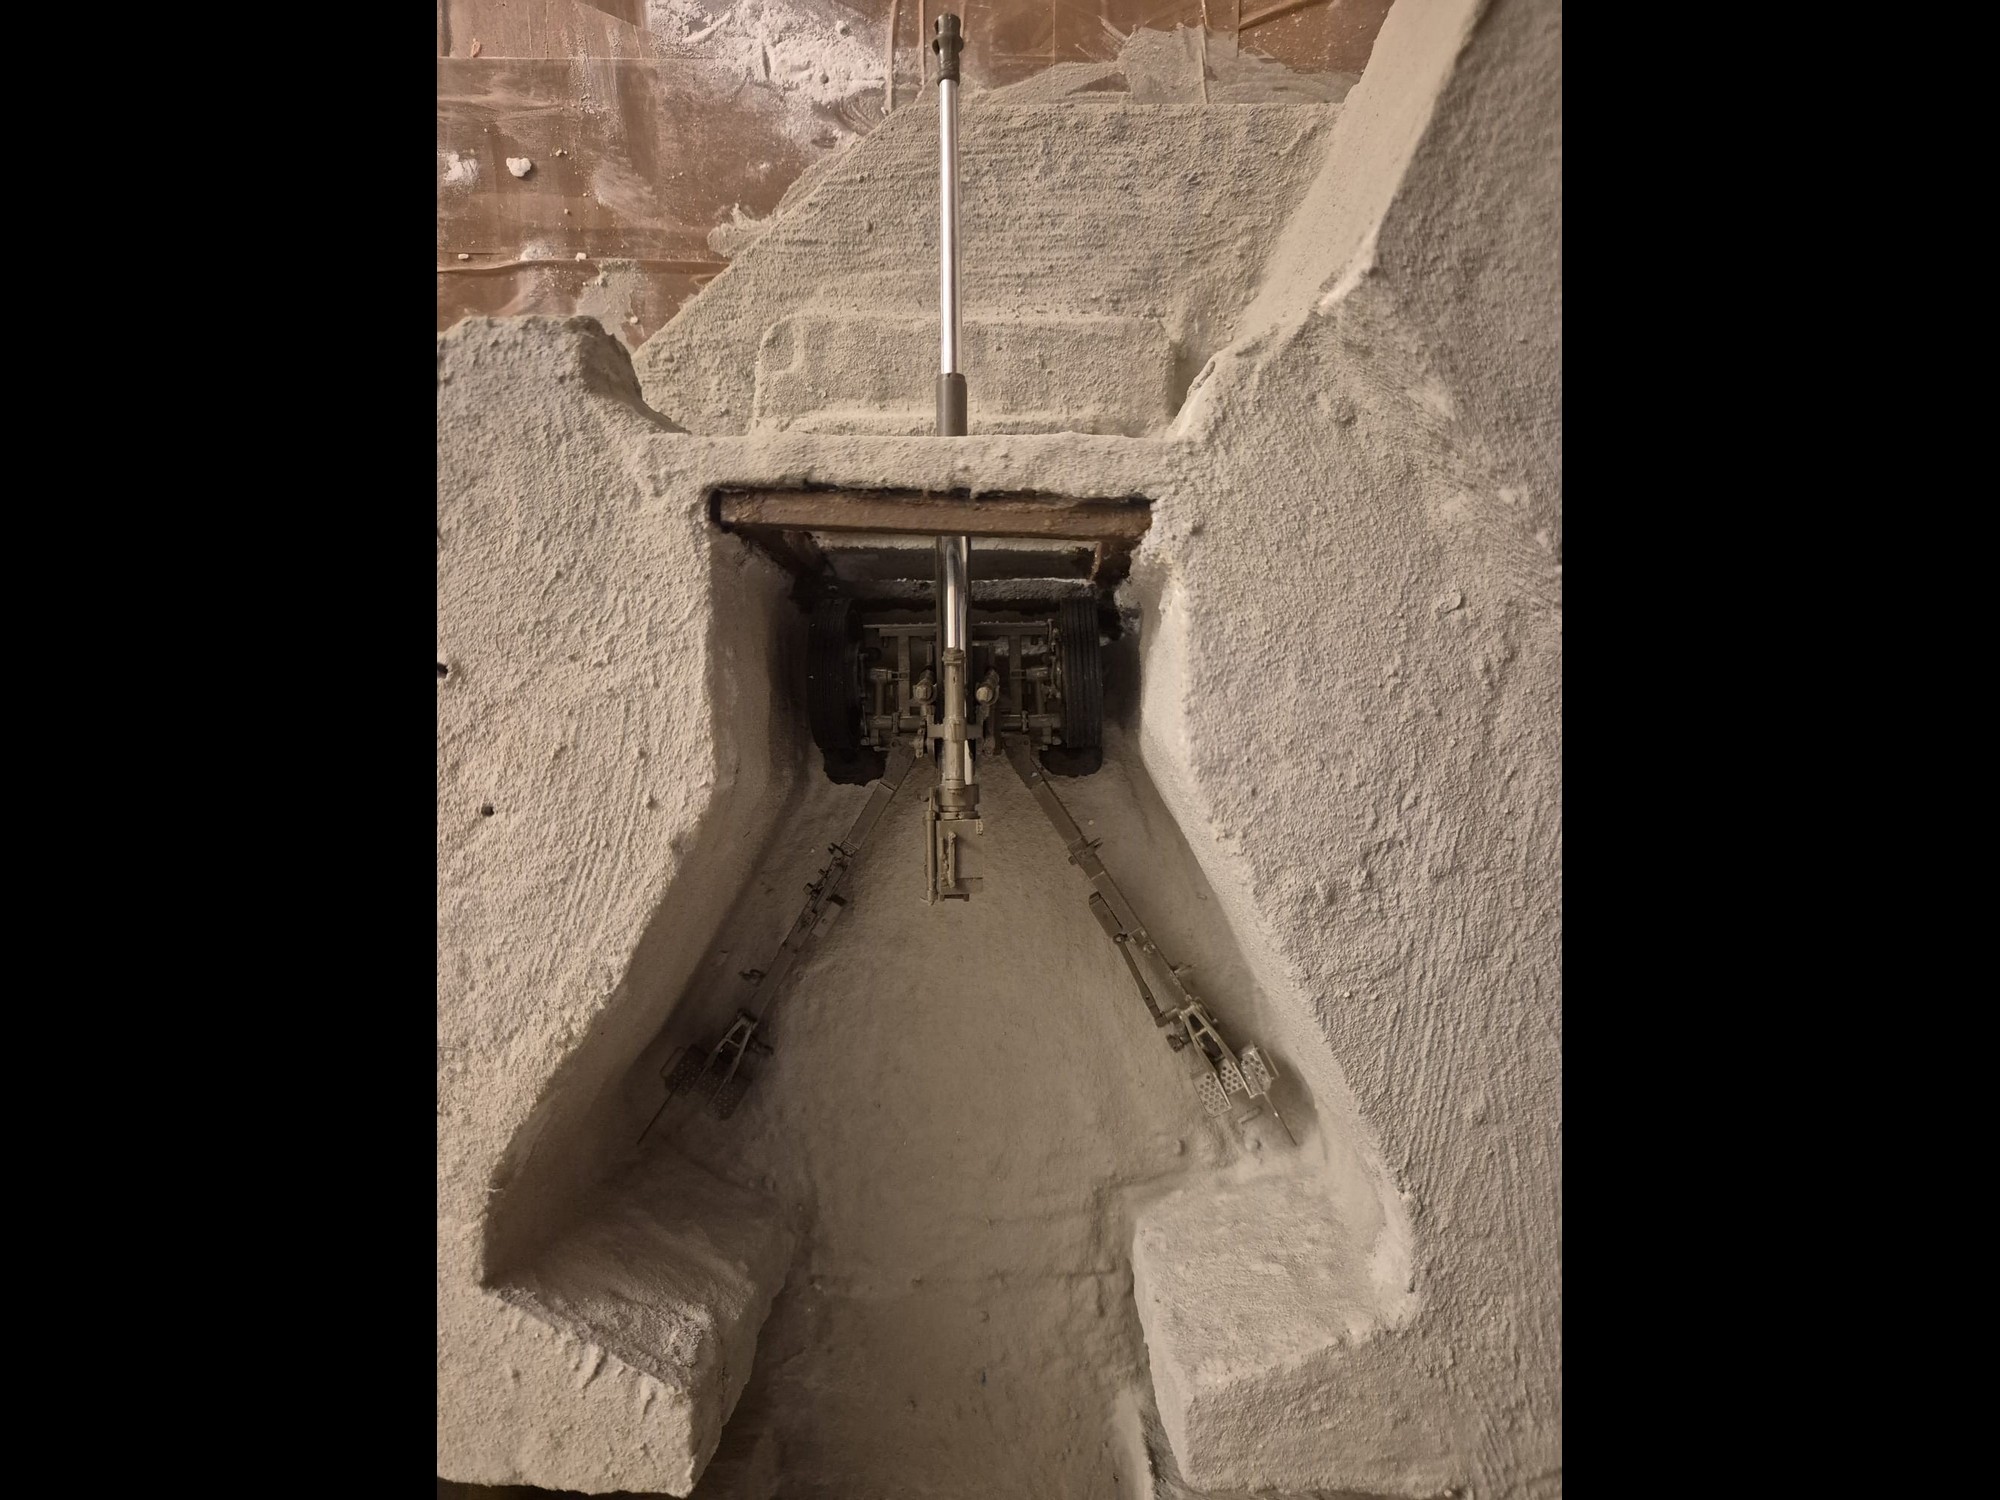
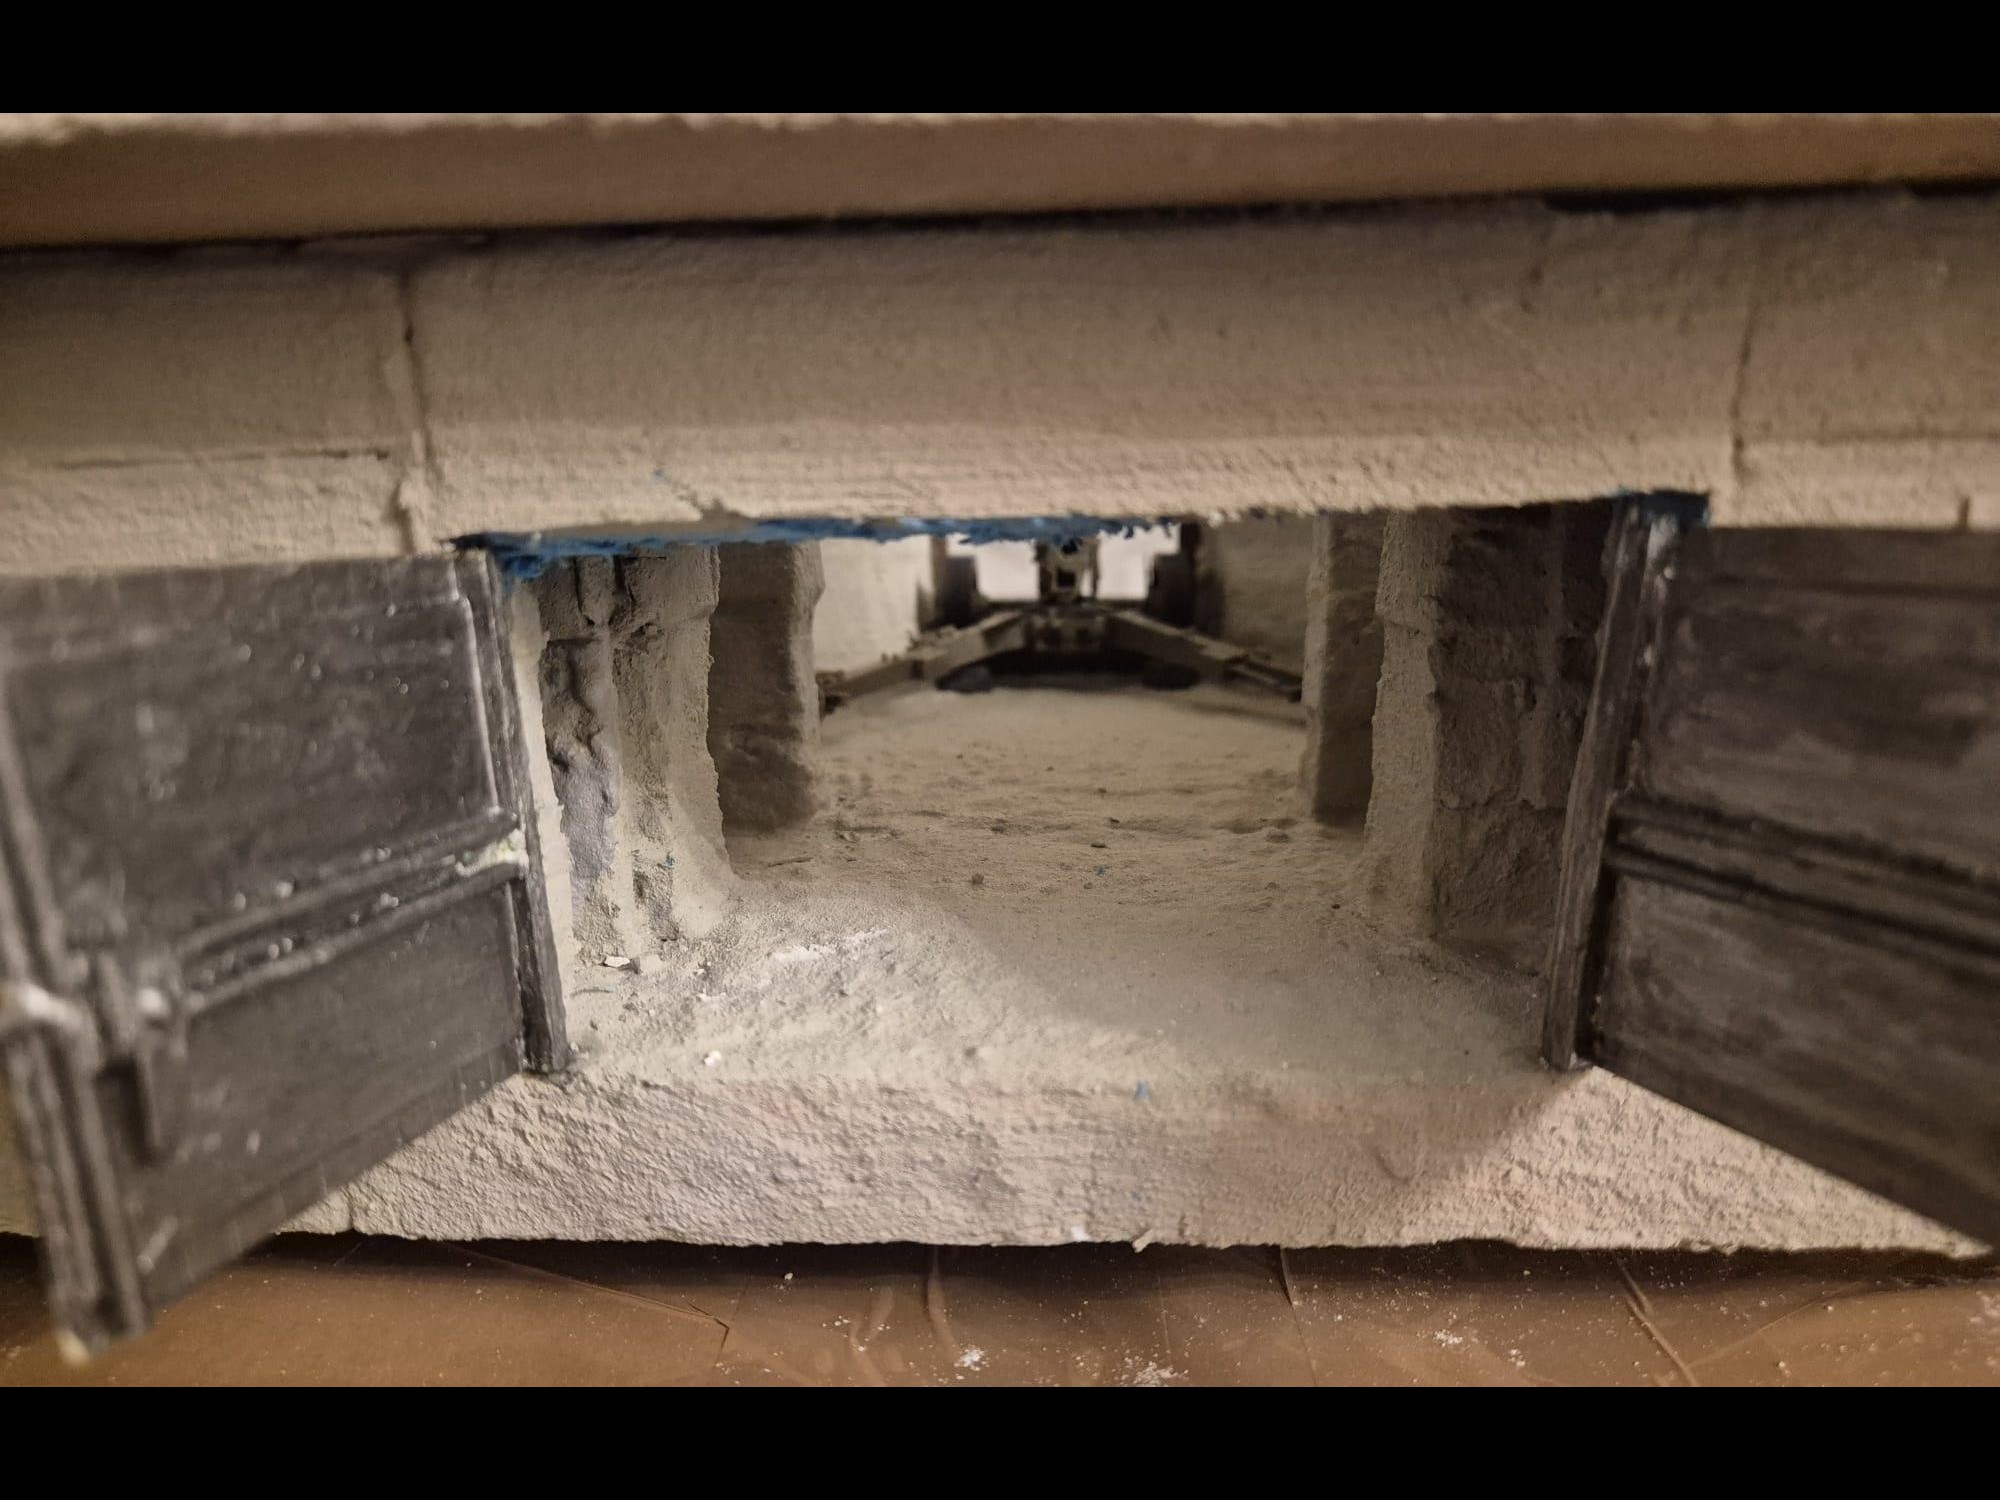
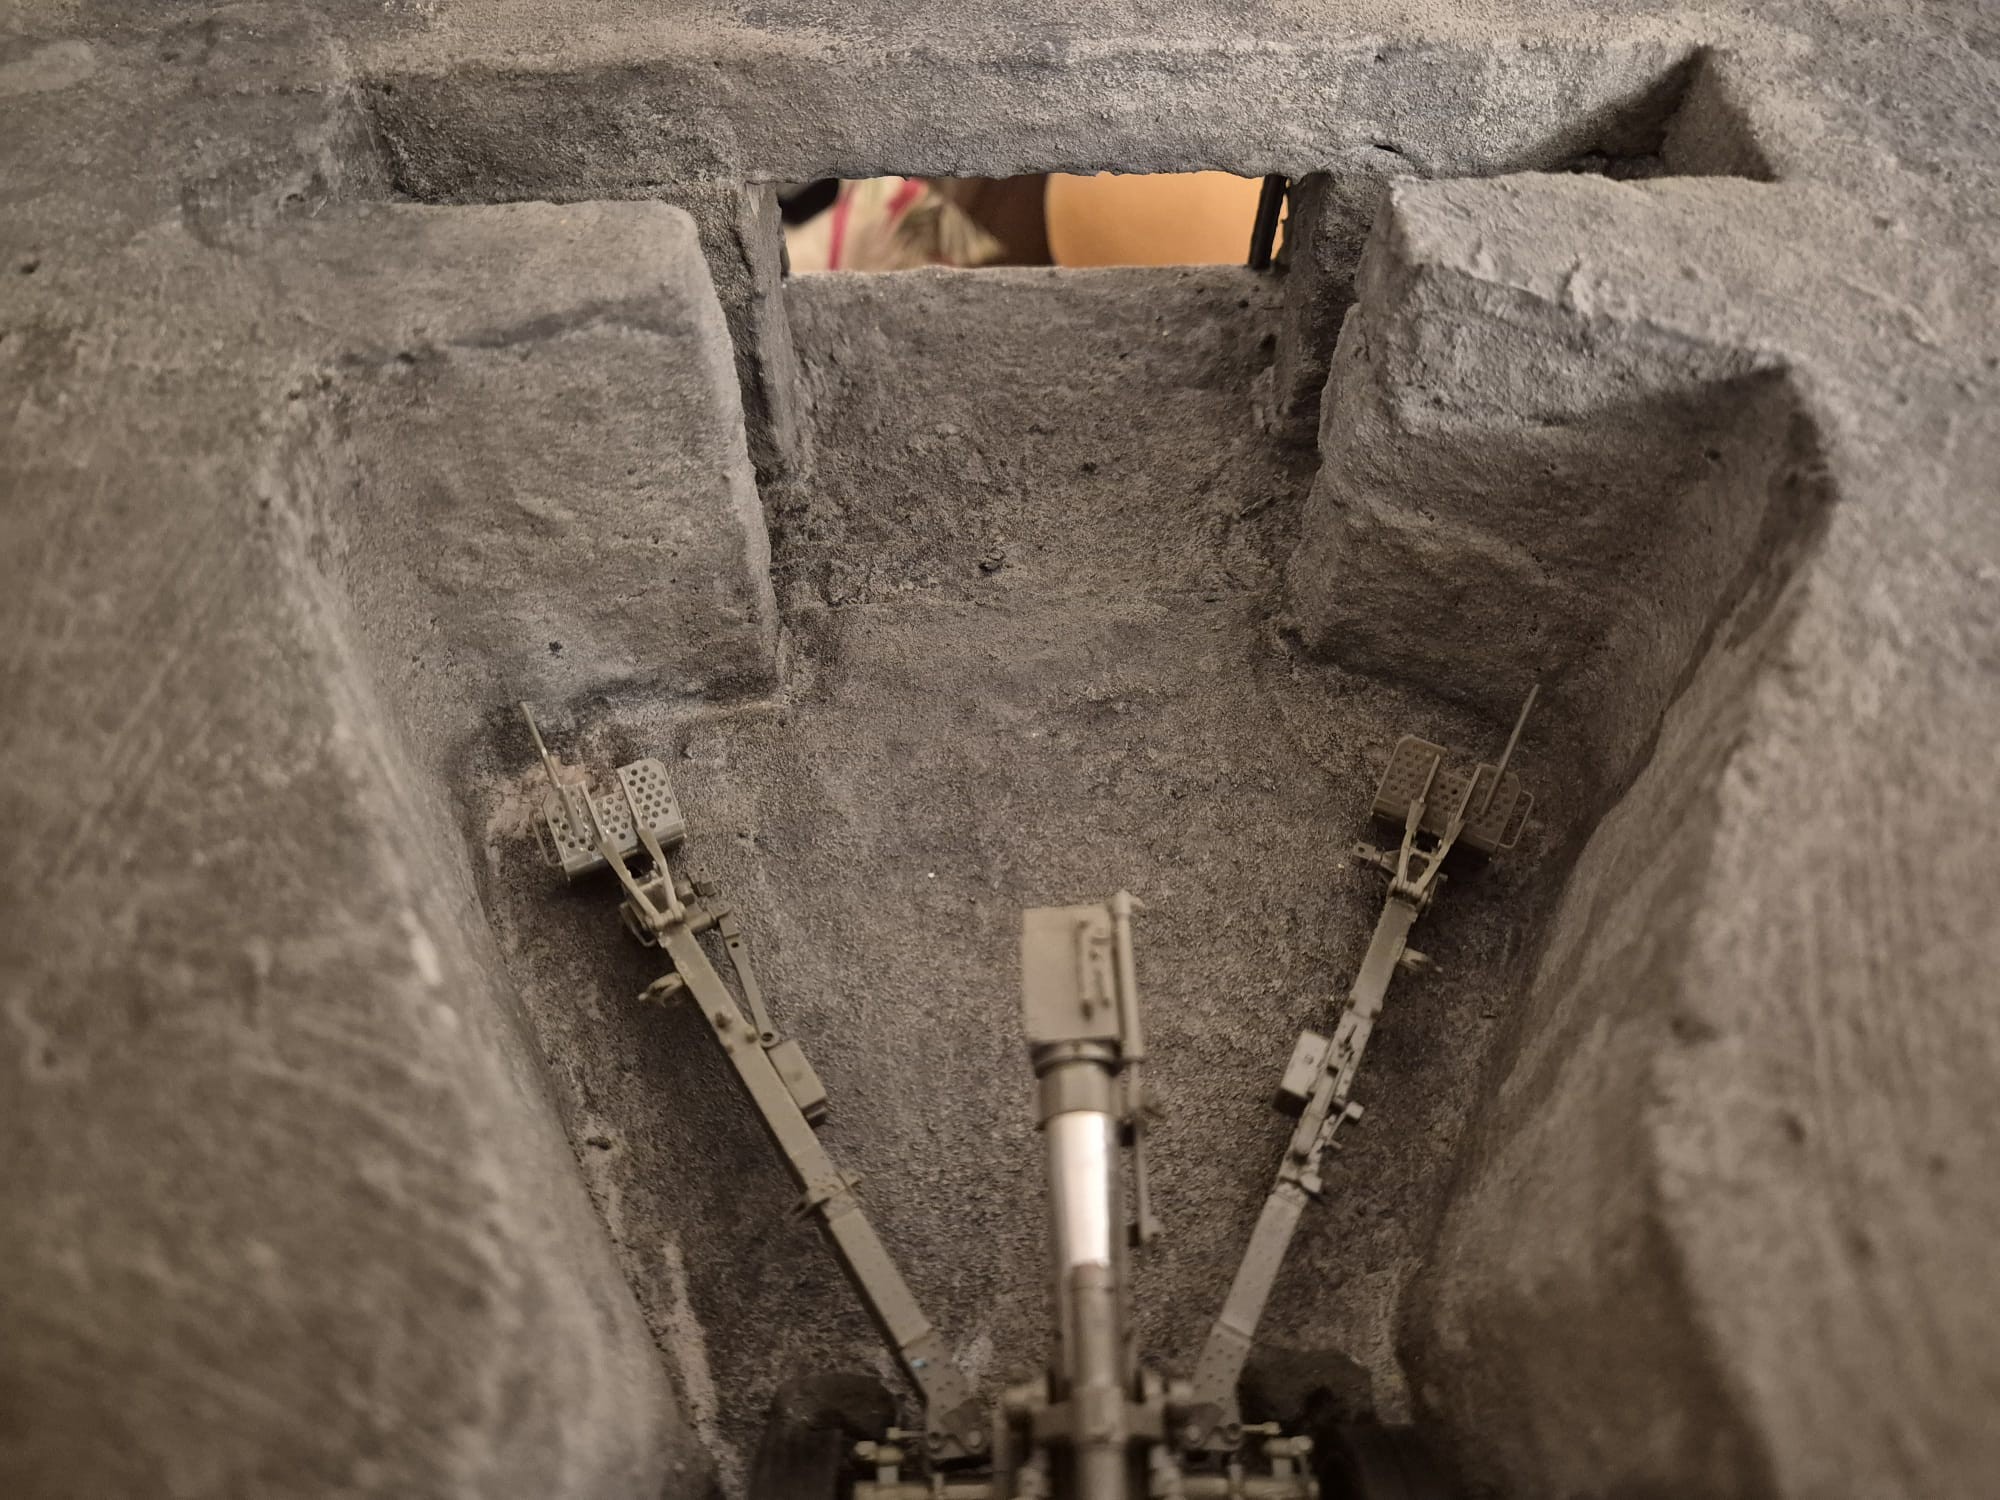
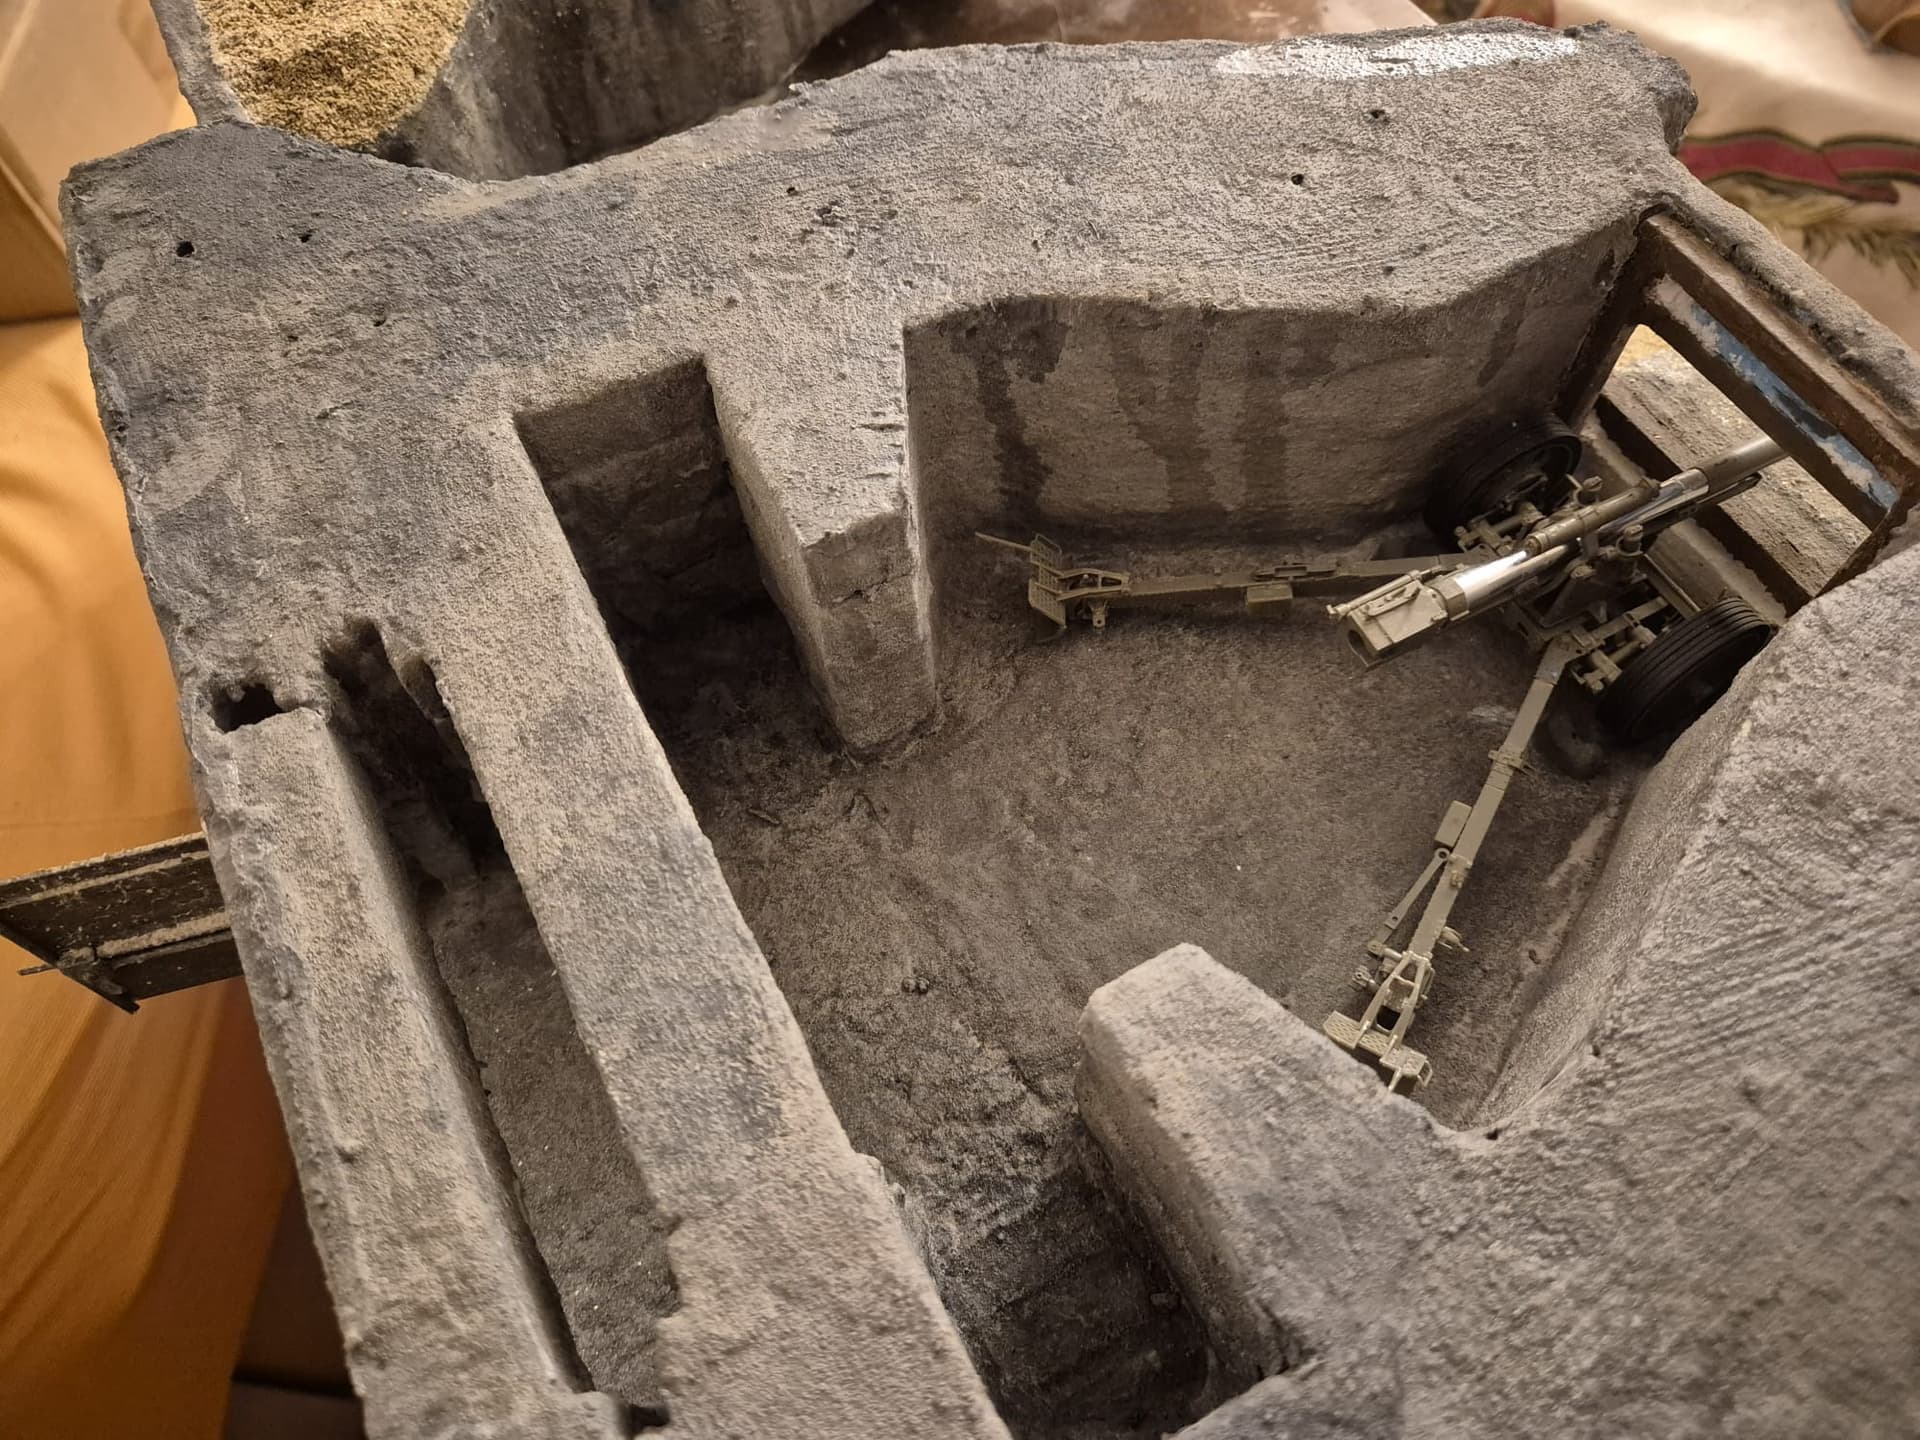
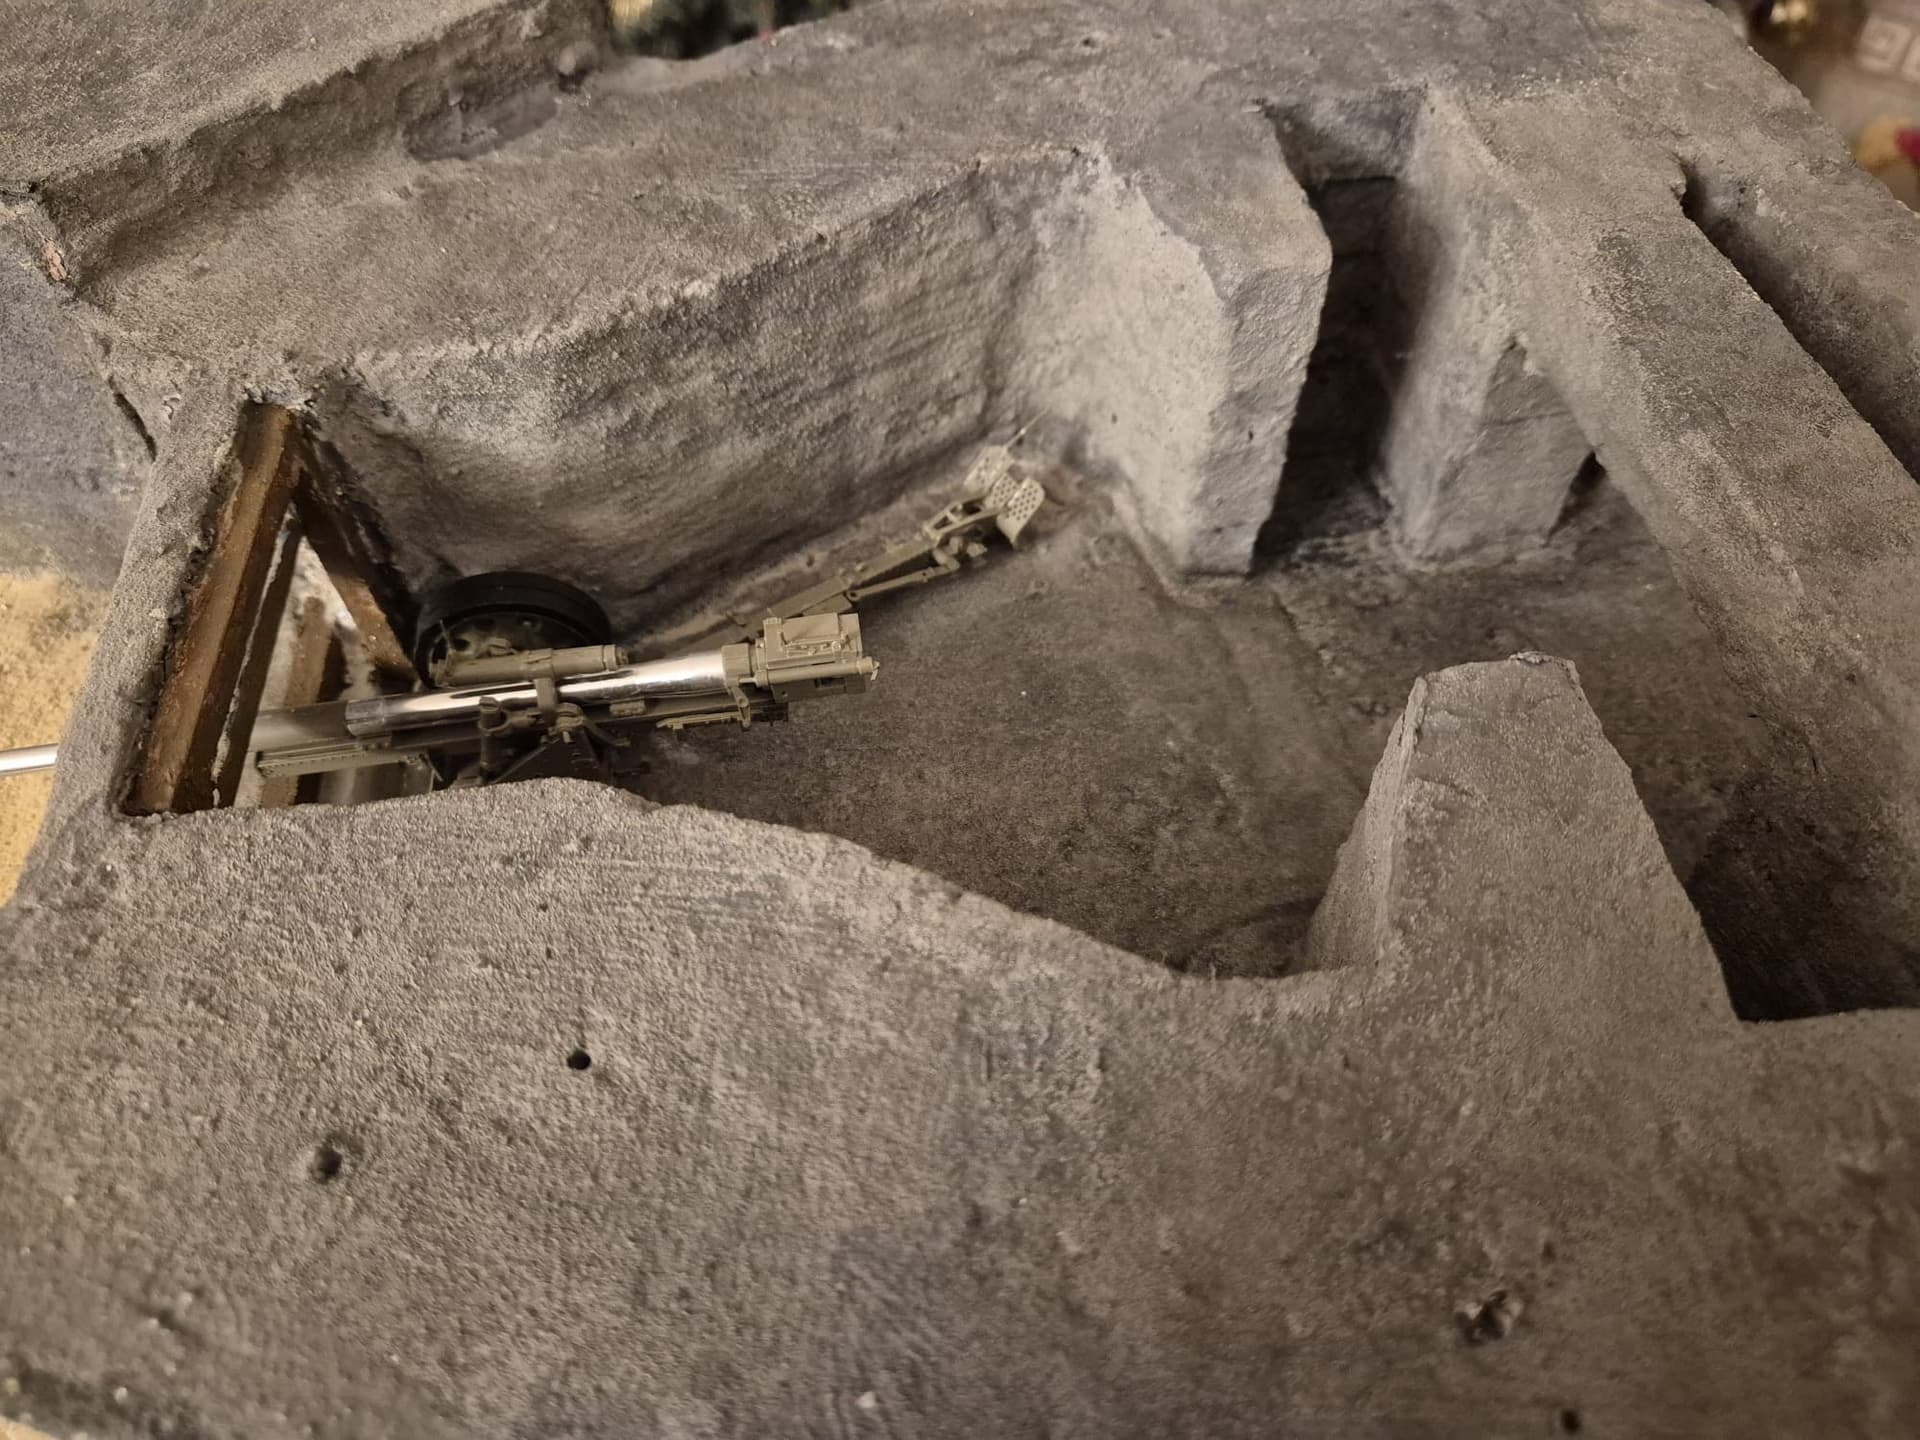
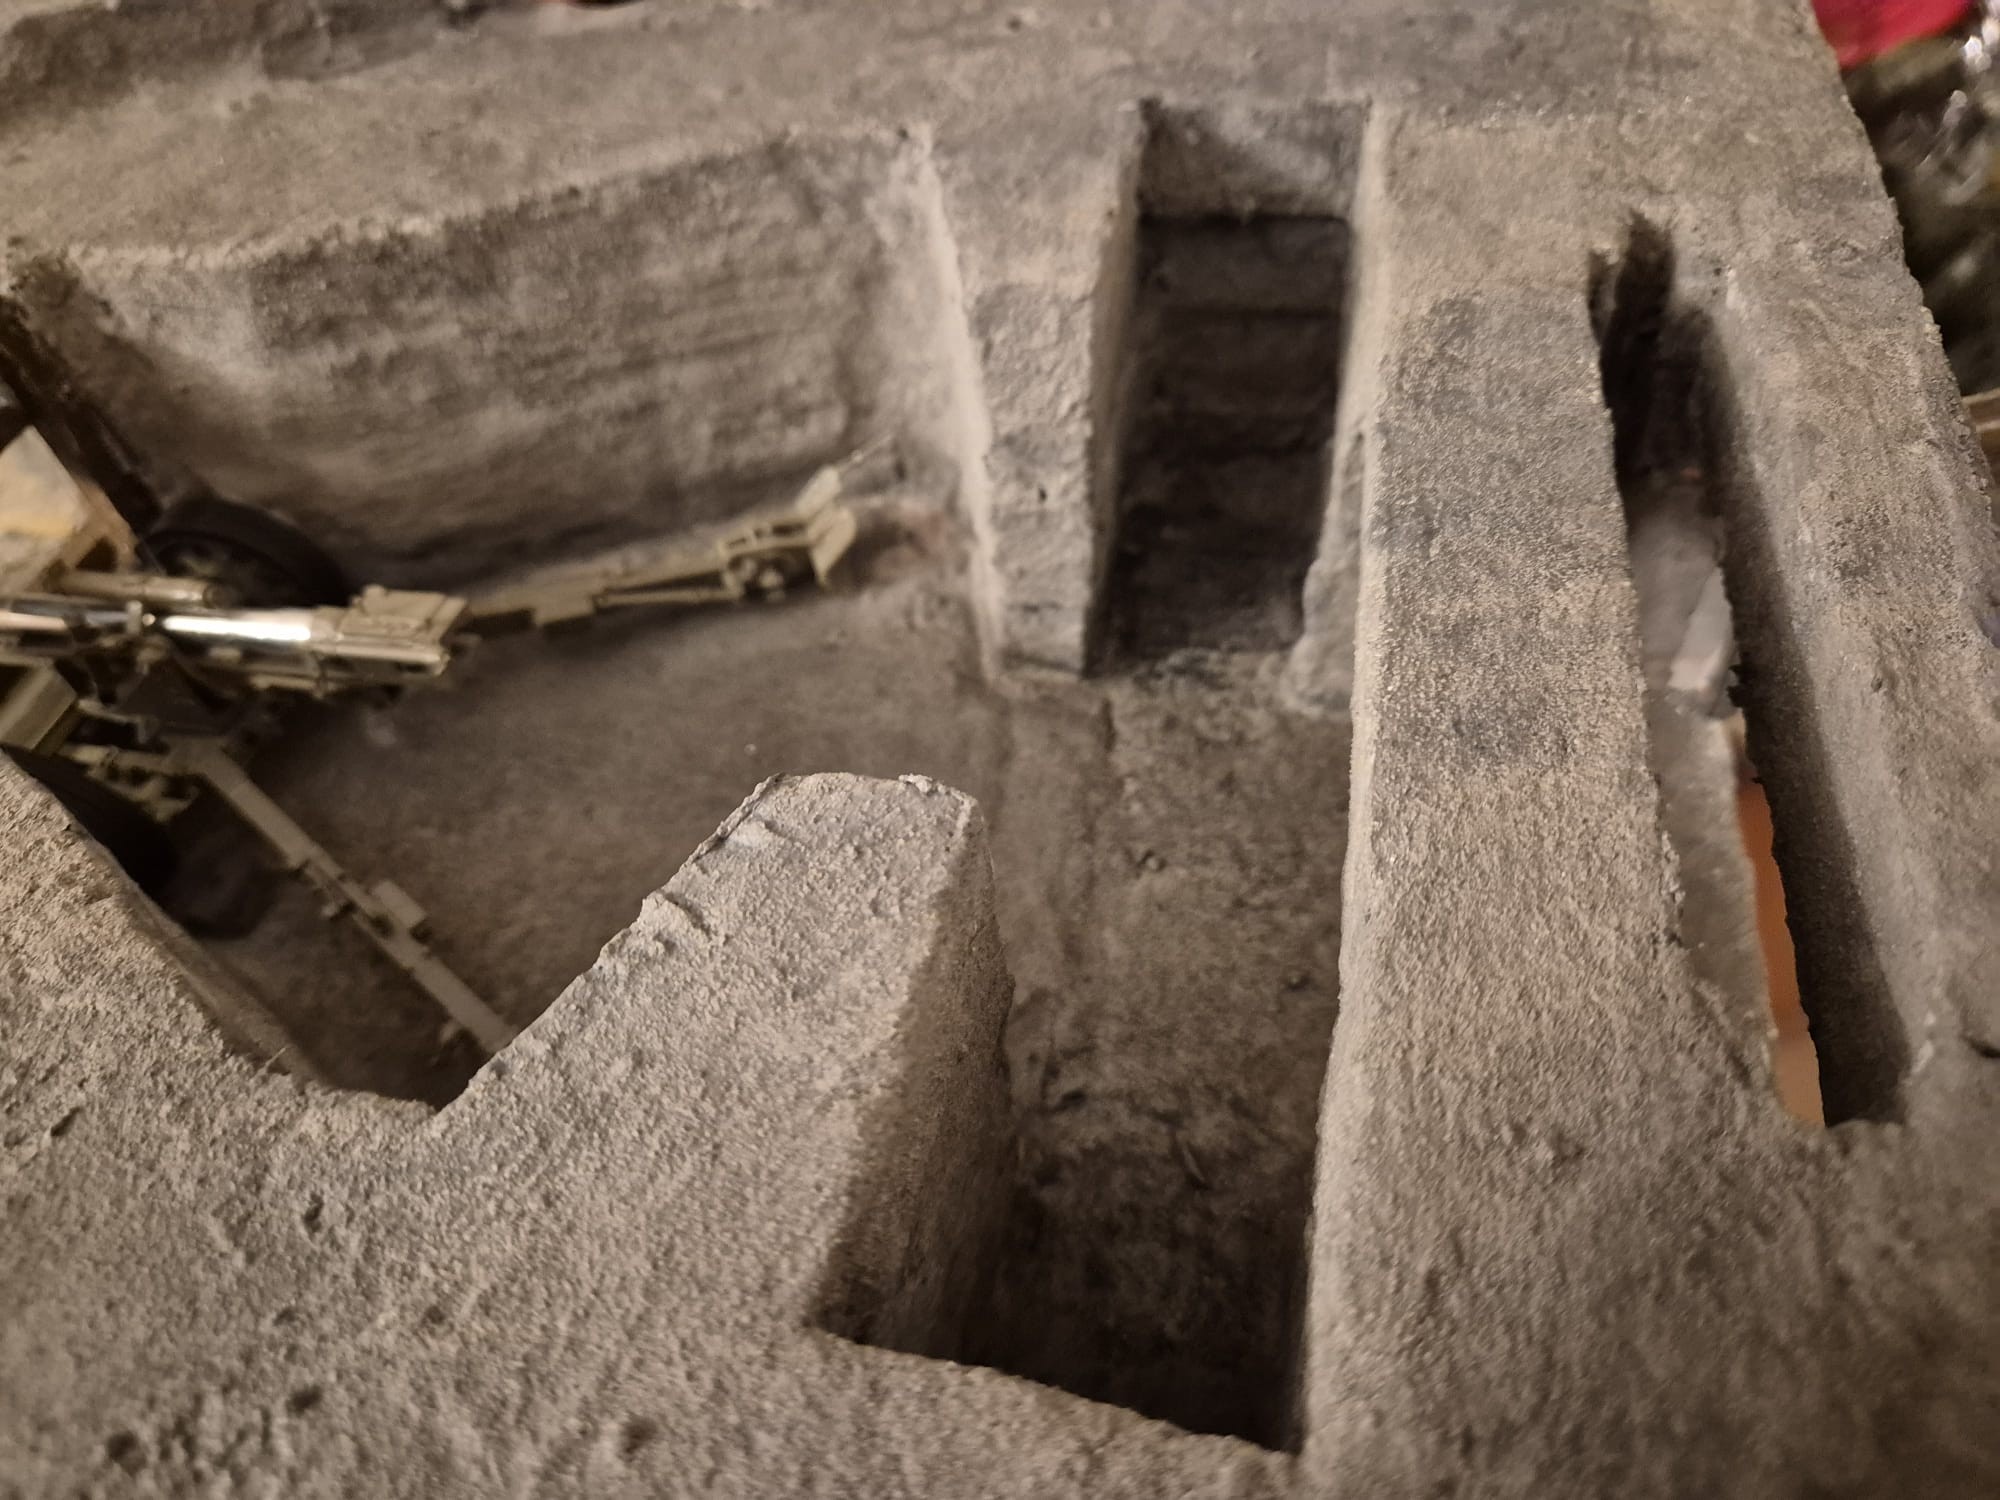
Today you will see the interior of the R677, its roof filled with Mold-A-Scene and painted to simulate soil on it.
You will also see the M272 completely painted and weathered, although some minor retouches may be necessary. I also filled its roof with Mold-A-Scene and done the same procedure as on the R677.
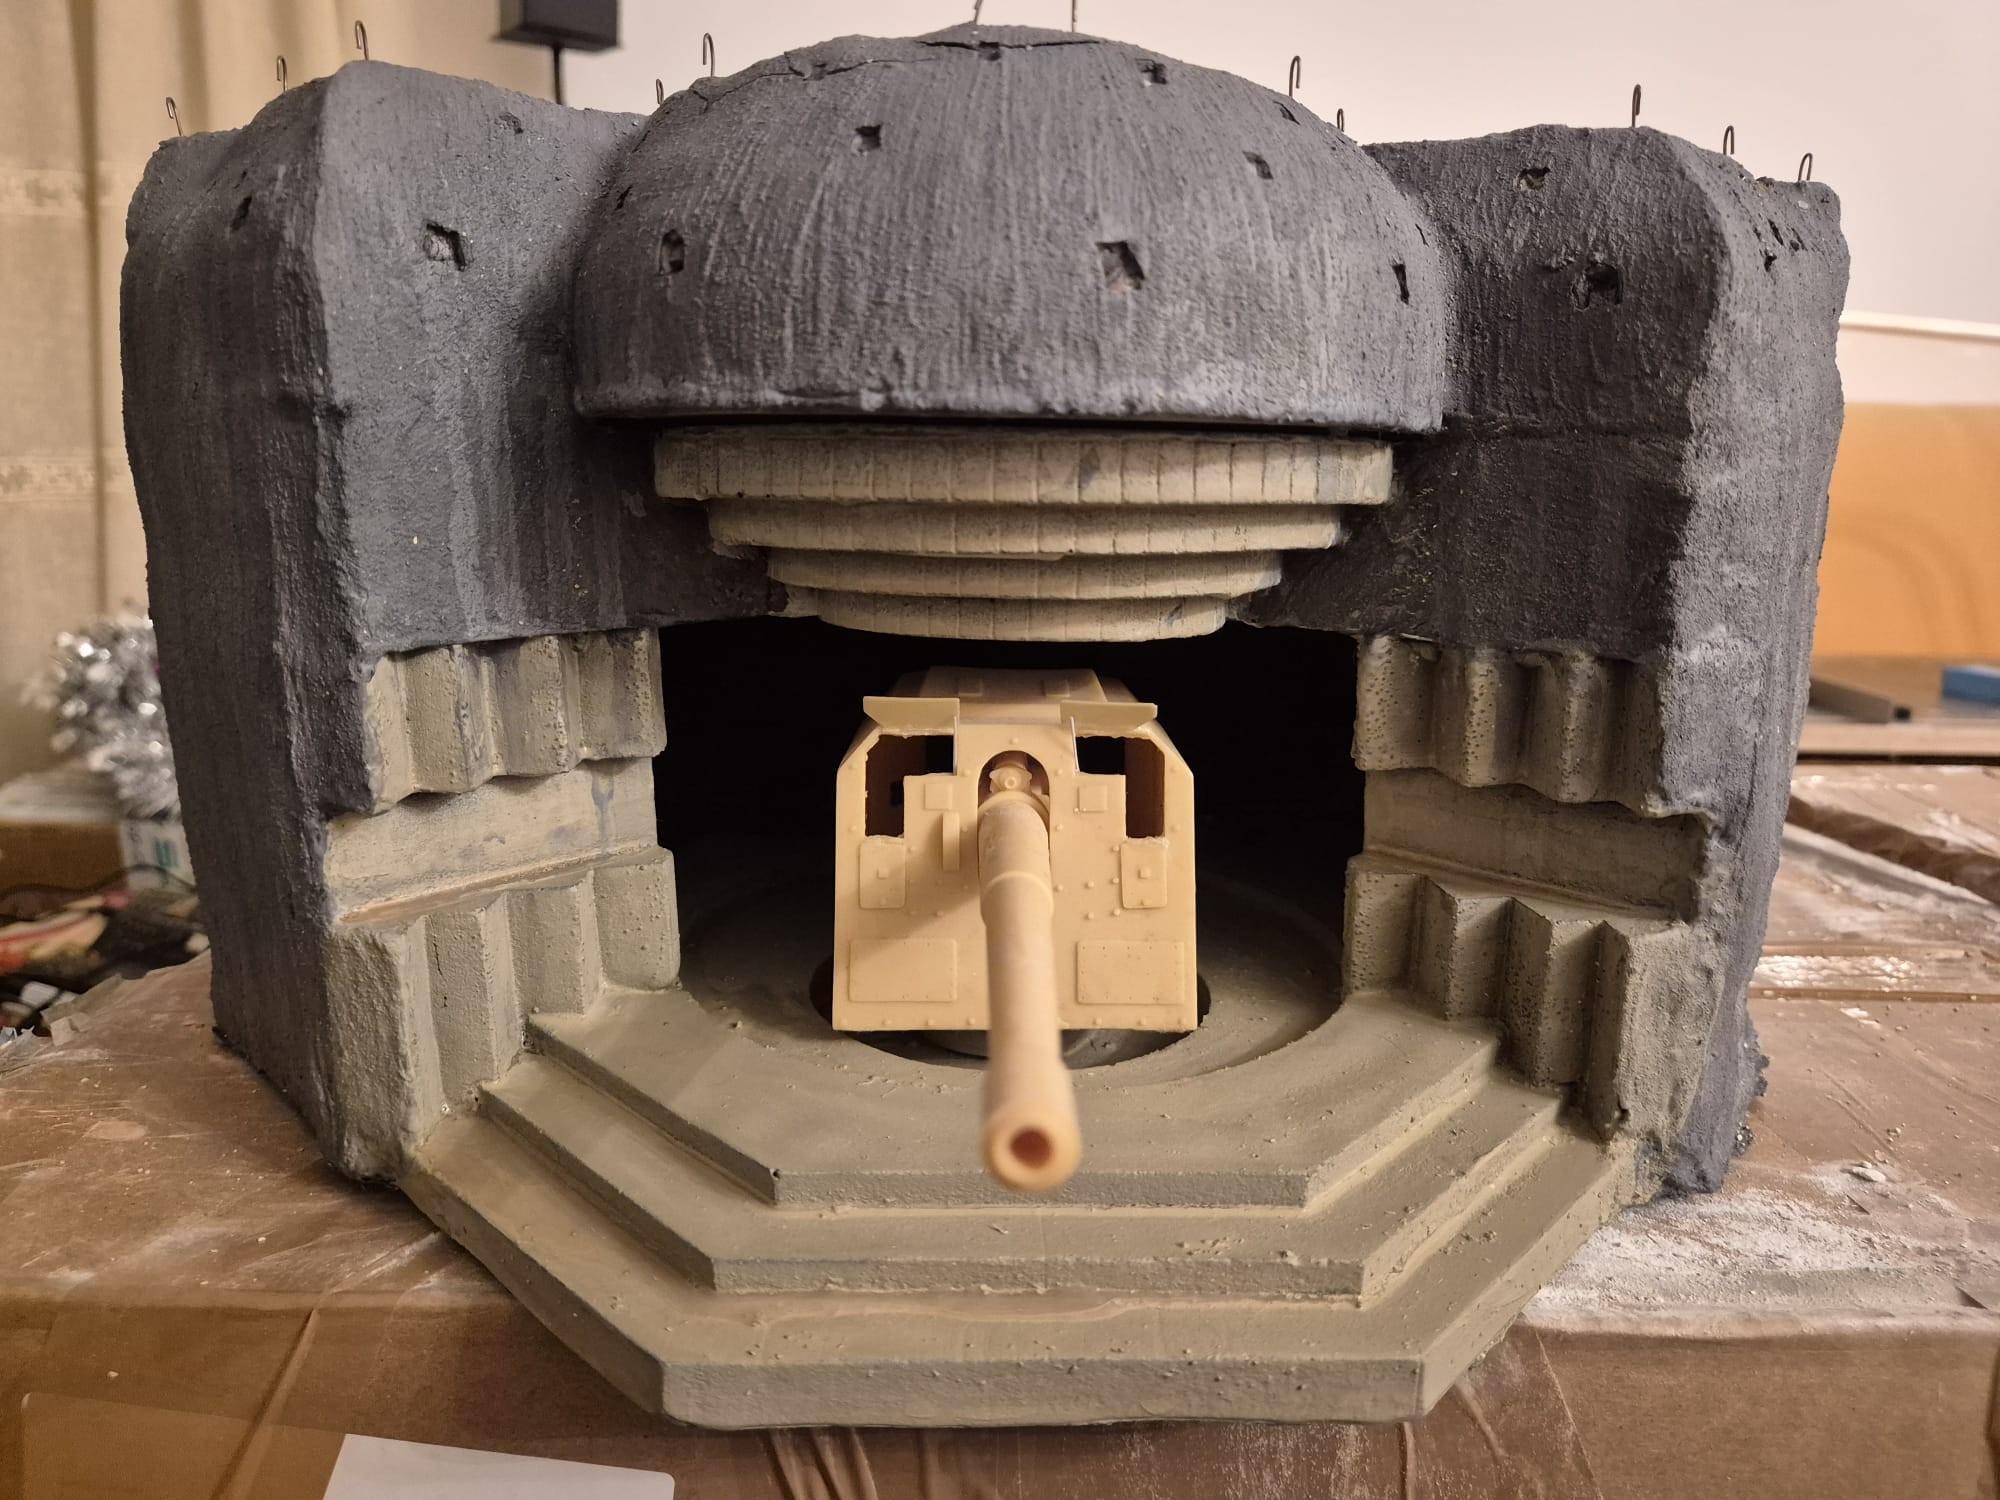
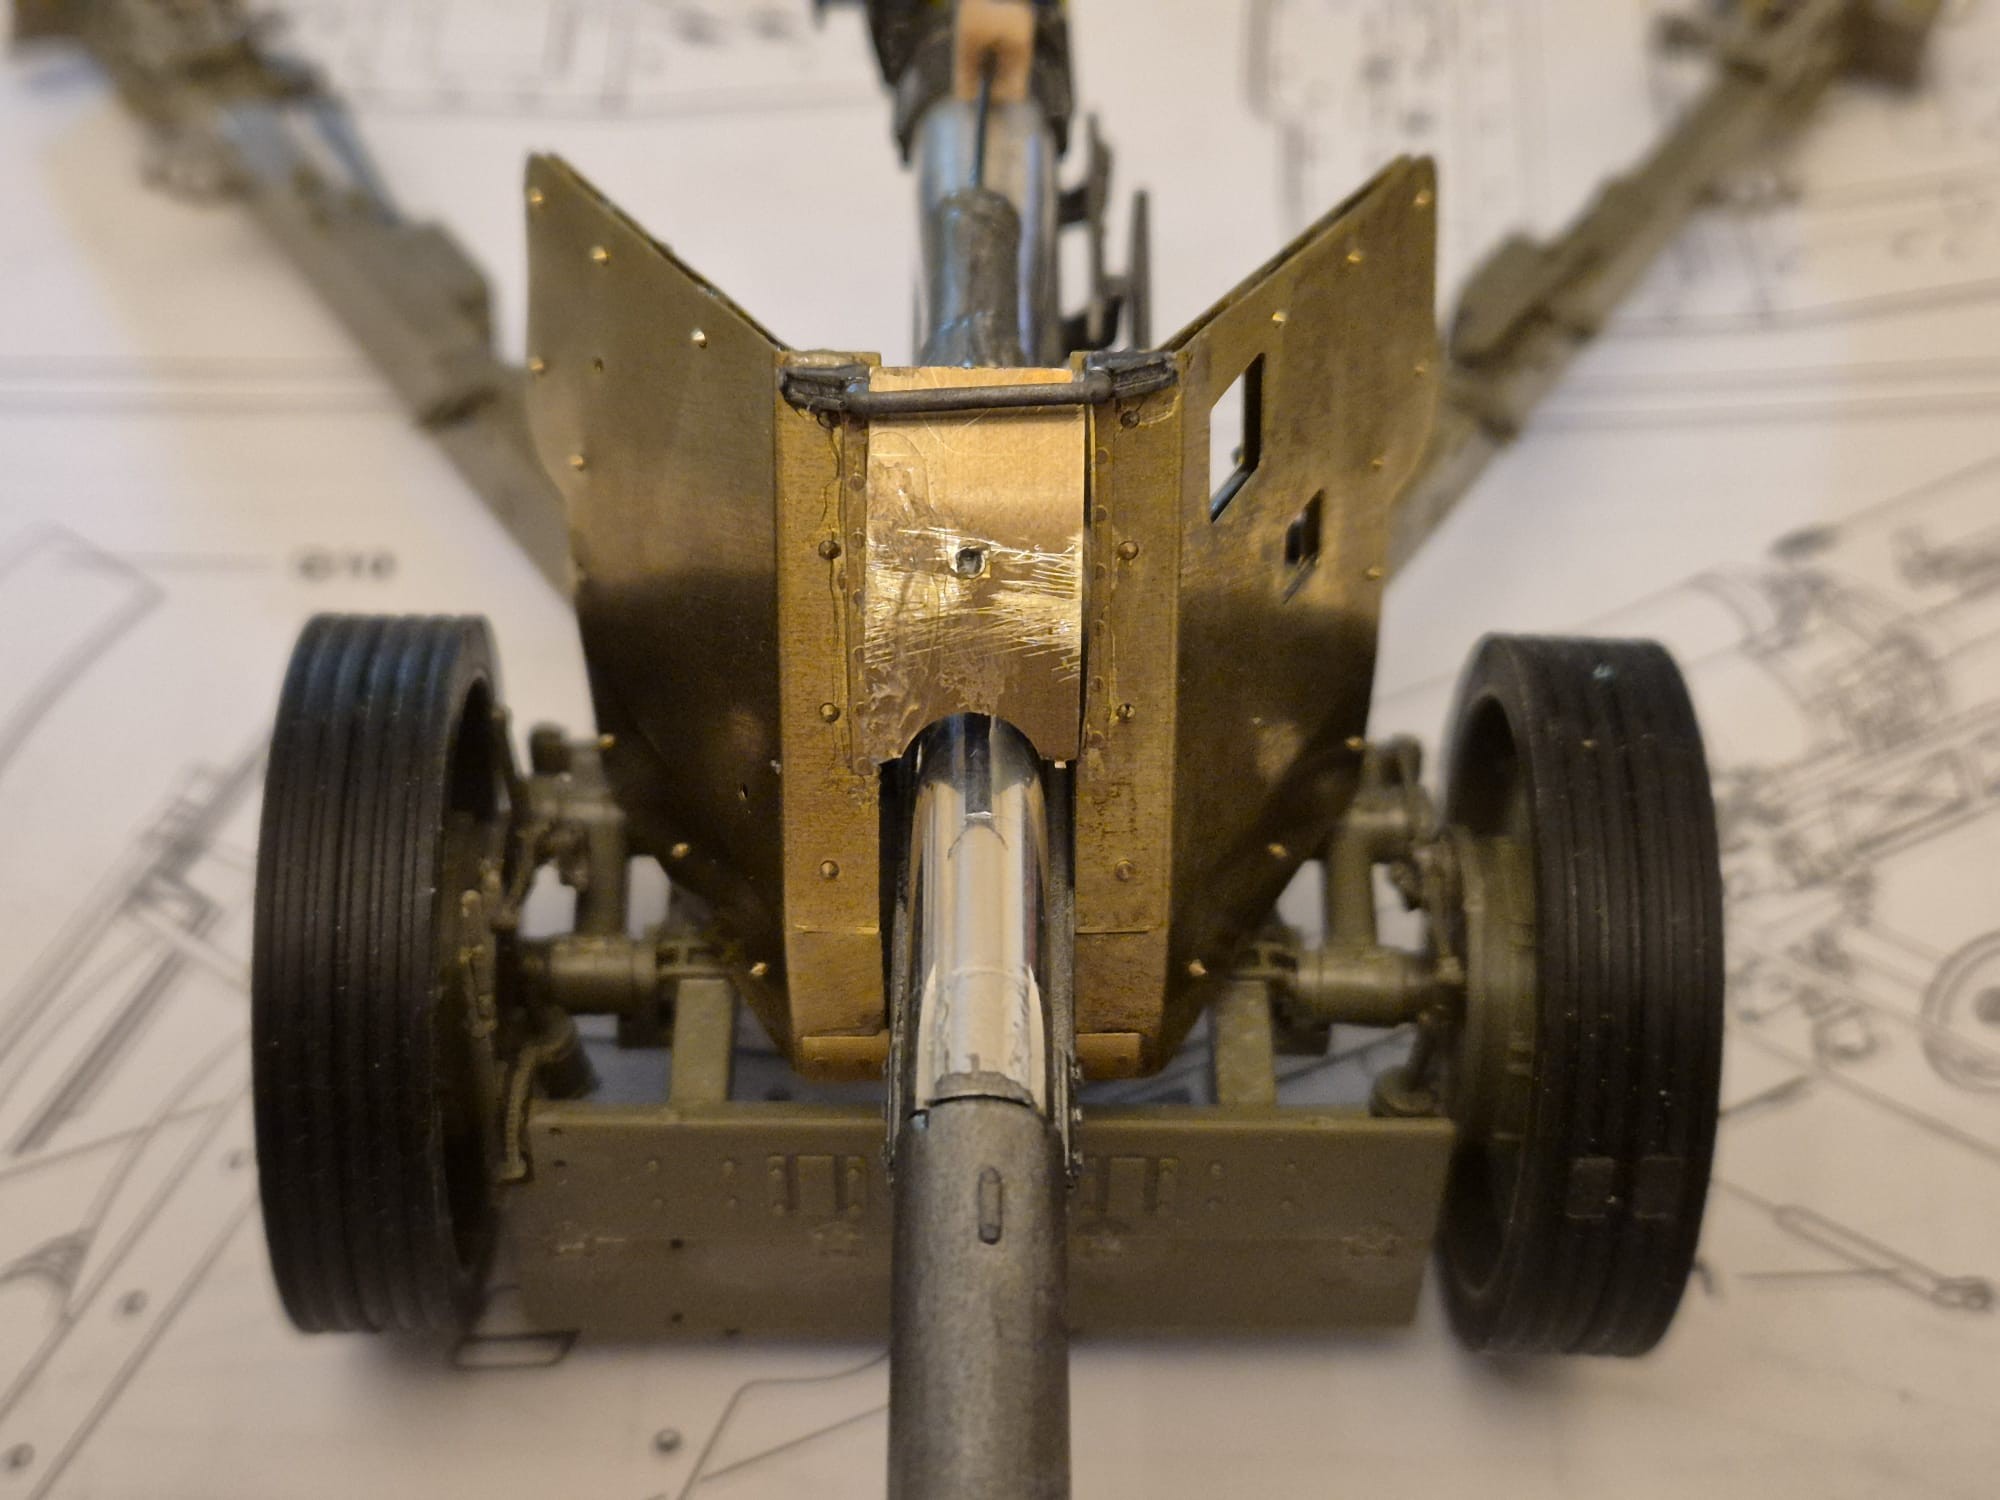
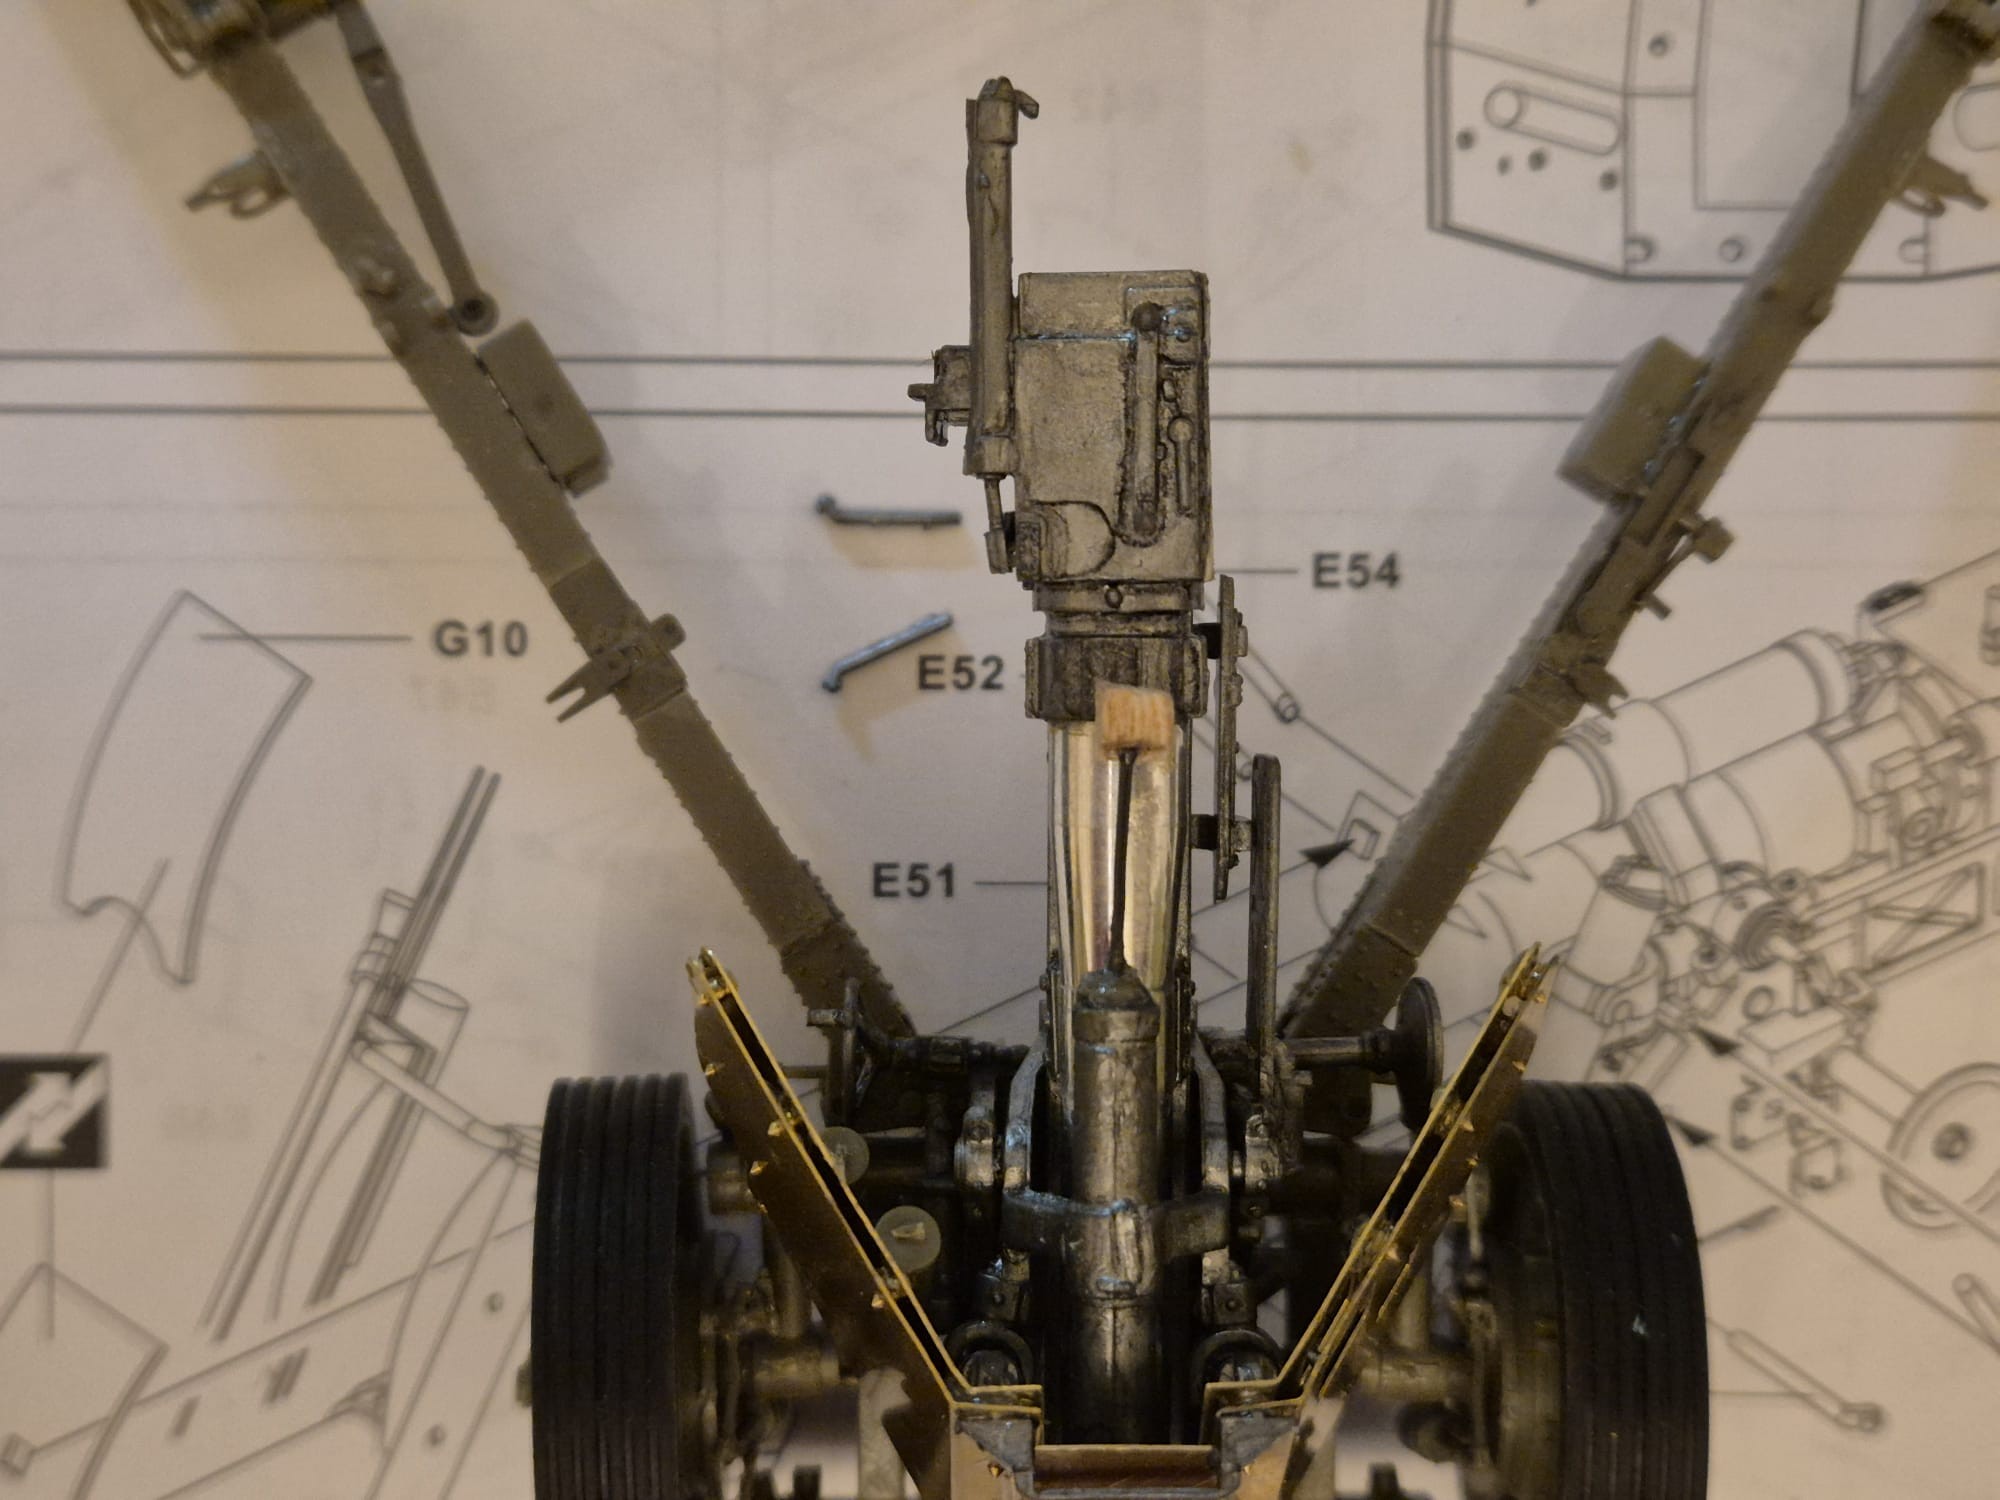
I then punched those famous square holes on the upper roof segments, fixed the camouflage net hooks on the front parapet, repainted the side walls of the protection rear wall (needs retouched on the right side), fixed the four air vents to each side to it (the upper one is for air intake and the lower one is for air expelling during the gun firing).
So, the first set of pictures is reserved for the finished R677 Bunker at Omaha Beach during the Omaha Beach landings…


And now for the M272 Naval Bunker with its 150mm Naval Gun…


Should you question the colors of the M272 bunkers that I have applied, you should know that in 1944 during the Allied landing, it closely looked as it does right here.
Like the R677, the M272 will be partially interred in mounds of earth and vegetation and therefore, even if they do not closely look like the real side walls, once so covered, all the imperfections you might see on them won’t matter.
Regarding the grass and other vegetation to be applied, I will only do so once entirely placed in their respective dioramas, at which time I will apply the correct amount of vegetation, both their roofs as well as around their walls.
For the M272, the soil cover and vegetation will also be applied to the rear of the bunker and will partially cover the protection wall as well.
And so my friends, tomorrow I will take a breather with all that, only to dedicate my time to both the guns on Thursday.
Hopefully, I may manage to complete them both on that day. If not, then by Friday evening.
Once fully painted I will reinsert both in their respective bunkers and this will be my final post here until June, when I will complete my “The Last Warning (April 1944, Normandy)” diorama.
So keep on browsing around here either on Thursday, or Friday to see the fully finished work.
After all, it is also dedicated to you all who have followed me thus far and you deserve a Grand Finale.
Until then, please stay safe and continue with your good work as modelers.
3 Likes
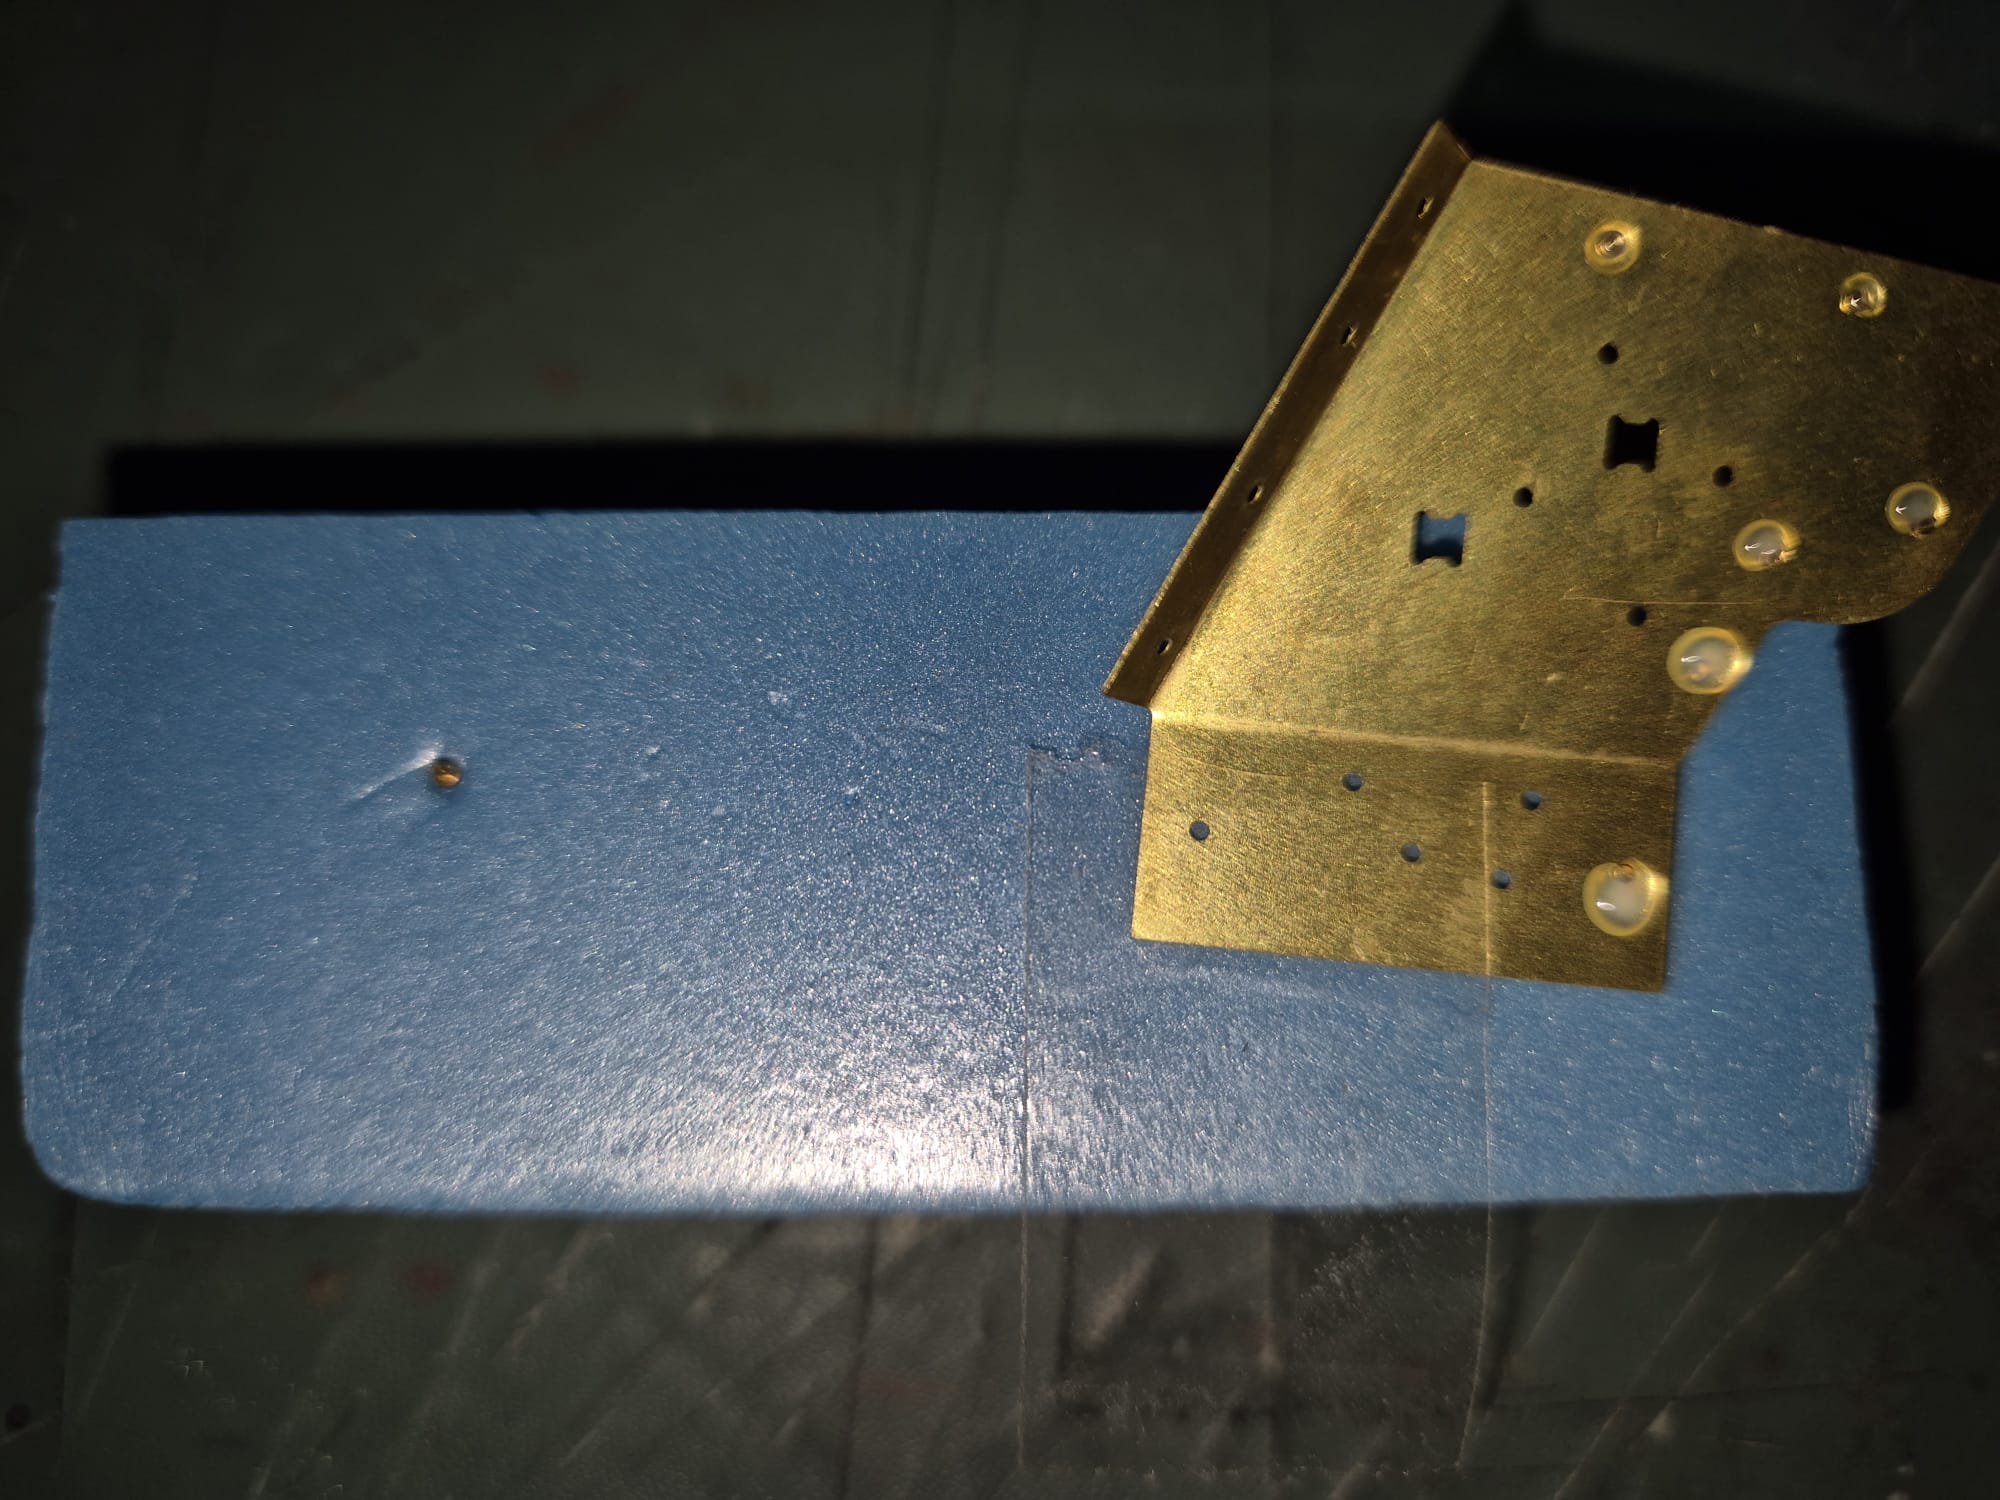
For those planning to build either an AFV Club PAK43/41 88mm or a PAK40 75mm anti-tank guns and have difficulties with the double shield mounting
I found an easier way to apply the bolts.
First of all forget the plastic ones that come in the kits. They are useless. Rather spend a little more money to acquire AFV Club AF35073 Brass Shield Bolts (possibly two sets just in case you may loose one or two because they are very tiny).
Also completely forget using any tweezers because they cannot grab the bolts correctly and tend to easily slip away before they are actually placed into the tiny holes of the rear shield.
Use instead (don’t laugh, I am serious) the Tamiya snippers for decal cutting (see the picture).

It is not magic and it needs a firm hand and a bit of patience to grab one of the brass bolts correctly.
Note: use magnifying glasses to identify them. The bolts have two ends: one is cylinder like, the other is pointy. The cylinder one has to fit in the hole of the rear shield exposing the pointy one.
Even better is to use this product:
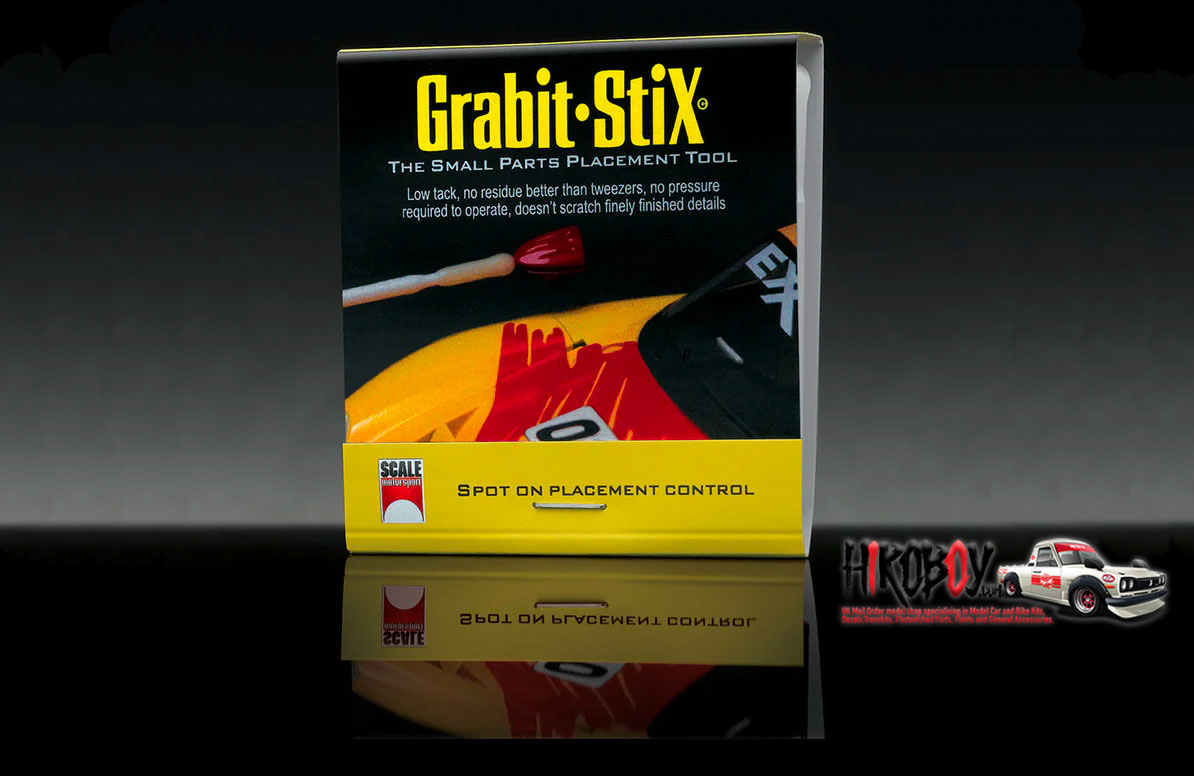
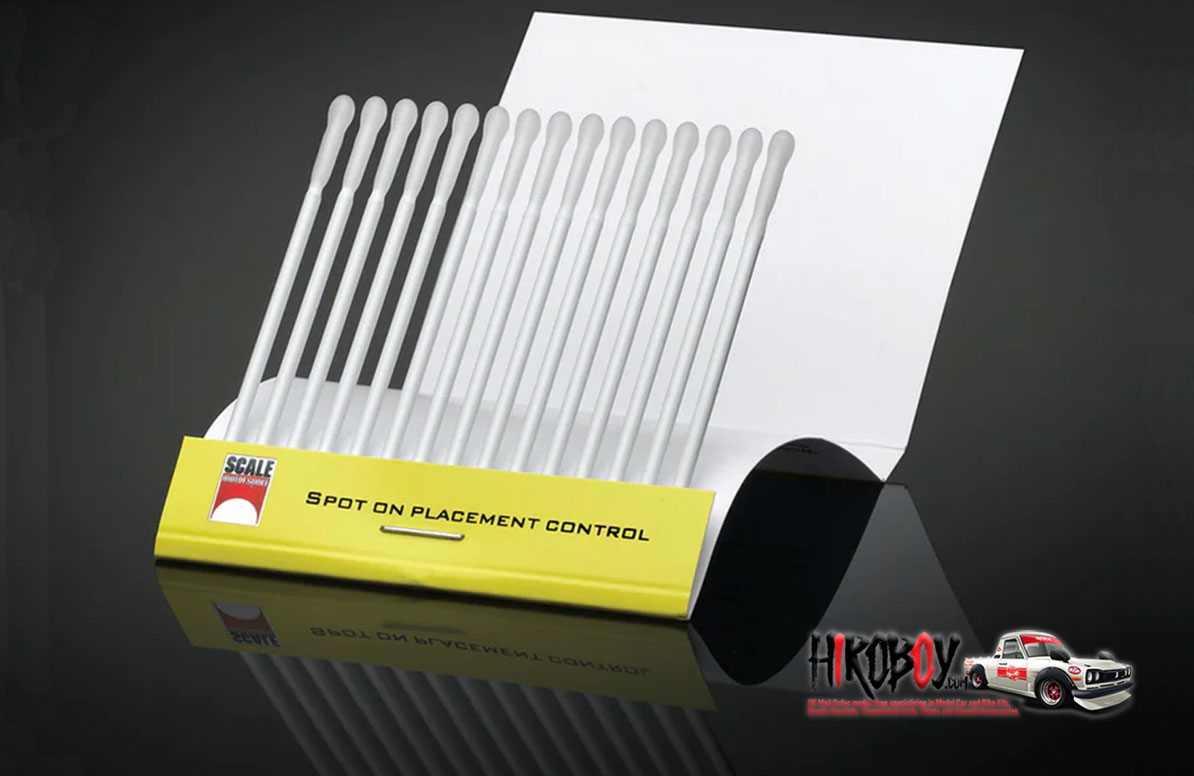
These sticky sticks, if used properly can take up the bolt from its cylinder part and insert it into the foam hole and using a toothpick release it in it.
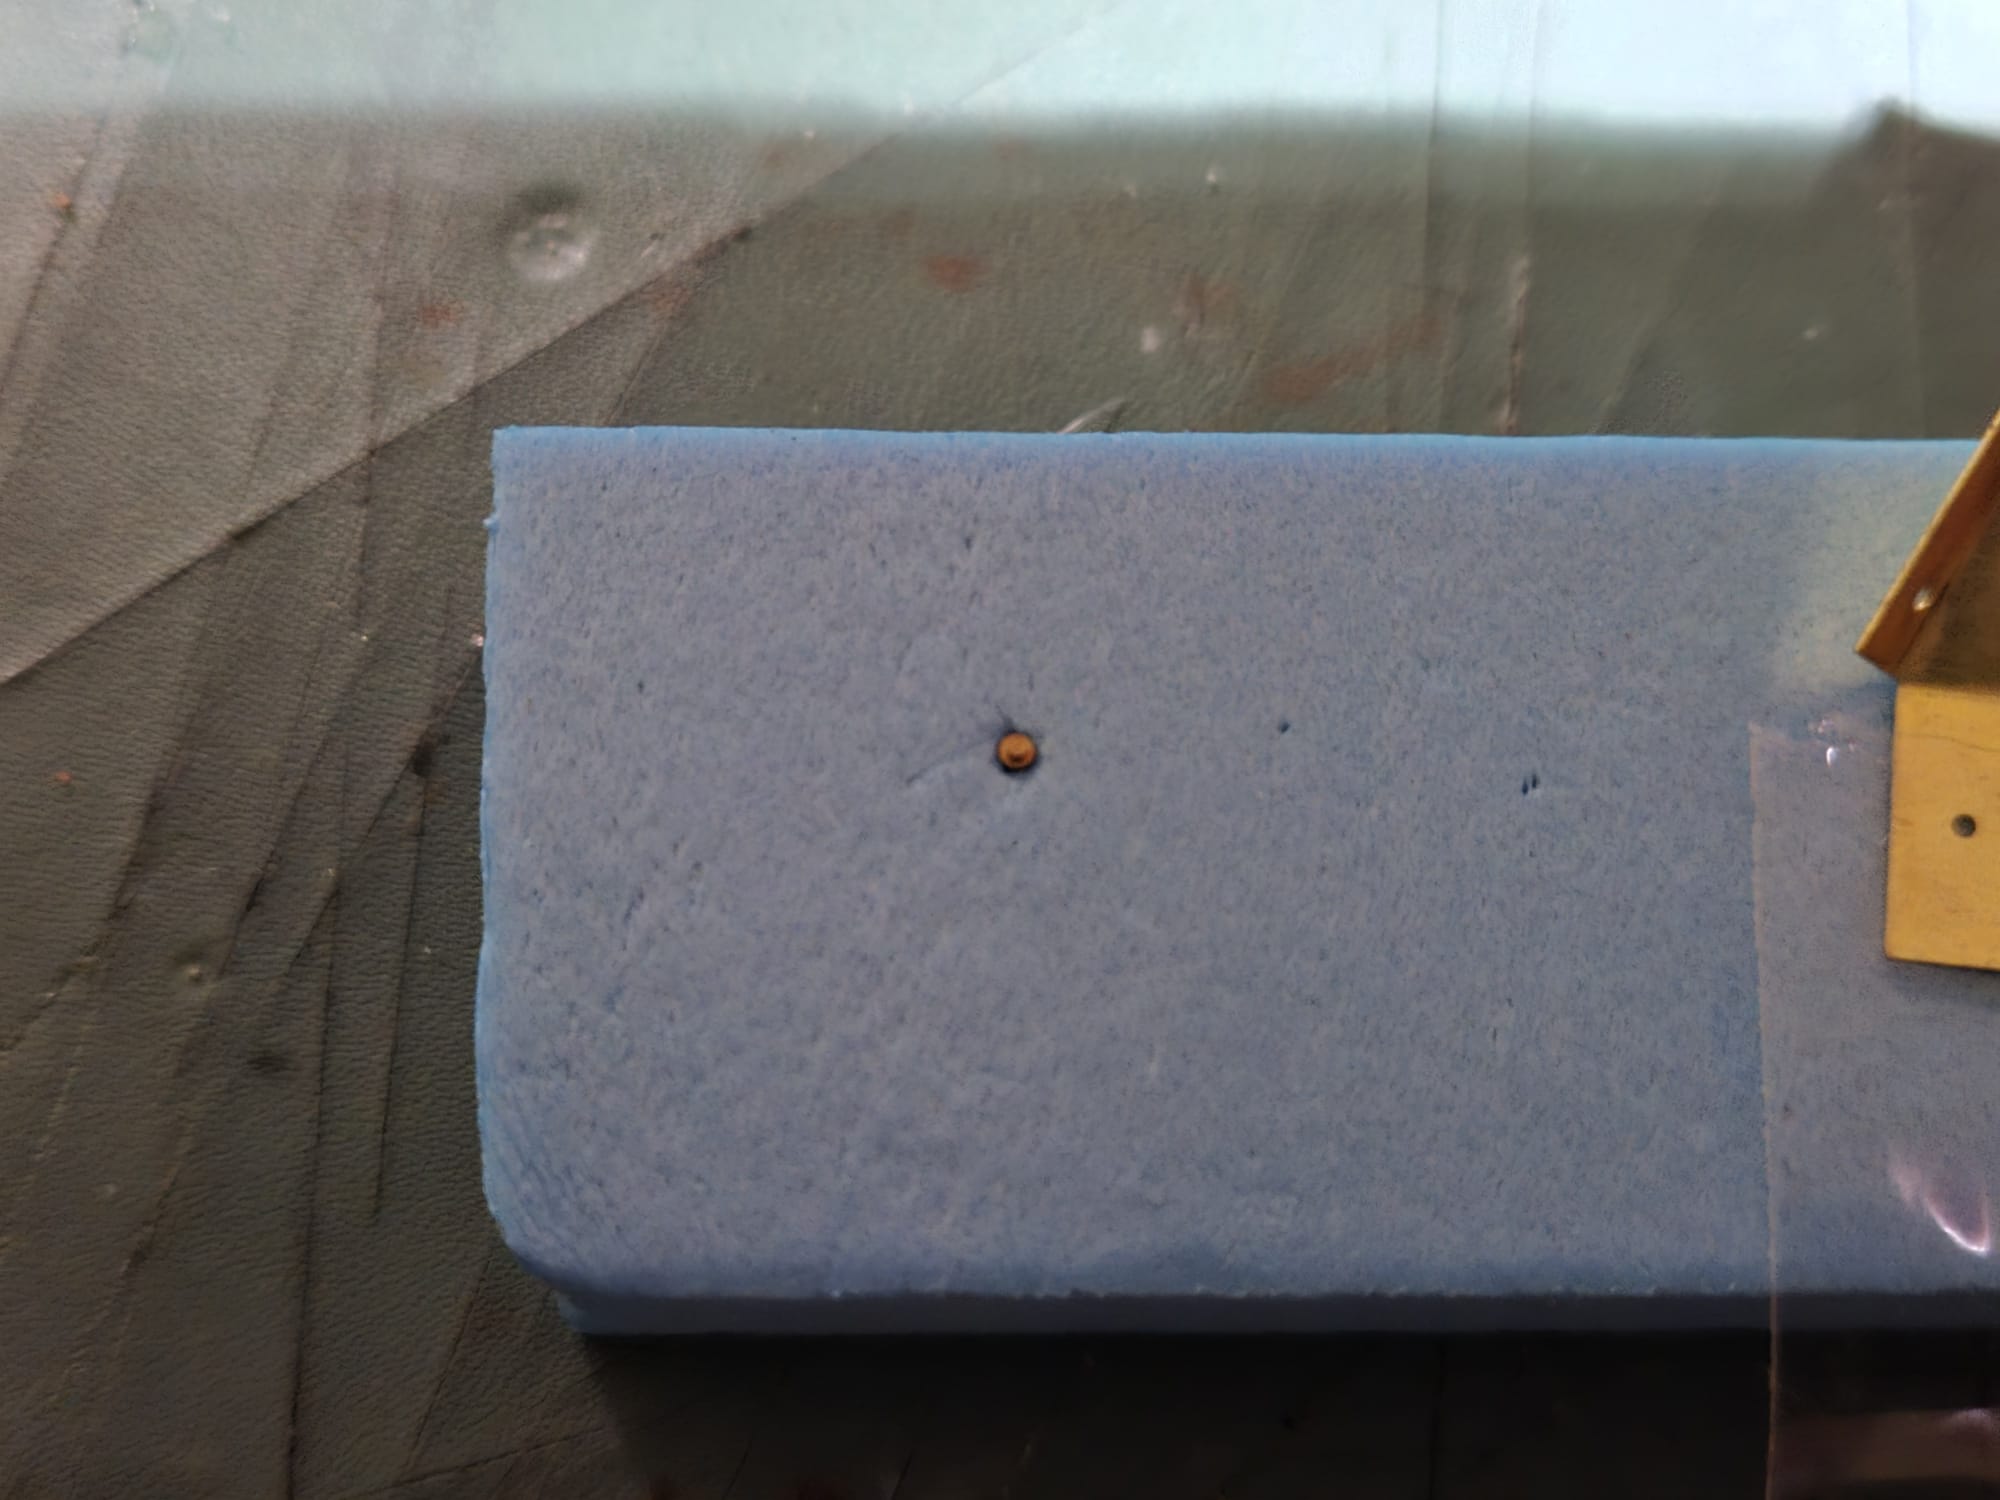
Now on how to make it easier to fix them all in the correct holes of the rear shields.
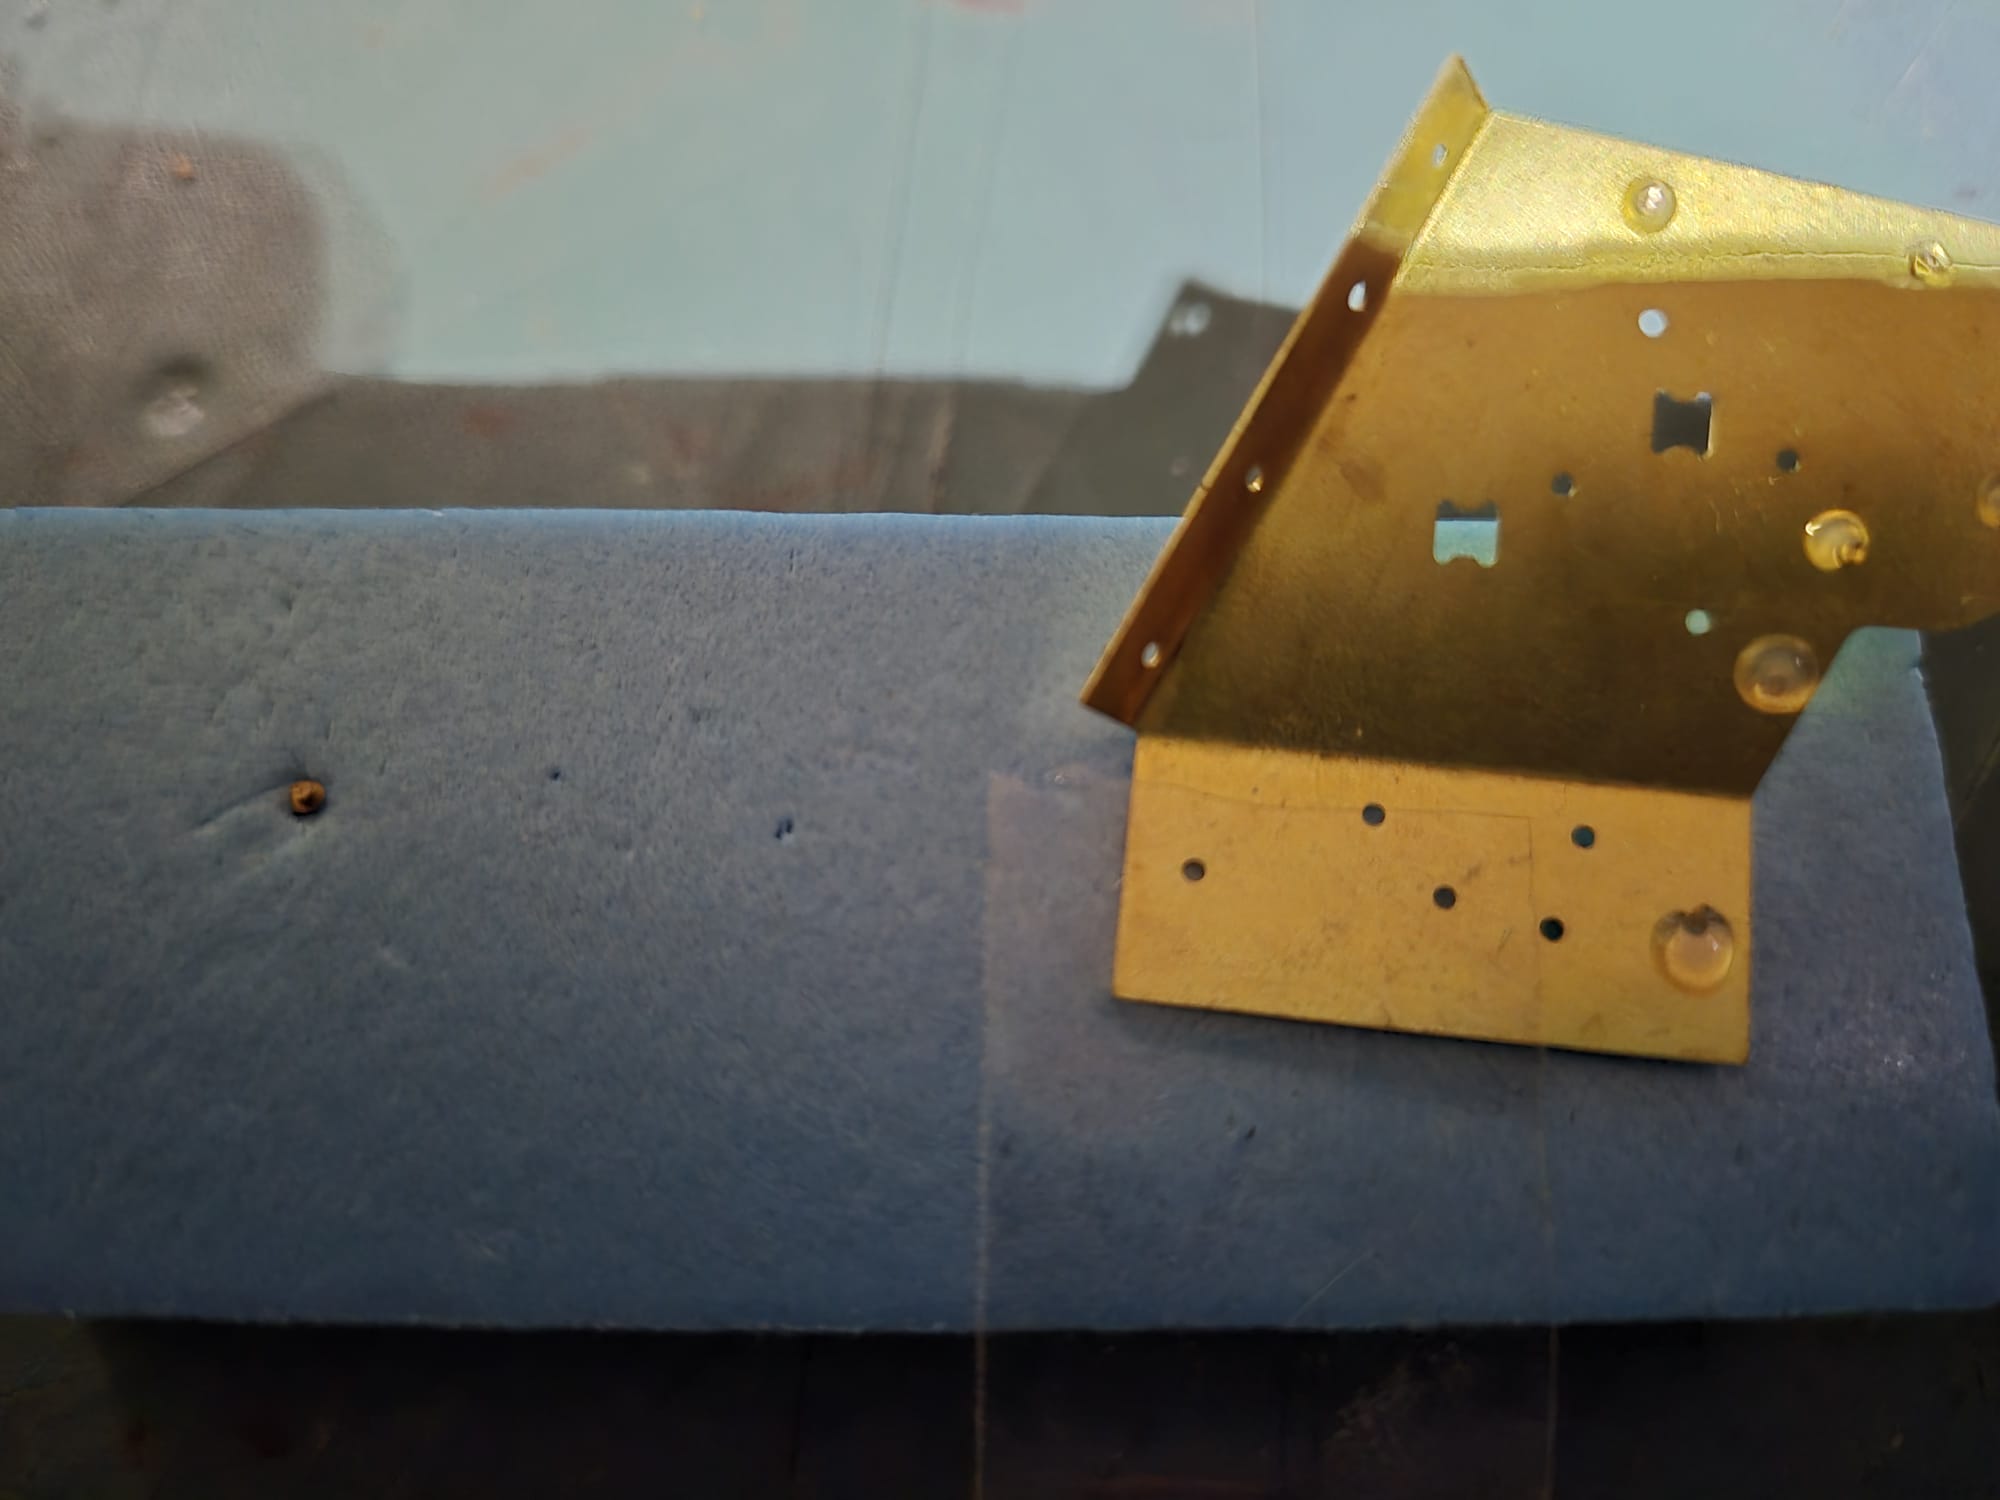
Once you have managed to grab one of them with the pointed side facing downwards, use a piece of polystyrene foam and fix the bolt into it.
You might slightly and carefully push it in with your finger, but not too deeply, allowing the cylinder end to be exposed.
Once you have managed that carefully pose the lower shield with the desired hole (pay close attention to the instructions in the box) over it until you see the cylindrical end appear, then simply apply a tiny bit of Scotch tape to hold the rear shield flat over it and apply a droplet of Deluxe Photo-etch glue to the exposed cylinder on the rear shield and let it dry completely, then remove the Schotch tape and repeat the operation for all the remaining bolts.
Why am I suggesting the Deluxe glue? Because it is not as aggressive, nor as fast drying as other CA glues. I would also suggest to apply flexible pinpoint glue dispensers to the main nozzle in order to have a more precise gluing point.
Note that the glue comes out looking milky white, but worry not, once it dries it turns completely transparent and actually flattens itself as long as you do not apply too much of it. Once completely cured it is as hard as stone. It takes a couple of hours before it does.
And here are a couple of pictures of what I have done.
As said, it is a bit fiddly, but much easier to do than struggling to apply the bolts in any other way.
And this way to apply them can completely be forgotten…
Fixing them from the rear is by far more practical than doing it from the front and less risky when speaking of loosing a bolt in the process since it is ready to be firmly inserted into the right hole without having to handle it.
I hope this has been helpful for those of you planning to do such works, and in my view, much easier to do even with other tiny pieces of brass or of any other material since once they are fixed into a piece of foam they are simply ready to be glued.
And whether gluing directly into the hole or from behind makes no difference with CA glue, since the glue actually even seals the joint between the part to be glued and the receptacle hole.
All the best to you all and let me know whether my trick has helped you in any way or not. I would be interested to know your own results.
![]()
![]()
![]()
PS: I am still at it, and believe me, it is a very slow process and needs really a lot of patience and commitment, but I am sure that I eventually will manage to place all 26 bolts in place, but then will also come the next torture: the very complicated holding arms structure holding the double shield in place.
Wish me luck.
3 Likes
Just a tiny note about my status of the PAK43/41 gun
While the main gun structure is by now ready, the double sided shield requires by far more time to be assembled correctly.
The delay is due to the process of applying every single bolt to the assigned holes of the rear shield.
First of all, one must capture them and fix them into the foam board, then locate the specific hole in the rear shield where to fix them and then apply a Scotch tape to the rear shield to hold it firmly over the cylindrical part of the bolt. Following that, apply a tiny drop of CA glue over the exposed bolt part and let it dry and then proceed with the following one.
Since the specific glue I am using is the Deluxe Photo-Etch glue, which is a slow curing CA non aggressive glue, it takes a while before it dries completely and fixes the bolt to the rear shield in a sturdy way.
This operation has to be respected with every other bolt thus applied and this requires indeed a lot of time.
This is why I am not sure to be able to show you the finished gun by tonight.
Another reason is, that following this assembly, I will further have to fix all the complicated holding arms array to the rear of the shield to hold it firmly attached to the main gun structure.
And this is why to my utmost regret I won’t be able to keep my promise to show it this evening.
But should I manage to complete it tonight and paint both the PAK43/41 and the Naval Gun by tomorrow I am sure I will be able to show them in their original and realistic state by tomorrow evening.
So please, forgive me for this delay, but as you can see it is really not an easy build at all and requires both patience and endurance on my part.
Whomever invented this system must either be a jeweler himself, or a complete madman, or both. In any case I would suggest to those who produced such models, to come up with a much more practical way to reproduce such details, since people are not born jewelers, nor do they have all the time in the world to doodle around with such minute pieces.
After all, every minute we can economize on such stupid and unnecessary complications, could go to build something more pleasurable and probably as well tooled as anything else, but sensibly easier to put together.
And as it is said, time is money, and since this is also a reality in everything one does, why fill otherwise excellent models with almost impossible details which in the end can barely be seen by a normal human being?
I would suggest to all of those model designers to try to simplify such tasks as much as they can, because otherwise no one would still have fun in building such items and today there are certainly means to do so that produce such details with much more practical solutions than the ones contained in this model box.
All it requires is a bit hard thinking and better planning.
And to you my dear fellow modelers, I wish you luck with all those immensely embarrassing little details you have found in your model boxes, which alas are indeed required to finish your kit, but slowly disappear once the model is completely finished.
As the French say: bon courage! ![]()
![]()
![]()
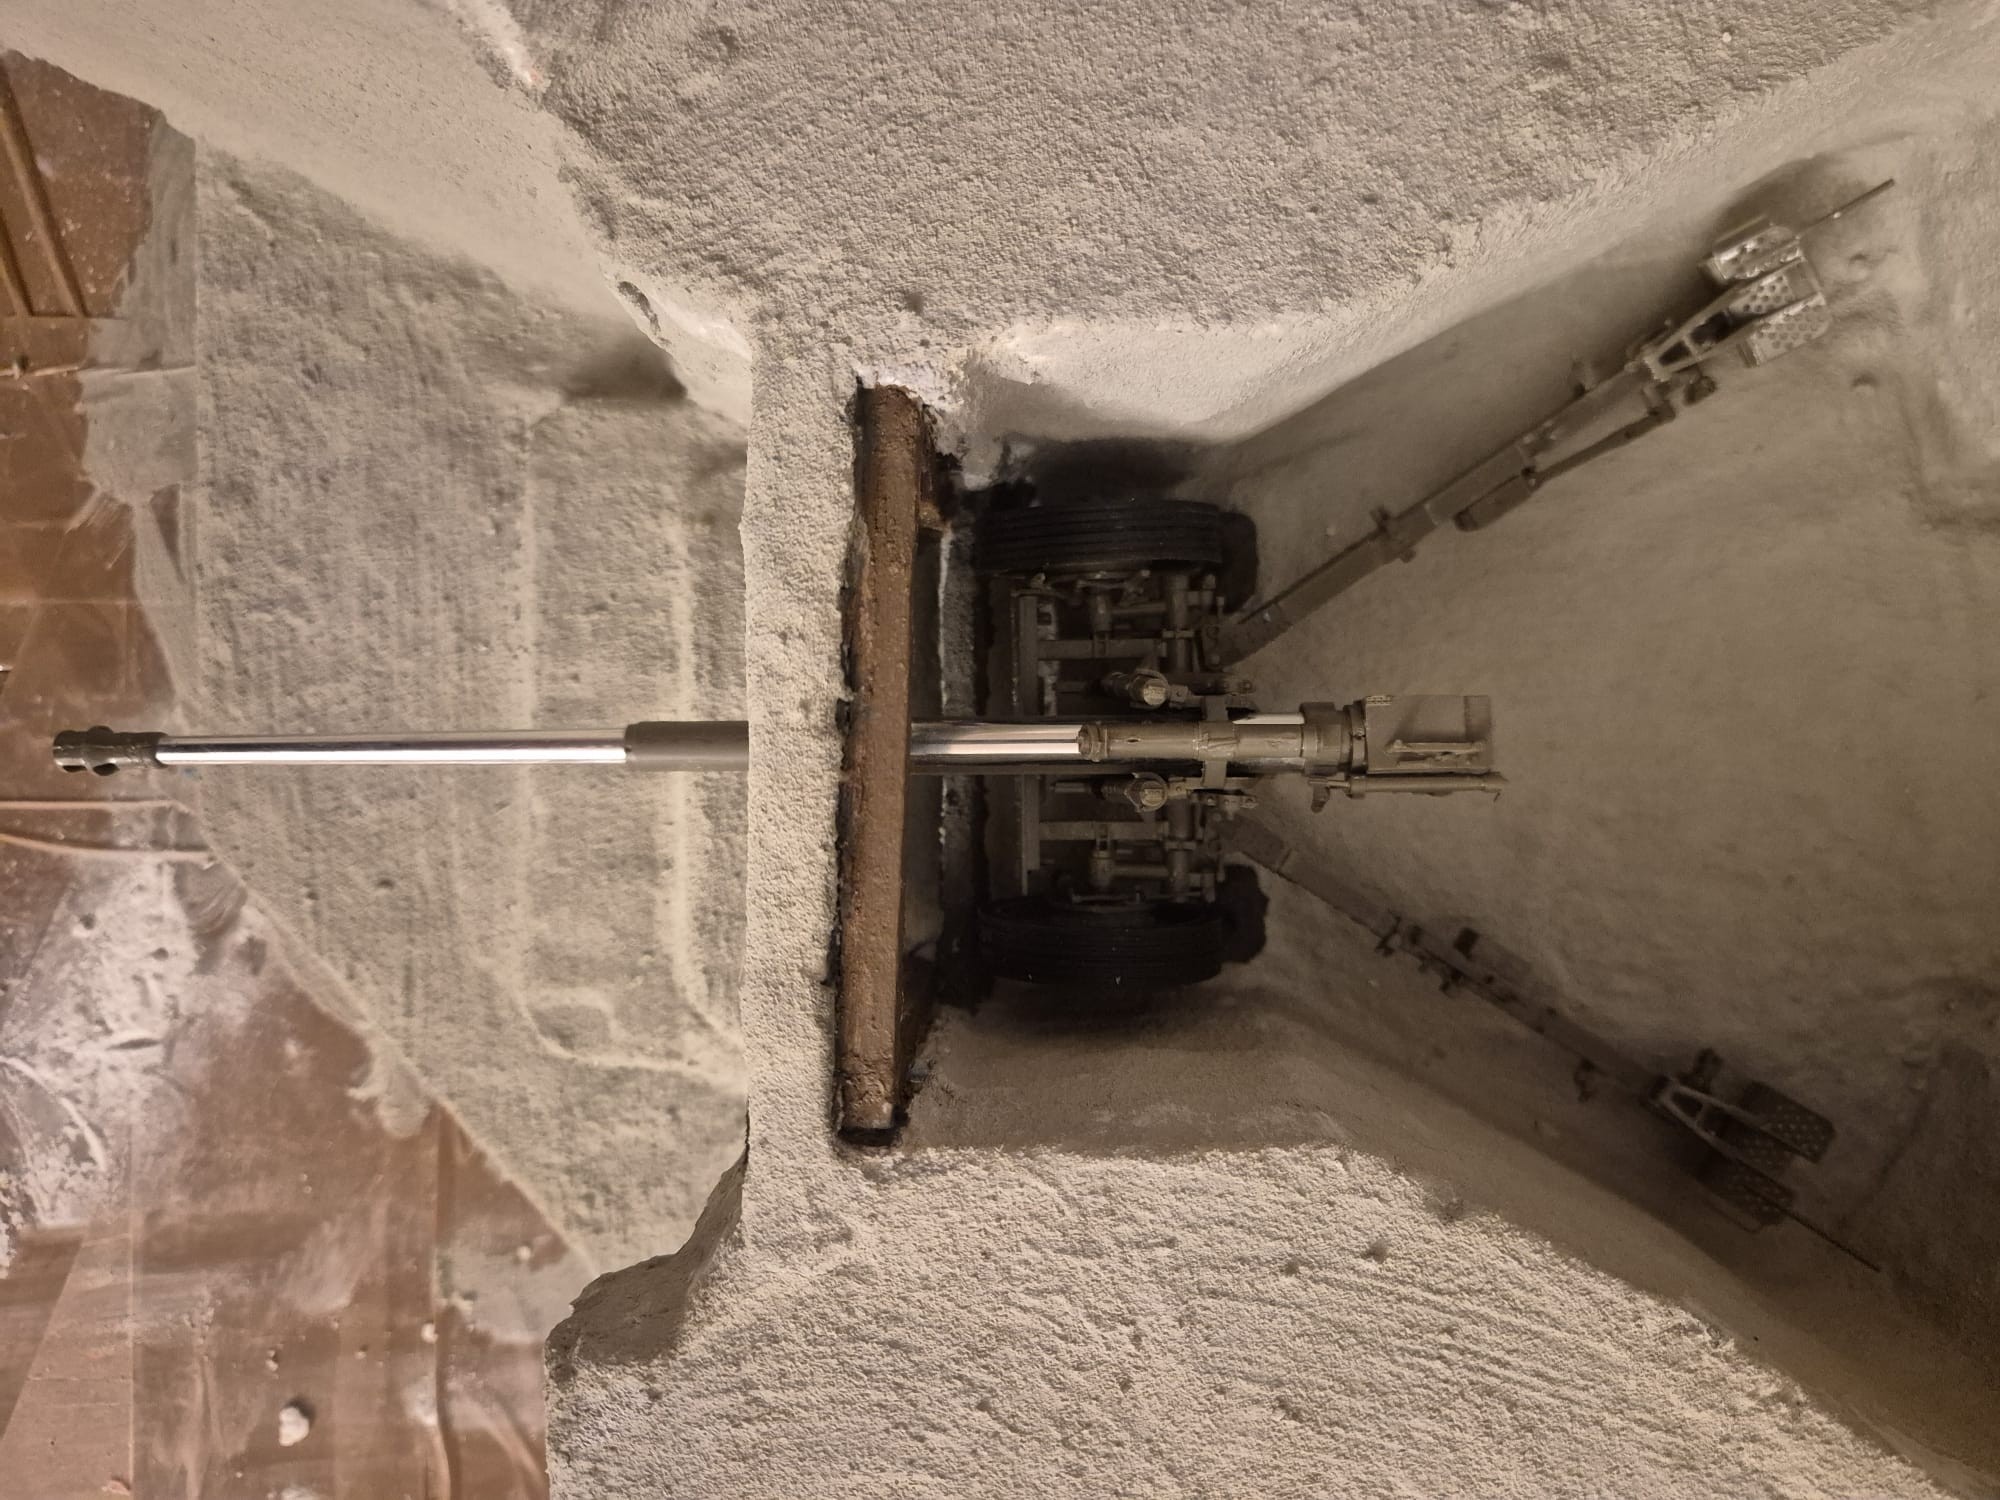
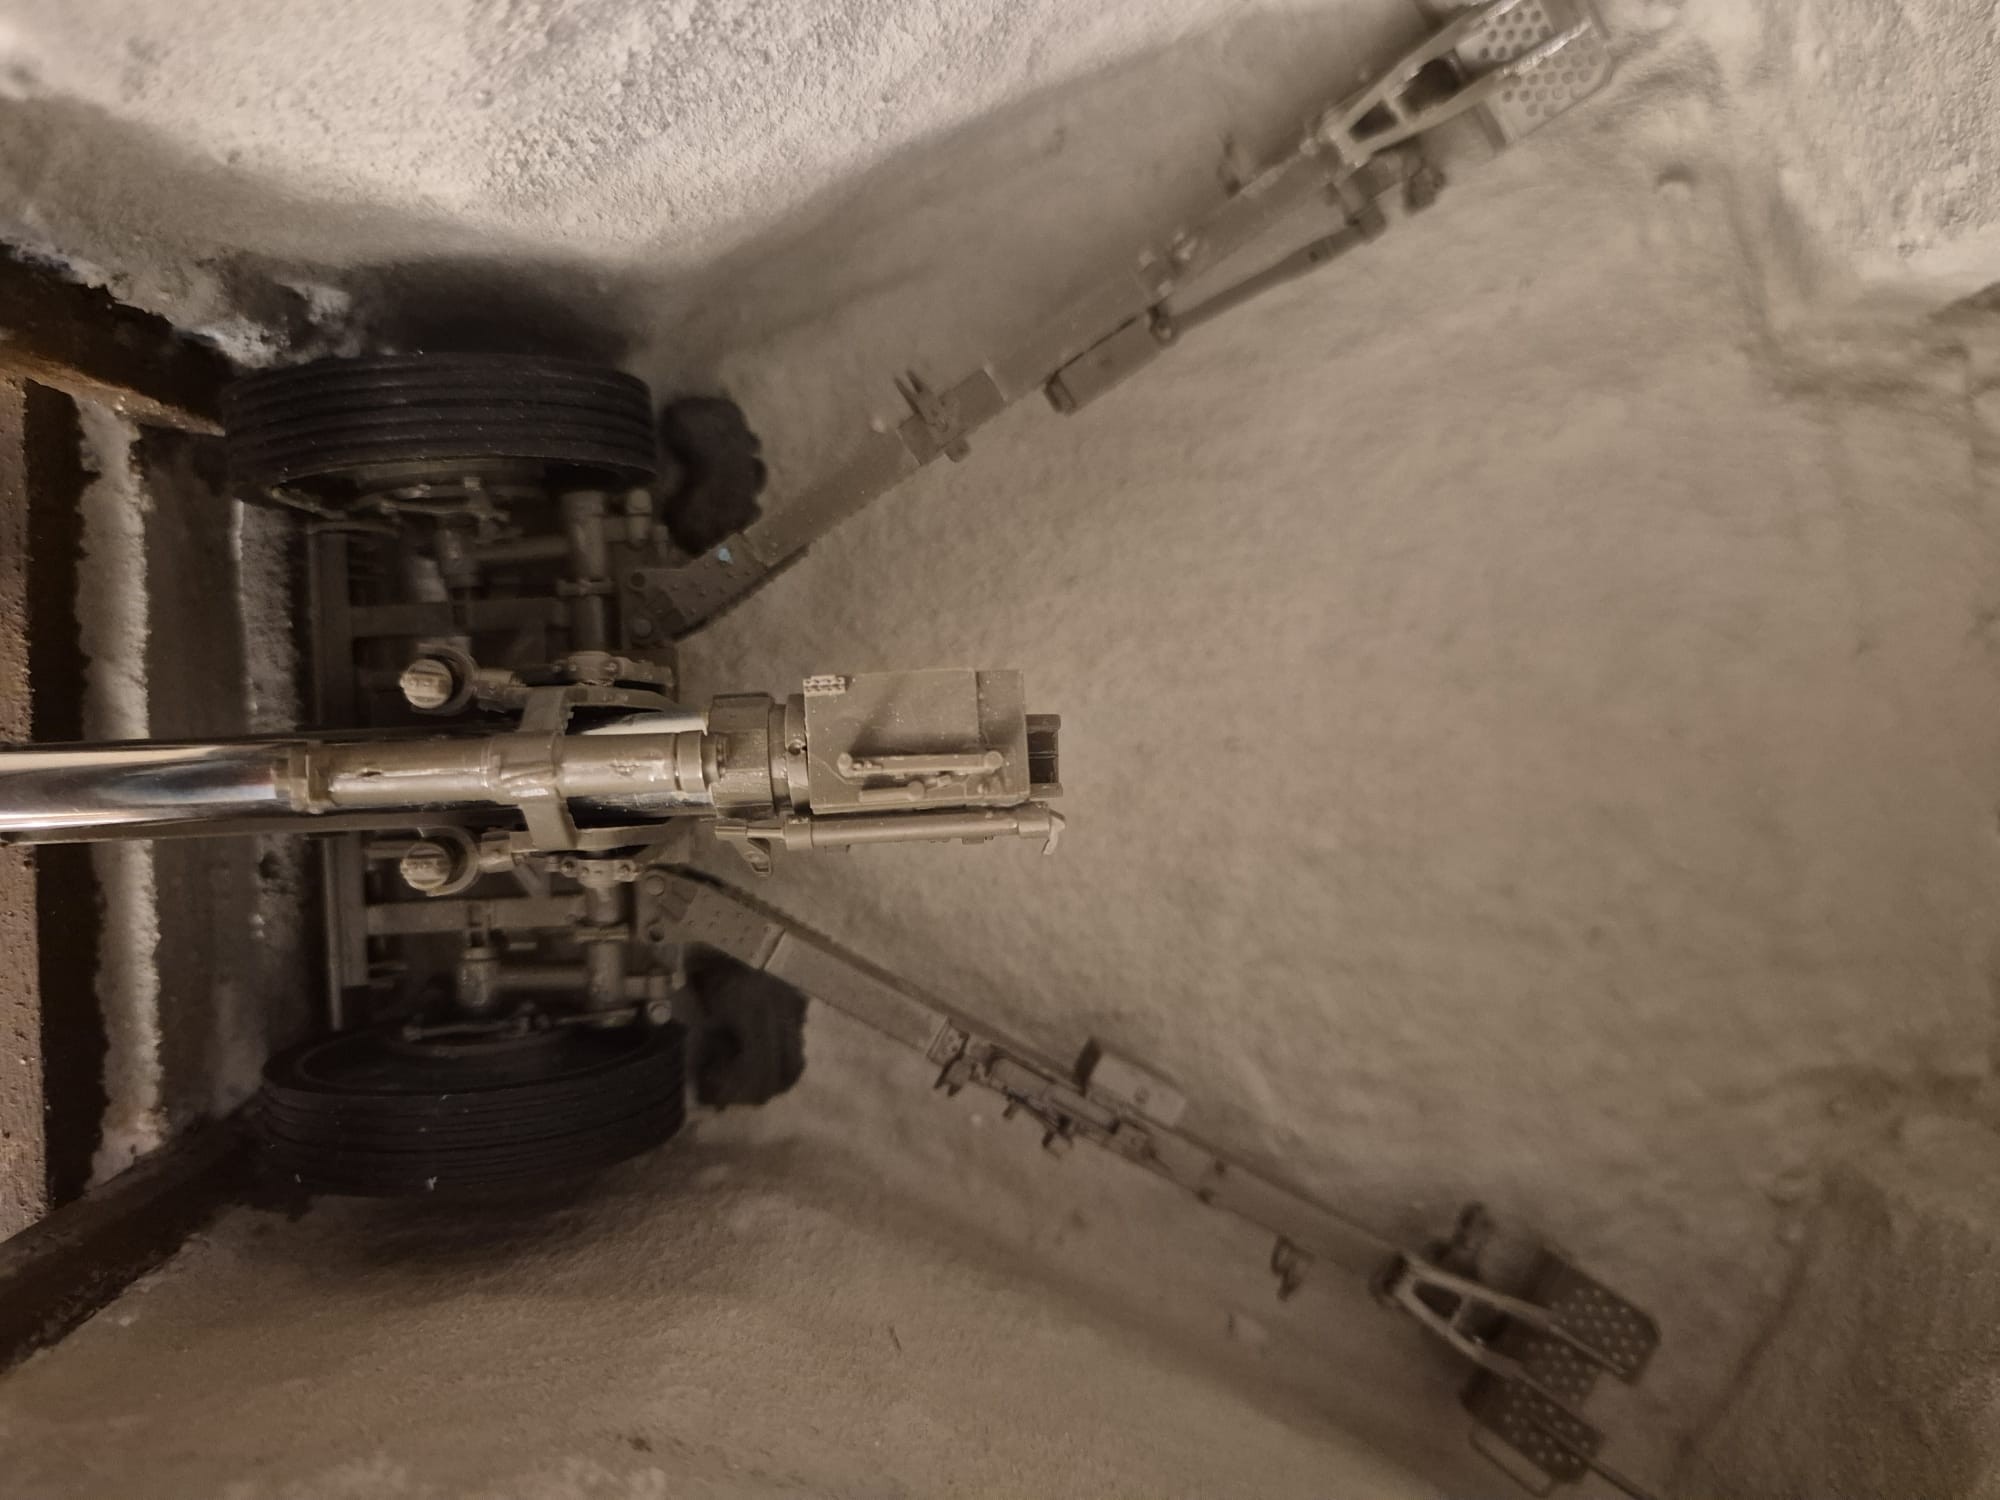
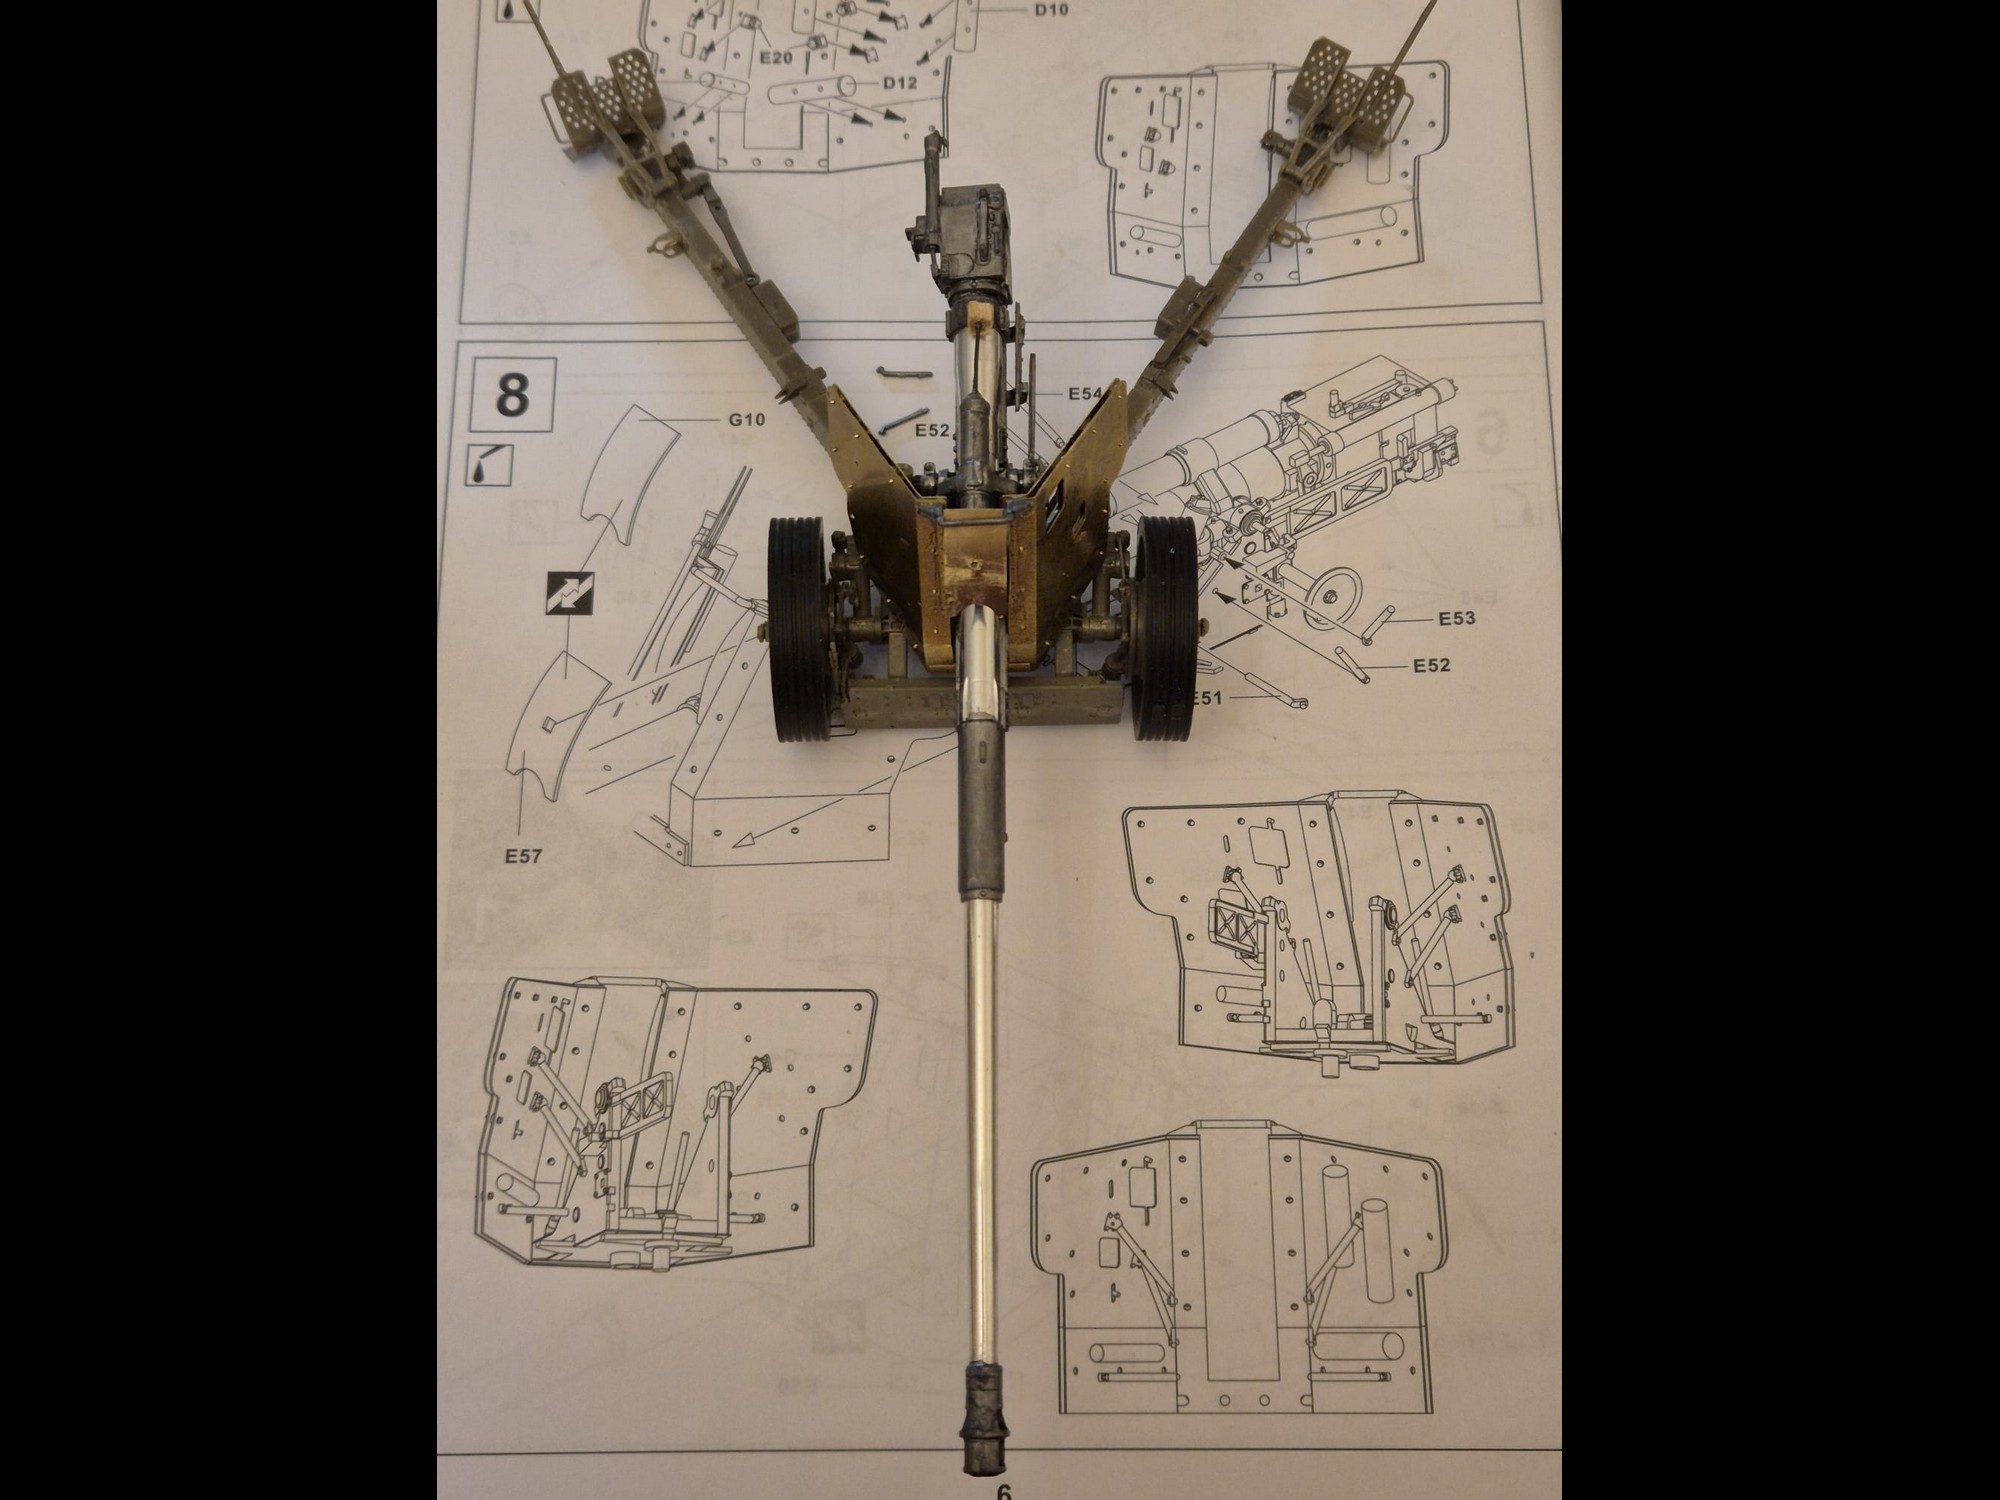
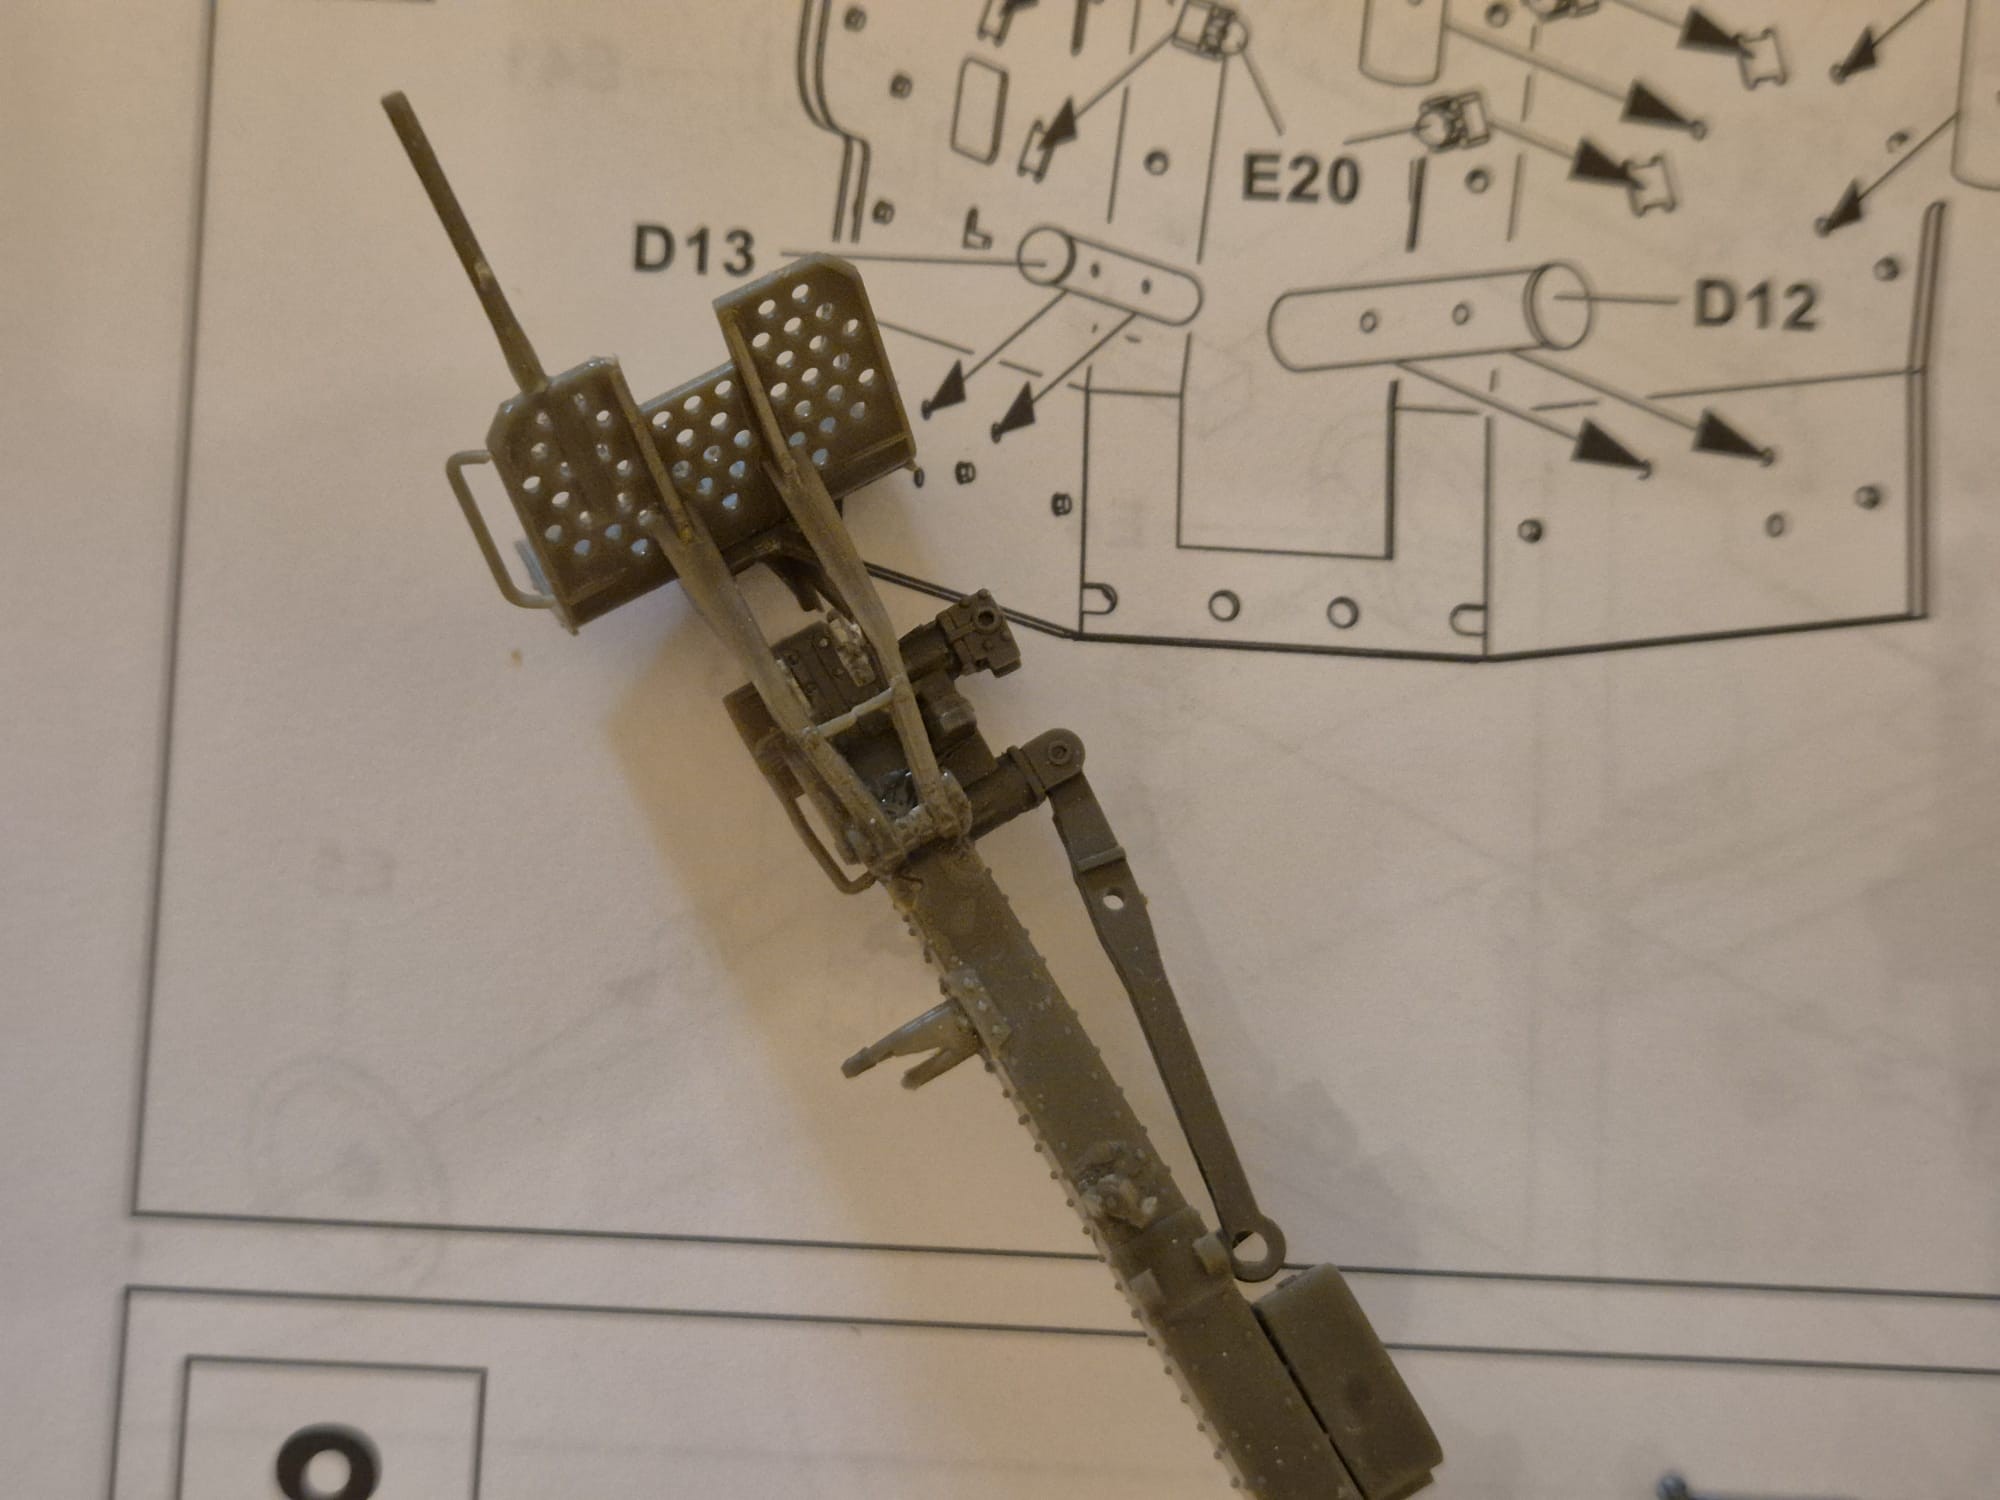
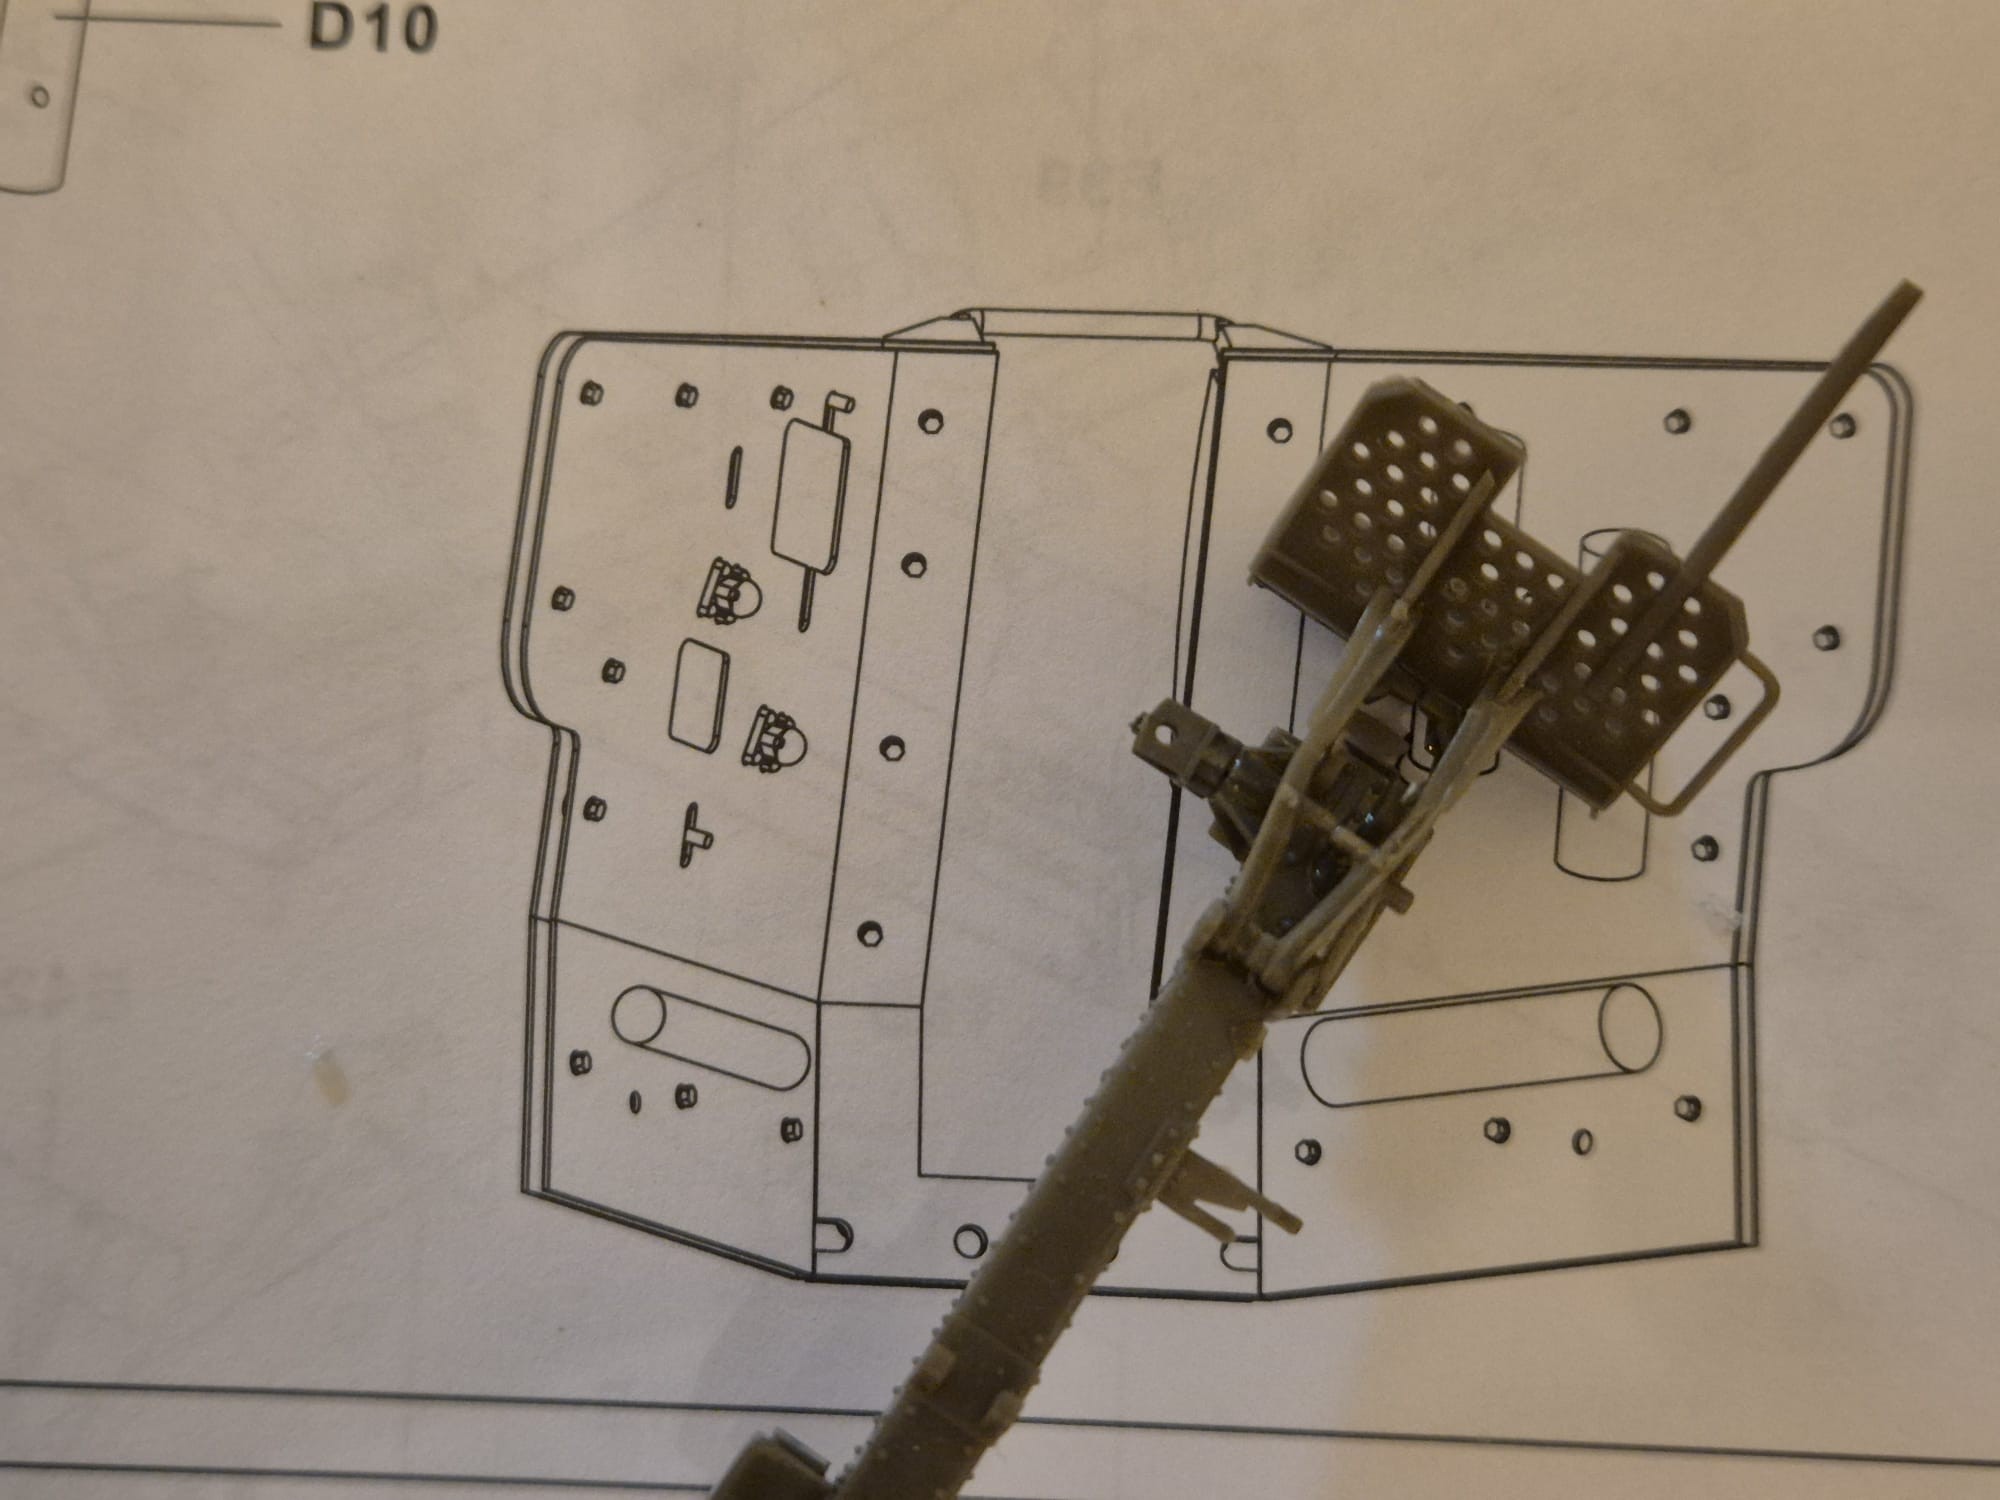
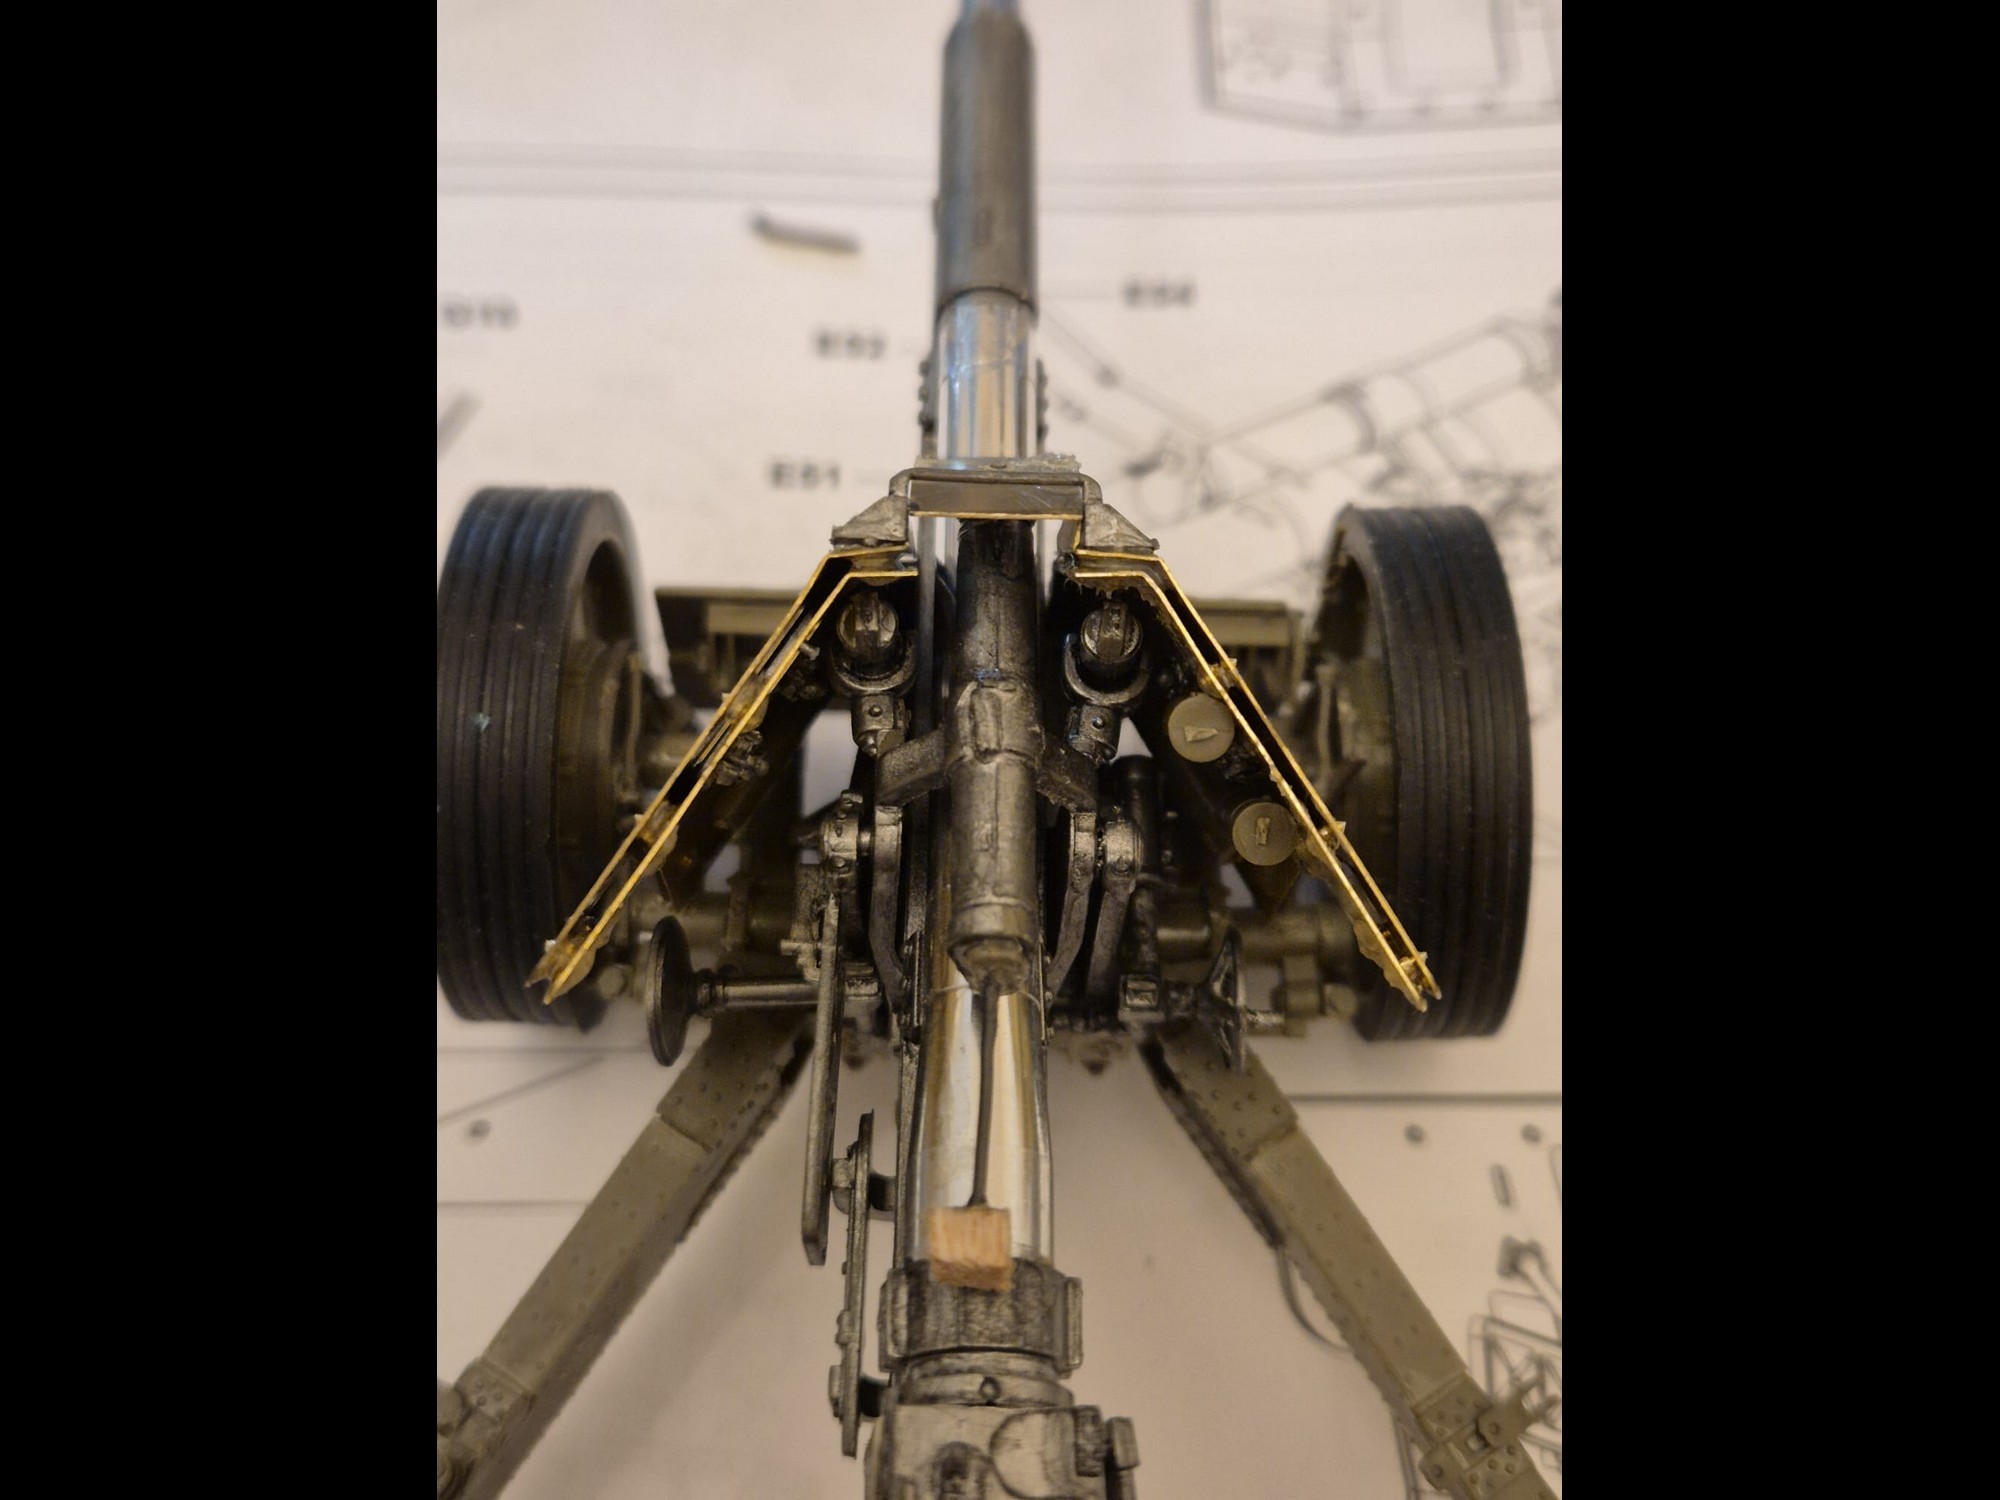
A few preliminary of the almost finished PAK43/41 88mm Anti-tank gun.
Just a few more tiny pieces to glue to it, such as those darned brackets holding the forward double shield (which by now has become quite heavy) and the assembly will be complete.
Although seeing how it looks right now, fully crammed with already a ton of tiny details I don’t seem it necessary to also apply those fiddly tiny brackets, but I will try anyway.
In any case, even without them, one wouldn’t really notice the difference since the shield is so tightly fixed to the rest of the gun rest that one could not really see them.
It took me a whole lot of patience to assemble that double shield, but in the end it came out quite well, at least in my personal opinion. Still, it was rather an ordeal to pick up every single bolt and place it correctly where it belonged.
And even the fixing of the front shields was rather complicated. Despite the fact that finally all the bolts managed to click in place in the front holes, I took it upon myself to fix them all once more inside the shield’s divisions in order firmly block them. I did that with CA glue dispensed with a very capillary glue nozzle on every bolt.
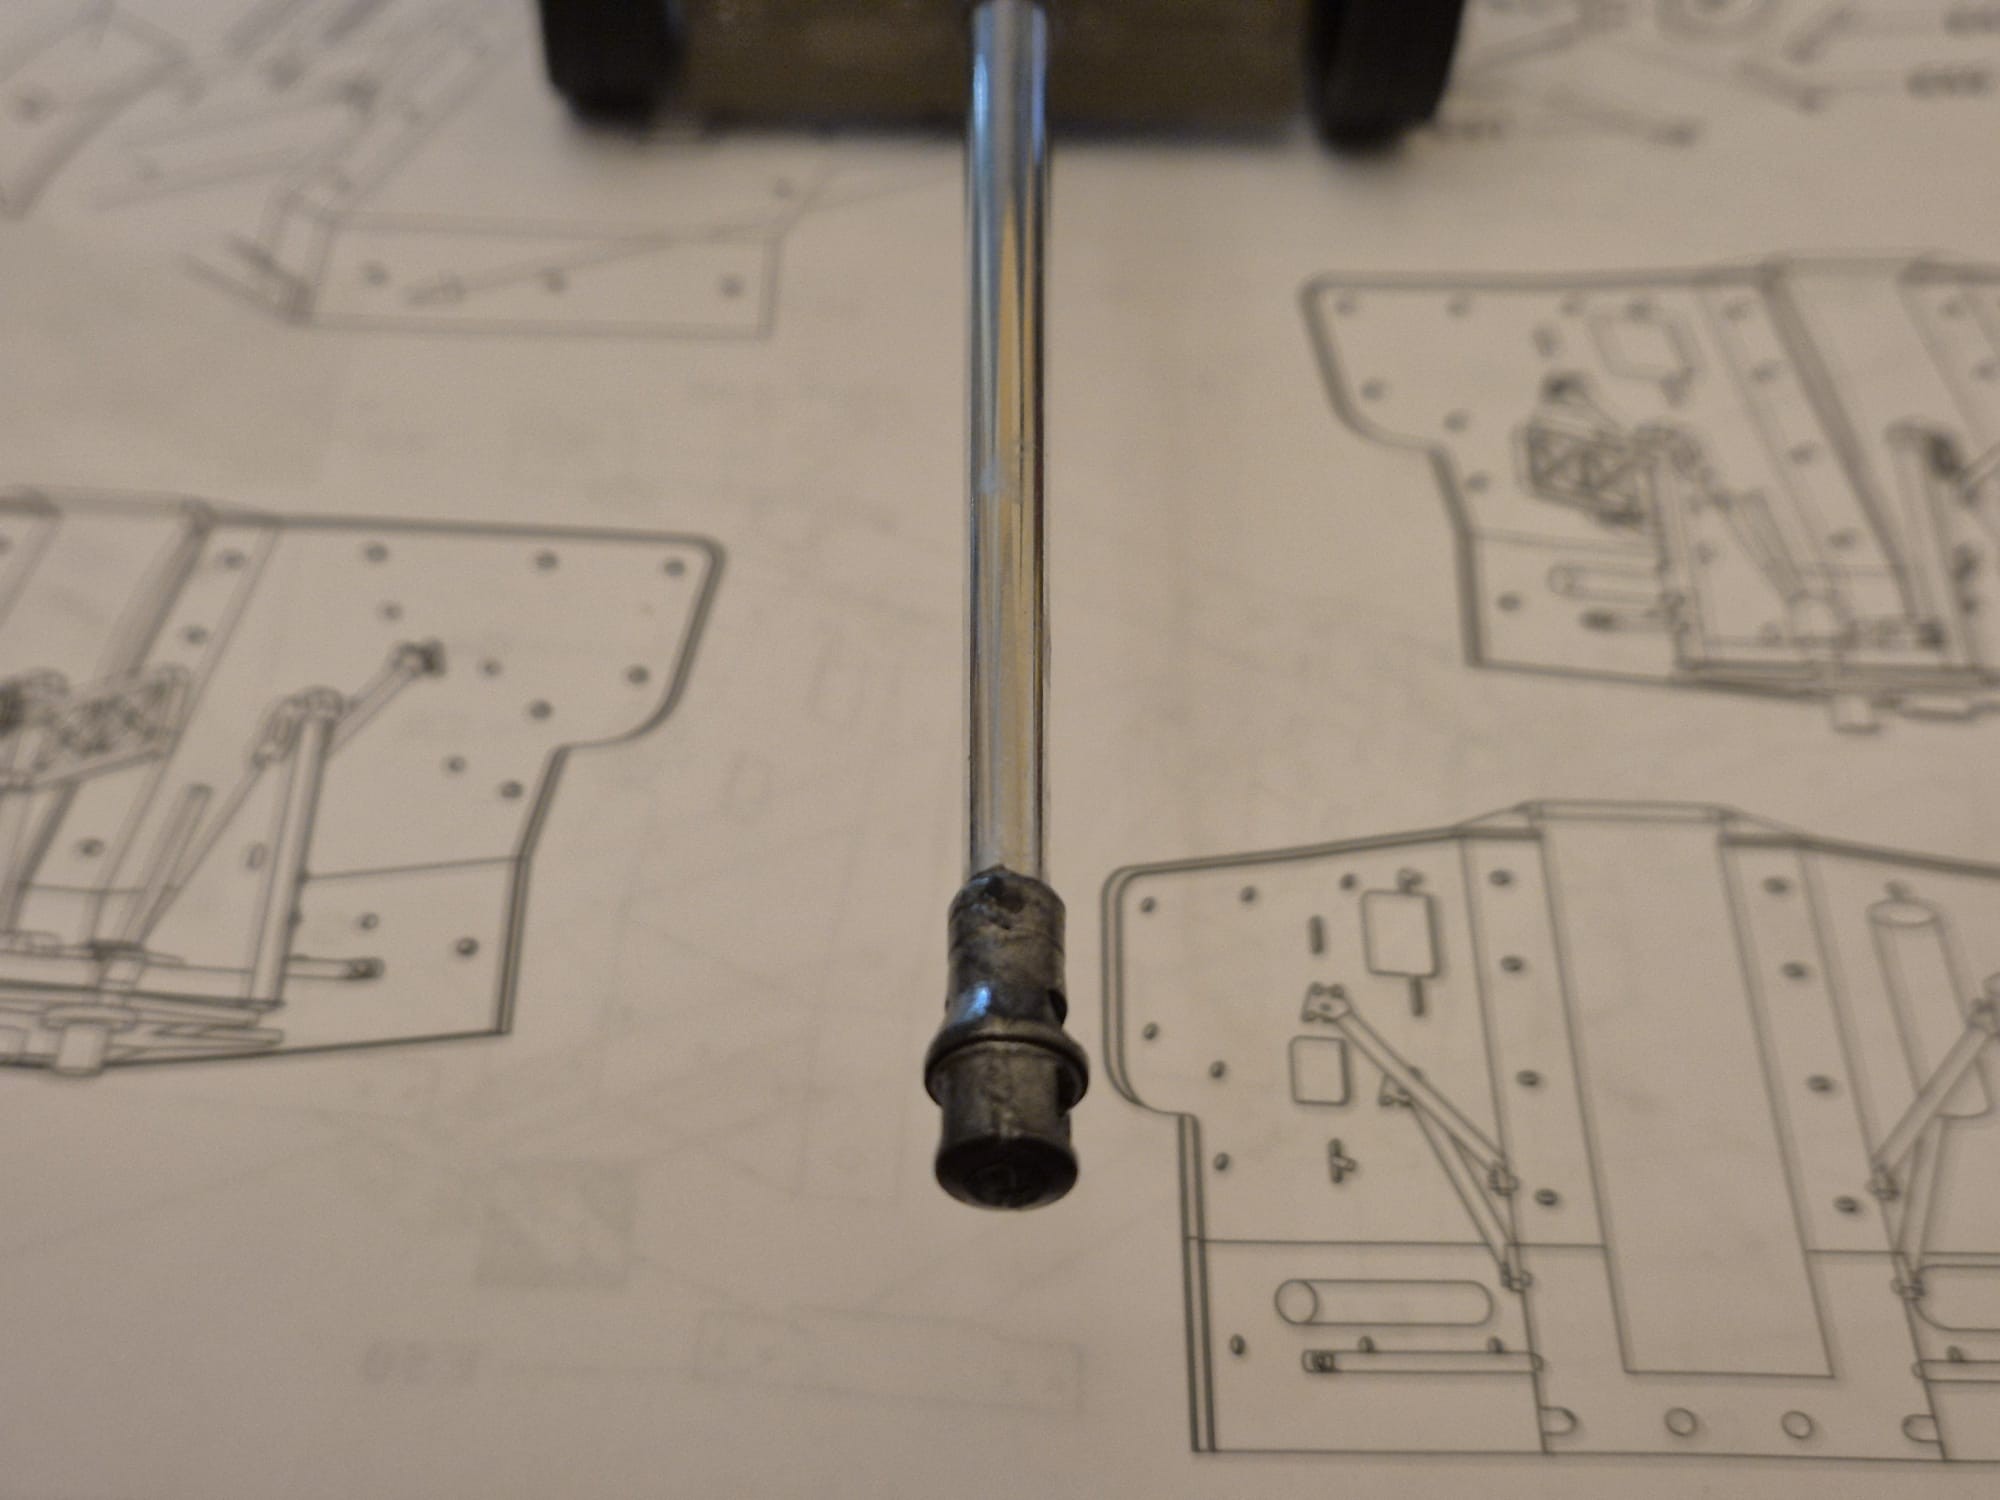
Unfortunately, while fixing the shield the ramrod on the upper gun holding cylinder broke off and went in nowhere limbo. Since it was nevertheless too crooked to start with (being in polystyrene) I substituted it with a small piece of wire which I straightened and cut a with of balsa wood to replace the lead (hence the light tan color).
All this will disappear once fully painted.
Also, the gun breach as per instructions is positioned on the left hand side and therefore the sliding ammunition loader is on that side, but in bunkers it would be reversed for practical reasons (one of the many field adjustments Germans made to their weapons).
And here are finally the preliminary pictures of the almost finished gun.
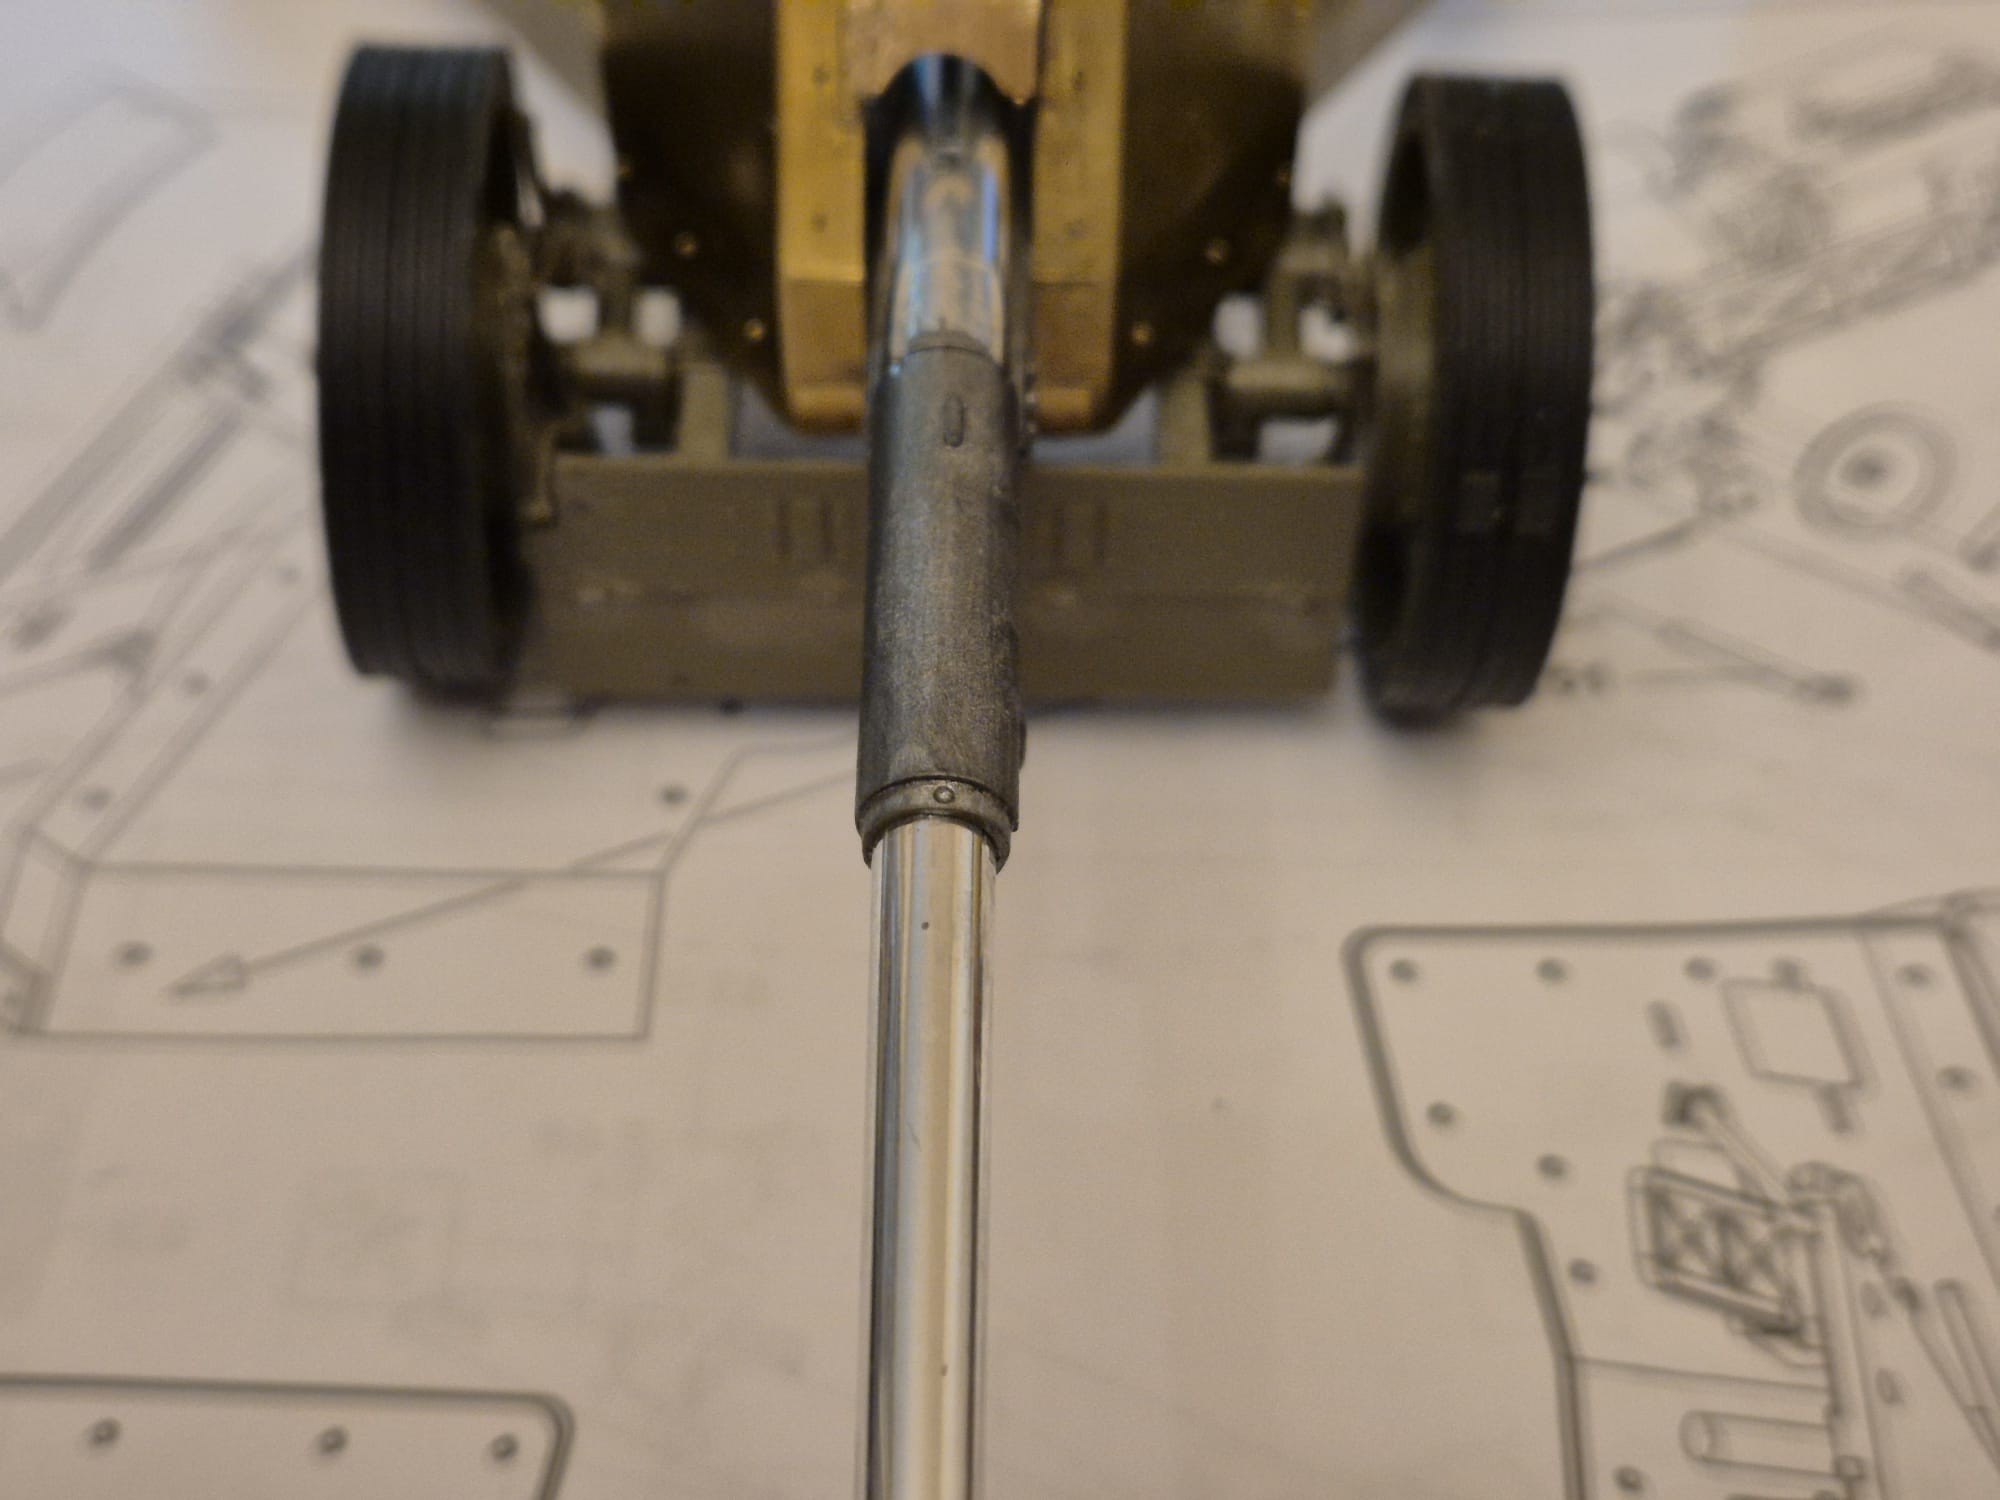


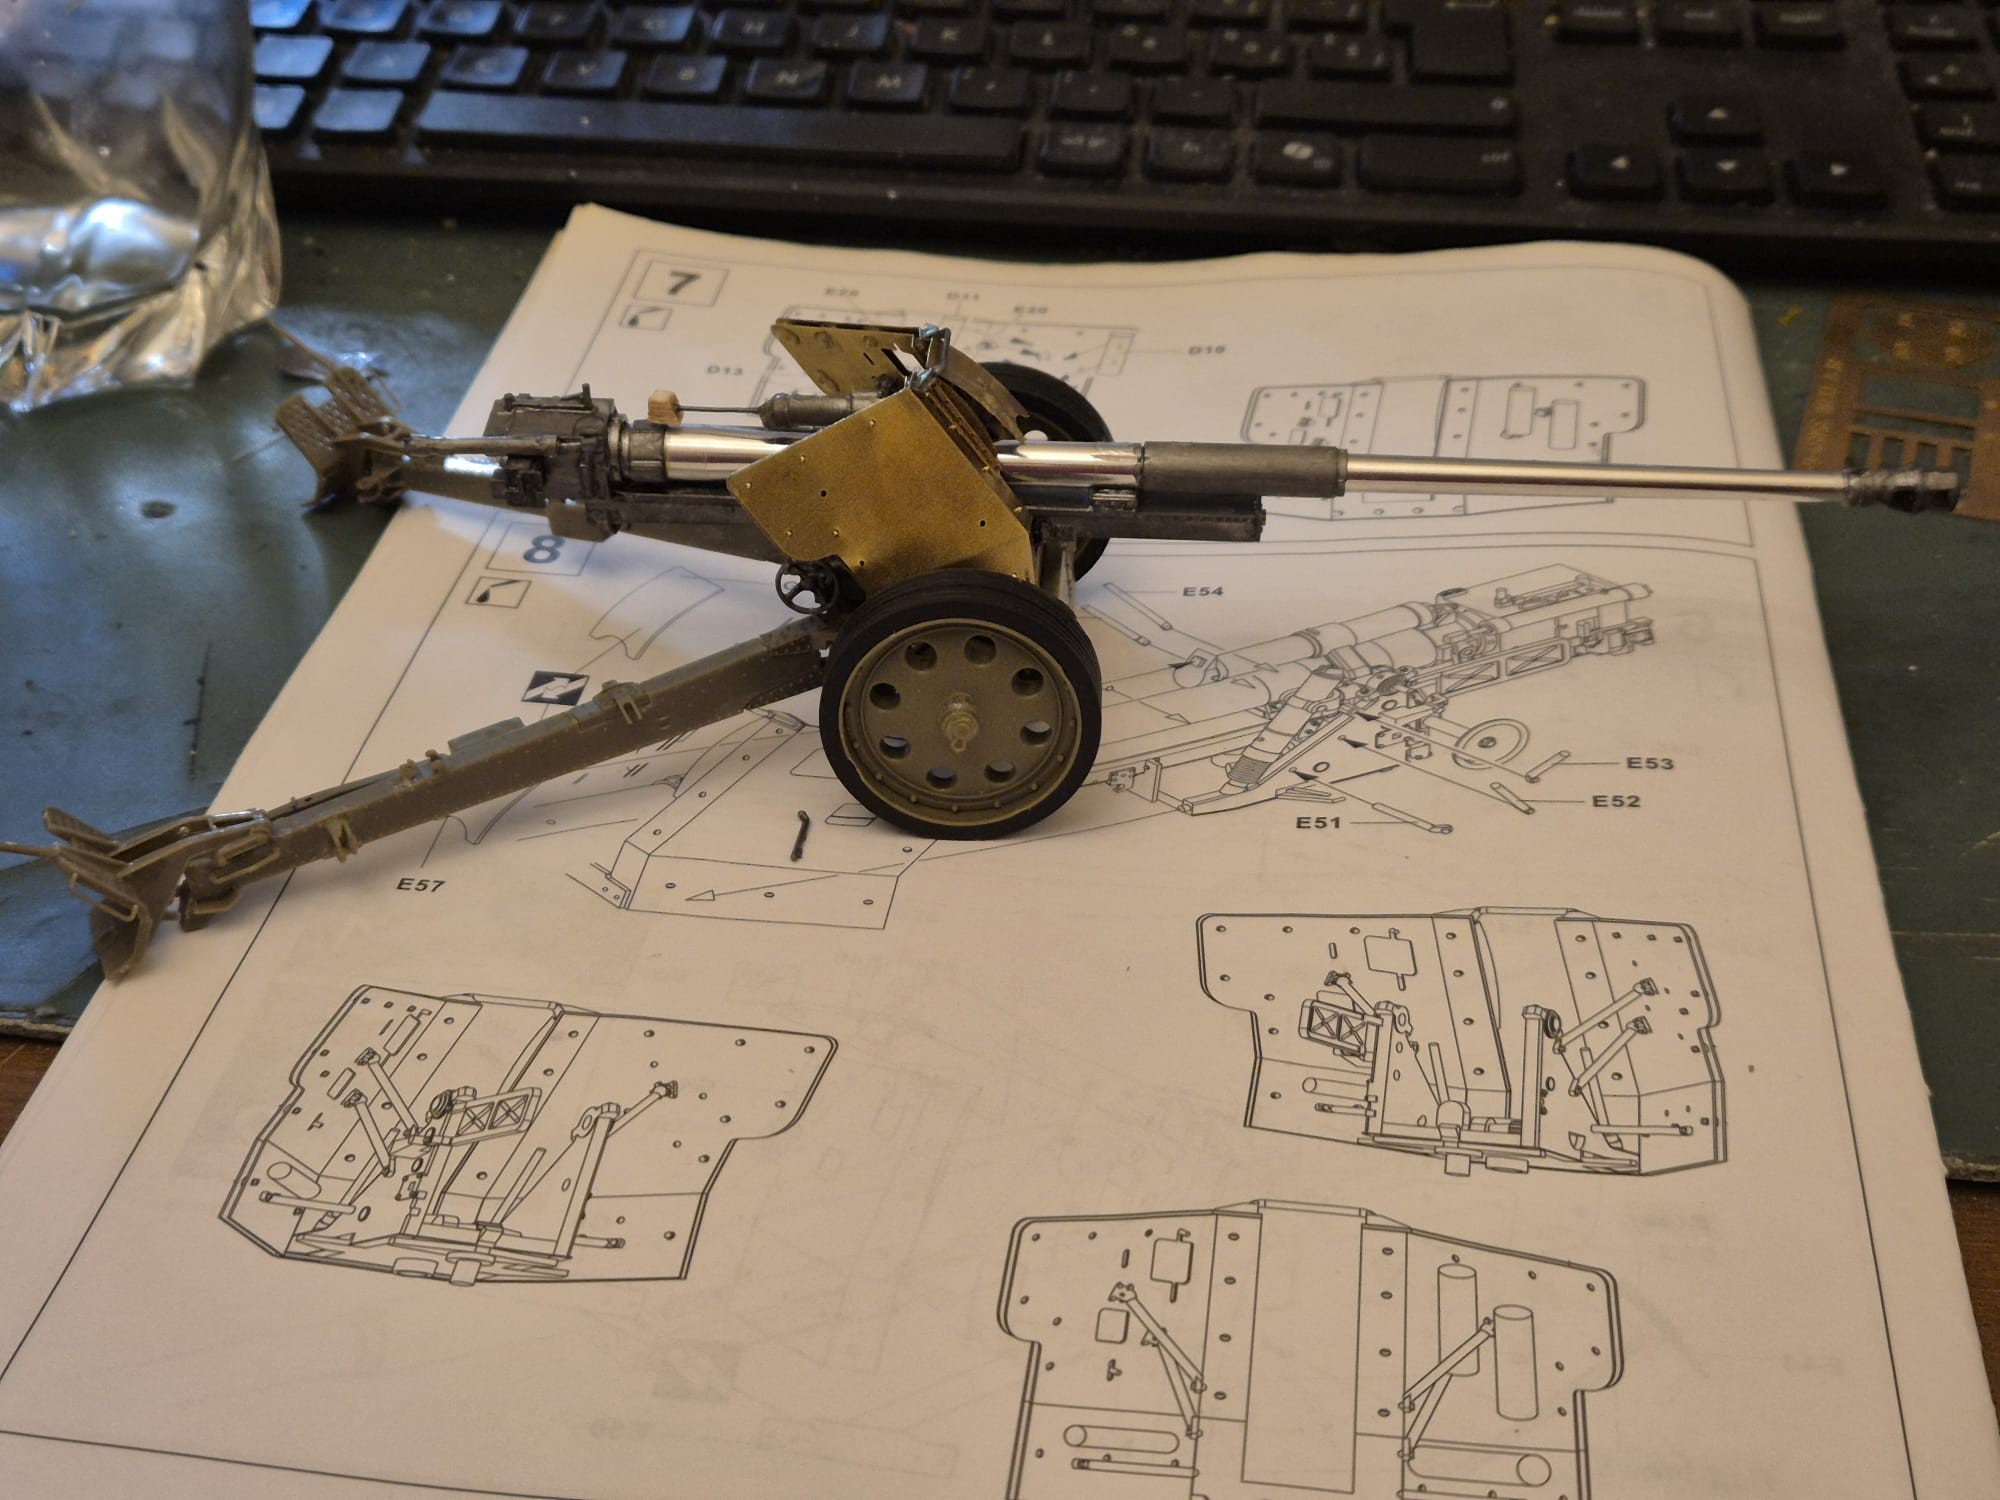
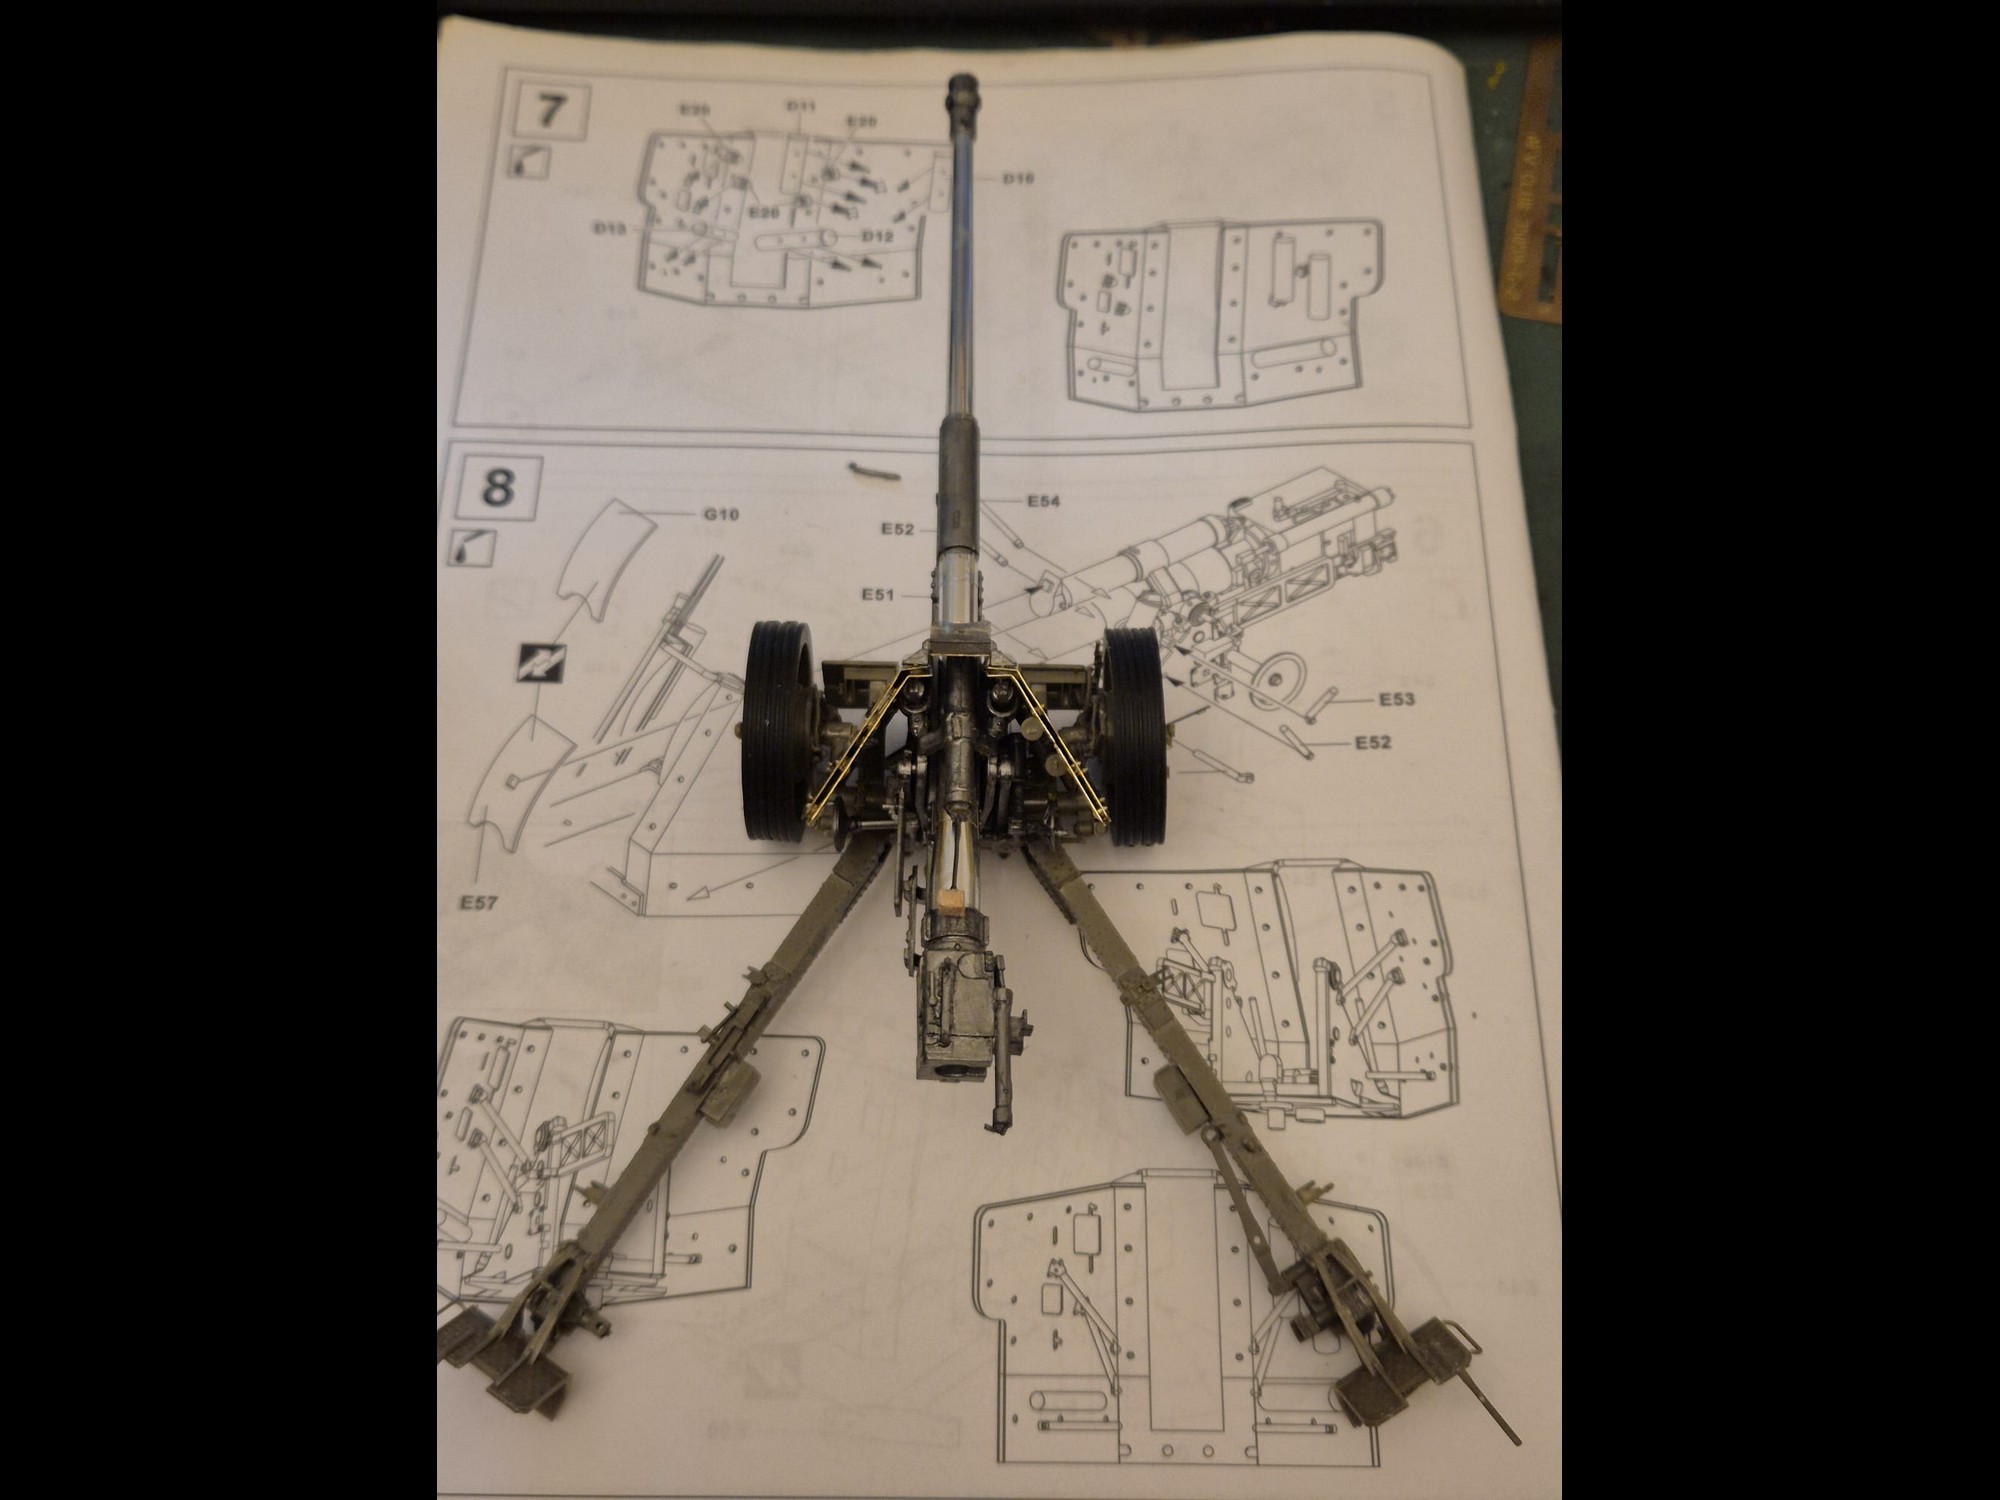

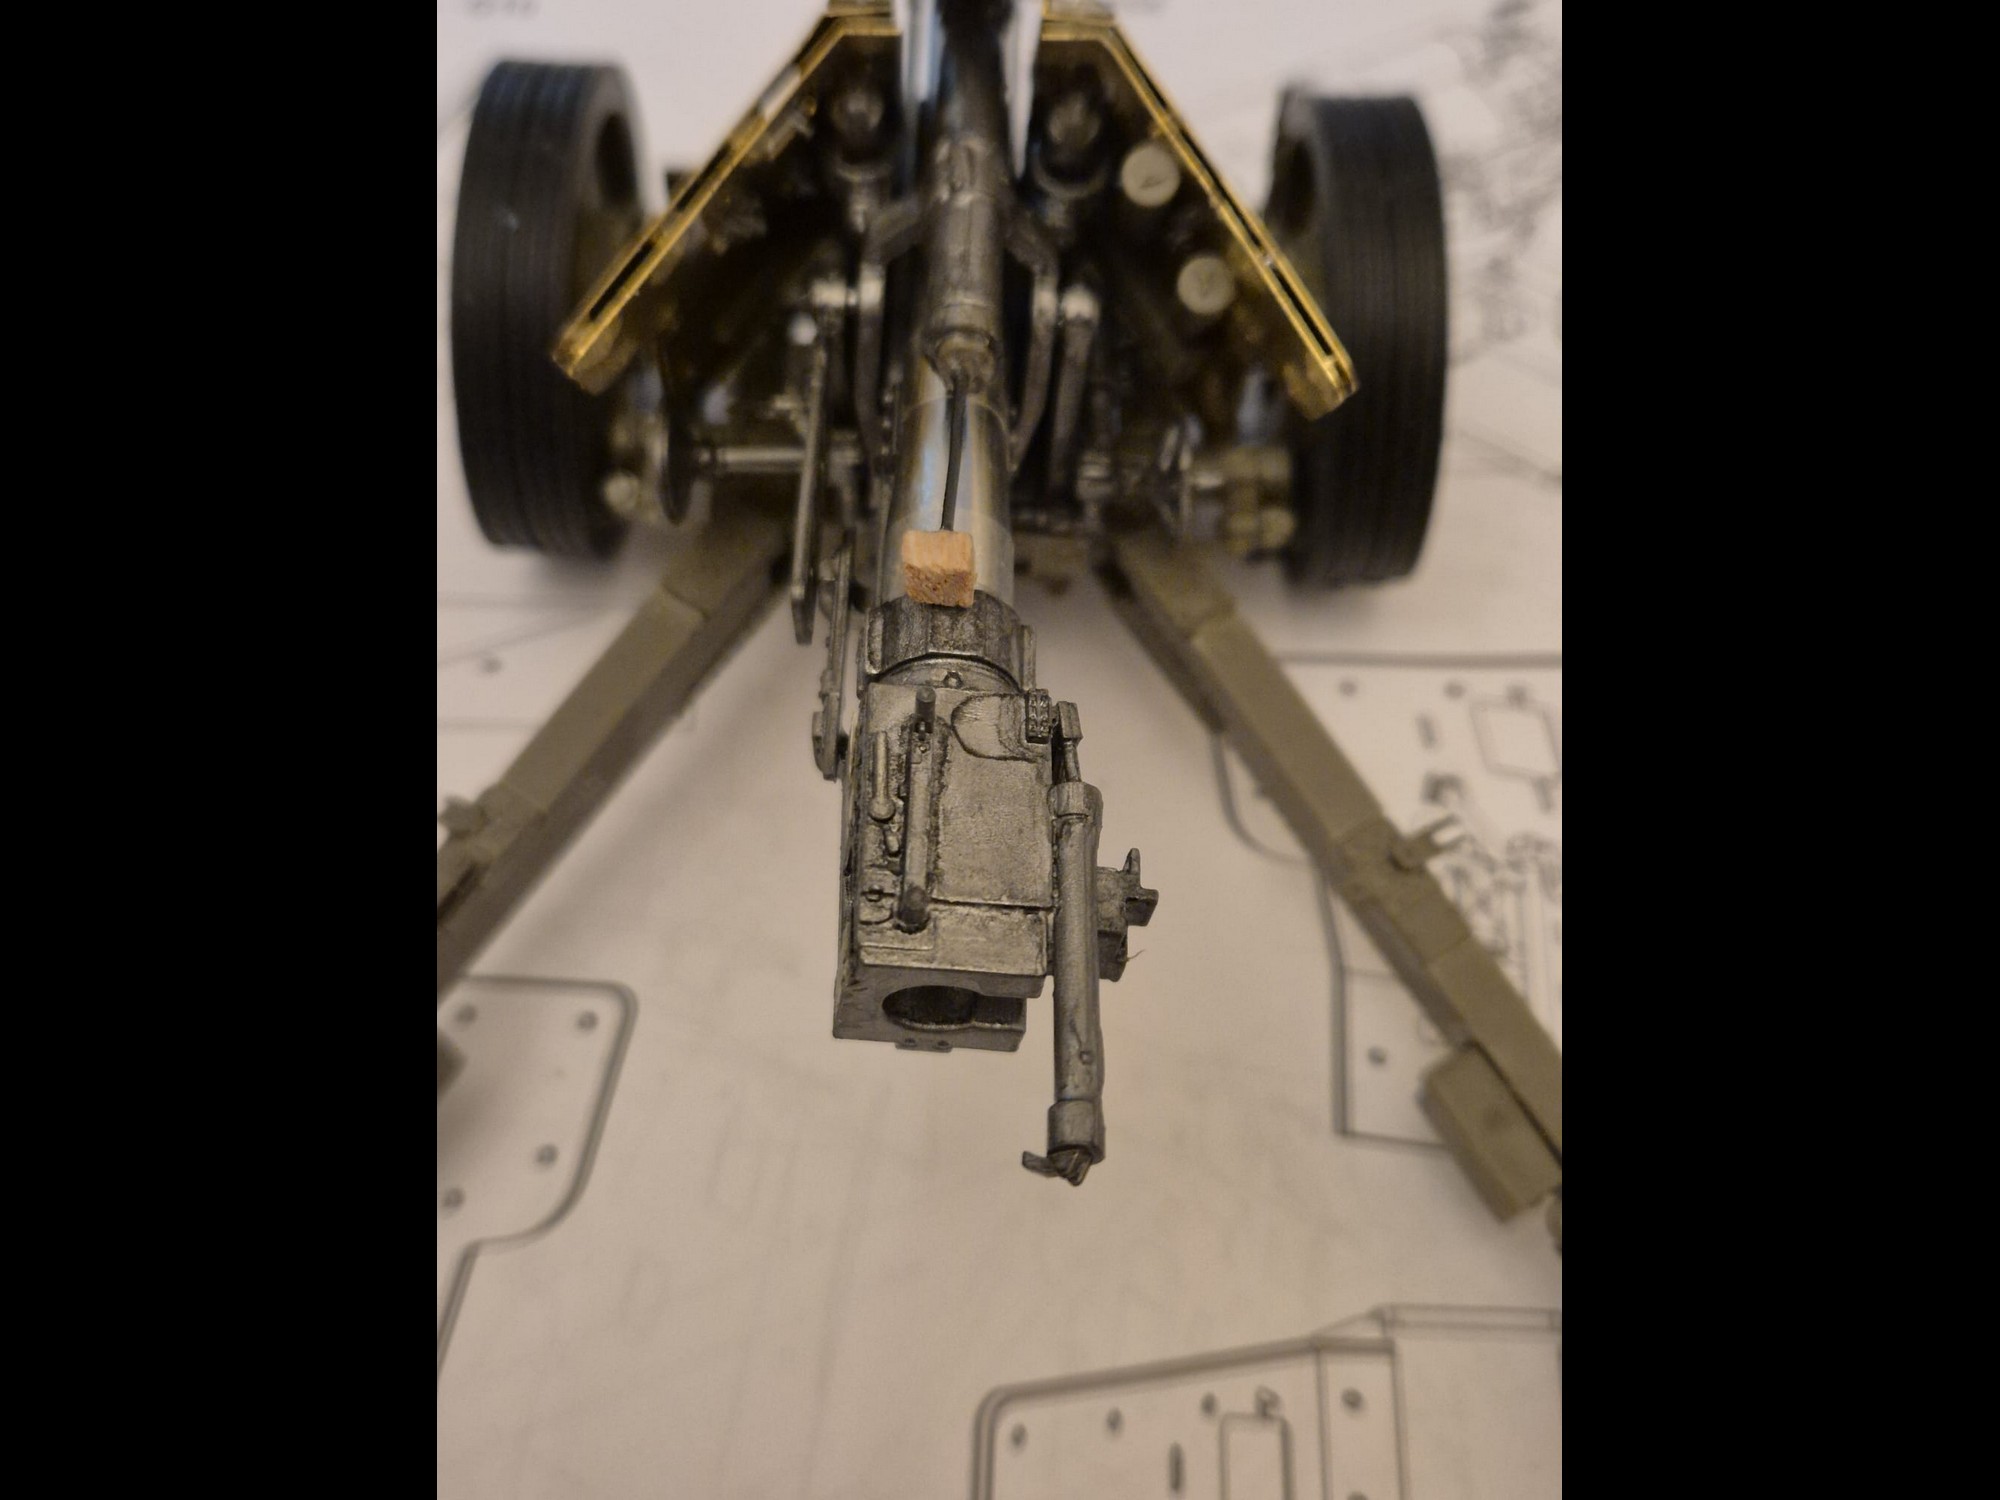
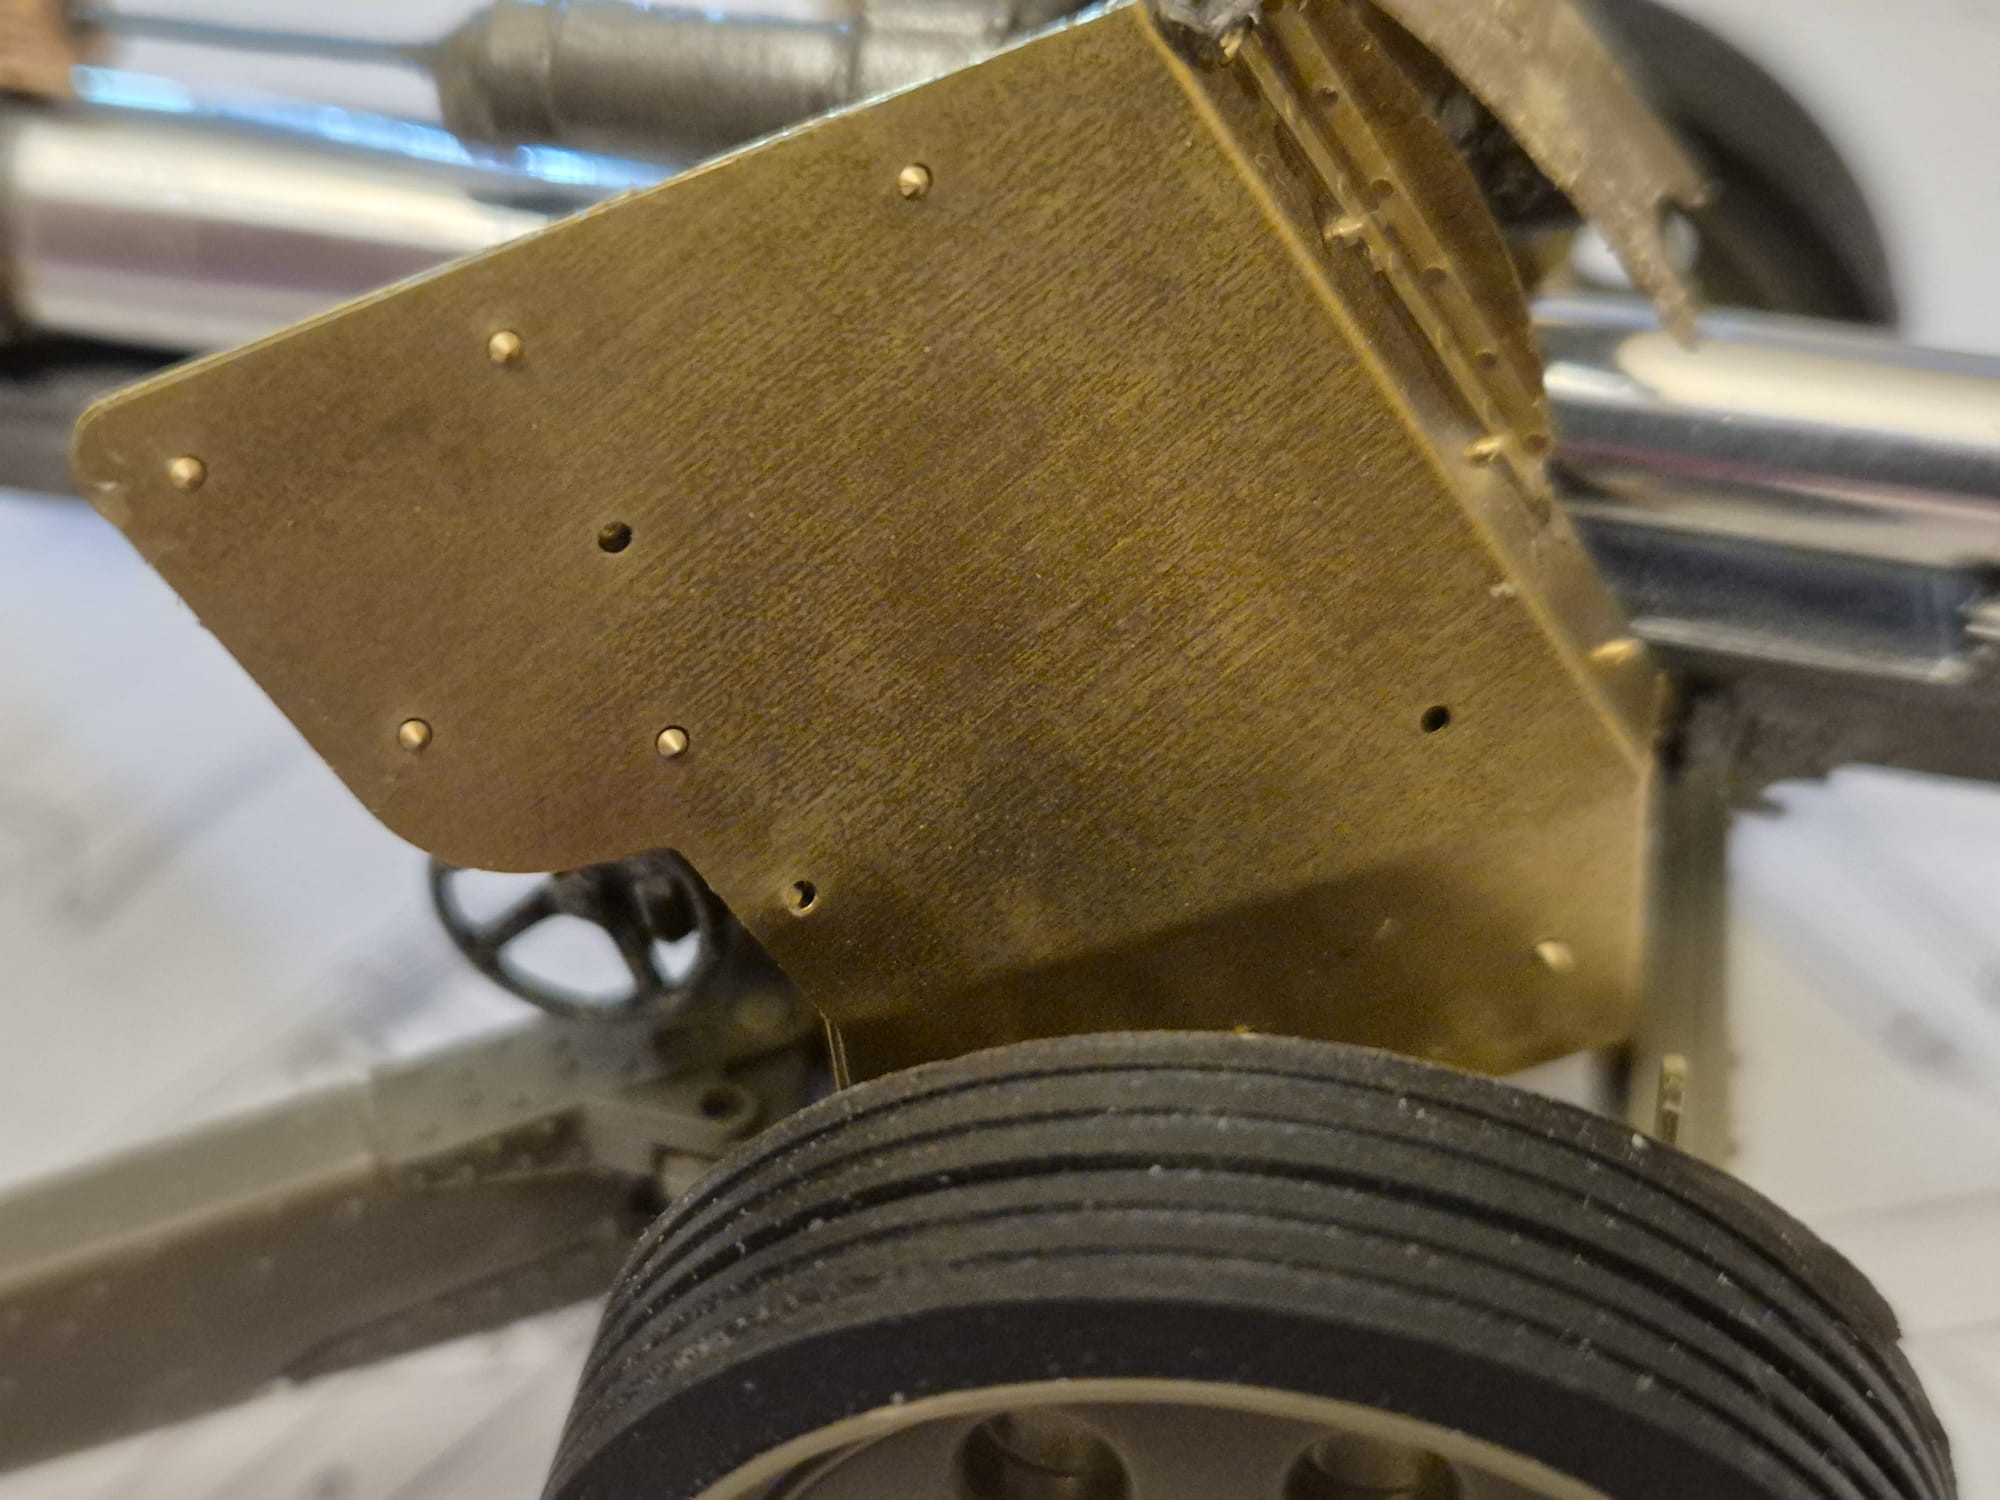
Considering that the gun will practically be hidden within the bunker and not much of it will be seen anyway, even if the roof will be removed, I don’t see why I should have applied all those really minute details to it, since once surrounded by its artillery crew they will disappear completely.
And yet, with second one I own and which will be built in a far future, in a Battle of the Bulge scenario, I will proceed quite differently than with this one, since the AFV Club instructions are completely awkward and wrong in the assembly sequence.
I have already switched them with this one, but more have still to be reordered to make sense and facilitate the mounting of some of those multiple tiny pieces which seem to never end.
Should you wish to build one for yourselves, I would suggest to read closely the instructions given and then take the time to fully understand the structure of the gun, because otherwise you will be in trouble in so many ways. Once done that, decide for yourselves which is the more logical order to follow.
And believe me. the drawings can be highly confusing and therefore, before gluing anything dry fit every part carefully before doing so, it would make your life much easier.
Anyway, I believe I can be finished with this model by later in the afternoon (my time - in Switzerland). Once done I will paint this and the Naval gun in their original WWII colors and tonight you will receive the pictures of the final chapter in this long journey to get something that could closely mirror the historical reality of these items.
So, this not yet goodbye but just farewell until later.
I hope you will stand by for the grand finale and thank you for your kind attention.
3 Likes