Painting: Camouflage completed! - Thoughts and reflections
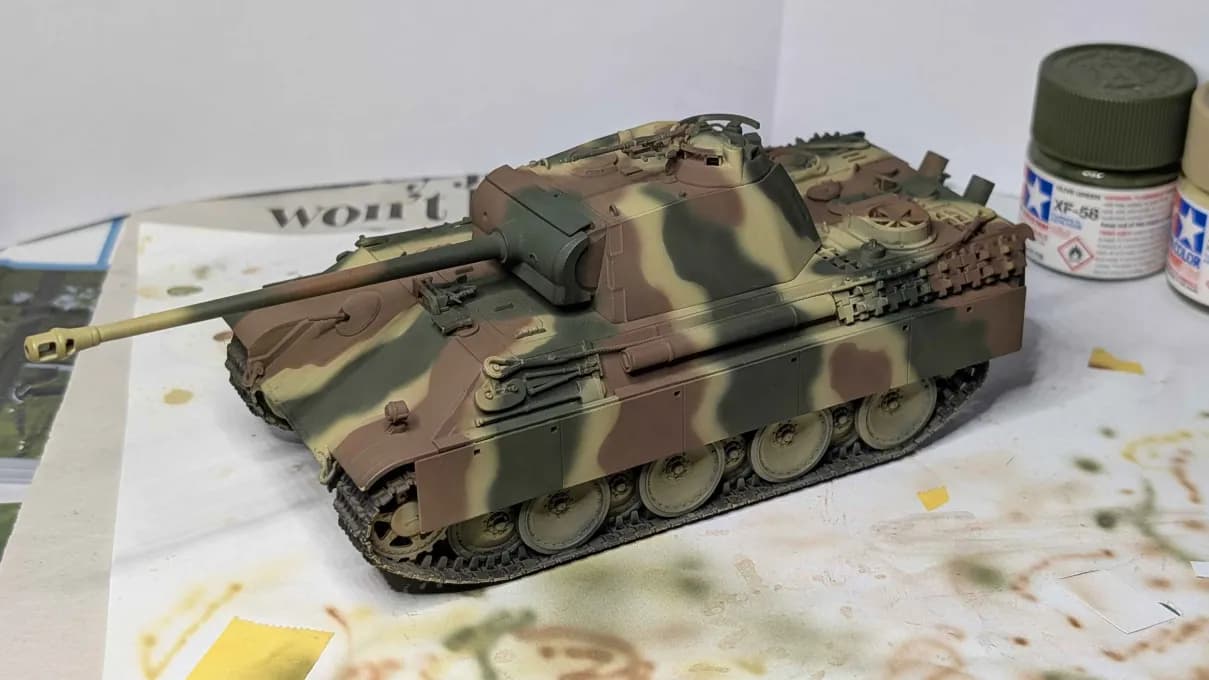
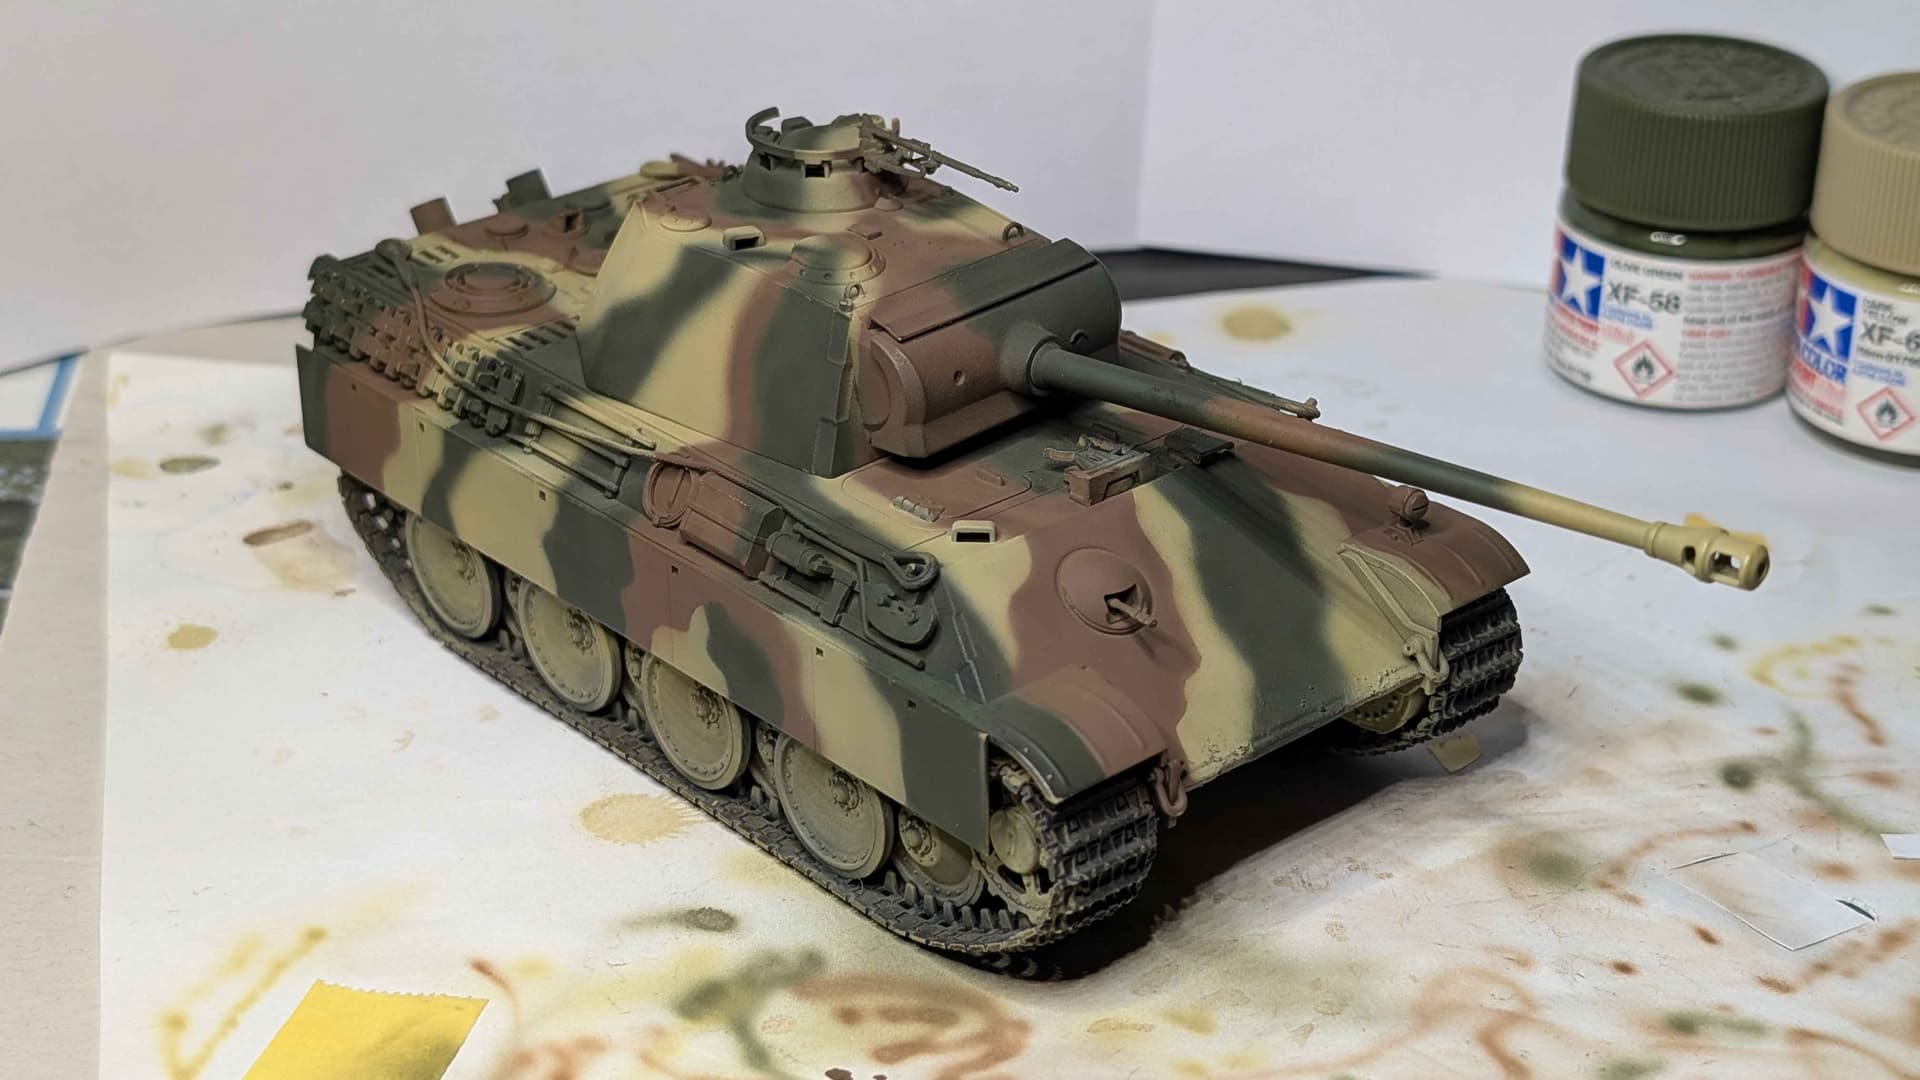
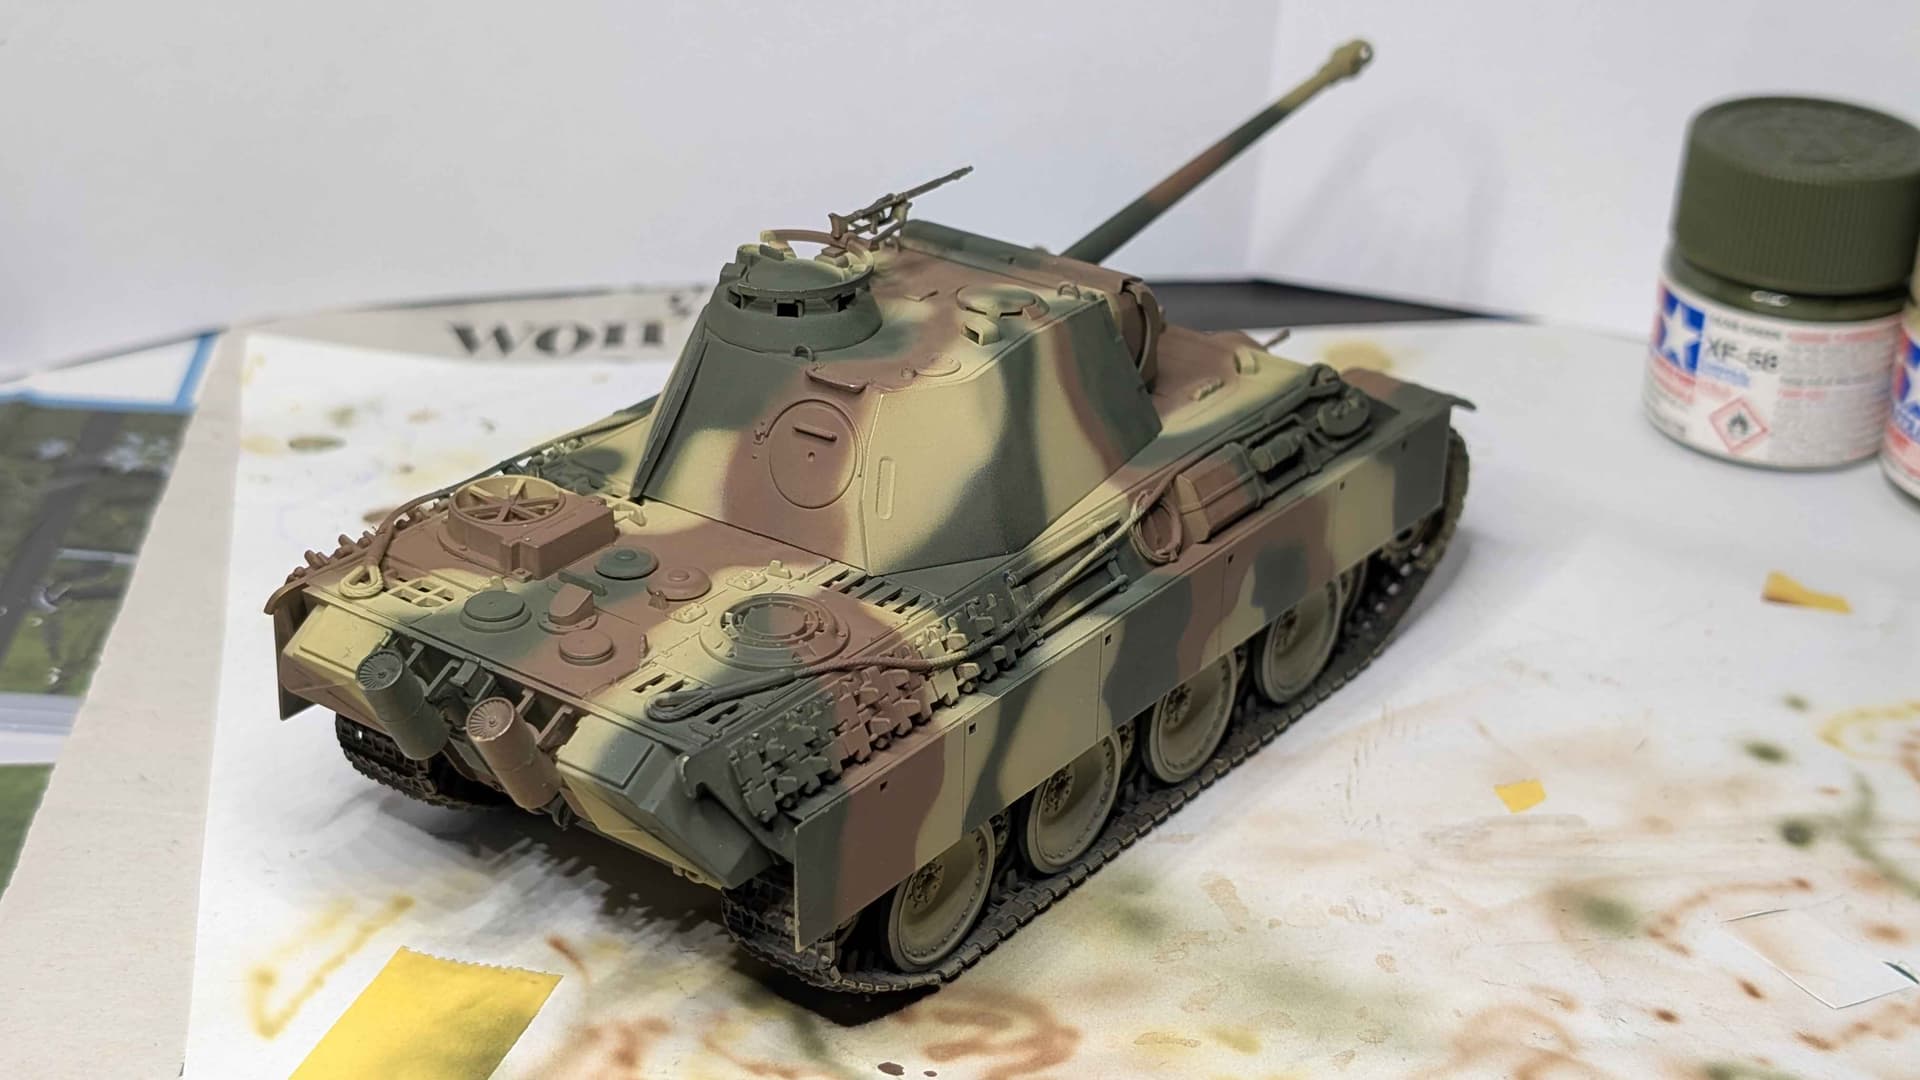
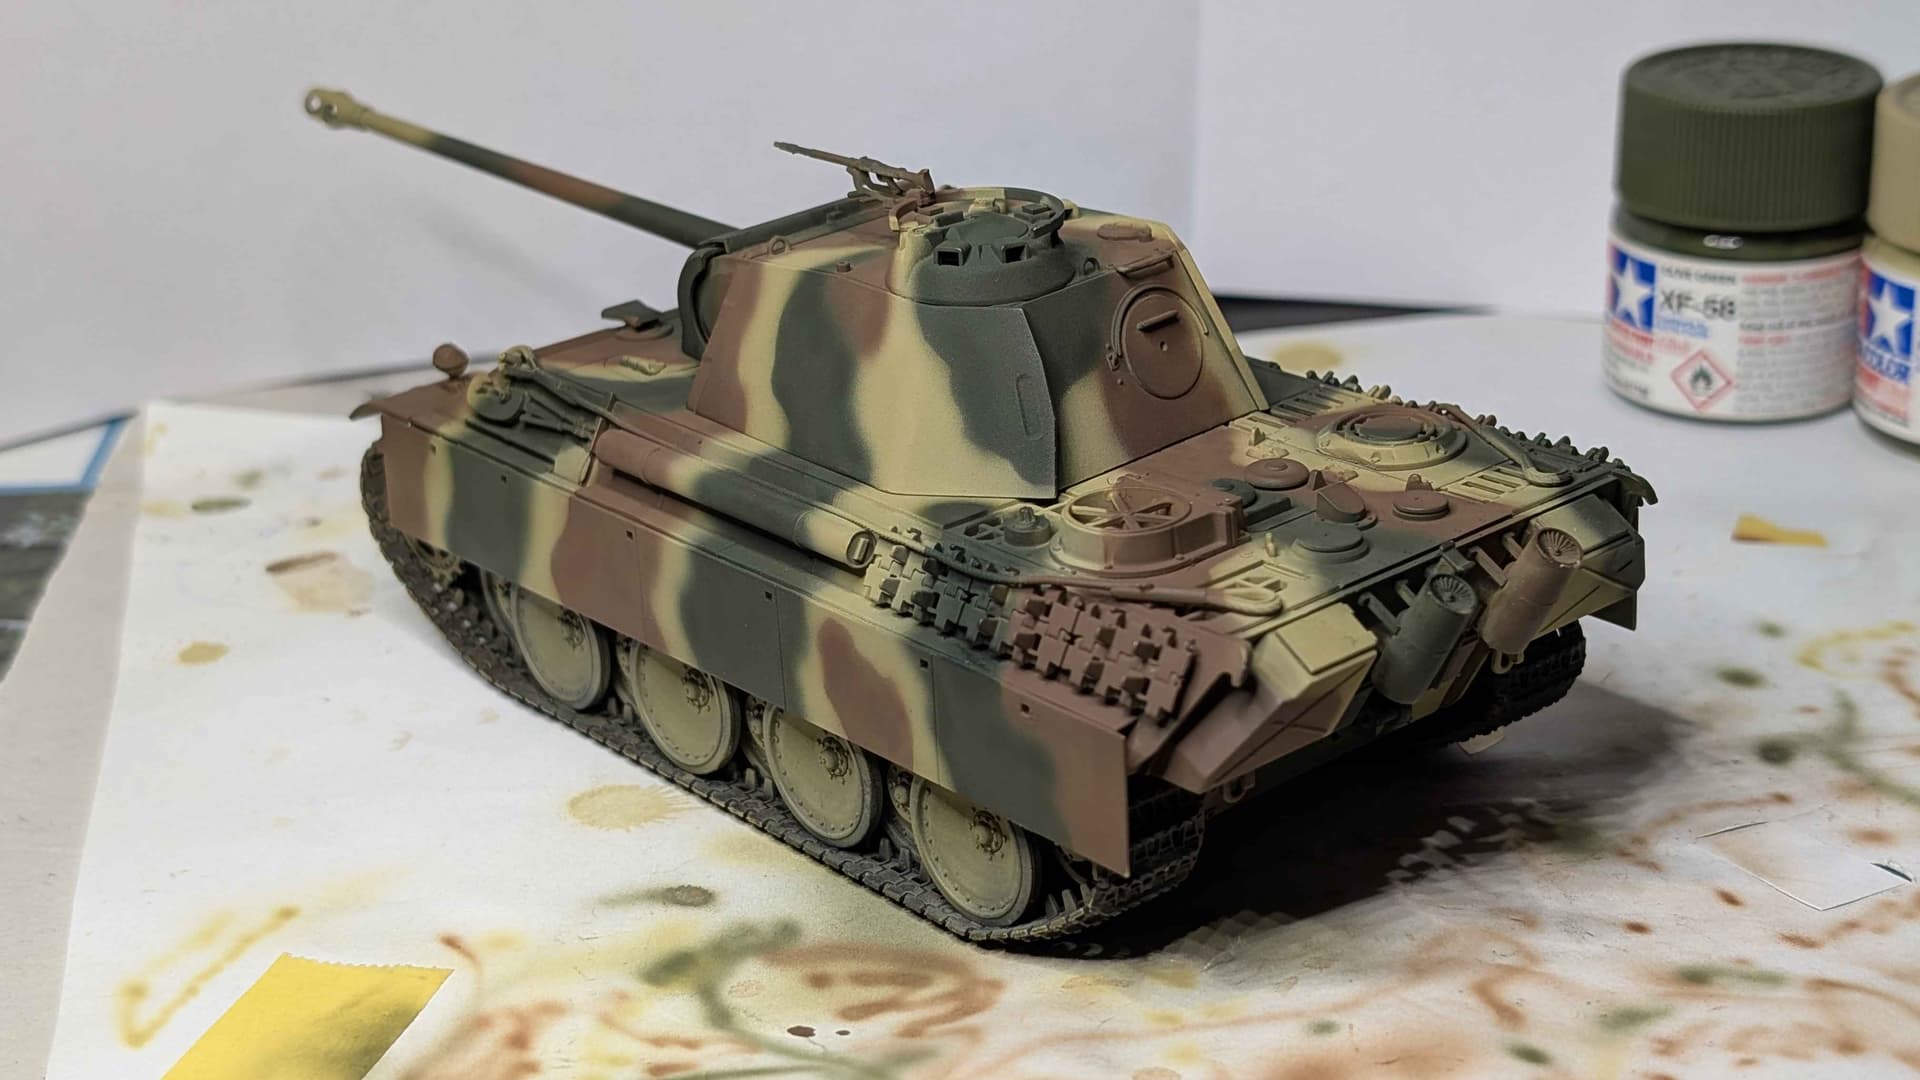
In what must be a new record for the slowest basecoating of a camouflage scheme, with two aborted attempts at progress and several methodology changes, we finally have a completed airbrushed camo scheme of our Panther using Tamiya XF-60 Dark Yellow, XF-64 Red-Brown and XF-58 Olive-Green in that order of application.
Since our last post, we’ve been going back and touching up a few areas where paint ran under masks, or we felt the edge lines between colours were too hard.
Any overspray from touching up the Dark Yellow also needed to be touched up in turn by the other two colours, to ensure that secondary colours diffused over the Dark Yellow and not the other way around. This is because until quite late in the war, the Dark Yellow was uniformly applied over the factory primer and the red and green colours were then applied either in the field or in the factory. So unless we’re depicting a very late war tank (which we’re not), the green and brown would always diffuse over the yellow.
We made the task more difficult for ourselves overall due to several factors, including:
- Prior over-assembly of the model forcing us to work around details such as tools and track
- Switching from a casual observation of the reference scheme to a religious adherence
- Some well-intentioned attempts at masking that yielded an inconsistent product
Ultimately we got there, so I’ll take this opportunity to discuss what worked and what didn’t work
What worked:
- Following the scheme from the instructions to ensure generally historically correct linework
- Upscaling the instructions to match the model dimensions and printing out**
- Using imaging software to generate compatible patterns on sides instructions didn’t show***
- Paper masks cut to focus on the edge of the colour, and fixed with Tamiya masking tape
- Baking paper (or other tracing paper) to transfer required shapes, but not serving as masks
** The camouflage patterns in the instructions line up accurately between the various 2D facings in this case, but this doesn’t happen all of the time so you can’t completely rely on it
*** I used a combination of PDF xChange Editor to create the pattern and GIMP (free Photoshop clone) to stretch the 2D facings so that the masks would lay flat and complete against the sloped armour
What didn’t work:
- Freehanding the scheme off the instructions by eye with the airbrush as a first point of contact
- Relying on mask relief to create consistent edge diffusion, because the relief was inconsistent**
- Poor airbrush hygiene, resulting in a large spray pattern and eroding confidence in control
- Liquid mask around tools / equipment and the like. Easy to get on, very hard to get off.
- Baking paper as a mask. Flimsy, and the non-stick properties also apply to Tamiya tape
** This looked great in theory, but upon removing some of the masks I found an excess of diffusion under the mask which was so extensive that the masking tape “spacers” ended up masking the model from the overspray, which required fixing to restore
All in all, the masking was a complete pain in the arse. It was time consuming, and made the task much bigger than it needed to be - i.e. once I started the process of masking, I needed to make sure I could finish within a certain timeframe or risk lifting paint when the mask was removed. This stifled progress on the model, because between moving house and having a baby arrive I simply wasn’t confident of the required block of time to start and complete a given mask-and-paint cycle materialising.
I felt married to the process from about Step #14 as I was trying to get some sort of finish consistency across each of the camo re-applications. As mentioned earlier, I’d also had some hygiene issues with the airbrush which caused a much wider spray pattern. This prompted a much more aggressive approach to the masking out of an abundance of caution.
As soon as I was confident that I had the airbrush spray pattern under control and the general camouflage pattern correct, I was freehanding directly onto the model. Next time if I’m trying to follow an instructional pattern, I’m just going to pencil the regions on by eye and follow up with paint…
So with the camo out of the way, we can start to pick out some of the other basecoat details such as tracks, tools and possibly some initial muzzle/exhaust fouling… A job for another day!