For me, I’d rather paint PE prior to installation (in this case) because it’s a different color than the deck, and my hands aren’t steady enough to not slop paint all over the deck. It would be easier to paint it if it was installed and the same as the deck color. Since it’s painted first, I just need to do a tiny amount of touch up after installation…no mess. Today, I installed bare PE radars to the masts and painted with my airbrush. It all depends on the situation. By the way, I always bend, trim, and test fit before painting, because the paint will crack off while bending.
3 Likes
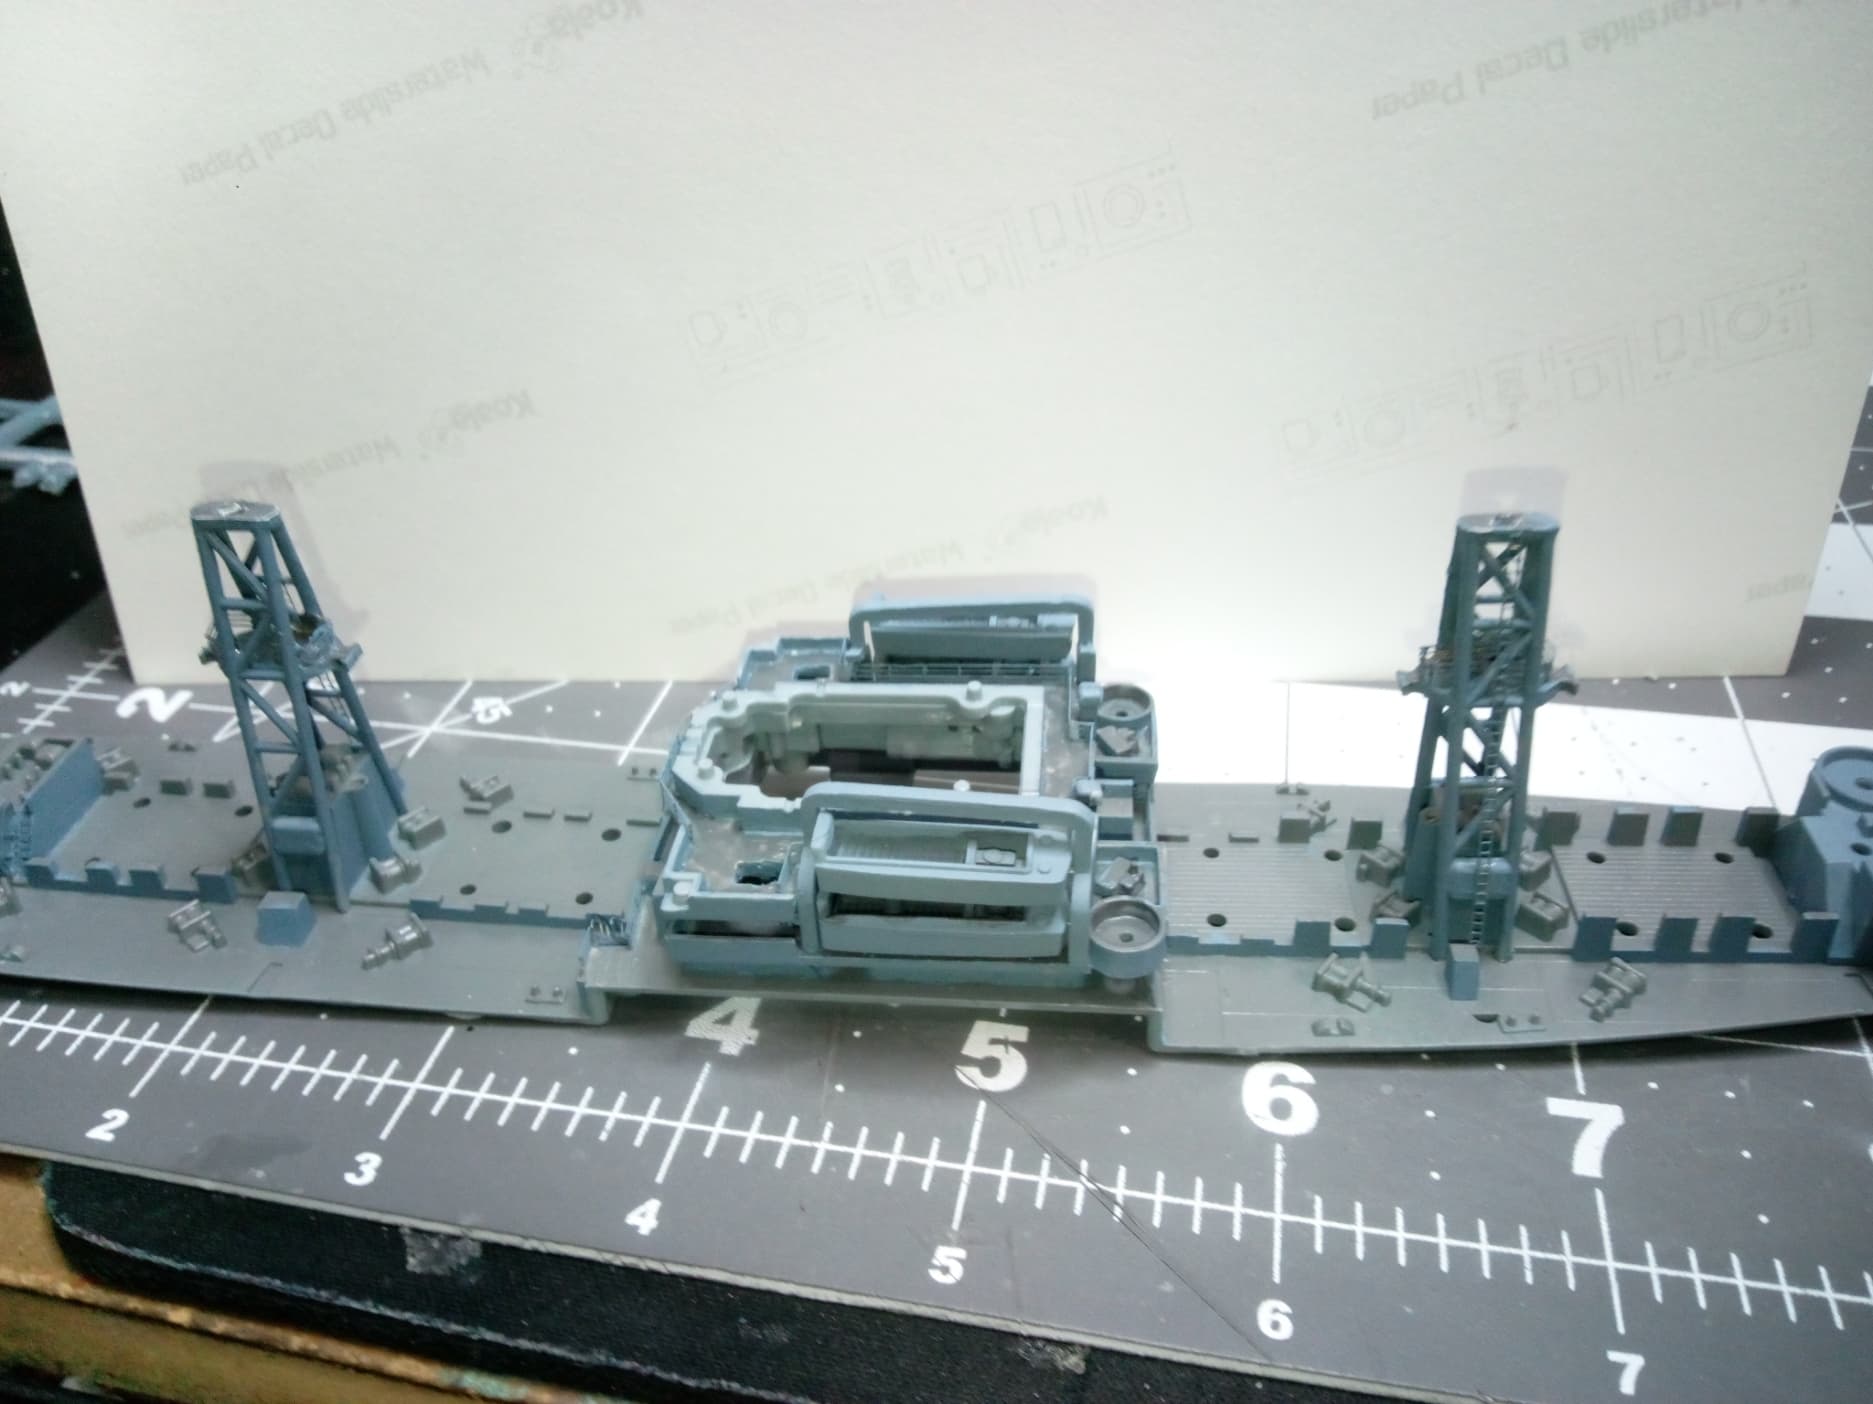
Update chapter 9: finally, some real progress. Most of the extreme fiddly work and detail is complete and I’ve started to assemble some stuff. Got the radars installed on the masts and painted.

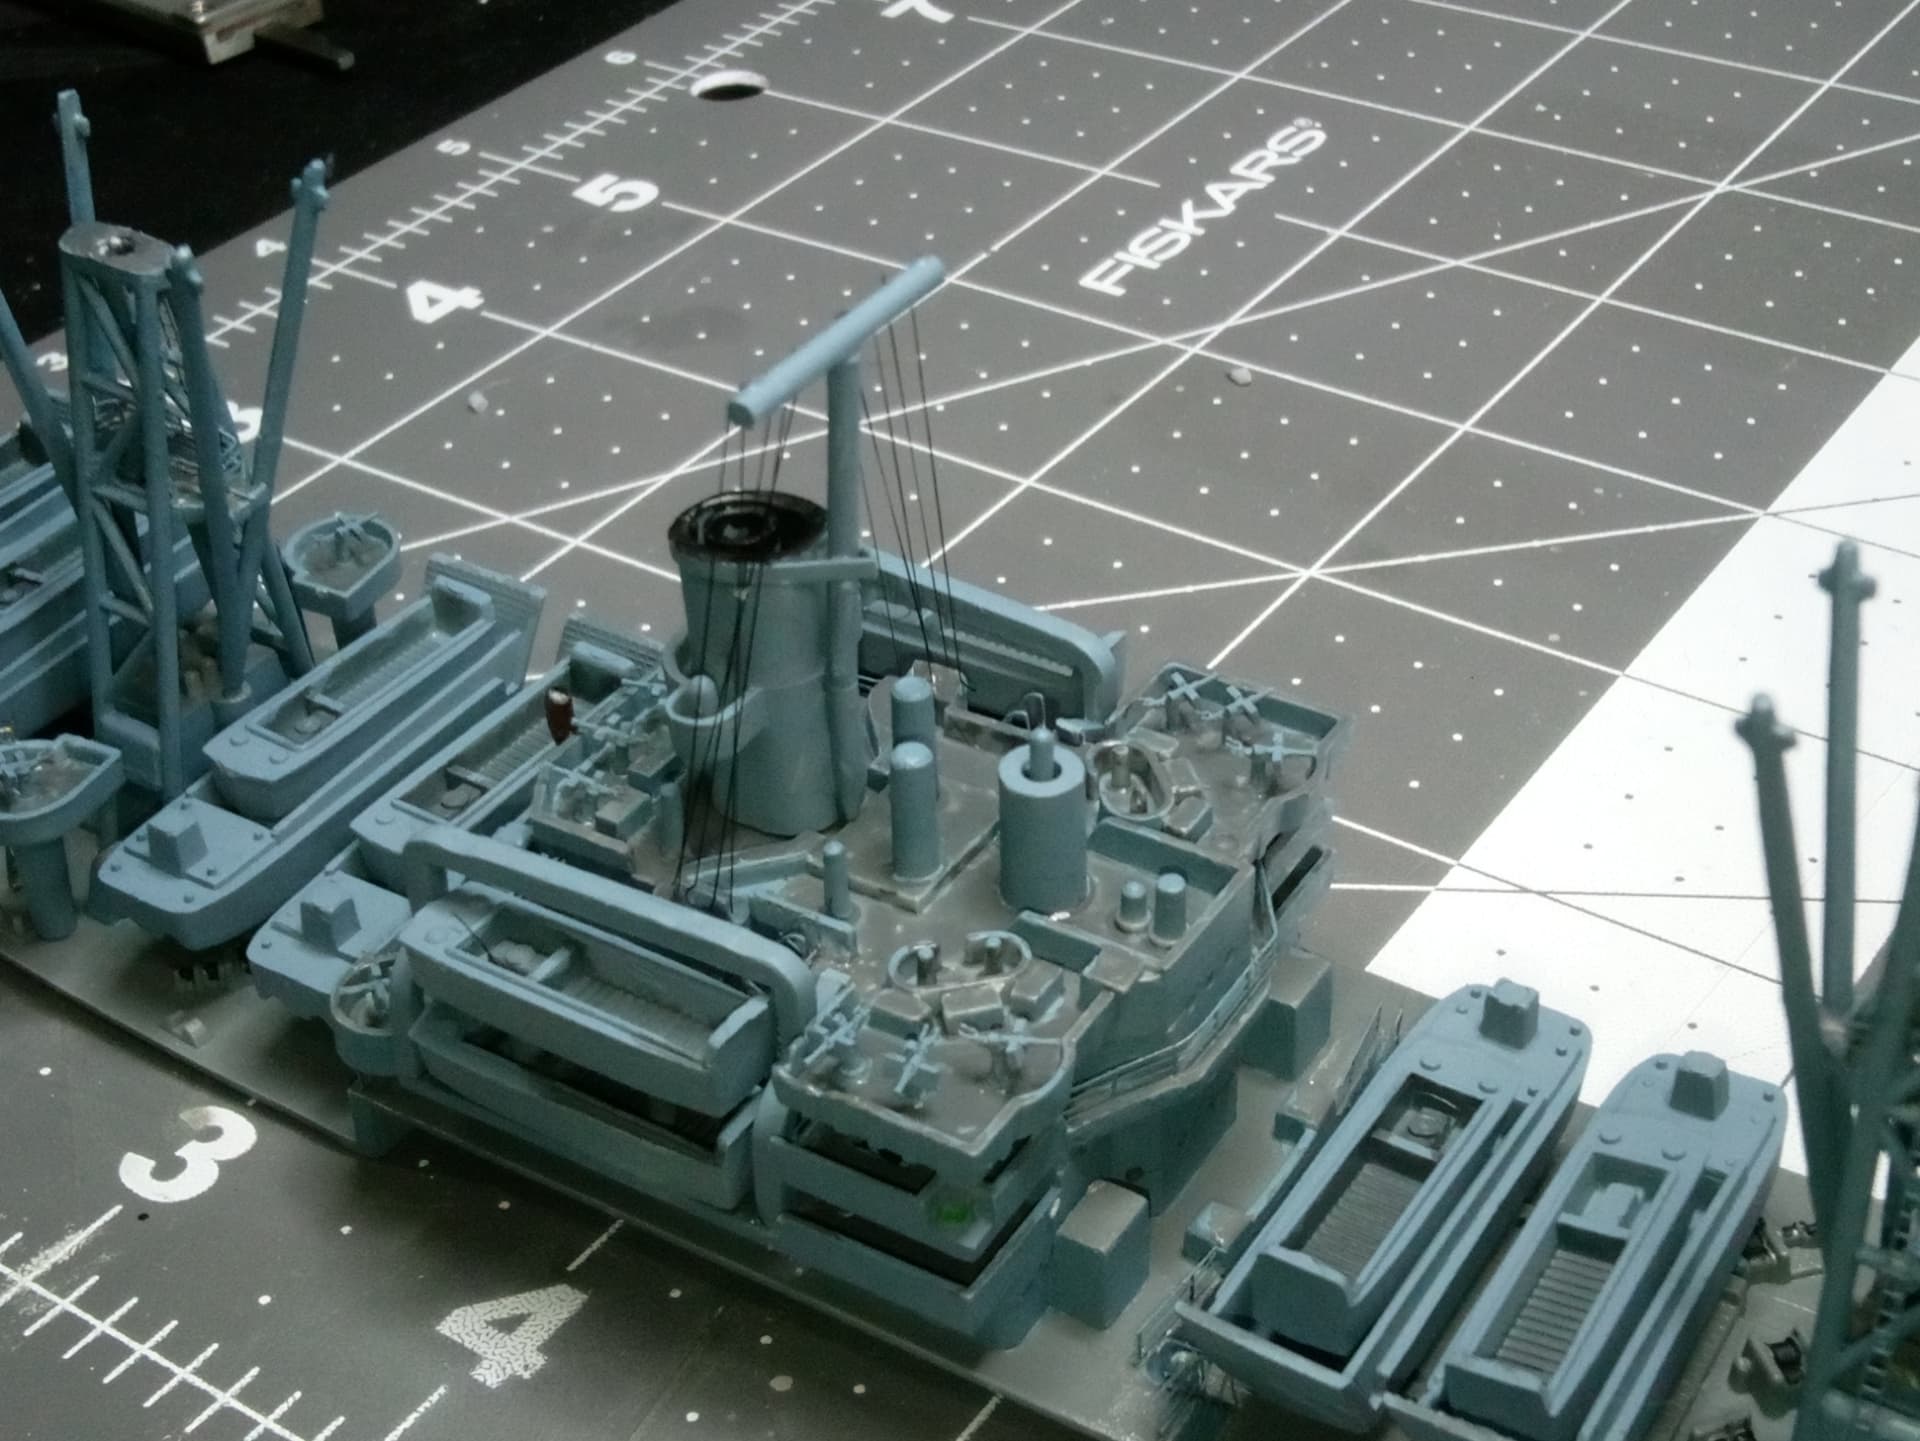
Installed the boom towers, the second superstructure deck, and the boats and davits.
It’s here I made a mistake. I went to install the top deck of the superstructure and realized the davits were in the way. I solved this issue by removing the 4 locator pins and sliding in the deck while simultaneously spreading the rear of the davit arms. It’s in!
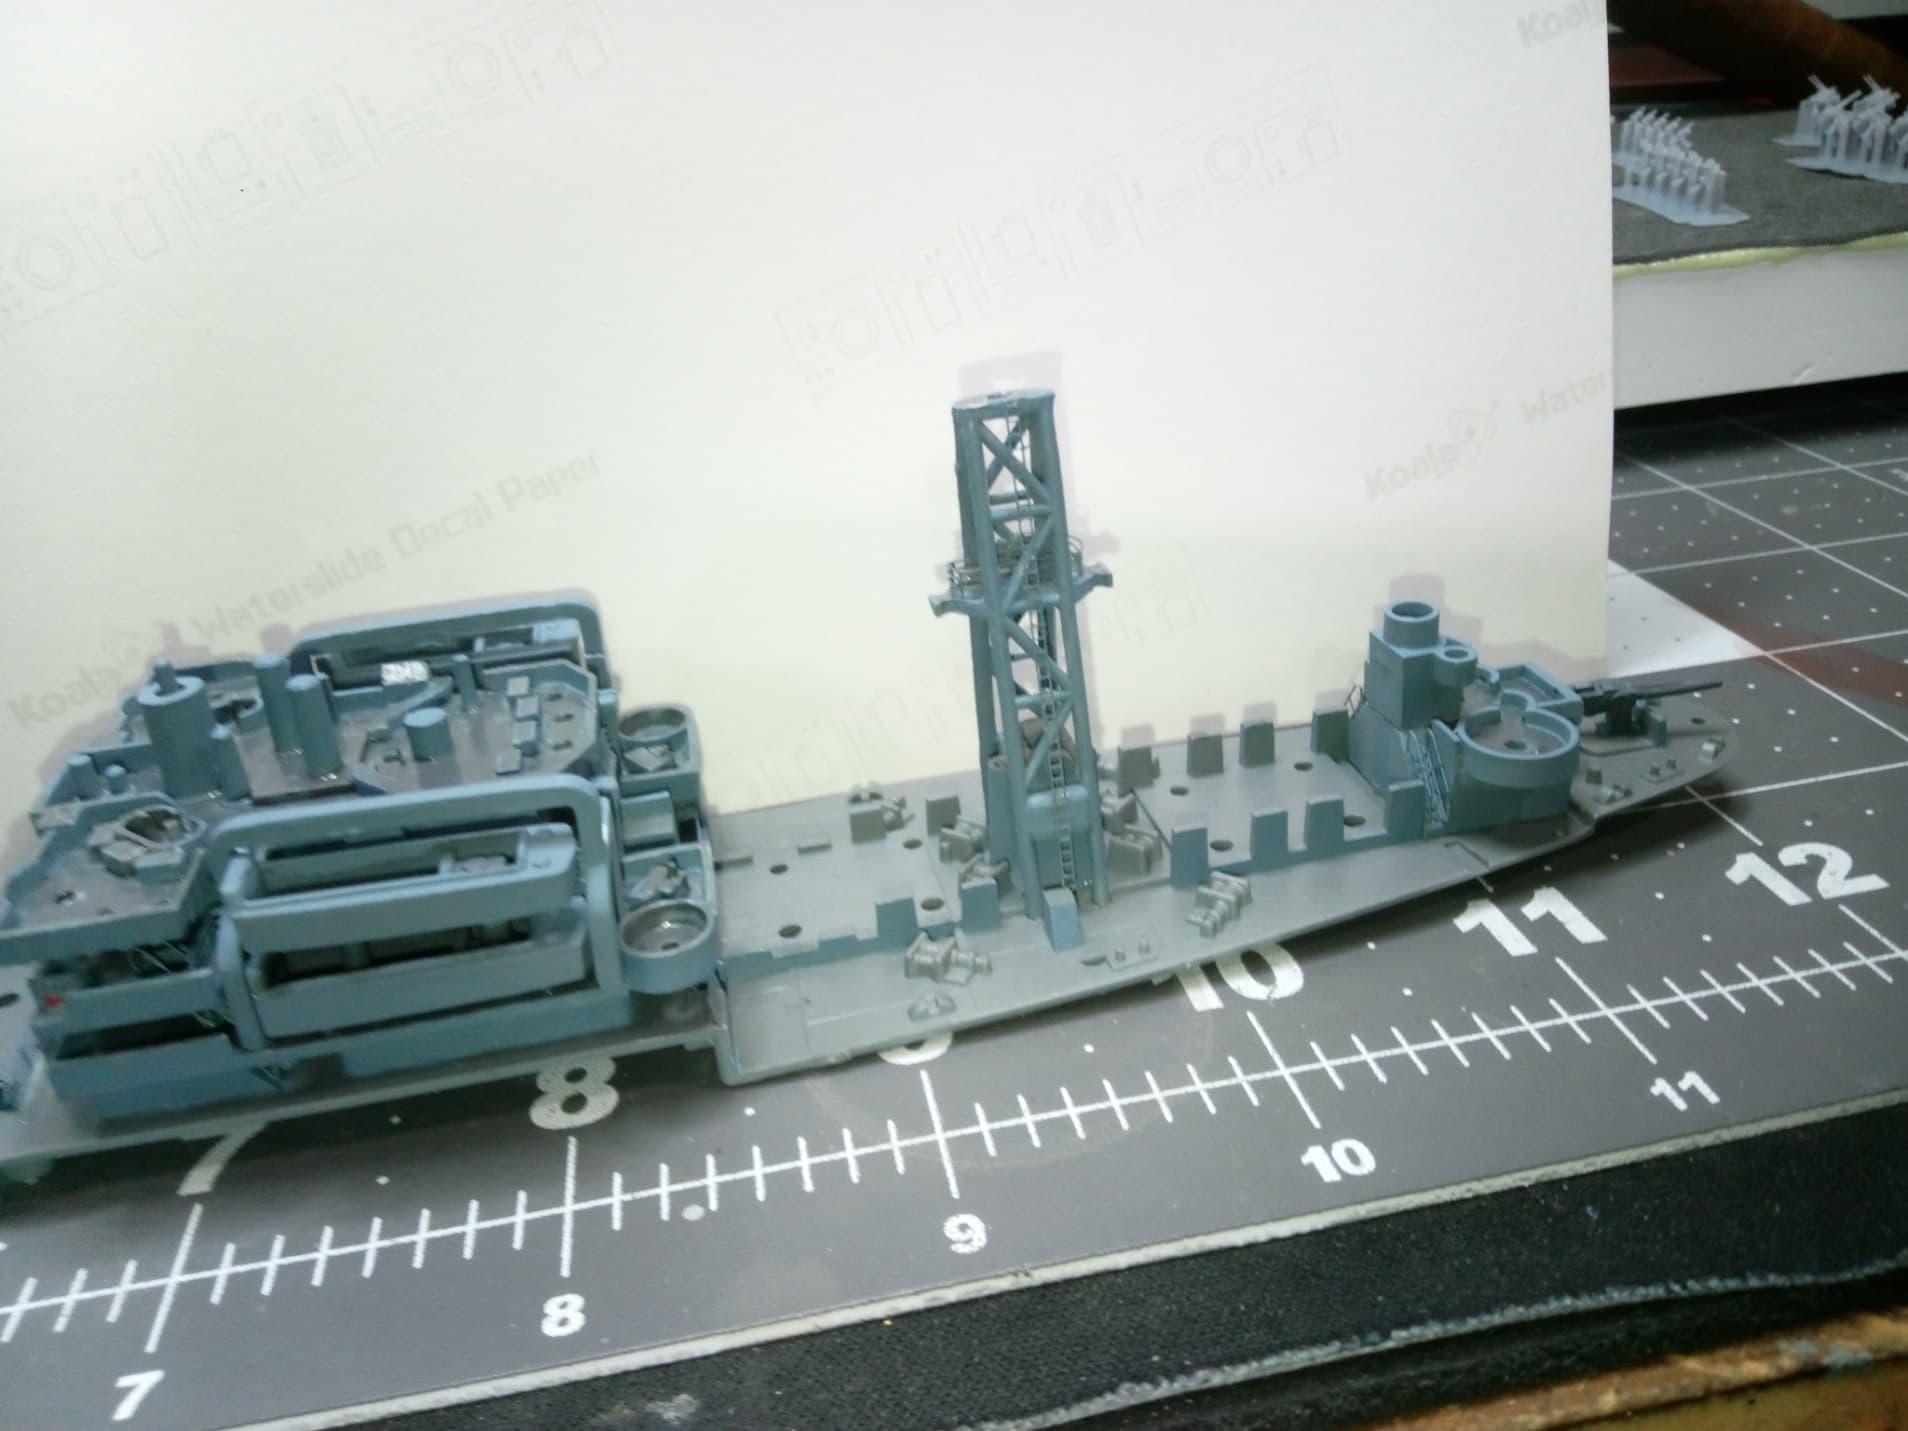
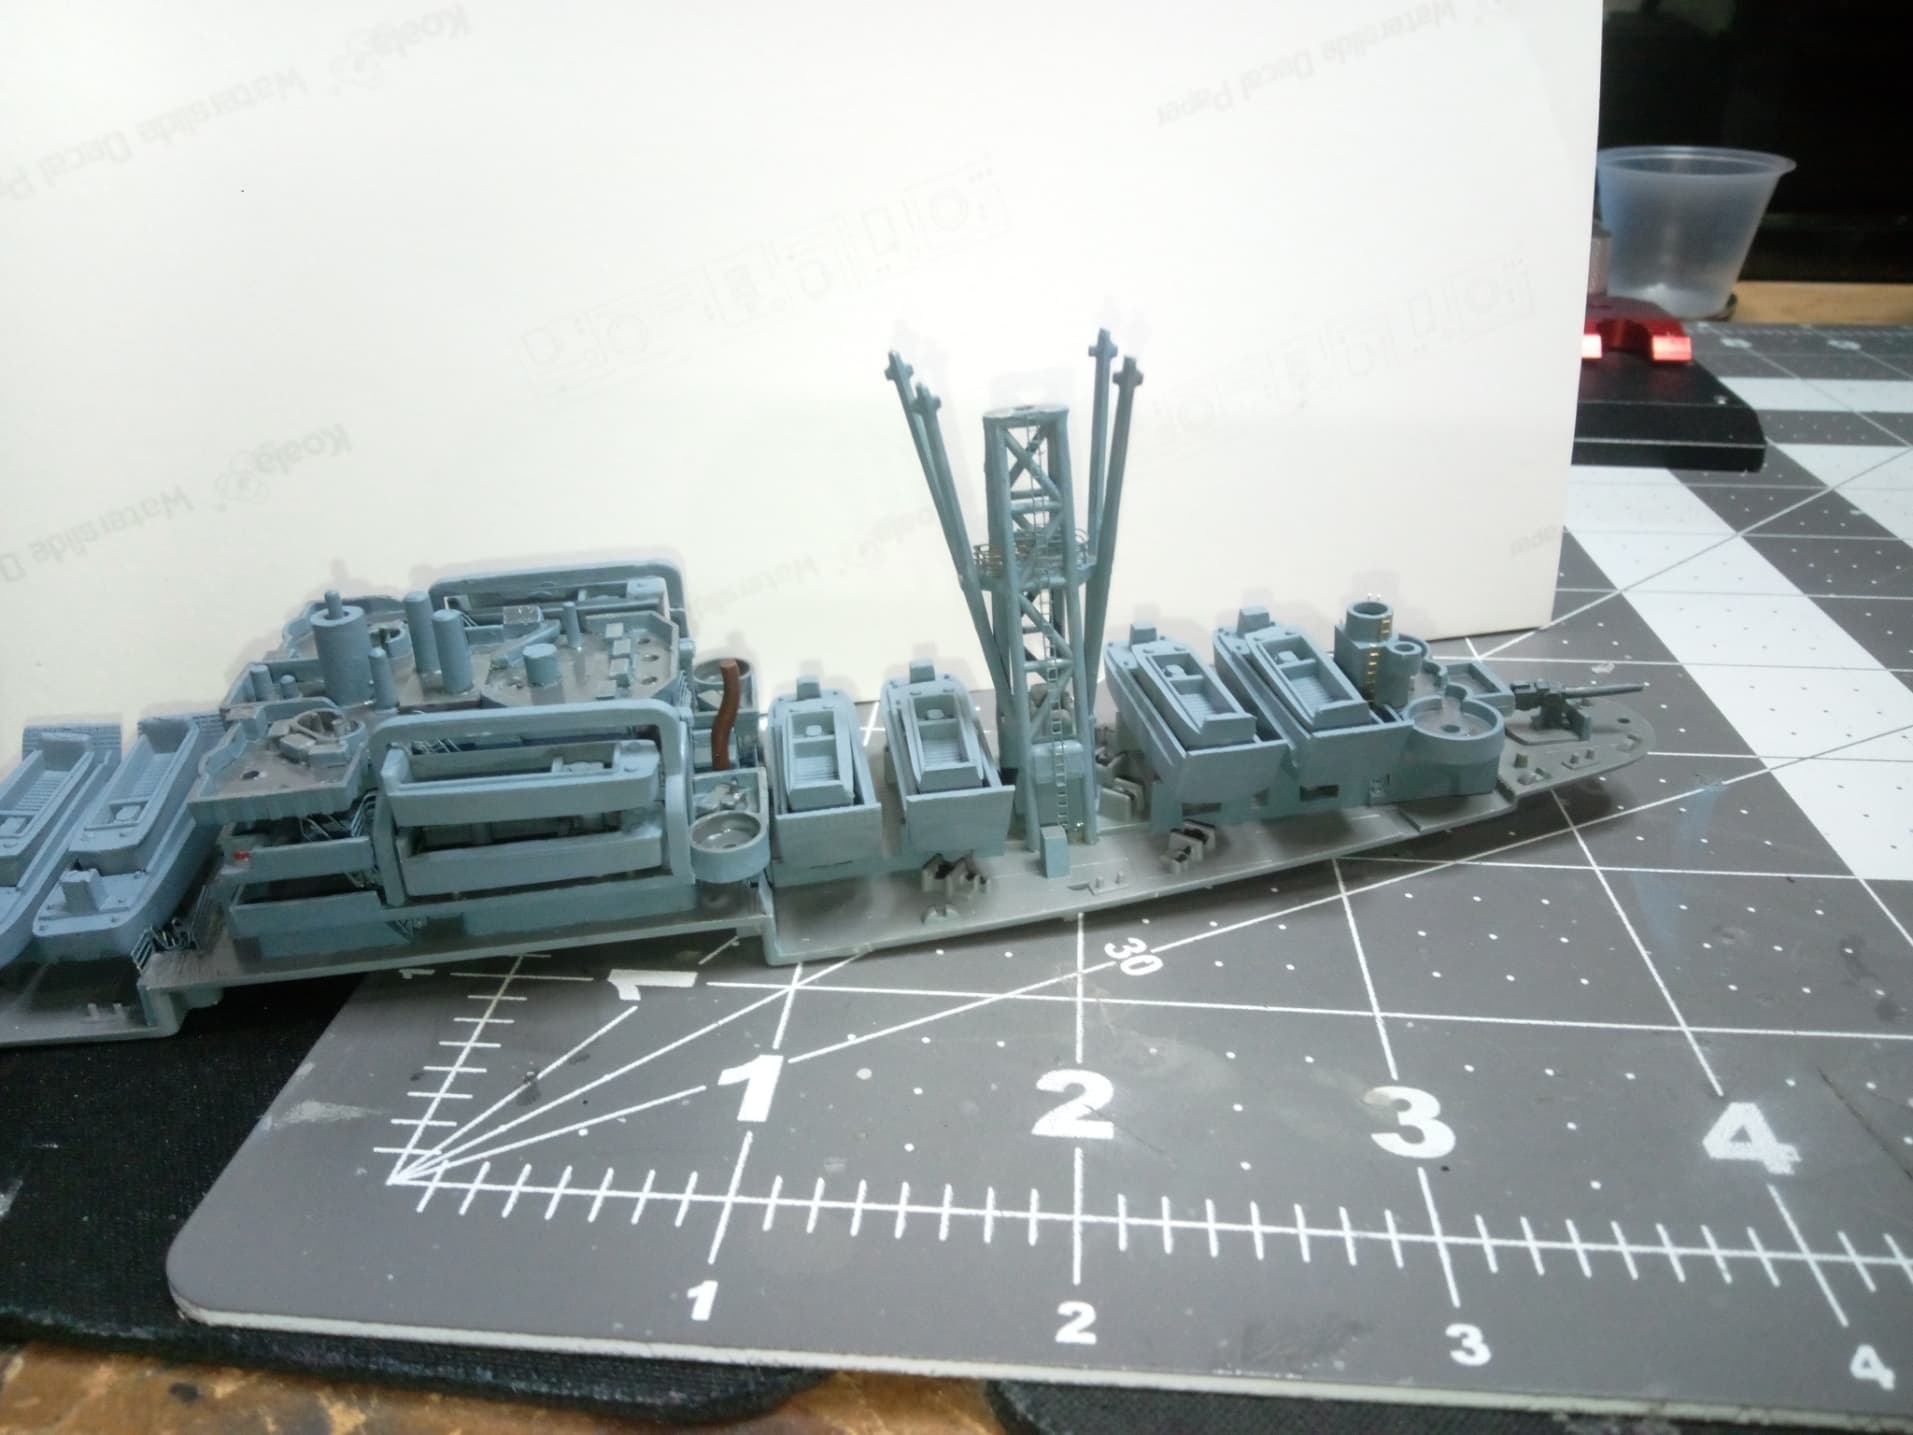
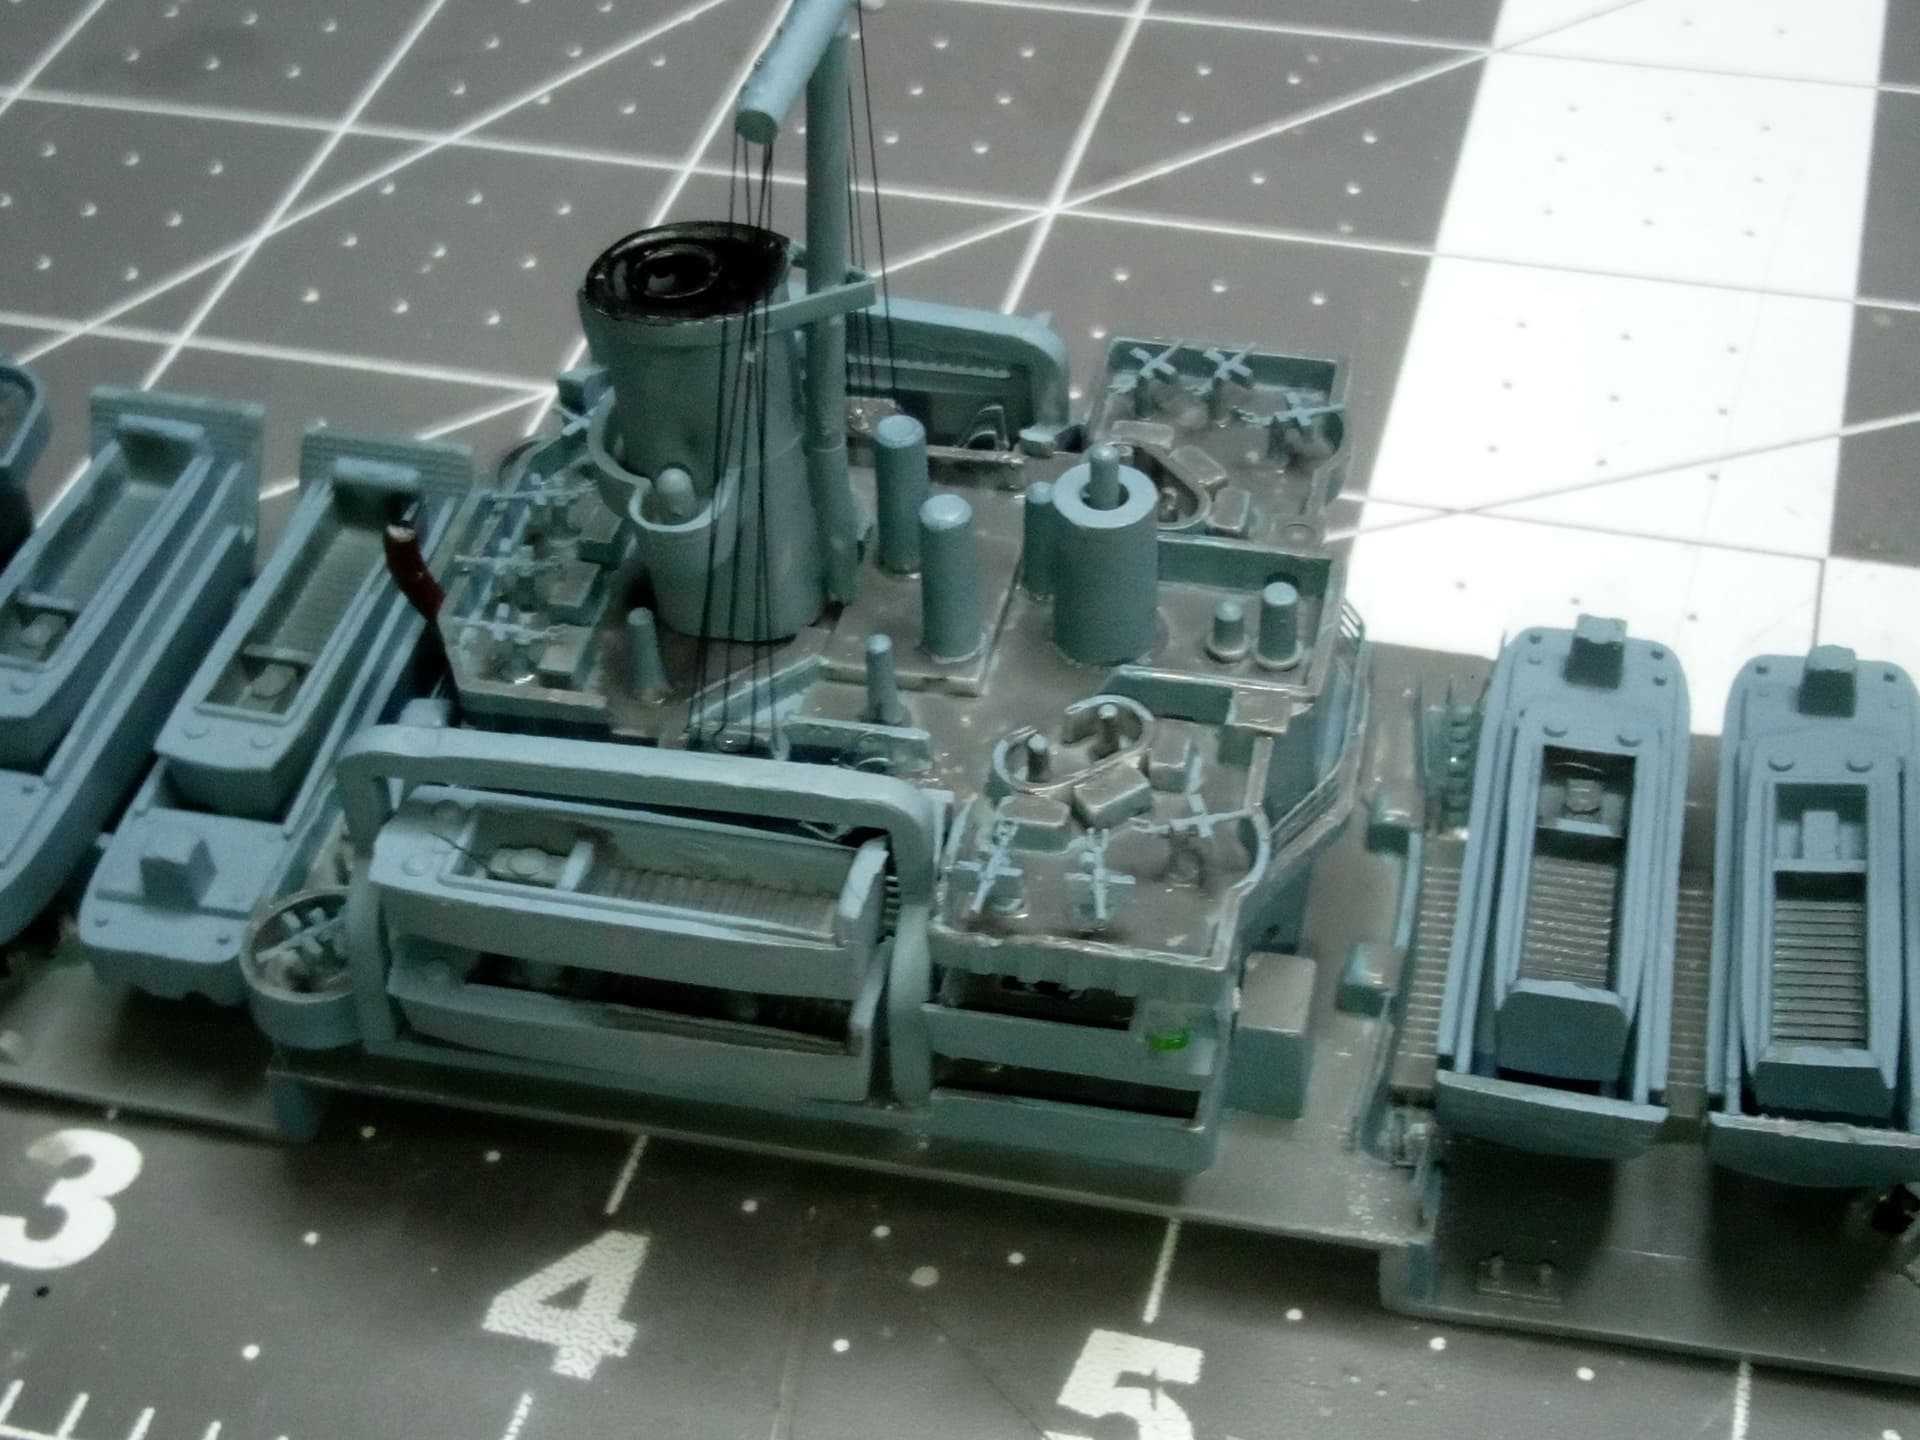
Installed the 5in .38" after dirtying it up with some panel liner to make the details pop.
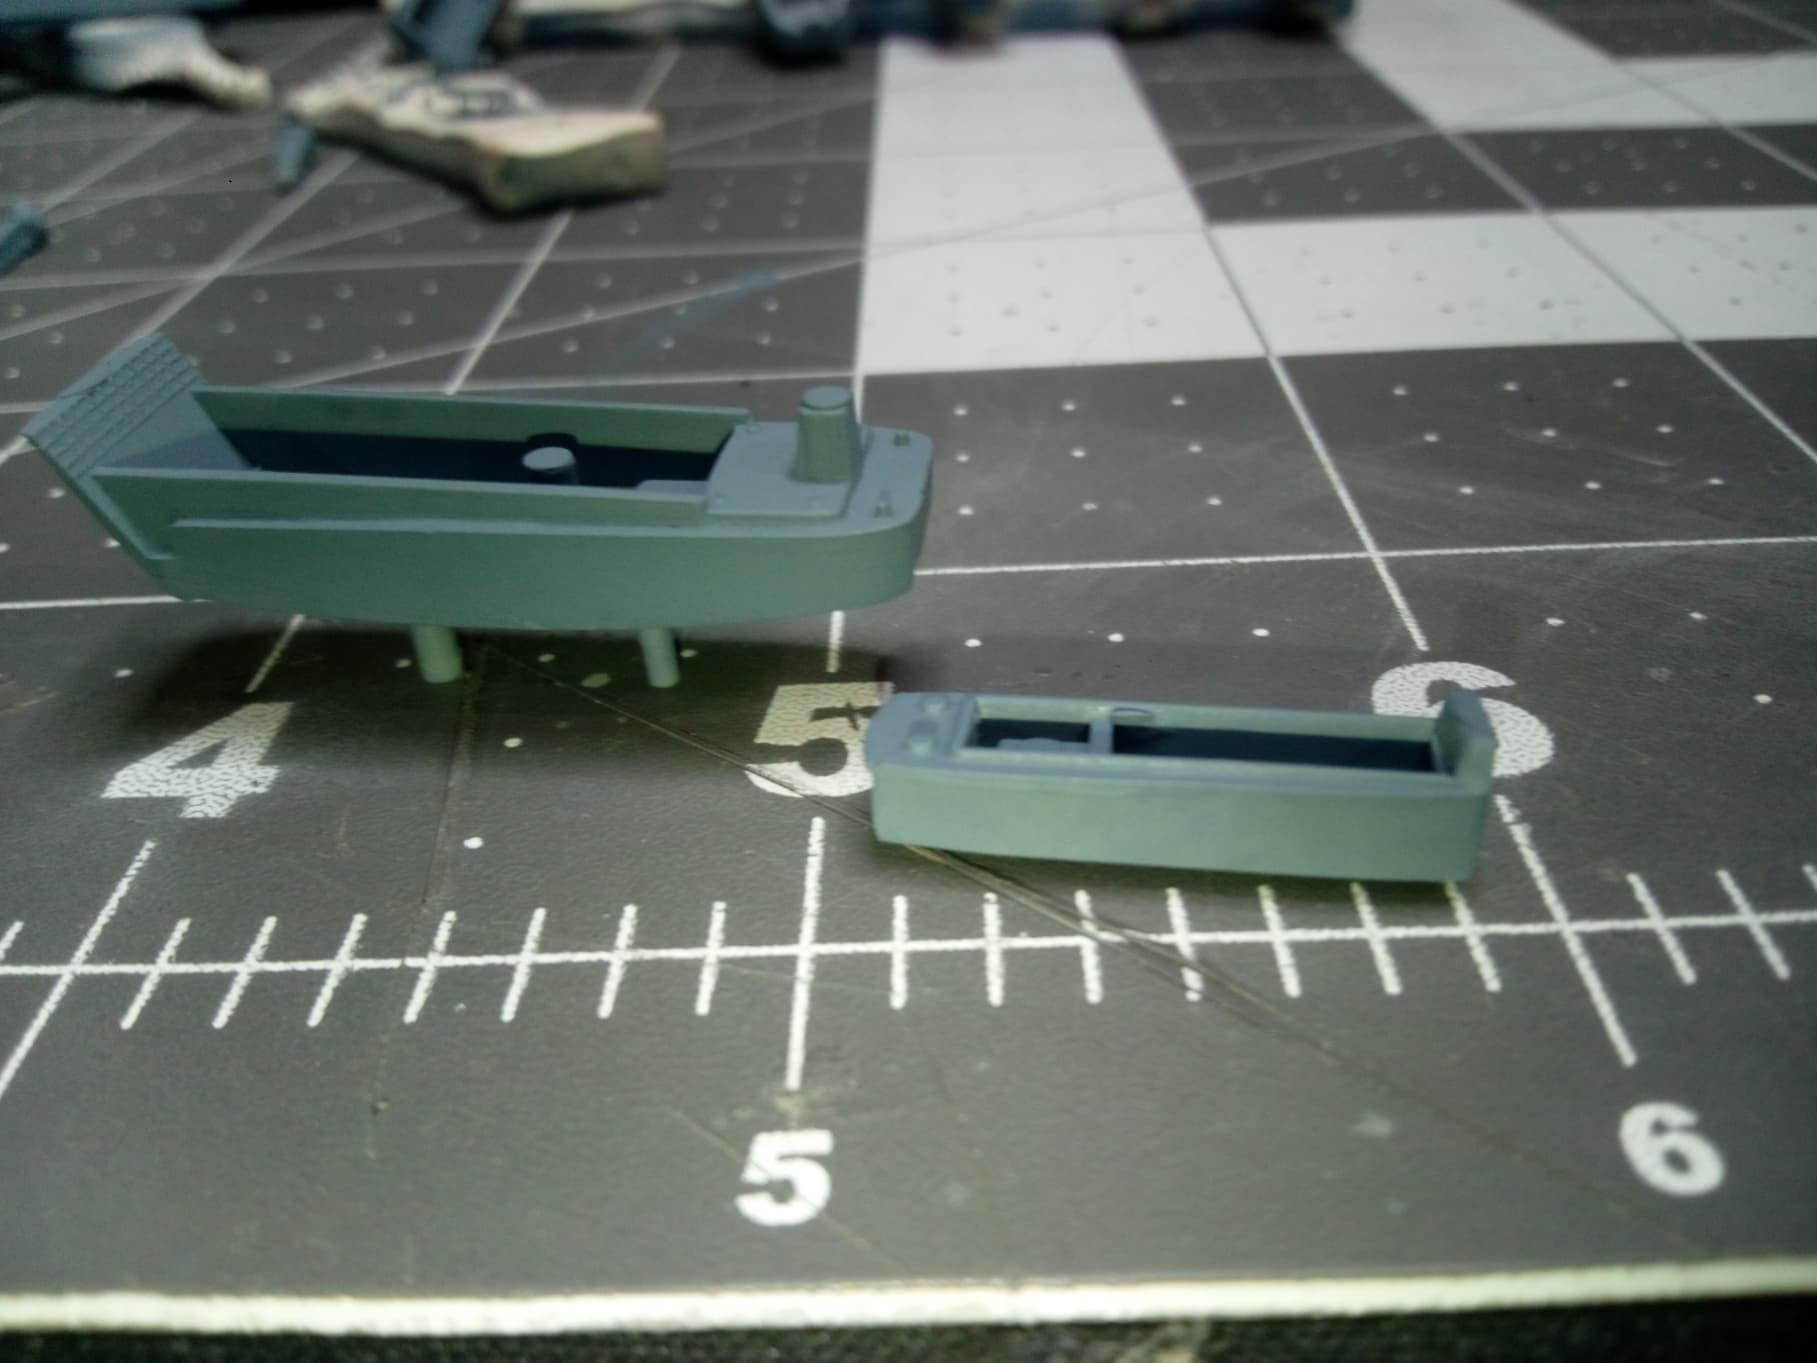
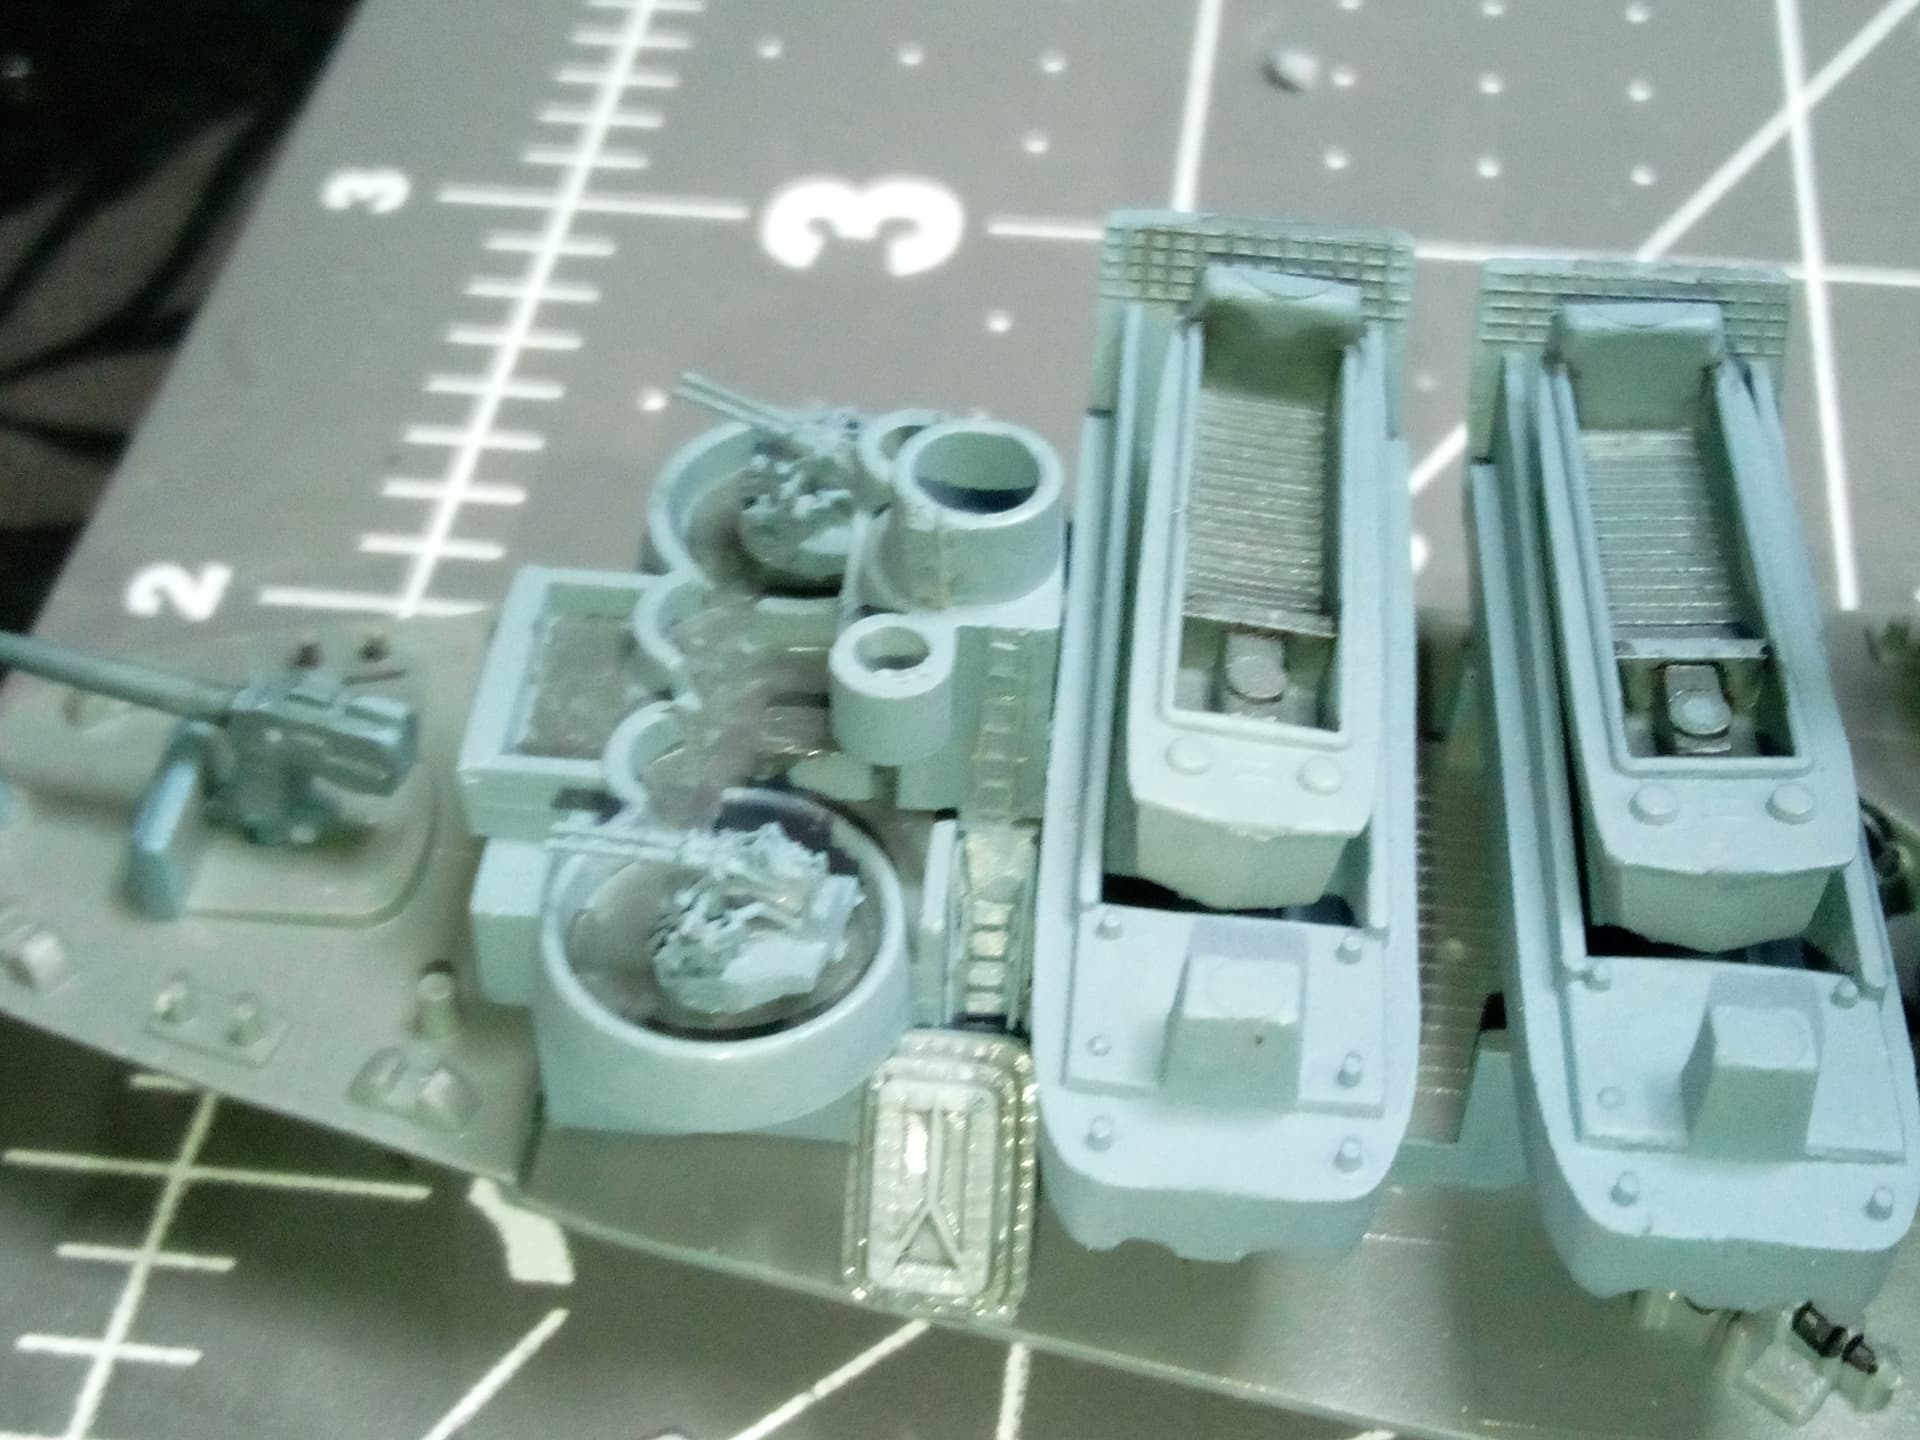
Painted, assembled, and installed the landing craft, and finished installing the booms on the towers,
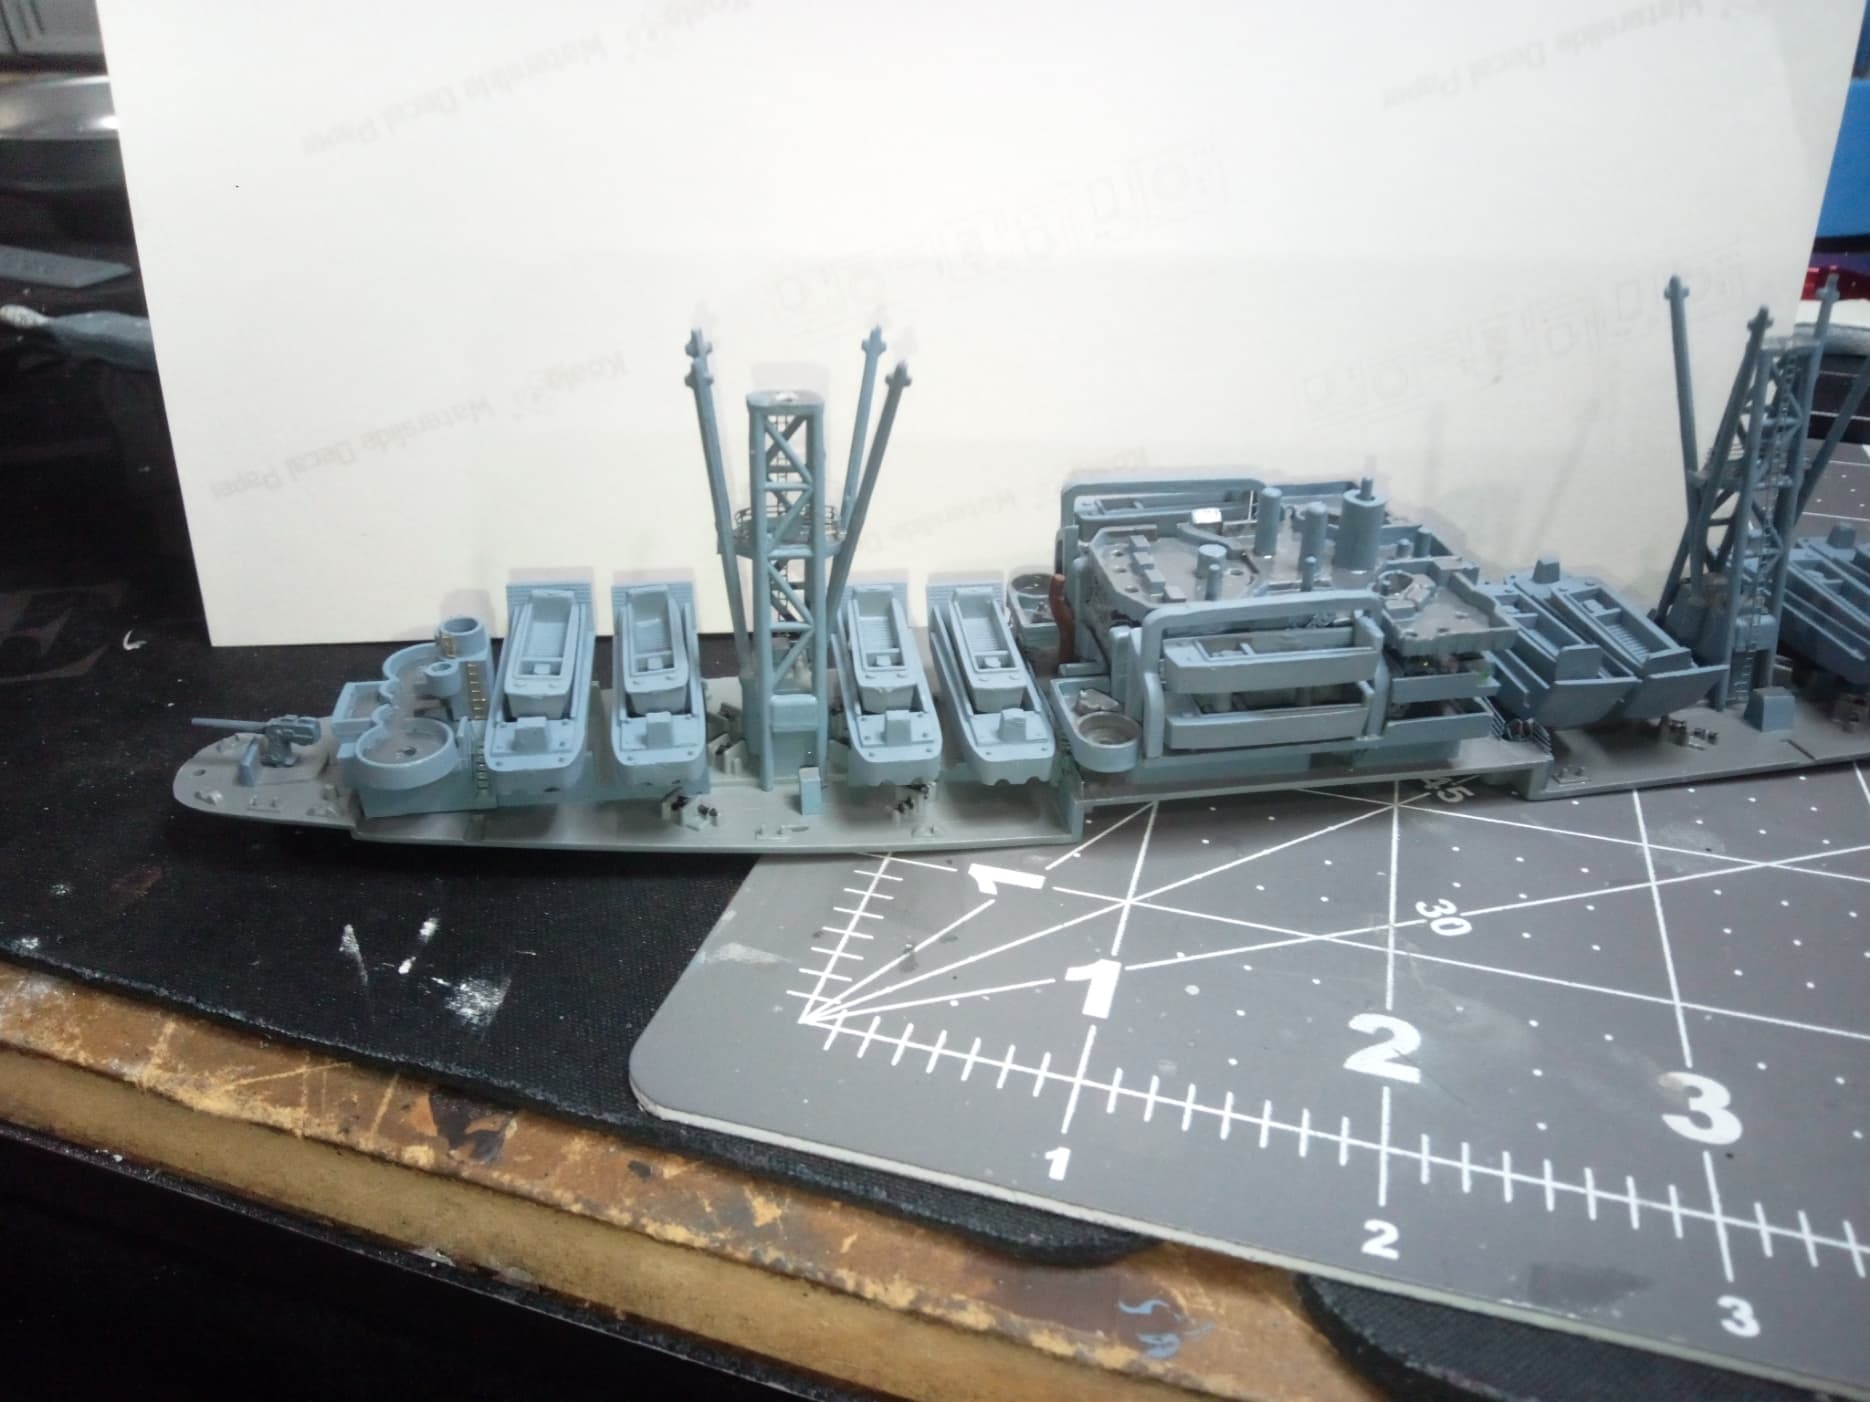
If you look closely, you’ll see some ladders I installed for the observation platforms, still need some touch up. Here’s a look at the starboard bow:
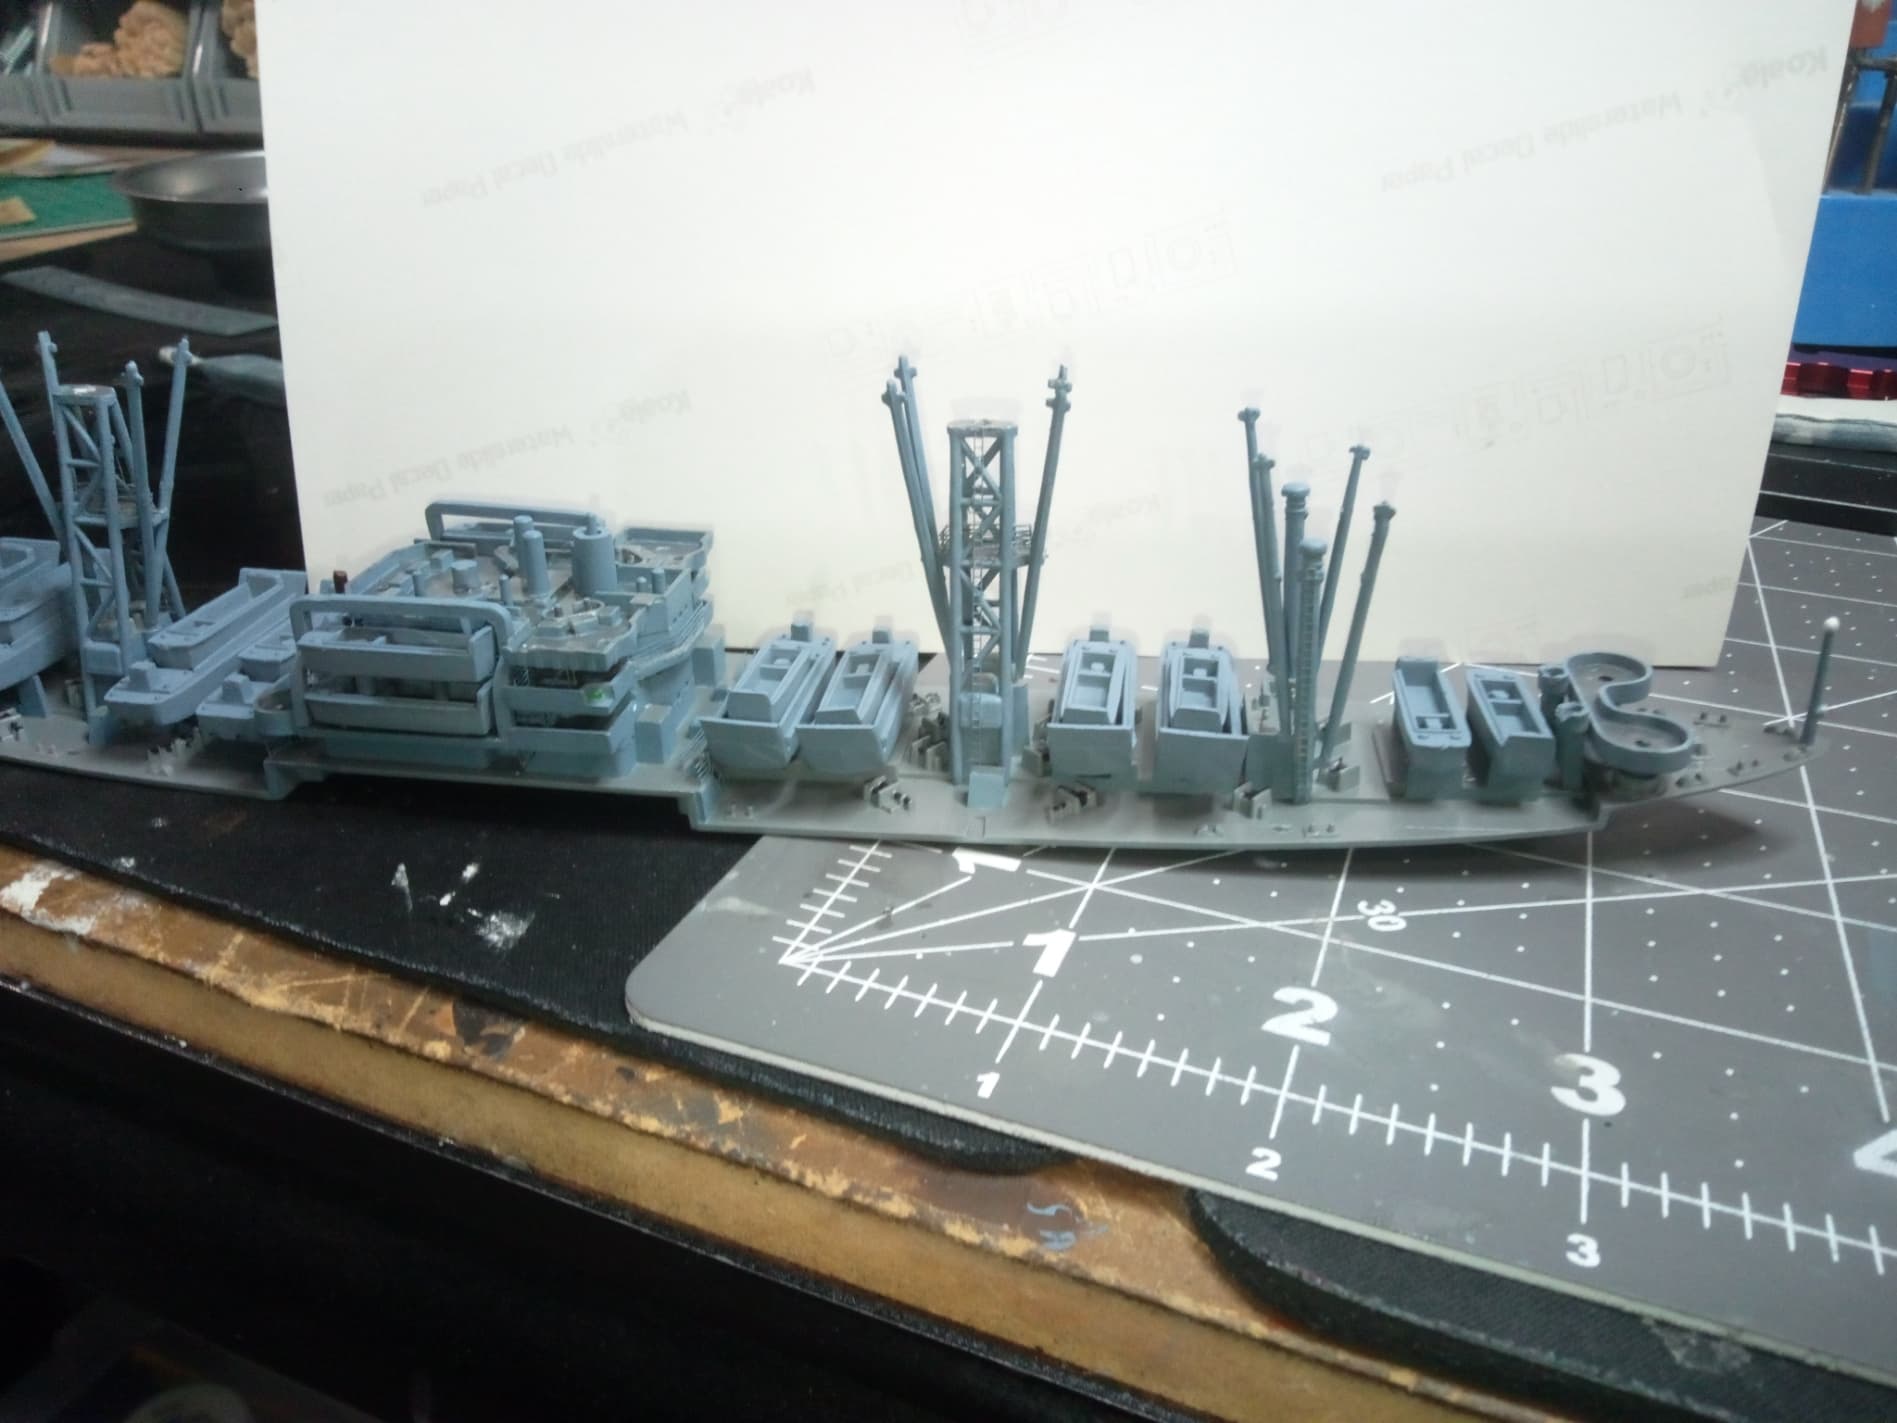
And port aft:
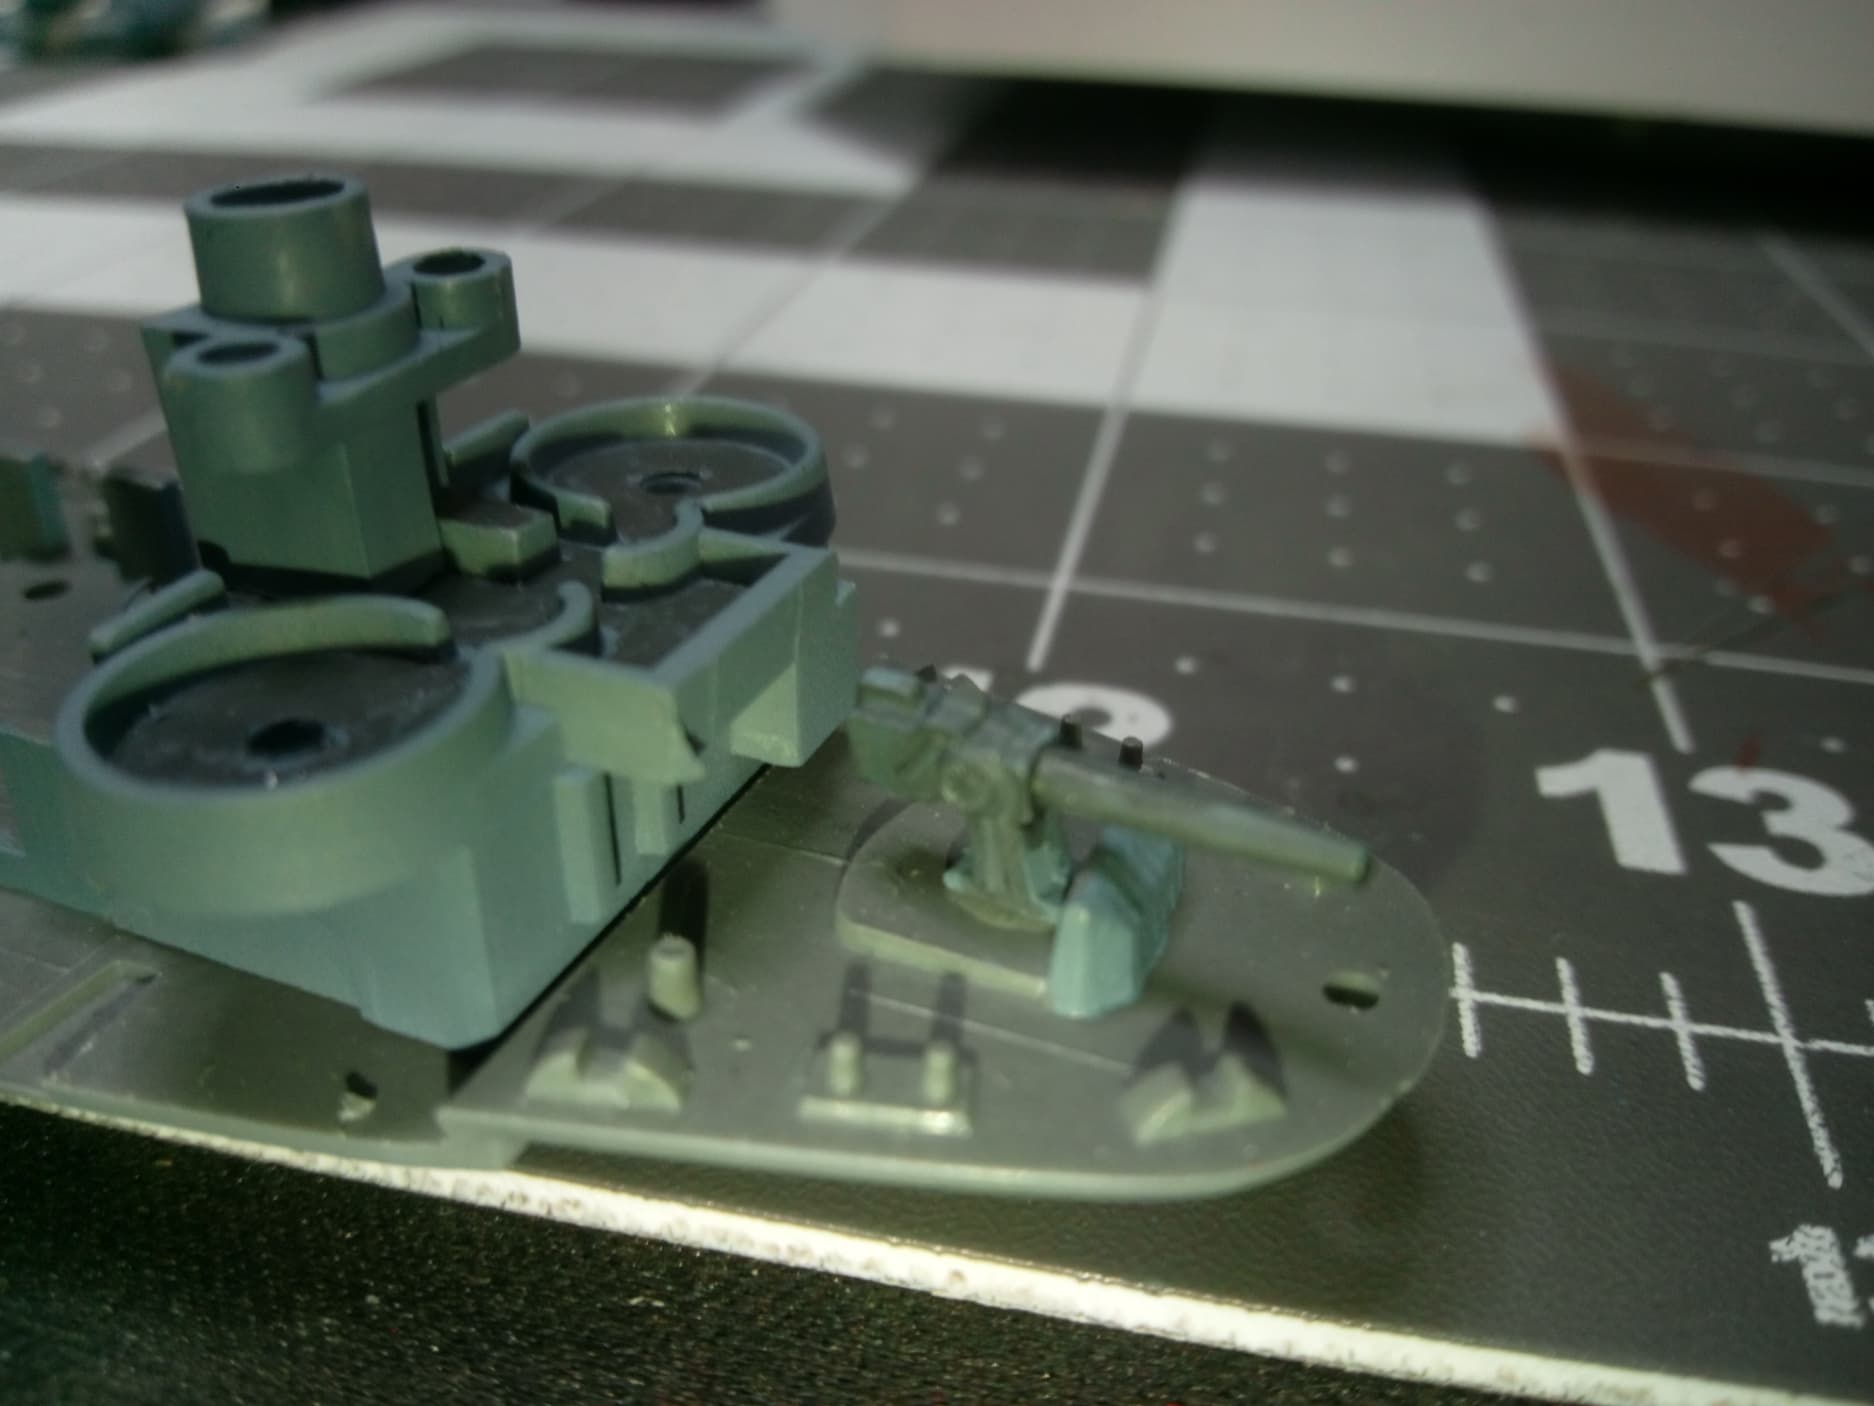
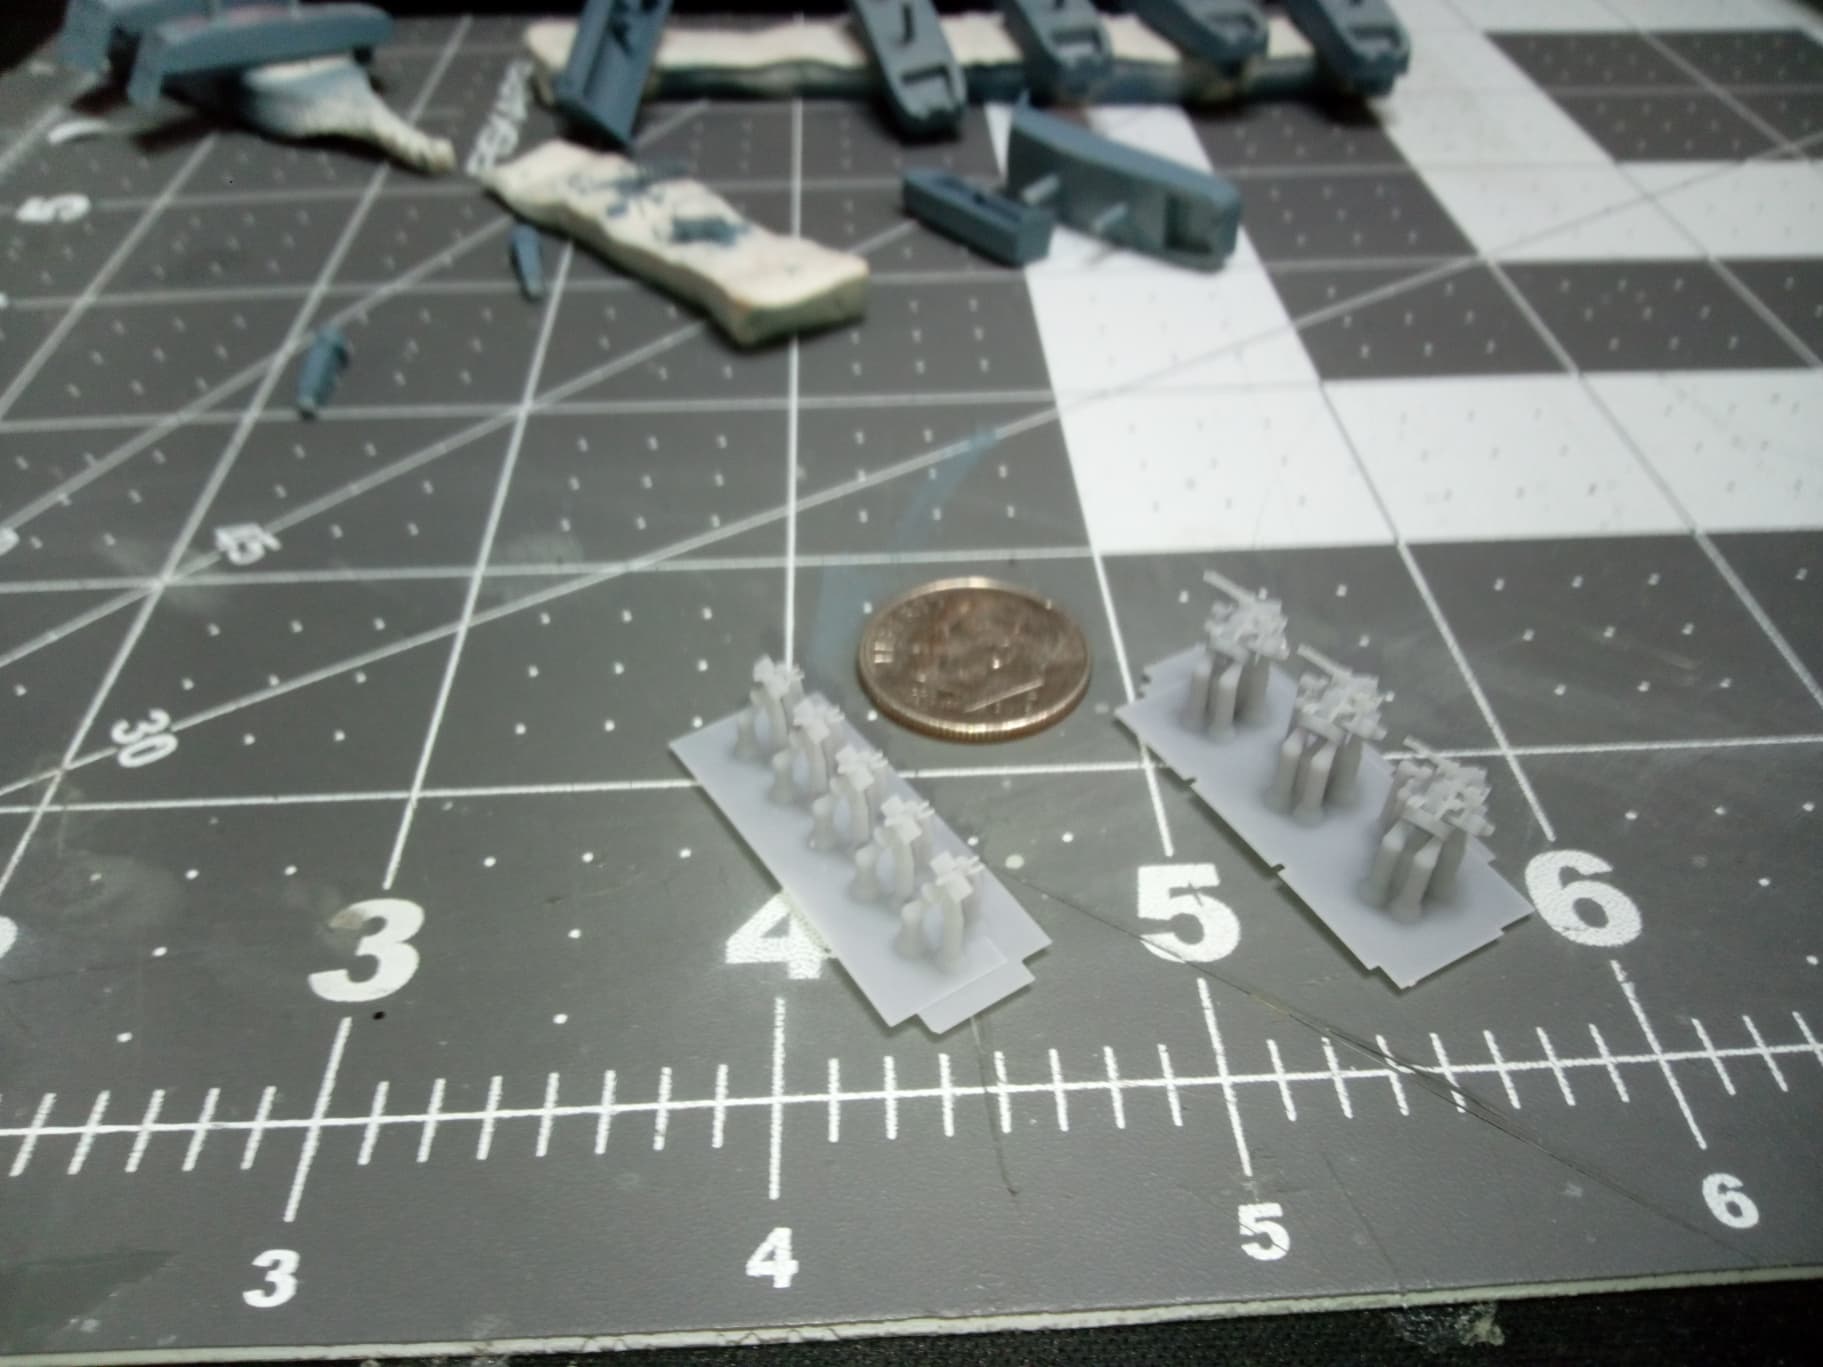
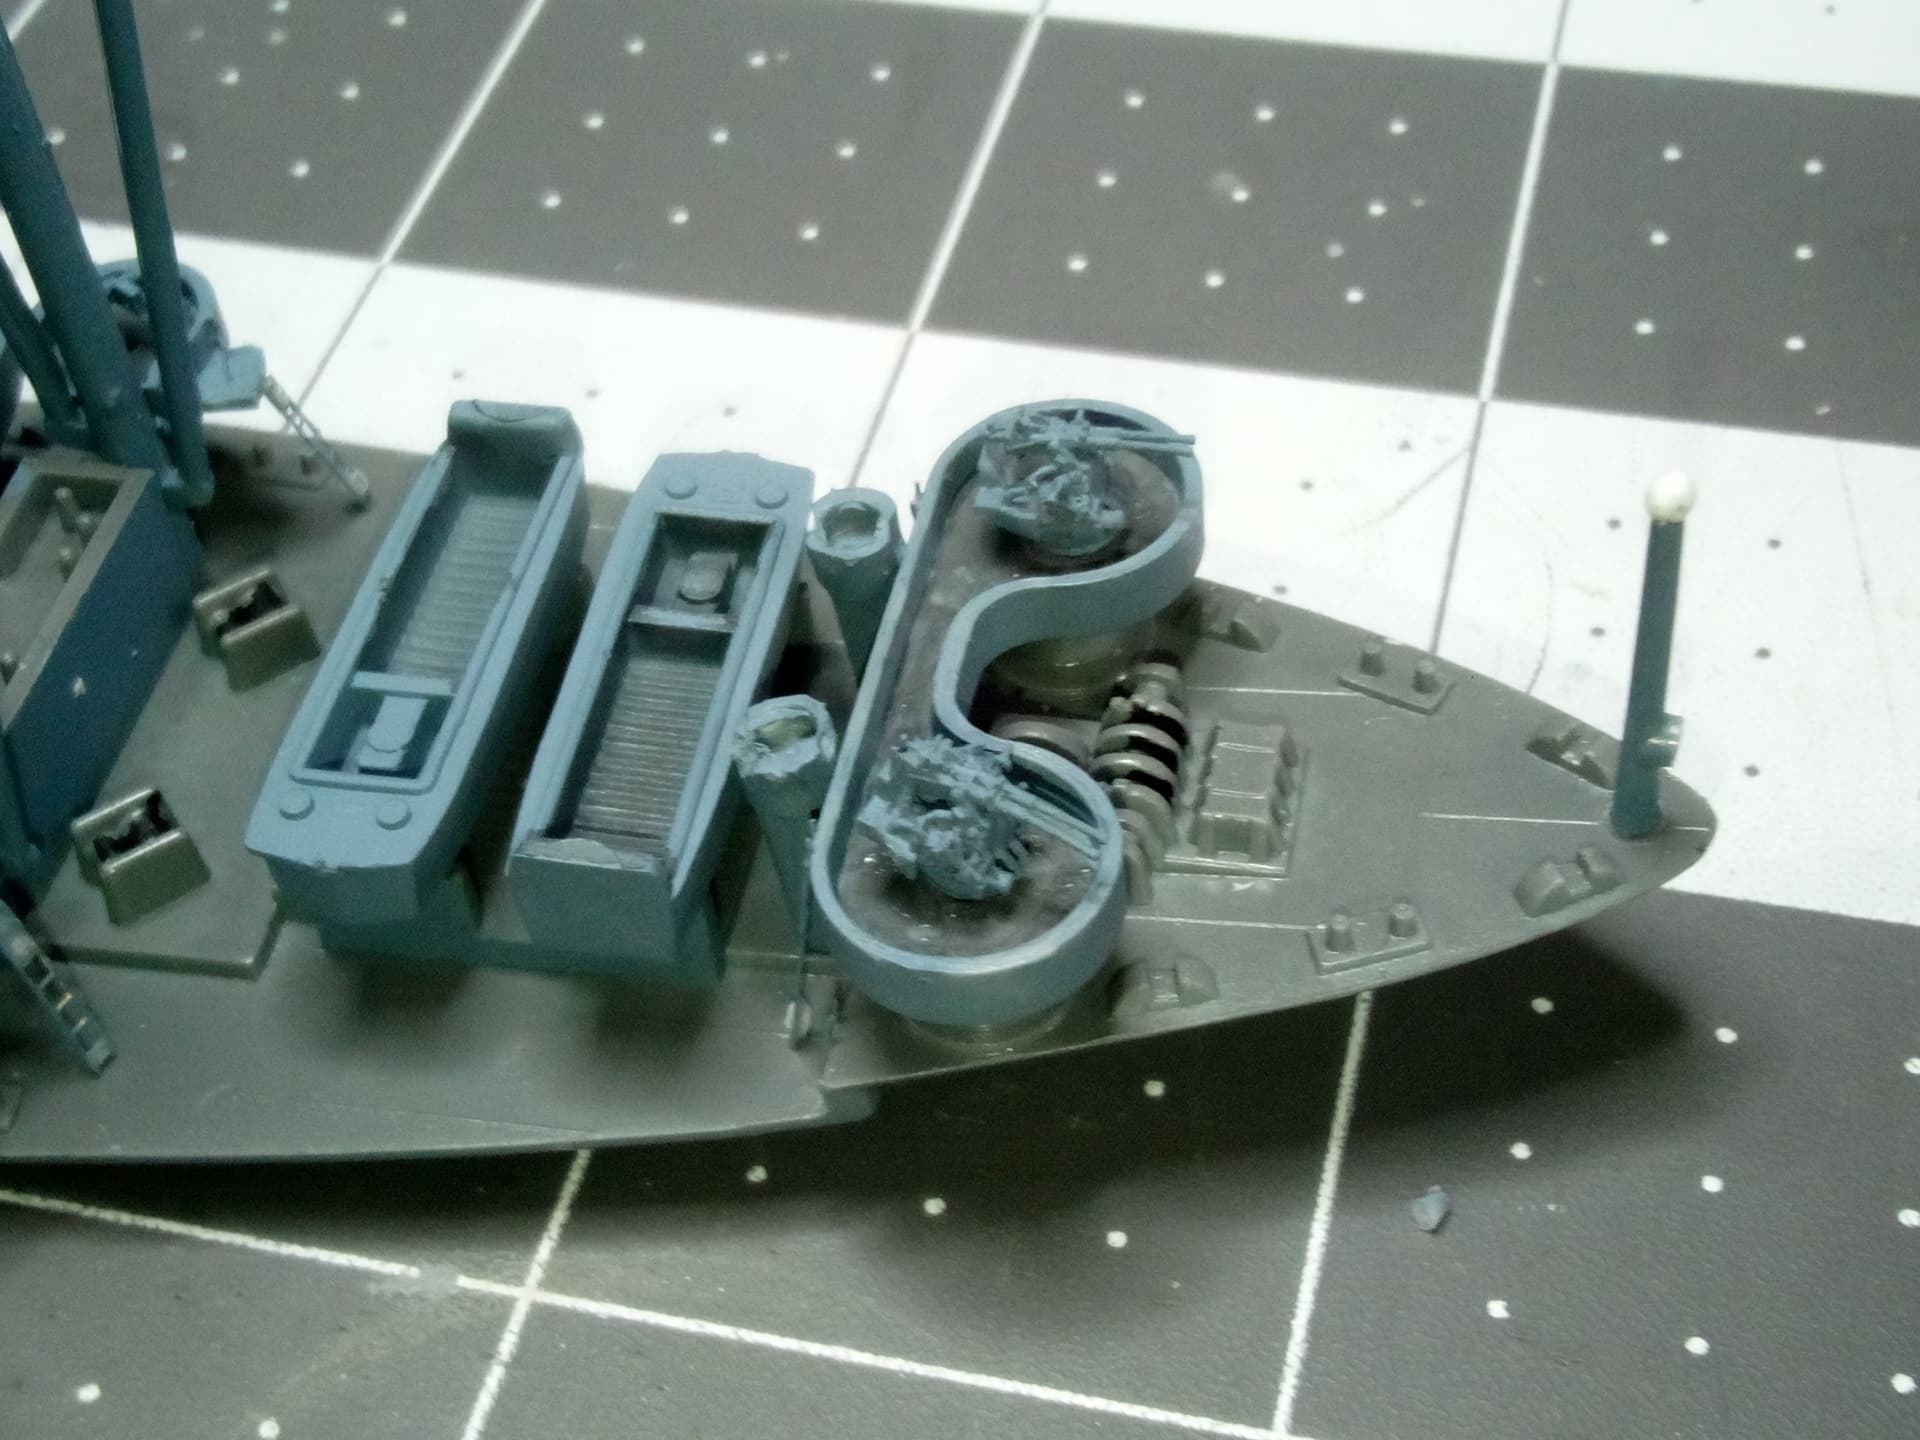
I received today the rest of the ship’s guns, 3d printed bofors and 20mm. They are going to take a lot of time to remove from the matrix and paint, but totally worth it. The tiny detail is incrdible!
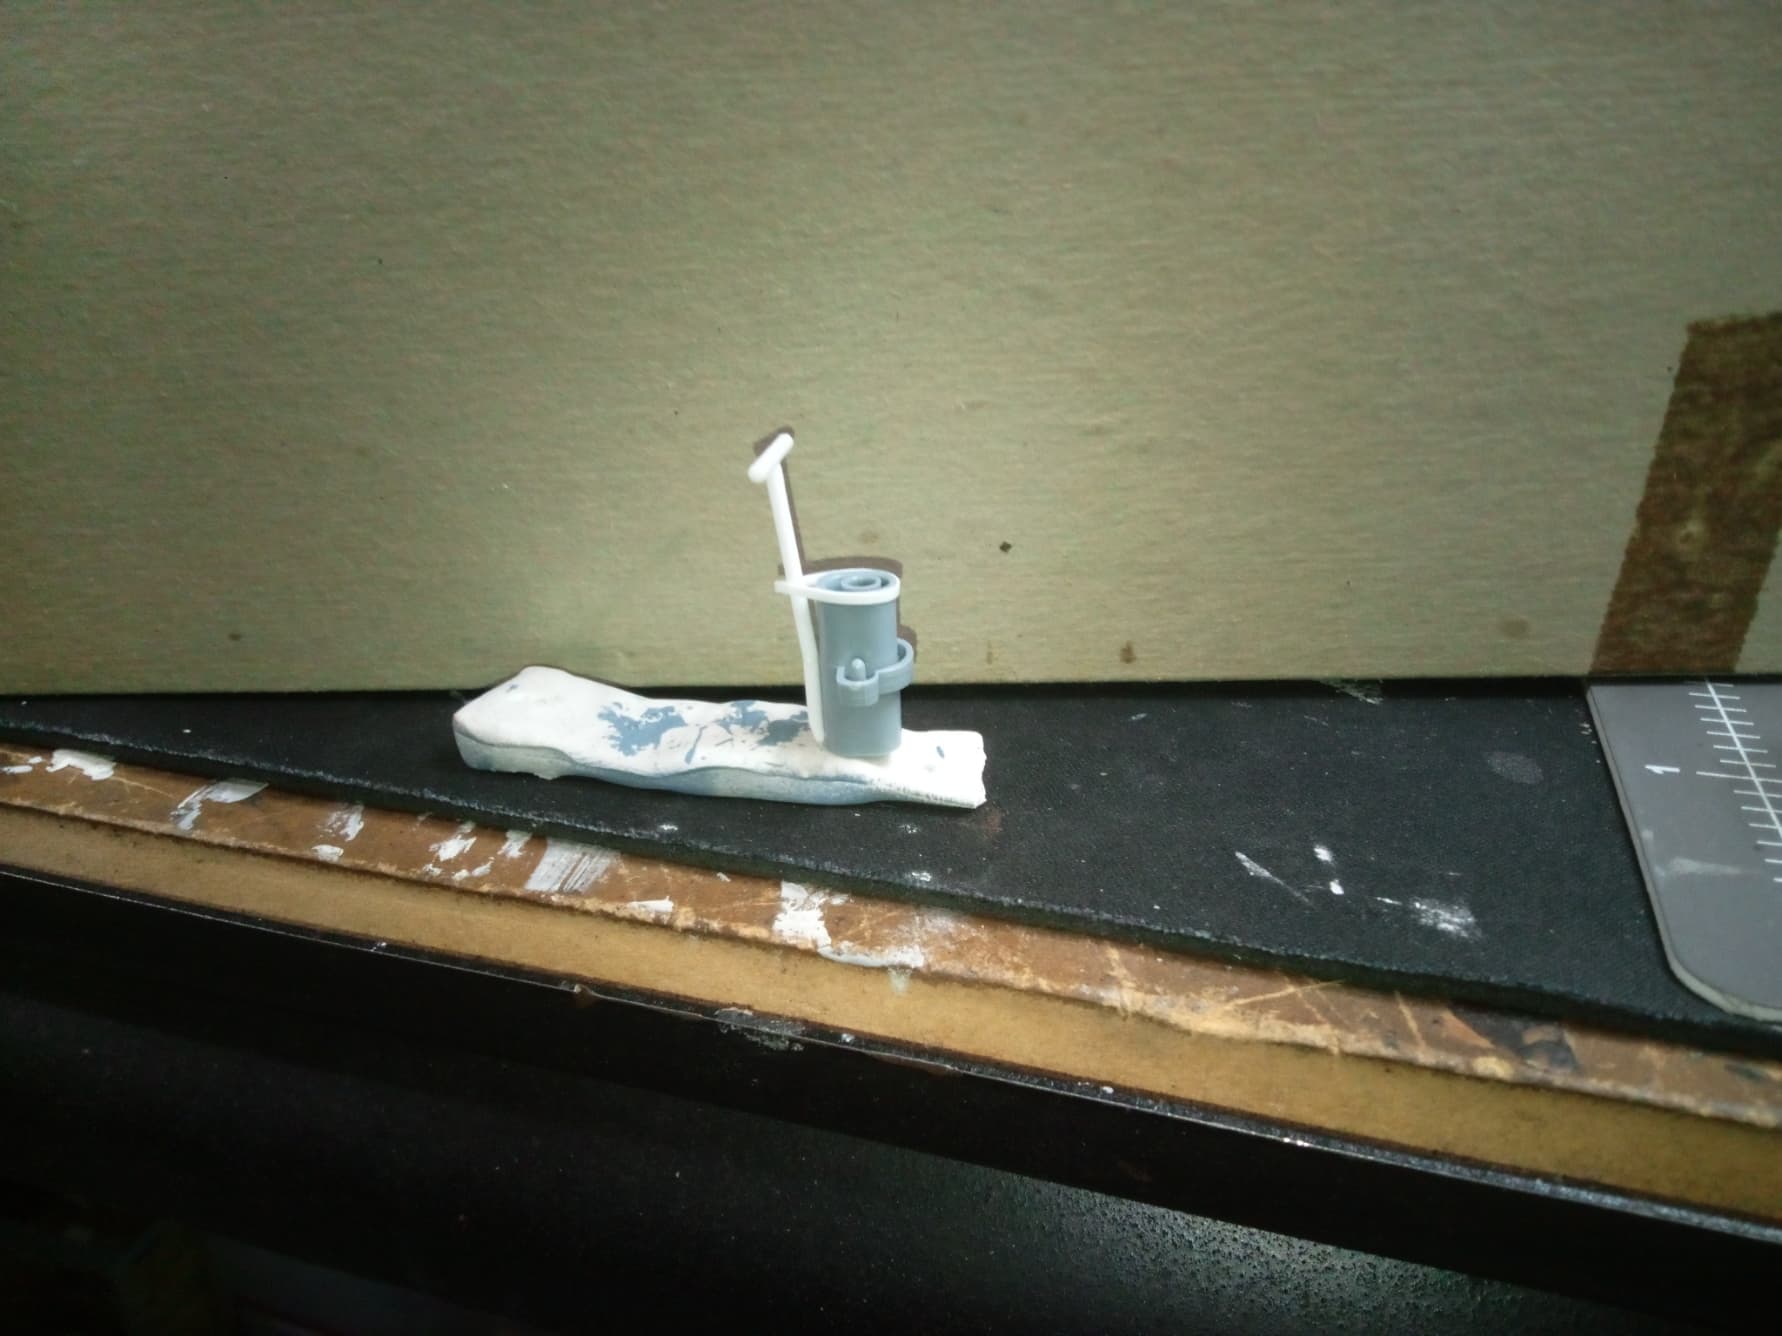
I can’t remember if I mentioned previously that Renwal left out the signal mast which is part of the funnel. This was not a lost part, they just didn’t make one, so I’m scratch building one and hope to have it done next time I’m at the bench. I still need to mount four gun platforms, which Renwal also cheaped out on. They are nothing like what is actually on the ship. Instead of a steel framework to support them, Renwal went with the platforms atop a round peg, like an earring. This blew out a bunch of stairways I made for the platforms, so employing artistic license I’ll use ladders instead. Compounding the issue, 2 of the platforms are not to correct scale height…ugh! I also have an issue with the jack staff, as it is not only not to scale (it’s as thick as a crane boom) but it is a wavy 45-degree down angle style, and Renwal did not include a US Flag for it on the decal sheet, or any other flag for that matter. Anybody out there got a 1/500 scale wavy US Flag to spare? Let me know, I’ll pay! Otherwise, I’m going to have to make something.
On another note, I’ve been using several brands of paint. Tamiya, of course, but AK 3rd gen, mission models, and squadron. I think the AK is my new favorite. Brushed or airbrushed, it applies smooth, doesn’t skin or clog. Great stuff. On the other hand, I don’t recommend the Squadron for brushing. It’s watery and weird and doesn’t cover well. I haven’t shot it in the airbrush, so i don’t know. I do know I won’t be buying it in the future. The mission models paint is a lot like the Tamiya, so all good.
That’s it until next time…Happy modeling!
7 Likes
Everything is moving right along and looking great!
1 Like
Great progress. Amazing how much detail you have enhanced and added.
p.s. Artistic License is always in play when scale modeling. ![]()
1 Like
This is the last chapter of the build log. As mentioned previously, I fabbed up the signal mast:
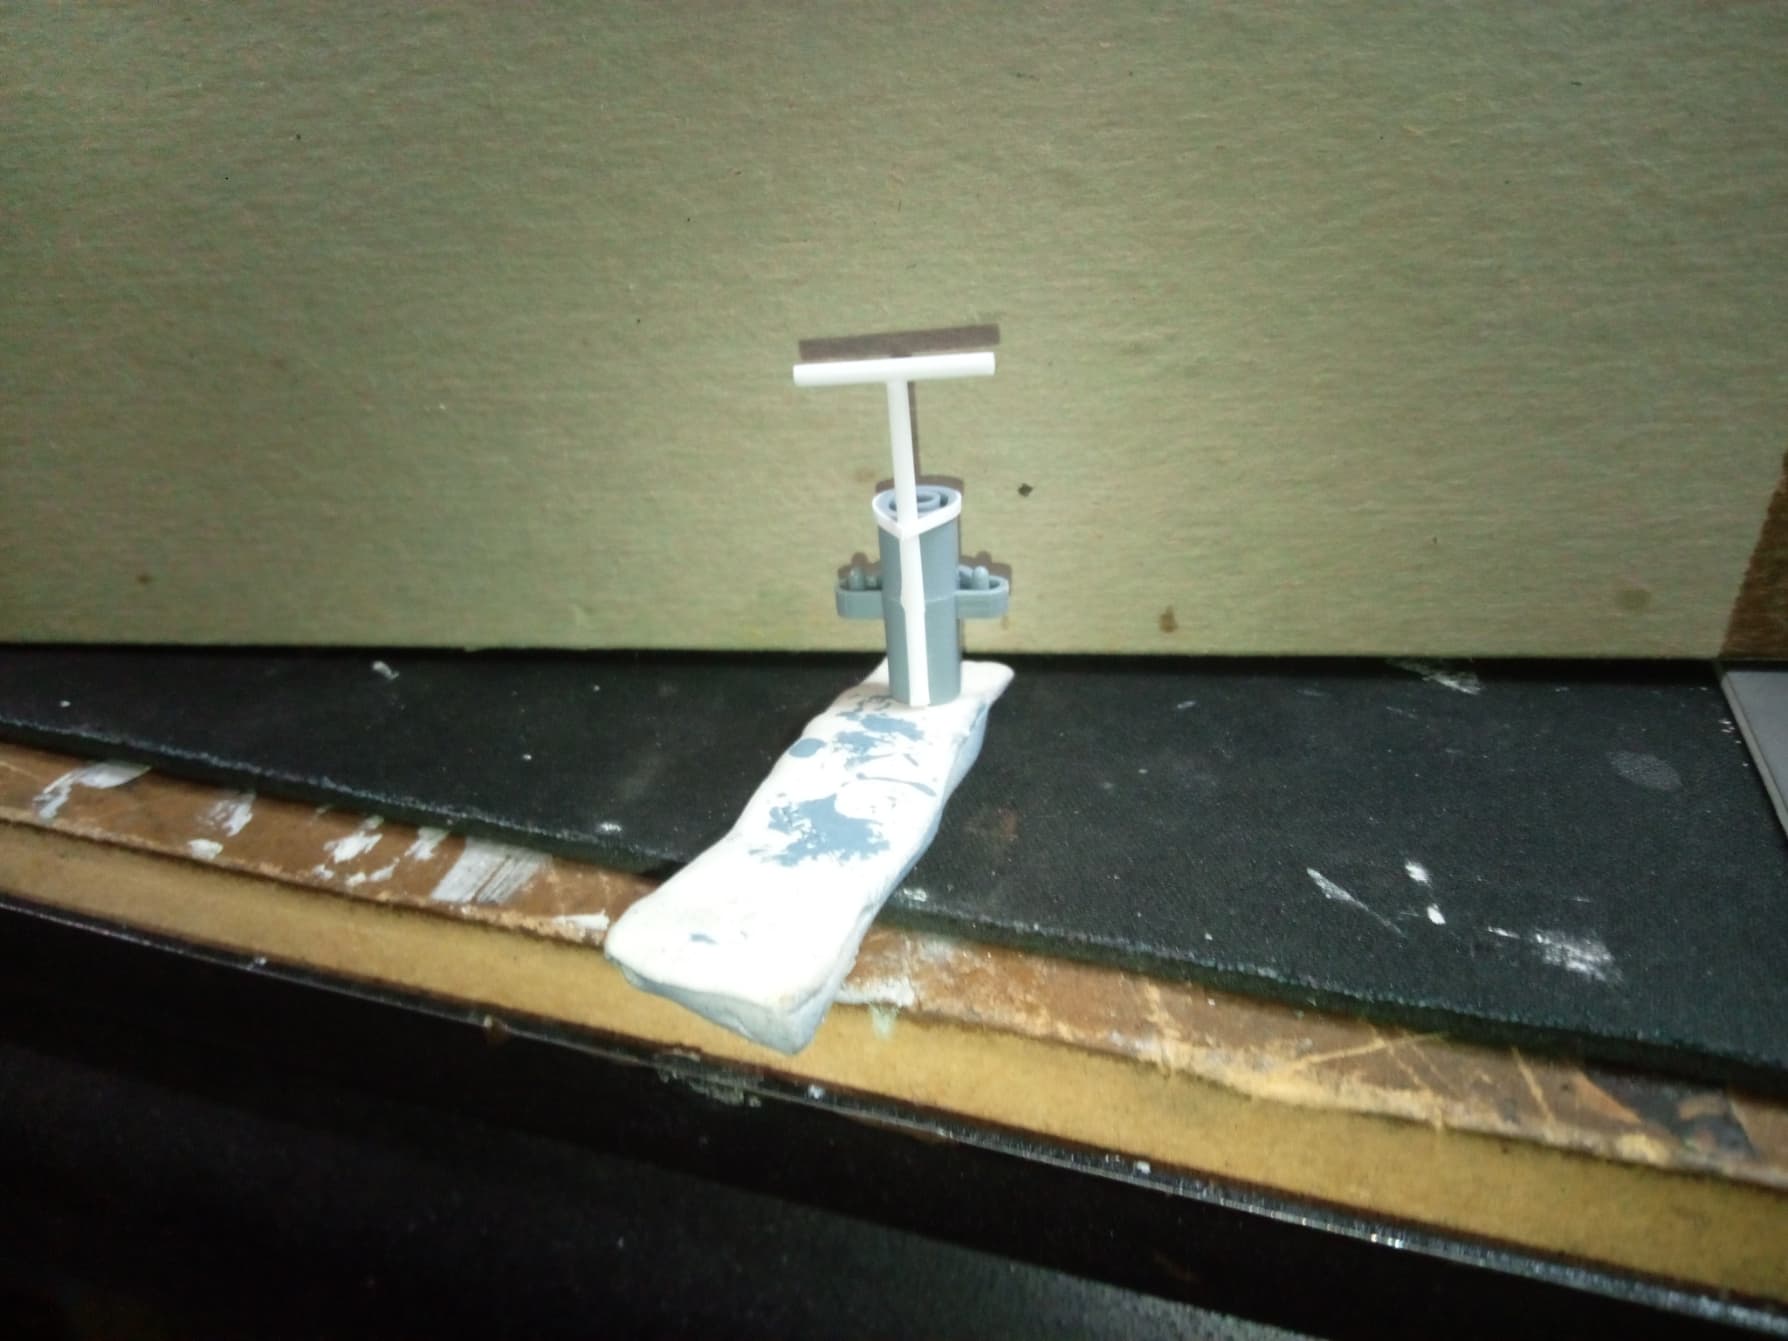
And mounted to the top deck.
I painted up the guns and attached them to the ship. 4 sets of dual Bofors, and 16 20mm courtesy of Distefan 3D.
From there, I attached the deck to the hull:
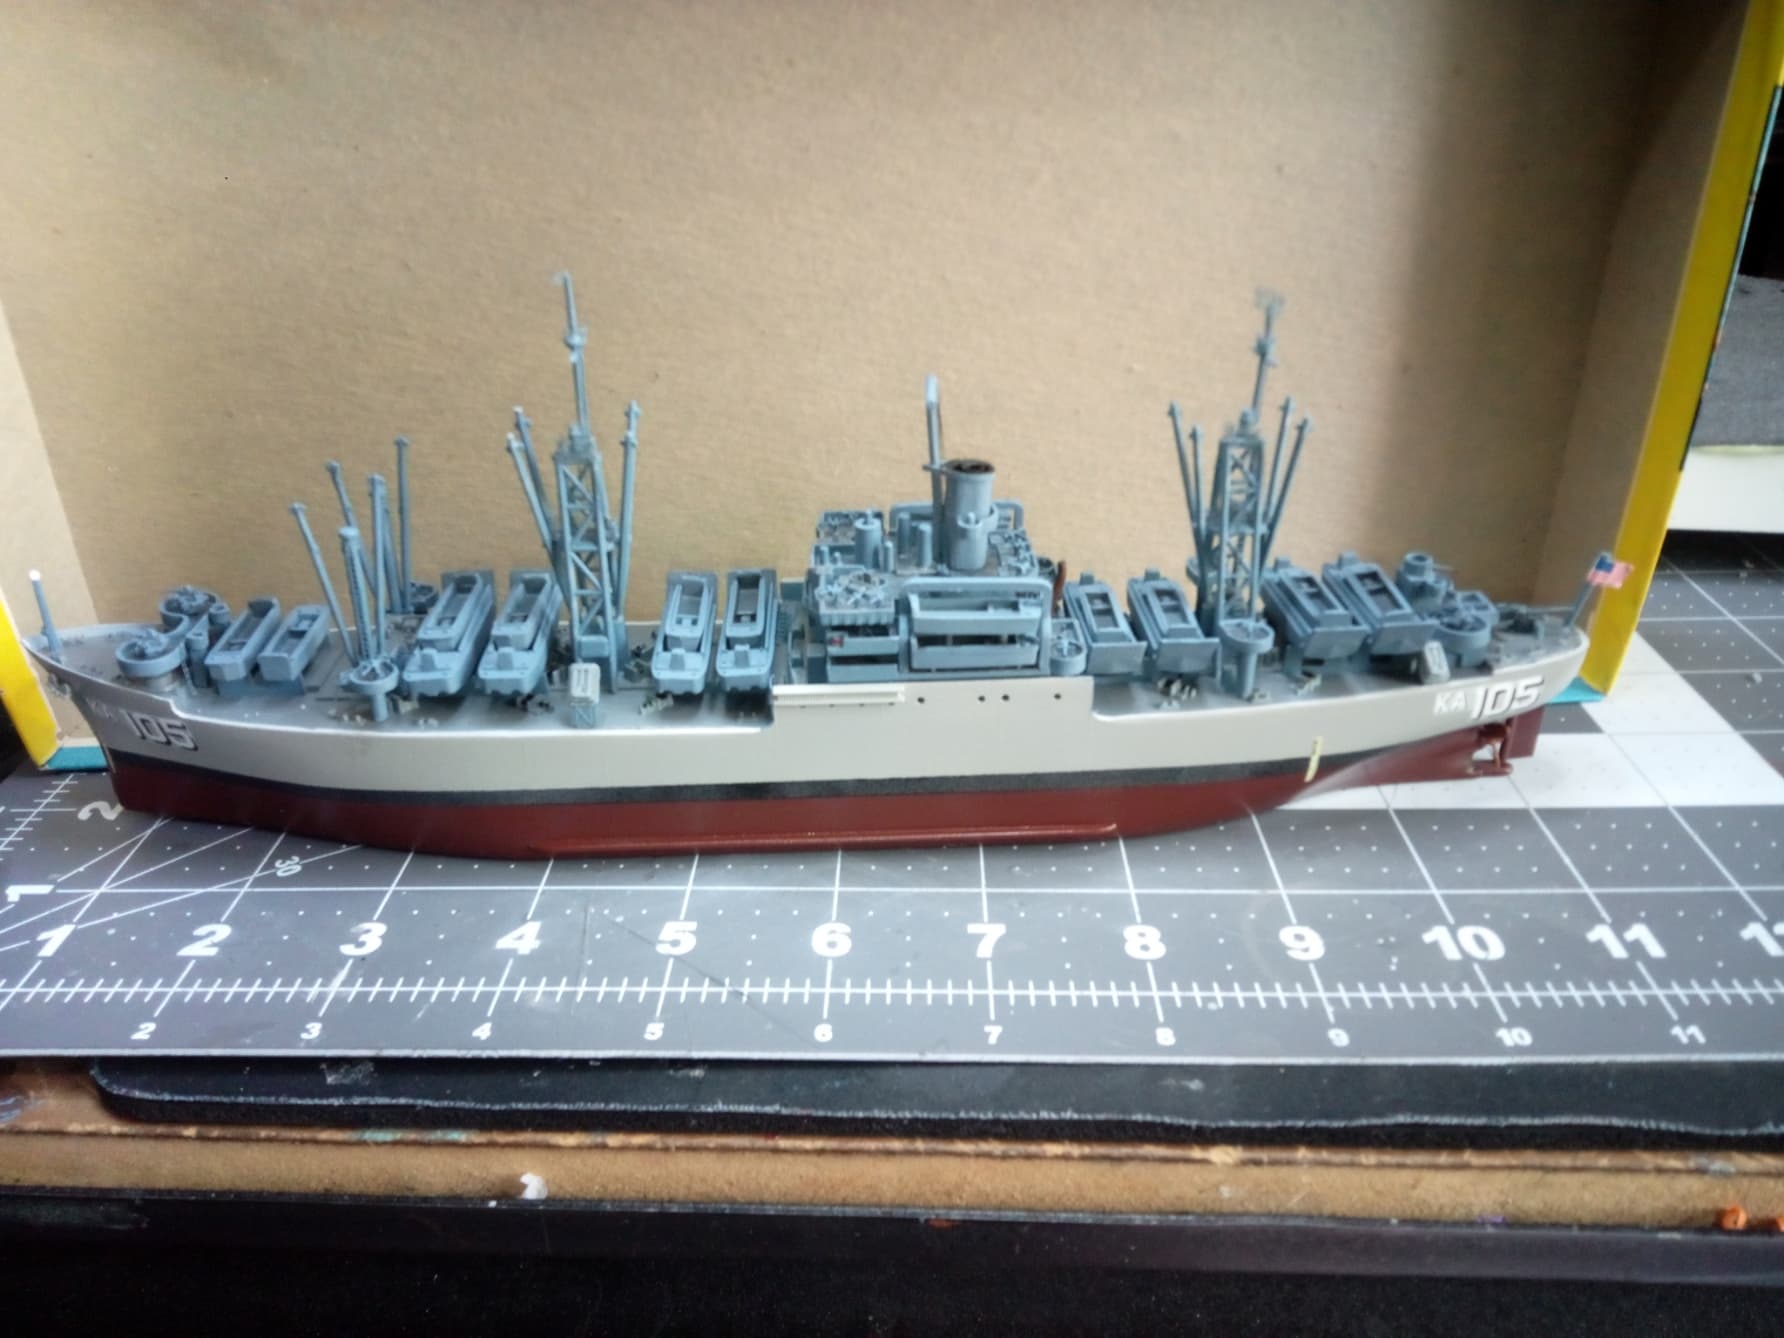
Nothing left to do but the rigging and the matt clear. Sorry, no photos of the rigging process. I can tell you it was 12 intense hours of rigging EZ Line (which I now refer to as Aggravting Line) on the crane towers and masts. But it is done and I’m proud of it. This project is complete!
I took a bunch of photos, which I 'll post as a separate thread entitled Completed Build, Renwal USS Seminole (Now USS Skagit.) Please check it out!
5 Likes
That’s a most impressive effort on this ancient kit. Thank you for sharing and congratulations on getting through it.
If I were building one of those classic Renwals I’d do similar with the decks to align them, but then I’d fill those dreadful split portholes and replace with PE portholes with a dot of gloss black for the glass.
1 Like
Congratulations on completing the build. It is a far, far better model than what you started with.
1 Like
Quite the project and I love the connection to your Grandfather. My father was in the pacific during WWII as a line chief, like the crusty sergeant in Black sheep squadron who always called everyone “college boy”.
1 Like
Great call/fix on those rounded corners, it really looks better. I really appreciate the use of your tools to show scale, it helps to better understand what we are looking at.
1 Like
Well done mrb865! That ship looks amazing. You’ve proven that even these old vintage kits can still be turned into some real “head turners”. Definitely something to be proud of.
1 Like
Looks great! Good job, your a fast builder!
1 Like
Mr. B, fear is normal when tackling with PE stuff, especially a railing, since although being metallic it is also very frail, especially in this scale you are building your vessel. Said that though, with some skills and tricks of the trade you may manage it anyway. I know because I did prepare a few landing crafts in 1/72 scale which included extremely tiny PE parts for the machine gun masts on deck and they were very difficult to handle and glue to the deck. I finally managed, but only through a nice dose of heavy sweat and not breathing too much while finally placing them.
In my opinion I would suggest to go ahead and detach the molded railing (in my view not very brilliantly done). The best way to do it is just like one does on Star Trek spaceship models where one wants to remove a segment and replace it with a more accurate resin or PE one.
The way to do it is first drill very tiny holes along the entire are where the railing is fixed, naturally paying real attention not to put holes too near to the rest of the hull, then, with a fine saw or a very sharp scalpel slowly and carefully cut along the series of holes you made. Once the railing has been removed just sand flush the area remaining by gradually applying various grits of sanding paper. Once you have done this, take the PE railing and attach it to masking tape to hold it straight just leaving the attaching points looking out. Once again, very carefully place it into position where it belongs and being careful to have left a bit of masking tape as overhang on both left and right sides of the PE railing attach it to the ends where it belongs.
Next provide yourself with tiny pinpoint plastic Superglue dispensers to apply to a super glue original dispenser. Another way is to use a needle or toothpick and let a drop of super glue run into the spaces where the railing has to be firmly glues. Better use a super glue that takes a bit more to dry and if ever, use an accellerator with it if are ready to finalize the bond.
It is tricky, I know, and therefore it requires a lot of patience and a firm grip.
The secret though is to also have a very firm hand and have planned ahead the attaching points of the railing. Mark them if you need to with a pencil or a crayon beforehand so that you can clearly see where the glue is supposed to go and always use a tiny drop, as said, with a slow drying type otherwise it could soon become a nightmare.
Another suggestion would be to instead of wanting to attach the entire PE railing in one piece you may want to segment it into tinier pieces, but this requires a special pair of scissors expressly meant for PE pieces (you can easily find them in any major hobby store), or lacking thereof, a very sharp new Exacto blade or better still and as said, a surgical scalpel being very careful on how to handle it. They are extremely sharp. You can find them sold by Amazon. Segmenting the railing may be easier to handle but also needs for the ends to then match again. But as I have specified earlier, if you attach them all to masking tape the operation could be a sinch. But in the end it is your model and seeing how carefully and originally you already did build its base, it will be your personal decision and evaluation that really counts.
I hope I gave you some useful hints in that direction. That’s all I can do for you.
The rest lies in your skillful hands and I am sure you will take the best decision to be what I trust will be a tiny gem of a cargo ship, especially if dedicated to the memory of your Grandpa.
I am eager to see your progress with this marvel and I can already see how many pieces and details it will require, not to speak of a refined painting of it all.
Wishing you all the best I am here should you need my further assistance, but bear in mind that ships, except space faring ones, are not really my cup of tea. ![]()
![]()
1 Like