Bandai 1/72 Destroid Spartan

I often wonder if putty is more trouble than it is worth. Admittedly the scratches and gouges will look pretty bad on a finished product, but the amount of time and effort necessary to fix them is as you said, maddening. Putty requires hours of curing. Meaning it can take days to finish a minor fix.

I’ve started using CA for smaller corrections not because it needs less work but because the cure time is almost zero. I can fill sand, fill sand, fill sand back to back without waiting. CA allows me to finish in hours instead of the days required for putty.

Yup, about the CA. Same deal here. That has been my go to solution as well. Just every now and then I regret the decision. Most instances it works fantastic. Mainly, I think, to fill joins it works well. Beyond that, it gets dicey. Like I tried filling a depression on a flat surface. That was a MAJOR struggle. No matter what, I could not get it smoothed out. I had to abandon that and switch to a conventional filler.

Like you were saying, fillers are a major time suck.

I am stull looking for that perfect recipe.

Looks great Phonenix, good show!

I like to use Perfect Plastic Putty. Dries pretty fast and seems to be less trouble than superglue.

New post!

Been a while since I was back here. “Life” had the audacity to claim it was more important than working on a build. The lack of a post for nearly two weeks lends credence to life’s claim. [:)]

Thankfully it relinquished it’s claim long enough for me to get some quality time at the bench today.

Missiles are done! Almost.

I had some length consistency issues. It’s truly amazing to realize the human eye/brain can discern differences of a few thousandths of an inch. As it were, my errors measured in the hundredths of an inch. The differences were rather egregious. Especially when placed side by side. Not to despair. 30 minutes with a sanding stick and I was able to fix 19 of the required 24. Not enough to fill both shoulders, but it is more than enough to fiinish a single one.

Time for the slideshow.

My parts bin where I’ve been storing the missile parts.

parts bin

Beginning the assembly of the missiles and the remaining shoulder missile box/cover. I decided to cap both ends of the missile rather than leave one end open. I figured capping both ends would make it easier to secure them in place.

initial assembly

Capped and the edges rounded. It was about an hour of sanding to bevel all those edges. Boy were my finger tips and thumbnail sensitive after that. I was worried I was going to sand a hole in my thumbnail!

beveled

First layer of the detonators installed.

detonator1

The second and final layer of the detonator was made with a .5mm punch in .01" thick styrene. They were smaller than most grains of sand.

teenytiny

Wax pencil for the win on those. It picked them up really well. Held onto them well, usually, when dipping them into the glue. And let go the moment they were applied.

I’d tried doing this with tweezers and a needle point. Doable but not really effective or efficient. The pencil just worked. If placing lots of small parts, a wax pencil is totally worth the investment.

19 missiles are now ready to be primed for paint.

missiles at the ready

I’m glad I decided to put in the extra effort to add those tiny discs to the top. They break up an otherwise monotonously smooth surface. Plus, they should take a wash nicely to add depth to them.

I’ll probably use a little blue tack to attach them to some cardboard so I can use the airbrush to prime them.

The box art makes it difficult to tell whether they are dark grey but washed out due to light. Or light grey but darkened due to shadow.

I have some time ponder this while finishing the second missile box and installing it.

Been a while since I was back here. “Life” had the audacity to claim it was more important than working on a build. The lack of a post for nearly two weeks lends credence to life’s claim. Smile

I can sooo relate.

I’m glad I decided to put in the extra effort to add those tiny discs to the top. They break up an otherwise monotonously smooth surface. Plus, they should take a wash nicely to add depth to them.

I agree. Those discs add much to them. Nice work, PG! [Y]

I’m pleased that you took the high road and made all those missiles. They will no doubt look terrific packed into the Spartan’s bays. You’re going to have one mean-a$$ looking Destroid!

I bet you can!

It’s been an odd year. Compared to the previous years my output has been practically nill. The builds are becoming more involved, which I like, but the real influence seems to be less available time at the bench. Which is somewhat annoying as I have many things I’d like to accomplish. The proof of that is my stash finally growing to the point where it will take years to build what I have. Not a bad thing. Just hit that particular milestone a little earlier than expected. :slight_smile:

Thanks! I was really wondering if I’d bit off more than I can chew when I started down this path, but I’ve been pleasantly surprised by how well things have gone.

I so hope it will!

Hit a major speed bump on this build. Most of the glue joints on the missile box and cover failed. For some reason the plastic didn’t meld together well. I’ve spent most of today re-gluing the joints.

Yesteday I discovered I had a box of a thousand popsicle sticks. Turns out they make really nifty part holders for airbrushing. I attached the missiles to the popsicle sticks with a small dab of CA. They should pop right off once they’re finished and ready to be installed.

The missiles have been primed, covered with the base color, and then hit with sealer. I picked up a bottle of Vallejo Mecha Z grey on a whim a while back and this seemed like a good time to give it a try.

missiles

I think that color will do perfectly for the missiles.

And you truly can make a paint booth out of just about anything. In my case a cardboard box and an old vacuum cleaner.

paint booth

Literally just put the end of the hose in the bottom of the box and turn it on. It’s an old cannister vac. The vacs standard bag/filter catches the particulates and fumes really well. I only use acryclics but I don’t get any odors with the setup. Light is provided by an LED cabinet light that I installed by cutting out a trough in the top side of my cardboard box booth. The trough lets the light in and holds the light in place.

The guy on the left is my personal coach. He keeps me going when I feel dishearthened. He also helps takes care of any extra paint I have left in my airbrush. lol

I could not have said it better.

Enjoy it while it lasts! The other shoe is still there. Lol. [;)]

And there it is! If it works-- the builds shall come. [:P]

I love the personal coach! Lol.

Wow those look amazing Phoenix!

Good luck on finding a good cement for the boxes. I tend to just reach for the two-part epoxy when I’m in doubt.

And neat looking airbrushing box. I’ve done similar sorts of stuff. When you mess up the cardboard box enough instead of cleaning it I just toss it and grab another.

It’s always there. Waiting. Lurking. I can feel it’s eyes on me…[:|]

lol [:D]

Thanks Gamera!

I got them back together with some judiciously applied Tamiya extra thin, plus clamping with the newly found popsicle sticks.

I’ll have to find some of that perfect plastic putty you mentioned earlier. I got the boxes installed but having to do a lot filling and sanding to clean up the areas where they join the shoulders. Thinking I should have those done in the next day or two.

In the meantime the missiles have received their yellow dabs of paint on the tips and are awaiting a dark wash to add some shadow.

For the moment I am deliberately avoiding the hinge for the missile covers. I think that can wait till almost the very end.

Looking forward to finishing the cleanup of the missile boxes and resuming the rest of the build.

Sounds good!!!

I ordered my PPP off Amazon. I don’t remember if it was from them or someone else that sells though them.

Have both missile boxes installed and primed. The joins aren’t perfect but they are good enough for me. Still need to build and affix the emblems to the missile covers before they can be primed.

Quick and dirty photo of a dry fit.

lousy photo

Nothing is glued together. The torso is just resting on the legs. Completely missing the waist, but wow.

Dang he’s looking mean, but in a good way.

Good to see her still coming along!

[:D][:D][:D]

Momentum on this is building now that I’ve been able to shift focus.

A few months back I picked up a bottle of Vallejo Mecha Matte Varnish to try out. After testing it out discovered it is more of a very soft satin finish that is quite nice, but not matte. However, when cured it seems to be a lot harder than Vallejo’s normal line of varnishes.

sheen

I painted the joints black and then covered them with that varnish as these are high wear areas and prone to rubbing and scrabbing. This will be a real test of the durability.

Because all the legs joints are black I painted them before assembly and then masked them to protect them during the painting of the rest of the model.

masking

If I did it right the mask should easily peel off once everything else is done.

The main torso is glued up with the central cannon door painted before installation and masked for protection during the rest of the build. Arms are attached using semi-permanent method. The vents on the back of the shoulders have been installed with a light coating of white glue. That way if the arms ever become loose I can easily get access to the plastic eclip to remove the arms and work on tightening them up. Having said that I am now thinking about the rare earth magnet method Real G brought up a while back. Something to consider…

glueing

I’ve had to glue the torso and legs together panel by panel because the parts were warped just enough that it wasn’t possible to glue them all at once and maintain good alingment. Even with clamping. It’s been a slow process but it will mean a lot less correction needed on the back end.

Once the glue on the legs and torso completely cure the cockpit and final bits and bobs can be installed. At which point painting will begin in earnest.

Funny story about the glueing.

I’d started on the first leg (the ones being held by the large yellow clamps). Clamping them together with the little green and black clamps you see. While the glue was setting up I was across my garage drying some CA (different story) when I hear this loud “BANG” like something metal had fallen off a shelf or from my workbench. What made it weird is there is nothing large or metallic on or above my bench that could have fallen.

I start looking around and can’t find anything out of place. Everything looks normal. I’m about to attribute the noise to poltergeists when I notice one of the clamps on the leg is missing. After some searching I find it on the ground 8 feet away. It had flown off with enough force to go sailing across the garage. The noise I’d heard was it hitting and bouncing off an old empty paint can that had been sitting on top of the opposite bench!

Pretty sure that would have left a mark if I’d been near it when it let go. LOL

Needless to say no more little clamps on those legs. Only the big beefy ones now.[:D]

And just as quickly as progress started speeding up, it slowed down. During painting I found lots of places where it would be possible to see internal unpainted sections in the original green. I didn’t like the effect this would create. The solution was simple, but it added another step. IE it took more time, but it is of benefit to the overall aesthetic of the build.

Taking the path of least reasistance meant a simple black coat to all the internals which would hide the green and any overspray should look like shadows. That is the hope.

The last few days have been spent blacking and then clear coating for durability due to proximity to rub spots. Then time curing in the drybox so as to harden the paint and clear coat as much as possible.

Progress!

legs

Most of the priming coat went down beautifully.

It did reveal a few seams that would have a negative effect on the model. Much sanding has been done and most issues have been fixed. YAY!

However, a few stubborn ones required putty.

Have I mentioned lately how much I loathe putty? Vile stuff. Fills where you don’t want it and sticks everywhere but where you need it. [bnghead]

gag-putty

Despite the putty’s attempts to sabotage me I did manage to get some decent work in.

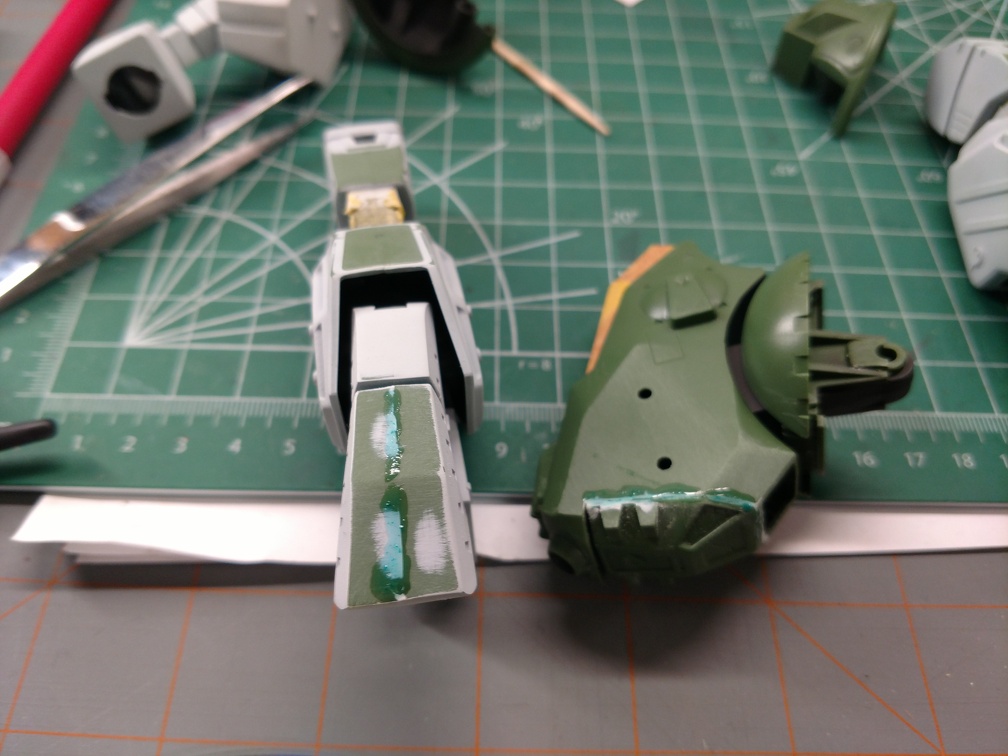
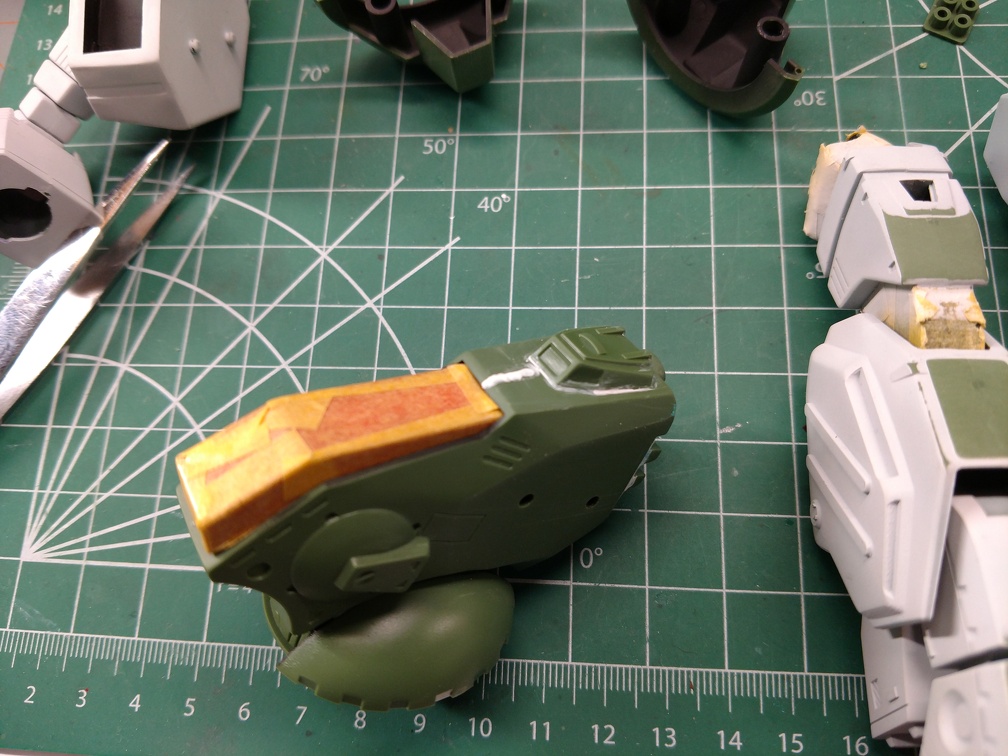
Still, not good enough. I was getting a little fed up with the putty so decided to go back to CA because I tend to have better luck with it. Somewhere I read about coloring the CA so as to be able to better see the work. My paints are water based so that was a no go. Tried adding a little Chalk pastel to it. It sorta worked.

CApastels

One hiccup though. My pastels appear to act like a slow acting accelerator. After a couple of mixes and applications it turned to rock. Despite that slight drawback it seemed to work pretty well.

sanded off

CASandedPastels2

But then my bottle of CA glued it’s cap to the applicator tip. When I tried to take it off, it broke off at the base. [:|] sigh.

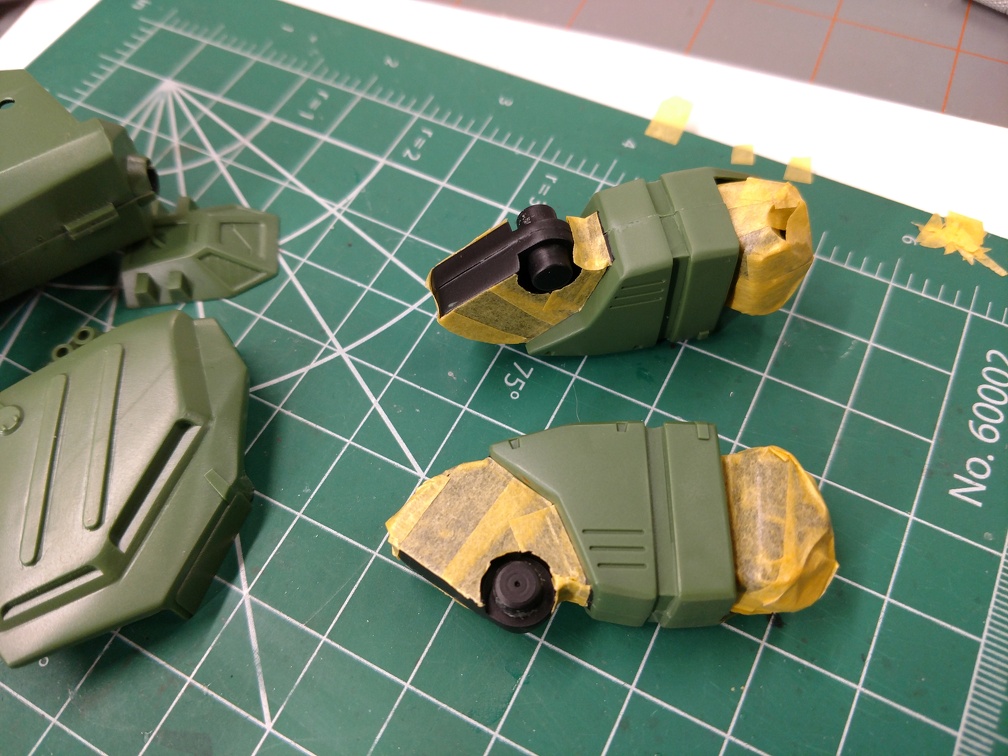
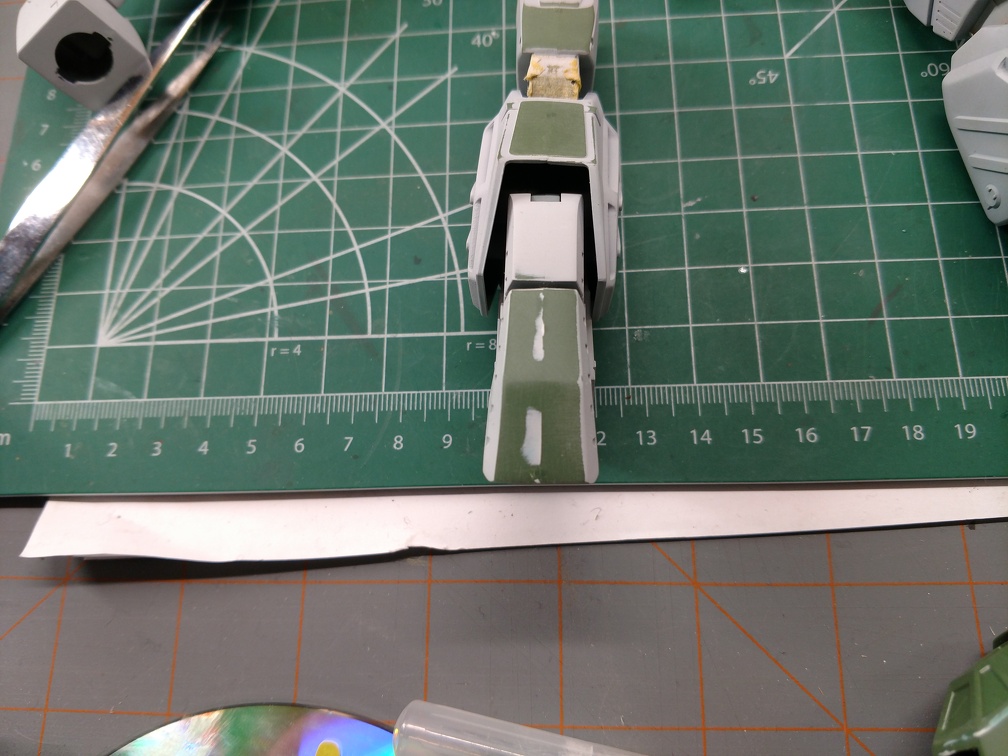
Back to putty till I get a new bottle of CA. Which is inconvenient as the cockpit had several unsightly pin holes appear in the seams around it’s base. Apparently the plastic was still soft when I unclamped it a day later and the body flexed just enough to cause it to pull away in a couple of spots.

The putty didn’t apply very well. Thinking it could be good enough.

cockpit

I’m really hoping those streaks of putty won’t show up in the primer. Finger crossed.

Despite these little frustrating moments the build is coming together nicely. I’m starting to be able to visualize how the final product will look.

Gamera, I purchased a bottle of Perfect Plastic Putty to try. It will be intersting to see how different it is from the Tamiya and Vallejo putties.

Sometimes the problem is the materials being used. Sometimes it’s the person using the materials. The jury is out as to which is which when it comes to me and putty. [:D]