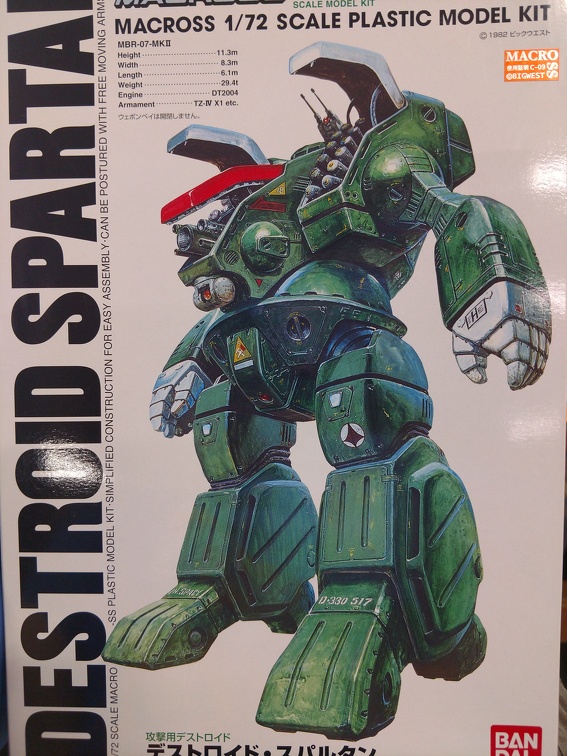
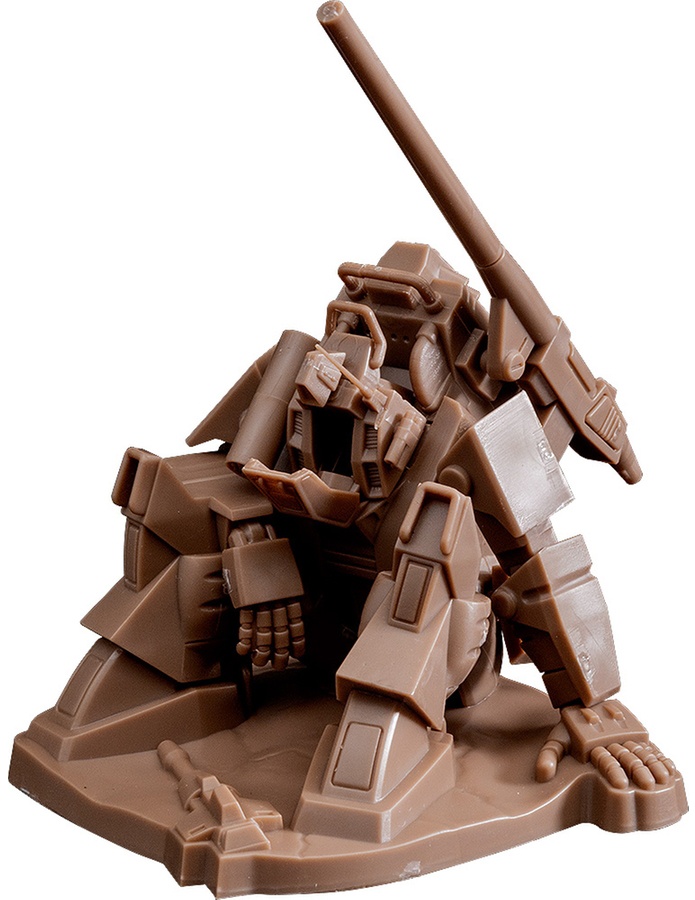
Yup, it’s another Destroid model from the Macross series. This time it’s a Spartan. The only Destroid to have hands.
Was planning on doing this epic pose with it’s missiles and main gun exposed, but was crushed upon discovering the model was molded with the shoulder missiles closed. [:'(]
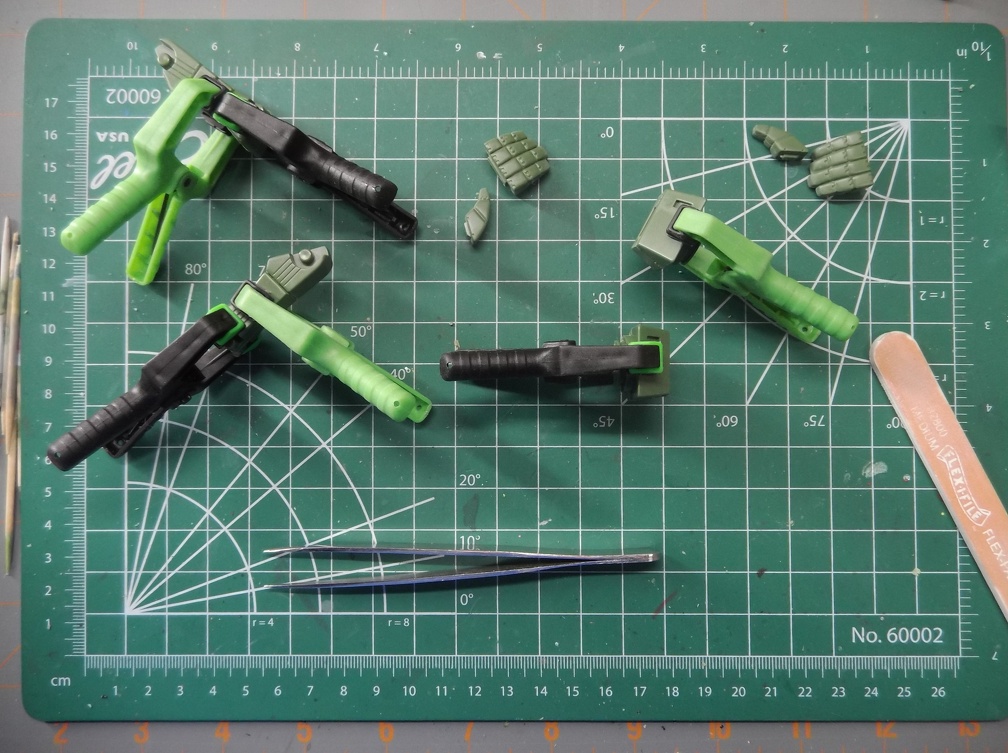
This build has a lot more pieces to it than the Phalanx. However, due to how it is constructed it simplifies the painting, meaning assembly is easier. I’ve already got most of the lower arms put together.
The above is an evening’s worth of work.
The fit isn’t near as nice as on the newer kits but with judicious use of glue and clamping most of the seams are disappearing. Lots of scraping is in my future.
I’m not sold on the original color scheme or the box art. I’m debating on whether to do a variant of the paint scheme of the Phalanx.
You could always paint it in a Battletech color scheme. For a long time everyone from the great houses to mercenary units used them in various schemes from unit colors to camoflage.
I thought I had read somewhere that the Spartan was designed in Russia, and the others were from the USA. That would account for the marked differences in their appearances. I like the Spartan, heck I love pretty much all things Macross (do NOT say Robotech! Shush. Shush I say, SHUSH! [:P]).
I bought the Imai kit back in the day before Carl Macek and Harmony Gold made their indellible mark on anime culture here in the USA. At that time, I think the kits were excess inventory that were being dumped on the US market, so they were cheap - I think I paid something like $7.50. When the shows began airing here, prices shot up and they kits became scarce.
The Spartan is unique among the Destroids, but it shares the missile packs and the gun cluster with the Tomahawk.
I recently got the Bandai repop of the Spartan, as I was uncertain if Wave would bother making a new tool kit. So I will definitely be keen on seeing what you do with your kit. Will you be retofitting polycaps into the joints? I figure if the kit gets proper modern jointing, it should be able to make some nice action poses.
Here’s a 1.75" tall scratchbuilt Spartan, with some friends that I built back in the late 1980s.
I noticed there are now Battletech gaming minis the same size, but with better detail and waterslide decals available. But back in the day there were only crummy looking white metal caricatures to play with.
That green is rather off putting. In my opinion it was an unfortunate choice and undermined the mecha. It didn’t go along with any of the other color schemes of it’s fellow Destroids.
Hmm, I hadn’t considered anthracite. I’d briefly toyed with the idea of bitumen but that can be sticky to get right.
I like how they did a three color palette. It works for the figure. Keeping the scarlet or similar shade in the chest center. If I go with anthracite for the main body, perhaps a lighter shade for the shoulders and hands…
That could make for a very aggressive looking figure. I’ll have to toy with this more. Thanks for the suggestion TB!
Interesting coincidence mentioning Battletech. I was just reminded yesterday that Battletech started by using images for it’s mecha from Macross, Dugram, and similar. I think the Battletech equivalent of this unit was called the Archer. Unfortuantely due to legal battles over the licensing (which seem to still be cropping up periodically). You have any good Battletech references you’d recommend perusing for additional inspiration?
That could explain the difference. Especially since the Tomahawk, Defender, and Phalanx all use the same legs.
LOL, it’s a love shared by many. I think if you order my stash by volume it would be Star Wars, Macross, Maschinen Krieger (I blame you all in the Finescale forums for getting me hooked on it [:P]), and everything else.
It was many years before I learned that it wasn’t “Robotech”, the its true name was Macross. It seems others were a little slow at it too.
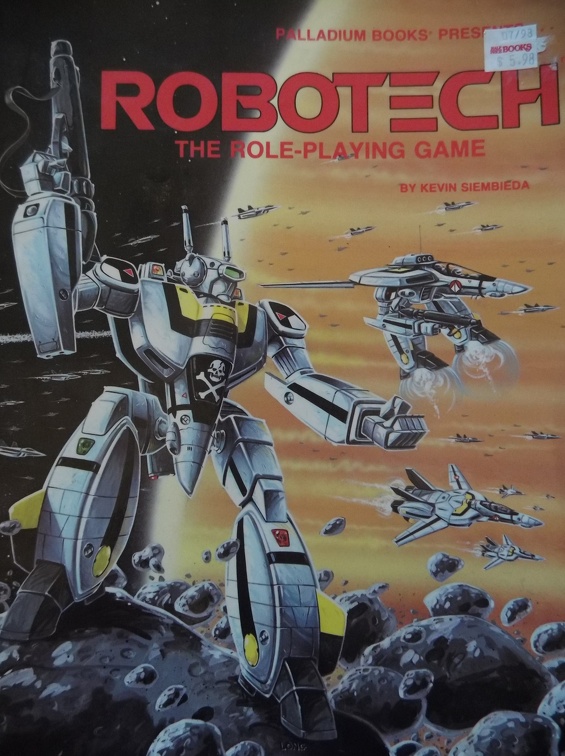
A little something from my personal archives. Used to spend hours poring over that book.
Oh man. You guys are going to make me work on this one. I’m still a basic builder in mindset. Stuff like that rarely crosses my mind. However, the Phalanx suffers greatly because it’s all friction fit. There is benefit to be had from trying this mod. It would also explain why I saved all those extra polycaps from my other models. LOL
I’ve already assembled two of the rotating joints. Time to step back and re-evaluate.
RealG, You’re minis are fantastic. The Glaug is simply amazing. Maybe you can get them laser scanned and then 3-D printed. I’d be willing to buy a set.
The shoulder covers can’t be posed and they didn’t include anything to represent the missiles.
I very briefly thought about the possibility of scratch building something but decided it was more than I wanted to take on at this time. I’ll just stick with how they shipped and go from there.
Ha ha, not my fault! Blame the Baron for the MaK, he was here before me! Hee hee.
Yes, YES… You must work harder and harder, and get deeper and deeper. It always happens, regardless of what you build!
But seriously, if you do consider rejointing the model, we can offer help. The waist rotating joint could just be modded to be like a tank turret, i.e. twist lock.
And a really good way to joint the kit is to use the “ato-hame” (insert after) technique, where you can assemble all the pieces after painting and finishing are completed. It makes cleaning up the seams easy and no-hassle.
If you want high quality Macross minis, they are commercially available, made of hard plastic, and come with decals. A much better option compared to my simplistic ones!
The Phalanx, Spartan, and all the other Destroids, battle and commander pods were created by the Japanese in the early 80s if not a little before that. I got over there and some of their shows were already of T.V. and the kits were in the stores by 1980, just after I got there.
Some of the shows included Crusher Joe, Votoms, Macross, and Dougram. An example would be the Locust from Battletech. It came from the Crusher Joe series and I think it was a unmanned hunter that was not the two stories high machine as called for in Battletech or Mechwarrior.
Dougram reminded me a bit like the war going on between Russia and Afganastan.
The source books for the Battletech games would cover the great houses of the Inner Sphere. They shouild have pictures of the various units of each house. There were also books on the mercenary forces, the machines that fought in the arenas, and the Clans. They left during the breakup of the inner sphere and just disappeared, for a coiuple hundred years. At first they had the same machines as everybody else, but there were put into training units or just storage while better things started to show up and their own civilization developed.
WHen they reappeared, in the I.S. things got a bit desperate as everyone tried to figure out who these invaders were with the more powerful equipment.
Had family from out of state visiting this week. A good time was had by all but it meant the bench was ignored.
Was able to take a little time on the bench today. Spent most of it cleaning up the seams on the arms. Was pleasantly surprised to see they cleaned up rather well. Hopefully they’ll continue to look that good after the first coat of primer is applied.
LOL. There’s plenty of blame to go around. You all have contributed greatly to my growing infatuation with it. [:)]
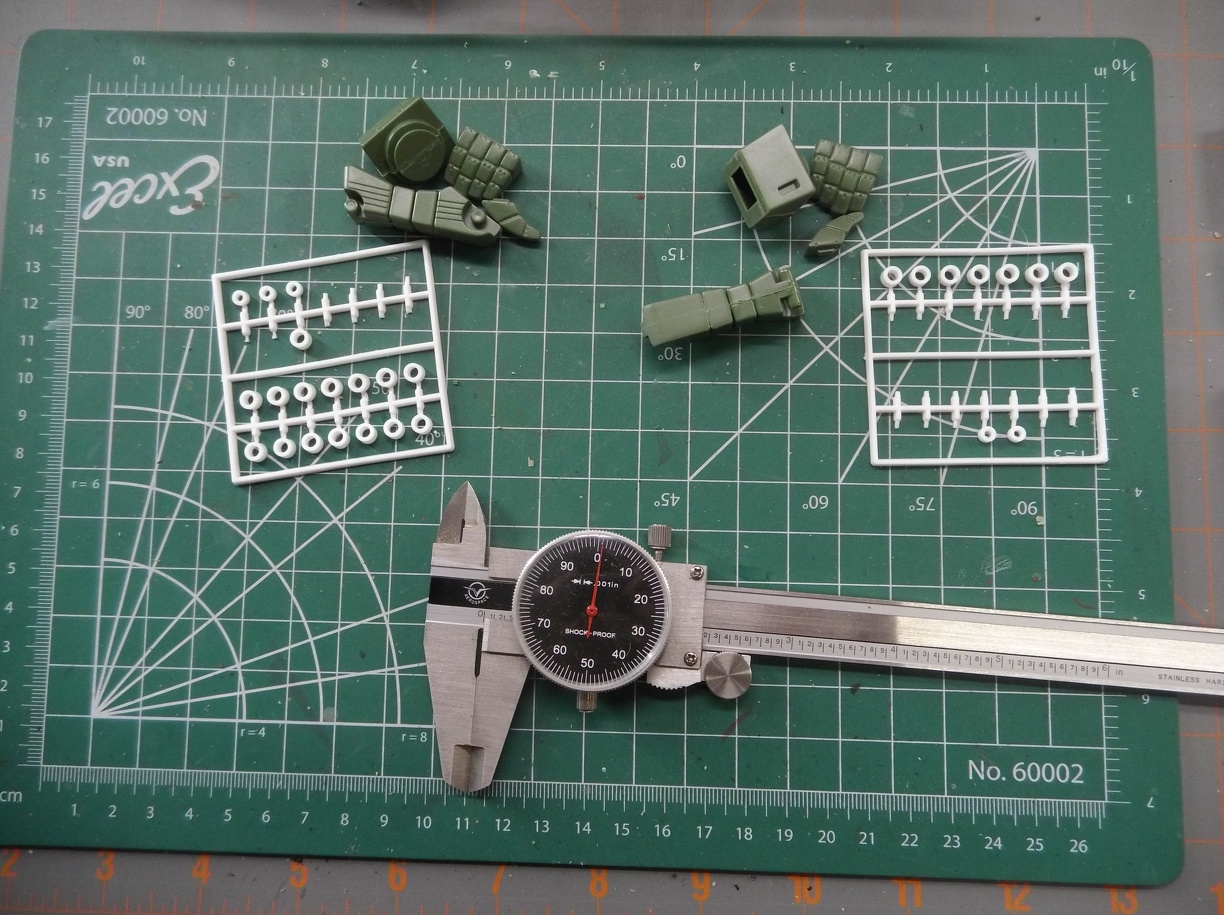
I’ll hold you to it. Before cleaning up the seams I dug out all the polycaps I’d saved. Not as many as I’d thought but they may be enough. I’ve started measuring the joints to get an idea of how much modding it would take.
Never thought I’d be using my calipers on a build, but sure am glad I have them. Initial thoughts for minimal modification are to try thining the walls and pins just enough to fit the cap. If there isn’t enough material to do that, it may require replacing the pins and sockets. Thinking of using Evergreen tube styrene of appropriate diameter but worried about the strength of any glue joint.
Ikar01, I was introduced to Dougram quite accidentally. I ran across this model of the Dougram and it caught my fancy as something that would be fun to paint with exteeme weathering.
It now sits patiently in my stash waiting for it’s turn on the bench. At some point I’d like to pick up a few of the other models from that show.
I remembe that picture from the series. It takes place in a desert and there is a woman with a cloak blowing in the wind as she stands no far away just looking at it. It’s almost like she was remember ing the last time she watched it in battle and was remembering the pilot. I don’t remember what happened to him.
I’ve only seen snippets of the series. Watching the series is on my bucket list. I’m looking forward to learning more about the why and where that scene is based upon.
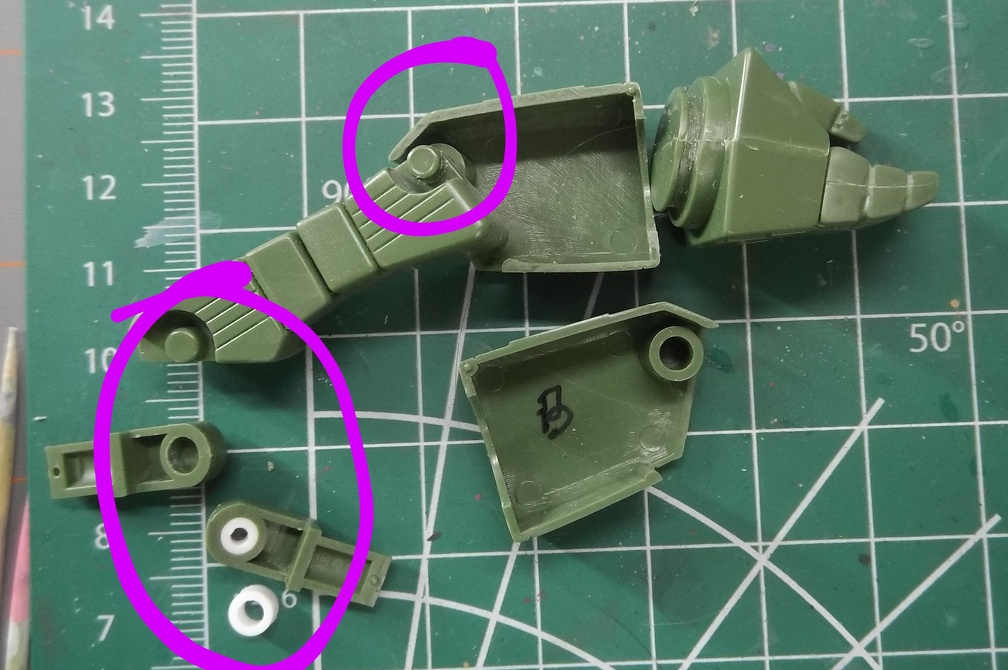
The halves of the forearms didn’t align properly. Used a hotair rework tp soften the plastic some to better align the parts. Still not perfect but it should be easier to adjust during glueing.
After reviewing the joints I’ve decided not to do the polycap retrofit.
I don’t have a sufficient number of polycaps to replace all the remaining joints. Nor do I have the tools or materials for replacing the pins.
I will however try out Real G’s suggestion of modifying the rotating wrists and waist to hookup like a tank turret. It will help with the painting and assembly as well as give me a new skill to work on.
Next up will be figuring out how to mark the hand to determine what of the plastic will be removed to create locking tabs and then mirroring that onto the wrist of the forearm.
I don’t know if it was at the beginning or the end of the series since I missed both. It could fit either way, as a person remembering what had happened or someone finding it sometime after the war and wondering what she found. Who knows?
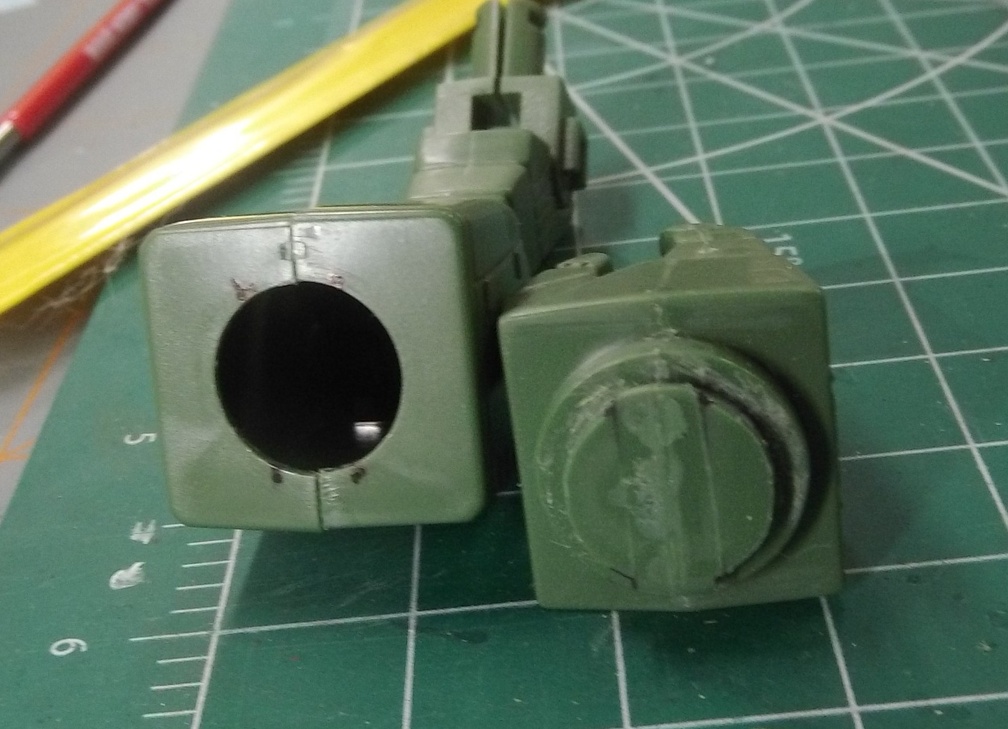
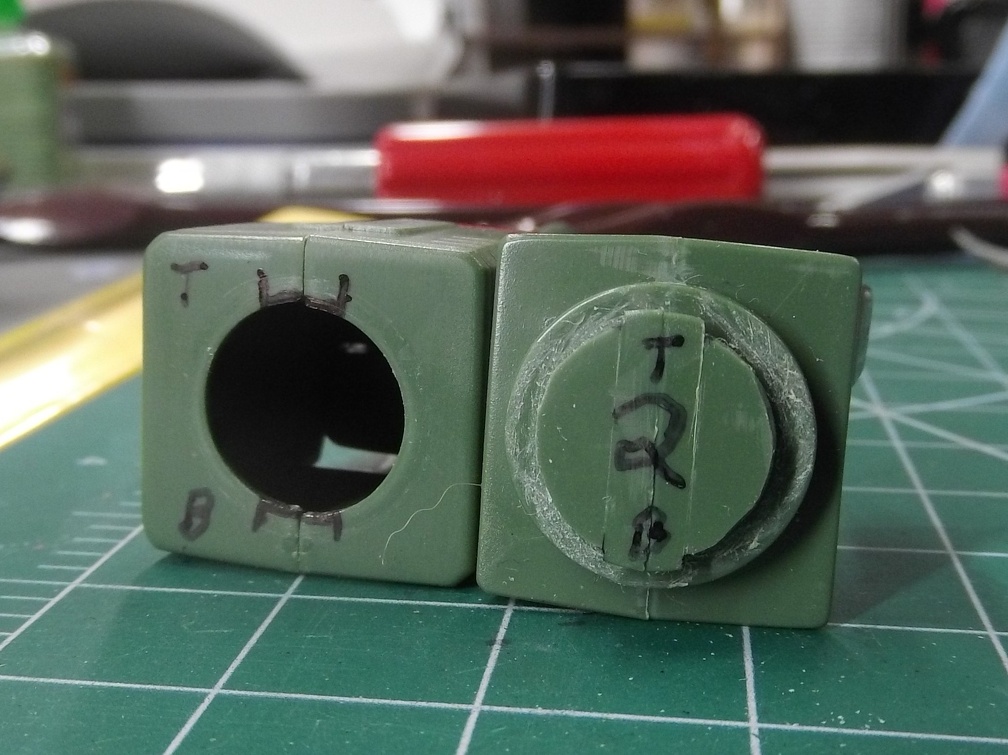
Got some bench time today and worked on the wrist flanges. I spent the last couple of weeks hemming and hawing about the best way to trim them. It finally dawned on me that the seams were exactly perpendicular to the at rest pose of the hands and they can be used as the reference point for where to trim.
I scored a couple of lines to mark the flanges. Not exactly parallel to the seam but good enough for what was needed.
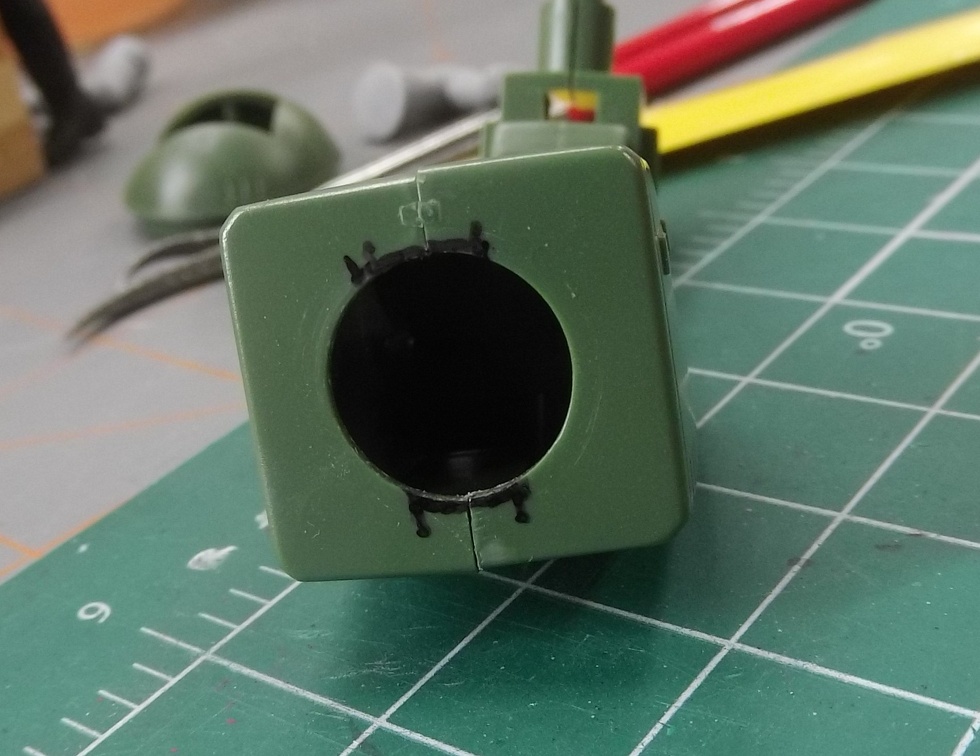
Discovered that a chisel blade made trimming the flange easy. Nice long pieces of it peeled right off. You can see the shaped tabs at this point.
Used a fine tip sharpie to mark off the forearm where I was going to have to shave off material to for the tabs to slip into.
The sharpies point was about the exact depth I need so used that to mark how much material to remove. Once all the black is gone between the two points should have the needed depth.
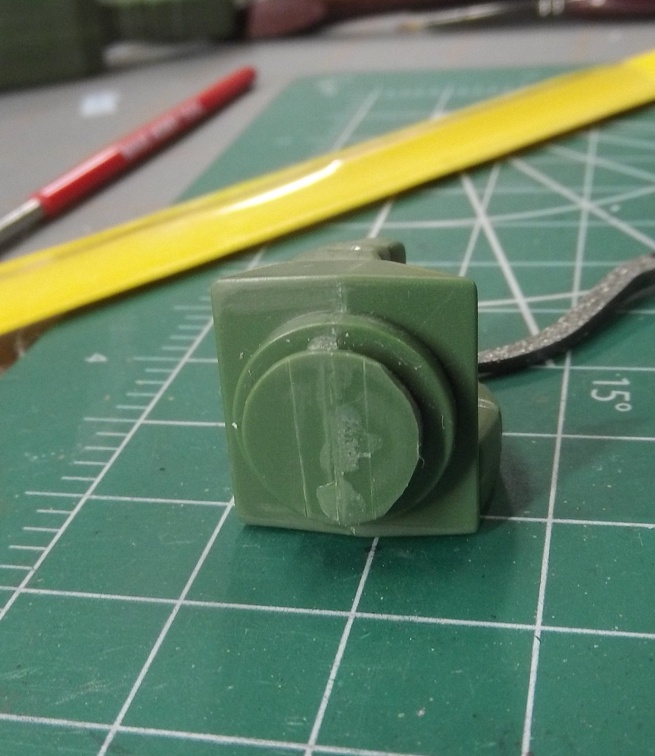
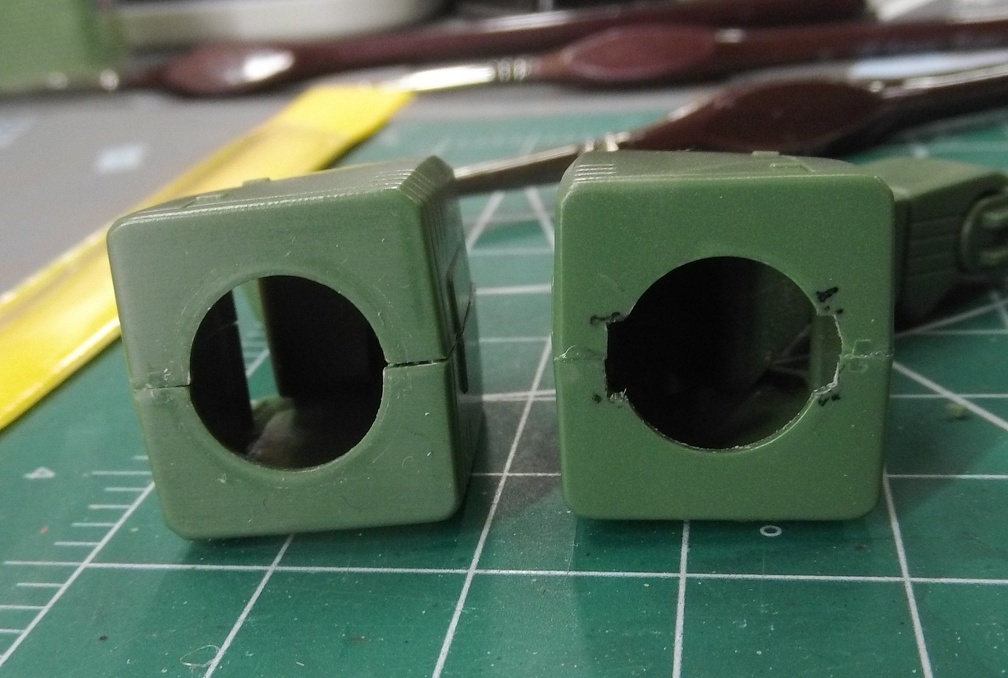
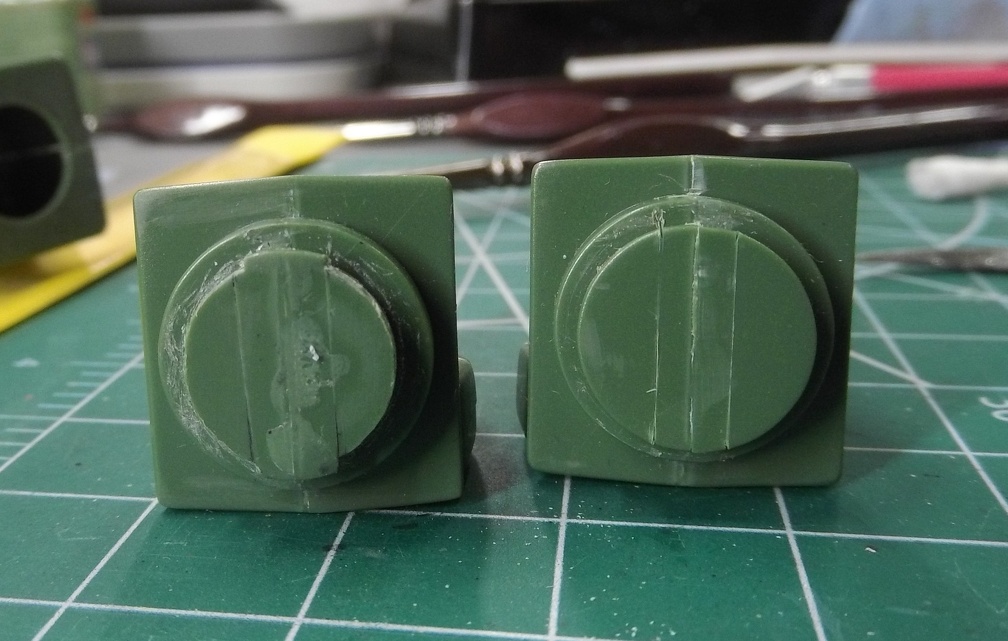
Comparison between the unmodified and modified forearm.
Modified hand is on the left the as yet to be modified hand on the right.
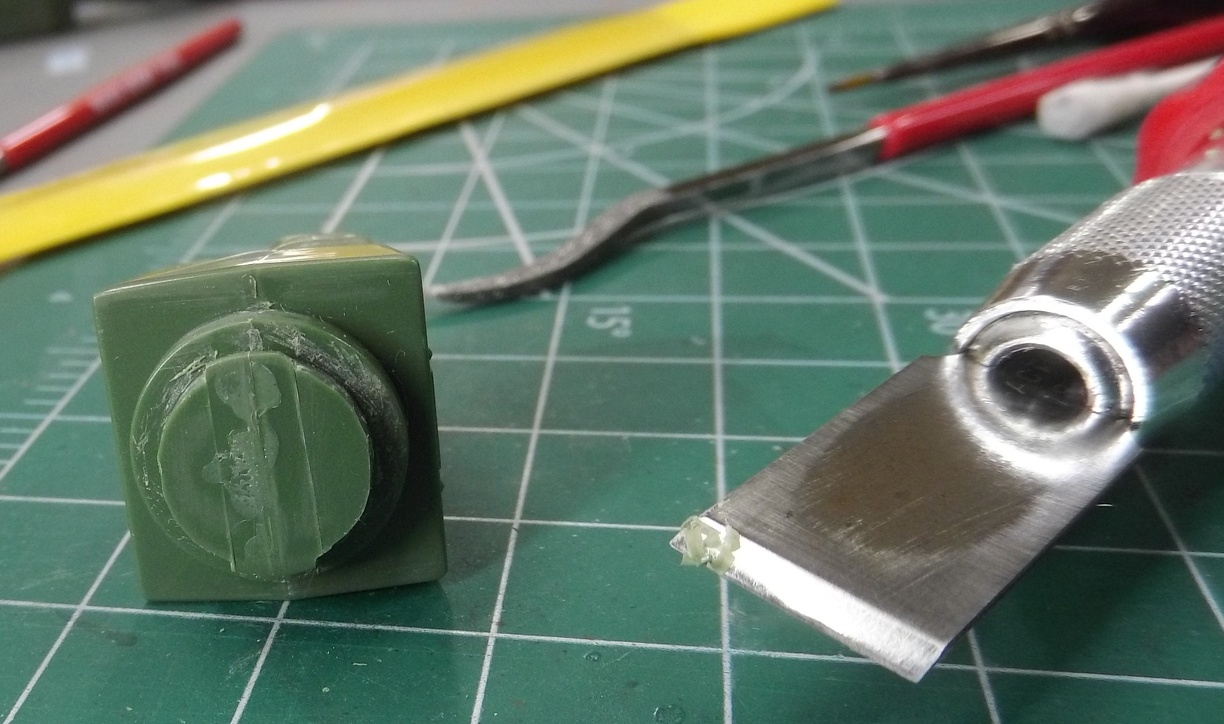
After trimming the flange on the second hand realized I didn’t have a way to distinguish between the two so numbered it. Also labeled Top and Bottom flanges to make it easier to test fit.
The marking and lessons learned made the second one go a lot faster. Didn’t have to do any additional itting either. It came together without a hitch.
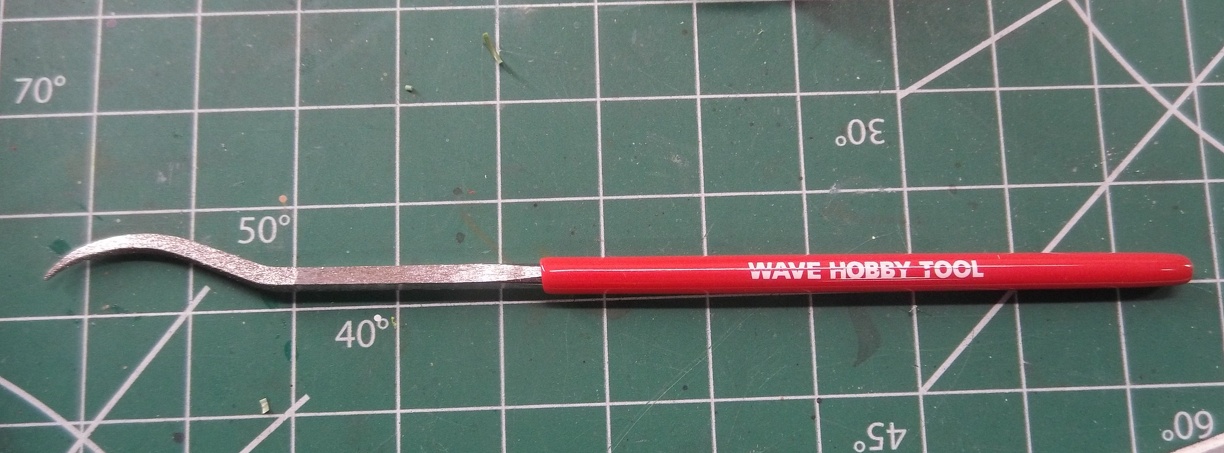
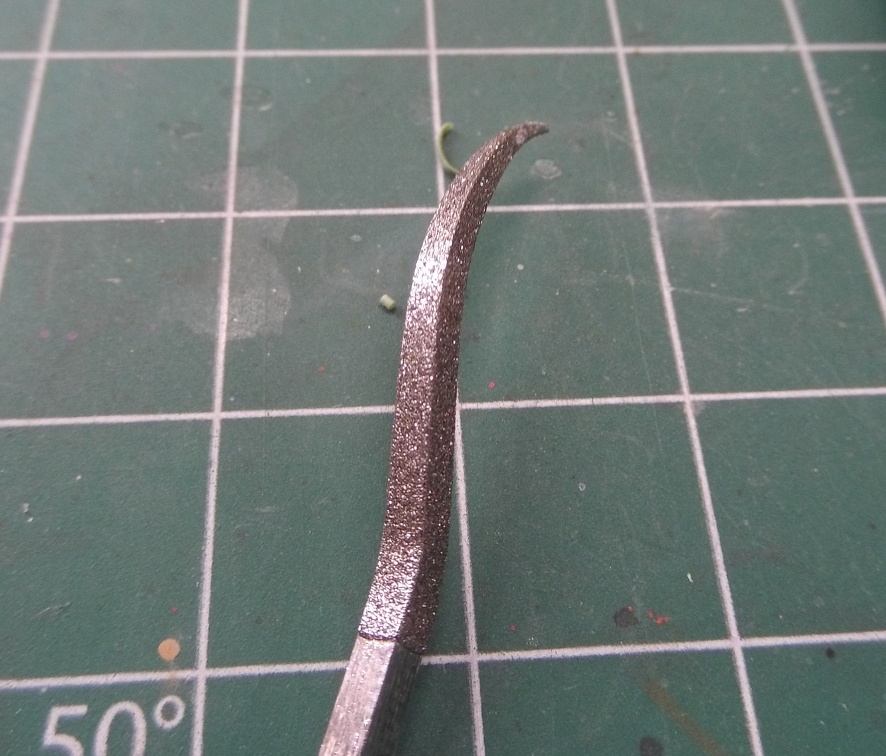
To remove the material for the flanges I used this file. It’s my new favorite tool.
It’s about 150 grit and very aggressive. It made short work of cutting out the slots. It’s top and bottom are flat which helped tremendously and it never clogged. At a few bucks it ws a worthwhile investment.