Someone posted the complete series on Dougram youtube and it’s been a fun watch. I’m about 6 episdoes in. I think there is a total of 74. They did have that scene the model was based on in the first episode and it looked like the person was remembering the past. Looking forward to seeing how the series progresses.
Neat! Nice going there!
PhoenixG,
Don’t forget the wargamer’s hack of using rare earth magnets. The huge hands of the Spartan are a good example of where magnets could simplify things, allowing the part to be painted then just popped on.
I think the poster art for Dougram was the aftermath at the story’s end. A friend gave me a digital copy of the show, but I have yet to binge watch it until the end.
With the hands setup to be able to be attached after the fact moving on to additional assembly.
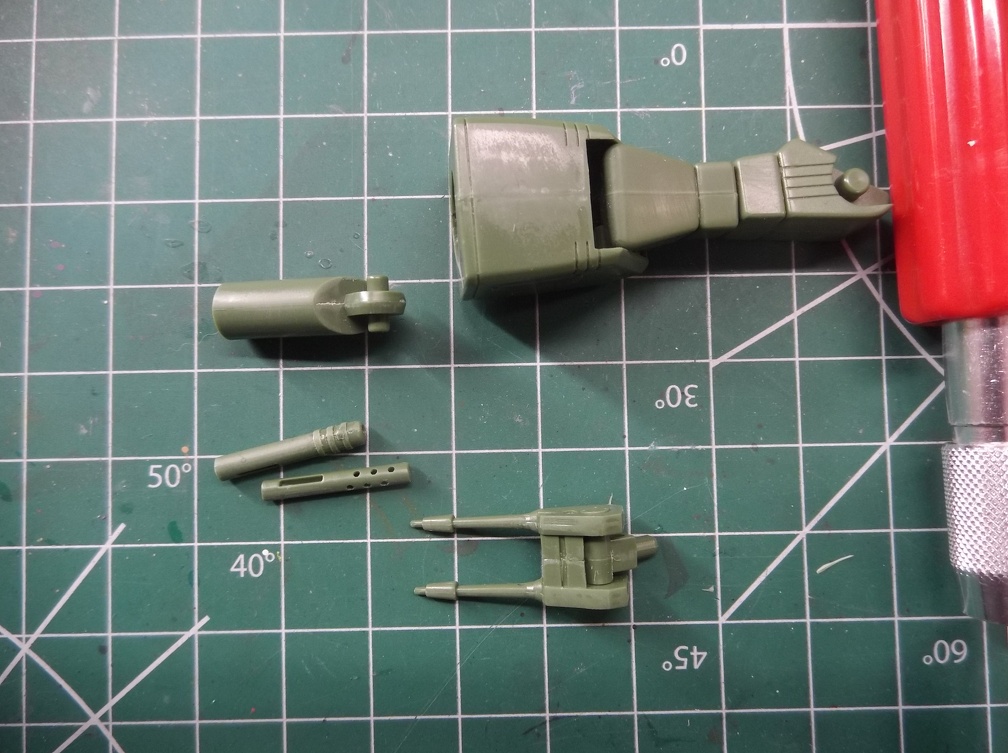
Started putting together the various barrels for the chest cannons. They went together suprisingly well. Only need some touch up filler here and there to smooth out a couple of places where the glue didn’t completely fill the gaps.
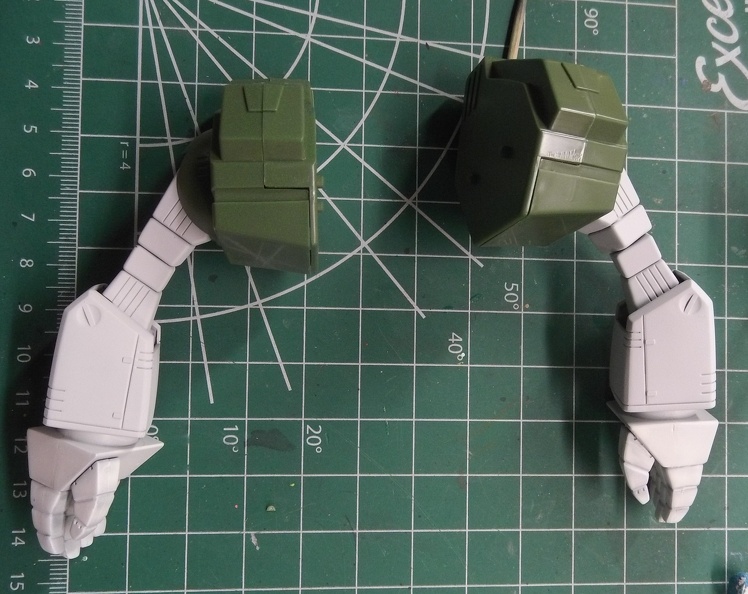
While I was doing that I finished priming the first arm and hands.
It was clean enough for my satisfaction that I’m not worried about doing any touch up fills.
Also did some preshading around the joints of the fingers. Haven’t tried this before. Steep learning curve on how to use an airbrush to apply that. Kinda sloppy but I think it will work well enough. I picked up a cheap dual action airbrush w/an adjustable stop so it be treated like a single action. Was fiddling with it to get the right amount paint out. Can you gues which hand was done after getting the hang of it? Hint: the lines are more defined. ![]()
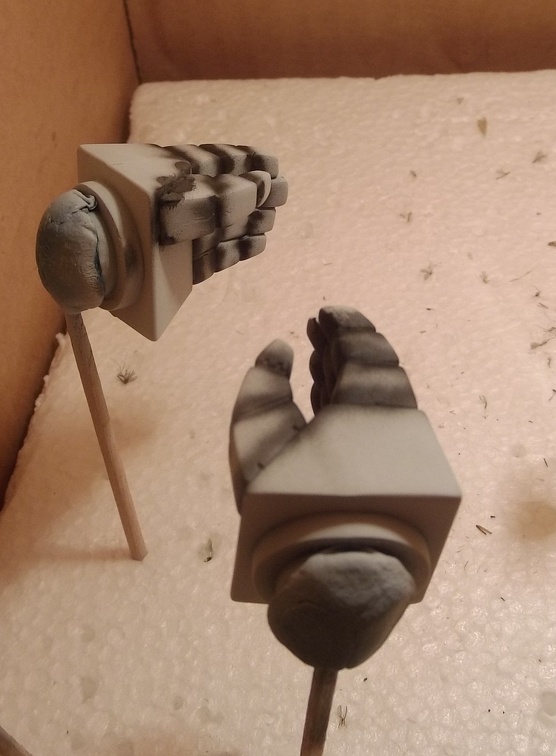
The action on the airbrush isn’t as smooth as on the Iwata and the seal on the valve isn’t as good. But, it lays down paint just fine and it works for what I got it for.
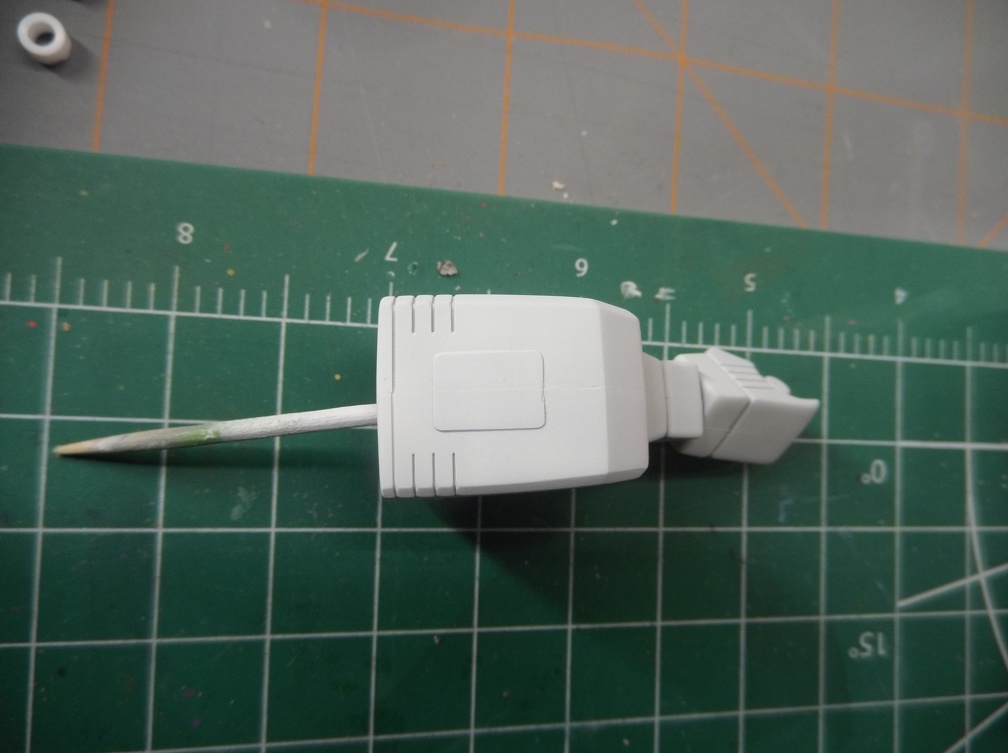
I’ve decided to do a paint scheme similar to the Missile Phalanx. The body will be a sandy color while the hands and shoulder missile covers will be an offwhite. The center Chest cover will be scarlett. All of which is subject to change. ![]()
Can’t believe I missed your post Real G. That rare earth magnet trick would have been awesome to think of three weeks ago and several hours of labor earlier. [:D] No worries though. I actually had fun making the slot/tab arrangment.
It’s good to try something very different and learn from it. It does make my anxiety levels go through the roof whenever I stray from the directions. There’s always that voice in the back of my head that tells me all of the ways I’ll irrevocably screw up the model. But each time I work through a mod like this, the voice loses some of it’s power and it gets easier to try the next thing. It’s why one of my personal rules is to attempt at least one new technique per model. Doesn’t matter if it’s painting or building. You guys egging me on doesn’t hurt either and is much appreciated. [:)].
They also used it in the first episode. Sounds like they worked to have the story come full circle. I think it was Ikar01 who first mentioned it, but it really does have that 80’s Cold War era vibe to it. Rather than binge watchig it, I spin up an episode periodically while working at the bench.
Initial test fit of the shoulders revealed massive seam lines. All of the seams are bit proud. Painted the hands the off white. Surprised at how little of the preshading shows in the photo.
Assembled the shoulders. The seams are really bad. This is after a fair amount of sanding.
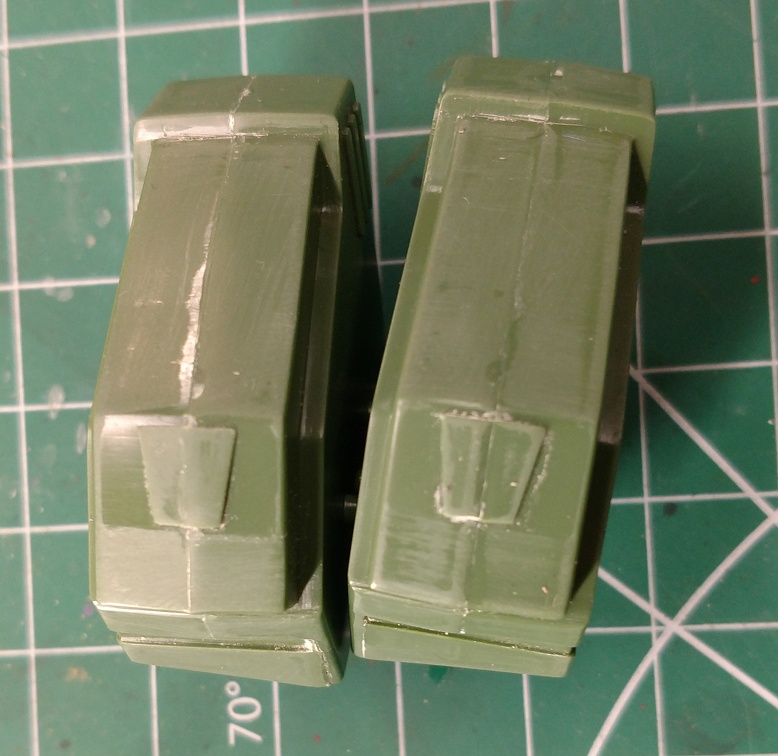
Going to need lots of filling to smooth them out. Apparently when gluing and clampling this edge pushed it out. Thankfully it is an inside edge on the bottom. Makes it a good candidate for practicing puttying. Even if I mess it up, it will be hard to see.
Completed and painted the chest cannons and top mounted gun. Covered them in gunmetal grey. Some black wash should ease the shine and make the details pop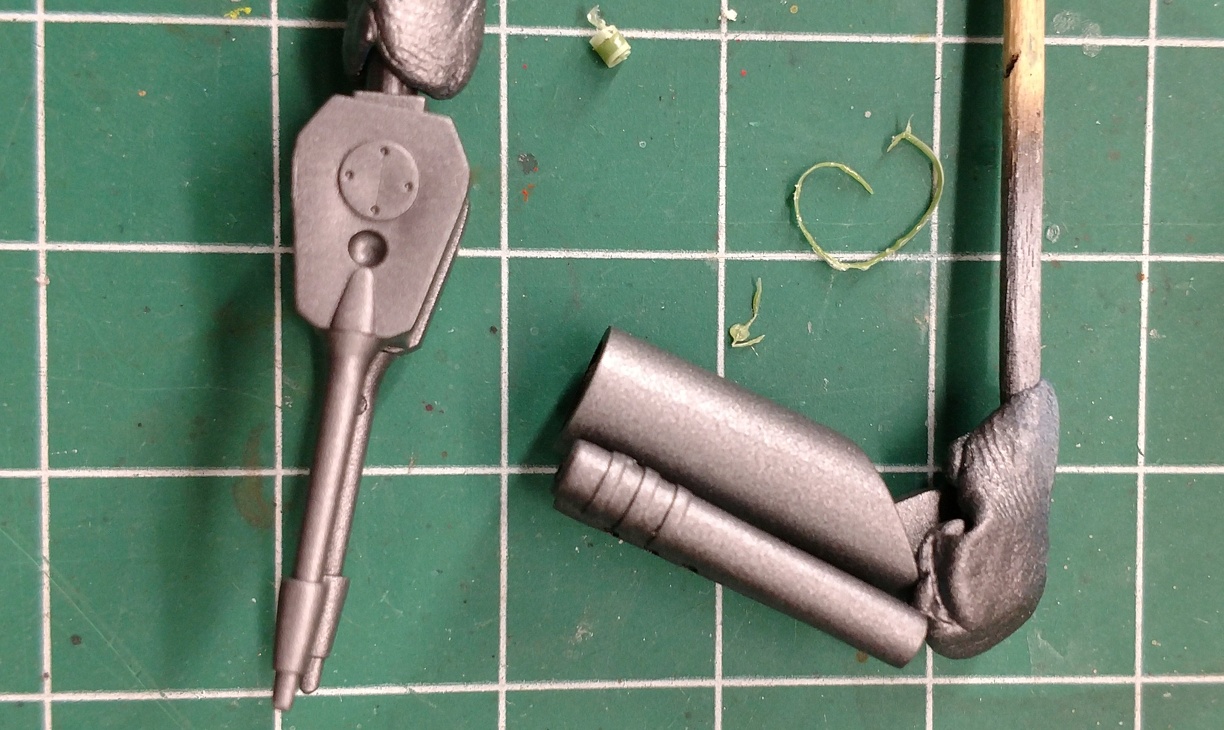
PhoenixG,
I apologize for not being helpful in a timely manner.
For the missile bays, how handy are you with sheet plastic? If you cut away the bay doors, the seams on the torso parts will be easier to sand flat.
Yes, you would need to make the doors, box in the missile bays and source missiles, plus make a hinge to allow the doors to open. It’s a lot of work, but the box art with the “full-open, everything hanging out” look is so cool.
-OR-
If you just made the doors, they would look better than the kit part, and you could leave them loose till after painting, which would eliminate masking.
Oh man, I wish Wave or Hasegawa would give us a new-tool kit of the Spartan with “full boogie”!
Real G, I owe you the apology. My comment about the timing is a failed attempt at humor. I should have prefaced it with a “lol” or something. I’m very sorry that I came across as critical.
Thank you so much for continuing to offer your assistance and insight.
My sheet plastic skills are effectively zero. Doesn’t mean I’m not willing to try. just that I’m not so confident that my end result will be better. I’ve been staring at the shoulder for who knows how long thinking about options for building the internal box, missiles, and cover.
The box would be very shallow due to how the arms attach. There’s less than .2" of clearance for it.
Once I subtract out the thickness of the plastic it’ll probably be closer to .14" of space. The overall depth of the covers is .17" Meaning the missiles would have to be just under an OAL of .25" to fit and maintain scale with the model. The covers at their widest is about .58" w/a gentle taper down to .55". Depending upon the thickness of the styrene used the interal width could be as little as .5". With space between the missiles they probably should have an outside diameter no larger than .2". Not impossible, but not much wiggle room either.
Maybe doing a standalone mockup of the box, cover, and missiles would be a good test of my commitment. Would need to make a trip to the LHS to get some styrene…
Hey PG, it is good to see another build from you. And yet another cool looking figure. Looking good so far, and I will be following your build.
PhoenixG,
No sir, the apology is mine! I did not mean any snark in my response! I was just sad that I didn’t think of the magnet idea before you did the hands. But your way worked, so all is well!
I bought a Bandai rebox of the Spartan to do what you are doing now. I had the original Imai kit over 30 years ago, and I botched it up pretty badly. So I wanted a rematch to finally have a decent looking Spartan on the shelf.
Anyway, rock on, and keep the updates coming!
Real G,
We’ve just experenienced the perennial challenge of text based communications. The lack of contextual depth in the messaging.
I wish to assure your there there was no snark perceived in any of your messages. I was however, concerned that I had unintentionally offended. I am relieved to discover that was not the case.
Good luck on your Spartan build when you choose to take on that challenge! Your original experience is why I hesitate to mod. Well, that and because there is a scarcity of Macross models where I live which meant no second chances. Until the forums revealed HLJ to me, and much, much, more. Well my pocket book may not be saying thank you, but the modeler in me is doing the Snoopy happy dance. ![]()
Thank you for the continued encouragement!
Hi Bakster,
Good to hear from you and thanks!
I must say your LIS build has been a hoot to follow. Can’t wait to see the next episode in the saga of “what color is it really?”. [:D]
I decided to attempt to build a mockup of the missile box and spent a good chunk of time yesterday trying to draw out a diagram of it.
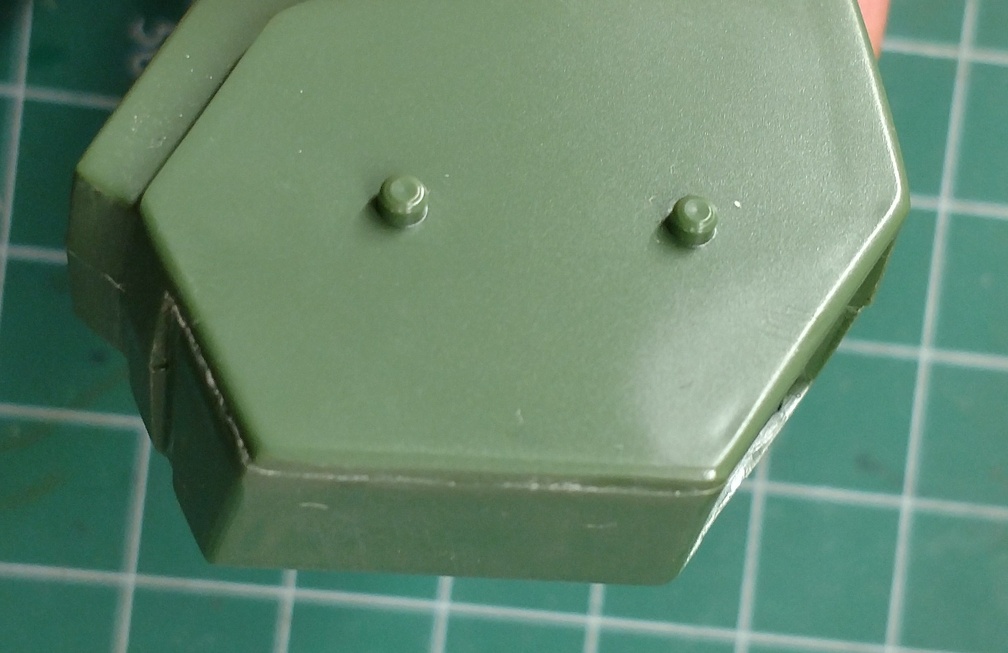
First attempt was to try tracing some of the outline. First issue was the little emblems molded on to the covers was interfering with getting level. Out comes the chisel and shaved one off. Pretty confident I can replace that with some scratch styrene or shave off the other one and call it good.

So now I should be able to trace it out. Laid it down on some sheet styrene I’d acquired and started the process. However, because everything is tapered, and rounded, and humped over it’s near impossible to get a clean trace. And using a ruler to clean it up only highlighted how inconsistent each trace was.
Put my thinking cap on at this point. Everything is tapered so it’s not like building a bunch of rectangles and calling it good. I was trying to trace it because Measuring angles is a bit extreme.
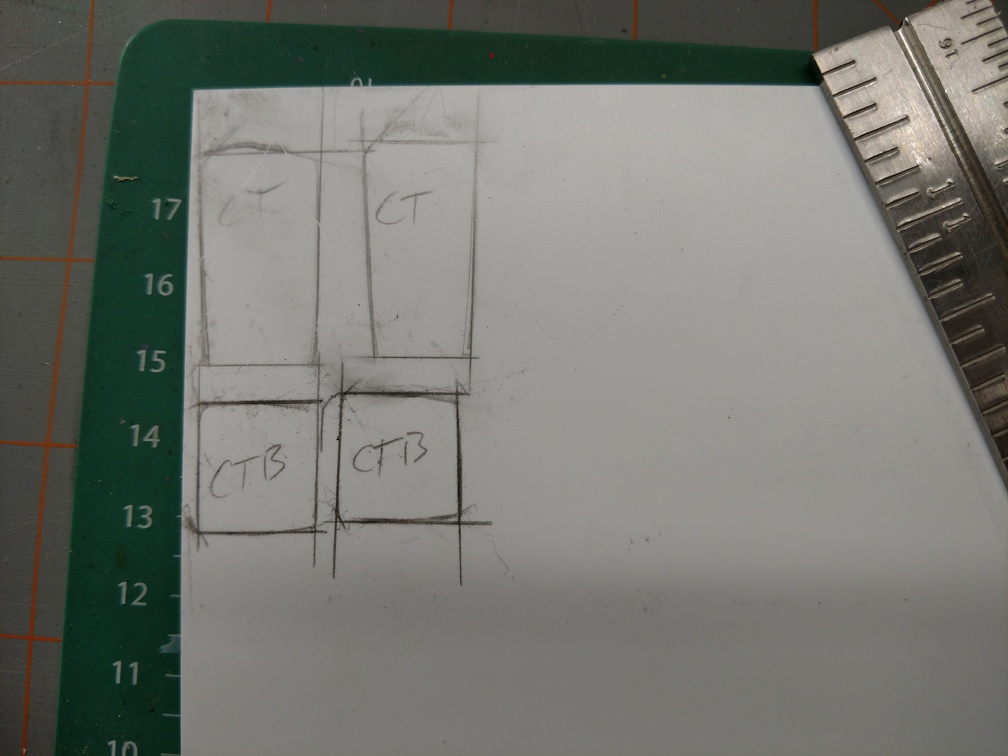
Introduced a minor epiphany. Realized can measure the widths and heights and connect the dots. Out came the calipers and a few choice words as I only have two hands and the job at times needed three. Needless to say I did get a template drawn out.

The arrows are to tell me which side of the pencil line to cut on. That Pencil lead is about the thickness of the taper so cutting on the wrong side of the line will either make it too narrow or too wide. However, I can now scan, print and apply them to the styrene as templates. Small step forward.
I still need to figure out how to build the side walls of the box. Again, no simple lines. Time for more caliper work? Nope, had another epiphany. Scan the part. Flatbed scanners automatically record inches etc of the image. It turned out a lot better than I expected.

Armed with a good high res scan,open it in a photo editor with a ruler and grid line. Voila, virtual calipers and no need for an extra hand. Each square represents 1/100 of an inch.
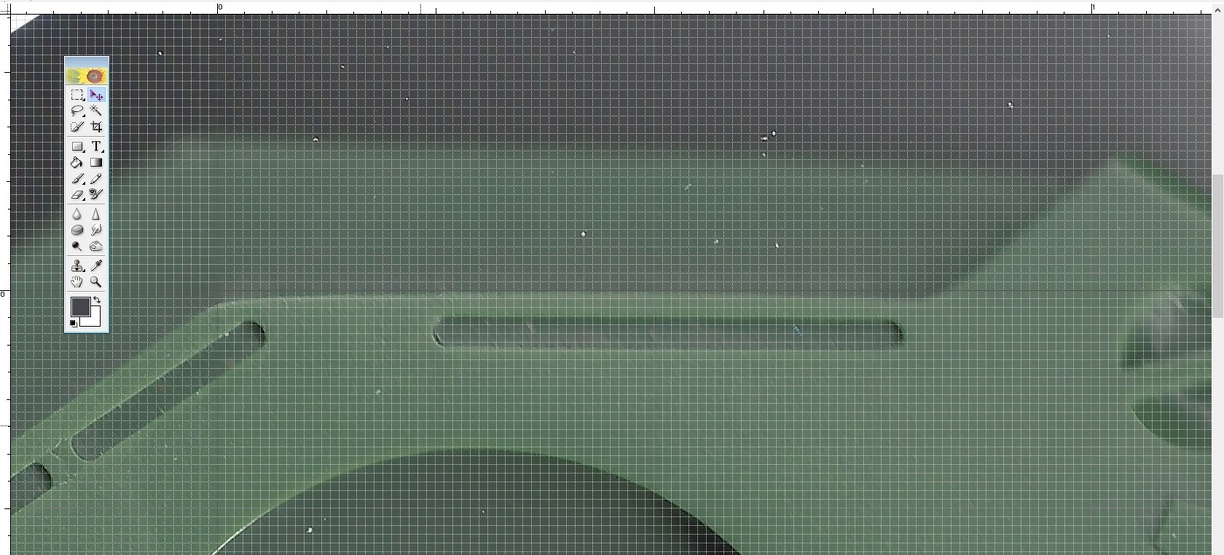
I can use this to outline the sidewalls onto the image and I just realized I can print the template from here without ever having to measure anything. Just saved myself from counting lots of little squares.
This process is still time consuming, but not as much and more accurate and consistent than if I tried to do this all freehand.
Laughing. Well, I think that animal is beat to death, but I am sure I can find something more to obsess over. Just give it time. I will find something. Lol.
PG. I wonder if you placed the piece on a scanner and set it 1:1. Even with the raised detail, just maybe it will image it. Just a thought.
Looking good, Compadre. Keep up the good work.
Nevermind, I see u did that.
I never considered interference of the arm sockets to the missile bays. Yeah, that makes the bays very shallow. Maybe split the missile bay floor into two pieces and place them around the arm sockets? The missiles would still need to align in a row, and not have a “up over the hill” run. Very challenging.
I was going to replace the shoulder armor with a more spherical one so the arm tracks up and down following the curve, but now that I know there is an interference problem with the missile bays, I’ll have to rethink this.
Great minds think alike. Though I may be giving myself more credit on that one. [:P]
It makes them extremely shallow. It was measuring at just over a tenth of an inch deep at the narrowest parts.
That is exactly what I was planning to do and have been building the template around it.
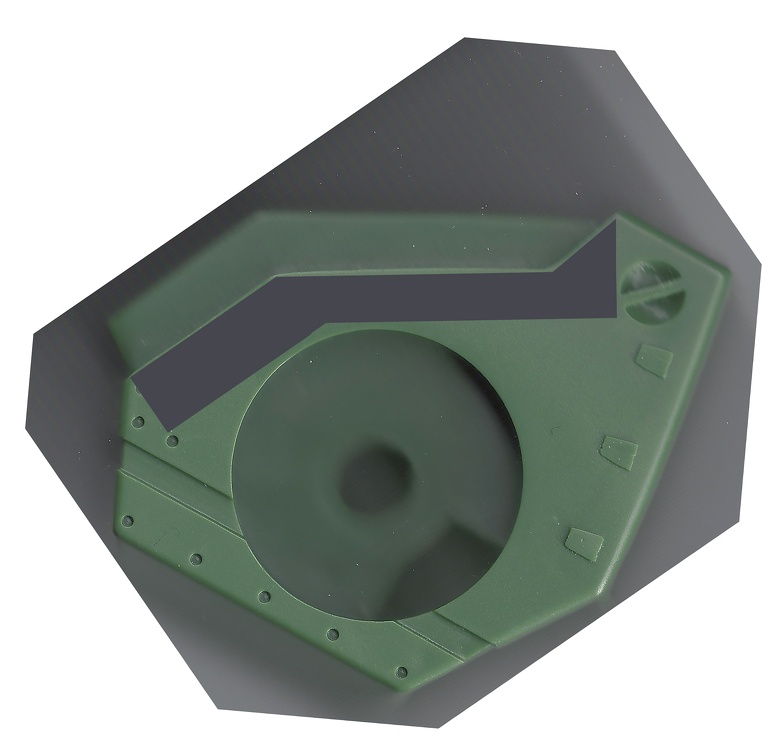
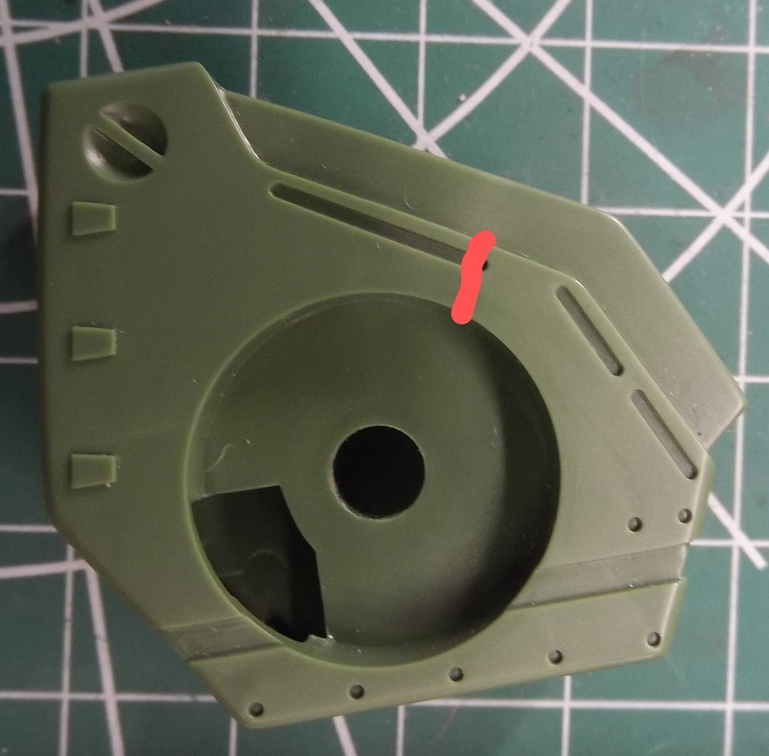
I spent spent some time yesterday outlining the template on to the piece. The template is the dark grey outline. It revealed there is a slight curve to that part. Getting an exact fit to that curve is more effort than it is worth. My plan is to make the sides slightly proud to account for it. It would do two things. Ensure plenty of surface for gluing and it will give a hairsbreadth more depth to the box. Anything sticking over the edge can be sanded down.
One final alternative to this is to of course cut out part of the recess for the shoulder to make more room for the box. However, that will be very challenging as I’d already glued the two sides of the should together before embarking upon this journey. Just another twist to this little experiment
I had drawn the cover template in pencil but after scanning it in for printing it became apparent it had several inconsistencies that would create poor fit. Ended up spending several hours drawing it out again on the computer.
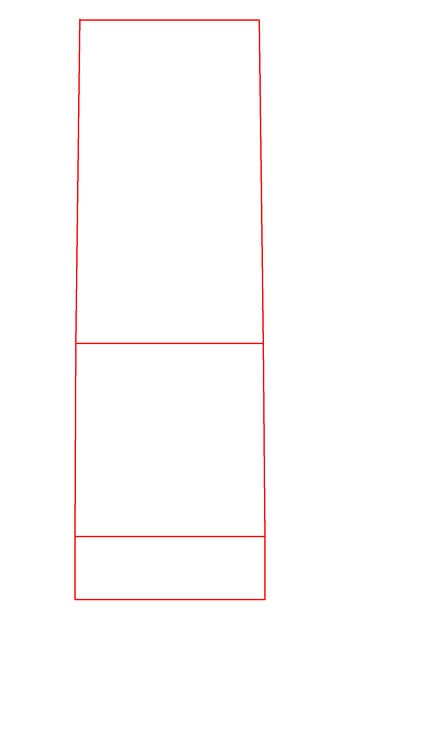
it is a very simple outline but the taper makes it a complex shape. A good portion of the time was spent learning the tools so that it could an accurate representation. Everything should be within a couple thousandths of an inch. Sadly it does require that level of accuracy. The taper is visible to the naked eye and it’s a difference of only a few hundredths of an inch.
Working on creating the templates for the sides of the missile cover and the other sides of the missile box.
I just had a frightening thought. I don’t think I accounted for the thickness of the plastic that will remain after cutting off the covers…
At least if I have to do it, it should go faster now that I know how to do it.
What a pain. [:P]