Got more time at the bench last night.
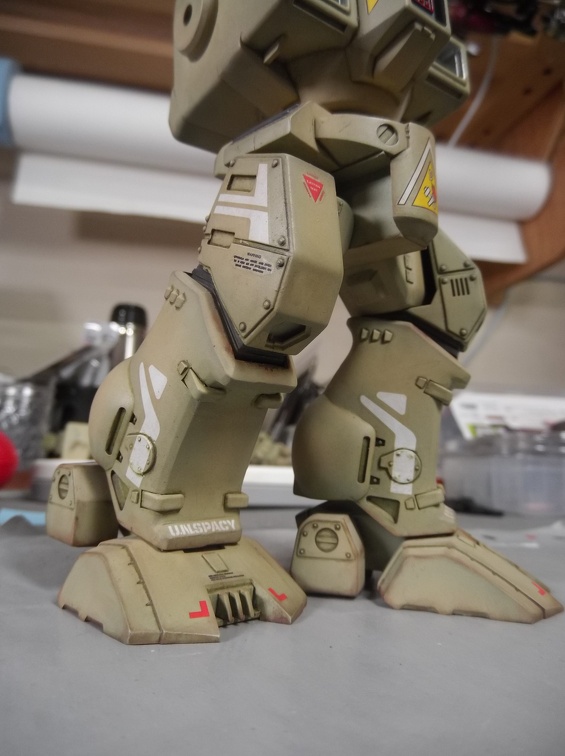
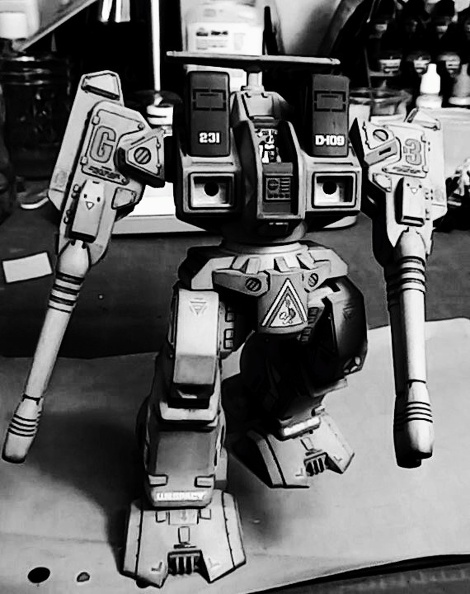
Slowly working my way up the Defender. Darkened the feet more. Added color to the edges around the shins.
I’m totally digging the how the lower legs are looking.
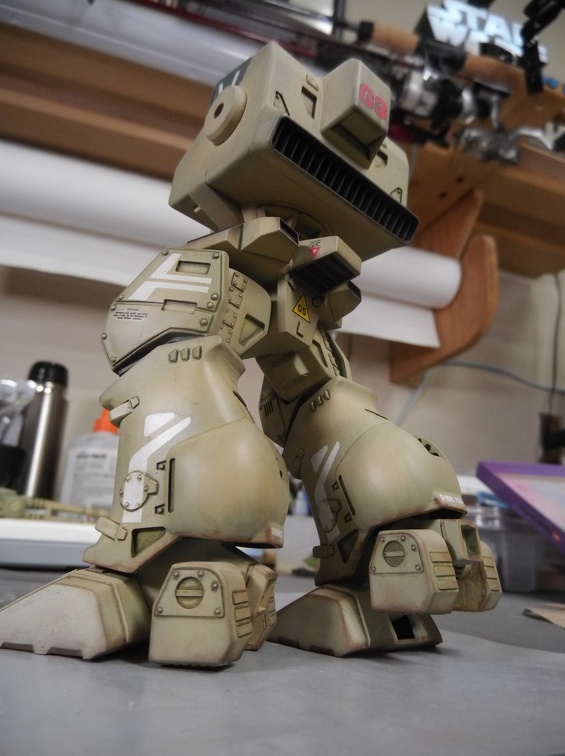
Added soot and grime around the various exhaust and intake vents.
Not satisfied with the soot staining on the back exhaust. I feel like it’s missing something or that it may be over exaggerated. I do get the feeling it’s heading in the right direction though.
Making slight changes to the colors used as I work my way up the Defender. It’s really tall so dirt and grime isn’t going to accumulate the same from bottom to top.
I stopped at this point because it was starting to blur together. Good sign to step back and come back later with a fresh set of eyes.
It’s ironic really. All that time spent trying to get a good paint job just so it can be deliberately messed up.
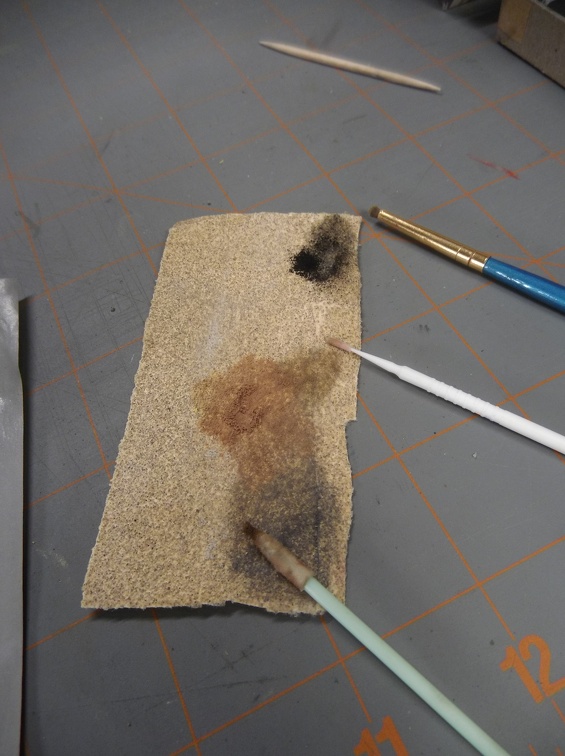
This weathering was done with classic pastels. These are the tools I was using.
Nothing really fancy. I mixed the pastels right on the sand paper. It works well for me.
The rest is just a couple types of swab and an old cut down brush. 99% of the work was the cut down brush. The swabs were used mostly for cleanup.
When mixing up the pastels I use a fair amount of grey. It’s very handy for de-saturating colors. Sometimes they’re just too intense and adding a little grey is all that is needed. Works well with paints too.
I have to do that as well with walking away and coming back a few minutes later to give things a not only fresh, but unbiased look also. I’ve caught more than a few things in doing that. Continuing to look good here @PhoenixG .
It’s entertaining to see the various parts of this build and all of the weathering all come together to what it is now @PhoenixG . You’re frickin’ NAILIN’ this one buddy!!
Glad you’ve been enjoying the thread. Thanks!
I’m heading into the home stretch and chomping at the bit. Have to restrain myself or I’ll rush the finish. That’s when most at risk for those big “whoops!” moments.
Yessiree…that’s when I start messing up is when I get in a hurry at the end to get everything all buttoned up. I’ve got to where I’ll make a list of the last few items I need to do so I can keep everything in order and slow down a little bit. lol
That’s my goal! However, I’ve hit a bit of a mental block. I’m failing to visualize how the rest of the body should be shaded. I’m pulling a blank on the colors and where to apply the shading. I’m open to suggestions.
The shelf above my bench.
I have been ruminating upon an idea for display, but there are many other things I’d like to do before I think about tackling that. So it’s going to be the shelf for now.
Now there’s an excellent idea. I should try that with this one now. It may help me make it past the aforementioned mental block as well. And there are still several fiddly bits to take care of and It’s not unusual for me to forget about them. Thanks!
Could it be the pose-ability of the figure that’s making it difficult? If you highlight/shade for one pose (light direction) and then move the pose, it could get thrown off.
Aside form that, one trick you could try is to take some photos with your phone of the figure under a single bright light, at different angles. To make it even starker, I’ll convert the photos to black and white and boost the contrast (easy to do on an iPhone, at least). That can really help visualize how the curves and shapes look.
That’s a really good idea. Thanks! I also experience what you guys are talking about, only in the opposite way – I freeze up at the end of a build. Some of those last steps are so monumental and so easy to mess up!
That has actually been one of my stumbling blocks. Do I attempt a more neutral stance on the finished look and let regular lighting do the rest. Or do I simply pick a small range of poses and paint to that. I’m typically inclined to leave off the fake highlights. But this one has a lot of hard edges almost making it a must.
Brilliant! I love this idea!
What a simple and effective way to identify the values of the subject!
I don’t even need to take new photos. I photograph under various lighting conditions as a way to check my work. I’ve picked up on some pretty egregious color issues that way.
I had to test this right away.
I am already getting ideas of what to do. Next up is picking the color palette to execute with.
Awesome suggestion @Toimi_Tom!
I think this is exactly what I needed.
I discovered that real touch Gundam markers work very well for applying a transparent color to the lenses. A useful discovery since I don’t have any transparent paints. At the same time I learned that while the real touch Gundam markers do make for good transparency they don’t play so well with future polish. Upon application of the future, it started to wash away the paint.
Minor issue. I’ll just go over the backs with the marker once again before installation.
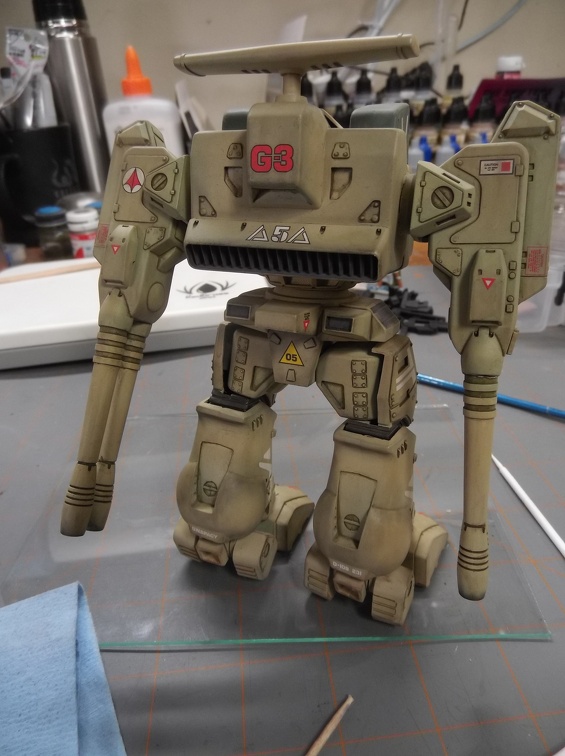
For the final weather of the arms. I decided to go with bi-direction dirt. Top down and bottom up. My reasoning is the back blast from the guns will drive dirt up the arm while normal maneuvers and parking will have the usual gravity assisted streaking.
It’s a fairly subtle weathering. It becomes more pronounced in lower light and fades in brighter lighting.
I think this is the most time I have ever spent applying pastels for weathering. At first it was a chore, but eventually it became fun.
Outstanding actions. Glue the pilot’s butt to the seat and affix the lenses. After that it’s setting it up for the glamour shots.
It’s a triumph! It looks great @PhoenixG. The weathering and shading is spot on and looks perfectly in scale.
I love the pilot sitting in there – adds a ton of personality. So cool that it’s totally poseable like that, too, with its squad mates. Looks like you got a good color match between the three.
Glad you like it! I’m fairly happy with the pilot seat. Maybe not the safest design for the pilot but it adds character.
The polycap retrofit made the posing possible. Otherwise it would have been a fixed pose because the original friction joints lose their hold really fast.
When I did the first one I noted the color mix. That made it a lot easier to achieve a degree of consistency. I now have bottles labeled with the specific color blend and order of application. When I need more I just follow the instructions on the bottle. This will be really handy later as I still have 4 kits to do.
Almost forgot to do the sum up portion of my build.
The quality of the model is about average for the era it came out in. Meaning there are fit issues. Most could be addressed easily and a few that required a lot more work than I was willing to do.
The actual polycap refit was easier than I expected. However, one thing I learned is that the heavier the model is, the thicker the pins needs to be. The pins I used seemed great at the time because they could use existing holes. What I didn’t account for was the lack of surface area of the smaller pins and the amount of weight they’d have to overcome. So while the joints maintained resistance there are some poses that just can’t be done because the weight is too great. Next time I’ll do the extra work and re-drill as necessary to accommodate larger pins.
My next lesson was with my first attempt at lighting. When lighting a model it’s important to think of how you might service the electronics. The switch placement was a cool thing but ultimately became the doom of the lighting. Next time I’ll try to place it somewhere I can replace it if needed or find a way to install it after all the painting and body work is done.
I’ve discovered that my work is more like painting a picture since my subjects don’t have real world references that can be used. Because of that I’ve started to research classic painting methods and techniques. I like to believe it helps.
Overall a fun build. I recently acquired the fourth and final Destroid in this particular group. It will eventually be joining the lineup, but that will be at a much later date.