As some will recall, I began a build of a 1/48th scale B-29 in honor of my old high school science teacher, who was the radar operator on one during WWII. He flew out of Tinian, in the 9th Bomber Group. He was in the 1st Squadron, and he flew on two birds: “God’s Will” (Number 2) and “Sweet Sue” (Number 5). I am going to build the Sweet Sue aircraft as he won a DFC while on a mission in that bird. Got shot up a bit and downed two Japanese fighters; had to divert to Iwo on that mission.
I am a recent returnee to modeling, having set it aside for many years while I worked on other life projects such as work and some additional schooling. Managed to get all that wrapped up and thought it would be best to get back to it while I am still able and to give myself a good hobby in the cold winter months! My last project was an OH58-D Kiowa I built in honor of my son, who was then a Scout pilot in the 10MD, finished in 2003 or so. I liked how that turned out and after a short visit with my old teacher this past summer I thought I had better get back to the workbench.
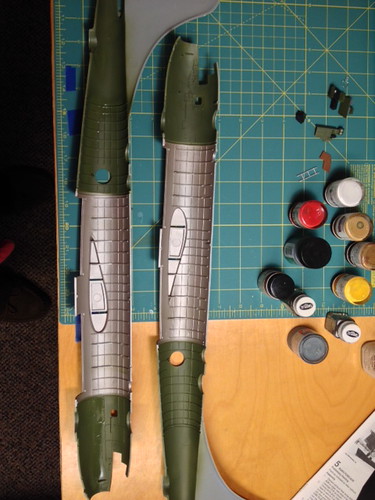
Pic below shows the fuselage halves in their plastic bag, to give a good sense for the size of this model. It is absolutely HUGE! My first qualms came when I opened the box for the first time and got a little weak-kneed at the sheer size. My second qualm came when I realized it is al all natural metal finish bird, which is going to be a challenge.
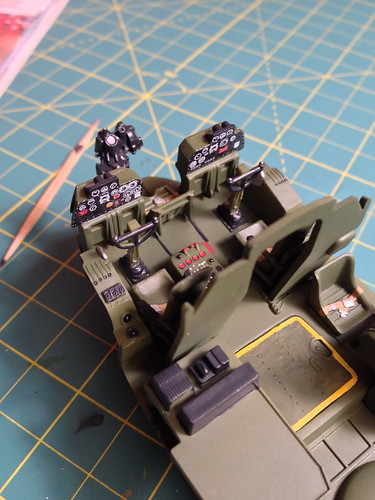
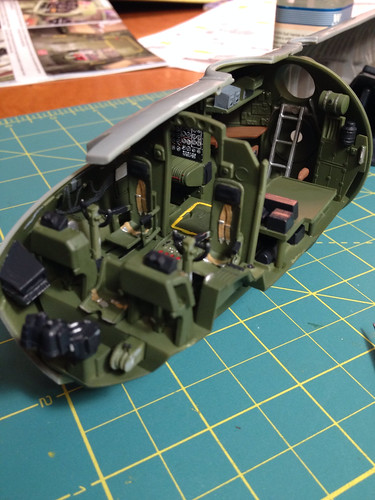
The shot above shows the cockpit about halfway finished. I have the seats in, the Norden bombsight and the control columns, but not the instrument panels or flight engineers station. I used a single drop of white glue on the bombsight to simulate glass in the optics; I was very pleased with how that turned out. As I said in the opening I have been away from modeling for awhile and I am trying to get the rust out!
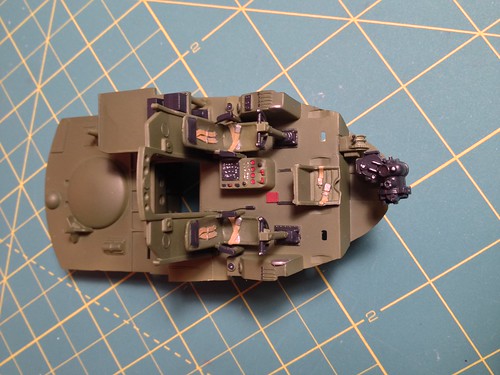
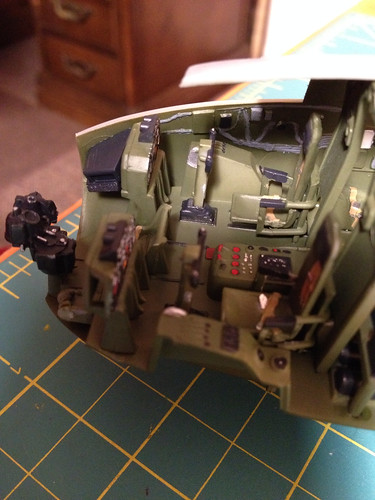
The above photo shows the cockpit mostly completed, with the instrument panels and flight engineer station in place. Revell uses a decal for the instrument panels and the engineers station, so I painted the background flat black, put on the decals and snugged them down tight with some Solvaset. Worked perfectly and they are very realistic in my view. I have an excellent reference book of a B-29 walkaround by Savage; it has great interior photos of a rebuilt B-29, which I used as a guide for the various colors in the cockpit.
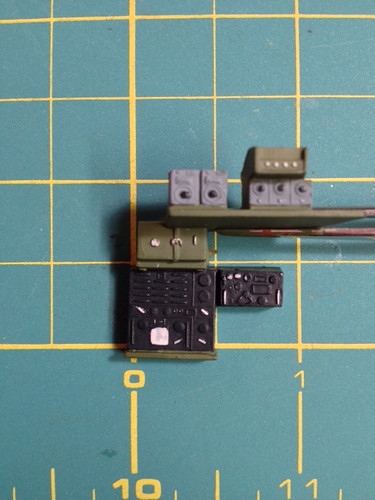
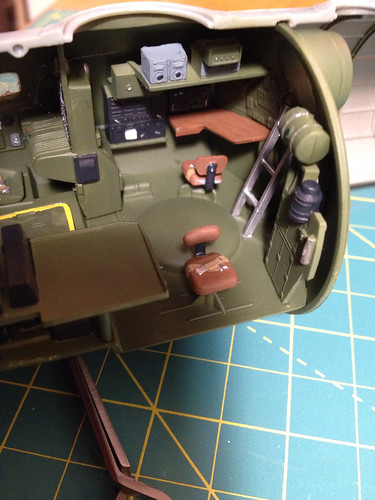
A view of the radio rack. It is a shame no one will ever see this once it is sealed up. I am using the opportunity tp refresh my skills, even it it won’t be visible at the end. Also, because my friend Dick Baker would not want it any other way!
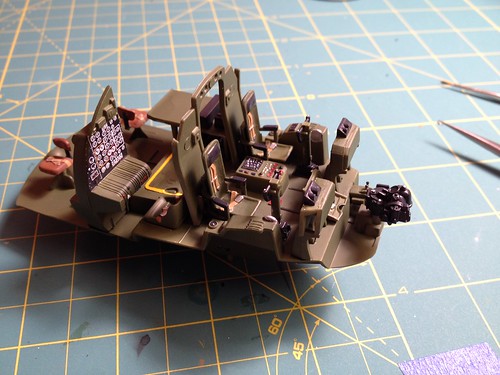
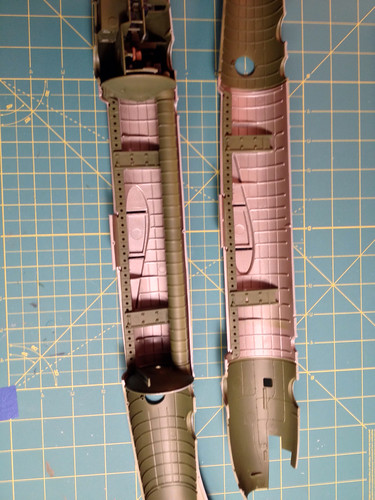
Her I have started on the fuselage interior. I did the bomb bay as a steel color (not Alclad, though) since it was not painted in the usual dark green. I have not yet picked out any of the details on the sides of the fuselage. Sort of pondering how to paint the long, thin wiring in a light gray. It is molded onto the side of the fuselage and might be hard to paint.
nicely done. I love detailing the interior but its always a shame putting the fuselage halves together knowing that work wont be easily visible! can’t wait to see more
Thanks. the interior color is called Dark Green, as per the instructions in the kit. I know it looks like olive drab in the photos, but it isn’t. I was surprised to see that as well, because in reality is loks more like the zinc chromate aircraft interior color than OD. This photo might be more accurate (different lighting, perhaps?)
In fact, I notice the differing shades from the piece on the left to the circular bulkhead on the right, but they were both sprayed with the same color moments before.
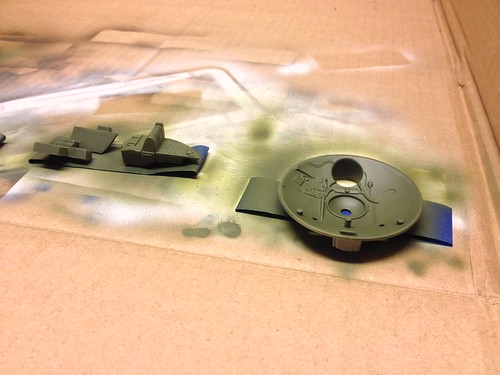
Thanks, Viejo. I think this is the easy part; I am most worried about the fuselage seam, and the natural metal finish. I think I will use Alclad over a coat of gloss black. Haven’t picked out a shade of Alclad yet, though. I don’t think I mentioned it yet, but this is a straight out of the box build. I am still thinking about how to display it for my friend. A wood base with an acrylic cover appeals to me. Another issue I am thinking over is how to transport it across country to get it to him. All in good time.
Now working on the remainder of the interior. Bomb bays, and start of the bomb load. I plan to use the bombs as a place to practice puttying and filing the seams away, so when I do the fuselage I am practiced.