In the picture above, of the fuselage, the large squares on the background mat are 1" square, with the small squares 1/2". It is a monster.
Cheers, Bob
In the picture above, of the fuselage, the large squares on the background mat are 1" square, with the small squares 1/2". It is a monster.
Cheers, Bob
That’s showing 16" of fuselage. I bet total is a couple of feet. And if this is how you do just getting back into it, I can’t wait to see the full wind in your sails…
Thanks, Viejo. That was kind of you. I hope the fuselage seam and finish work come out ok! I guess it is about 24" long total. I’ll measure it when I get back home on Monday. Cheers, Bob
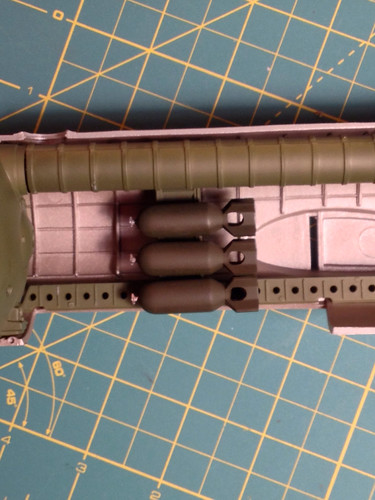
I got back to work on the model after a few days off to celebrate my son’s birthday with he and his family. I picked up by completing the bomb load (it is 12 bombs, appears to be 500 pounders). Then I did the central gunner station, where the two spotters sat in plexiglass blisters, and the top gunner who sat in a steamed plywood chair (not steel, like the others) in a blister on the upper fuselage.
The idea of dipping the clear parts into Future floor polish is new to me; it apparently came into vogue after I left the hobby. I did it for the few clear parts I have installed to date (one small side window and the two blisters on the sides of the fuselage) I have to say I am impressed with how well that conveys the appearance of glass!
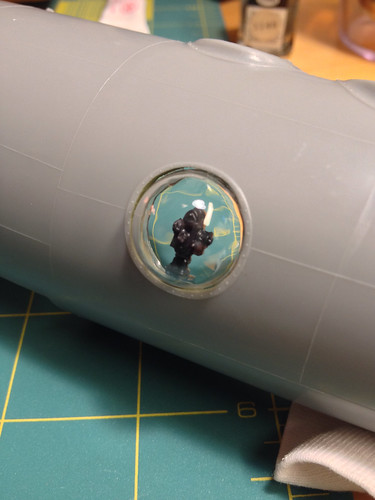
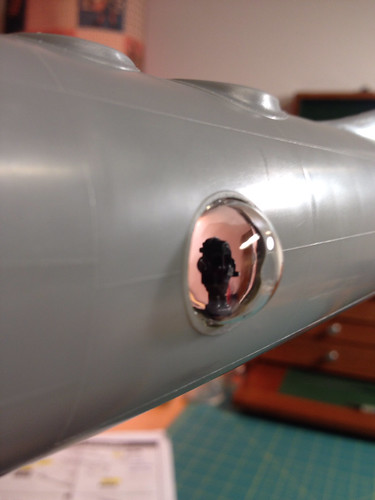
Forgive me for posting so many pictures of it, but I thought it was cool! I also took a photo of the view from the inside:
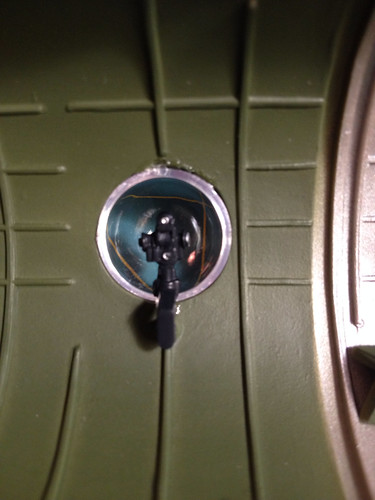
This is what the gunners station looks like:
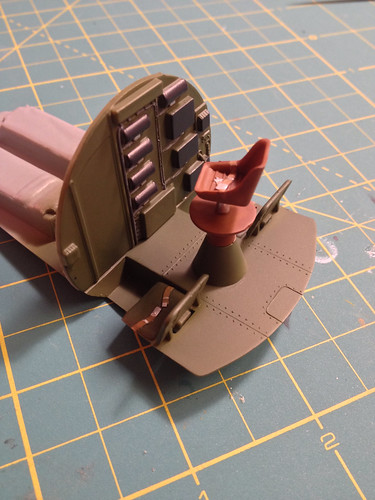
And this is it when installed:
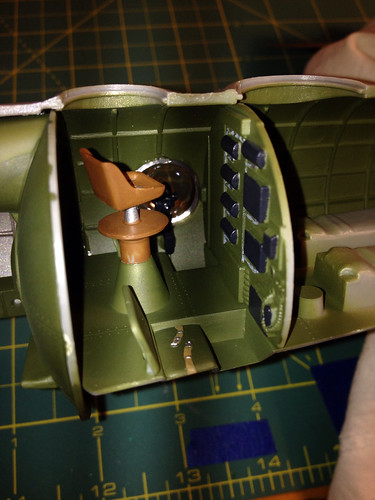
You might notice that I did not paint the bunk beds arrangement that were included in the kit. This was because they cannot be seen at all when the fuselage halves are joined. I am surprised they went to the trouble to make them.
Am off to a lengthy trip as a part of the day job, so won’t be able to get back to the build until around Thanksgiving. More to follow then.
Cheers, Bob
Oh, and Bish: it is 24" tip to tail. I threw in a photo of one-quarter of the bomb load, just for fun. The bombs are olive drab, in contrast to the dark green of the aircraft interior parts.
Ah! Monogram´s beautiful B-29! The first topic that caught my attention after getting on here.
Great work so far, congrats!
That is a really nice looking build. I made one back when I was in high school, and it did not come out anywhere nearly as good. You have wet my appetite for a big beautiful Monogram bomber in the future. Thanks.
John
Great work… you’ll do that kit justice. I have one that I’m going to someday build as my uncle’s B-29
If any of you are looking to avoid doing the NM on a B-29,a found a set of decals for o.d.,fully armed birds from Illiad Decals.
Misspelled,it is Iliad Decals.
Thanks very much. Can’t wait to get back to it. I appreciate the kind words.
Well, I am back at work on the B29 build. I had a lengthy business trip which got in the way, then had to go pack and move my mother-in-law in with us after she was diagnosed with Alzheimer’s disease. That has slowed me down somewhat but I am finally able to get back to the workbench.
I have completed the interior of the fuselage now and dry fit the two halves together to be sure they fit:

image by robertholcomb73, on Flickr
You can see the tape to hold things together; I have not yet glued the fuselage seam together.
Here is a shot of the cockpit interior:

image by robertholcomb73, on Flickr
I have begun putting the wings assemblies together; they are glued together and drying now:

image by robertholcomb73, on Flickr
Had a small disaster I am coping with. To make a long story short, there is now a small kitten in our house. Found her after she was hit by a car and “inherited” her (along with her medical bills!). She has discovered the workbench, and suddenly today I realized I am missing the small tail skid from the B29 which had been carefully painted and set aside. Have searched high and low but have not found what she did with it. I may have to rebuild it from scratch!
Real nice work. I had that kit back in '85 I think. Never finished it for reasons I can’t remember. I bought it again a few months ago and it’s patiently waiting in my ever growing stash. I’d love to be able to find some after market decals to dress it in the markings of either one of the planes that dropped the atom bombs. Haven’t found any yet.
That is most excellent work. I as well have that one awaiting in the stash pile. You’re going to make me pull the trigger on my '29 or the '36. I’ve never taped my fuse sides together. I’m intimidated by having pro weld/tenax turn the sticky part of the glue into a solvent mess. How do you like that technique?
I haven’t glued the fuselage halves together yet; so far I just dry fit them to be sure all the interior parts were aligned on both sides properly. I’d have the same concern using tape to hold it together after glue was applied to the seam. To be honest, I am not sure how I will clamp the sides together when I glue it. I’ll have to think about that for a bit. The tail is easy, but the rest might require special clamps.
Got several other issues rattling around, such as how to attach and mask that odd-shaped canopy, and how to attach and brace the wings until they dry. My research is showing that there were several different kinds of metal finish on the engine nacelles including some stainless steel to dissipate heat. About time to invest in some Alclad II.
Just in time for your build here Eduard is going to offer some of their photo etched wonders for this kit. Also the wheels will be available from their BRASSIN series. Some months ago I was able to get my hands on their masking set for the kit´s clear canopy parts.
I did some research today on the Eduard photoetched set, and canopy mask set. NOW you tell me! Might have to invest in the mask, although I think using the thin metal foil sheet film would do just as well. The photoetched set is very impressive, but pretty expensive when you consider most of it will be locked inside the fuselage out of sight. Be cool for a cut-away version, though.
When I built my B-29 I carefully cut the rear crew entry hatch open and also opened the door between the bunks and the CFC compartment…
I bet that looked impressive. The Eduard photoetched set would be perfect for that today. The Monogram kit I am using has a nice photo on the side of the box of a interior view of the aircraft.
I am awaiting some paint and so have not cemented the fuselage together yet. Have begun details on the engines and cowlings. And manufactured a new tail skid to replace the one the cat stole!
More photos soon.
Ok, it’s time for another stupid question!
I know the model is tail heavy, so I have to put weight somewhere up front to keep it resting on its nose wheel. Check. So I was looking for some space in the forward fuselage that would be hidden from sight where I could epoxy in some BB’s to add weight. Found a nice space around the forward lower gun turret that would work ok. Then I thought, why fill in AROUND the gun tub, when I could FILL IN the gun tub?
So I filled the two forward gun tubs with BB’s, the upper turret and the lower turret. My question is, how much weight is required? I weighed the two BB-filled tubs, and combined they weight 0.90 ounces. Think I need more weight stuffed somewhere, before I glue the fuselage shut?
cheers, Bob