Another 1/96 USS Constitution - third time's a charm (I hope)

Hello Evan,

I just reread your previous post in this thread and realized that you had directly mentioned the alternate planking underneath the guns. Please accept my sincere apologies for not reading more closely.

I would like to describe in detail some of the techniques I used as I go along. For the vertical hanging knees i stacked together 3 pieces of 0.156 x 0.040 styrene stripes, of 3 different lengths, short, shorter and shortest, to form a sort of 3-stepped staircase, then filled and sanded the steps so the entire piece was a sharp vee. I sanded down the edges and rounded the bottom, and glued what was once the stepped side down to the gun deck bulwarks. The diagonals are similar but made of only 2 pieces of styrene.

Here are a few shots comparing the 24 pounders from Revell and BlueJacket. BlueJacket is on the left, and Revell on the right:

_DSC7652 by Jose Gonzales, on Flickr_DSC7654 by Jose Gonzales, on Flickr_DSC7657 by Jose Gonzales, on FlickrThe Revell gun was left over from the last Constitution I built, and the Bluejacket was the one assembled by the previous owner presumably to check the fit of the guns to the gunports. I painted them temporarily to get an idea of how they would look. I’m currently leaning toward the BlueJacket version despite the short barrels.

Inspired by Force9’s build, I have planked the bulkheads on the spar deck with representations of the bolts that attach them, although I’ve done a much poorer and cruder job of it. As always I got better as I went along. I used the tip of a needle file to imprint the bolts:

_DSC7752 by Jose Gonzales, on Flickr_DSC7753 by Jose Gonzales, on Flickr

Hello all,

It’s been a while since my last update. I’ve done a few things on the model since then, and I figured I’d better post them now before the pics back up and the pile gets so large that I procrastinate further.

I primed and painted the inner bulwarks. The gun deck bulwarks got ModelMaster flat white and the spar deck got ModelMaster green. My last Constitution got the old small testor’s green which was bluer, but this yellower modelmaster green looks more of a match to the green in the Corne paintings, at least to my eye

I also drilled out a lot of holes for the eyebolts and ringbolts surrounding the gunports. Each gunport got 4 holes, plus a hole for a shared eyebolt between each port for the side tackles of each gun.

Next I tackled the 24 pounders. I had already purchased blackening solutions from Bluejacket, but I had to decide between painting the guns and blackening them.

Painted on the left, blackened on the right. The painted barrel looks like the barrels on the ship today. The blackened barrel reminds me of the replica guns I saw on board the HMS Surprise at the maritime museum here in San Diego, metallic with oxidation. I chose to go with blackening; even though I think I like the look of the painted barrel better, I think the blackened barrels will have more of an impact.

To blacken the guns, I first had to polish them to remove some dirt and oxidation coating the barrels, so I stuck them in my drill chuck, used it as a mini lathe of sorts, and polished the barrels with sand paper while spinning. It made a big difference, as unpolished barrels would have shown very patchy blackening.

For the guns I had to assemble ringbolts with and without rings. The BlueJacket kit comes with ~300 ringbolts, but no rings. It also comes with 9 feet of brass wire, so I wound the wire several dozen turns tightly around a 1/8 inch diameter brass tubing, slid the wire off the tubing, and snipped off rings. I threaded one ringbolt onto each ring, closed the ring with a pair of pliers (I did not solder, as these would not be taking any strain) and blackened them with the solution. Looks like I’ll need a lot of those ringbolts. Each carriage will have 7 ringbolts (only 2 of which will have rings, see above picture), and the gunports will have at least 4 ringbolts each, at least 2 of which will have rings.

I next turned my attention to the camboose. I attempted to assemble bluejacket’s photoetched pieces, but the pieces broke at the folds as I was manipulating them. I ended up having to assemble the camboose from the many pieces that resulted from them breaking apart.

For the brick hearth, I painted a small square of styrene sheet red, then etched a brick pattern.

I used 3/16 x 3/16 square wood dowel from the Bluejacket kit for the bitts and cheeks, and added the ringbolts._DSC7778 by Jose Gonzales, on Flickr_DSC7777 by Jose Gonzales, on Flickr

I decided I would open most of the hatches on the gun deck, and suspend a representative section of the berth deck underneath the gun deck, to be visible through the opened hatches, so I cut out the hatch gratings from select hatches on the gun deck, then built up the hatch coamings using scrap strips from the gun deck planking. I added square wood dowel underneath the deck flanking the open hatches to represent the gun deck beams where they might be visible through the hatches. These would also serve to anchor the dowels I would be using to suspend my berth deck section underneath.

_DSC7832 by Jose Gonzales, on Flickr

The Bluejacket kit includes some basswood sheets that have been scribed to simulate deck planking

_DSC7822 by Jose Gonzales, on Flickr

I cut a section that was long enough to match the hatches I was opening on the gun deck, cut out some corresponding rectangles out of the sheet to represent the continuation of the hatches on the deck, and built up the coamings around the cutout rectangles. I then added deck beams similar to those underneath the gun deck. I cut short segments of square dowels that would serve as berth deck stanchions, as well as the means of suspending the berth deck segment, drilled holes on both ends of each, and inserted small diameter brass rod, one short, the other longer. I drilled holes into the gun deck “beams”, inserted the short brass rods of the dowels and glued the stanchions to the gun deck securely. I then drilled holes through the berth deck section and through the deck beams, inserted the long brass rods on the stanchions through these holes, and bent the brass rod to secure the berth deck to the gun deck.

_DSC7831 by Jose Gonzales, on Flickr

_DSC7828 by Jose Gonzales, on Flickr

The stanchions aren’t perfectly straight, but they are barely visible from above, and the import thing is that the hatches line up very well.

_DSC7829 by Jose Gonzales, on Flickr

I also started working on the chain pumps. Initially I was going to make them out of styrene, but my first efforts were large and out of scale. I switched to basswood sheets. The round housings I made out of plumbing washers that are used in faucet stems. I cut them in half and glued the halves to the top of the pumps, then painted them all ModelMaster military brown. Here is a comparison of the styrene vs wood versions:

_DSC7821 by Jose Gonzales, on Flickr

Hi all,

I’ve assembled the gun deck to the hull halves - pix upcoming - but I wanted to share some musing about the guns and my plans to rig them.

So for a fully rigged gun, there are 5 tackles: 2 side tackles, 2 gun tackles and 1 training tackle. For each tackle, there would be 1 single and 1 double block. For each block there would be 1 hook. So, for 24 fully rigged spar deck carronades, there would be a total of 120 tackles, 120 single blocks, 120 double blocks, 240 hooks. For 30 gun deck guns, that would be 150 tackles, 150 single blocks, 150 double blocks, 300 hooks.

My original ambition was to fully rig all guns…

Hello all,

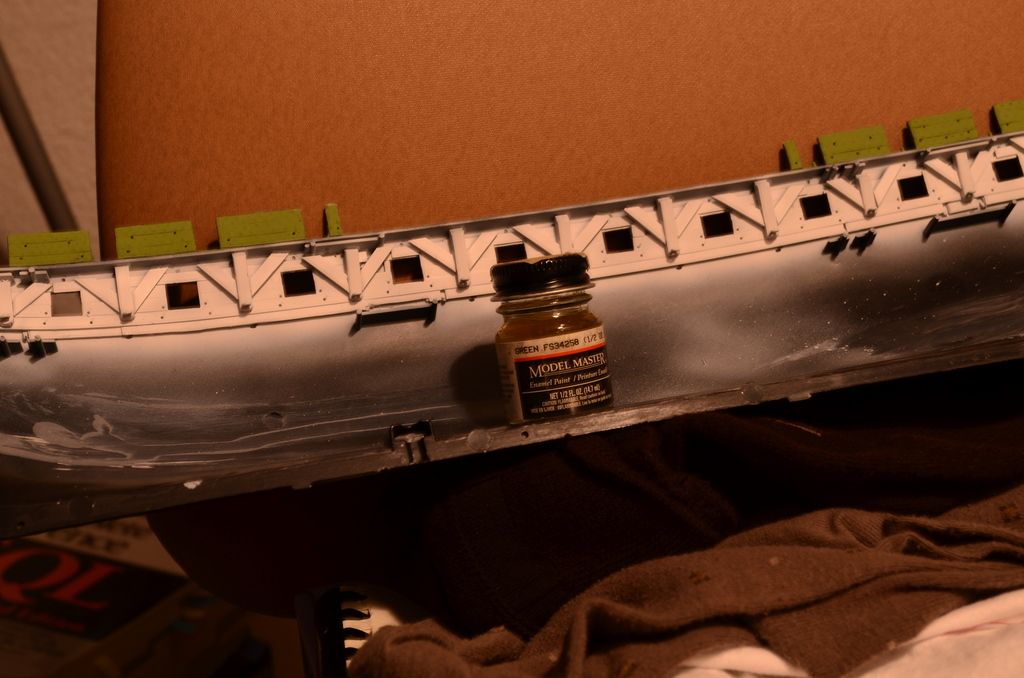
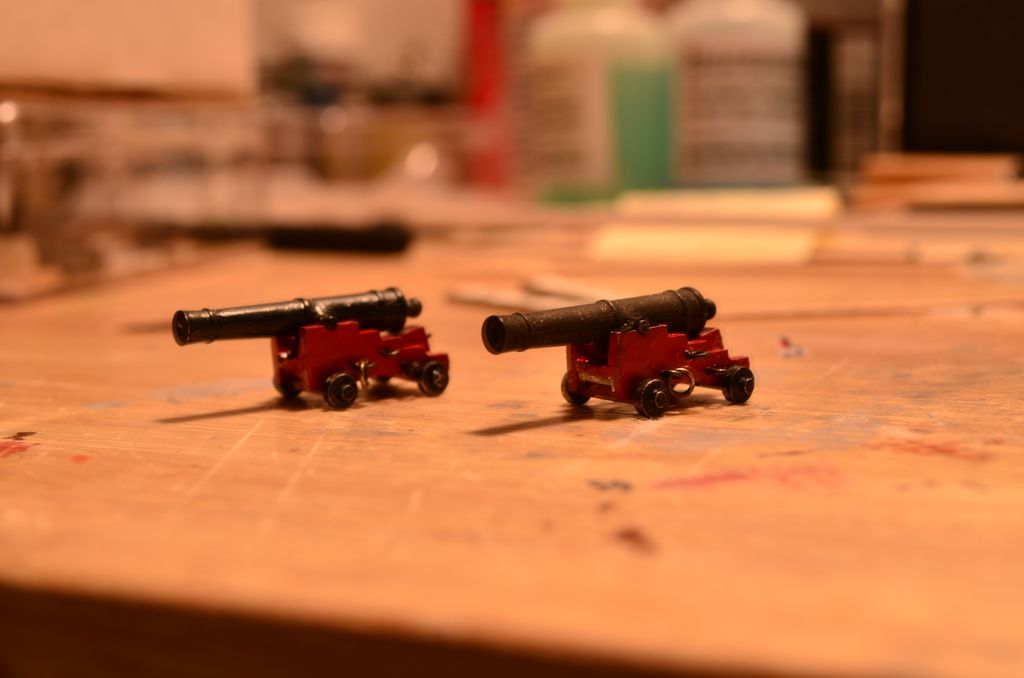
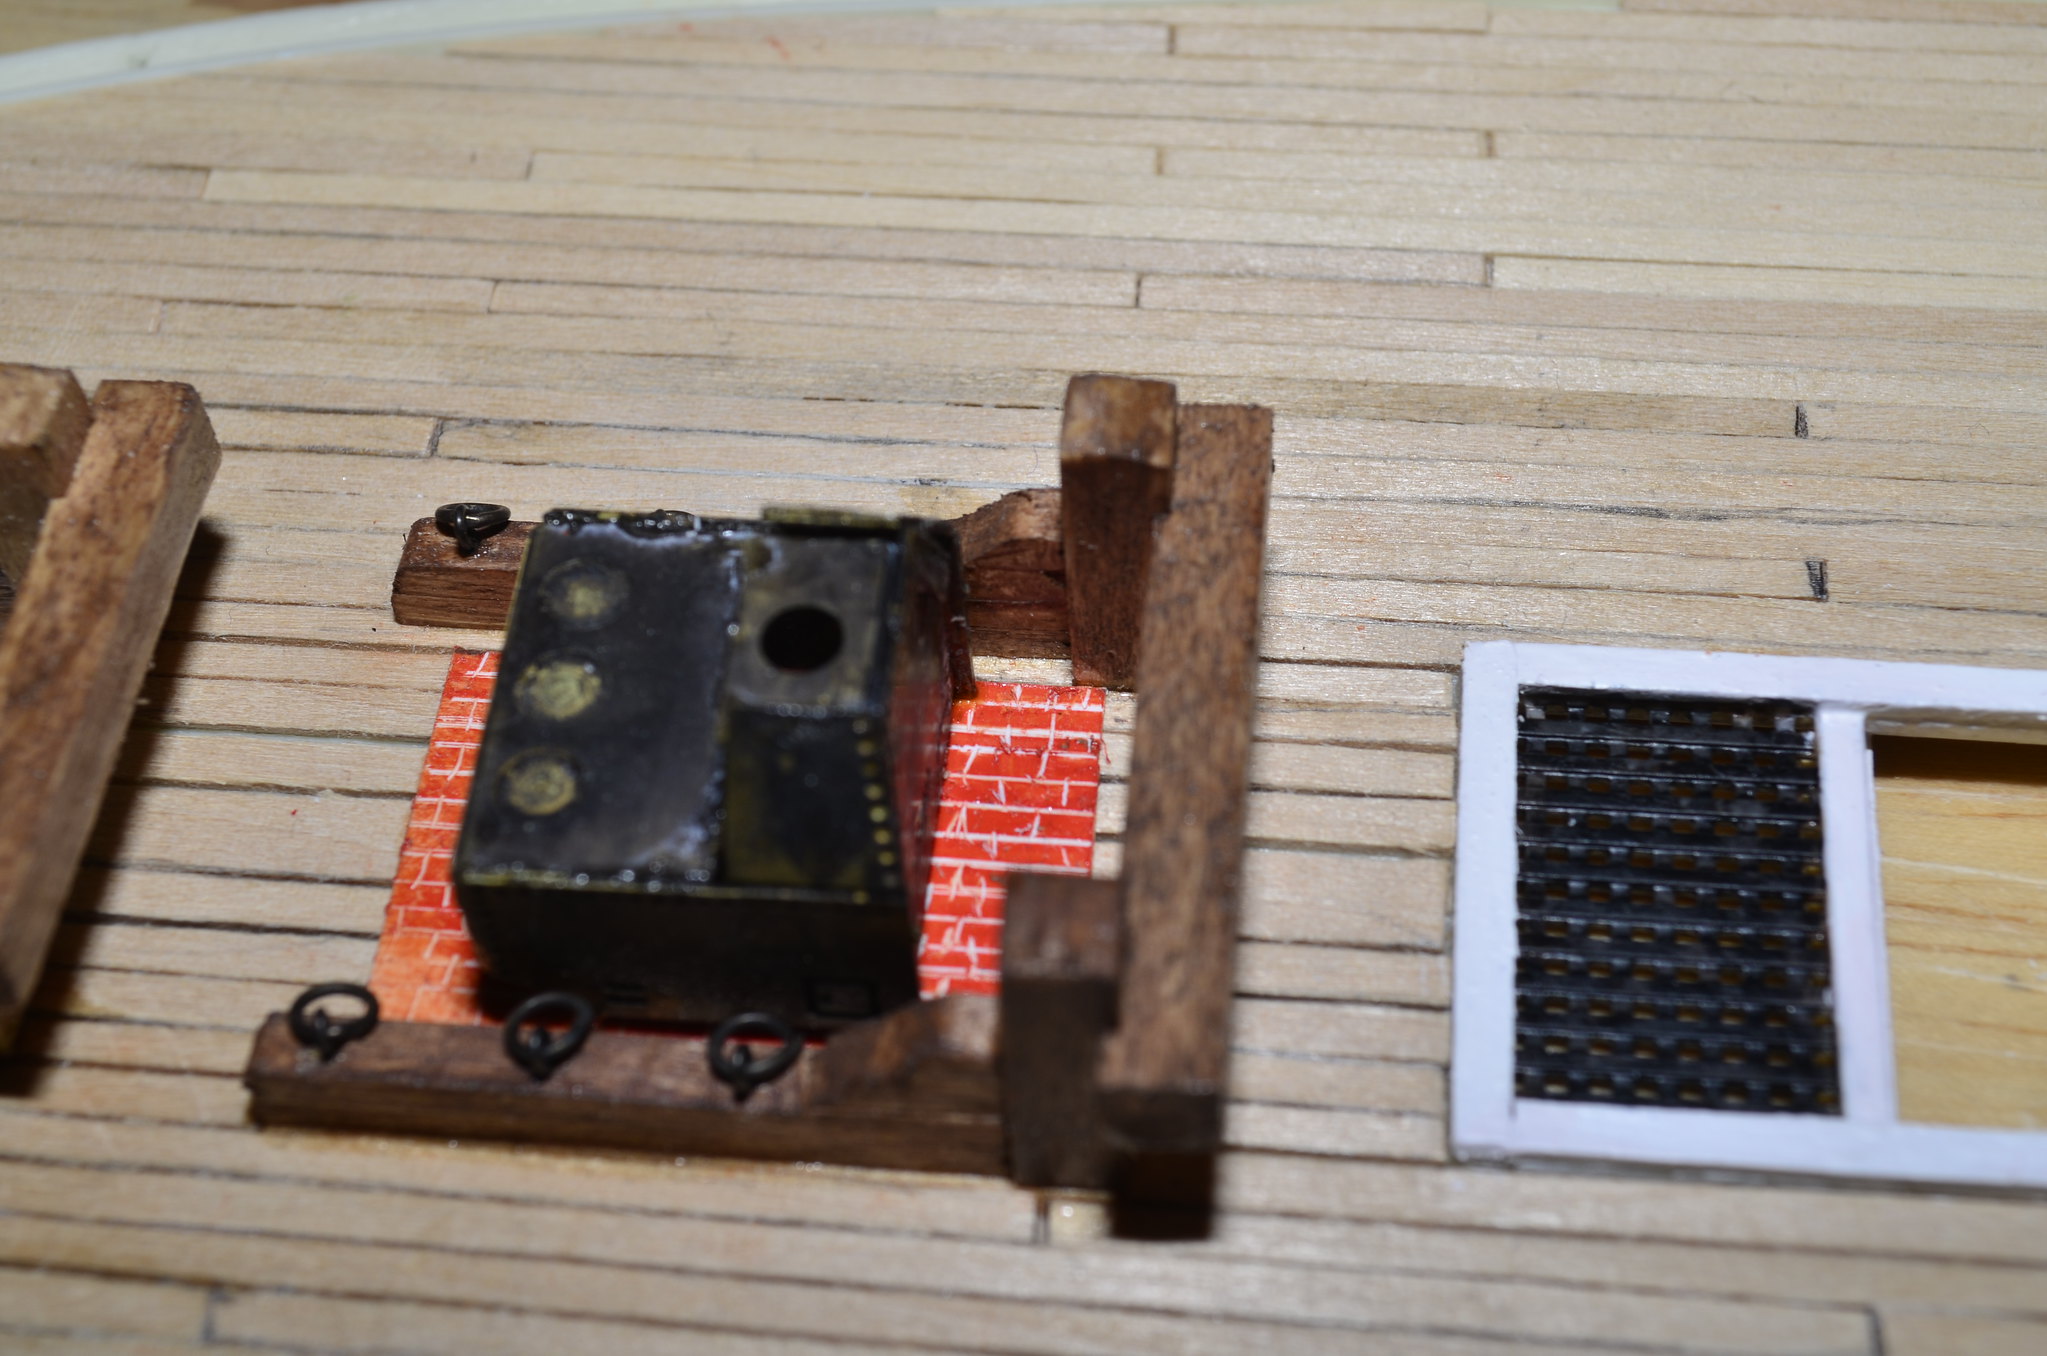
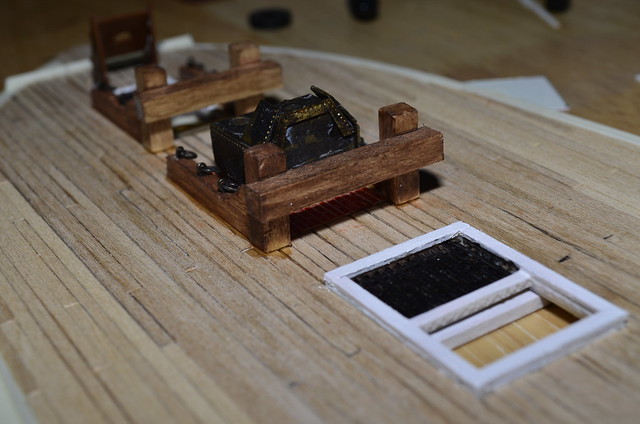
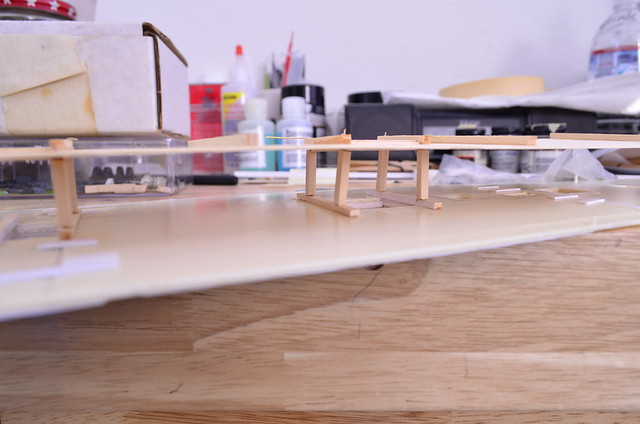
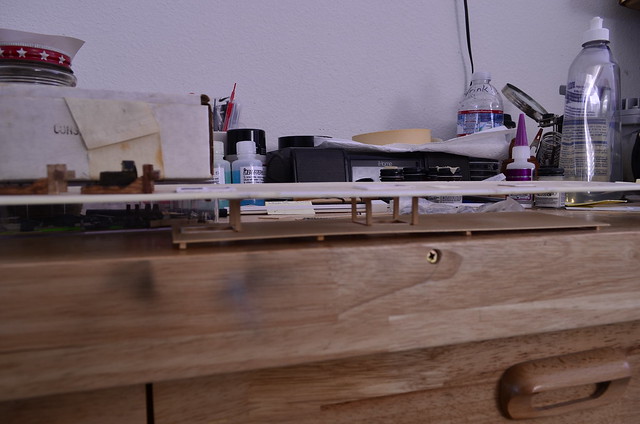
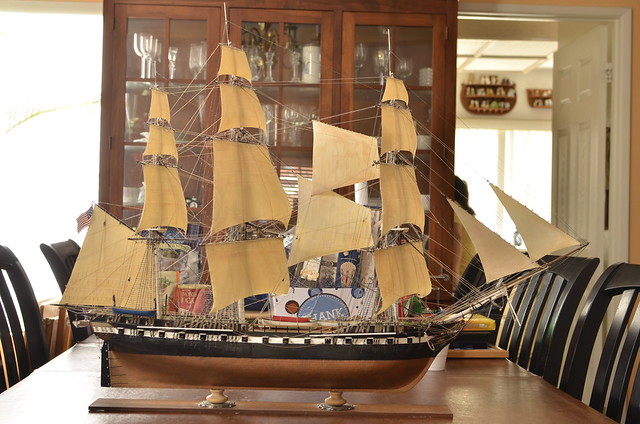
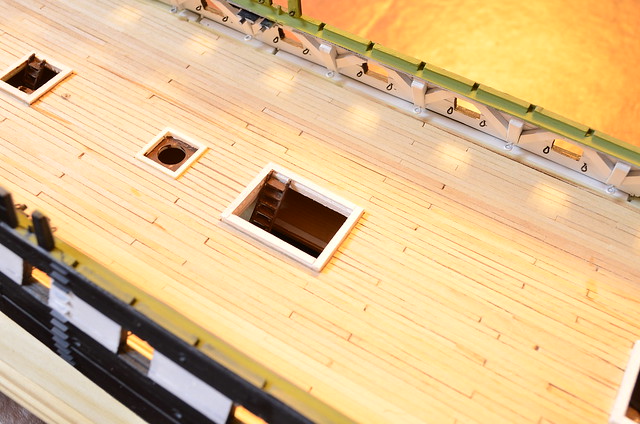
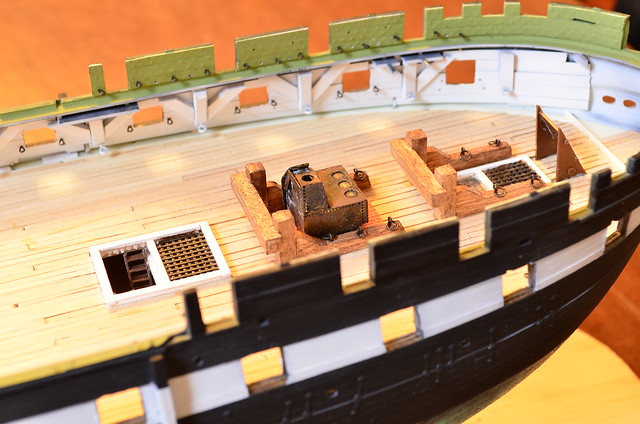
Here are the promised pictures of the assembled hull halves and gun deck.

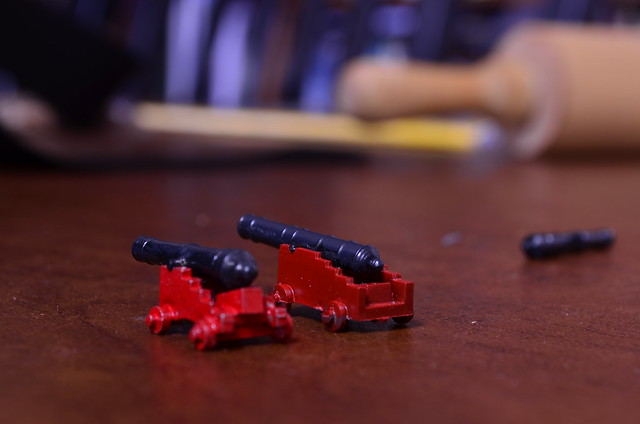
_DSC7838 by Jose Gonzales, on Flickr

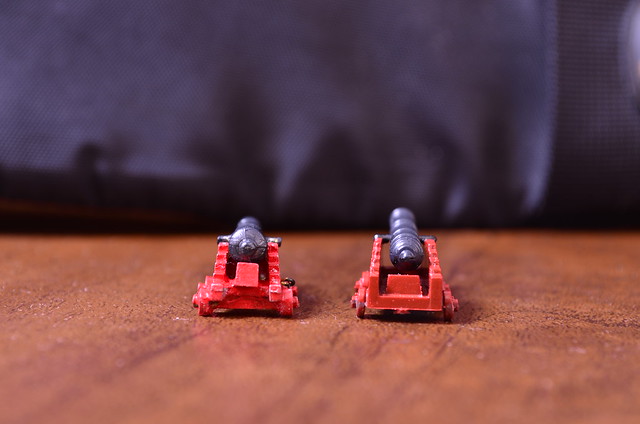
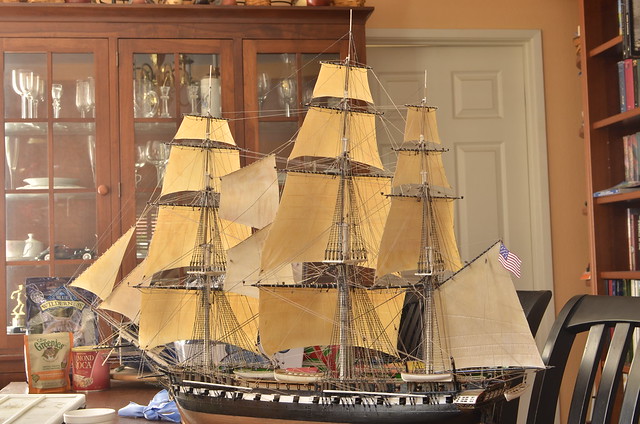
_DSC7839 by Jose Gonzales, on Flickr

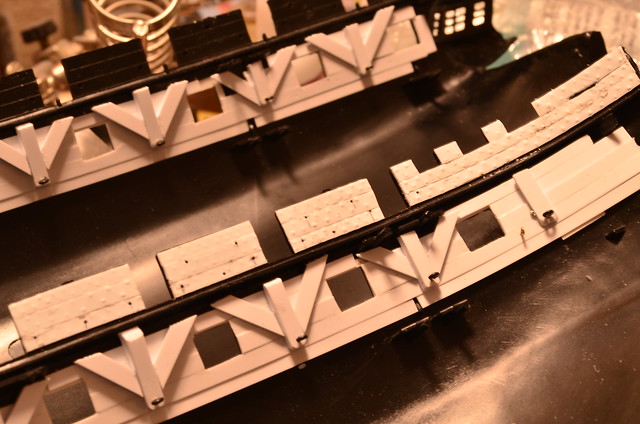
_DSC7840 by Jose Gonzales, on Flickr

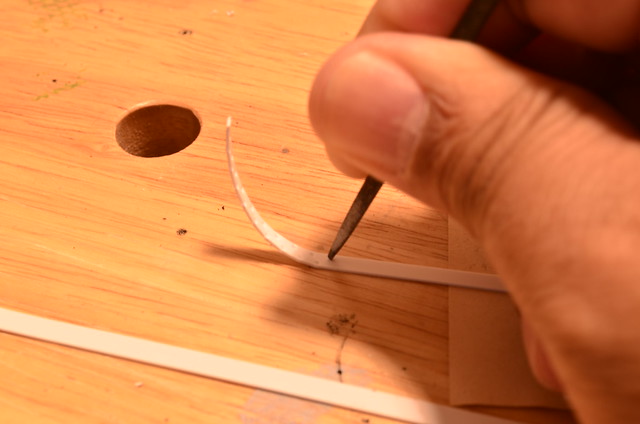
_DSC7841 by Jose Gonzales, on Flickr

_DSC7842 by Jose Gonzales, on Flickr

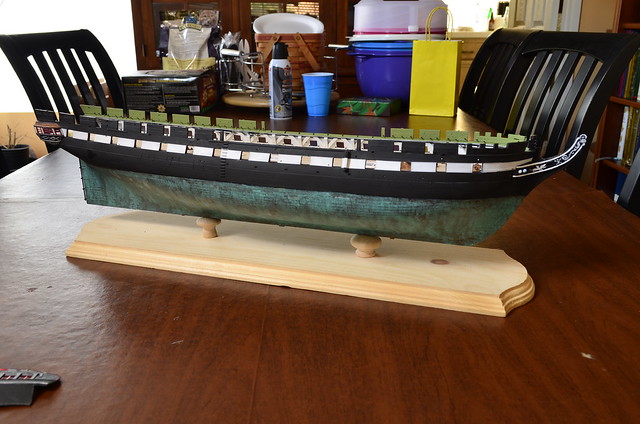
I was encouraged by the success of the suspended berth deck below, and was considering building up the spar deck from the wood dowels and deck plank sheets, but when I lined up the Revell plastic spar deck pieces on the deck plan sheet from the BlueJacket kit, I found some discrepancies.

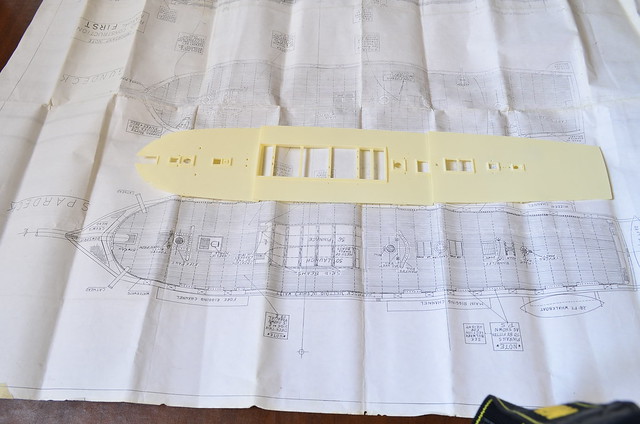
_DSC7844 by Jose Gonzales, on Flickr

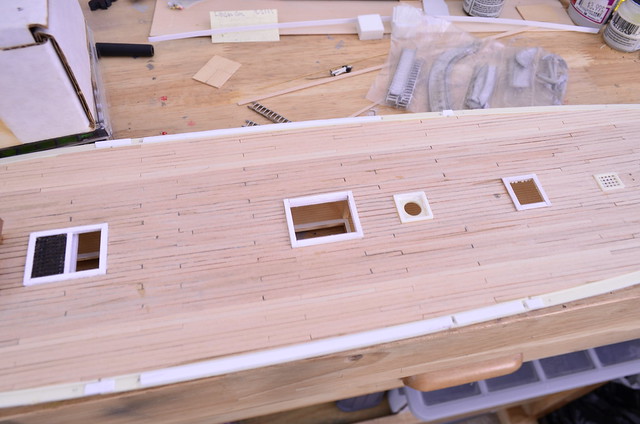
First, note that the main hatch on the Bluejacket plans is smaller than the Revell deck’s hatch. The deck beam locations seem to line up fairly well. But the biggest discrepancy is the locations of the fore and main masts. The foremast on the Bluejacket plans is stepped farther back, and the mainmast is farther forward

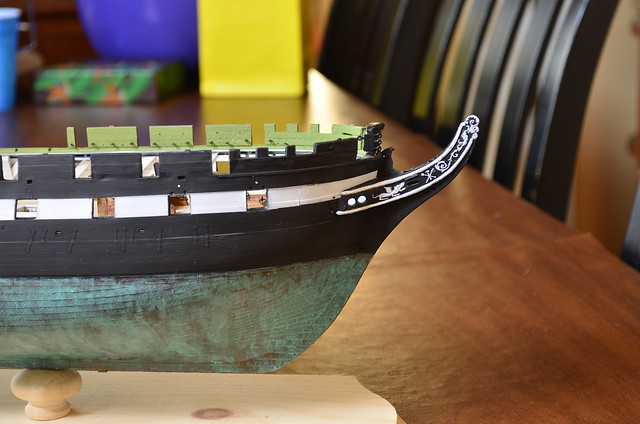
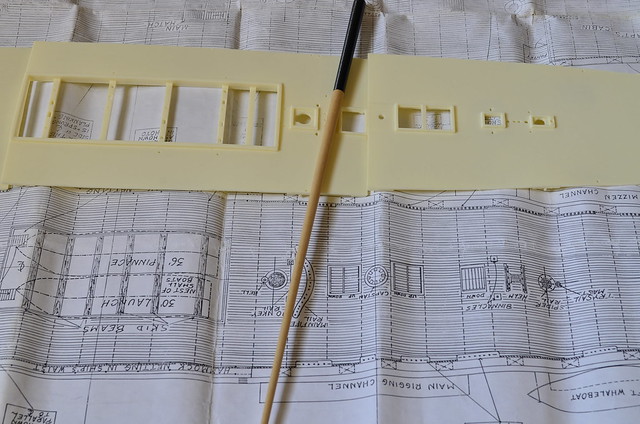
_DSC7846 by Jose Gonzales, on Flickr

_DSC7845 by Jose Gonzales, on Flickr

The mizzen mast lines up fairly closely. Since I had already mounted the wood-planked plastic gun deck, I could not use these plans to generate a wooden spar deck to match the gun deck.

I searched for an explanation for the discrepancy, and found one - in the book “Old Ironsides: The Rise, Decline, and Resurrection of the USS Constitution” by Thomas Gillmer, illustrations by William Gilkerson, 1993, paperback (first printing 1997). On pg 160, Chapter 5 “The Restoration Question”, Gillmer describes the changes in the structure of the ship over the last ~200+ years: “One of the most striking diversions from the original design is in the location of the masts. The formast step has been moved aft about 2 feet 4 inches. At the deck it is 3 feet 2 inches farther aft, showing an increased rake aft of more than 2 1/2 degrees; this results in a total aftward change of approximately 5 1/2 feet to the mast’s fore top. the mainmast, to the contrary, has been moved forward and closer to the foremast, with the mast-step center moved about 2 feet 3 inches forward on the keelson…” In short, the mizzen mast is relatively unchanged from launch, but the foremast has been moved back, and the main mast has been moved forward since launch. If this is true, the Bluejacket plans represent the ship post mast step movement, while the Revell kit has the masts in their original location. If you have the book, there is also a drawing on pg 156 of the same chapter which overlays a draft of the current lines of the ship on top of an as-built drawing - this drawing alone is worthy of a separate discussion. The question is, when did the mast-step changes take place, before, during, or after the glory years of the War of 1812? Unfortunately, the book does not answer that question.

Hi all,

I’ve been working on stropping the lower deadeys in preparation for mounting the channels, and it’s been quite hard. I found some instruction on the forums at Modelshipworld.com, that I think will be very useful, will try out their suggestions. Here is the page:

http://modelshipworld.com/index.php/topic/7625-manufacturing-of-deadeye-strops/

Best,

Jose

_DSC7843 by Jose Gonzales, on Flickr

I attached the stern to the hull a couple of weeks ago, but have not taken pictures of the hull since then yet. Here’s a shot of the stern before attaching. I’ve built this model twice before, and both times, the stern attachment has been a major headache, because the back end of the gun deck has always interfered with the fit of the stern to the hull. The corner formed by the end of the gun deck itself and the vertical rise of what ends up being the horizontal shelf across the back of the ship in the captain’s cabin juts out just too far, and so either the bottom of the stern will not lie flush with the hull, or the upper part of the stern will not align with the back part of the galleys on either side. This time around, I was armed with a dremel, which I did not have on the previous attempts at building this ship, so after a LOT of grinding, in which I thinned that corner almost to the point of making it translucent, I was able to attach the stern piece to the hull flush.

Coming up - my trials and tribulations with the chainplates and deadeyes

very nice jgonzarles , I had the same trouble on my stern , no dremel just a file , my painting’s not’ as good as your’s though

steve5

Hi Jose,

sorry for the long post but im also currently building the 1/96 USS C.

Just got done reading your entire blog on the 1/96 Constitution. some pretty awsome information. i have currrently continued work on my own Revell 1/96 USS C. (For all the plastic model haters, Ive been building revell models my whole life since i was 10 and love plastic models so please be kind to me.)

before i ask you my qestion, i just wanted to let you know i am not using parts from any other model kit because i want to maintain the integrity of the original Revell Kit. revell is really good at getting me new missing and broken parts so there is another source for you. MOST parts i have asked for they have supplied free of charge. this included updated planes for rigging and assembly. way better and more detailed that the original ones included in the kit. yes its a little harder to work with just the kit provided but the part trees provide a lot of scrap so no worries. plus, im a huge fan of Revell and like to stick to their provided parts as much as possible.

my question is this. i noticed you metioned the orginal revell plastic formed sails were really bad. i believe u said “good riddance” and i aggree. this is the only thing i am willing to switch out. but my dilemma is this. What do i use in place of them for Sails? this is new territory for me. all my other ships i have assembled i have used the sails provided. do you have any suggestions? i have been looking at different fabrics but im worried about the scale of the weave matching the ship.

Hello James,

I’m not a hater of the original vacu-formed sails, just the fuzzy coated ones from the Museum Classics version of the kit. My last completed constitution has the non-coated plastic ones. I built the kit mostly out of the box, but I bought rigging lines of a wide variety of diameters and tied my own shrouds and ratlines. If I had to do it again, I’d probably ditch the plastic and use tissue to try to recreate the fully deployed sails. Here are pix of my previous USS Constitution, finished a couple of years ago:

_DSC4949 by Jose Gonzales, on Flickr

_DSC4966 by Jose Gonzales, on Flickr

_DSC4969 by Jose Gonzales, on Flickr

This time around I plan to put furled sails following the method of our professor emeritus, John Tilley. He provides an excellent detailed description in the following thread:

http://cs.finescale.com/fsm/modeling_subjects/f/7/t/33775.aspx?sort=ASC&pi240=1

I may still change my mind and try the tissue with fully deployed or partially deployed sails.

There are a ton of helpful posts and build logs on this site, from some much more experienced and better modellers than myself. I’ll post links to some of the most helpful ones as I go along in my build. Please post a build log if you feel up to it, we would all enjoy it and are happy to help.

This is my First 1/96 and i want to do it right. i read through mister Tilleys posts and i believe im going to go with furled as well. i also did not know that when furled, the yards are lowered not raised. that is definitly worth knowing. thanks for the help Jose and yes i bleieve i will start a build blog shortly. the biggest mistake on my model to date is the seams are still visible on the main deck because i decided not to use balsa for planking. i wanted to stick to the original plastic decking. howver i was able to effectivly pull out the wood grain using a washing tecnique i learned a long time ago. but im going to put posed scenes and equipment on the seams to hide them instead of trying to redo the deck. thanks for the help.

It was kind of Mr. Gonzales to mention that old thread. Unfortunately, since those days two of the products I mentioned have become unavailable: silkspan tissue and Poly-Scale paint.

The good news is that good substitutes can be had. Bluejacket Shipcrafters sells a material called “Modelspan” that, though I haven’t actually tried it yet, certainly looks like it should work fine as a substitute for silkspan. Here’s a link: http://www.bluejacketinc.com/fittings/fittings11.htm . Modelspan is about halfway down the page.

Incidentally, if you’re serious about sailing ship modeling Bluejacket is a good firm to get acquainted with. Its britannia metal fittings are, in my opinion, the best in the business.

A Spanish paint company called Vallejo is working valiantly to meet the needs of modelers who liked the old Poly-Scale line. Vallejo colors can be found in lots of online retailers, and some local hobby shops. (The HobbyLobby store here in the teeming metropolis of Greenville, NC has a Vallejo rack.) Some of the old railroad-oriented colors that I like for ship purposes (including my favorite color for furled sails, “aged concrete,” are being made by Vallejo and marketed by Microlux (the small tool folks). Here’s a link: http://www.micromark.com/microlux-flat-acrylic-paint-for-brush-application-aged-concrete-2-ounces,12449.html .

Hope that helps a little. Mr. Gonzales is right: for what little it’s worth, I just can’t live with vac-formed plastic sails.

Prof. Tilley,

My thoughts are with you- bring in those lawn chairs!

Thanks GM, but it looks like the hurricane (actually it’s been downgraded to a tropical storm now) isn’t going to hit us hard. The schools are sending the kids home two hours early today, and ECU night classes have been canceled. But (getting down to really important matters) it’s been asserted that ECU’s first football game will go on tomorrow as scheduled. The weathermen say the worst will be tonight, between 8:00 pm and 8:00 am. They’re predicting between four and eight inches of rain, and winds up to 35 mph. By North Carolina hurricane standards that’s a nuisance.

What is worrisome is the Weather Channel’s projection that when the storm moves out to sea (somewhere around Norfolk) it may strengthen again, and possibly come back ashore. It’s conceivable that another Sandy may be brewing.

My thoughts are also with you, Prof Tilley, hope all goes well.

I do love the BlueJacket fittings. Case in point - the deadeyes are classified into upper and lower. The difference? while for the lower deadeyes all the holes have grooves that point in the direction that the lanyard will be running, for the upper deadeyes, one of the holes does not have a groove on one side. Why? because a lanyard begins with a stopknot, then the lanyard goes through the first hole in the upper deadeye, then runs down to the first hole in the lower deadeye, then up again through the second hole of the upper deadeye, and so forth. That upper deadeye does not need a groove next to that first hole where the stop knot stops the lanyard. I’ve looked at other deadeyes provided by other companies, and they don’t separate the deadeyes to upper and lower, and many don’t even have the grooves etched in next to the holes. For me, the little details make the slightly higher price of the parts well worth the difference.

Jose,

Awesome progress on ur model. The Blue jacket parts are pretty amazing. I still plan on sticking with the recall parts. Shaving and, sanding here I come :).

A note for u since u seem, to, be the only other one making forward progress, on, this beast. I, have been hunting for 1/96 figure for this models. Their are a lot of good alternatives out there however non that won’t require a ton of prep/modifications to work. I plan on creating a mold of the 20 figures that are, provided, in the revell kit. They all have the right dress but, most importantly, they are 1/96. If you would like, I would be more, than willing to make a second mold for your use as well. I’m keeping all plastic scrab from the build to make the figures. After that I will be using resin or styrene. I plan on having a minimum of 70 figures on Deck and maybe more, if I include a squad of Marines. No worries about me charging you. It’s free. Gotta help out my fellow builder of this behemoth. Just let me know.

Here’s a link to some pics of my build as well. Not as crazy detail as yours cause I’m trying to stick to the original revell model. But maybe u will learn something. I’ve learned tons from you so far.

http://s346.photobucket.com/user/mma200600/library/Mobile%20Uploads