Another 1/96 USS Constitution - third time's a charm (I hope)

Hello all,

I am Jose Gonzales, a part time participant in this forum a while back, but relegated to the role of lurker (for those offended by lurkers, please accept my apologies) for the last few years by children, health issues, and life in general.

I begin this log with a dilemma. Many years ago, I was lucky enough to score big on e-bay with a BlueJacket Constitution kit for $55. I wondered at the time if the seller knew what he had in his hands - new, the kit was selling for 10 times that amount. I counted my lucky stars and added the kit to the stash without examining it closely

Fast forward to a few years ago. My neighbor was having a garage sale, and was getting rid of a revell 1/96 Constitution, a Museum Classics version with “cloth-like sails” and a wooden panel with brass-coated plastic stands. I bought that for $25, with the thought in mind of mashing it with the metal parts from the BlueJacket kit - I did not have woodworking tools or skills, and if I wanted to copper plate the Bluejacket kit, I would have to buy 3000 individual copper plates, so I figured the mash-up might be a way to make a great model without having to carve any wood. The kit was placed in the stash and sat for a few years.

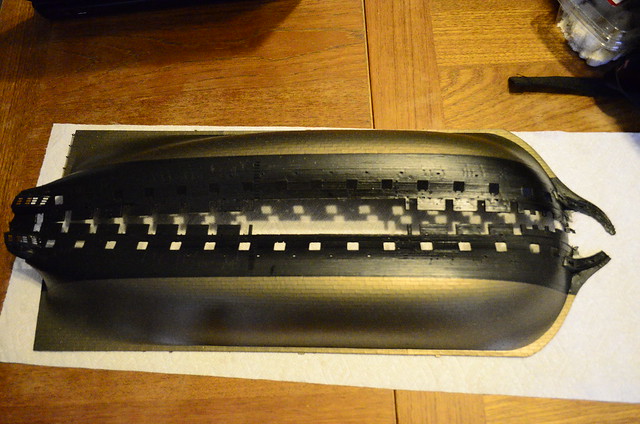
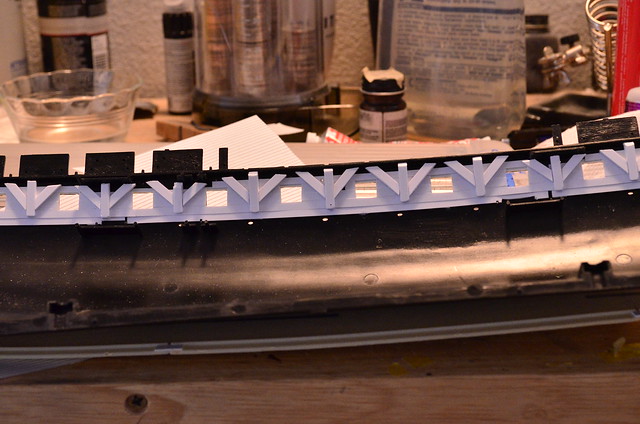
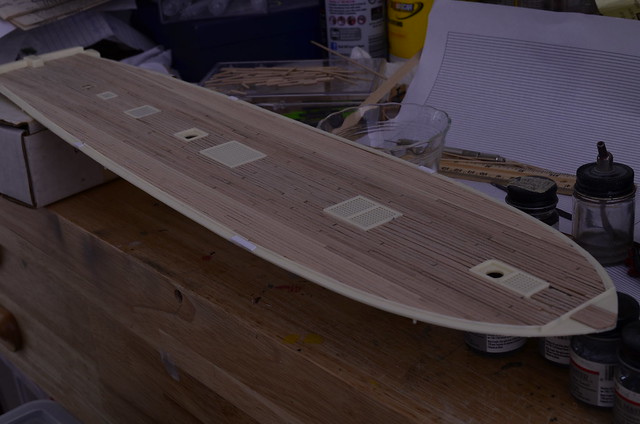
Fast forward to April 10, 2016. I had just sold my Constitution version 2 (which took 10 years to build) to clear space for my next build - the Heller HMS Victory 1:100. I had purchased Dafi’s absolutely beautiful photoetch set for the Victory (amazing set, well worth the money), but was a little intimidated by the scale and scope of the project. As i dug out my Victory from the stash, I caught sight of the Bluejacket kit, and dragged it out for an inspection. The original purchaser had started on the solid hull, and had made some glaring mistakes, which might explain whay they were willing to part with it. This was the bicentennial version, so it is solid to the gun deck, and upwards, includes the whole hull up to the spar deck bulwarks. The builder has only to cut the gun ports and build up the beams and planking for the spar deck. The owner had cut the gun ports perpendicular to the hull. This means that in the areas of high tumble-home, the gun ports were cut at a downward angle. With thickness of the bulwarks, the ports in the middle of the ship probably had ended up at the deck level. The owner tried to accomodate this by lowering the gun deck, but he apparently assembled one of the guns, set it on the deck to see how it looked, and found that the barrel would not reach out of the hull because of the angle of the gunports.

I had seen the wonderful work of Arnie and Evan, among many others, and found my self inspired to give Old Ironsides one more try. The question - should I contact BlueJacket and order another hull, or go with my original plan to mash up the parts of the two kits? Given that I still did not have woodworking tools or the skills required for such a complex model, I chose the latter.

A close inspection of th kit revealed that even without the hull, this kit is an amazing treasure trove of parts. Check out this parts list: http://www.bluejacketinc.com/kits/partsLists/constitution.pdf

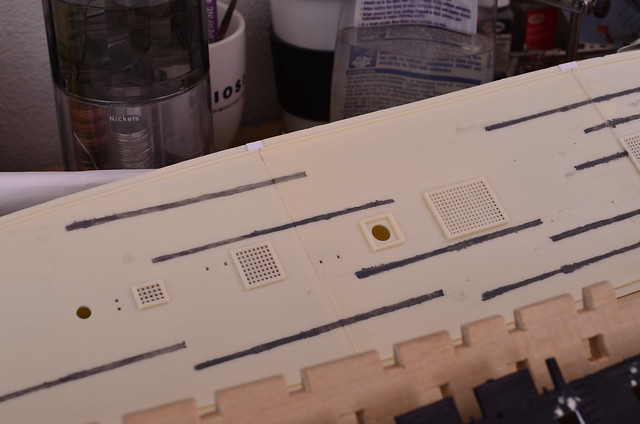
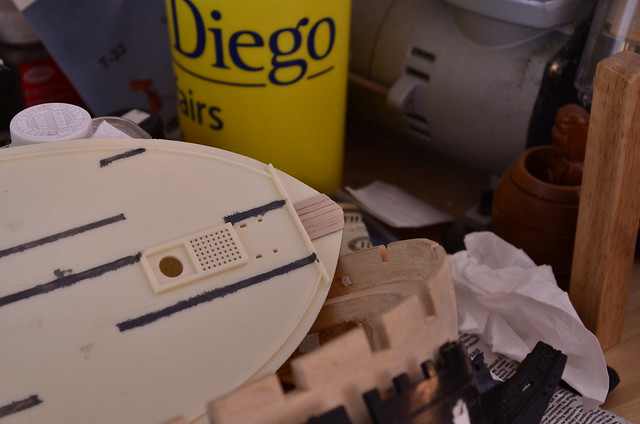
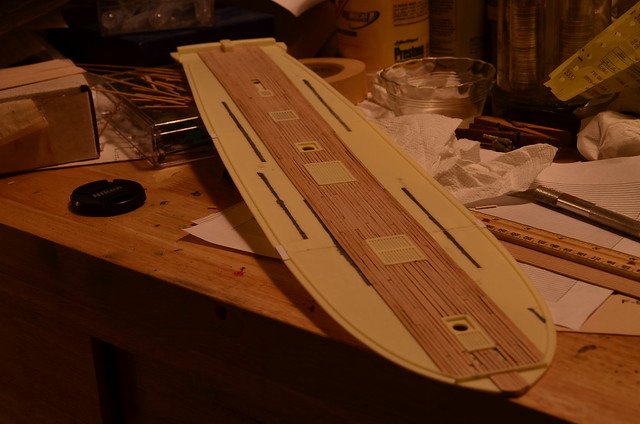
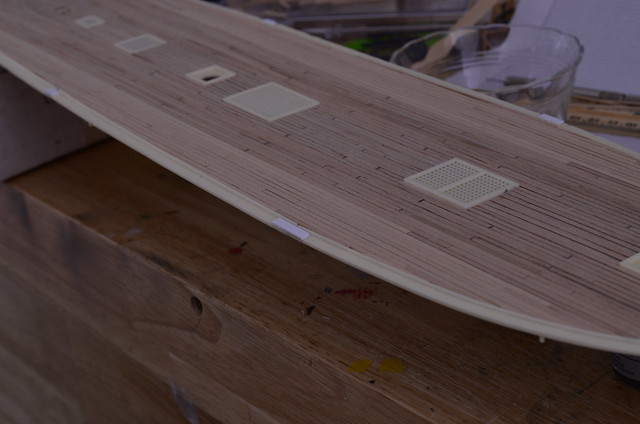
I checked the contents, and it appears all of it is there, with the exception of a small amount of decking that the previous owner had applied to a small section of the gun deck. Beautiful pieces, which I will be happy to put to good use.

Unfortunately, the Revell Constitution I had purchased had a few issues:

  1. The “cloth-like sails” were crushed beyond repair - good riddance.

  2. On one of the hull halves, the billet-head had broken off. The piece was still in the box, and it looked like a clean break, which would be hardly noticeable when glued back on.

  3. On the other hull half, the knighthead had broken off. Unfortunately, while inspecting the box, I had actually found the piece, but thinking it was a piece of scrap plastic, I threw it away on, of all days, trash day! Gone forever.

Everything else in the kit was intact and complete. I turned to my trusty friend, Constitution version 1, which I had built when I was 16, and had scavenged for parts to enhance my Constitution 2 build. One last sacrifice - I sawed off the knighthead with a no. 11 blade, and put the piece in the spares box for later application.

Now, off to the build![:D]

Well Jose, I would follow a third path.

I would keep the wood kit intact. To me the mistakes, if they are, sound easily fixable.

The Revell kit is nice but it’s after all a plastic model.

Hello Mr Morrison,

Thank you very much for your suggestion. I understand that the Bluejacket Kit is, in its intact form, worth quite a lot, and is potentially a basis for a great model. I took a closer look at the partially carved hull, and found some further mistakes made by the original builder. They cut an extra gun port at the bow, and omitted the last gunport near the gallery towards the stern. (He cut 16 ports per side, and I know about the bridle port added by Bainbridge, so he essentially omitted gun port 16 and added gunport -1). It would be easy enough to cut a new port aft and fill in the port forward, but the builder also based his spar deck bulwarks and carronade ports on the faulty placement of the gun ports, so the quarterdeck bulwarks start too far forward, and the the focsl bulwarks end too early. In addition, the copper plates required for the coppering will cost and extra $225, and that’s money I just spent on the photoetch for the Victory.

I plan to start with the plastic hull, and scratch build from the Bluejacket wood, and apply all the metal parts, so that a small number of parts will be from the revell kit.

Here is a view of the two hull halves from the Revell kit - note the broken nose._DSC7554 by Jose Gonzales, on Flickr

I did not have thick strip styrene on hand, but I did have a 0.040 thick styrene sheet, so i cut some rough strips, cut that into small pieces, and surrounded the gunports to thicken them. For the ports with lots of tumblehome near the middle, I overlapped the strip over the opening, and then filed down the strip horizontally relative to the upright ship. My original intent was simply to make the bulwars appear thicker through the gunports, but I then realized that the gundeck bulwarks would be visible through the main hatch, so I started to plank the bulwarks between the ports that would be visible through the hatch with 0.030 x 0.156 " styrene strip. One thing led to another, and I ended up planking the entire gundeck bulwarks and adding hanging vertical and diagonal knees.

_DSC7623 by Jose Gonzales, on Flickr

If you have the broken piece, you’ll be able to glue it to the opposite half.

Yes, I do have the broken piece, and plan to attach it when I bring the hull halves together. I have a question for you constitution experts. I checked the deck planking width for the decks as scribed on the revell kit, based on the 1/96 scale - 1/8 inch = 1 foot, and found that the scale width of the planks was ~9 inches. The planking provided by the BlueJacket kit, which I plan to apply, is 6 scale inches wide. Any ideas which one is closer to historical width?

I’ll be interested to see answers to that. The ship has been rebuilt so many times that it would be very difficult to know. Even the earliest photos would of course be 50 years after construction.

I’ve seen photos and, well, the real thing plus contemporary drawings and I think there are some weird things going on.

But that is just me.

Here are pictures of the hull from the Bluejacket kit.

Here is the bluejacket hull juxtaposed with the revell hull. Note the misplacement of the quarterdeck and forecastle bulkheads. I confirmed this with the plans that came with the bluejacket kit, which match the Revell hull.

_DSC7630 by Jose Gonzales, on Flickr

Here is the gun deck. I reinforced the bottom of the deck with styrene strip. The center section was thicker than thhe outer sections, so I added thickness with some additional styrene strip_DSC7634 by Jose Gonzales, on Flickr

My initial plan was to mask individual planks, paint different shades of gray and brown, then overlay with the main light deck color. The masking did not work, and the paint seeped under the tape.

_DSC7633 by Jose Gonzales, on Flickr

The next plan is to plank with wood strips. I bought 1/32 basswood sheets at the local hobby store (they did not have wood strips in the right size). I then marked and pencilled in plankinng lines of 3/32 width (9 scale inches) and cut with a straight edge and no. 11 blade, and tested my planking skills at the bow section of the gun deck

_DSC7635 by Jose Gonzales, on Flickr

Sr Gonzales, Let me recommend google’s Image Search, and enter “USS Constitution Deck”–this will get you a glut of images of the current ship, but those are a place to start. The lumber available for the original build was old growth forest giants. I’ll wager the raw bawlk planks in the yards were probably two foot wide. Only yhr needs of ship building narrowed those to 8 or 10" wide… If memory serves, Connie is center planked with the planks being full from the centerline out, and joggled into the waterway plank. But, my memory could be wrong, too. But, it was only 2¢, too.

Where I see weird stuff in contemporary photos, Capn, is not a lot of joggling, but curved to fit the waterway, and redirection of plank lines along the way.

We do know her decks were originally pine.

Hello Jose

Regarding the planking… Joshua Humphries does not provide most of the plank dimensions in his builders notes… He does, however, specify white oak planks 6 inches thick and “not less than” 10 inches wide for the thick strake planking along the gun deck. These were scarfed into the underlying beams and joggled together at forty foot intervals to add strength to the complex structure. (You can see my feeble representation of these strakes within my build log somewhere… ) Humphries further specifies using the best white oak planks on the gun deck 6 feet out from the side - the rest to be of the best heart pitch pine. This is similar on the spar deck with white oak 5 feet from the side. This higher grade white oak would stand up better directly under the gun carriages.

Good to see you taking on the 1/96 Constitution kit. I think this Revell version is the most representative of her 1812 appearance - even more so than the Bluejacket kit.

I’ll be following along as I begin to ramp up again on my own build later this month.

Cheers

Evan

Hmm, quarter-sawn heart pine will bend nicely; almost without needing a steam box. So, Yankee Ingenuity–why fuss with joggling when straps and wedges will get a curve that works as well. would explain the honey-colored decks, too.

http://www.maritime.org/conf/conf-otton-mat.htm

Whereas the original materials for deck, ceiling, and deck beams were specified to be “best heart pitch pine”

“Places white oak timber was used in the Rehabilitation and Restoration of Constitution: Planking, Below the Waterline”

The hull planking and the deck planking being of two different types…

Congratulations and good luck with the build. It’s a great subject. I want it to fall into my stash badly but Amazon won’t send to Spain without charging more than what the model’s worth for shipping and customs… :frowning:

Will be following this closely.

Thank you, I will be watching your HMS Victory build as well. Here is my latest update. It took me two weeks to complete the gun deck planking. I cut the planks myself from sheets of 1/32 inch thick basswood from the local hobby store. I started by creating a 1-column table in Microsoft Word, with cells that were ~ 3/32 inches tall, which works out to about 9 inches in that scale. I printed the table out, and used it as a guide to drawing lines on the basswood sheets. I then used a ruler with a metal straightedge and a number 11 blade in my exacto knife to cut the long planks out._DSC7639 by Jose Gonzales, on Flickr

Initially I was cutting the planks and gluing them directly onto the Revell gun deck. Problem was, doing them one at a time ensured that they would be uneven. I tried to use the etchings on the revell deck as a guide for placement of the planks, since I had worked out that the planks on the Revell deck would be 9 scale inches wide as well, but it turns out that the planks I was cutting were just a touch narrower than the planks on the plastic. It led to uneven gaps between some of the planks._DSC7637 by Jose Gonzales, on Flickr

Just like learning to tie clove hitches for ratlines, I got better as went along. I figured out that by cutting out several planks at a time, then stacking them and filing and sanding them to shape, I ended up with much more even planks. Here is the completed deck - you can see that the outer deck appears much more even than the center. _DSC7644 by Jose Gonzales, on Flickr

_DSC7643 by Jose Gonzales, on FlickrUnfortunately, I finished my first basswood sheet, and had to start using a second sheet, which happened to be a pronounced shade lighter than the first, so the outer deck has a much lighter tone. I had read somewhere that the outer areas under the guns on the gun deck were at one time planked with a different wood than the inner planks, but I can’t find the reference right now. Perhaps i can imagine that the shade differences represent these different types of wood. It took me 2 weeks to plank the deck, working half an hour to an hour a night. I learned that going slow yields much better looking results.

I think it look’s fantastic my friend really looking forward to this build , have you tried e-bay rdiaz

steve5

Another dilemma…Thanks, steve5, I really appreciate the compliment (or is that complement, I can never remember when to use which). I ordered some blackeners from Bluejacket for blackening the guns and other metal parts, so I’ve paused a bit in the build. I also assembled a 24-lb gun from both the Revell and Bluejacket kits. Force9’s (Evan’s) fantastic build detailed on pg 10 of the log (http://cs.finescale.com/fsm/modeling_subjects/f/7/t/146977.aspx?page=10 ) the discrepancy in size between the Revell and Bluejacket 24 pounders. In short, the Revell barrels are the correct length for 1812 (9 ft 6 in), but look “wimpy”, while the Bluejacket barrels are the length of the guns originally loaded onto Old Ironsides as built (8 ft), incorrect for 1812, but they sure look more “menacing” . I don’t have a spare Heller Victory around, so I have a choice to make - shorter, better looking barrels, or longer, historically accurate, but wimpy looking barrels? Also, the Bluejacket kit comes with matching carriages, fine for the short barrels, but a bit small if I were to load the longer barrels onto them. The Bluejacket carriages look much beefier in terms of the thickness of the side panels than the Revell ones, have the bottom curve already molded in, and a nice taper to match the taper of the barrels. I’ll post pics when I can.

Jose

I second Steve’s compliment (complement has to do with completion - i.e.: That dark stain is a nice complement to your wood deck). I commend your fortitude in perservering with the creation and placement of the deck planks.

Mike