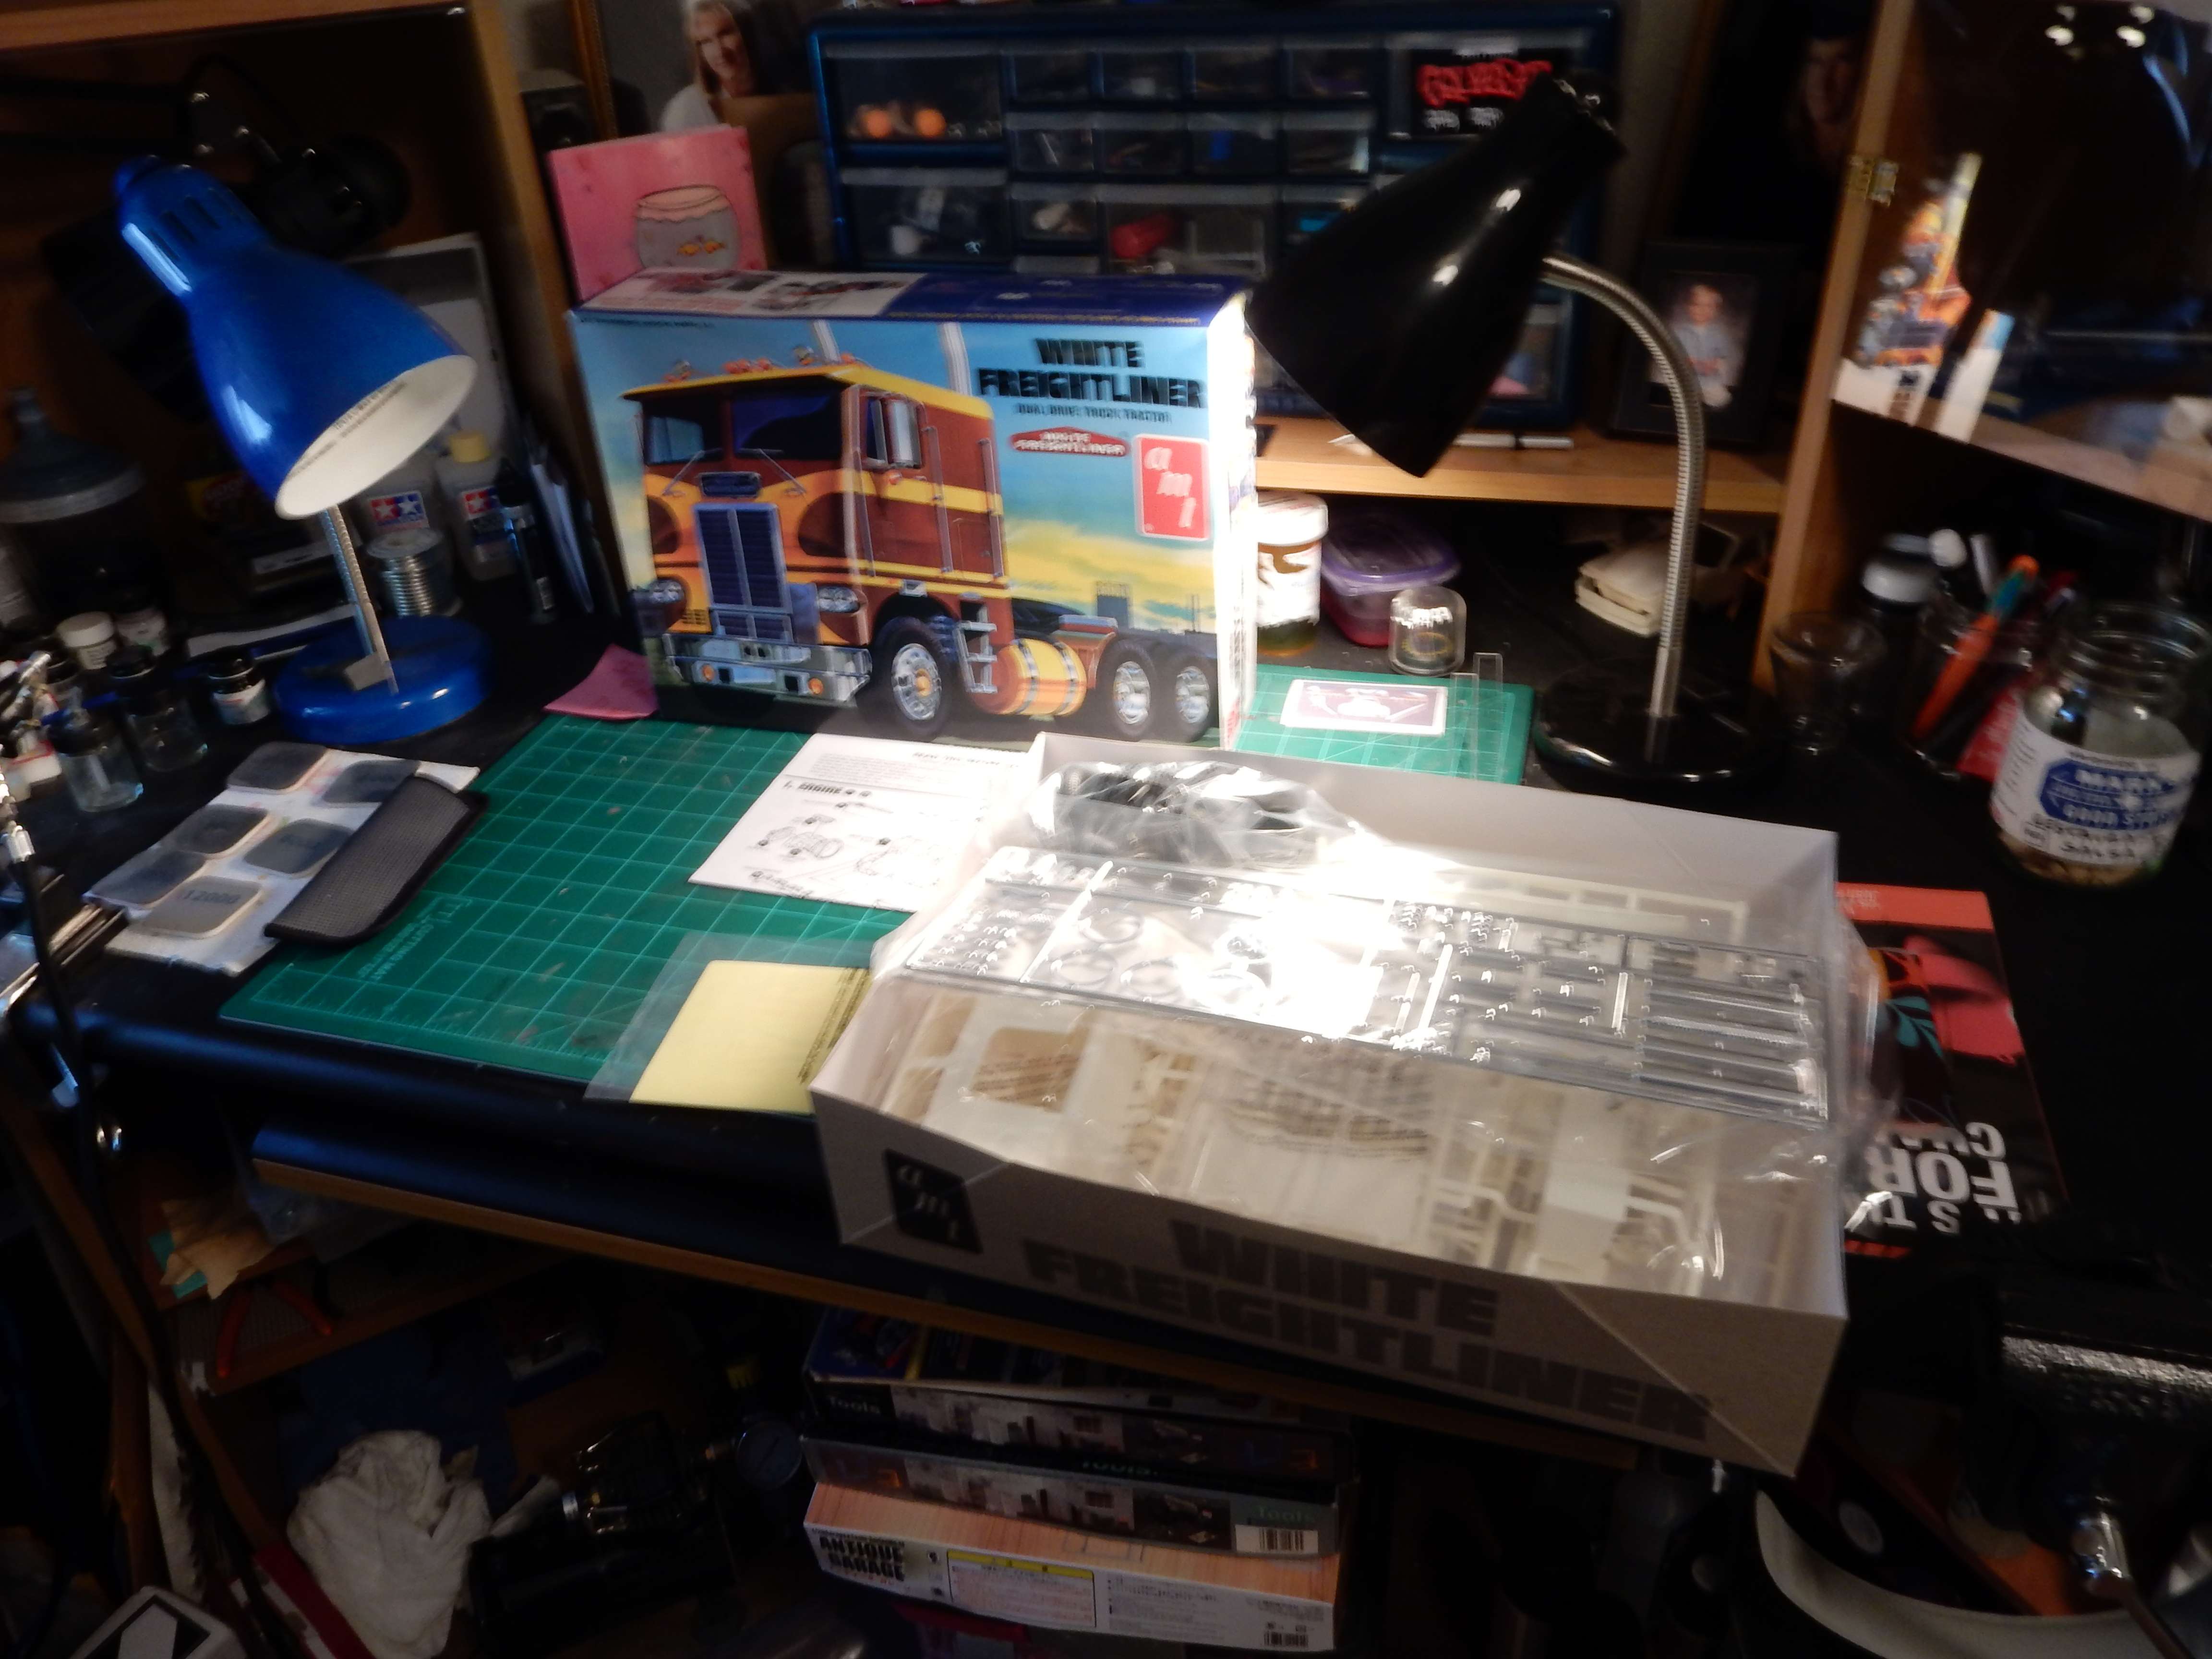
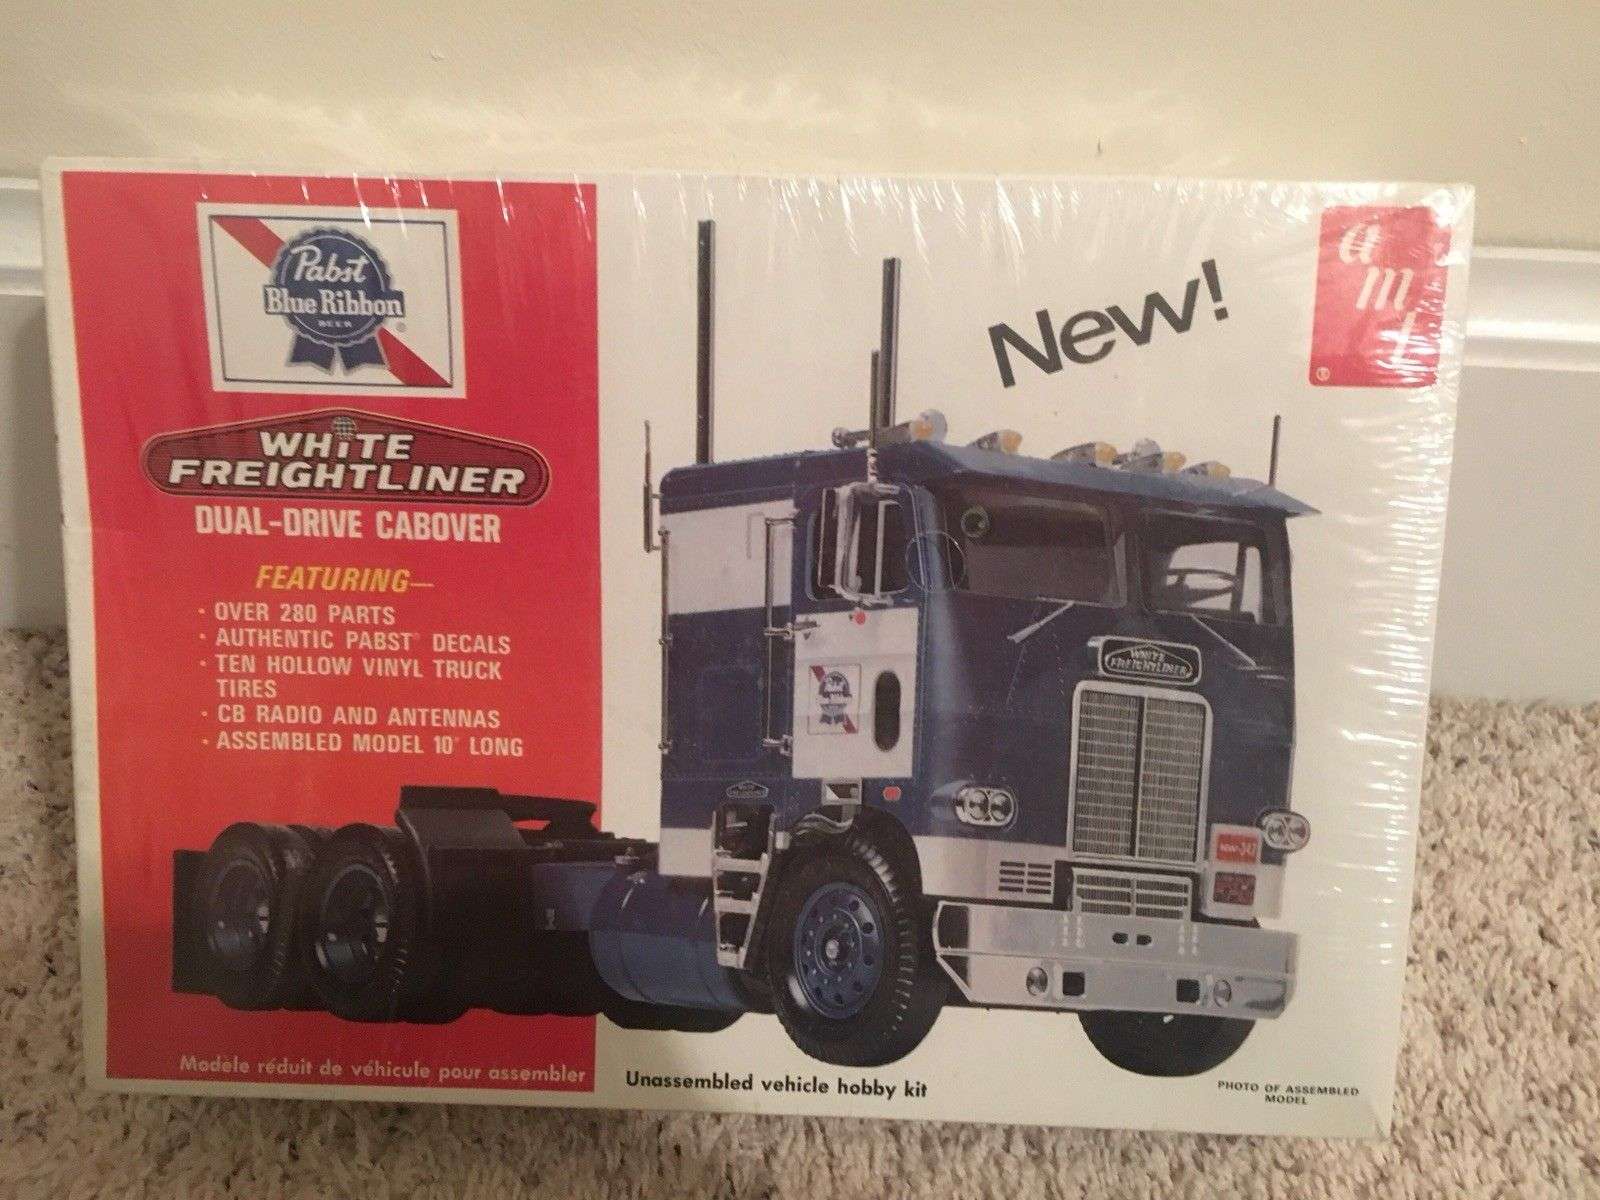
With the end of my “Demon II” build in sight and a slight lull in it due to waiting on parts I’ve decided to put my next build on the work bench. This one is another “Blast from the Past”. I built this kit as a kid and although it was a terrible build looking back, I had a lot of fun with it. After a tumble on the shelf shortly after I built it she was put out of her misery. The Pactra Star Blue paint had been brushed on and it was the ugly duckling of all of my builds even in that day. Flashing forward some 35 years later here I go to give this beauty another shot. As some of you know, I’ve been wanting to build a rig for some time now and this just seemed like the perfect one to build.
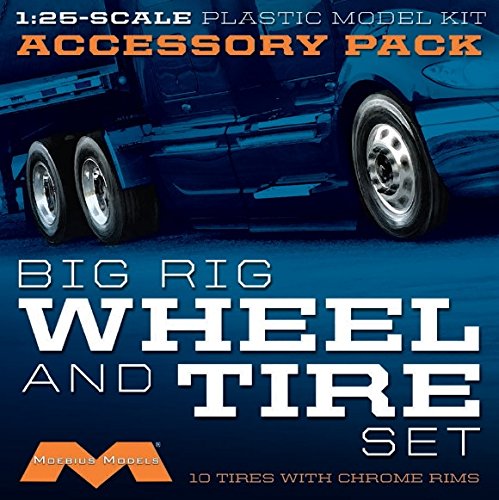
The Pactra paint line has ended so I’ll be on the search for a close, if not perfect, match to the original Star Blue as possible. I also need to do a lot of research on White Freightliners as to get a lot of the details right and the paints as close as possible. Decals are shot so I’ll be outsourcing those to get a fresh set. I’ve also managed to round up an upgraded set of wheels and tires for this bad boy so I turned to Moebius for those.
I’ve also ordered an upgraded resin engine to use with this kit. The OOB one isn’t bad but it just doesn’t have the details that I want. So I’ll be posting pictures of that when it comes in.
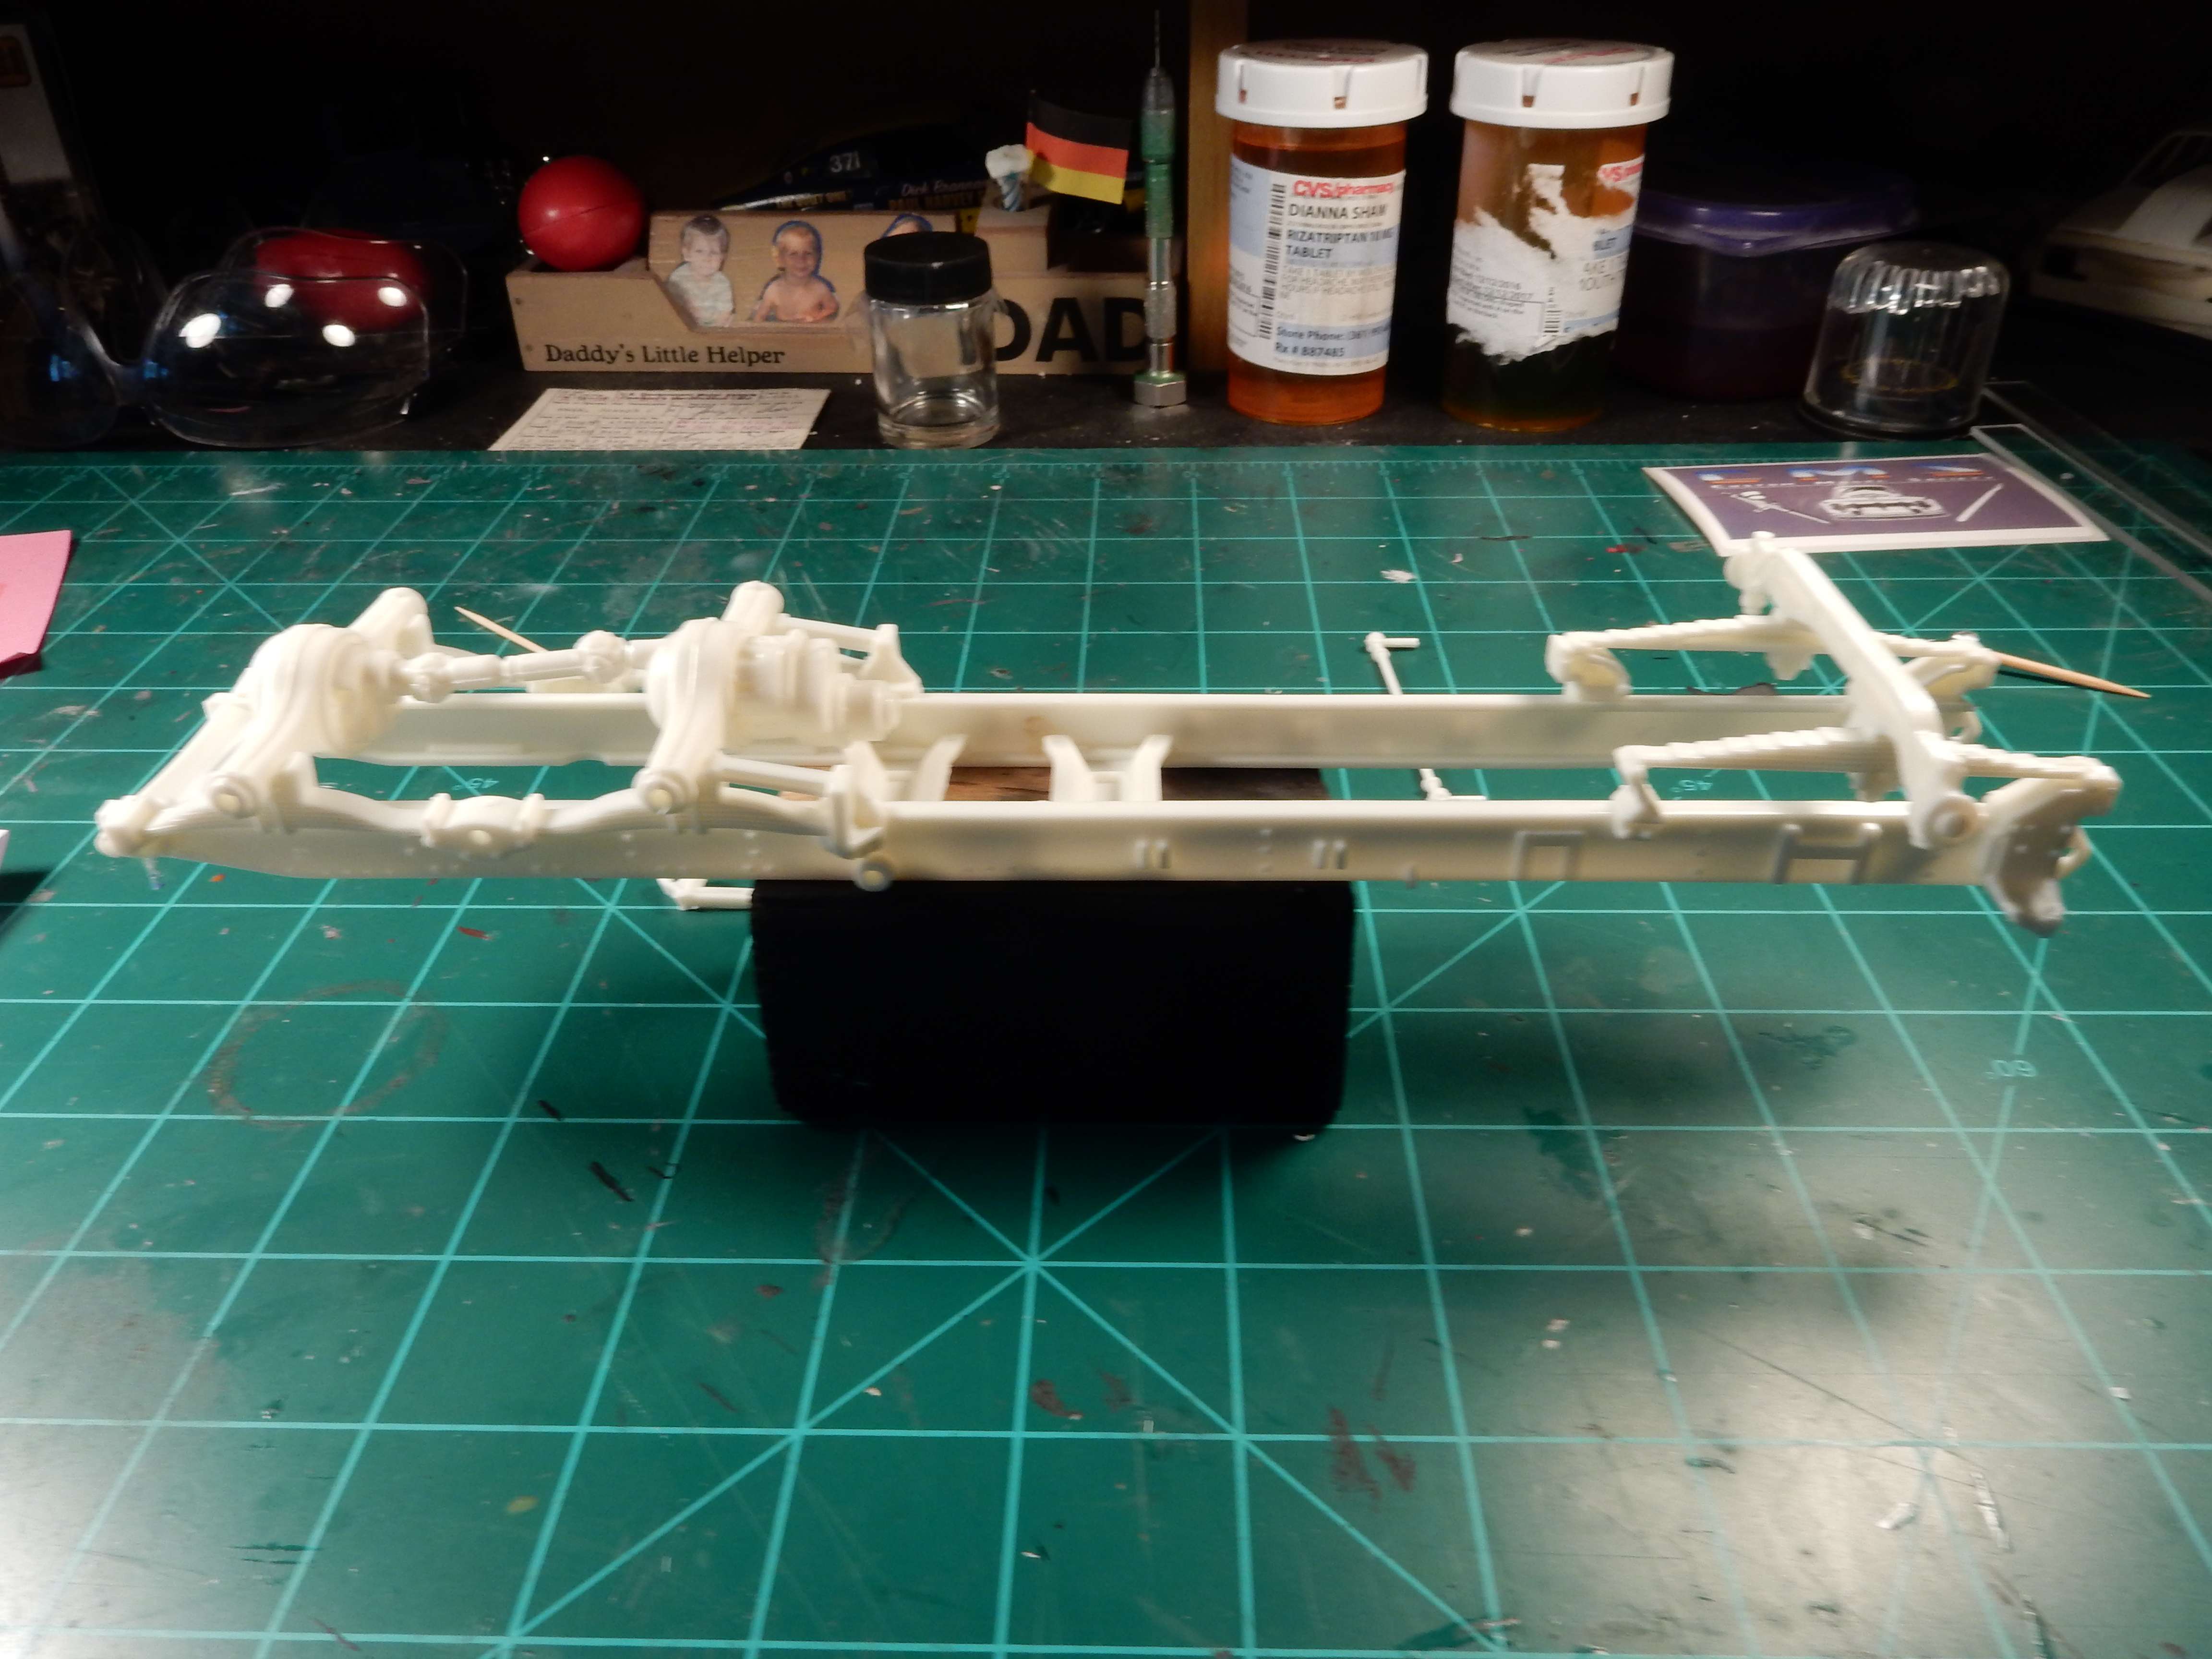
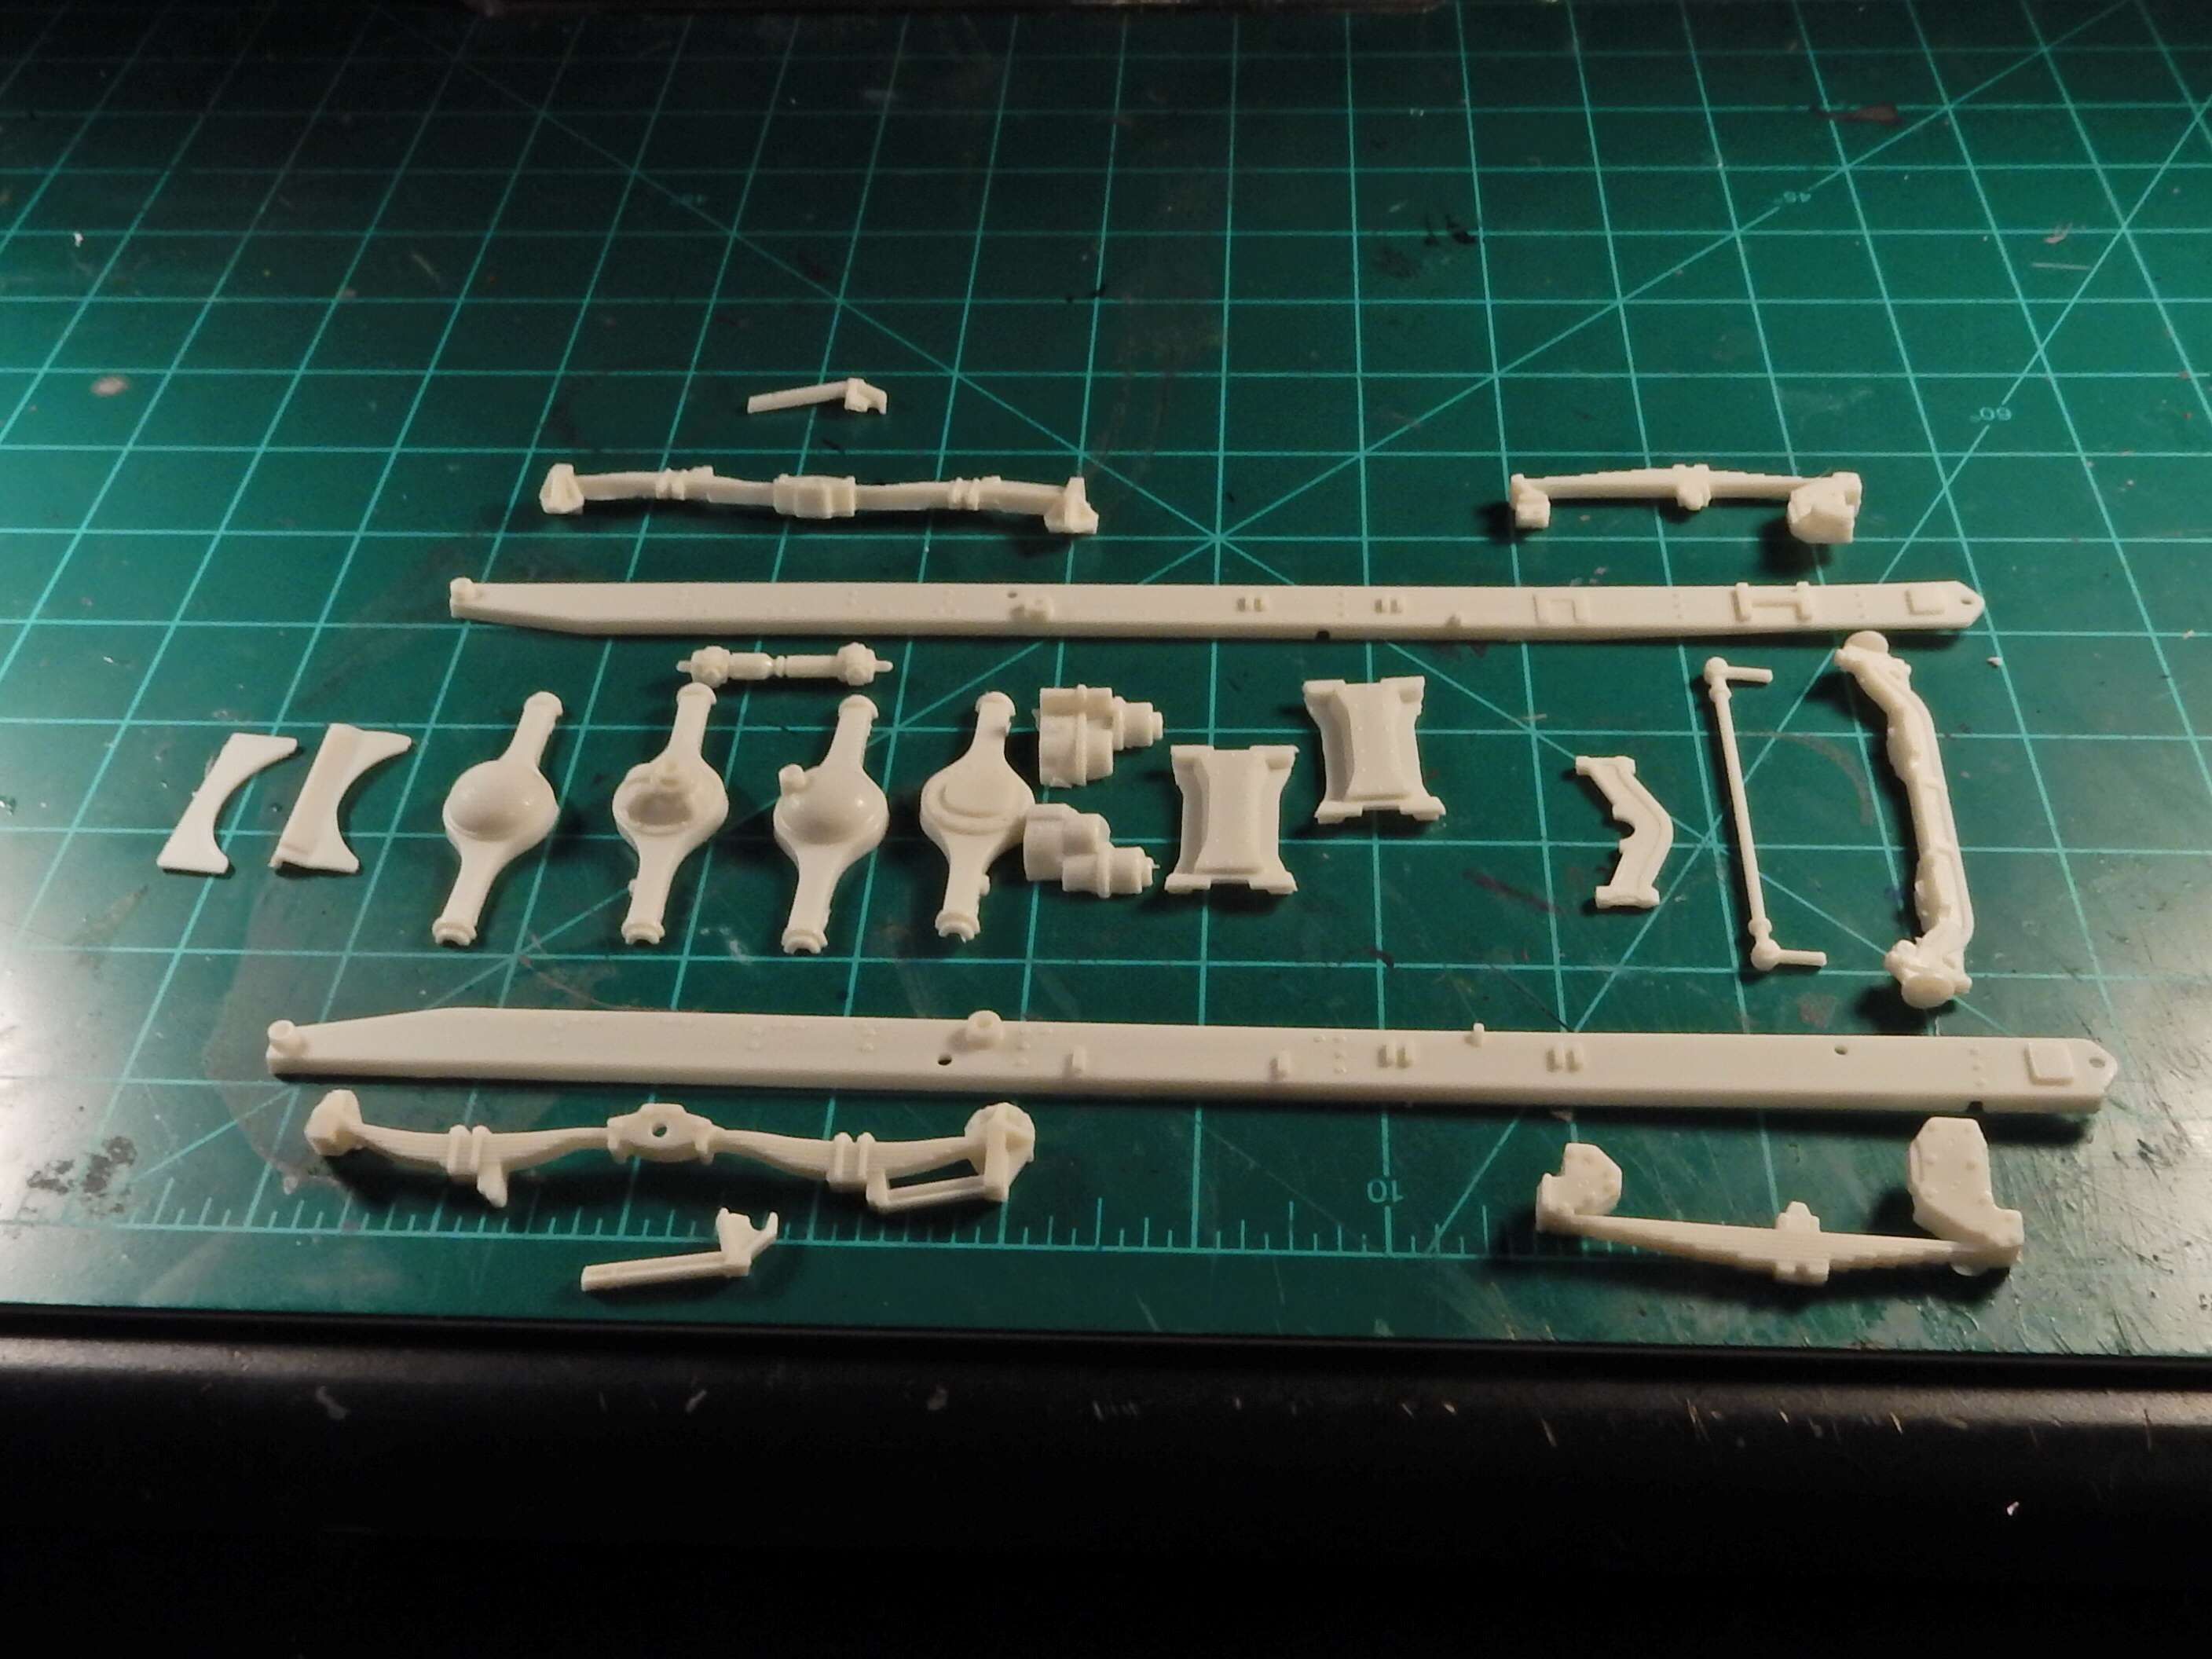
Right off the bat there are a lot of parts to this basic frame and suspension. Got lots of cleanup to do and some research before painting. I’m not used to building these kinds of kits so the research is going SLOW.
I’ll be watching this one with interest. If you want to treat this baby with your usual attention to detail, this is going to be a long project! Those AMT kits are factually very correct, put the parts tend to be very crude. On the other hand the Italeri kits have nice detail, but some of them are pure fantasy - the worst is probably the “Power truck” or Mack Superliner. For example, instead of a Mack frame and suspension it has… a Freightliner frame and suspension! This could be useful for you. Almost all of the Italeri 1:24 trucks have a Freightliner frame.
But first I wanted to invite you to take a look at my Mack Superliner build thread, to give you all kinds of wrong ideas… Please note that this build is still not finished - that’s exactly what happens when you go too deep with a project. But I have it stored and I intend to finish it one sunny day:
More like those are easy to find just by googling “Freightliner frame” or something like this. The thing is Freightliner started to build trucks in the fifties and their basic frame and suspension design stayed the same for decades. So the cutoff from a 1986 truck will be almost the same as in your model. One thing to note is the air ride - they started to build air bags instead of springs some time in the seventies, and since this gives you a lot better ride the air ride is now way more popular than the spring suspension. So here’s the idea - maybe you’d like to transplant the Italeri frame to your model? This gives you much nicer detail, air ride and positionable front wheels to top it off - what do you say?
And you should know that the drivers didn’t regard the Freightliners very high. In their slang they are called “Freightshakers”. A one man company driver wouldn’t rather buy a Freightshaker - more likely a Paccar (Kenworth/Peterbilt) for comfort or a Mack for ruggedness. On the other hand a fleet owner would be glad to buy a couple of hundreds of them Freightliners. And now the company is owned by Mercedes of Germany.
Good luck with your build - I will be watching - and have a nice day
THANK Heavens! I was so worried you would just give up modeling after finishing the Demon II (choke-gasp –wheez OK Not really) This is going to be a great kit for you an’ your skills to bring into the 21st Century .
Oh, and I looked but all my Pactra is dried out, but the 10¢ printed on the bottle cap is pure nostalgia
I have a “pile” of truck’s i need to build myself. I will be watching.
BTW: I had a bottle of Pactra Metalic blue for Decade’s. I think I bought it in 1975 or 76, had a 35 cent price PRINTED on the cap. It finally dried up in 2013 !
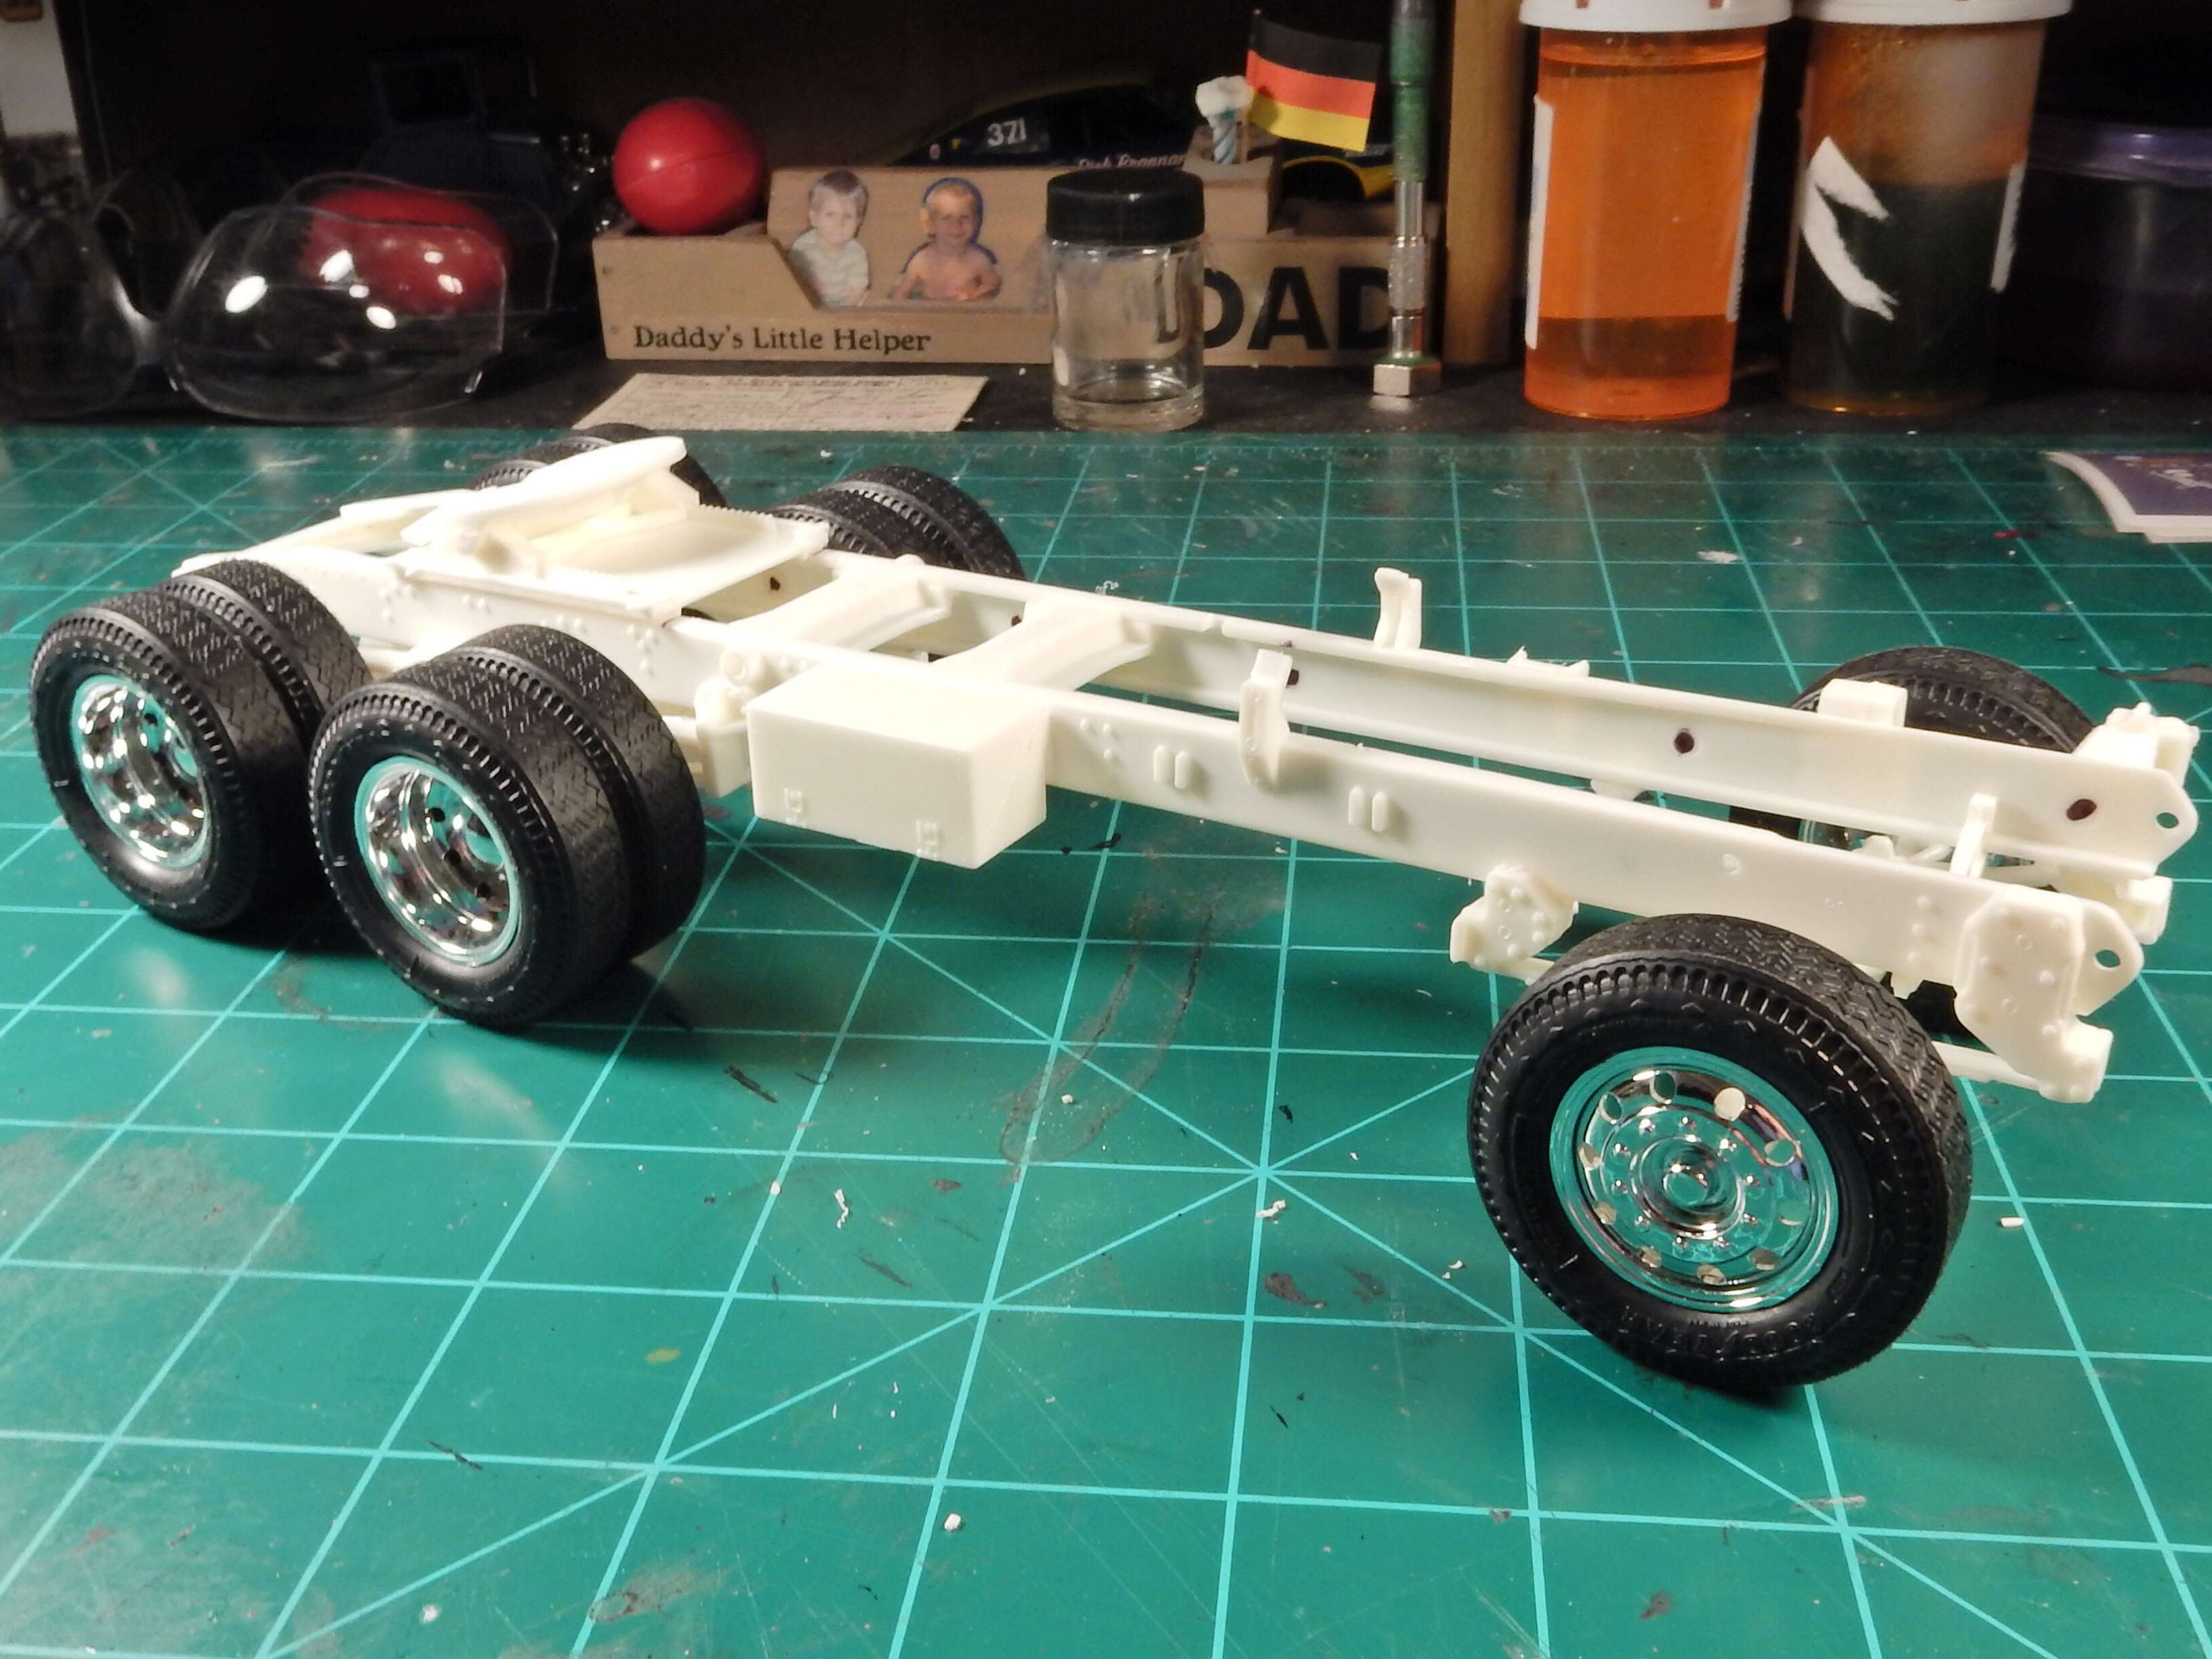
I’ve been looking at this and a few other boo boo’s that this kit has. The front tires are supposedly a problem area as they stick out from the wheel well too much. I’m either going to have to cut the front axle some or not install the front brakes. The cab is sectioned into a front half and a back half…presenting a nasty seam. The list goes on but I’ve started trying to remedy the problem by turning to my spare kit. I’ll be doing a dry run on a total assembly of this truck without any paint just to see how to mitigate the problems that show up along the way.
Additional kit acquired today:
Got the frame and suspension already assembled. The front axle is just lying on top of the leaf springs. I’ll be working with this part to ensure the tires end up where they are supposed to. I’ll look into that whole headlight ordeal when I get there. Dunno if I’ll do anything with that or not yet.Depends on how nasty and in depth the surgery is going to be.
I “Trimmed” the center of the axle when I built mine … back in 1989 ?
I cut the axle in the center and trimmed about a scale 6 inch’s from it . Then glued it back together. Once the engine was installed , you couldnt see the “Scar” .
I dont recall what I did to the cab… me being “Me” … I probably Brush painted a thick layer of primer into the seam … then sanded it for day’s !
This is definitely going to be one awesome build to watch you work up there Boss. Me’s believes that you will be raising the bar on the concept of “epic build”. Bring it on Bro.
So far, aside from ALOT of clean up that I’ll have to do on the real build, it’s going pretty smooth sailing. One has to watch out for a slight lean in the frame on one side during the suspension / frame build up. I really don’t know what happened there as everything is mounted up how it’s supposed to be. Will have to make some minor adjustments on the main build to prevent that from happening but it’s really not all that noticeable to the casual eye.
I omitted the front brakes on this one as a lot of folks have suggested on other sites and it’s going to help put the wheels back under the fenders the way they are supposed to be.
Here’s a shot of what they look like uncorrected :
and after the correction:
Here we are with the rolling chassis on the test build:
By the way, if anybody is going to build a Freightliner COE I’ve got over 100 walkaround reference pictures. Just sayin…


 (choke-gasp –wheez OK Not really) This is going to be a great kit for you an’ your skills to bring into the 21st Century .