Well, here’s a bit of background. This kit is the original issue of the Watkins truck. I built it once when it was brand new, took it apart later to try to improve it. It remained unfinished through many false starts, but I’m restarting yet again.
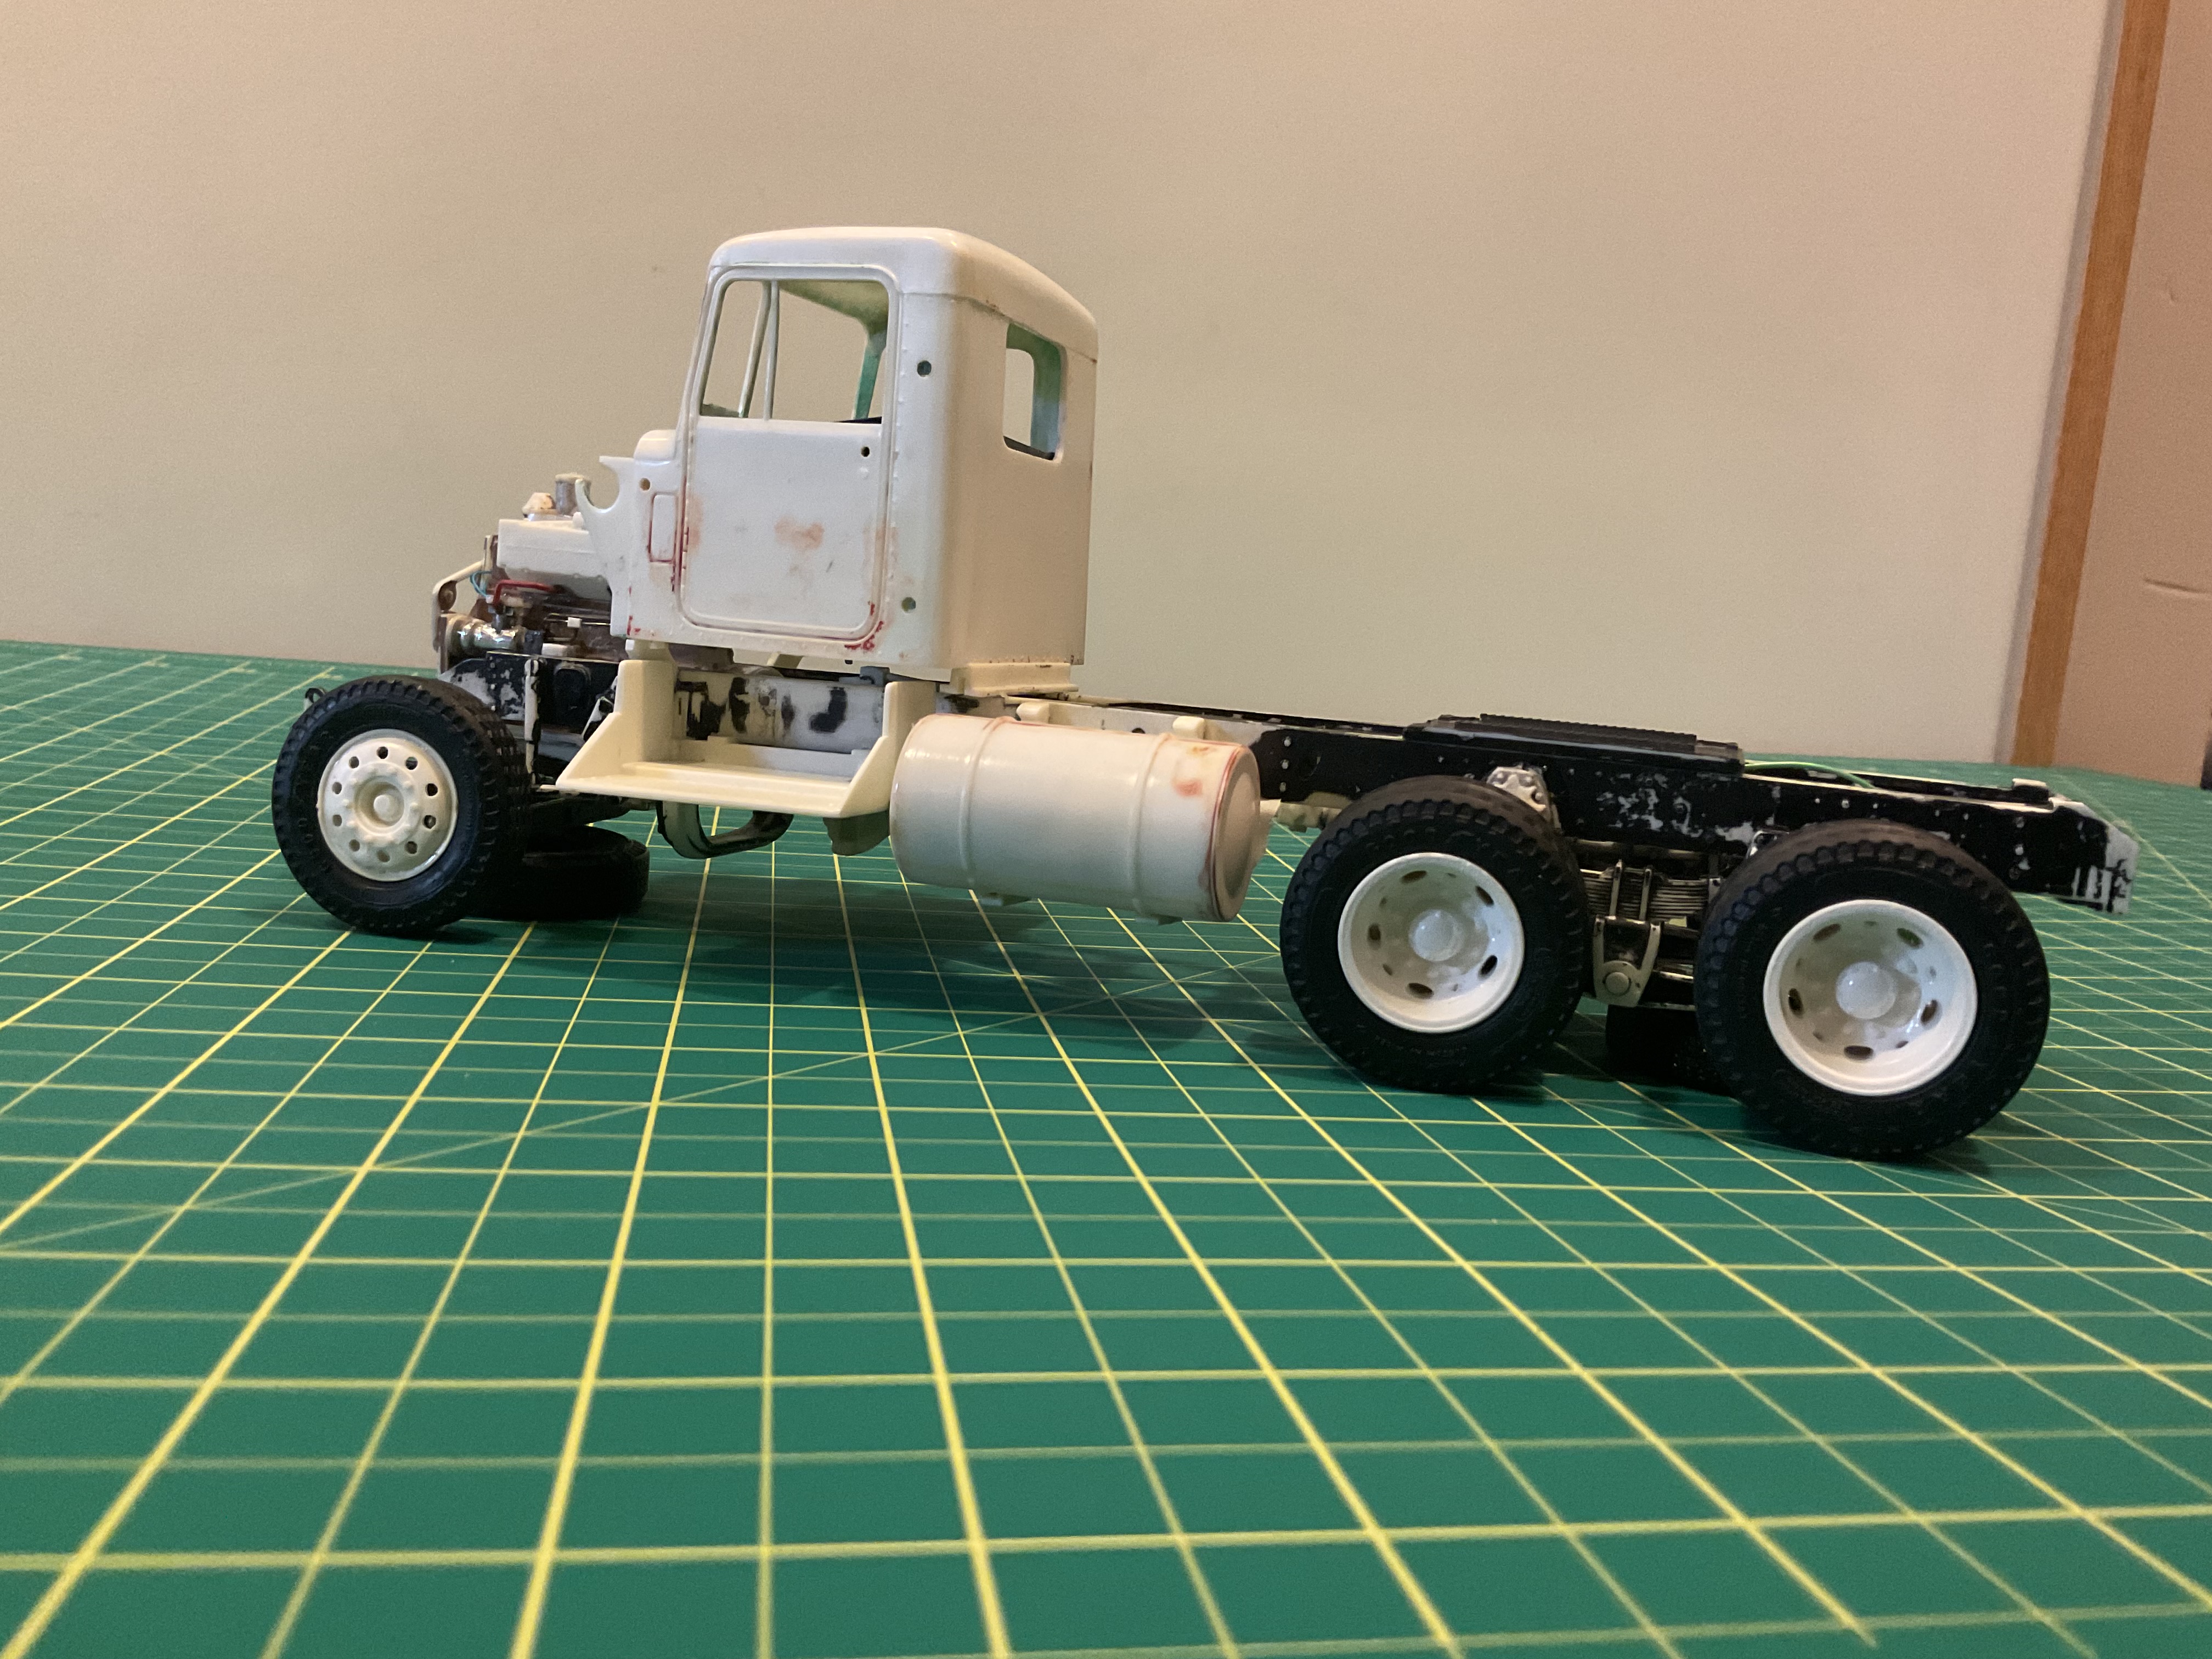
This time I decided to remove the sleeper and shorten the wheelbase to create a day cab version. No official measurements, I just removed to exact length of the sleeper from the frame. Original length frame in foreground.
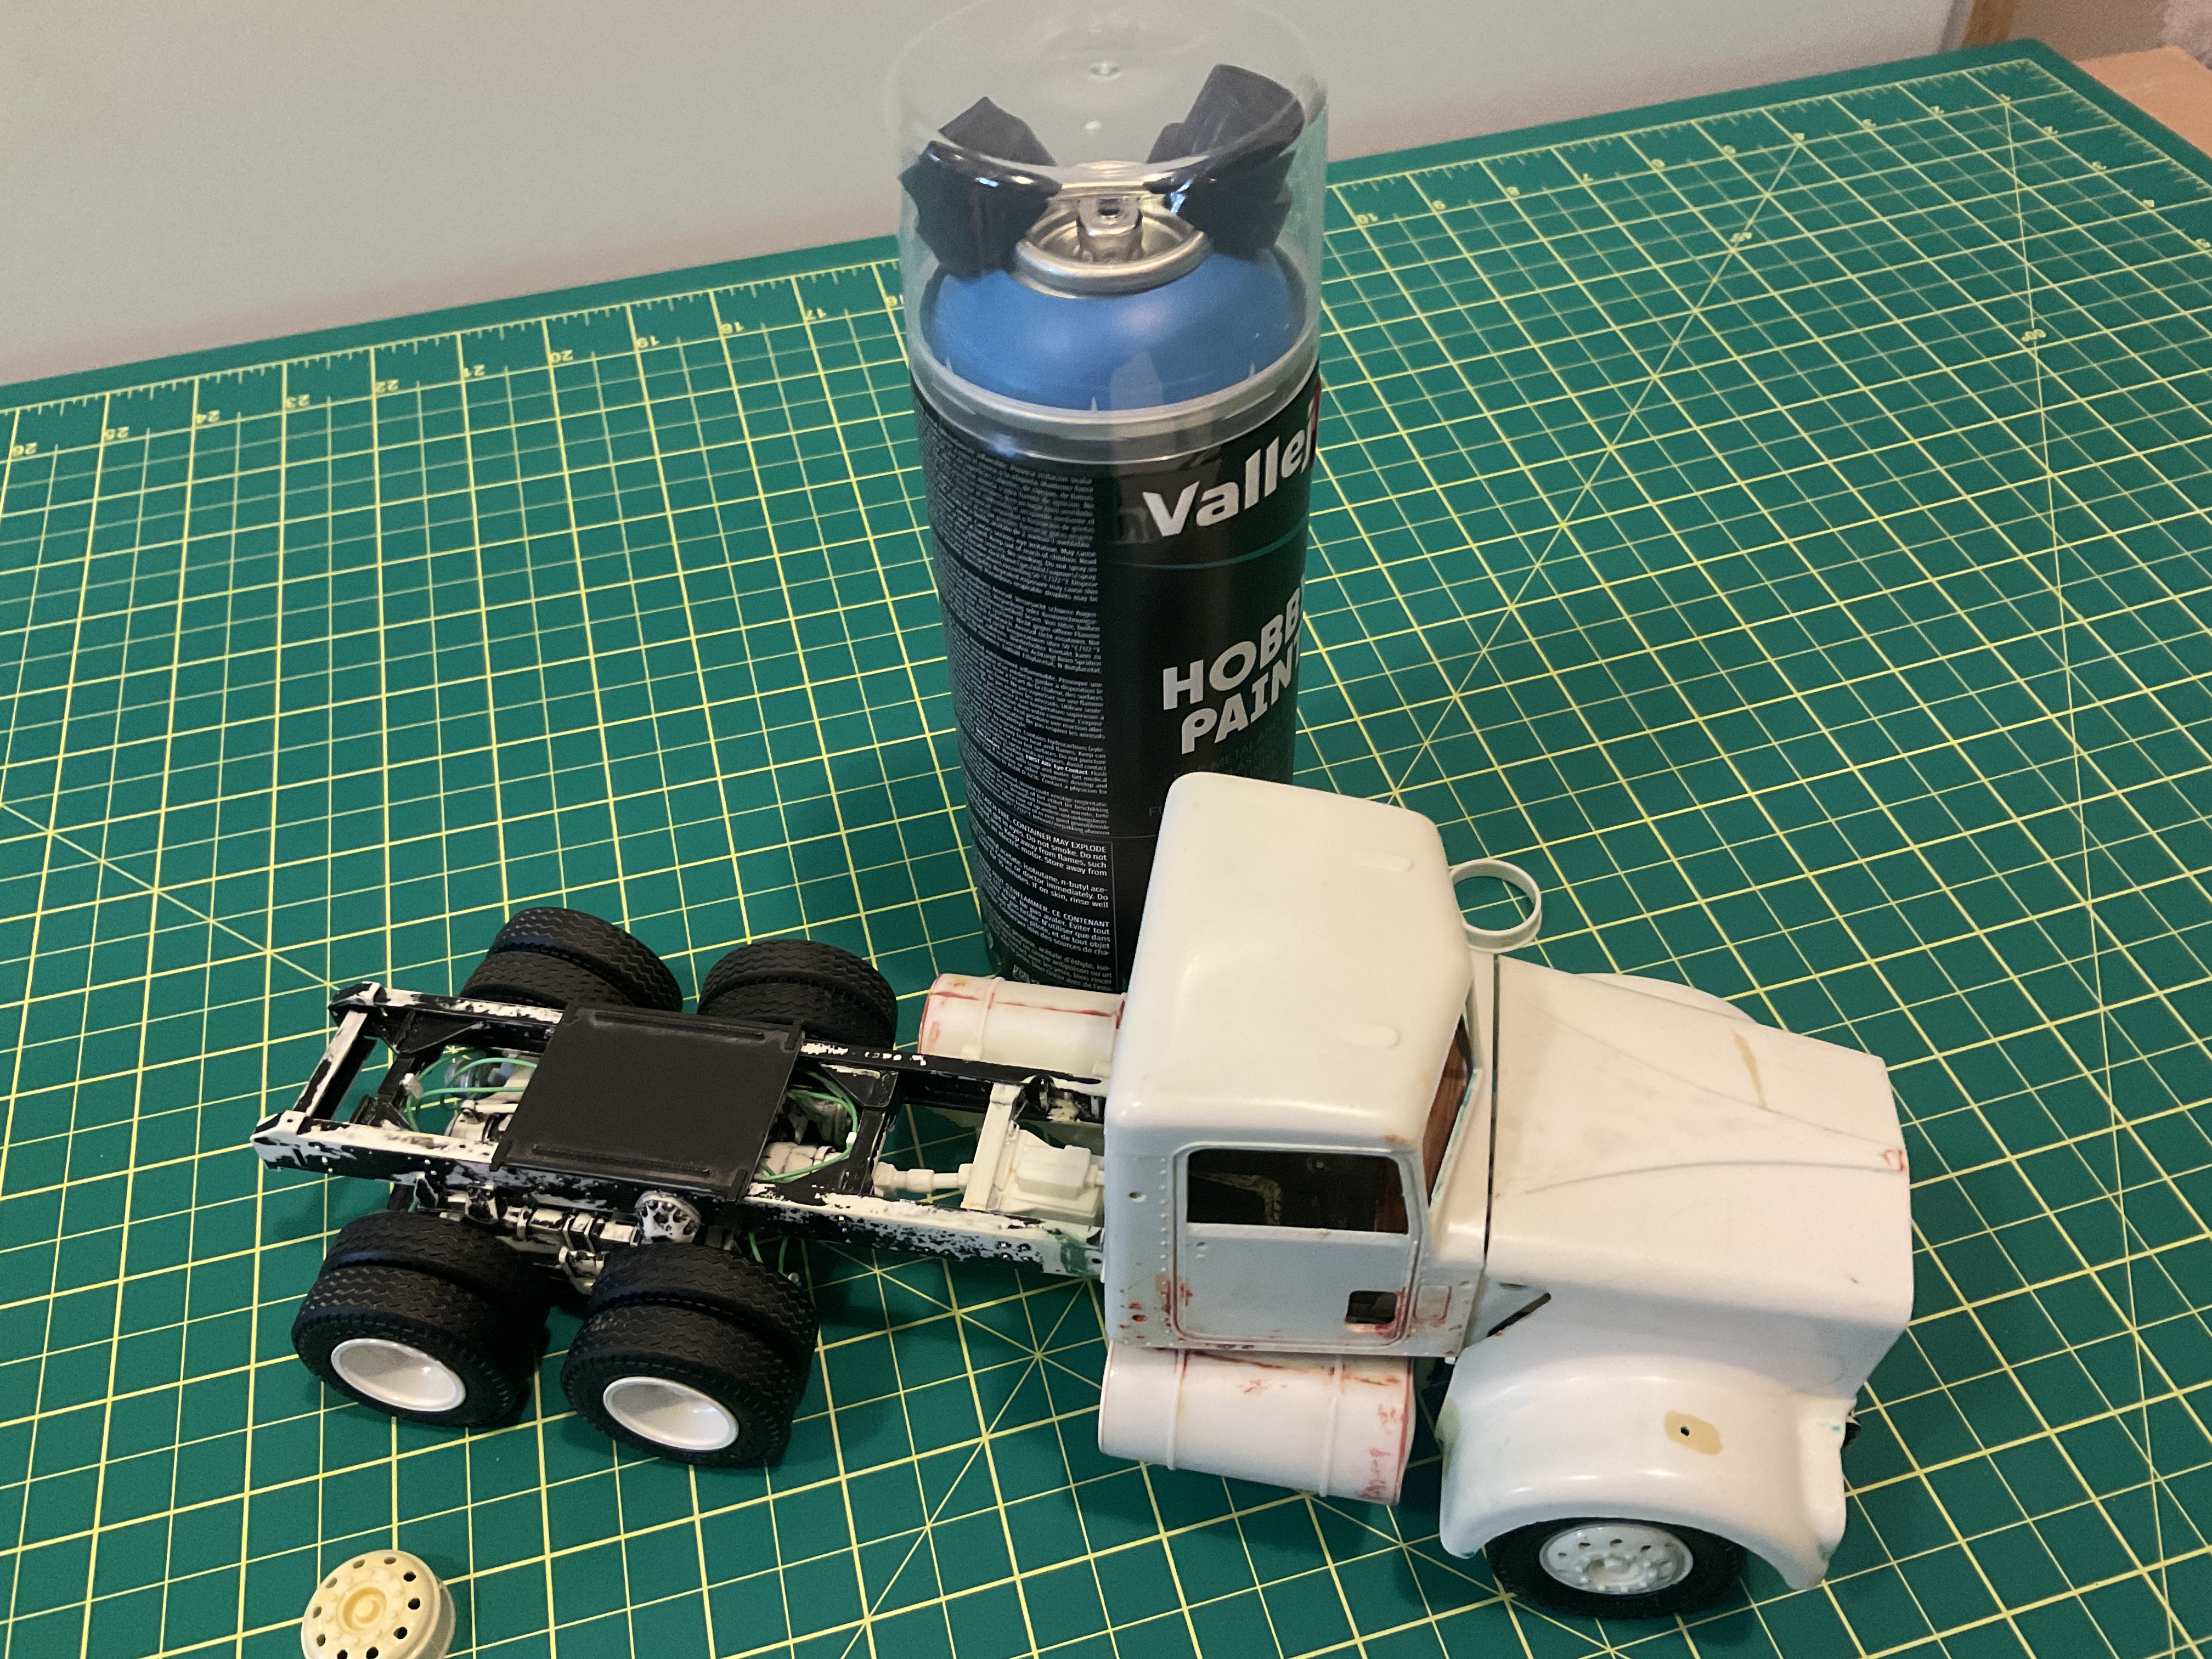
I’ve added some airlines for the brakes and a bit of plumbing on the engine. Hoping to find some wheels that are more utilitarian than what came in the box. I’ll add more pictures when I can.
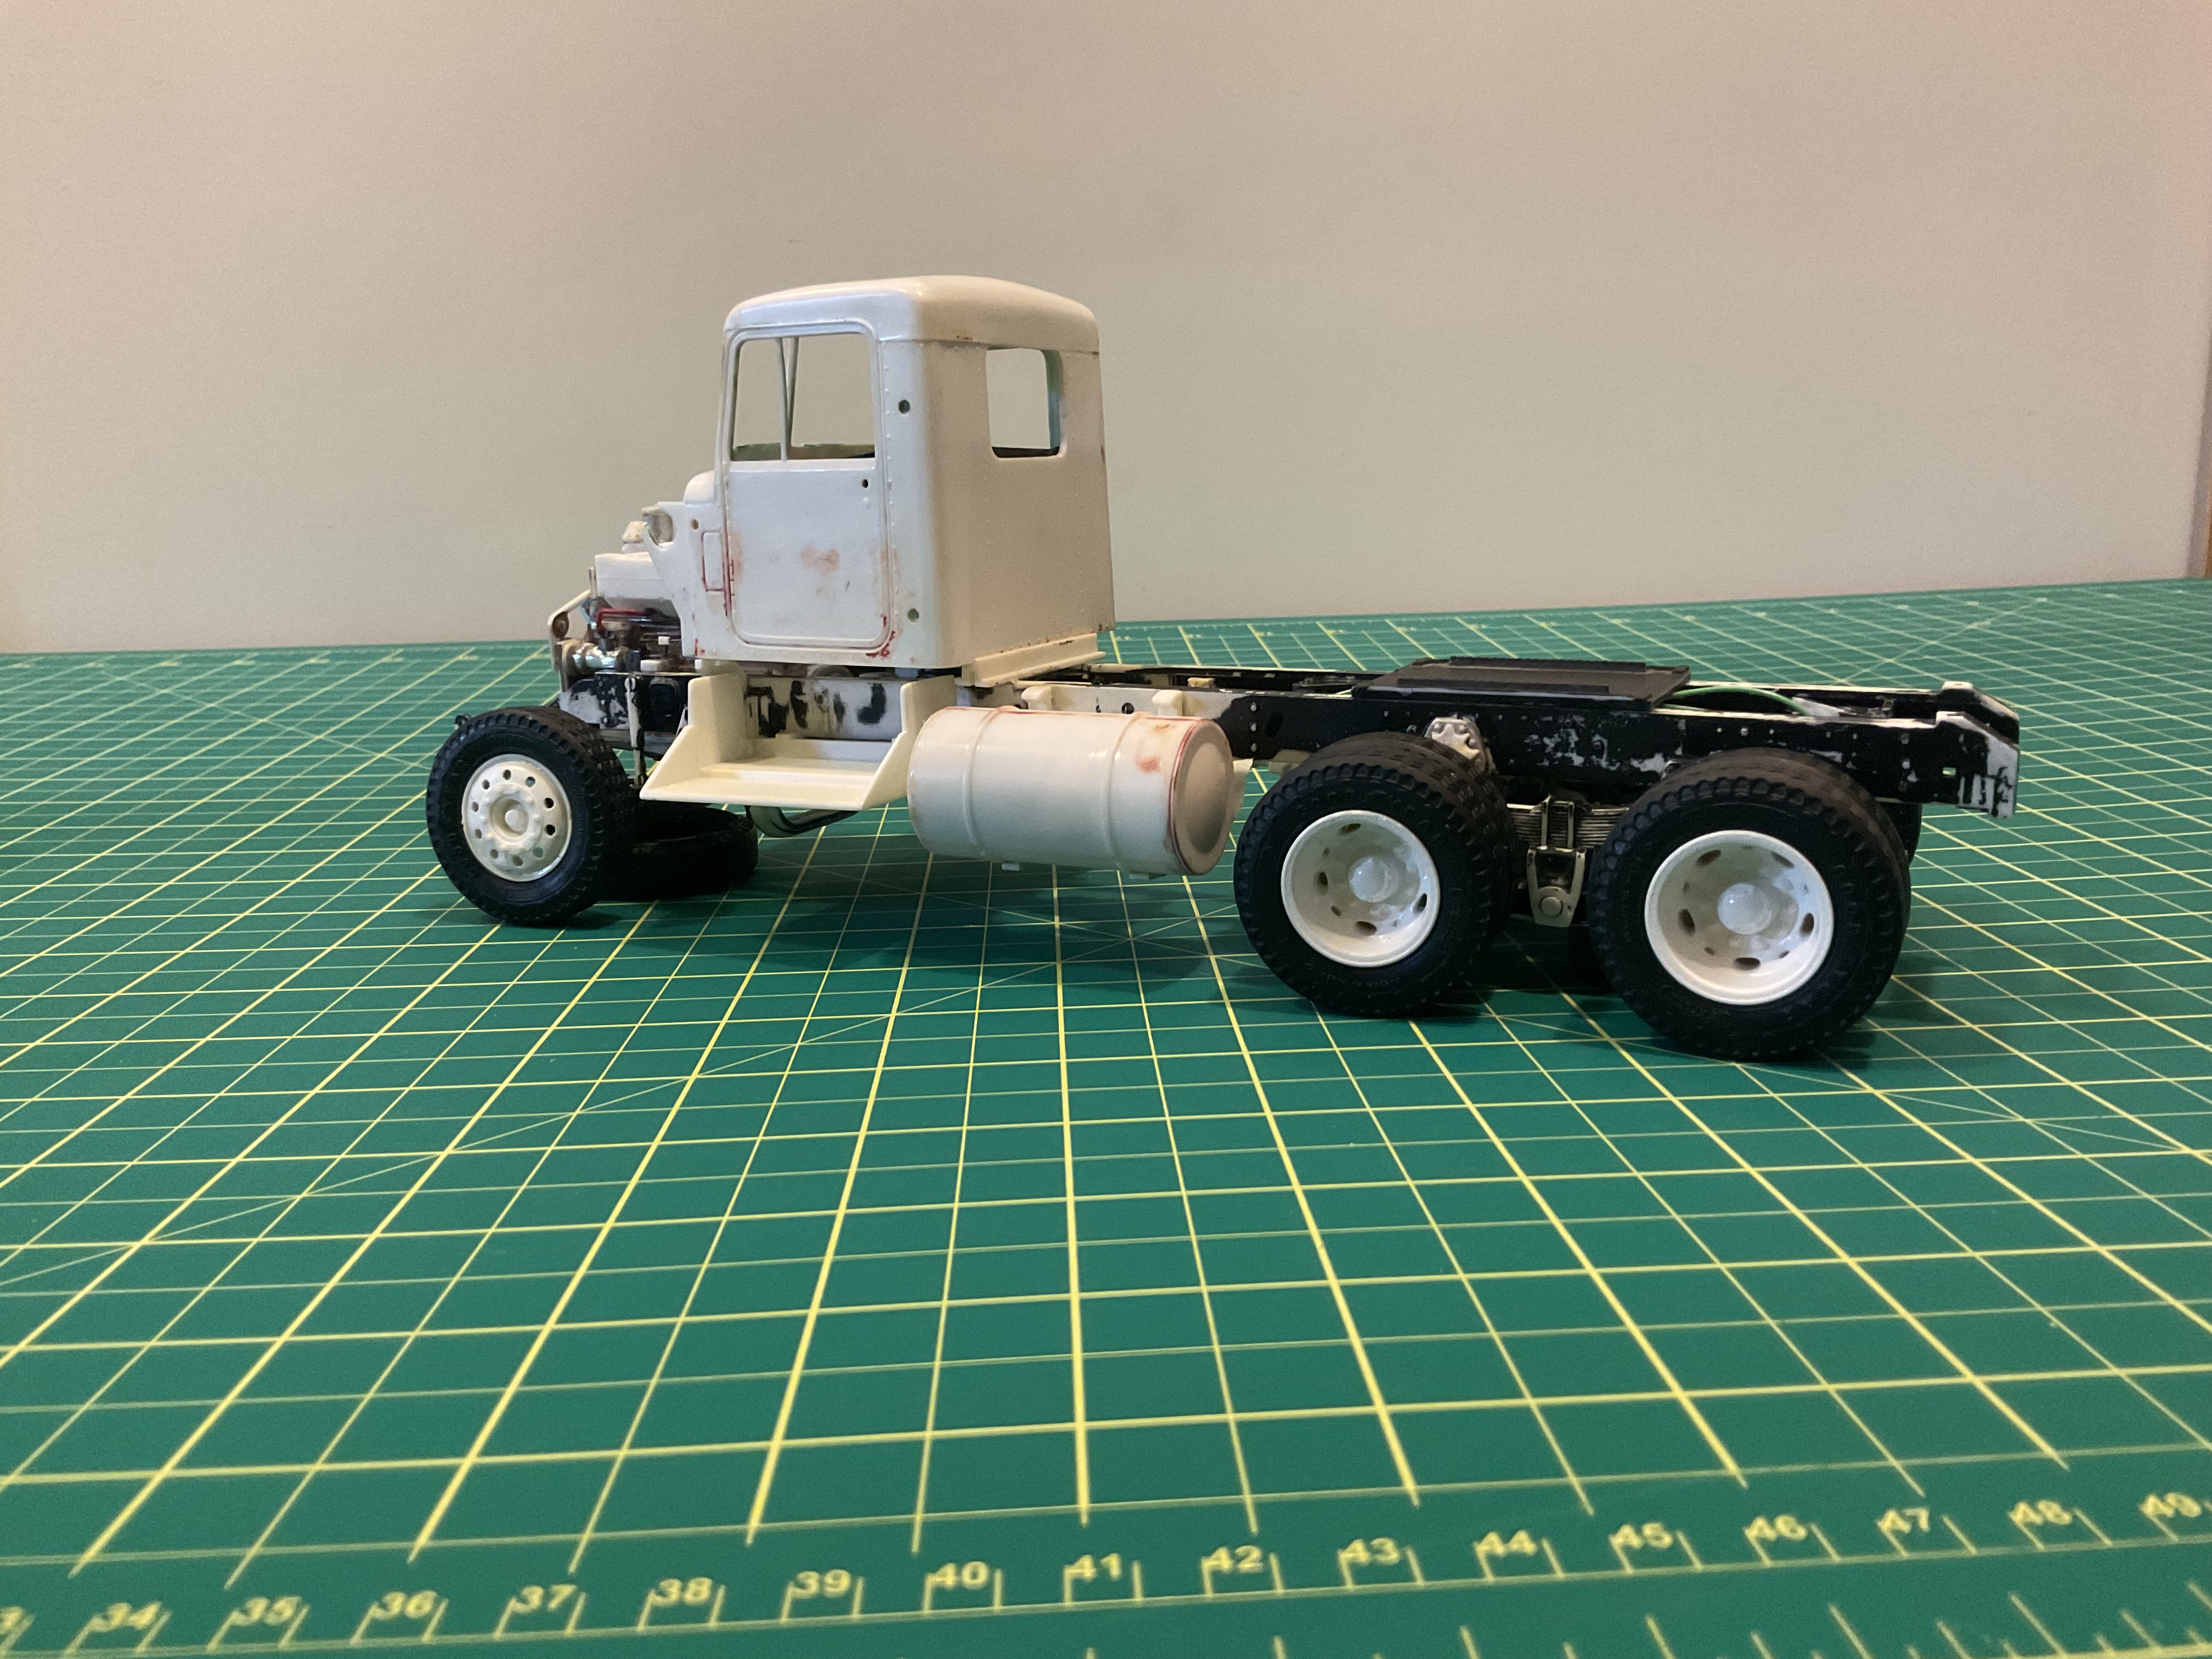
Got a bit of work done today. Found a set of 5 hole rear drives that should give more of a fleet look to the truck. Sticking with the 10 hole aluminum for the front.
Also added some additional plumbing for the air brakes and engine. Two more air tanks to plumb in, then run it to the cab. Reference for the early Cummins NTA 370 engine seems a bit scarce, so I’m trying to pull some info from later versions and trace the locations and systems to plumb the engine with air and fuel lines.
Surprised there’s no comments on this so far. I really like the surgery that you are carrying out on this one as well as the detailing additions @Frozin . Looking forward to seeing the next steps buddy.
This is really cool. Nice work. Every time I see a semi-trailer model kit it catches my eye. But if I start doing big rigs I’ll run out of display room right quick!
Nice work so far, Frozin. I spent a lot of time with all of the Cummins engines and there is not a lot of external plumbing on them, even the fuel lines are internal. Here are two pages from the NT series overhaul manual. There will be an oil feed line from the oil cooler to the top of the turbocharger and a larger oil drain line from the turbo to the block on the right side. There are water lines going to and from the head of the air compressor on the right front, and a fuel line from the fuel pump to the front of the engine at the cylinder head, a fuel line from the tank to the filter at the left rear of the block, and a return fuel line from the rear head to the fuel tanks. There is a large oil suction line from the lower oil pan to the oil pump at the lower left front of the engine. There are steel water lines to the top front of the intercooler and a water drain line at the lower rear of the intercooler. There are steel water lines to and from the oil cooler and thermostat housing on the right side of the engine.
Those couple pages and the info you provided will allow me to bring a bit more detail to it. Most of what I’m still planning are air lines to the compressor and fuel pump / filters.
[quote=“Frozin, post:6, topic:373525”]
Those couple pages and the info you provided will allow me to bring a bit more detail to it. Most of what I’m still planning are air lines to the compressor and fuel pump / filters.
[/quote] I’ll be watching for the added details.
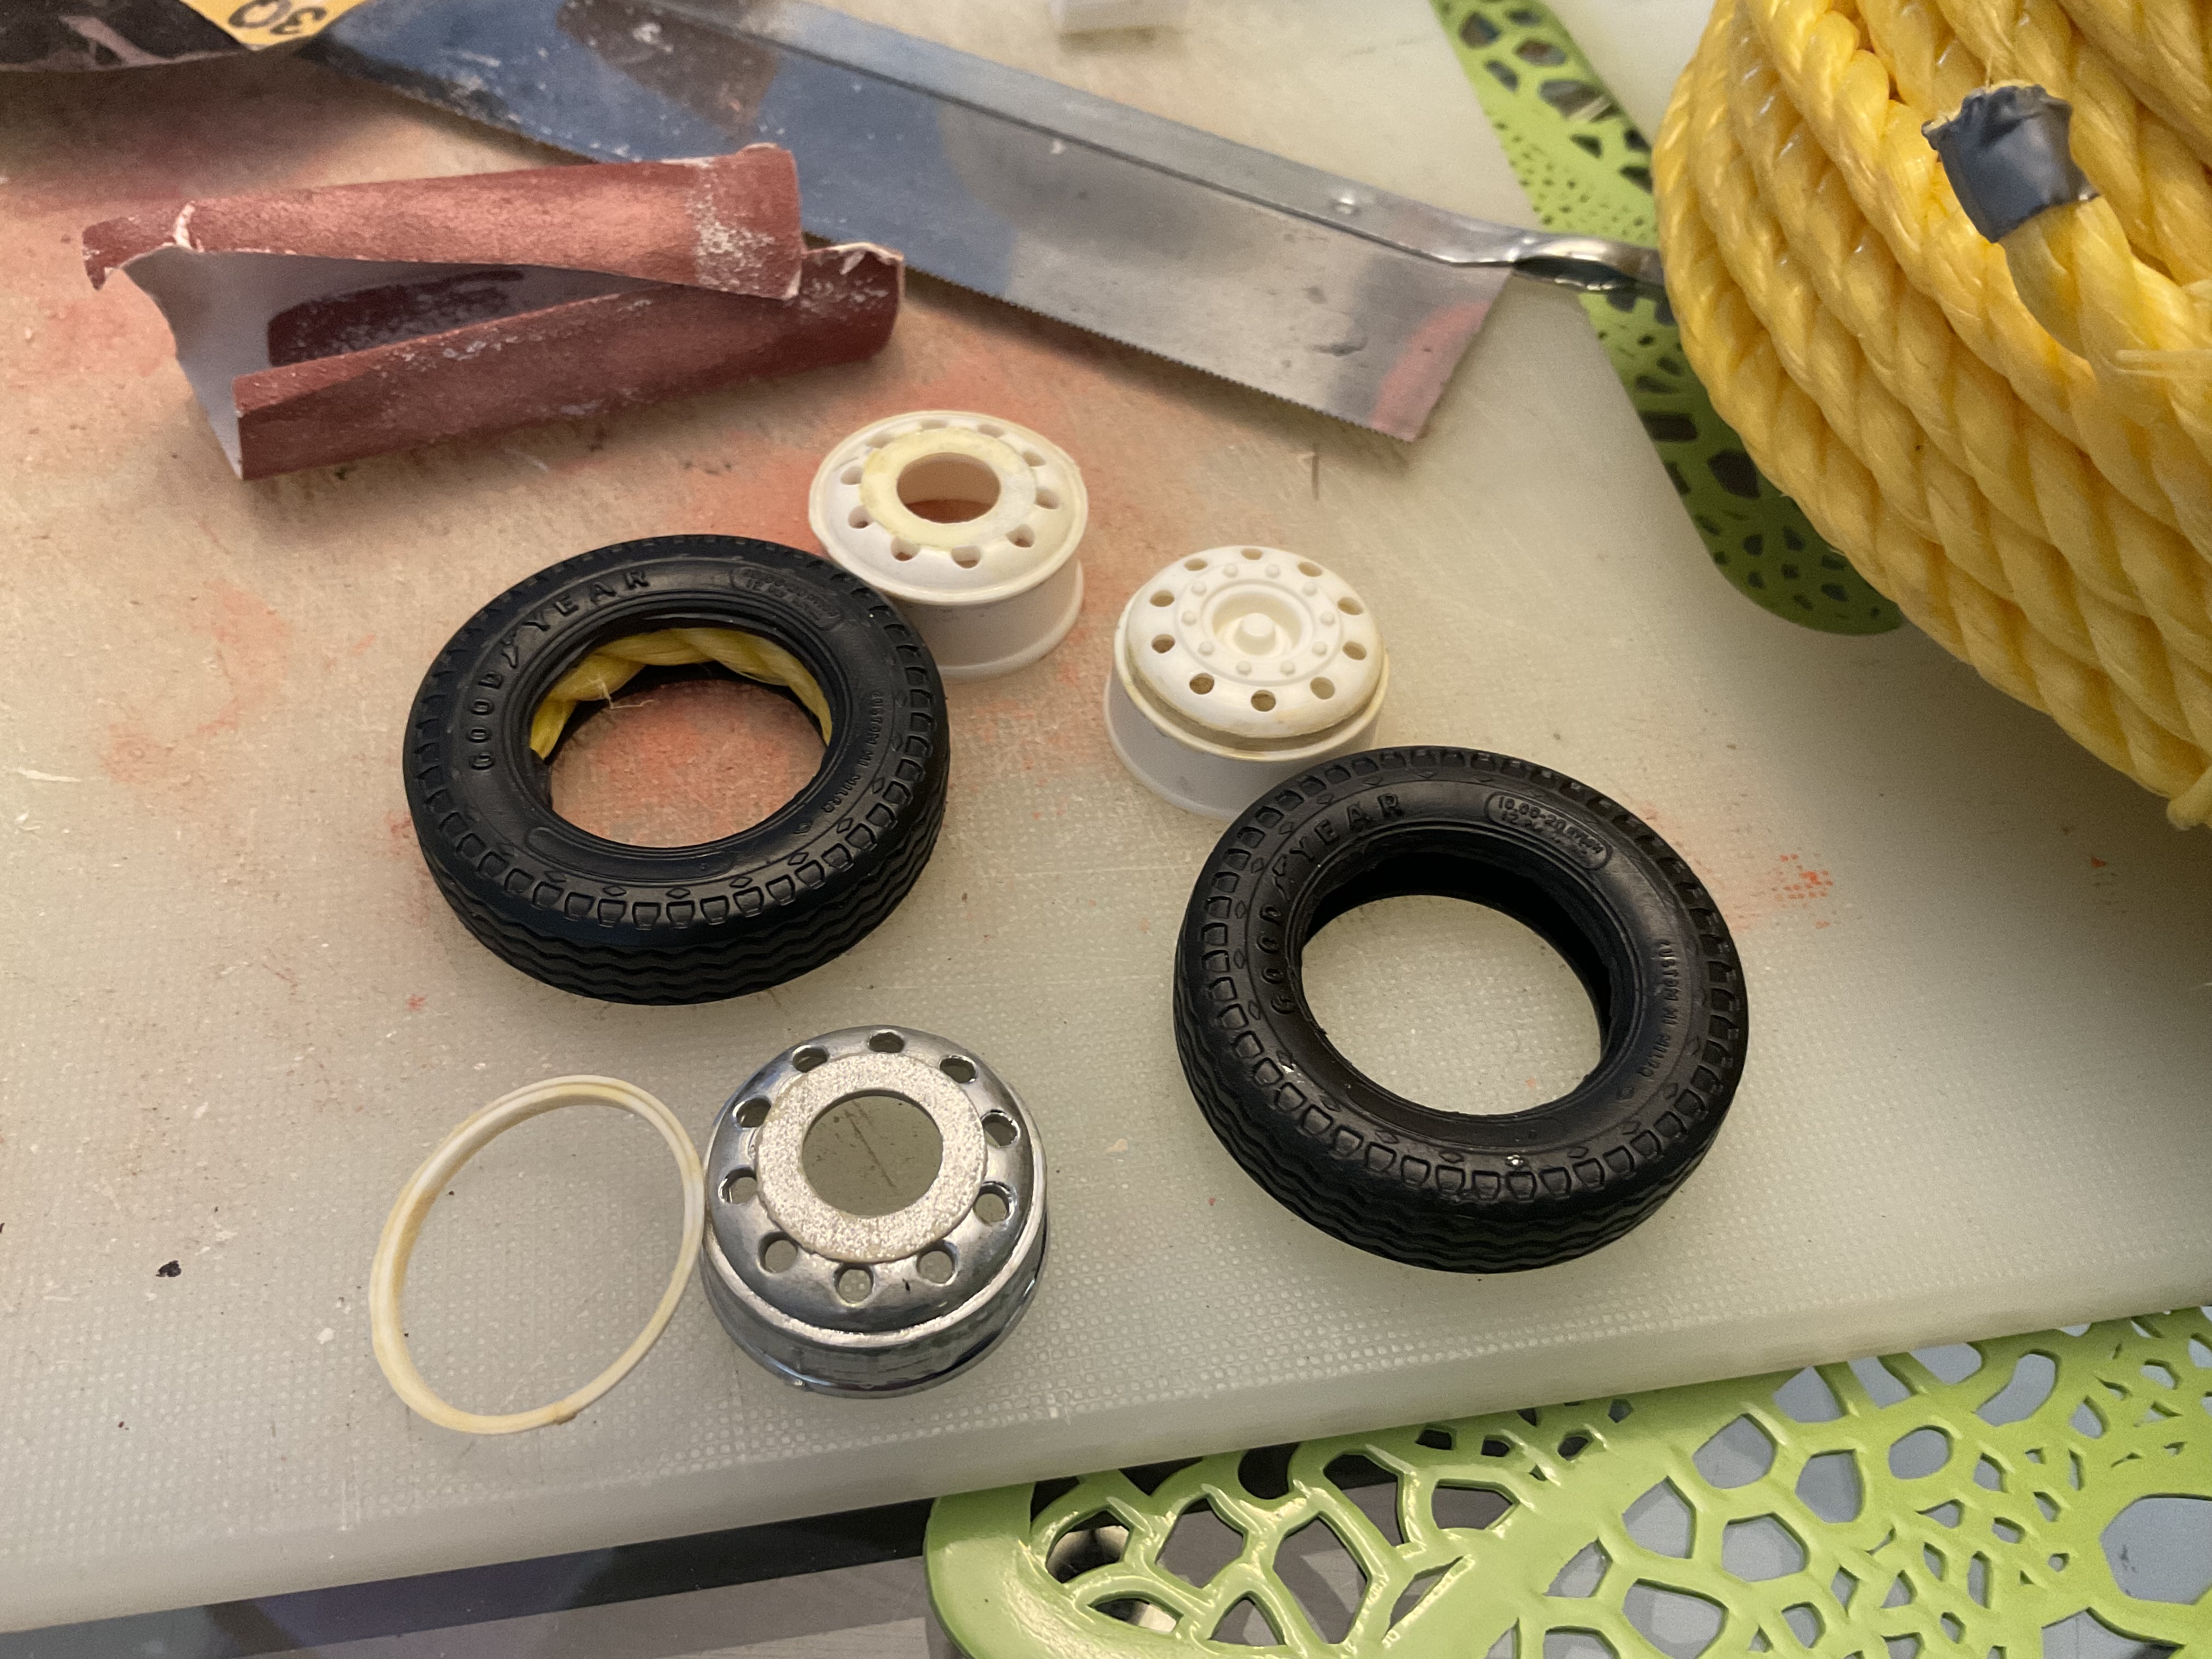
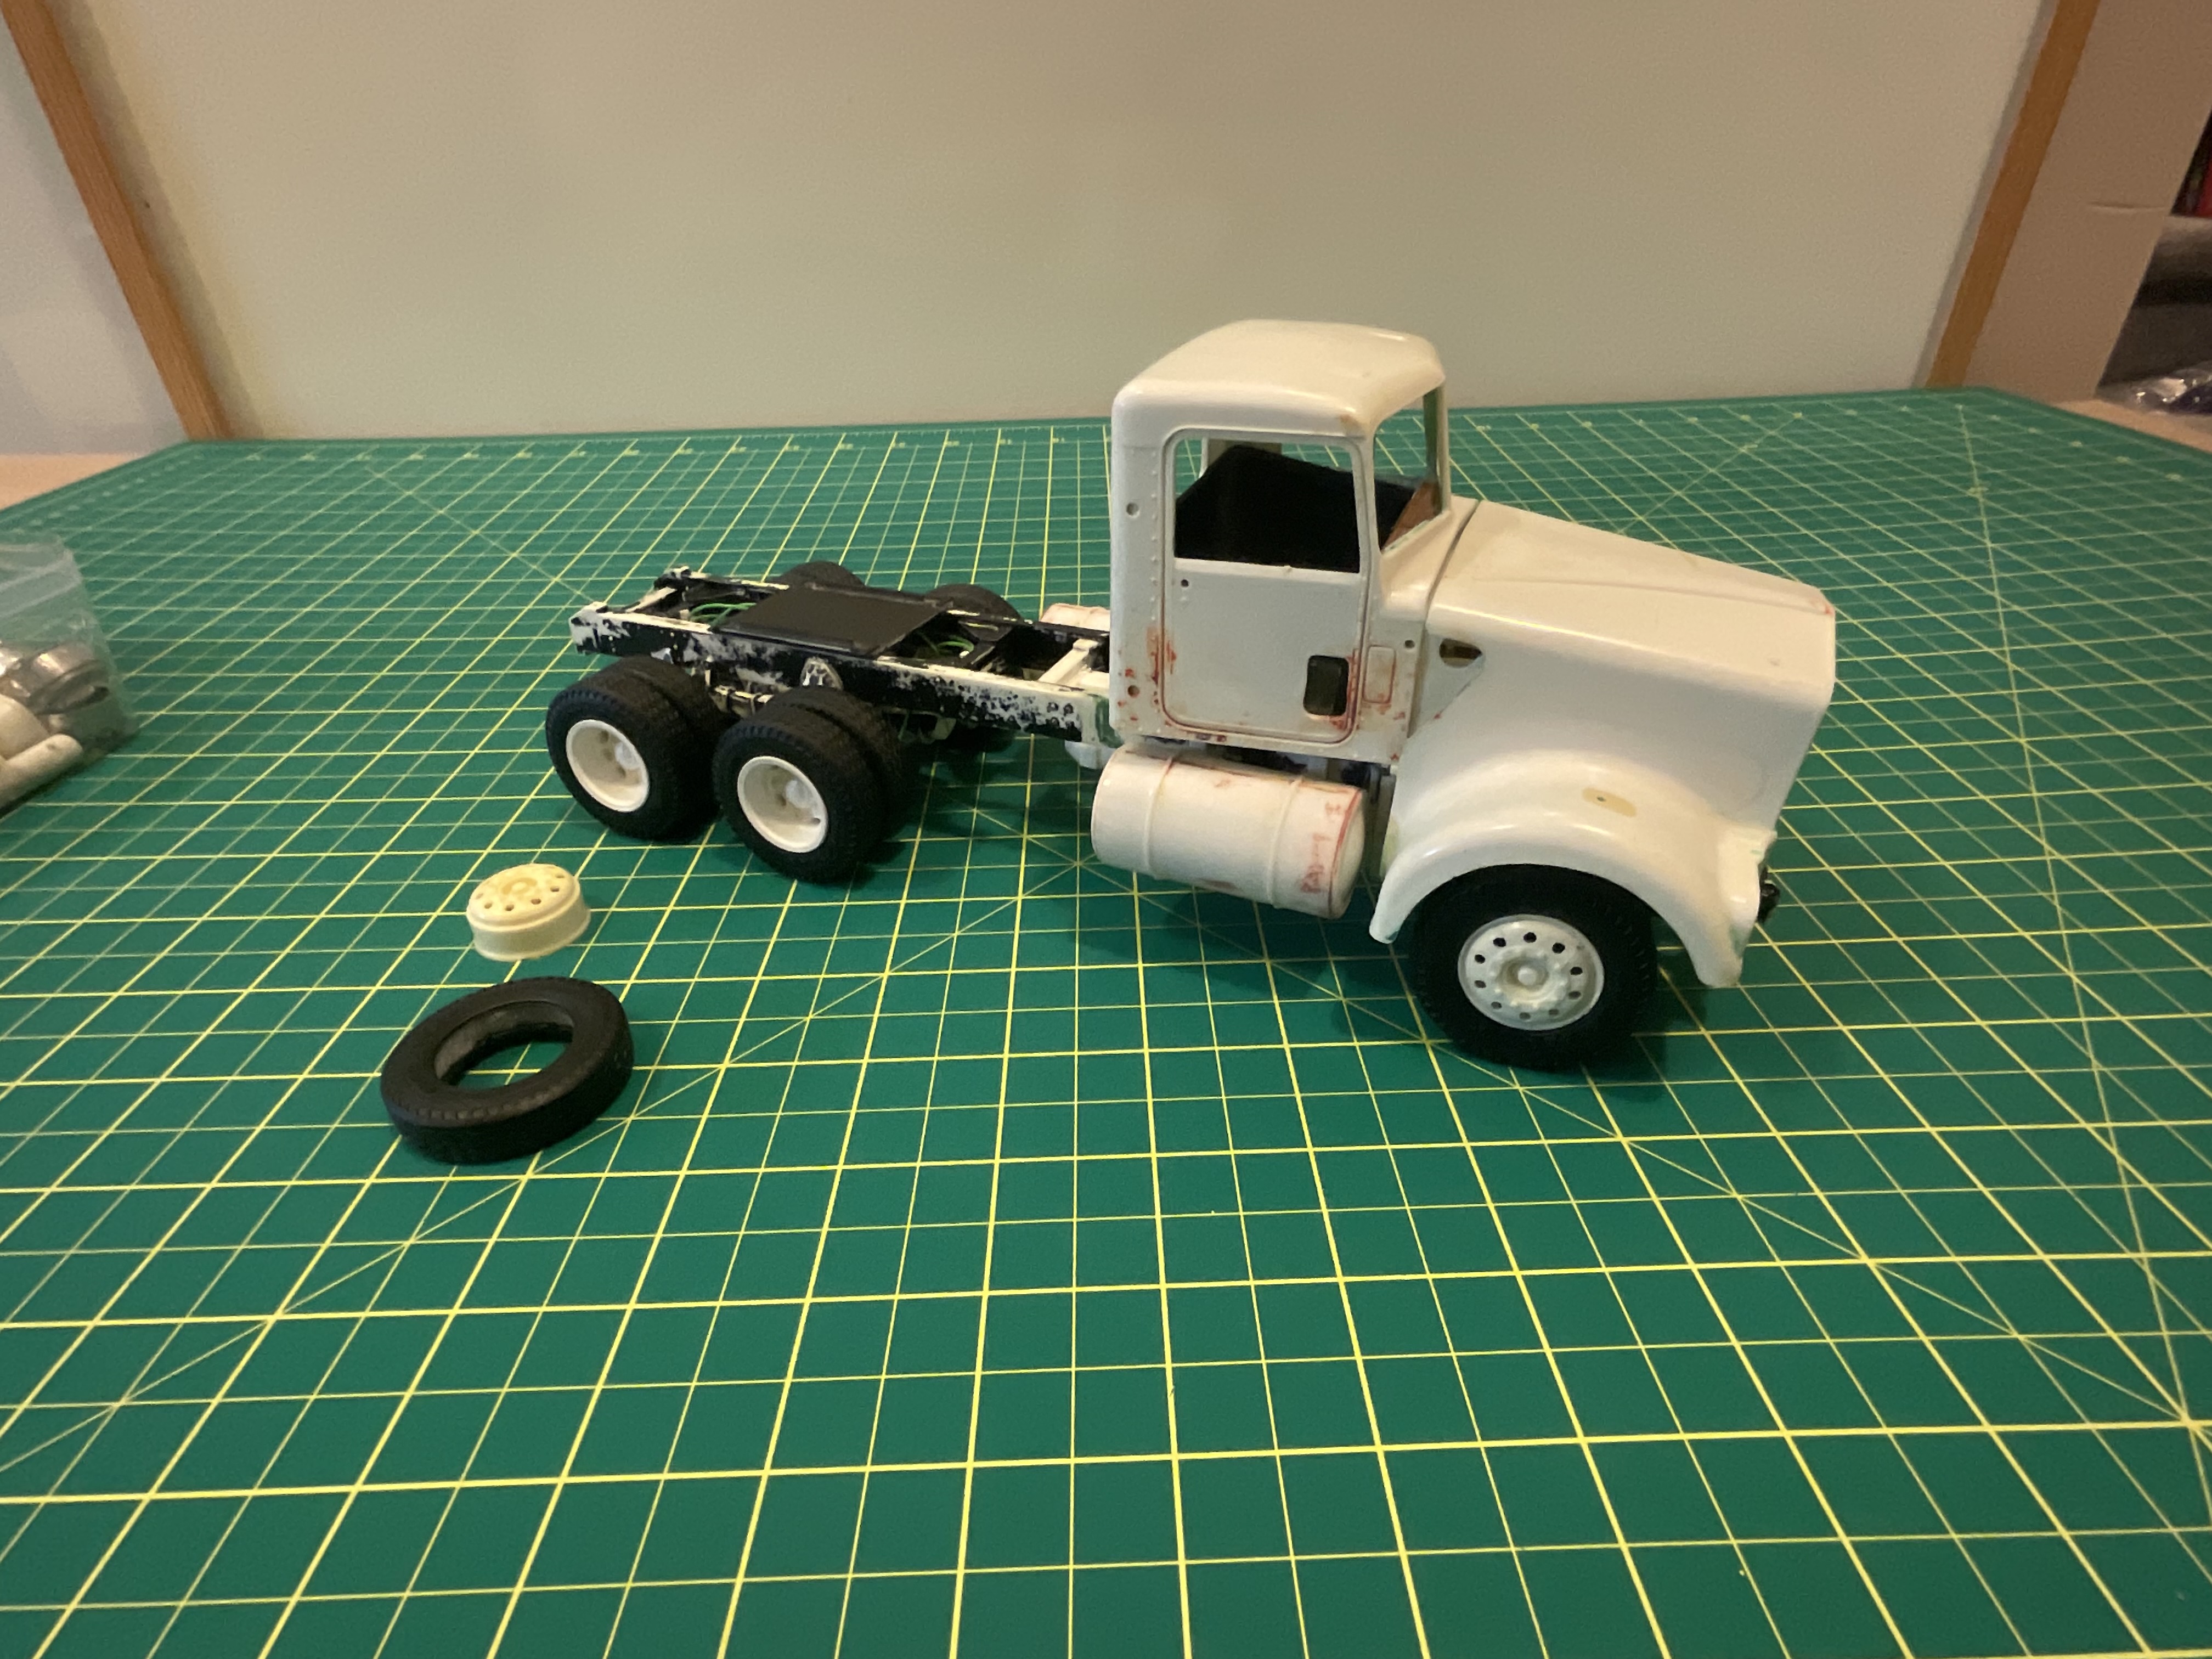
Anyone who has built one of these has had to deal with theses two part rims and pseudo-rubber tires. The rings are the outer rim beads, supposed to be glued on to the rim after the tires are mounted. Makes painting / finishing the rims pretty tough. As well, the tires don’t really keep shape to stay on the beads.
Here’s my solution….de-chrome the wheels and rings, glue bead rings on, then I’ll refinish the wheels, mount tires after. As for the tires, I’ve slightly sanded the beads to allow some space to flex over the beads and used a small piece of 1/4” poly rope to fill the tires to provide inflation.
Used some old “easy off” oven cleaner. It was aerosol, but the air leaked out. I cut the bottom out of the can, essentially decanted it into a glass jar. Applied with a brush, it removed the chrome in about 1 minute. Not bad for what was probably 7-10 years old.
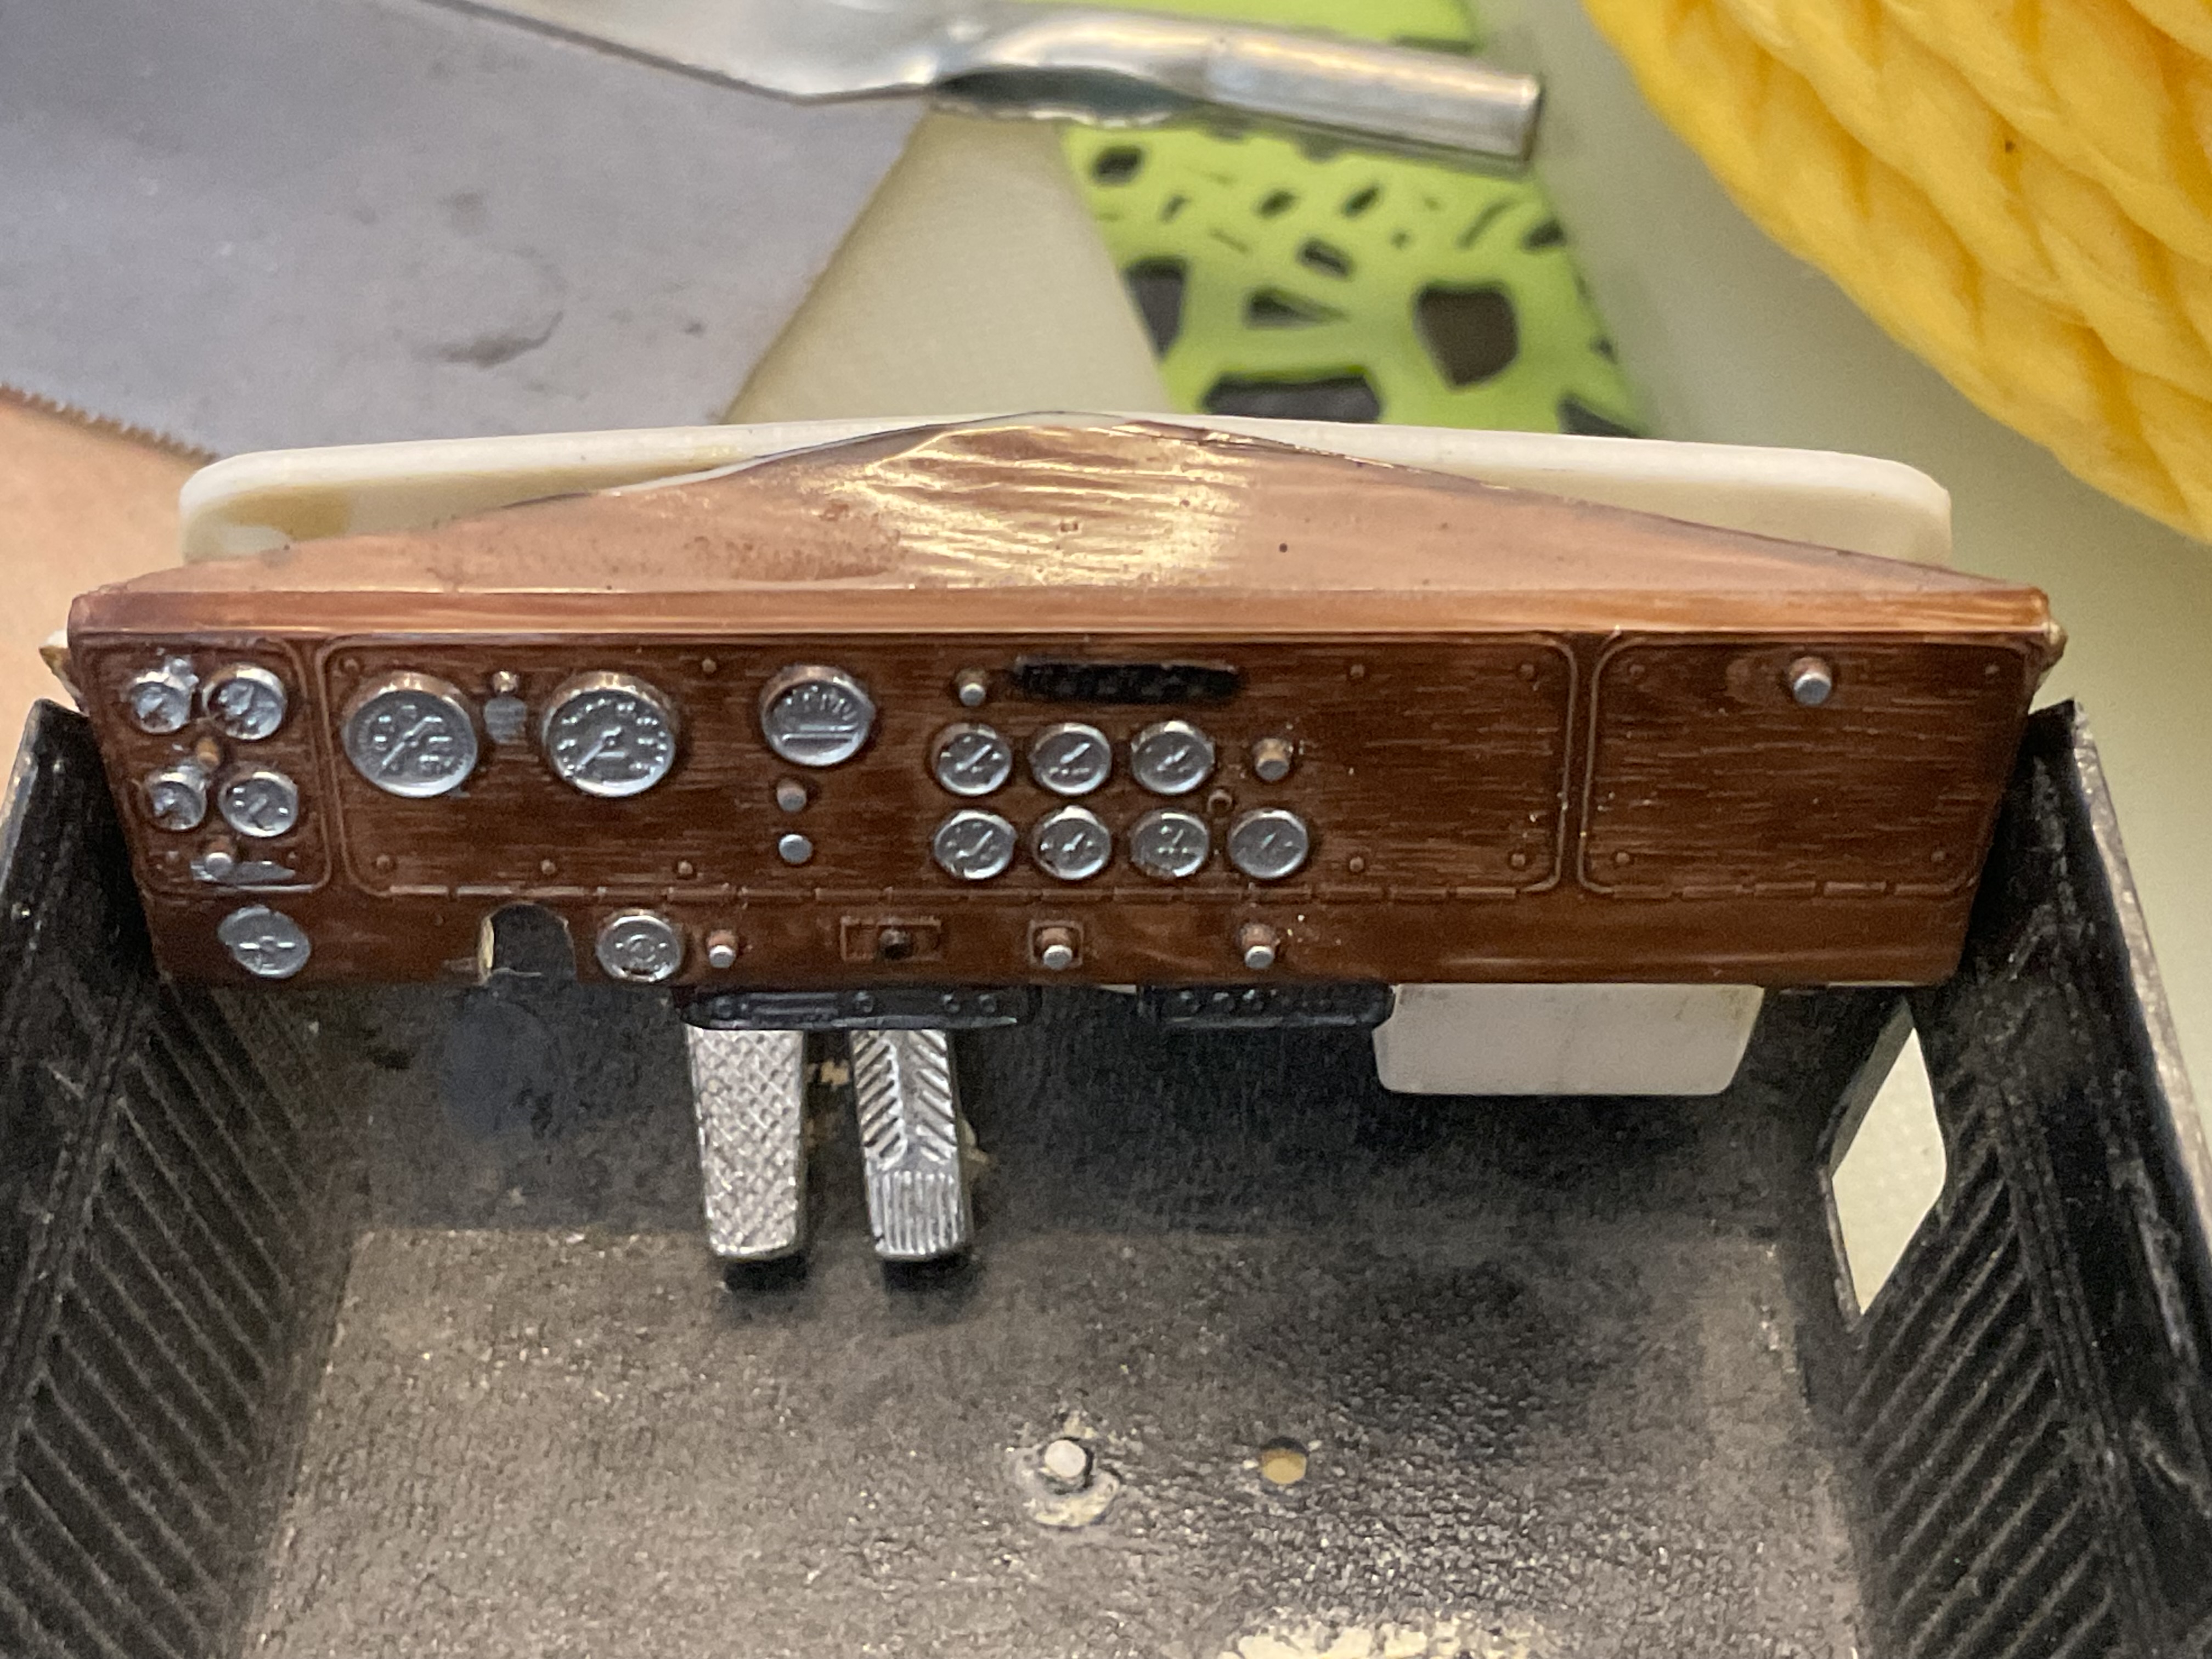
Did a bit of work on the dash, just trying for a basic wood grain first. More detailing of the gauges etc to come.
Unfortunately there are some limitations due to design and molding. The interior tub is sloped in a couple different directions, which means it isn’t flush to the doors and cab sides. I don’t think I’m going to try to correct it on this one, but I have another of these kits that I may correct and possibly even open a door.
It’s definitely a good basis for where I want to go with it, I’ve made it harder for myself by having repainted and rebuilt parts of it multiple times.
Yeah, that was pretty standard for the time. Doors and sides of the cab and the back wall. I had another 79 W-900 and also a 76 W-925 and they were all the same.
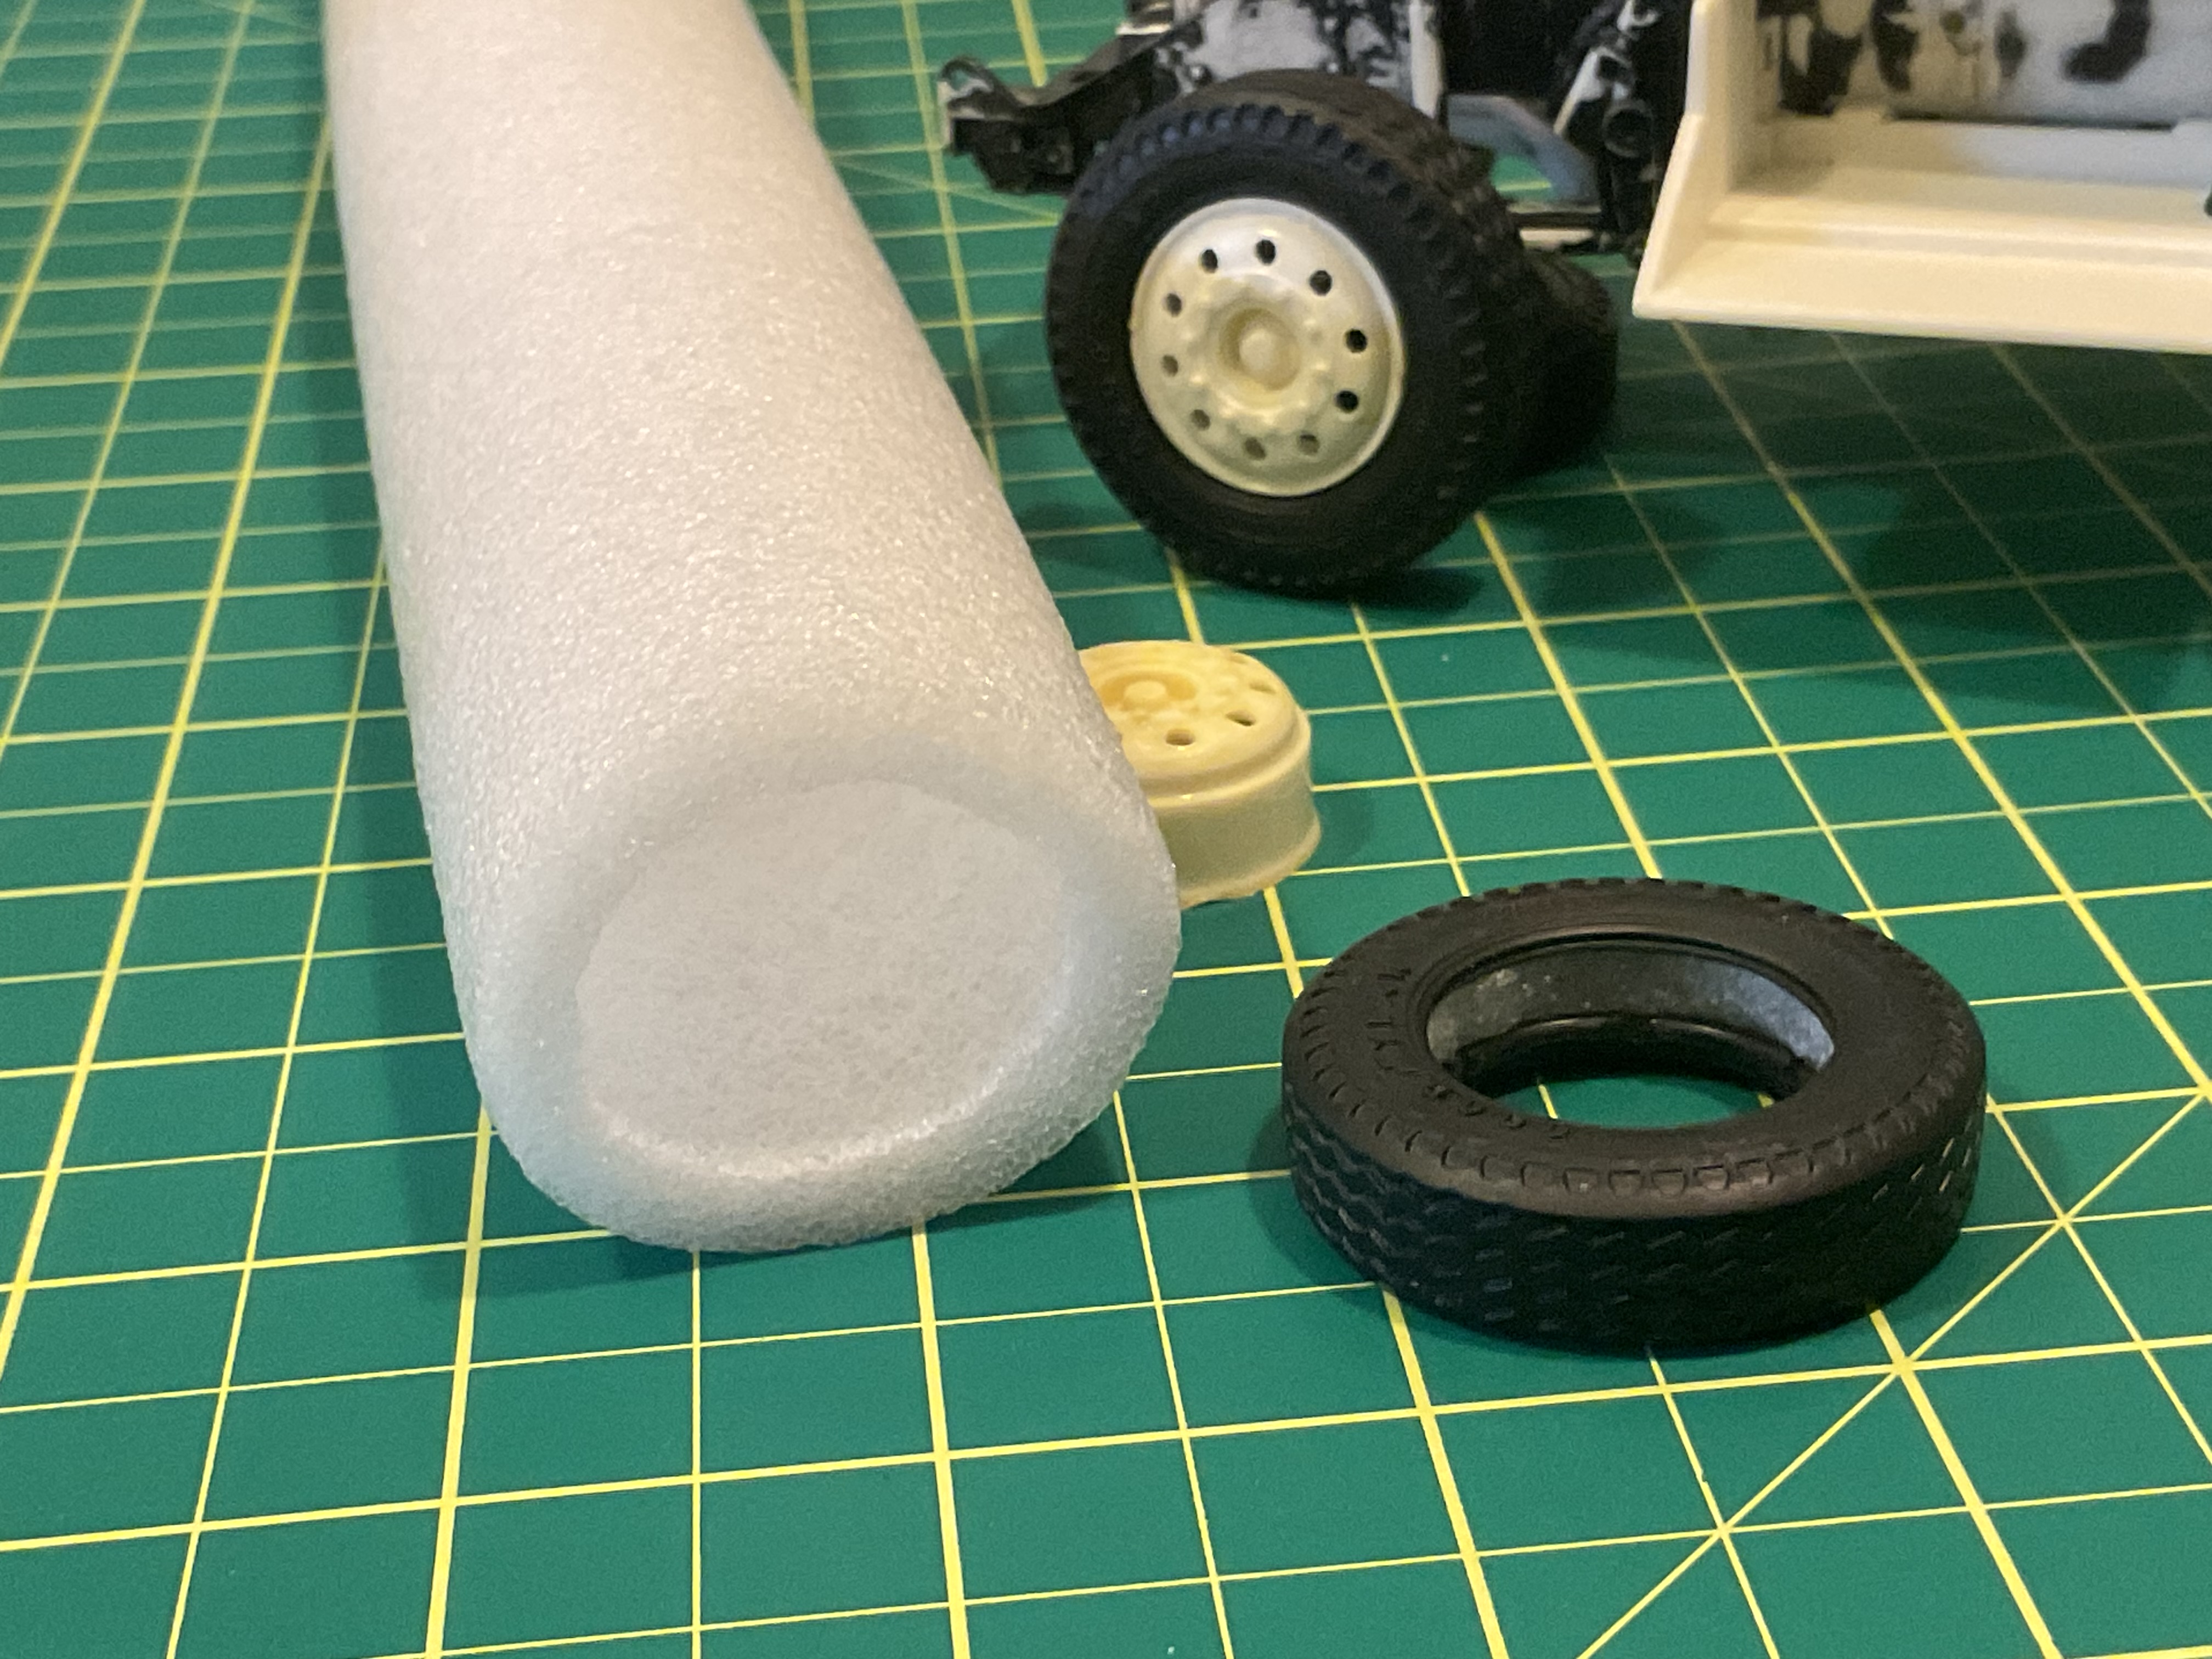
Trying to cut 1/4” nylon rope into 1 3/4” lengths, then squeezing them into the tires and then trying to manhandle them onto the rims was pretty frustrating. I took a step back and looked at it from a different angle. Taking a trick from RC cars, I found a foam tube and cut rings from it. The tube was one of the kids’ light up foam swords.
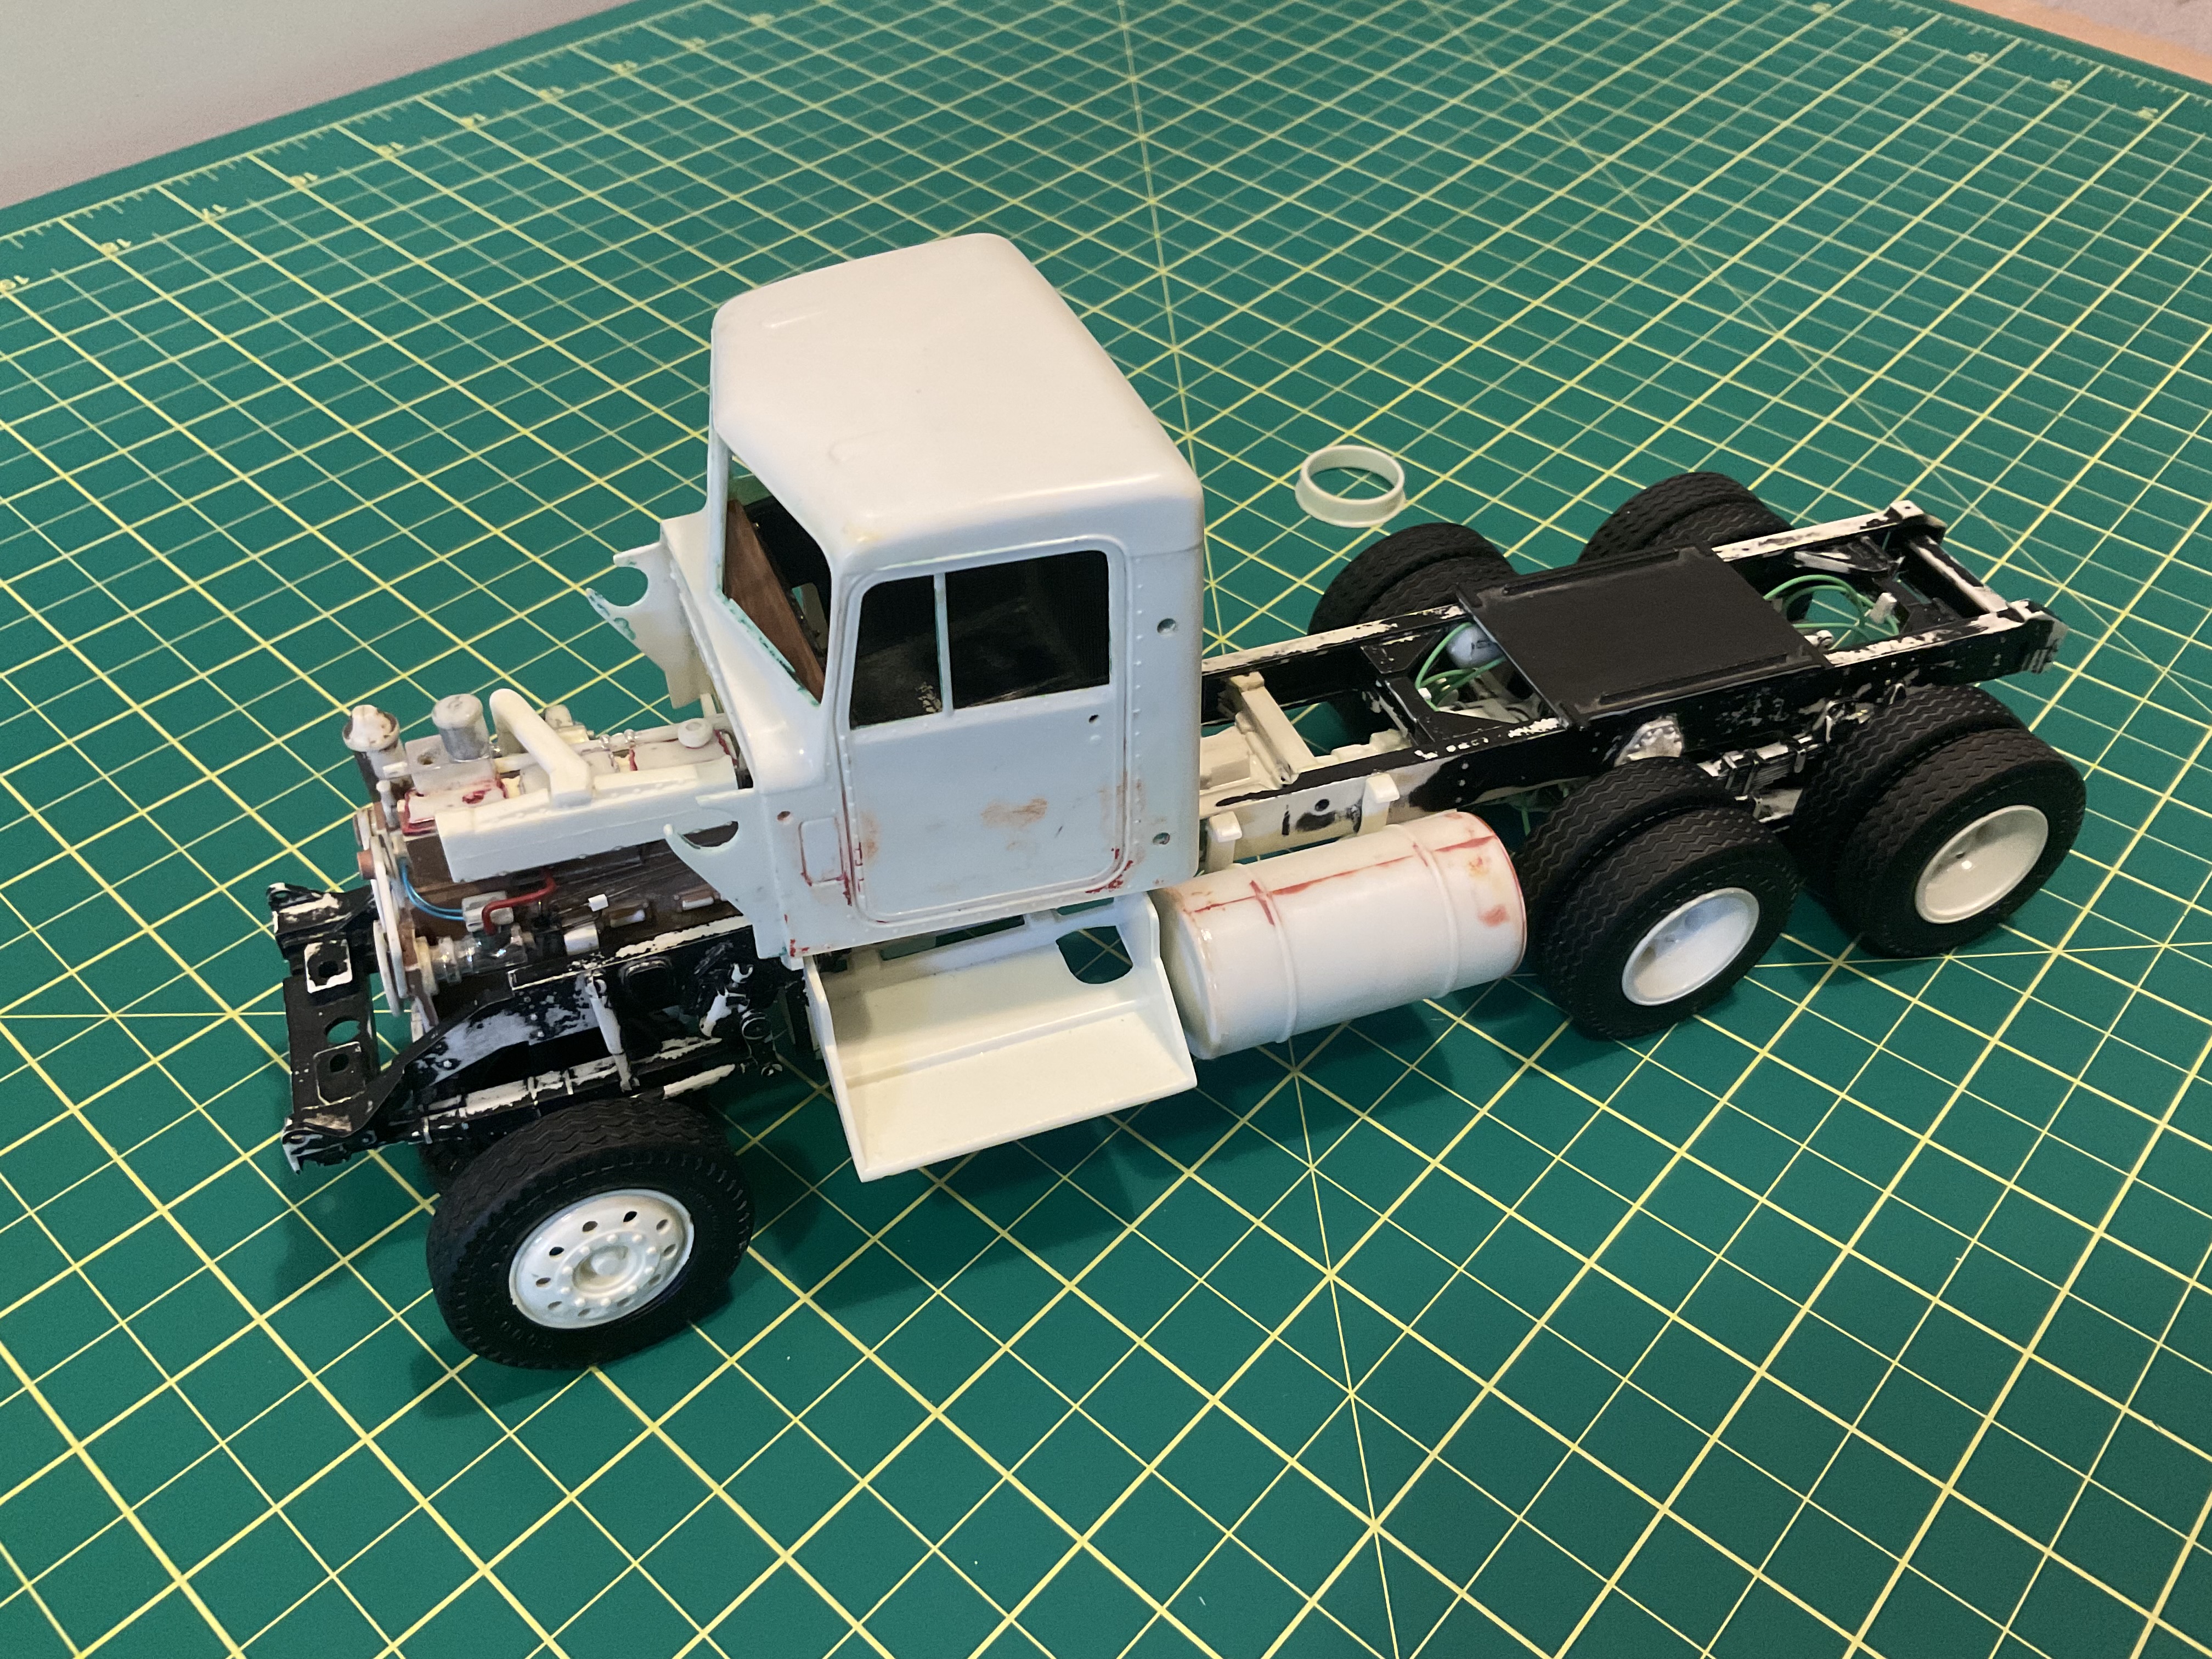
Once I had that figured, I moved on to disassembling cleaning up and reassembling the rear wheels. A quick coat of white paint and they’re ready to go.
Started collecting materials for the upholstery as per @jeaton01 picture. But also found out I’m missing one of the windshields. I can easily cut some replacement clear, but they are supposed to be inset from inside the cab, and this may cause it to not sit far enough forward. More planning required.
Fuel tanks were dechromed, as well as the stacks and a few additional air tanks for the brake system. Also think I picked out the main color. Probably with a mid tone grey frame.
Looking good Frozin! These kits can be challenging, but fun to build. I have the Peterbuilt wrecker that i got for Christmas. Will be working on that soon.
@NucMedTech I’ve got a few trucks in the stash, probably even the same wrecker you have. I’d be interested in seeing where you go with yours.
These old kits leave a lot to be desired in terms of fit and finish, I’m really contemplating picking up one of the newer Italeri truck kits to compare. It’s pretty tough to drop well over $100 for one kit though.