More progress on the engine of the Albatross, after taking a short break to do spring yard work. I’d much rather be playing at the work bench.
My intention was to replicate many of the suggestions of the builder whose video on Scale-a-Ton I’ve been viewing, but my dexterity with tiny parts is just not up to the skill level of that builder. I tried to get as close as I could.
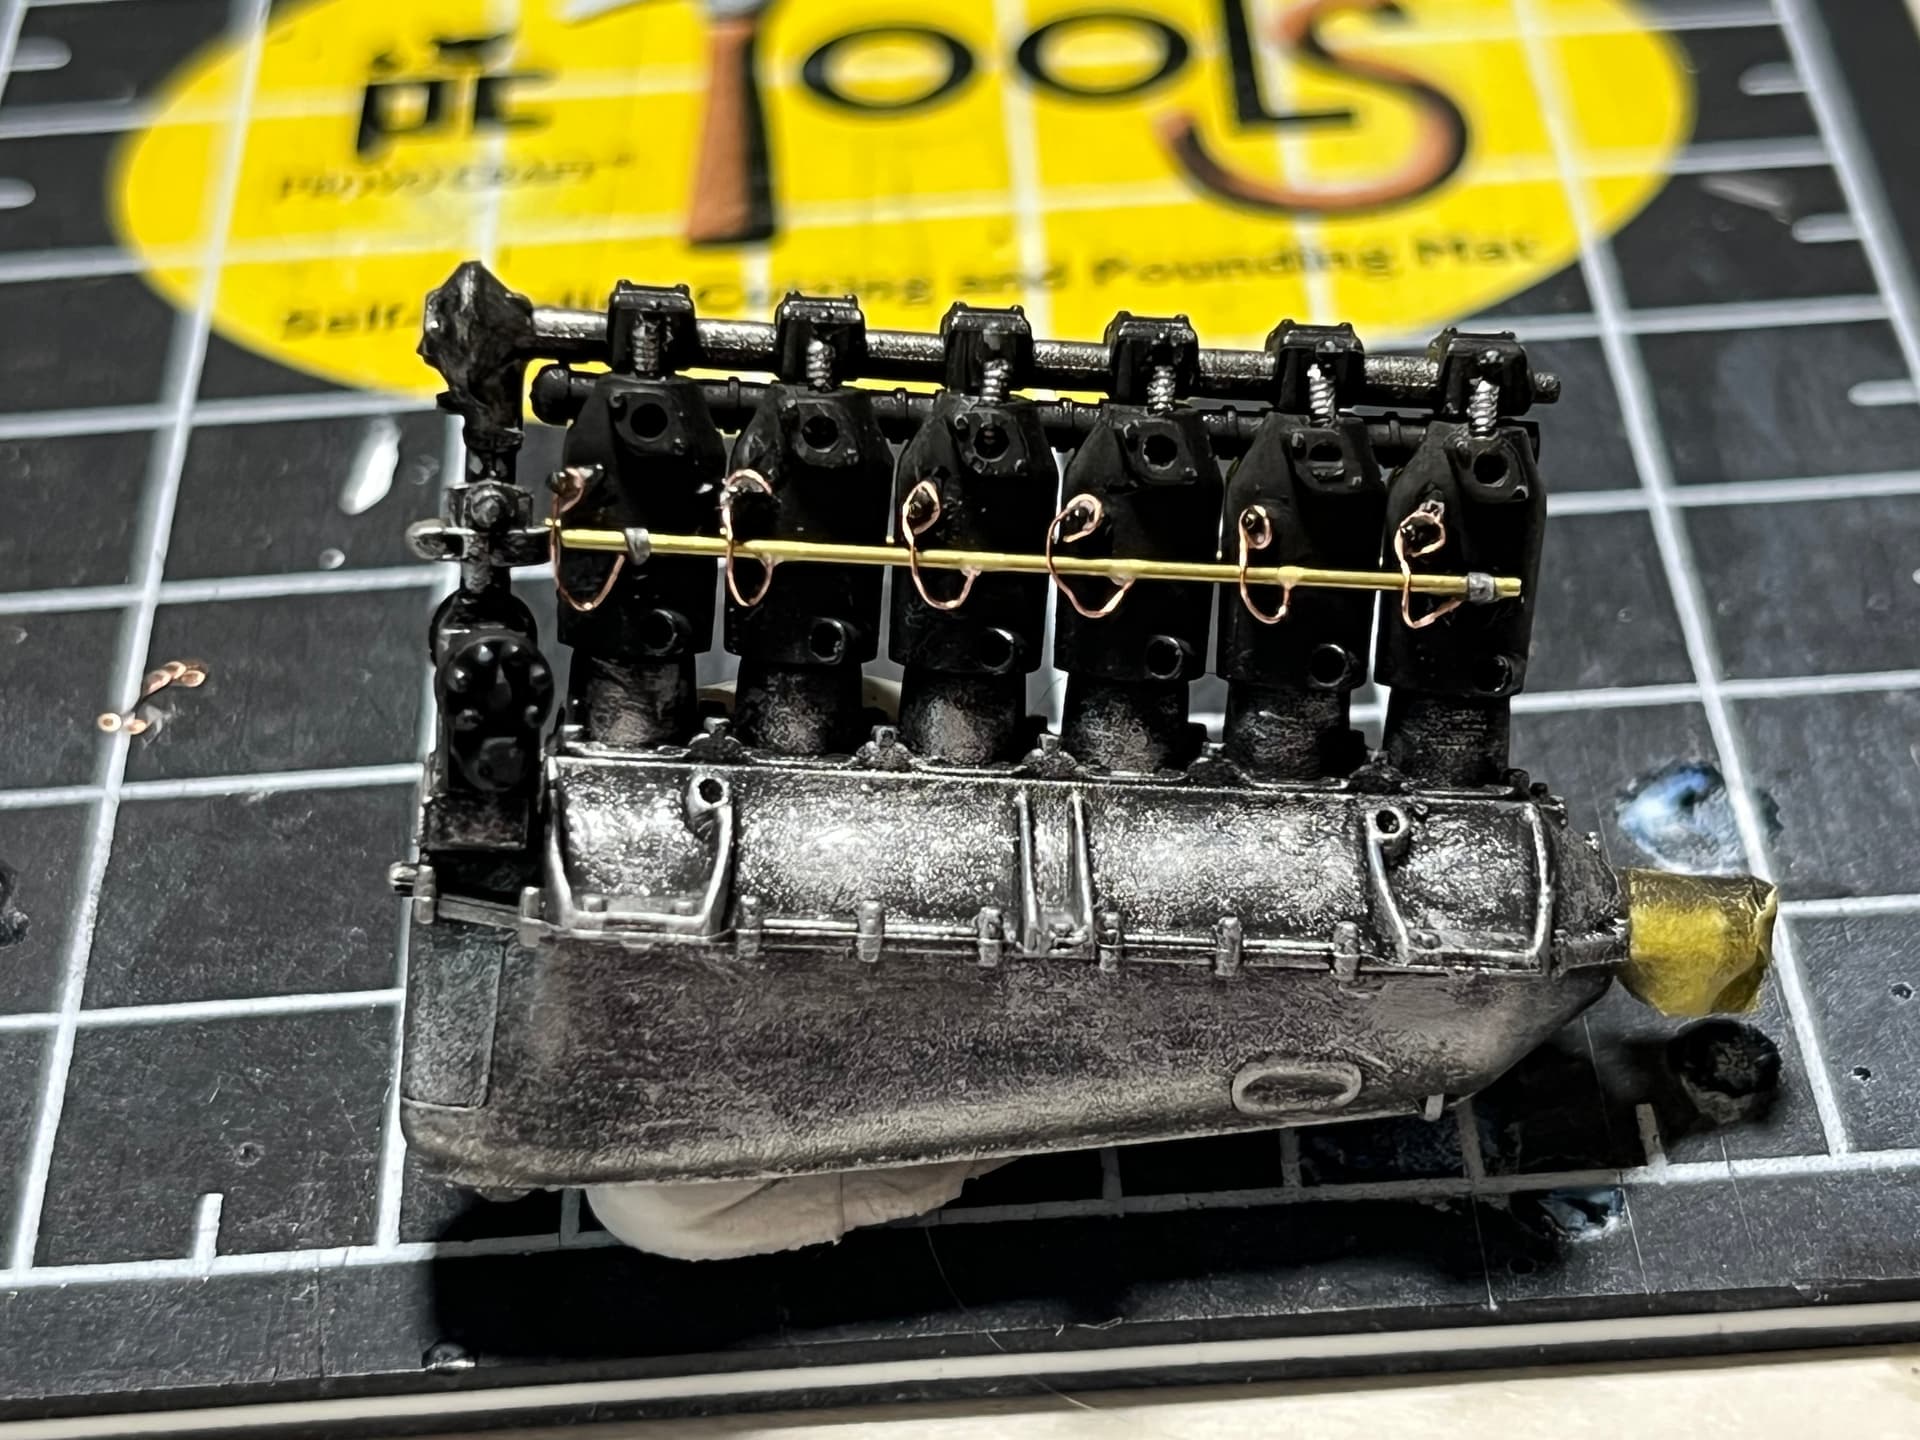
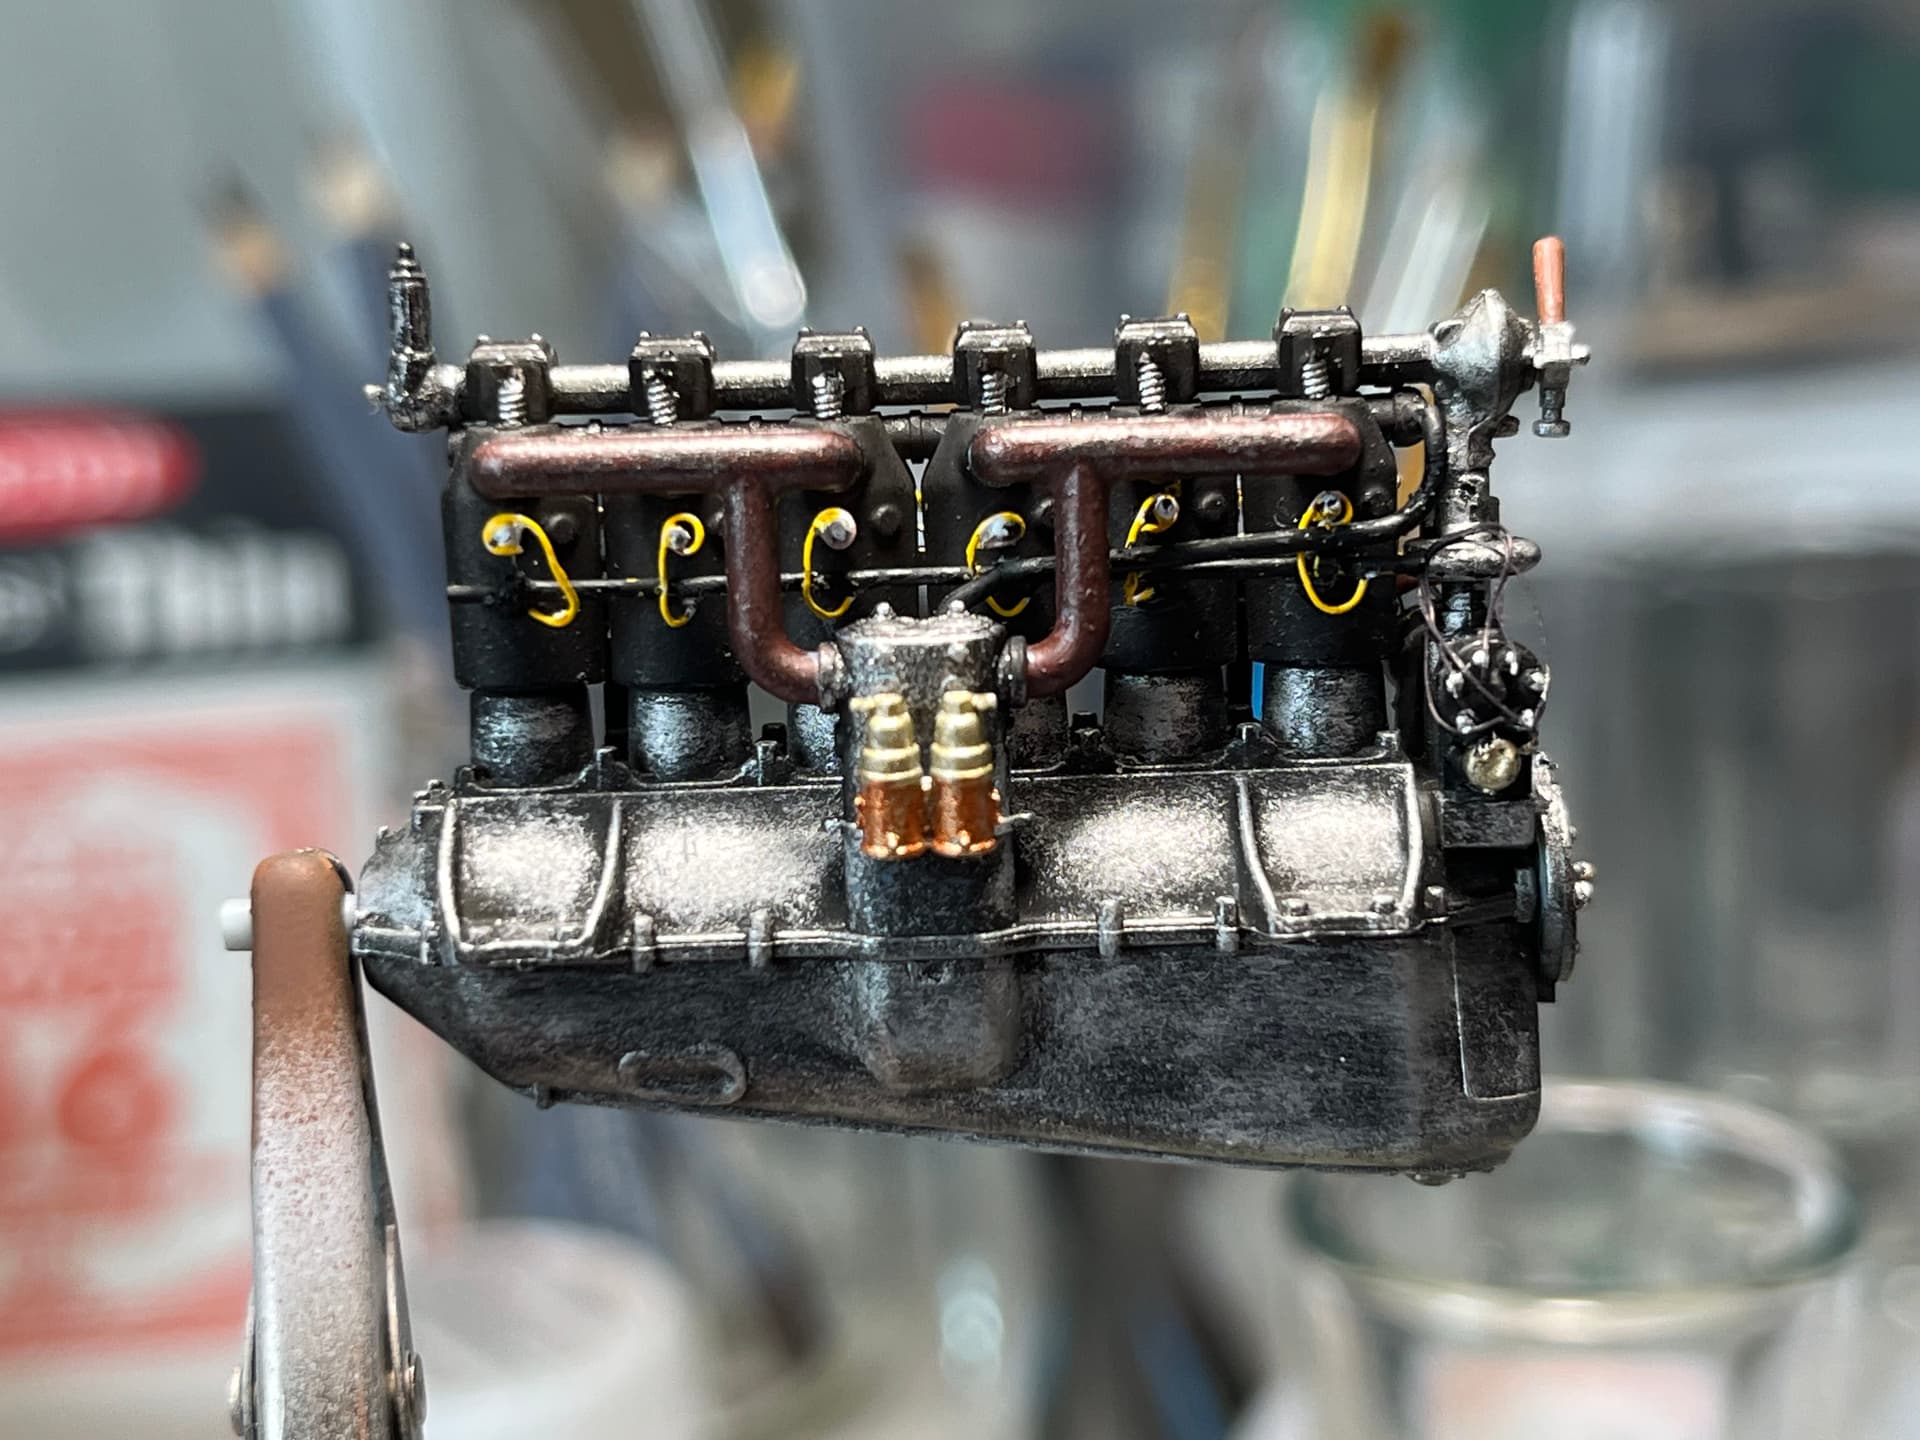
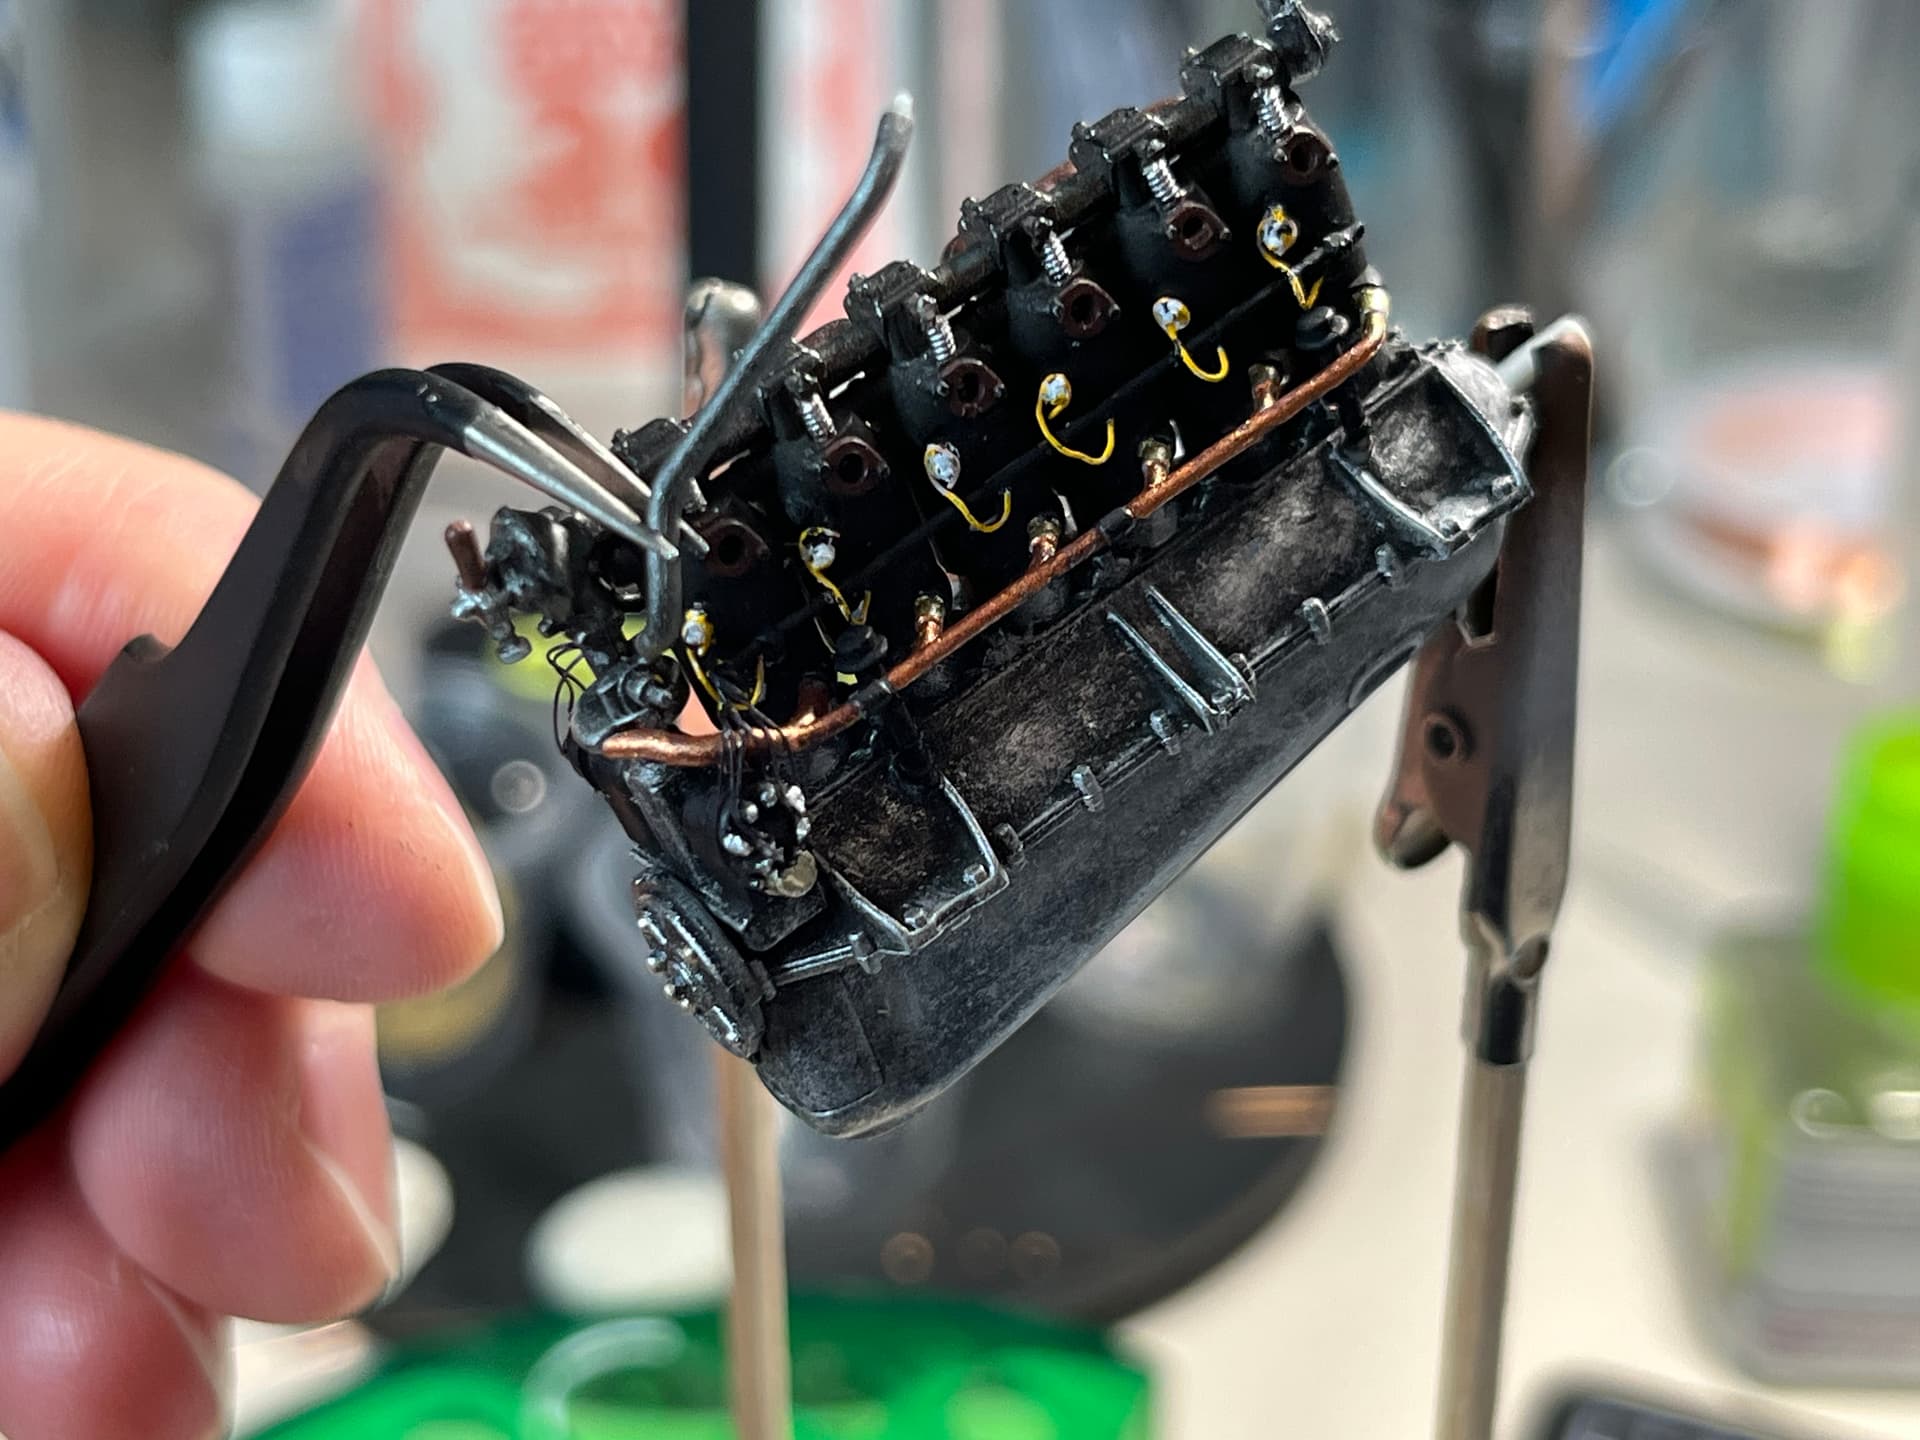
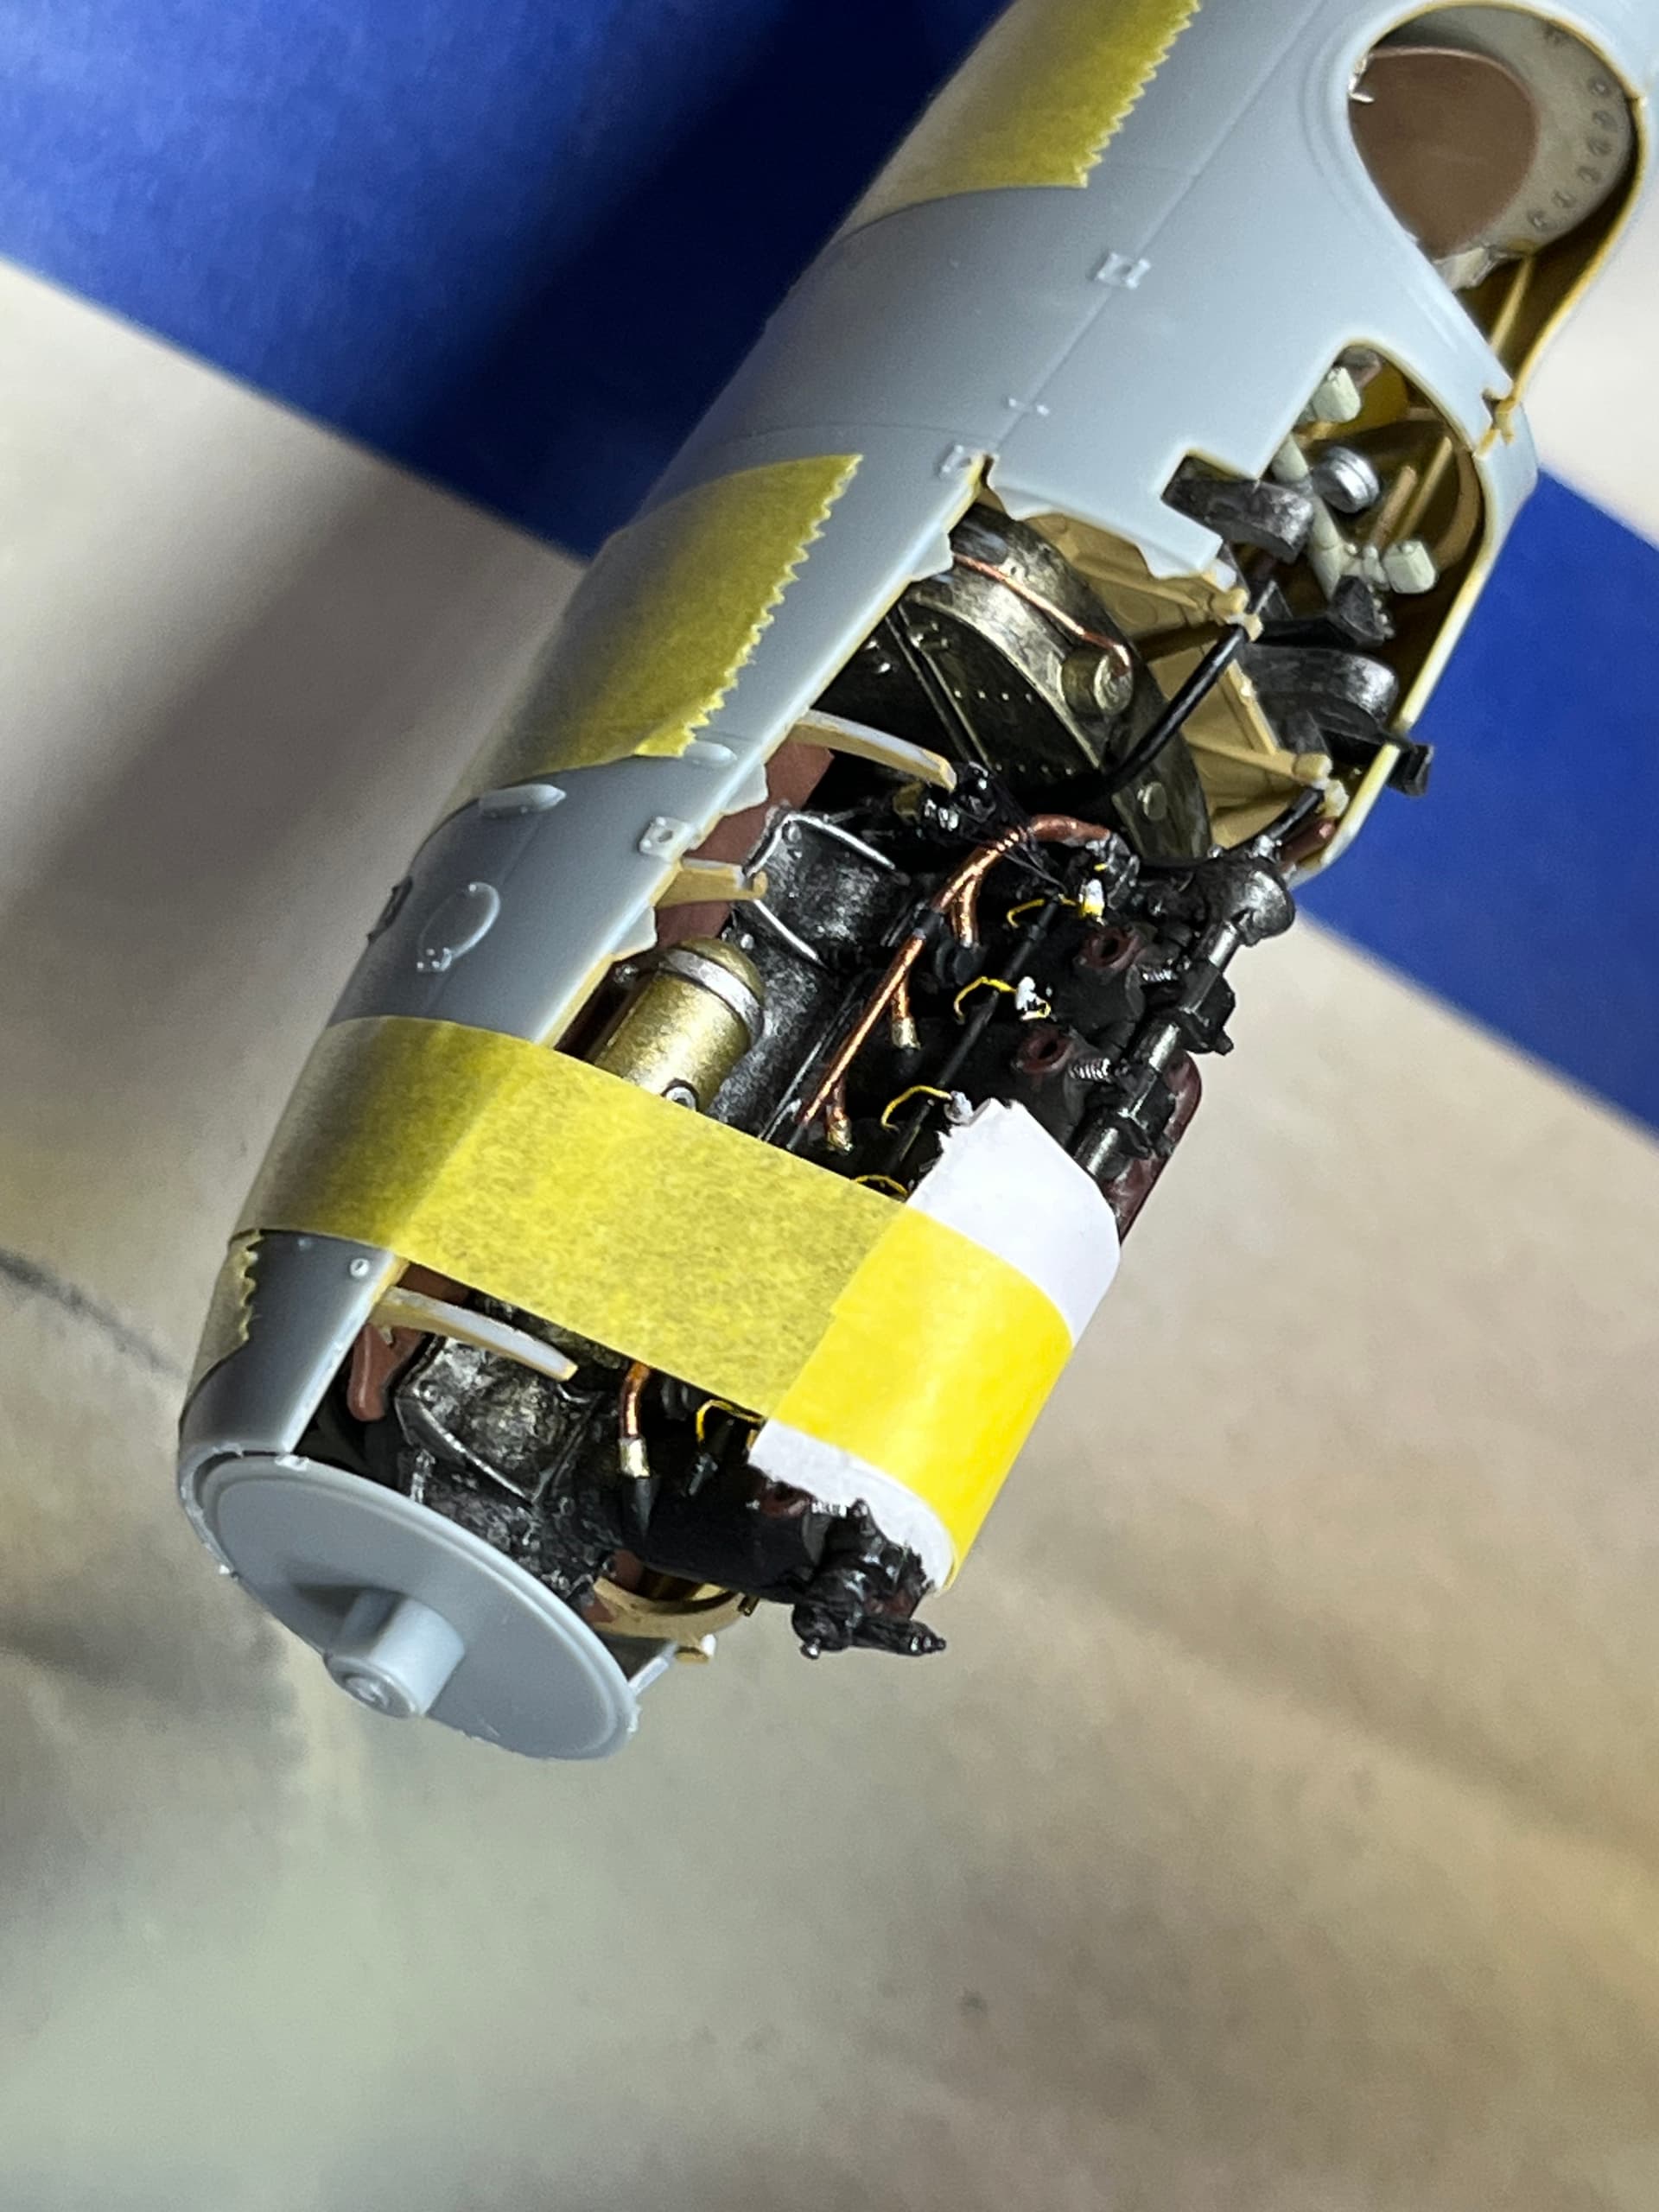
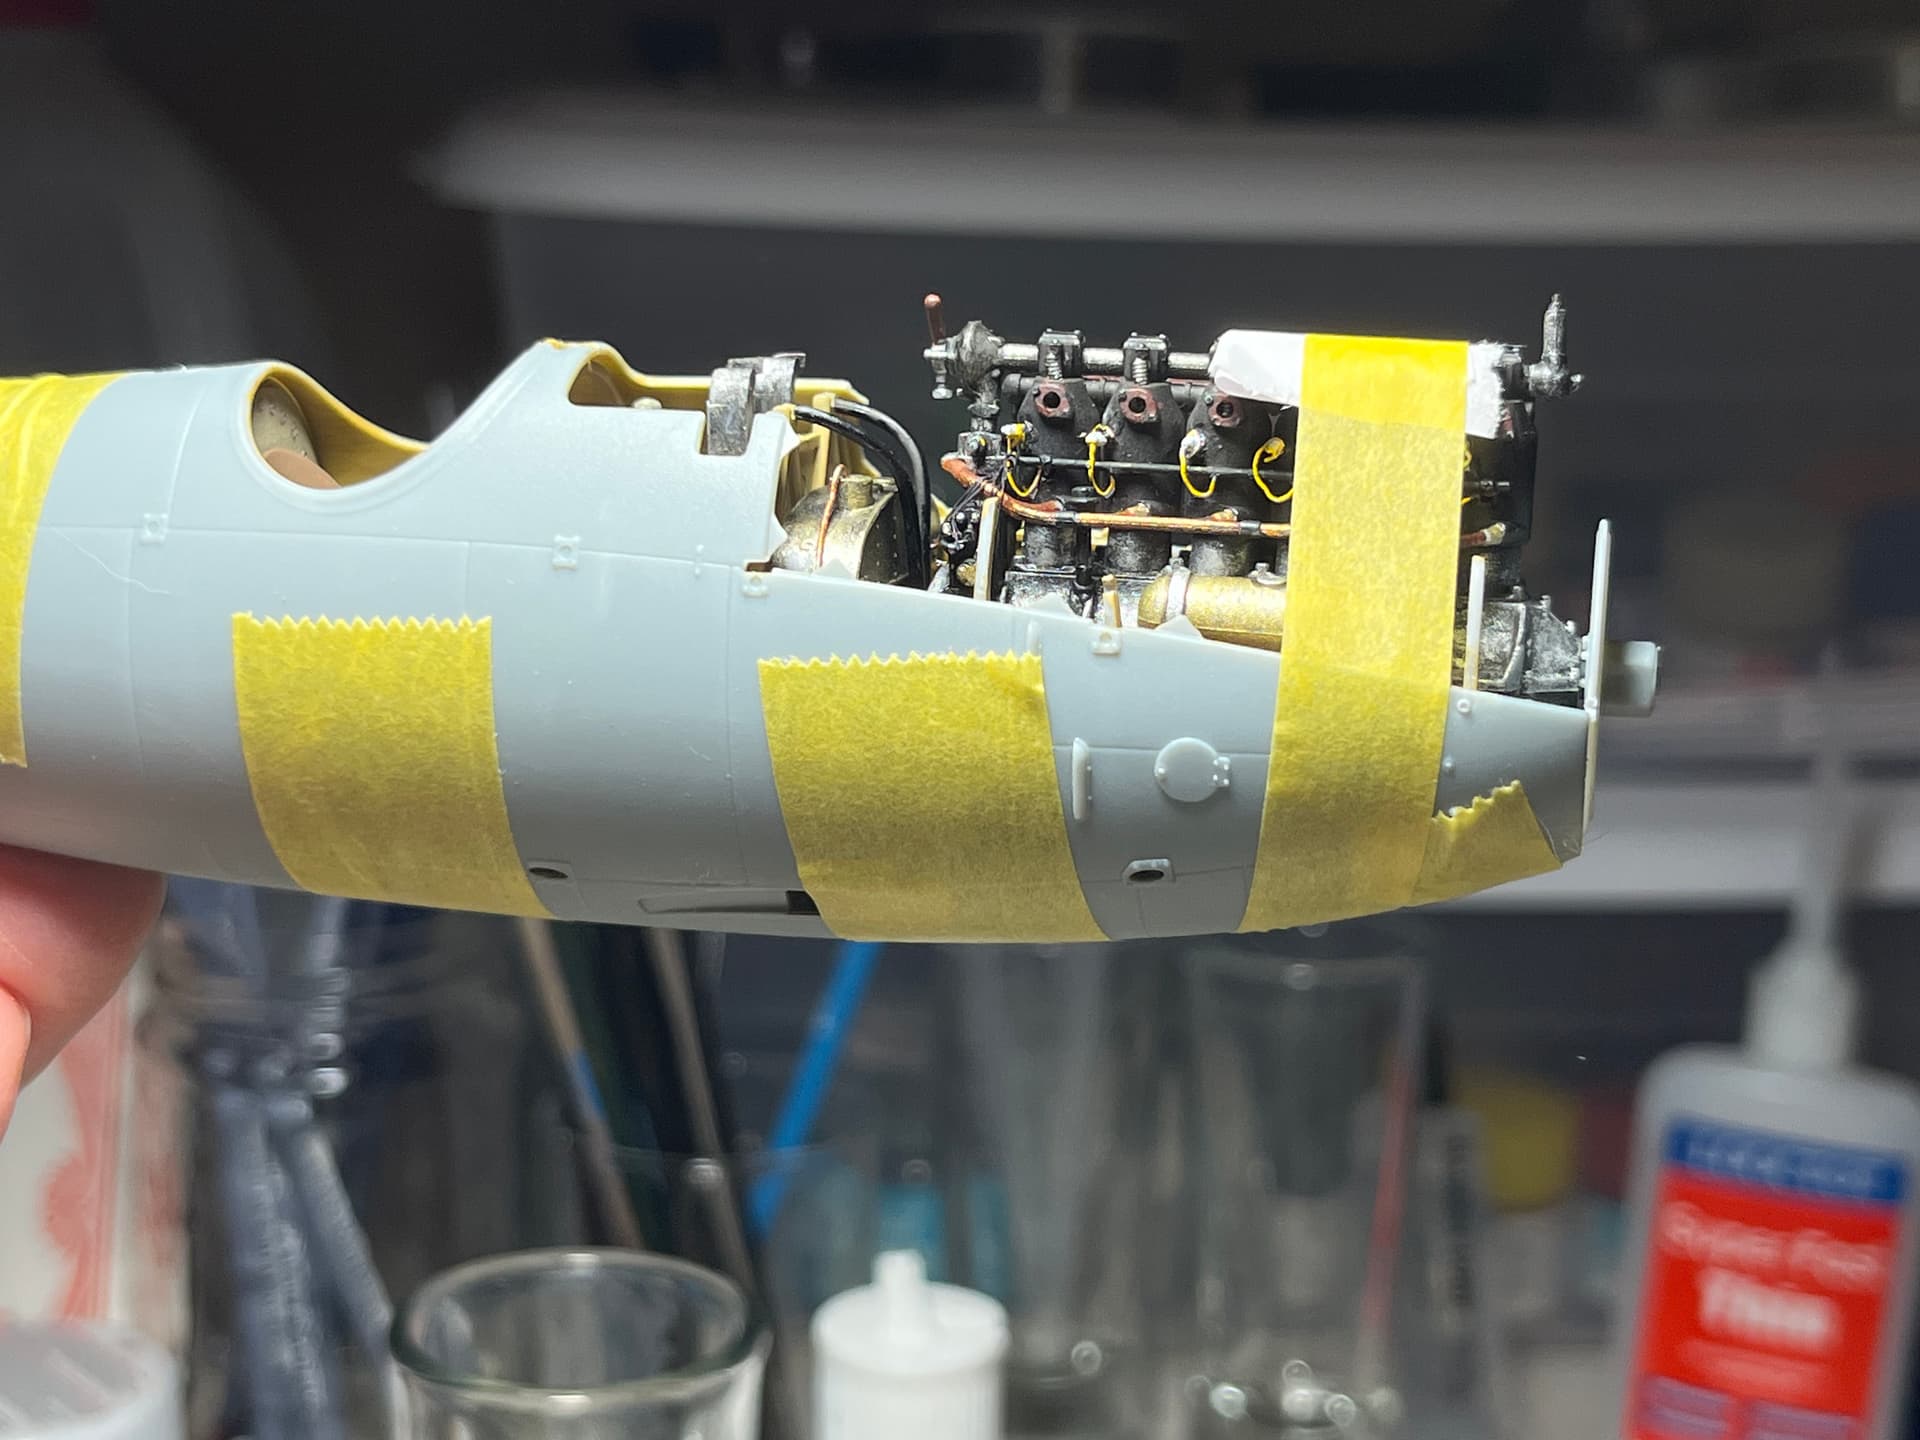
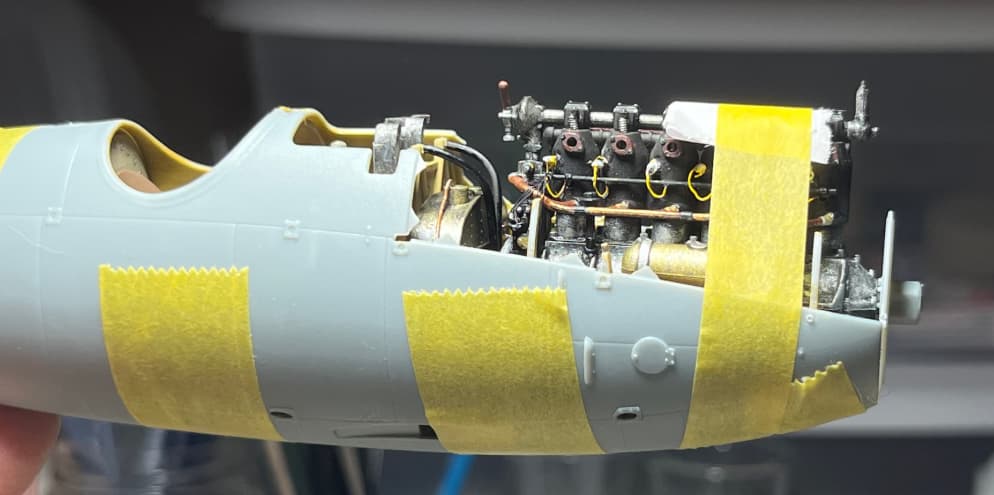
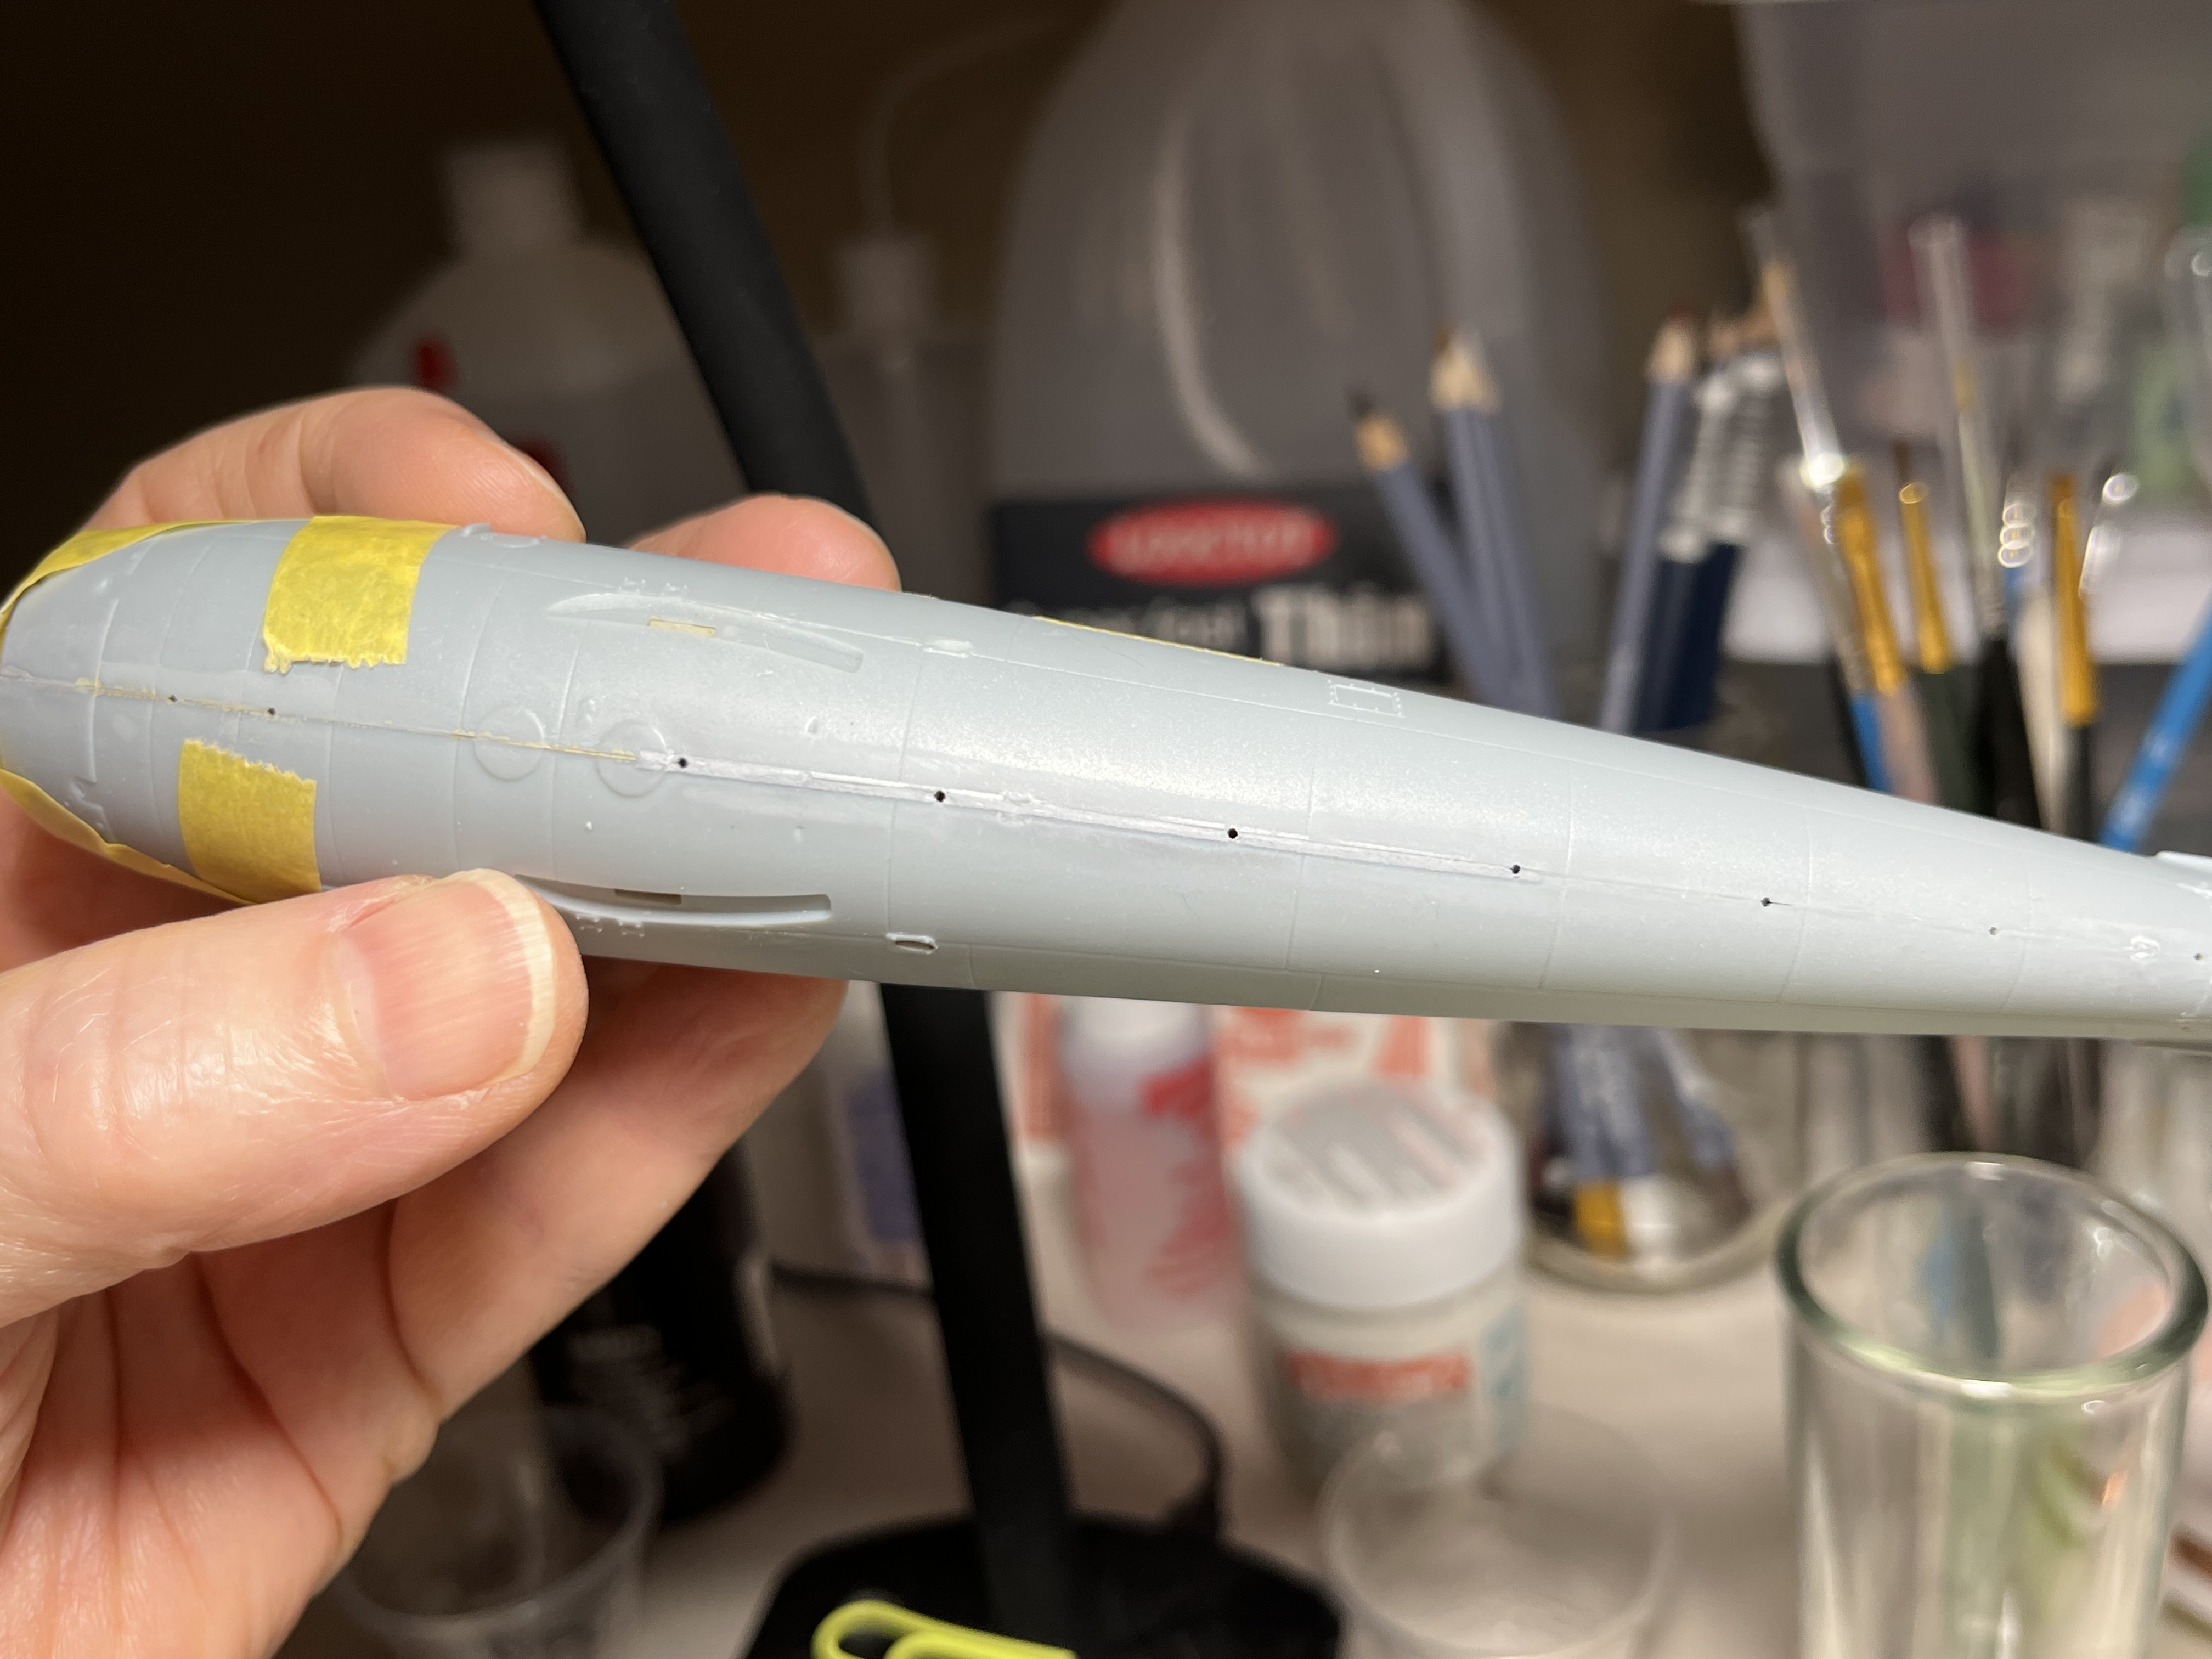
I added segments of brass tubes and tiny hex nuts as “spark plugs” in the pre-drilled holes of the cylinder block, then substituted a larger brass tube for the cable housing, and added segments of 34 gauge wire for cables - to be painted later. Also used short strands of EZ-Line for wiring to the magneto.
The pipe to the radiator, which is mounted on the upper wing, will be added later. If I add it now, I am almost certain to break it off, and it is too fragile as it is.
I think my next steps are to put engine assembly and other parts in the fuselage with the cockpit parts and seal it up. I need to study the instructions for how to proceed from there since I need to be mindful of the steps to prepare for later rigging and the particular paint scheme of the option I’ve chosen (“option E” in my kit).
You details are top notch. I wanted to say if you walk around barefoot long enough there’s a good chance you’ll find those missing guitar strings parts.
My sister suggested a tactic I haven’t tried yet - put a nylon stocking (or a similar fine mesh) over the end of the vacuum-cleaner hose and start looking.
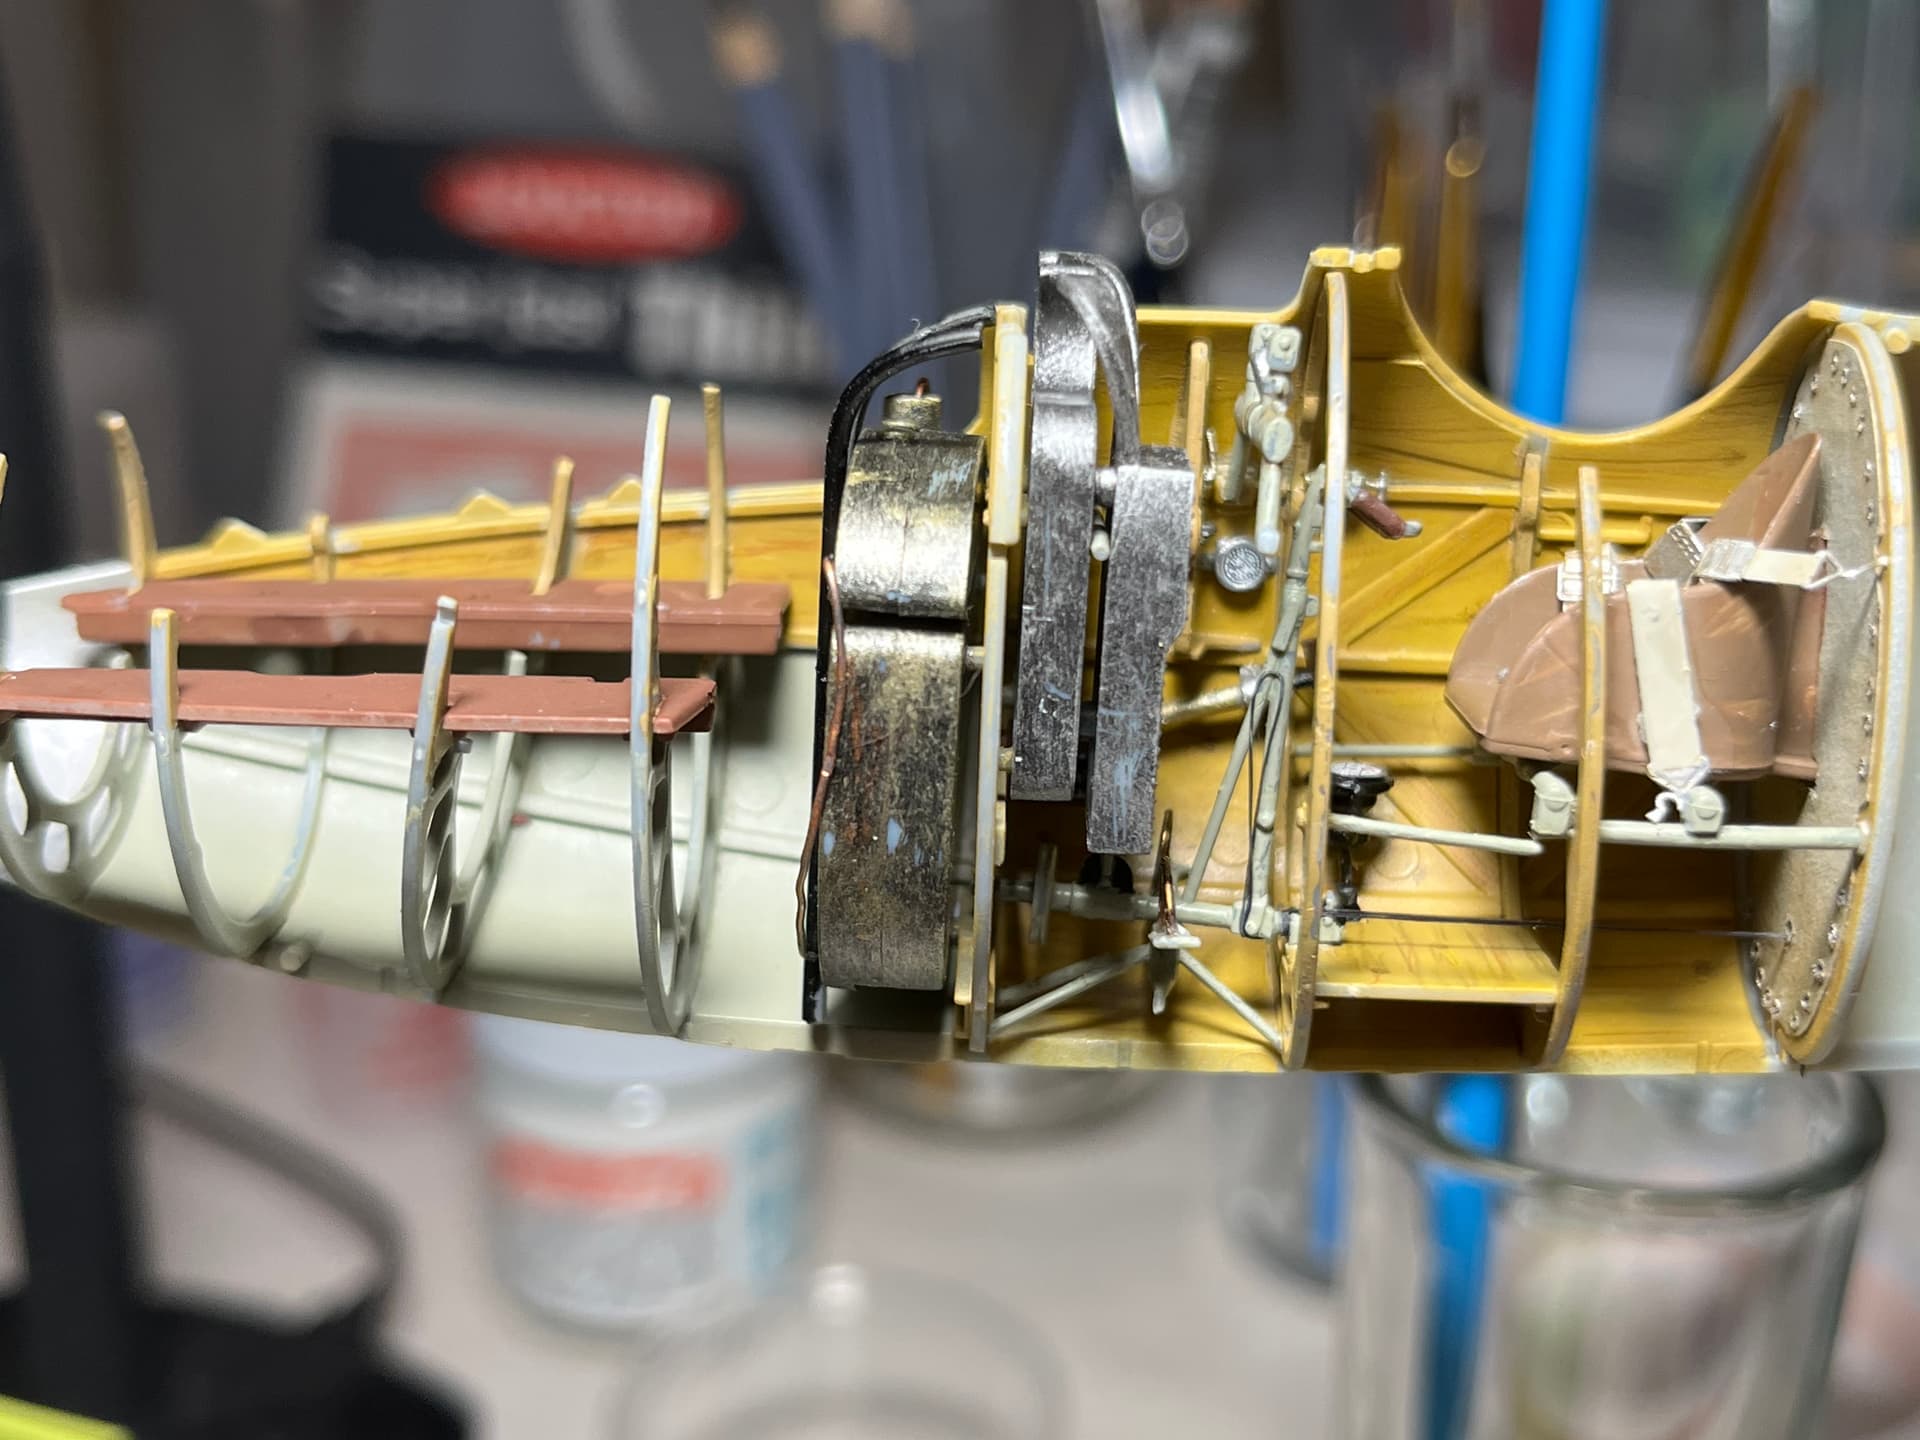
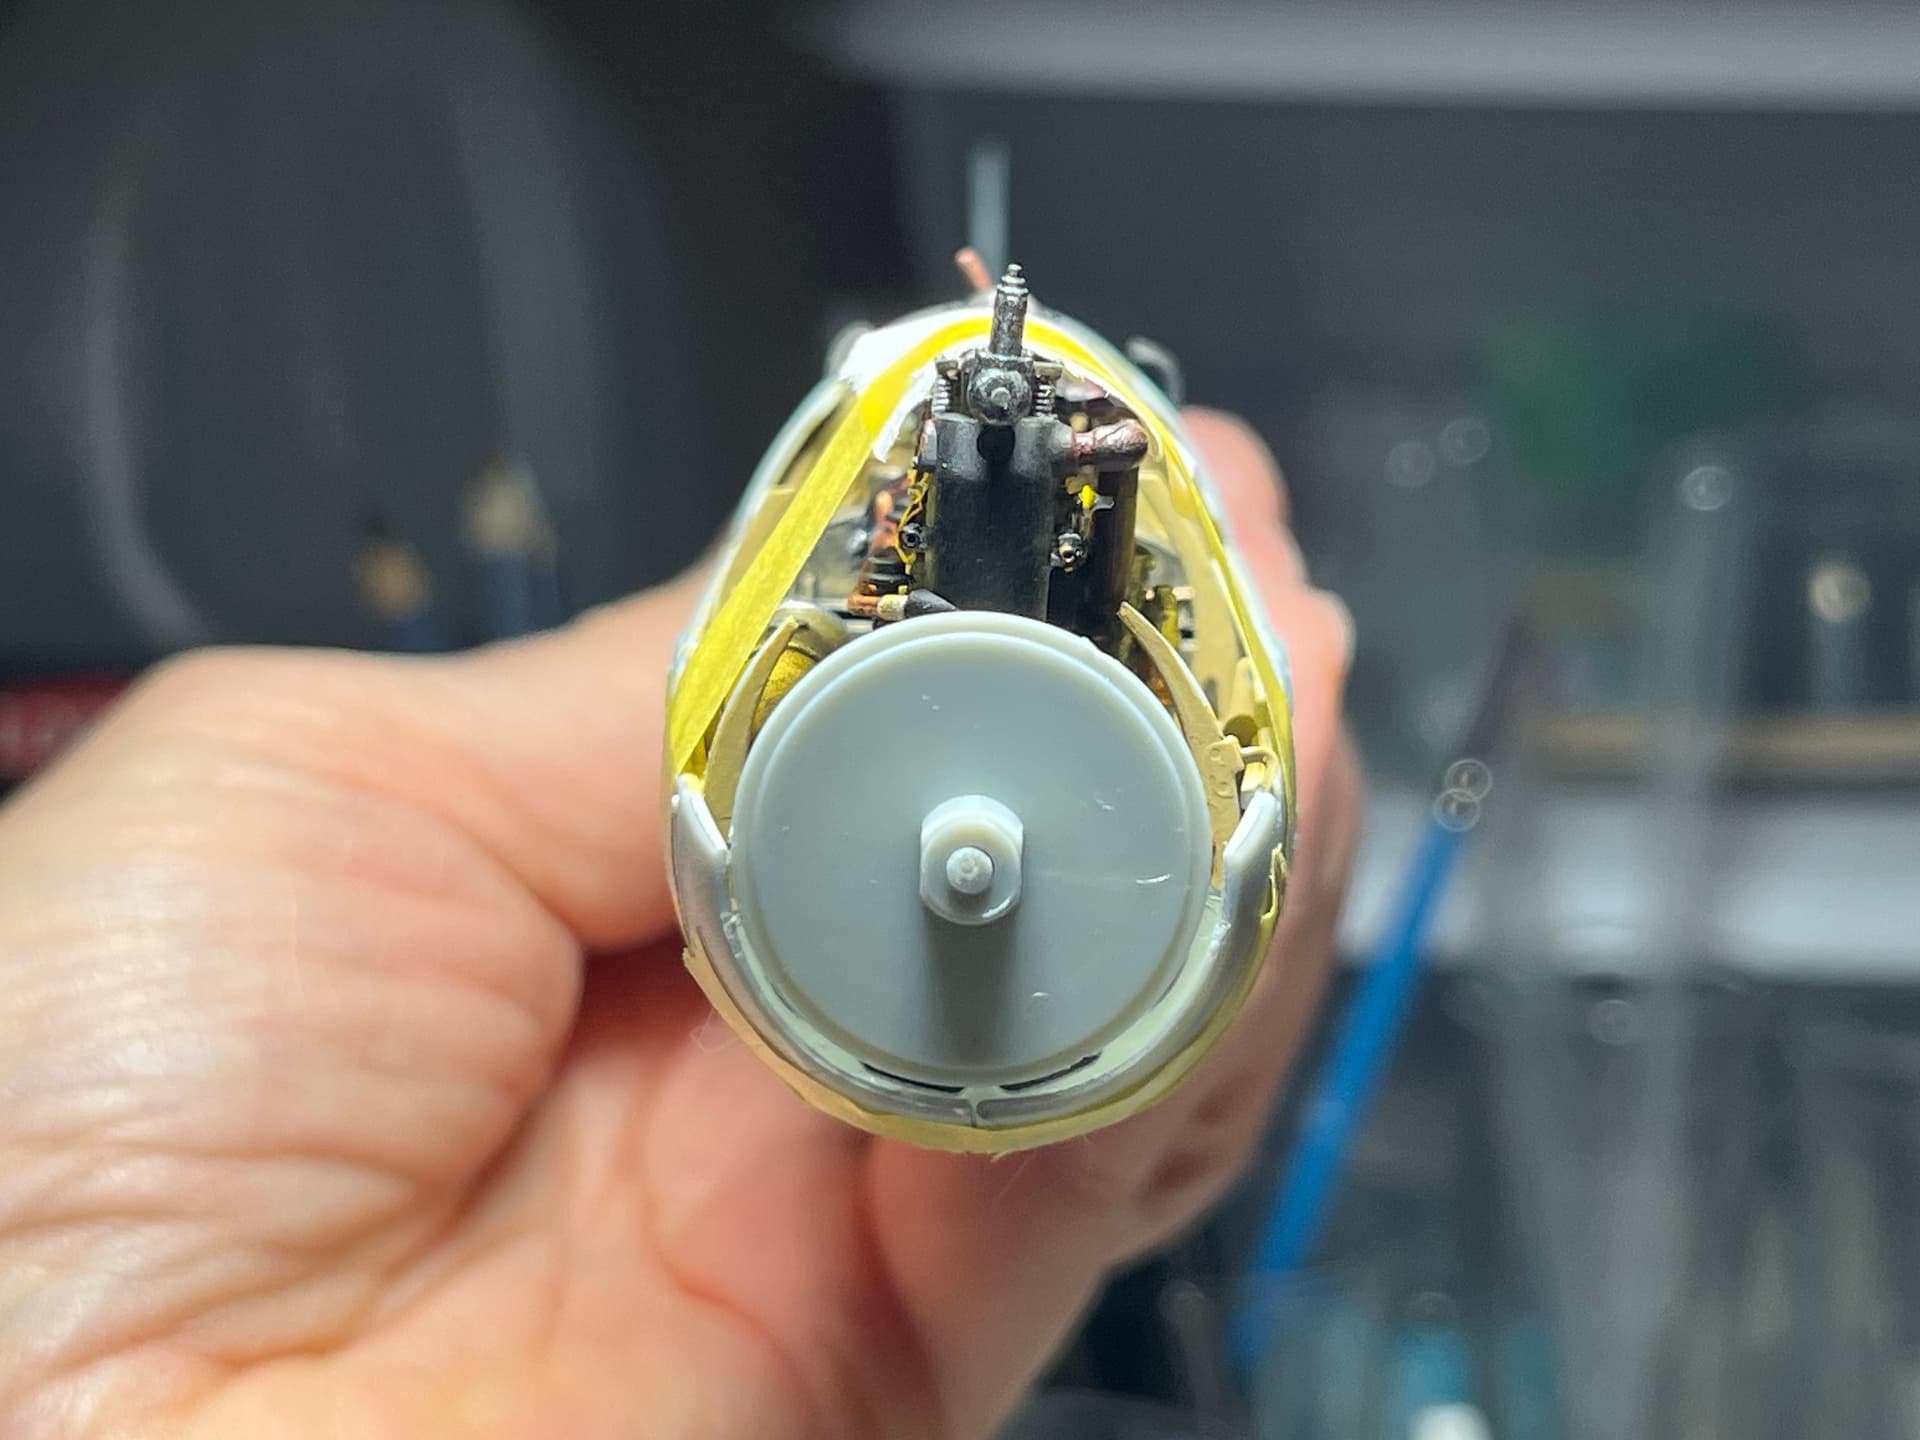
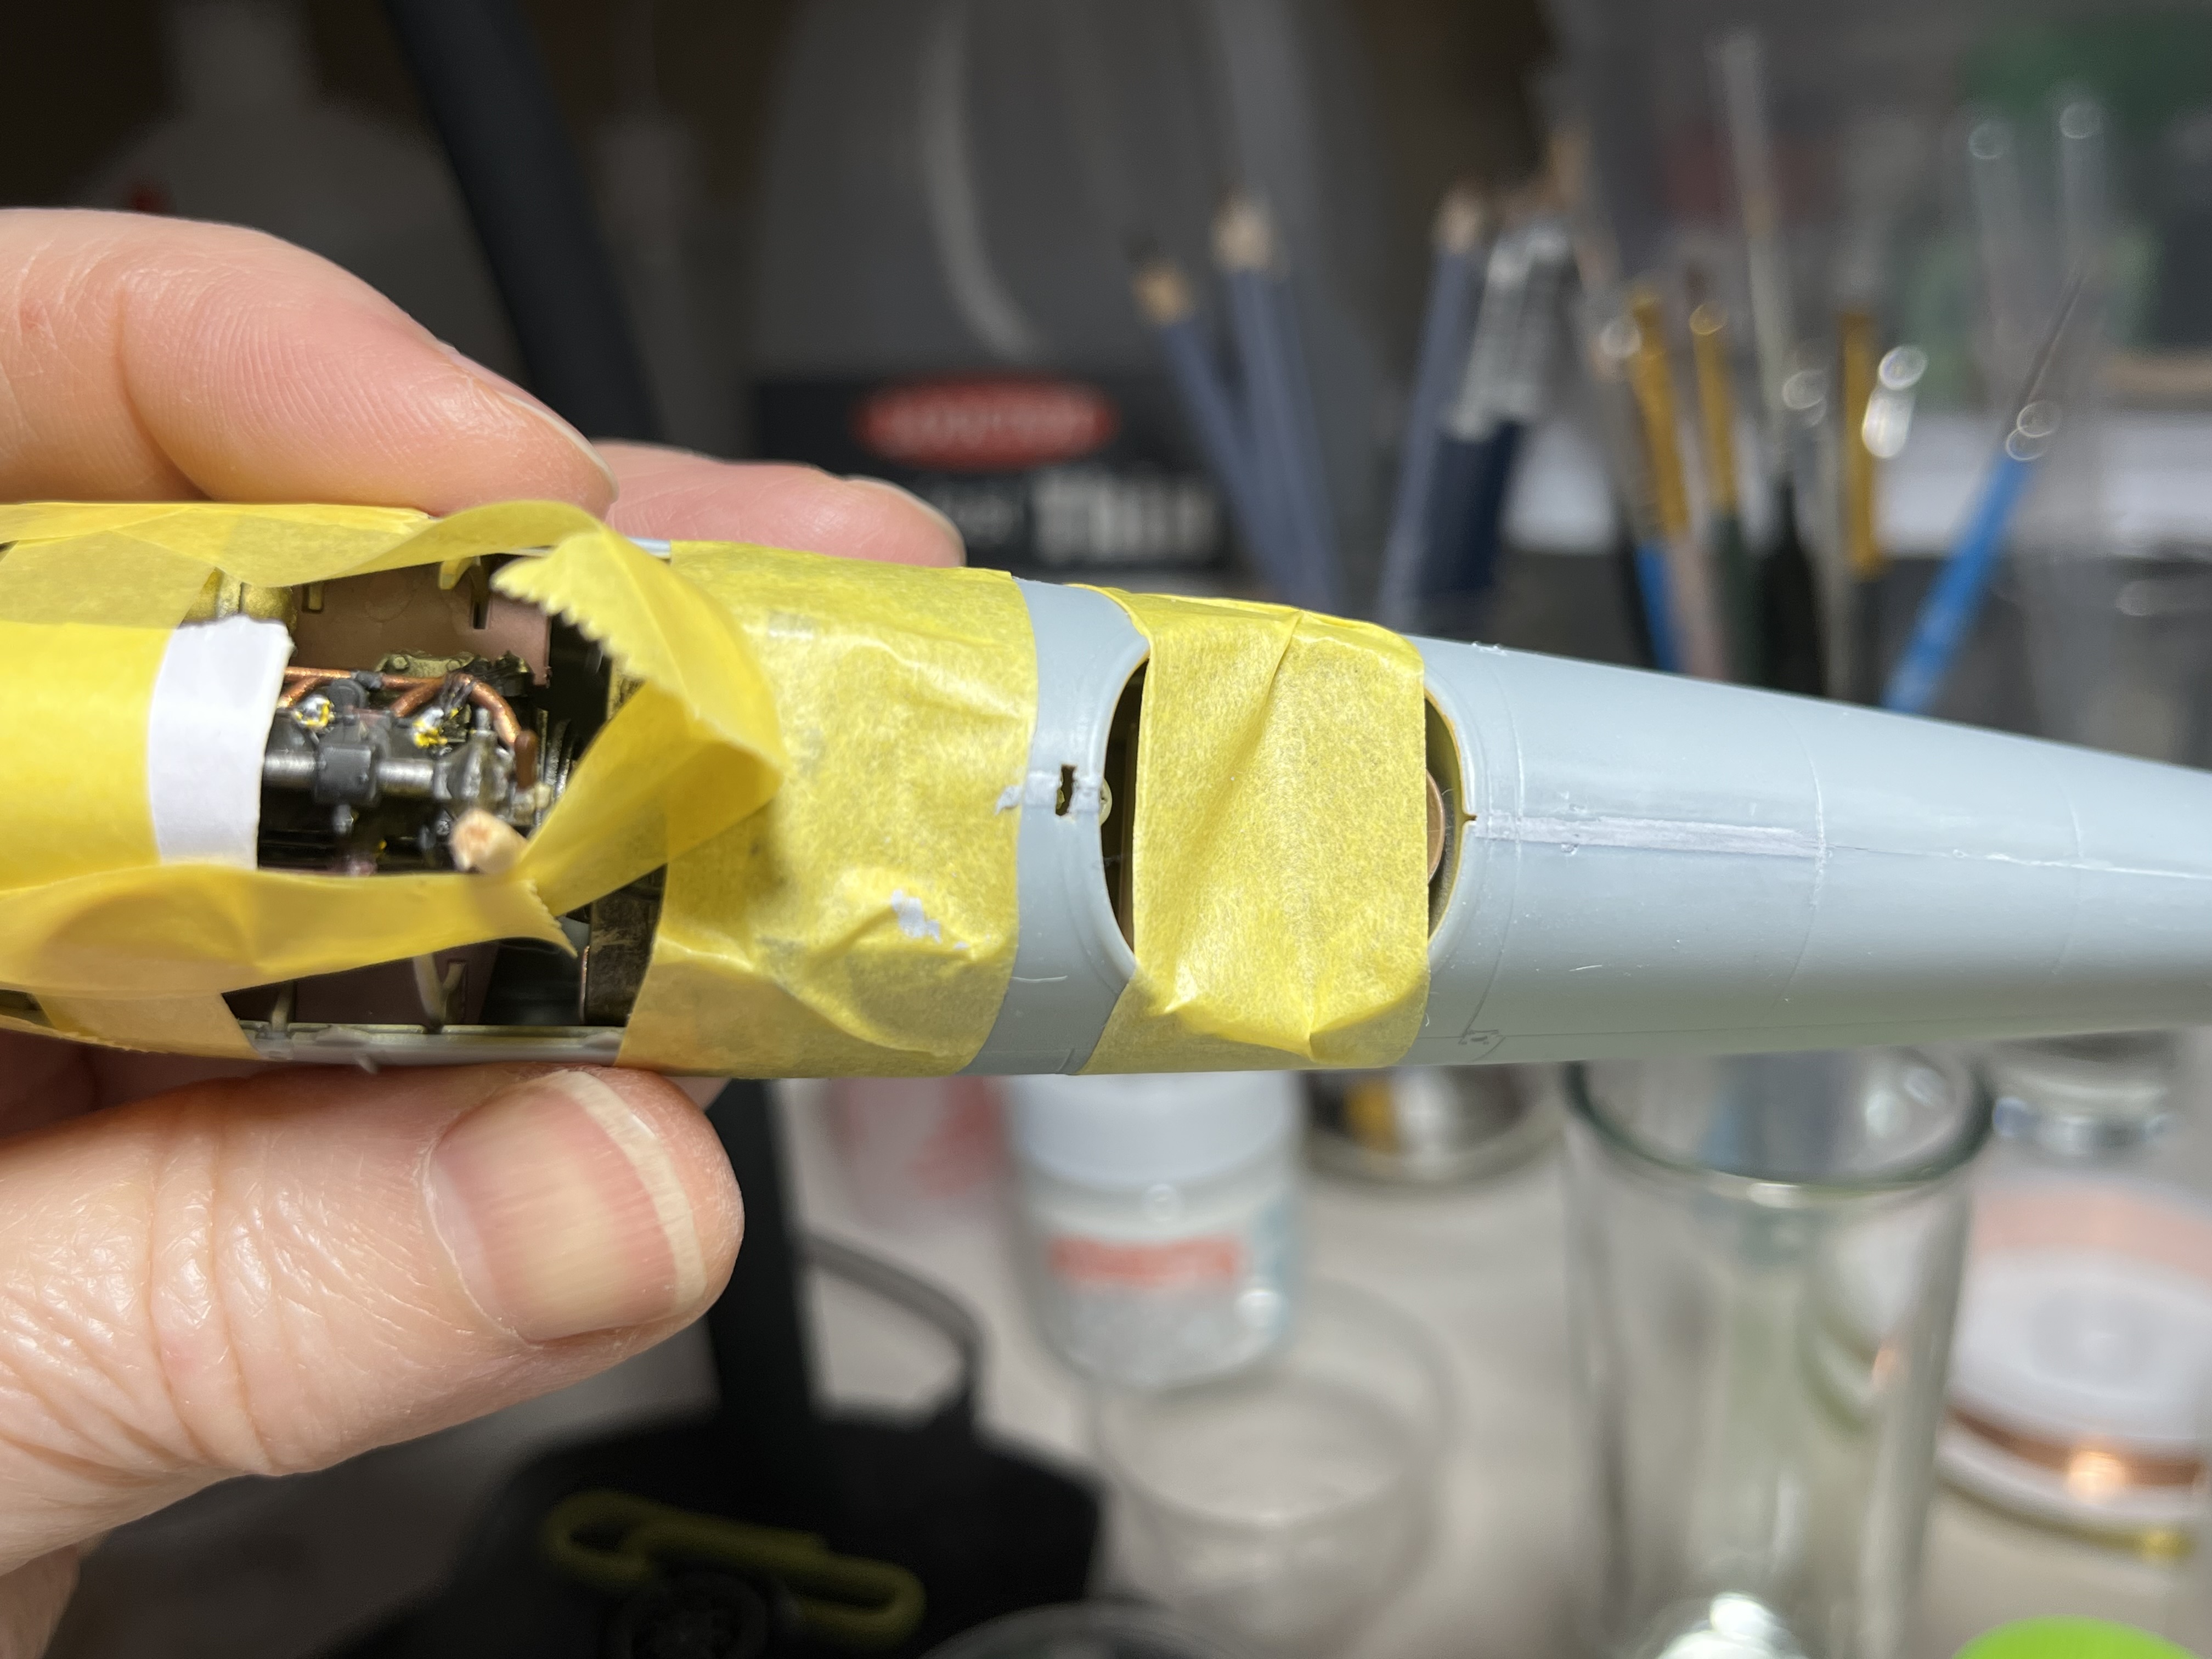
Yesterday’s progress - put the engine and other interior parts in the fuselage to check for alignment. Today I glued them in place but have some minor gaps to fill, even though I sanded the edges and cleaned all grooves from any paint. It’s just a very tight fit, but nothing that a little careful cosmetic work can’t fix. I was more concerned about the alignment of the propeller shaft, i.e., that it was centered where it should be. Some builders have done all the work to this point only to find that they have a noticeable gap between the spinner and the rest of the fuselage. I think mine may be okay. It was a relief.
I’m not terribly familiar with this airplane, but I believe many WWI planes had internal rigging between the cage pieces (I believe to give them support strength but don’t quote me on that). If that’s valid for this airplane, do you plan to add such detail? While they can be visible through the cockpit opening, not having them certainly doesn’t take away from the build.
I do not plan to add that detail (just glued the fuselage together a few minutes ago). But I also have not seen any recommendations for that from other builders and would need considerable guidance on the how-to about that.
I applied some putty in the tiny gaps after gluing the fuselage together, and now I’m cleaning it up. I don’t have a lot of experience with this and am not sure when it’s enough. I can judge the results better when I zoom in on my photos. I see a small place near the cockpit which needs a few more molecules of putty. It’s annoying me enough that I may try to fill it.
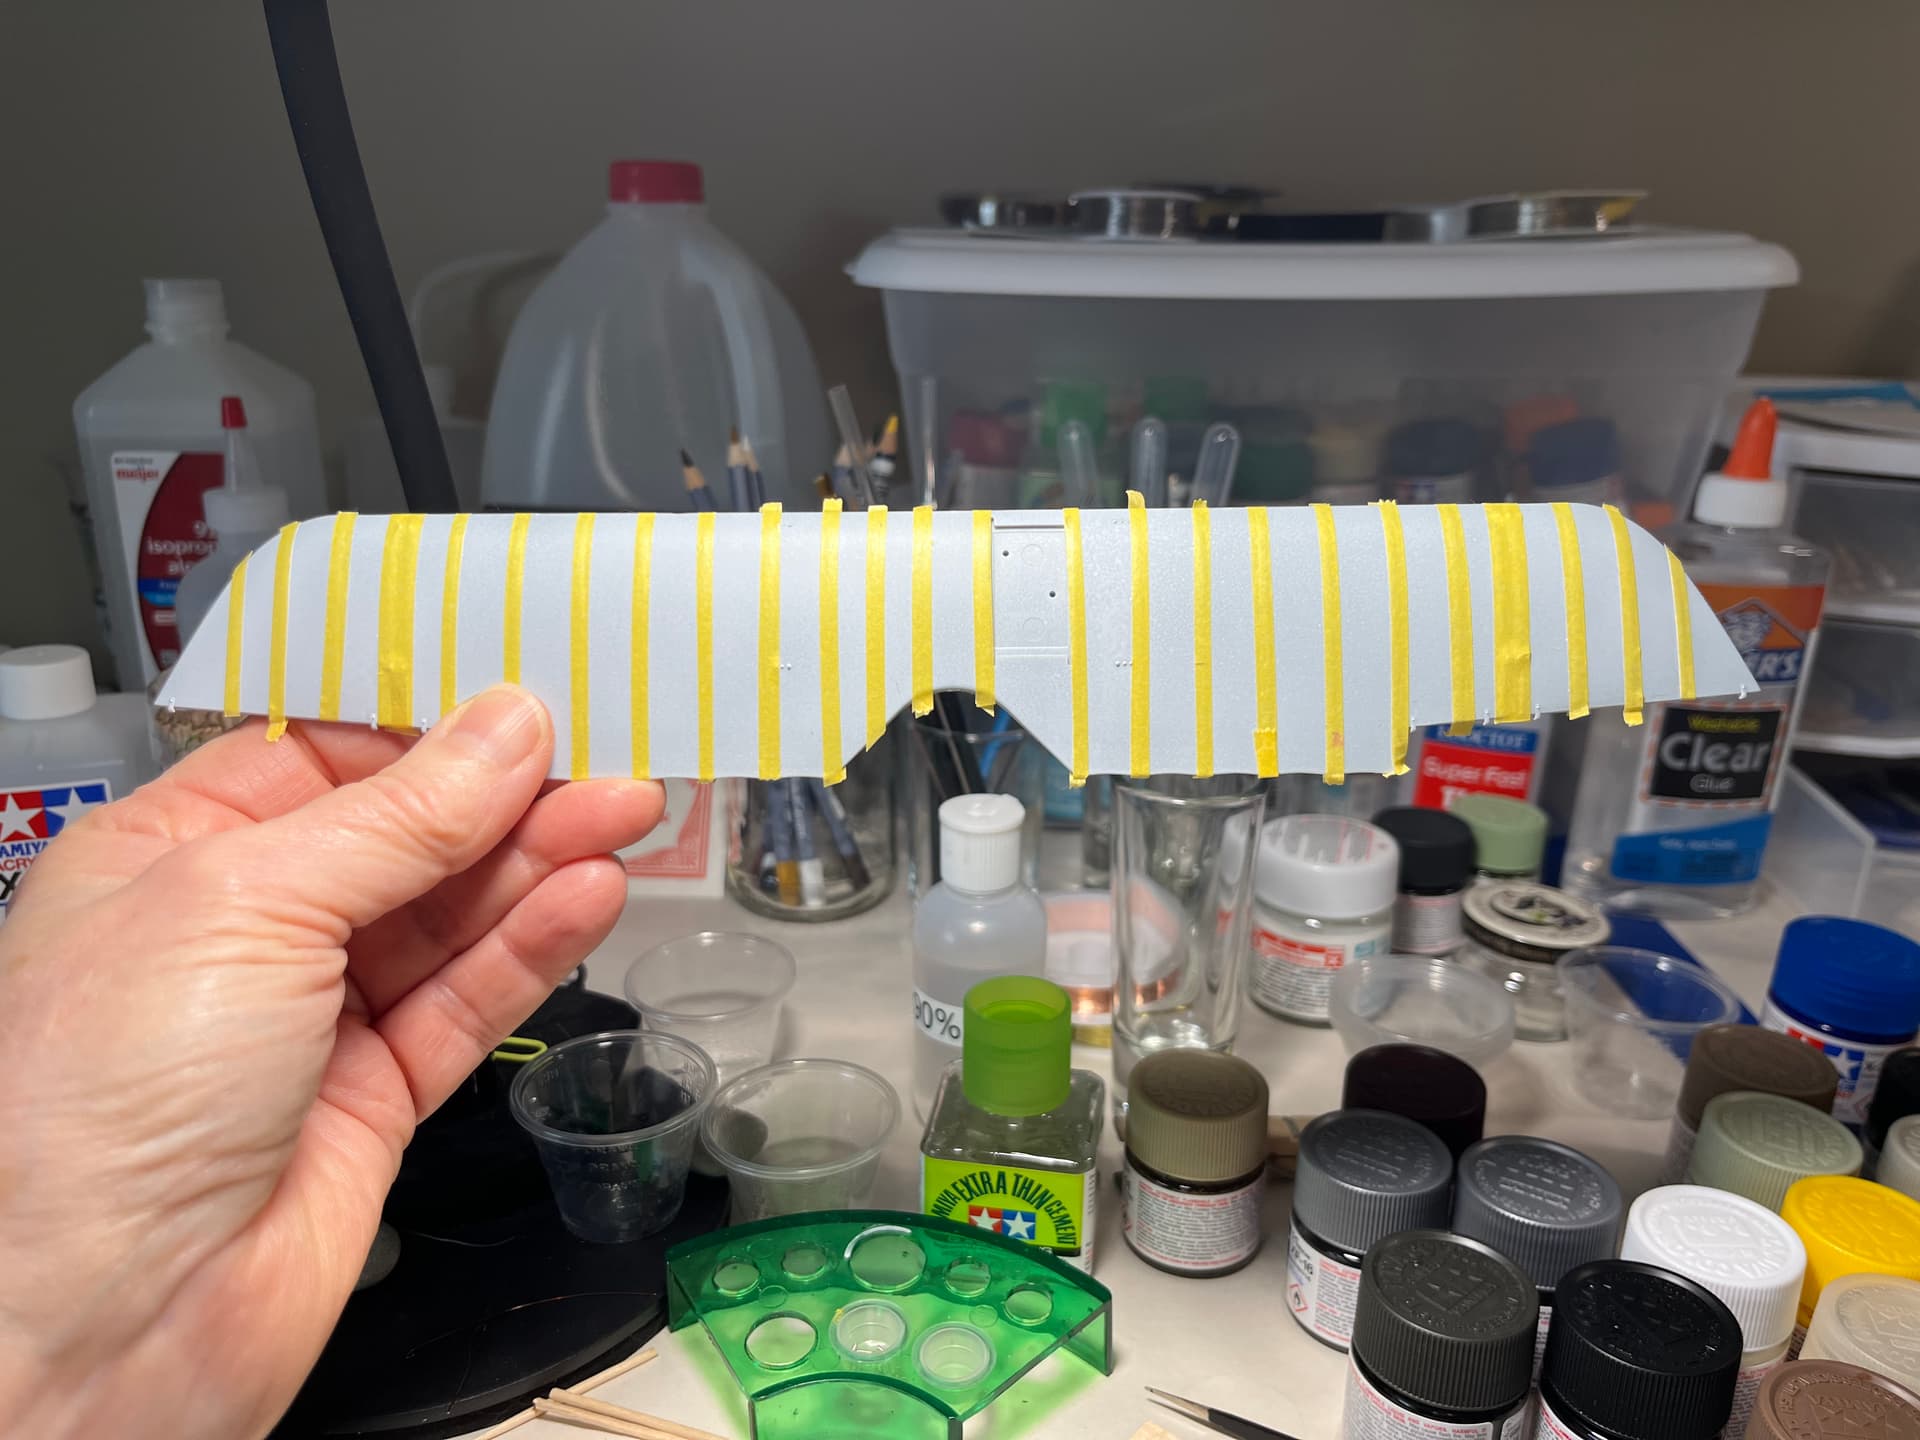
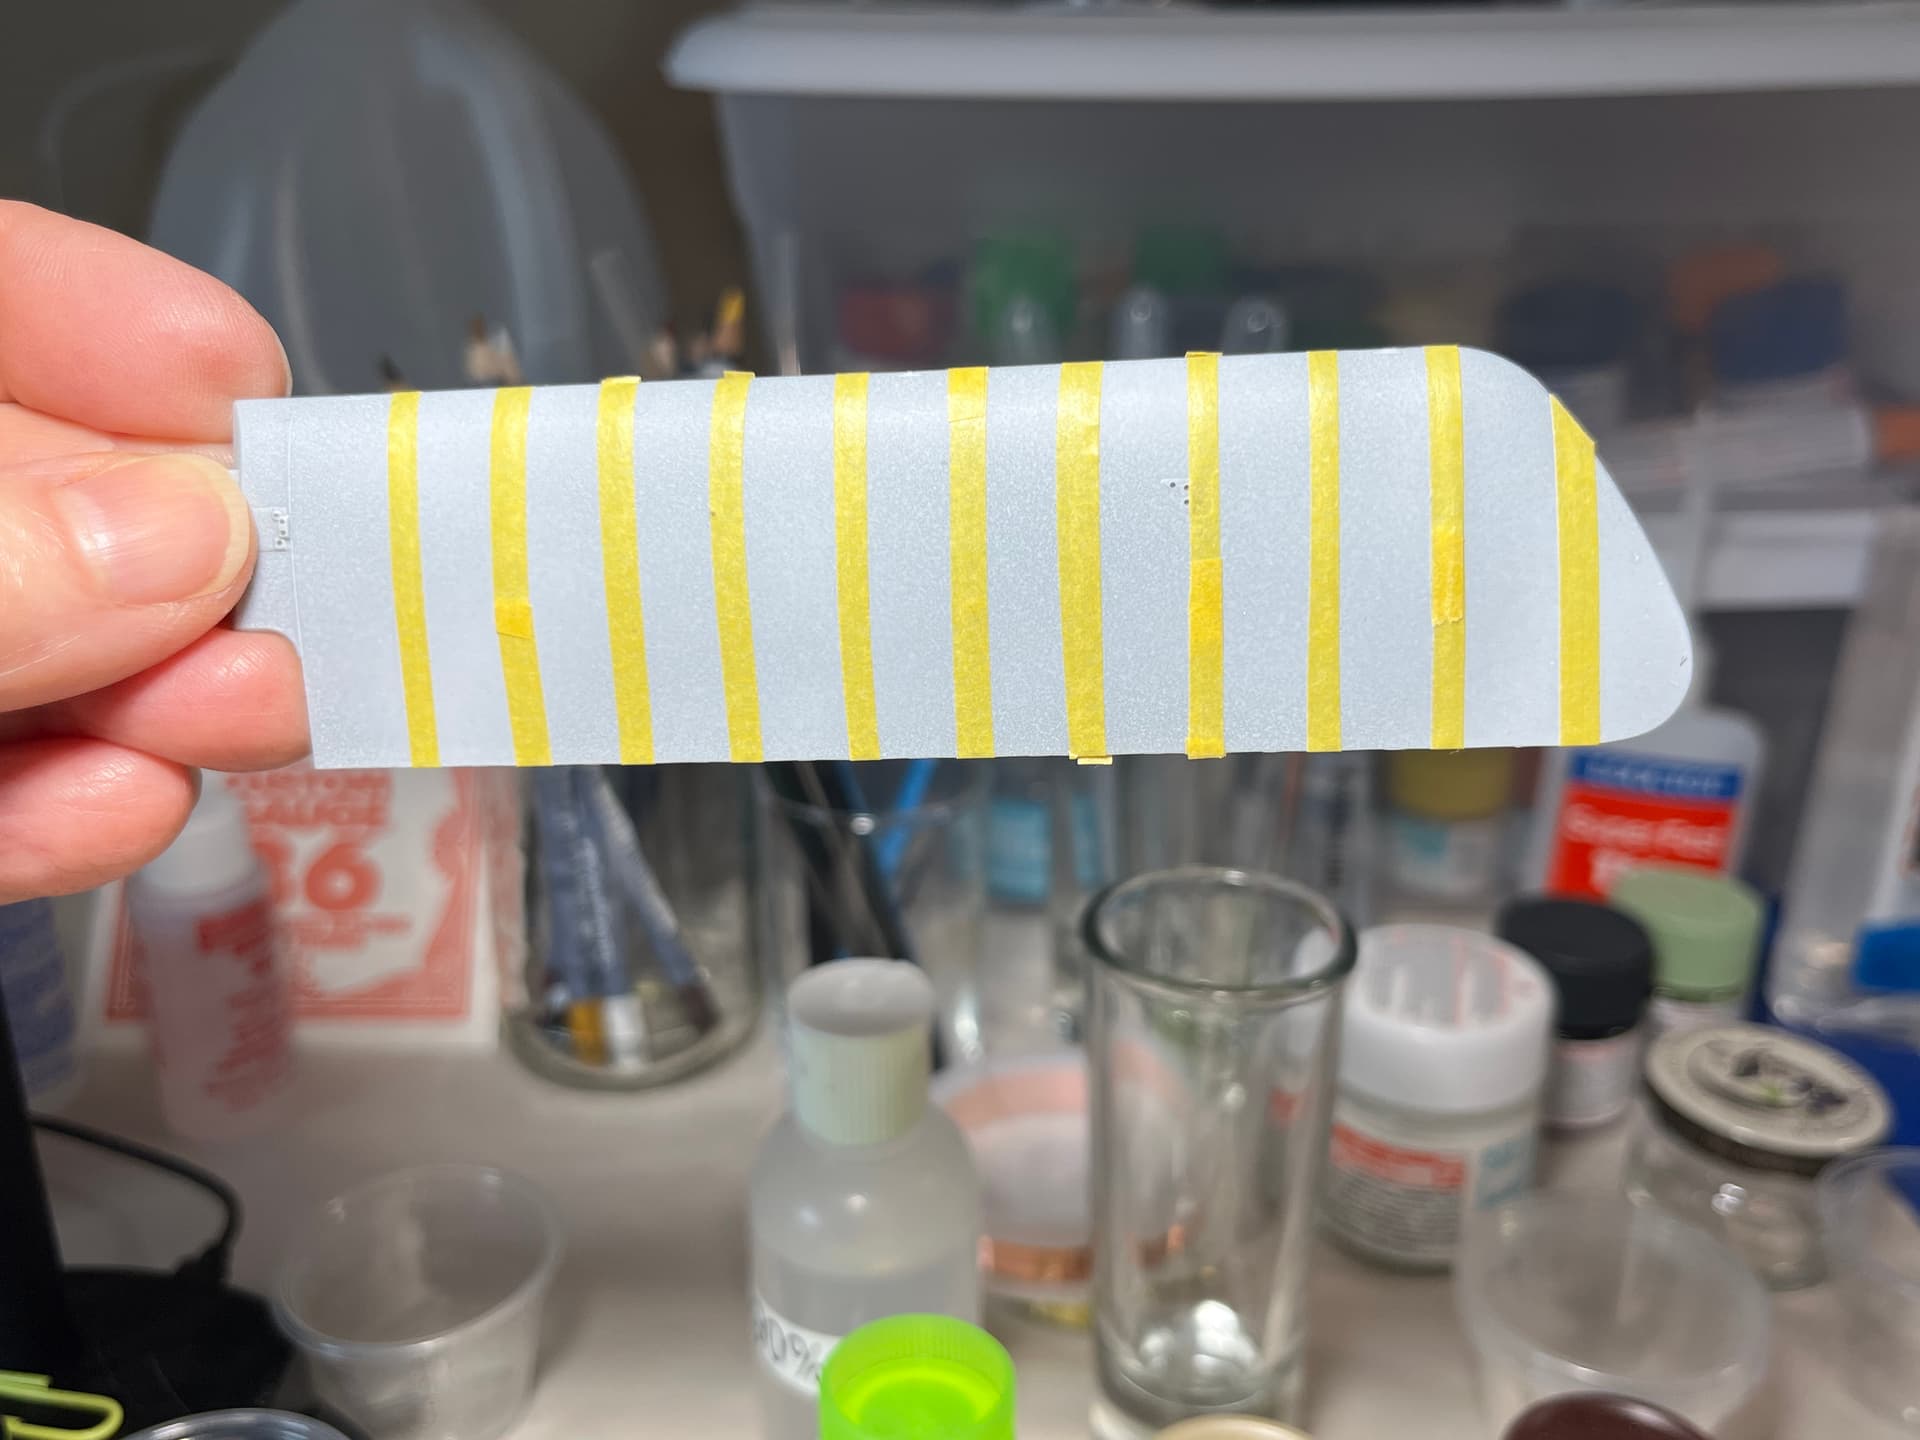
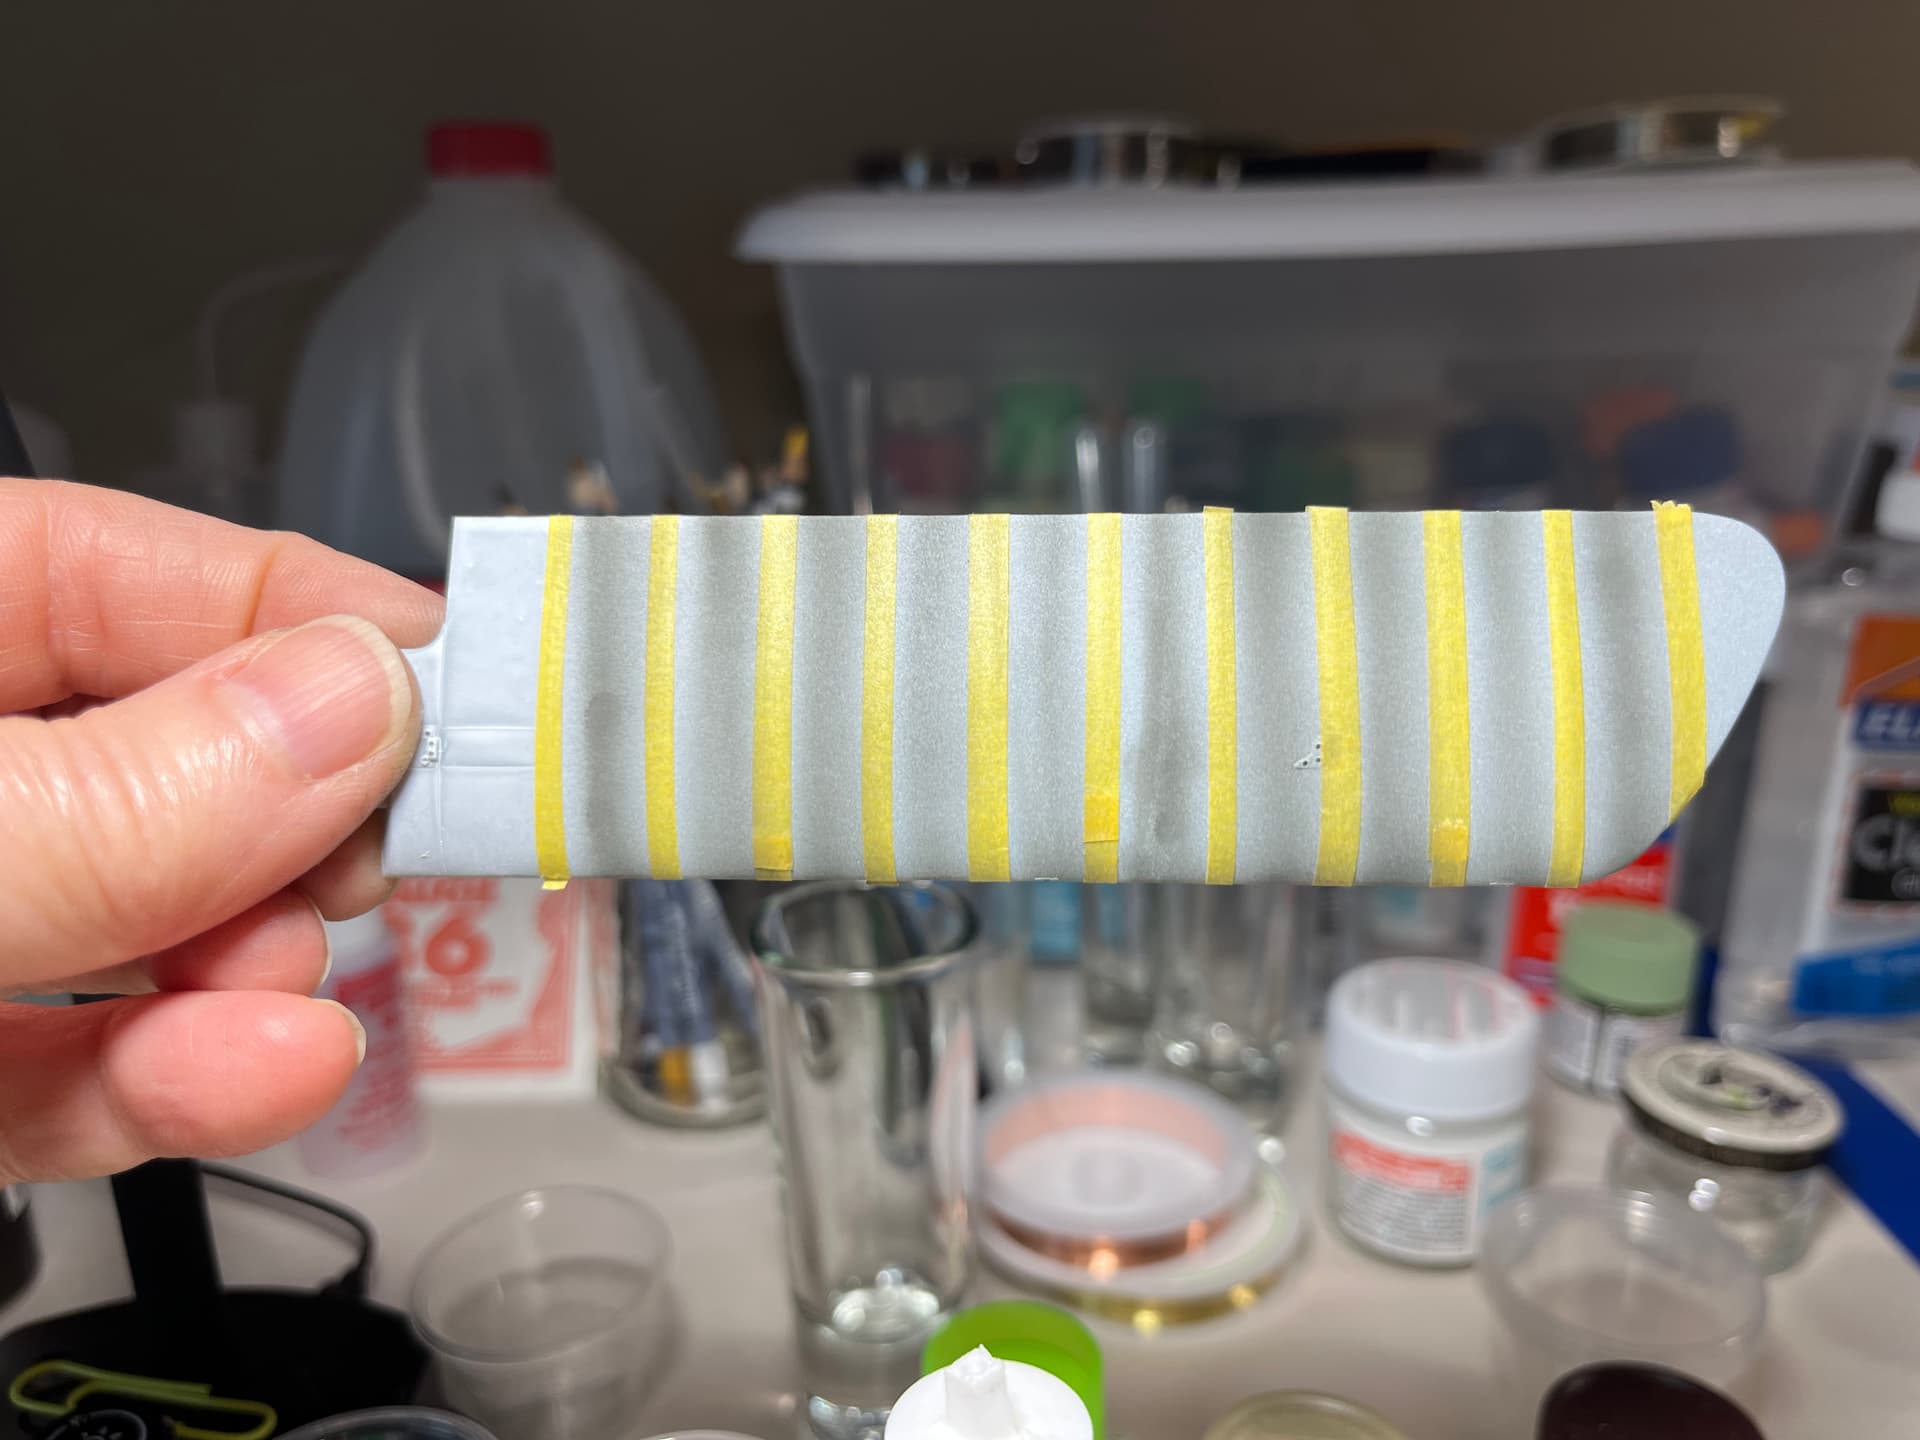
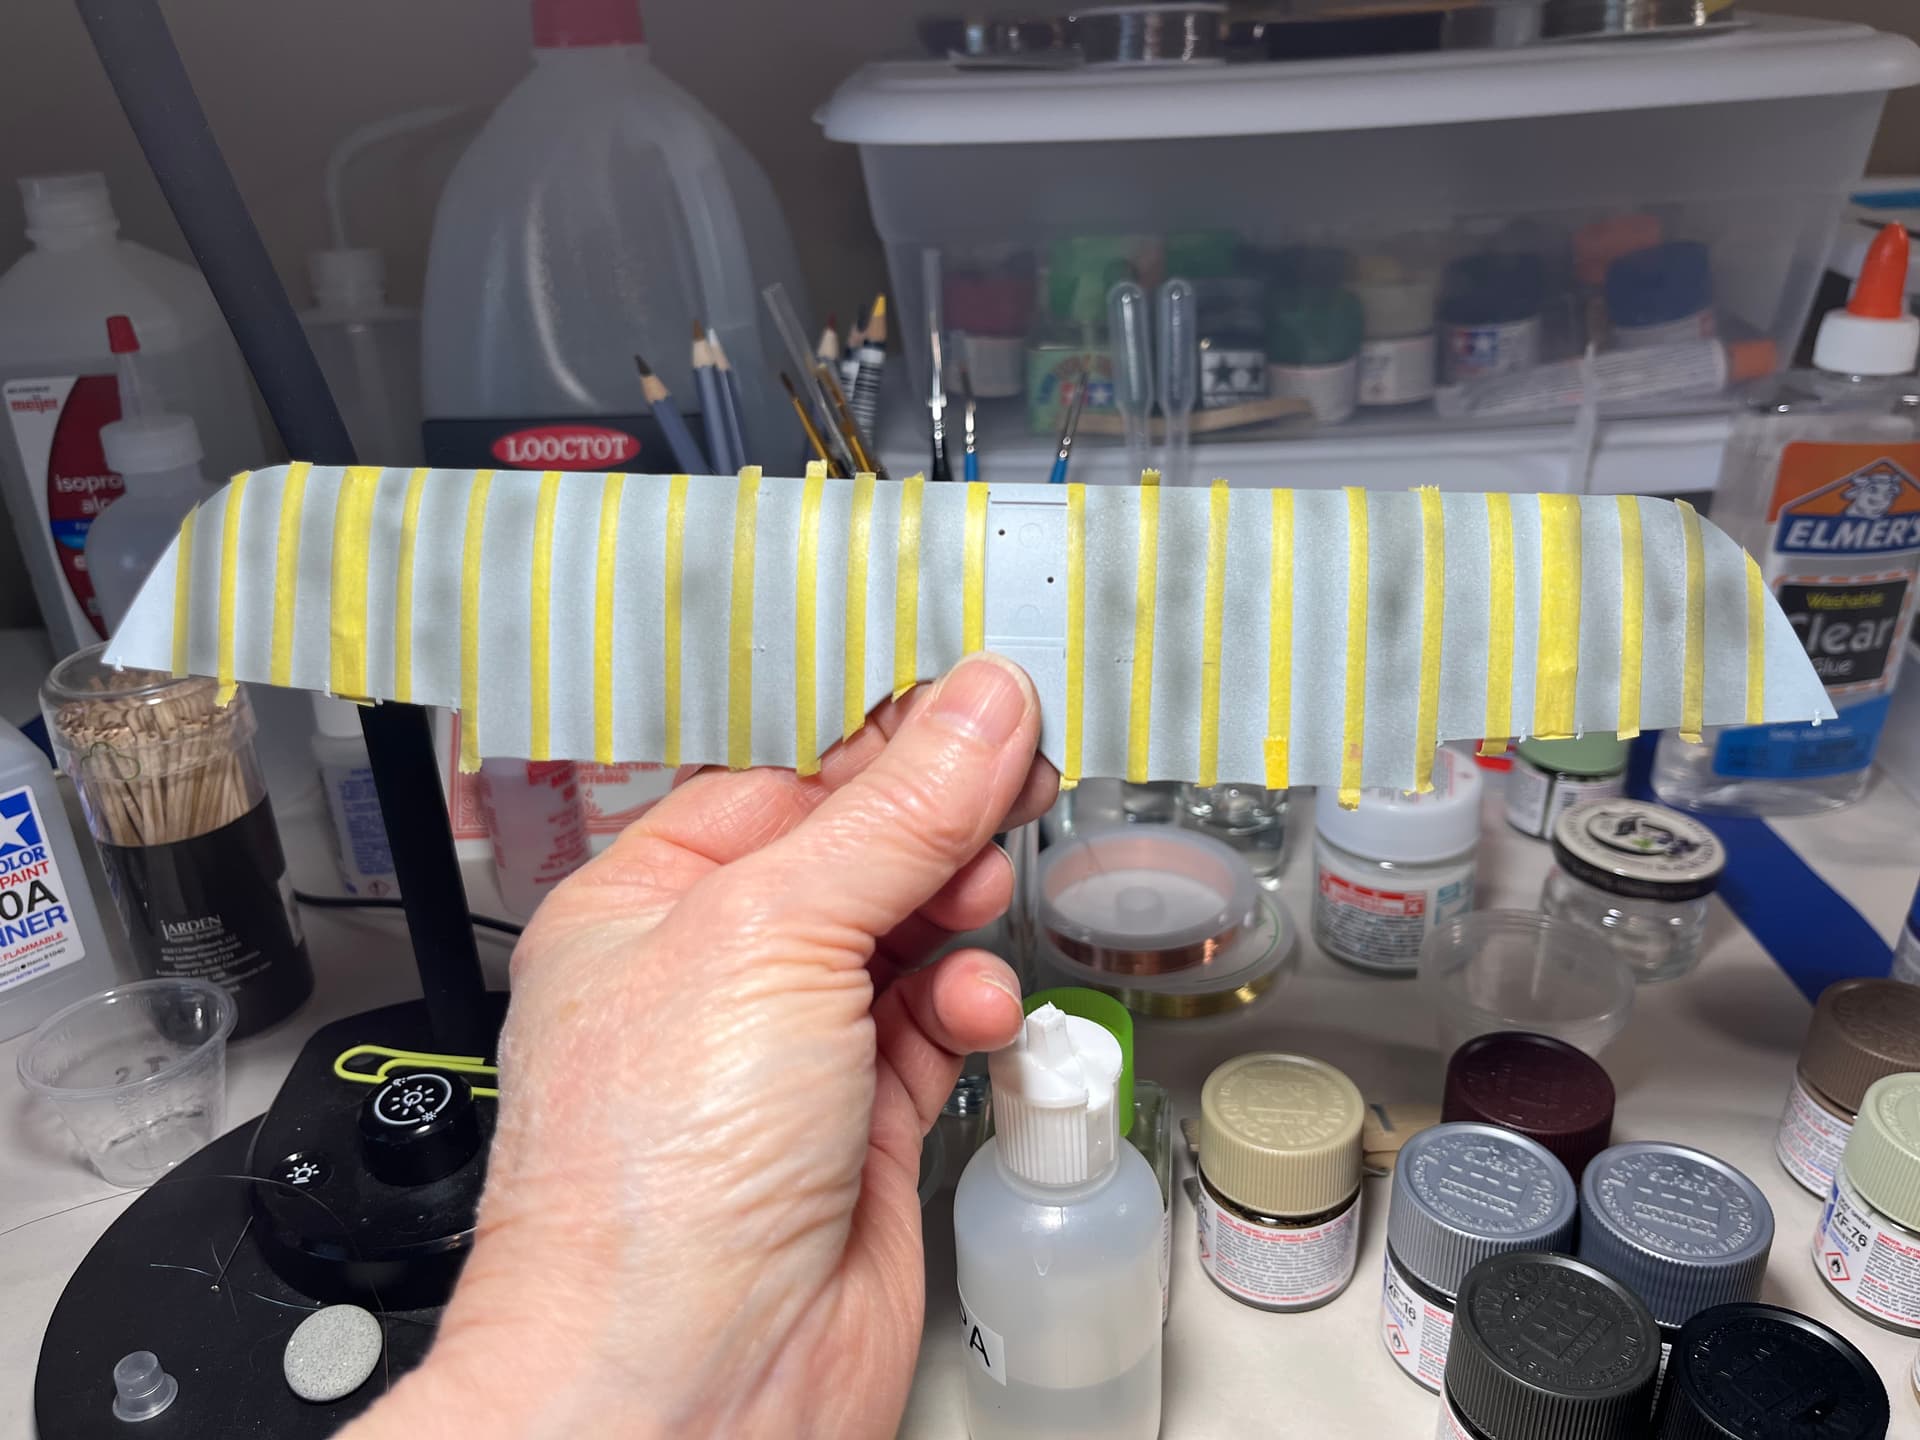
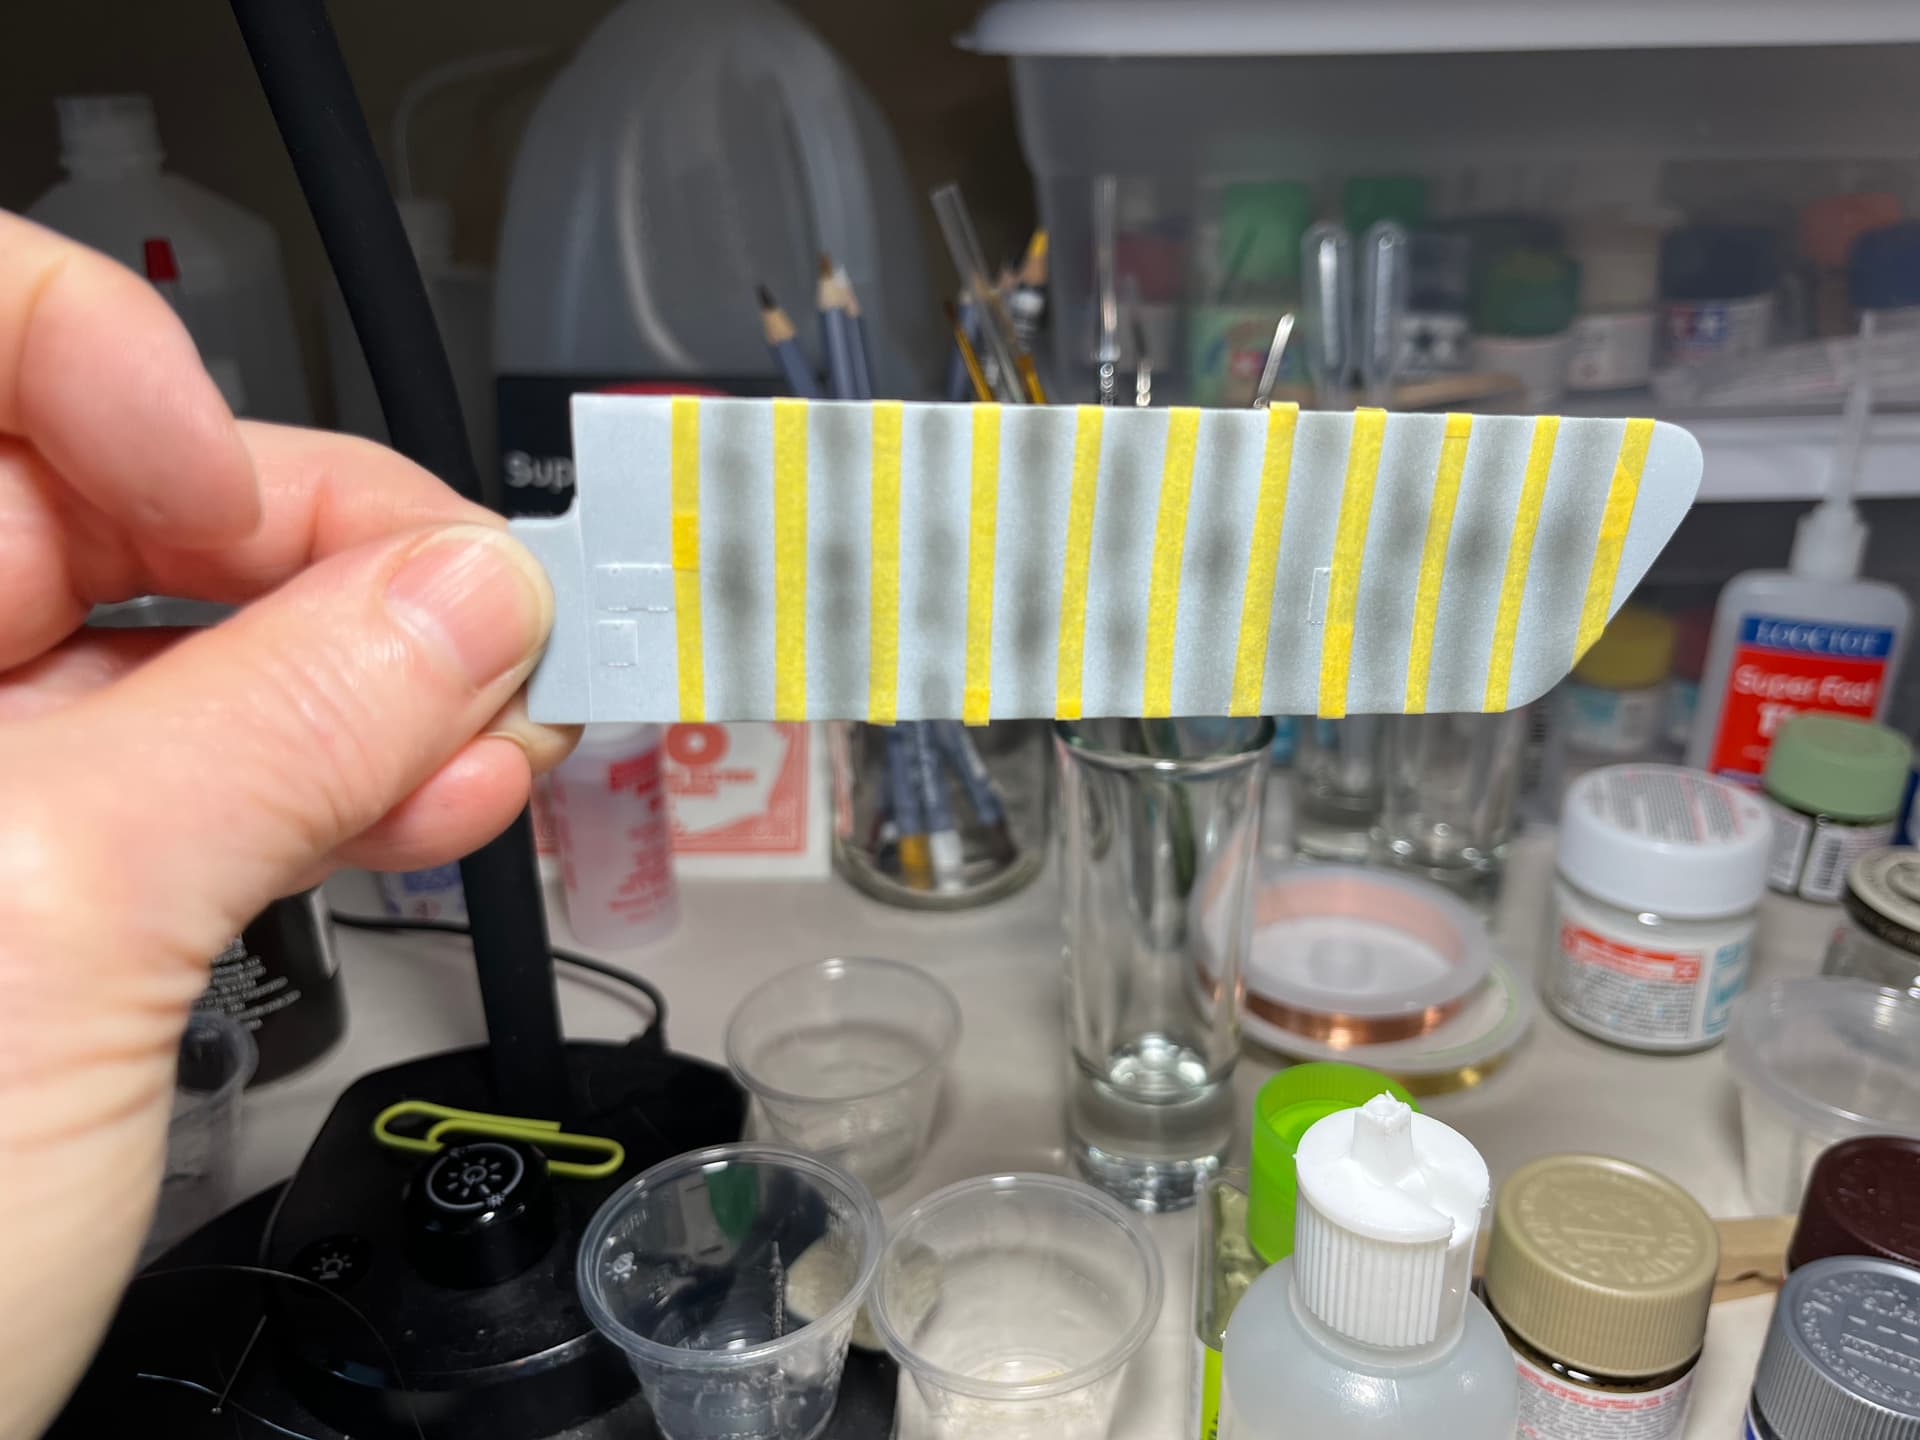
I did a lot of masking today. The masking on the wings is to allow an underlayer of thinned dark gray (about 75% IPA and 25% Nato Black) to create the illusion of depressions in the canvas between the supporting frame pieces of the wing.
I am struggling with some airbrush issues today and am not happy with the result of the shading. But since I still have color layers to add over the “shadows,” it may still have the desired effect. I don’t feel like I have very good airbrush control, and the paint flow doesn’t seem to be as consistent as it once was.
I am taking care to make sure the brush is cleaned properly and I’m using the lower pressure. This is an Iwata NEO CN, so it’s not super sophisticated, but I have used it through three builds without much trouble. Yesterday, I replaced the needle with a new one, and that helped, but still it seems that the flow of paint drags. Suggestions?
This one turned out okay, but I’m not pleased with the others.
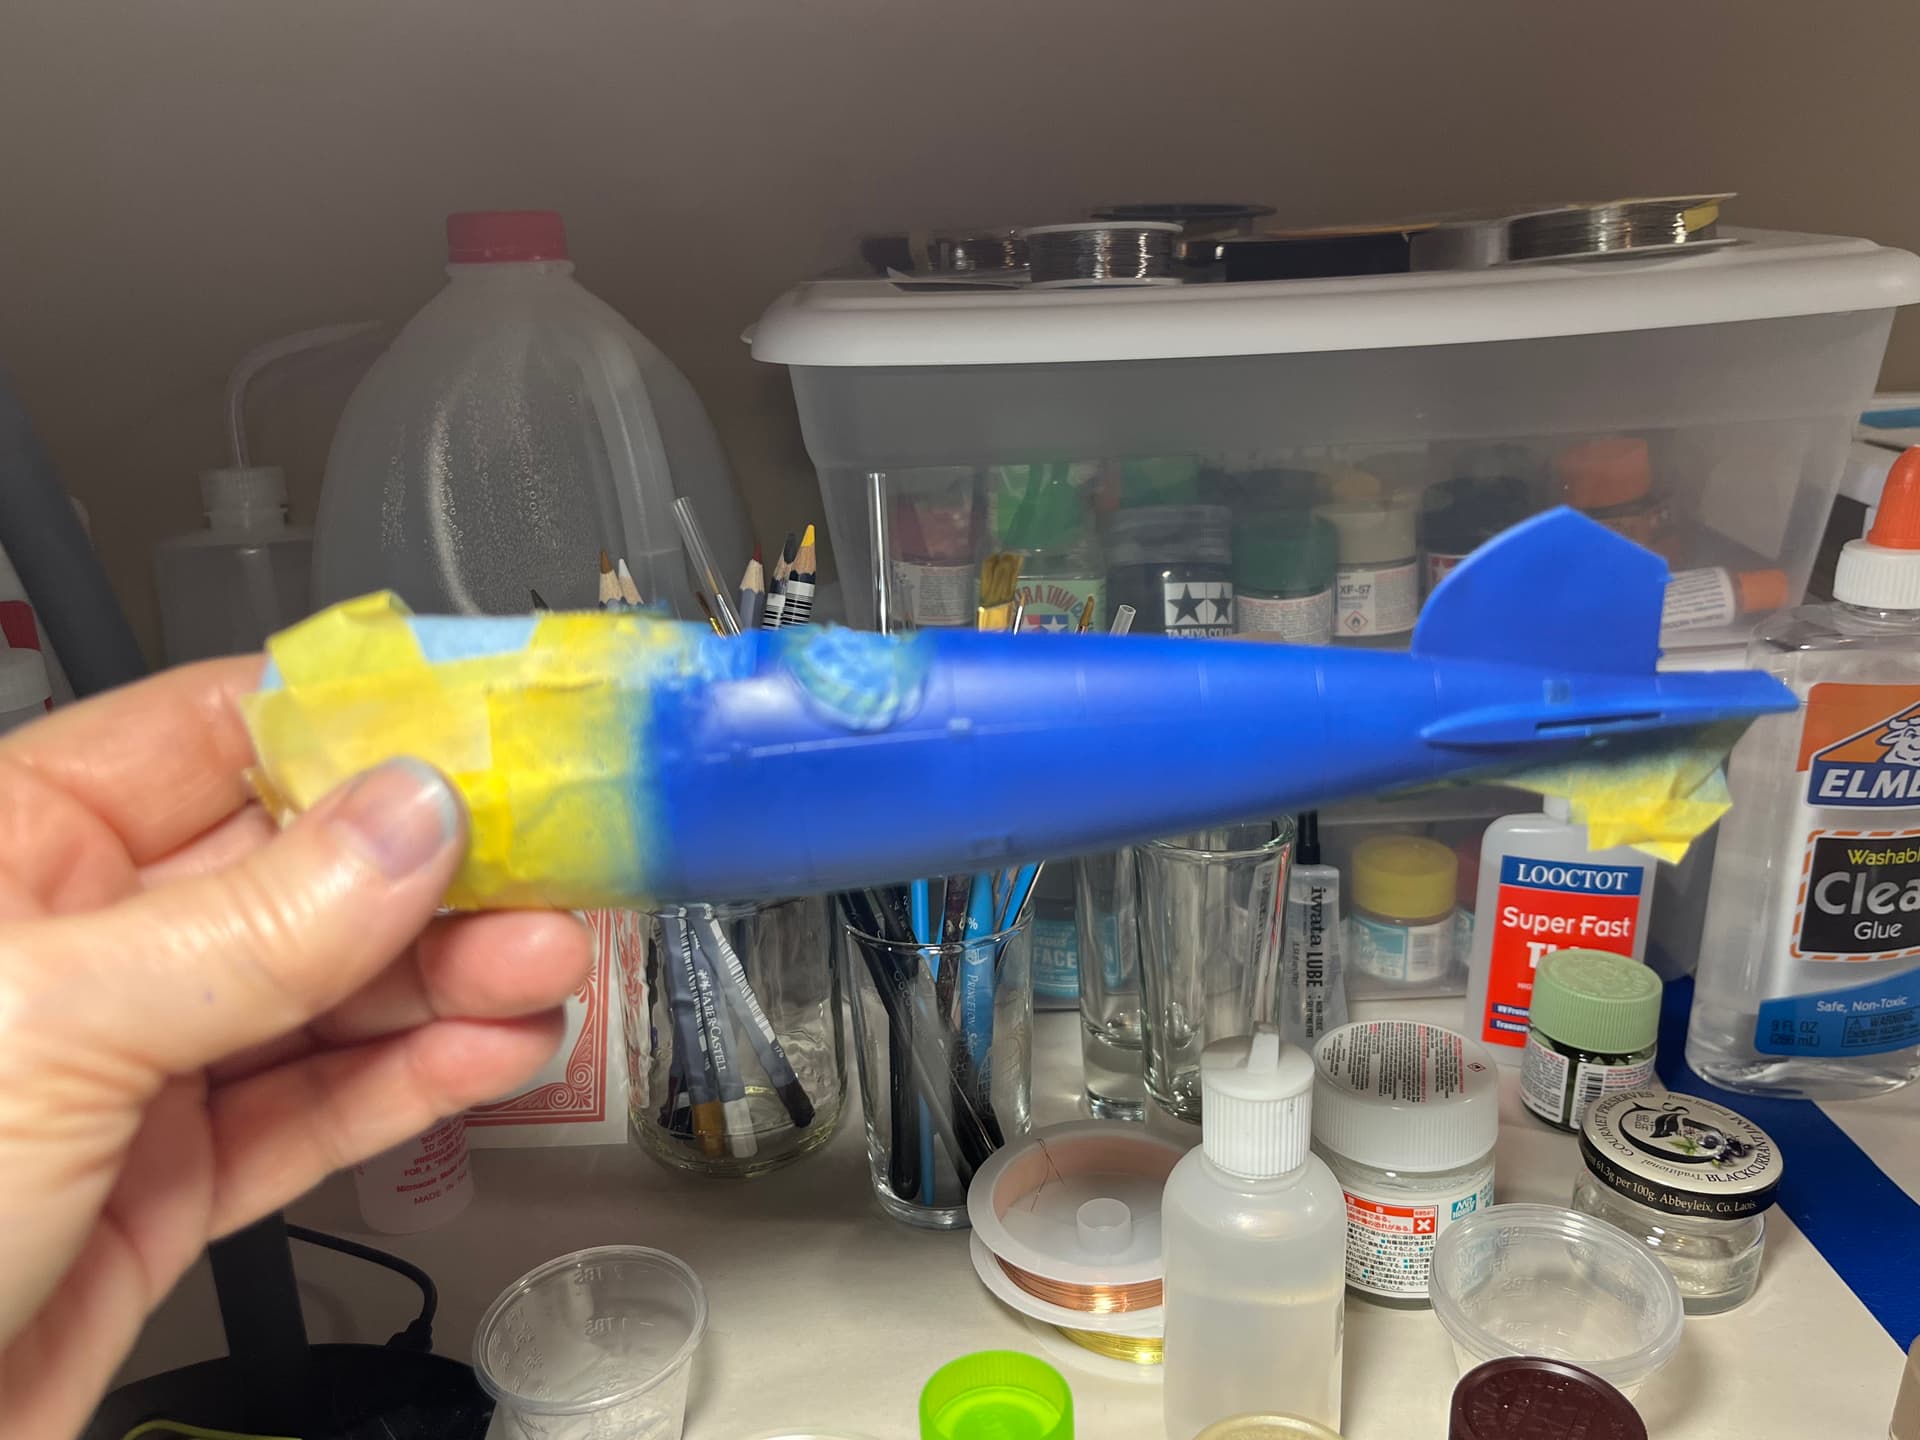
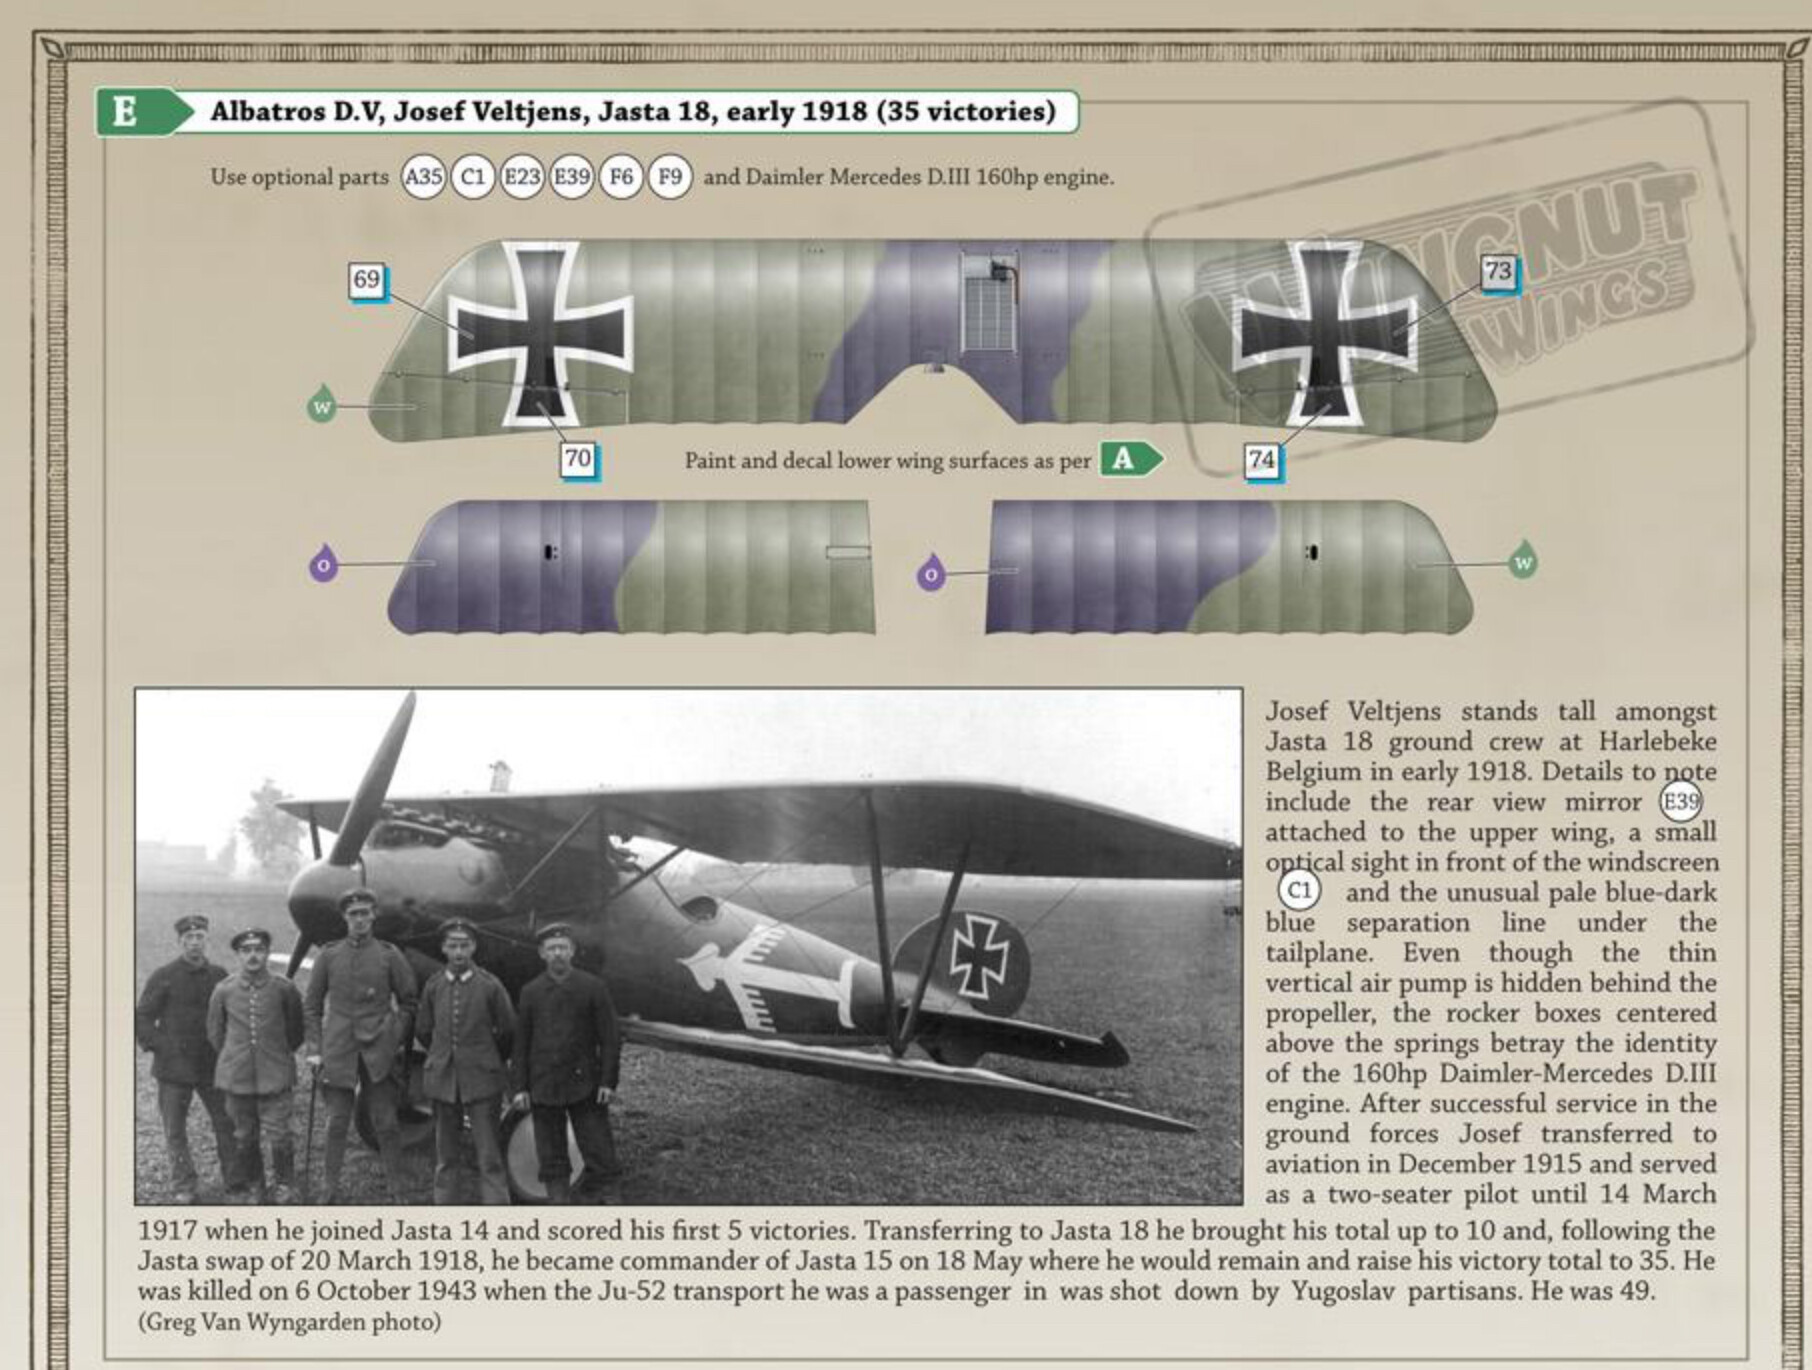
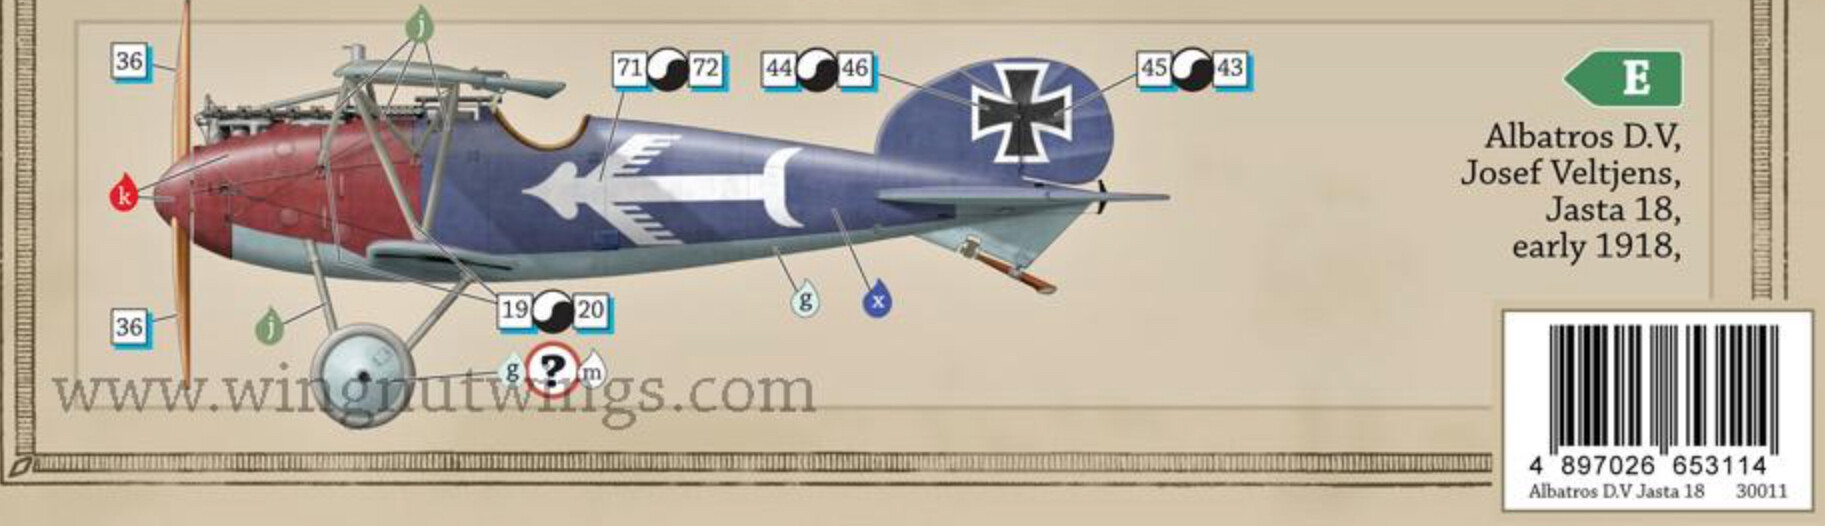
Though the lozenge decals are provided, they aren’t needed for the Veltjens model, so I will be painting the wings.The underside of all wings is a light blue. The tops are green and mauve.
I have the same airbrush. I’ve have to completely strip it. Clean everything twice when it does what you’re saying yours is doing. It also could be not thin enough paint??? Those have been my only two issues with mine.