Hi there - Not entirely sure this is the right forum but will start here.
I am about to start building Airfix’s Saturn V model. It calls for a colour of “130 Satin White” for the exterior.
My issue is that Humbrol isn’t widely sold in this area of the world and also, given its quite a large model, I was thinking of using a rattle can instead of my air brush.
Does anyone know how I would achieve a Satin finish with say Tamiya paints? They don’t seem to have Satin versions of Tamiya and I’m really confused as to how to match the colour called for.
I used Tamiya’s white rattle can primer to paint mine. It is actually a satin finish. I sprayed gloss for decals, but then finished with clear semi-gloss. I primarily used Tamiya rattle cans to paint my model. Masking over the ribbed sections proved to be easier than I thought - you just have to go slow and burnish the tape into the recesses as you go. I had very little paint creep, so all I did was use the tip of a knife to gently scrape back the errant black paint.
It was a bear cleaning up the flash, short shots, and raised scuzzies caused by corrosion in the molds. The seams on the F1 engines were fun to fill/sand, so much so that I gave up on the second and third stage engines! It’s also hard to photograph due to its size.
That’s a 1/144 V-2 rocket next to the Saturn V - it is quite amazing that only 25 years separate the two.
Anyway, good luck on your build! And post photos! It’s always nice to see one of these monsters being built.
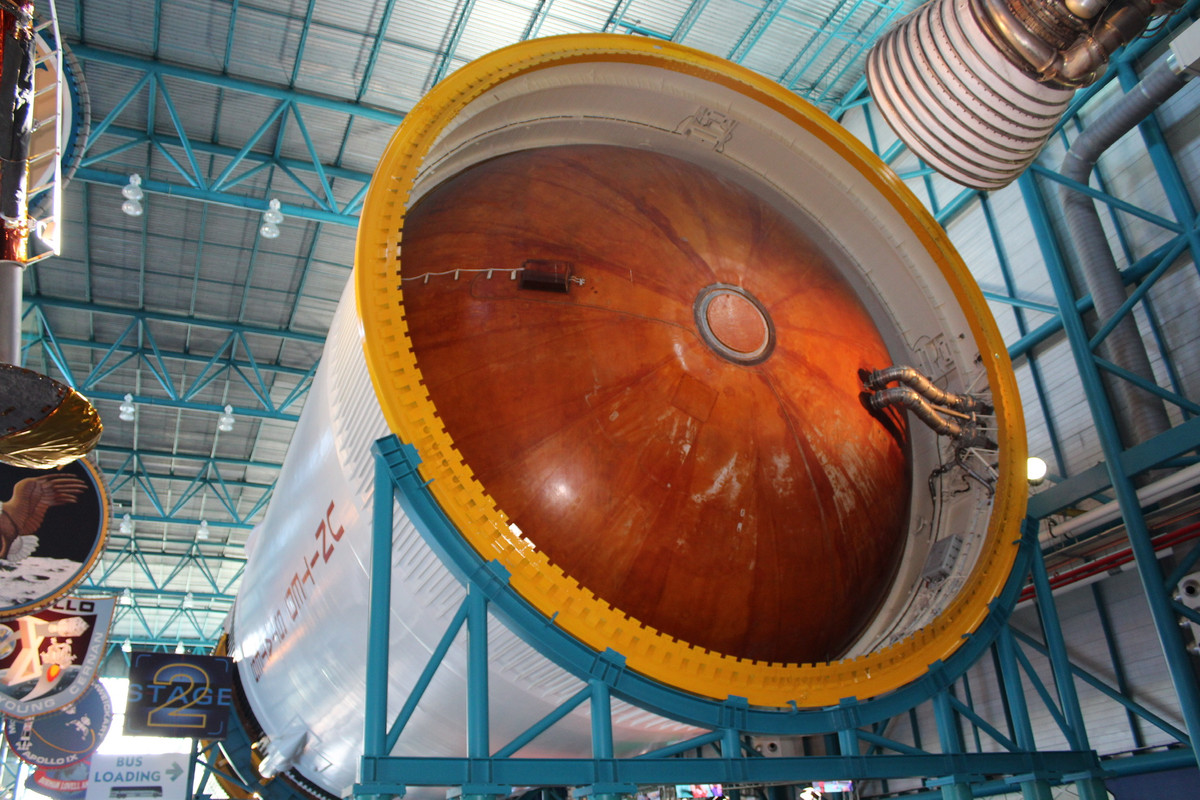
Actually another question for you - What colour did you paint the top of the tanks on the inside of each stage? Airfix says Aluminium… If you look at the revell kit it says green and then looking at refence photos it looks almost yellow (in some photos). I think I’m leaning towards Aluminium …
Hi there - I’m really sorry to keep bombarding you with questions but I’m finding this model seems to have a few tricks!
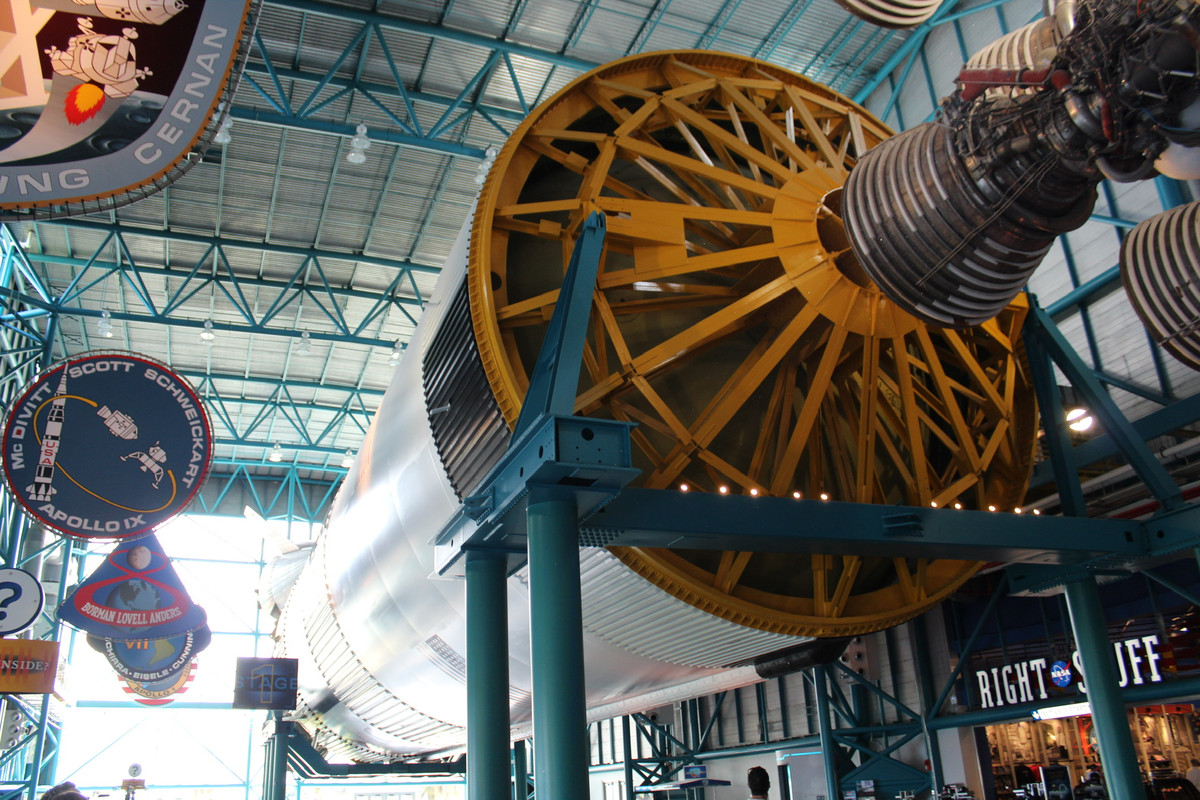
How did you paint the lower part of the rocket? There are 4 conical shrouds covering the engines and the lower portion extends beyond the base plate of the engine sections which is coloured silver/grey. I’m really puzzled on how to keep a straight line across that surface and seprate the silver bit with the white/black section. Link to a photo below
I think I stood the 1st stage on a flat surface and made a simple gage with a block and pencil. I moved the gage around the shrouds, and used it for reference while slowly burnishing a strip of tape around them. Yeah it was a PITA! BTW, I should have sprayed my engine bells with clear flat - I must have forgot.
Ha ha, I feel your pain! One handy tip is to use stretched sprue from the kit to fill the seam lines on the rocket bodies. I used putty and now have “ghost seams” everywhere! The semi-gloss finish reveals them big time. [:(]
The sprue fill-n-sand technique works really well. I have models several years old that have no signs of ghost seams despite having extensive amounts of sprue used. The other plus is that the sprue is the same hardness and color of the kit, so it sands the same, unlike CA glue.
Another way to use sprue is to scrape it with the back of a stanley knife or something to make thin “scrapes” for want of a better word and mix them with a thin glue, I use green Tamiya and mix it to a thinish paste, put this over the seems and when dried and sanded you will never know there was a seem there. Try it on a old model for practise, I hardly ever use putty now. Static can be fun gathering the scrapes but it’s worth it.
Also love the space models, have the Saturn V, V2, Voyager, ISS etc.
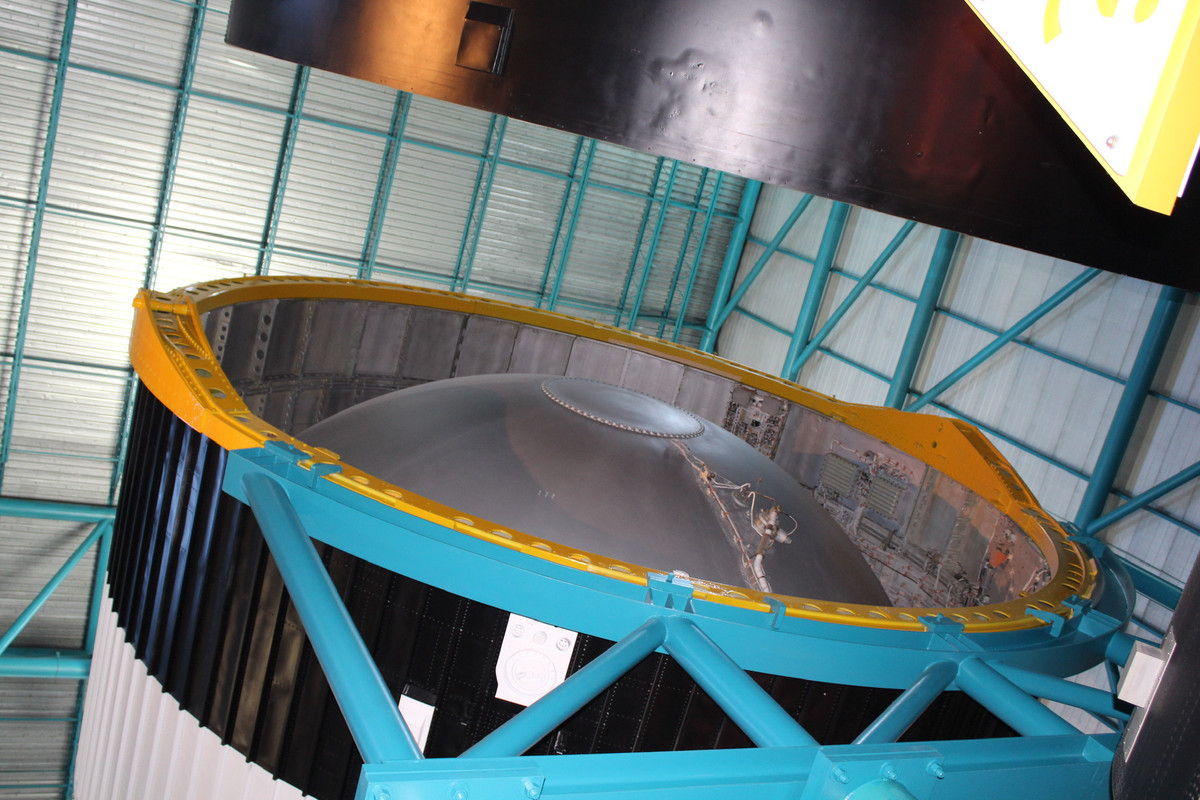
Snibs & DJ, you’re quite welcome. I hope that the photos help. I have more photos of the Command, Service, and Lunar modules if you need them, as well as of the nozzle areas of Stages 1, 2, and 3. Kennedy is an awesome place to visit.
DJ, the Saturn V is indeed an incredible machine. So massive to see in person.
There was this big fuzzy grey squirrel that was trying to cut in line when we got there. He/she went zigging and zagging between people. It stopped in front of me and so one of my friends got a photo of it.
There was also a black bird with a weird raspy cry that sounded like an alarm that stopped by to say hello. I started talking to it while waiting for my friends, and it let me go up to it and have its photo taken.
I didn’t stop to chat with the ‘gators though. [:P]
Stick the photos are super helpful thank you. I have ordered some new paints Not sure how I will do the dirty yellow will have a think. I visited in late 2000. What a place! Needed a few days to be honest.
Ill put my hand up for more photo’s Stik if it’s not a hassle, I’m sure it will help 100’s of modelers besides me as well for years. Thank’s again Stik.