@Aggieman
If the diagram in the instructions is really precise, it looks like that part should fit over the top of the cylinders.
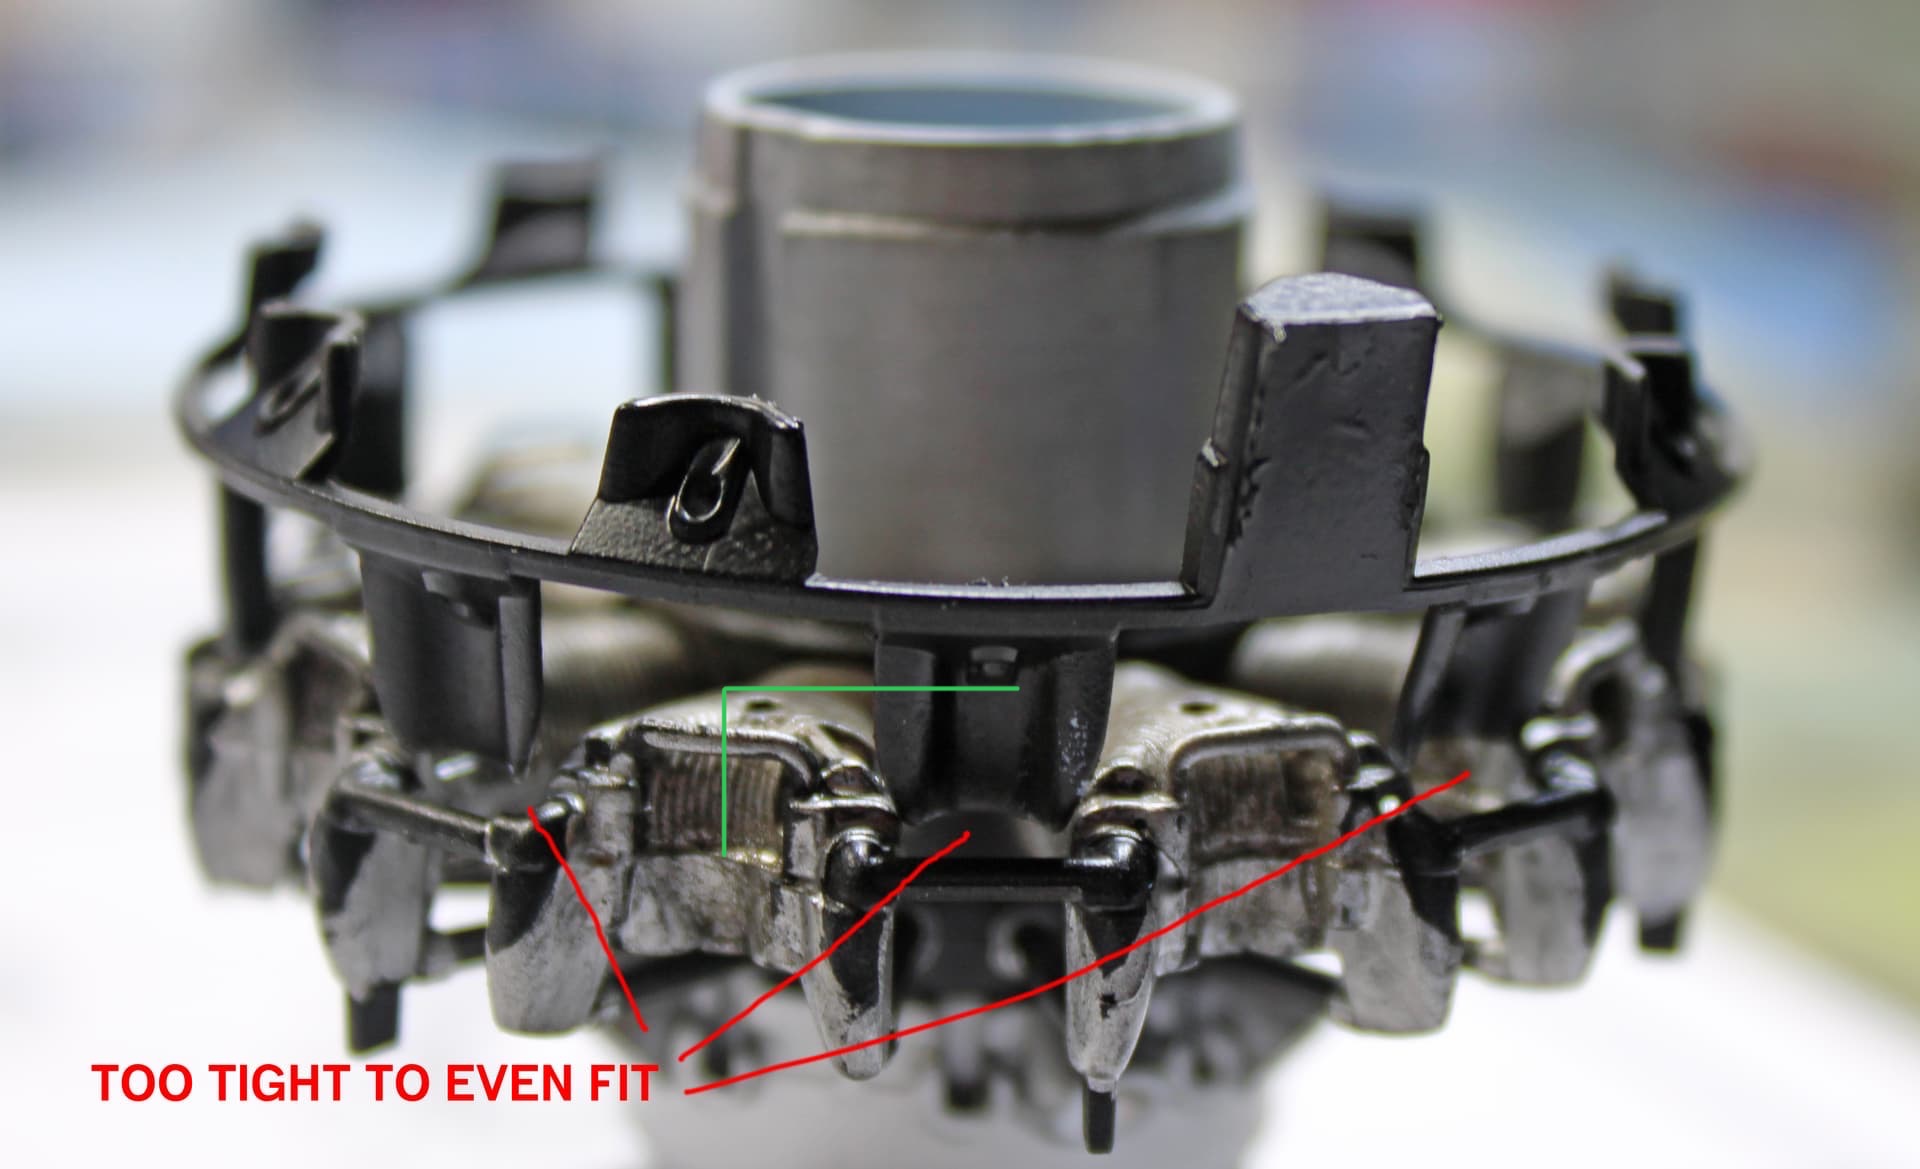
Try turning it a bit just to see if it will fit over the top of the cylinders.
@Aggieman
If the diagram in the instructions is really precise, it looks like that part should fit over the top of the cylinders.
Try turning it a bit just to see if it will fit over the top of the cylinders.
There’s a photo of the engine on this website:
That part does go over the top of the cylinders.
@Edwin Thanks for that link.
I tried to get some work done on the engine this weekend. I did manage to get the two wasps together with that connecting ring modified slightly to allow it to squeeze into place as per the instructions. My modification might turn out to have been wrong, but I don’t think there was another way to get it into position.
But I ended up putting the engine on hold for now as I was unhappy with the wiring materials I had on hand. The instructions call for …7mm copper wire for the ignition wiring, but what I had was .6mm or .8mm lead wire. I could have made the .6mm work but didn’t really fancy having to paint that wire. So I ordered some .7mm copper wire which should arrive by Tuesday or Wednesday this week.
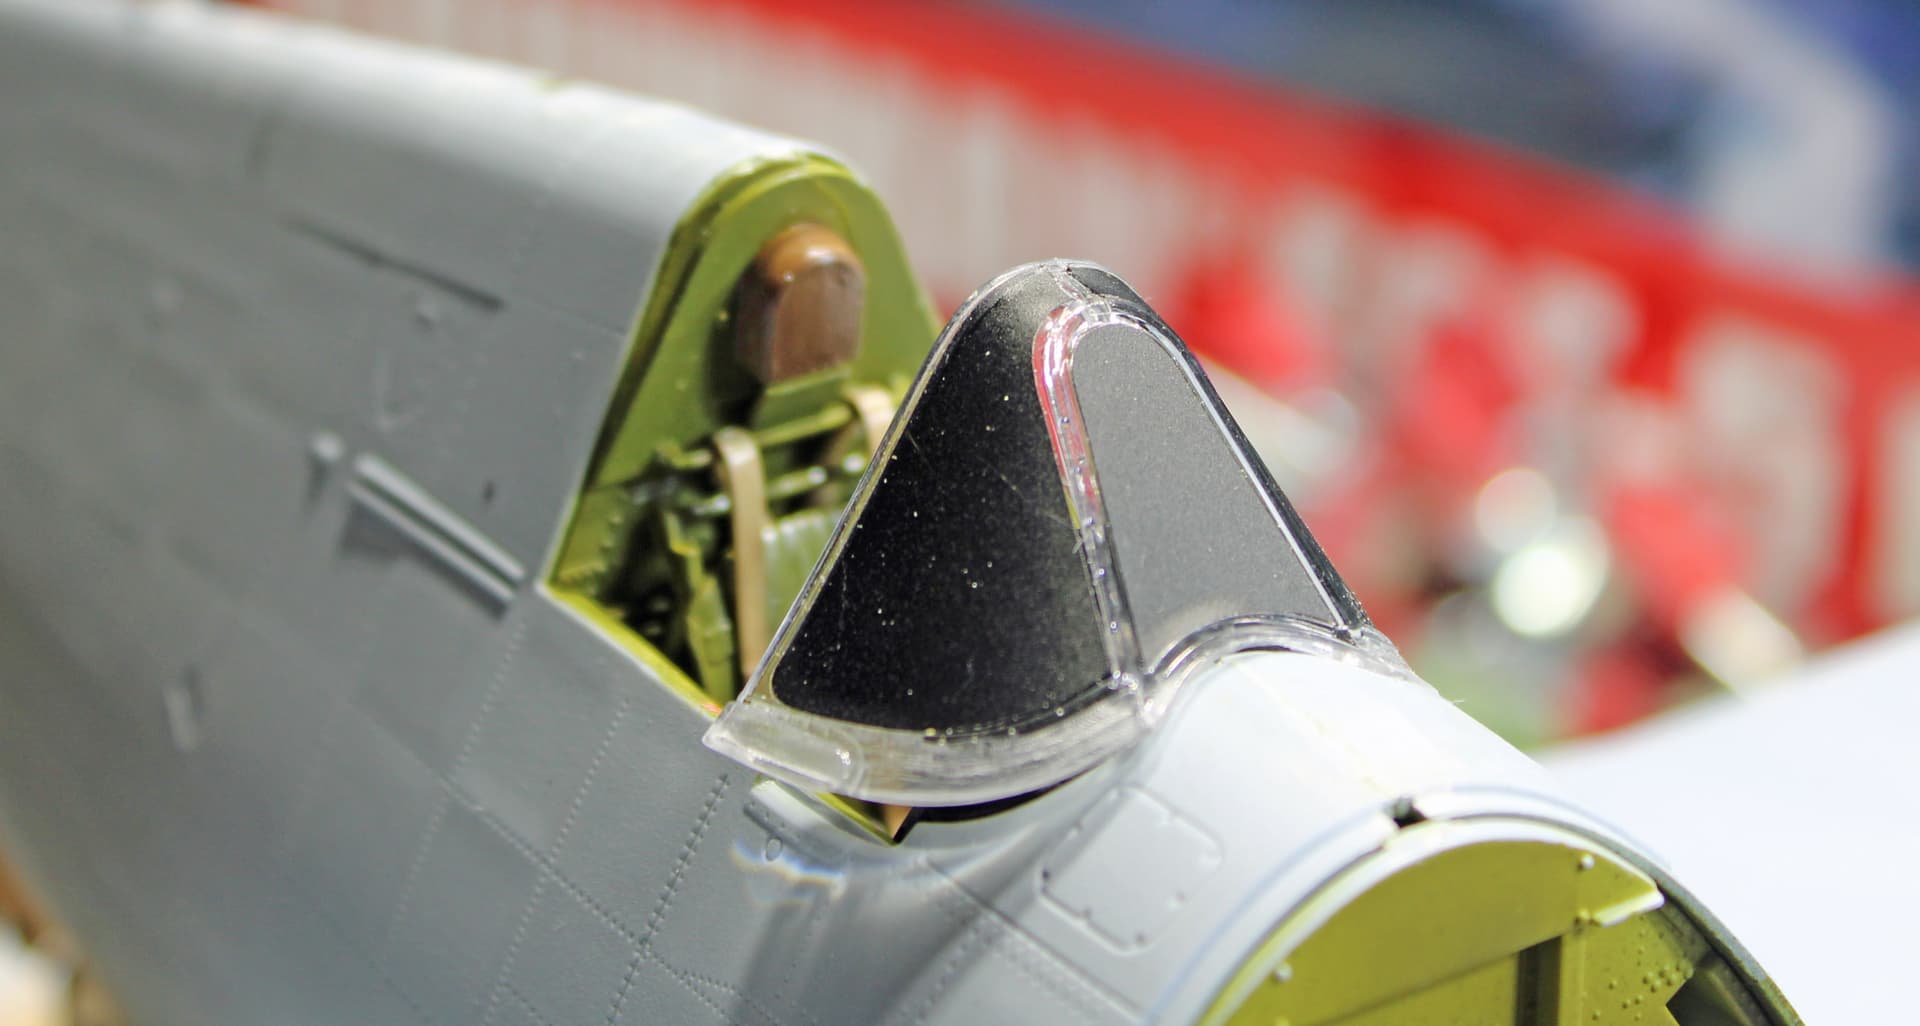
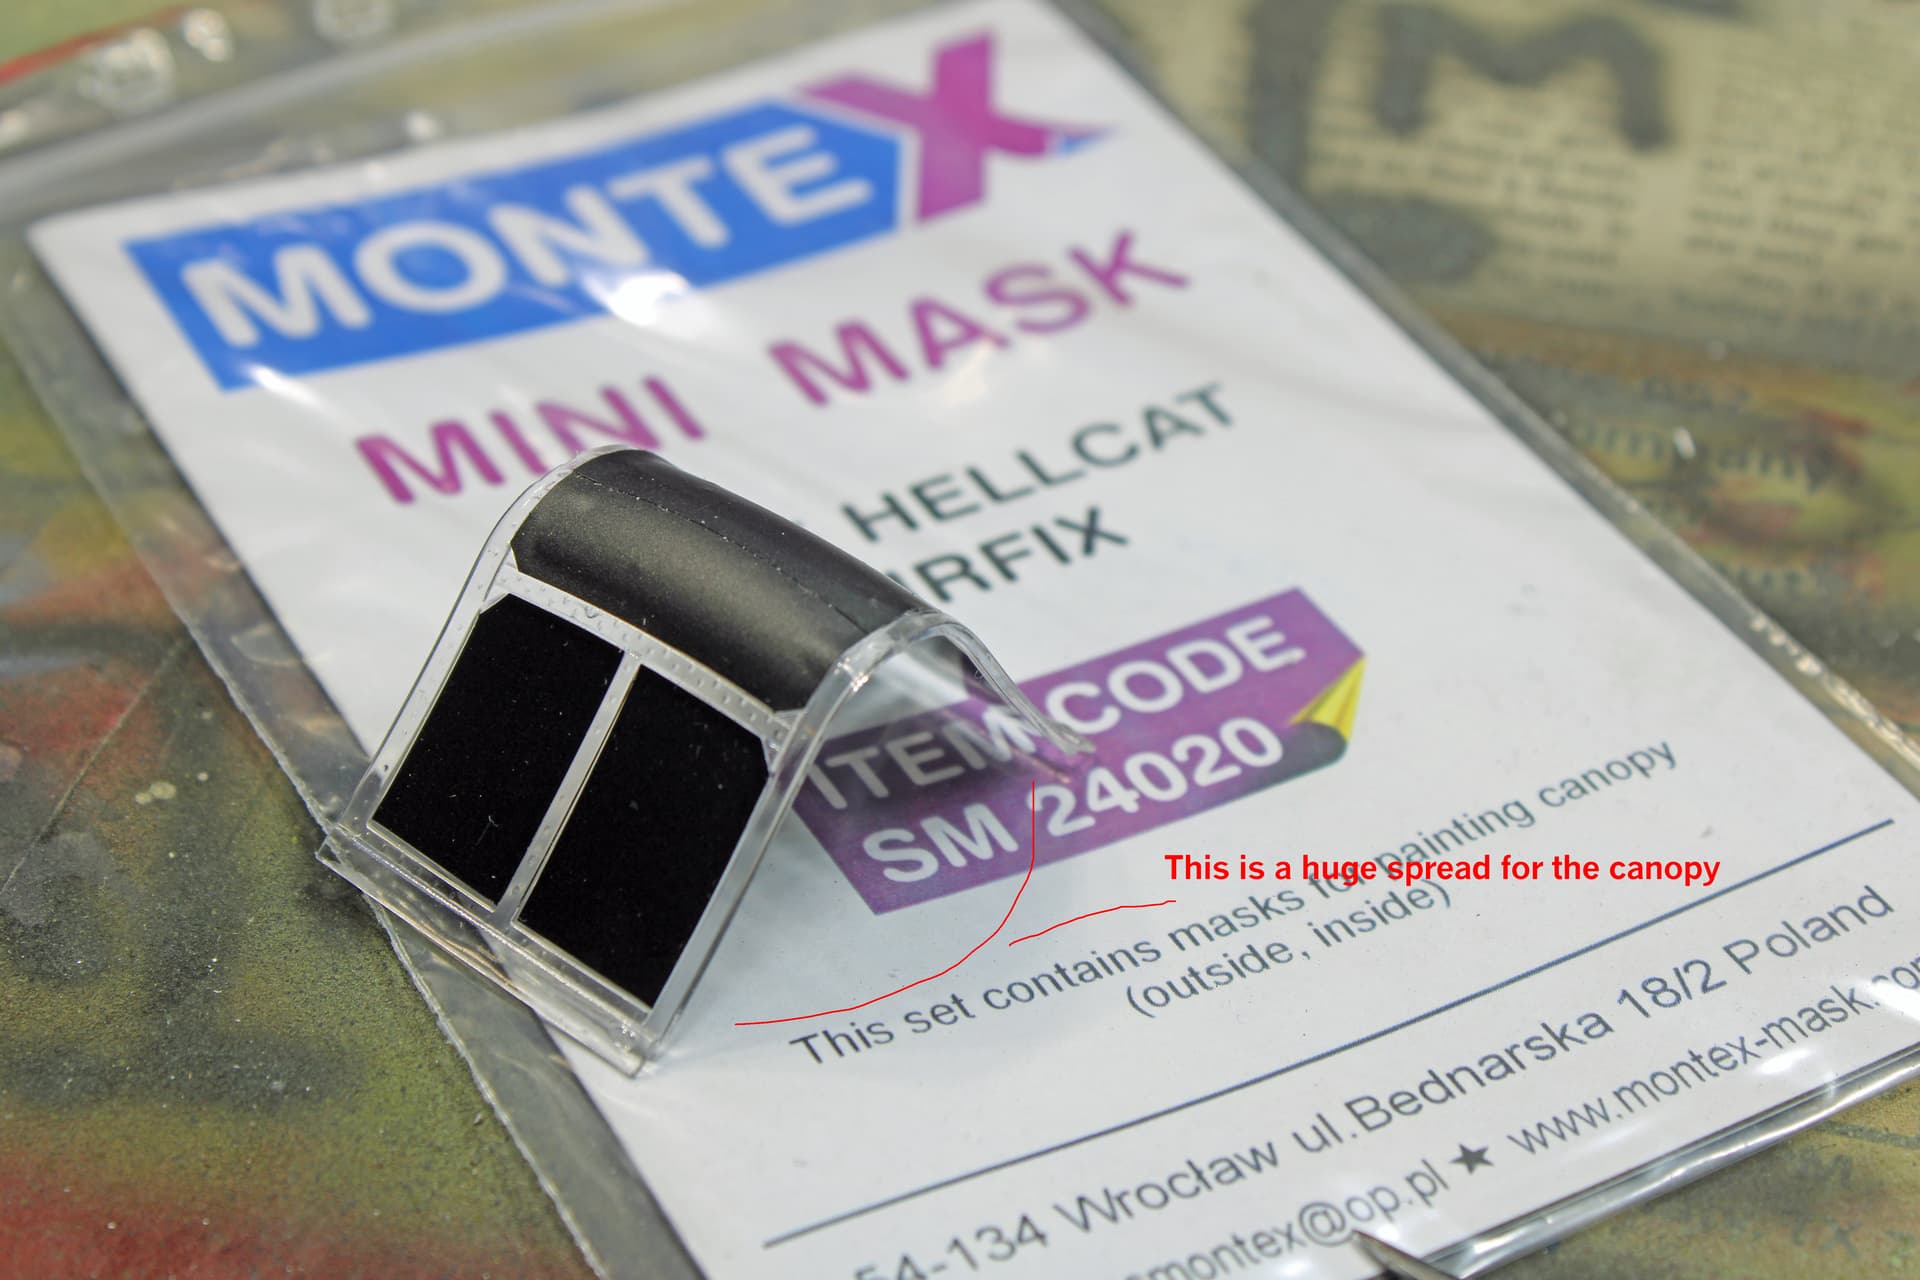
Today I opted to get started on the canopy and windscreen by applying the Montex masks and then starting the process of attaching the windscreen. Both of these parts are mal-formed but both should go on the kit with a little patience on my part.
Oh boy those clear parts are nasty. Looking forward to your solution there for sure.
And here I thought I was having problems with MY canopy (on a Hawker Hurricane). Guess I should thank my lucky stars!
Gary
OMG! I hope that Airfix will replace that canopy for you.
This’ll take up some shelf space…years back I did the Kinetic P-47 in the same scale and nearly had to take a loan out for all the Alclad II I had to purchase to cover it haha
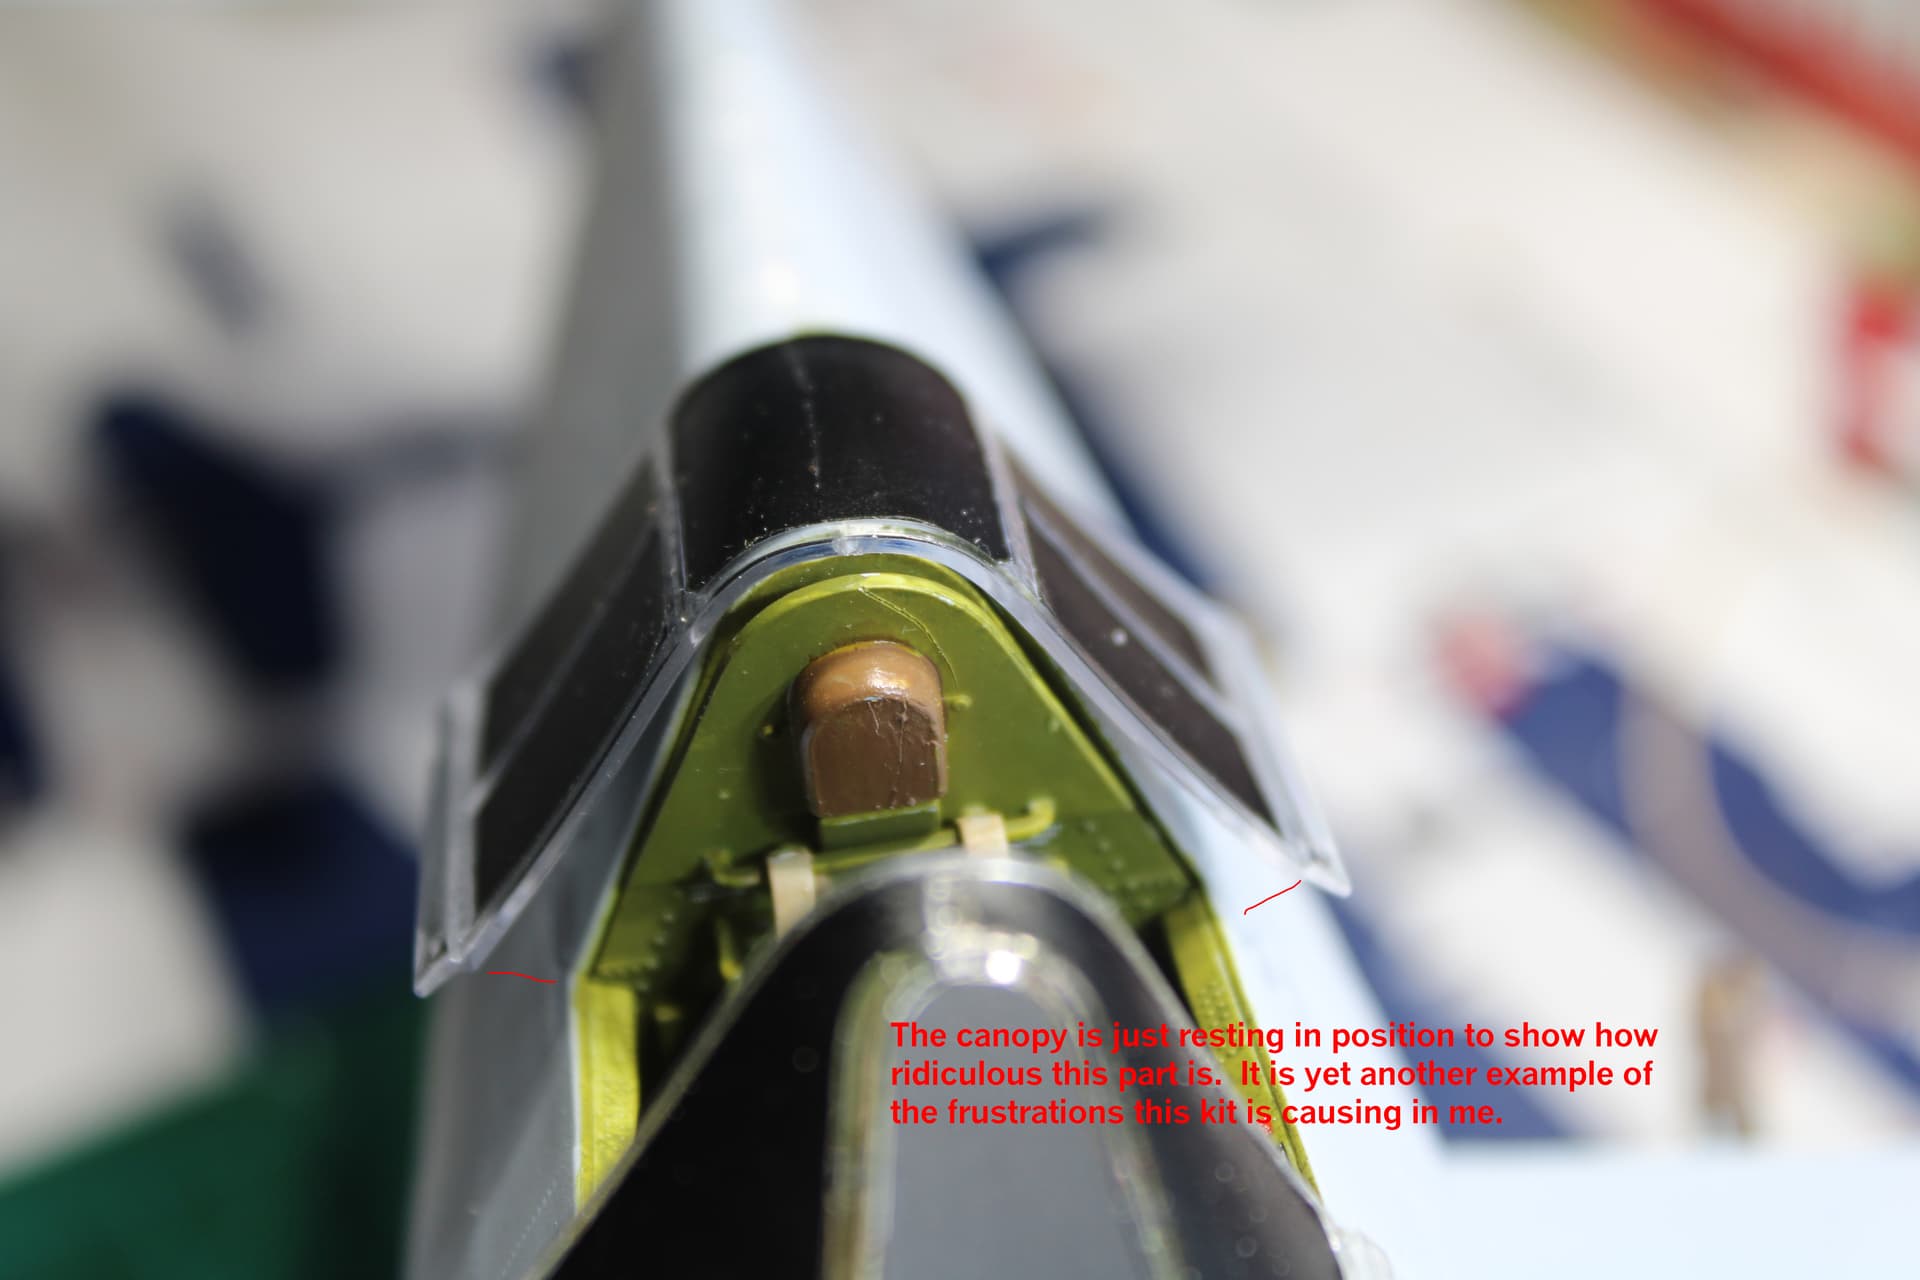
Look at that canopy. Looks almost like it spent a decade on under the back window of a car in the hot sun. So frustrating! What’s your plan to remedy it? Can you use heat to reform the parts?
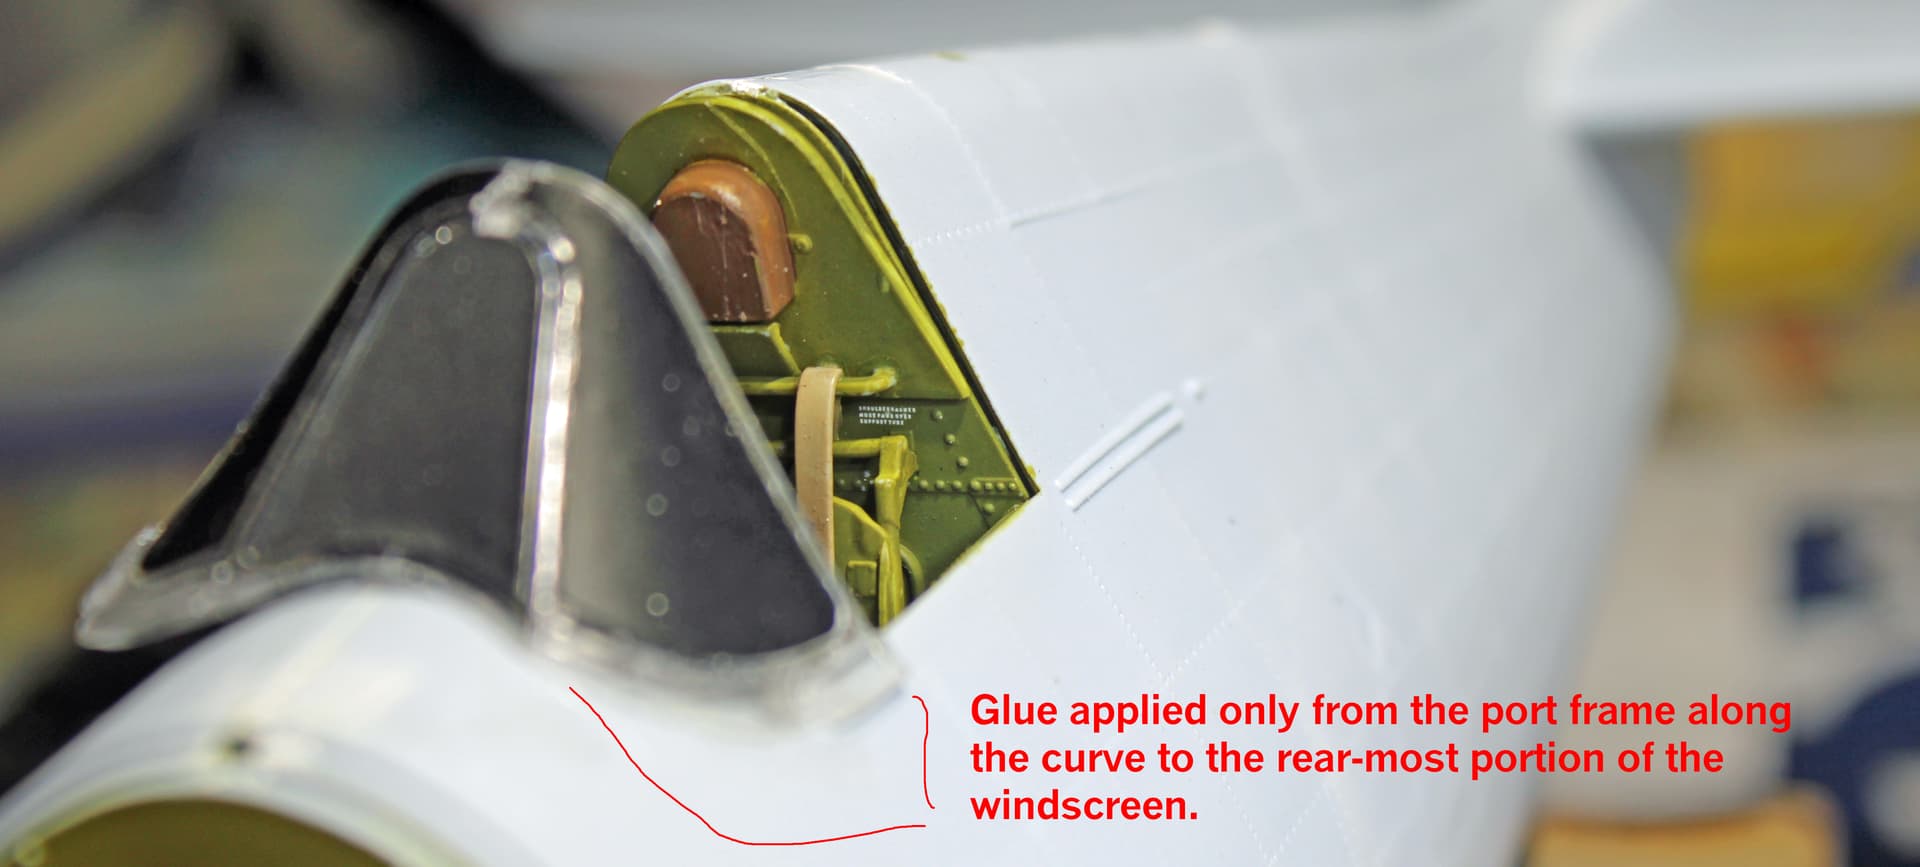
@Toimi_Tom I thought about doing that. What I am going to try first is to force it into position. I have dry fit it to confirm that it will do as I’m thinking, which is to attach on one side initially, let that dry, then bend the other side into position and glue it. Will have to let it set under some tape or perhaps a clamp.
If it breaks, my only option seems to be contacting Airfix. The blog I’ve been using talks about that, so I know it’s available. Whether they actually have the part available is another thing. I have searched various online shops and eBay for an aftermarket canopy to no avail.
It might be worth it to reach out to Airfix now, in case it takes a while to get the new parts. Might be nice to have them on the way asap.
If you end up not needing them, no big deal, but for me, the peace of mind of knowing backups are on the way would be worth it as I’m bending those brittle parts into place. ![]()
You and me both Gary. My Ta-152 canopy seemed to be problematic until I saw @Aggieman (Steve’s) canopy here. I think I’ll just stay quiet about mine.
Steve, you’re sticking with this in good fashion buddy. Seems like a good call on the .7mm wire and am looking forward to seeing that Wasp all wired up.
Thanks Joe!
On other builds, I’ve been known to HULK SMASH kits that cause me this much frustration. But those are kits that did not carry a 3-digit price tag. I will see this one through to the end. I can’t promise a perfect Hellcat, but it’ll be as good as I can wrangle it into shape.
Oh, and on the windscreen, my approach did work. I hit the unglued side late last night with glue, taped it down and then used an alligator clip to ensure it stayed that way overnight. This morning it was firmly in place. I expect I’ll have similar success with that canopy.
![]() Always a good feeling when something goes right in the middle of the chaos.
Always a good feeling when something goes right in the middle of the chaos.
There’s a good number of kits out there now with a hefty enough price tag on them to keep us from busting our builds up into a million pieces or throwing them away.
Heck yeah! Very glad to read this.
I suppose that the larger scale means thinner clear parts with maybe more flexibility than I was picturing. I have snapped clear canopy parts on 72nd aircraft more than once!
@Toimi_Tom Yeah, in 1/72, that canopy would have gone straight to some heat.
Slow progress with family visiting, spring break, and my youngest daughter’s birthday. But I did manage a bit of time before work to get the ignition wiring installed on this big engine. I used .7mm copper wire, which looks pretty good but is a bit too shiny. I’ll address that with a wash and a coat of flat clear.
Last time I thought about this, I had thought I would put the engine on pause after doing all that wiring so that I could focus efforts elsewhere. Really wanting to get a coat of primer on the airframe, but that’s just out of order at the moment. I decided last night to just finish the engine, despite the overwhelming number of pipes and other things that must be attached (and quite likely will not be visible at all). One of the pipes was not attached to the sprue when I first opened the box, so I had set that one aside. I retrieved that pipe from the spares box where I keep things like clear parts when I’m doing a build, cleaned it up (lots of seam lines), and whittled down the attachment prongs that were way oversized (as per the blog), and test fitting reveals that it’s going to fit in nicely with no - GASP - fit issues.
Ha, nice! Take the wins where you can get em, eh?
Tell me a little about this wire you’re using. Is it just stripped electrical cabling, or are you using a modeling-specific product?
Can’t wait to see some pics of this engine.
Impressive!
I am just starting a 1:48 Hellcat. I sure be following your build closely.
It’s a modeling-specific product I found at UMM-USA.
I found this store about 6 years ago when I was detailing the gear bay on the Tamiya 1/32 P-51D I built around that time and was in need to wiring. I grabbed several sizes of lead wire for that build, and I’ve been using that stuff on many builds since. It sure cuts easier than the copper wire. I had intended to use the lead wire on the Hellcat, but I didn’t have .7mm and I was going to have to paint the wiring. I opted to just get copper wire and save myself the painting effort.