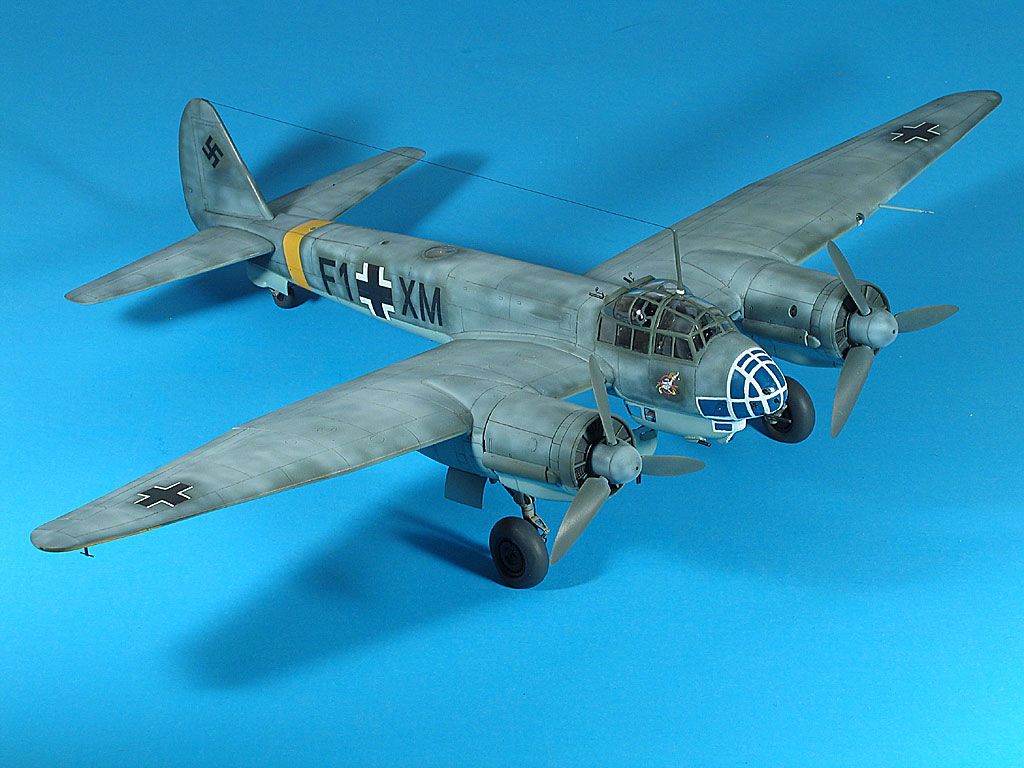
I was able to add the finishing touches to Shanghai Dragon’s 1/48 Ju 88C-6 tonight. In case you haven’t seen the progress pics, I built this kit using the Eduard photoetched detail set. I also added hydraulic lines to the gear legs, a pair of headphones to the radio operator’s station, and a seat in the ventral turret position. The wheels are True Details resin items.
The temperate camo scheme was masked and painted. I scanned the decals, and used them as templates for drafting tape masks. These were applied in position, and the white camo was sprayed irregularly on the upper surfaces. After glosscoating, the kit decals were next. The previous masking gives the appearance that the white camo was sprayed around them. The white frame lines on the nose are kit decals, with the centers brush painted True Blue and brushed with a thin coat of Future.
The Ju 88C-6 was a heavy fighter, with six forward-firing guns. These were feared, but the glass nosed version didn’t pose a threat. Creative groundcrews painted a fake “glass” nose on some of the aircraft, luring unsuspecting fighters to attack.
So much for the info and intro. Here’s my “Wolf in sheep’s clothing”
Outstanding (as always). The attention to detail in the cockpit and beyond is really impressive, amazing in fact. Thanks for sharing and keep it up! Jon
Thank you Jurgen, jcfay, Rick, Bgrigg, Brian, and Swanny !
jcfay - Eduard provides lots of goodies for the cockpit in their PE set. Worth the money, IMHO.
Bgrigg - no need to think about following me, I don’t do competition. I never compare one person’s build to another’s. The old “apples and oranges” thing.
Brian - I gotta have that detail ! If I build a kit without PE, I always regret not adding it. So now I just add it and feel good about the build !
Swanny - I’ve got three commission birds going at the moment that are nearing airframe painting. I just started a 1/48 Hasegawa A6M2-N Rufe with Eduard PE. I’m in the process of adding wires, cables, and hoses to the cockpit right now. I’ll probably also start a Hasegawa Henschel 129 and P-47D bubbletop. I can always build more Me 262s also . . .
wibhi - brush painting the True Blue “glass” on the nose was challenging. Just getting the brush in there took a little creative thinking.
plasticjunky - the Trimaster/DML/Dragon kits are my favorite ones to build. While not the EEZZ “fall-together” kits, you can’t beat the detail. I use enamel washes over Future, mixing the base colors with black. I apply and remove them with a #000 brush. Removing the excess this way is a lot more work (about three hours) than wiping the airframe, but it gives precise control. Even if the lines are shallow in some places, you can still leave a line on top of the surface.
Amazing work Pix! You’re always finding a way to make the usual builds so much more interesting. I love the insignia below the greenhouse, and the open gondola. Great work as usual.
Comfortable… yup I love that stuff. I followed your lead and used the same set you did on a P-40E and also used a set on my 190D-9. So when the 88 moves to the front of the line there will be some PE waiting.
Hi Pix, Wow! This is a fantastic build build, I love the way you did the winter camo. I have the same kit to build in my stash, if it comes out half as good as yours I’ll be a happy man. Thanks for sharing this build with us, its given me plenty of inspiration. Regards, Darren.