I think it has relly worked well.
8 Rad looks awesome!
Fantastic work Terry, and so quick! Way to go! I can’t wait to see what else you do. Keep 'em coming!
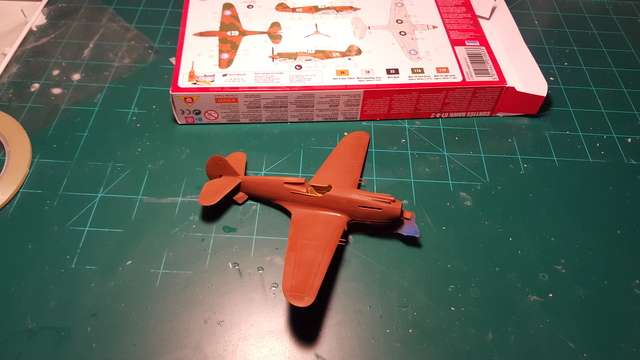
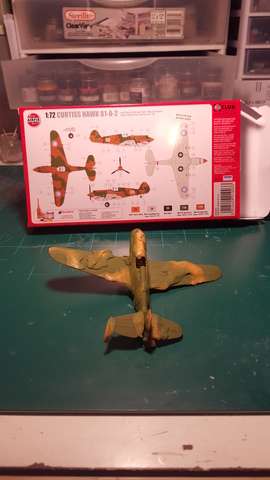
OK guys, here is an update on the P-40 and a start on the B-47.
The P-40 is nearing completion on the painting. I sprayed the light gray on the underbelly and the brown on the upper surfaces. Once this is dry I will use some Supper Putty to mask off for the green. The kit has gone together well.
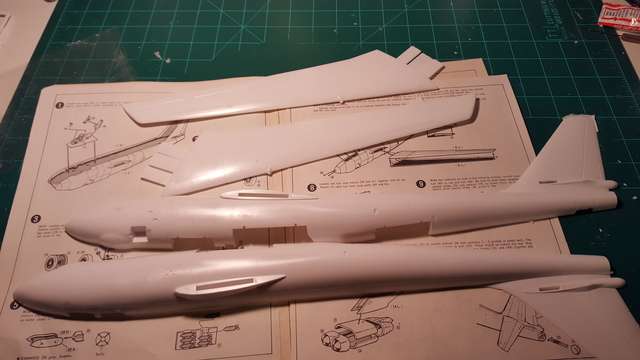
Now while that is drying, I’m starting the B-47. This is another rudimentary kit with some flashing and very basic cockpit. I have however ordered a decal set with the 105th and the 380th BW. This build should also be a quick one as there are very few parts. The time consuming part will be the painting.
Nice progress. I was going to comment that your brown looked awful “red” but then I noticed that the “red” of the Airfix box was more of a neon magenta and realized that it’s my cheapo work monitor that has the odd colors, not your model! [whstl]
Looking forward to seeing the camo done. Always when a plane “comes to life.”
LOL, that’s exactly why I put the box in the frame. My S6 wants to change colors with varying light intensities. It isn’t as red as it shows, but there is some red in there.
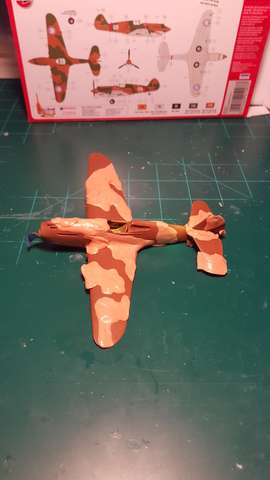
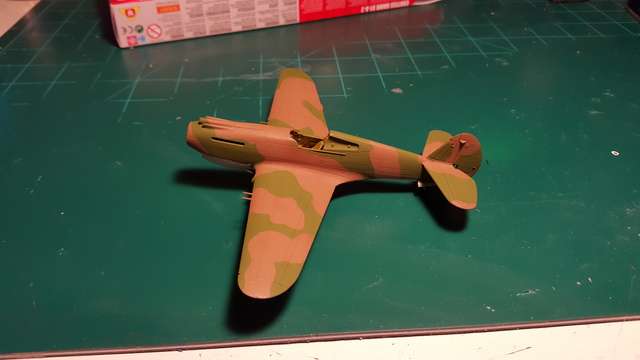
I Silly Putty’ed (is that a word?) the camo and sprayed the green. Tomorrow I’ll touch up the underside grey and install the gear.
Steve
That silly putty makes the camo masking look easy. Anxious to see it unmasked.
I have been using wall mounting putty (like blue-tac) but I find it wants to stick to my fingers more than to the model – lots of swearing and re-doing areas. Is the silly putty better to use?
Silly Putty is pretty easy. I do want to change the brown, it still looks too red and doesn’t look right with the green.
Got some free time the last few days and made some progress on my scooter.
She’s all buttoned up, primed, preshaded, and got the main colors on her. I have a few spots I need to touch up and need to get some red on the slats. That’s my job for tonight. [:)]
Overall she went together quite nicely. The only spot I really needed to fill was by the cannons. The antenna and pitot are both molded into the fuselage. Was trying to be careful but still managed to break both of them off. [sn0ps] I scratched a new antenna prior to priming and managed to loose that one as well… [bnghead]
Anyway, here she is at the moment.


Thanks for looking!
That’s going to look great Krusty, I love the looks of the A-4.
Well I didn’t like the brown so I cross referenced the Humbrol 119 to MM and purchased dark tan 30219. I like it much better, so again tomorrow I’ll touch up the grey underside spay some gloss and apply the decals.
Steve
My diorama is almost complete so I thought I’d throw a few pictures out here until its completed. Just a few minor touches and i’ll be finished and i’ll do my best to take some good shots.


Terry
Wow Terry, you are an absolute genius when it comes to scenery. Looks great. [Y]
Great work guys. I like the preshading on that A-4 and modelcrazy I agree that your Curtiss looks better with the updated brown. And nice foliage in that diorama!
Slow progress here – a little bit of work each night, and then waiting overnight for things to cure. Getting work done on another kit in the meantime but it’s painful being “this close” to done and it still taking forever. Here’s about where I’m at.
Undercarriage permanently installed (pay no attention to the missing wheels).

Gargantuan out-of-scale kit aerial mast, and a brass one I made to better match the wispy look of the real thing.
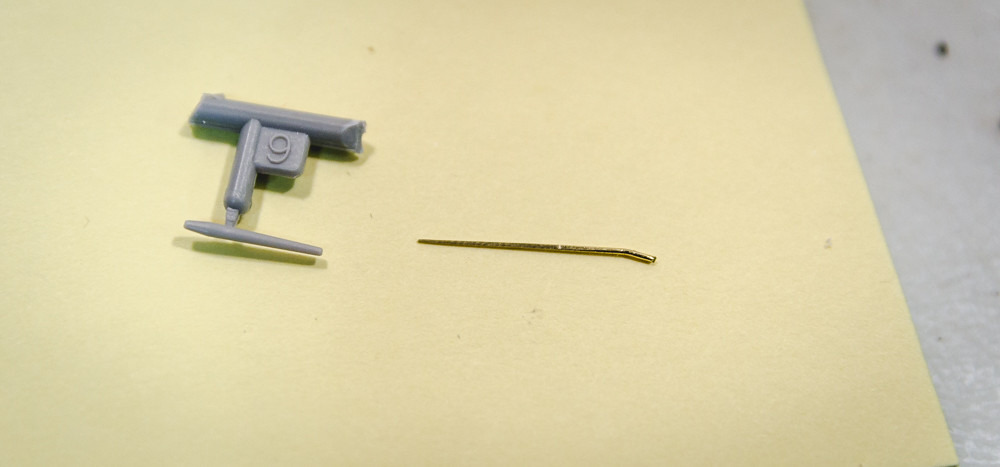
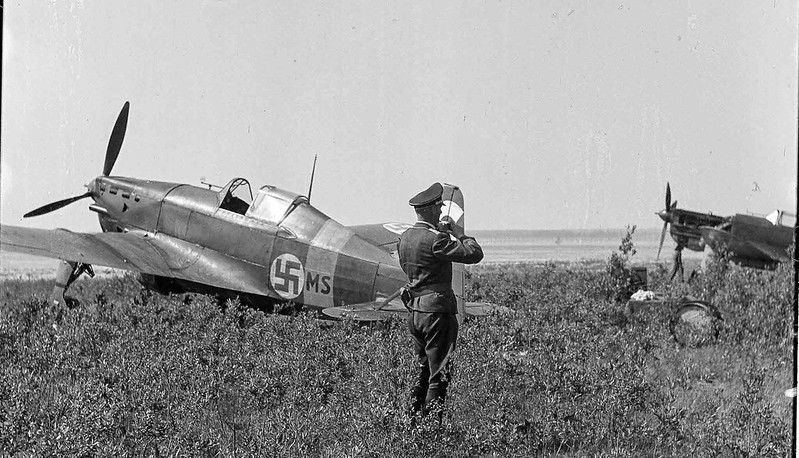
Photo of the real deal:
Meanwhile I masked and drybrushed the tiny exhaust pipes in Tamiya red-brown.
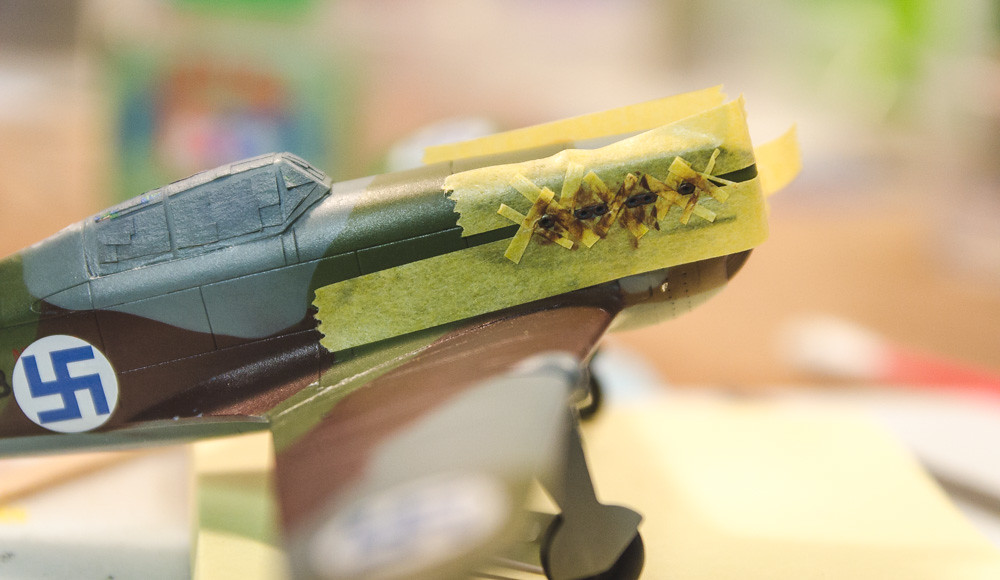
Fade coat, shading coat, and dull coat are coming, but I gotta get that tail number done first. Maybe tonight, if my new second batch of custom decals works… [|-)]
Wayne
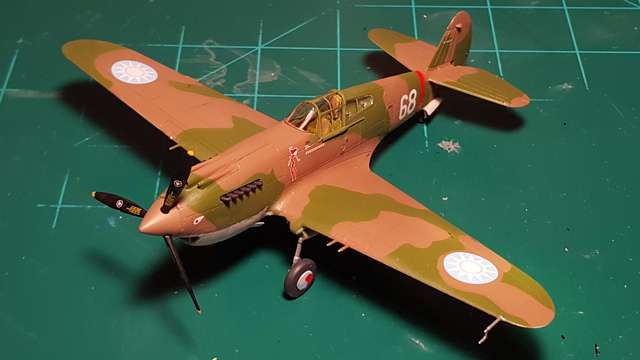
Well dog gone it, I messed up the shark mouth [bnghead], maybe I can find a sheet or just get another kit since it was only $8.00.
Well anyway, here is 68 until I get the shark mouth and weather it.
Steve
Suomi I love that little plane, prop planes that do battle a couple thousand feet in the air are so cool. Air combat was so close you could see your enemy, not like missles of today fired from miles away.
This one looks like its ready to go at a moments notice maybe at the edge of a field. Is there more to the story of this particular plane?
Your camo pattern looks awesome, very nice work. Are you planning on displaying it in a field like the photo? Forgine me if youve already answered these questions, I haven’t gone through the thread yet.
Terry
You airplane guys are so good at these camo patterns thats always on curved edges, and BTW I love the colors.
Terry
…and you armor guys are great at making things look worn and dirty. [:)] Love your weathering and great dio!
What did you use for the grass? I’ve used static grass on 1:48th scale bases, but think it looks a little out of scale for my 1:72. Perhaps the stuff I have is too course…
been off the grid for a few days.
nice work everybody. i think the roster is now current. may get base coat on MCV on sunday. been working on a 1/35 S-tank (103C with a B and both in OTS in the pile). trying a winter pattern and a snow base.
i may have to do an aeroplane after seeing the builds here. i have a BV-138 and a whole mess of helos.
Love to see one of your helos Wayne. I will be updating the P-40 pic as soon as I can get new decals.
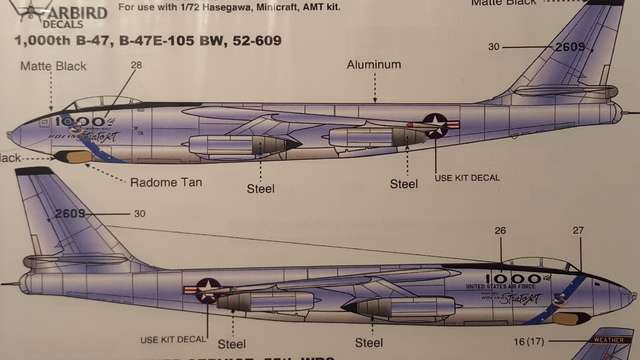
I received the new decals for the B-47. I’m going with the 105th BW. I love the 1000th Wichita Built Boeing Stratojet nose art.