Hey Bill the Doog found a book with the cover still on it.[;)]
Good job Karl
Tony lee
Hey Bill the Doog found a book with the cover still on it.[;)]
Good job Karl
Tony lee
!http://i752.photobucket.com/albums/xx170/mqnina/emoticons/11.gif*Was there ever any doubt?*
Very nice on the save Karl. Soldering does wonders for things like this and using the styrene piece as a form makes sense. Glad you were able to work it out…the primed piece looks a beaut! [;)]
Nice save. [Y]
NIce save, Karl.
I’ll enjoy watching this one come together.
By the way, is it me or is something wrong with your second update - all the images are gone (or at least I can’t see them. I get the “This image has been deleted or moved” message from Photobucket).
Thanks, guys–I have to admit a feeling of being “well chuffed” at this lucky rescue! Thanks to all for the words of support! [:D]
Boyd–thanks for that callout about my second post–I just remember that I DID move the photos in my Photobucket account. I loaded them into the wrong album. I’ll have to go and repair that now. [:(] Thanks again!
You should be well-chuffed too Karl. I learnt soldering on electronic PCB’s at college whilst getting my engineering qualifications and I still struggle with it sometimes - now it’s primed that looks SUPERB [Y]
I’ll be really interested to see how this build turns out.
Nice save - keep it up!
Ben [Y]
Nice
Hi, Karl great to see you back home in armour. I love the subject, I bought two of the 105mm when it came out. I did not go for this one as I have the gun as a separate kit.
Great save on the pepper pot muzzle brake, I only examined the gun parts in the kit box and did not realise that the plastic pepper pot was so badly done.
Great work so far, I will be following this one closely. I know it’s not a subject for everybody but it’s so weird that I cannot turn away for an instant.
Just a heads up, I have heard that it might be worth your time adding some weight to the insides of the hull, the way that aircraft modellers add weight to the nose of tricycle landing gear aircraft, apparently the metal gun barrel can cause the vehicle to tip over.
Well good luck with the build and I look forward to seeing you progress.
Terry.
Nice to see you back Karl! Your builds always educate, amaze and inspire! Great work and save on the perforated muzzle brake; with primer on it looks fantastic! This is a very interesting vehicle and I know you’ll hit a home run with it!
Well…I thought Bill was sneaking by, then I see your post so it is official…I am getting careless and need a flogging [:|]. Nice work as always…
Looking at your muzzle…what is the outside diameter??? Is it close to a standard size so you could use a tube and work it front that point. Is there a PE replacement…somewhere…internet search. Otherwise a good center measurements and drilling…carefully
I will keep thinking [*-)]
Rounds Complete!!
You do need a flogging----if you go back in the thread you’ll see that the problem was already corrected ala Von Hammer methods…
Thanks again, guys–just wanted to say that I"m working away here, re-engineering some stuff on the rear hull that needed attention. The nice thing about these “paper panzers” is that they’re not at all set in stone as far as their configuration–and sometimes the research on them doesn’t take some realities or possibilities in mind.
I’m adding some cool things to the vehicle that I think would have been added, and Hans is going to be so proud of me [;)]. No aftermarket stuff; well, hardly anything, really.
Terry, thanks man–and a good suggestion about the weights being added to counterbalance the weight of the gun; I don’t usually go for the metal gun barrel, but this one was sooooooooo long, it seemed to make sense. However, the gun rests pretty squarely on the chassis, and it has a travel lock to rest upon, so I"m confident that it will sit well. Thanks for the suggestion though! [:)]
Mike–you know, I actually thought about that–using a piece of tubing to replace the piece, but luckily I pulled it out at the last minute. Don’t worry about not catching it in the text–I’ve got to be the WORST person here about missing details in someone’s post and then asking a redundant question, lol!
I’ll have an update soon, guys! Thanks to all again!!! [:D]
Good stuff! I wonder how the new Dragon 8.8cm Waffentrager will compare to the Trumpeter one? Hmmmm
Hey thanks, K-Dawg! I appreciate the look-in!
Well, I figured I better get an update out here before you think I forgot about this one…I’m dedicating this post to Hans Von Hammer, our resident “don’t need no stinkin’ AM parts!” guy who I hope will find favor with my attempts to scratchbuild 95% of the details here–this one’s for you, Hans!
First of all, here’s the nifty little sight mechanism–some nice detailing here, and the PE parts are kit parts.
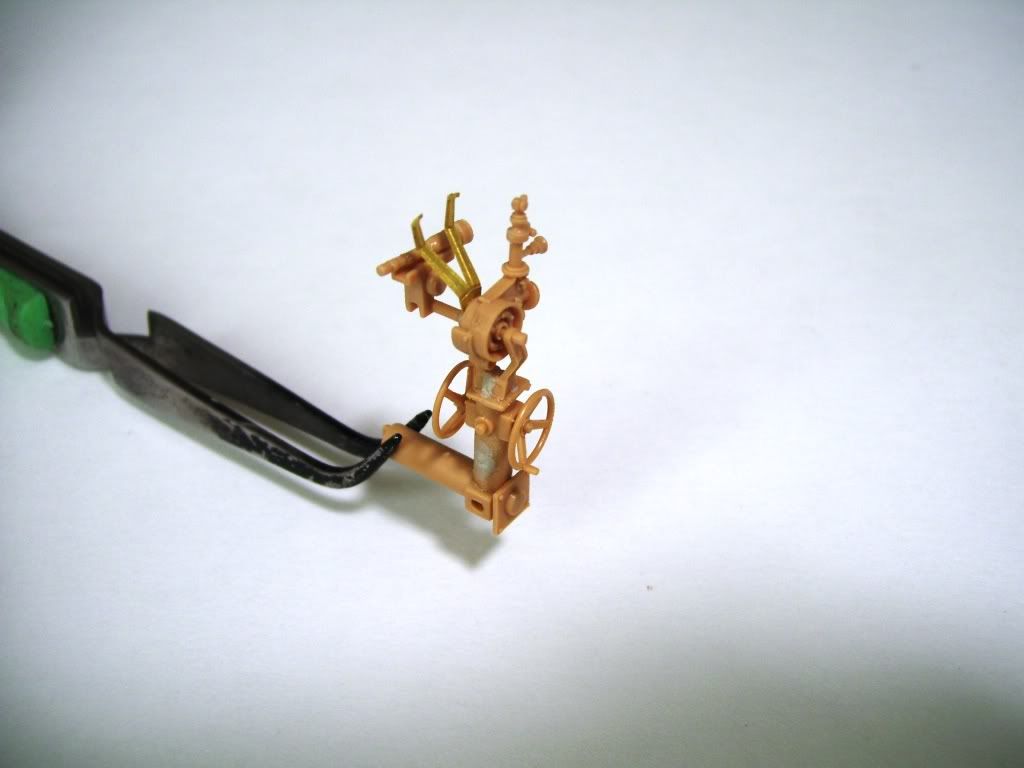
And added to the gun, with seat and pedals added…
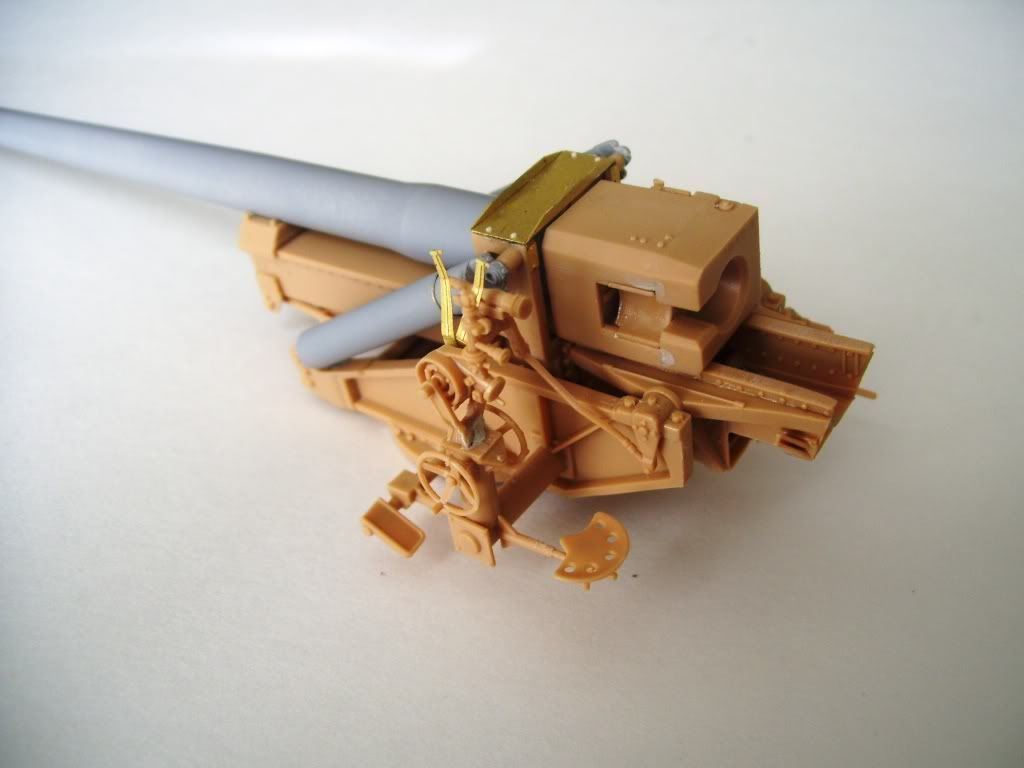
Here’s the build-up before I started appraising and tinkering with things…SEE THAT GUN CRADLE, TERRY?! [:D]
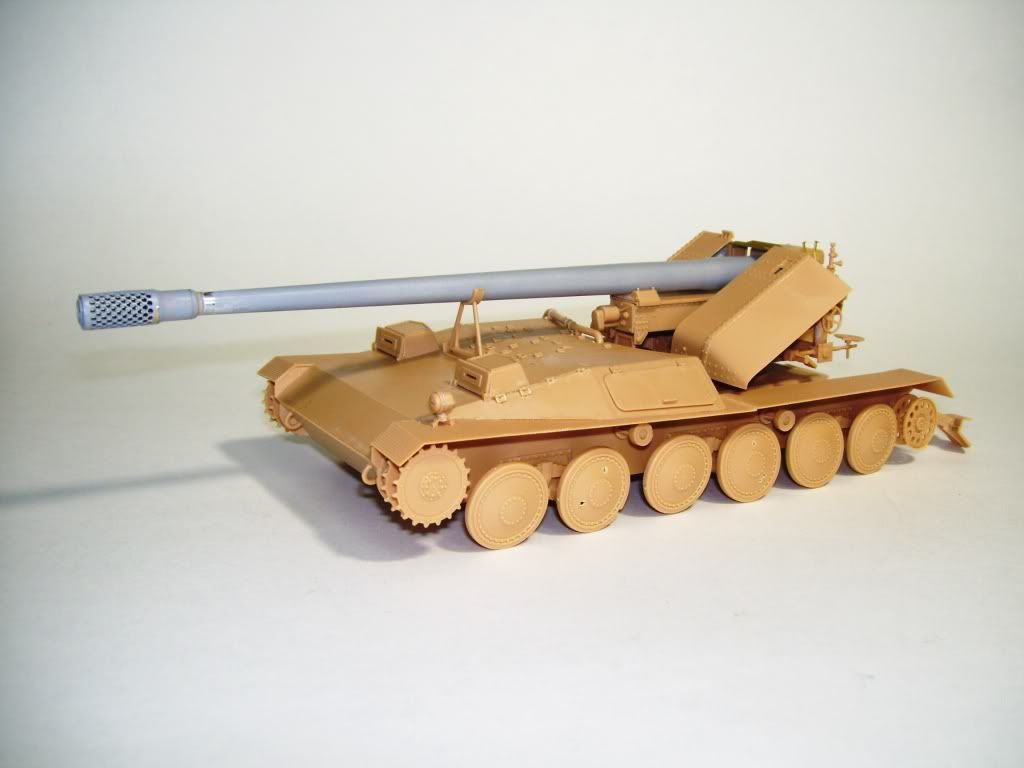
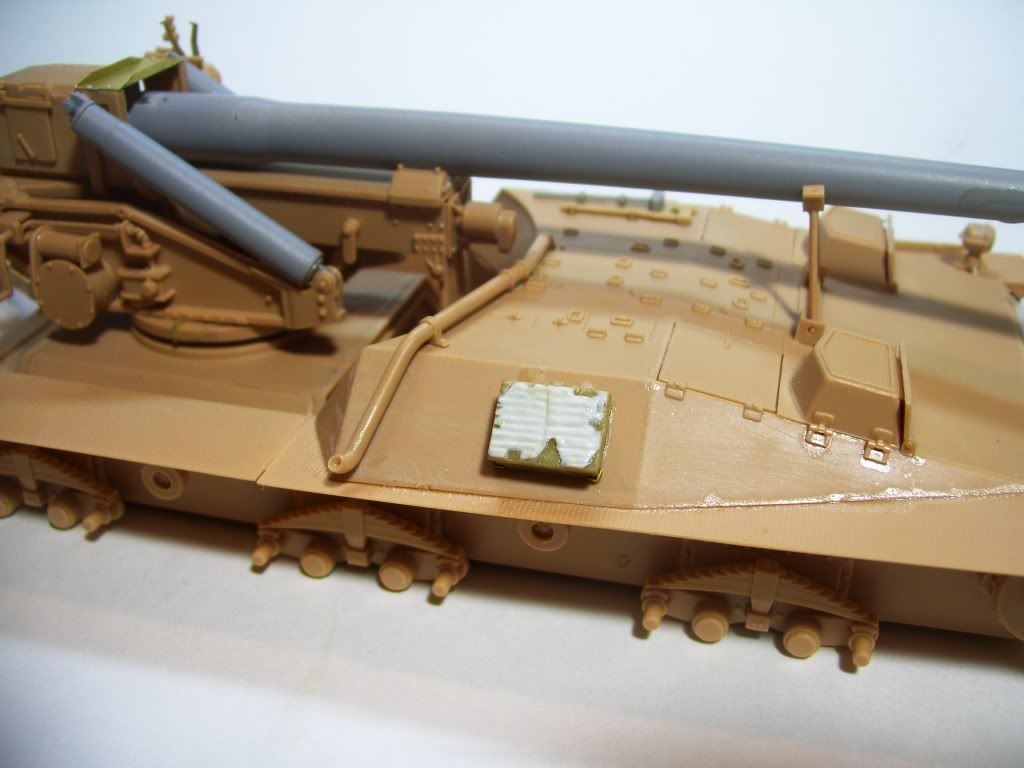
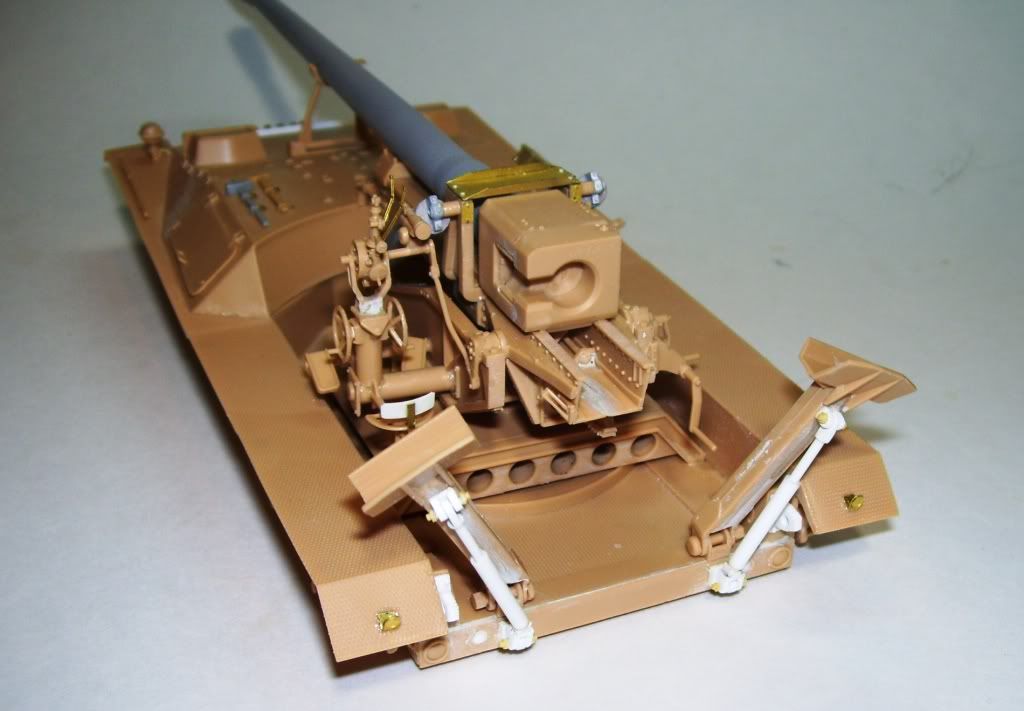
OK, so…[whstl]…I took a look at this concept of a model and thought that there were a number of things that could have used improvement and additions…first of all, tools and some fittings. I added some tools—a shovel, axe. crow bar, on the top hull and fender; they have scrap brass holder locking handles but you can’t see them in the photo too well–and added a spare track holder on the front made from brass, wire and strip. (still adding details)
I added an expedient “field mod”–a stowage bin from an old zimmeritted vehicle. I figured they would maybe keep barrel cleaning heads/rags in here? In any case, it presents interesting painting possibilities?
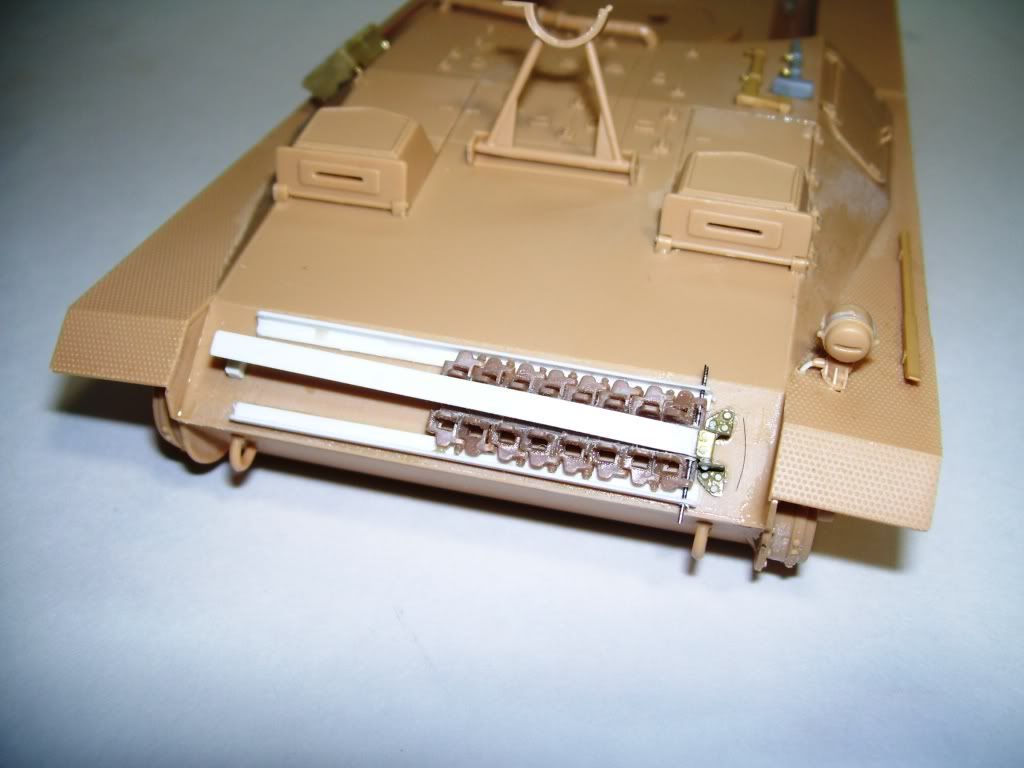
Next, one thing that really bothered me was that these rear spades had no way to raise or keep them up when traveling. The way the kit had them engineered, they would literally drag on the ground. I also didn’t like the lack of towing pintles–these parts in circles are solid. So I figured to build hydraulic lifters and replace the towing pintles.
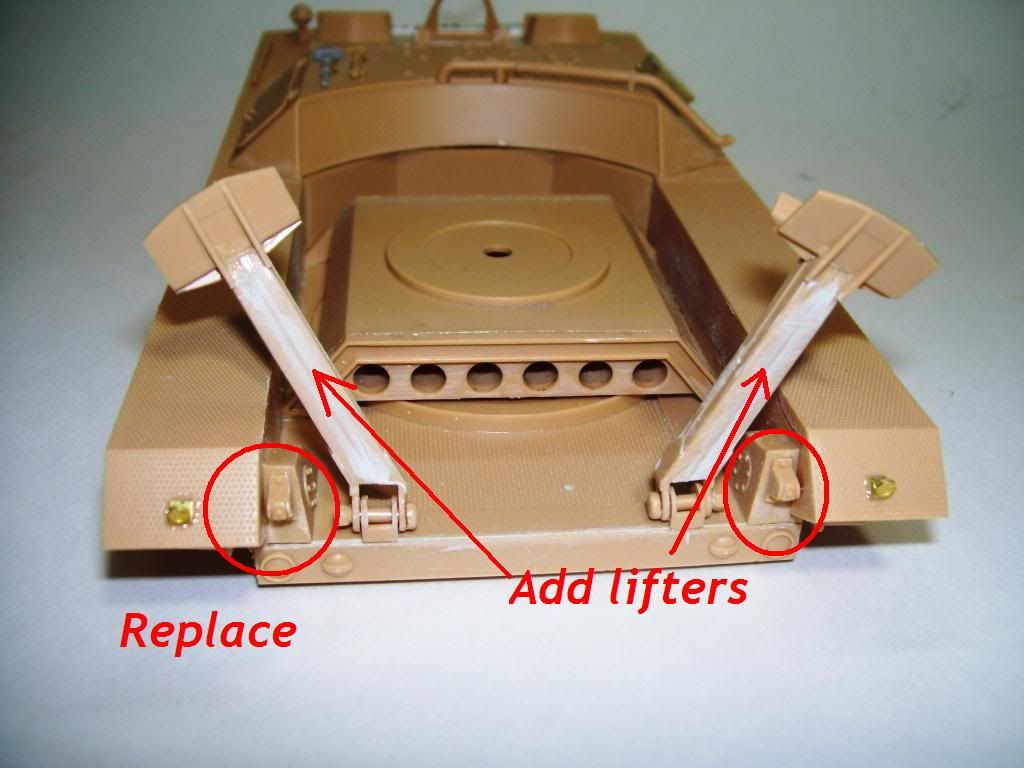
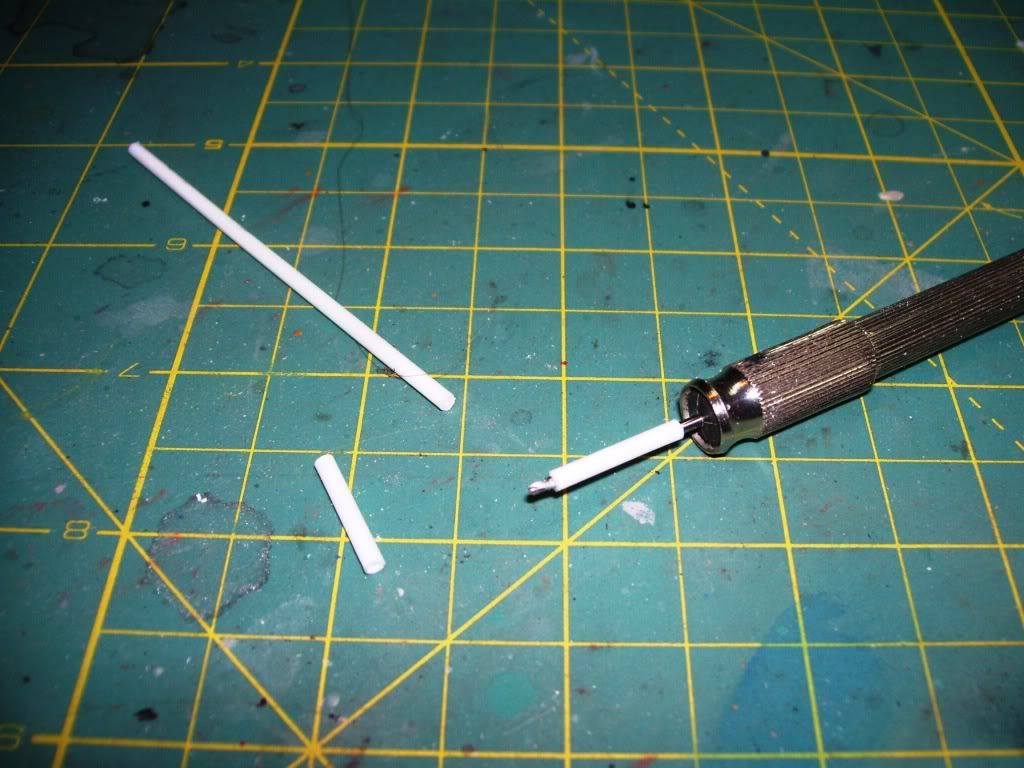
I shaved off those “lights” or whatever they were–remember, everything is “conceptual” here, so you can pretty much take “artistic license” to a degree–and made new pintles, Then, I spent a good two days engineering and making through much trial-&-error some functioning hydraulic lifters. I drilled out some sprue with a micro-drill, and fashioned the rest from styrene rod and strip.
Here’s what I have so far…I also added a back to the seat from scrap brass and styrene. You might notice that I cut away the fender insides as well to provide access to the pintles from a cable or hook:
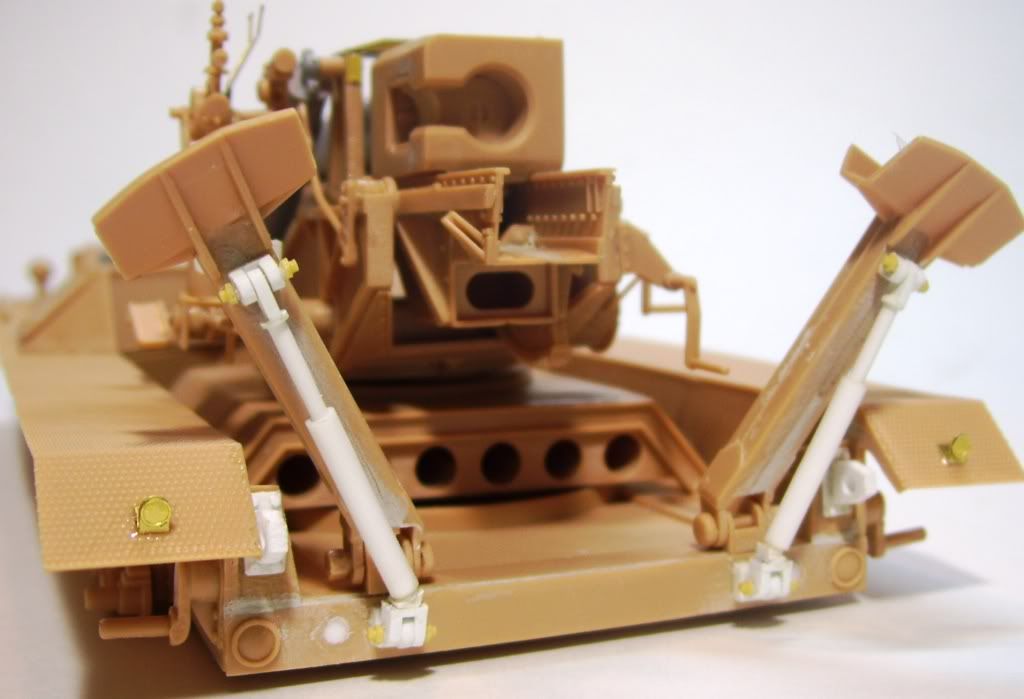
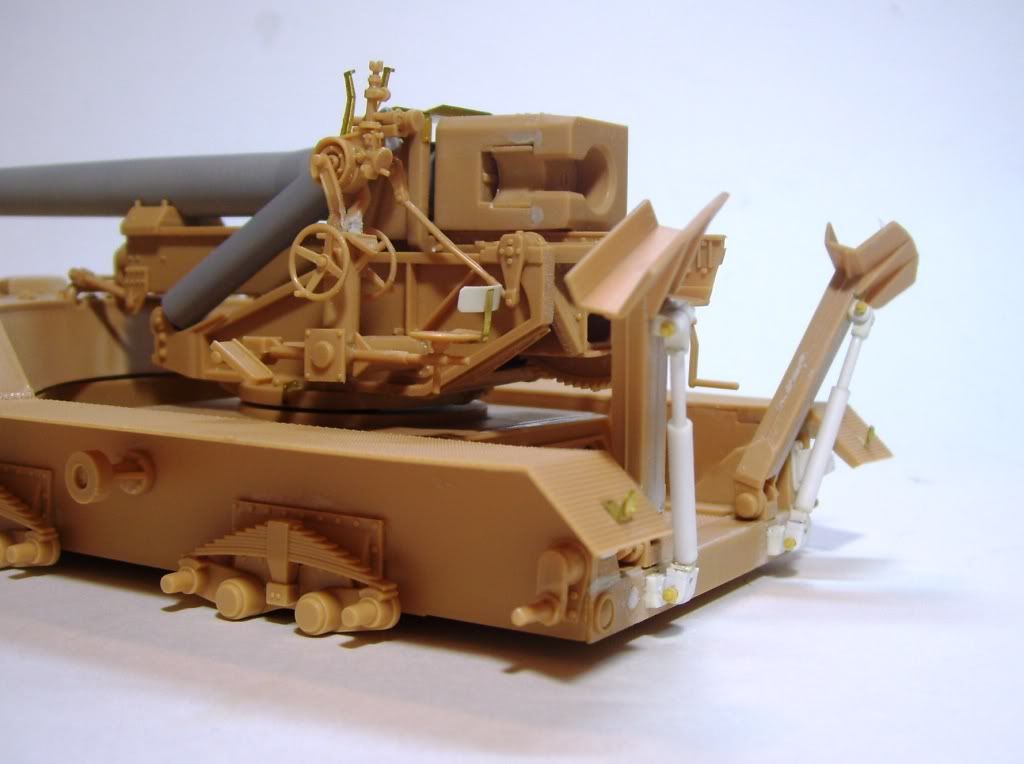
I also plan to add retaining hooks to the spade arms’ fronts, to hold them in place during travel. I’m prbably going to portray this vehicle in travel mode, in order to use the gun travel lock to hold up the heavy metal barrel.
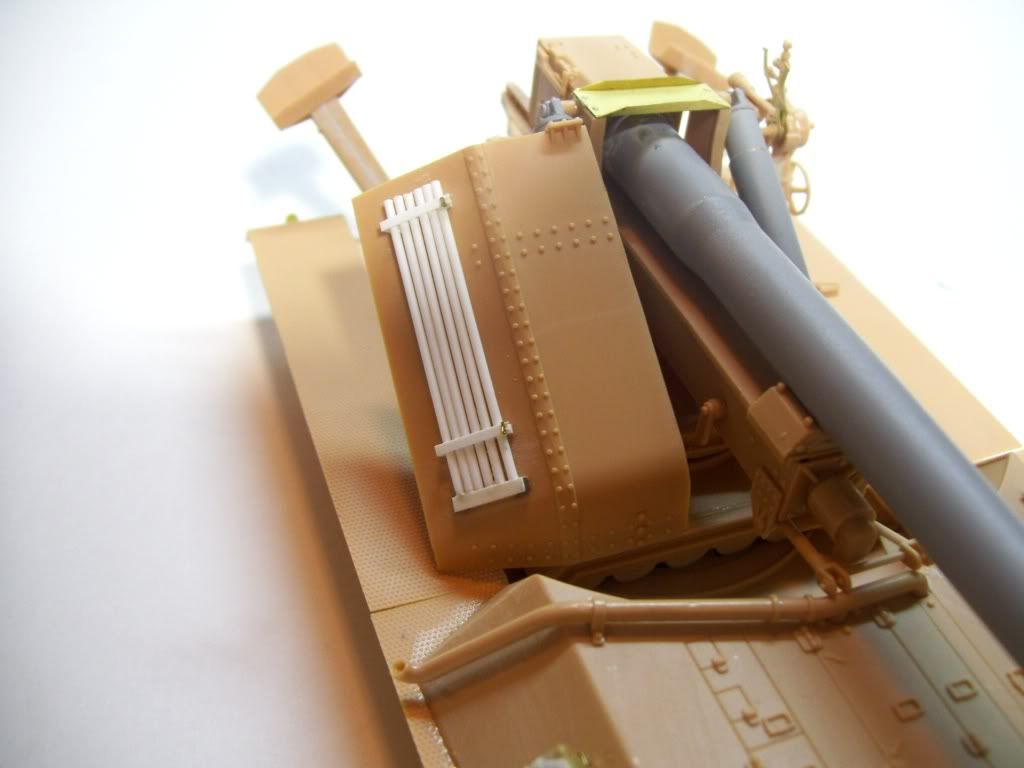
I also scratchbuilt some gun cleaning rods and mounted them to a frame on the front gun shield with a little PE butterfly clasp.
That’s it so far, guys! Hope you like it–I like these projects because there’s so much room for improvisation! I hope you’re equally inspired to create your own mods–I’ve got some more coming on this one; just a few small ones, but you’ll have to wait for the next update!
Comments and critiques always welcomed!
the doog
!http://www.sherv.net/cm/emoticons/toilet/reading-on-toilet.gifOOOOH… Something fresh!
A very nice Friday night delight.
Good call on the accessories too.
Karl - The panoramic telescope (sight) is nicely detailed. Interesting scratch build with the with the hydraulic lifters for the spades. Nice job with the ramming staffs. You could have aiming posts somewhere (candy cane poles)…just another item to think about.
OK…now both Bill and Karl doing weekday updates…what is this world coming to.
Rounds Complete!!
Nice work on the mods and additions Karl! This baby definitely shows the German obsession with big guns…[:D]
Excellent scratchbuilding Karl! I love all the additions you’ve incorporated…not only are they logical (especially the hydraulic lifters) ,but they will add immensely to the overall buld. Its coming together very nicely!
Wow that is some size Karl. Gotcha on the gun cradle, just a question, if you pointed the gun over to 90 degrees would it alter the balance, I now know the question is redundant because of the way you intend to display the vehicle, but curiosity and all that. Te cradle will more than likely support the kit over time. I love the struts you have added to the legs, cool.
I look forward to seeing you progress.
Regards,
Terry.